(WOC-052) -...
13
Rzr Door Instructions (WOC-052)
Transcript of (WOC-052) -...
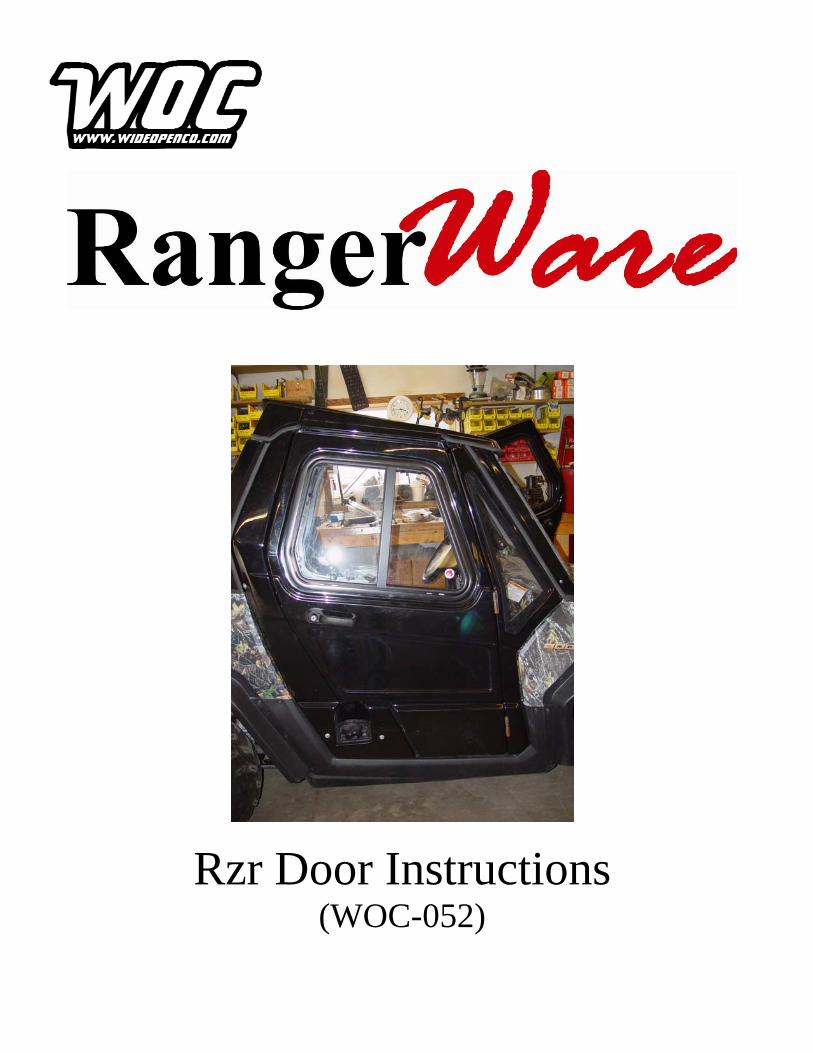
Rzr Door Instructions (WOC-052)

Important Note: (Read before installing Windshield and Top)
• The bolts, clamps and spacers securing the Windshield and Top to the front roll cage will be replaced by the bracket and hardware supplied in this kit. (Instruction #4)
• The lower front roll cage bolts (behind the windshield) will be replaced with the hardware supplied in this installation kit.
• Instruction #1 must be done prior to installing the windshield.
• For ease of installation leave all fasteners in the windshield, top, rear panel and door parts loose until instructed to tighten.
• Use a rubber bonded washer against all exterior gel coat surfaces.
• Use flat washers against all metal surfaces.
• Some model vehicles will require the removal of part or all of the rider restraint bar located next to each seat. Remove as needed.
• Odd numbered items refer to passenger side parts, even numbered parts refer to driver side parts
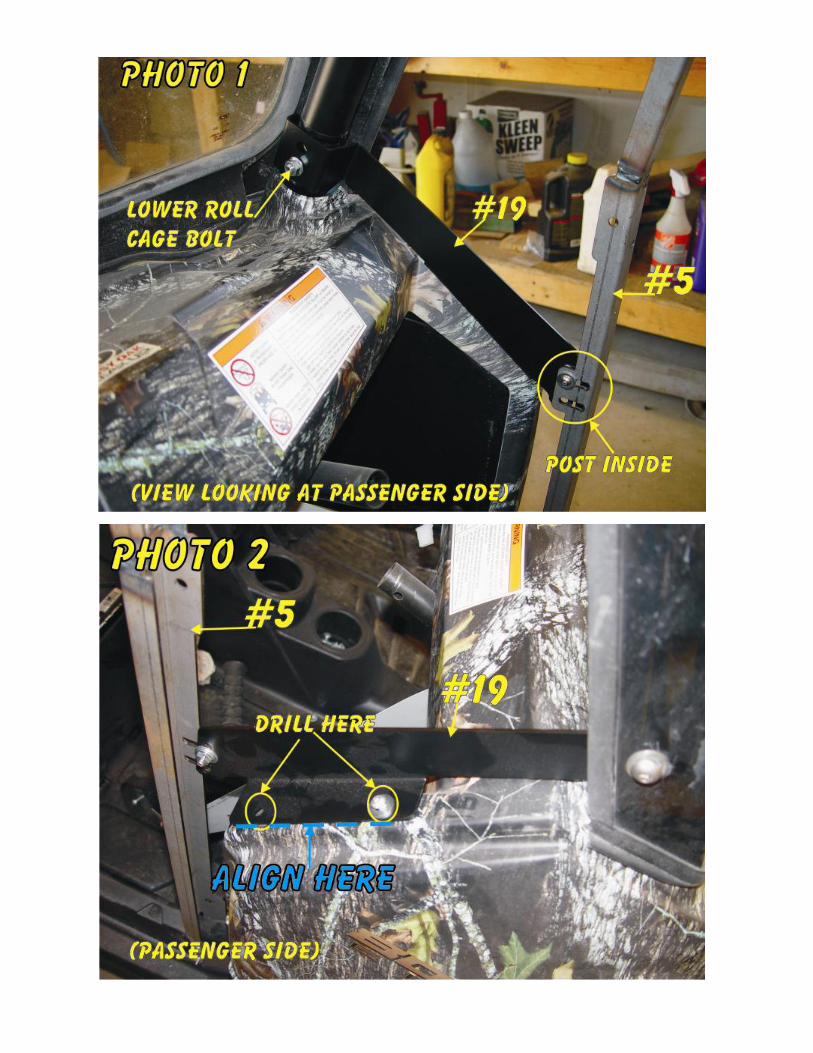
1. (Photos 1 & 2) Remove the lower roll cage bolt in each front corner of the dash and replace them with a 1 ¾” cap screw (threads to the inside). Use the original nylock nut and tighten securely. Position items 18 & 19 over the longer bolt as shown and fasten loosely with a 3/8” flange nut. (Photo 1 & 2) Align the outer edge of the brackets with the dash body line and mark the bracket holes on the dash. Remove the brackets and drill holes to ½”. Insert the rubber well nuts in the holes. Fasten the brackets securely using the ¼” x 1” bolts and the 3/8” flange nut.
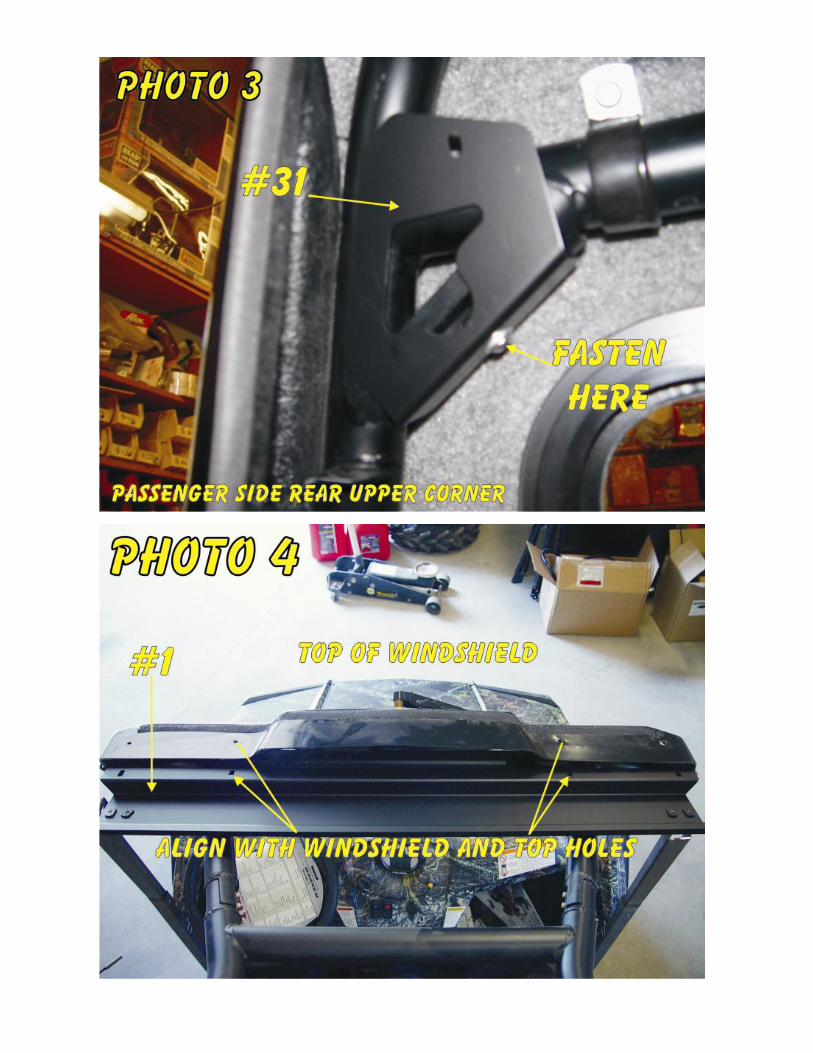
2. (Photo 3) Install items 31 & 32 in the upper rear corners of the roll cage. Use a 5/16” x 1” hex bolt with a washer and 5/16” flange nut on the inside of the roll cage support and tighten securely.
3. (Photos 4 & 5) Loosely install the windshield (lower bolts only) and position Item 1 as shown in Photo 4. Position the rear threshold clamps on the roll cage as shown in Photo 5)
4. (Photo 4) Install the rear panel and top. Align the slots in item 1 with the holes in the top and windshield and loosely fasten using (4) ¼’ x 1 ½” bolts.
5. (Photos 1,6 & 7) Position the door posts (items 4 & 5) over the lower plastic rail (Photo 6). With the post on the inside, loosely fasten the post to brackets 18 & 19 using 1/4” x 1” bolts. Align the bottom of the post with the bodyline and drill

9/32” holes into the plastic. Drill the holes one at a time from each side of the post and insert a ¼” bolt after each hole to ensure alignment. Insert ¼” x 2” bolts from the inside of the posts and tighten until the post starts to close on the plastic rail. Push the center of the post all the way forward and tighten the bolts holding it to the dash brackets (items 18 & 19)
6. (Photo 8) Using ¼” x 1” bolts loosely fasten items 2 & 3 to item 1. Position items 26 & 27 over the brackets (items 2 & 3) and align with the posts. Fasten loosely using ¼” x 1” bolts (Photo 8).
7. (Photo 9) Fasten the lower post hinges (items 8 & 9) to the post using (2) ¼” x ¾” counter sunk screws and (1) ¼” x 1” screw. Tighten securely.
8. (Photo 10) Apply a piece of self adhesive rubber trim to the fender as shown.
9. Photo 11) Position the front wing windows on the door posts (under the windshield & top). Align the upper hole with the bracket (items 26 & 27) and fasten loosely using ¼” x 1” bolts. Align the slots with the holes in the posts and loosely fasten using ½” self taping screws and washers. Press the window tight against the post and vehicle body and tighten the screws. NOTE: The screws may be loosened later and the window adjusted to align with the door.
10. (Photo 9) Fasten the upper post hinges (items 6 & 7) to the post and tighten securely. Place the (4) brass washer on the hinge pins and lubes the pins lightly.
11. (Photo 12) Position the B-pillars on the vehicle. The upper flange slides between the rear panel and the roll cage and rests on the box corner. Align the roll cage clamp and fasten loosely using a ¼” x 1 ½” bolt with washer and nylock nut on the inside.
12. (Photo 13) Attach item 36 (4 pieces) to the vehicle by sliding the metal edge under the plastic flange. Align the brackets with the holes in the B-Pillars and fasten loosely using ¼” x 1” bolts.
13. (Photo 14) Align and loosely fasten items 33 & 34 to the upper rear bracket (items 31 & 32). Loosely fasten to B-Pillars using ¼” x 1” bolts.
14. (Photo 12) Push the B-Pillar back tightly against the vehicle box and fender and tighten the bolts thru the clamps and lower brackets. Push the upper corner of the B-Pillar back and outward and tighten the bolts in items 33 & 34 to secure.
15. Align the top and rear panel and tighten the bolts securing them together.
16. (Photo 16) Fasten the 4 door hinges (items 10, 11, 12, & 13) to the doors using ¼” x ¾“counter sunk bolts. Leave the hinges just loose enough to slide in the slots. Hang the door on the hinge pins and close the door. Make sure each hinge is down tightly on the pins. Slide the door in or out to align with the wing windows and note the position of each hinge. Open or remove the door and tighten the hinges in position. Further adjustments can be made by just loosening

1 hinge at a time and adjusting until the door is aligned and lifts on and off easily from the hinge pins. NOTE: The wing windows can also be adjusted in and out.
17. (Photo 16) Align the body lines on the door and B-Pillar by one of the following procedures 1) Loosen the bolts connecting the door posts (items 4 & 5) to the dash brackets (items 18 & 19). Push the center of the post forward to raise the rear of the door and pull back to lower the door. Retighten the bolts. 2) Loosen the bolts holding the B-Pillar in place and adjust as necessary. Retighten the bolts.
18. Adjust the seal between the door and wing window by loosening the bolts at the top of the door post and adjusting the window as needed. Tighten the bolts securely. NOTE: The top bracket (item 1) is slotted to provide more front to rear adjustment. When the wing window has been properly adjusted tighten the (4) fasteners securing the top and windshield to the bracket.
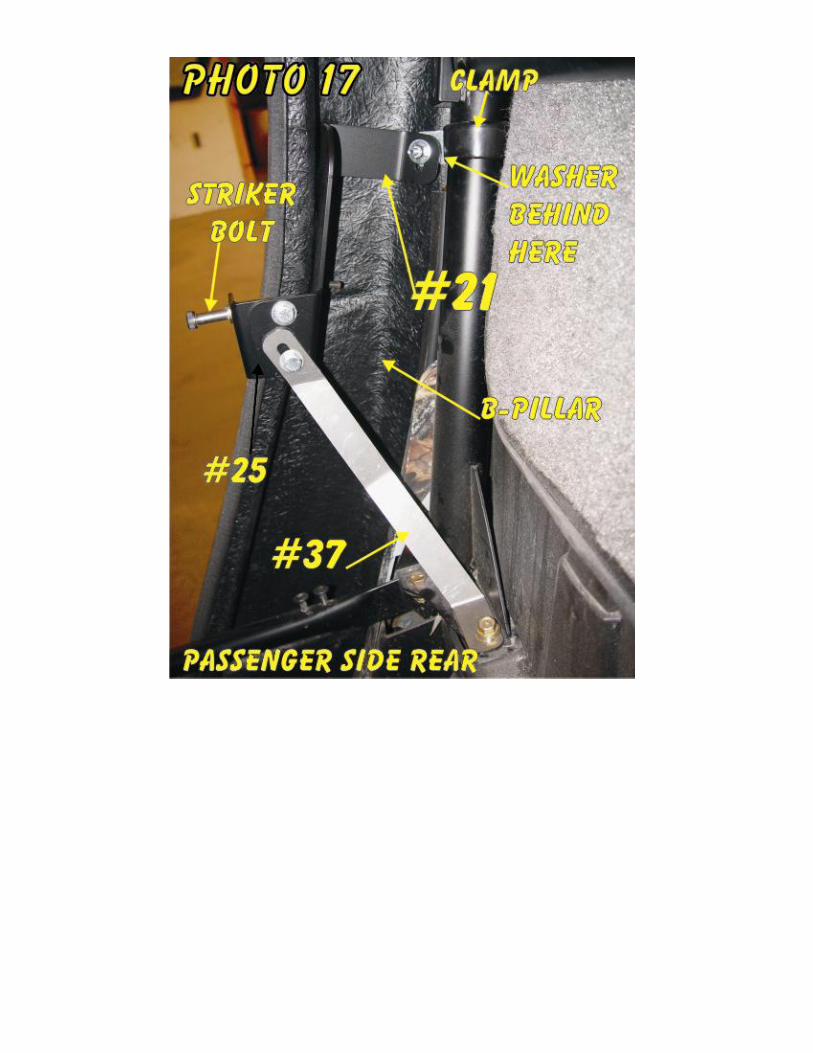
19. (Photo 17) Place a washer over the nut which secures the B-Pillar to the roll cage clamp. Position the brackets (items 20 & 21) over the clamp bolt and loosely fasten with a washer and nut. Align the bracket slots with the counter sunk holes in the B-Pillar and fasten loosely with (2) ¼” x ¾” counter sunk bolts (washer on inside only). Remove the inside roll cage support bolt located behind the seat on each side. Position the striker support brace (items 37 & 38) and loosely replace the bolt. Loosely fasten the striker bolt brackets (items 24 & 25) to items 20 & 21 using 5/16” x 1” hex bolts. The lower bolt also fastens the support braces (items 37 & 38). Fasten the striker bolts in the center of the slots of items 24 & 25. Use the yellow zinc washer under the striker bolt and tighten. Slowly close the door noting the position of the latch. Adjust the striker bolt assembly to align with the latch and tighten all bolts. Loosen and adjust the striker bolt in or out as needed to provide a tight closing door on the second latch action (click).
20. Check and Tighten all Fasteners.