


Languages
Pages
Legal

Parent Handouts
for
Articulation
Includes Tips and Tricks for:/k, g, f, v, sh, ch, j, s, z, l, th, r/
Created by Word of Mouth
Erin Diggins, MA CCC-SLP

Thanks for Downloading! ©2015 Erin Diggins, MA CCC-SLP
Word of Mouth
For more resources and ideas, please visit
my TPT store and follow my blog!
Stay connected with me!
Terms of Use: If you want to tell a friend about this product, please send them to my
TPT store! You may NOT share this download. You may NOT copy, resell,
or claim this document as your own. You may NOT distribute this
document electronically or electronically store it on shared drives.
If you liked this resource, leave me feedback!
Check out more of my resources:
©Word of Mouth

Graphics and Fonts by
©Word of Mouth
Thank you!
Ideas for Use:
•Give these handouts to parents at IEP meetings.
•Place the handouts in student homework folders.
•Give these to teachers to help them practice speech sounds with students in the classroom.
•Send these home to parents of students in articulation RtI programs.
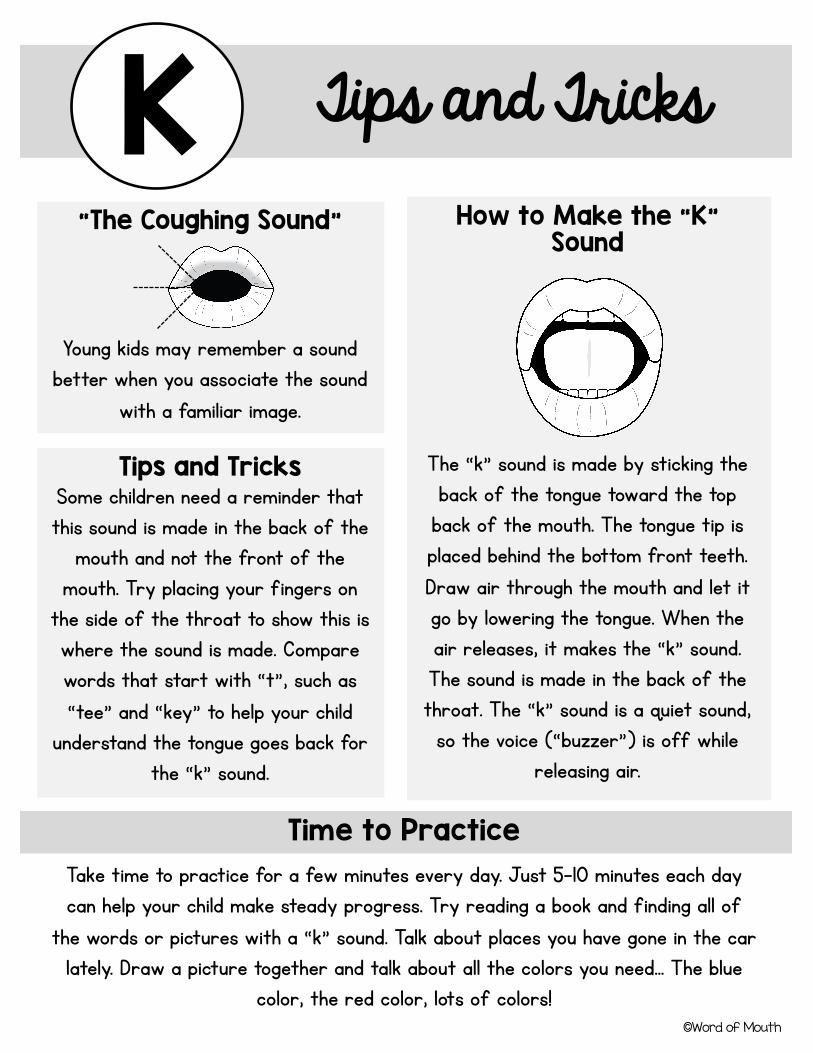
How to Make the “K”
Sound
The “k” sound is made by sticking the back of the tongue toward the top
back of the mouth. The tongue tip is placed behind the bottom front teeth. Draw air through the mouth and let it go by lowering the tongue. When the air releases, it makes the “k” sound. The sound is made in the back of the throat. The “k” sound is a quiet sound,
so the voice (“buzzer”) is off while releasing air.
K Tips and Tricks
“The Coughing Sound”
Young kids may remember a sound better when you associate the sound
with a familiar image.
Tips and Tricks
Some children need a reminder that this sound is made in the back of the
mouth and not the front of the mouth. Try placing your fingers on
the side of the throat to show this is where the sound is made. Compare words that start with “t”, such as “tee” and “key” to help your child
understand the tongue goes back for the “k” sound.
Take time to practice for a few minutes every day. Just 5-10 minutes each day can help your child make steady progress. Try reading a book and finding all of
the words or pictures with a “k” sound. Talk about places you have gone in the car lately. Draw a picture together and talk about all the colors you need... The blue
color, the red color, lots of colors!©Word of Mouth
Time to Practice
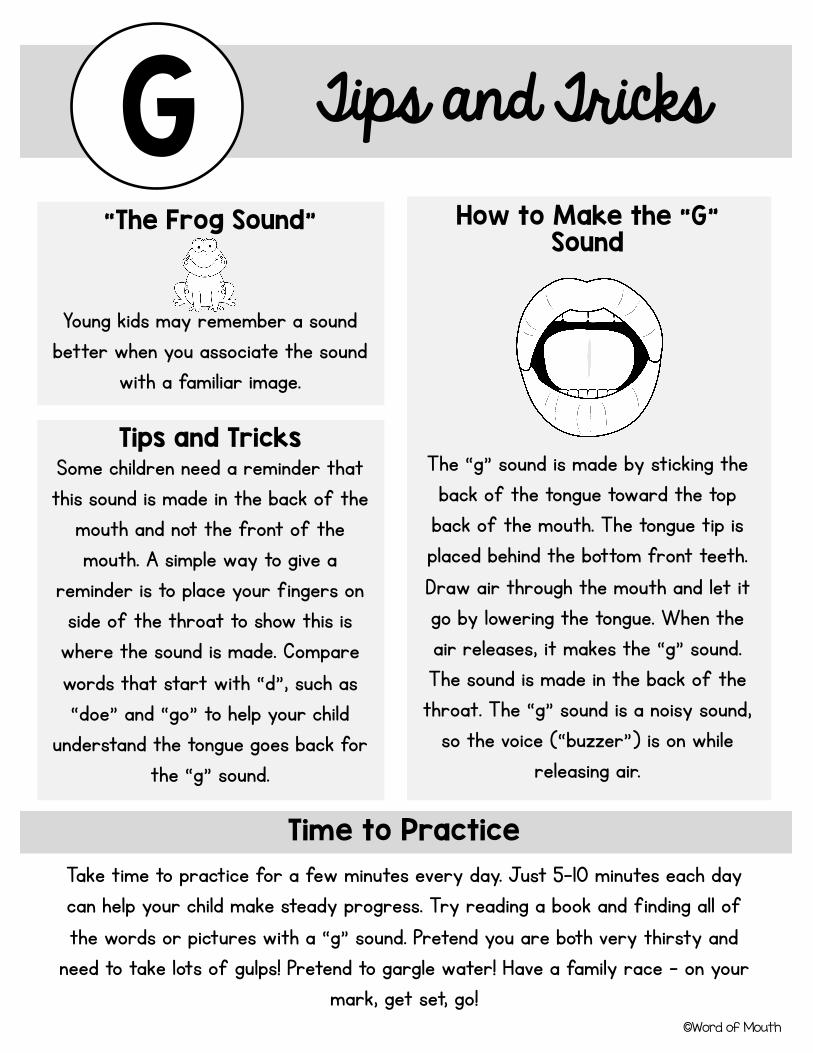
How to Make the “G”
Sound
The “g” sound is made by sticking the back of the tongue toward the top
back of the mouth. The tongue tip is placed behind the bottom front teeth. Draw air through the mouth and let it go by lowering the tongue. When the air releases, it makes the “g” sound. The sound is made in the back of the throat. The “g” sound is a noisy sound,
so the voice (“buzzer”) is on while releasing air.
G Tips and Tricks
Tips and Tricks
Some children need a reminder that this sound is made in the back of the
mouth and not the front of the mouth. A simple way to give a
reminder is to place your fingers on side of the throat to show this is
where the sound is made. Compare words that start with “d”, such as “doe” and “go” to help your child
understand the tongue goes back for the “g” sound.
Take time to practice for a few minutes every day. Just 5-10 minutes each day can help your child make steady progress. Try reading a book and finding all of the words or pictures with a “g” sound. Pretend you are both very thirsty and
need to take lots of gulps! Pretend to gargle water! Have a family race - on your mark, get set, go!
©Word of Mouth
Time to Practice
“The Frog Sound”
Young kids may remember a sound better when you associate the sound
with a familiar image.

How to Make the “F”
Sound
The “f” sound is made by placing the front top teeth gently on the bottom lip. The tongue lays at rest inside the mouth behind the bottom front teeth. Gently blow air through
the middle of the mouth and out the front teeth. The “f” sound is a quiet sound, so the voice (“buzzer”)
is off while gently blowing air through the mouth.
F Tips and Tricks
Tips and Tricks
If your child is having trouble getting his/her teeth and lips in the right position, try practicing in front of a mirror. This helps
your child see if his/her teeth are in the right spot! Try saying “f” all by itself and then adding a vowel – “fee”, “fi”, “fo”. Then
work up to words!
Take time to practice for a few minutes every day. Just 5-10 minutes each day can help your child make steady progress. Try reading a book and
finding all of the words or pictures with an “f” sound. Pretend to water some plants with a hose - fff! Try drawing an ocean with lots of fish!
©Word of Mouth
Time to Practice
“The Hose Sound”
Young kids may remember a sound better when you associate the sound with a familiar image.
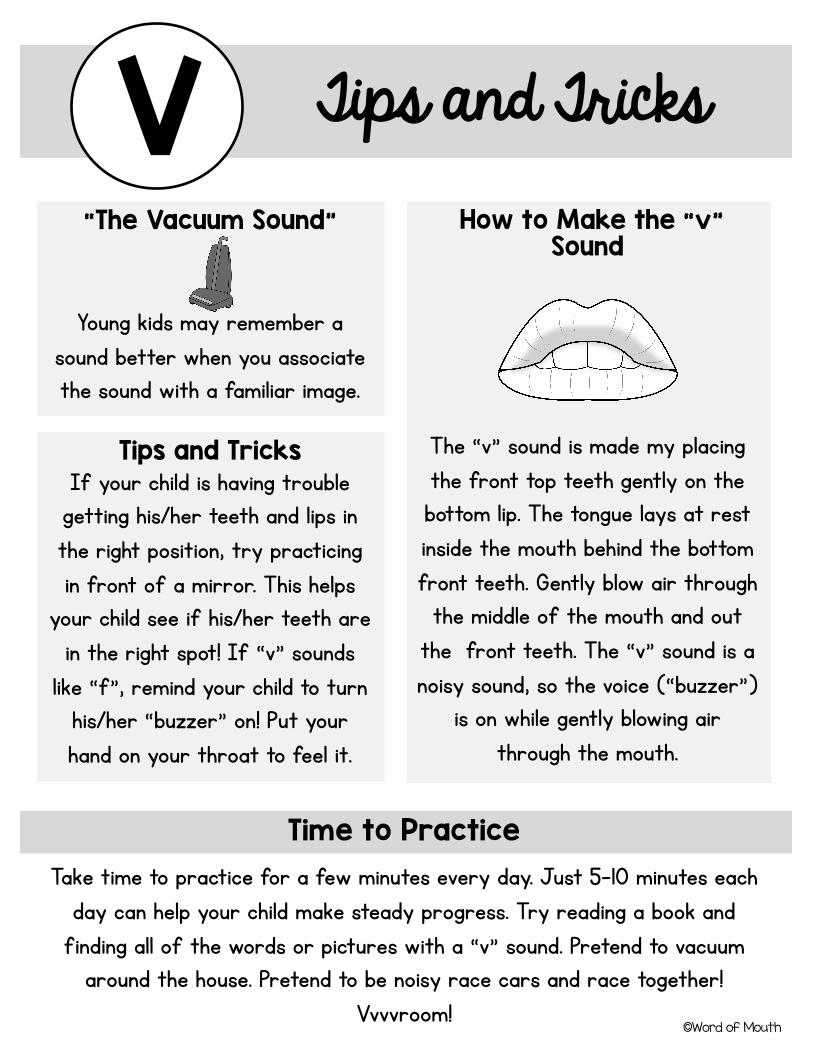
How to Make the “v”
Sound
The “v” sound is made my placing the front top teeth gently on the bottom lip. The tongue lays at rest inside the mouth behind the bottom front teeth. Gently blow air through
the middle of the mouth and out the front teeth. The “v” sound is a noisy sound, so the voice (“buzzer”)
is on while gently blowing air through the mouth.
V Tips and Tricks
Tips and Tricks
If your child is having trouble getting his/her teeth and lips in the right position, try practicing in front of a mirror. This helps
your child see if his/her teeth are in the right spot! If “v” sounds
like “f”, remind your child to turn his/her “buzzer” on! Put your hand on your throat to feel it.
Take time to practice for a few minutes every day. Just 5-10 minutes each day can help your child make steady progress. Try reading a book and
finding all of the words or pictures with a “v” sound. Pretend to vacuum around the house. Pretend to be noisy race cars and race together!
Vvvvroom!©Word of Mouth
Time to Practice
“The Vacuum Sound”
Young kids may remember a sound better when you associate the sound with a familiar image.
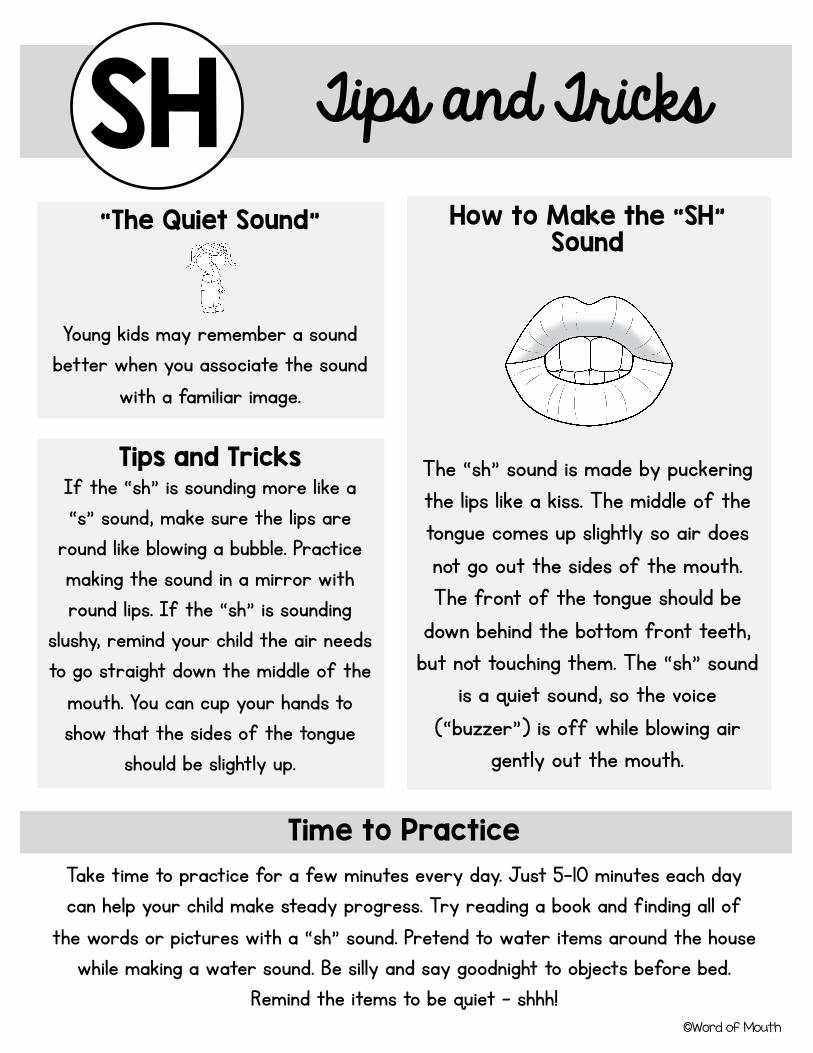
How to Make the “SH”
Sound
The “sh” sound is made by puckering the lips like a kiss. The middle of the tongue comes up slightly so air does not go out the sides of the mouth. The front of the tongue should be
down behind the bottom front teeth, but not touching them. The “sh” sound
is a quiet sound, so the voice (“buzzer”) is off while blowing air
gently out the mouth.
SH Tips and Tricks
Tips and Tricks
If the “sh” is sounding more like a “s” sound, make sure the lips are
round like blowing a bubble. Practice making the sound in a mirror with round lips. If the “sh” is sounding
slushy, remind your child the air needs to go straight down the middle of the
mouth. You can cup your hands to show that the sides of the tongue
should be slightly up.
Take time to practice for a few minutes every day. Just 5-10 minutes each day can help your child make steady progress. Try reading a book and finding all of
the words or pictures with a “sh” sound. Pretend to water items around the house while making a water sound. Be silly and say goodnight to objects before bed.
Remind the items to be quiet – shhh!©Word of Mouth
Time to Practice
“The Quiet Sound”
Young kids may remember a sound better when you associate the sound
with a familiar image.

How to Make the “CH”
Sound
The “ch” sound is made by puckering the lips like a kiss. The The tip of the tongue should press against the top of the mouth behind the front teeth and then lowered after starting the sound. The air is pushed through the center of the mouth. The “ch” sound
is a quiet sound, so the voice (“buzzer”) is off while blowing air
out the mouth.
CH Tips and Tricks
Tips and Tricks
Make sure the tongue is touching the top of the mouth right behind the
front teeth! Try asking your child to hold a cheerio to the top of his/her mouth with the tongue and remind him/her this is where the tongue is for the “ch” sound. If the “ch” is
sounding like a “sh”, practice making the sound short! The breath should not keep flowing after making “ch”.
Take time to practice for a few minutes every day. Just 5-10 minutes each day can help your child make steady progress. Try reading a book and finding all of
the words or pictures with a “ch” sound. Pretend you or your child need to go to the doctor because you are very sneezy – achoo! Play with trains or make a dance
train with your family – choo choo!©Word of Mouth
Time to Practice
“The Choo-Choo Sound”
Young kids may remember a sound better when you associate the sound
with a familiar image.
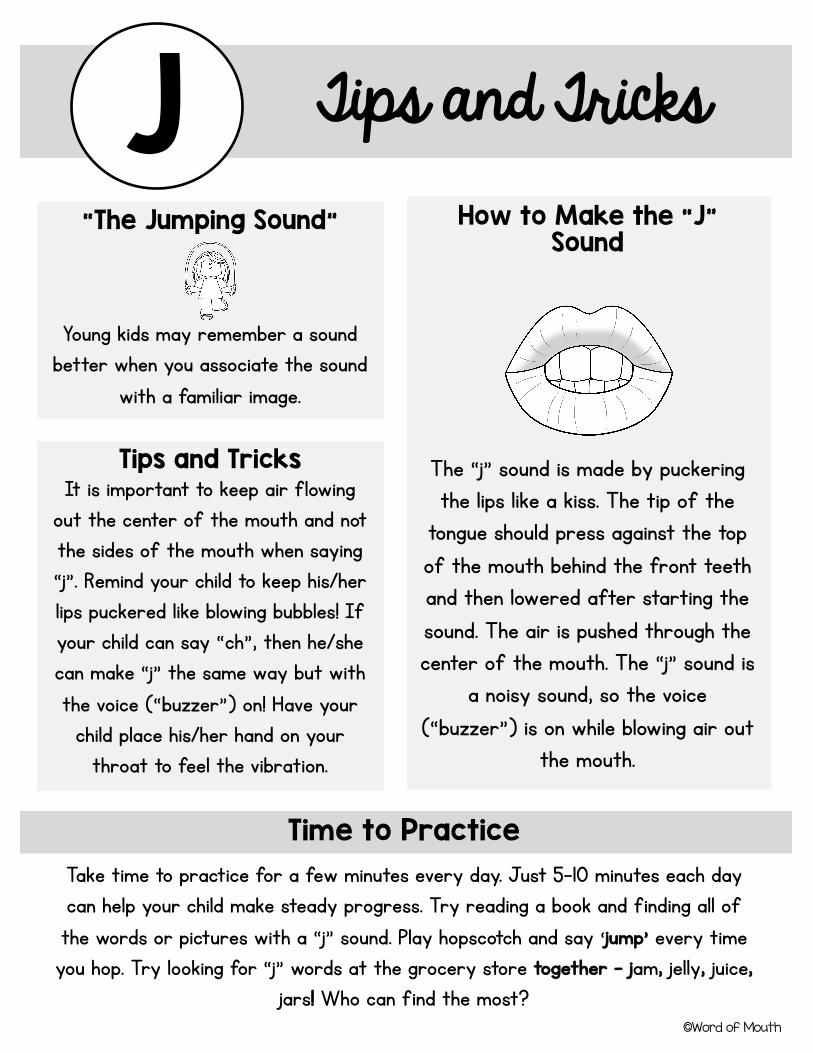
How to Make the “J”
Sound
The “j” sound is made by puckering the lips like a kiss. The tip of the
tongue should press against the top of the mouth behind the front teeth and then lowered after starting the sound. The air is pushed through the center of the mouth. The “j” sound is
a noisy sound, so the voice (“buzzer”) is on while blowing air out
the mouth.
J Tips and Tricks
Tips and Tricks
It is important to keep air flowing out the center of the mouth and not the sides of the mouth when saying “j”. Remind your child to keep his/her lips puckered like blowing bubbles! If your child can say “ch”, then he/she can make “j” the same way but with the voice (“buzzer”) on! Have your
child place his/her hand on your throat to feel the vibration.
Take time to practice for a few minutes every day. Just 5-10 minutes each day can help your child make steady progress. Try reading a book and finding all of the words or pictures with a “j” sound. Play hopscotch and say ‘jump’ every time you hop. Try looking for “j” words at the grocery store together – jam, jelly, juice,
jars! Who can find the most?©Word of Mouth
Time to Practice
“The Jumping Sound”
Young kids may remember a sound better when you associate the sound
with a familiar image.
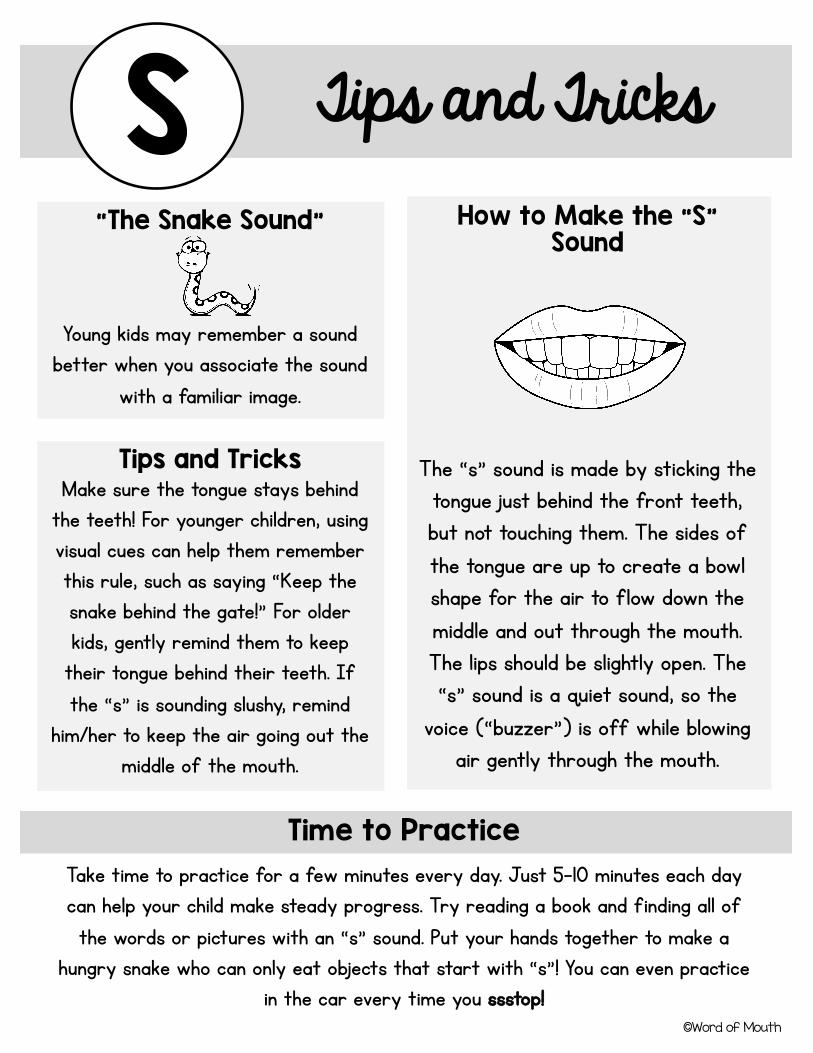
How to Make the “S”
Sound
The “s” sound is made by sticking the tongue just behind the front teeth, but not touching them. The sides of the tongue are up to create a bowl shape for the air to flow down the middle and out through the mouth. The lips should be slightly open. The “s” sound is a quiet sound, so the
voice (“buzzer”) is off while blowing air gently through the mouth.
S Tips and Tricks
Tips and Tricks
Make sure the tongue stays behind the teeth! For younger children, using visual cues can help them remember this rule, such as saying “Keep the snake behind the gate!” For older kids, gently remind them to keep
their tongue behind their teeth. If the “s” is sounding slushy, remind
him/her to keep the air going out the middle of the mouth.
Take time to practice for a few minutes every day. Just 5-10 minutes each day can help your child make steady progress. Try reading a book and finding all of the words or pictures with an “s” sound. Put your hands together to make a
hungry snake who can only eat objects that start with “s”! You can even practice in the car every time you ssstop!
©Word of Mouth
Time to Practice
“The Snake Sound”
Young kids may remember a sound better when you associate the sound
with a familiar image.

How to Make the “Z”
Sound
The “z” sound is made by sticking the tongue just behind the front teeth, but not touching them. The sides of the tongue are up to create a bowl shape for the air to flow down the middle and out through the mouth. The lips should be slightly open. The “z” sound is a noisy sound, so the
voice (“buzzer”) is on while blowing air gently through the mouth.
Z Tips and Tricks
Tips and Tricks
Make sure the tongue stays behind the teeth! For younger children, using visual cues can help them remember this rule, such as saying “Keep the snake behind the gate!”. For older kids, gently remind them to keep
their tongue behind their teeth. If the “z” is sounding like an “s”, don’t
forget to turn your “buzzer” on while practicing!
Take time to practice for a few minutes every day. Just 5-10 minutes each day can help your child make steady progress. Try reading a book and finding all of the words or pictures with a “z” sound. Put your hands together to make a bee who loves to buzzzz around the house! Talk about animals and decide if you could
find them at a zzzoo!©Word of Mouth
Time to Practice
“The Buzz Sound”
Young kids may remember a sound better when you associate the sound
with a familiar image.
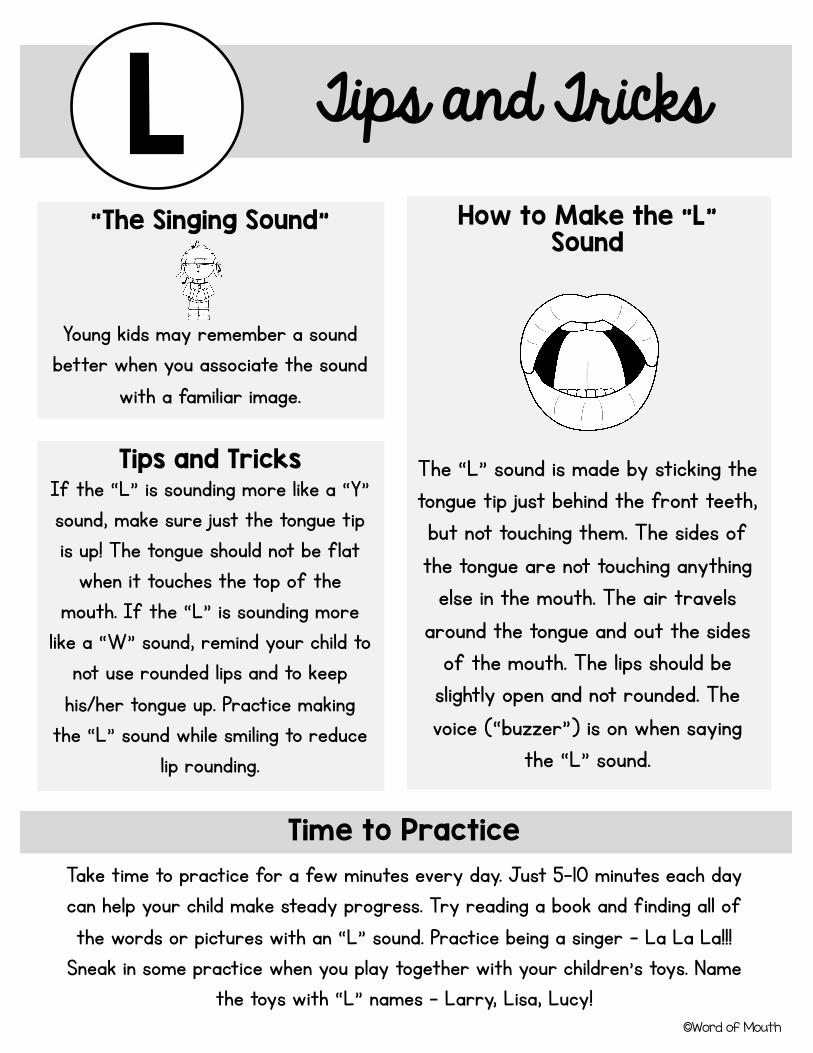
How to Make the “L”
Sound
The “L” sound is made by sticking the tongue tip just behind the front teeth, but not touching them. The sides of the tongue are not touching anything
else in the mouth. The air travels around the tongue and out the sides
of the mouth. The lips should be slightly open and not rounded. The voice (“buzzer”) is on when saying
the “L” sound.
L Tips and Tricks
Tips and Tricks
If the “L” is sounding more like a “Y” sound, make sure just the tongue tip is up! The tongue should not be flat
when it touches the top of the mouth. If the “L” is sounding more
like a “W” sound, remind your child to not use rounded lips and to keep
his/her tongue up. Practice making the “L” sound while smiling to reduce
lip rounding.
Take time to practice for a few minutes every day. Just 5-10 minutes each day can help your child make steady progress. Try reading a book and finding all of the words or pictures with an “L” sound. Practice being a singer – La La La!!!
Sneak in some practice when you play together with your children’s toys. Name the toys with “L” names – Larry, Lisa, Lucy!
©Word of Mouth
Time to Practice
“The Singing Sound”
Young kids may remember a sound better when you associate the sound
with a familiar image.
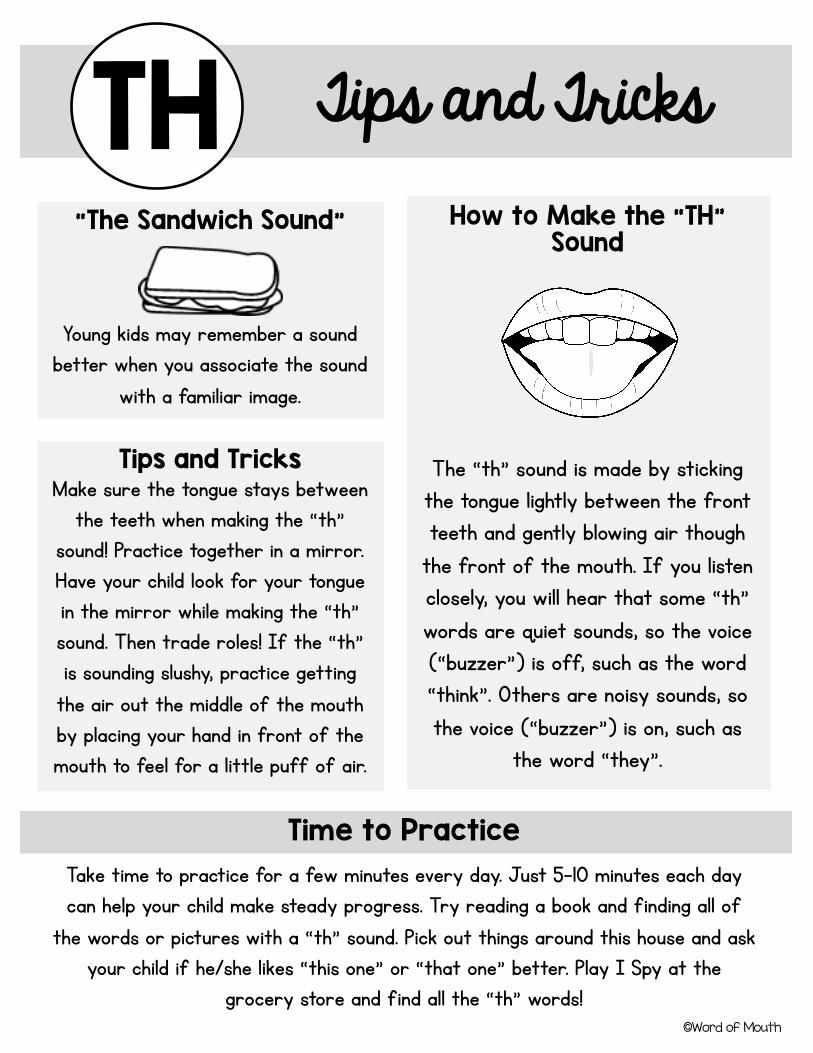
How to Make the “TH”
Sound
The “th” sound is made by sticking the tongue lightly between the front teeth and gently blowing air though
the front of the mouth. If you listen closely, you will hear that some “th” words are quiet sounds, so the voice (“buzzer”) is off, such as the word “think”. Others are noisy sounds, so the voice (“buzzer”) is on, such as
the word “they”.
TH Tips and Tricks
Tips and Tricks
Make sure the tongue stays between the teeth when making the “th”
sound! Practice together in a mirror. Have your child look for your tongue in the mirror while making the “th” sound. Then trade roles! If the “th” is sounding slushy, practice getting
the air out the middle of the mouth by placing your hand in front of the mouth to feel for a little puff of air.
Take time to practice for a few minutes every day. Just 5-10 minutes each day can help your child make steady progress. Try reading a book and finding all of
the words or pictures with a “th” sound. Pick out things around this house and ask your child if he/she likes “this one” or “that one” better. Play I Spy at the
grocery store and find all the “th” words!©Word of Mouth
Time to Practice
“The Sandwich Sound”
Young kids may remember a sound better when you associate the sound
with a familiar image.
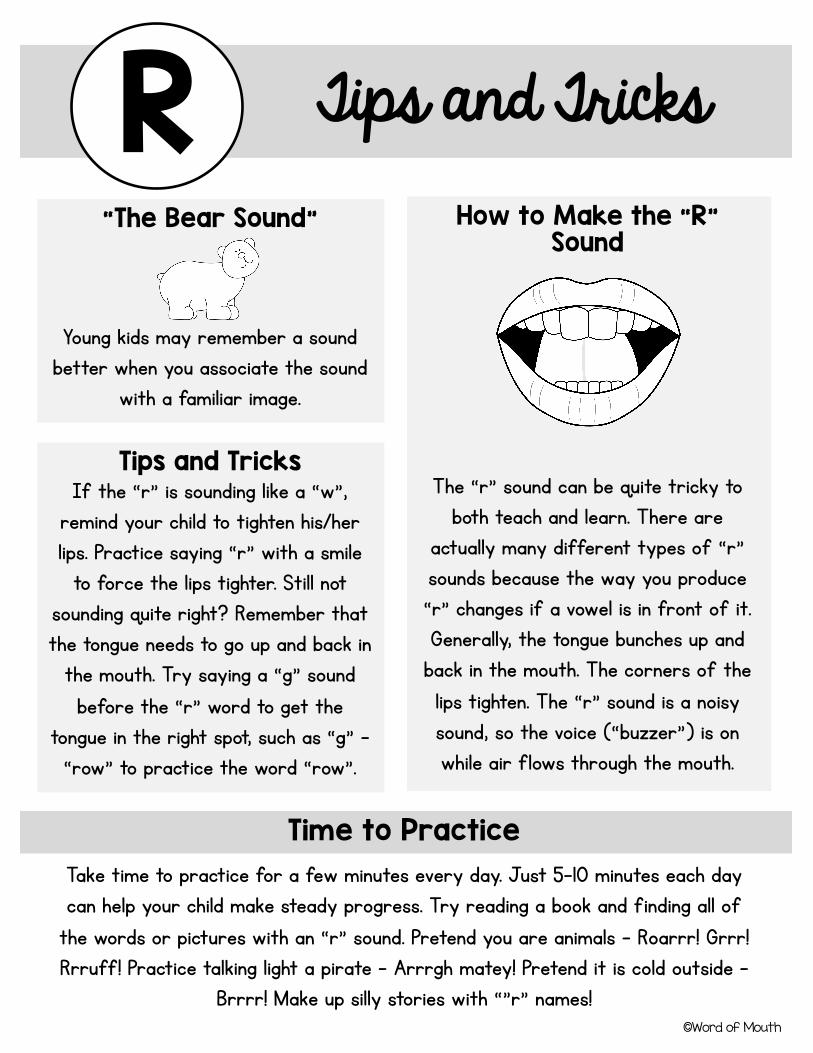
How to Make the “R”
Sound
The “r” sound can be quite tricky to both teach and learn. There are
actually many different types of “r” sounds because the way you produce “r” changes if a vowel is in front of it. Generally, the tongue bunches up and
back in the mouth. The corners of the lips tighten. The “r” sound is a noisy sound, so the voice (“buzzer”) is on while air flows through the mouth.
R Tips and Tricks
Tips and Tricks
If the “r” is sounding like a “w”, remind your child to tighten his/her lips. Practice saying “r” with a smile
to force the lips tighter. Still not sounding quite right? Remember that the tongue needs to go up and back in
the mouth. Try saying a “g” sound before the “r” word to get the
tongue in the right spot, such as “g” –“row” to practice the word “row”.
Take time to practice for a few minutes every day. Just 5-10 minutes each day can help your child make steady progress. Try reading a book and finding all of
the words or pictures with an “r” sound. Pretend you are animals - Roarrr! Grrr! Rrruff! Practice talking light a pirate – Arrrgh matey! Pretend it is cold outside –
Brrrr! Make up silly stories with “”r” names!©Word of Mouth
Time to Practice
“The Bear Sound”
Young kids may remember a sound better when you associate the sound
with a familiar image.
Top Related