VR-TheWorld Server First Experience Guide
34
Version 3.10.9
Transcript of VR-TheWorld Server First Experience Guide

Version 3.10.9
Copyright © 2021 MAK TechnologiesAll rights Reserved. Printed in the United States.
Under copyright laws, no part of this document may be copied or reproduced in any form without prior written consent of MAK Technologies.
VR-Exchange™, VR-TheWorld™, VR-Vantage™, DI-Guy™, and DI-Guy Scenario™ are trademarks of MAK Technologies. MÄK Technologies®,
VR-Forces®, RTIspy®, B-HAVE®, and VR-Link® are registered trademarks of MAK Technologies.
GL Studio® is a registered trademark of The DiSTI® Corporation.
Portions of this software utilize SpeedTree® technology (©2008 Interactive Data Visualization, Inc.). SpeedTree is a registered trademark of Interactive Data
Visualization, Inc. All rights reserved.
SilverLining™ is a trademark of Sundog Software.
Terrain Profiles are based in part on the work of the Qwt project (http://qwt.sourceforge.net).
3ds Max® is a registered trademark of Autodesk, Inc.
All other trademarks are owned by their respective companies.
MAK Technologies10 Fawcett Street, Suite 204Cambridge, MA 02138 USA
Voice: 617-876-8085Fax: 617-876-9208
www.mak.com
Revision VRW-3.10.9-3-210701

VR-T
Contents
Chapter 1. VR-TheWorld Server First Experience1.1. Installing VR-TheWorld Server Software and Data .................... 1-2
1.1.1. Considerations for Using Docker ....................................... 1-21.2. Installing VR-TheWorldServer on Linux ..................................... 1-4
1.2.1. Setting Up Your Computer ................................................. 1-41.2.2. Installing Docker ................................................................. 1-41.2.3. Installing the Data Drive .................................................... 1-51.2.4. Copy Data or Mount the Data Drive .................................. 1-61.2.5. Installing VR-TheWorldServer ........................................... 1-71.2.6. Installing the MAK-Supplied Database ............................. 1-9
1.3. Installing VR-TheWorldServer on Windows .............................. 1-101.3.1. Prerequisites for Using Docker ........................................ 1-101.3.2. Installing Docker ............................................................... 1-111.3.3. Attach the Data Drive and Copy Data ............................. 1-121.3.4. Installing VR-TheWorldServer ......................................... 1-121.3.5. Installing the MAK-Supplied Database ........................... 1-13
1.4. Connecting to a MAK-Supplied Server ....................................... 1-141.4.1. Connecting to VR-TheWorld Server Using Dynamic
DNS ................................................................................... 1-14
Chapter 2. Using VR-TheWorld Server2.1. Connect VR-Vantage to VR-TheWorld Server ............................. 2-1
2.1.1. Start VR-Vantage Stealth and Connect to VR-TheWorld Server .................................................................................. 2-2
2.2. Navigating the Terrain .................................................................. 2-42.3. View Simulated Entities on VR-TheWorld Server Terrain ......... 2-6
2.3.1. Connect to a Simulation Network ...................................... 2-62.3.2. Start the Logger and Play a Simulation ............................ 2-62.3.3. View the Entities ................................................................. 2-7
2.4. Explore Terrain in the VR-TheWorld Server Web Interface ....... 2-82.4.1. Explore a Layer ................................................................... 2-9
iiiheWorld Server First Experience
Contents
Chapter 3. Installing VR-Vantage and MAK Data Logger3.1. Install VR-Vantage and the Logger .............................................. 3-23.2. Setting Up the License Manager .................................................. 3-3
3.2.1. Identify the Host ID and License Server Name ................ 3-33.2.2. Put the License File in the MAKLicenseManager
Directory ............................................................................. 3-43.2.3. Run the License Server ...................................................... 3-43.2.4. Specify the License Server ................................................. 3-4
iv MAK Technologies

VR-T
1. VR-TheWorld Server First Experience
Thank you for deciding to try out VR-TheWorld Server. This first experience with VR-TheWorld Server demonstrates how easy it is to connect to the server and view streaming terrain in a 2D or 3D simulation application. Although you can stream terrain to any application that supports the osgEarth libraries, to ensure a consistent experience, this guide assumes that you have installed and licensed MAK Data Logger and VR-Vantage as described in “Installing VR-Vantage and MAK Data Logger,” on page 3-1.
The exercises in this guide use the free VR-TheWorld Server at VR-TheWorld.com. This allows you to evaluate VR-TheWorld Server without actu-ally installing a local server. However, if you choose to install and evaluate a local server, this chapter explains how to do so. MAK can also provide you with a URL for a dedicated instance of the server. If you prefer this last option, please contact your MAK salesperson.
Complete documentation of VR-TheWorld Server is in VR-TheWorld Server Users Guide, which is included with VR-TheWorldServer.
i VR-TheWorld.com is accessible via server configuration files (earth files). It is not directly accessible as a URL in a web browser.
1-1heWorld Server First Experience

VR-TheWorld Server First Experience — Installing VR-TheWorld Server Software and
Data1.1. Installing VR-TheWorld Server Software and DataVR-TheWorldServer is built on the Docker platform. This allows you to use Linux or Windows as platforms to run VR-TheWorldServer.
A VR-TheWorldServer installation has the following software and hardware components:
Docker. A web-based application used to deliver the VR-TheWorld Server database structure and data.
VR-TheWorldServer software. VR-TheWorldServer database structure and data files. The database
provided by MAK is optional. You can create your own database and use your own data files. You can also add your data files to those provided by MAK.
Hard drive. MAK provides a hard drive with installation scripts and data files.
The minimum recommended hardware configuration for running VR-TheWorld Server is:
Server:
– Quad core
– 32 GB RAM
– 250 GB hard drive
Data storage:
– 4 TB of usable space (after configuration).
Operating system:
– Red Hat 7
– CentOS 7
– Windows 10
1.1.1. Considerations for Using DockerThis section discusses the following issues that you may need to consider when using Docker:
Ports. Handling crashes and reboots. Path syntax.
i Installing and configuring Docker on Windows requires changes to your system’s BIOS as well as Windows features. Please follow the instructions closely.
1-2 MAK Technologies

VR-TheWorld Server First Experience — Installing VR-TheWorld Server Software and Data
Ports
Docker does not bypass firewalls. It creates rules inside the kernel to redirect traffic that comes to the host. The docker-compose file lists the ports that are being used in the following format:
host_port : docker_port
By default, Docker exposes container ports to the IP address 0.0.0.0. (This matches any IP on the system). If you want to, you can tell Docker which IP address to bind on. For example, to bind on localhost port 80 and container port 8080, you would specify:
127.0.0.1:80:8080
Some customers may prefer this for security reasons. Otherwise, that host port becomes open to all incoming connections.
Handling Crashes and Reboots
You can implement a restart policy for your Docker container that will prevent the need for you to manually restart the containers in the case of a crash or reboot.
This is done through the --restart argument, which can be called within the docker run command or the docker update command (once containers are running). For our case, the docker update command makes more sense, because the docker run command is not called explicitly during the installation process.
Here is how to set this for a single container:
docker update --restart unless-stopped container_name
Here is how to set this for all containers:
docker update --restart unless-stopped $(docker ps -q)
tab lists the potential values for the --restart flag. unless-stopped is the most commonly used value. It is designed for the use case of handling a server crash / reboot.
Table 1-1:
Command Description
no Default value - containers would not be restarted.
on failure Restarts container in the case of an error (container crashes).
always Always restart container if it stops.
unless-stopped Always restart container unless it is manually stopped.
VR-TheWorld Server First Experience 1-3

VR-TheWorld Server First Experience — Installing VR-TheWorldServer on Linux
Specifying Paths in Docker
Declare all paths using a forward slash (/), not the Windows-standard backslash (\). Items are appended to Docker paths following a Unix format, and when a path mixes backslashes with forward slashes it becomes invalid. If you want to declare the paths in a Windows format, set the COMPOSE_CONVERT_WIN-DOWS_PATHS environment variable to 1.
1.2. Installing VR-TheWorldServer on LinuxThis section explains how to install VR-TheWorldServer on Linux operating systems.
1.2.1. Setting Up Your ComputerVariations in Linux systems may create problems installing Docker and running VR-TheWorldServer. Please review the issues discussed in this section to ensure that your system is properly set up.
Partition Setup
It is recommended that you configure /etc/fstab to point to drives by UUID. If drives are not configured by UUID, the mount locations or order of the drivers might change after you restart the server.
Partitions should use the XFS scheme. Non-XFS partitions may experience problems when copying the contents of the external drive to the internal drive.
Installing Docker on CentOS 8
CentOS has some packages that affect container behavior. Use the yum autoremove command to remove the podman and buildah packages.
1.2.2. Installing DockerDownload and install Docker. Follow the instructions at https://docs.docker.com/engine/install/
Install docker-compose
Install docker-compose as follows:
sudo curl -L "https://github.com/docker/com-pose/releases/download/1.27.4/docker-compose-$(uname -s)-$(uname -m)" -o /usr/local/bin/docker-compose
1.27.4 is the version of docker-compose in this example. If you are installing a different version, use that version number.
1-4 MAK Technologies

VR-TheWorld Server First Experience — Installing VR-TheWorldServer on Linux
Configure the Firewall
Firewall settings may restrict the usage of certain ports through docker.
To set up the firewall:
1. Find out which zone the docker interface it bound to, most likely “no zone”:
sudo firewall-cmd --get-zone-of-interface=docker0
2. Add the docker0 interface to the public zone. Changes will be visible only after firewalld reloads:
sudo nmcli connection modify docker0 connection.zone public
3. Add masquerading, which allows for docker ingress and egress:
sudo firewall-cmd --zone=public --add-masquerade --perma-nent
4. Reload firewalld:
sudo firewall-cmd --reload
5. Reload dockerd:
sudo systemctl restart docker
1.2.3. Installing the Data DriveYou must mount the data drive and create the installation directory. The drive is in XFS format.
To mount the data drive:
1. The data drive has a USB connection. Attach it to a USB 3.0 port on your computer.
2. Issue the following command to get the location of the drive:
sudo fdisk -l
This lists all the drives connected to the computer. The MAK data drive is called /dev/sd*, where * is a letter from a-z). The data drive size is 6000GBs. Write down the name of the MAK drive.
3. Create the data directory:
sudo mkdir -p /data
VR-TheWorld Server First Experience 1-5

VR-TheWorld Server First Experience — Installing VR-TheWorldServer on Linux
1.2.4. Copy Data or Mount the Data DriveYou can run VR-TheWorldServer from the data drive or copy the data to your computer’s hard drive. For best performance, MAK recommends that you copy the data to your computer’s hard drive.
To copy the contents of the MAK data drive to an internal drive, run the following command:
xfsdump -J - /dev/NAMEOFDRIVE | xfsrestore -J - /data
where NAMEOFDRIVE is the name you recorded when you got the location of the disk.
If you choose to run VR-TheWorldServer from the data drive, rather than copying data, mount the data drive to /data, as follows:
sudo mount /dev/NAMEOFDRIVE /data
where NAMEOFDRIVE is the name you recorded when you got the location of the disk.
i Copying the data takes 8-10 hours. Do not interrupt the process. Partitions should use the XFS scheme. Non-XFS partitions may
experience problems when copying the contents of the external drive to the internal drive.
1-6 MAK Technologies

VR-TheWorld Server First Experience — Installing VR-TheWorldServer on Linux
1.2.5. Installing VR-TheWorldServerVR-TheWorldServer organizes data into layers, which reference the data files. You must install the database structure. You can do so automatically or manu-ally.
To install VR-TheWorldServer:
1. Change directory to the install directory:
cd /data/VRTheWorld
2. Optionally, edit the settings file, docker-compose.yml. The file is commented to explain the options. (For more information, please see .)
vim docker-compose.yml
3. Load the images for VR-TheWorldServer (you must have elevated permis-sions to run these commands):
docker load < postgis_9.5-alpine.tar.gzdocker load < redis_3.2-alpine.tar.gzdocker load < vrtheworld_VERSIONOFVRTW.tar.gz
where VERSIONOFVRTW is the version of VR-TheWorldServer you are installing.
4. Start VR-TheWorldServer:
docker-compose up -d
You can now access VR-TheWorldServer using its IP address. The default user-name and password is readymap.
VR-TheWorld Server First Experience 1-7

VR-TheWorld Server First Experience — Installing VR-TheWorldServer on Linux
Configuration Options for Docker
In the docker-compose.yml file, you can pass optional arguments to our docker container to increase your VR-TheWorldServer performance. These are defined in the optional environment section of the file. Table 1-2 describes the environ-ment variables.
To set environment variables in docker-compose.yml, read the instructions at this link: https://docs.docker.com/compose/compose-file/#environment
Table 1-2: Docker environment variables
Variable Description
NUM_WORKERS The number of background workers started for processing general background tasks.
NUM_TILERS The number of background workers started for seeding map tiles via cache jobs.
NUM_TILE_GENERATORS The number of background workers started for gener-ating map tiles on demand.
GENERATE_TILES_IN_BACK-GROUND_WORKER
Whether to generate tiles on demand in a background process or in the main apache process. By default, tiles ae generated in a background process to avoid bogging down the server during periods of high load. Set this environment variable to False to restore the original behavior of generating tiles in the main apache process.
USE_LAYER_NAMES When set to True, VR-TheWorldServer will expose layers using their name instead of their ID in GIS services. This could make switching between VR-TheWorldServer servers that have similar layer names easier when configuring earth files.
1-8 MAK Technologies

VR-TheWorld Server First Experience — Installing VR-TheWorldServer on Linux
1.2.6. Installing the MAK-Supplied DatabaseVR-TheWorldServer does not presume any particular data. You can load your own database or the database supplied by MAK. If you are using MAK applica-tions such as VR-Vantage or VR-Forces, the terrain database files provided with these applications presume use of the MAK database structure and data files.
This section explains how to load the MAK database.
To install the MAK database:
1. Change directory to the VR-TheWorldServer install directory:
cd /data/VRTheWorld
2. Shut down the docker containers and restart them:
docker-compose downdocker-compose up -d
3. Load the database into readymap:
docker-compose exec readymap readymap_restore /data/back-ups/vrtw3.db
Once the installation process is complete, you can log into the web interface of VR-TheWorldServer. The default username and password is admin.
If you load the MAK database using a script, it removes all of the currently installed data from the server.
VR-TheWorld Server First Experience 1-9

VR-TheWorld Server First Experience — Installing VR-TheWorldServer on Windows
1.3. Installing VR-TheWorldServer on WindowsThis section explains how to install VR-TheWorldServer on Windows.
1.3.1. Prerequisites for Using DockerTo use Docker on Windows, you must enable virtualization, WSL2 (Windows Subsystem for Linux), and Hyper-V. These are all capabilities that are built into Windows 10, but which might not be enabled.
To check the status of virtualization:
1. Open Task Manager.
2. Select the Performance tab.
3. The status of virtualization is displayed under the graph (Figure 1-1).
Figure 1-1. Task Manager, Performance tab
If virtualization is not enabled, you must enable it. Instructions for doing so are readily available using an internet search.
To enable Hyper-V and WSL2
1. Right-click the Start menu icon and select Search.
2. In the Search box, type Windows Features. The search results shows Turn Windows Features On or Off as the best match.
3. Click Turn Windows Features On or Off. The Windows Features dialog box opens (Figure 1-2).
1-10 MAK Technologies

VR-TheWorld Server First Experience — Installing VR-TheWorldServer on Windows
Figure 1-2. Windows Features
4. Select the check box next to Hyper-V.
5. Select the check box next to Windows Subsystem for Linux.
1.3.2. Installing DockerDownload and install Docker. Follow the instructions at https://docs.docker.com/docker-for-windows/install/
VR-TheWorld Server First Experience 1-11
VR-TheWorld Server First Experience — Installing VR-TheWorldServer on Windows
1.3.3. Attach the Data Drive and Copy DataThe drive provided by MAK for Windows is in NTFS format.
To attach the data drive and copy the data:
1. Plug the USB cable from the data drive into a USB 3.0 port on your machine.
2. Open a console window.
3. Enter:
diskmgmt.msc
The screen displays a list of all the drives connected to the system.
4. Write down the letter of the data drive provided.
5. In Windows File Explorer, create a directory (folder) called data on the target drive. VR-TheWorldServer will use this directory to store all the files it needs to use.
6. Copy the data from the source directory to your data directory.
1.3.4. Installing VR-TheWorldServerYou can pass optional arguments to our docker container to increase your VR-TheWorldServer performance. These are defined in the optional environment section of the file. Table 1-2 describes the environment variables.
To install VR-TheWorldServer on Windows:
1. Open a console window.
2. Change directory to the data drive:
cd DATADRIVE:\data\VRTheWorld
3. In a text editor, open docker-compose-windows.yml.
4. Copy all of the content in the file.
5. In a text editor, open docker-compose.yml.
6. Replace all of the content with the content you copied from docker-compose-windows.yml. (VR-TheWorldServer includes configurations for Linux and Windows. However, Docker only looks for docker-compose.yml, so you have to replace the Linux configuration information with the Windows configura-tion.)
7. Examine the content of the file. If there are an backslashes (\), replace them with forward slashes (/).
8. In lines 15 and 16, replace DATADRIVE with the drive letter on which the data is installed.
9. Save the file and close it.
1-12 MAK Technologies

VR-TheWorld Server First Experience — Installing VR-TheWorldServer on Windows
10. In your console window, in DATADRIVE:\data\VRTheWorld, execute the following commands:
docker load -i postgis_9.5-alpine.tar.gzdocker load -i redis_3.2-alpine.tar.gzdocker load -i vrtheworld_VERSIONOFVRTW.tar.gz
where VERSIONOFVRTW is the version of VR-TheWorldServer that you are installing.
11. Start VR-TheWorldServer:
docker-compose up -d
You can now access VR-TheWorldServer using its IP address. The default username and password is readymap.
1.3.5. Installing the MAK-Supplied DatabaseVR-TheWorldServer does not presume any particular data. You can load your own database or the database supplied by MAK. If you are using MAK applica-tions such as VR-Vantage or VR-Forces, the terrain database files provided with these applications presume use of the MAK database structure and data files.
This section explains how to load the MAK database.
To install the MAK database:
1. Change directory to the VR-TheWorldServer install directory:
cd DATADRIVE:\data\VRTheWorld
2. Shut down the docker containers and restart them:
docker-compose downdocker-compose up -d
3. Copy vrtw3.db to the /data/added directory. (Docker will see this as /data/vrtw3.db because our default mount location is /data/added, as configured by the docker.yml file.)
4. Load the database into readymap (this will take 5 to 10 minutes):
docker-compose exec readymap readymap_restore /data/vrtw3.db
Once the installation process is complete, you can log into the web interface of VR-TheWorldServer. The default username and password is admin.
If you load the MAK database using a script, it removes all of the currently installed data from the server.
VR-TheWorld Server First Experience 1-13

VR-TheWorld Server First Experience — Connecting to a MAK-Supplied Server
1.4. Connecting to a MAK-Supplied ServerIf you have a server that was provided by MAK, VR-TheWorld Server is config-ured to use DHCP and it has a static IP address. If your network has dynamic DNS set up, you can connect to the server without further configuration. If you do not have dynamic DNS, you must configure an IP address for the server.
1.4.1. Connecting to VR-TheWorld Server Using Dynamic DNSTo connect to the server using dynamic DNS:
1. Set up the server and connect it to the network.
2. Open a web browser.
3. Point the browser to http://localhost/vr-theworld.
Figure 1-3. VR-TheWorld Server
4. Click admin in the upper right corner of the window. The default user is admin. The default password is admin. It is recommended that you change the password the first time you log in.
5. Configure the server, as described in Chapter 3, Configuring VR-TheWorld Server.
i For web connections, the default user is admin. The default pass-word is admin. You can change these passwords.
VR-TheWorldServer does not work with Internet Explorer. Use Firefox, Chrome, or Edge.
1-14 MAK Technologies

VR-T
2. Using VR-TheWorld Server
This chapter will help you:
“Connect VR-Vantage to VR-TheWorld Server” “View Simulated Entities on VR-TheWorld Server Terrain” “Explore Terrain in the VR-TheWorld Server Web Interface”
2.1. Connect VR-Vantage to VR-TheWorld ServerThe purpose of a terrain server such as VR-TheWorld Server is to provide high-quality streaming terrain to applications that need it for simulation purposes. That is, the terrain is not just for looking at (imagery), but needs to provide the elevation data required by applications that are simulating entities on the land, the sea, and in the air. In this part of the guide we show how easy it is to get terrain data from VR-TheWorld Server into an application (VR-Vantage).
By default, the procedure in this chapter will connect you to the MAK public version of VR-TheWorldServer. If you want to use your own server, the easiest way to do that is to change your hosts file to point to your server instead of the MAK public server. To do this on Windows:
1. Log into your computer with administrator privileges.
2. In a text editor, open C:\windows\system32\drivers\etc\hosts.
3. Add the following lines to the file:
10.10.10.10 www.vr-theworld.com10.10.10.10 www.vr-theworld.com
where 10.10.10.10 is replaced with the IP address of your server.
2-1heWorld Server First Experience

Using VR-TheWorld Server — Connect VR-Vantage to VR-TheWorld Server
2.1.1. Start VR-Vantage Stealth and Connect to VR-TheWorld ServerVR-Vantage Stealth is part of the VR-Vantage family of visualization products. It provides a 3D situational awareness view of the world. VR-Vantage Stealth includes a server connection configuration file (an .earth file) that is configured to connect to the VR-TheWorld Server running at VR-TheWorld.com.
To start VR-Vantage Stealth:
1. On the Windows Start menu, choose MAK Technologies VR-Vantage Stealth 64-bit. VR-Vantage starts up.
The Load Terrain dialog box opens (Figure 2-1).
Figure 2-1. Load Terrain dialog box
2. Click Close. (The terrains listed in the Load Terrain dialog box connect to VR-TheWorld Server, but do not let you load a terrain server directly.)
3. On the Terrain Toolbar, click the Add Server Connection button ( ). The Add Terrain Server dialog box opens.
4. In the Servers list, select MAK Earth (online).earth.
5. Click Connect. VR-Vantage connects to the server and immediately starts to stream in terrain data.
2-2 MAK Technologies

Using VR-TheWorld Server — Connect VR-Vantage to VR-TheWorld Server
Figure 2-2. MAK Earth (online) terrain
VR-TheWorld Server First Experience 2-3

Using VR-TheWorld Server — Navigating the Terrain
2.2. Navigating the TerrainWhen you first connect to VR-TheWorld, the data is streamed in at a low resolu-tion because the observer is high above the earth. Use the mouse and the Q, W, E, A, S, and D keys to rotate the view of the earth and zoom in and out:
Press Q to rotate the earth so that North America is centered. Press W to zoom in. Zoom in a little bit at a time. As you zoom in, see how the
detail increases as terrain is streamed in. Use the mouse to drag the terrain so that Boston, Massachusetts is centered
in the view. Then zoom in to see the highly detailed inset.
Figure 2-3. Boston inset
Hold down the right mouse button and move the mouse to change the orien-tation. Then press E to move the eyepoint down towards the ground. The terrain is populated with geotypical buildings on the footprints of the build-ings in the city (Figure 2-4).
2-4 MAK Technologies

Using VR-TheWorld Server — Navigating the Terrain
Figure 2-4. Geotypical buildings
VR-TheWorldServer has footprint data for many cities and can dynamically extrude buildings on those footprints. Continue to explore the terrain until you are ready to move to the next exercise in this guide.
VR-TheWorld Server First Experience 2-5

Using VR-TheWorld Server — View Simulated Entities on VR-TheWorld Server Terrain
2.3. View Simulated Entities on VR-TheWorld Server TerrainSo far, we have demonstrated VR-TheWorld Server in a world without any simulated entities. Now we will show how you can use VR-TheWorld Server to provide terrain under distributed simulation scenarios. To do this, we need to connect to the DIS network, start the Logger, and play a Logger recording.
2.3.1. Connect to a Simulation Network1. In VR-Vantage, choose Settings Connection. The Simulation Connections
dialog box opens.
2. In the list of connectsions, select DIS (7).
3. Click Connect.
2.3.2. Start the Logger and Play a Simulation1. On the Start Menu, choose MAK Technologies Logger DIS 64-bit. The Logger
starts.
2. Choose File Open. The Open File dialog box opens.
3. Select VR-TheWorld_FirstExperienceDIS.lgr.
4. Click Open.
5. Choose Play Toggle Loop at End. This will cause the recording to continuously loop back to the beginning when it reaches the end.
6. Choose Play Play/Pause, or click the Play button.
i If for some reason you decided not to install the Logger, please skip this section. However, if you have a simulation application that you can use to generate entity messages, you can use it to evaluate how you can view entities on VR-TheWorld Server terrain.
The default connection for the Logger and the DIS (7) connection for VR-Vantage use port 3000. If for some reason you have changed the default port for one or both of these applications, you must change them to make sure they match.
You must also make sure that the exercise IDs match.
2-6 MAK Technologies

Using VR-TheWorld Server — View Simulated Entities on VR-TheWorld Server Terrain
2.3.3. View the EntitiesThe scenario you are viewing has three entities – a jet flying over the Rocky Mountains, a helicopter flying over an inset of Boston, Massachusetts, USA, and a truck driving on a road in Afghanistan.
1. In the Objects List Panel at the left of the VR-Vantage Stealth window, right-click FtrFW 1 and choose Attach Tether. VR-Vantage Stealth displays a fighter flying through the Rocky Mountains as terrain streams in from VR-TheWorld Server underneath. Notice how the server is providing both imagery and elevation.
Figure 2-5. Fighter jet over the Rocky Mountains
2. In the Objects List Panel, right-click USAtRW 1 and choose Attach Tether. The observer is now attached to a helicopter flying over the Boston inset. (It may take a few seconds for VR-Vantage to stream in the highest resolution imagery from the server.)
VR-TheWorld Server comes with 15m imagery for the entire earth. However, as with this Boston inset, it can support very high resolution data as well. We have provided a few free, high-resolution insets to demonstrate this capability. When you deploy VR-TheWorld Server, you can add as much data as you would like, based on the needs of your application.
You might want to press S to zoom out a little for a better view of the inset. Press Spacebar to return to the default view of the entity.
VR-TheWorld Server First Experience 2-7

Using VR-TheWorld Server — Explore Terrain in the VR-TheWorld Server Web Interface
3. In the Objects List Panel, right-click SmWhel 1 and choose Attach Tether. This entity is a HMMVW driving along a road in Afghanistan. (Again, it may take 30 seconds or so for terrain to stream in at the highest level of resolution. Until then, the HMMVW may appear to be in the air.)
The application that we used to generate this recording, VR-Forces, used the VR-TheWorld Server streaming terrain in its simulation engine. Since the terrain used to simulate the entities and the terrain you are using to visualize them is the same, as you watch the HMMVW drive in VR-Vantage Stealth you can see that it maintains its proper relationship to the terrain. VR-TheWorld Server can provide perfectly correlated streaming terrain to a variety of simulation and visualization applications.
2.4. Explore Terrain in the VR-TheWorld Server Web InterfaceUp to now we have been viewing the data set specified in a connection configu-ration file included with VR-Vantage. Suppose you want to know what else is available on your server? You can open the VR-TheWorld Server web interface and explore the maps and layers on the server.
To open the web interface:
1. Connect to your local server as described in “Connecting to a MAK-Supplied Server,” on page 1-14. The browser displays the interface.
Figure 2-6. VR-TheWorld web interface
i You must have access to a local server for this part of the first experience.
2-8 MAK Technologies

Using VR-TheWorld Server — Explore Terrain in the VR-TheWorld Server Web Interface
2.4.1. Explore a LayerVR-TheWorld Server’s data sets are organized in layers. Layers are composed of files. The VR-TheWorld Server web interface lets you view the individual layers and their characteristics. Most importantly, it provides URLs that allow you to connect your application to the terrain server.
(Creating and editing your own layers is an administrative task, which is not covered in this guide.)
1. The default view is the list of raster layers
2. In the list, select the Bakersfield-Composite layer. A map is displayed. Note the topographic map in the southwestern United States.
Figure 2-7. Bakesfield composite layer
3. Zoom in on the west coast of the United States. As you zoom in, the map becomes more detailed. VR-TheWorld Server is actually providing different maps with increasing detail, based on the zoom level in your web client.
VR-TheWorld Server First Experience 2-9

Using VR-TheWorld Server — Explore Terrain in the VR-TheWorld Server Web Interface
Figure 2-8. San Diego layer
2-10 MAK Technologies

VR-T
3. Installing VR-Vantage and MAK Data Logger
To evaluate VR-TheWorld Server, you need an application that can connect to the server and use the streaming data. Ideally you should also have an applica-tion that can generate entity data to visualize. For that purpose, MAK has provided an evaluation license for VR-Vantage Stealth, our 3D viewing applica-tion, and MAK Data Logger, to send some entity traffic over the network. This chapter provides installation and setup instructions for these applications.
3-1heWorld Server First Experience

Installing VR-Vantage and MAK Data Logger — Install VR-Vantage and the Logger
3.1. Install VR-Vantage and the LoggerYour MAK salesperson has given you a link to the VR-Vantage and Logger installers, the license manager installer, and possibly a sample Logger file to support your first user experience. Download the files. Before you install the applications, note the following possible issues:
When you install VR-Vantage, there may be a delay of up to several minutes from the time you try to run the setup program to the time that an installa-tion dialog box is displayed. If you experience this problem, turning off User Access Control can reduce or eliminate this delay.
These instructions assume you are familiar with installing Windows appli-cations that use a wizard-style installer. They also assume that you have an unzipping application and know how to use it.
To install VR-Vantage, run the installer. On the VR-Vantage Installation Code page, click Skip Toolkit Installation.
Figure 3-1. VR-Vantage setup wizard
Run the MAK Data Logger installer. Accept all of the default settings.
3-2 MAK Technologies

Installing VR-Vantage and MAK Data Logger — Setting Up the License Manager
3.2. Setting Up the License ManagerTo use a MAK product, you must install the MAK License Manager and get a license for your product. Before you can use a MAK product, you must obtain a valid license file and specify the license server.
To install the MAK License Manager, run the installer.
The general procedure for configuring license management is as follows:
1. Identify the name and ID of the license server and request a license file.
2. Put the license file in the MAK/MAKLicenseManager directory on the license server.
3. Run the license server.
4. Specify the license server location.
3.2.1. Identify the Host ID and License Server NameFor simplicity, use the computer on which you installed VR-TheWorld Server as the license server. To find out the host ID and license server name:
1. On the Start menu, choose MAK Technologies MAK License Manager. The MAK License Manager utility opens.
Figure 3-2. License Manager
2. Select the Request License tab. It displays the server name and the IDs for your network cards.
3. If you have more than one network card, select the one that you want to use as Host ID.
VR-TheWorld Server First Experience 3-3
Installing VR-Vantage and MAK Data Logger — Setting Up the License Manager
4. Send the host ID and hostname to your MAK salesperson. MAK will e-mail you a license file.
3.2.2. Put the License File in the MAKLicenseManager DirectoryWhen you receive your license file, put it in the MAKLicenseManager directory on the license server. The file should have the extension .lic. If it does not, please contact [email protected] to clarify why it did not follow this convention.
3.2.3. Run the License Server To start the license server daemon, on the server machine only, execute
runLm from the MAKLicenseManager directory.
Shutting Down the License Server
To force all applications to check in their licenses and shut down the license server daemon, run lmdown.
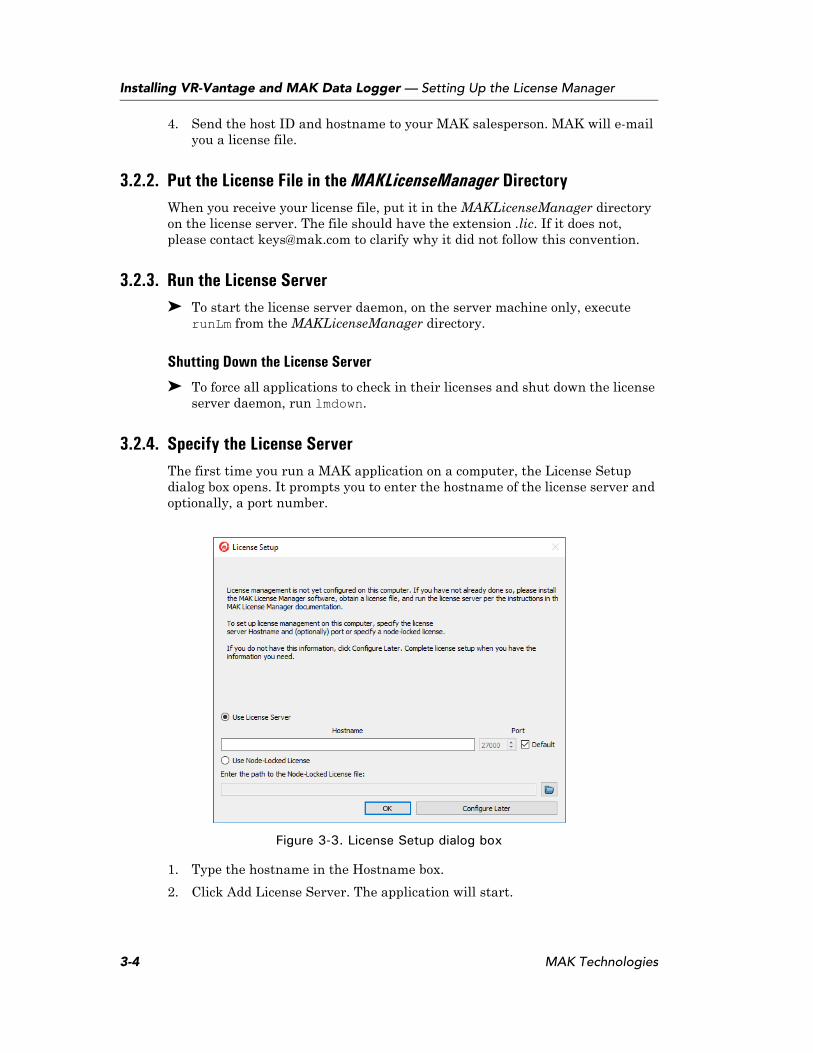
3.2.4. Specify the License ServerThe first time you run a MAK application on a computer, the License Setup dialog box opens. It prompts you to enter the hostname of the license server and optionally, a port number.
Figure 3-3. License Setup dialog box
1. Type the hostname in the Hostname box.
2. Click Add License Server. The application will start.
3-4 MAK Technologies


VRW-3.10.9-3-210701