SeaStar - Star-Oddi - Logging Life Science · 1 Downloading and Installing SeaStar SeaStar runs...
12
SeaStar Start-Up Guide Application Software for Star-Oddi data logging system
-
Upload
truongdiep -
Category
Documents
-
view
245 -
download
0
Transcript of SeaStar - Star-Oddi - Logging Life Science · 1 Downloading and Installing SeaStar SeaStar runs...

SeaStarStart-Up Guide
Application Software for Star-Oddi data logging system
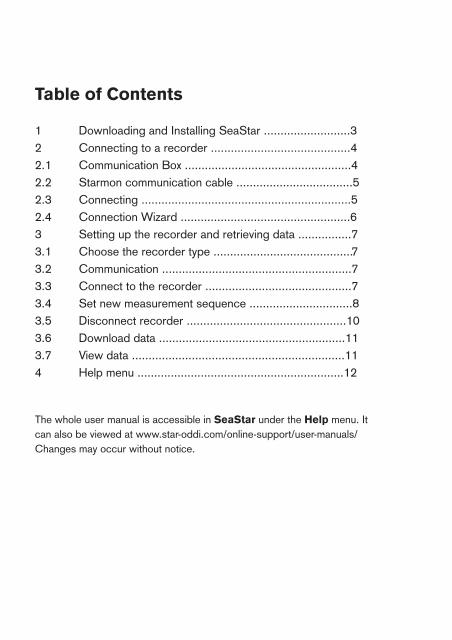
Table of Contents
1 Downloading and Installing SeaStar ..........................32 Connecting to a recorder ..........................................42.1 Communication Box ..................................................42.2 Starmon communication cable ...................................52.3 Connecting ...............................................................52.4 Connection Wizard ...................................................63 Setting up the recorder and retrieving data ................73.1 Choose the recorder type ..........................................73.2 Communication .........................................................73.3 Connect to the recorder ............................................73.4 Set new measurement sequence ...............................83.5 Disconnect recorder ................................................103.6 Download data ........................................................113.7 View data ................................................................114 Help menu ..............................................................12
The whole user manual is accessible in SeaStar under the Help menu. It can also be viewed at www.star-oddi.com/online-support/user-manuals/ Changes may occur without notice.
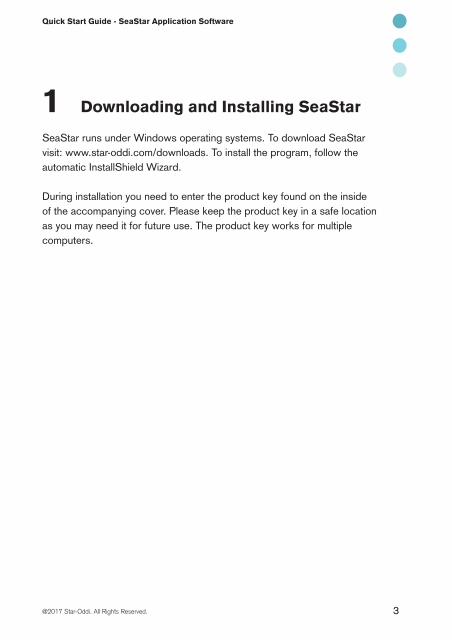
1 Downloading and Installing SeaStar
SeaStar runs under Windows operating systems. To download SeaStar visit: www.star-oddi.com/downloads. To install the program, follow the automatic InstallShield Wizard.
During installation you need to enter the product key found on the inside of the accompanying cover. Please keep the product key in a safe location as you may need it for future use. The product key works for multiple computers.
3
Quick Start Guide - SeaStar Application Software
@2017 Star-Oddi. All Rights Reserved.

2 Connecting to a recorder
2.1 Communication Box
The Communication Box is a USB compatible communication interface, specially designed to communicate with DST recorders wirelessly via RF (radio frequency). USB driver should automatically install on the computer, if not then visit www.star-oddi.com/downloads.
The Communication Box has three diodes:1. Red – shows that power is fed to the Communication Box.2. Yellow – shows that SeaStar has made connection with the box, the appropriate DST has been defined as a recorder type and that correct COM port has been selected.3. Green – illuminates when the DST sits in the com box.
You may need to use the Connection Wizard to get the yellow and green lights. See chapter 2.4.
Green light can only appear if the red and yellow ligths are on. With all the lights on, the DST is ready for connection. The recorder is inserted into the box as shown in the figure below. Make sure DST is wiped dry before insertion.
4
Quick Start Guide - SeaStar Application Software
@2017 Star-Oddi. All Rights Reserved.
Figure 2.1 Inserting recorder into the Communication Box
DST
Communication Box
2.2 Starmon communication cable
If using DST: skip and go to section 2.4.The communication/USB cable is for use with Starmon recorders. The cable will feed power to the recorder while communicating with the computer.
2.3 Connecting Unscrew the end cap on the Starmon and the socket becomes accessible.Connect the communication/USB cable between the computer and the socket inside the recorder.
2.4 Connection Wizard
If you are starting the software for the first time, you will be asked if you want the Connection Wizard to open automatically each time you start SeaStar. If you change your mind you can always change the settings under Settings-Options-Startup.
If you wish to program and start up the recorder manually go to chapter 3.
5@2017 Star-Oddi. All Rights Reserved.
Quick Start Guide - SeaStar Application Software
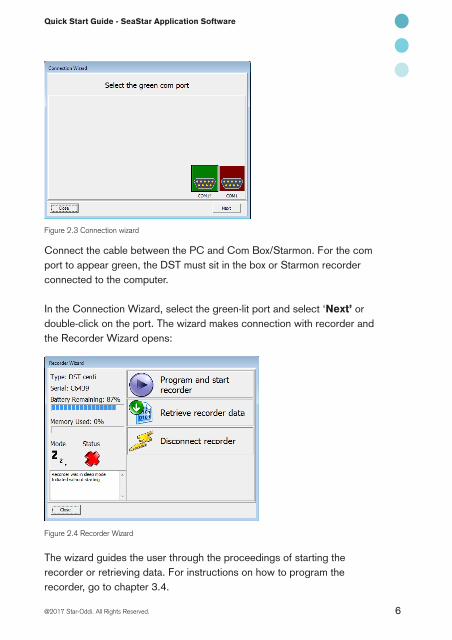
Connect the cable between the PC and Com Box/Starmon. For the com port to appear green, the DST must sit in the box or Starmon recorder connected to the computer.
In the Connection Wizard, select the green-lit port and select ‘Next’ or double-click on the port. The wizard makes connection with recorder and the Recorder Wizard opens:
The wizard guides the user through the proceedings of starting the recorder or retrieving data. For instructions on how to program the recorder, go to chapter 3.4.
6
Figure 2.3 Connection wizard
Figure 2.4 Recorder Wizard
Quick Start Guide - SeaStar Application Software
@2017 Star-Oddi. All Rights Reserved.
7
3 Setting up the recorder and retrieving data
If you have set up the recorder using the wizard, then please go to 3.6.
3.1 Choose the recorder type Choose the recorder type in the File menu, New Recorder Type.
3.2 Communication Connect the PC interface as described in section 2.
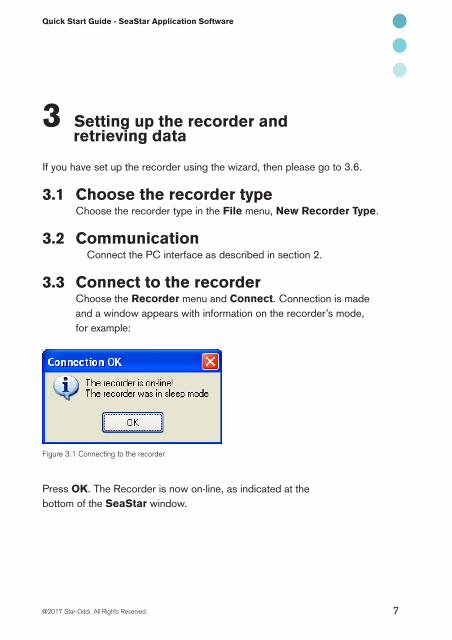
3.3 Connect to the recorder Choose the Recorder menu and Connect. Connection is made and a window appears with information on the recorder’s mode, for example:
Press OK. The Recorder is now on-line, as indicated at thebottom of the SeaStar window.
Figure 3.1 Connecting to the recorder
Quick Start Guide - SeaStar Application Software
@2017 Star-Oddi. All Rights Reserved.
8
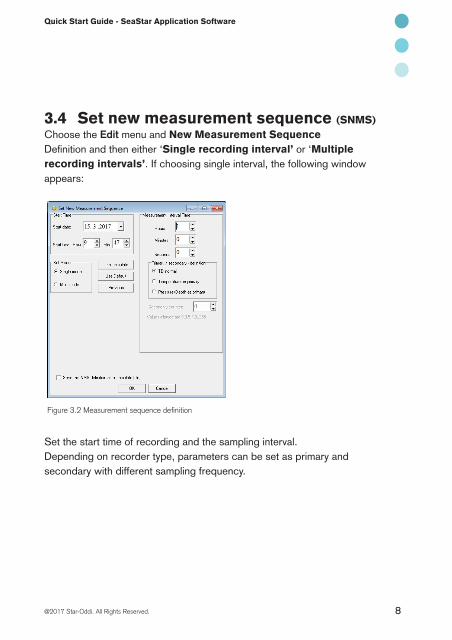
3.4 Set new measurement sequence (SNMS) Choose the Edit menu and New Measurement SequenceDefinition and then either ‘Single recording interval’ or ‘Multiple recording intervals’. If choosing single interval, the following window appears:
Set the start time of recording and the sampling interval.Depending on recorder type, parameters can be set as primary and secondary with different sampling frequency.
Figure 3.2 Measurement sequence definition
Quick Start Guide - SeaStar Application Software
@2017 Star-Oddi. All Rights Reserved.
9
If you want to program several records with the same sampling interval and start time, it is convenient to select Multi Mode under Set Mode.
For more detailed information on the options in the programming window see the user manual under the Help menu in SeaStar.
SeaStar offers the option of setting up more than one sampling interval within a measurement sequence. Please refer to the Multiple Intervals chapter in the user manual.
After the settings have been selected, press the OK button.
If you are using the wizard, the software will automatically start the new measurement sequence. If not using the wizard choose the Recorder menu and Start New Measurement Sequence command.
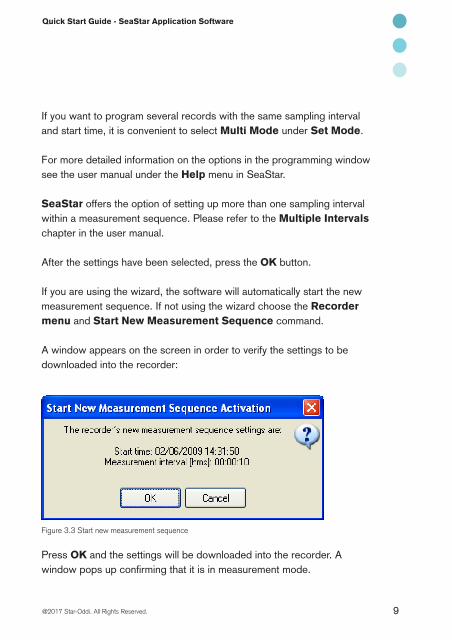
A window appears on the screen in order to verify the settings to bedownloaded into the recorder:
Press OK and the settings will be downloaded into the recorder. A window pops up confirming that it is in measurement mode.
Figure 3.3 Start new measurement sequence
Quick Start Guide - SeaStar Application Software
@2017 Star-Oddi. All Rights Reserved.
10
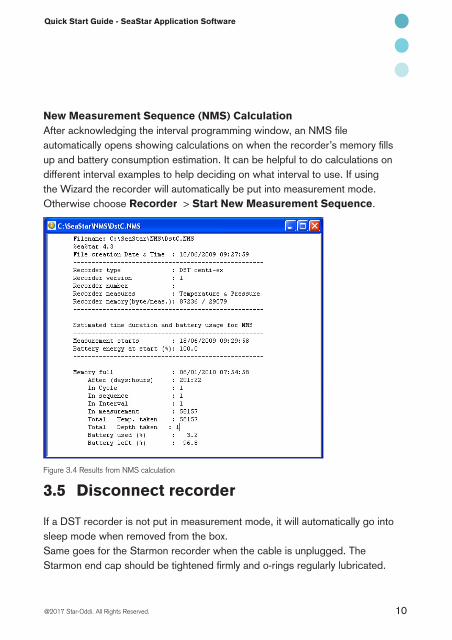
New Measurement Sequence (NMS) CalculationAfter acknowledging the interval programming window, an NMS file automatically opens showing calculations on when the recorder’s memory fills up and battery consumption estimation. It can be helpful to do calculations on different interval examples to help deciding on what interval to use. If using the Wizard the recorder will automatically be put into measurement mode. Otherwise choose Recorder > Start New Measurement Sequence.
3.5 Disconnect recorder
If a DST recorder is not put in measurement mode, it will automatically go into sleep mode when removed from the box. Same goes for the Starmon recorder when the cable is unplugged. The Starmon end cap should be tightened firmly and o-rings regularly lubricated.
Figure 3.4 Results from NMS calculation
Quick Start Guide - SeaStar Application Software
@2017 Star-Oddi. All Rights Reserved.
11
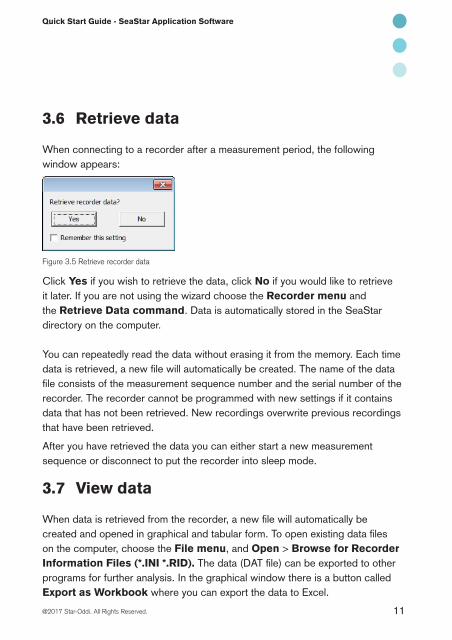
Figure 3.5 Retrieve recorder data
3.6 Retrieve data
When connecting to a recorder after a measurement period, the following window appears:
Click Yes if you wish to retrieve the data, click No if you would like to retrieve it later. If you are not using the wizard choose the Recorder menu and the Retrieve Data command. Data is automatically stored in the SeaStar directory on the computer.
You can repeatedly read the data without erasing it from the memory. Each time data is retrieved, a new file will automatically be created. The name of the data file consists of the measurement sequence number and the serial number of the recorder. The recorder cannot be programmed with new settings if it contains data that has not been retrieved. New recordings overwrite previous recordings that have been retrieved.
After you have retrieved the data you can either start a new measurement sequence or disconnect to put the recorder into sleep mode.
3.7 View data
When data is retrieved from the recorder, a new file will automatically becreated and opened in graphical and tabular form. To open existing data files on the computer, choose the File menu, and Open > Browse for Recorder Information Files (*.INI *.RID). The data (DAT file) can be exported to other programs for further analysis. In the graphical window there is a button called Export as Workbook where you can export the data to Excel.
Quick Start Guide - SeaStar Application Software
@2017 Star-Oddi. All Rights Reserved.
4 Help menu
User manualSelect User Manual to open the recorder user manual.
TroubleshootingSelect Troubleshooting to open the Trouble-Shooter.
Check for updatesEach time SeaStar is started it will automatically check for an update at the Star-Oddi website. We recommend to always approve the software update, user manual and troubleshooter. It is also possible to check for updates manually by choosing Help > Check for Updates.
Changes may occur without notice
12
Quick Start Guide - SeaStar Application Software
@2017 Star-Oddi. All Rights Reserved.