RES Manger Procedures - Infinity POS · RES 3000 Manager Procedures Documentation . Traverse City...
28
RES 3000 Manager Procedures Documentation Traverse City Office Grand Rapids Office 845 Robinwood Court 3033 Orchard Vista Drive Traverse City, MI 49686 Suite 104 231.941.9800 phone Kentwood, MI 49546 231.941.4112 fax 616.281.2000 phone 616.974.1006 fax For 24 hour 7 day a week support call: 1-866 FOR-IPOS
Transcript of RES Manger Procedures - Infinity POS · RES 3000 Manager Procedures Documentation . Traverse City...

RES 3000 Manager Procedures Documentation
Traverse City Office Grand Rapids Office 845 Robinwood Court 3033 Orchard Vista Drive Traverse City, MI 49686 Suite 104 231.941.9800 phone Kentwood, MI 49546 231.941.4112 fax 616.281.2000 phone 616.974.1006 fax
For 24 hour 7 day a week support call: 1-866 FOR-IPOS

1 Revised October 1, 2008
Audience This manual is intended for beginning users, as well as intermediate and advanced users who might want to learn about new features.
Description This guide introduces you to using RES 3000 Manager Procedures and instructs on how to perform the following tasks:
• Add and Modify Menu Items
• Modify Combo Groups
• Add and Modify Employee Records
• Add and Modify Schedule Records
• Add Cashier Numbers
• Assign Barcodes to Menu Items
• Define Currencies.
• Define and Modify Revenue Centers
• Edit Table Assignments, Inventory Counts, Set Kitchen Themes, and Edit Team Service Groups.
• Access and view Dashboard Totals.

2 Revised October 1, 2008
Disclaimer Although the best efforts are made to ensure that the information in this manual is complete and correct, Infinity POS makes no warranty of any kind with regard to this material, including but not limited to the implied warranties of marketability and fitness for a particular purpose. Information in this manual is subject to change without notice.
Infinity POS shall not be liable for errors contained herein or for incidental or consequential damages in connection with the furnishing, performance, or use of this manual.

3 Revised October 1, 2008
TABLE OF CONTENTS
AUDIENCE .................................................................................................................................................... 1
DESCRIPTION .............................................................................................................................................. 1
DISCLAIMER ................................................................................................................................................ 2
MANAGER PROCEDURES – INTRODUCTION .......................................................................................... 5
MANAGER PROCEDURES – USAGE ......................................................................................................... 5
To Open Manager Procedures: .................................................................................................................. 5
Navigation and Function Buttons: ............................................................................................................ 6
Manager Procedures Wizards: ................................................................................................................... 7Menu Items: ............................................................................................................................................... 7
Edit a Menu Item: ................................................................................................................................... 8Add or Edit Prices: ................................................................................................................................. 8Set Availability: ....................................................................................................................................... 9
Combo Groups: ....................................................................................................................................... 10To Edit Combo Menu Item Prices: ....................................................................................................... 10To Add Combo Price Record: .............................................................................................................. 10
Employees: .............................................................................................................................................. 11Add New Employee: ............................................................................................................................. 11Delete Employee: ................................................................................................................................. 11Edit Employee: ..................................................................................................................................... 12Edit ID: ................................................................................................................................................. 12Edit Training Status: ............................................................................................................................. 12Increment Shift: .................................................................................................................................... 13Edit Job Information: ............................................................................................................................ 13Edit Time Card: .................................................................................................................................... 13
Schedule Records: .................................................................................................................................. 14Add a New Schedule Record: .............................................................................................................. 14Edit Schedule Record: ......................................................................................................................... 14Delete Schedule Record: ..................................................................................................................... 14
Cashiers: .................................................................................................................................................. 15Increment Shift: .................................................................................................................................... 15
Barcodes: ................................................................................................................................................. 16Add Barcode Record: ........................................................................................................................... 16Edit Barcode Record: ........................................................................................................................... 16Delete Barcode Record ........................................................................................................................ 16
Currencies: .............................................................................................................................................. 17Edit Currency Rate: .............................................................................................................................. 17
Revenue Centers: .................................................................................................................................... 17Redirect Printer: ................................................................................................................................... 18Disable Printer: ..................................................................................................................................... 18Set Current Business Date: ................................................................................................................. 19Edit Table Assignments: ...................................................................................................................... 19Set Active Kitchen Theme .................................................................................................................... 23Set Active Kitchen Theme .................................................................................................................... 23Edit Team Service ................................................................................................................................ 23Dashboard: ........................................................................................................................................... 25Using the Dashboard ........................................................................................................................... 26Viewing Sales Information .................................................................................................................... 26

4 Revised October 1, 2008
Viewing Kitchen/Speed of Service Information .................................................................................... 26Viewing Labor Information ................................................................................................................... 26Viewing Employee Information ............................................................................................................. 27Defining Contests: ................................................................................................................................ 27

5 Revised October 1, 2008
Manager Procedures – Introduction The Manager Procedure module is a software application that provides privileged employees with easy to use shortcuts that modify the system and database. Although Manager Procedures can perform tasks that can also be performed through POS Configurator, it offers the following advantages:
• Manger Procedures limits the actions that an employee may perform. An employee must be specifically privileged to perform a particular procedure. Only procedures that an employee is privileged to perform appear on the workstation display.
• Manager Procedures is easy to use. An employee can easily perform tasks that would require more comprehensive training and system understanding to reliably perform in POS Configurator.
Manager Procedures – Usage
To Open Manager Procedures:
1. To open Manager Procedures, select Start Menu | Programs | MICROS Applications | POS | Manager Procedures from the desktop. The Manager Procedures login screen
displays. Enter an access ID and select . The Welcome to Manager Procedures screen displays.
NOTE: Procedures may also be accessed from a key in POS Operations, if a touch screen is programmed to include the Manager Procedure keys.
2. You will be prompted to sign in. Type your identification number and then press
or hit enter on the keyboard.

6 Revised October 1, 2008
Navigation and Function Buttons:
Alphanumeric Keypad: Use the alphanumeric keypad to enter the appropriate information.
Back button: Returns to the previous screen.
Cancel button: Returns to the previous screen and disregards any changes made.
Clear button: Removes any information that has been entered for the selected field.
Close Button: Use this button to exit the Manager Procedures application.
Drop Down Menu: When you select the button a menu of options for the associated field appears.
Edit button: Opens the selected record to edit.
Help Button: Use this button throughout Manager Procedures to access help information on the currently displayed screen.
Logout Button: Use this button to log out of Manager Procedures and return to the login screen.
Next button: Use this button to move to the next screen in the wizards.
Number Pad: Use the numeric keypad to enter the appropriate information.
OK button: Saves any changes made and returns to the previous screen.

7 Revised October 1, 2008
Manager Procedures Wizards: On the main screen of Manager Procedures are buttons that will guide the user through wizards to modify the database. Changes that you make to the 3700 using Manger Procedures are posted immediately to the database. These changes are implemented as if they had been made in POS Configurator.
Menu Items: Click on this button to add or modify menu items, set availability, edit or add prices, and edit effectively.
Add New Menu Item:
Opens the “Add New Menu Item Record” screen so information may be added for a new menu item. 1. Click on the Add New Menu Item button.
2. Click the button.
3. Enter in the name of the item by using the keyboard button.
4. Click the button.
5. Complete the necessary information for each page of the wizard and click .
6. Click on the last page of the wizard to save the new menu item. Menu Effectivity:
Use this procedure to define when menu item prices are available. Definition of Fields: Price Number: Displays the number of the menu price change record. Number: Displays the number of the menu item. 1. Name: Displays the name of the menu item.
2. Effectivity Date: Displays the current effectivity date for the menu price change records.
3. Select from: Select the beginning date/time to filter menu price change records.

8 Revised October 1, 2008
4. Select to: Select the ending date/time to filter menu price change records.
5. New Prices: Select this option to display new menu items within the specified date range.
6. Discontinued: Select this option to display menu items that are no longer available within the specified date range.
7. Price Changes: Select this option to display menu items that have a price change within the specified date range.
8. Change Effectivity Dates: Click this button to change the effectivity date for the selected menu effectivity record.
9. Old Price/New Price: Displays the prices for before and after the price change.
10. Back: Closes Menu Effectivity and returns to the previous screen. Edit a Menu Item:
Use this screen to select a menu item by highlighting the item from the table and selecting Edit.
Use and to page through the list of menu items. Definition of Fields: 1. Number: Displays the object number of the menu items that may be selected for edit.
2. Name: Displays the name of the menu items that may be selected for edit.
3. Class: Displays the menu item class for the items that may be selected for edit.
4. Locate by Name: To locate a specific menu item, enter a name in the Locate by Name field (or click
the alpha-numeric keypad icon to enter a name using the keypad ) and select the button.
5. Show Blanks: Select this option to display items with no menu item name assigned. Clear this option to filter out items with no menu item name assigned.
6. Edit button: Opens the selected record.
7. Back button: Returns to the previous screen. Add or Edit Prices:
1. Select Edit Prices.
2. Select a menu item and click .
3. Select a price record and click to edit.
4. Select to exit price screen.
5. Select to save the changes.

9 Revised October 1, 2008
Definition of Fields: Set Price for Menu Item: Use this procedure to define prices for menu items. 1. Price 1-10: Enter the price(s) associated with this menu item. For open menu items (cost entered
manually at the time of sale), enter 0.00.
2. Surcharge: Enter the amount of the Florida Liquor Surcharge. Leave this field blank if your restaurant is outside the state of Florida or for non-alcoholic menu items.
3. Tare Weight: Enter the price of this item's container (tare) in either kilograms or pounds. The tare weight is subtracted from the total weight before calculating the price. Use the Price 1 field to enter the price per pound in either kilograms or pounds.
4. Effective From: Enter the first date on which this menu item is available at these prices.
5. Effective To: Enter the last date on which this menu item is available at these prices.
6. Button: Saves any changes made and returns to the previous screen.
7. Cancel Button: Returns to the previous screen and disregards any changes made.
8. Add Price Record Button: Deletes the currently displayed menu item price record. Set Availability:
1. Select Set Availability.
2. Select a menu item.
3. Select Edit.
4. Touch [Available], [Limited Availability] or [Not Available] as needed. If using Limited availability
enter the available amount by using the up or down arrows
5. Select to Save.
NOTE: You must perform the same procedure again when the item is available. Highlight [AVAILABLE] instead.
NOTES:

10 Revised October 1, 2008
Combo Groups: Edit Prices and add Price Records for combo groups.
A Combo Meal consists of two or more menu items, grouped together and sold to the customer for a single price. Combo meals are a common feature in quick service restaurants, where speed of service is crucial. Typically, restaurants use combo meals to increase business by packaging the most frequently requested menu combinations (e.g., hamburger, fries, and a drink) and offering them for a lower price than if the items were purchased à la carte. To Edit Combo Menu Item Prices:
1. Select . 2. Select a menu item and click Edit. 3. Select a price record and click Edit. 4. Make the appropriate price changes from the Set Price for Combo Menu Item screen.
5. Select to save. To Add Combo Price Record: 1. Select Add Combo Price Record.
2. Select a combo menu item and click . 3. Enter the appropriate prices from the Set Price for Combo Menu Item screen.
4. Select to save. NOTES:

11 Revised October 1, 2008
Employees: Use the buttons on the right side of the screen to select a procedure: Add New Employee, Delete Employee, Edit Employee, Edit ID, Edit Training Status, Increment Shift, Edit Job
Information, Edit Time Card Add New Employee:
Use the Add New Employee wizard to prompt you thorough the steps of adding a new employee.
1. Click to begin adding a new employee.
2. Enter the first and last name of the employee using the keyboard buttons . This will appear on
the guest check. Click .
3. Select the employee's Class and Revenue Center. Click . 4.
5.
Select the Cashier number that this employee is associated with.
Select what Cash Drawer will this employee access. Click . 6. 7.
Select whether this employee be clocking in and out.
8.
If payroll records are exported out to a third party processor, select a Payroll ID for the new employee. If not, then leave blank.
9.
If you are using the Time and Attendance feature of RES3700, choose the grace period (in minutes) for a late clock in. If not, then leave blank.
Select whether this employee considered a minor under local laws. Click .
10. Select what job will this employee perform by clicking on the drop down button . Click
and then . 11. Select if this employee will be active for a set period. If so, specify the date range by clicking on the
calendar button . Click and then .
12. Click to add the new employee, or click to close the wizard without adding the employee.
Delete Employee:
Use this procedure to delete an employee.
NOTE: Employee records may only be deleted only if there is not associated totals information.
1. Select an employee by clicking on them. 2. Select the Delete Employee button.

12 Revised October 1, 2008
Edit Employee:
1. Select Edit Employee. 2. Select an Employee name.
3. Select . 4. Select the appropriate options from the Edit Employee screen using the configuration buttons.
5. Select to save. Edit ID:
1. Select Edit ID. 2. Select an employee name.
3. Select .
4. Enter the new ID in the New ID and Confirm New ID fields. You may swipe a Magnetic Id card at this time if performing this function on a workstation.
5. Select to save. Edit Training Status:
1. Select Edit Training Status. 2. Select an employee.
3. Select . 4. Select In Training or Not in Training.
5. Select to save
NOTE: Training Mode allows an employee to enter sales and post transactions without affecting the real system totals. Orders will not be sent to the kitchen and tenders will not post to the system while the employee is in training mode.

13 Revised October 1, 2008
Increment Shift:
Use this procedure to increment an employee's shift. A shift is the block of time that represents an employee's work. Shifts are used to determine the totals that appear on employee reports. A shift begins when the previous one is incremented, and ends when it is incremented again. 1. Select an employee.
2. Select the Increment Shift button.
3. The Increment Shift button is grayed out and the number in the Shift Number column is incremented.
Most establishments use a stored procedure to increment shifts automatically. However, you can do it manually using this procedure if necessary.
Edit Job Information:
1. Select Edit Job Information.
2. Select an employee.
3. Select or to assign an additional job function.
4. Select a job.
5. Select .
6. Enter the appropriate Job Information.
7. Select to save. Edit Time Card:
1. Select Edit Time Card.
2. Select an employee.
3. Select .
4. Select the time card record to be adjusted.
5. Select .
6. Make the necessary time card changes.
7. Select to save.

14 Revised October 1, 2008
Schedule Records: Use the buttons on the right side of the screen to select a procedure: Add, modify, or delete schedule records.
Add a New Schedule Record:
1. Choose the Employee by click on the drop down menu, clicking on the employee name, and clicking
. 2. Choose the job code for the scheduled time by clicking on the drop down menu, clicking on the job
code, and clicking . 3. Choose the job category by clicking on the drop down menu, choosing the job category, and clicking
.
4. Choose the Clock in date and time by clicking on the calendar button and clicking .
5. Choose the Clock out date and time by clicking on the calendar button and clicking . 6. If for this schedule record an override is needed for Early In/Out or Late In/Out upon clock in/out is
needed, click on the number pad button and enter in the override amount in minutes.
7. Click to save the record. Edit Schedule Record:
1. Select Edit Schedule Record.
2. Select the schedule record for editing.
3. Select the button.
4. Select the appropriate options from the Edit Schedule Record screen following the steps from Add Schedule Record above.
5. Select to save. Delete Schedule Record:
1. Select a schedule record for deletion. 2. Select the Delete Schedule Record button.

15 Revised October 1, 2008
Cashiers: Use the buttons on the right side of the screen to select a procedure: Increment Shift.
Increment Shift:
Use this procedure to increment a cashier's shift. A shift is the block of time that represents a cashier's work. Shifts are used to determine the totals that appear on cashier reports. A shift begins when the previous one is incremented, and ends when it is incremented again. 1. Select a cashier.
2. Select the Increment Shift button.
3. The Increment Shift button is grayed out and the number in the Shift Number column is incremented.
NOTE: Most establishments use a stored procedure to increment shifts automatically. However, you can do it manually using this procedure if necessary.
NOTES:

16 Revised October 1, 2008
Barcodes: Use the buttons on the right side of the screen to select a procedure: Add Barcode Record, Delete Barcode Record, Edit Barcode Record
Add Barcode Record: Use this procedure to link barcodes to selected menu items. You can create the barcode number as well as the menu item and/or price level to be linked to this barcode. Barcodes can be created manually or scanned (with the proper devices). In addition, any price differentials for like items with different barcodes can be assigned here as well. 1. Number: The system displays the next available record number. If desired, you may change the
number by clicking on the icon. 2. Enter in the Barcode Number by scanning or typing the number in. Up to 20 digits may be used. 3. Select the Menu Item linked to this barcode. 4. Select the price level that is associated with this barcode. Linking a barcode to a price level allows
items with different barcodes to be grouped together by price level for reporting purposes.
5. Click to save the record.
Edit Barcode Record: 1. Select Edit Barcode Record.
2. Select the barcode record for editing.
3. Select the button.
4. Select the appropriate options from the Edit Barcode Entry screen.
5. Select to save. Delete Barcode Record
1. Select a barcode record for deletion. 2. Select the Delete Barcode Record button. 3. Click Yes for confirmation.

17 Revised October 1, 2008
Currencies:
Edit Currency Rate:
1. Select a currency. 2. Select Edit Currency Rate. 3. Enter the appropriate currency rate on the Enter Currency Rate screen.
4. Select to save.
Revenue Centers:
Use this procedure to change the current serving period. A Serving Period is an arbitrary time span used by management to track and report sales activity. Once enabled, totals are reported as part of the active serving period until that period is manually changed, usually through Manager Procedures.
1. Select a revenue center. 2. Select Change Current Serving Period. 3. Select a serving period on the Set Current Serving Period screen.
4. Select to save. NOTES:

18 Revised October 1, 2008
Printers: Use the buttons on the right side of the screen to select a procedure.
Redirect Printer:
Use this procedure to redirect orders from one printer to another printer. You often redirect printers depending on the current volume of business. For example, at night, a restaurant with two bars prints drink orders at both bars. During the day, the restaurant may close one bar and redirect all its drink orders to the open bar's printer.
NOTE: Redirecting a printer is different from assigning a backup printer. A backup printer is only used in the event of a printer or communication failure, and printing is switched over automatically.
1. Select a printer.
2. Select the Redirect Printer button.
3. Choose the printer you would like the output to go to.
4. Click to save this configuration. Disable Printer:
Use this procedure to disable a printer. A printer may be disabled if it has been physically moved or if you no longer need to send print jobs to the printer.
1. Select a printer.
2. Select the Disable Printer button.
3. The Redirected column should now say <Disabled>. NOTES:

19 Revised October 1, 2008
Others:
Set Current Business Date:
Use this procedure to change the business date. If you change this date, all posting stops for the current business date and starts for the new business date. The business date affects totals, reports, timekeeping, prices that use effective dates, pay periods, etc.
NOTE: Most establishments use a stored procedure to change the business date. However, you can do it manually using this procedure, if necessary.
1. Select the Change Business Date button.
2. Enter the business date on the Set Current Business Date screen.
3. Select to save. Edit Table Assignments:
Use these procedures to assign seating sections to an employee. This may be done for all employees or for employees associated with a specific revenue center. If an employee has not been given rights for table section assignments (in POS Configurator | Employee Classes), their name will not be available.
1. Select a section from the grid. Use the Revenue Center field to only display the sections associated with a particular revenue center.
2. Select the Assign Employee to Section button.
3. Select the employee to assign to the section.
4. Select to save.
NOTE: If any of the tables in the selected section have already been assigned to an employee, you will be prompted to either Assign All (re-assign the tables), Assign Unassigned (assign only the tables that are currently unassigned), or Cancel the assignment.
1. Select a table from the grid. Use the Revenue Center field to only display the tables associated with a particular revenue center.
2. Select the Assign Employee to Table button.
3. Select the employee to assign to the table.
4. Select to save.

20 Revised October 1, 2008
1. Select a table from the grid. Use the Revenue Center field to only display the tables associated with a particular revenue center.
2. Select the Assign Employee to Table button.
3. Select the employee to assign to the table.
4. Select to save.
1. Select the Clear All Table Assignments button.
2. Select from the confirmation box that appears.
1. Select the section to be unassigned.
2. Select the Unassign Section button.
1. Select the table to be unassigned.
2. Select the Unassign Table button.
1. Use this procedure to print a list of employees and their table assignments. The list will print to the Report Printer for this workstation.
NOTES:

21 Revised October 1, 2008
Quick Counts
The Quick Count interface provides inventory control for a revenue center without the purchase of a third-party application. With Quick Count, a manager can define recipe ingredients and costs, monitor inventory levels, and analyze menu item performance. Item Variance reports, which detail the difference between expected versus actual inventory, are also included. These reports help a manager identify excess supplies, determine when to adjust prices, or indicate problems with recipe preparation or portion control. Using Manager Procedures: Although ingredients are defined in the POS Configurator, inventory levels are recorded and tracked through Manager Procedures. To accommodate the Quick Count feature, a new Inventory form was added. This form is used to monitor deliveries and waste, to enter the results of a physical inventory, and to provide a comparison of actual versus theoretical usage. Inventory Count Sheets and the Item Variance report are also run from here. The Inventory form consists of the following fields and options: Inventory Item — An alphabetical listing of all the ingredients entered in the POS Configurator. The column cannot be edited from Manager Procedures. Beginning Amount — Indicates how much stock is on hand at the start of the new period. The column cannot be edited. Data are posted automatically when the period is closed. The new amount will always equal the ending inventory for the previous period. Deliveries — Represents the sum of all deliveries for that inventory item during the current period. This value is entered manually. Multiple deliveries of the same item must be totaled by the user and entered as a single unit value.
NOTE: To avoid confusion and error, MICROS recommends entering deliveries once a period. You may enter deliveries more often as long as you remember that the system will not total the entries for you nor check to ensure their accuracy.
Waste — Refers to the inventory depleted but not sold through the POS system (e.g., items wasted through spoilage, breakage, etc.). As with deliveries, the entry is a manual adjustment, representing the total amount wasted for the current period. Theoretical Usage — Indicates how much of the inventory was used during the current period. This is the value calculated by the system, based on the number of menu items sold through the POS. It cannot be edited. Ending Inventory — Represents the results of an on-premises, hand count of the inventory. This is a manual entry. Unit Name — This is the unit measure (smallest increment) assigned to an inventory item in the POS Configurator. It cannot be edited in Manager Procedures. Print Count Sheets — Prints a blank form, listing all of the ingredients itemized in the POS Configurator. This form is used as a checklist for conducting and recording the results of a physical inventory. Items are listed alphabetically. Compute Amounts — Calculates the theoretical usage. This value is system-generated and cumulative for the current period. Close Period — Allows the user to specify the end of the current report period. This is a manual process. There are no system-defined periods in Quick Count.

22 Revised October 1, 2008
NOTE: Once a period is closed, the form is cleared and the manually entered Ending Inventory is automatically transferred to the Beginning Amount column. This process cannot be rolled backward!
Variance Report — Compares actual versus theoretical usage. The system allows you to define the parameters of a report period through the selection of beginning and ending dates.
1. Click on the button to open the Inventory Form.
2. Click on the item to be modified. Text Boxes will appear in the Inventory Form.
3. In the Deliveries column, enter the sum of all deliveries for each item received during the current period.
4. In the Waste column, enter the sum of all wasted ingredients (i.e., from spoilage, breakage, etc.) recorded during the current period.
5. Click the Print Count Sheets button to print out an itemized list of the inventory. Use this list to tabulate the results of a physical inventory of the stock on hand.
6. In the Ending Inventory column, enter the results of the physical inventory.
7. Click the Close Period button to end the period. When the confirmation box is presented, click Yes to continue, No to cancel the process.
NOTE: When the period is closed, the Inventory form is cleared and the Ending Inventory is posted as the Beginning Amount for the next period.
(Optional)
8. Run the Variance Report. This can be done in two ways: a. As part of the Close Period process — A dialog box is presented after
confirmation, asking if you want to run the report. b. As a separate process — Click the Variance Report button to run the report
independently.
9. When the variance report option is selected, the system prompts you to specify a beginning and end date for the report period.
23 Revised October 1, 2008
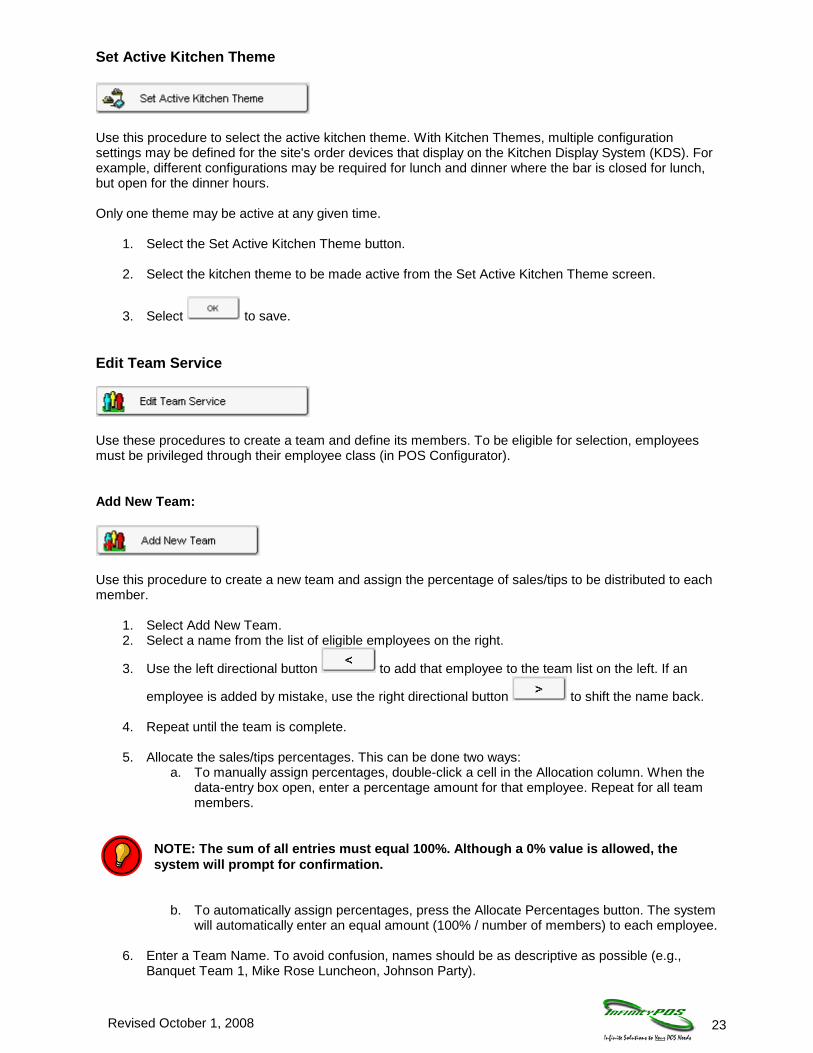
Set Active Kitchen Theme
Use this procedure to select the active kitchen theme. With Kitchen Themes, multiple configuration settings may be defined for the site's order devices that display on the Kitchen Display System (KDS). For example, different configurations may be required for lunch and dinner where the bar is closed for lunch, but open for the dinner hours. Only one theme may be active at any given time.
1. Select the Set Active Kitchen Theme button.
2. Select the kitchen theme to be made active from the Set Active Kitchen Theme screen.
3. Select to save.
Edit Team Service
Use these procedures to create a team and define its members. To be eligible for selection, employees must be privileged through their employee class (in POS Configurator). Add New Team:
Use this procedure to create a new team and assign the percentage of sales/tips to be distributed to each member.
1. Select Add New Team. 2. Select a name from the list of eligible employees on the right.
3. Use the left directional button to add that employee to the team list on the left. If an
employee is added by mistake, use the right directional button to shift the name back.
4. Repeat until the team is complete.
5. Allocate the sales/tips percentages. This can be done two ways: a. To manually assign percentages, double-click a cell in the Allocation column. When the
data-entry box open, enter a percentage amount for that employee. Repeat for all team members.
NOTE: The sum of all entries must equal 100%. Although a 0% value is allowed, the system will prompt for confirmation.
b. To automatically assign percentages, press the Allocate Percentages button. The system
will automatically enter an equal amount (100% / number of members) to each employee.
6. Enter a Team Name. To avoid confusion, names should be as descriptive as possible (e.g., Banquet Team 1, Mike Rose Luncheon, Johnson Party).

24 Revised October 1, 2008
7. Select to save team record.
Edit Team
Use this procedure to add, modify, or delete employee membership on a team. Team members may be added or deleted as long as the team record is active. At least one team member must be assigned at all times.
1. Select the team to be edited.
2. Select the Edit Team button.
3. Select the appropriate options from the Edit Team screen.
4. Select to save. Close A Team
Use this procedure to close a team. A team record may only be closed if there are no open checks associated with it on the system.
1. Select a team.
2. Select the Close A Team button. Close All Teams
Use this procedure to close all active teams. Team records may only be closed if there are no open checks associated with them on the system.
1. Select the Close All Teams button. Print Team List
Use this procedure to print a team history report. This report describes the composition of a team for a given date range. If more than one team is selected, the report will be grouped by team and date. If changes were made to a team, the report will list each version that was active during the dates specified. The version information will include the name of the employee who changed it, the time it was changed, followed by a list of team members and their allocation percentages.
1. Select the Print Team List button.
2. From the calendar form, select the starting date range value and press .

25 Revised October 1, 2008
3. From the calendar from, select the ending date range value and press .
4. Press to print the report to the screen.
Dashboard:
The Dashboard utility provides instant access to the latest sales and kitchen performance information that is updated every minute and labor information that is updated every 15 minutes. The Dashboard screen is divided into the following information panels. Sales Information This panel provides instant up-to-the minute sales information, including time period sales information. You will know when sales have increased or decreased significantly from the last 15- minute period. Kitchen/Speed of Service Information This panel provides instant access to how your kitchen is performing. For table service environments, you will know your average prep times, how many "late" orders there have been in the last 15 minutes, and which items have been 86'd. For quick service environments, you will know how many orders are in the queue, how many orders are "parked", and how many orders are "late". Labor Information This panel provides instant access to your labor cost in dollars as well as the labor as a percentage of sales. In addition, you will instantly know that you have clocked-in employees who are approaching overtime, so that managers can make real-time labor cost saving decisions. Employee Information This panel provides real-time information on who are your best performing employees based on net sales, item sales or group sales. In addition, you can set up a competition that drives sales and displays employees in the best performance order.

26 Revised October 1, 2008
Using the Dashboard Accessing the Dashboard
1. Press the [Dashboard Manager Procedures] key on the touchscreen
Or
2. Launch the Manager Procedures application and press the Dashboard icon.
3. The Dashboard application appears. Viewing Sales Information The Sales information panel provides current time period and daily totals for the following information:
• Net Sales • Check Count (Table Service Only) • Guest Count (Table Service Only) • Transaction Count (Quick Service Only) • Discounts • Voids • Cancels
The Sales button changes to yellow when the Current Net Sales amount increases or decreases from the previous 15-minute time period by the amount defined in POS Configurator | System | Dashboard | General | Sales alert | Yellow alert. The Sales button changes to red when the Net Sales amount increases or decreases from the previous 15-minute time period by the amount defined in POS Configurator | System | Dashboard | General | Sales alert | Red alert. Click the Sales button to drill-down to a horizontal bar graph view of time period sales. Viewing Kitchen/Speed of Service Information The Kitchen/Speed of Service information panel provides kitchen performance information, including the following:
• 86'd Items (Table Service Only) • Counter Time (Quick Service Only) • Drive Thru Time (Quick Service Only) • Park Time (Quick Service Only)
If you are running in a QSR environment, click the [SOS] (Speed of Service) button to drill-down to a screen that displays the average times for the last 15-minute time period and previous hour for the following:
• Order time • Line time • Window time • Pickup time
Viewing Labor Information The Labor information panel provides real-time data for:
• Labor costs • Labor as a percentage of sales • Employees who are approaching overtime
The Labor button changes to yellow when either of the following conditions occurs:

27 Revised October 1, 2008
• Number of employees in overtime exceeds the percentage defined in POS Configurator | System | Dashboard | Alert Levels | Employees in overtime alert | Yellow alert
• Labor cost percentage exceeds the percentage defined in POS Configurator | System |
Dashboard | Alert Levels | Labor cost alert | Yellow alert The Labor button changes to red when either of the following conditions occurs:
• Number of employees in overtime exceeds the percentage defined in POS Configurator | System | Dashboard | Alert Levels | Employees in overtime alert | Red alert
• Labor cost percentage exceeds the percentage defined in POS Configurator | System | Dashboard | Alert Levels | Labor cost alert | Red alert
Click the Labor button to drill-down to sales, labor cost, and labor as a percentage of sales information in 15-minute increments. Viewing Employee Information The Employee Information panel displays the following for all employees with sales on the current shift:
• Number of guest checks (Table Service Only) • Sales (Table Service Only) • Average per check (Table Service Only) • All clocked in employees (Quick Service Only) • Till assignment (Quick Service Only) • Cash pull alert (Quick Service Only) • Count (Table Service or Quick Service with contests) • Amount (Table Service or Quick Service with contests)
Click the Employee button to drill-down to a spreadsheet-style report with sales, check, and guest discount, service charge, no sale, void, and transaction cancel information for each employee. You can also further drill-down to an Employee Sales graph. Click the Contest button to drill-down to a spreadsheet-style employee report with counts for each contest item. Defining Contests:
1. To define a contest, from the Dashboard Screen, select the button.
2. Select from the Contest Page to launch the List Wizard. 3. Select the appropriate Contest List Type. The contest name cannot be changed. Only one
contest can be configured at a time.
4. Select .
5. Choose the items to track for the contest and click .
6. Select .
7. Click the button.