Kronos webTA 4 - United States Department of...
90
Kronos webTA 4.2 DOC Timekeeper User Guide
Transcript of Kronos webTA 4 - United States Department of...

Kronos webTA 4.2 DOC Timekeeper User Guide

© 2015, Kronos Incorporated. Kronos and the Kronos logo are registered trademarks and webTA is a trademark of Kronos Incorporated or a related company. All other product and company names are used for identification purposes only and may be the trademarks of their respective owners. All specifications are subject to change. All rights reserved.
Published by Kronos Incorporated 297 Billerica Road, Chelmsford, Massachusetts 01824-4119
Phone: 978-250-9800, Fax: 978-367-5900
webTA 4.2 DOC Timekeeper User Guide Document Revision History
Document Revision Product Version Release Date A Version 4.2.6 September 2015

webTA 4.2 DOC Timekeeper User Guide i ©2015 Kronos Incorporated
Table of Contents Introduction ............................................................................................................................................ 1
About the Timekeeper Main Menu......................................................................................................... 1
Timekeeping Cycle ....................................................................................................................................... 1
Employee and Timesheet Profiles ................................................................................................... 2
About Employee Profiles............................................................................................................................ 2
Working with Employee Profiles ............................................................................................................ 8
Viewing employee profiles .................................................................................................................. 8
Editing employee profiles.................................................................................................................... 8
About Timesheet Profiles .......................................................................................................................... 9
Splitting employee timesheet profiles ......................................................................................... 13
About Default Timesheet Profiles......................................................................................................... 14
About Telework Profiles .......................................................................................................................... 14
Managing Delegates............................................................................................................................ 15
Working with Delegates ........................................................................................................................... 15
Adding delegates .................................................................................................................................. 15
Deleting delegates ............................................................................................................................... 16
About Timekeeper Profiles ..................................................................................................................... 16
Taking over employees ............................................................................................................................. 17
Employee Accounts ............................................................................................................................. 18
Working with My Timekeeper Accounts ........................................................................................... 18
Selecting My Timekeeper accounts .............................................................................................. 18
Adding My Timekeeper accounts .................................................................................................. 19
Removing My Timekeeper accounts ............................................................................................ 20
Working with delegate accounts ................................................................................................... 20
About Census Agency Accounts............................................................................................................. 20
Creating My Timekeeper Accounts (Census) ............................................................................ 21
Removing My Timekeeper Accounts (Census) ........................................................................ 22
Editing My Timekeeper Accounts (Census) .............................................................................. 23

webTA 4.2 DOC Timekeeper User Guide ii ©2015 Kronos Incorporated
Overview of the Select Timesheets page ..................................................................................... 24
Searching for Timesheets ........................................................................................................................ 25
Using search criteria in free-text fields ....................................................................................... 26
Using drop-down lists to filter information .............................................................................. 26
Using links on the Select Timesheets page ................................................................................ 26
Overview of Select Actions menus ....................................................................................................... 27
Employee Timesheets ........................................................................................................................ 28
Working with Employee Timesheets .................................................................................................. 28
Adding timesheet transactions in employee timesheets...................................................... 29
Editing timesheet transactions in employee timesheets ..................................................... 29
Deleting timesheet transactions in employee timesheets ................................................... 30
About Census Agency Timesheets ........................................................................................................ 31
Adding employee timesheet transactions (Census) ............................................................... 31
Editing employee timesheet transactions (Census) ............................................................... 32
About Timesheet Remarks ...................................................................................................................... 33
Adding a pay period remark to an employee timesheet ...................................................... 33
Adding a daily remark to an employee timesheet .................................................................. 34
Deleting remarks from an employee timesheet ...................................................................... 34
About Validating Employee Timesheets ............................................................................................ 35
Validating employee timesheets .................................................................................................... 36
Validating all timesheets ................................................................................................................... 37
Validating delegate timesheets ...................................................................................................... 37
About Correction Timesheets ................................................................................................................ 38
Correcting employee timesheets ................................................................................................... 40
About the Timesheet Summary ............................................................................................................. 42
Opening and printing Timesheet Summaries ........................................................................... 44
About Processed Timesheets ................................................................................................................. 44
Viewing processed timesheets ....................................................................................................... 45
Employee Schedules ........................................................................................................................... 46
About default schedules ........................................................................................................................... 46
Working with Employee Default Schedules ..................................................................................... 47
Adding employee default schedules ............................................................................................. 47

webTA 4.2 DOC Timekeeper User Guide iii ©2015 Kronos Incorporated
Editing employee default schedules ............................................................................................. 47
Deleting employee default schedules .......................................................................................... 48
About Census Agency Default Schedules ........................................................................................... 48
Adding employee default schedules (Census) .......................................................................... 48
Editing employee default schedules (Census) .......................................................................... 49
About advanced schedules ...................................................................................................................... 50
Viewing schedule templates ............................................................................................................ 53
Opening the Employee Schedules List View ............................................................................. 54
Opening the Employee Schedules Grid View ............................................................................ 55
Viewing employee schedules .......................................................................................................... 56
Adding and assigning schedules .................................................................................................... 57
Employee Leave Balances ................................................................................................................ 59
Working with Employee Leave Balances........................................................................................... 60
Viewing employee leave balances ................................................................................................. 60
Adjusting employee leave balances .............................................................................................. 61
Employee Leave Requests ................................................................................................................ 61
Working with Employee Leave Requests .......................................................................................... 63
Viewing employee leave requests ................................................................................................. 63
About the Request Calendar ................................................................................................................... 63
Tips on using the request calendar ............................................................................................... 64
Viewing employee request calendars .......................................................................................... 64
Employee Premium Pay Requests ................................................................................................. 65
Working with Employee Premium Pay Requests........................................................................... 65
Viewing employee premium pay requests ................................................................................ 65
Deleting employee premium pay requests ................................................................................ 66
Employee Telework Requests ........................................................................................................ 68
Submitting employee telework requests ................................................................................... 68
Modifying employee telework requests ..................................................................................... 69
Deleting employee telework requests ......................................................................................... 69

webTA 4.2 DOC Timekeeper User Guide iv ©2015 Kronos Incorporated
Import Job Management ................................................................................................................... 70
Reports .................................................................................................................................................... 74
Default Schedules ........................................................................................................................................ 74
Final Timesheets ......................................................................................................................................... 75
Leave Audit Report ..................................................................................................................................... 76
New Employees ........................................................................................................................................... 77
Uncertified Timesheets ............................................................................................................................. 79
Unvalidated Timesheets ........................................................................................................................... 80
Saving report output to files ................................................................................................................... 81
About the Background Execution option ........................................................................................... 82
About My Saved and Scheduled Reports ........................................................................................... 82
Downloading reports ......................................................................................................................... 83
E-mailing reports ................................................................................................................................. 84
Deleting reports ................................................................................................................................... 84
Rerunning reports ............................................................................................................................... 84

webTA 4.2 DOC Timekeeper User Guide 1 ©2015 Kronos Incorporated
Introduction The purpose of this guide is to reinforce concepts, tasks and procedures covered in your webTA training. It provides detailed, step-by-step instructions accompanied by screenshots, examples, and, where appropriate, Agency policy and processes.
The tasks in this guide are written for users assigned the Timekeeper role in the webTA system. These tasks include adding new employees, creating accounts, editing, validating, and correcting timesheets, submitting leave and premium pay requests, adding schedules, and running reports. Timekeepers perform these functions on behalf of their assigned employees.
NOTE: Some features and procedures are specifically for Census Agency employees. The notation (Census) is appended to procedures unique to Census Agency employees.
About the Timekeeper Main Menu The Timekeeper main menu lists functions available to the Timekeeper role. An example of the Timekeeper main menu page is shown below.
Timekeeping Cycle The webTA system pay period schedule is based on the Agency’s two-week pay period. For accurate payroll processing, employees are encouraged to maintain timesheets daily and promptly resolve system warnings or errors.

webTA 4.2 DOC Timekeeper User Guide 2 ©2015 Kronos Incorporated
Employee and Timesheet Profiles The system creates two profiles when a user is added to webTA: an employee profile and a timesheet profile. The employee profile identifies who the employee is (name, user ID), the role and licenses to which they have access, where they are assigned (agency), and to whom they are assigned (Timekeeper and Supervisor.) The timesheet profile identifies the employee’s basic pay plan, employee status, leave-related information, and the method for working with accounts.
If the employee user data is imported, both profiles may be complete without the need for manual updates. If some of the required data is missing, you may need to update the employee profile and/or the timesheet profile. Until both profiles are complete, the employee’s timesheet cannot be opened.
About Employee Profiles The Employee Profile includes a separate page for each of the sections below:
• Settings
• Licenses
• Calendars
• Locator Info
• Roles
• Timesheet Details
Timekeepers may add or edit most fields in employee profiles and timesheet profiles. Once these values have been initially adjusted, the data will rarely require changes.
Below is a sample Employee Profile > Settings page.

webTA 4.2 DOC Timekeeper User Guide 3 ©2015 Kronos Incorporated
Employee Profile page contents--Settings page • No Time Tracking. Identifies whether the user records time and attendance in webTA. (DOC
agencies do not use this option.)
• User ID. The login ID for the employee.
• Password. The employee’s webTA user password. Passwords must conform to Agency guidelines. Employees may update passwords on this page.
• Name fields. The employee's first, middle and last name.
• Active. Indicates whether the employee is active (that is, eligible to use webTA) or inactive. When employees are inactivated, none of their records are deleted from the system, but they will no longer be able to log into the system, and their records are ignored during verification, certification, and transmission file builds.
• Timekeeper. The employee's assigned Timekeeper.
• Supervisor. The employee's assigned Supervisor.
• Organization. The employee's assigned organization and agency.
• E-mail Address. The e-mail address that the employee has been assigned so they can send and receive webTA messages from the designated e-mail application. Employees may update their e-mail address.
• Timezone. The time zone in which the employee is located.
• Start Page. Specify the default role for the main menu, if the employee is assigned more than one role.
Licenses page contents

webTA 4.2 DOC Timekeeper User Guide 4 ©2015 Kronos Incorporated
The Licenses page lists all webTA licenses to which the employee may be given access. To enable licenses, take these steps:
1. Click Select Timesheets on the main menu.
The Select Timesheets page opens.
2. Click the check box on the row that identifies the employee and then select Employee Profile from the Profiles and Settings menu.
The Employee Profile page opens.
3. Click Licenses from the sidebar menu.
The Licenses page opens.
4. Click the check box next to each license that the employee will use.
5. Click Save.
NOTE: Depending on which licenses are enabled, different options may appear on the sidebar menu. For example, if the webTA Telework license is enabled, the Telework profile option appears on the left side of the page.
Calendars page contents The Calendars page lists calendars or unfunded mandate calendars that may be assigned to the employee. To assign a calendar, take these steps:
1. Click Select Timesheets on the main menu.
The Select Timesheets page opens.
2. Click the check box on the row that identifies the employee and then select Employee Profile from the Profiles and Settings menu.
The Employee Profile page opens.
3. Click Calendars from the Employee Profile Settings sidebar menu.
The Calendars page opens.
4. Click the check box next to each calendar that the employee will use.
5. Click Save.
Locator Info page contents This page contains employee work address and contact information. Employees may update Locator Info fields.
Roles page contents The Role Assignments page designates the role that the user will be assigned in webTA. The Role Assignments page is shown below.

webTA 4.2 DOC Timekeeper User Guide 5 ©2015 Kronos Incorporated
Employee property
• Disable Auto Spend Deferred LTP. Disables the employee from automatically using LTP hours that have been deferred.
Timekeeper property
• Local Corrections. Gives the Timekeeper the ability to make corrections to timesheets; the corrections are strictly for agency purposes and will not be transmitted for processing by NFC.
Master Timekeeper properties
Master Timekeepers may work with their own personal records from the Select Timesheets page, regardless of the properties selected below.
• Local Corrections. Gives the Master Timekeeper the ability to make corrections to timesheets; the corrections are strictly for agency purposes and will not be transmitted for processing by NFC.
• Editable. Gives the Master Timekeeper the ability to edit user profile and timesheet data for employees who are in the same direct organization as the Master Timekeeper.
• Department (Read Only). The Master Timekeeper has read-only access to all employee records in the system.
• Department (Editable).The Master Timekeeper may edit all employee records in the system. This is the default option for this role.
• Agency (Read Only). The Master Timekeeper has read-only access to employees who are assigned to the same agency as the Master Timekeeper.
• Agency (Editable). The Master Timekeeper may edit user profile and timesheet data for employees who are assigned to the same agency as the Master Timekeeper.

webTA 4.2 DOC Timekeeper User Guide 6 ©2015 Kronos Incorporated
Master Supervisor properties
Master Supervisors may work with their own personal records from the Select Timesheets page, regardless of the properties selected below.
• Department. The Master Supervisor may edit all employee records in the system. This is the default option for this role.
• Agency. The Master Timekeeper may edit user profile and timesheet data for employees who are assigned to the same agency as the Master Supervisor.
HR Administrator properties
HR Administrators may work with their own personal records and the records of active and inactive employees from the Select Timesheets page, regardless of the properties selected below.
• Account Menu Off. Gives the HR Administrator access to the Manage Accounts function on the main menu.
• Agency. The HR Administrator may edit user profile and timesheet data for employees who are assigned to the same agency as the HR Administrator.
• Org Tree Menu On. Gives the HR Administrator access to the Organization Management function on the main menu. .
• LTP Menu On. Gives the HR Administrator access to the Leave Transfer Program function on the main menu.
• Department. The HR Administrator may edit all employee records in the system. This is the default option for this role.
To enable roles for an employee, take these steps:
1. Click Select Timesheets on the main menu.
The Select Timesheets page opens.
2. Click the check box on the row that identifies the employee and then select Employee Profile from the Profiles and Settings menu.
The Employee Profile page opens.
3. Click Roles from the Employee Profile Settings sidebar menu.
The Roles page opens.
4. Click the check box next to each role that the employee will use.
5. Click Save.
Timesheet Details page contents The Timesheet Details page includes settings that determine whether data pre-populates in new timesheets.

webTA 4.2 DOC Timekeeper User Guide 7 ©2015 Kronos Incorporated
• Retain Data Type. These options determine what data, if any, the system uses to populate new timesheets. • None. New timesheets are blank. • Entries Only – No Times. Work entries from the previous pay period’s timesheet are copied
into the employee’s timesheet when the new pay period begins; hours are not carried over. For example, if you select Regular as the time type and a specific BLI in the previous pay period, the new timesheet would contain these entries; it would not include any hours.
• All. Work entries and hours from the previous pay period’s timesheet are copied into the employee’s timesheet when the new pay period begins; hours are carried over. For example, if you select Regular as the time type in the previous pay period, the new timesheet would contain these entries; it would also include hours.
• Pay from Schedule. Hours and time types from the default schedule are copied into the employee’s timesheet when the new pay period begins. For example, if the schedule is set up with 8 hours of RT daily, the timesheet is populated with the same time type and hours.
If the employee’s actual hours or time type differs from the default schedule, the employee may edit the timesheet so that the actual entries are recorded.
• Exception Processing. Hours and time types from the default schedule are copied into the employee’s timesheet when the new pay period begins. For example, if the schedule contains 80 hours of Regular Time, the timesheet is populated with the same time type and hours. If the employee’s actual hours or time type differs from the default schedule, the employee must record the deviation (also called an “exception”) directly in the timesheet. The entries in the timesheet will be automatically adjusted. For example, if Monday contains 8 hours of Regular Time from the default schedule, and the employee enters 4 hours of Annual Leave, the Regular Time entry is reduced from 8 hours to 4 hours, maintaining a total of 8 hours for the day.
• Start Pay Period for Timesheet. The starting pay period in which the timesheet will be available. The default is the current pay period. A previous pay period or the current pay period may be specified.
• Timesheet Entry Type. Select Hours for duration-based timesheets or Time In/Time Out for punch-based timesheets.
• Approvers. These options designate who will validate and certify the employee's timesheet.

webTA 4.2 DOC Timekeeper User Guide 8 ©2015 Kronos Incorporated
• Timekeeper. The timekeeper to whom the employee is assigned. Click Search for Timekeeper to locate the timekeeper's name. The Select User page opens. Click Select on the row that identifies the Timekeeper. You return to the previous page and the name appears in the field.
• Supervisor. The supervisor to whom the employee is assigned. Click Search for Supervisor to locate the supervisor’s name. The Select User page opens. Click Select on the row that identifies the Supervisor. You return to the previous page and the name appears in the field.
To specify timesheet details, take these steps:
1. Click Select Timesheets on the main menu.
The Select Timesheets page opens.
2. Click the check box on the row that identifies the employee and then select Employee Profile from the Profiles and Settings menu.
The Employee Profile page opens.
3. Click Timesheet Details from the sidebar menu.
The Timesheet Details page opens.
4. Select options.
5. Click Save.
Working with Employee Profiles
Viewing employee profiles To view an employee profile, take these steps:
1. Click Select Timesheets on the main menu.
The Select Timesheets page opens.
2. Click the check box next to the employee(s) you want to work with and then select Employee Profile from the Profiles and Settings action menu.
The Employee Profile page opens.
3. If you selected multiple records, use the arrows near the top and bottom of the page to go to the next or previous record.
–OR–
Click Cancel to go back to the previous page.
Editing employee profiles To edit an employee profile, take these steps:
1. Click Select Timesheets on the main menu.
The Select Timesheets page opens.

webTA 4.2 DOC Timekeeper User Guide 9 ©2015 Kronos Incorporated
2. Click the check box next to the employee(s) you want to work with and then select Employee Profile from the Profiles and Settings action menu.
The Employee Profile page opens.
3. Make changes.
4. If you selected multiple records, use the arrows near the top and bottom of the page to go to the next or previous record.
–OR–
Click Cancel to go back to the previous page.
About Timesheet Profiles Timesheet profiles identify the pay period, employee status, pay plan details, leave and other related details. All fields on the timesheet profile are read-only for employees.
The Timesheet Profile page is shown below.

webTA 4.2 DOC Timekeeper User Guide 10 ©2015 Kronos Incorporated

webTA 4.2 DOC Timekeeper User Guide 11 ©2015 Kronos Incorporated
Timesheet Profile page contents The Timesheet Profile page includes the following sections: Pay Period, Status Change, Status, Pay Details, Overtime/Standby, Leave, Accounting, and Pay Provider. Each section is described below.
Pay Period
• Pay Period. The pay period to which the timesheet profile corresponds.
Status Change
• Status Change Type. Indicates the type of status change (Start or End) for mid-pay period accession and separations.
• Status Change Day. Indicates the day in the two-week pay period when the status starts or ends.
Status
• Oath of Office. Identifies an employee who is new to the agency. This also identifies the employee’s first timesheet reported.
• Final Report. Indicates that this is the last timesheet report that is being sent for the employee.
• On Hold. Indicates that no timesheet data will be transmitted for payroll processing for the employee.
Pay Details
• Pay Plan. Identifies the Employee’s pay plan.
• Tour of Duty. Indicates if an Employee is full time, part time, or intermittent.
NOTE: To satisfy OPM guidelines for Phased Retirement, a new tour of duty (Phased Retirement), 35 transaction codes and relevant exceptions and restrictions are available in webTA. The new transactions codes are restricted for use by employees assigned to the Phased Retirement tour of duty, also referred to as Work Schedule-R. A timesheet validation warning displays if employees exceed the tour of duty hours.
• Duty Hours. Displays the total number of biweekly hours that the Employee is scheduled to work.
• Work Week. Defines a typical work week for an Employee.
• Alternative Work Schedule. Indicates if the Employee is assigned to an alternate work schedule (ex.5/4/9 Schedule, Variable Workday, etc.)
OT/Standby • RSO/Salary Cap. Identifies regularly scheduled overtime settings for the Employee.
• Standby Hours Week 1. Indicates an Employee’s entitlement to premium pay for standby duty in Week 1.
• Standby Hours Week 2. Indicates an Employee’s entitlement to premium pay for standby duty in Week 2.
• Standby AUO Percent. Defines the applicable percentage for the number of hours of standby used in week 1 and week 2 or the Administratively Uncontrollable. Overtime (AUO) percentage for this Employee.

webTA 4.2 DOC Timekeeper User Guide 12 ©2015 Kronos Incorporated
Leave
• Service Computation Date. Used to calculate the leave accrual category.
• Leave Category Override. Establishes the accrual category override that is not dependent on the SCD.
• Leave Ceiling Override. Specifies the leave ceiling that overrides the default leave ceiling for the Employee.
• Home Leave Computation Date. Indicates the start date for an Employee to participate in the home leave accrual program.
• Home Leave Category. Establishes the amount of home leave an Employee will accrue per pay period.
• Home Leave End Date. Indicates the end date for participation in the home leave accrual program.
• VLTP Recipient. Indicates the employee is a recipient of hours from the voluntary leave transfer program (VLTP).
• VLTP Recipient. Indicates the employee is a recipient of hours from the voluntary leave transfer program (VLTP).
• ELTP Recipient. Indicates the employee is a recipient of hours from the emergency leave transfer program (ELTP).
• FMLA Invoked, FMLA Expiration Date. A check mark in the FMLA Invoked check box indicates that the employee's leave request for FMLA has been invoked and approved. A date in the FMLA Expiration Date field identifies the date that the employee's FMLA expires; this date is 12 months from the Start Date in the leave request. The check box and the date may be system-generated, or manually entered by a user. Two scenarios are described below.
• webTA enables FMLA Invoked and populates the FMLA Expiration Date. This scenario takes place when an employee invokes and submits an FMLA leave request, and the employee’s Supervisor approves the request. Upon Supervisor approval, webTA enables the FMLA Invoked check box in the employee’s Timesheet Profile and populates the FMLA Expiration Date. The FMLA Expiration Date is 12 months from the Start Date in the leave request. • If the Supervisor denies the FMLA request, there are no changes in the Timesheet
Profile. • If the Supervisor reverts an approved request to Pending, the system clears both the
FMLA Invoked check box and the FMLA Expiration Date field. • Users manually enable the check mark and type the FMLA Expiration Date. Users who have
system permission to edit the Timesheet Profile (Timekeepers, Master Timekeepers, HR Administrators, and Administrators) may manually enable the FMLA Invoked check box and type the FMLA Expiration Date, or clear the check box and FMLA Expiration Date. This may be useful if the leave request is adjusted and a manual update is required.
• FMLA Military Invoked, FMLA Military Expiration Date. (Please see the explanation above for FMLA Invoked, FMLA Expiration Date.)
• Military Regular Leave Flag. Indicates that the employee is entitled to military regular leave and generates the automatic accrual.
• Military Emergency Leave Flag. Indicates that the employee is entitled to military emergency leave and generates the automatic accrual.

webTA 4.2 DOC Timekeeper User Guide 13 ©2015 Kronos Incorporated
Accounting • Accounting Type. If the agency has implemented accounting, time in pay and dollar
transactions must have an accounting code associated with them. Each agency may specify the method of entry for account information in the employee's timesheet. The following options are available:
• Manual entry. The employee selects an account for each line of time in pay and dollar transactions.
• Local. The employee selects an account that is stored locally in webTA rather than at NFC. webTA then includes the accounting data in the transmission file to NFC. This option is useful for agencies that want to generate reports from webTA that are based on account codes, but have set accounts for employees.
• Stored. The employee selects an account that is stored at NFC. This option is useful for agencies in which all time in pay and dollar transactions are charged to the same account.
Pay Provider-NFC • Agency. The agency that the employee's Timekeeper is assigned to. This data is populated from
the Timekeeper's timekeeper profile.
• State Code. The state that the employee's Timekeeper is assigned to. This data is populated from the Timekeeper's timekeeper profile.
• Town. The town that the employee's Timekeeper is assigned to. This data is populated from the Timekeeper's timekeeper profile.
• Unit. The unit that the employee's Timekeeper is assigned to. This data is populated from the Timekeeper's timekeeper profile.
NOTE: For Census Agency employees, the value in this field determines the employee’s Division. The Division is the first segment of the Census Agency account string. The employee’s Division is associated with a list of projects.
• Timekeeper. This data is populated from the Timekeeper's timekeeper profile.
• New Contact Point. Whether the contact information has been updated.
Splitting employee timesheet profiles If an employee’s profile changes on a non-pay period boundary, use the Split Profile option to update the profile with the change. To split a timesheet profile, take these steps:
1. Click Select Timesheets on the main menu.
The Select Timesheets page opens.
2. Click the User ID link of the employee whose timesheet profile you want to work with.
−OR−
Click the check box on the row that identifies the employee(s) and then select Timesheet Profile from the Profiles and Settings action menu.
The Timesheet Profile page opens.
3. Click Split Profile near the bottom of the page.
Two versions of the profile display side-by-side. The original profile appears on the left. The new version appears on the right.

webTA 4.2 DOC Timekeeper User Guide 14 ©2015 Kronos Incorporated
4. From the Starting Date of New Status drop-down list, select the date that the new status will begin.
5. Make additional changes to the new version of the profile.
6. Click Save.
7. Optionally, click UnSplit.
IMPORTANT! If Unsplit is clicked before Save, any changes made to the Split Timesheet Profile page, including status change information, will be discarded.
About Default Timesheet Profiles The default timesheet profile is the timesheet profile associated with the default timesheet. When you enter transactions on the default timesheet, the system uses the values from the default timesheet profile to correctly populate values on the default timesheet.
About Telework Profiles The telework profile is available for employees who are licensed to use the webTA Telework module. The Telework page is shown below.
Telework page contents The Telework page contains these fields.
• Telework Eligibility. Whether the employee is eligible for telework as determined by their job responsibilities.
• Telework Ready. Whether the telework agreement has been approved. • Regular/Routine. Whether the telework adheres to a regularly occurring schedule. • Situational/Ad Hoc. Whether the telework is ad hoc, that is, it takes place at different times. • Agreement Status. The status of the telework agreement. Statuses include: None, Pending,
Approved, Denied, or Terminated. • Agreement Start. The start date of the telework agreement. • Agreement Expires. The expiration date of the telework agreement.

webTA 4.2 DOC Timekeeper User Guide 15 ©2015 Kronos Incorporated
• Do Not Delete Expired Agreements. Whether expired agreements may be deleted from the system.
Managing Delegates Timekeepers may delegate their role to one or more alternate Timekeepers. Delegates validate timesheets, edit and submit leave requests and premium pay requests for employees, or perform other tasks.
It’s a good idea to delegate your role to at least one other Timekeeper in the event that you are unable to perform tasks due to vacation, training or other off-site events. Delegation authority remains in effect until the delegate’s name is removed from the list of assigned delegates.
A sample My Delegates page is shown below.
Working with Delegates
Adding delegates To delegate your role, take these steps:
1. Click My Delegates on the Timekeeper main menu.
The My Delegates page opens. A table lists users who have already been delegated as a backup.
2. Click Add Delegate.
The Add Delegate page opens. A table lists users who are qualified to be selected as delegates.
3. Click the check box next to user(s) you want to select as delegates and then click Select Checked Users.
A message confirms that the delegation was successful.
4. Add more delegates.
−OR−
Click Cancel to go back to the previous page.

webTA 4.2 DOC Timekeeper User Guide 16 ©2015 Kronos Incorporated
Deleting delegates To remove delegates from your role, take these steps:
1. Click My Delegates on the Timekeeper main menu.
The My Delegates page opens. A table lists users who have already been delegated as a backup.
2. Click the "X" on the row that identifies the user you want to remove as a delegate.
A pop-up window opens.
3. Click OK to remove the delegate. A message confirms that the delegate was removed.
−OR−
Click Cancel to dismiss the operation.
About Timekeeper Profiles Timekeeper profiles contain Timekeeper contact information. The contact information is stored in the Timekeeper's assigned employees' timesheet profiles. The information appears under the Pay Provider section on the Timesheet Profile page. If payroll processing issues come up with employee timesheets, the Timekeeper may be contacted. The Timekeeper Profile page is shown below.
Timekeeper Profile page contents Agency. The Timekeeper's assigned agency.
State Code. The Timekeeper's assigned state.
Town. The Timekeeper's assigned town.
Unit. The Timekeeper's assigned unit.
Timekeeper. The Timekeeper's assigned ID.
The following additional options are available to BEA and NIST Timekeepers:
Validate Using External Accounts. Enable this option to validate accounts on the employee’s timesheet against the contents of an external account table. A warning displays if the account is not found.

webTA 4.2 DOC Timekeeper User Guide 17 ©2015 Kronos Incorporated
Primary Timekeeper. Enable this option to designate the Timekeeper as a Primary Timekeeper. Primary Timekeepers may perform additional tasks, such as building supplemental files.
To work with timekeeper profiles, take these steps:
1. Click Timekeeper Profile on the Timekeeper main menu.
The Timekeeper Profile opens.
2. Type your contact information.
3. Click Save.
Taking over employees Timekeepers may take over (reassign) employees from other Timekeepers. To take over employees from another Timekeeper, follow these steps:
1. Click Takeover Employee from the Delegates/Reassignment section on the main menu.
The Takeover Employee page opens.
2. Click Select on the row that identifies the employee you want to take over.
The employee is assigned to your employee group.
3. Click Cancel to go back to the main menu.

webTA 4.2 DOC Timekeeper User Guide 18 ©2015 Kronos Incorporated
Employee Accounts Timekeepers may add new accounts, select existing accounts, update account descriptions, and remove accounts. Accounts listed under the My Accounts section on the My Timekeeper Accounts page are available to the Timekeeper’s assigned employees.
Timekeepers may work with delegate Timekeeper accounts, as explained below in more detail. An example My Timekeeper Accounts page is shown below.
NOTE: Census Agency accounts require using different procedures. For details and screenshots, see “About Census Agency Accounts” below.
Working with My Timekeeper Accounts Timekeepers may add new accounts or select (get) existing accounts so that they are available to employees.
Selecting My Timekeeper accounts To select (get) accounts so that they are available to your assigned employees, take these steps:

webTA 4.2 DOC Timekeeper User Guide 19 ©2015 Kronos Incorporated
1. Click My Timekeeper Accounts on the Timekeeper main menu.
The My Timekeeper Accounts page opens.
2. Click Get Account(s).
The Select Accounts page opens. Accounts that are already available to assigned employees are identified with the status “Selected” in the Select column.
3. Click Select on the row that identifies the account.
The Select button is replaced by “Selected.”
4. Continue selecting accounts.
–OR–
Click Cancel to go back to the My Timekeeper Accounts page. The accounts you selected are listed under My Accounts.
Adding My Timekeeper accounts Timekeepers may add new accounts to webTA.
To add (create) accounts, take these steps:
1. Click My Timekeeper Accounts on the Timekeeper main menu.
The My Timekeeper Accounts page opens.
2. Under the Create New Account section, select the organization from the Account Structure drop-down list.
3. Type values in the Fund, Project and Task text boxes. (Depending on your agency, the fields may vary.)
4. Optionally, type a description in the Description text box.
5. Click Create.
A message confirms the account was successfully added and the account displays under My Accounts. The account is available to your assigned employees.
6. Continue adding accounts.
–OR–

webTA 4.2 DOC Timekeeper User Guide 20 ©2015 Kronos Incorporated
Click Cancel to go back to the My Timekeeper Accounts page. The accounts you added are listed under My Accounts.
Removing My Timekeeper accounts You may remove accounts so that they are no longer available to your assigned employees. When you remove an account, it is not deleted from the system. It is simply removed from the list of accounts available to you and your employees.
To remove accounts, take these steps:
1. Click My Timekeeper Accounts on the Timekeeper main menu.
The My Timekeeper Accounts page opens.
2. Click the “X” on the row that identifies the account you want to remove.
A message confirms the account was removed. To restore the account to your list, see the procedure “Selecting My Timekeeper Accounts.”
3. Click Cancel to go back to the My Timekeeper Accounts page.
Working with delegate accounts Timekeepers may select a Timekeeper delegate from the Delegate drop-down list near the top of the page. To work with delegate accounts, take these steps:
1. Click My Timekeeper Accounts on the Timekeeper main menu.
The My Timekeeper Accounts page opens.
2. Click the Delegate drop-down list and select a delegate.
3. Click Switch.
The page refreshes with the delegate’s accounts. You may now create, select, or remove accounts on behalf of the delegate and their assigned employees.
4. To return to your role, click the Delegate drop-down list, select Self, and then click Switch.
The page refreshes with your accounts.
About Census Agency Accounts The Census Agency account structure differs from other agency accounts. As a result, the tasks that involve working with Census Agency accounts require different procedures. Census Agency Timekeepers can perform these tasks:
• Add new accounts from the My Timekeeper Accounts function.
• Add new accounts when you work with timesheets, default schedules, or other webTA functions that involve work or leave transactions
As with other agency Timekeepers, Census Agency Timekeepers’ assigned employees have access to the Timekeeper’s accounts.
An example My Timekeeper Accounts page for Census Agency Timekeepers is shown below. To reset the Branch value to “00”, type 00 in the Division field. To see a default list of Projects, type 14 in the Division field.

webTA 4.2 DOC Timekeeper User Guide 21 ©2015 Kronos Incorporated
Creating My Timekeeper Accounts (Census) To add new accounts, Census Agency Timekeepers may take these steps:
1. Click Accounts (Census) on the Timekeeper main menu.
The My Timekeeper Accounts page opens.
NOTE: Depending on how accounts are set up, default values may display when the page opens. The screenshots in this procedure are examples and may differ from your setup.
2. Under Add an Account, type a 2-digit Division code.
The system populates associated values in the Branch and Project drop-down lists.
3. Select a code from the Branch drop-down list.
4. Select a code from the Project drop-down list.
5. Type a code in the Task field.
6. Type a code in the Function field.

webTA 4.2 DOC Timekeeper User Guide 22 ©2015 Kronos Incorporated
7. Click Create.
The My Timekeeper Accounts page refreshes with the account string and a Description field.
8. Type a brief description and then click Save.
The My Timekeeper Accounts page returns to its original state. The new account is listed under the Existing Accounts table, as shown below. The account is available to your assigned employees.
9. Create another account.
–OR–
Click Cancel to go back to the main menu.
Removing My Timekeeper Accounts (Census) Timekeepers may remove accounts. When you remove an account, it is not deleted from the system. It is simply removed from the list of accounts available to you and your assigned employees.
To remove accounts, Census Agency Timekeepers may take these steps:
1. Click Accounts (Census) on the Timekeeper main menu.
The My Timekeeper Accounts page opens.
2. Optionally, type search clues to find the account.
The account displays under Existing Accounts.
3. Click the “X” on the row that identifies the account you want to remove.
A pop-up box asks you to confirm the action.
4. Click OK to remove the account. A message confirms the account was deleted. The account is no longer available to you or your assigned employees.
–OR–
Click Cancel to dismiss the action.

webTA 4.2 DOC Timekeeper User Guide 23 ©2015 Kronos Incorporated
Editing My Timekeeper Accounts (Census) Timekeepers may edit account descriptions.
To edit an account description, Census Agency Timekeepers may take these steps:
1. Click Accounts (Census) on the Employee main menu.
The My Accounts page opens.
2. Optionally, type search clues to find the account.
The account displays under Existing Accounts.
3. Place the cursor in the Description field and make changes.
4. Click Save Description.
5. Click Cancel to go back to the main menu.

webTA 4.2 DOC Timekeeper User Guide 24 ©2015 Kronos Incorporated
Overview of the Select Timesheets page The Select Timesheets page is useful for roles such as Timekeepers and Supervisors who perform tasks on behalf of assigned employees. The page includes search filters that help you quickly find people, timesheets, profiles, and schedules associated with specific pay periods, timesheets statuses, user IDs, organizations, and other characteristics.
When the system lists the search results, you use the Select Action options near the bottom of the page to perform tasks. Search filters and Select Action options are described below in more detail.
To open the Select Timesheets page, click Select Timesheets on the Timekeeper main menu. An example Select Timesheets page is shown below.
To search for employees, use these drop-down lists or search criteria:
• Pay Period. Use this drop-down list to select a specific pay period or all pay periods. • Timesheet Status. Use this drop-down list to display employee records with a specific timesheet
status: • All. If you select All pay periods + All timesheet statuses, the system shows all timesheets
that are not processed for every pay period. If you select a specific pay period + All timesheet statuses, the system shows all timesheets (including processed timesheets) for the specific pay period.
• Saved. Displays records with the timesheet status Saved. • Pending Attestation. Displays records with the timesheet status Pending Attestation (the
timesheet is partially validated and must be affirmed.) • All Validated. Displays records that have been validated by employees and Timekeepers.

webTA 4.2 DOC Timekeeper User Guide 25 ©2015 Kronos Incorporated
• Validated by Employee. Displays records that have been validated by employees. • Validated by Timekeeper. Displays records that have been validated by Timekeepers. • Validation Overridden. Displays records that have had validation overridden. • Certified and Pre-Processed. Displays records that have been validated, certified, and are
ready to be built. • Processed. Displays records that have been processed for payroll for a specific pay period.
NOTE: To view processed timesheets, you must select a specific pay period from the Pay Period drop-down list. If you select All pay periods + Processed timesheet status, no results are shown and the following alert appears: "Must choose a pay period for processed timesheets."
• Saved and Employee Validated. Displays records that have been saved and/or validated by employees.
• Saved and All Validated. Displays records that have been saved and/or validated by Timekeepers.
• User ID. Type search criteria to search for employees by User ID. • Last Name. Type search criteria to search for employees by last name. • First Name. Type search criteria to search for employees by first name. • Organization. Use this drop-down list to select employees assigned to a specific organization. • Timekeeper. Type search criteria to search for employees assigned to a specific Timekeeper. • Supervisor. Type search criteria to search for employees assigned to a specific Supervisor. • Delegates For. Use this drop-down list to display employee records with the following delegate
criteria. • NONE. Shows only your employees: • <Delegate Name.> Shows only the employees of the selected delegate.
• Timesheet Type. Use this drop-down list to display one of the following types of timesheets: • All. Displays all timesheet types (Correction, Regular, and Invalid Timesheet Profile). • Correction. The timesheet was corrected after it was processed. The corrected timesheet
has not yet been sent for re-processing. • Regular. The timesheet is an original timesheet. • Invalid Timesheet Profile. The timesheet cannot be opened because the user’s timesheet
profile is missing required data. The timesheet profile must be accurately completed and saved before it can be considered valid by the system.
• On Hold. Displays timesheets that have been placed on hold. If the On Hold option is checked (Timesheet Profile > On Hold), the employee's timesheet is not transmitted to the payroll provider for processing. Users can save changes to timesheets that are on hold, but the timesheet cannot be validated nor processed.
Searching for Timesheets You may use the Select Timesheets search box to search for timesheets associated with a specific employee or managed by specific Timekeepers and/or Supervisors.
• To search for timesheets associated with a specific employee, type search clues in the User ID and Name text boxes, then click Search or press Enter.

webTA 4.2 DOC Timekeeper User Guide 26 ©2015 Kronos Incorporated
• To search for timesheets of employees who are assigned to a specific Timekeeper or Supervisor, type search clues in the Timekeeper or Supervisor text boxes, then click Search or press Enter.
Using search criteria in free-text fields You may enter text or numbers, a wildcard, or both.
NOTE: Do not include quotation marks in the search criteria.
To enter text, numbers, or wildcards:
• By user ID: Type the ID in the User ID search field, and then click Search. • For all Employees with the same last name: Type the name in the Last Name search field and
then click Search. For example, type “Smith” and click Search. The system adds an implied asterisk wildcard at the end and matches employees with a last name of “Smith”, "Smithers”, “Smithson”, etc.
• For all Employees with the same first name: Type the name in the First Name search field, and then click Search. For example, type “Robert” and click Search. The system finds employees with the first name “Robert.”
• To use wildcards, type an asterisk to match text or numbers, or type a question mark to match a single character.
To search for employees, take these steps:
1. Type search criteria in the User ID, Last Name, First Name, Timekeeper, or Supervisor fields and then click Search.
The system matches the criteria.
2. To start over, click Clear and the page returns to its default state.
Using drop-down lists to filter information To use a drop-down list to filter information on the Select Timesheets page, take these steps
1. Select the option from the filter drop-down menu. For example, select Validated by Employee from the Timesheet Status drop-down menu.
2. Click Search.
The results display. For example, if you selected Validated by Employee from the Timesheet Status drop-down menu, timesheets with the current status Validated by Employee display.
3. To start over, click Clear and the page returns to its default state.
Using links on the Select Timesheets page Pay periods and user IDs are available as hyperlinks on the Select Timesheets page. Below is a brief description of each link:
• Pay period links. Click a pay period link to open an employee’s timesheet. Depending on the status of the timesheet, a code may be appended to the end of the pay period date. Codes and corresponding descriptions are listed below:
(LC) Local Correction
(C) Regular Correction.

webTA 4.2 DOC Timekeeper User Guide 27 ©2015 Kronos Incorporated
(P) Prior Correction.
• User ID links. Click a user ID link to open an employee’s timesheet profile.
Overview of Select Actions menus The Select Actions menus are located near the bottom of the Select Employees page. Timekeepers may use the menu options to work with their assigned employees. Each menu and its functions are described below.
• Timesheets • Timesheet. Access one or several timesheets. • Timesheet Summary. View one or several Timesheet Summaries. • Validate Selected. Validate one or several timesheets. • Validate All. Validate all timesheets in your employee group that are ready for validation. • Create Correction. Correct a processed timesheet. • Processed Timesheets. View timesheets that have been certified and processed.
• Profiles and Settings • Timesheet Profile. View and edit one or several timesheet profiles. • Work Schedules. Add, edit, view or delete one or several schedules. • Default Timesheet Profile. View and edit one or several default timesheet profiles. • Employee Profile. View and edit one or several employee profiles.
• Leave and Premium Pay • Leave Balances. View leave balances for an employee, including details that show the
amount accrued by pay period. You may also manually adjust leave balances. • Leave Calendar. View leave and premium pay requests in a monthly calendar format. • Leave Requests. View leave requests. • Premium Pay Requests. View premium pay requests.
• Messages • Send Message. Send a message to one or more employees.
• Default Schedule Default Schedule. Add, edit or delete default schedules.

webTA 4.2 DOC Timekeeper User Guide 28 ©2015 Kronos Incorporated
Employee Timesheets The Timekeeper’s main timesheet responsibilities include adding, editing and deleting work and leave time, and validating and correcting timesheets for their assigned employees.
NOTE: Census Agency employees use a slightly different version of the timesheet. The notation (Census) is appended to procedures that are unique to Census Agency timesheets.
Here is an example of a timesheet.
Depending on how the employee’s Employee Profile is set up and whether the employee has a schedule, new timesheets will be pre-populated with data. This reduces repetitive data entry and the possibility of errors. Here are some examples:
• Pre-populated with data from the previous pay period. The cells in the Week 1 and Week 2 grids may contain the same hours and/or transaction code and account entered in the previous pay period.
• Pre-populated with standard data from a schedule. The cells in the Week 1 and Week 2 grids may contain the same hours, transaction code, and account that appear in the employee’s schedule.
Working with Employee Timesheets Timesheets record the number of work and leave hours each day. For most work and leave hours, the system requires an associated transaction code and account. The timesheet contains a separate row for each combination of transaction code and account in the pay period.

webTA 4.2 DOC Timekeeper User Guide 29 ©2015 Kronos Incorporated
NOTE: Census Agency employees use a slightly different version of the timesheet. The notation (Census) is appended to procedures that are unique to Census Agency employees.
Adding timesheet transactions in employee timesheets To add work or leave time in employee timesheets, take these steps:
1. Click Select Timesheets on the main menu.
The Select Timesheets page opens.
2. Click the check box next to the employee(s) you want to work with and then select Timesheet from the Timesheets menu.
−OR−
Click the pay period link on the row that identifies the employee you want to work with.
The timesheet opens.
3. Click the plus sign (+) under Work Time or Leave Time.
A new row appears.
4. Accept the default transaction code.
−OR−
Click the transaction code link to select a different transaction code. The Select Values pop-up opens. Select the transaction code from the drop-down list and then click Select. The pop-up is removed and the transaction code populates.
5. Accept the default account.
−OR−
Click the account link to select a different account. The Accounting pop-up window opens. Click Select on the row that identifies the account. The pop-up is removed and the account populates.
6. Press the Tab key to move the cursor to the appropriate cell and type the duration using the format hh.mm (hours and minutes in 15 minute increments, separated by a decimal.) For example, type 7.25 for seven hours and fifteen minutes.
7. Click Save and then click Cancel to go back to the Select Timesheets page.
Editing timesheet transactions in employee timesheets Make the following types of edits to work or leave time in employee timesheets.
• Change a specific duration. For example, you might change 8:00 to 6:00 in the cell for Monday. The transaction code and account remain the same. In this case, simply use the Backspace key to clear the current entry and type in the new entry.
• Change the pay code and/or account associated with an entire row. For example, you might change the transaction code from 01-Regular Base Pay to 01-Telework Home-Routine for an entire row. In this case, select the transaction code and/or account from the appropriate drop-down list.
To edit time entries and transactions in an employee timesheet, take these steps:
1. Click Select Timesheets on the main menu.
webTA 4.2 DOC Timekeeper User Guide 30 ©2015 Kronos Incorporated
The Select Timesheets page opens.
2. Click the check box next to the employee(s) you want to work with and then select Timesheet from the Timesheets menu.
−OR−
Click the pay period link on the row that identifies the employee you want to work with.
The timesheet opens.
3. To edit existing time entries, click the cursor in the field that you want to edit and press the Backspace key to delete the existing hours. Type the new hours and then click Save.
4. To select a different transaction code, click the transaction code link. The Select Values pop-up opens. Select the transaction code from the drop-down list and then click Select Work Time Transaction or Select Leave Time Transaction. The pop-up is removed and the transaction code is filled in.
5. To select a different account, click the account link. The Accounting pop-up opens. Click Select on the row that identifies the account. The pop-up is removed and the account populates.
6. Click Save and then click Cancel to go back to the Select Timesheets page.
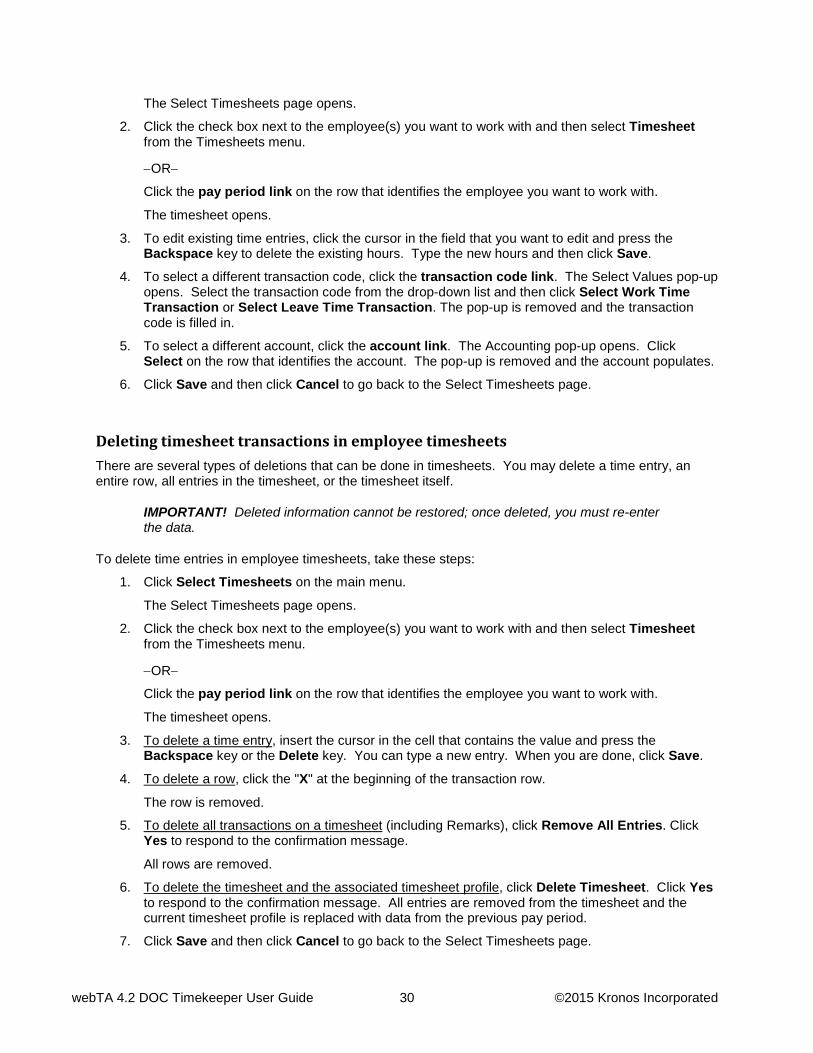
Deleting timesheet transactions in employee timesheets There are several types of deletions that can be done in timesheets. You may delete a time entry, an entire row, all entries in the timesheet, or the timesheet itself.
IMPORTANT! Deleted information cannot be restored; once deleted, you must re-enter the data.
To delete time entries in employee timesheets, take these steps:
1. Click Select Timesheets on the main menu.
The Select Timesheets page opens.
2. Click the check box next to the employee(s) you want to work with and then select Timesheet from the Timesheets menu.
−OR−
Click the pay period link on the row that identifies the employee you want to work with.
The timesheet opens.
3. To delete a time entry, insert the cursor in the cell that contains the value and press the Backspace key or the Delete key. You can type a new entry. When you are done, click Save.
4. To delete a row, click the "X" at the beginning of the transaction row.
The row is removed.
5. To delete all transactions on a timesheet (including Remarks), click Remove All Entries. Click Yes to respond to the confirmation message.
All rows are removed.
6. To delete the timesheet and the associated timesheet profile, click Delete Timesheet. Click Yes to respond to the confirmation message. All entries are removed from the timesheet and the current timesheet profile is replaced with data from the previous pay period.
7. Click Save and then click Cancel to go back to the Select Timesheets page.

webTA 4.2 DOC Timekeeper User Guide 31 ©2015 Kronos Incorporated
About Census Agency Timesheets Census Agency employee timesheets have many of the same features and use similar procedures as timesheets used in other agencies. Census Agency timesheets include these additional features.
• Timesheet Entry Page. Use this page to specify transactions (that is, pay code and account combinations.)
• E icon (Edit Timesheet Entry). Click the "E" on a transaction row to open the Timesheet Entry page and edit the transaction.
• Mile Transactions. Use this section of the timesheet to record reimbursement mileage.
• Change Default Sort. Use this option to sort work and leave transactions, dollar transactions, and mileage transaction.
Adding employee timesheet transactions (Census) To add work or leave time in Census Agency employee timesheets, Timekeepers may take these steps:
1. Click Select Timesheets on the main menu.
The Select Timesheets page opens.
2. Click the check box next to the employee(s) you want to work with and then select Timesheet from the Timesheets menu.
−OR−
Click the pay period link on the row that identifies the employee you want to work with.
The timesheet opens.
3. Click the plus sign (+) under Work Time, Leave Time, Dollar Transactions, or Mile Transactions.
The New Timesheet Entry page opens.
1. Click Select on the row that identifies the account if it is listed under the Existing Accounts table.
–OR–
Search for an account and then click Select.
The New Timesheet Entry page refreshes with the account and the Transaction Code drop-down list.
–OR–
Add a new account. See the procedure Creating My Accounts (Census) and then continue to the next step.
5. Select a transaction code from the Transaction drop-down list and then click Save.
You return to the timesheet. The transaction and account appear in the new row, as shown below.

webTA 4.2 DOC Timekeeper User Guide 32 ©2015 Kronos Incorporated
6. Type hours, dollar amounts, or miles and then click Save.
7. Click Cancel to go back to the main menu.
Editing employee timesheet transactions (Census) Make the following types of edits to work or leave time in timesheets:
• Change a specific duration. For example, you might change 8.00 to 6.00 in the cell for Monday. The transaction code and account remain the same. In this case, simply use the Backspace key to clear the current entry and type in the new entry, or double-click on the entry to modify it.
• Change the transaction code and account associated with an entire row. For example, you might change the transaction code from 01-Regular Base Pay to 01-Telework Home-Routine for an entire row. In this case, click the E icon located above the plus-sign (+) and make the update on the Edit Timesheet Entry page.
To edit transactions in Census Agency timesheets, Timekeepers may take these steps:
1. Click Select Timesheets on the main menu.
The Select Timesheets page opens.
2. Click the check box next to the employee(s) you want to work with and then select Timesheet from the Timesheets menu.
−OR−
Click the pay period link on the row that identifies the employee you want to work with.
The timesheet opens.
3. To edit existing time or dollar entries, click the cursor in the field that you want to edit and press the Backspace key to delete the existing hours or dollars. Type the new entry and then click Save.
4. To edit a transaction, click the E (Edit) icon located above the plus sign (+) under Work Time, Leave Time, Dollar Transactions, or Mile Transactions.
The Edit Timesheet Entry page opens.
5. Click Select on the row that identifies the account if it is listed under the Existing Accounts table.
–OR–
Search for an account and then click Select.
The New Timesheet Entry page refreshes with the account and the Transaction Code drop-down list.

webTA 4.2 DOC Timekeeper User Guide 33 ©2015 Kronos Incorporated
6. Make changes.
7. Click Save and then click Cancel to go back to the main menu.
For procedures on deleting time entries and transactions, see Deleting timesheet transactions.
About Timesheet Remarks Remarks are useful for entering free-text comments that pertain to several days or a specific time entry. Two types of remarks may be entered in timesheets: Pay Period Remarks and Daily Remarks. A pay period remark might apply to several days or the entire pay period, for example, “Attended a conference, Week 1, Mon-Wed." A daily remark might apply to a particular time entry, for example, “EA for physical fitness.”
The number of daily remarks appears in parentheses in the Remarks tab header, for example, “Remarks (1).” The example screenshot below contains a pay period remark in the Pay Period Remarks field, and a daily remark under the Daily Remark column.
The system records the name, user ID, date, time and role of the user (for example, Employee, Timekeeper, or Supervisor) along with the remark. This information also appears in the Timesheet Summary under the Remarks section.
Adding a pay period remark to an employee timesheet To add a pay period remark to an employee timesheet, take these steps:
1. Click Select Timesheets on the main menu.
The Select Timesheets page opens.
2. Click the check box next to the employee(s) you want to work with and then select Timesheet from the Timesheets menu.
−OR−
Click the pay period link on the row that identifies the employee you want to work with.
The timesheet opens.
3. Click the Remarks tab near the bottom of the timesheet.
The tab opens.
4. Place the cursor in the Pay Period Remarks field and type the text.
5. Click Save.

webTA 4.2 DOC Timekeeper User Guide 34 ©2015 Kronos Incorporated
Adding a daily remark to an employee timesheet To add a daily remark to an employee timesheet, take these steps:
1. Click Select Timesheets on the main menu.
The Select Timesheets page opens.
2. Click the check box next to the employee(s) you want to work with and then select Timesheet from the Timesheets menu.
−OR−
Click the pay period link on the row that identifies the employee you want to work with.
The timesheet opens.
3. Click the cursor on the time entry to add a remark.
4. Double-click or press the Shift & R keys. The Remarks tab near the bottom of the timesheet opens and a new row appears. The row populates with the date of the time entry (for example, Fri 7/19), the type of entry (for example, RT-Regular Time), the user name, user ID, the current date and time, and the user’s role.
−OR−
Click the Remarks tab near the bottom of the timesheet. The tab opens. Click the plus sign (+) under the Add column. A new row appears. The row populates with the user name, user ID, the current date and time, and the user’s role. Select the date from the Date drop-down list and then go to the next step.
5. Type the text in the Daily Remark field.
6. Click Save Remarks.
A red triangle appears in the upper right corner of the time entry cell to indicate that a remark has been added, as shown below.
7. Continue working in the timesheet.
−OR−
Click Save and then click Cancel.
Deleting remarks from an employee timesheet To delete remarks from an employee timesheet, take these steps:
1. Click Select Timesheets on the main menu.
The Select Timesheets page opens.
2. Click the check box next to the employee(s) you want to work with and then select Timesheet from the Timesheets menu.
−OR−

webTA 4.2 DOC Timekeeper User Guide 35 ©2015 Kronos Incorporated
Click the pay period link on the row that identifies the employee you want to work with.
The timesheet opens.
3. Click the Remarks tab near the bottom of the timesheet.
The tab opens.
4. Click the “X” on the row that identifies the daily remark that you want to delete. Click Save Remarks.
−OR−
Click the cursor in the field under Pay Period Remarks and use the Backspace key to delete the text. Click Save.
NOTE: You cannot add or delete remarks after the timesheet has been sent to Payroll for processing.
About Validating Employee Timesheets Timesheets must be validated before they can be certified by the Supervisor and sent to the payroll provider for processing. Employees may validate their own timesheets, or Timekeepers may validate timesheets on behalf of their employees. The validation feature checks the timesheet against a set of business rules (for example, RT hours may not exceed 8 hours on a single day for certain employee schedules.)
The following screenshot includes Error messages that the system generated upon validation. Notice that the employee inadvertently charged 8 hours of regular time and 8 hours of annual leave on the same Friday of Week 1.
To resolve the errors, you must edit the timesheet to reflect the correct time type, either 8 hours of regular time or 8 hours of annual leave, and then try validating again.

webTA 4.2 DOC Timekeeper User Guide 36 ©2015 Kronos Incorporated
Validating employee timesheets To validate one or several timesheets, take these steps:
1. Click Select Timesheets on the main menu.
The Select Timesheets page opens.
2. Click the check box next to the employee(s) you want to work with and then select Validate Selected from the Timesheets menu.
−OR−
Click the pay period link on the row that identifies the timesheet you want to validate.
The timesheet(s) open.
3. Click Validate near the bottom of the page.
The Timesheet Summary opens. To complete the validation, click Affirm near the bottom of the timesheet or click Cancel Attestation to cancel the action.
−OR−
If webTA encounters validation problems, Validation Messages display above the timesheet. Two types of messages may appear: Errors or Warnings.

webTA 4.2 DOC Timekeeper User Guide 37 ©2015 Kronos Incorporated
Errors appear when timesheet entries violate one or more validation rules. Errors are indicated by the word “ERROR," followed by a brief description of the problem.
IMPORTANT! Errors must be corrected in order to properly validate your timesheet and proceed to the next step.
Warnings display when the system identifies data that may be a problem. However, the problem will not be severe enough to delay routing the timesheet to the Supervisor for certification.
4. If you are validating multiple timesheets, click the arrow near the top or bottom of the page to continue to the next timesheet; otherwise, click Cancel to return to the Select Employees page.
Validating all timesheets Timekeepers may validate all timesheets that are ready to be validated by selecting the Validate All option on the Select Timesheets page. To validate all timesheets, take these steps:
1. Click Select Timesheets on the main menu.
The Select Timesheets page opens.
2. Click Validate All from the Timesheets menu.
3. The first timesheet opens.
4. Click Validate near the bottom of the page.
The Timesheet Summary opens. To complete the validation, click Affirm near the bottom of the timesheet or click Cancel Attestation to cancel the action.
−OR−
If webTA encounters validation problems, Validation Messages display above the timesheet. Two types of messages may appear: Errors or Warnings.
Errors appear when timesheet entries violate one or more validation rules. Errors are indicated by the word “ERROR," followed by a brief description of the problem.
IMPORTANT! Errors must be corrected in order to properly validate your timesheet and proceed to the next step.
Warnings display when the system identifies data that may be a problem. However, the problem will not be severe enough to delay routing the timesheet to the Supervisor for certification.
5. When you are ready, click the arrow near the top or bottom of the page to continue to the next timesheet.
Validating delegate timesheets If you are a delegate for another Timekeeper, you may need to validate timesheets for your delegated employees. To validate timesheets for your delegated employees, take these steps:
1. Click Select Timesheets on the main menu.
The Select Timesheets page opens.
2. Click the Delegates For drop-down list near the top of the page and select the Timekeeper for whom you are a delegate. Optionally, select other search criteria (for example, the pay period) and then click Search.

webTA 4.2 DOC Timekeeper User Guide 38 ©2015 Kronos Incorporated
The delegated employees are listed on the Select Timesheets page.
3. Click the pay period link on the row that identifies the timesheet you want to validate.
−OR−
Click the check box next to the name of one or more employee(s) and then select Validate Selected from the Timesheets menu.
The timesheet opens.
4. Click Validate near the bottom of the page.
The Timesheet Summary opens. To complete the validation, click Affirm near the bottom of the timesheet or click Cancel Attestation to cancel the action.
−OR−
If webTA encounters validation problems, Validation Messages display above the timesheet. Two types of messages may appear: Errors or Warnings.
Errors appear when timesheet entries violate one or more validation rules. Errors are indicated by the word “ERROR," followed by a brief description of the problem.
IMPORTANT! Errors must be corrected in order to properly validate your timesheet and proceed to the next step.
Warnings display when the system identifies data that may be a problem. However, the problem will not be severe enough to delay routing the timesheet to the Supervisor for certification.
5. If you are validating multiple timesheets, click the arrow near the top or bottom of the page to continue to the next timesheet; otherwise, click Cancel to return to the Select Timesheets page.
About Correction Timesheets Processed timesheets may occasionally require a correction. Here are some characteristics of correction timesheets:
• Perform this type of correction on a historical timesheet (that is, a timesheet that has been processed.)
• Correction timesheets are flagged with (C) in the Pay Period drop-down list in the timesheet, as shown below. The (C) with parentheses stands for Corrected; C without parentheses stands for Certified.
NOTE: If a timesheet has never been corrected, the correction timesheet is a copy of the original timesheet. If a timesheet has already been corrected, the correction timesheet is the most recently corrected version of the timesheet.
A sample Create Correction page is shown below. The page displays a table that lists the pay period and corresponding date range, the timesheet status (Historical, Regular, Future, Missing or Corrected), and an option for creating corrections.

webTA 4.2 DOC Timekeeper User Guide 39 ©2015 Kronos Incorporated
Create Correction page contents The Create Correction page includes the following fields and functions:
• Pay Period. The pay period associated with the timesheet. • Date Range. The date range associated with the pay period. • Timesheet Status. The Create Correction page displays these timesheet statuses.
• Regular. The timesheet has been generated for the associated pay period, but has not been processed for payroll.
• Historical. The timesheet has been processed for payroll. • Future. The timesheet has not yet been generated for the associated pay period. • Missing. A timesheet was neither generated nor processed for the associated pay period. • Corrected. A correction (amendment) was made to a historical timesheet.

webTA 4.2 DOC Timekeeper User Guide 40 ©2015 Kronos Incorporated
• Regular Correction. Also referred to as a local correction, you use this function to make a correction (amendment) to a historical timesheet.
• Prior Correction. This type of correction creates a new timesheet that is recorded locally and transmitted to the payroll provider. Perform this type of correction on missing timesheets (that is, timesheets that have not yet been created.) Timesheets are flagged with (P) in the Pay Period column on the Select Timesheets page, for example, 16-2015 (P).
• Create Correction. This type of correction is recorded locally and transmitted to the payroll provider. Perform this type of correction on an historical timesheet that has been processed within the previous 26 pay periods. Timesheets are flagged with (C) in the in the Pay Period column on the Select Timesheets page, for example, 17-2015 (C).
Correcting employee timesheets To correct processed employee timesheets, take these steps:
1. Click Select Timesheets on the main menu.
The Select Timesheets page opens.
2. Click the check box next to the employee you want to work with and then select Create Correction from the Timesheets action menu.
The Create Correction page opens.
3. Optionally, select the year from the Select Year drop-down list and then click Go.
4. Click Create Correction, Create Prior Correction, or Create Regular Correction on the row that identifies the timesheet.
The timesheet opens.
5. Make changes.
6. Optionally, click the Remarks tab and type a brief description of the correction in the Pay Period Remarks box.
7. Save the timesheet and then validate the timesheet as you would an original timesheet.

webTA 4.2 DOC Timekeeper User Guide 41 ©2015 Kronos Incorporated
An example correction timesheet is shown below. Notice that the pay period in the Pay Period drop-down list is appended with S (C), which stands for Saved and Corrected. The Timesheet Type in the upper right corner is Correction.
When the Timekeeper validates the correction timesheet, the pay period in the Pay Period drop-down list is appended with VT (C), which stands for Validated by Timekeeper and Corrected.
The pay period is appended with S (C) The Timesheet Type is Correction

webTA 4.2 DOC Timekeeper User Guide 42 ©2015 Kronos Incorporated
About the Timesheet Summary Every timesheet has a corresponding Timesheet Summary that provides, by pay period, a read-only snapshot of the following types of information:
• Validation messages • Timesheet hours and associated daily totals • Work schedule • Weekly and biweekly totals • Remarks • Dollar transactions • Mileage transactions • Leave requests and status • Premium pay requests and status • Telework requests and status • Leave transfer donations and status • Leave data • Timesheet profile data • Continuation of Pay (COP) data • Activity log of actions taken by other roles
A sample Timesheet Summary is shown below (the graphic has been edited to fit on the page):

webTA 4.2 DOC Timekeeper User Guide 43 ©2015 Kronos Incorporated

webTA 4.2 DOC Timekeeper User Guide 44 ©2015 Kronos Incorporated
Opening and printing Timesheet Summaries To open and print timesheet summaries, take these steps:
1. Click Select Timesheets on the main menu.
The Select Timesheets page opens.
2. Click the check box next to the employee(s) you want to work with, and then select Timesheet Summary from the Timesheets action menu.
The Timesheet Summary page opens.
3. Click Printable Version at the bottom of the page.
A window opens with the printable version of the timesheet summary.
4. Click Print and then click Cancel to go back to the previous page.
5. If you selected multiple employees, click the Next arrow near the top or bottom of the page to continue to the next Timesheet Summary.
6. When you are done, click Cancel.
Depending on whether the timesheet is a correction timesheet, additional options may be included at the bottom of the Timesheet Summary page.
• Show Correction. Use this option to view a correction timesheet that contains an amendment. • Create Correction. Use this option to open a correction timesheet and make an amendment. • Original Timesheet. Use this option to open the original timesheet that preceded the correction
timesheet.
About Processed Timesheets Use the Processed Timesheets option to view a list of processed timesheets (also referred to as certified timesheet summaries.) The Processed Timesheets page is shown below.

webTA 4.2 DOC Timekeeper User Guide 45 ©2015 Kronos Incorporated
Viewing processed timesheets To view a list of processed timesheets, take these steps:
1. Click Processed Timesheets on the main menu.
The Processed Timesheets page opens.
2. Click the pay period link on the row that identifies the timesheet you want to view:
The Timesheet Summary page opens.
3. Click Cancel to return to the previous page.

webTA 4.2 DOC Timekeeper User Guide 46 ©2015 Kronos Incorporated
Employee Schedules Depending on your agency’s implementation of webTA, employees have access to a default schedule or an advanced schedule. Default schedules provide basic schedule functionality while advanced schedules provide more robust options. The webTA Advanced Scheduling module must be implemented and the employee must have an Advanced Scheduling license in order to have an advanced schedule.
About default schedules Default schedules consist of a biweekly schedule of work hours and the transaction code and account to which the hours are charged. Default schedules include optional Time In and Time Out fields above the Work Time section, and Absence Start and Absence End fields above the Leave Time Section. The system does not calculate, round, require, nor validate this data.
NOTE: Census Agency employees use slightly different procedures when working with default schedules. For details, see About Census Agency Default Schedules below.
If an employee is unable to add and maintain his or her default schedule because, for example, they are on leave, the Timekeeper may perform the task on their behalf. An example default schedule is shown below:
Values from the default schedule display on the Schedule tab near the bottom of the employee’s timesheet. Depending on the Employee Profile > Timesheet Details > Retain Data Option setting, the values may automatically populate new timesheets. This helps reduce errors and minimizes repetitive manual data entry each pay period.

webTA 4.2 DOC Timekeeper User Guide 47 ©2015 Kronos Incorporated
Working with Employee Default Schedules
Adding employee default schedules To add a default schedule for an employee, take these steps:
1. Click Select Timesheets on the main menu.
The Select Timesheets page opens.
2. Click the check box next to the employee(s) you want to work with, and then select Default Schedule from the Default Schedule action menu.
The Default Schedule page opens.
3. Click the plus sign (+) under Work Time.
A new row appears.
4. Accept the default transaction code.
−OR−
Click the transaction code link to select a different transaction code. The Select Values pop-up opens. Choose the transaction code from the drop-down list and then click Select Work Time Transaction. The pop-up is removed and the transaction code populates.
5. Accept the default account.
−OR−
Click the account code link to select a different account. The Accounting pop-up opens. Click Select on the row that identifies the account. The pop-up is removed and the account populates.
6. Press the Tab key to move the cursor to the appropriate cell and type the duration using the format HH.mm (hours and minutes in 15 minute increments, separated by a decimal.) For example, type 7.25 for seven hours and fifteen minutes. Complete the schedule by entering the duration for each day.
7. Click Save and then click Cancel to go back to the previous page.
Editing employee default schedules To edit an employee’s default schedule, take these steps:
1. Click Select Timesheets on the main menu.
The Select Timesheets page opens.
2. Click the check box next to the employee(s) you want to work with, and then select Default Schedule from the Default Schedule action menu.
The Default Schedule page opens.
3. To edit existing entries, click the cursor in the field that you want to edit and press the Backspace key to delete the existing hours. Type the new hours and then click Save.
4. To select a different transaction code, click the transaction code link. The Select Values pop-up opens. Choose the transaction code from the drop-down list and then click Select Work Time Transaction. The pop-up is removed and the transaction code populates.
5. To select a different account, click the account code link. The Accounting pop-up opens. Click Select on the row that identifies the account. The pop-up is removed and the account populates.
6. Click Save and then click Cancel to go back to the previous page.

webTA 4.2 DOC Timekeeper User Guide 48 ©2015 Kronos Incorporated
Deleting employee default schedules To delete an employee’s default schedule, take these steps:
1. Click Select Timesheets on the main menu.
The Select Timesheets page opens.
2. Click the check box next to the employee(s) you want to work with, and then select Default Schedule from the Default Schedule action menu.
The Default Schedule page opens.
IMPORTANT! Deleted information cannot be restored; once deleted, data must be re-entered.
3. To delete a time entry, insert the cursor in the cell that contains the value and press the Backspace key. You can type a new entry. When you are done, click Save.
4. To delete a row, click the "X" at the beginning of the transaction row.
The row is removed.
5. To delete all entries, click Remove All Entries. Click Yes to respond to the confirmation message.
All rows are removed.
6. Click Save and then click Cancel to go back to the previous page.
About Census Agency Default Schedules Census Agency employees use slightly different procedures when working with default schedules. The procedures follow.
Adding employee default schedules (Census) To add a new default schedule for a Census Agency employee, Timekeepers may take these steps:
1. Click Select Timesheets on the main menu.
The Select Timesheets page opens.
2. Click the check box next to the employee(s) you want to work with, and then select Default Schedule from the Default Schedule action menu.
The Default Schedule page opens.
3. Click the plus sign (+) under Work Time.
The New Timesheet Entry page opens.
4. Click Select on the row that identifies the account if it is listed under the Existing Accounts table.
−OR−
Search for an account and then click Select.
The New Timesheet Entry page refreshes with the Transaction Code drop-down list and the account populates.
–OR–
Add a new account. See the procedure Creating My Timekeeper Accounts (Census) and then continue to the next step.

webTA 4.2 DOC Timekeeper User Guide 49 ©2015 Kronos Incorporated
5. Select a transaction code from the Transaction drop-down list.
6. Click Save.
You return to the default schedule. The transaction code and account display under the Work Time or Leave Time section of the grid.
7. Press the Tab key to move the cursor to the appropriate cell and type the duration using the format hh.mm (hours and minutes in 15 minute increments, separated by a colon.) For example, type 7.5 for seven hours and thirty minutes. Complete the schedule by entering the duration for each day.
8. Click Save to save the default schedule.
9. Click Cancel to go back to the main menu.
Editing employee default schedules (Census) To edit a default schedule for a Census Agency employee, Timekeepers may take these steps:
1. Click Select Timesheets on the main menu.
The Select Timesheets page opens.
2. Click the check box next to the employee(s) you want to work with, and then select Default Schedule from the Default Schedule action menu.
The Default Schedule page opens.
3. To edit existing time entries, click the cursor in the field that you want to edit and press the Backspace key to delete the existing hours. Type the new hours and then click Save.
4. To select a different transaction or account, click the E icon that appears above the plus-sign (+).
The Edit Timesheet Entry page opens.
5. Click Select on the row that identifies the account if it is listed under the Existing Accounts table. The New Timesheet Entry page refreshes with the Transaction Code drop-down list and the account populates.
−OR−
Search for an account and then click Select.
–OR–
Add a new account. See the procedure Creating My Timekeeper Accounts (Census).
5. Select a transaction code from the Transaction drop-down list.
6. Click Save.
You return to the default schedule. The transaction code and account display under the Work Time or Leave Time section of the grid.
7. Make additional changes and then click Save to save the default schedule.
8. Click Cancel to go back to the main menu.

webTA 4.2 DOC Timekeeper User Guide 50 ©2015 Kronos Incorporated
To delete default schedules, see the procedure Deleting default schedules.
About advanced schedules Advanced schedules include features such as Regular Days Off, permanent and temporary schedules, additional pay period options, and a Supervisor approval process. Timekeepers maintain and submit advanced schedules on behalf of their employees. Supervisors approve or deny schedule requests.
An example advanced schedule is shown below. The status bar in the upper right corner indicates the schedule was approved. The activity log near the bottom of the page identifies dates and names of users who performed the actions.
About temporary and permanent advanced schedules Timekeepers may add and submit permanent or temporary schedules for their assigned Employees. A permanent schedule is an employee’s regular day to day schedule. A temporary schedule may be assigned to an employee for a length of time with a specific pay period start and end date. For example, an employee may be assigned a temporary schedule if they are attending training. Temporary schedules may also be created for a historical pay period or pay period range to generate a corrected timesheet for

webTA 4.2 DOC Timekeeper User Guide 51 ©2015 Kronos Incorporated
those pay periods. Whether a schedule is permanent or temporary, the total hours must match the Duty Hours specified in the employee’s timesheet profile; otherwise the system generates a validation error.
Timekeepers create and submit schedules for employees and Supervisors respond to submitted schedule requests. The system applies the permanent schedule every pay period unless a temporary schedule has been approved for the employee. When an approved temporary schedule ends, the system reverts to the employee’s permanent schedule. Until the schedule has been approved by the employee’s Supervisor, the schedule cannot be applied to the employee’s timesheet.
The Advanced Scheduling module includes the following tools:
• Shift. A shift is the smallest segment of a schedule. • Schedule templates. Schedule templates contain values that may be used to automatically
populate employee schedules. • Employee Schedules List View. The Schedules List View displays a high level summary of
schedules assigned to employees. Timekeepers may click user name links to view or work with schedules for their assigned employees.
• Employee Schedules Grid View. The Schedules Grid View displays employees and the daily shifts assigned to each employee for the specified pay period. Timekeepers may click user name links to view or work with schedules for their assigned employees.
Each tool is described below in more detail.
About shifts A shift is the smallest segment of time that the Timekeeper can select to create a schedule. The HR Administrator adds and maintains a list of shifts. Timekeepers may view the list of available shifts on the Shifts page, shown below.
The page includes these columns
• Name link. The shift name. Depending on your role, you may be able to click the name link to view shift details.
• Description. A brief description of the shift. • Start Time. The time that the shift begins (HH:MM), for example, 8:00 a.m. NOTE: If the shift is
an RDO, enter the same start time and stop time, for example, 8 a.m. This bypasses the mandatory field validation check and results in zero hours.
• Stop Time. The time that the shift ends (HH:MM), for example, 4:00 p.m. NOTE: If the shift is an RDO, enter the same start time and stop time, for example, 8 a.m. This bypasses the mandatory field validation check and results in zero hours charged to the transaction code in the timesheet.

webTA 4.2 DOC Timekeeper User Guide 52 ©2015 Kronos Incorporated
• Meal. The duration of the meal in minutes, for example, 0:30 minutes. • Total Hours. The total number of hours for the day, for example, 7:30 hours. • Status. Whether the shift is active or inactive. If the shift is inactive, it is not listed as available
when assigning shifts to schedules. • RDO. Whether the shift is a Regular Day Off (RDO). NOTE: If the shift is an RDO, you must still
enter a Start Time, Stop Time and Transaction Code for the shift. • Transaction Code. The transaction code associated with the shift hours.
Viewing shifts To view a list of available shifts, take these steps:
1. Click Shifts from the Schedule section on the main menu.
The Shifts page opens.
2. View the list.
3. Click Cancel to return to the main menu.
About schedule templates Schedule templates offer a quick, easy way to add permanent or temporary schedules. Schedule templates contain values that Timekeepers may use to populate schedules assigned to employees. Schedule templates eliminate the need to manually create individual schedules for employees. Instead, when a Timekeeper adds a schedule for an employee, they can insert a schedule template to automatically populate the employee’s schedule.
The HR Administrator adds and maintains schedule templates. A sample schedule template is shown below.

webTA 4.2 DOC Timekeeper User Guide 53 ©2015 Kronos Incorporated
Viewing schedule templates To view available schedule templates, take these steps:
1. Click Schedule Templates from the Schedule section on the main menu.
The Schedule Templates page opens.
2. Click the schedule template name link that you want to view.
The Schedule Template page opens. The page is read-only for all roles except the HR Administrator.
3. Click Cancel to return to the previous page
About the Employee Schedules List View The Employee Schedules List View page displays employees and their assigned schedules for the specified pay period. Timekeepers may click the employee name link to work with the employee’s permanent or temporary schedule. An example Employees Schedules List View page is shown below.

webTA 4.2 DOC Timekeeper User Guide 54 ©2015 Kronos Incorporated
Opening the Employee Schedules List View To open the Employee Schedules List View, take these steps:
1. Click Employee Schedules List View from the Schedule section on the main menu.
The Employee Schedules List View page opens.
2. Click the employee name link of the employee.
The Schedule Assignment page opens.
3. Click the schedule name link to view the assigned schedule.
4. Click Cancel to return to the previous page
About the Employee Schedules Grid View The Employee Schedules - Grid View page displays employees and the daily shifts assigned to each employee for the specified pay period. The total scheduled hours for each day appear in the TOTALS row near the bottom of the page. An example Employee Schedule Grid View page is shown below.

webTA 4.2 DOC Timekeeper User Guide 55 ©2015 Kronos Incorporated
Opening the Employee Schedules Grid View To open the Employee Schedules Grid View, take these steps:
1. Click Employee Schedules Grid View from the Schedule section on the main menu.
The Employee Schedules Grid View page opens.
2. Click the employee name link of the employee.
The Schedule Assignment page opens.
3. Click the schedule name link to view the assigned schedule.
4. Click Cancel to return to the previous page
Working with advanced schedules Timekeepers are responsible for monitoring, adding and submitting schedules for their assigned employees. Permanent and temporary schedules include these features:
• A status bar in the upper right corner of the page identifies whether the schedule is pending, approved or denied.
• The Schedule Type indicates whether the schedule is permanent or temporary. • An activity log near the bottom of the schedule shows a list of actions taken, the date of the
action, and the name of the person who initiated the action.
The (Add) Schedule page is shown below.

webTA 4.2 DOC Timekeeper User Guide 56 ©2015 Kronos Incorporated
Viewing employee schedules To view an employee’s assigned schedule, take the following steps:
1. Click Employee Schedules - List View from the Schedule section on the main menu.
The Employee Schedules - List View page opens.
–OR–
Click Employee Schedules - Grid View from the Schedule section on the main menu.
The Employee Schedules - Grid View page opens.
2. Click the employee name link to open the employee’s schedule assignment.

webTA 4.2 DOC Timekeeper User Guide 57 ©2015 Kronos Incorporated
The Schedule Assignment page opens.
3. Click the schedule name link of the permanent or temporary schedule that you want to view.
The Schedule page opens.
4. View the schedule.
5. Click Cancel to return to the previous page.
Adding and assigning schedules To add and assign a permanent or temporary schedule to an employee, take the following steps:
1. Click Employee Schedules - List View from the Schedule section on the Main Menu.
The Employee Schedules - List View page opens.
2. Click the employee name link to open the employee’s schedule assignment.
The Schedule Assignment page opens.
3. Click Add Permanent Schedule.
The (Add) Schedule page opens.
–OR–
Click Add Temporary Schedule.
The (Add) Temporary Schedule page opens.
4. Optionally, click Insert Schedule Template to select an existing schedule template.
The schedule is populated with values from the schedule template. Continue to the next step to modify the name, description, shift or other information, or go to the last step to submit the schedule.
5. Type a schedule name in the Name field.
6. Type a brief description in the Description field.
7. Select the number of weeks from the Weeks drop down menu.
8. Accept the default start date or click the calendar icon to specify a different start date. The start date must coincide with the start date of a pay period.
9. Accept the default end date or click the calendar icon to specify a different end date. The end date must coincide with the end date of a pay period. An end date is required for temporary schedules and optional for permanent schedules.
10. Click check boxes next to the days of the week in which you want to insert a shift.
11. Click Insert Shift.
The Insert Shift pop-up box opens.
12. Click the row that identifies the shift you want to insert and then click OK.
You return to the (Add) Schedule page and the shift populates the days you identified.
13. Optionally, click the plus sign (+) under the Add Row column to insert another shift on a day that is populated with an existing tour. A second row appears.
Click the check box to the left of the row and then click Insert Shift. The Insert Shift pop-up box opens. Click the row that identifies the shift you want to insert and then click OK. You return to the (Add) Schedule page.

webTA 4.2 DOC Timekeeper User Guide 58 ©2015 Kronos Incorporated
14. Optionally, click the “X” under the Delete column to delete a shift.
–OR–
Click the check box to the left of the row you want to remove and then click Delete Shift.
The shift is removed.
15. Click Submit to save the schedule and submit it to the Supervisor.
–OR–
Click Cancel to return to the Schedule Assignment page without saving changes.

webTA 4.2 DOC Timekeeper User Guide 59 ©2015 Kronos Incorporated
Employee Leave Balances Timekeepers may view employee leave balances and make manual forward adjustments. A sample Leave Balances page is shown below:
To view leave balance details by pay period, click the leave type name link in the Accrual Leave Balances table. The Details page opens, shown below.

webTA 4.2 DOC Timekeeper User Guide 60 ©2015 Kronos Incorporated
Leave Balance Details page contents The Leave Balance Details table includes these columns:
• Pay Period. The pay period in which the adjustment occurs. • Date. The effective date of the adjustment, usually the end of the pay period. • Adjustment Type. The source of the system adjustment. For example, Timesheet Accrual,
Timesheet Usage, or Forward Adjustment (for manual adjustments to the forward balance.) • Amount. The amount of the adjustment. • Balance. The new balance as a result of adding the adjustment amount. • Expiration Date. The date on which some portion of the leave balance will expire. For example,
this might be used for compensatory time and other leave types for which amounts that are accrued are forfeited if not used by a certain date.
Both system adjustments and manual adjustments are recorded under the Adjustment Type column. Examples of system adjustments include “Timesheet Accrual” and “Timesheet Useage.” An example of a manual adjustment is “Forward Adjustment.”
Working with Employee Leave Balances
Viewing employee leave balances To view leave balances for employees, take these steps:
1. Click Select Timesheets on the main menu.
The Select Timesheets page opens.
2. Click the check box next to the employee(s) you want to work with and then select Leave Balances from the Leave and Premium Pay action menu.
The Leave Balances page opens.

webTA 4.2 DOC Timekeeper User Guide 61 ©2015 Kronos Incorporated
3. Optionally, click the leave type to see details for a specific leave balance.
The Details page opens.
4. Click Cancel to go back to the previous page.
Adjusting employee leave balances To manually adjust an employee’s leave balance, take these steps:
1. Click Select Timesheets on the main menu.
The Select Timesheets page opens.
2. Click the check box next to the employee(s) you want to work with and then select Leave Balances from the Leave and Premium Pay action menu.
The Leave Balances page opens.
3. Click the leave type name link to see details for a specific leave balance.
The Details page opens.
4. Click Add Manual Forward Adjustment.
The Adjust Forward Balance page opens.
5. Click the Pay Period drop-down list and select the pay period in which the adjustment will take place.
6. Type the new balance in the Adjusted Forward Balance field.
7. Click Save and then click Cancel to go back to the previous page.
Employee Leave Requests Timekeepers may view leave requests for their assigned employees. Whether or not employees submit leave requests, leave transactions must be entered directly in the timesheet.
An employee leave request is shown below.

webTA 4.2 DOC Timekeeper User Guide 62 ©2015 Kronos Incorporated

webTA 4.2 DOC Timekeeper User Guide 63 ©2015 Kronos Incorporated
Working with Employee Leave Requests
Viewing employee leave requests To view an employee leave request, take these steps:
1. Click Employee Leave Requests on the main menu. The Leave Requests - Current page opens. The Leave Requests table displays current and future requests for your assigned employees.
−OR−
Click Select Employees on the main menu. Click the check box next to the employee(s) you want to work with, and then select Leave Requests from the Leave and Premium Pay action menu.
The Leave Requests - Current page opens. The Leave Requests table displays current and future requests for the specific employee that you selected.
2. Click the leave request status link to open a request.
The Leave Request Form page opens. Click Cancel to go back to the previous page.
−OR−
Click History to view historical leave requests. The Leave Requests − History page opens. The Leave Requests − History table displays historical requests. Click Current to return to the Leave Requests − Current page.
−OR−
Click View Calendar to see leave requests displayed in a calendar view.
The Leave Calendar page opens. Click the month drop-down list to view a different month. Click the request link to open a specific request.
3. Click Cancel to go back to the previous page.
About the Request Calendar The Request Calendar displays leave request and premium pay request information in the format of a monthly calendar.
NOTE: The Request Calendar function supports viewing requests from multiple employees.
A sample Request Calendar is shown below.

webTA 4.2 DOC Timekeeper User Guide 64 ©2015 Kronos Incorporated
Tips on using the request calendar Here are some tips on using the request calendar:
• Click the Previous and Next arrows near the top of the calendar to see previous and future months.
• Each request is preceded by one of the following request status codes: A (Approved), D (Denied), or P (Pending).
• To view details about a specific request, click the Request link. The Leave (or Premium Pay) Request Form page opens.
• Use the View drop-down list near the top of the calendar to filter requests. • To view requests from your assigned employees, select My Employees. • To view requests from your delegated employees, select My Delegated Employees. • To view requests from your employees as well as your delegated employees, select All.
Viewing employee request calendars To view a request calendar for one or more employees, take these steps:
1. Click Employee Leave Requests on the main menu and then click View Calendar.
−OR−

webTA 4.2 DOC Timekeeper User Guide 65 ©2015 Kronos Incorporated
Click Select Employees on the main menu. Click the check box next to the employee name(s) that you want to view, and then select Leave Calendar from the Leave and Premium Pay Requests action menu.
The Request Calendar page opens.
2. Click the request status link that identifies the request you want to view.
The page opens.
3. Click Cancel to go back to the previous page.
Employee Premium Pay Requests Timekeepers may view premium pay requests for their assigned employees and delete requests that are pending. Whether or not employees submit premium pay requests, premium pay transactions must be entered directly in the timesheet.
An employee premium pay request is shown below:
Working with Employee Premium Pay Requests
Viewing employee premium pay requests To view an employee premium pay request, take these steps:
1. Click Employee Premium Pay Requests on the main menu. The Premium Pay Request Current page opens. The Premium Pay Requests table displays current and future requests for your assigned employees.

webTA 4.2 DOC Timekeeper User Guide 66 ©2015 Kronos Incorporated
−OR−
Click Select Employees on the main menu. Click the check box next to the employee(s) you want to work with, and then select Premium Pay Requests from the Leave and Premium Pay action menu.
The Premium Pay Requests Current page opens. The Premium Pay Requests table displays current and future requests for the specific employee that you selected.
4. Click the request status link to open a request.
The Premium Pay Request Form page opens. Click Cancel to go back to the previous page.
−OR−
Click History to view historical premium pay requests. The Premium Pay Requests − History page opens. The Premium Pay Requests − History table displays historical requests. Click Current to return to the Premium Pay Requests − Current page.
−OR−
Click View Calendar to see premium pay requests displayed in a calendar view.
The Calendar page opens. Click the month drop-down list to view a different month. Click the request link to open a specific request.
5. Click Cancel to go back to the previous page.
Deleting employee premium pay requests Timekeepers may delete premium pay requests that are in pending status. If the request has already been approved or denied, you can contact the employee’s Supervisor to revert the request to pending and then delete it.
To delete a pending employee premium pay request, take these steps:
1. Click Employee Premium Pay Requests on the main menu. The Premium Pay Request Current page opens. The Premium Pay Requests table displays current and future requests for your assigned employees.
−OR−
Click Select Employees on the main menu. Click the check box next to the employee(s) you want to work with, and then select Premium Pay Requests from the Leave and Premium Pay action menu.
The Premium Pay Requests Current page opens. The Premium Pay Requests table displays current and future requests for the specific employee that you selected.
2. Click the request status link on the row that identifies the request you want to delete.

webTA 4.2 DOC Timekeeper User Guide 67 ©2015 Kronos Incorporated
The Premium Pay Request page opens.
3. Click Delete Request at the bottom of the page.
A message asks you to confirm that you want to delete the request. Click Yes to proceed; the request is removed and you return to the previous page.
−OR−
Click Cancel to dismiss the action.
4. If necessary, delete the leave transaction from the timesheet.

webTA 4.2 DOC Timekeeper User Guide 68 ©2015 Kronos Incorporated
Employee Telework Requests If the webTA Telework module has been implemented at your agency, the Telework section may appear on the Timekeeper main menu. Timekeepers may submit telework requests on behalf of their assigned employees, update pending requests, and delete pending requests. The system sends workflow notifications to the employee, Timekeeper and Supervisor as the request is routed. Upon Supervisor approval, webTA automatically enters telework hours in the employee’s timesheet.
A sample Telework Request page is shown below.
Submitting employee telework requests Timekeepers cannot add telework requests on behalf of employees, however, you may submit a pending request. To submit a pending employee telework request, take these steps:
1. Click Telework Requests under the Telework section on the main menu.
The Telework Request – Current page opens.
2. Click the telework request status link of the telework request you want to submit.
The Telework Request page opens.
3. Click Submit near the bottom of the page.

webTA 4.2 DOC Timekeeper User Guide 69 ©2015 Kronos Incorporated
-OR-
Click Cancel to dismiss changes and return to the previous page.
Modifying employee telework requests To modify a pending employee telework request, take these steps:
1. Click Telework Requests under the Telework section on the main menu.
The Telework Request page opens.
2. Click the telework request status link on the row that identifies the request you want to modify.
The Telework Request page opens.
3. Make changes.
4. Click Submit.
-OR-
Click Delete to delete the request. A confirmation message displays. Click Yes to delete the request or click Cancel.
-OR-
Click Cancel to dismiss changes and return to the previous page.
Deleting employee telework requests To delete a pending employee telework request, take these steps:
1. Click Telework Requests under the Telework section on the main menu.
The Telework Request page opens.
2. Click the telework request status link on the row that identifies the request you want to delete.
The Telework Request page opens.
3. Click Delete.
A confirmation message appears.
4. Click Yes to delete the request.
-OR-
Click Cancel to dismiss the operation.

webTA 4.2 DOC Timekeeper User Guide 70 ©2015 Kronos Incorporated
Import Job Management Timekeepers use the Import Job Management feature to run the DOC Webfred Import. WEBFRED imports Census Bureau employee time in pay (TIP) and reimbursement data into webTA so that field employees receive pay through NFC payroll processing.
The following guidelines are important to be aware of:
• If the pay period entry in the WEBFRED file does not match the employee's current pay period in webTA, the system will not import the data.
• Employee records are locked after the import takes place. If the WEBFRED file is reloaded, employee data is not updated unless the following conditions are met: • Timekeepers and HR Administrators may use the Import EOM Data option. This option tells
the system that all records in the WEBFRED file you are importing can be overwritten in the future, but only if the data has never been previously imported. This gives Timekeepers a way to overwrite timesheet data. If the check box is not initially enabled when you import the timesheet data, all future attempts to import data for that pay period will fail. The only way to overwrite the data is by contacting the HR Administrator, who may use the Force Import option to import the data.
• HR Administrators may use the Force Import option. This option clears the employee's current TIP and reimbursement data and then overwrites it with the new import.
• If an error occurs during the import, the system clears the employee's record for the pay period so that it may be imported again after data issues are resolved in the WEBFRED file.
The Import Job page is shown below.

webTA 4.2 DOC Timekeeper User Guide 71 ©2015 Kronos Incorporated
Import Job Management page contents Name. The name of the import job.
Import Type. The type of import that will be run, for example, “Core Import Work Schedules.”
Payroll Provider. If multiple payroll providers are defined in the system, select the one you want to use.
Disabled. Whether the job is enabled or disabled.
Protocol. Determines how to read the import file.
Local file. Reads the import file from the server’s local file system.
FTP. Reads the import file via File Transfer Protocol (FTP).
SFTP. Reads the import file via Secure File Transfer Protocol (SFTP).
Directory. If the protocol “Local file” is selected, this is the directory of the webTA server. If the protocol “FTP” or “SFTP” is selected, this is the remote directory on those respective services.
Filename Pattern. Determines the filename pattern to match when looking for import files. For example, if you specified the filename pattern my_file_{CURRENT_DATE].txt then the resulting filename would, for

webTA 4.2 DOC Timekeeper User Guide 72 ©2015 Kronos Incorporated
example, be my_file_20130220.txt. Optionally, use the following variables to the filename as demonstrated in the example:
CURRENT_DATE. The current date in YYYYMMDD format.
CURRENT_TIME. The current time in HHMMSS format.
DIRECTORY. The directory specified.
REMOTE_HOST. The host name specified.
REMOTE_USER. The user specified.
REMOTE_PASS. The password specified.
PP. The current pay period number.
YYYY. The current pay period year.
Pre-Process File Command. Specify a system call to run on the file before it is processed. The output from the system call will be the data read by the import process.
Post Process Destination Directory. The directory into which the import file will be moved after it has been processed.
Hostname. If the protocol is FTP or SFTP, type the hostname.
User. If the protocol is FTP or SFTP, type the username for authentication.
•Password. If the protocol is FTP or SFTP, type the password for authentication.
# Retries. Number of retries to attempt when failures occur.
Retry Delay (secs). Number of seconds between retries.
Execute Multithread. Indicates whether the import job should be run multi-threaded.
User Data File. The data file is located on the local PC. (NOTE: Click Run Import Now With User Data File if you select this option.)
Edit Schedule. Set up a schedule that determines when the job will run.
The options at the bottom of the page include these buttons:
• Run Import Now. Upload the data file to the application server or make it accessible via an FTP/SFTP server, and then run the import.
• Run Import Now With User Data File. Upload the data file on the local PC directly to webTA, and then run the import.
About the Create Test Record option Use the Create Test Record function to create import records via a form or to parse an existing line from an import file to view the individual fields. Every import job has a specific file format (for example,

webTA 4.2 DOC Timekeeper User Guide 73 ©2015 Kronos Incorporated
positions 1-9 are the SSN, positions 10-40 make up the employee’s user ID, etc.) Click the Record Class drop-down list to see a list of available file formats.
About the Edit Deletion Job option Use the Edit Deletion Job option to regularly delete data generated by the system upon the completion of each import job. Every time an import job runs, the job generates a line in the table at the top of the job details. The deletion job deletes those lines as well as any data associated with them. You may specify whether to enable or disable the delete job, the number of days of data to maintain prior to deletion, and when the deletion job will run.
To run the WEBFRED import, take these steps:
1. Click Import Job Management from the System Set Up section on the Administrator main menu.
The Import Job Management page opens.
2. Click the job name link (for example, Run WEBFRED Import.)
The Import Job page opens.
3. Complete the fields.
4. Optionally, to import EOM (End of Month) data, enable the Import EOM Data check box. This option overwrites current data.
5. Optionally, HR Administrators may enable the Force Import check box to clear current TIP and reimbursement data and overwrite it with the new import.
6. Click Save.
A message confirms that the job is running.
7. Click Cancel to go back to the previous page.

webTA 4.2 DOC Timekeeper User Guide 74 ©2015 Kronos Incorporated
Reports Timekeepers may run, view, save or print webTA reports. The following webTA reports are available to Timekeepers:
• Default Schedule Report • Final Timesheets • Leave Audit • New Employees • Uncertified Timesheets • Unvalidated Timesheets
Each report is described below, followed by topics on using report tools to save report output to different file formats, run reports in the background, and save and schedule reports.
Default Schedules The Default Schedule report lists employees who use default schedules with one of the following options specified in Timesheet Details > Retain Data Type: Pay from Schedule, or Exception Processing.
To generate a Default Schedules report, take these steps:
1. Click Reports from the Reports section on the main menu.

webTA 4.2 DOC Timekeeper User Guide 75 ©2015 Kronos Incorporated
The Reports page opens.
2. Click Default Schedules.
The page opens.
3. Click Run Report.
–OR–
Click the PDF, Excel, HTML, or CSV link in the upper right corner of the page to display the report output in the specified file type. A dialog displays options to open or save the output file.
–OR–
Click the Background Execution drop-down list and select an option. A message confirms that the report has been submitted. To access the report output, click Cancel to go back to the Reports page and then click My Saved and Scheduled Reports near the bottom of the page.
–OR–
Click Schedule Report to schedule the report to run on specific days and at specific times. (This option is available if the Advanced Reporting module has been implemented.)
Final Timesheets The Final Timesheets report lists, by pay period, employees who have separated from the organization. The Separation Date displays in the End Date column.
To generate a Final Timesheets report, take these steps:
1. Click Reports from the Reports section on the main menu.
The Reports page opens.
2. Click Final Timesheets.
The page opens:
3. Use the following parameters:
• Type optional text in the Report Header field. The text will appear in the report title. • Specify the starting pay period range from the From PP drop-down list and the ending pay
period range from the To PP drop-down list. • Click the Users drop-down list to specify a user status:
• Active. Employees are still eligible to use webTA.

webTA 4.2 DOC Timekeeper User Guide 76 ©2015 Kronos Incorporated
• Inactive. Employees’ records are still in the system, but they no longer have access to webTA.
• Active & Inactive. View both active and inactive employees. 4. Click Run Report.
–OR–
Click the PDF, Excel, HTML, or CSV link in the upper right corner of the page to display the report output in the specified file type. A dialog displays options to open or save the output file.
–OR–
Click the Background Execution drop-down list and select an option. A message confirms that the report has been submitted. To access the report output, click Cancel to go back to the Reports page and then click My Saved and Scheduled Reports near the bottom of the page.
–OR–
Click Schedule Report to schedule the report to run on specific days and at specific times. (This option is available if the Advanced Reporting module has been implemented.)
Leave Audit Report The Leave Audit report displays leave balances and adjustments for a specified type of leave within a designated range of pay periods.
The following columns are included in the Leave Audit Report:
• Pay Period. The pay period number followed by the pay year. For example, 22-2013. • Manual Adjust. Any adjustment that was made to the available leave in the pay period. • Forward. The leave balance that was forwarded from the prior pay period.

webTA 4.2 DOC Timekeeper User Guide 77 ©2015 Kronos Incorporated
• Accrued. The amount of leave accrued during the pay period. The column is blank for leave types that do not accrue, such as LWOP.
• Available. The total amount of leave that is available for use in the pay period. The column is blank for leave types that do not accrue, such as LWOP.
• Used. The amount of leave used by the employee in the pay period. This is usually the sum from the timesheet data submitted by the employee for the pay period. For annual leave and sick leave, it may also include LTP donations.
• Balance. The ending balance for the leave type in the pay period. This is usually the available leave minus the leave used. For non-accruable leave, this is usually the forwarded amount minus the used amount.
• Maximum Available. This column is included if the selected leave type is "Annual." It shows the maximum annual leave amount currently available. Usually, this is the sum of your current balance plus your projected accruals through the end of the Leave Year.
To generate a Leave Audit report, take these steps:
1. Click Reports from the Reports section on the main menu.
The Reports page opens.
2. Click Leave Audit.
The page opens.
3. Use the following parameters:
• Type optional text in the Report Header field. The text will appear in the report title. • Select the pay period range from the From PP and To PP drop-down lists.
• Click the Leave Type drop-down list to select the type of leave.
• Click Search next to the Employee field. The Select User page opens. Click Select on the row that identifies the employee. You return to the Report Parameters page and the Employee field populates with the selected name.
4. Click Run Report. –OR–
Click the PDF, Excel, HTML, or CSV link in the upper right corner of the page to display the report output in the specified file type. A dialog displays options to open or save the output file.
–OR–
Click the Background Execution drop-down list and select an option. A message confirms that the report has been submitted. To access the report output, click Cancel to go back to the Reports page and then click My Saved and Scheduled Reports near the bottom of the page.
–OR–
Click Schedule Report to schedule the report to run on specific days and at specific times. (This option is available if the Advanced Reporting module has been implemented.)
New Employees The New Employees report lists, by pay period, new users who have been added to the system. Depending on your role, new users are limited to your employee group. An employee is considered "new" until a timesheet is included in a build.

webTA 4.2 DOC Timekeeper User Guide 78 ©2015 Kronos Incorporated
To generate a New Employees report, take these steps:
1. Click Reports from the Reports section on the main menu.
The Reports page opens.
2. Click New Employees
The page opens:
3. Use the following parameters:
• Type optional text in the Report Header field. The text will appear in the report title. • Specify the pay period range. Select the starting pay period from the From PP drop-down list
and the ending pay period from the To PP drop-down list. 4. Click Run Report.
–OR–
Click the PDF, Excel, HTML, or CSV link in the upper right corner of the page to display the report output in the specified file type. A dialog displays options to open or save the output file.
–OR–
Click the Background Execution drop-down list and select an option. A message confirms that the report has been submitted. To access the report output, click Cancel to go back to the Reports page and then click My Saved and Scheduled Reports near the bottom of the page.
–OR–
Click Schedule Report to schedule the report to run on specific days and at specific times. (This option is available if the Advanced Reporting module has been implemented.)

webTA 4.2 DOC Timekeeper User Guide 79 ©2015 Kronos Incorporated
Uncertified Timesheets The Uncertified Timesheets report lists timesheets that have not been certified, by pay period.
To generate an Uncertified Timesheets report, take these steps:
1. Click Reports from the Reports section on the main menu.
The Reports page opens.
2. Click Uncertified Timesheets.
The page opens:
3. Use the following parameters:
• Type optional text in the Report Header field. The text will appear in the report title. • Specify the pay period range. Select the starting pay period from the From PP drop-down list
and the ending pay period from the To PP drop-down list. • Accept the organization.
−OR−
Click the organization name link. The Organization Management page opens. Click Select on the row that identifies the organization. You return to the Report Parameters and the Organization field is populated with the name
• Accept or clear the Include Sub Orgs check box. (It is enabled by default.) • Click the Users drop-down list to specify a user status:
• Active. Employees are still eligible to use webTA. • Inactive. Employees’ records are still in the system, but they no longer have access to
webTA. • Active & Inactive. View both active and inactive employees.
4. Click Run Report. –OR–
Click the PDF, Excel, HTML, or CSV link in the upper right corner of the page to display the report output in the specified file type. A dialog displays options to open or save the output file.
–OR–

webTA 4.2 DOC Timekeeper User Guide 80 ©2015 Kronos Incorporated
Click the Background Execution drop-down list and select an option. A message confirms that the report has been submitted. To access the report output, click Cancel to go back to the Reports page and then click My Saved and Scheduled Reports near the bottom of the page.
–OR–
Click Schedule Report to schedule the report to run on specific days and at specific times. (This option is available if the Advanced Reporting module has been implemented.)
Unvalidated Timesheets The Unvalidated Timesheets report lists timesheets that have not been validated, by pay period.
To generate an Unvalidated Timesheets report, take these steps:
1. Click Reports from the Reports section on the main menu.
The Reports page opens.
2. Click Unvalidated Timesheets.
The page opens:
3. Use the following parameters:
• Type optional text in the Report Header field. The text will appear in the report title. • Specify the pay period range. Select the starting pay period from the From PP drop-down list
and the ending pay period from the To PP drop-down list. • Click the Include Missing check box to specify timesheets that are unvalidated and have not
yet been created (that is, timesheets that are missing). If the check box is disabled, the report will only list timesheets that have been created but not validated.
• Accept the organization.
−OR−

webTA 4.2 DOC Timekeeper User Guide 81 ©2015 Kronos Incorporated
Click the organization name link. The Organization Management page opens. Click Select on the row that identifies the organization. You return to the Report Parameters and the Organization field is populated with the name.
• Accept or clear the Include Sub Orgs check box. (It is enabled by default.) • Click the Users drop-down list to specify a user status:
• Active. Employees are still eligible to use webTA. • Inactive. Employees’ records are still in the system, but they no longer have access to
webTA. • Active & Inactive. View both active and inactive employees.
4. Click Run Report. –OR–
Click the PDF, Excel, HTML, or CSV link in the upper right corner of the page to display the report output in the specified file type. A dialog displays options to open or save the output file.
–OR–
Click the Background Execution drop-down list and select an option. A message confirms that the report has been submitted. To access the report output, click Cancel to go back to the Reports page and then click My Saved and Scheduled Reports near the bottom of the page.
–OR–
Click Schedule Report to schedule the report to run on specific days and at specific times. (This option is available if the Advanced Reporting module has been implemented.)
Saving report output to files Options are available for saving reports in the following file types:
• Excel
• HTML
• CSV
An example report page is shown below. The output options are in the upper right corner.
To save a report in a PDF, Excel, HTML or CSV file, take these steps:
1. Run the report.
The report output appears.

webTA 4.2 DOC Timekeeper User Guide 82 ©2015 Kronos Incorporated
2. Click the PDF, Excel, HTML or CSV link in the upper right corner of the Report page.
A dialog opens with options to view or save the output file.
3. Select an option.
–OR–
Click Cancel to dismiss the action.
About the Background Execution option You may also run and save reports using the Background Execution option. Use this option if you want to be able to continue working in webTA without waiting for the report to finish. The Background Execution drop-down list is shown below.
The Background Execution drop-down list includes the following options:
• Excel
• HTML
• CSV
• Emailed PDF
• Emailed Excel
• Emailed HTML
• Emailed CSV
The e-mail option sends the report to the e-mail address in your Employee Profile. Monitor the status of reports executed in the background on the My Saved and Scheduled Reports page.
About My Saved and Scheduled Reports The My Saved and Scheduled Reports page shows a list of reports generated using the Background Execution. Use the My Saved and Scheduled Reports page to view reports in PDF, Excel, HTML or CSV file format, view the status of a report that has been submitted, download reports, delete reports, e-mail a report to yourself, or rerun reports.
The My Saved and Scheduled Reports page is shown below.

webTA 4.2 DOC Timekeeper User Guide 83 ©2015 Kronos Incorporated
My Saved and Scheduled Reports page contents Click the Status drop-down list and then click Search to see reports in one of the following statuses:
• All. See all reports in any status. • Pending. The report has been scheduled to run but has not been picked up by the report
creation job yet. • Queued. The report has been picked up by the report creation job. • Generating. The report is now being run by the report creation job. • Complete. The report has been successfully generated. • Error. The system encountered an error upon generating the report. • Invalid. When an ad hoc report structure is changed, all of the associated report schedule
instances are marked invalid. You must create a new report schedule.
The following columns appear on the My Saved and Scheduled Reports table:
• Name. The name of the report • Report Name. The name of the report. • Submitted. The date and time that the report was submitted for execution. • Completed. The date and time that the report finished. • Next Scheduled Date. The date and time the report is next scheduled to run. (This option is only
available with Advanced Reporting.) • Format. The type of report output file. Options include: PDF, Excel, HTML, or CSV. • Status. The current status of the report. • Pages. The number of pages in the output. • Size (Bytes). The size of the output file. • Message. System messages produced when the report was generated. • Download. Download the report file to a local computer. • Rerun. Run the report again.
Downloading reports To download a report from the My Saved and Scheduled Reports table, take these steps:
1. Click My Saved and Scheduled Reports from the Reports section on the main menu.
The My Saved and Scheduled Reports page opens.
2. Click Download on the row that identifies the report.
The File Download dialog opens.

webTA 4.2 DOC Timekeeper User Guide 84 ©2015 Kronos Incorporated
3. Click Open to open the output file.
–OR–
Click Save to save the output file to a location on your PC.
–OR–
Click Cancel to cancel the operation.
E-mailing reports To e-mail a report to yourself from the My Saved and Scheduled Reports table, take these steps:
1. Click My Saved and Scheduled Reports from the Reports section on the main menu.
The My Saved and Scheduled Reports page opens.
2. Click the check box on the row that identifies the report and then click Email.
A confirmation message appears.
3. Click Yes to e-mail the report.
–OR–
Click No to cancel the operation.
Deleting reports To delete reports from the My Saved and Scheduled Reports table, take these steps:
1. Click My Saved and Scheduled Reports from the Reports section on the main menu.
The My Saved and Scheduled Reports page opens.
2. Click the check box on the row that identifies the report and then click Delete.
–OR–
Click the "X" on the row that identifies the report.
A confirmation message appears.
3. Click Yes to delete the report.
–OR–
Click No to cancel the operation.
Rerunning reports To rerun a report listed on the My Saved and Scheduled Reports table, take these steps:
1. Click My Saved and Scheduled Reports from the Reports section on the main menu.
The My Saved and Scheduled Reports page opens.
2. Click Rerun Now on the row that identifies the report.
A message confirms that the report has been submitted for execution.
3. Click Cancel to go back to the previous page.