Korg KRONOS, KRONOS X, and KRONOS 2 Quick Start guide E7copy

Kronos 6 Work Force
Time Keeping System
Manager Procedure Manual

Kronos Manager Procedure Manual
Table of Contents
Log In to Kronos https://kronos.rit.edu/wfc/logon ............................................................... 1 Punches Access an Employee Timecard............................................................................................... 2 Add a New Punch to Employee Timecard........................................................................... 5 Edit a Punch on an Employee Timecard .............................................................................. 7 Delete a Punch on an Employee Timecard .......................................................................... 8
Pay codes Add / Edit Paycode.................................................................................................................. 9 Deleting Paycodes.................................................................................................................. 11
Schedules Set up an Employee Schedule .............................................................................................. 12 Delete Pattern from Schedule............................................................................................... 15
Group Edits Add New Punches ................................................................................................................. 17 Add New Amounts ............................................................................................................... 19
Sign Off an Employee Timecard............................................................................................ 21 Quick Find.................................................................................................................................. 22 Reports Running Reports .................................................................................................................... 23 Badge Number by Name ...................................................................................................... 27
My Links ..................................................................................................................................... 28 Help ............................................................................................................................................. 29

Kronos Manager Procedure Manual
1
Log In to Kronos
Summary: Logging in is necessary to gain access to the Kronos software. Process: 1. Open Internet Explorer (Windows) or Safari (Mac). 2. Enter the URL to Kronos. 3. Enter in your Username and Password.
4. Click the “Log On” button.
Figure 1

Kronos Manager Procedure Manual
2
Access an Employee Timecard Summary:
Accessing a time card in the Kronos time tracking system is necessary for timecard sign off, viewing or editing punches, and viewing schedules.
Process: 1. Click on the “Timekeeping” tab then “Current Timecard” or “Kronos Sign‐Off
Day” from the tops tabs. 2. Check to be sure the department and the time period are as needed. (Figure 2, pg
3) 3. Select the employee(s).
a. Click “Actions” and then choose “Select All.” OR
b. Double click on an employee. OR
c. Select multiple employees by pressing control (CTRL) on the keyboard and single clicking employees. Then click the time card link in the upper left corner. (Figure 3, pg 3) OR
d. Hold a single click while highlighting multiple employees and click the time card link in the upper left corner.
4. Time Periods can be changed by selecting any of the options in the drop down menu from the top tool bar. (Figure 4, pg 4)
5. Cycle through the time cards selecting the employee name from the drop down menu or using the left and right arrow next to Name & ID. (Figure 5, pg 4)
Extra Information:
• Timecard for the current pay period is default. • Account, Accrual, Audits and Schedule can be found in the bottom windows. • Employee time cards can be accessed from any of the genies.

Kronos Manager Procedure Manual
3
Figure 2
Figure 3
These drop down menus can be used to change the department and time period.
Select the employees then press the “Timecard” link that the arrow is pointing to.

Kronos Manager Procedure Manual
4
Figure 4
Figure 5
Change the time period by selecting from the drop down menu
Change the timecards by selecting a new name or by using the arrows.

Kronos Manager Procedure Manual
5
Add a New Punch to Employee Timecard Summary:
Manually adding a new punch may be necessary. Process: 1. Select the desired employee timecard. 2. Select the cell where the punch is needed. (Figure 6, pg 6) 3. Enter in the time of the punch. (Figure 7, pg 6) 4. Verify that the time is correct. If changes are needed, repeat steps 2 and 3. 5. Click on “Save” in the menu bar above the timecard. Extra Information:
• A.M. is default. • P.M. times need to have a “p” after the time or be entered in military time. • If you don’t “Save” the timecard any changes will be lost. • Choose either option from the “Timekeeping” tab to see if any employees have missed punches.
• If an employee forgets to punch in or out, hours will not be recognized as time worked.

Kronos Manager Procedure Manual
6
Figure 6
Figure 7
The two dark squares indicate that the punches were missed and need to be entered. Single click on the cell and enter in the new time.
Enter in the new time in the desired cell. Click “Save” from the menu bar above the time cad.

Kronos Manager Procedure Manual
7
Edit a Punch on an Employee Timecard Summary: Manually editing an existing punch may be necessary. Process: 1. Select the employee time card that needs the edit. 2. Select the cell where the edit is needed. 3. Edit the punch by selecting the punch and entering in the new time. (Figure 8) 4. Verify that the time is correct. If changes are needed, repeat steps 2 and 3. 5. Click on “Save” in the menu bar above the time. Extra Information:
• A.M. is default. • P.M. times either need to have a “p” after the time or be entered in military time. • If you don’t save the time card any changes will be lost.
Figure 8
Select the punch that needs to have the edit. Key in the new time and click “Save” from the menu bar above the timecard.

Kronos Manager Procedure Manual
8
Delete a Punch on an Employee Timecard
Summary: Deleting a punch is necessary when a punch is entered in error. Process: 1. Select the desired employee time card. 2. Select the punch that needs to be deleted by clicking on it once. (Figure 8, pg 7) 3. Press the delete key on your keyboard to delete the punch.
4. To delete all punches for a specific date, click the “X” to the left of the particular date and then click “Yes” in the pop up window.
5. Verify that the delete is correct. 6. Click on “Save” in the menu bar above the time card.

Kronos Manager Procedure Manual
9
Add / Edit Pay codes Summary: Correct pay codes are essential to ensure that people are paid correctly for holiday
time off, sick days, vacation days, etc. Process: 1. Select the desired employee timecard. 2. Select the desired date and click on the “Pay Code” cell. 3. From the drop down menu, select the desired pay code. (Figure 9) 4. Select the “Amount” cell and enter in the correct amount. (Figure 10, pg 10) 5. Click on “Save” from the menu bar above the time card. 6. Verify the changes were made by looking at the pay codes (Figure 11, pg 10) Extra Information:
• A pay code can not be on the same line as a punch. Click the blue arrow next to the date for a new row.
• If vacation amount exceeds the accrual amount, Kronos will pop up a warning message. Neither Sick nor Sick Bank will allow overdraft.
Figure 9
Click on the ‘Pay code’ cell for the correct date and select the new pay code from the drop down list
Kronos Manager Procedure Manual
10
Figure 10
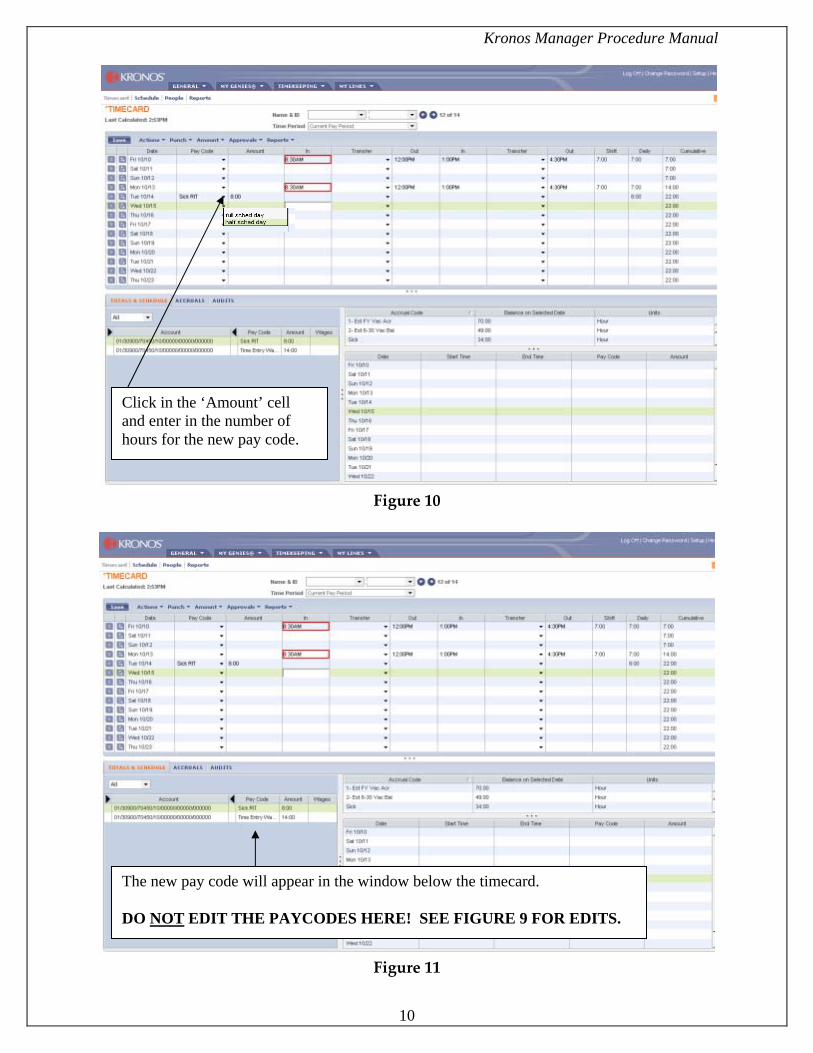
Figure 11
Click in the ‘Amount’ cell and enter in the number of hours for the new pay code.
The new pay code will appear in the window below the timecard. DO NOT EDIT THE PAYCODES HERE! SEE FIGURE 9 FOR EDITS.

Kronos Manager Procedure Manual
11
Deleting Pay codes
Summary: Deleting pay codes may be necessary for employees who no longer need certain
pay codes on their timecards. Process:
1. Select the pay code cell and click the “X” next to the date on the time card. (Figure 12)
2. Click “Yes” from the pop up window to delete contents of the entire row. 3. Click on “Save” from the menu bar.
Figure 12
The ”X” is the highlighted box to the left of the date. The pop up window confirms the deletion.

Kronos Manager Procedure Manual
12
Set up an Employee Schedule Summary: Schedules can be set up for visual representation of shifts. Process: 1. Click on “Schedule” from the top tool bar. 2. Select the employee whose schedule you want to edit. (Figure 13) 3. Single Shift: Select the person and date. Select “Shift” and “Add.” (Figure 14, pg
13) 4. Pattern: Select the person. Select “Shift” and “Add Pattern.” 5. Enter schedule times. (Figures 15A, pg 13 and 15B and 15C, pg 14) 6. The new schedule will appear in the editor. (Figure 16, pg 14) 7. Click “Save” from the menu bar. Extra Information:
• The newly created schedule will appear in the editor and on the person’s time card in the schedule section.
• Don’t forget to click “Save.”
Figure 13
Select “Schedule” from the top tool bar.

Kronos Manager Procedure Manual
13
Figure 14
For a single shift, select the person and date. Then select “Shift” and “Add.” For a pattern, select “Add Pattern.”
Figure 15A – Add Shift Fill in the start and end times. Click “OK.”

Kronos Manager Procedure Manual
14
Figure 16
The new schedule for the employee will appear on the current schedule. Don’t forget to click “Save.”
Figure 15B – Add Pattern Fill in the times for the schedule for each day. The work start date must be after the pattern start date. Be sure to select an end date or “Forever.” Click “OK.”
Figure 15C – Insert Pattern To select standard shift patterns, select “Insert Pattern.” Click “OK.” The Pattern Editor will automatically populate the time card.

Kronos Manager Procedure Manual
15
Delete Pattern from Schedule Summary: Deleting patterns are necessary when a schedule changes. Process: 1. Select the employee(s). 2. Click “Shift” from the menu bar and “Delete Pattern” from the drop down menu.
(Figure 17) 3. Select the pattern to delete from the Editor window. 4. Click “Delete.” 5. Click on “OK.” (Figure 18, pg 16) 6. The pattern is taken off of the schedule. (Figure 19, pg 16) Extra Information:
• Steps 4 and 5 are pointed out in figure 18.
Figure 17

Kronos Manager Procedure Manual
16
Figure 18
Figure 19
Click both “Delete” and “OK.”
Kronos Manager Procedure Manual
17
Add New Punches to a Group Summary: Adding new amounts may be necessary in such cases when the system is down
and times are recorded by paper. Process: 1. Select one of the options from either the “My Genies” or “Timekeeping” tabs. 2. Highlight employees that need the same punch. 3. Select “Punch” from the time card menu bar and click “Add Punch.” (Figure 20,
pg 18) 4. Enter in the date and time in the pop up window. (Figure 21, pg 18) Leave the
“Override” and “Cancel Deduction” fields empty. 5. Click “OK.”

Kronos Manager Procedure Manual
18
Figure 20
Figure 21
Click “Punch” from the drop down menu and select “Add Punch.”
Select the date and enter in the time of the new punch. Click “OK.” The punch will be added to everyone’s timecard that was selected.

Kronos Manager Procedure Manual
19
Add New Amounts to Group Summary: Add the same amount to a group of people instead of individually. Process: 1. Select one of the options from either the “My Genies” or “Timekeeping” tabs. 2. Highlight employees that need the same amount added to their timecard. 3. Select “Amount” from the time card menu bar and click “Add.” (Figure 22, pg
20) 4. Enter in the new pay code, amount, and effective date. (Figure 23, pg 20) 5. Click “OK.”

Kronos Manager Procedure Manual
20
Figure 22
Figure 23
Highlight the employees to add the new amount, click “Amount” from the time card menu bar and then “Add” from the drop down menu.
Enter in the new Pay Code, Amount, and Effective Date. Click “OK.”

Kronos Manager Procedure Manual
21
Sign Off an Employee Timecard Summary: Employee timecards must be signed off by their supervisor. Doing so
acknowledges that the hours should be paid. Process: 1. Click on the “Timekeeping” tab from the top tool bar. 2. Click on “Kronos Sign‐Off Day.” 3. Right click on the employee(s) and select “Sign Off.” (Figure 24)
OR 4. Select employees to be signed off, click “Approvals” from the time card tool bar,
and select “Sign Off.” (Figure 24) 5. Click “Refresh” next to the Time Period. (Figure 24) Extra Information:
• Selecting multiple employees for sign off can be done by pressing control (Ctrl) on the keyboard and single clicking on the employees.
• Only previous pay periods can be signed off, not current pay periods. • Sign off must be done the day after the pay period ends.
Figure 24
From “Kronos Sign – Off Day” select the employees that need to be signed off, right click, then select “Sign Off.”
Click ‘Refresh’ once the card has been signed off.
Or select “Approvals” and then “Sign Off.”

Kronos Manager Procedure Manual
22
Quick Find Summary: This is an easy way to quickly find a single employee by name or by ID. Process: 2. Select “QuickFind” under the “My Genies” tab. 3. Type in the name or ID of the employee and press enter. Extra Information:
• All results within your department will be returned.
Figure 25
Results will be returned in tabular form.
Kronos Manager Procedure Manual
23
Running Reports Summary: Necessary reports that need to be run to fulfill supervisor responsibilities. Process: 1. Select one or more employees. 2. Single click on “Reports” from the top tool bar. (Figure 26, pg 24) 3. Under Categories, single click on the + next to the type of report. 4. Select a report to run. (Figure 27, pg 24) 5. Single click on “Set Options” tab above the menu bar to change the format the
report is being written to. (Figure 28, pg 25) 6. Use the options to set up the report as you need. 7. Click on “Run Report” on the menu bar above the list of reports. (Figure 29, pg 25) 8. The view will change to the “Check Run Status” tab. Click on “Refresh” button in
the menu bar. 9. When the status cell shows “Complete,” click on “View Report” in the menu bar or
double click the name to view the report. (Figure 30, pg 26) 10. When the report is no longer needed, select the report and select “Delete” from the
menu bar. Extra Information:
• Make sure the pop‐up blocker allows https://kronos.rit.edu or allows all pop‐ups from that site.
• Most screens in Kronos can be printed by selecting the “Actions” menu and then selecting “Print.”
• Reports will be in .pdf format. • The following screen shots are numbered in order of the process number.

Kronos Manager Procedure Manual
24
Figure 26
Figure 27
Click on the type of report (3), then the actual report (4).
Click on the employee(s) (1) and then on “Reports” (2).

Kronos Manager Procedure Manual
25
Figure 28
Figure 29
“Set Options” tab (5) will allow multiple options within the report (6).
Click “Run Report” from the menu bar (7).

Kronos Manager Procedure Manual
26
Figure 30
Click “Refresh Status” (8) to update the status. When complete, click “View Report” (9) for the report to pop up. Note: pop-ups must be allowed from this site.

Kronos Manager Procedure Manual
27
Badge Number by Name
Summary: This genie allows for quick access to Badge # and other assorted information. Process: 1. Click on the “My Genies” tab and then “Badge Number by Emp Name.” (Figure
31) 2. The genie will appear in the center frame.
Figure 31
If you wish to print the report, use the browser print function.

Kronos Manager Procedure Manual
28
My Links
Summary: Important RIT links are provided for your convenience. Process: 1. Click on the “My Links” tab at the top of the page. (Figure 32) 2. Click on the link that you need from the list. Extra Information: • The link will appear in a new browser window.
Figure 32
Kronos Manager Procedure Manual
29
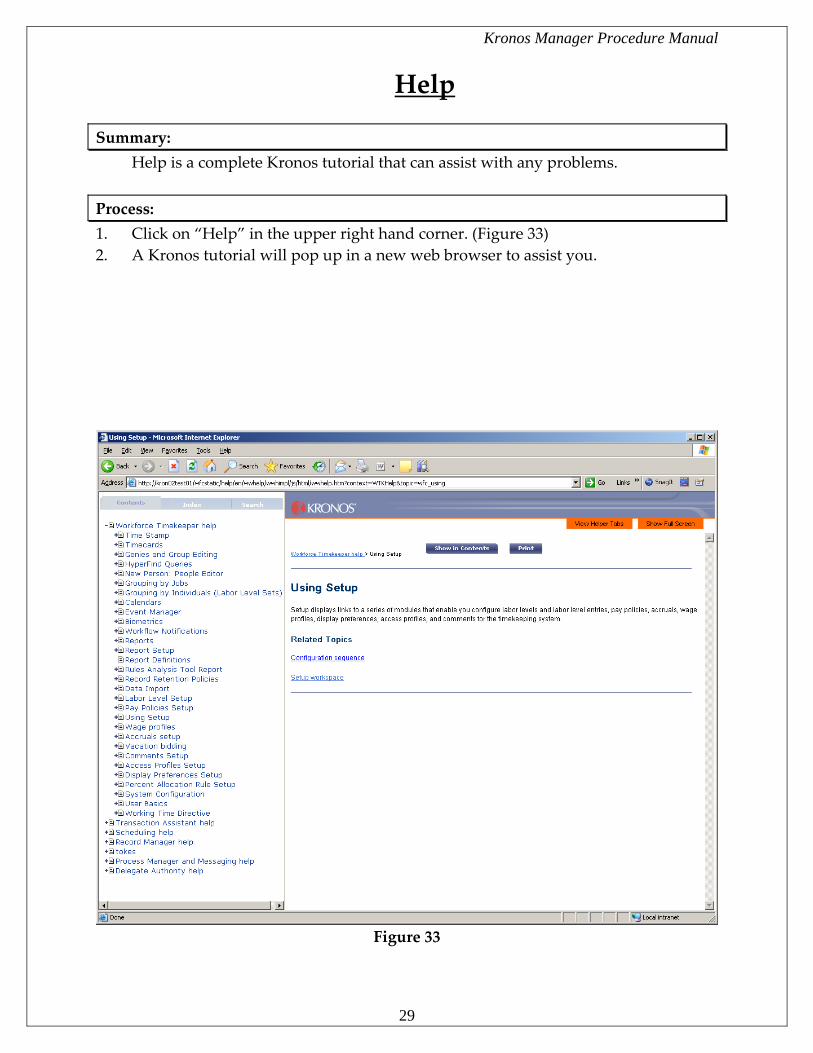
Help Summary: Help is a complete Kronos tutorial that can assist with any problems. Process: 1. Click on “Help” in the upper right hand corner. (Figure 33) 2. A Kronos tutorial will pop up in a new web browser to assist you.
Figure 33