Goto Main menu of HOI’s login, Click TEACHER ... FOR VIEWING EMPLOYEE DETAILS AND ADDING NEW...
15
GUIDELINE FOR VIEWING EMPLOYEE DETAILS AND ADDING NEW EMPLOYEE DETAILS Goto Main menu of HOI’s login, Click TEACHER INFORMATION Menu to expand, Click Teacher Details sub-menu The next screen will appear as below To enter a new staff details click on ADD NEW STAFF. Click here to open the following Teacher entry form.
Transcript of Goto Main menu of HOI’s login, Click TEACHER ... FOR VIEWING EMPLOYEE DETAILS AND ADDING NEW...

GUIDELINE FOR VIEWING EMPLOYEE DETAILS AND ADDING NEW EMPLOYEE DETAILS
Goto Main menu of HOI’s login, Click TEACHER INFORMATION Menu to expand, Click
Teacher Details sub-menu
The next screen will appear as below
To enter a new staff details click on ADD NEW STAFF.
Click here to open the following
Teacher entry form.

The next screen will appear as below
Fill up the Primary Details, Personal Details, Contact Details and Professional Details as below.
All the data given below is only to show an example. All the * marked fields are mandatory
fields. At first fill and submit the Primary Details, otherwise you cannot fill the personal, contact
and professional details.
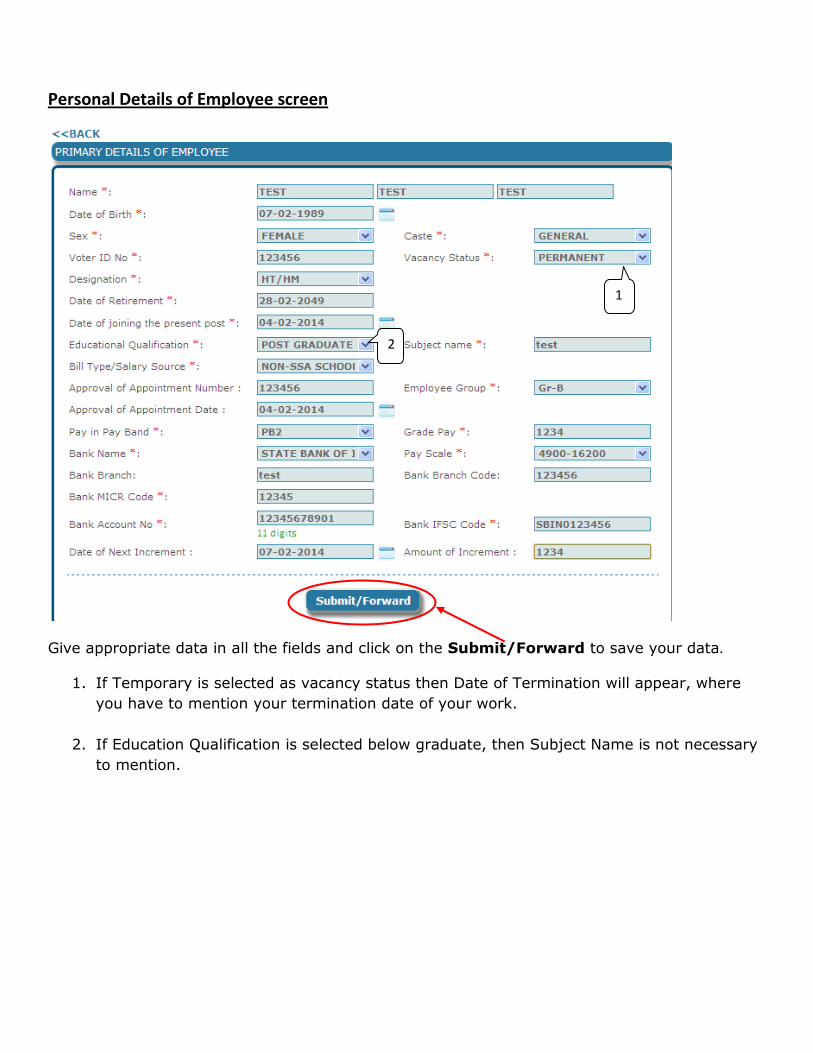
Personal Details of Employee screen
Give appropriate data in all the fields and click on the Submit/Forward to save your data.
1. If Temporary is selected as vacancy status then Date of Termination will appear, where
you have to mention your termination date of your work.
2. If Education Qualification is selected below graduate, then Subject Name is not necessary
to mention.
2
1

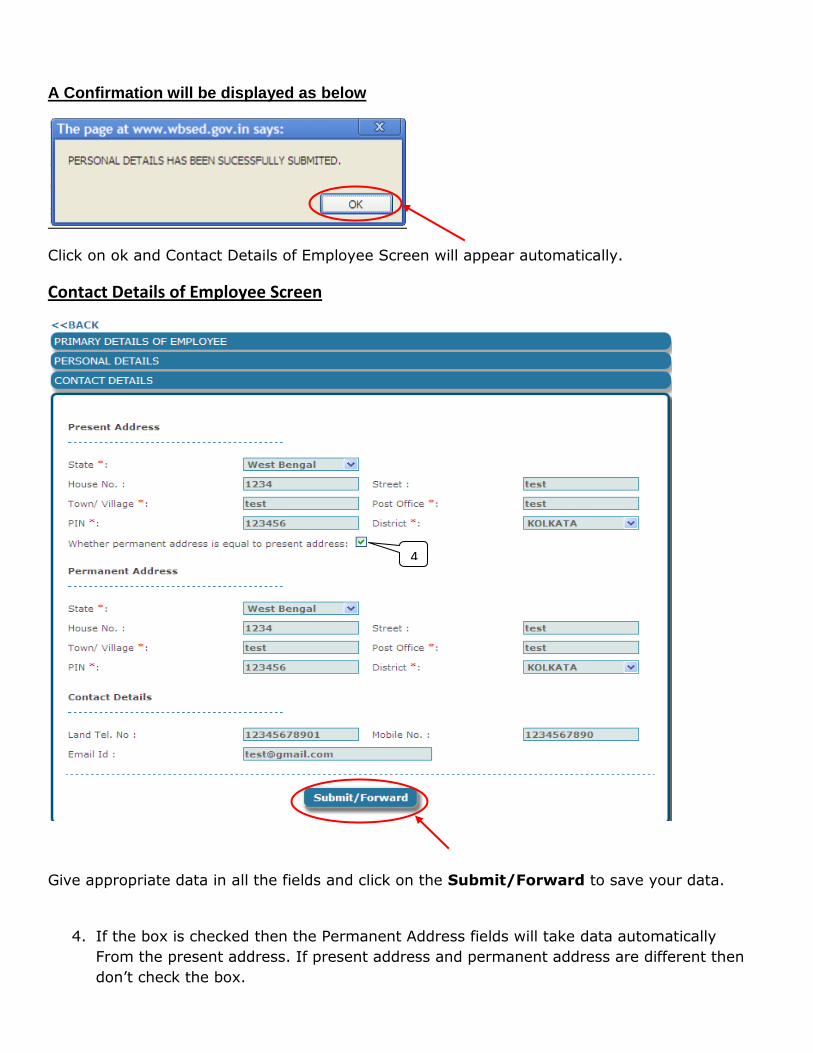
A Confirmation will be displayed as below
Click on ok and Personal Details of Employee Screen will appear automatically.
Personal Details of Employee Screen
Give appropriate data in all the fields and click on the Submit/Forward to save your data.
3. If you are un- married then the spouse details field will not appear.
3
A Confirmation will be displayed as below
Click on ok and Contact Details of Employee Screen will appear automatically.
Contact Details of Employee Screen
Give appropriate data in all the fields and click on the Submit/Forward to save your data.
4. If the box is checked then the Permanent Address fields will take data automatically
From the present address. If present address and permanent address are different then
don’t check the box.
4

A Confirmation will be displayed as below
Click on ok and Professional Details of Employee Screen will appear automatically.

Professional Details of Employee Screen
Give appropriate data in all the fields and click on the Submit/Forward to save your data.
5. To add previous employment in school click on the ‘+’ sign.
6. To delete data of previous employment in school click on the ‘-‘sign.
5
6

A Confirmation will be displayed as below
Click on ok. All the data have been saved successfully and sent for approval of Head of the
Institution.
To view the details of employee
Click on Teacher’s Details sub menu.
The screen will appear as below
Click on the employee you have created and the Primary Details of the Employee will be
shown as below.

Primary Details
Click on Personal Details to view.
Personal Details
Click on Contact Details to view.
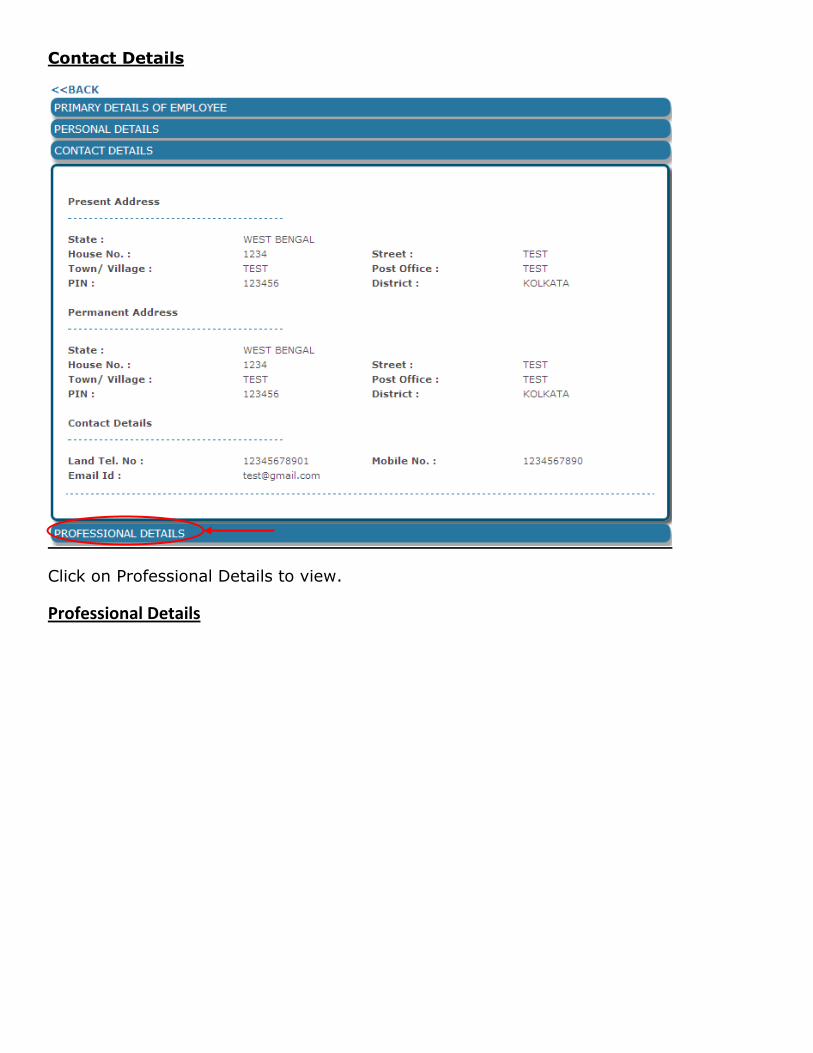
Contact Details
Click on Professional Details to view.
Professional Details

Edit and Update the Employee Details
Click on Teacher’s Details sub menu.
The screen will appear as below

Click on the edit button shown in the screen above and the edit screen of employee details will
appear.
Edit Primary Details of Employee
Click on the update to save the changed data.
Click on the Personal Details to change the data.

Edit Personal Details of Employee
Click on the update to save the changed data.
Click on the Contact Details to change the data.

Edit Contact Details of Employee
Click on the update to save the changed data.
Click on the Professional Details to change the data.

Edit Professional Details of Employee
Click on the update to save the changed data
For any further information you can mail us at [email protected]