First Steps - Working with forms
16
First Steps Working with Forms
Transcript of First Steps - Working with forms

First Steps Working with Forms


Intake Forms is used to enter data for cases, linked names, events, and notes using a single window. Accessed by clicking the Icon.
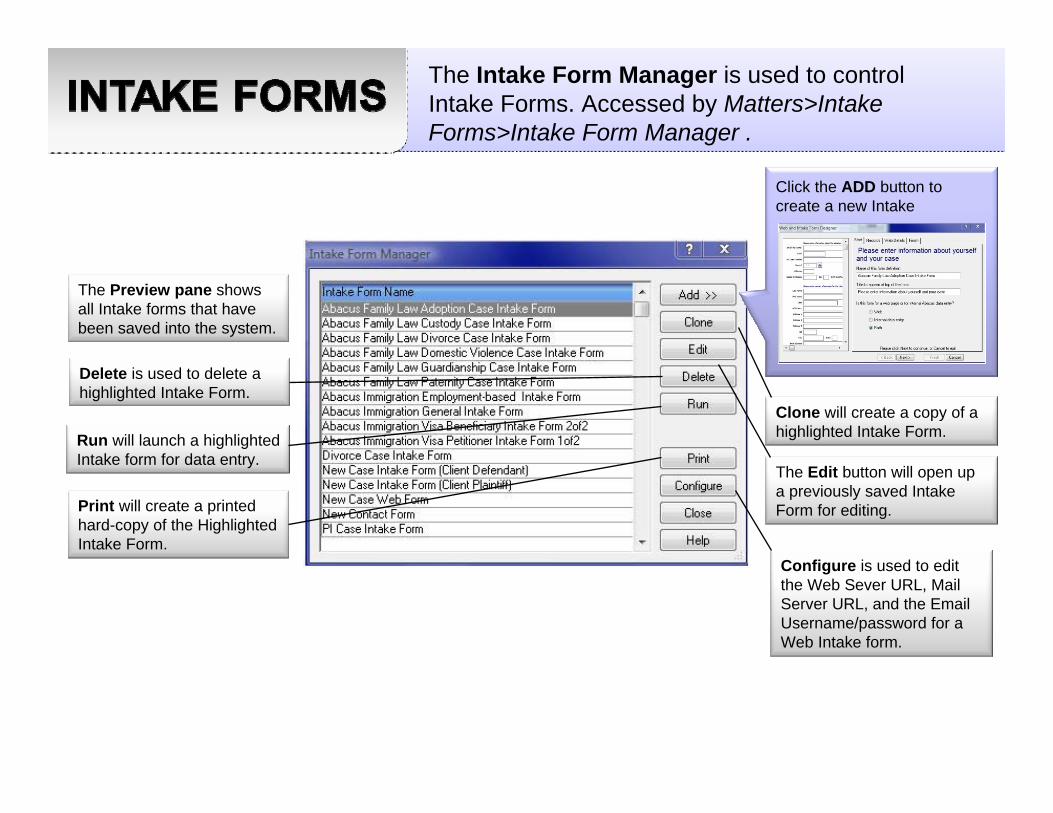
Clone will create a copy of a highlighted Intake Form.
The Edit button will open up a previously saved Intake Form for editing.
Delete is used to delete a highlighted Intake Form.
Run will launch a highlighted Intake form for data entry.
The Preview pane shows all Intake forms that have been saved into the system.
Print will create a printed hard-copy of the Highlighted Intake Form.
Configure is used to edit the Web Sever URL, Mail Server URL, and the Email Username/password for a Web Intake form.
The Intake Form Manager is used to control Intake Forms. Accessed by Matters>Intake Forms>Intake Form Manager .
Click the ADD button to create a new Intake

This is the preview of how the intake form will appear.
Use Records to add, delete, modify fields as well as matter, names, and events records to the intake form.
Name of this form definition, is used to give the form a name, as well as, Title to appear at top of the form is used to give the form a heading.
Web Details is used to use the intake form as a web form.
Use Finish to complete the Intake/Web form.
Pre-select if this will be a Web-Form, Intake Form, or both using these check mark boxes.
The Web and Intake Form Designer is used to create/modify Intake Forms. Click add to access the Web and Intake Form Designer.

Add a Record to Add a Matters, Names or Event to the Intake Form.
Clone a Record will copy the highlighted record.
Edit Properties opens up the highlighted record for editing.
Delete will erase the added Record.
Move Up and Move Down, will change the position of the highlighted record.
This is the Preview window that displays what records will be shown on the intake form.
Save button will save the changes that are made.
The Records tab selects records and fields wanted on the form. These records determine the type of data that is collected.
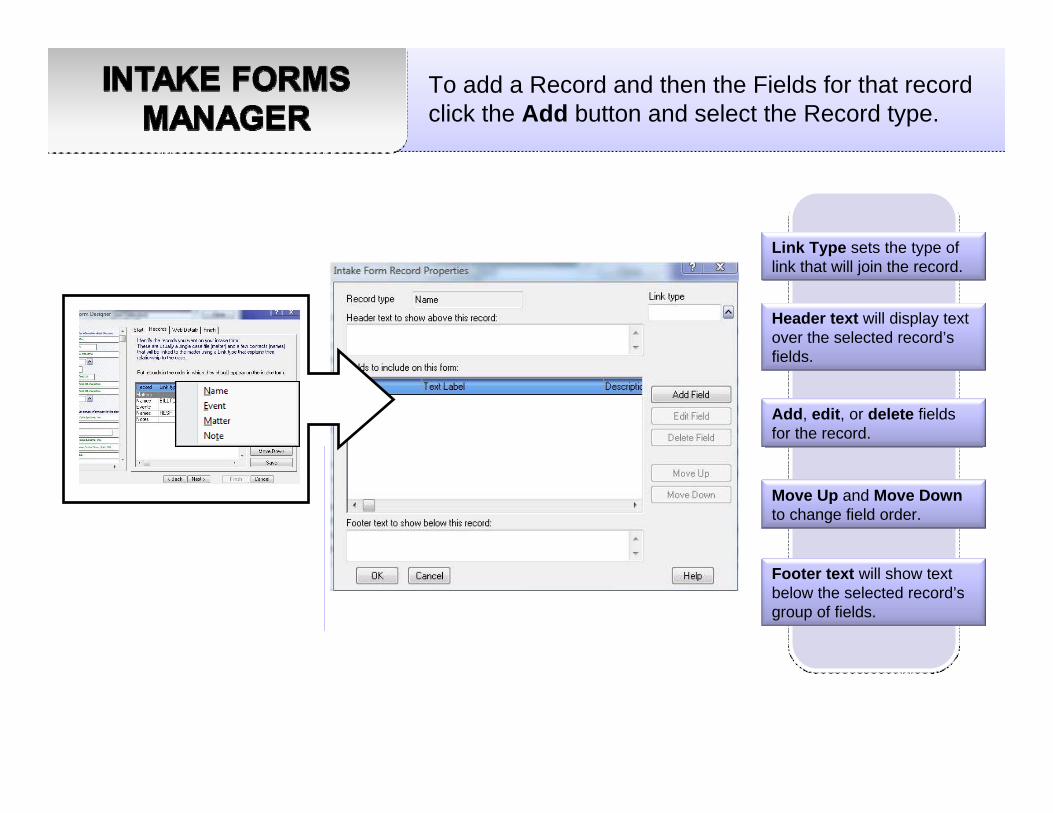
Link Type sets the type of link that will join the record.
Header text will display text over the selected record’s fields.
Add, edit, or delete fields for the record.
Move Up and Move Down to change field order.
Footer text will show text below the selected record’s group of fields.
To add a Record and then the Fields for that record click the Add button and select the Record type.

In the Web and Intake Form Designer window select Web Details, and enter in the email to where the form data will be sent to.
Send an email to this address each time a form is submitted
Optional URL to redirect to after a form is submitted is used to display a webpage after the form has been submitted, so the user receives a confirmation screen detailing that their form has been submitted.
Web Forms are Intake Forms and are created from the Intake Form Manager.
When the web form is all completed, click the finish tab, to preview the form and select Finish.

Once the Intake Form has been saved go back to the Intake Form Manager Browse window and right click on the form to select create web page.
To receive and import into Abacus, set up a email account in Configure the Web Server.
Use Local Server to create the Web Page using the Local Server settings.

III. Web Forms
Follow these steps to use Web Intake forms and upload it to your web server.
1. Open up the intake Form Manager Window2. Right-Click on Desired form and select create Web Page3. Select the HTML Template to create a webpage and select
open.4. Click Open, and save your new webpage.5. Use your FTP program to Upload the .htm file and the .Itk
file.6. To run the web form create a link to the .htm file
Use this example html to create the form in a pop-up window<script type="text/javascript" language="javascript" src="/abacus_scripts.js"></script>Here is an example of the link using javascript:<a href="javascript:void(0)"onClick="MM_openBrWindow(‘http://wf.abacuslaw.com/cgi-bin/abacus.exe?itkurl=New Case Web Form.itk','','scrollbars=yes,resizable=yes,width=770,height=525')" class="style4">Client Intake Form </a>

To access Quick Forms, open up a Matter or Name record and click the Print Icon from the tool-bar. Then select Quick Forms.
Press Insert Field Button to insert additional field.
Press the Run button to see an onscreen sample.
Lines that begin with ‘//’ will not print..
Value for these fields will display wherever the field is added.
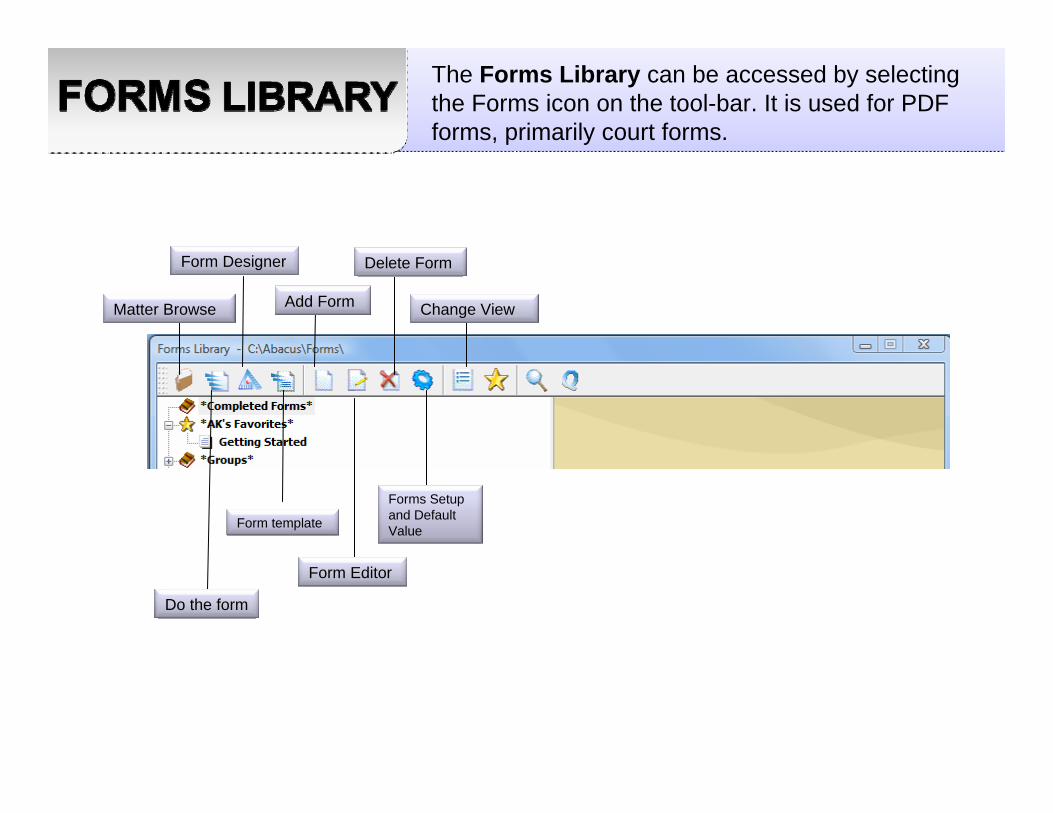
Add FormMatter Browse
Forms Setup and Default Value
Do the form
Form template
Form Designer Delete Form
Change View
Form Editor
The Forms Library can be accessed by selecting the Forms icon on the tool-bar. It is used for PDF forms, primarily court forms.

To create a form first make sure the original form is downloaded and saved in /forms/library/source. Then click Add Form.

To add a field first click the Field button, and draw a box on the form.. Right-click in the
drawn box to select a field to add.
To add form fields to the PDF use the Form Designer First highlight a Form and select Design.
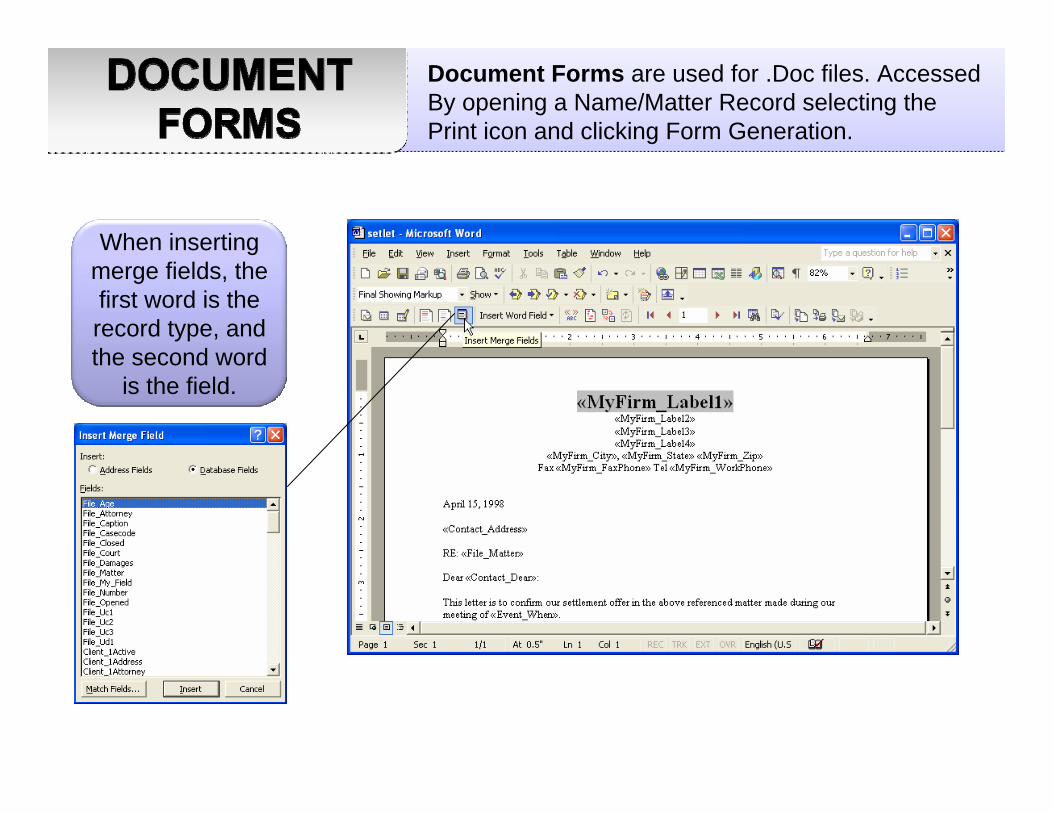
Document Forms are used for .Doc files. Accessed By opening a Name/Matter Record selecting the Print icon and clicking Form Generation.
When inserting merge fields, the first word is the record type, and the second word
is the field.

Alf Files determine what fields can be used in a form. Accessed by selecting Documents>Setup Alf Files.