
Cardboard VR Projects for Android - Sample Chapter
57
C o m m u n i t y E x p e r i e n c e D i s t i l l e d Develop mobile virtual reality apps using the native Google Cardboard SDK for Android Cardboard VR Projects for Android Jonathan Linowes Matt Schoen Free Sample
-
Upload
packt-publishing -
Category
Technology
-
view
565 -
download
2
Transcript of Cardboard VR Projects for Android - Sample Chapter

C o m m u n i t y E x p e r i e n c e D i s t i l l e d
Develop mobile virtual reality apps using the native Google Cardboard SDK for Android
Cardboard VR Projects for AndroidJonathan Linow
esM
att Schoen
Cardboard VR Projects for Android
Google Cardboard is a low-cost, entry-level media platform through which you can experience virtual reality and virtual 3D environments. Its applications are as broad and varied as mobile smartphone applications themselves. This book will educate you on the best practices and methodology needed to build effective, stable, and performant mobile VR applications.
In this book, we begin by defi ning virtual reality (VR) and how Google Cardboard fi ts into the larger VR and Android ecosystem. We introduce the underlying scientifi c and technical principles behind VR, including geometry, optics, rendering, and mobile software architecture. We start with a simple example app that ensures your environment is properly set up to write, build, and run the app. Then we develop a reusable VR graphics engine that you can build upon. And from then on, each chapter is a self-contained project where you will build an example from a different genre of application, including a 360 degree photo viewer, an educational simulation of our solar system, a 3D model viewer, and a music visualizer.
Who this book is written forThe book is for established Android developers with a good knowledge of Java. No prior OpenGL or graphics knowledge is required. No prior experience with Google Cardboard is expected, but those who are familiar with Cardboard and are looking for projects to expand their knowledge can also benefi t from this book.
$ 44.99 US£ 28.99 UK
Prices do not include local sales tax or VAT where applicable
Jonathan LinowesMatt Schoen
What you will learn from this book
Build Google Cardboard VR applications
Explore the ins and outs of the Cardboard SDK Java classes and interfaces, and apply them to practical VR projects
Employ Android Studio, Android SDK, and the Java language in a straightforward manner
Discover and use software development and Android best practices for mobile and Cardboard applications, including considerations for memory management and battery life
Implement user interface techniques for menus and gaze-based selection within VR
Utilize the science, psychology, mathematics, and technology behind virtual reality, especially those pertinent to mobile Cardboard VR experiences
Understand Cardboard VR best practices including those promoted by Google Design Lab
Cardboard VR
Projects for Android
P U B L I S H I N GP U B L I S H I N G
community experience dist i l led
Visit www.PacktPub.com for books, eBooks, code, downloads, and PacktLib.
Free Sample

In this package, you will find: • The authors biography • A preview chapter from the book, Chapter 6 'Solar System' • A synopsis of the book’s content • More information on Cardboard VR Projects for Android
About the Authors
Jonathan Linowes is the owner of Parkerhill Reality Labs, a start-up VR/AR consultancy fi rm. He is a VR and 3D graphics enthusiast, full-stack web developer, software engineer, successful entrepreneur, and teacher. He has a fi ne arts degree from Syracuse University and a master's degree from the MIT Media Lab. He has founded several successful start-ups and held technical leadership positions at major corporations, including Autodesk Inc. He is also the author of the Unity Virtual Reality Projects book by Packt Publishing.
Matt Schoen is the cofounder of Defective Studios and has been making VR apps since the early DK1 days. Still in the early stages of his career, he spent most of his time working on Unity apps and games, some for hire and some of his own design. He studied computer engineering at Boston University and graduated with a BS in 2010, at which point he founded Defective with Jono Forbes, a high-school friend. He has been making games and apps ever since. Matt was the technical lead on Defective's debut game, CosmoKnots, and remains involved in Jono's pet project, Archean. This is his fi rst foray into authorship, but he brings with him his experience as an instructor and curriculum designer for Digital Media Academy. Jono and Matt have recently joined Unity's VR Labs division, where they will be helping to create experimental new features which will shape the VR landscape for years to come.
Preface
PrefaceGoogle Cardboard is a low-cost, entry-level medium used for experiencing virtual 3D environments. Its applications are as broad and varied as mobile smartphone applications themselves. This book gives you the opportunity to implement a variety of interesting projects for Google Cardboard using the native Java SDK. The idea is to educate you with best practices and methodologies to make Cardboard-compatible mobile VR apps and guide you through making quality content appropriate for the device and its intended us ers.
What this book coversChapter 1, Virtual Reality for Everyone, defi nes Google Cardboard, explores it, and discusses how it's used and how it fi ts in the spectrum of VR devices.
Chapter 2, The Skeleton Cardboard Project, examines the structure of a Cardboard app for Android, takes a tour of Android Studio, and helps you build a starter Cardboard project by introducing the Cardboard Java SDK.
Chapter 3, Cardboard Box, discusses how to build a Cardboard Android app from scratch (based on Google's Treasure Hunt sample) with a 3D cube model, transformations, stereoscopic camera views, and head rotations. This chapter also includes discussions of 3D geometry, Open GL ES, shaders, matrix math, and the rendering pipeline.
Chapter 4, Launcher Lobby, helps you build an app to launch other Cardboard apps on your phone. Rather than using 3D graphics, this project simulates stereoscopic views in screen space and implements gaze-based selections.
Chapter 5, RenderBox Engine, shows you how to create a small graphics engine used to build new Cardboard VR apps by abstracting the low-level OpenGL ES API calls into a suite of the Material, RenderObject, Component, and Transform classes. The library will be used and further developed in subsequent projects.

Preface
Chapter 6, Solar System, builds a Solar System simulation science project by adding a sunlight source, spherical planets with texture mapped materials and shaders, animating in their solar orbits, and a Milky Way star fi eld.
Chapter 7, 360-Degree Gallery, helps you build a media viewer for regular and 360-degree photos, and helps you load the phone's camera folder pictures into a grid of thumbnail images and use gaze-based selections to choose the ones to view. It also discusses how to add process threading for improved user experience and support Android intents to view images from other apps.
Chapter 8, 3D Model Viewer, helps you build a viewer for 3D models in the OBJ fi le format, rendered using our RenderBox library. It also shows you how to interactively control the view of the model as you move your head.
Chapter 9, Music Visualizer, builds a VR music visualizer that animates based on waveform and FFT data from the phone's current audio player. We implement a general architecture used to add new visualizations, including geometric animations and dynamic texture shaders. Then, we add a trippy trails mode and multiple concurrent visualizations that transition in and out randomly.
[ 187 ]
Solar SystemWhen I was 8 years old, for a science project at school, I made a Solar System from wires, styrofoam balls, and paint. Today, 8-year olds all around the world will be able to make virtual Solar Systems in VR, especially if they read this chapter! This project creates a Cardboard VR app that simulates our Solar System. Well, maybe not with total scientifi c accuracy, but good enough for a kid's project and better than styrofoam balls.
In this chapter, you will create a new Solar System project with the RenderBox library by performing the following steps:
• Setting up the new project• Creating a Sphere component and a solid color material• Adding an Earth texture material with lighting• Arranging the Solar System geometry• Animating the heavenly bodies• Interactively changing camera locations• Updating the RenderBox library with our new code
As we put these together, we will create planets and moons from a sphere. Much of the code, however, will be in the various materials and shaders for rendering these bodies.
The source code for this project can be found on the Packt Publishing website, and on GitHub at https://github.com/cardbookvr/solarsystem (with each topic as a separate commit).
Solar System
[ 188 ]
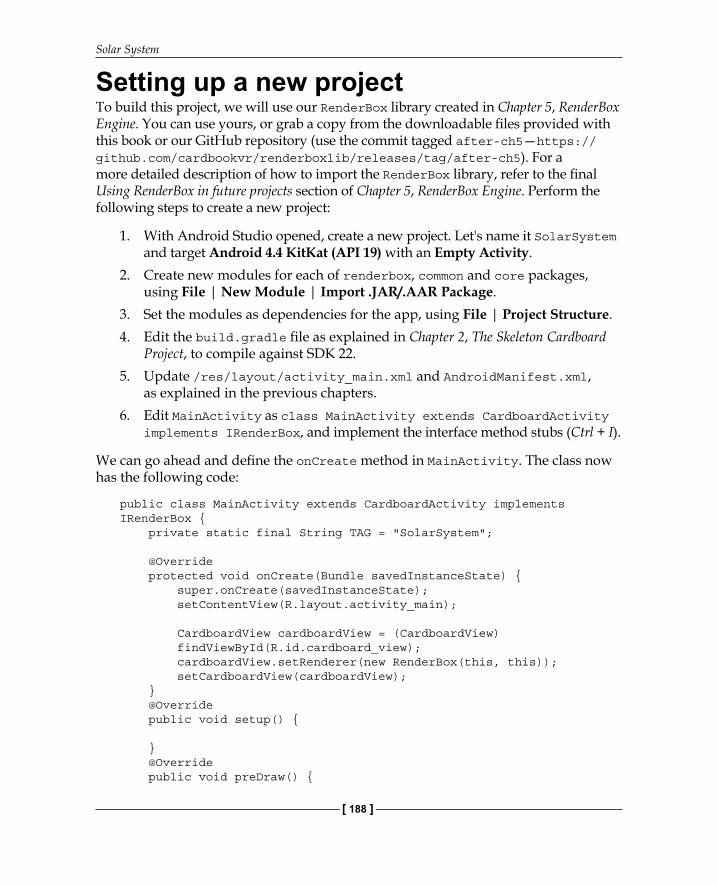
Setting up a new projectTo build this project, we will use our RenderBox library created in Chapter 5, RenderBox Engine. You can use yours, or grab a copy from the downloadable fi les provided with this book or our GitHub repository (use the commit tagged after-ch5—https://github.com/cardbookvr/renderboxlib/releases/tag/after-ch5). For a more detailed description of how to import the RenderBox library, refer to the fi nal Using RenderBox in future projects section of Chapter 5, RenderBox Engine. Perform the following steps to create a new project:
1. With Android Studio opened, create a new project. Let's name it SolarSystem and target Android 4.4 KitKat (API 19) with an Empty Activity.
2. Create new modules for each of renderbox, common and core packages, using File | New Module | Import .JAR/.AAR Package.
3. Set the modules as dependencies for the app, using File | Project Structure.4. Edit the build.gradle fi le as explained in Chapter 2, The Skeleton Cardboard
Project, to compile against SDK 22.5. Update /res/layout/activity_main.xml and AndroidManifest.xml,
as explained in the previous chapters.6. Edit MainActivity as class MainActivity extends CardboardActivity
implements IRenderBox, and implement the interface method stubs (Ctrl + I).
We can go ahead and defi ne the onCreate method in MainActivity. The class now has the following code:
public class MainActivity extends CardboardActivity implements IRenderBox { private static final String TAG = "SolarSystem";
@Override protected void onCreate(Bundle savedInstanceState) { super.onCreate(savedInstanceState); setContentView(R.layout.activity_main);
CardboardView cardboardView = (CardboardView) findViewById(R.id.cardboard_view); cardboardView.setRenderer(new RenderBox(this, this)); setCardboardView(cardboardView); } @Override public void setup() {
} @Override public void preDraw() {
Chapter 6
[ 189 ]
} @Override public void postDraw() { }}
While we build this project, we will be creating new classes that could be good extensions to RenderBox lib. We'll make them regular classes in this project at fi rst. Then, at the end of the chapter, we'll help you move them into the RenderBox lib project and rebuild the library:
1. Right-click on the solarsystem folder (com.cardbookvr.solarsystem), select New | Package, and name it RenderBoxExt.
2. Within RenderBoxExt, create package subfolders named components and materials.
There's no real technical need to make it a separate package, but this helps organize our fi les, as the ones in RenderBoxExt will be moved into our reusable library at the end of this chapter.
You can add a cube to the scene, temporarily, to help ensure that everything is set up properly. Add it to the setup method as follows:
public void setup() { new Transform() .setLocalPosition(0,0,-7) .setLocalRotation(45,60,0) .addComponent(new Cube(true)); }
If you remember, a cube is a component that's added to a transform. The cube defi nes its geometry (for example, vertices). The transform defi nes its position, rotation, and scale in 3D space.
You should be able to click on Run 'app' with no compile errors, and see the cube and Cardboard split screen view on your Android device.
Creating a Sphere componentOur Solar System will be constructed from spheres, representing planets, moons, and the Sun. Let's fi rst create a Sphere component. We are going to defi ne a sphere as a triangle mesh of vertices that form the surface of the sphere (For more information on a triangle mesh, refer to https://en.wikipedia.org/wiki/Triangle_mesh).
Solar System
[ 190 ]
Right-click on the RenderBoxExt/components folder, select New | Java Class, and name it Sphere. Defi ne it as public class Sphere extends RenderObject:
public class Sphere extends RenderObject{ private static final String TAG = "RenderBox.Sphere"; public Sphere() { super(); allocateBuffers(); }}
The constructor calls a helper method, allocateBuffers, which allocates buffers for vertices, normals, textures, and indexes. Let's declare variables for these at the top of the class:
public static FloatBuffer vertexBuffer; public static FloatBuffer normalBuffer; public static FloatBuffer texCoordBuffer; public static ShortBuffer indexBuffer; public static int numIndices;
Note that we've decided to declare the buffers public to afford future fl exibility in creating arbitrary texture materials for objects.
We'll defi ne a sphere with a radius of 1. Its vertices are arranged by 24 longitude sections (as hours of the day) and 16 latitude sections, providing suffi cient resolution for our purposes. The top and bottom caps are handled separately. This is a long method, so we'll break it down for you. Here's the fi rst part of the code where we declare and initialize variables, including the vertices array. Similar to our Material setup methods, we only need to allocate the Sphere buffers once, and in this case, we use the vertex buffer variable to keep track of this state. If it is not null, the buffers have already been allocated. Otherwise, we should continue with the function, which will set this value:
public static void allocateBuffers(){ //Already allocated? if (vertexBuffer != null) return; //Generate a sphere model float radius = 1f; // Longitude ||| int nbLong = 24; // Latitude --- int nbLat = 16;
Vector3[] vertices = new Vector3[(nbLong+1) * nbLat + nbLong * 2]; float _pi = MathUtils.PI; float _2pi = MathUtils.PI2;
Chapter 6
[ 191 ]
Calculate the vertex positions; fi rst, the top and bottom ones and then along the latitude/longitude spherical grid:
//Top and bottom vertices are duplicated for(int i = 0; i < nbLong; i++){ vertices[i] = new Vector3(Vector3.up). multiply(radius); vertices[vertices.length - i - 1] = new Vector3(Vector3.up).multiply(-radius); } for( int lat = 0; lat < nbLat; lat++ ) { float a1 = _pi * (float)(lat+1) / (nbLat+1); float sin1 = (float)Math.sin(a1); float cos1 = (float)Math.cos(a1);
for( int lon = 0; lon <= nbLong; lon++ ) { float a2 = _2pi * (float)(lon == nbLong ? 0 : lon) / nbLong; float sin2 = (float)Math.sin(a2); float cos2 = (float)Math.cos(a2);
vertices[lon + lat * (nbLong + 1) + nbLong] = new Vector3( sin1 * cos2, cos1, sin1 * sin2 ). multiply(radius); } }
Next, we calculate the vertex normals and then the UVs for texture mapping:
Vector3[] normals = new Vector3[vertices.length]; for( int n = 0; n < vertices.length; n++ ) normals[n] = new Vector3(vertices[n]).normalize();
Vector2[] uvs = new Vector2[vertices.length]; float uvStart = 1.0f / (nbLong * 2); float uvStride = 1.0f / nbLong; for(int i = 0; i < nbLong; i++) { uvs[i] = new Vector2(uvStart + i * uvStride, 1f); uvs[uvs.length - i - 1] = new Vector2(1 - (uvStart + i * uvStride), 0f); } for( int lat = 0; lat < nbLat; lat++ ) for( int lon = 0; lon <= nbLong; lon++ )
Solar System
[ 192 ]
uvs[lon + lat * (nbLong + 1) + nbLong] = new Vector2( (float)lon / nbLong, 1f - (float)(lat+1) / (nbLat+1) );
This next part of the same allocateBuffers method generates the triangular indices, which connect the vertices:
int nbFaces = (nbLong+1) * nbLat + 2; int nbTriangles = nbFaces * 2; int nbIndexes = nbTriangles * 3; numIndices = nbIndexes; short[] triangles = new short[ nbIndexes ];
//Top Cap int i = 0; for( short lon = 0; lon < nbLong; lon++ ) { triangles[i++] = lon; triangles[i++] = (short)(nbLong + lon+1); triangles[i++] = (short)(nbLong + lon); }
//Middle for( short lat = 0; lat < nbLat - 1; lat++ ) { for( short lon = 0; lon < nbLong; lon++ ) { short current = (short)(lon + lat * (nbLong + 1) + nbLong); short next = (short)(current + nbLong + 1);
triangles[i++] = current; triangles[i++] = (short)(current + 1); triangles[i++] = (short)(next + 1);
triangles[i++] = current; triangles[i++] = (short)(next + 1); triangles[i++] = next; } }
//Bottom Cap for( short lon = 0; lon < nbLong; lon++ ) { triangles[i++] = (short)(vertices.length - lon - 1);
Chapter 6
[ 193 ]
triangles[i++] = (short)(vertices.length - nbLong - (lon+1) - 1); triangles[i++] = (short)(vertices.length - nbLong - (lon) - 1); }
Finally, apply these calculated values to the corresponding vertexBuffer, normalBuffer, texCoordBuffer, and indexBuffer arrays, as follows:
//convert Vector3[] to float[] float[] vertexArray = new float[vertices.length * 3]; for(i = 0; i < vertices.length; i++){ int step = i * 3; vertexArray[step] = vertices[i].x; vertexArray[step + 1] = vertices[i].y; vertexArray[step + 2] = vertices[i].z; } float[] normalArray = new float[normals.length * 3]; for(i = 0; i < normals.length; i++){ int step = i * 3; normalArray[step] = normals[i].x; normalArray[step + 1] = normals[i].y; normalArray[step + 2] = normals[i].z; } float[] texCoordArray = new float[uvs.length * 2]; for(i = 0; i < uvs.length; i++){ int step = i * 2; texCoordArray[step] = uvs[i].x; texCoordArray[step + 1] = uvs[i].y; }
vertexBuffer = allocateFloatBuffer(vertexArray); normalBuffer = allocateFloatBuffer(normalArray); texCoordBuffer = allocateFloatBuffer(texCoordArray); indexBuffer = allocateShortBuffer(triangles); }
This is a lot of code, and might be hard to read on the pages of a book; you can fi nd a copy in the project GitHub repository if you prefer.
Solar System
[ 194 ]
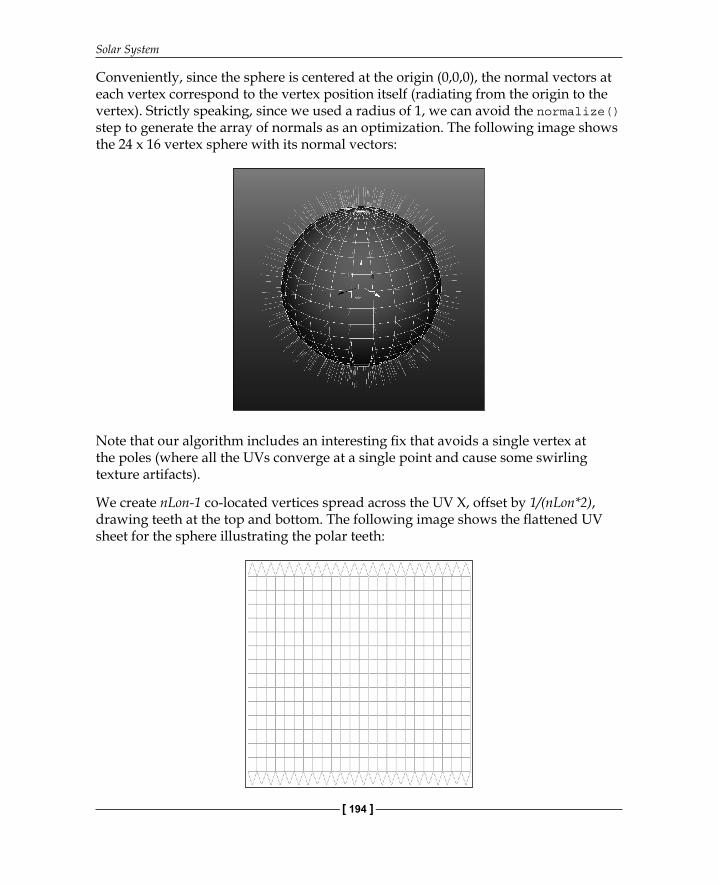
Conveniently, since the sphere is centered at the origin (0,0,0), the normal vectors at each vertex correspond to the vertex position itself (radiating from the origin to the vertex). Strictly speaking, since we used a radius of 1, we can avoid the normalize() step to generate the array of normals as an optimization. The following image shows the 24 x 16 vertex sphere with its normal vectors:
Note that our algorithm includes an interesting fi x that avoids a single vertex at the poles (where all the UVs converge at a single point and cause some swirling texture artifacts).
We create nLon-1 co-located vertices spread across the UV X, offset by 1/(nLon*2), drawing teeth at the top and bottom. The following image shows the fl attened UV sheet for the sphere illustrating the polar teeth:
Chapter 6
[ 195 ]
A solid color lighted sphereWe are going to start by rendering our sphere in a solid color but with lighted shading. As usual, we start by writing the shader functions that, among other things, defi ne the program variables they will need from the Material that uses it. Then, we'll defi ne the SolidColorLightingMaterial class and add it to the Sphere component.
Solid color lighting shadersIn the previous chapters, where we used shaders with lighting, we did the lighting calculations in the vertex shader. That's simpler (and faster), but transitioning the calculations to the fragment shader yields better results. The reason is that, in the vertex shader, you only have one normal value to compare against the light direction. In the fragment, all vertex attributes are interpolated, meaning that the normal value at a given point between two vertices will be some point in between their two normals. When this is the case, you see a smooth gradient across the triangle face, rather than localized shading artifacts around each vertex. We will be creating a new Material class to implement lighting in the fragment shader.
If necessary, create an Android Resource Directory for the shaders (resource type: raw), res/raw/. Then, create the solid_color_lighting_vertex.shader and res/raw/solid_color_lighting_fragment.shader fi les and defi ne them as follows.
File: res/raw/solid_color_lighting_vertex.shader
uniform mat4 u_MVP;uniform mat4 u_MV;
attribute vec4 a_Position;attribute vec3 a_Normal;
varying vec3 v_Position;varying vec3 v_Normal;
void main() { // vertex in eye space v_Position = vec3(u_MV * a_Position);
// normal's orientation in eye space v_Normal = vec3(u_MV * vec4(a_Normal, 0.0));
// point in normalized screen coordinates gl_Position = u_MVP * a_Position;}
Solar System
[ 196 ]
Note that we have separate uniform variables for u_MV and u_MVP. Also, if you remember that in the previous chapter, we separated the lighting model from the actual model because we did not want scale to affect lighting calculations. Similarly, the projection matrix is only useful to apply the camera FOV to vertex positions and will interfere with lighting calculations.
File: res/raw/solid_color_lighting_fragment.shader
precision mediump float; // default medium precision in the fragment shaderuniform vec3 u_LightPos; // light position in eye spaceuniform vec4 u_LightCol;uniform vec4 u_Color;
varying vec3 v_Position; varying vec3 v_Normal;varying vec2 v_TexCoordinate;
void main() { // distance for attenuation. float distance = length(u_LightPos - v_Position);
// lighting direction vector from the light to the vertex vec3 lightVector = normalize(u_LightPos - v_Position);
// dot product of the light vector and vertex normal. // If the normal and light vector are // pointing in the same direction then it will get max // illumination. float diffuse = max(dot(v_Normal, lightVector), 0.01);
// Add a tiny bit of ambient lighting (this is outerspace) diffuse = diffuse + 0.025;
// Multiply color by the diffuse illumination level and // texture value to get final output color gl_FragColor = u_Color * u_LightCol * diffuse;}
Chapter 6
[ 197 ]
Solid color lighting materialNext, we defi ne the Material class for the shaders. In the materials folder, create a new Java class named SolidColorLightingMaterial and defi ne it as follows:
public class SolidColorLightingMaterial extends Material { private static final String TAG = "solidcolorlighting";
}
Add the variables for color, program references, and buffers, as shown in the following code:
float[] color = new float[4]; static int program = -1; static int positionParam; static int colorParam; static int normalParam; static int modelParam; static int MVParam; static int MVPParam; static int lightPosParam; static int lightColParam;
FloatBuffer vertexBuffer; FloatBuffer normalBuffer; ShortBuffer indexBuffer; int numIndices;
Now, we can add a constructor, which receives a color (RGBA) value and sets up the shader program, as follows:
public SolidColorLightingMaterial(float[] c){ super(); setColor(c); setupProgram(); }
public void setColor(float[] c){ color = c; }
Solar System
[ 198 ]
As we've seen earlier, the setupProgram method creates the shader program and obtains references to its parameters:
public static void setupProgram(){ //Already setup? if (program != -1) return;
//Create shader program program = createProgram(R.raw.solid_color_lighting_vertex, R.raw.solid_color_lighting_fragment);
//Get vertex attribute parameters positionParam = GLES20.glGetAttribLocation(program, "a_Position"); normalParam = GLES20.glGetAttribLocation(program, "a_Normal");
//Enable them (turns out this is kind of a big deal ;) GLES20.glEnableVertexAttribArray(positionParam); GLES20.glEnableVertexAttribArray(normalParam);
//Shader-specific parameters colorParam = GLES20.glGetUniformLocation(program, "u_Color"); MVParam = GLES20.glGetUniformLocation(program, "u_MV"); MVPParam = GLES20.glGetUniformLocation(program, "u_MVP"); lightPosParam = GLES20.glGetUniformLocation(program, "u_LightPos"); lightColParam = GLES20.glGetUniformLocation(program, "u_LightCol");
RenderBox.checkGLError("Solid Color Lighting params"); }
Likewise, we add a setBuffers method that is called by the RenderObject component (Sphere):
public void setBuffers(FloatBuffer vertexBuffer, FloatBuffer normalBuffer, ShortBuffer indexBuffer, int numIndices){ this.vertexBuffer = vertexBuffer; this.normalBuffer = normalBuffer; this.indexBuffer = indexBuffer; this.numIndices = numIndices; }

Chapter 6
[ 199 ]
Lastly, add the draw code, which will be called from the Camera component, to render the geometry prepared in the buffers (via setBuffers). The draw method looks like this:
@Override public void draw(float[] view, float[] perspective) { GLES20.glUseProgram(program);
GLES20.glUniform3fv(lightPosParam, 1, RenderBox.instance.mainLight.lightPosInEyeSpace, 0); GLES20.glUniform4fv(lightColParam, 1, RenderBox.instance.mainLight.color, 0);
Matrix.multiplyMM(modelView, 0, view, 0, RenderObject.lightingModel, 0); // Set the ModelView in the shader, // used to calculate lighting GLES20.glUniformMatrix4fv(MVParam, 1, false, modelView, 0); Matrix.multiplyMM(modelView, 0, view, 0, RenderObject.model, 0); Matrix.multiplyMM(modelViewProjection, 0, perspective, 0, modelView, 0); // Set the ModelViewProjection matrix for eye position. GLES20.glUniformMatrix4fv(MVPParam, 1, false, modelViewProjection, 0);
GLES20.glUniform4fv(colorParam, 1, color, 0);
//Set vertex attributes GLES20.glVertexAttribPointer(positionParam, 3, GLES20.GL_FLOAT, false, 0, vertexBuffer); GLES20.glVertexAttribPointer(normalParam, 3, GLES20.GL_FLOAT, false, 0, normalBuffer);
GLES20.glDrawElements(GLES20.GL_TRIANGLES, numIndices, GLES20.GL_UNSIGNED_SHORT, indexBuffer); }
Now that we have a solid color lighting material and shaders, we can add them to the Sphere class to be used in our project.

Solar System
[ 200 ]
Adding a Material to a SphereTo use this Material with the Sphere, we'll defi ne a new constructor (Sphere) that calls a helper method (createSolidColorLightingMaterial) to create the material and set the buffers. Here's the code:
public Sphere(float[] color) { super(); allocateBuffers(); createSolidColorLightingMaterial(color); }
public Sphere createSolidColorLightingMaterial(float[] color){ SolidColorLightingMaterial mat = new SolidColorLightingMaterial(color); mat.setBuffers(vertexBuffer, normalBuffer, indexBuffer, numIndices); material = mat; return this; }
Okay, we can now add the sphere to our scene.
Viewing the SphereLet's see how this looks! We'll create a scene with a sphere, a light, and a camera. Remember that, fortunately, the RenderBox class creates the default Camera and Light instances for us. We just need to add the Sphere component.
Edit your MainActivity.java fi le to add the sphere in setup. We'll color it yellowish and position it at x, y, z location (2, -2, 5):
private Transform sphere;
@Override public void setup() { sphere = new Transform(); float[] color = new float[]{1, 1, 0.5f, 1}; sphere.addComponent(new Sphere(color)); sphere.setLocalPosition(2.0f, -2.f, -5.0f); }
Chapter 6
[ 201 ]
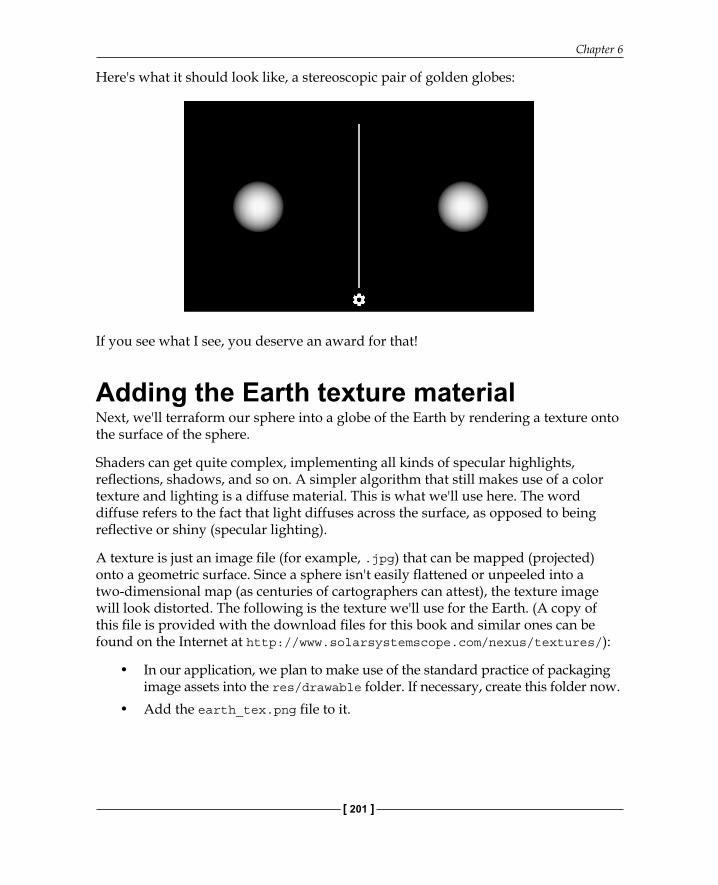
Here's what it should look like, a stereoscopic pair of golden globes:
If you see what I see, you deserve an award for that!
Adding the Earth texture materialNext, we'll terraform our sphere into a globe of the Earth by rendering a texture onto the surface of the sphere.
Shaders can get quite complex, implementing all kinds of specular highlights, refl ections, shadows, and so on. A simpler algorithm that still makes use of a color texture and lighting is a diffuse material. This is what we'll use here. The word diffuse refers to the fact that light diffuses across the surface, as opposed to being refl ective or shiny (specular lighting).
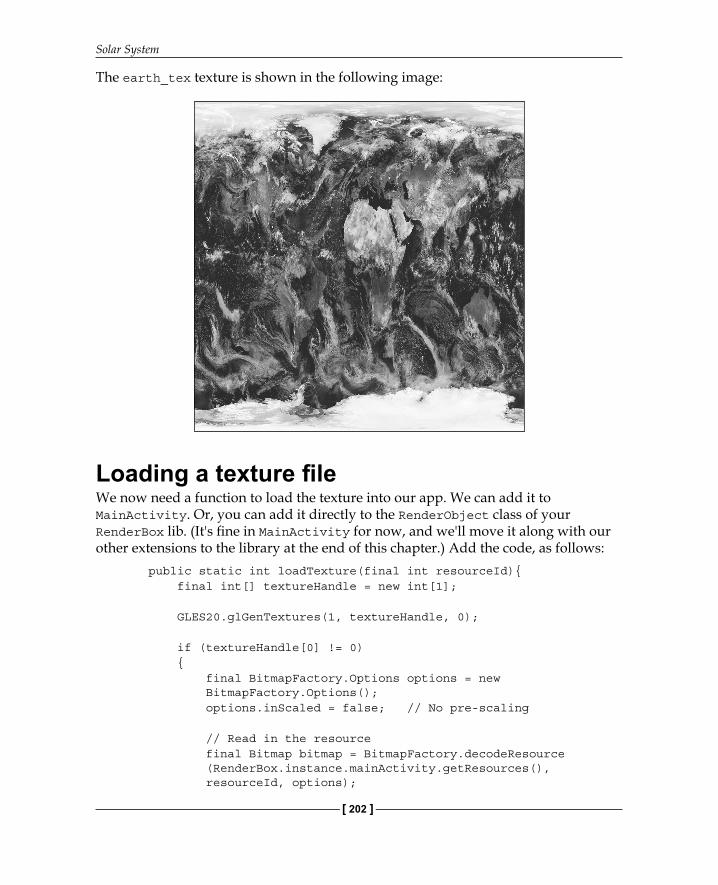
A texture is just an image fi le (for example, .jpg) that can be mapped (projected) onto a geometric surface. Since a sphere isn't easily fl attened or unpeeled into a two-dimensional map (as centuries of cartographers can attest), the texture image will look distorted. The following is the texture we'll use for the Earth. (A copy of this fi le is provided with the download fi les for this book and similar ones can be found on the Internet at http://www.solarsystemscope.com/nexus/textures/):
• In our application, we plan to make use of the standard practice of packaging image assets into the res/drawable folder. If necessary, create this folder now.
• Add the earth_tex.png file to it.
Solar System
[ 202 ]
The earth_tex texture is shown in the following image:
Loading a texture fi leWe now need a function to load the texture into our app. We can add it to MainActivity. Or, you can add it directly to the RenderObject class of your RenderBox lib. (It's fi ne in MainActivity for now, and we'll move it along with our other extensions to the library at the end of this chapter.) Add the code, as follows:
public static int loadTexture(final int resourceId){ final int[] textureHandle = new int[1];
GLES20.glGenTextures(1, textureHandle, 0);
if (textureHandle[0] != 0) { final BitmapFactory.Options options = new BitmapFactory.Options(); options.inScaled = false; // No pre-scaling
// Read in the resource final Bitmap bitmap = BitmapFactory.decodeResource (RenderBox.instance.mainActivity.getResources(), resourceId, options);
Chapter 6
[ 203 ]
// Bind to the texture in OpenGL GLES20.glBindTexture(GLES20.GL_TEXTURE_2D, textureHandle[0]);
// Set filtering GLES20.glTexParameteri(GLES20.GL_TEXTURE_2D, GLES20.GL_TEXTURE_MIN_FILTER, GLES20.GL_NEAREST); GLES20.glTexParameteri(GLES20.GL_TEXTURE_2D, GLES20.GL_TEXTURE_MAG_FILTER, GLES20.GL_NEAREST);
// Load the bitmap into the bound texture. GLUtils.texImage2D(GLES20.GL_TEXTURE_2D, 0, bitmap, 0);
// Recycle the bitmap, since its data has been loaded // into OpenGL. bitmap.recycle(); }
if (textureHandle[0] == 0) { throw new RuntimeException("Error loading texture."); }
return textureHandle[0]; }
The loadTexture method returns an integer handle that can be used to reference the loaded texture data.
Diffuse lighting shadersAs you may now be familiar, we are going to create a new Material, which uses new shaders. We'll write the shaders now. Create the two fi les in the res/raw folder named diffuse_lighting_vertex.shader and diffuse_lighting_fragment.shader, and defi ne them as follows.
File: res/raw/diffuse_lighting_vertex.shader
uniform mat4 u_MVP;uniform mat4 u_MV;
attribute vec4 a_Position;attribute vec3 a_Normal;attribute vec2 a_TexCoordinate;

Solar System
[ 204 ]
varying vec3 v_Position;varying vec3 v_Normal;varying vec2 v_TexCoordinate;
void main() { // vertex in eye space v_Position = vec3(u_MV * a_Position);
// pass through the texture coordinate. v_TexCoordinate = a_TexCoordinate;
// normal's orientation in eye space v_Normal = vec3(u_MV * vec4(a_Normal, 0.0));
// final point in normalized screen coordinates gl_Position = u_MVP * a_Position;}
File: res/raw/diffuse_lighting_fragment.shader
precision highp float; // default high precision for floating point ranges of the planets
uniform vec3 u_LightPos; // light position in eye spaceuniform vec4 u_LightCol;uniform sampler2D u_Texture; // the input texture
varying vec3 v_Position;varying vec3 v_Normal;varying vec2 v_TexCoordinate;
void main() { // distance for attenuation. float distance = length(u_LightPos - v_Position);
// lighting direction vector from the light to the vertex vec3 lightVector = normalize(u_LightPos - v_Position);
// dot product of the light vector and vertex normal. // If the normal and light vector are // pointing in the same direction then it will get max // illumination. float diffuse = max(dot(v_Normal, lightVector), 0.01);

Chapter 6
[ 205 ]
// Add a tiny bit of ambient lighting (this is outerspace) diffuse = diffuse + 0.025;
// Multiply the color by the diffuse illumination level and // texture value to get final output color gl_FragColor = texture2D(u_Texture, v_TexCoordinate) * u_LightCol * diffuse;}
These shaders add attributes to a light source and utilize geometry normal vectors on the vertices to calculate the shading. You might have noticed that the difference between this and the solid color shader is the use of texture2D, which is a sampler function. Also, note that we declared u_Texture as sampler2D. This variable type and function make use of the texture units, which are built into the GPU hardware, and can be used with UV coordinates to return the color values from a texture image. There are a fi xed number of texture units, depending on graphics hardware. You can query the number of texture units using OpenGL. A good rule of thumb for mobile GPUs is to expect eight texture units. This means that any shader may use up to eight textures simultaneously.
Diffuse lighting materialNow we can write a Material to use a texture and shaders. In the materials/ folder, create a new Java class, DiffuseLightingMaterial, as follows:
public class DiffuseLightingMaterial extends Material { private static final String TAG = "diffuselightingmaterial";
Add the variables for the texture ID, program references, and buffers, as shown in the following code:
int textureId; static int program = -1; //Initialize to a totally invalid value for setup state static int positionParam; static int texCoordParam; static int textureParam; static int normalParam; static int MVParam; static int MVPParam; static int lightPosParam; static int lightColParam;
Solar System
[ 206 ]
FloatBuffer vertexBuffer; FloatBuffer texCoordBuffer; FloatBuffer normalBuffer; ShortBuffer indexBuffer; int numIndices;
Now we can add a constructor, which sets up the shader program and loads the texture for the given resource ID, as follows:
public DiffuseLightingMaterial(int resourceId){ super(); setupProgram(); this.textureId = MainActivity.loadTexture(resourceId); }
As we've seen earlier, the setupProgram method creates the shader program and obtains references to its parameters:
public static void setupProgram(){ //Already setup? if (program != -1) return;
//Create shader program program = createProgram(R.raw.diffuse_lighting_vertex, R.raw.diffuse_lighting_fragment); RenderBox.checkGLError("Diffuse Texture Color Lighting shader compile");
//Get vertex attribute parameters positionParam = GLES20.glGetAttribLocation(program, "a_Position"); normalParam = GLES20.glGetAttribLocation(program, "a_Normal"); texCoordParam = GLES20.glGetAttribLocation(program, "a_TexCoordinate");
//Enable them (turns out this is kind of a big deal ;) GLES20.glEnableVertexAttribArray(positionParam); GLES20.glEnableVertexAttribArray(normalParam); GLES20.glEnableVertexAttribArray(texCoordParam);
//Shader-specific parameters textureParam = GLES20.glGetUniformLocation(program, "u_Texture"); MVParam = GLES20.glGetUniformLocation(program, "u_MV"); MVPParam = GLES20.glGetUniformLocation(program, "u_MVP");
Chapter 6
[ 207 ]
lightPosParam = GLES20.glGetUniformLocation(program, "u_LightPos"); lightColParam = GLES20.glGetUniformLocation(program, "u_LightCol");
RenderBox.checkGLError("Diffuse Texture Color Lighting params"); }
Likewise, we add a setBuffers method that is called by the RenderObject component (Sphere):
public void setBuffers(FloatBuffer vertexBuffer, FloatBuffer normalBuffer, FloatBuffer texCoordBuffer, ShortBuffer indexBuffer, int numIndices){ //Associate VBO data with this instance of the material this.vertexBuffer = vertexBuffer; this.normalBuffer = normalBuffer; this.texCoordBuffer = texCoordBuffer; this.indexBuffer = indexBuffer; this.numIndices = numIndices; }
Lastly, add the draw code, which will be called from the Camera component, to render the geometry prepared in the buffers (via setBuffers). The draw method looks like this:
@Override public void draw(float[] view, float[] perspective) { GLES20.glUseProgram(program);
// Set the active texture unit to texture unit 0. GLES20.glActiveTexture(GLES20.GL_TEXTURE0);
// Bind the texture to this unit. GLES20.glBindTexture(GLES20.GL_TEXTURE_2D, textureId);
// Tell the texture uniform sampler to use this texture in // the shader by binding to texture unit 0. GLES20.glUniform1i(textureParam, 0);
//Technically, we don't need to do this with every draw //call, but the light could move. //We could also add a step for shader-global parameters //which don't vary per-object
Solar System
[ 208 ]
GLES20.glUniform3fv(lightPosParam, 1, RenderBox.instance.mainLight.lightPosInEyeSpace, 0); GLES20.glUniform4fv(lightColParam, 1, RenderBox.instance.mainLight.color, 0);
Matrix.multiplyMM(modelView, 0, view, 0, RenderObject.lightingModel, 0); // Set the ModelView in the shader, used to calculate // lighting GLES20.glUniformMatrix4fv(MVParam, 1, false, modelView, 0); Matrix.multiplyMM(modelView, 0, view, 0, RenderObject.model, 0); Matrix.multiplyMM(modelViewProjection, 0, perspective, 0, modelView, 0); // Set the ModelViewProjection matrix for eye position. GLES20.glUniformMatrix4fv(MVPParam, 1, false, modelViewProjection, 0);
//Set vertex attributes GLES20.glVertexAttribPointer(positionParam, 3, GLES20.GL_FLOAT, false, 0, vertexBuffer); GLES20.glVertexAttribPointer(normalParam, 3, GLES20.GL_FLOAT, false, 0, normalBuffer); GLES20.glVertexAttribPointer(texCoordParam, 2, GLES20.GL_FLOAT, false, 0, texCoordBuffer);
GLES20.glDrawElements(GLES20.GL_TRIANGLES, numIndices, GLES20.GL_UNSIGNED_SHORT, indexBuffer);
RenderBox.checkGLError("Diffuse Texture Color Lighting draw"); }}
Comparing this with the SolidColorLightingMaterial class that we defi ned earlier, you will notice that it's quite similar. We've replaced the single color with a texture ID, and we've added the requirements for a texture coordinate buffer (texCoordBuffer) given by a Sphere component. Also, note that we are setting the active texture unit to GL_TEXTURE0 and binding the texture.
Chapter 6
[ 209 ]
Adding diffuse lighting texture to a Sphere componentTo add the new material to the Sphere component, we'll make an alternative constructor that receives a texture handle. It then creates an instance of the DiffuseLightingMaterial class and sets the buffers from the sphere.
Let's add the material to the Sphere component by defi ning a new constructor (Sphere) that takes the texture ID and calls a new helper method named createDiffuseMaterial, as follows:
public Sphere(int textureId){ super(); allocateBuffers(); createDiffuseMaterial(textureId); }
public Sphere createDiffuseMaterial(int textureId){ DiffuseLightingMaterial mat = new DiffuseLightingMaterial(textureId); mat.setBuffers(vertexBuffer, normalBuffer, texCoordBuffer, indexBuffer, numIndices); material = mat; return this; }
Now, we can use the textured material.
Viewing the EarthTo add the Earth texture to our sphere, modify the setup method of MainActivity to specify the texture resource ID instead of a color, as follows:
@Override public void setup() { sphere = new Transform(); sphere.addComponent(new Sphere(R.drawable.earth_tex)); sphere.setLocalPosition(2.0f, -2.f, -2.0f); }
Solar System
[ 210 ]
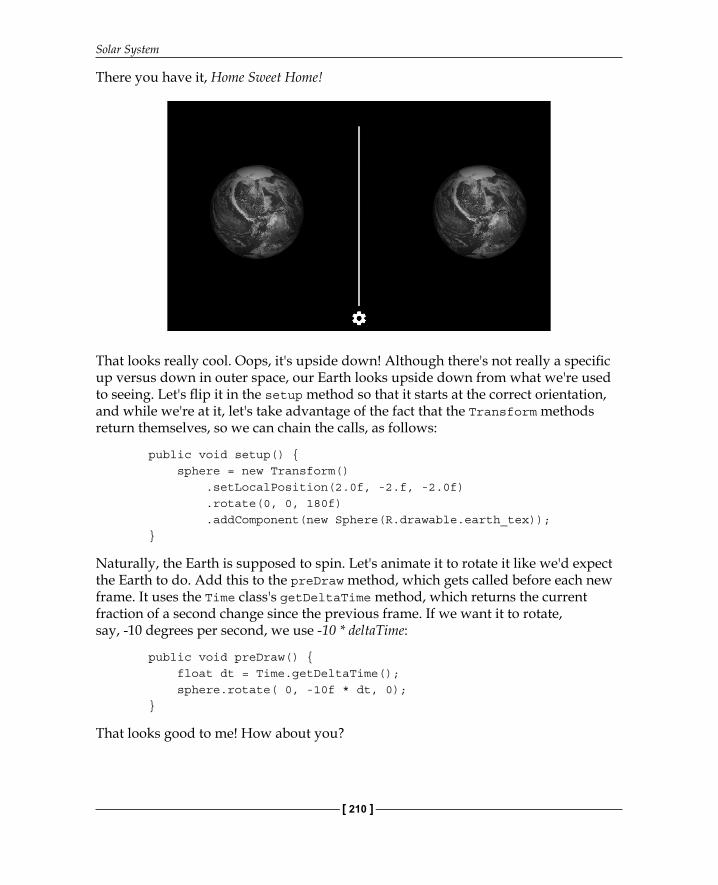
There you have it, Home Sweet Home!
That looks really cool. Oops, it's upside down! Although there's not really a specifi c up versus down in outer space, our Earth looks upside down from what we're used to seeing. Let's fl ip it in the setup method so that it starts at the correct orientation, and while we're at it, let's take advantage of the fact that the Transform methods return themselves, so we can chain the calls, as follows:
public void setup() { sphere = new Transform() .setLocalPosition(2.0f, -2.f, -2.0f) .rotate(0, 0, 180f) .addComponent(new Sphere(R.drawable.earth_tex)); }
Naturally, the Earth is supposed to spin. Let's animate it to rotate it like we'd expect the Earth to do. Add this to the preDraw method, which gets called before each new frame. It uses the Time class's getDeltaTime method, which returns the current fraction of a second change since the previous frame. If we want it to rotate, say, -10 degrees per second, we use -10 * deltaTime:
public void preDraw() { float dt = Time.getDeltaTime(); sphere.rotate( 0, -10f * dt, 0); }
That looks good to me! How about you?
Chapter 6
[ 211 ]
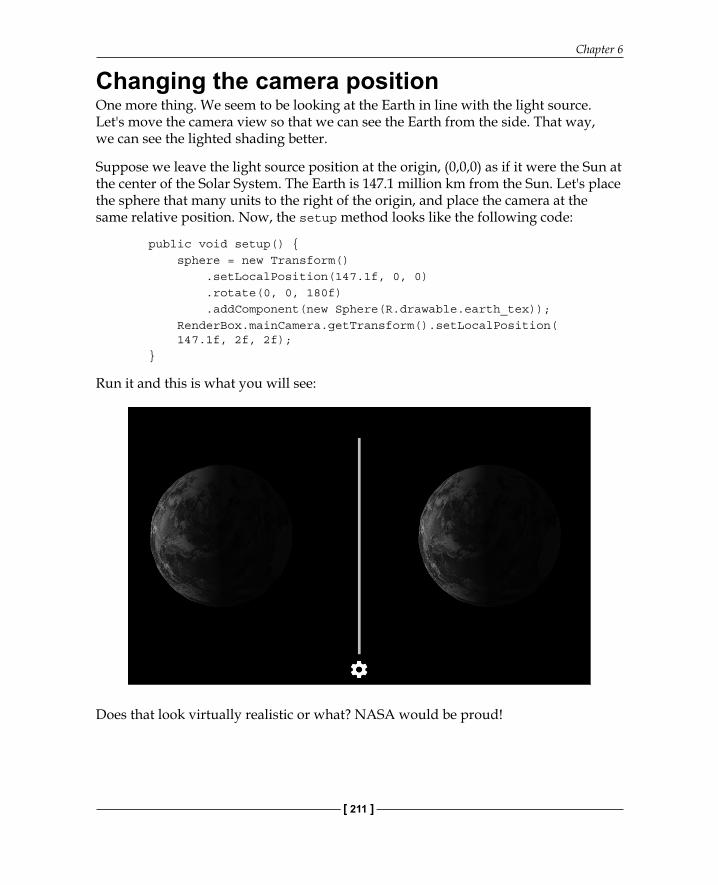
Changing the camera positionOne more thing. We seem to be looking at the Earth in line with the light source. Let's move the camera view so that we can see the Earth from the side. That way, we can see the lighted shading better.
Suppose we leave the light source position at the origin, (0,0,0) as if it were the Sun at the center of the Solar System. The Earth is 147.1 million km from the Sun. Let's place the sphere that many units to the right of the origin, and place the camera at the same relative position. Now, the setup method looks like the following code:
public void setup() { sphere = new Transform() .setLocalPosition(147.1f, 0, 0) .rotate(0, 0, 180f) .addComponent(new Sphere(R.drawable.earth_tex)); RenderBox.mainCamera.getTransform().setLocalPosition( 147.1f, 2f, 2f); }
Run it and this is what you will see:
Does that look virtually realistic or what? NASA would be proud!
Solar System
[ 212 ]
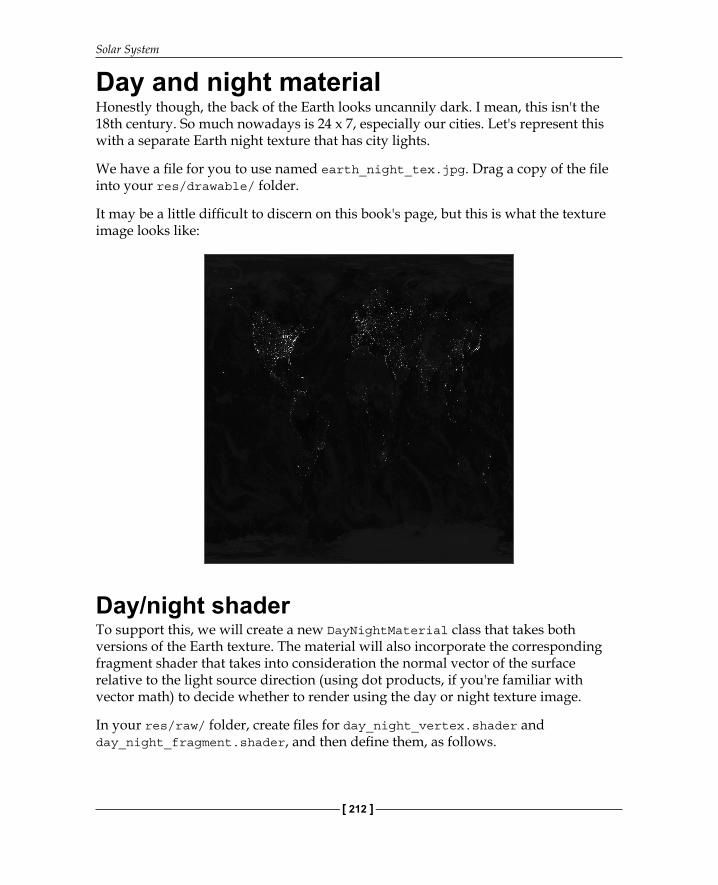
Day and night materialHonestly though, the back of the Earth looks uncannily dark. I mean, this isn't the 18th century. So much nowadays is 24 x 7, especially our cities. Let's represent this with a separate Earth night texture that has city lights.
We have a fi le for you to use named earth_night_tex.jpg. Drag a copy of the fi le into your res/drawable/ folder.
It may be a little diffi cult to discern on this book's page, but this is what the texture image looks like:
Day/night shaderTo support this, we will create a new DayNightMaterial class that takes both versions of the Earth texture. The material will also incorporate the corresponding fragment shader that takes into consideration the normal vector of the surface relative to the light source direction (using dot products, if you're familiar with vector math) to decide whether to render using the day or night texture image.
In your res/raw/ folder, create fi les for day_night_vertex.shader and day_night_fragment.shader, and then defi ne them, as follows.
Chapter 6
[ 213 ]
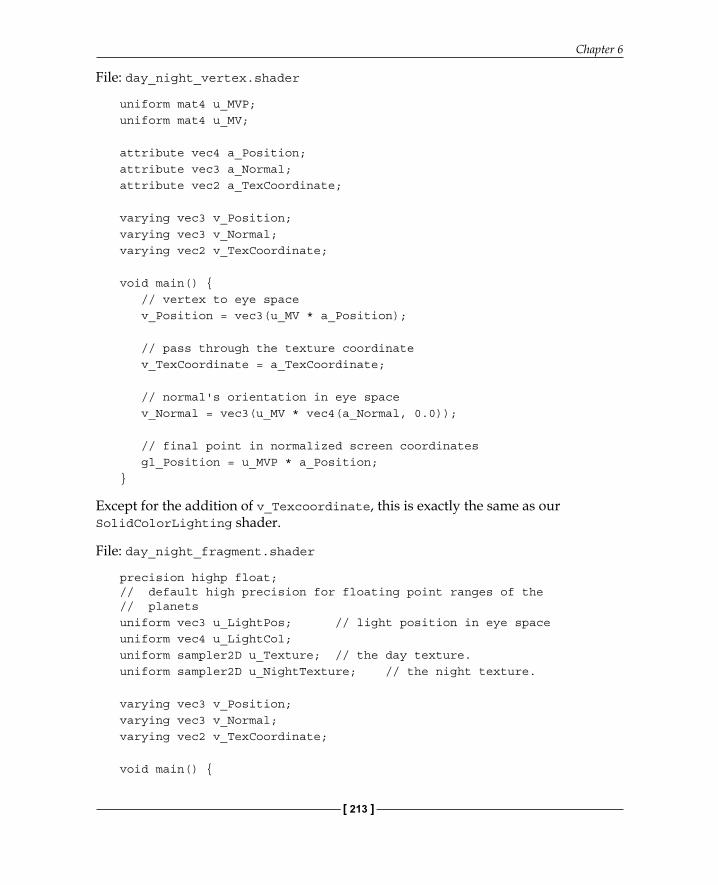
File: day_night_vertex.shader
uniform mat4 u_MVP;uniform mat4 u_MV;
attribute vec4 a_Position;attribute vec3 a_Normal;attribute vec2 a_TexCoordinate;
varying vec3 v_Position;varying vec3 v_Normal;varying vec2 v_TexCoordinate;
void main() { // vertex to eye space v_Position = vec3(u_MV * a_Position);
// pass through the texture coordinate v_TexCoordinate = a_TexCoordinate;
// normal's orientation in eye space v_Normal = vec3(u_MV * vec4(a_Normal, 0.0));
// final point in normalized screen coordinates gl_Position = u_MVP * a_Position;}
Except for the addition of v_Texcoordinate, this is exactly the same as our SolidColorLighting shader.
File: day_night_fragment.shader
precision highp float; // default high precision for floating point ranges of the // planetsuniform vec3 u_LightPos; // light position in eye spaceuniform vec4 u_LightCol;uniform sampler2D u_Texture; // the day texture.uniform sampler2D u_NightTexture; // the night texture.
varying vec3 v_Position;varying vec3 v_Normal;varying vec2 v_TexCoordinate;
void main() {
Solar System
[ 214 ]
// lighting direction vector from the light to the vertex vec3 lightVector = normalize(u_LightPos - v_Position);
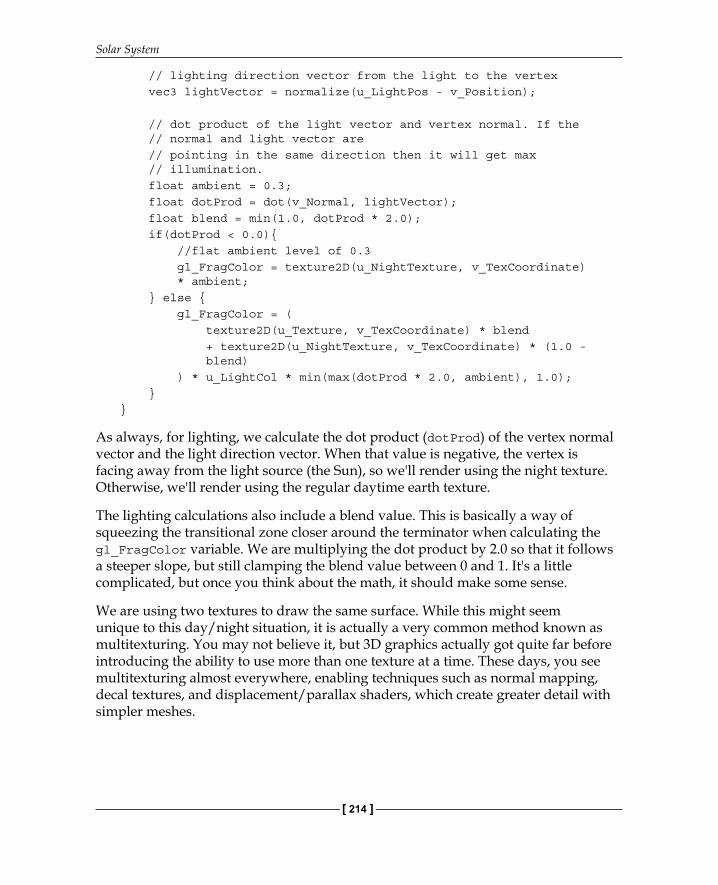
// dot product of the light vector and vertex normal. If the // normal and light vector are // pointing in the same direction then it will get max // illumination. float ambient = 0.3; float dotProd = dot(v_Normal, lightVector); float blend = min(1.0, dotProd * 2.0); if(dotProd < 0.0){ //flat ambient level of 0.3 gl_FragColor = texture2D(u_NightTexture, v_TexCoordinate) * ambient; } else { gl_FragColor = ( texture2D(u_Texture, v_TexCoordinate) * blend + texture2D(u_NightTexture, v_TexCoordinate) * (1.0 - blend) ) * u_LightCol * min(max(dotProd * 2.0, ambient), 1.0); }}
As always, for lighting, we calculate the dot product (dotProd) of the vertex normal vector and the light direction vector. When that value is negative, the vertex is facing away from the light source (the Sun), so we'll render using the night texture. Otherwise, we'll render using the regular daytime earth texture.
The lighting calculations also include a blend value. This is basically a way of squeezing the transitional zone closer around the terminator when calculating the gl_FragColor variable. We are multiplying the dot product by 2.0 so that it follows a steeper slope, but still clamping the blend value between 0 and 1. It's a little complicated, but once you think about the math, it should make some sense.
We are using two textures to draw the same surface. While this might seem unique to this day/night situation, it is actually a very common method known as multitexturing. You may not believe it, but 3D graphics actually got quite far before introducing the ability to use more than one texture at a time. These days, you see multitexturing almost everywhere, enabling techniques such as normal mapping, decal textures, and displacement/parallax shaders, which create greater detail with simpler meshes.
Chapter 6
[ 215 ]
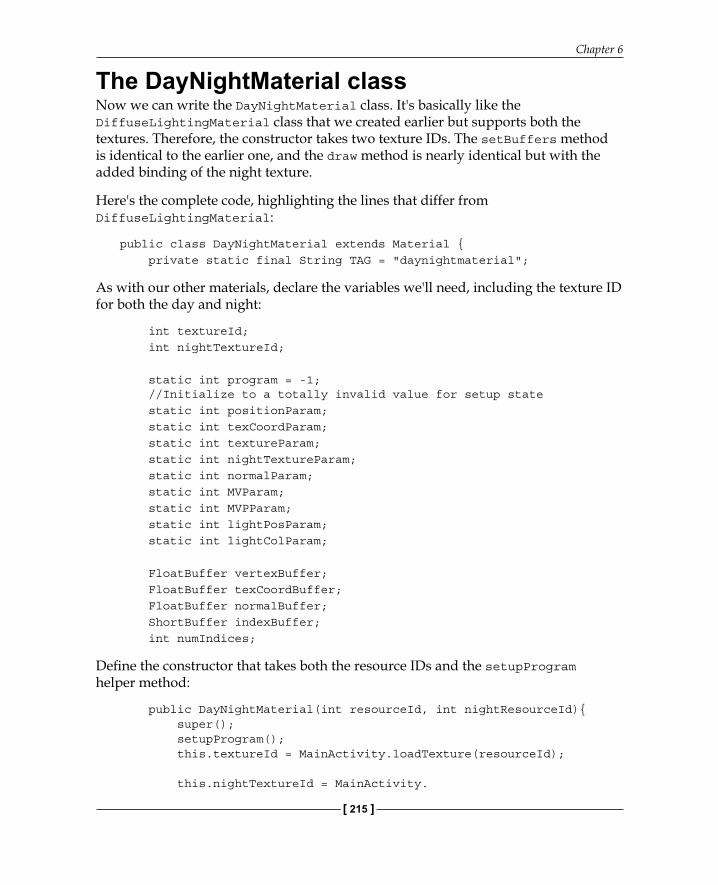
The DayNightMaterial classNow we can write the DayNightMaterial class. It's basically like the DiffuseLightingMaterial class that we created earlier but supports both the textures. Therefore, the constructor takes two texture IDs. The setBuffers method is identical to the earlier one, and the draw method is nearly identical but with the added binding of the night texture.
Here's the complete code, highlighting the lines that differ from DiffuseLightingMaterial:
public class DayNightMaterial extends Material { private static final String TAG = "daynightmaterial";
As with our other materials, declare the variables we'll need, including the texture ID for both the day and night:
int textureId; int nightTextureId;
static int program = -1; //Initialize to a totally invalid value for setup state static int positionParam; static int texCoordParam; static int textureParam; static int nightTextureParam; static int normalParam; static int MVParam; static int MVPParam; static int lightPosParam; static int lightColParam;
FloatBuffer vertexBuffer; FloatBuffer texCoordBuffer; FloatBuffer normalBuffer; ShortBuffer indexBuffer; int numIndices;
Defi ne the constructor that takes both the resource IDs and the setupProgram helper method:
public DayNightMaterial(int resourceId, int nightResourceId){ super(); setupProgram(); this.textureId = MainActivity.loadTexture(resourceId);
this.nightTextureId = MainActivity.

Solar System
[ 216 ]
loadTexture(nightResourceId); } public static void setupProgram(){ if(program != -1) return; //Create shader program program = createProgram(R.raw.day_night_vertex, R.raw.day_night_fragment);
//Get vertex attribute parameters positionParam = GLES20.glGetAttribLocation(program, "a_Position"); normalParam = GLES20.glGetAttribLocation(program, "a_Normal"); texCoordParam = GLES20.glGetAttribLocation(program, "a_TexCoordinate");
//Enable them (turns out this is kind of a big deal ;) GLES20.glEnableVertexAttribArray(positionParam); GLES20.glEnableVertexAttribArray(normalParam); GLES20.glEnableVertexAttribArray(texCoordParam);
//Shader-specific parameters textureParam = GLES20.glGetUniformLocation(program, "u_Texture"); nightTextureParam = GLES20.glGetUniformLocation(program, "u_NightTexture"); MVParam = GLES20.glGetUniformLocation(program, "u_MV"); MVPParam = GLES20.glGetUniformLocation(program, "u_MVP"); lightPosParam = GLES20.glGetUniformLocation(program, "u_LightPos"); lightColParam = GLES20.glGetUniformLocation(program, "u_LightCol");
RenderBox.checkGLError("Day/Night params"); } public void setBuffers(FloatBuffer vertexBuffer, FloatBuffer normalBuffer, FloatBuffer texCoordBuffer, ShortBuffer indexBuffer, int numIndices){ //Associate VBO data with this instance of the material this.vertexBuffer = vertexBuffer; this.normalBuffer = normalBuffer; this.texCoordBuffer = texCoordBuffer; this.indexBuffer = indexBuffer; this.numIndices = numIndices; }
Chapter 6
[ 217 ]
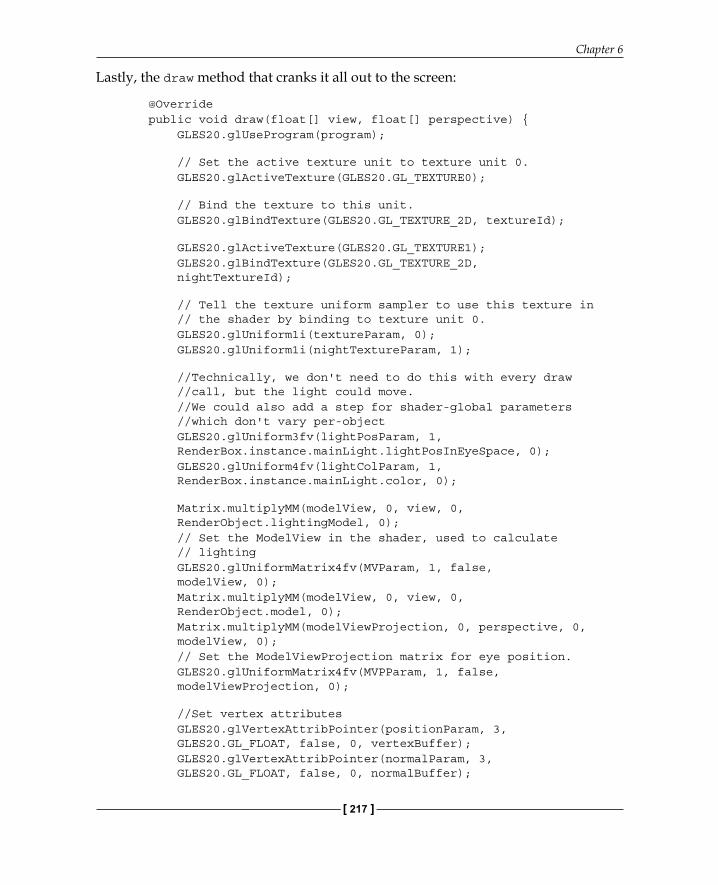
Lastly, the draw method that cranks it all out to the screen:
@Override public void draw(float[] view, float[] perspective) { GLES20.glUseProgram(program);
// Set the active texture unit to texture unit 0. GLES20.glActiveTexture(GLES20.GL_TEXTURE0);
// Bind the texture to this unit. GLES20.glBindTexture(GLES20.GL_TEXTURE_2D, textureId);
GLES20.glActiveTexture(GLES20.GL_TEXTURE1); GLES20.glBindTexture(GLES20.GL_TEXTURE_2D, nightTextureId);
// Tell the texture uniform sampler to use this texture in // the shader by binding to texture unit 0. GLES20.glUniform1i(textureParam, 0); GLES20.glUniform1i(nightTextureParam, 1);
//Technically, we don't need to do this with every draw //call, but the light could move. //We could also add a step for shader-global parameters //which don't vary per-object GLES20.glUniform3fv(lightPosParam, 1, RenderBox.instance.mainLight.lightPosInEyeSpace, 0); GLES20.glUniform4fv(lightColParam, 1, RenderBox.instance.mainLight.color, 0);
Matrix.multiplyMM(modelView, 0, view, 0, RenderObject.lightingModel, 0); // Set the ModelView in the shader, used to calculate // lighting GLES20.glUniformMatrix4fv(MVParam, 1, false, modelView, 0); Matrix.multiplyMM(modelView, 0, view, 0, RenderObject.model, 0); Matrix.multiplyMM(modelViewProjection, 0, perspective, 0, modelView, 0); // Set the ModelViewProjection matrix for eye position. GLES20.glUniformMatrix4fv(MVPParam, 1, false, modelViewProjection, 0);
//Set vertex attributes GLES20.glVertexAttribPointer(positionParam, 3, GLES20.GL_FLOAT, false, 0, vertexBuffer); GLES20.glVertexAttribPointer(normalParam, 3, GLES20.GL_FLOAT, false, 0, normalBuffer);
Solar System
[ 218 ]
GLES20.glVertexAttribPointer(texCoordParam, 2, GLES20.GL_FLOAT, false, 0, texCoordBuffer);
GLES20.glDrawElements(GLES20.GL_TRIANGLES, numIndices, GLES20.GL_UNSIGNED_SHORT, indexBuffer);
RenderBox.checkGLError("DayNight Texture Color Lighting draw"); }}
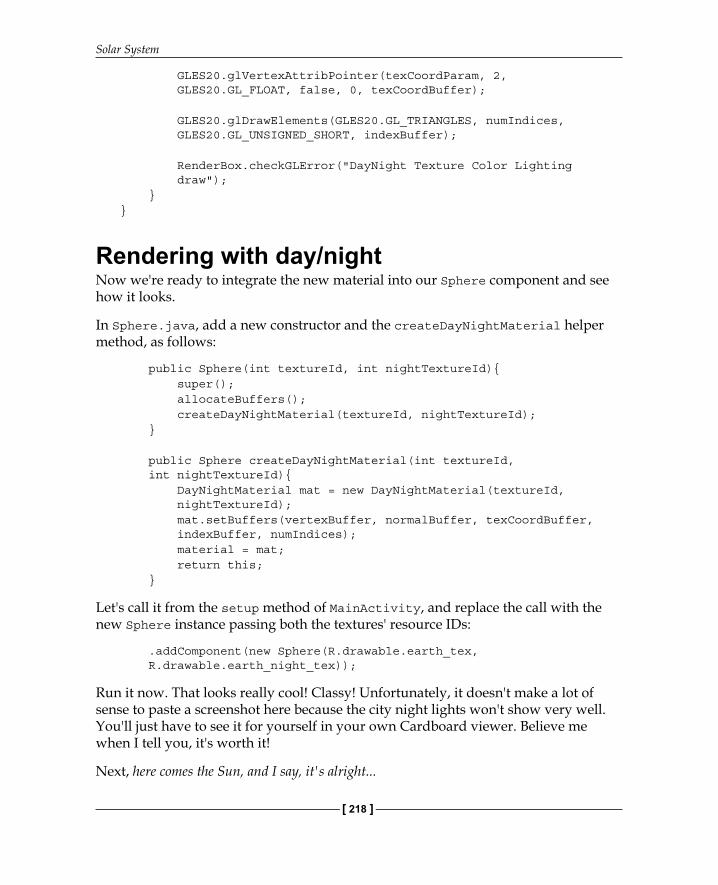
Rendering with day/nightNow we're ready to integrate the new material into our Sphere component and see how it looks.
In Sphere.java, add a new constructor and the createDayNightMaterial helper method, as follows:
public Sphere(int textureId, int nightTextureId){ super(); allocateBuffers(); createDayNightMaterial(textureId, nightTextureId); }
public Sphere createDayNightMaterial(int textureId, int nightTextureId){ DayNightMaterial mat = new DayNightMaterial(textureId, nightTextureId); mat.setBuffers(vertexBuffer, normalBuffer, texCoordBuffer, indexBuffer, numIndices); material = mat; return this; }
Let's call it from the setup method of MainActivity, and replace the call with the new Sphere instance passing both the textures' resource IDs:
.addComponent(new Sphere(R.drawable.earth_tex, R.drawable.earth_night_tex));
Run it now. That looks really cool! Classy! Unfortunately, it doesn't make a lot of sense to paste a screenshot here because the city night lights won't show very well. You'll just have to see it for yourself in your own Cardboard viewer. Believe me when I tell you, it's worth it!
Next, here comes the Sun, and I say, it's alright...
Chapter 6
[ 219 ]
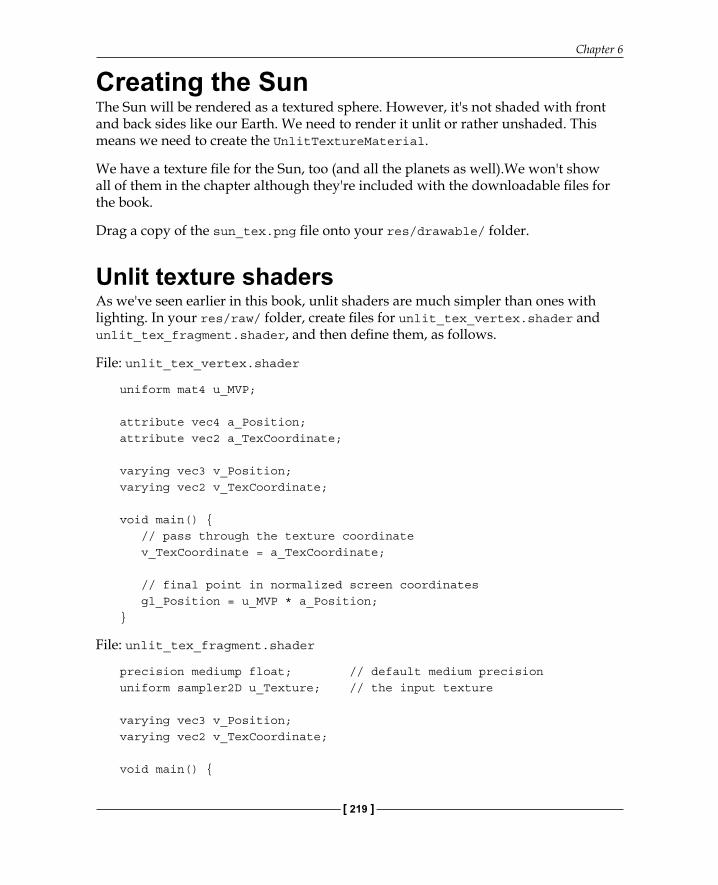
Creating the SunThe Sun will be rendered as a textured sphere. However, it's not shaded with front and back sides like our Earth. We need to render it unlit or rather unshaded. This means we need to create the UnlitTextureMaterial.
We have a texture fi le for the Sun, too (and all the planets as well).We won't show all of them in the chapter although they're included with the downloadable fi les for the book.
Drag a copy of the sun_tex.png fi le onto your res/drawable/ folder.
Unlit texture shadersAs we've seen earlier in this book, unlit shaders are much simpler than ones with lighting. In your res/raw/ folder, create fi les for unlit_tex_vertex.shader and unlit_tex_fragment.shader, and then defi ne them, as follows.
File: unlit_tex_vertex.shader
uniform mat4 u_MVP;
attribute vec4 a_Position;attribute vec2 a_TexCoordinate;
varying vec3 v_Position;varying vec2 v_TexCoordinate;
void main() { // pass through the texture coordinate v_TexCoordinate = a_TexCoordinate;
// final point in normalized screen coordinates gl_Position = u_MVP * a_Position;}
File: unlit_tex_fragment.shader
precision mediump float; // default medium precisionuniform sampler2D u_Texture; // the input texture
varying vec3 v_Position;varying vec2 v_TexCoordinate;
void main() {
Solar System
[ 220 ]
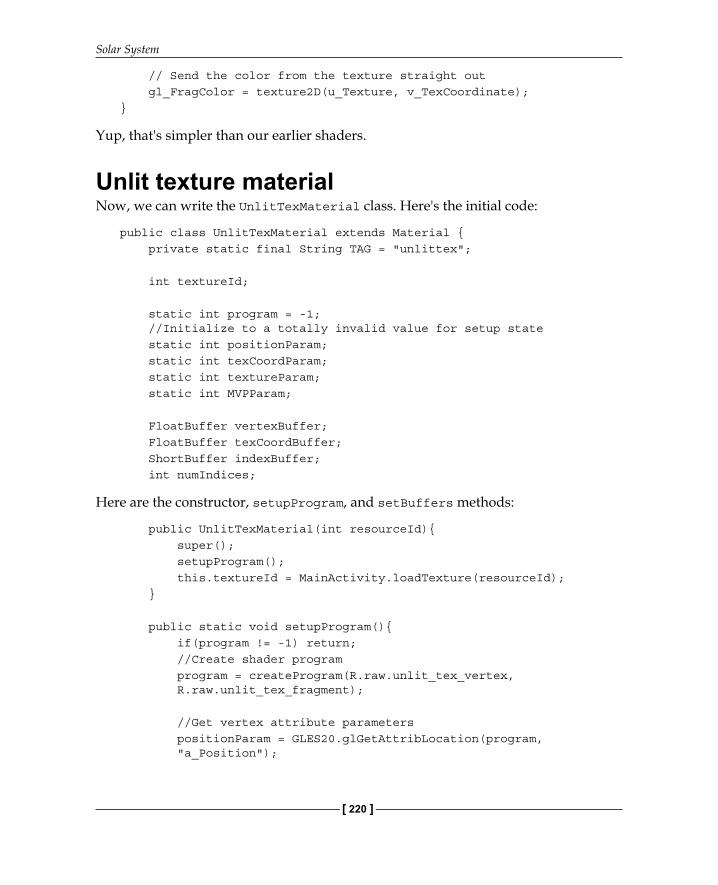
// Send the color from the texture straight out gl_FragColor = texture2D(u_Texture, v_TexCoordinate);}
Yup, that's simpler than our earlier shaders.
Unlit texture materialNow, we can write the UnlitTexMaterial class. Here's the initial code:
public class UnlitTexMaterial extends Material { private static final String TAG = "unlittex";
int textureId; static int program = -1; //Initialize to a totally invalid value for setup state static int positionParam; static int texCoordParam; static int textureParam; static int MVPParam;
FloatBuffer vertexBuffer; FloatBuffer texCoordBuffer; ShortBuffer indexBuffer; int numIndices;
Here are the constructor, setupProgram, and setBuffers methods:
public UnlitTexMaterial(int resourceId){ super(); setupProgram(); this.textureId = MainActivity.loadTexture(resourceId); } public static void setupProgram(){ if(program != -1) return; //Create shader program program = createProgram(R.raw.unlit_tex_vertex, R.raw.unlit_tex_fragment);
//Get vertex attribute parameters positionParam = GLES20.glGetAttribLocation(program, "a_Position");
Chapter 6
[ 221 ]
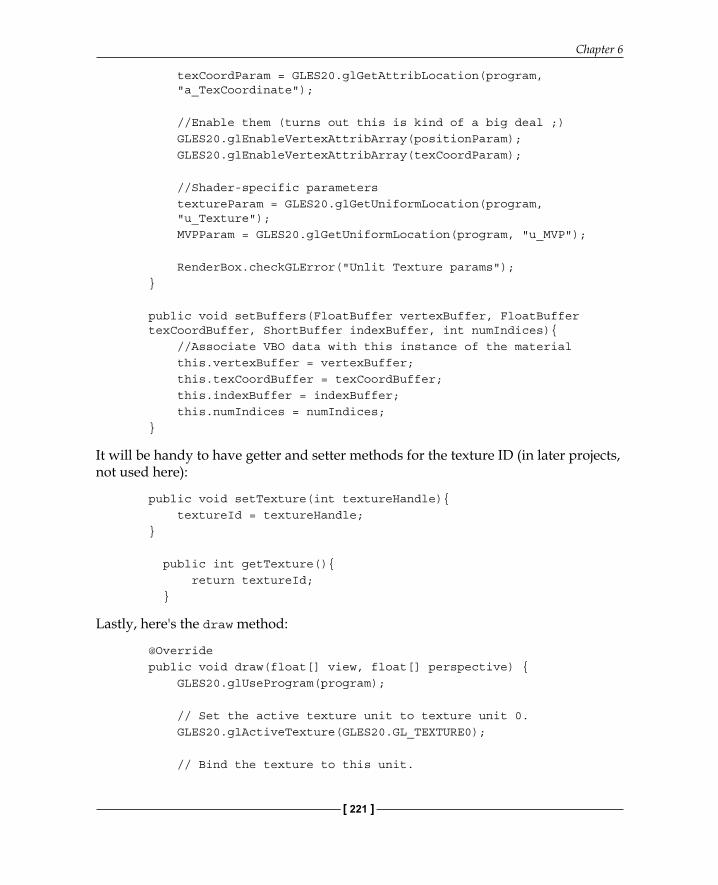
texCoordParam = GLES20.glGetAttribLocation(program, "a_TexCoordinate");
//Enable them (turns out this is kind of a big deal ;) GLES20.glEnableVertexAttribArray(positionParam); GLES20.glEnableVertexAttribArray(texCoordParam);
//Shader-specific parameters textureParam = GLES20.glGetUniformLocation(program, "u_Texture"); MVPParam = GLES20.glGetUniformLocation(program, "u_MVP");
RenderBox.checkGLError("Unlit Texture params"); } public void setBuffers(FloatBuffer vertexBuffer, FloatBuffer texCoordBuffer, ShortBuffer indexBuffer, int numIndices){ //Associate VBO data with this instance of the material this.vertexBuffer = vertexBuffer; this.texCoordBuffer = texCoordBuffer; this.indexBuffer = indexBuffer; this.numIndices = numIndices; }
It will be handy to have getter and setter methods for the texture ID (in later projects, not used here):
public void setTexture(int textureHandle){ textureId = textureHandle; }
public int getTexture(){ return textureId; }
Lastly, here's the draw method:
@Override public void draw(float[] view, float[] perspective) { GLES20.glUseProgram(program);
// Set the active texture unit to texture unit 0. GLES20.glActiveTexture(GLES20.GL_TEXTURE0);
// Bind the texture to this unit.
Solar System
[ 222 ]
GLES20.glBindTexture(GLES20.GL_TEXTURE_2D, textureId);
// Tell the texture uniform sampler to use this texture in // the shader by binding to texture unit 0. GLES20.glUniform1i(textureParam, 0);
Matrix.multiplyMM(modelView, 0, view, 0, RenderObject.model, 0); Matrix.multiplyMM(modelViewProjection, 0, perspective, 0, modelView, 0); // Set the ModelViewProjection matrix in the shader. GLES20.glUniformMatrix4fv(MVPParam, 1, false, modelViewProjection, 0);
// Set the vertex attributes GLES20.glVertexAttribPointer(positionParam, 3, GLES20.GL_FLOAT, false, 0, vertexBuffer); GLES20.glVertexAttribPointer(texCoordParam, 2, GLES20.GL_FLOAT, false, 0, texCoordBuffer);
GLES20.glDrawElements(GLES20.GL_TRIANGLES, numIndices, GLES20.GL_UNSIGNED_SHORT, indexBuffer);
RenderBox.checkGLError("Unlit Texture draw"); }}
Rendering with an unlit textureWe're ready to integrate the new material into our Sphere class and see how it looks.
In Sphere.java, add a new constructor that takes a boolean parameter, indicating that the texture should be lighted, and the createUnlitTexMaterial helper method:
public Sphere(int textureId, boolean lighting){ super(); allocateBuffers(); if (lighting) { createDiffuseMaterial(textureId); } else { createUnlitTexMaterial(textureId); } }
public Sphere createUnlitTexMaterial(int textureId){
Chapter 6
[ 223 ]
UnlitTexMaterial mat = new UnlitTexMaterial(textureId); mat.setBuffers(vertexBuffer, texCoordBuffer, indexBuffer, numIndices); material = mat; return this; }
Notice that the way in which we've defi ned constructors, you can call either new Sphere(texId) or Sphere(texId, true) to get lighted renders. But for unlit, you must use the second one as Sphere(texId, false). Also note that setting up the whole component in the constructor is not the only way to go. We only do it this way because it keeps our MainActivity code concise. In fact, as we start expanding our use of RenderBox and its shader library, it will become necessary to put most of this code into our MainActivity class. It would be impossible to create a constructor for every type of material. Ultimately, a materials system is necessary to allow you to create and set materials without having to create a new class for each one.
Adding the SunNow, all we need to do is add the Sun sphere to the setup method of MainActivity. Let's make it big, say, at a scale of 6.963 (remember that's in millions of kms). This value may seem arbitrary now, but you'll see where it comes from when we run the calculations on the Solar System geometry and scale the planets as well.
Add the following code to the setup method of MainActivity:
public void setup() { Transform origin = new Transform();
//Sun Transform sun = new Transform() .setParent(origin, false) .setLocalScale(6.963f, 6.963f, 6.963f) .addComponent(new Sphere(R.drawable.sun_tex, false));
//"Sun" light RenderBox.instance.mainLight.transform. setPosition( origin.getPosition()); RenderBox.instance.mainLight.color = new float[]{1, 1, 0.8f, 1};
//Earth…
Solar System
[ 224 ]
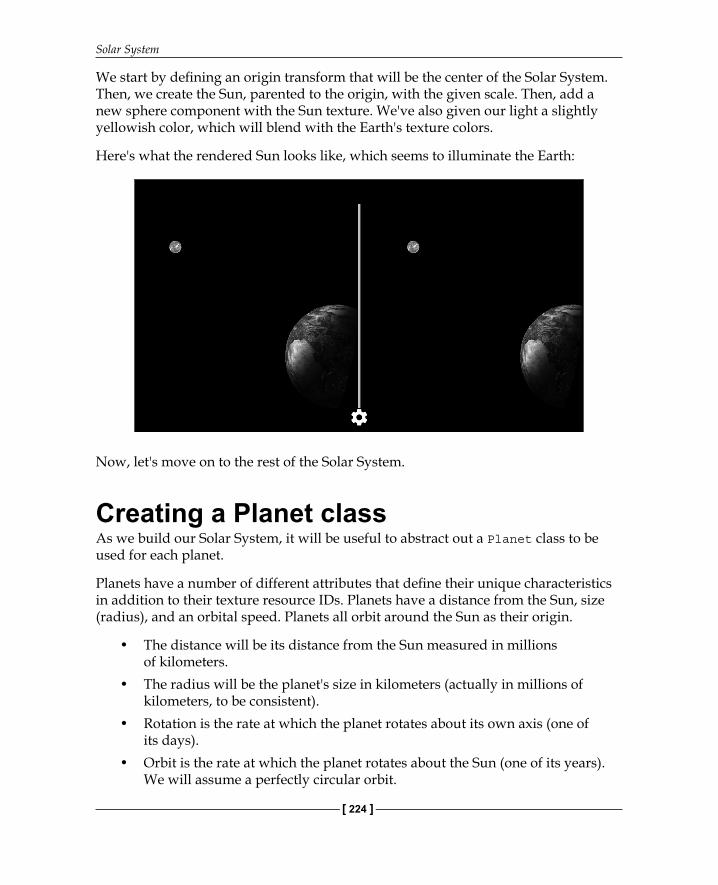
We start by defi ning an origin transform that will be the center of the Solar System. Then, we create the Sun, parented to the origin, with the given scale. Then, add a new sphere component with the Sun texture. We've also given our light a slightly yellowish color, which will blend with the Earth's texture colors.
Here's what the rendered Sun looks like, which seems to illuminate the Earth:
Now, let's move on to the rest of the Solar System.
Creating a Planet classAs we build our Solar System, it will be useful to abstract out a Planet class to be used for each planet.
Planets have a number of different attributes that defi ne their unique characteristics in addition to their texture resource IDs. Planets have a distance from the Sun, size (radius), and an orbital speed. Planets all orbit around the Sun as their origin.
• The distance will be its distance from the Sun measured in millions of kilometers.
• The radius will be the planet's size in kilometers (actually in millions of kilometers, to be consistent).
• Rotation is the rate at which the planet rotates about its own axis (one of its days).
• Orbit is the rate at which the planet rotates about the Sun (one of its years). We will assume a perfectly circular orbit.
Chapter 6
[ 225 ]
• TexId is the resource ID of the texture image for the planet.• origin is the center of its orbit. For planets, this will be the Sun's transform.
For a moon, this will be the moon's planet.
The Solar System is a really big thing. The distances and radii are measured in millions of kilometers. The planets are really far apart and relatively small compared to the size of their orbits. The rotation and orbit values are relative rates. You'll note that we'll normalize them to 10 seconds per Earth day.
From these attributes, a planet maintains two transforms: one transform for the planet itself and another transform that describes its location in orbit. In this way, we can rotate each planet's separate parent transform which, when the planet is at a local position whose magnitude is equal to the orbital radius, causes the planet to move in a circular pattern. Then we can rotate the planet itself using its transform.
For the Moon, we'll also use the Planet class (yeah, I know, maybe we should have named it HeavenlyBody?) but set its origin as the Earth. The moon does not rotate.
In your app (for example, app/java/com/cardbookvr/solarsystem/), create a Java class and name it Planet. Add variables for its attributes (distance, radius, rotation, orbit, orbitTransform, and transform), as follows:
public class Planet { protected float rotation, orbit; protected Transform orbitTransform, transform;
public float distance, radius;
Defi ne a constructor that takes the planet's attribute values, initializes the variables, and calculates the initial transforms:
public Planet(float distance, float radius, float rotation, float orbit, int texId, Transform origin){ setupPlanet(distance, radius, rotation, orbit, origin); transform.addComponent(new Sphere(texId)); }
public void setupPlanet(float distance, float radius, float rotation, float orbit, Transform origin){ this.distance = distance; this.radius = radius; this.rotation = rotation; this.orbit = orbit; this.orbitTransform = new Transform(); this.orbitTransform.setParent(origin, false); transform = new Transform()
Solar System
[ 226 ]
.setParent(orbitTransform, false) .setLocalPosition(distance, 0, 0) .setLocalRotation(180, 0, 0) .setLocalScale(radius, radius, radius); }
The constructor generates an initial transform for the planet and adds a Sphere component with the given texture.
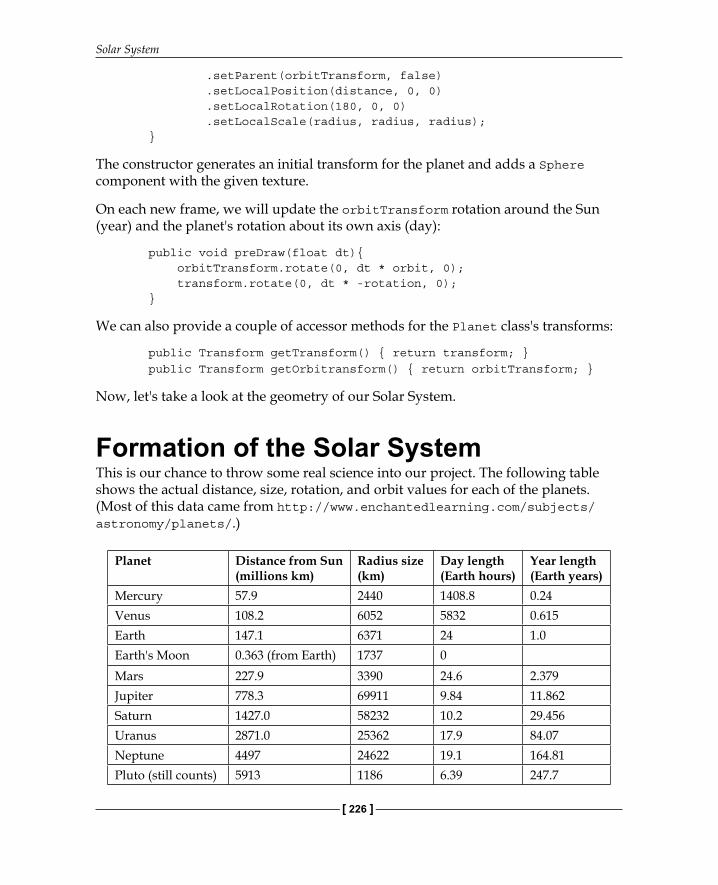
On each new frame, we will update the orbitTransform rotation around the Sun (year) and the planet's rotation about its own axis (day):
public void preDraw(float dt){ orbitTransform.rotate(0, dt * orbit, 0); transform.rotate(0, dt * -rotation, 0); }
We can also provide a couple of accessor methods for the Planet class's transforms:
public Transform getTransform() { return transform; } public Transform getOrbitransform() { return orbitTransform; }
Now, let's take a look at the geometry of our Solar System.
Formation of the Solar SystemThis is our chance to throw some real science into our project. The following table shows the actual distance, size, rotation, and orbit values for each of the planets. (Most of this data came from http://www.enchantedlearning.com/subjects/astronomy/planets/.)
Planet Distance from Sun (millions km)
Radius size (km)
Day length (Earth hours)
Year length (Earth years)
Mercury 57.9 2440 1408.8 0.24Venus 108.2 6052 5832 0.615Earth 147.1 6371 24 1.0Earth's Moon 0.363 (from Earth) 1737 0Mars 227.9 3390 24.6 2.379Jupiter 778.3 69911 9.84 11.862Saturn 1427.0 58232 10.2 29.456Uranus 2871.0 25362 17.9 84.07Neptune 4497 24622 19.1 164.81Pluto (still counts) 5913 1186 6.39 247.7
Chapter 6
[ 227 ]
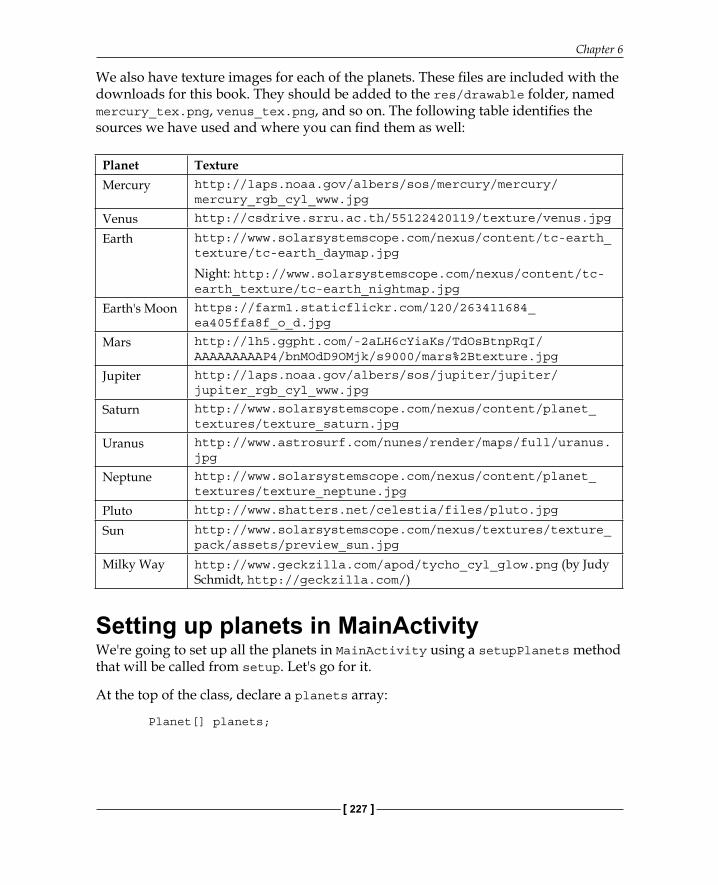
We also have texture images for each of the planets. These fi les are included with the downloads for this book. They should be added to the res/drawable folder, named mercury_tex.png, venus_tex.png, and so on. The following table identifi es the sources we have used and where you can fi nd them as well:
Planet TextureMercury http://laps.noaa.gov/albers/sos/mercury/mercury/
mercury_rgb_cyl_www.jpg
Venus http://csdrive.srru.ac.th/55122420119/texture/venus.jpg
Earth http://www.solarsystemscope.com/nexus/content/tc-earth_texture/tc-earth_daymap.jpg
Night: http://www.solarsystemscope.com/nexus/content/tc-earth_texture/tc-earth_nightmap.jpg
Earth's Moon https://farm1.staticflickr.com/120/263411684_ea405ffa8f_o_d.jpg
Mars http://lh5.ggpht.com/-2aLH6cYiaKs/TdOsBtnpRqI/AAAAAAAAAP4/bnMOdD9OMjk/s9000/mars%2Btexture.jpg
Jupiter http://laps.noaa.gov/albers/sos/jupiter/jupiter/jupiter_rgb_cyl_www.jpg
Saturn http://www.solarsystemscope.com/nexus/content/planet_textures/texture_saturn.jpg
Uranus http://www.astrosurf.com/nunes/render/maps/full/uranus.jpg
Neptune http://www.solarsystemscope.com/nexus/content/planet_textures/texture_neptune.jpg
Pluto http://www.shatters.net/celestia/files/pluto.jpg
Sun http://www.solarsystemscope.com/nexus/textures/texture_pack/assets/preview_sun.jpg
Milky Way http://www.geckzilla.com/apod/tycho_cyl_glow.png (by Judy Schmidt, http://geckzilla.com/)
Setting up planets in MainActivityWe're going to set up all the planets in MainActivity using a setupPlanets method that will be called from setup. Let's go for it.
At the top of the class, declare a planets array:
Planet[] planets;
Solar System
[ 228 ]
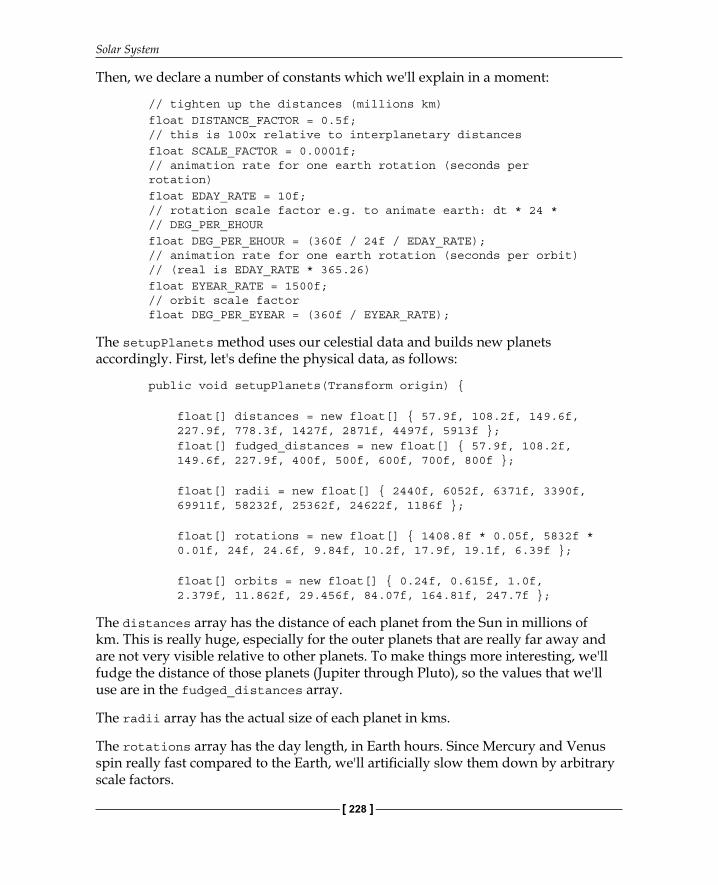
Then, we declare a number of constants which we'll explain in a moment:
// tighten up the distances (millions km) float DISTANCE_FACTOR = 0.5f; // this is 100x relative to interplanetary distances float SCALE_FACTOR = 0.0001f; // animation rate for one earth rotation (seconds per rotation) float EDAY_RATE = 10f; // rotation scale factor e.g. to animate earth: dt * 24 * // DEG_PER_EHOUR float DEG_PER_EHOUR = (360f / 24f / EDAY_RATE); // animation rate for one earth rotation (seconds per orbit) // (real is EDAY_RATE * 365.26) float EYEAR_RATE = 1500f; // orbit scale factor float DEG_PER_EYEAR = (360f / EYEAR_RATE);
The setupPlanets method uses our celestial data and builds new planets accordingly. First, let's defi ne the physical data, as follows:
public void setupPlanets(Transform origin) {
float[] distances = new float[] { 57.9f, 108.2f, 149.6f, 227.9f, 778.3f, 1427f, 2871f, 4497f, 5913f }; float[] fudged_distances = new float[] { 57.9f, 108.2f, 149.6f, 227.9f, 400f, 500f, 600f, 700f, 800f };
float[] radii = new float[] { 2440f, 6052f, 6371f, 3390f, 69911f, 58232f, 25362f, 24622f, 1186f };
float[] rotations = new float[] { 1408.8f * 0.05f, 5832f * 0.01f, 24f, 24.6f, 9.84f, 10.2f, 17.9f, 19.1f, 6.39f };
float[] orbits = new float[] { 0.24f, 0.615f, 1.0f, 2.379f, 11.862f, 29.456f, 84.07f, 164.81f, 247.7f };
The distances array has the distance of each planet from the Sun in millions of km. This is really huge, especially for the outer planets that are really far away and are not very visible relative to other planets. To make things more interesting, we'll fudge the distance of those planets (Jupiter through Pluto), so the values that we'll use are in the fudged_distances array.
The radii array has the actual size of each planet in kms.
The rotations array has the day length, in Earth hours. Since Mercury and Venus spin really fast compared to the Earth, we'll artifi cially slow them down by arbitrary scale factors.

Chapter 6
[ 229 ]
The orbits array has the length of each planet's year in Earth years and the time it takes for one complete rotation around the Sun.
Now, let's set up the texture IDs for each planet's materials:
int[] texIds = new int[]{ R.drawable.mercury_tex, R.drawable.venus_tex, R.drawable.earth_tex, R.drawable.mars_tex, R.drawable.jupiter_tex, R.drawable.saturn_tex, R.drawable.uranus_tex, R.drawable.neptune_tex, R.drawable.pluto_tex };
Now initialize the planets array, creating a new Planet object for each:
planets = new Planet[distances.length + 1]; for(int i = 0; i < distances.length; i++){ planets[i] = new Planet( fudged_distances[i] * DISTANCE_FACTOR, radii[i] * SCALE_FACTOR, rotations[i] * DEG_PER_EHOUR, orbits[i] * DEG_PER_EYEAR * fudged_distances[i]/distances[i], texIds[i], origin); }
While we fudged some of the planets' actual distances so that they'd be closer to the inner Solar System, we also multiply all the distances by a DISTANCE_FACTOR scalar, mostly to not blow up our fl oat precision calculations. We scale all the planet sizes by a different SCALE_FACTOR variable to make them relatively larger than life (a factor of 0.0001 is actually a factor of 100 because radii are calculated in km while the distance is calculated in millions of km).
The rotation animation rate is the actual length of the day of the planet scaled by how fast we want to animate a day in VR. We default to 10 seconds per Earth day.
Lastly, the planetary orbit animation has its own scale factor. We've sped it up about 2 X. You can also adjust the orbit rate of the distance fudge factors (for example, Pluto orbits the Sun once every 247 Earth years, but we've moved it a lot closer so it needs to slow down).
Solar System
[ 230 ]
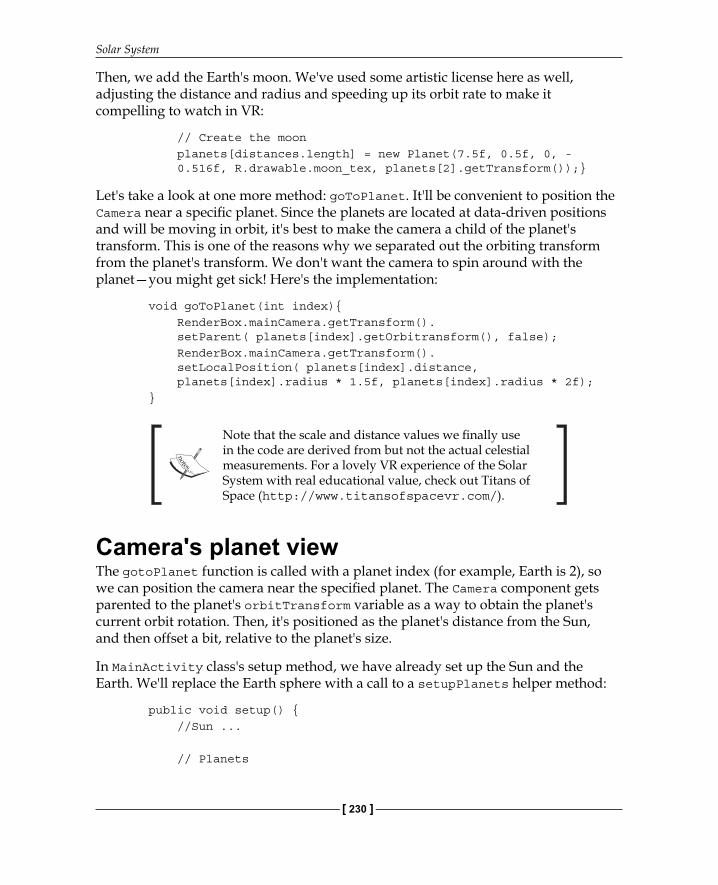
Then, we add the Earth's moon. We've used some artistic license here as well, adjusting the distance and radius and speeding up its orbit rate to make it compelling to watch in VR:
// Create the moon planets[distances.length] = new Planet(7.5f, 0.5f, 0, - 0.516f, R.drawable.moon_tex, planets[2].getTransform());}
Let's take a look at one more method: goToPlanet. It'll be convenient to position the Camera near a specifi c planet. Since the planets are located at data-driven positions and will be moving in orbit, it's best to make the camera a child of the planet's transform. This is one of the reasons why we separated out the orbiting transform from the planet's transform. We don't want the camera to spin around with the planet—you might get sick! Here's the implementation:
void goToPlanet(int index){ RenderBox.mainCamera.getTransform(). setParent( planets[index].getOrbitransform(), false); RenderBox.mainCamera.getTransform(). setLocalPosition( planets[index].distance, planets[index].radius * 1.5f, planets[index].radius * 2f); }
Note that the scale and distance values we fi nally use in the code are derived from but not the actual celestial measurements. For a lovely VR experience of the Solar System with real educational value, check out Titans of Space (http://www.titansofspacevr.com/).
Camera's planet viewThe gotoPlanet function is called with a planet index (for example, Earth is 2), so we can position the camera near the specifi ed planet. The Camera component gets parented to the planet's orbitTransform variable as a way to obtain the planet's current orbit rotation. Then, it's positioned as the planet's distance from the Sun, and then offset a bit, relative to the planet's size.
In MainActivity class's setup method, we have already set up the Sun and the Earth. We'll replace the Earth sphere with a call to a setupPlanets helper method:
public void setup() { //Sun ...
// Planets
Chapter 6
[ 231 ]
setupPlanets(origin);
// Start looking at Earth goToPlanet(2); }
If you build and run the project now, you will see the Earth, the Sun, and maybe some of the planets. But not until they're moving in their orbits will they come to life.
Animating the heavenly bodiesNow that we have all the planets instantiated, we can animate their orbit and axis rotations. All it takes is updating their transforms in the MainAcitvity class's preDraw method:
@Override public void preDraw() { float dt = Time.getDeltaTime(); for(int i = 0; i < planets.length; i++){ planets[i].preDraw(dt); } }
Run! Oh, wow! I feel like a god. Well, not exactly, because it's dark outside. We need stars!
A starry sky domeWhat if the Universe was just a giant ball and we're inside it? That's what we're going to imagine to implement a starry sky spherical background.
In computer graphics, you can create backgrounds to make the scene look bigger than it really is. You can use a spherical texture, or skydome, as we will use here. (A common alternative in many game engines is a cuboid skybox, constructed from six internal faces of a cube.)
Among the set of textures that we provided with this book is milky_way_tex.png. Drag a copy of this fi le into your res/drawable/ directory, if it's not there already.
Now, we can add the starry sky dome to our scene. Add the following code to MainActivity.setup():
//Stars in the sky Transform stars = new Transform() .setParent(RenderBox.mainCamera.transform, false)
Solar System
[ 232 ]
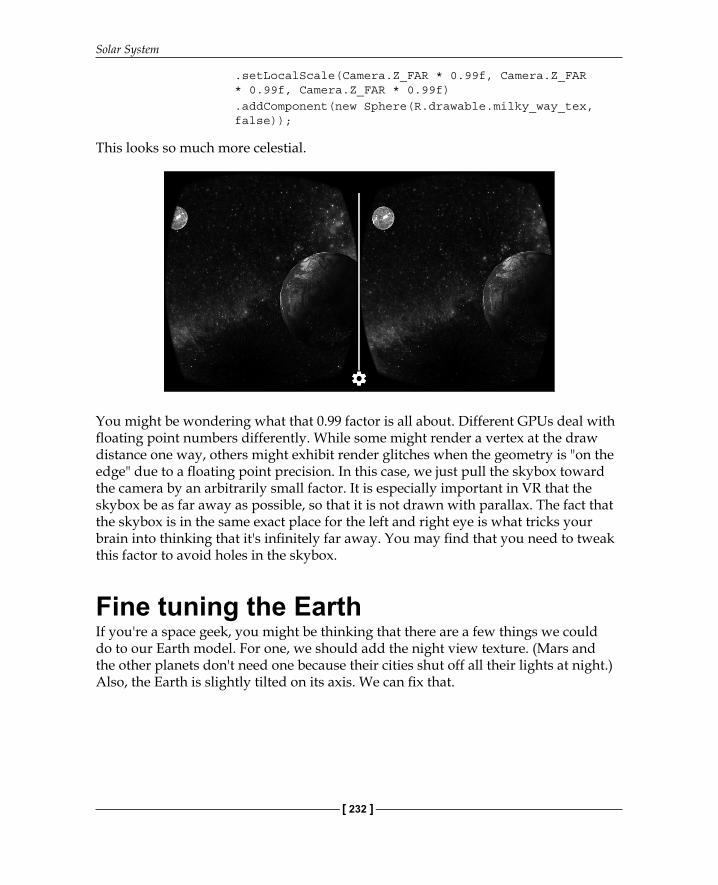
.setLocalScale(Camera.Z_FAR * 0.99f, Camera.Z_FAR * 0.99f, Camera.Z_FAR * 0.99f) .addComponent(new Sphere(R.drawable.milky_way_tex, false));
This looks so much more celestial.
You might be wondering what that 0.99 factor is all about. Different GPUs deal with fl oating point numbers differently. While some might render a vertex at the draw distance one way, others might exhibit render glitches when the geometry is "on the edge" due to a fl oating point precision. In this case, we just pull the skybox toward the camera by an arbitrarily small factor. It is especially important in VR that the skybox be as far away as possible, so that it is not drawn with parallax. The fact that the skybox is in the same exact place for the left and right eye is what tricks your brain into thinking that it's infi nitely far away. You may fi nd that you need to tweak this factor to avoid holes in the skybox.
Fine tuning the EarthIf you're a space geek, you might be thinking that there are a few things we could do to our Earth model. For one, we should add the night view texture. (Mars and the other planets don't need one because their cities shut off all their lights at night.) Also, the Earth is slightly tilted on its axis. We can fi x that.
Chapter 6
[ 233 ]
The night textureFirst, let's add the night texture. To do this, let's make an Earth Java class a subclass of a Planet. Right-click on your Java solarsystem folder, select New | Java Class, and name it Earth. Then, start defi ning it like this:
public class Earth extends Planet {
public Earth(float distance, float radius, float rotation, float orbit, int texId, int nightTexId, Transform origin) { super(distance, radius, rotation, orbit, origin); transform.addComponent(new Sphere(texId, nightTexId)); }}
This requires that we add a new constructor to the Planet class, which omits texId, since the Earth constructor creates the new Sphere component, this time with two textures, textId and nightTexId.
In Planet.java, add the following code:
public Planet(float distance, float radius, float rotation, float orbit, Transform origin){ setupPlanet(distance, radius, rotation, orbit, origin); }
Now, in MainActivity, let's create an Earth separately from the other planets. In setupPlanets, modify the loop to handle this case:
for(int i = 0; i < distances.length; i++){ if (i == 2) { planets[i] = new Earth( fudged_distances[i] * DISTANCE_FACTOR, radii[i] * SCALE_FACTOR, rotations[i] * DEG_PER_EHOUR, orbits[i] * DEG_PER_EYEAR * fudged_distances[i] / distances[i], texIds[i], R.drawable.earth_night_tex, origin); } else { planets[i] = new Planet(
Solar System
[ 234 ]
Axis tilt and wobbleAmong all its greatness, like all nature and mankind, the Earth is not perfect. In this case, we're talking about tilt and wobble. The Earth's axis of rotation is not exactly perpendicular to the orbital plane. It also suffers from a slight wobble as it rotates. We can show this in our virtual model.
Modify the Earth class constructor to read as follows:
Transform wobble;
public Earth(float distance, float radius, float rotation, float orbit, int texId, int nightTexId, Transform origin) { super(distance, radius, rotation, orbit, origin);
wobble = new Transform() .setLocalPosition(distance, 0, 0) .setParent(orbitTransform, false); Transform tilt = new Transform() .setLocalRotation(-23.4f,0,0) .setParent(wobble, false); transform .setParent(tilt, false) .setLocalPosition(0,0,0) .addComponent(new Sphere(texId, nightTexId)); }
Now, the Earth's rotation on each frame is against this wobble transform, so give Earth its own preDraw method, as follows:
public void preDraw(float dt){ orbitTransform.rotate(0, dt * orbit, 0); wobble.rotate(0, dt * 5, 0); transform.rotate(0, dt * -rotation, 0); }
Changing the camera locationThe fi nal feature of our Solar System is to make it more interactive. I mean all these planets look so cool, but you can't really see them from so far away. How about clicking on the Cardboard trigger to jump from planet to planet, nice and up close?
Chapter 6
[ 235 ]
Fortunately, we already have a goToPlanet method that we used to set our initial view from the Earth. Because MainActivity extends CardboardActivity, we can use the Cardboard SDK's onCardboardTrigger method (refer to https://developers.google.com/cardboard/android/latest/reference/com/google/vrtoolkit/cardboard/CardboardActivity.html#onCardboardTrigger()).
Add the following code to MainActivity:
int currPlanet = 2;
public void onCardboardTrigger(){ if (++currPlanet >= planets.length) currPlanet = 0; goToPlanet(currPlanet); }
The app will start with the camera near the Earth (index 2). When the user presses the cardboard trigger (or touches the screen), it'll go to Mars (3). Then, Jupiter, and so on, and then cycle back to Mercury (0).
Possible enhancementsCan you think of other enhancements to this project? Here are a few you could consider and try to implement:
• Add rings to Saturn. (A cheap way to implement might be a plane with transparency.)
• Improve goToPlanet so that your camera position animates between positions.• Add controls to allow you to change the perspective or fly freely
through space.• Add a top-down view option, for a "traditional" picture of the Solar System.
(Be aware of float precision issues at scale.)• Add moons to each of the other planets. (This can be implemented just like
we did for the Earth's moon, with its mother planet as its origin.)• Represent the asteroid belt between Mars and Jupiter.• Add tilt and wobble to the other planets. Did you know that Uranus spins
on its side?• Add text labels to each planet that use the planet's transform but always face
the camera. In lieu of 3D text objects, the labels could be prepared images.• Add background music.• Improve the positional accuracy in such a way that it accurately represents
the relative positions of each planet on a given date.
Solar System
[ 236 ]
Updating the RenderBox libraryWith the Solar System project implemented and our code stabilized, you might realize that we've built some code that is not necessarily specifi c to this application, which can be reused in other projects, and ought to make its way back to the RenderBox library. That's what we'll do now.
We recommend you do this directly within Android Studio, selecting and copying from this project's hierarchy view to the other's. Perform the following steps:
1. Move all the .shader fi les from the Solar System's res/raw/ directory into the res/raw/ directory of the RenderBox lib's RenderBox module. If you've been following along, there will be eight fi les for the vertex and fragment .shader fi les for day_night, diffuse_lighting, solid_color_lighting, and unilt_tex.
2. Move all the Component and Material .java fi les from the Solar System's RenderBoxExt module folder to the corresponding folders in RenderBox lib's RenderBox module. Remove all invalid references to MainActivity in the source code.
3. In the Solar System project, we implemented a method named loadTexture in MainActivity. It rightfully belongs to the RenderBox library. Find the declaration for loadTexture in the Solar System's MainActivity.java fi le, and cut the code. Then, open the RenderObject.java fi le in RenderBox lib and paste the defi nition into the RenderObject class.
4. In the RenderBox lib, replace (refactor) all the instances of MainActivity.loadTexture with RenderObject.loadTexture. These will be found in several Material Java fi les, where we load material textures.
5. In RenderBox.java, the reset() method destroys the handles of any materials. Add the calls for the new materials that we just introduced:
DayNightMaterial.destroy()
DiffuseLightingMaterial.destroy()
SolidColorLightingMaterial.destroy()
UnlitTexMaterial.destroy()
6. Resolve any package name mismatches, and fi x any other compile-time errors, including removing any references to solarsystem throughout.
Now, you should be able to successfully rebuild the library (Build | Make Module 'renderbox') to generate an updated renderbox[-debug].aar library fi le.
Chapter 6
[ 237 ]
Lastly, the Solar System project can now use the new .aar library. Copy the renderbox[-debug].aar fi le from the RenderBoxLib project's renderbox/build/output folder into the SolarSystem renderbox/ folder, replacing the older version of the same fi le with the newly built one. Build and run the Solar System project with this version of the library.
SummaryCongratulations! You received an "A" on your Solar System science project!
In this chapter, we built a Solar System simulation that can be viewed in virtual reality using a Cardboard VR viewer and an Android phone. This project uses and expands the RenderBox library, as discussed in Chapter 5, RenderBox Engine.
To begin, we added a Sphere component to our repertoire. Initially, it was rendered using a solid color lighting material. Then, we defi ned a diffuse lighting material and rendered the sphere with an Earth image texture, resulting in a rendered globe. Next, we enhanced the material to accept two textures, adding an additional one to the back/"night" side of the sphere. And lastly, we c reated an unlit texture material, which is used for the Sun. Armed with actual sizes of the planets and distances from the Sun, we confi gured a Solar System scene with nine planets, the Earth's moon, and the Sun. We added a star fi eld as a sky dome, and we animated the heavenly bodies for their appropriate rotation (day) and orbit (year). We also implemented some interaction, responding to Cardboard trigger events by moving the camera view from planet to planet.
In the next chapter, we'll get to use our sphere again, this time, to view your library of 360-degree photos.

Where to buy this book You can buy Cardboard VR Projects for Android from the Packt Publishing website. Alternatively, you can buy the book from Amazon, BN.com, Computer Manuals and most internet book retailers.
Click here for ordering and shipping details.
www.PacktPub.com
Stay Connected:
Get more information Cardboard VR Projects for Android


![A Window to your Smartphone: Exploring Interaction and ... · tion VR [5], Google Cardboard [6] and similar technologies, which have extended the accessibility of immersive VR to](https://static.fdocuments.net/doc/165x107/6039d9f50323592ba33f99a5/a-window-to-your-smartphone-exploring-interaction-and-tion-vr-5-google-cardboard.jpg)


