Microscopes - Olympus IX71 and IX51 Inverted Microscope Instructions

Butterfly Wings and Microscopes Author: Patricia Gould
Date Created: 8/3/08 Subject: Biology
Level: 7-12 Standards: NYS Living Environment
Standard 1 – Analysis, Inquiry and Design Standard 2 – Information Systems Standard 4 – The Living Environment Standard 6 – Interconnectedness: Common Themes English Language Arts Standard 1 – Language for Information and Understanding Standard 3 – Language for Critical Analysis and Evaluation
Schedule: Activity #1 3 days Activity #2 3 days
Objectives: Appreciate the connection between science knowledge and technology advancements. Determine the structure of butterfly wings using multiple technologies and different magnifications. Compare and contrast wing structures of two species showing mimicry Create a hypothesis, draw a conclusion and give suggestions for additional research Communicate and discuss findings.
Students will: Make a hypothesis about the structure of the wing scales in different parts of the wing Make a hypothesis about similarities in wing scales between two butterfly mimics Examine butterfly wings at various magnifications and record their observations Explain how the different types of microscopes helped them learn about wing structure and relate this to the history of science discovery Draw a conclusion based on their hypothesis Give suggestions for further research Discuss their experience with the class.
Vocabulary: light microscope scanning electron
microscope mimicry
resolution magnification scale bar
Materials: For Each Pair/group: Butterfly wing
At the Stations- Station 1: Colored pencils 2 Hand lens Tweezers Ruler Station 2: Compound Microscope Microscope slides Measurement slide Tweezers Colored pencils Station 3: Compound Microscope
Gooseneck lamp Measurement slide Tweezers Colored pencils Microscope slide
(monarch and viceroy needed for activity 2) per group Station 4: Stereo Microscope Measurement slide Tweezers Petri dish Ruler Station 5: Scanning Electron
Microscope Prepared mounts of wings and/or electron micrographs of wing scales
Butterflies and Microscopes Lab - 2 –
Science Content for the Teacher: Resolution - the ability to distinguish space between two objects and to see them as distinct
images. Magnification – the ratio of the size of an image compared to its actual size. If a microscope cannot resolve two points, then magnifying the image will not help. For example,
if you take a picture out of focus with your camera, enlarging it will only make it a big fuzzy picture.
Scale Bar – line drawn on an image to demonstrate actual size of the magnified image. Due to the increased use of digital media, it is no longer enough to state the magnification. The final product is not to the same scale because the programs in which it is used will change the ultimate size. The scale bar allows quantitative analysis of images and comparisons, just as it does on maps with different scales.
Light Microscope – uses visible light to illuminate the object and optical lenses to focus and enlarge the image.
Scanning Electron Microscope – a beam of electrons is used to create an image of the surface of an object. The electron beam is controlled by electromagnets as it sweeps across a small area of the sample in a series of rows. The electrons that are emitted from the sample are then collected and read by a detector which sends information to a viewing monitor. The image is saved digitally or by photograph.
Background information: Knowledge about the natural world began when man made observations about his environment.
The first known systematic studies of nature were done in the fifth century BC from the writings of Hippocrates and Aristotle. Their knowledge was limited to what was visible with the naked eye. Lenses have been found dating back to the ancient Assyrians and by the fifteenth century became commonly used for correcting vision. However, the development of the microscope did not happen until the seventeenth century. This new technology lead to a number of new ideas about the natural world, and especially contributed to the development of the cell theory. As lenses improved, more details could be seen by scientists. Unfortunately, the wavelength of light became a limiting factor. Even the best microscopes could not resolve any two objects closer than half the wavelength of the light used (~ 0.2 microns), With the discovery of the electron in the nineteenth century, electron microscopes were developed. Electrons travel with a much smaller wavelength and the resolution increases (~ 0.0002 microns). Structures of the cell never before seen became visible. As technology improved, our ability to gain a deeper understanding of the natural world also improved. At each stage of learning, scientists not only answered questions, but generated new ones.
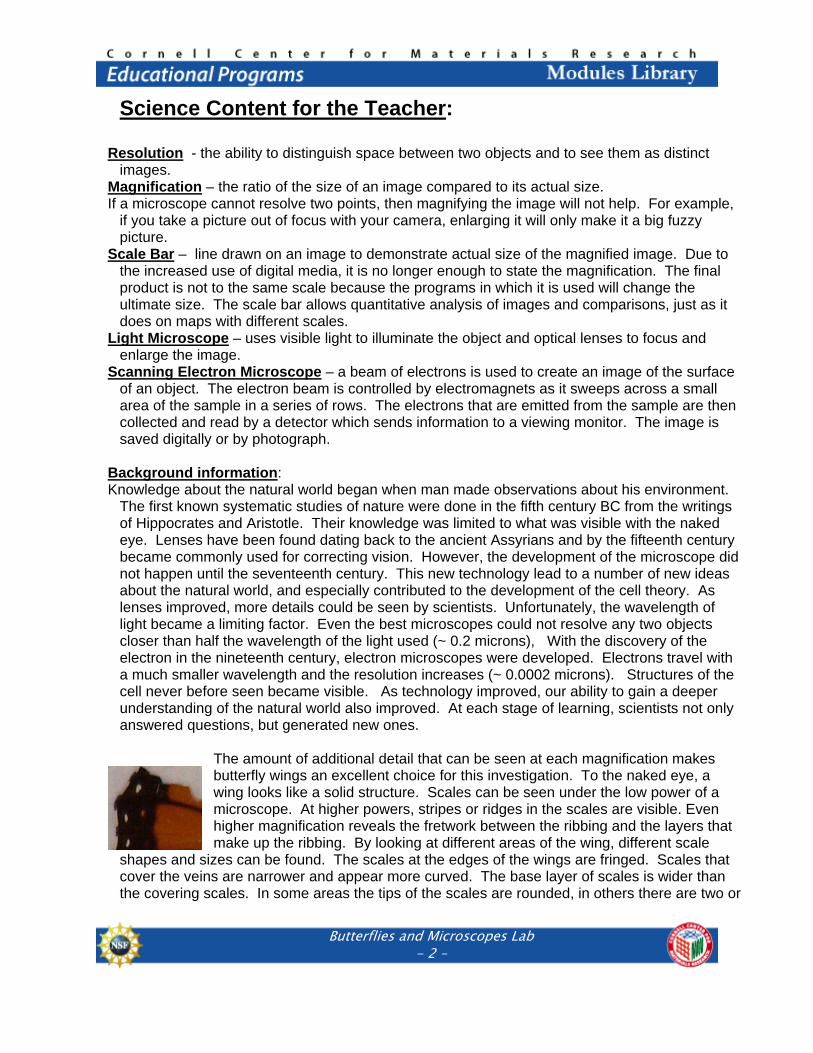
The amount of additional detail that can be seen at each magnification makes butterfly wings an excellent choice for this investigation. To the naked eye, a wing looks like a solid structure. Scales can be seen under the low power of a microscope. At higher powers, stripes or ridges in the scales are visible. Even higher magnification reveals the fretwork between the ribbing and the layers that make up the ribbing. By looking at different areas of the wing, different scale
shapes and sizes can be found. The scales at the edges of the wings are fringed. Scales that cover the veins are narrower and appear more curved. The base layer of scales is wider than the covering scales. In some areas the tips of the scales are rounded, in others there are two or
Butterflies and Microscopes Lab - 3 –
three scallops at the end of each scale. Sensory organs (sencilla) can be seen on the wings either as bumps in the veins or hair like protrusions.
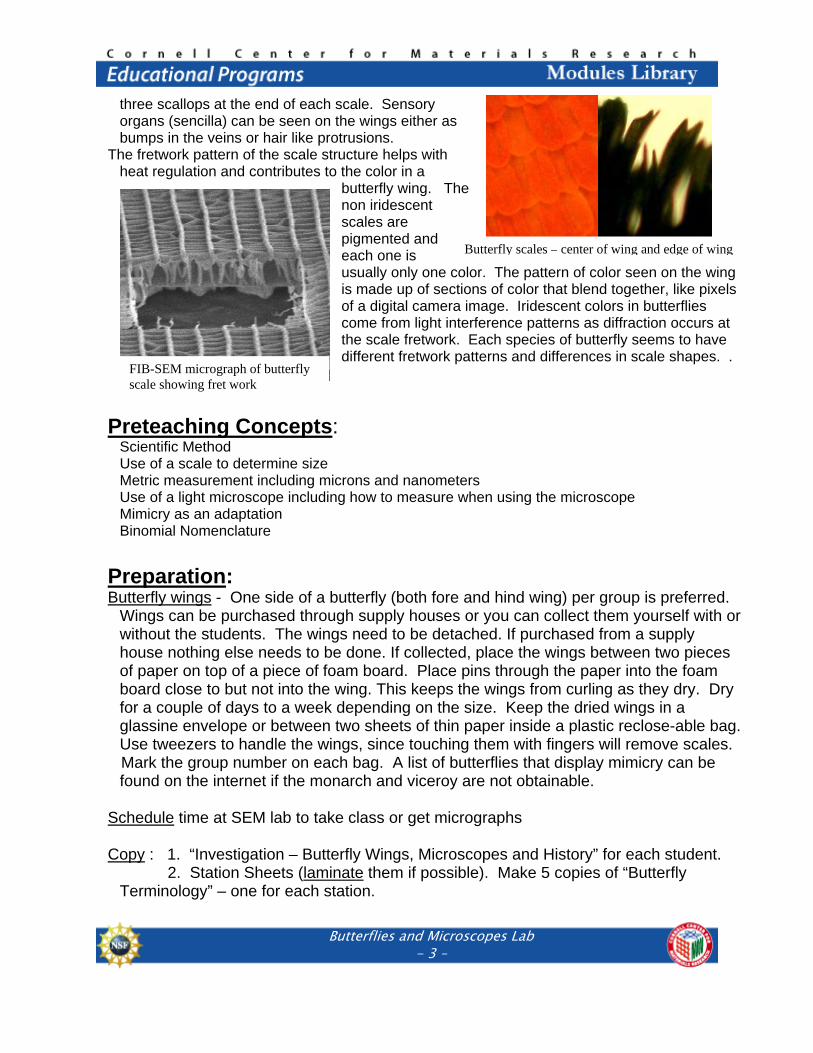
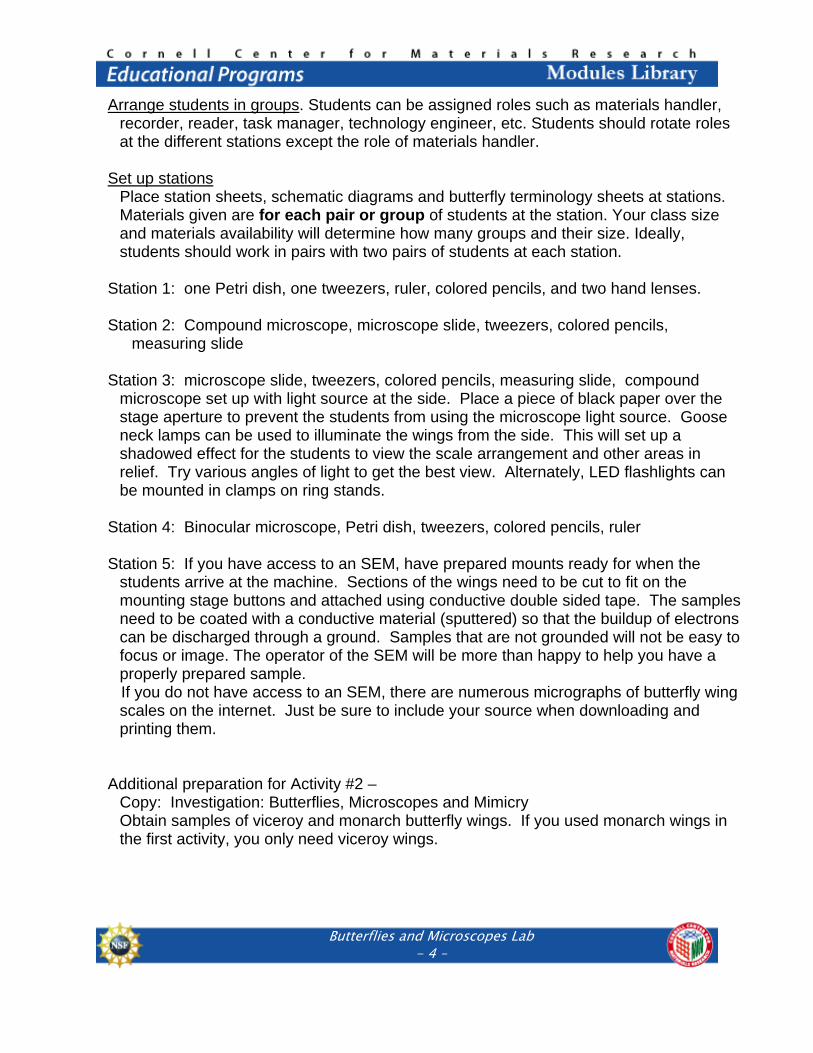
The fretwork pattern of the scale structure helps with heat regulation and contributes to the color in a
butterfly wing. The non iridescent scales are pigmented and each one is usually only one color. The pattern of color seen on the wing is made up of sections of color that blend together, like pixels of a digital camera image. Iridescent colors in butterflies come from light interference patterns as diffraction occurs at the scale fretwork. Each species of butterfly seems to have different fretwork patterns and differences in scale shapes. .
Preteaching Concepts: Scientific Method Use of a scale to determine size Metric measurement including microns and nanometers Use of a light microscope including how to measure when using the microscope Mimicry as an adaptation Binomial Nomenclature
Preparation: Butterfly wings - One side of a butterfly (both fore and hind wing) per group is preferred.
Wings can be purchased through supply houses or you can collect them yourself with or without the students. The wings need to be detached. If purchased from a supply house nothing else needs to be done. If collected, place the wings between two pieces of paper on top of a piece of foam board. Place pins through the paper into the foam board close to but not into the wing. This keeps the wings from curling as they dry. Dry for a couple of days to a week depending on the size. Keep the dried wings in a glassine envelope or between two sheets of thin paper inside a plastic reclose-able bag. Use tweezers to handle the wings, since touching them with fingers will remove scales.
Mark the group number on each bag. A list of butterflies that display mimicry can be found on the internet if the monarch and viceroy are not obtainable.
Schedule time at SEM lab to take class or get micrographs Copy : 1. “Investigation – Butterfly Wings, Microscopes and History” for each student.
2. Station Sheets (laminate them if possible). Make 5 copies of “Butterfly Terminology” – one for each station.
Butterfly scales – center of wing and edge of wing
FIB-SEM micrograph of butterfly scale showing fret work
Butterflies and Microscopes Lab - 4 –
Arrange students in groups. Students can be assigned roles such as materials handler, recorder, reader, task manager, technology engineer, etc. Students should rotate roles at the different stations except the role of materials handler.
Set up stations Place station sheets, schematic diagrams and butterfly terminology sheets at stations.
Materials given are for each pair or group of students at the station. Your class size and materials availability will determine how many groups and their size. Ideally, students should work in pairs with two pairs of students at each station.
Station 1: one Petri dish, one tweezers, ruler, colored pencils, and two hand lenses. Station 2: Compound microscope, microscope slide, tweezers, colored pencils,
measuring slide Station 3: microscope slide, tweezers, colored pencils, measuring slide, compound
microscope set up with light source at the side. Place a piece of black paper over the stage aperture to prevent the students from using the microscope light source. Goose neck lamps can be used to illuminate the wings from the side. This will set up a shadowed effect for the students to view the scale arrangement and other areas in relief. Try various angles of light to get the best view. Alternately, LED flashlights can be mounted in clamps on ring stands.
Station 4: Binocular microscope, Petri dish, tweezers, colored pencils, ruler Station 5: If you have access to an SEM, have prepared mounts ready for when the
students arrive at the machine. Sections of the wings need to be cut to fit on the mounting stage buttons and attached using conductive double sided tape. The samples need to be coated with a conductive material (sputtered) so that the buildup of electrons can be discharged through a ground. Samples that are not grounded will not be easy to focus or image. The operator of the SEM will be more than happy to help you have a properly prepared sample.
If you do not have access to an SEM, there are numerous micrographs of butterfly wing scales on the internet. Just be sure to include your source when downloading and printing them.
Additional preparation for Activity #2 –
Copy: Investigation: Butterflies, Microscopes and Mimicry Obtain samples of viceroy and monarch butterfly wings. If you used monarch wings in the first activity, you only need viceroy wings.

Butterflies and Microscopes Lab - 5 –
Activity #1: Butterfly Wings, Microscopes and History Classroom Procedure: Day 1: In classroom: Double period 15 minutes: Have students list as many tools used by scientists as they can. Discuss why so many tools are needed and what the tools help them learn. Ask what the first scientists used as tools. What do you think they were they able to discover about the world? What was the most important tool developed for biologists? What does the microscope do for a scientist?
Explain that this lab will show them the difference in the type of information obtained using different forms of observation – from the unaided eye to the electron microscope. Their tasks will give them an understanding of how advances in technology have helped increase our science knowledge.
Hand out lab “Butterfly Wings, Microscopes and History”. Have students complete the first section (Prediction and Hypothesis)
before they begin their stations. Inform them of their groups and which station will be their starting point. Also
assign one member of the group to be the materials handler who will be responsible for the butterfly wings at all times.
Students begin stations. Teacher circulates to assist in technical matters. The electron microscope operator will assist the students at that station if you are at the SEM facility.
Students have approximately 18 minutes at each station to complete their tasks. Day 2: Single period Students go to lab stations and complete the tasks. Day 3: Double Period – Share findings and have class discussion.
Activity #2: Butterfly Wings, Microscopes and Mimicry Follow the same schedule as Activity #1, but begin with a classroom discussion about mimicry. Hand out information on the viceroy mimicry of the monarch butterfly. The questions they will be trying to answer in this lab are: How much of a mimic is the viceroy? Do the butterflies share similarities in scale structure as well as pigment and pattern?
Butterflies and Microscopes Lab - 6 –
Assessment: Assessment will be based on the students answers on their worksheets and their
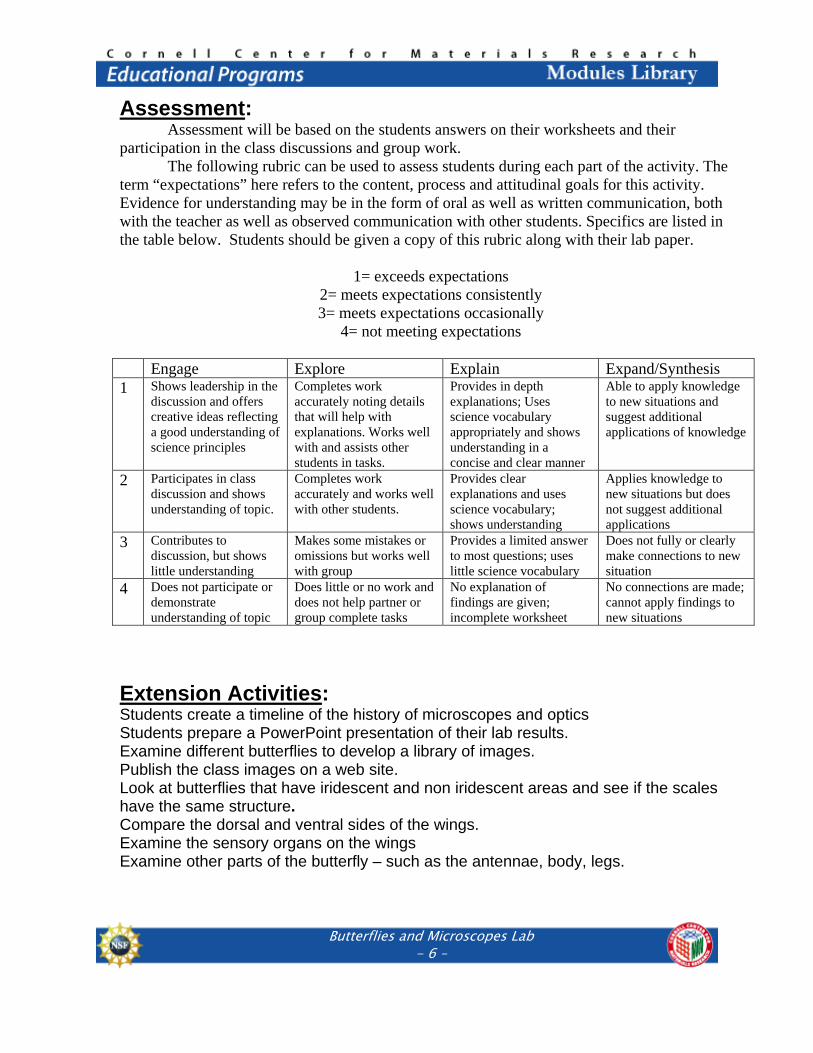
participation in the class discussions and group work. The following rubric can be used to assess students during each part of the activity. The
term “expectations” here refers to the content, process and attitudinal goals for this activity. Evidence for understanding may be in the form of oral as well as written communication, both with the teacher as well as observed communication with other students. Specifics are listed in the table below. Students should be given a copy of this rubric along with their lab paper.
1= exceeds expectations 2= meets expectations consistently 3= meets expectations occasionally
4= not meeting expectations Engage Explore Explain Expand/Synthesis 1 Shows leadership in the
discussion and offers creative ideas reflecting a good understanding of science principles
Completes work accurately noting details that will help with explanations. Works well with and assists other students in tasks.
Provides in depth explanations; Uses science vocabulary appropriately and shows understanding in a concise and clear manner
Able to apply knowledge to new situations and suggest additional applications of knowledge
2 Participates in class discussion and shows understanding of topic.
Completes work accurately and works well with other students.
Provides clear explanations and uses science vocabulary; shows understanding
Applies knowledge to new situations but does not suggest additional applications
3 Contributes to discussion, but shows little understanding
Makes some mistakes or omissions but works well with group
Provides a limited answer to most questions; uses little science vocabulary
Does not fully or clearly make connections to new situation
4 Does not participate or demonstrate understanding of topic
Does little or no work and does not help partner or group complete tasks
No explanation of findings are given; incomplete worksheet
No connections are made; cannot apply findings to new situations
Extension Activities: Students create a timeline of the history of microscopes and optics Students prepare a PowerPoint presentation of their lab results. Examine different butterflies to develop a library of images. Publish the class images on a web site. Look at butterflies that have iridescent and non iridescent areas and see if the scales have the same structure. Compare the dorsal and ventral sides of the wings. Examine the sensory organs on the wings Examine other parts of the butterfly – such as the antennae, body, legs.

Butterflies and Microscopes Lab - 7 –
Supplemental Information: A History of Optics: http://www.ece.umd.edu/~taylor/optics.htm History of the Microscope: http://paperproject.org/microscopehistory/index.html http://www.microscope.com/compound-microscope-history-t-4.html http://www.anatomy-resources.com/micro/sm101.htm http://www.edwardwillett.com/Columns/microscopes.htm Scanning Electron Microscopy: http://www.mos.org/sln/sem/seminfo.html Mimicry: http://home.cogeco.ca/~lunker/mimicry.htm Viceroy/Monarch mimicry and evolution: http://www.iscid.org/encyclopedia/Monarch_Viceroy_Puzzle Swallowtail mimics: http://www.fcps.edu/islandcreekes/ecology/eastern_tiger_swallowtail.htm
Safety: There are no specific safety precautions, but students are working with electrical devices (microscopes and lamps) and glass slides. All general lab safety guidelines should be followed.
Acknowledgments: Cornell Center for Materials Research Outreach Personnel: Nev Singhota Kevin Dilley Jane Earle Facility Managers: John Sinnott, Anthony Condo, Dr. Yuanming Zhang,
Dr. Maura Weathers, Malcolm Thomas, John Grazul, John Hunt National Science Foundation Newburgh Enlarged City School District North Junior High Principal – Ronald Jackson District Director of Science – Al Romano Building Lead Teacher for Science – Stanley Dabroski
Butterflies and Microscopes Lab - 1 –
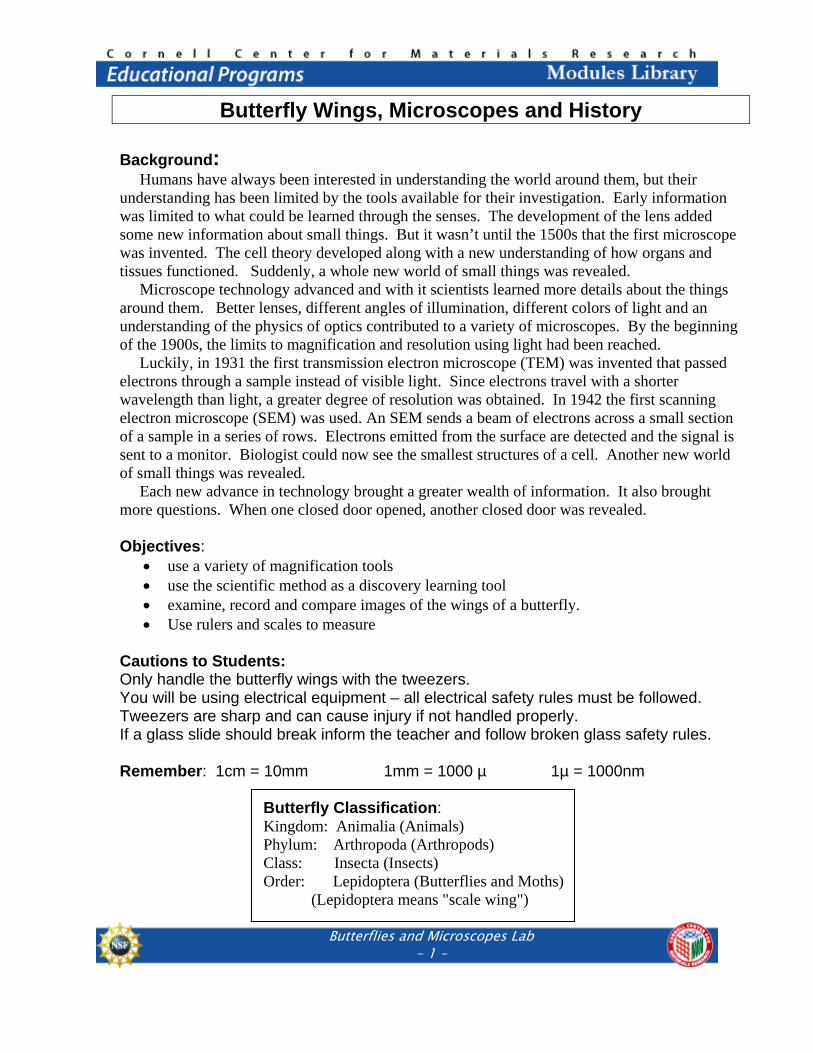
Butterfly Wings, Microscopes and History Background: Humans have always been interested in understanding the world around them, but their understanding has been limited by the tools available for their investigation. Early information was limited to what could be learned through the senses. The development of the lens added some new information about small things. But it wasn’t until the 1500s that the first microscope was invented. The cell theory developed along with a new understanding of how organs and tissues functioned. Suddenly, a whole new world of small things was revealed. Microscope technology advanced and with it scientists learned more details about the things around them. Better lenses, different angles of illumination, different colors of light and an understanding of the physics of optics contributed to a variety of microscopes. By the beginning of the 1900s, the limits to magnification and resolution using light had been reached. Luckily, in 1931 the first transmission electron microscope (TEM) was invented that passed electrons through a sample instead of visible light. Since electrons travel with a shorter wavelength than light, a greater degree of resolution was obtained. In 1942 the first scanning electron microscope (SEM) was used. An SEM sends a beam of electrons across a small section of a sample in a series of rows. Electrons emitted from the surface are detected and the signal is sent to a monitor. Biologist could now see the smallest structures of a cell. Another new world of small things was revealed. Each new advance in technology brought a greater wealth of information. It also brought more questions. When one closed door opened, another closed door was revealed. Objectives:
use a variety of magnification tools use the scientific method as a discovery learning tool examine, record and compare images of the wings of a butterfly. Use rulers and scales to measure
Cautions to Students: Only handle the butterfly wings with the tweezers. You will be using electrical equipment – all electrical safety rules must be followed. Tweezers are sharp and can cause injury if not handled properly. If a glass slide should break inform the teacher and follow broken glass safety rules. Remember: 1cm = 10mm 1mm = 1000 µ 1µ = 1000nm
Butterfly Classification: Kingdom: Animalia (Animals) Phylum: Arthropoda (Arthropods) Class: Insecta (Insects) Order: Lepidoptera (Butterflies and Moths)
(Lepidoptera means "scale wing")
Butterflies and Microscopes Lab - 2 –
Procedure: Part A: Prediction and Hypothesis The wings of butterflies and moths are covered with scales (see classification). When you look at a butterfly, do you see these scales? ______________ Draw what you think a butterfly scale would look like if you could see it:
Predict: Are all the scales on the wings the same? _________________________
Explain your answer: ________________________________________________
__________________________________________________________________
__________________________________________________________________
Write a hypothesis about the wing scales of a butterfly that you will be able to
answer in this lab activity: ____________________________________________
__________________________________________________________________
__________________________________________________________________
Procedure: Part B: Stations In this part of the lab you will rotate between five stations. Each station has different tools for you to examine the wings. You will also find information to help you answer the questions. When you finish, return your wings to the envelope provided. Move to the next station at the direction of your teacher, making sure all of materials are left for the following group. Be as complete and accurate as you can. Explain your answers clearly. You will have 18 minutes at each station to complete the tasks. READ the precaution on handling the butterfly wings.
Butterflies and Microscopes Lab - 3 –
Station #1 Materials: ruler, colored pencils, Petri dish, hand lenses, tweezers What is the earliest time listed at this station? ________________ What magnifying instrument is available for you to use? ____________________ With tweezers, gently remove the wings and place them in the Petri dish, dorsal
(brighter) side up. Do NOT use the hand lenses yet. Examine the wings and make your observations below: Size: measure with the ruler in cm and convert to mm and microns.
Length Width cm mm µ cm mm µ
Forewing Hindwing
Can you see any scales only using your eyes? ______________________ Use the hand lens at the station and examine the wings. Can you see any scales using the lens? ______________________ Describe any differences you see when using the hand lens: __________________________________________________________________
__________________________________________________________________
__________________________________________________________________
Color pattern on wings: Draw and label the dorsal wing color pattern with and without using the hand lens.
Butterflies and Microscopes Lab - 4 –
Station #2 Materials: microscope slide, tweezers, colored pencils, measuring slide What is the earliest time listed at this station? ________________ What magnifying instrument is available at this station? ____________________ To use measuring slide: Place the measurement slide on the stage and focus it
so that the markings go completely across the center of the field of view. Place one mark at the extreme left of your field of view. This: Not this:
Record the diameter of the field of view in millimeters and microns and the
total magnification for both low and high power in the chart
Carefully place the wings on the microscope slide. Look at the wings under low magnification. Draw and label a few scales from three different areas of the wing. Record the
area you are viewing. Keep the size to the same scale as your field of view:
Low Power High Power Total magnification Diameter of Field of View
mm microns
Butterflies and Microscopes Lab - 5 –
Look at the wings under high magnification. Draw and label a few scales from three different areas of the wing. Record the
area you are viewing. Keep the size to the same scale as your field of view:
Estimate the width and length of two different scales.
Scale #1 Width: __________________ Length ___________________ Scale #2 Width: __________________ Length ___________________
In the space below, compare details between low and high power for each area. Area of wing Observations
Butterflies and Microscopes Lab - 6 –
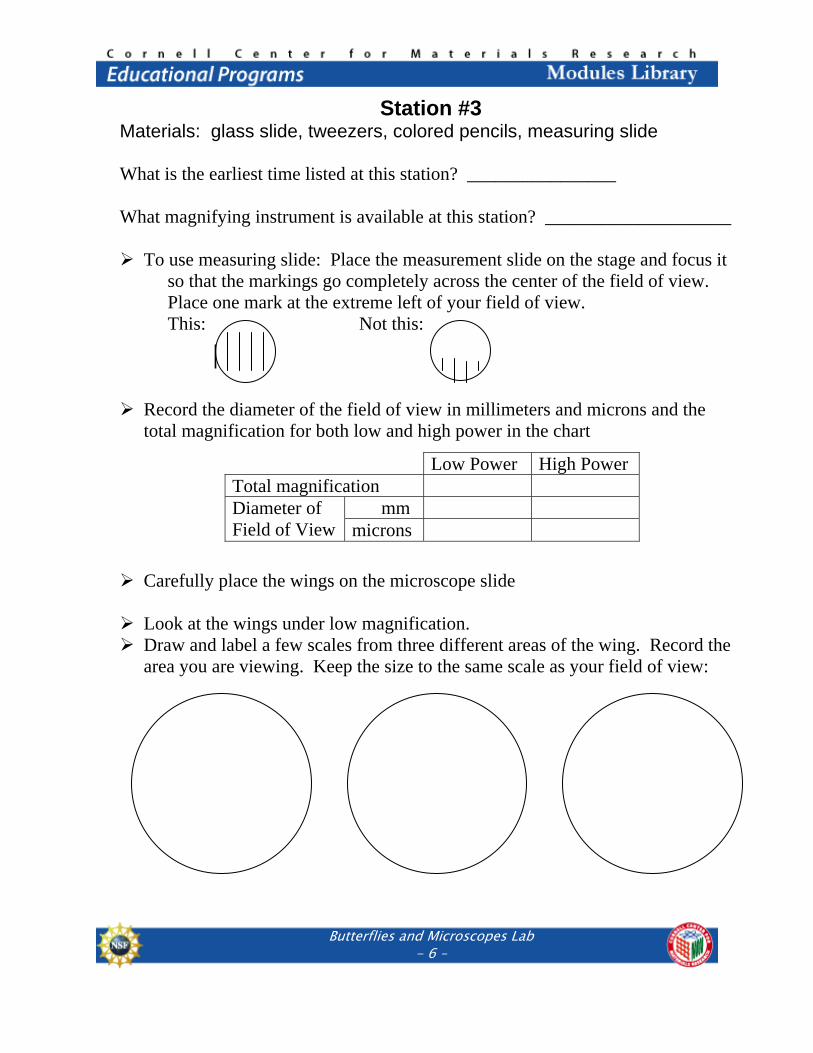
Station #3 Materials: glass slide, tweezers, colored pencils, measuring slide What is the earliest time listed at this station? ________________ What magnifying instrument is available at this station? ____________________ To use measuring slide: Place the measurement slide on the stage and focus it
so that the markings go completely across the center of the field of view. Place one mark at the extreme left of your field of view. This: Not this:
Record the diameter of the field of view in millimeters and microns and the
total magnification for both low and high power in the chart
Carefully place the wings on the microscope slide Look at the wings under low magnification. Draw and label a few scales from three different areas of the wing. Record the
area you are viewing. Keep the size to the same scale as your field of view:
Low Power High Power Total magnification Diameter of Field of View
mm microns
Butterflies and Microscopes Lab - 7 –
Look at the wings under high magnification. Draw and label a few scales from three different areas of the wing. Record the
area you are viewing. Keep the size to the same scale as your field of view:
Estimate the width and length of two different scales.
Scale #1 Width: __________________ Length ___________________ Scale #2 Width: __________________ Length ___________________
Describe the difference in illumination between this microscope and a regular
compound microscope. ______________________________________________
__________________________________________________________________
__________________________________________________________________
How does this difference change the image? ______________________________ __________________________________________________________________
__________________________________________________________________
__________________________________________________________________
__________________________________________________________________
What advantage does this technology have over the regular light microscope?
__________________________________________________________________
__________________________________________________________________
__________________________________________________________________
Butterflies and Microscopes Lab - 8 –
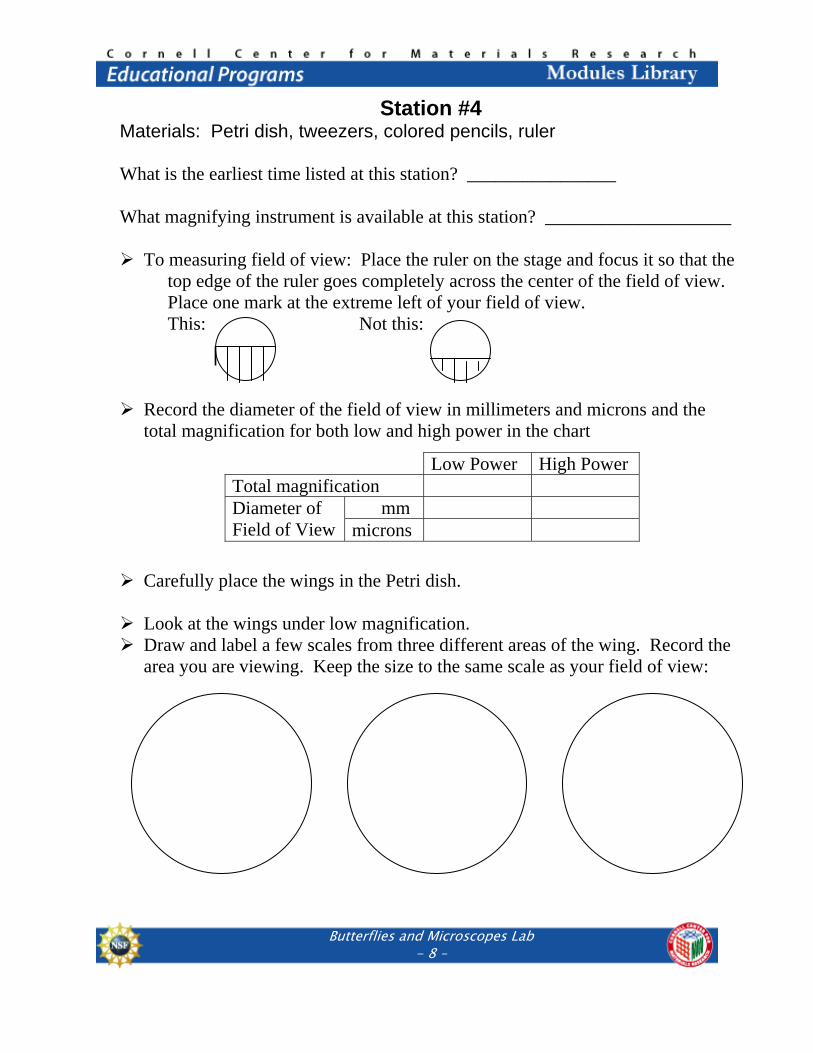
Station #4 Materials: Petri dish, tweezers, colored pencils, ruler What is the earliest time listed at this station? ________________ What magnifying instrument is available at this station? ____________________ To measuring field of view: Place the ruler on the stage and focus it so that the
top edge of the ruler goes completely across the center of the field of view. Place one mark at the extreme left of your field of view. This: Not this:
Record the diameter of the field of view in millimeters and microns and the
total magnification for both low and high power in the chart
Carefully place the wings in the Petri dish. Look at the wings under low magnification. Draw and label a few scales from three different areas of the wing. Record the
area you are viewing. Keep the size to the same scale as your field of view:
Low Power High Power Total magnification Diameter of Field of View
mm microns
Butterflies and Microscopes Lab - 9 –
Look at the wings under high magnification. Draw and label a few scales from three different areas of the wing. Record the
area you are viewing. Keep the size to the same scale as your field of view:
Estimate the width and length of two different scales.
Scale #1 Width: __________________ Length ___________________ Scale #2 Width: __________________ Length ___________________
Describe the difference between this microscope and a regular compound
microscope. _______________________________________________________
__________________________________________________________________
__________________________________________________________________
What is the advantage of a stereo microscope?
__________________________________________________________________
__________________________________________________________________
__________________________________________________________________
Butterflies and Microscopes Lab - 10 –
Station #5 Materials: mounting button, tweezers, colored pencils, ruler, micrographs What is the earliest time listed at this station? ________________ What magnifying instrument is available at this station? ____________________ What new details are visible in the micrographs?
__________________________________________________________________
__________________________________________________________________
__________________________________________________________________
Draw and label an area from three different magnifications of the wing. Record the area you are viewing.
Use the scale bar on the micrographs to help you measure the length and width
of three different scales. Scale #1 Width: __________________ Length ___________________
Scale #2 Width: __________________ Length ___________________ Scale #3 Width: __________________ Length ___________________ Explain the difference in illumination between the light electron microscopes. __________________________________________________________________ ____________________________________________________________________________________________________________________________________ What advantage does this give the electron microscope over the light microscope?
__________________________________________________________________
__________________________________________________________________
Butterflies and Microscopes Lab - 11 –
Conclusion Questions: 1. State a conclusion for your hypothesis and support it with details from this lab. __________________________________________________________________
__________________________________________________________________
__________________________________________________________________
__________________________________________________________________
__________________________________________________________________
2. Which microscope did you find the most useful to answer your hypothesis?
Explain your answer. ________________________________________________
__________________________________________________________________
__________________________________________________________________
3. Suggest a reason for the different sizes and shapes of scales.________________
__________________________________________________________________
__________________________________________________________________
4. Of all of the different types of tools used, are any not being used today?
__________________________________________________________________
5. Why would a scientist use more than one of these tools during research?
__________________________________________________________________
__________________________________________________________________
6. How is scientific knowledge dependant upon technology? ________________
__________________________________________________________________
__________________________________________________________________
__________________________________________________________________
7. What is the difference between magnification and resolution? _____________
__________________________________________________________________
__________________________________________________________________
Butterflies and Microscopes Lab - 12 –
8. Which microscope had the best resolution? ____________________________
Why? _____________________________________________________________
__________________________________________________________________
__________________________________________________________________
9. Why did they not know about microorganisms and germs until the 1500’s?
__________________________________________________________________
__________________________________________________________________
10. Suggest two questions for further study using microscopes and butterfly wings.
__________________________________________________________________
__________________________________________________________________
__________________________________________________________________
Butterflies and Microscopes Lab - 1 –
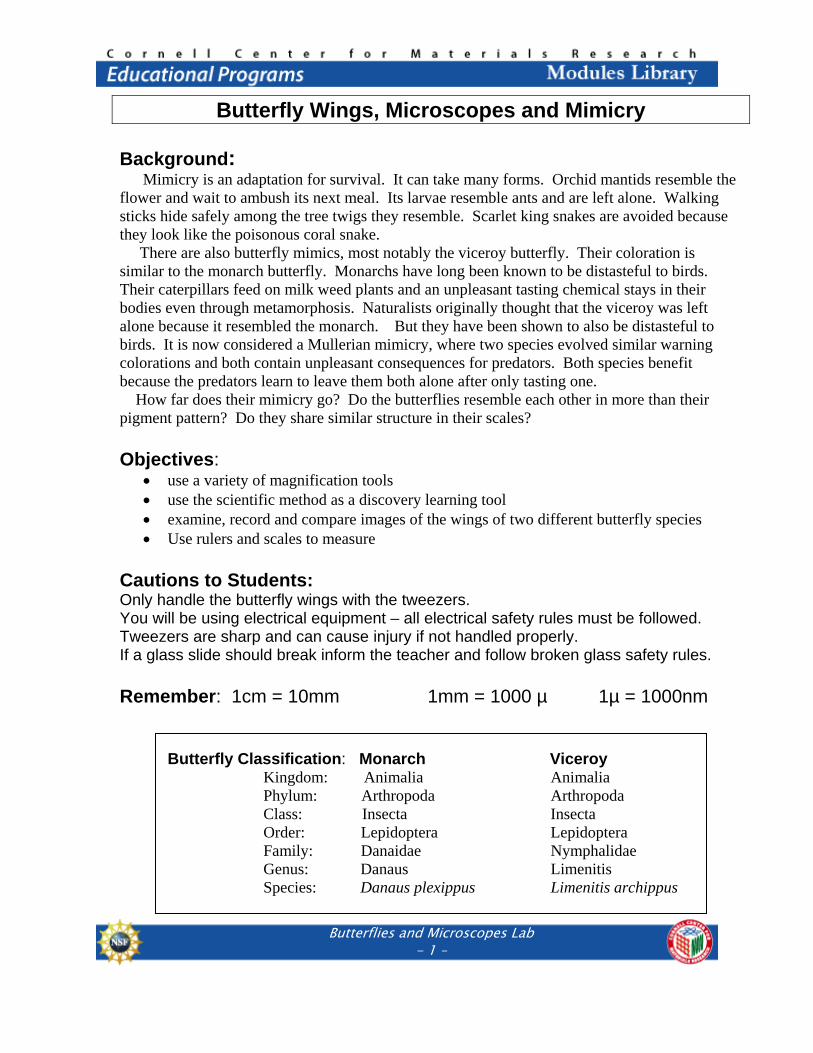
Butterfly Wings, Microscopes and Mimicry Background: Mimicry is an adaptation for survival. It can take many forms. Orchid mantids resemble the flower and wait to ambush its next meal. Its larvae resemble ants and are left alone. Walking sticks hide safely among the tree twigs they resemble. Scarlet king snakes are avoided because they look like the poisonous coral snake. There are also butterfly mimics, most notably the viceroy butterfly. Their coloration is similar to the monarch butterfly. Monarchs have long been known to be distasteful to birds. Their caterpillars feed on milk weed plants and an unpleasant tasting chemical stays in their bodies even through metamorphosis. Naturalists originally thought that the viceroy was left alone because it resembled the monarch. But they have been shown to also be distasteful to birds. It is now considered a Mullerian mimicry, where two species evolved similar warning colorations and both contain unpleasant consequences for predators. Both species benefit because the predators learn to leave them both alone after only tasting one. How far does their mimicry go? Do the butterflies resemble each other in more than their pigment pattern? Do they share similar structure in their scales? Objectives:
use a variety of magnification tools use the scientific method as a discovery learning tool examine, record and compare images of the wings of two different butterfly species Use rulers and scales to measure
Cautions to Students: Only handle the butterfly wings with the tweezers. You will be using electrical equipment – all electrical safety rules must be followed. Tweezers are sharp and can cause injury if not handled properly. If a glass slide should break inform the teacher and follow broken glass safety rules. Remember: 1cm = 10mm 1mm = 1000 µ 1µ = 1000nm
Butterfly Classification: Monarch Viceroy
Kingdom: Animalia Animalia Phylum: Arthropoda Arthropoda Class: Insecta Insecta Order: Lepidoptera Lepidoptera Family: Danaidae Nymphalidae Genus: Danaus Limenitis Species: Danaus plexippus Limenitis archippus

Butterflies and Microscopes Lab - 2 –
Procedure: Part A: Prediction and Hypothesis The question to be answered: Do the viceroy and monarch butterflies, as mimics, share similar structure in their scales as well as their color? What is your prediction? Give a reason for your answer.
__________________________________________________________________
__________________________________________________________________
__________________________________________________________________
Write a hypothesis that can be answered in this investigation. ____________________________________________________________________________________________________________________________________ Procedure: Part B: Stations In this part of the lab you will rotate between five stations. Each station has different tools for you to examine the wings. You will also find information to help you answer the questions. When you finish, return your wings to the envelope provided. Move to the next station at the direction of your teacher, making sure all of materials are left for the following group. Be as complete and accurate as you can. Explain your answers clearly. You will have 18 minutes at each station to complete the tasks. READ the precaution on handling the butterfly wings
Butterflies and Microscopes Lab - 3 –
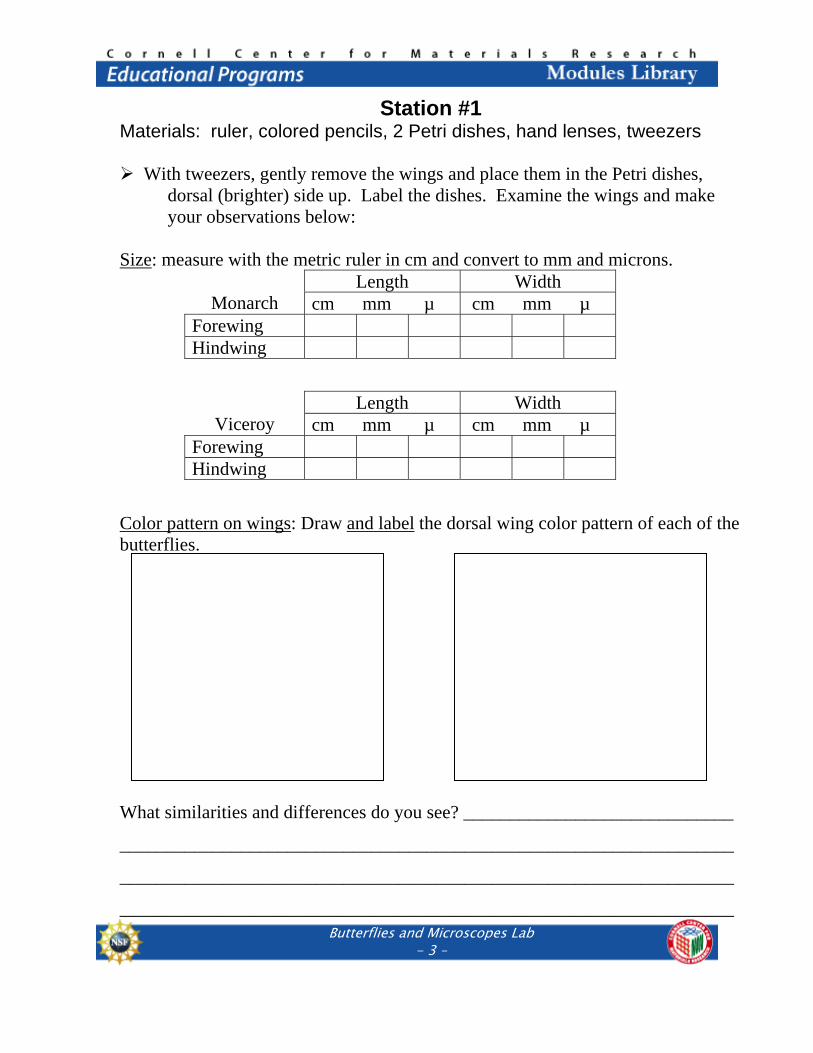
Station #1 Materials: ruler, colored pencils, 2 Petri dishes, hand lenses, tweezers With tweezers, gently remove the wings and place them in the Petri dishes,
dorsal (brighter) side up. Label the dishes. Examine the wings and make your observations below:
Size: measure with the metric ruler in cm and convert to mm and microns.
Monarch
Length Width cm mm µ cm mm µ
Forewing Hindwing
Viceroy
Length Width cm mm µ cm mm µ
Forewing Hindwing
Color pattern on wings: Draw and label the dorsal wing color pattern of each of the butterflies.
What similarities and differences do you see? _____________________________
__________________________________________________________________
__________________________________________________________________
__________________________________________________________________
Butterflies and Microscopes Lab - 4 –
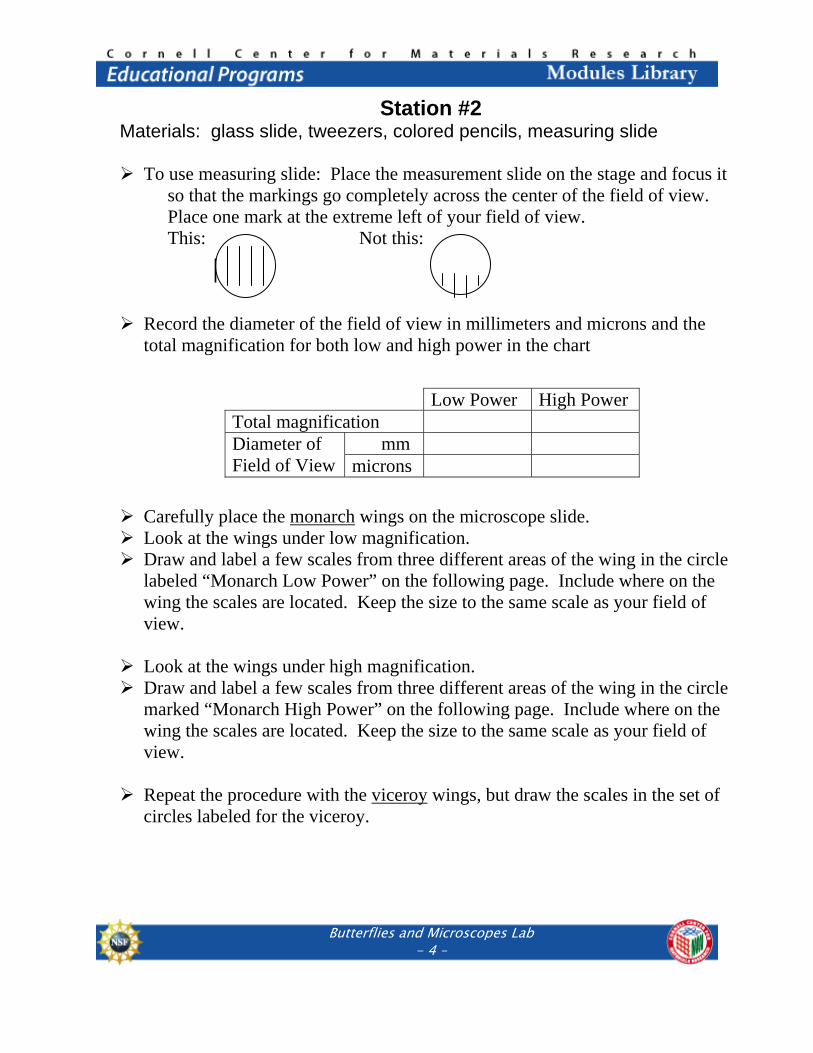
Station #2 Materials: glass slide, tweezers, colored pencils, measuring slide To use measuring slide: Place the measurement slide on the stage and focus it
so that the markings go completely across the center of the field of view. Place one mark at the extreme left of your field of view. This: Not this:
Record the diameter of the field of view in millimeters and microns and the
total magnification for both low and high power in the chart
Carefully place the monarch wings on the microscope slide. Look at the wings under low magnification. Draw and label a few scales from three different areas of the wing in the circle
labeled “Monarch Low Power” on the following page. Include where on the wing the scales are located. Keep the size to the same scale as your field of view.
Look at the wings under high magnification. Draw and label a few scales from three different areas of the wing in the circle
marked “Monarch High Power” on the following page. Include where on the wing the scales are located. Keep the size to the same scale as your field of view.
Repeat the procedure with the viceroy wings, but draw the scales in the set of
circles labeled for the viceroy.
Low Power High Power Total magnification Diameter of Field of View
mm microns
Butterflies and Microscopes Lab - 5 –
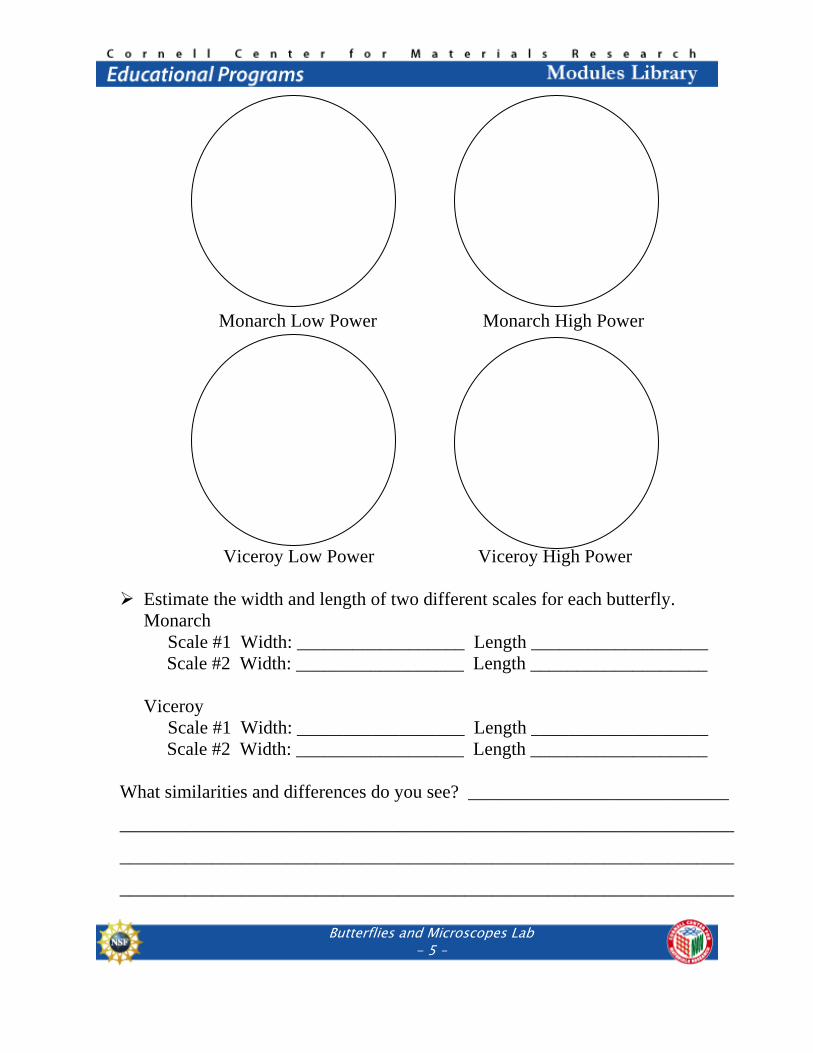
Monarch Low Power Monarch High Power
Viceroy Low Power Viceroy High Power Estimate the width and length of two different scales for each butterfly.
Monarch Scale #1 Width: __________________ Length ___________________
Scale #2 Width: __________________ Length ___________________ Viceroy
Scale #1 Width: __________________ Length ___________________ Scale #2 Width: __________________ Length ___________________
What similarities and differences do you see? ____________________________
__________________________________________________________________
__________________________________________________________________
__________________________________________________________________
Butterflies and Microscopes Lab - 6 –
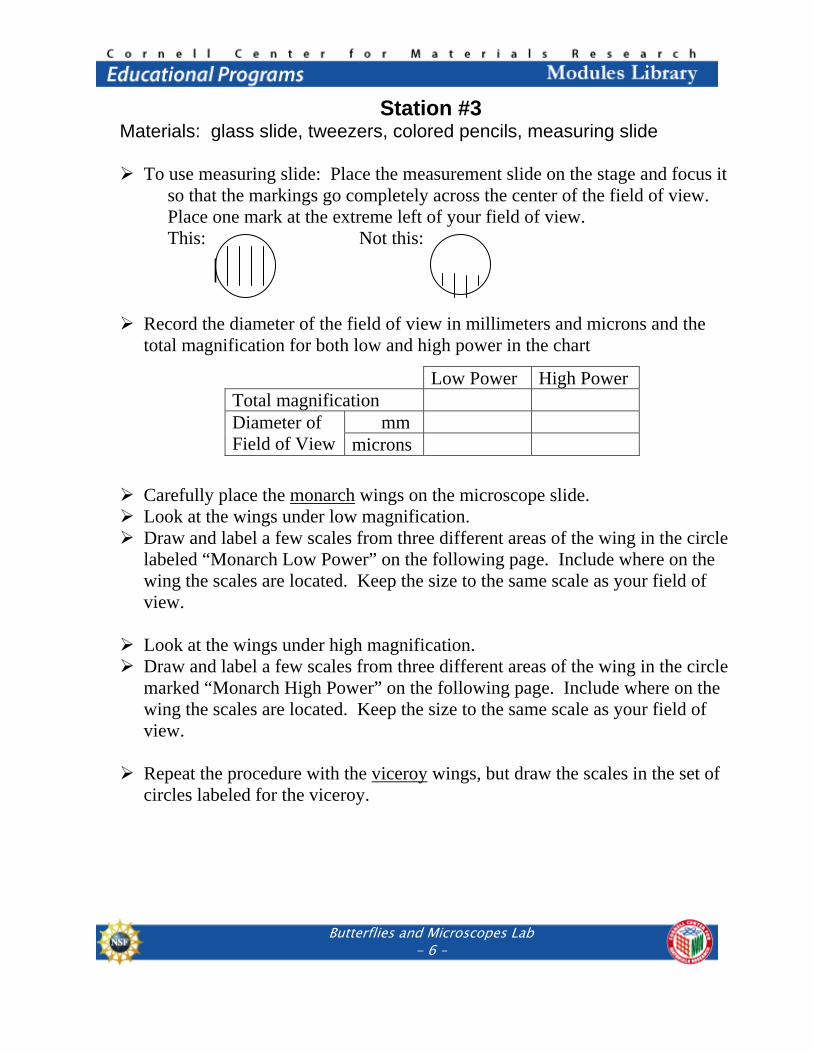
Station #3 Materials: glass slide, tweezers, colored pencils, measuring slide To use measuring slide: Place the measurement slide on the stage and focus it
so that the markings go completely across the center of the field of view. Place one mark at the extreme left of your field of view. This: Not this:
Record the diameter of the field of view in millimeters and microns and the
total magnification for both low and high power in the chart
Carefully place the monarch wings on the microscope slide. Look at the wings under low magnification. Draw and label a few scales from three different areas of the wing in the circle
labeled “Monarch Low Power” on the following page. Include where on the wing the scales are located. Keep the size to the same scale as your field of view.
Look at the wings under high magnification. Draw and label a few scales from three different areas of the wing in the circle
marked “Monarch High Power” on the following page. Include where on the wing the scales are located. Keep the size to the same scale as your field of view.
Repeat the procedure with the viceroy wings, but draw the scales in the set of
circles labeled for the viceroy.
Low Power High Power Total magnification Diameter of Field of View
mm microns
Butterflies and Microscopes Lab - 7 –
Monarch Low Power Monarch High Power
Viceroy Low Power Viceroy High Power Estimate the width and length of two different scales for each butterfly.
Monarch Scale #1 Width: __________________ Length ___________________
Scale #2 Width: __________________ Length ___________________ Viceroy
Scale #1 Width: __________________ Length ___________________ Scale #2 Width: __________________ Length ___________________
Compare the arrangement of scales between the monarch and the viceroy. Can you tell them apart from one another? __________________________________________________________________
__________________________________________________________________
__________________________________________________________________
Butterflies and Microscopes Lab - 8 –
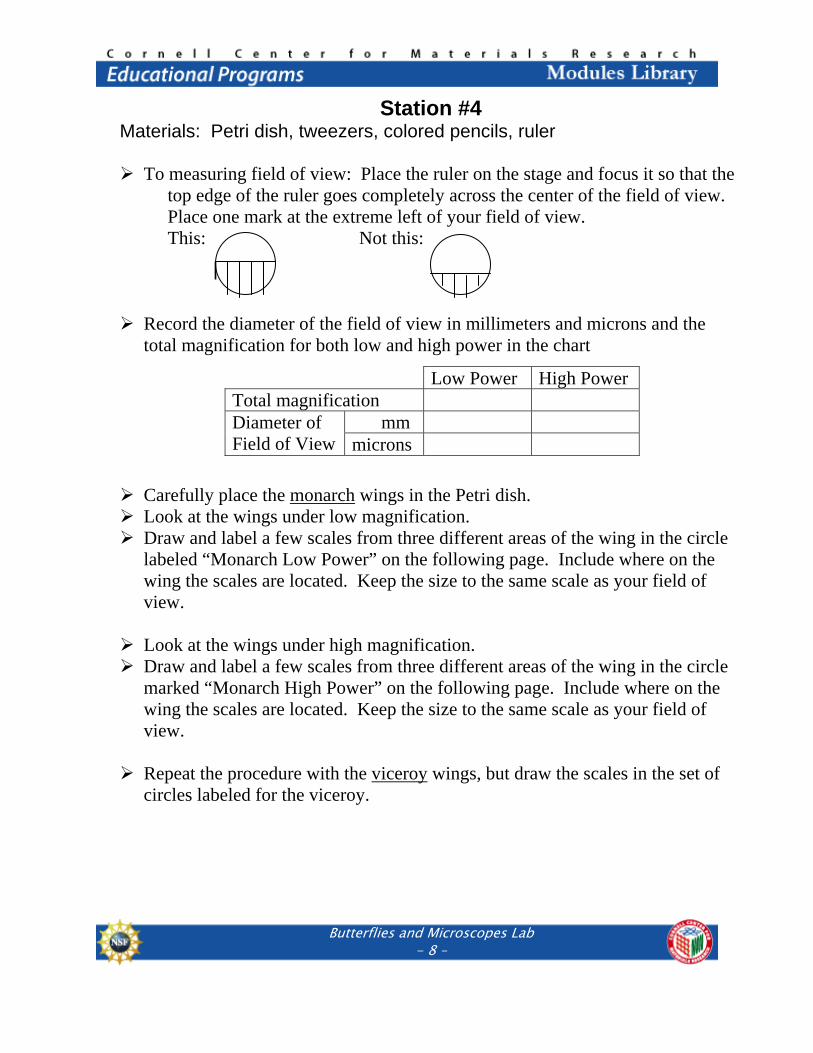
Station #4 Materials: Petri dish, tweezers, colored pencils, ruler To measuring field of view: Place the ruler on the stage and focus it so that the
top edge of the ruler goes completely across the center of the field of view. Place one mark at the extreme left of your field of view. This: Not this:
Record the diameter of the field of view in millimeters and microns and the
total magnification for both low and high power in the chart
Carefully place the monarch wings in the Petri dish. Look at the wings under low magnification. Draw and label a few scales from three different areas of the wing in the circle
labeled “Monarch Low Power” on the following page. Include where on the wing the scales are located. Keep the size to the same scale as your field of view.
Look at the wings under high magnification. Draw and label a few scales from three different areas of the wing in the circle
marked “Monarch High Power” on the following page. Include where on the wing the scales are located. Keep the size to the same scale as your field of view.
Repeat the procedure with the viceroy wings, but draw the scales in the set of
circles labeled for the viceroy.
Low Power High Power Total magnification Diameter of Field of View
mm microns
Butterflies and Microscopes Lab - 9 –
Monarch Low Power Monarch High Power
Viceroy Low Power Viceroy High Power Estimate the width and length of two different scales for each butterfly.
Monarch Scale #1 Width: __________________ Length ___________________
Scale #2 Width: __________________ Length ___________________ Viceroy
Scale #1 Width: __________________ Length ___________________ Scale #2 Width: __________________ Length ___________________
What additional differences or similarities can you see with this microscope?
__________________________________________________________________
__________________________________________________________________
__________________________________________________________________
Butterflies and Microscopes Lab - 10 –
Station #5 Materials: mounting button, tweezers, colored pencils, ruler, micrographs Draw and label an area from three different magnifications of the wing for the
monarch. Record the area you are viewing. Draw and label an area from three different magnifications of the wing for the
Viceroy. Record the area you are viewing.
Butterflies and Microscopes Lab - 11 –
Use the scale bar on the micrographs to help you measure the length and width of three different scales for each butterfly.
Monarch
Scale #1 Width: __________________ Length ___________________ Scale #2 Width: __________________ Length ___________________
Scale #3 Width: __________________ Length ___________________ Viceroy
Scale #1 Width: __________________ Length ___________________ Scale #2 Width: __________________ Length ___________________
Scale #3 Width: __________________ Length ___________________ Compare the framework pattern of the monarch butterfly scale to that of the viceroy butterfly scale. __________________________________________________________________
__________________________________________________________________
__________________________________________________________________
__________________________________________________________________
What other similarities or differences are seen in the micrographs? __________________________________________________________________
__________________________________________________________________
__________________________________________________________________
__________________________________________________________________
Butterflies and Microscopes Lab - 12 –
Conclusion Questions: 1. Write a conclusion based on your hypothesis. Be sure to back it up using details from this lab. __________________________________________________________________
__________________________________________________________________
__________________________________________________________________
__________________________________________________________________
__________________________________________________________________
__________________________________________________________________
__________________________________________________________________
__________________________________________________________________
__________________________________________________________________
__________________________________________________________________
__________________________________________________________________
__________________________________________________________________
2. Based on your observations, do you think scale structure would be a useful tool to identify or classify butterflies? Explain your answer. __________________________________________________________________
__________________________________________________________________
__________________________________________________________________
__________________________________________________________________
3. Do you think that the two butterflies are more closely related than their species name suggests? Explain. __________________________________________________________________
__________________________________________________________________
__________________________________________________________________
__________________________________________________________________
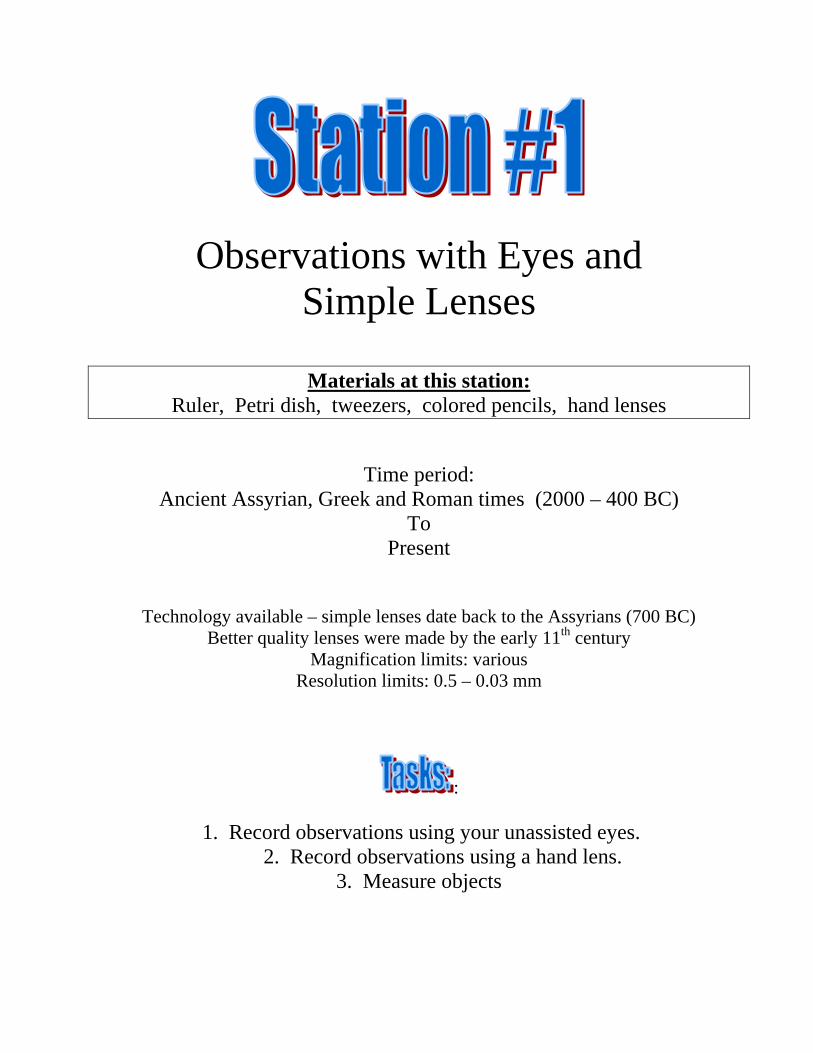
Observations with Eyes and Simple Lenses
Materials at this station: Ruler, Petri dish, tweezers, colored pencils, hand lenses
Time period: Ancient Assyrian, Greek and Roman times (2000 – 400 BC)
To Present
Technology available – simple lenses date back to the Assyrians (700 BC) Better quality lenses were made by the early 11th century
Magnification limits: various Resolution limits: 0.5 – 0.03 mm
:
1. Record observations using your unassisted eyes. 2. Record observations using a hand lens.
3. Measure objects
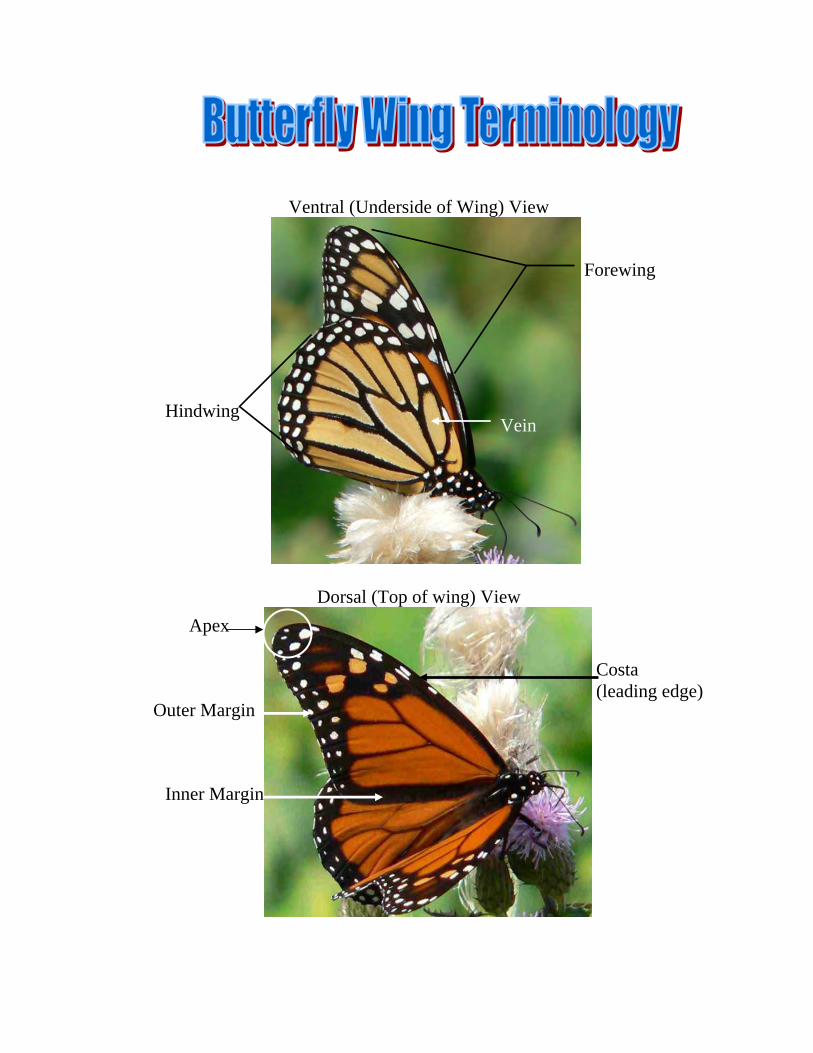
Ventral (Underside of Wing) View
Dorsal (Top of wing) View
Forewing
Hindwing Vein
Apex
Outer Margin
Inner Margin
Costa (leading edge)
Observations with Compound Microscope
Materials at this station: Glass slide, Tweezers, Colored pencils, Measuring slide
Time period: 1590 AD – present
New Technology available – Compound Microscope Light passes through thin sections
Able to magnify up to 2500x Resolution limit ~0.2µ (=200nm)
: 1. Measure field of view – low power and high power
2. Record your observations under low power 3. Record your observations under high power
4. Measure objects
Observations with a Stereo Microscope
Materials at this station: Petri dish, Tweezers, Colored pencils, Ruler
Time Period: 1894 to present
New Technology Available – Stereo microscope Light is reflected or transmitted
Able to view thick objects 3-D image obtained
Same resolution as Compound Microscopes Usually only up to 500x magnification
: 1. Measure field of view – low power and high power
2. Record your observations under low power 3. Record your observations under high power
4. Measure objects
Observations with an Oblique Light Source
Materials at this station: Glass slide Tweezers, Colored pencils, Measuring slide
Time Period: 1830 – Present
New Technology Available – Dark Field Microscope Illumination light at an angle
Creates contrast in unstained samples 3-D effect
This a simulation – true dark field microscopes have a ring of illumination light
: 1. Measure field of view – low power and high power
2. Record your observations under low power 3. Record your observations under high power
4. Measure objects
Observations with a Scanning Electron Microscope
Materials at this station: Mounting button, Tweezers, Colored pencils, Ruler, Micrographs
Time Period: 1942 – Present
New Technology Available – Scanning Electron Microscope Illumination is with electrons passing over a small surface area
Smaller wavelength improves resolution to ~ 0.2nm Magnification – AMRAY 1000 (at NFA) 100,000x
Can be as high as 1,000,000x “3-D” image of surface of object
Samples need to be covered with conductive material (usually gold)
: 1. Record observations of micrographs
2. Measure objects and calculate their true size
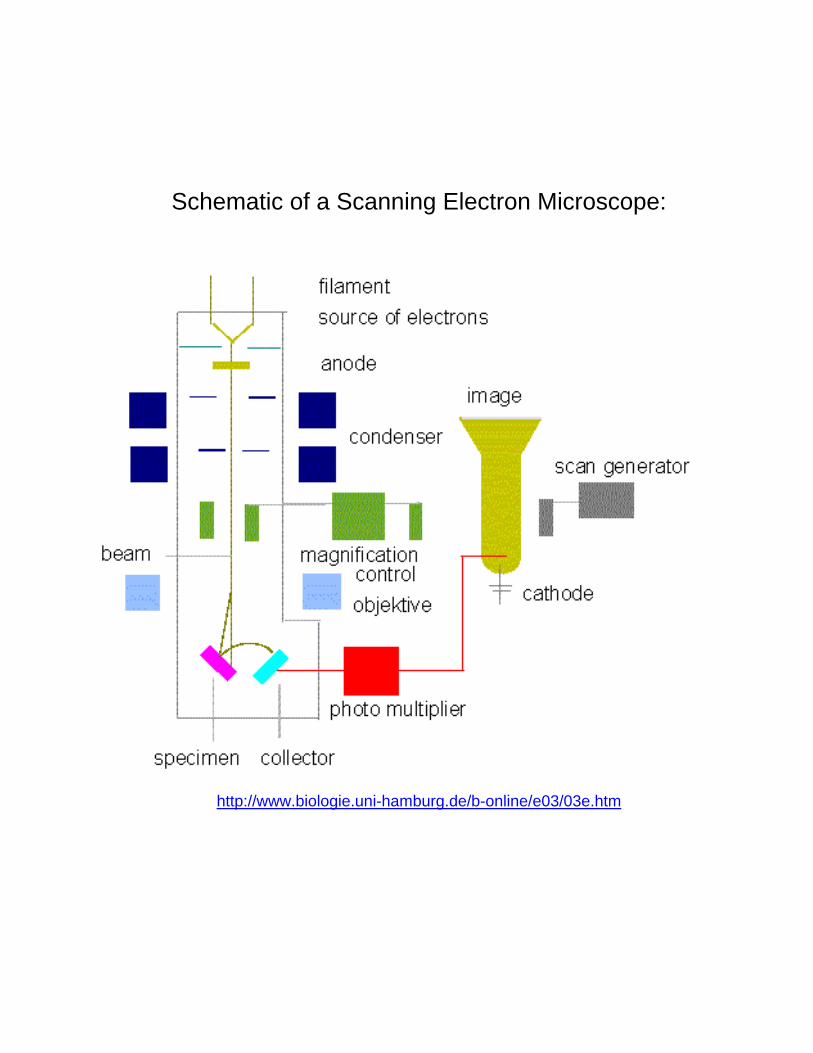
Schematic of a Scanning Electron Microscope:
http://www.biologie.uni-hamburg.de/b-online/e03/03e.htm
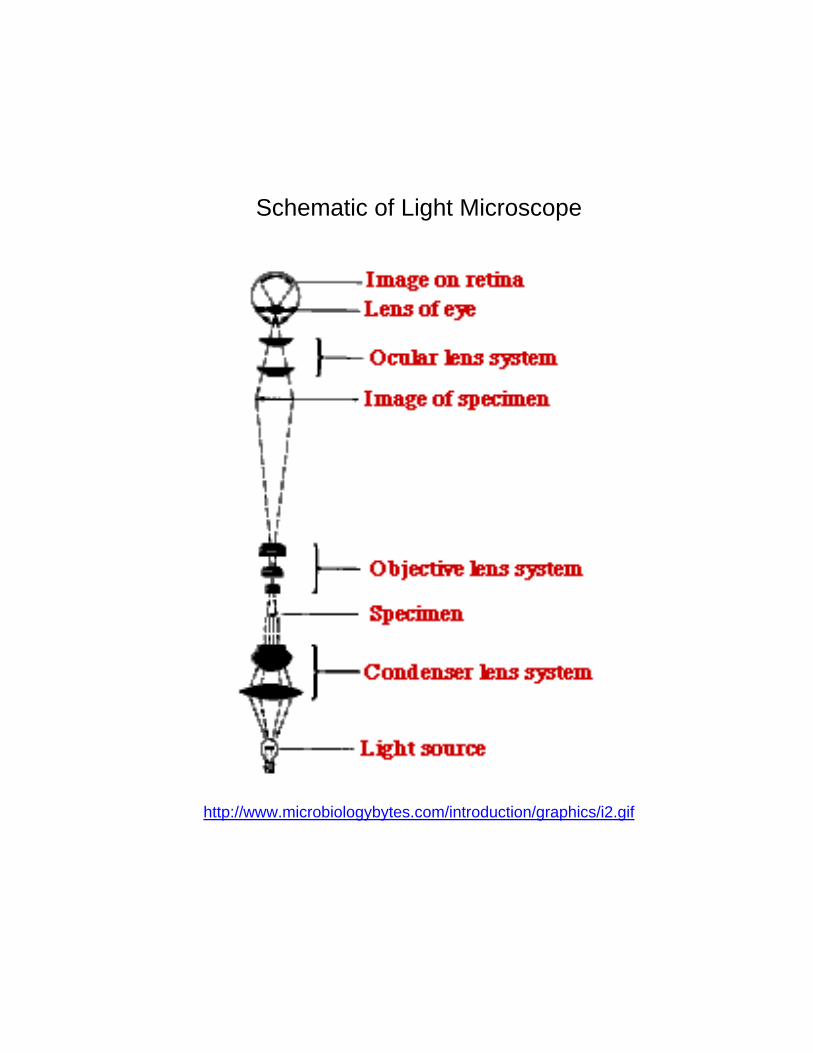
Schematic of Light Microscope
http://www.microbiologybytes.com/introduction/graphics/i2.gif
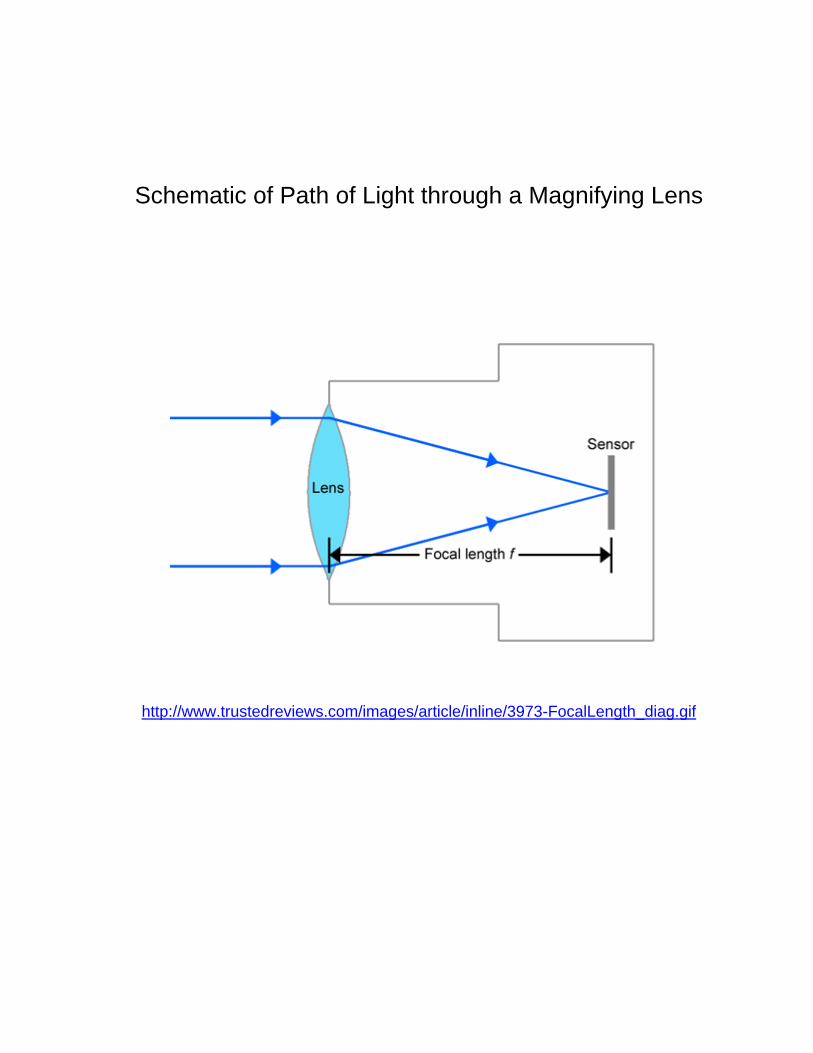
Schematic of Path of Light through a Magnifying Lens
http://www.trustedreviews.com/images/article/inline/3973-FocalLength_diag.gif
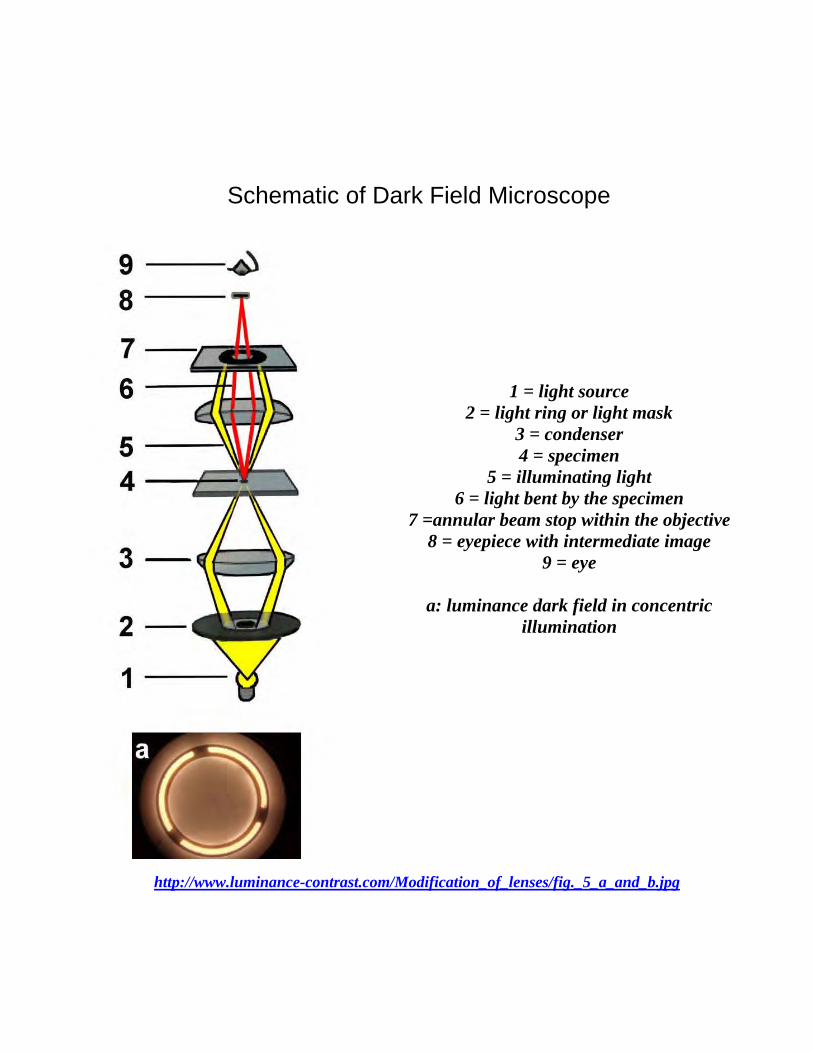
Schematic of Dark Field Microscope
1 = light source 2 = light ring or light mask
3 = condenser 4 = specimen
5 = illuminating light 6 = light bent by the specimen
7 =annular beam stop within the objective 8 = eyepiece with intermediate image
9 = eye
a: luminance dark field in concentric illumination
http://www.luminance-contrast.com/Modification_of_lenses/fig._5_a_and_b.jpg
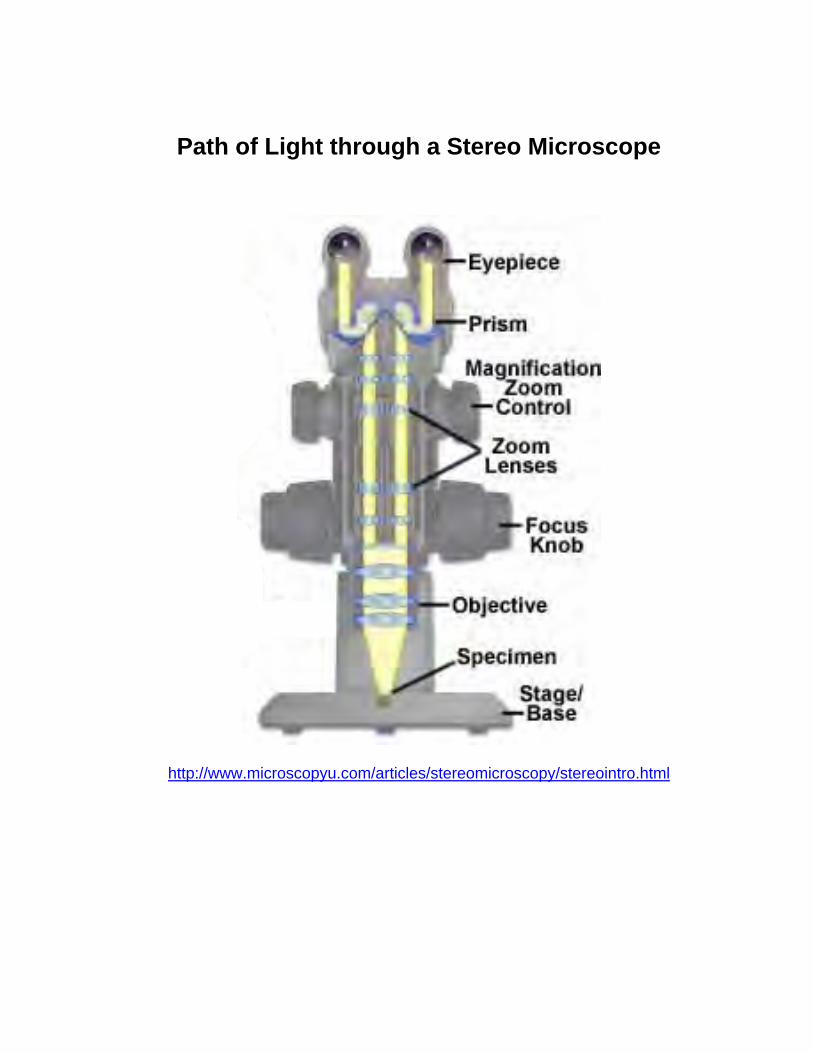
Path of Light through a Stereo Microscope
http://www.microscopyu.com/articles/stereomicroscopy/stereointro.html