APPLIED TECHNOLOGY & ENGINEERING Cereal Box Project · CEREAL COST COST TO MAKE ! 15 oz $0.70 !...
13
1 APPLIED TECHNOLOGY & ENGINEERING Name: ______________________________________ Date: __________________ Grade: ____ Section: ___ Cereal Box Project
Transcript of APPLIED TECHNOLOGY & ENGINEERING Cereal Box Project · CEREAL COST COST TO MAKE ! 15 oz $0.70 !...
1
APPLIED TECHNOLOGY & ENGINEERING
Name: ______________________________________
Date: __________________ Grade: ____ Section: ___
Cereal Box Project
2
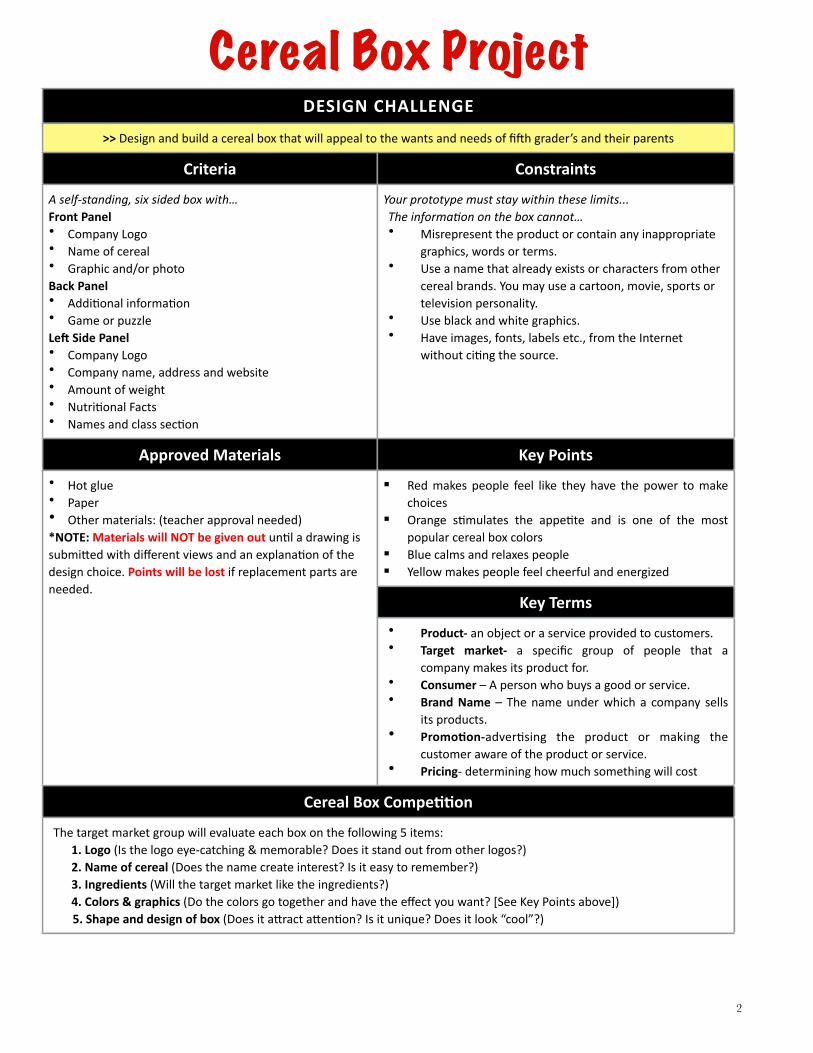
DESIGN CHALLENGEDESIGN CHALLENGE
>> Design and build a cereal box that will appeal to the wants and needs of fi7h grader’s and their parents>> Design and build a cereal box that will appeal to the wants and needs of fi7h grader’s and their parents
Criteria Constraints
A self-‐standing, six sided box with…Front Panel• Company Logo• Name of cereal• Graphic and/or photoBack Panel• AddiAonal informaAon• Game or puzzleLe0 Side Panel• Company Logo• Company name, address and website• Amount of weight• NutriAonal Facts• Names and class secAon
Your prototype must stay within these limits...The informa=on on the box cannot…• Misrepresent the product or contain any inappropriate
graphics, words or terms.• Use a name that already exists or characters from other
cereal brands. You may use a cartoon, movie, sports or television personality.
• Use black and white graphics.• Have images, fonts, labels etc., from the Internet
without ciAng the source.
Approved Materials Key Points
• Hot glue• Paper• Other materials: (teacher approval needed)*NOTE: Materials will NOT be given out unAl a drawing is submiRed with different views and an explanaAon of the design choice. Points will be lost if replacement parts are needed.
Red makes people feel like they have the power to make choices
Orange sAmulates the appeAte and is one of the most popular cereal box colors
Blue calms and relaxes people Yellow makes people feel cheerful and energized
• Hot glue• Paper• Other materials: (teacher approval needed)*NOTE: Materials will NOT be given out unAl a drawing is submiRed with different views and an explanaAon of the design choice. Points will be lost if replacement parts are needed.
Key Terms
• Hot glue• Paper• Other materials: (teacher approval needed)*NOTE: Materials will NOT be given out unAl a drawing is submiRed with different views and an explanaAon of the design choice. Points will be lost if replacement parts are needed.
• Product-‐ an object or a service provided to customers.• Target market-‐ a specific group of people that a
company makes its product for.• Consumer – A person who buys a good or service. • Brand Name – The name under which a company sells
its products. • PromoDon-‐adverAsing the product or making the
customer aware of the product or service.• Pricing-‐ determining how much something will cost
Cereal Box Compe@@onCereal Box Compe@@on
The target market group will evaluate each box on the following 5 items: 1. Logo (Is the logo eye-‐catching & memorable? Does it stand out from other logos?) 2. Name of cereal (Does the name create interest? Is it easy to remember?) 3. Ingredients (Will the target market like the ingredients?) 4. Colors & graphics (Do the colors go together and have the effect you want? [See Key Points above]) 5. Shape and design of box (Does it aRract aRenAon? Is it unique? Does it look “cool”?)
The target market group will evaluate each box on the following 5 items: 1. Logo (Is the logo eye-‐catching & memorable? Does it stand out from other logos?) 2. Name of cereal (Does the name create interest? Is it easy to remember?) 3. Ingredients (Will the target market like the ingredients?) 4. Colors & graphics (Do the colors go together and have the effect you want? [See Key Points above]) 5. Shape and design of box (Does it aRract aRenAon? Is it unique? Does it look “cool”?)
Cereal Box Project
3
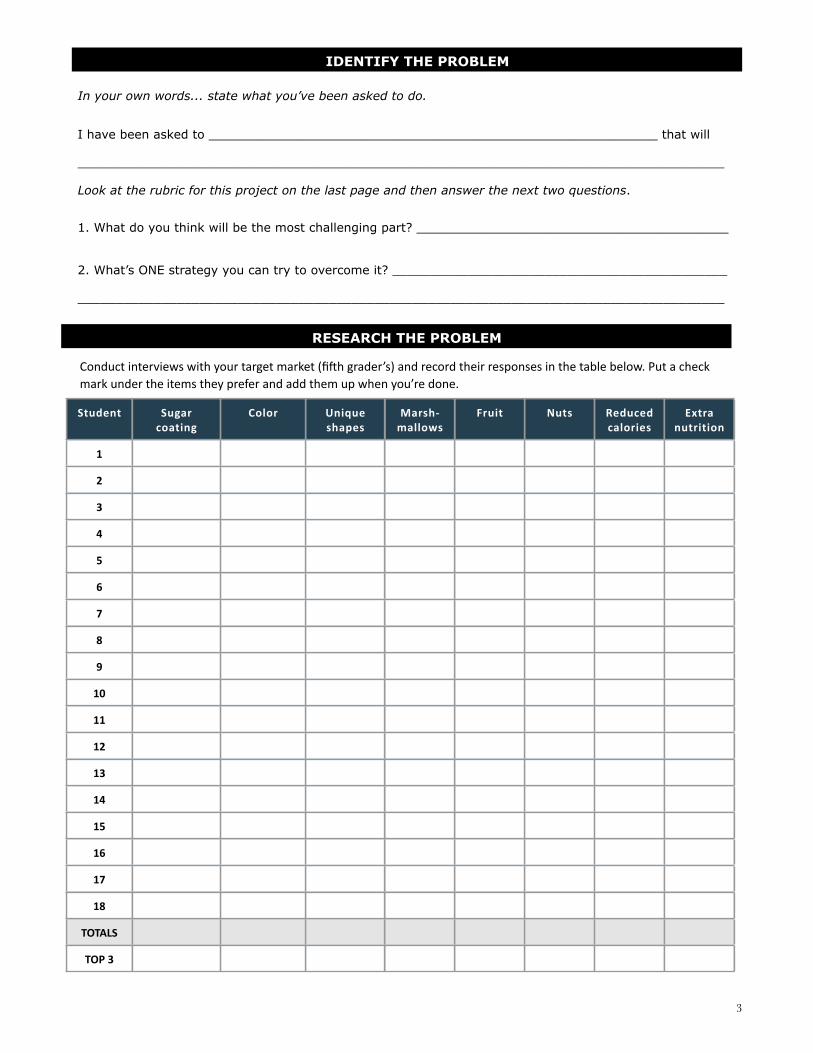
IDENTIFY THE PROBLEM
In your own words... state what you’ve been asked to do.
I have been asked to ___________________________________________________________ that will
_____________________________________________________________________________________
Look at the rubric for this project on the last page and then answer the next two questions.
1. What do you think will be the most challenging part? _________________________________________
2. What’s ONE strategy you can try to overcome it? ____________________________________________
_____________________________________________________________________________________
RESEARCH THE PROBLEM
Conduct interviews with your target market (fi7h grader’s) and record their responses in the table below. Put a check mark under the items they prefer and add them up when you’re done.
Student Sugar coating
Color Unique shapes
Marsh-‐mallows
Fruit Nuts Reducedcalories
Extra nutrition
1
2
3
4
5
6
7
8
9
10
11
12
13
14
15
16
17
18
TOTALS
TOP 3
4
DEVELOP POSSIBLE SOLUTIONS
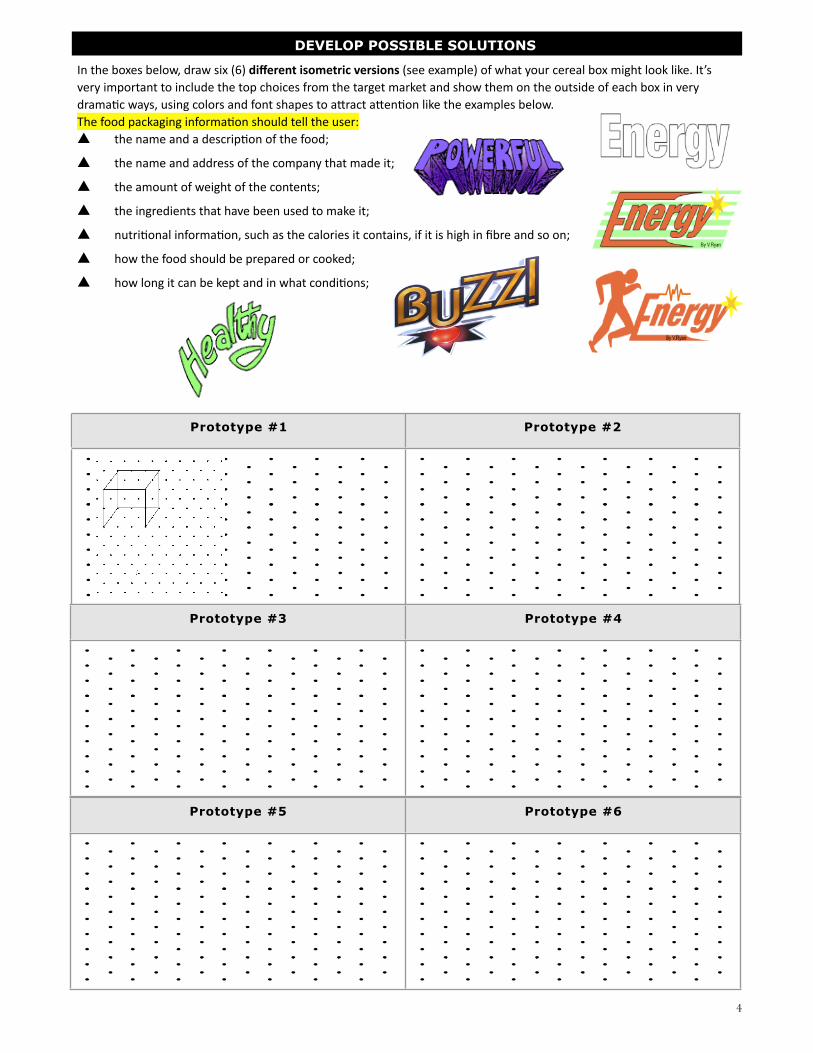
In the boxes below, draw six (6) different isometric versions (see example) of what your cereal box might look like. It’s very important to include the top choices from the target market and show them on the outside of each box in very dramaAc ways, using colors and font shapes to aRract aRenAon like the examples below.The food packaging informaAon should tell the user:▲ the name and a descripAon of the food;
▲ the name and address of the company that made it;
▲ the amount of weight of the contents;
▲ the ingredients that have been used to make it;
▲ nutriAonal informaAon, such as the calories it contains, if it is high in fibre and so on;
▲ how the food should be prepared or cooked;
▲ how long it can be kept and in what condiAons;
Prototype #1 Prototype #2
Multiple-Use Classroom Resources 18
Isometric Dot Paper
Teaching Aid Master 18
©Prentice-Hall, Inc. All rights reserved.
Multiple-Use Classroom Resources 18
Isometric Dot Paper
Teaching Aid Master 18
©Prentice-Hall, Inc. All rights reserved.
Prototype #3 Prototype #4
Multiple-Use Classroom Resources 18
Isometric Dot Paper
Teaching Aid Master 18
©Prentice-Hall, Inc. All rights reserved.
Multiple-Use Classroom Resources 18
Isometric Dot Paper
Teaching Aid Master 18
©Prentice-Hall, Inc. All rights reserved.
Prototype #5 Prototype #6
Multiple-Use Classroom Resources 18
Isometric Dot Paper
Teaching Aid Master 18
©Prentice-Hall, Inc. All rights reserved.
Multiple-Use Classroom Resources 18
Isometric Dot Paper
Teaching Aid Master 18
©Prentice-Hall, Inc. All rights reserved.
Downloaded from www.secondarydandt.org – the website of Nuffield Secondary Design & Technology 2
Packaging Design Guide
These questions will help you to develop ideas foryour packaging design.! Who is the product for?
Is it for adults, children, teenagers, men,women or families? What ages are they? Whatappeals to the type of person for whom youare designing?
! What is the form of the product?Is it: powder, liquid, paste, granules, a solidblock or small pieces?
! What are its physical properties?Is it: fragile, perishable, heavy, edible, sticky,smelly, frozen?
! How might the product be damaged?By: crushing, vibration, moisture, temperaturechanges, pests, insects, bacteria?
! What is the size and shape of the product?You will need to measure or work out howmuch room the product will take. Somepackages have to hold several items. You willneed to take this into account.
! How will you get it out of the packaging?Will it be poured, squeezed, spooned,dispensed one at a time?
! Where will it be stored and used?In the show – will it be kept: on a shelf, in adisplay counter, hung on a rack?In the home – in a cupboard, in the fridge, in ahandbag, on the dining table, by the sink?
! How much does the product cost?The materials and type of packaging usedshould be appropriate for the price of theproduct.
! What is the image of the product?Think about the kind of words that describe itscharacter. Is it: firm, powerful, healthy,precious, exotic, old fashioned?
LIRT 1
5
! !"
Price Points
Carefully consider your research and your own preferences and then list any add-ons that will be added to your cereal, the box and the design. "
"!
"""
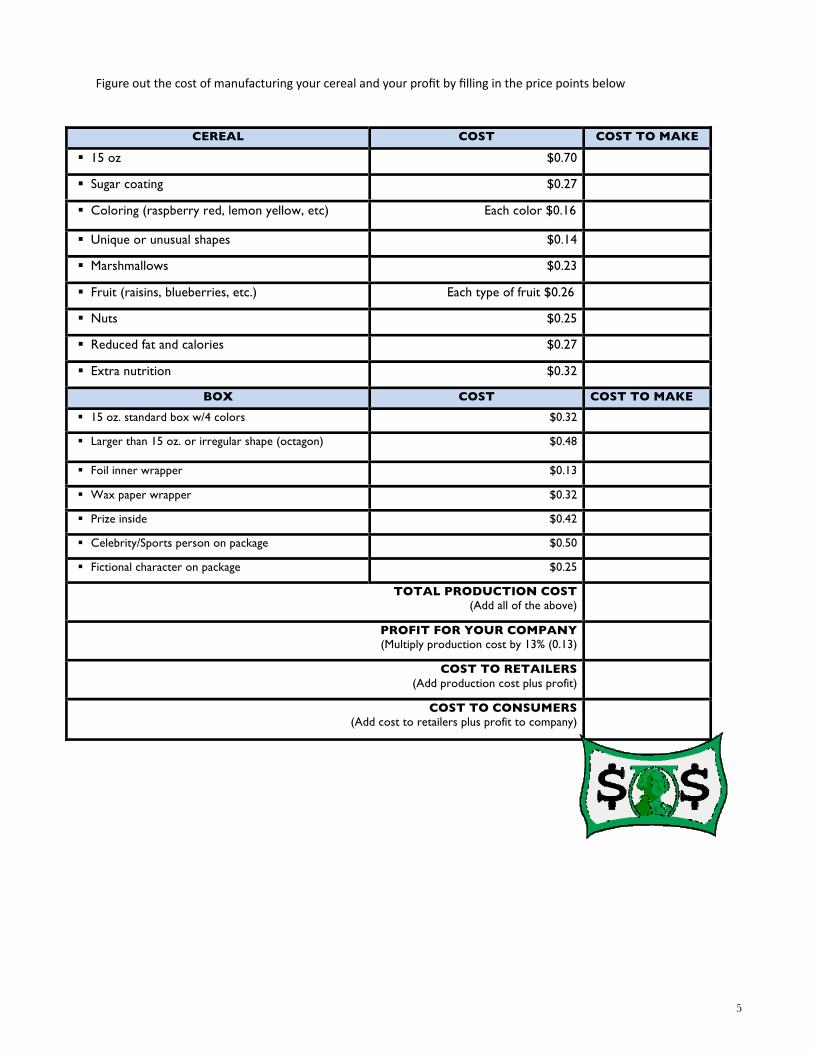
CEREAL COST COST TO MAKE
! 15 oz $0.70
! Sugar coating $0.27
! Coloring (raspberry red, lemon yellow, etc) Each color $0.16
! Unique or unusual shapes $0.14
! Marshmallows $0.23
! Fruit (raisins, blueberries, etc.) Each type of fruit $0.26
! Nuts $0.25
! Reduced fat and calories $0.27
! Extra nutrition $0.32
BOX COST COST TO MAKE
! 15 oz. standard box w/4 colors $0.32
! Larger than 15 oz. or irregular shape (octagon) $0.48
! Foil inner wrapper $0.13
! Wax paper wrapper $0.32
! Prize inside $0.42
! Celebrity/Sports person on package $0.50
! Fictional character on package $0.25
TOTAL PRODUCTION COST (Add all of the above)
PROFIT FOR YOUR COMPANY (Multiply production cost by 13% (0.13)
COST TO RETAILERS (Add production cost plus profit)
COST TO CONSUMERS (Add cost to retailers plus profit to company)
!"#$%&'(! ! ! ! ! !
"#$!%$&'!()#*$+,!-!()#*$+'!'.-'!/011!-((,-1!'#!'.,!/-2'&!-2*!2,,*&!#3!4#$)!'-)5,'!%-)6,'7! !8&,!'.,!9),-63-&'!:,),-1!:#&'!;0&'!'#!.,1(!4#$!*,&052!'.0&!2,/!()#*$+'7!!<'!.-&!'.,!9=><:!:?>@!3#)!+,),-1!-2*!'.,!9=><:!:?>@!3#)!'.,!A#B7! !@#!%-6,!4#$)!+,),-1!$20C$,!&#!'.-'!'.,!+#2&$%,)!/011!($)+.-&,!4#$)!+,),-1!02&',-*!#3!#2,!#3!4#$)!+#%(,'0'#)&!4#$!/011!&,1,+'!D-**E#2F&G!'#!-**!'#!4#$)!+,),-1H!4#$)!A#B!-2*!'.,!(-+6-5,!*,&[email protected]&!),C$0),&!'.#$5.'!-2*!),&,-)+.7!!
")*)+"&,(I,&,-)+.! 0&! '#! ()#J0*,! 023#)%-'0#2! -A#$'! /.-'! '.,!+#2&$%,)!/-2'&!-2*!2,,*&7!?3',2!'.0&!0&!*#2,!/0'.!&$)J,4&!#)! A4! 1##6025! -'! '.,! +#%(,'0'0#27! ! K#)! #$)! ),&,-)+.! -&6!&,J,)-1! 3,11#/! &'$*,2'&!/.-'! '.,4! 106,! 02! '.,0)! +,),-1! -2*!/.-'! '.,0)! (-),2'&! 106,7! ! @.0&! /011! .,1(! 4#$! *,+0*,! /.0+.!-**E#2&!'#!($'!02!4#$)!+,),-17!!
$-(+../0123145((")*)+"&,678('+"8)'(9+":)'(;#":*,))'!!
EEEEEEEEEEEEEEEEEEEEEEEEEEEEEEEEEEEEEEEEEEEEEEEEEEEEEEEEEEEEEEEEEEEEEEEEEEEEEEEEEEEEEEEEEEEEE!(
!"6&)!!L)0+,!0&!*,',)%02025!-!*#11-)!-%#$2'!4#$!+-2!&,11!'.,!()#*$+'!3#)7(($-(+../0123145((!"#$%&'6#7<$)=)>#!9)7'(&#*'(;#":*,))'!!M)0',!'.,!A-&0+!+#&'&!#3!4#$)!+,),-1!-2*!A#B!#2'#!4#$)!+#&'!/#)6&.,,'7!!:-),3$114!+#2&0*,)! 4#$)! ),&,-)+.! -2*! 4#$)! #/2!(),3,),2+,&! -2*! '.,2! 10&'! -24! -**E#2&! '.-'!/011!A,!-**,*!'#!4#$)!+,),-1H!'.,!A#B!-2*!'.,!*,&0527!!!N,',)%02,!'-4?@(!A-BCD4/-1(&-.4(OA4!-**025!-11!+#&'&!#3!'.,!+,),-1P!N,',)%02,!&-.4(4-("34?/@3A.!OA4!-**025!@#'-1!L)#*$+'0#2!:#&'!-2*!L)#30'P!N,',)%02,!&-.4(4-(&-1.C23A!OA4!-**025!:#&'!'#!I,'-01,)&!-2*!L)#30'P!!
!"#E6'!0&!J,)4!0%(#)'-2'!'#!-!L)#*$+'0#2!:#%(-24!#)!-!I,'-01!>'#),!O=1A,)'F&H!N0+6F&H!,'+7P7!!!@#!&'-4!02!A$&02,&&H!-!+#%(-24!%$&'!%-6,!,2#$5.!%#2,4!'#!+#J,)!+#&'&!#3!()#*$+'0#2!(1$&!0',%&!&$+.!-&Q!,%(1#4,,&H!A$01*025!1,-&,&H!$'010'0,&H!&'#+6.#1*,)F&!*0J0*,2*&H!,'+7!
Figure out the cost of manufacturing your cereal and your profit by filling in the price points below
6
CHOOSING & MARKETING A SOLUTION
IdenAfy which prototype you’ve chosen to make and explain why. If you really can’t tell me why this prototype is insanely great, you shouldn’t be building it.
A paragraph has a beginning a middle and
an end.The beginning, or the topic sentence, states what the paragraph is about.
The middle develops the idea in detail by giving specific support & details
for it (usually 3 - 5).
The end (conclusion) restates the main idea in the topic sentence.
______________________________________________________________________
______________________________________________________________________
______________________________________________________________________
______________________________________________________________________
______________________________________________________________________
______________________________________________________________________
______________________________________________________________________
______________________________________________________________________
______________________________________________________________________
______________________________________________________________________
______________________________________________________________________
__________________________________________________________________________________________
__________________________________________________________________________________________
__________________________________________________________________________________________
__________________________________________________________________________________________
__________________________________________________________________________________________
__________________________________________________________________________________________
__________________________________________________________________________________________
__________________________________________________________________________________________
__________________________________________________________________________________________
__________________________________________________________________________________________
__________________________________________________________________________________________
__________________________________________________________________________________________
__________________________________________________________________________________________
__________________________________________________________________________________________
__________________________________________________________________________________________
__________________________________________________________________________________________
__________________________________________________________________________________________
__________________________________________________________________________________________
__________________________________________________________________________________________
__________________________________________________________________________________________
__________________________________________________________________________________________
__________________________________________________________________________________________
__________________________________________________________________________________________
__________________________________________________________________________________________
__________________________________________________________________________________________
__________________________________________________________________________________________
7
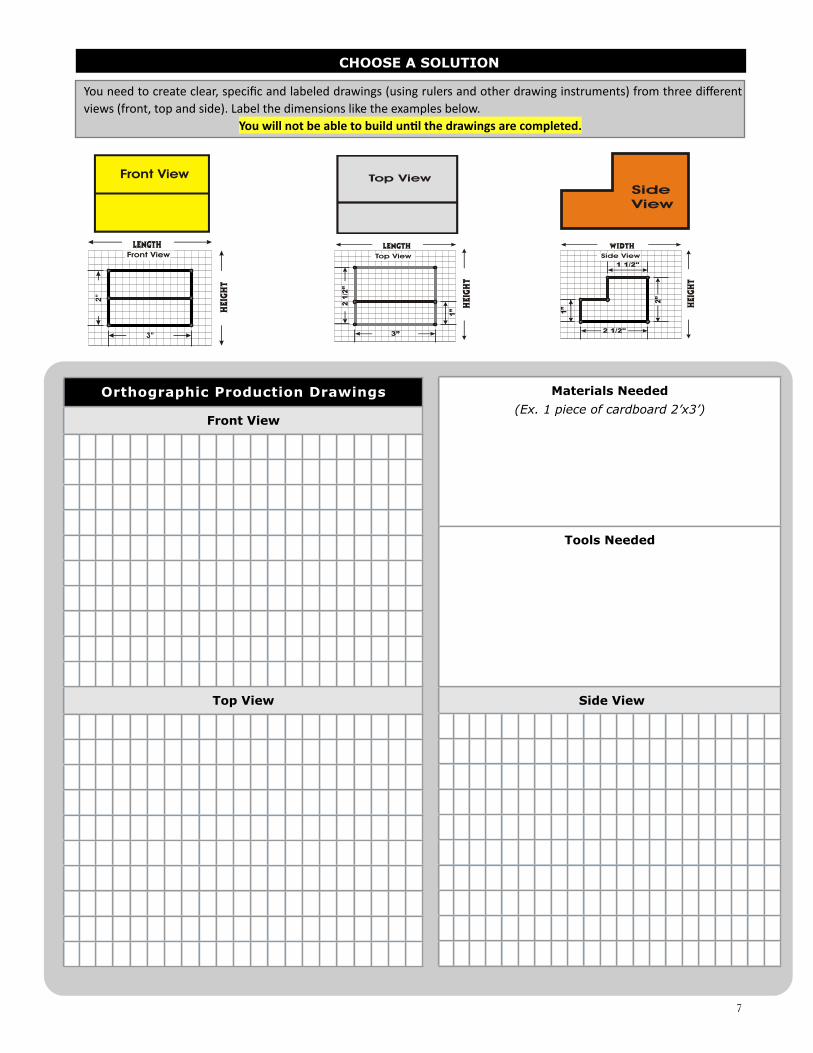
CHOOSE A SOLUTION
You need to create clear, specific and labeled drawings (using rulers and other drawing instruments) from three different views (front, top and side). Label the dimensions like the examples below.
You will not be able to build unDl the drawings are completed.
A - Place a point of origin 3 blocks over and 3 blocks up
B - Draw in the object line representing the overall length (3inches or 12 blocks)
C - Draw in the object line representing the overall height (2 inches or 8 blocks)
D - Finish drawing the object lines that represent the outside edges of the shape
E - Measure and draw any other object lines that represent more surfaces
LENGTH
HEIGHT
Front ViewD
D
LENGTH
HEIGHT
Front View
E
LENGTH
HEIGHT
Front ViewC
BA
A- CHEAT Transfer the length of the shape to the top view by drawing dotted lines
B - Draw in the object line representing the overall width (2 ½ inches or 10 blocks)
C - Finish drawing the object lines that represent the outside edges of the shape
D - Measure and draw any other object lines that represent more surfaces
LENGTH
HEIGHT
Top View
CHEAT
WIDTH
A
LENGTH
WIDTH
Top View
B
C
C
Width
Top View
D
STEP 1
STEP 2
1. Front View2. Top View3. Right Side View4. Dimensions5. Isometric View
1. Front View2. Top View3. Right Side View4. Dimensions5. Isometric View
1 1/2"
2”F
ro
t
n
T
p
o
Side
Rightn
t
Le
gh
Width
Heig
ht
2 1/2"
1”
3”
3-ViewDrawings Top View
Front View SideView
LENGTH
A - Place a point of origin 3 blocks over and 3 blocks up
B - Draw in the object line representing the overall length (3inches or 12 blocks)
C - Draw in the object line representing the overall height (2 inches or 8 blocks)
D - Finish drawing the object lines that represent the outside edges of the shape
E - Measure and draw any other object lines that represent more surfaces
LENGTH
HEIGHT
Front ViewD
D
LENGTH
HEIGHT
Front View
E
LENGTH
HEIGHT
Front ViewC
BA
A- CHEAT Transfer the length of the shape to the top view by drawing dotted lines
B - Draw in the object line representing the overall width (2 ½ inches or 10 blocks)
C - Finish drawing the object lines that represent the outside edges of the shape
D - Measure and draw any other object lines that represent more surfaces
LENGTH
HEIGHT
Top View
CHEAT
WIDTH
A
LENGTH
WIDTH
Top View
B
C
C
Width
Top View
D
STEP 1
STEP 2
1. Front View2. Top View3. Right Side View4. Dimensions5. Isometric View
1. Front View2. Top View3. Right Side View4. Dimensions5. Isometric View
1 1/2"
2”F
ro
t
n
T
po
Side
Rightn
t
Le
gh
Width
Heig
ht
2 1/2"
1”
3”
3-ViewDrawings Top View
Front View SideView
LENGTH
A - Dimension the overall length (either the front or top view)
B - Dimension the overall height (either the front or side view)
C - Dimension the overall width (either the top or side view)
D - Dimension any other edges, cut-outs, slants, holes, etc. (don’t over dimension, it only makes the drawing look messy)
A- Draw the side view of the shape in the bottom right corner of the sketch box (over one up one)
B - Starting at point #1, draw a diagonal line up to the left 5 intersections. (take your time and hit each diagonal intersection)
C - Repeat step B for points 2, 3, 4, and 5.
D - Now simply connect all 5 dots and your isometric view will be complete.
STEP 4
STEP 5
LENGTH
HEIGHT
Front View
3”
2” HEIGHT
Top View
2 1/2” 1”
3”
WidTH
HEIGHT
Side View
2 1/2"
1 1/2"
1” 2”
Length
Sketch
12345
A
B
Sketch
12345
A
C
Sketch
12345
A
D
C
D
D
DC
C
A- CHEAT Transfer the height of the shape to the side view by drawing dotted lines
B - Draw in the object line representing the overall width (2 ½ inches or 10 blocks)
C - Draw in the object line representing the overall height (2inches or 8 blocks, you also have a dot that represents the height)
D- Finish drawing the object lines that represent the outside edges of the shape
HEIGHT
WIDTHLENGTH
CH
EA
T
Front View Side View
A
WidTH
HEIGHT
Side View
C
B
WidTH
HEIGHT
Side View
D
D
STEP 3
A - Dimension the overall length (either the front or top view)
B - Dimension the overall height (either the front or side view)
C - Dimension the overall width (either the top or side view)
D - Dimension any other edges, cut-outs, slants, holes, etc. (don’t over dimension, it only makes the drawing look messy)
A- Draw the side view of the shape in the bottom right corner of the sketch box (over one up one)
B - Starting at point #1, draw a diagonal line up to the left 5 intersections. (take your time and hit each diagonal intersection)
C - Repeat step B for points 2, 3, 4, and 5.
D - Now simply connect all 5 dots and your isometric view will be complete.
STEP 4
STEP 5
LENGTH
HEIGHT
Front View
3”
2” HEIGHT
Top View2 1/2
”
1”3”
WidTH
HEIGHT
Side View
2 1/2"
1 1/2"
1” 2”
Length
Sketch
12345
A
B
Sketch
12345
A
C
Sketch
12345
A
D
C
D
D
DC
C
A- CHEAT Transfer the height of the shape to the side view by drawing dotted lines
B - Draw in the object line representing the overall width (2 ½ inches or 10 blocks)
C - Draw in the object line representing the overall height (2inches or 8 blocks, you also have a dot that represents the height)
D- Finish drawing the object lines that represent the outside edges of the shape
HEIGHT
WIDTHLENGTH
CH
EA
T
Front View Side View
A
WidTH
HEIGHT
Side View
C
B
WidTH
HEIGHT
Side View
D
D
STEP 3
A - Dimension the overall length (either the front or top view)
B - Dimension the overall height (either the front or side view)
C - Dimension the overall width (either the top or side view)
D - Dimension any other edges, cut-outs, slants, holes, etc. (don’t over dimension, it only makes the drawing look messy)
A- Draw the side view of the shape in the bottom right corner of the sketch box (over one up one)
B - Starting at point #1, draw a diagonal line up to the left 5 intersections. (take your time and hit each diagonal intersection)
C - Repeat step B for points 2, 3, 4, and 5.
D - Now simply connect all 5 dots and your isometric view will be complete.
STEP 4
STEP 5
LENGTH
HEIGHT
Front View
3”
2” HEIGHT
Top View
2 1/2” 1”
3”
WidTH
HEIGHT
Side View
2 1/2"
1 1/2"
1” 2”
Length
Sketch
12345
A
B
Sketch
12345
A
C
Sketch
12345
A
D
C
D
D
DC
C
A- CHEAT Transfer the height of the shape to the side view by drawing dotted lines
B - Draw in the object line representing the overall width (2 ½ inches or 10 blocks)
C - Draw in the object line representing the overall height (2inches or 8 blocks, you also have a dot that represents the height)
D- Finish drawing the object lines that represent the outside edges of the shape
HEIGHT
WIDTHLENGTH
CH
EA
T
Front View Side View
A
WidTH
HEIGHT
Side View
C
B
WidTH
HEIGHT
Side View
D
D
STEP 3
Orthographic Production DrawingsOrthographic Production DrawingsOrthographic Production DrawingsOrthographic Production DrawingsOrthographic Production DrawingsOrthographic Production DrawingsOrthographic Production DrawingsOrthographic Production DrawingsOrthographic Production DrawingsOrthographic Production DrawingsOrthographic Production DrawingsOrthographic Production DrawingsOrthographic Production DrawingsOrthographic Production DrawingsOrthographic Production DrawingsOrthographic Production DrawingsOrthographic Production DrawingsOrthographic Production DrawingsOrthographic Production DrawingsOrthographic Production DrawingsOrthographic Production Drawings
Front ViewFront ViewFront ViewFront ViewFront ViewFront ViewFront ViewFront ViewFront ViewFront ViewFront ViewFront ViewFront ViewFront ViewFront ViewFront ViewFront ViewFront ViewFront ViewFront ViewFront View
Top ViewTop ViewTop ViewTop ViewTop ViewTop ViewTop ViewTop ViewTop ViewTop ViewTop ViewTop ViewTop ViewTop ViewTop ViewTop ViewTop ViewTop ViewTop ViewTop ViewTop View
Materials Needed(Ex. 1 piece of cardboard 2’x3’)
Materials Needed(Ex. 1 piece of cardboard 2’x3’)
Materials Needed(Ex. 1 piece of cardboard 2’x3’)
Materials Needed(Ex. 1 piece of cardboard 2’x3’)
Materials Needed(Ex. 1 piece of cardboard 2’x3’)
Materials Needed(Ex. 1 piece of cardboard 2’x3’)
Materials Needed(Ex. 1 piece of cardboard 2’x3’)
Materials Needed(Ex. 1 piece of cardboard 2’x3’)
Materials Needed(Ex. 1 piece of cardboard 2’x3’)
Materials Needed(Ex. 1 piece of cardboard 2’x3’)
Materials Needed(Ex. 1 piece of cardboard 2’x3’)
Materials Needed(Ex. 1 piece of cardboard 2’x3’)
Materials Needed(Ex. 1 piece of cardboard 2’x3’)
Materials Needed(Ex. 1 piece of cardboard 2’x3’)
Materials Needed(Ex. 1 piece of cardboard 2’x3’)
Materials Needed(Ex. 1 piece of cardboard 2’x3’)
Materials Needed(Ex. 1 piece of cardboard 2’x3’)
Materials Needed(Ex. 1 piece of cardboard 2’x3’)
Materials Needed(Ex. 1 piece of cardboard 2’x3’)
Materials Needed(Ex. 1 piece of cardboard 2’x3’)
Materials Needed(Ex. 1 piece of cardboard 2’x3’)
Tools NeededTools NeededTools NeededTools NeededTools NeededTools NeededTools NeededTools NeededTools NeededTools NeededTools NeededTools NeededTools NeededTools NeededTools NeededTools NeededTools NeededTools NeededTools NeededTools NeededTools Needed
Side View Side View Side View Side View Side View Side View Side View Side View Side View Side View Side View Side View Side View Side View Side View Side View Side View Side View Side View Side View Side View

8
ENGINEERING LOGS
Describe what you did today. Mention any problems you had, design changes or questions.
Make a labeled sketch that shows what you did.
LOG #1 Date: _________________
__________________________________________
__________________________________________
__________________________________________
__________________________________________
__________________________________________
__________________________________________
__________________________________________
__________________________________________
__________________________________________
__________________________________________
__________________________________________
YES I used complete sentences to describe my progress
YES My description is neatly written and legible
YES I used key terms when possible
YES My drawing is large enough and centered in the space
YES My line quality is sharp and precise (no smudges)
YES Labels and dimensions are OUTSIDE the drawing
EXAMPLE
BUILD A PROTOTYPE
9
Describe what you did today. Mention any problems you had, design changes or questions.
Make a labeled sketch that shows what you did.
LOG #2 Date: _________________
__________________________________________
__________________________________________
__________________________________________
__________________________________________
__________________________________________
__________________________________________
__________________________________________
__________________________________________
__________________________________________
__________________________________________
__________________________________________
YES I used complete sentences to describe my progress
YES My description is neatly written and legible
YES I used key terms when possible
YES My drawing is large enough and centered in the space
YES My line quality is sharp and precise (no smudges)
YES Labels and dimensions are OUTSIDE the drawing
Describe what you did today. Mention any problems you had, design changes or questions.
Make a labeled sketch that shows what you did.
LOG #3 Date: _________________
__________________________________________
__________________________________________
__________________________________________
__________________________________________
__________________________________________
__________________________________________
__________________________________________
__________________________________________
__________________________________________
__________________________________________
__________________________________________
YES I used complete sentences to describe my progress
YES My description is neatly written and legible
YES I used key terms when possible
YES My drawing is large enough and centered in the space
YES My line quality is sharp and precise (no smudges)
YES Labels and dimensions are OUTSIDE the drawing

10
Describe what you did today. Mention any problems you had, design changes or questions.
Make a labeled sketch that shows what you did.
LOG #4 Date: _________________
__________________________________________
__________________________________________
__________________________________________
__________________________________________
__________________________________________
__________________________________________
__________________________________________
__________________________________________
__________________________________________
__________________________________________
__________________________________________
YES I used complete sentences to describe my progress
YES My description is neatly written and legible
YES I used key terms when possible
YES My drawing is large enough and centered in the space
YES My line quality is sharp and precise (no smudges)
YES Labels and dimensions are OUTSIDE the drawing
Describe what you did today. Mention any problems you had, design changes or questions.
Make a labeled sketch that shows what you did.
LOG #5 Date: _________________
__________________________________________
__________________________________________
__________________________________________
__________________________________________
__________________________________________
__________________________________________
__________________________________________
__________________________________________
__________________________________________
__________________________________________
__________________________________________
YES I used complete sentences to describe my progress
YES My description is neatly written and legible
YES I used key terms when possible
YES My drawing is large enough and centered in the space
YES My line quality is sharp and precise (no smudges)
YES Labels and dimensions are OUTSIDE the drawing

11
COMPLETE DECISION
My prototype’s performance was: (Check one)
___ Exceptional: it worked every time it was tested and needed no repairs
Some reasons for this are:
1. _____________________________________________________________________________
2. _____________________________________________________________________________
3. _____________________________________________________________________________
___ Very good: it worked most of the time it was tested and didn’t need any (or many) repairs
Some reasons for this are:
1. _____________________________________________________________________________
2. _____________________________________________________________________________
3. _____________________________________________________________________________
___ Good: it worked some of the time it was tested and needed repairs
Some reasons for this are:
1. _____________________________________________________________________________
2. _____________________________________________________________________________
3. _____________________________________________________________________________
___ Not good: it didn’t really work
Some reasons for this are:
1. _____________________________________________________________________________
2. _____________________________________________________________________________
3. _____________________________________________________________________________
Things that I redesigned (changed)
1. _____________________________________
2. _____________________________________
3. ____________________________________
What the changes did
1. _____________________________________
2. _____________________________________
3. _____________________________________
Things I’d do differently next time
1. _____________________________________
2. _____________________________________
3. ____________________________________
What these might do
1. _____________________________________
2. _____________________________________
3. _____________________________________
12
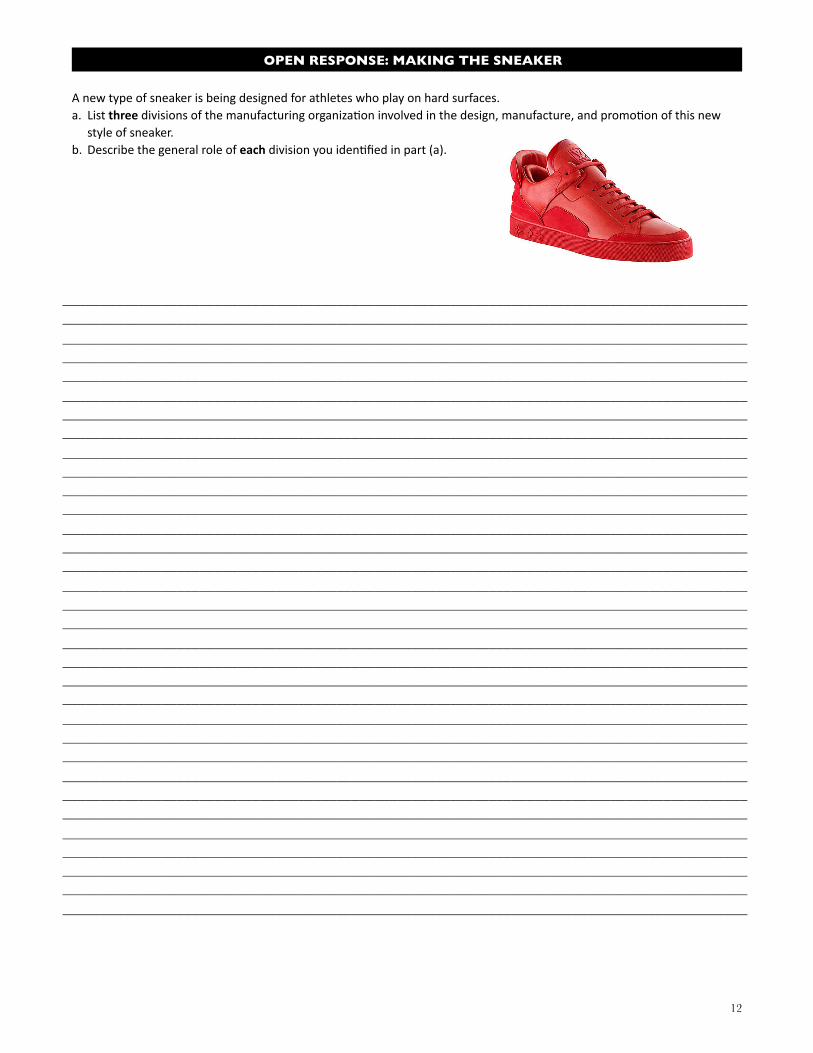
OPEN RESPONSE: MAKING THE SNEAKER
A new type of sneaker is being designed for athletes who play on hard surfaces.a. List three divisions of the manufacturing organizaAon involved in the design, manufacture, and promoAon of this new
style of sneaker.b. Describe the general role of each division you idenAfied in part (a).
__________________________________________________________________________________________
__________________________________________________________________________________________
__________________________________________________________________________________________
__________________________________________________________________________________________
__________________________________________________________________________________________
__________________________________________________________________________________________
__________________________________________________________________________________________
__________________________________________________________________________________________
__________________________________________________________________________________________
__________________________________________________________________________________________
__________________________________________________________________________________________
__________________________________________________________________________________________
__________________________________________________________________________________________
__________________________________________________________________________________________
__________________________________________________________________________________________
__________________________________________________________________________________________
__________________________________________________________________________________________
__________________________________________________________________________________________
__________________________________________________________________________________________
__________________________________________________________________________________________
__________________________________________________________________________________________
__________________________________________________________________________________________
__________________________________________________________________________________________
__________________________________________________________________________________________
__________________________________________________________________________________________
__________________________________________________________________________________________
__________________________________________________________________________________________
__________________________________________________________________________________________
__________________________________________________________________________________________
__________________________________________________________________________________________
__________________________________________________________________________________________
__________________________________________________________________________________________
__________________________________________________________________________________________
13
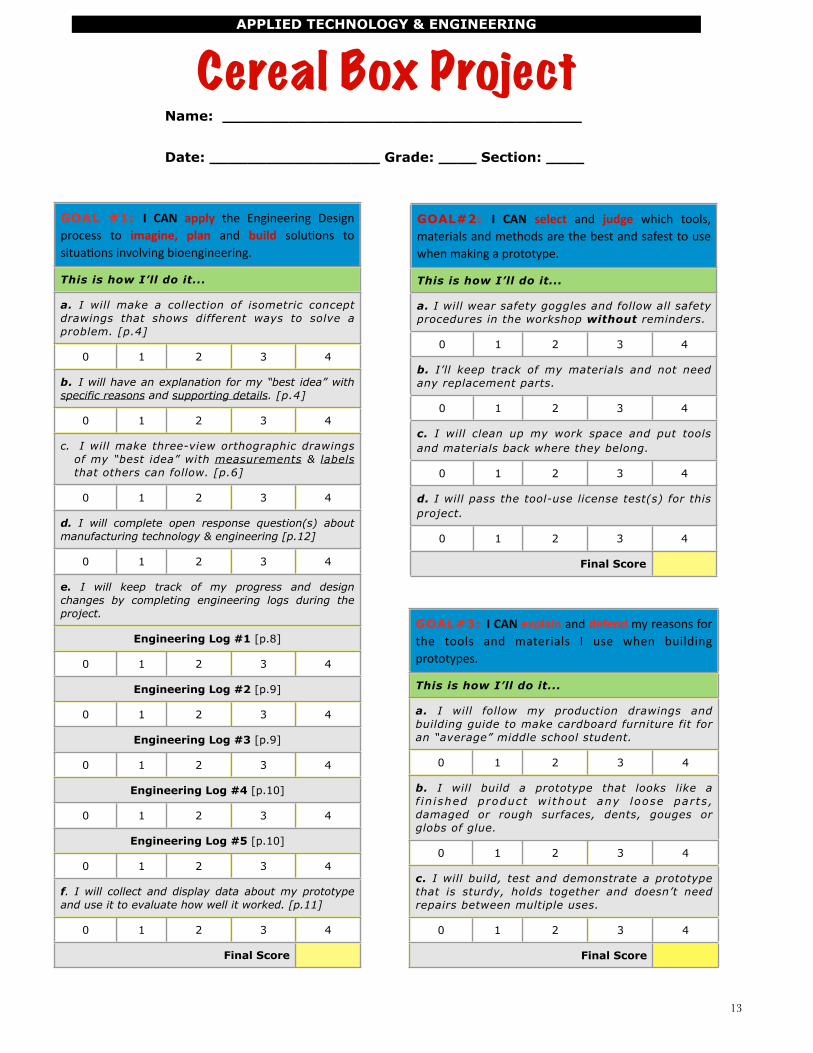
GOAL #1: I CAN apply the Engineering Design process to imagine, plan and build soluAons to situaAons involving bioengineering.
GOAL #1: I CAN apply the Engineering Design process to imagine, plan and build soluAons to situaAons involving bioengineering.
GOAL #1: I CAN apply the Engineering Design process to imagine, plan and build soluAons to situaAons involving bioengineering.
GOAL #1: I CAN apply the Engineering Design process to imagine, plan and build soluAons to situaAons involving bioengineering.
GOAL #1: I CAN apply the Engineering Design process to imagine, plan and build soluAons to situaAons involving bioengineering.
This is how I’ll do it...This is how I’ll do it...This is how I’ll do it...This is how I’ll do it...This is how I’ll do it...
a. I will make a collection of isometric concept drawings that shows different ways to solve a problem. [p.4]
a. I will make a collection of isometric concept drawings that shows different ways to solve a problem. [p.4]
a. I will make a collection of isometric concept drawings that shows different ways to solve a problem. [p.4]
a. I will make a collection of isometric concept drawings that shows different ways to solve a problem. [p.4]
a. I will make a collection of isometric concept drawings that shows different ways to solve a problem. [p.4]
0 1 2 3 4
b. I will have an explanation for my “best idea” with specific reasons and supporting details. [p.4]b. I will have an explanation for my “best idea” with specific reasons and supporting details. [p.4]b. I will have an explanation for my “best idea” with specific reasons and supporting details. [p.4]b. I will have an explanation for my “best idea” with specific reasons and supporting details. [p.4]b. I will have an explanation for my “best idea” with specific reasons and supporting details. [p.4]
0 1 2 3 4
c. I will make three-view orthographic drawings of my “best idea” with measurements & labels that others can follow. [p.6]
c. I will make three-view orthographic drawings of my “best idea” with measurements & labels that others can follow. [p.6]
c. I will make three-view orthographic drawings of my “best idea” with measurements & labels that others can follow. [p.6]
c. I will make three-view orthographic drawings of my “best idea” with measurements & labels that others can follow. [p.6]
c. I will make three-view orthographic drawings of my “best idea” with measurements & labels that others can follow. [p.6]
0 1 2 3 4
d. I will complete open response question(s) about manufacturing technology & engineering [p.12]d. I will complete open response question(s) about manufacturing technology & engineering [p.12]d. I will complete open response question(s) about manufacturing technology & engineering [p.12]d. I will complete open response question(s) about manufacturing technology & engineering [p.12]d. I will complete open response question(s) about manufacturing technology & engineering [p.12]
0 1 2 3 4
e. I will keep track of my progress and design changes by completing engineering logs during the project.
e. I will keep track of my progress and design changes by completing engineering logs during the project.
e. I will keep track of my progress and design changes by completing engineering logs during the project.
e. I will keep track of my progress and design changes by completing engineering logs during the project.
e. I will keep track of my progress and design changes by completing engineering logs during the project.
Engineering Log #1 [p.8]Engineering Log #1 [p.8]Engineering Log #1 [p.8]Engineering Log #1 [p.8]Engineering Log #1 [p.8]
0 1 2 3 4
Engineering Log #2 [p.9]Engineering Log #2 [p.9]Engineering Log #2 [p.9]Engineering Log #2 [p.9]Engineering Log #2 [p.9]
0 1 2 3 4
Engineering Log #3 [p.9]Engineering Log #3 [p.9]Engineering Log #3 [p.9]Engineering Log #3 [p.9]Engineering Log #3 [p.9]
0 1 2 3 4
Engineering Log #4 [p.10]Engineering Log #4 [p.10]Engineering Log #4 [p.10]Engineering Log #4 [p.10]Engineering Log #4 [p.10]
0 1 2 3 4
Engineering Log #5 [p.10]Engineering Log #5 [p.10]Engineering Log #5 [p.10]Engineering Log #5 [p.10]Engineering Log #5 [p.10]
0 1 2 3 4
f. I will collect and display data about my prototype and use it to evaluate how well it worked. [p.11]f. I will collect and display data about my prototype and use it to evaluate how well it worked. [p.11]f. I will collect and display data about my prototype and use it to evaluate how well it worked. [p.11]f. I will collect and display data about my prototype and use it to evaluate how well it worked. [p.11]f. I will collect and display data about my prototype and use it to evaluate how well it worked. [p.11]
0 1 2 3 4
Final ScoreFinal ScoreFinal ScoreFinal Score
GOAL#2: I CAN select and judge which tools, materials and methods are the best and safest to use when making a prototype.
GOAL#2: I CAN select and judge which tools, materials and methods are the best and safest to use when making a prototype.
GOAL#2: I CAN select and judge which tools, materials and methods are the best and safest to use when making a prototype.
GOAL#2: I CAN select and judge which tools, materials and methods are the best and safest to use when making a prototype.
GOAL#2: I CAN select and judge which tools, materials and methods are the best and safest to use when making a prototype.
This is how I’ll do it...This is how I’ll do it...This is how I’ll do it...This is how I’ll do it...This is how I’ll do it...
a. I will wear safety goggles and follow all safety procedures in the workshop without reminders.a. I will wear safety goggles and follow all safety procedures in the workshop without reminders.a. I will wear safety goggles and follow all safety procedures in the workshop without reminders.a. I will wear safety goggles and follow all safety procedures in the workshop without reminders.a. I will wear safety goggles and follow all safety procedures in the workshop without reminders.
0 1 2 3 4
b. I’ll keep track of my materials and not need any replacement parts.b. I’ll keep track of my materials and not need any replacement parts.b. I’ll keep track of my materials and not need any replacement parts.b. I’ll keep track of my materials and not need any replacement parts.b. I’ll keep track of my materials and not need any replacement parts.
0 1 2 3 4
c. I will clean up my work space and put tools and materials back where they belong.c. I will clean up my work space and put tools and materials back where they belong.c. I will clean up my work space and put tools and materials back where they belong.c. I will clean up my work space and put tools and materials back where they belong.c. I will clean up my work space and put tools and materials back where they belong.
0 1 2 3 4
d. I will pass the tool-use license test(s) for this project.d. I will pass the tool-use license test(s) for this project.d. I will pass the tool-use license test(s) for this project.d. I will pass the tool-use license test(s) for this project.d. I will pass the tool-use license test(s) for this project.
0 1 2 3 4
Final ScoreFinal ScoreFinal ScoreFinal Score
GOAL#3: I CAN explain and defend my reasons for the tools and materials I use when building prototypes.
GOAL#3: I CAN explain and defend my reasons for the tools and materials I use when building prototypes.
GOAL#3: I CAN explain and defend my reasons for the tools and materials I use when building prototypes.
GOAL#3: I CAN explain and defend my reasons for the tools and materials I use when building prototypes.
GOAL#3: I CAN explain and defend my reasons for the tools and materials I use when building prototypes.
This is how I’ll do it...This is how I’ll do it...This is how I’ll do it...This is how I’ll do it...This is how I’ll do it...
a. I will follow my production drawings and building guide to make cardboard furniture fit for an “average” middle school student.
a. I will follow my production drawings and building guide to make cardboard furniture fit for an “average” middle school student.
a. I will follow my production drawings and building guide to make cardboard furniture fit for an “average” middle school student.
a. I will follow my production drawings and building guide to make cardboard furniture fit for an “average” middle school student.
a. I will follow my production drawings and building guide to make cardboard furniture fit for an “average” middle school student.
0 1 2 3 4
b. I will build a prototype that looks like a f in ished product wi thout any loose parts , damaged or rough surfaces, dents, gouges or globs of glue.
b. I will build a prototype that looks like a f in ished product wi thout any loose parts , damaged or rough surfaces, dents, gouges or globs of glue.
b. I will build a prototype that looks like a f in ished product wi thout any loose parts , damaged or rough surfaces, dents, gouges or globs of glue.
b. I will build a prototype that looks like a f in ished product wi thout any loose parts , damaged or rough surfaces, dents, gouges or globs of glue.
b. I will build a prototype that looks like a f in ished product wi thout any loose parts , damaged or rough surfaces, dents, gouges or globs of glue.
0 1 2 3 4
c. I will build, test and demonstrate a prototype that is sturdy, holds together and doesn’t need repairs between multiple uses.
c. I will build, test and demonstrate a prototype that is sturdy, holds together and doesn’t need repairs between multiple uses.
c. I will build, test and demonstrate a prototype that is sturdy, holds together and doesn’t need repairs between multiple uses.
c. I will build, test and demonstrate a prototype that is sturdy, holds together and doesn’t need repairs between multiple uses.
c. I will build, test and demonstrate a prototype that is sturdy, holds together and doesn’t need repairs between multiple uses.
0 1 2 3 4
Final ScoreFinal ScoreFinal ScoreFinal Score
APPLIED TECHNOLOGY & ENGINEERING
Cereal Box ProjectName: ______________________________________
Date: __________________ Grade: ____ Section: ____


![Cereal Food, Cereals and Cereal Products Processing IndustryNIIR]_Books-Cereal... · Profitable Agro Based Projects with Project Profiles (Cereal Food Technology) ... use. Cereals](https://static.fdocuments.net/doc/165x107/5ab66a817f8b9ab47e8dc8d4/cereal-food-cereals-and-cereal-products-processing-industry-niirbooks-cerealprofitable.jpg)