2019 FieldManager User Guide - dot.nv.gov
189
NEVADA DEPARTMENT OF TRANSPORTATION F IELD M ANAGER NDOT User Guide PREPARED BY : NDOT HQ CONSTRUCTION 775-888-7460 January 2019
Transcript of 2019 FieldManager User Guide - dot.nv.gov

NEVADA DEPARTMENT OF TRANSPORTATION
FIELDMANAGER NDOT User Guide
PREPARED BY :
NDOT HQ CONSTRUCTION 775-888-7460
January 2019


i
Contents 1 Introduction to FieldManager® .................................................................................................................................... 1-1
1.1 FieldManager Workflow ...................................................................................................................................... 1-1
1.2 FieldManager System Requirements ................................................................................................................... 1-2
1.3 About this Manual ................................................................................................................................................ 1-2
1.3.1 Overview ...................................................................................................................................................... 1-2
2 Getting Started ............................................................................................................................................................. 2-1
2.1 Logging on to FieldManager Software ................................................................................................................. 2-1
2.2 Understanding the Application Window and Toolbar ......................................................................................... 2-2
2.3 Using the Menus to Invoke Commands ............................................................................................................... 2-4
2.4 Shortcut Keys ....................................................................................................................................................... 2-4
2.5 Using List Windows .............................................................................................................................................. 2-4
2.6 Using Tab Windows .............................................................................................................................................. 2-5
2.7 Using Modal Windows ......................................................................................................................................... 2-7
2.8 Changing the Way Windows Are Displayed ......................................................................................................... 2-8
2.9 Changing Your Password ...................................................................................................................................... 2-8
2.10 Using Spell Check ................................................................................................................................................. 2-9
2.11 Finding Information ........................................................................................................................................... 2-10
2.11.1 Using the Find Feature on List Windows ................................................................................................... 2-10
2.11.2 Sorting List Windows .................................................................................................................................. 2-10
2.11.3 Filtering List Windows ................................................................................................................................ 2-11
2.12 Refreshing Data in a Window ............................................................................................................................. 2-13
2.13 Using the Print Option ....................................................................................................................................... 2-14
2.13.1 Printing Reports from List Windows .......................................................................................................... 2-14
2.14 Using Online Help ............................................................................................................................................... 2-15
2.14.1 Using the Using Help Menu Choice ............................................................................................................ 2-16
2.14.2 Using the Contents and Index Menu Choice .............................................................................................. 2-16
2.14.3 Using the Keyboard Menu Choice .............................................................................................................. 2-16
2.14.4 Using the Glossary Menu Choice ............................................................................................................... 2-16
2.14.5 Using the Technical Support Menu Choice ................................................................................................ 2-16
2.14.6 Using the About FieldManager Menu Choice ............................................................................................ 2-16
3 FieldManager Contract Setup ...................................................................................................................................... 3-1
3.1 Change Contract Documentation ........................................................................................................................ 3-1
General Tab .................................................................................................................................................. 3-1
Administrators Tab ....................................................................................................................................... 3-3
Site Times Tab .............................................................................................................................................. 3-4
Users Tab ...................................................................................................................................................... 3-4

ii
4 Working with Contractors ............................................................................................................................................ 4-1
4.1 Adding New Subcontractors ................................................................................................................................ 4-1
5 Working with Items ...................................................................................................................................................... 5-1
5.1 Adding New Unattached Items ............................................................................................................................ 5-1
5.1.1 General Tab .................................................................................................................................................. 5-2
5.1.2 Documentation Tab ..................................................................................................................................... 5-3
5.1.3 Materials Tab ............................................................................................................................................... 5-4
5.2 Changing Existing Items ....................................................................................................................................... 5-6
5.2.1 Changing General Tab Information (Unattached Items Only) ..................................................................... 5-6
5.2.2 Changing Documentation Tab Information ................................................................................................. 5-7
5.2.3 Changing Materials Tab Information ........................................................................................................... 5-7
5.3 Deleting Items (Unattached Only) ....................................................................................................................... 5-8
5.4 Marking Items as Completed ............................................................................................................................... 5-9
5.5 Reviewing Items ................................................................................................................................................. 5-10
6 Working with Materials ............................................................................................................................................... 6-1
6.1 Adding New Materials to an Item ........................................................................................................................ 6-1
6.1.1 General Tab .................................................................................................................................................. 6-2
6.1.2 Items Tab ...................................................................................................................................................... 6-3
6.2 Approving Materials ............................................................................................................................................ 6-4
6.3 Changing an Existing Material .............................................................................................................................. 6-7
6.3.1 Changing Approvals Tab Information .......................................................................................................... 6-7
6.3.2 Changing Item Tab Information ................................................................................................................... 6-8
6.4 Deleting Approvals from an Existing Material ..................................................................................................... 6-9
6.5 Deleting Materials .............................................................................................................................................. 6-10
6.6 Reviewing Materials ........................................................................................................................................... 6-12
7 Inspector Daily Report ................................................................................................................................................. 7-1
7.1 Adding a New IDR................................................................................................................................................. 7-1
7.1.1 General Tab .................................................................................................................................................. 7-2
7.1.2 Postings Tab ................................................................................................................................................. 7-3
7.1.3 View Tab ....................................................................................................................................................... 7-5
7.2 Reviewing IDRs from Mobile Inspector/FieldBook Applications ......................................................................... 7-6
7.3 Deleting IDRs ........................................................................................................................................................ 7-7
7.4 Generating IDRs ................................................................................................................................................. 7-10
7.5 Copying IDR information to a new IDR .............................................................................................................. 7-11
8 Daily Diaries ................................................................................................................................................................. 8-1
8.1 Adding a New Daily Diary Record ........................................................................................................................ 8-1
8.1.1 General Tab .................................................................................................................................................. 8-2
8.1.2 Site Times Tab .............................................................................................................................................. 8-3

iii
8.1.3 View Tab ....................................................................................................................................................... 8-4
8.2 Changing an Existing Daily Diary Record .............................................................................................................. 8-5
8.2.1 Changing General Tab Information .............................................................................................................. 8-5
8.2.2 Changing/Deleting Site Time Tab Information............................................................................................. 8-6
8.2.3 Site Time Adjustment ................................................................................................................................... 8-7
8.3 Deleting a Daily Diary ........................................................................................................................................... 8-8
8.4 Generating a Daily Diary ...................................................................................................................................... 8-9
8.5 Reviewing a Daily Diary ...................................................................................................................................... 8-10
9 Working with Stockpiles ............................................................................................................................................... 9-1
9.1 Adding Stockpiles Using the Wizard .................................................................................................................... 9-1
9.1.1 Stockpile Wizard Setup – Single Category.................................................................................................... 9-2
9.1.2 Stockpile Wizard Setup – Multiple Categories ............................................................................................. 9-5
9.2 Deleting a Stockpile ............................................................................................................................................ 9-11
9.3 Manually Balancing (Decrementing) Stockpiles ................................................................................................. 9-11
9.4 Viewing the Stockpile Summary Report ............................................................................................................ 9-15
10 Contract Modifications .......................................................................................................................................... 10-1
10.1 Adding a New Contract Modification ................................................................................................................. 10-1
10.1.1 General Tab ................................................................................................................................................ 10-2
10.1.2 Inc/Dec Tab ................................................................................................................................................ 10-4
10.1.3 New Items Tab – Adding a New Item ......................................................................................................... 10-6
10.1.4 New Item Tab – Adding an Unattached Item ............................................................................................. 10-8
10.1.5 Time Extensions Tab ................................................................................................................................ 10-10
10.1.6 Attachments Tab ...................................................................................................................................... 10-12
10.1.7 View Tab ................................................................................................................................................... 10-14
10.2 Changing an Existing Contract Modification ................................................................................................... 10-14
10.3 Generating and Printing a Contract Modification ........................................................................................... 10-15
10.4 Approving a Contract Modification ................................................................................................................. 10-17
10.5 Reviewing a Contract Modification ................................................................................................................. 10-20
10.6 Deleting a Contract Modification .................................................................................................................... 10-21
10.6.1 Deleting a Draft Contract Modification.................................................................................................... 10-21
10.6.2 Deleting a Generated Contract Modification ........................................................................................... 10-21
10.7 Creating the Closeout (Balancing) Contract Modification ............................................................................... 10-22
11 Estimates ................................................................................................................................................................ 11-1
11.1 Adding Estimates ............................................................................................................................................... 11-1
General Tab ................................................................................................................................................ 11-3
Item Usage Tab .......................................................................................................................................... 11-3
Payments with Insufficient Materials ........................................................................................................ 11-4
View Estimate Tab ...................................................................................................................................... 11-5

iv
View Amt Bal Tab ....................................................................................................................................... 11-6
View Insuff Mtl Tab .................................................................................................................................... 11-7
Generating the Estimate ............................................................................................................................ 11-8
Reviewing an Estimate ............................................................................................................................. 11-10
12 Contract Retainage ................................................................................................................................................ 12-1
12.1 Reviewing Contract Retainage in an Estimate .................................................................................................. 12-1
12.2 Reviewing Contract Retainage in the Contractor Payment Summary Report ................................................. 12-3
12.3 Reducing Retainage Prior to Final Payment ..................................................................................................... 12-4
13 Semi-Final Estimate Procedures ............................................................................................................................ 13-1
13.1 Creating the Semi-Final Estimate ..................................................................................................................... 13-1
13.2 Editing and Reviewing the Semi-Final Estimate ............................................................................................... 13-3
13.3 Contractor Item Quantity Review ..................................................................................................................... 13-3
13.4 Generating and Printing the Semi-Final ........................................................................................................... 13-4
14 Exporting A Contractor Read-Only File .................................................................................................................. 14-1
14.1 Exporting Read-Only Contract File to FieldManager Read-Only (Prime Contractor) ...................................... 14-1
15 Using Inquiries: General Information ..................................................................................................................... 15-1
15.1 Viewing and Printing Inquiries .......................................................................................................................... 15-1
15.2 Viewing and Printing Inquiries from the Inquiries List ...................................................................................... 15-4
15.3 Inquiries Details ................................................................................................................................................. 15-5
Appendix A - FieldManager Glossary .................................................................................................................................. A-1
Appendix B - Contract Modification Types .......................................................................................................................... B-1
Appendix C – Contract Modification Step-By-Step Guidelines ............................................................................................ C-1
C.1 Creating Contract Modifications .......................................................................................................................... C-1
C.2 Generating Contract Modifications ...................................................................................................................... C-3
C.3 Approving Executed Contract Modifications ........................................................................................................ C-3
Appendix D – NDOT Materials Approval Process (EDOC) ................................................................................................... D-1

FieldManager User Guide – 1/2019 1-1
1 Introduction to FieldManager® Welcome to the FieldManager® module, a fast, easy-to-use, computer-based system for documenting construction progress, initiating contractor payment, and communicating with HQ Construction Division and Contracting community. This user guide is the key to discovering the FieldManager module’s vast capabilities, and is a valuable resource both for novice and experienced users. The FieldManager module can record and maintain item progress information, stockpiles, contract modifications, and daily diaries. At the end of the pay period, an estimate can be generated and exported to NDOT’s financial system. All item progress data, daily diary entries, contract modifications, and reports are maintained in the FieldManager module and are instantly available to the user.
1.1 FieldManager Workflow FieldManager software focuses on refining the workflow of construction contract management at the field office level. With FieldManager software, the field office can manage field-gathered data and then interface with construction crew’s office and Headquarters. FieldManager software allows users to update contract information, and it implements a shared database to expand NDOT’s data-sharing ability. Figure 1.1 below displays FieldManager software’s basic contract management workflow.
Figure 1.1. FieldManager Workflow
1.2 FieldManager System Requirements This version of FieldManager software is designed to run on a Microsoft Windows operating system. Contact NDOT’s Construction Administration Helpdesk for any questions relating to installation or update of software.

FieldManager User Guide – 1/2019 1-2
• D1 Construction Admin Helpdesk - (702) 385-6595 [email protected]
• D2 & D3 Construction Admin Helpdesk - (775) 888-7460 [email protected]
1.3 About this Manual This section describes the prerequisites for using FieldManager software, and the formatting conventions used throughout FieldManager software’s documentation.
1.3.1 Overview Training or experience with Microsoft Windows operating system is a prerequisite for FieldManager software.
The FieldManager User Guide provides information about FieldManager software’s functions, including advanced features. A comprehensive online Help system complements this user guide, and offers a quick reference to menu commands and window fields.

FieldManager User Guide – 1/2019 2-1
2 Getting Started The main window displays all statewide contracts. Please note that you have access to ALL contracts and functionality is based on permission level. These contracts are imported into FieldManager by HQ Construction Admin. The list can be filtered or sorted to only see the contracts that you are working on. Double-click on the contract you wish to open. Once you open your contract you will be able to perform all the functions along the left side of the screen as they pertain to your contract. Each of these will be discussed in this document.
2.1 Logging on to FieldManager Software You must log onto NDOT’s Citrix Server to access FieldManager Software. 1. Go to NDOT’s SharePoint Homepage and click on the iPD Log-In (Citrix XenApp) link (Figure
2-1). This will bring up the Citrix Login window (Figure 2-2). 2. The Logon type will always be “Explicit” and your User name and Password is the same as
logging into your primary office computer. The Domain will always be “nvdot”.
Figure 2-1. NDOT’s SharePoint Site
Figure 2-2 Citrix Login Window
3. Once you are connected to NDOT’s Citrix Server you can login to FieldManager Software. Do so by clicking on the FieldManager logo (Figure 2-3).

FieldManager User Guide – 1/2019 2-2
Figure 2-3. FieldManager Logo Figure 2-4. FieldManager Login Window
4. Enter your FieldManager User ID (same ID as logging onto your computer, example: h9040xxx) and the password you have set for FieldManager (Figure 2-4). Click Ok.
Note: FieldManager will time out after 15 minutes of inactivity. The program does not give a time out warning.
5. If this is the first-time logging into FieldManager your password will be assigned by HQ Construction Admin Section. Please call 775.888.7460 to make sure you have been properly set up and added to the software. After you log on for the first time you will be prompted to change your password (Figure 2-5). Click OK.
Figure 2-5. FieldManager Change Password Window
2.2 Understanding the Application Window and Toolbar When you start FieldManager, the Application Window displays and remains displayed as long as FieldManager is running. Figure 2-6 shows the different components of the FieldManager Application Window.

FieldManager User Guide – 1/2019 2-3
Figure 2-6. FieldManager Application Window Components – Contracts List Window
Within the Application Window, there is a large central area known as the window display area. This is the area where FieldManager windows open when FieldManager commands are invoked.
Along with the Window Display area, there are several other elements of the Application Window:
• Menu Bar: Contains names to click on to display drop-down lists of commands.
• Window Toolbar: Changes as the window display changes, showing only those commands that can be invoked for the active window. Clicking the down arrow beside the Contract Status toolbar button on the Window Toolbar will display fly-out buttons for accessing specific inquiries appropriate to the active window.
• Application Remains static; or constant, regardless of where the user is in the Toolbar: system. In other words, it always displays the same buttons no matter what commands are being invoked. Click these buttons to work with specific contract information; for example, click IDRs to access the Inspector’s Daily Reports.
• Title Bar: Contains standard Windows controls for minimizing, maximizing,
and closing the window.
• Status Bar: Changes depending on what the user is doing, offering helpful information about various functionalities.
Title Bar
Status Bar
Application Toolbar
Menu Bar Window Toolbar
Window Display Area - Contracts list window

FieldManager User Guide – 1/2019 2-4
2.3 Using the Menus to Invoke Commands Another way to invoke commands besides using toolbars is to choose commands from the menus on the Menu bar. These menus contain all the commands offered by toolbar buttons, in addition to several other commands.
1. To invoke a command in a window, click the menu name.
2. Then select a command from the drop-down list (Figure 2-7).
Figure 2-7. Edit Command and Shortcut Keys – Menu Bar
2.4 Shortcut Keys Within the View menu is a listing of shortcut keys, as they are commonly known, for accessing the PROJECTS and ITEMS buttons on the Window Toolbar (Figure 2-7). Several other shortcut keys may be found within the different drop-down menus, and with practice, you will become more efficient in maneuvering around in FieldManager.
2.5 Using List Windows A list window displays a list of records to work with. The Contracts list window always displays when FieldManager is first opened (Figure 2-6). Before changing records in a list window, select the record to work with by clicking on that record.
List windows display only the most important information about a record. To add or change a record in the list window, it is necessary to invoke the proper command before working with the record’s data in a tab window (for information on tab windows, see Section 2.6). If the list window contains more records than can be displayed in the window, the window will contain a scroll bar used to view records further down in the list. Depending on the information displayed in the window, there could be a scroll bar to the right of the window and at the bottom of the window. The right scroll bar is for viewing up and down in the window, and the bottom scroll bar is for viewing from left to right (Figure 2-8).

FieldManager User Guide – 1/2019 2-5
Figure 2-8. Items List Window
If you double-click a record in a list window, FieldManager displays the information for the record in tab windows that you can modify.
When you have a record open for editing the entire contract is “Locked-out” for editing by other users.
List windows have right mouse button menus that contain frequently used commands.
1. To bring up a right mouse button menu, point the mouse on the record to associate the command with, and then click the right mouse button. The example below (Figure 2-9) is from the Items list.
2. You can add, change, and delete the item selected or just review the item or inquiries
regarding the item.
Figure 2-9. Right-click Mouse - Item Button Menu
2.6 Using Tab Windows Tab windows contain dividing tabs, and they provide details about a record. They also allow a record’s data to be changed and allow new records to be created. While list windows only display certain fields of information about the contract, tab windows go into greater detail and can be modified. Figures 2-10 & 2-11 identify some common elements of tab windows.
Right and Bottom Scroll

FieldManager User Guide – 1/2019 2-6
Figure 2-10. Change Contract Documentation Tab Window – General Tab
Figure 2-11. Add IDR Tab Window – Postings Project/Category Drop-Down List Box
The following are common elements that appear in tab windows:
• Tab Names: These define the tabs that may be clicked to access different information about a record.
Tab Names
Status Area
Radio Button
Calendar Tool
Text Box
Drop-down List Box

FieldManager User Guide – 1/2019 2-7
• Status Area: This area containing blue text cannot be modified. Various types of status areas may be displayed depending on the functionality of the tab window.
• Text Box: Click in these fields to add to or modify field entries.
• Calendar Tool: Click on the drop-down menu to quickly enter dates for date fields.
• Radio Buttons: Click on these buttons to make a restricted selection. Please note on the Contract Documentation tab page you cannot select the Yes radio button to close a contract. This is automatically done when HQ Construction Admin Section staff create and process the final payment.
• Drop-down A text box with an accompanying arrow on which to click to List Box: display a list of valid values from which to choose.
To advance to the next text box in a tab window, simply press the TAB key or click in the text box. Hold down the SHIFT key and press the TAB key to “back tab”, which moves you back to the previous text box.
2.7 Using Modal Windows Modal windows require a response before continuing in the application. An example is shown in Figure 2-12. When a modal window appears, you will be unable to access the FieldManager menu and toolbars. Simply respond as appropriate to be able to continue.
Figure 2-12. Modal Window – Select Items for Contract Window

FieldManager User Guide – 1/2019 2-8
2.8 Changing the Way Windows Are Displayed FieldManager windows display in several ways to help organize the work being done. Figure 2-13 shows the locations on which to click to resize or re-organize several parts of a list window.
Figure 2-13. FieldManager Item Window – Re-sizing or re-organizing columns
The size and organization of a window can be changed as follows:
• Resizing windows: To resize a window, rest the mouse pointer on the border of the window until it displays as a double-arrow. Click and hold the mouse button to “grab” the window edge and drag the window border to any size.
• Resizing columns: To resize a column, rest the mouse pointer on the border
between two column headings, to the right of the column to be resized, until it displays as a bar with two arrows pointing to each
side. Click and hold the mouse button to “grab” the column edge and drag the column to the right or left, increasing or decreasing its width.
• Re-ordering columns: To reorder columns, click in the column heading so that FieldManager software highlights the entire column. Hold down the mouse button in the heading, and FieldManager software will display a faint gray bar down the length of the column. Continue to hold down the mouse button, and as you move the mouse, the gray bar will move. Release the mouse, and the column will be ordered in the window wherever the gray bar rests.
Choosing the Tile Vertical, Tile Horizontal, Layer or Cascade command from the Window menu will also display the window in a different way, according to standard Windows functionality.
2.9 Changing Your Password 1. To change your password, log on to FieldManager with your old password.
Column Heading Border
Column Heading
Window Border

FieldManager User Guide – 1/2019 2-9
2. Go to Utilities from the menu bar and choose Change Password from the menu list to display the Change Password window (Figure2-14).
3. Enter your Old Password and your new password in the required fields. Click Ok.
Figure 2-14. Change Password Window
2.10 Using Spell Check The spell check utility is provided whenever the user can modify data in a tab window. 1. You can choose to check the spelling for each modifiable text field in the window by
choosing Spell Check from the Utilities menu. 2. You can limit the spell check to the current field by choosing Spell Check from the right
mouse button menu. For example - To spell check an entire window:
a. Select a contract from the Contracts list window.
b. Click the CHANGE button on the Window Toolbar.
c. Go to Utilities from the menu bar and choose Spell Check.
d. This will prompt the spell check utility to examine the current tab window for
every modifiable text field that contains information (Figure 2-15). This window is similar to those found in many word processing programs.
e. Respond as you would to any spell check utility.

FieldManager User Guide – 1/2019 2-10
Figure 2-15. Spell Check Window
2.11 Finding Information FieldManager provides several different functions to help find specific information quickly and easily.
2.11.1 Using the Find Feature on List Windows The top left corner of most list windows contains a Find text box, similar to a search box, used to advance to a specific record in a list window.
1. Enter the first few numbers or letters of the value for the field identified in the text box label. The highlight in the list window advances to the first record in the list that matches the information specified for the field (Figure 2-16).
2. To change the field on which the search is based, double-click on the column heading
desired to appear in the text box label.
Figure 2-16. Contracts List Window – Find Text Box
2.11.2 Sorting List Windows It is often helpful to sort the information in List Windows in ascending or descending order. There are several ways to perform simple and advanced sort lists in FieldManager.
Single field sorting technique:
1. To sort a list window, double-click in the column header of the field to sort. The first time you double-click, FieldManager performs an ascending sort.
Column Heading Double-Click Here

FieldManager User Guide – 1/2019 2-11
2. Double-click a second time, and it performs a descending sort.
It is also possible to sort a list window in ascending or descending order according to specific fields and up to 6 fields may be chosen to sort by (Figure 2-17).
Multiple fields sorting technique:
1. To sort a list window, click on the SORT button from the Window Toolbar, and select a field from the drop-down list in the Order By text box.
2. Click either the “Ascending” or “Descending” radio button. If you select “Ascending”,
FieldManager lists numeric records from lowest to highest first, and then sorts from A to Z. “Descending” reverses this order.
3. To sort by an additional field, select it in the Then By text boxes, and choose “Ascending” or
“Descending” to determine the order in which those fields are sorted. 4. Click the More button to display additional Then By text boxes. 5. Click the Apply button to complete the sort.
Figure 2-17. Sort Window
When multiple fields are chosen, FieldManager will first sort the records based on the choice of column heading and sort order specific in the Order By box (the first choice in the Sort window). Then, with that original sort in place, it will sort by each successive column heading and sort order specified in the Then By box. If you have entered sort criteria and then decide to retain the original sort, click the RESET button to return the window to the previous sort criteria.
2.11.3 Filtering List Windows List windows can be filtered so that only records with a specific set of information will display. One or more filter criteria may be specified using the column, operator, and value of the filter. Filters may also be saved for future use.
1. To filter a list window, begin by clicking the Filter button on the Edit Toolbar; this will display the Filter Window (Figure2-18).

FieldManager User Guide – 1/2019 2-12
Figure 2-18. Filter Window
2. Click on the down arrows in the Column and Operator fields to display lists of values from which to choose (Figure 2-18).
Note: The Column field lists the names of all the columns in the list window on which
the filter can be based. The Operator field has a separate scrolling area with operators that can be used to narrow the filter. The last four operators – Contains, Does not Contain, Like, and Not Like – rely on pattern matching. The Contains option narrows the search and only lists entries that contain the given text anywhere within the data. Alternatively, the Does not Contain option only lists entries that do not include the given text. The Like option narrows the search and only lists entries that match the given text at the beginning of the data. In contract, the Not Like option only lists entries that exclude the given text at the beginning of the date.
3. Type your information in the Value field. This designates the filter criterion which marks the
limit of the sort, or data you are trying to match. 4. Click OK to apply the filter to the list window or CANCEL to cancel the filter and return to the
last window.
Using an Advanced Filter
Clicking the Advanced button in the Filter window displays an expanded version of the Filter window in which to select multiple rows of filter criteria and save any filters created (Figure2-19). Within this window, you can name the filter in the Name field so that it may be saved and used again.
Figure 2-19. Advanced Filter Example – Contract List for a Crew

FieldManager User Guide – 1/2019 2-13
1. In the Select Filter Condition area, set the conditions for the Column Name, Operator, and Value(s) fields just as with a simple filter.
2. To add additional rows of filter criteria, click the Insert Row button at the bottom of the
window and enter the appropriate values. Each time a row is inserted, FieldManager will place it above the currently selected row. To add a row of criteria at the bottom of the list of rows, click the Add Row button. To delete a row of criteria, select the row and click the Delete Row button.
3. Once several rows of filter criteria have been entered specify whether the filter finds
information that contains all or only some of the filter criteria. To do this, choose an And / Or operator between rows. And finds records that meet both criteria, and Or finds records that meet one or the other criterion. Select And / Or from a drop-down list attached to the field.
4. There may be times when two rows of criteria are needed. In this case, parentheses marks
may be used to group rows in a filter. To group two rows of criteria, highlight the first row of criteria and click on the (+ button to insert an open parenthesis mark before the criteria. Then, select the second row and click +) button to insert a close parenthesis mark. To remove a parenthesis, select the row where the parenthesis is, and click the (- or) buttons.
5. Once all the filter criteria have been entered, click Save to save the filter, Close to close the
filter without applying it to the window, or Apply to apply the filter to the window. If you click Close or Apply and have not saved the filter, FieldManager will ask if you want to save the filter. To do so, enter a filter name in the Name field.
6. To delete an existing advanced filter, open the Advanced Filter window. Select the filter
from the Name field, click the Delete button, and then click OK when FieldManager asks to verify the deletion.
2.12 Refreshing Data in a Window While working in FieldManager software, there are many times when you may have several windows open at once. As you work in one window, the information in the other window may be affected by changes you make in the first. Normally the changes are not reflected in the other windows until you close and re-open those windows. You can, however, use an option in FieldManager software to refresh or update the information in the other windows without having to exit those windows.
1. To ensure that you are viewing the most updated information for all open windows, click Refresh on the Window Toolbar, or alternatively, select Refresh from the View menu (Figure 2-20). FieldManager software will update the information in the windows according to any changes made in the system that affect those windows.
Figure 2-20. Examples of Refresh
Note: FieldManager software will only refresh windows according to information that has been saved in the system. In other words, you will need to click Save or Save/Close

FieldManager User Guide – 1/2019 2-14
in a window before that window’s changes can be used to refresh any other open windows. With that said, each window you open WILL NOT close until you physically close it. You can have multiple windows at one time, but it is a good practice is to close window as you are done with them, as it can get interesting, as explained in the above paragraphs.
2.13 Using the Print Option The Print option is always displayed on the Window Toolbar, and it may be used to print inquires, reports, and list window contents. The Print dialog box is similar to those found in many word processing programs. Respond as you would to any print utility.
2.13.1 Printing Reports from List Windows Certain list windows allow you to print reports, as well as list contents directly from the list window. These are the list windows from which you can print reports:
• IDR List • Daily Diary List • Estimates List • Contract Modifications List • Miscellaneous Reports: Notice of Change in Construction Status List • Miscellaneous Reports: Weekly Report of Time Charges List
1. To print reports, open the list window and select one or more rows for which you want to
print reports. 2. Click Print. FieldManager software opens a Print Options window containing two or more
option buttons (Figure 2-21).
The first option is the Print List option. If you select this option, FieldManager software will print the contents of the list window. The other option prints the reports for the rows selected in the list window. If you select this option for multiple reports, you can print all reports as one job by selecting the Consolidate into one print job check box. One advantage of doing so is that if you are printing to a PDF writer, you can save all reports to one PDF file, rather than saving separate PDF files for each report.
Figure 2-21. Print Option Window (for the IDR List Window)
3. To print the reports, select the options for the reports you wish to print and click OK. FieldManager software displays the Print dialog box (Figure 2-22).

FieldManager User Guide – 1/2019 2-15
Figure 2-22. Print Dialog Box
4. Click the Print button in the Print dialog box. If more than one report was selected in the list
window, FieldManager software displays a Progress Meter window so that you can monitor the progress of you print job.
2.14 Using Online Help Experienced and new computer users alike will appreciate the online Help system provided with the FieldManager software. Help provides a quick reference to menu commands and window fields, and it answers many questions about FieldManager software. It is designed to be the user’s main reference and guide along with this document. FieldManager software’s online Help works like Help in Microsoft applications. Links, identified by green, enable the user to go directly to related topics. In addition, FieldManager software’s online Help is context sensitive, meaning that users can readily access information geared toward the activity taking place on the screen. The context sensitive aspect of Help is available at various times by choosing Help from the right mouse button menu, or in some modal windows, by clicking Help that displays.
2.14.1 Using the Using Help Menu Choice Go to the Help menu and choose Using Help or press the F1 key to learn more about using FieldManager’s online Help.
2.14.2 Using the Contents and Index Menu Choice Go to the Help menu and choose Contents and Index or press the FieldManager Help Topics window to display a table of contents and index of the major topics in Help.
2.14.3 Using the Keyboard Menu Choice Go to the Help menu and choose Keyboard to display helpful information about using the keyboard to access software shortcuts.
2.14.4 Using the Glossary Menu Choice Go to the Help menu and choose Glossary to access FieldManager software’s glossary of terms.

FieldManager User Guide – 1/2019 2-16
2.14.5 Using the Technical Support Menu Choice Go to the Help menu and choose Technical Support to open a window displaying the names and phone numbers of persons in your agency available for help on specific topics.
2.14.6 Using the About FieldManager Menu Choice Go to the Help menu and choose About FieldManager to open a window displaying release information about your FieldManager software.

FieldManager User Guide – 1/2019 3-1
3 FieldManager Contract Setup This chapter provides information needed to set up a FieldManager contract after it has been loaded into the software by HQ Construction Admin Section. There are some fields that the Construction crew will be required to enter for all new contracts and some fields that are updated during the entire contract life cycle.
3.1 Change Contract Documentation Log into FieldManager through Citrix (for more information on logging on to FieldManager, see Chapter/Section 2.1 in this user guide). This will open the Contracts list window (Figure 3-1).
Figure 3-1. FieldManager Contracts List Window
General Tab The General tab contains general contract information: Project ID(s), contract dollar amounts, location, Prime Contractor, important dates and the number of days to view IDRs. HQ Construction Admin Section.
1. Select desired contract from the Contracts list window and click Docu on the Application Toolbar Window (Figure 3-1) or double-click on the contract ID. The Change Contract Documentation tab window opens with the General tab displayed (Figure 3-2).

FieldManager User Guide – 1/2019 3-2
Figure 3-2. Change Contract Documentation Tab Window - General tab
2. Fill out the required fields:
• Managing Office: Crew number and RE name (Example: C-901 Joe Smith). This is entered by HQ Construction Admin Section.
• Managing Office Crew number and add short description of contract. This language Comments: will be displayed on the contracts list screen. This is entered by HQ Construction Admin Section.
• Notice to This is entered by HQ Construction Admin Section. Proceed Date:
• Construction Enter date of first working day charged. This is entered by RE Started Date: (Required).
• Closed to This is not used at NDOT. Traffic Date:
• Open to This is not used at NDOT. Traffic Date:
• All Contract Work The date when final cleanup phase was completed. This is Completed: entered by RE (Required).
• Contract Closed: This indicates whether or not the contract is closed. The radio button “NO” will be selected until final payment has been made; the status of the contract will then automatically update and the radio button will then reflect “YES”. Completed by HQ Construction Admin staff.
• View IDRs & The number of days of IDRs that will be included in a refresh file Attachments in passed from the FieldManager application to the Mobile FieldBook: Inspector application. We recommend 14 days for each to reduce

FieldManager User Guide – 1/2019 3-3
risk of large file size but can be extended for viewing if needed. This is entered by RE.
• Traffic Comments: Comments detailing specifics on the Traffic data entered in this
window. This is entered by RE, not required.
3. Click Save or Save/Close on the Window Toolbar, depending on how you would like to proceed.
Administrators Tab The Administrators tab lists the administrators assigned to the contract including the Managing Office Manager, Resident Engineer, and Project Engineer for the contract. 1. Click on the Administrators tab (Figure 3-3).
Figure 3-3. Change Contractors Documentation Window - Administrators Tab
2. Fill out the required fields:
• Managing Office Enter the office person’s name. This is entered by RE Manager: (Required).
• Resident Engineer: RE assigned to the contract. Entered by HQ Construction Admin.
• Project Engineer: Project Engineer assigned to the contract. Entered by HQ Construction Admin.
• Final Quantities Date when final quantity information is sent to the contractor. to Contractor: Entered by HQ Construction Admin.
3. Click Save or Save/Close on the Window Toolbar, depending on how you would like to proceed.

FieldManager User Guide – 1/2019 3-4
Site Times Tab The Site Times tab identifies the amount of time allotted and completed for your contract. It is also where you start and stop charging days. 1. Click on the Site Times tab (Figure 3-4).
Figure 3-4. Change Contract Documentation Window-Site Times Tab
2. Enter the Time Charges Start Date by using the drop-down menu to select the first working day of the contract. This is entered by RE. (Required)
3. Enter the Time Charges Stop Date at the end of the contract by using the drop-down menu. This is entered by RE. (Required)
4. Click Save or Save/Close on the Window Toolbar, depending on how you would like to proceed.
Note: NDOT will not be using the Breakdowns, Site Event and Attachments tabs.
Users Tab The Users tab is where you will set up the various users who will work on this contract. It is important to add all your Mobile Inspector users so that the Mobile Inspector application, installed on NDOT EDOC iPads, will be able to send and receive contract data from the FieldManager application.
1. Click on the Users tab (Figure 3-5).

FieldManager User Guide – 1/2019 3-5
Figure 3-5. Change Contract Documentation Window - Users Tab
2. Click the Add User button (See blue box in Figure 3-5). The Select Users list window opens (Figure 3-6).
6 Figure 3-6. Users Tab – Select Users List Window
3. Select the user(s) from the master users list. You can select more than one user at a time to add to the users list. Click on the Select button to add the user(s) (Figure 3-6).
4. If you wish to delete a user select the Delete User button remove them from list (Figure 3-5).
5. Click Save or Save/Close on the Window Toolbar, depending on how you would like to proceed.
Note: If a desired user isn’t available for selection please call HQ Admin Section Helpdesk at 775.888.7460 to have the user added.


FieldManager User Guide – 1/2019 4-1
4 Working with Contractors The Contractors list window lists the Prime Contractor and all subcontractors (including Service Providers) associated with a contract. The Prime Contractor has already been entered by HQ Construction Admin. When the Resident Engineer receives the Request To Sublet form from HQ Contract Compliance all known subcontractors need to be added to the contract by the Office Person.
4.1 Adding New Subcontractors Log into FieldManager through Citrix (for more information on logging on to FieldManager, see Chapter/Section 2.1 in this user guide). The Contracts list window opens (Figure 4-1).
Figure 4-1. FieldManager Contracts List Window
1. Select desired contract in the Contracts list window, and click Contractors on the Application Toolbar (Figure 4-1). The Contractors list window opens (Figure 4-2). The prime contractor is shown with a bold, italicized text style.
Figure 4-2. Contractors List Window
2. Click Add on the Window Toolbar (Figure 4-2). The Add Contractor list window opens (Figure 4-3) identifying NDOT’s master list of approved subcontractors. Call HQ Contract

FieldManager User Guide – 1/2019 4-2
Admin Section Helpdesk at 775.888.7460 if your subcontractor is not located in the window.
Figure 4-3. Add Contractor List Window
3. Click on the subcontractor to add and click on the Select button (Figure 4-3). The Add Contractor window opens in the General tab (Figure 4-4).
Figure 4-4. Add Contractor Window
4. Select the appropriate Work Type and enter the subcontract amount (Figure 4-40, as indicated on the Request To Sublet form.
Note: Subcontractors addresses are not required.
!! DO NOT ASSIGN ITEMS TO SUBCONTRACTORS !!
5. Click Save/Close on the Window Toolbar.
6. Repeat steps 3 and 4 to add additional subcontractors.

FieldManager User Guide – 1/2019 5-1
5 Working with Items FieldManager contracts contain three types of items: original, unattached and attached items. Original items are those that were included in contract documents at time of award. Unattached items are items that are added to the contract so they can be tracked and postings made. These items are not eligible for payment until they have been added and approved through the contract modification process. Refer to Chapter/Section 10.1.4 in this user guide for details on adding an unattached item to a contact modification. Once unattached items are approved by a contract modification they are considered an attached item.
5.1 Adding New Unattached Items Log into FieldManager through Citrix (for more information on logging on to FieldManager, see Chapter/Section 2.1 in this user guide). The Contracts list window opens (Figure 5-1).
Figure 5-1 - FieldManager Contracts List Window
1. Select desired contract, and click Items on the Application Toolbar (Figure 5-1). The Items list window opens (Figure 5-2). The Items list window lists all the items in the contract, and it shows whether an item is an original item, an attached item (added by a contact modification), or an unattached item.

FieldManager User Guide – 1/2019 5-2
Figure 5-2. Items List Window
2. Click Add on the Window Toolbar (Figure 5-2). The Add Item window opens with the General tab displayed (Figure 5-3).
Figure 5-3. Add Item Tab Window - General Tab
5.1.1 General Tab 1. To complete the General tab item record, enter the following information in the
appropriate fields: • Item: Enter the item number or Click the drop-down arrow next to the
Item number box and NDOT’s Master Item list opens (Figure 5-4) Select the item to add and click on the Select button.
Note: Check for the correct unit of measure on items that have multiple units of measure.

FieldManager User Guide – 1/2019 5-3
Figure 5-4. Agency Master Item List – General Tab
• SupplementalDescription:
Enter when applicable.
• Section: Always 0.
• Project Check the box for each category with which to associate the item Category: to (See blue box in Figure 5-3).
2. Click Save or Save/Close on the Window Toolbar, depending on how you would like toproceed.
5.1.2 Documentation Tab 1. Click on the Documentation tab (Figure 5-5).
Figure 5-5. Add Item Tab Window - Documentation Tab
2. Enter the following information in the appropriate fields:
• Item Completed: This step should be performed as items are completed. All items

FieldManager User Guide – 1/2019 5-4
must be marked complete to complete the Semi-Final process (See Chapter 13 in this user guide). Only attached items may be marked complete to prevent an unapproved item from being marked by mistake, this option is disabled when you are adding a new unattached item (See Chapter/Section 5.2 in this user guide.
• Documentation: You may add documentation to this item to indicate the location of any supporting files. Not required.
• Attention: Check the box if this item needs attention (by the RE or Office Person). This flag will appear in the Item Usage tab in an Estimate (See Chapter/Section 11.2.2 in this user guide). If selected a reason must be provided in the Notes field before saving.
• Notes: This area is provided for additional notes on the new item. This field is required if the Attention check box is selected.
3. Click Save or Save/Close on the Window Toolbar, depending on how you would like to
proceed.
5.1.3 Materials Tab 1. Click on the Materials tab (Figure 5-6).
Figure 5-6. Add Item Tab Window - Materials Tab
2. Click the Add Material button (See blue box in Figure 5-6). The Select Materials list window opens (Figure 5-7). This lists all the materials requiring certification that are associated with the items of this contract

FieldManager User Guide – 1/2019 5-5
Figure 5-7. Materials Tab - Select Materials Window
3. Select the material from the list and click on the Select button. (Figure 5-7). The Add Item
Materials tab opens (Figure 5-8).
Figure 5-8. Add Item Tab Window - Materials Tab
4. Enter the following information in the appropriate fields:
• Usage Factor: Always 1. (Required)
• Remarks: Enter additional specific information about the material added to the unattached item. (Required)
Note: NDOT does not utilize the Breakdowns or Contractors tabs of the software.
5. Click Save or Save/Close button on the Window Toolbar, depending on how you want to proceed.
Note: Refer to Chapter/Section 6.1 in this user guide for additional information.

FieldManager User Guide – 1/2019 5-6
5.2 Changing Existing Items It is possible to change item information via the Items list window at any time. The only difference between changing an original bid item and changing an unattached item is that you cannot change any of the general information in the Change Item tab window for an original bid item.
5.2.1 Changing General Tab Information (Unattached Items Only) 1. Select the contract in the Contracts list window, and click Items on the Application Toolbar.
The Items list window opens (Figure 5-9).
Figure 5-9. Items List Window
2. Select the Unattached item, and click Change on the Window Toolbar (Figure 5-9) or double-click on the item. The Change Item tab window opens in the General tab (Figure 5-10).
Figure 5-10. Change Item Tab Window - General Tab (Unattached Item)
3. Make desired changes.
4. Click Save or Save/Close on the Window Toolbar, depending on how you want to proceed.

FieldManager User Guide – 1/2019 5-7
5.2.2 Changing Documentation Tab Information 1. Click on the Documentation tab (Figure 5-11). You can change any of the information
except the blue fields in the header at the top of the tab window.
Figure 5-11. Change Item Tab Window – Documentation Tab
2. Click Save or Save/Close on the Window Toolbar, depending on how you would like to
proceed.
5.2.3 Changing Materials Tab Information 1. Click on the Materials tab (Figure 5-12).
Figure 5-12. Change Item Tab Window - Materials Tab
2. The only information on this tab that you would change is the Remarks field.

FieldManager User Guide – 1/2019 5-8
3. Click Save or Save/Close button on the Window Toolbar, depending on how you would like to proceed.
5.3 Deleting Items (Unattached Only) Only Unattached items that have no item postings or payment made against them may be deleted. 1. Select the contract in the Contracts list window, and click Items on the Application Toolbar.
The Items list window opens (Figure 5-13).
Figure 5-13. Items List Window
2. Select the Unattached item and click Delete on the Window Toolbar (Figure 5-13). A Delete
Warning window opens (Figure 5-14).
Figure 5-14. Delete Warning Window - Delete Unattached Item
3. Click YES to complete the deletion. Note: If you attempt to delete an Unattached item that has IDR postings a Warning
window opens (Figure 5-15) indicating the item cannot be deleted unless the posting is deleted (See Chapter/Section 7.3 in this user guide).
Figure 5-15. Warning Window – Delete Unattached Item

FieldManager User Guide – 1/2019 5-9
Note: If you attempt to delete an original bid item or an item added by a contract modification you will receive an error message indicating that the item CANNOT be deleted (Figure 5-16).
Figure 5-16. Error Window - Delete Attached Item
5.4 Marking Items as Completed As items are completed they must be manually marked as completed. This step is applicable to the Semi-Final process (see Chapter 13 in this user guide). All items must be marked as completed before the Semi-Final estimate can be created. Note: Only attached items can be marked as completed. 1. Select the contract in the Contracts list window and click Items on the Application Toolbar.
The Items list window opens (Figure 5-17).
Figure 5-17. Items List Window
2. Select the completed item and click Change on the Application Toolbar (Figure 5-17). Click
the Documentation tab (Figure 5-18).

FieldManager User Guide – 1/2019 5-10
Figure 5-18. Change Item Tab Window – Documentation Tab
4. Click the Item Completed Yes radio button. (Figure 5-18).
5. Enter Notes as needed.
6. Click Save/Close on the Window Toolbar.
5.5 Reviewing Items If you are interested in information regarding an item but not wishing to change you can simply review the item. 1. Select the contract in the Contracts list window and click Items on the Application Toolbar.
The Items list window opens (Figure 5-19).
Figure 5-19. Items List Window
2. Select the item and click Review on the Window Toolbar (Figure 5-19). The Review Item tab window opens in the General tab in a mode in which you can view, but not change information (Figure 5-20).

FieldManager User Guide – 1/2019 5-11
Figure 5-20. Review Item Tab Window – General Tab
3. Click any of the tabs to review information for the item.
4. Click Close on the Application Toolbar to close the Review Item tab window and return to the Items list window.


FieldManager User Guide - 1/2019 6-1
6 Working with Materials FieldManager software tracks quantities of material and material approvals when items are posted in an IDR. This includes items on the Qualified Product List (QPL), which are qualified / certified, but still require a physical certification of compliance. The Resident Engineer is responsible for tracking certification for material approval, using the Materials Sampling & Testing Checklist that is provided by HQ Materials Division Lab Services prior to Notice to Proceed of contract. Note: Payments cannot be made against items with corresponding materials which require
a certification. All materials requiring certifications on original items will be loaded into the software by HQ Construction Admin. When adding a new item, please ensure there isn’t a corresponding material certification required.
6.1 Adding New Materials to an Item When adding an item to a contract that requires a material certification (either an unattached item (See Chapter/Section 5.1 in this user guide) or a new item added by a contract modification (See Chapter/Section 10.1.3 in this user guide) you will need to add the associated material for that item. Note: This step does not need to be completed if this is an unattached item where you have
already added the required material (See Chapter/Section 5.1.3 in this user guide). Log into FieldManager through Citrix (for more information on logging on to FieldManager, see Chapter/Section 2.1 in this user guide). This will open the Contracts list window (Figure 6-1).
Figure 6-1. FieldManager Contracts List Window
1. Select desired contract in the Contracts list window, and click Materials on the Application Toolbar (Figure 6-1). The Materials list window opens (Figure 6-2).

FieldManager User Guide - 1/2019 6-2
Figure 6-2. Materials List Window
2. Click Add on the Window Toolbar (Figure 6-2). The Add Material Tab window opens (Figure 6-3) with the General tab displayed.
Figure 6-3. Add Material Tab Window - General Tab
6.1.1 General Tab 1. To complete the General tab material record, enter the following information in the
appropriate fields:
• Material Click the drop down arrow to the right of this field (Figure 6-3). Description: The Select Material from Agency and Local Master Lists window opens. Select the material from the list and click the Select button (Figure 6-4).
Figure 6-4. Select Material from Agency and Local Master Lists Window

FieldManager User Guide - 1/2019 6-3
• Unit: When an item is selected from the NDOT Master Material list, the unit automatically populates. DO NOT CHANGE.
2. Click Save on the Window Toolbar.
6.1.2 Items Tab 1. Click on the Items tab (Figure 6-5).
Figure 6-5. Add Material Tab Window – Items Tab
2. Click the Add Item button (See blue box in Figure 6-5). The Select Items for Material window opens (Figure 6-6).
Figure 6-6. Select Items for Material Window
3. Select the item from the list and click the Select button (Figure 6-6). The Add Material Items tab window opens (Figure 6-7).

FieldManager User Guide - 1/2019 6-4
Figure 6-7. Add Materials – Items Tab Window
4. Fill in the following fields in which to record information about the material: • Usage Factor: Always 1. (Required)
• Remarks: Enter additional information concerning the material’s usage. (Required)
5. Click Save or Save/Close on the Window Toolbar, depending on how you want to proceed.
6.2 Approving Materials When submitted certifications of compliance (material certifications) are approved by HQ Materials Division, add the material approval in FieldManager for that item.
Figure 6-8. FieldManager Contracts List Window
1. Select the contract in the Contracts list window, and click Materials on the Application Toolbar (Figure 6-8). The Materials list window opens (Figure 6-9).

FieldManager User Guide - 1/2019 6-5
Figure 6-9. Materials List Window
2. Click Change on the Window Toolbar (Figure 6-9). The Change Material Tab window opens with the General tab displayed (Figure 6-10).
Figure 6-10. Change Material Tab Window – General Tab
3. Click on the Approvals tab (Figure 6-10).
Figure 6-11. Change Material Tab Window – Approvals Tab
4. Click the Add Approval button (Figure 6-11). The Approval form opens (Figure 6-12).

FieldManager User Guide - 1/2019 6-6
Figure 6-12. Change Material Tab Window – Approval Tab – Add Approval
5. Enter the following information in the appropriate fields (Figure 6-12):
• Qualified/ The default setting is No. DO NOT CHANGE! If you attempt to Certified Product: approve a material with the Yes button selected you will get an Error and will not be able to proceed (Figure 6-12).
Figure 6-13. Error in Approvals Tab
• Form Date: The date on the material certification from manufacturer. (Required)
• File: Click the drop-down arrow and select the file identification code for the material. This field corresponds to the first three numbers of the bid item number. (Required)
• Form: Click the drop-down arrow and select the 00 value. (Required) • Form Seq. This field keeps track of how many certs have been added for that
No: material and will populate automatically. (Required)
• Quantity Enter the numeric quantity for the material (up to 2 decimals Approved: are accepted). (Required) If a quantity is not entered an error will occur when you click the OK on the form.
• Source: Click the drop-down arrow and select the appropriate source. (Required)
• Lot Numbers: Enter lot number(s) when applicable. This field can be utilized and encouraged to use for whatever purpose the R.E. designates.
• Remarks: Enter the information from the certification. (i.e. Heat #, B/L #, Load #, or Rebar size #) (Required)
6. Click the Ok button to add the approval, or the Add More button if adding additional

FieldManager User Guide - 1/2019 6-7
approvals.
7. Click Save or Save/Close on the Window Toolbar, depending on how you would like to proceed.
6.3 Changing an Existing Material
6.3.1 Changing Approvals Tab Information 1. Select the contract in the Contracts list window and click Materials on the Application
Toolbar (Figure 6-14). The Materials list window opens (Figure 6-15).
Figure 6-14. FieldManager Contracts List Window
2. Select the material and click Change on the Window Toolbar (Figure 6-15). The Change
Material window opens in the General tab. Note: There are no changes that can be made in the General tab.
Figure 6-15. Materials List Window
3. Click on the Approvals tab (Figure 6-16).

FieldManager User Guide - 1/2019 6-8
Figure 6-16. Change Material – Approvals Tab
4. Select the Approval record and click the Change Approval button (See blue box in Figure 6-
16). 5. Change field information as needed (Figure 6-17).
Figure 6-17. Change Material – Approvals tab – Change Approval
6. Click the Ok button to commit the changes (Figure 6-17). 7. Click Save or Save/Close on the Window Toolbar, depending on how you would like to
proceed.
6.3.2 Changing Item Tab Information 1. Click on the Items tab (Figure 6-18).

FieldManager User Guide - 1/2019 6-9
Figure 6-18. Change Material Window – Items Tab
2. Change the information in the Remarks field. 3. Click Save or Save/Close on the Window Toolbar, depending on how you would like to
proceed.
6.4 Deleting Approvals from an Existing Material Warning: You cannot delete an approval for a materials once it has been included in a
pay estimate. To delete the approval for a material with usage BEFORE it has been included in a pay estimate, all usage needs to be deleted.
1. Select the contract in the Contracts list window and click Materials on the Application Toolbar (Figure 6-14). The Materials list window opens (Figure 6-19).
Figure 6-19. FieldManager Contracts List Window
2. Select the material and click Change on the Window Toolbar (Figure 6-20).

FieldManager User Guide - 1/2019 6-10
Figure 6-20. Materials List Window
3. Click on the Approvals tab (Figure 6-21).
Figure 6-21. Change Material – Approvals Tab
4. Select the Approval record and click the Delete Approval button (See blue box in Figure 6-
16). 5. Click the Yes button in the Delete Warning message (Figure 6-22).
Figure 6-22. Delete Approval Warning Window
6. Click Save or Save/Close on the Window Toolbar, depending on how you would like to proceed.
6.5 Deleting Materials Warning: You cannot delete materials that have approvals or once items associated
with that material have been included in a pay estimate. To delete usage BEFORE it has been included in a pay estimate, delete all usage. To delete a material with approvals BEFORE it has been included in a pay estimate, delete all approvals.

FieldManager User Guide - 1/2019 6-11
1. Select the contract in the Contracts list window and click Materials on the Application
Toolbar (Figure 6-23). The Materials list window opens (Figure 6-24).
Figure 6-23. FieldManager Contracts List Window
2. Select the material and click Delete on the Window Toolbar (Figure 6-20).
Figure 6-24. Materials List Window
3. Click the Yes button on the final Warning window (Figure 6-25).
Figure 6-25. Delete Material - Delete Warning Window
4. Click Close on the Window Toolbar to close the Materials tab window.

FieldManager User Guide - 1/2019 6-12
6.6 Reviewing Materials 1. Select the contract in the Contracts list window, and click Materials on the Application
Toolbar. The Materials list window opens (Figure 6-26).
Figure 6-26. Materials List Window
2. Select the material to review and click Review on the Window Toolbar (Figure 6-26). The Review Item tab window opens in the General tab in a mode in which you can view but not change information (Figure 6-27).
Figure 6-27. Review Material Tab Window. General Tab
3. Click on any of the tabs to review information for the material.
4. Click Close on the Application Toolbar to close the Review Material tab window and return to
the Materials list window.

FieldManager User Guide – 1/2019 7-1
7 Inspector Daily Report An Inspector Daily Report (IDR) is used to document daily site conditions and track quantities of contract items. Once an IDR has been generated, the system uses the item postings contained in the IDR to calculate the contractor’s payment when creating the estimate. An IDR can be created utilizing the Mobile Inspector application installed on NDOT iPads. Mobile Inspector is intended for inspectors to document the on-site contractor personnel and equipment, track item usage, and record other pertinent site information. Completed IDRs from Mobile Inspector transfer into FieldManager (refer to the Mobile_Inspector_User_Guide.pdf for more information), where they are reviewed and generated. Office Personnel create IDRs in FieldManager for posting to the following items: Lump Sum Traffic Control, Training Hours, Mobilization, Escalations, Liquidated Damages, ton items and Force Account. These postings only require completion of the General (See Chapter/Section 7.1.1 in this user guide) and Postings (See Chapter/Section 7.1.2 in this user guide) tabs. The Assistant RE(s) and Supervisor 1(s) will also create an IDR in FieldManager each day documenting their daily activity in the General tab (See Chapter/Section 7.1.1 in this user guide). NDOT does not use the Site Times tab in an IDR. All time is recorded in a Daily Dairy (See Chapter/Section 8.1.2 in this user guide)
7.1 Adding a New IDR Log into FieldManager through Citrix (for more information on logging on to FieldManager, see Chapter/Section 2.1 in this user guide). This will open the Contracts list window (Figure 7-1).
Figure 7-1 - FieldManager Contracts List Window
1. Select desired contract in the Contracts list window and click IDRs on the Application Toolbar (Figure 7-1). The Inspector’s Daily Reports (IDRs) list window opens (Figure 7-2).

FieldManager User Guide – 1/2019 7-2
Figure 7-2. Inspector’s Daily Reports List Window
2. Click Add on the Window Toolbar (Figure 7-2). The Add IDR window opens with the General tab displayed (Figure 7-3).
Note: It’s a good idea to SAVE frequently when adding and updating IDR information!
Figure 7-3. Add IDR – General Tab
7.1.1 General Tab 1. To complete the General tab enter the following information in the appropriate fields:
• IDR Date: Accept the default of the current date or enter any date prior to the current date. (Required)
• Inspector: Defaults to current user. (Required)
• Weather: Enter the weather. (Required)
• Temperature: Enter low/high temperatures in F°. (Required)

FieldManager User Guide – 1/2019 7-3
• Comments: Enter comments directly related to today’s activities. These comments will be imported into RE’s Daily Diary. (Required)
2. Click Save or Save/Close on the Window Toolbar, depending on how you want to proceed.
Note: The Contractors tab will be filled out by the inspectors on their IDRs in the Mobile Inspector application. Office Personnel will review and generate these IDRs (See Chapter/Sections 7.2 and 7.4 in this user guide for details).
Note: NDOT does not use the Site Times or Attachments tabs in IDRs. The RE will track days charged to contract in the Daily Diaries.
7.1.2 Postings Tab 1. Click on the Postings tab (Figure 7-4).
Figure 7-4. Add IDR – Postings Tab
2. Click the Add Posting button at the bottom of the tab window (See blue box in Figure 7-4). The Items list will open (Figure 7-5).
Figure 7-5. Add IDR - Contract Items List Window
3. Select the item you wish to place quantities against and click the Select Button (Figure 7-5).

FieldManager User Guide – 1/2019 7-4
Figure 7-6. Add IDR Window – Postings Tab
4. To complete the Postings tab IDR record, enter the following information in the appropriate fields (Figure 7-6):
• Project/ If there is only one category (AEB) FieldManager will automatically fill Category: it in. If multiple categories (AEBs), you will have to choose a category (AEB)
from the drop-down box.
IMPORTANT that this corresponds with the Agreement Estimate to ensure payment is made against appropriate funding source.
• Contractor: This defaults to the Prime Contractor. DO NOT CHANGE, all payments are associated with Prime Contractor regardless of who performs the work.
• Quantity: Enter the quantity of the item posting. This may be a fractional quantity (up to thousandths).
Note: Disincentives, Penalties and Liquidated Damage postings will require a NEGATIVE quantity.
• Stationing: Enter the starting and ending station numbers for the item usage. If these fields are not complete, the Location field is then required.
• Location: Enter a project location if the stationing information is not applicable or this is item that is used throughout the entire project.
• Attention: Check this box if you want the RE to review this item (Optional).
Note: NDOT does not use the Breakdown field.
• Remarks: Enter a remark that details the posting (Required).
• Materials: Click on this button when active. Confirm that the Qty. Used is equal to the Item Qty. Placed. Click the OK button to return to the posting (Figure 7-6a).

FieldManager User Guide – 1/2019 7-5
Figure 7-6a. Add IDR Window – Material Usage
Note: The information in the Materials button will be filled out by the inspectors on their IDRs in the Mobile Inspector application. Office Personnel will review and generate these IDRs (See Section 7.2).
!!DO NOT use the Add Materials button in the Postings tab!!
5. Click the OK button to continue.
6. Click the Add Posting button to add additional items (Figure 7-7). Repeat steps 3 thru 5 for each item posting.
Figure 7-7. Add IDR Window – Postings Tab (Adding Additional Postings)
Note: You can add, change or delete posting by clicking on the appropriate button as long as IDR hasn’t been included in an estimate.
7. Click Save or Save/Close on the Window Toolbar, depending on how you would like to proceed.
7.1.3 View Tab 1. Click on the View tab to open the Draft copy of the Inspector’s Daily Report (Figure 7-8). It is
a good idea to use the View tab to check the information on a draft IDR.
Note: The View tab may also be used at any time while posting IDRs.

FieldManager User Guide – 1/2019 7-6
Figure 7-8. Add IDR Window – View Tab (Inspector’s Daily Report)
2. Click Save or Save/Close on the Window Toolbar, depending on how you want to proceed.
7.2 Reviewing IDRs from Mobile Inspector/FieldBook Applications IDRs completed by Inspectors in the Mobile Inspector application are uploaded into FieldManager in an un-generated status. IDRs completed by Inspectors in the FieldBook application are uploaded into FieldManager in a Generated status. ALL Inspector IDRs MUST be reviewed by Office Personnel for accuracy.
Figure 7-9. Inspector’s Daily Reports List Window

FieldManager User Guide – 1/2019 7-7
1. Select the IDR from the Inspector’s Daily Reports list and click Change on the Application Toolbar (Figure 7-9) or double-click on the IDR. The Change IDR windows opens in the General tab (Figure 7-10).
Figure 7-10. Change IDR Window – General Tab
2. Review the information in each of the IDR tabs (General, Contractors and Postings/Materials) for accuracy. If necessary, corrections can be made in each of the tabs. If corrections are made by anyone other than original author the initials and date will appear in the top right corner of General tab.
3. When you are done reviewing/correcting the IDR, click Save/Close on the Window Toolbar. The IDR is now ready to Generate (see section 7.4).
7.3 Deleting IDRs IDRs can be deleted only if they have NOT been included in an estimate. The entire IDR should be printed prior to deleting it. 1. Select the contract in the Contracts list window, click on IDRs on the Application Toolbar.
The Inspector’s Daily Reports list window opens (Figure 7-11).
Figure 7-11. Inspector’s Daily Reports List Window

FieldManager User Guide – 1/2019 7-8
2. Select the IDR from the Inspector’s Daily Reports list and click Change on the Application Toolbar (Figure 7-11) or double-click on the IDR. The Change IDR windows opens in the General tab (Figure 7-12).
Figure 7-12. Change IDR Window – General Tab
3. Click on the Postings tab (Figure 7-13).
Figure 7-13. Change IDR Window – Postings Tab
4. Select all the postings in the IDR by holding down the shift key and clicking on each record. Click the Delete Posting button (Figure 7-13).
5. Click the Yes button on each Delete Warning message (Figure 7-14). You will receive a Delete Warning for each item posting.

FieldManager User Guide – 1/2019 7-9
Figure 7-14. Postings Tab - Delete Posting Warning
6. Click Save/Close on the Window Toolbar (Figure 7-15).
Figure 7-15. Change IDR Window – Postings Tab
7. Click Delete on the Window Toolbar (Figure 7-16).
Figure 7-16. Inspector’s Daily Reports List Window
8. Click the Yes button on the Delete Confirmation message (Figure 7-17).

FieldManager User Guide – 1/2019 7-10
Figure 7-17. IDR Delete Confirmation Window
9. Notify the Inspector that the IDR needs to be recreated.
7.4 Generating IDRs IDR’s need to be generated for the item postings to be included on the next estimate. Also, generated information from IDR’s can be imported into the RE’s Daily Diary for the corresponding day. 1. Select one or more IDRs to generate from the IDR’s list window. Click Generate on the
Window Toolbar (Figure 7-18).
Note: You can also generate an IDR from any of the IDR tab window while working in them by clicking Generate.
Figure 7-18. Inspector’s Daily Reports List Window
2. Click the Yes button on the Generate window (Figure 7-19). You will receive a Generate window for each IDR selected.
Figure 7-19. IDR Generate Confirmation Window
3. The Print Dialog box opens (Figure 7-20). Click on Print or Cancel depending on if you want a hard copy of the IDR(s).
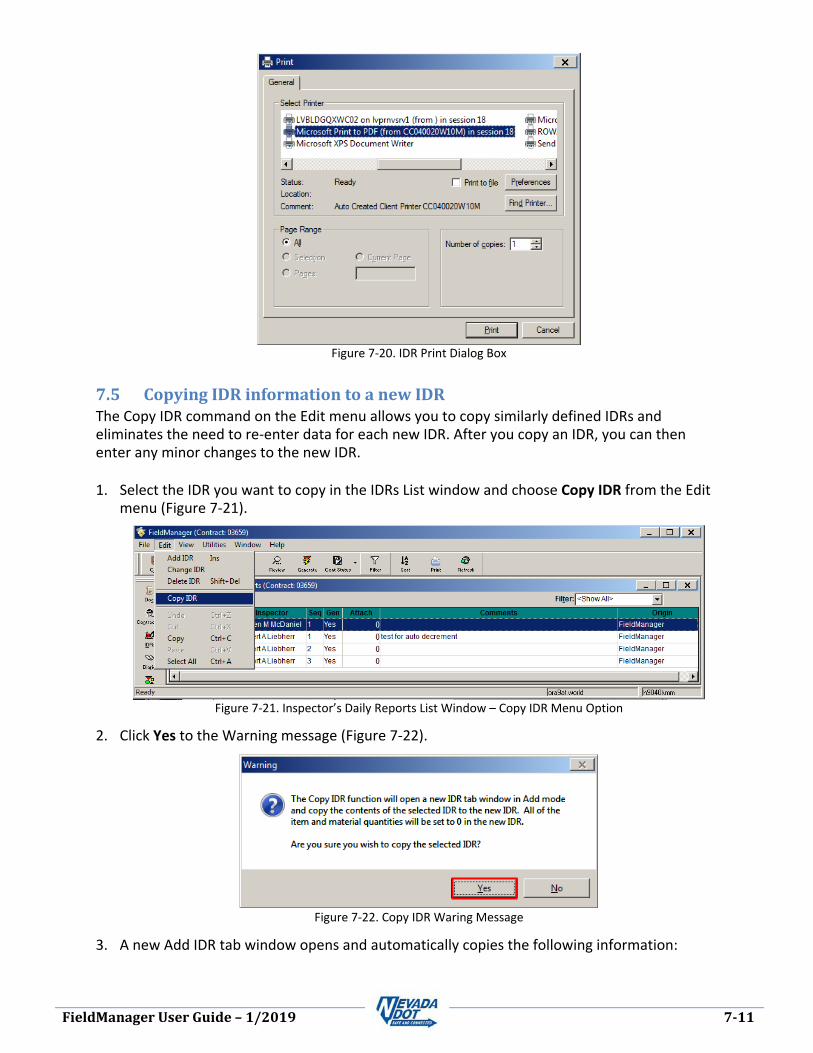
FieldManager User Guide – 1/2019 7-11
Figure 7-20. IDR Print Dialog Box
7.5 Copying IDR information to a new IDR The Copy IDR command on the Edit menu allows you to copy similarly defined IDRs and eliminates the need to re-enter data for each new IDR. After you copy an IDR, you can then enter any minor changes to the new IDR. 1. Select the IDR you want to copy in the IDRs List window and choose Copy IDR from the Edit
menu (Figure 7-21).
Figure 7-21. Inspector’s Daily Reports List Window – Copy IDR Menu Option
2. Click Yes to the Warning message (Figure 7-22).
Figure 7-22. Copy IDR Waring Message
3. A new Add IDR tab window opens and automatically copies the following information:

FieldManager User Guide – 1/2019 7-12
• General Tab: Comments are copied.
• Contractor Tab: All information is copied.
• Postings Tab: All information except item quantity and material quantity will be copied. Item and material quantities will be set at 0.
• Attachments: No information will be copied from this tab.
4. Finish creating the new IDR by making any necessary changes or additions to the copied information and editing out any information that does not pertain to current event.
5. Click Save/Close on the Window Toolbar.

FieldManager User Guide – 1/2019 8-1
8 Daily Diaries A Daily Diary is used to document pertinent daily contract activities and assess working days. It also incorporates information from GENERATED IDR’s for the corresponding day.
One diary, per day, per contract shall be completed by the Resident Engineer.
8.1 Adding a New Daily Diary Record Log into FieldManager through Citrix (for more information on logging on to FieldManager, see Chapter/Section 2.1 in this user guide). The Contracts list window opens (Figure 8-1).
Figure 8-1 - FieldManager Contracts List Window
1. Select desired contract in the Contracts list window, and click Diaries on the Application Toolbar (Figure 8-1). The Daily Diaries list window opens (Figure 8-2).
Figure 8-2. Daily Diaries List Window
2. Click Add in the Window Toolbar (Figure 8-2). The Add IDR window opens with the General tab displayed (Figure 8-3).

FieldManager User Guide – 1/2019 8-2
Note: It’s a good idea to SAVE frequently when adding and updating information!
8.1.1 General Tab 1. To complete the General tab (Figure 8-3) enter the following information in the appropriate
fields:
Note: A notation in blue print next to the Diary Date will indicate if there are generated IDRs for the corresponding date of the diary. If there is a notation in red print next to the Author field, it will list any un-generated IDRs for the Diary Date (see blue box in Figure 8-3).
• Diary Date: The default date is the current date. You may change this date if entering a Diary for a date in the past by typing in the new date or you can use the drop-down arrow for the calendar feature. (Required)
Note: The software will not allow you to create a diary for a future date.
• Author: Defaults to the name of the user who is currently logged into FieldManager. If this value needs to be changed use the drop-down arrow to choose the specified author. (Required)
• Low/High If available, click the Bring in Temperatures button to bring in the Temperature: information from generated IDR’s or enter values manually. (Required)
Note: The Bring in Temperatures button will only be enabled if there is at least one generated IDR from which to draw information. The lowest and highest temperatures out of all the generated IDRs will be brought in.
• Weather: Enter the weather or select from drop-down arrow. (Required)
• Comments: Enter your own comments and click the Bring in Weather and Comments button if it’s available. This will bring in all the Inspector’s Weather values and Comments from their generated IDRs for this Diary Date. (Required)
Note: The Bring in Weather and Comments button will only be enabled if there is at least one generated IDR from which to draw information.
Note: NDOT does not use the Sunrise/Sunset fields.

FieldManager User Guide – 1/2019 8-3
Figure 8-3. Add Daily Diary – General Tab
2. Click Save or Save/Close on the Window Toolbar, depending on how you would like to proceed.
8.1.2 Site Times Tab FieldManager tracks Site Times for “Working Days” and “Completion Date” contracts. A Working Days site allows the contractor to complete the contract work within a specific number of days. Completion Date contracts require the contract to be completed by a certain date. It is not necessary to track daily site times for a completion date, but is required for a “Working Day” contract to keep track of the amount of time worked on the site.
1. Click on the Site Times tab (Figures 8-4 & 8-5).
Figure 8-4. Add Daily Diary – Site Times Tab (Working Day Contract)

FieldManager User Guide – 1/2019 8-4
Figure 8-5. Add Daily Diary – Site Times Tab (Completion Date Contract)
2. Select the site record and enter the following information in the appropriate fields:
• Time Charge: The only valid entries for this field are: 1, 0, or -1. This field is required if you want to charge a day to a Working Day contract (Figure 8-4). This field CANNOT be left blank.
Note: This field is not available for Completion Date sites (Figure 8-5).
• Contractor(s) Indicates whether or not the Prime contractor was on site for day being charged. Choose either Yes or No.
• Hours Available: Enter the hours available to the contractor for day being charged. (Not required).
• Hours Worked: Enter the hours worked by the contractor for day being charged. (Not required).
• Controlling Enter the controlling operation for day being charged. (Not Operation: required).
• Reason for Enter the reason for delay for day being charged. (Required, if Delays: there is a delay).
• Comments: The information entered here will appear in the Site Information section of the Daily Diary when you either view it or print it. (Requires an explanation if NOT charging a working day).
3. Click Save or Save/Close on the Window Toolbar, depending on how you would like to proceed.
8.1.3 View Tab 1. Click on the View tab to open the Draft copy of the Daily Diary Report (Figure 8-6). It is a
good idea to use the View tab to check the information on a draft Daily Diary.

FieldManager User Guide – 1/2019 8-5
Figure 8-6. Add IDRs Window – View Tab (Daily Diary Report)
2. Click on Save or Save/Close on the Window Toolbar, depending on how you want to proceed.
8.2 Changing an Existing Daily Diary Record An existing Daily Diary can be changed, if it has not been included in an estimate, except for the adjustment of a site time record.
8.2.1 Changing General Tab Information 1. From the Daily Diaries list window select the Daily Diary, and click Change on the Window
Toolbar (Figure 8-7) or double-click on the diary. The Change Daily Diary tab window opens in the General tab (Figure 8-8).
Figure 8-7. Daily Diary List Window

FieldManager User Guide – 1/2019 8-6
Figure 8-8. Change Daily Diary Tab Window – General Tab
2. Make desired changes.
3. Click either Save or Save/Close on the Window Toolbar depending on how you want to proceed.
8.2.2 Changing/Deleting Site Time Tab Information 1. Click on the Site Times tab (Figure 8-9).
Figure 8-9. Change Daily Diary Tab Window – Site Times Tab
2. Make desired changes.
3. The entire record can also be deleted by clicking the Delete Diary Time Record button (see blue box in Figure 8-9). This will open a Delete Confirmation window (Figure 8-10).

FieldManager User Guide – 1/2019 8-7
Figure 8-10. Site Times Tab – Delete Confirmation Window
4. Click Yes to complete the deletion.
5. Click Save or Save/Close on the Window Toolbar, depending on how you would like to proceed.
8.2.3 Site Time Adjustment To make a change to a site time record after the Daily Diary has been included on an estimate, you must make a site time adjustment. 1. Open the generated Daily Diary and click the Site Times tab (Figure 8-11).
Figure 8-11. Change Daily Diary Tab Window – Site Times Tab – Adjusting a Time Record
2. Click the Adjust Time Records button (see blue box in Figure 8-11). This will open a new
record for time charge adjustment information (Figure 8-12).

FieldManager User Guide – 1/2019 8-8
Figure 8-12. Change Daily Diary Tab Window – Site Times Tab – Time Adjustment
3. Update the site record accordingly. As shown in Figure 8-12, to decrease the amount of time charged enter -1.00 in the Time Charge Adjustment field. To increase the time charged, enter 1.00 in the Time Charge Adjustment field.
4. Update the information for the Hours Available, Hours Worked, and Comments fields.
5. Click Save or Save/Close on the Window Toolbar, depending on how you would like to proceed.
8.3 Deleting a Daily Diary 1. Select the contract in the Contracts list window, click Diaries on the Application Toolbar.
The Daily Diaries list window opens (Figure 8-13).
Figure 8-13. Daily Diaries List Window
2. Select the Diary from the Daily Diaries list window and click Delete on the Application
Toolbar (Figure 8-13).

FieldManager User Guide – 1/2019 8-9
3. Click the Yes button on the Delete Confirmation message window (Figure 8-14).
Figure 8-14. Delete Daily Diary Confirmation Window
Note: A Daily Diary cannot be deleted if it has been included in an estimate.
8.4 Generating a Daily Diary Once a Daily Diary record is correct and complete, generate it so that the Daily Diary records can be included on the next estimate created in FieldManager. 1. From the Daily Diaries list window, select one or more Daily Diary records to generate and
click Generate on the Window Toolbar (Figure 8-15).
Figure 8-15. Daily Diary List Window
2. Click the Yes button on the Generate window (Figure 8-16). You will receive a Generate window for each Daily Diary selected.
Figure 8-16. Generate Daily Diary Confirmation Window
3. The Print Dialog box opens (Figure 8-17). Click on Print or Cancel depending on if you want a hard copy of the Daily Diary(s).

FieldManager User Guide – 1/2019 8-10
Figure 8-17. Daily Diary Print Dialog Box
8.5 Reviewing a Daily Diary If you are interested in viewing a Daily Diary without making changes you can simply review the document. 1. From the Daily Diaries list window select the Diary and click Review on the Window Toolbar
(Figure 8-18).
Figure 8-18. Daily Diaries List Window
2. The Review Daily Diary tab window opens in the General tab in a mode in which you can view, but not change information (Figure 8-19).

FieldManager User Guide – 1/2019 8-11
Figure 8-19. Review Daily Diary Tab Window – General Tab
3. Click any of the tabs to review information for the item.
Tip: Select the View tab to review the entire document.
4. Click Close on the Application Toolbar to close the Review Item tab window and return to the Daily Diary list window (Figure 8-19).


FieldManager User Guide – 1/2019 9-1
9 Working with Stockpiles FieldManager can create and maintain stockpile payments throughout the life of a contract. The program has a Stockpile Wizard with a 4-step process to set up a stockpile. Once a stockpile for an item has been set up it will pay the entire stockpile amount on the next estimate processed and it will automatically recover the stockpile payment when the associated item has been paid for through an estimate(s).
Refer to Chapter 24, Progress Payments, in the Documentation Manual, for the required documents needed to add a stockpile.
When the contract is completed or the item is 100% completed, and there is still a balance in the stockpile, a manual adjustment or decrementing can be made so the balance will become zero. When making a semi-final estimate the balance of all stockpiles need to equal zero.
9.1 Adding Stockpiles Using the Wizard To add a stockpile, you will need to set a Recovery Factor (item unit price), Recovery Quantity (item invoice quantity) and Transaction Dollar Amount (total amount of the invoice) for each stockpile (per category).
Note: When adding a stockpile using the Wizard make sure that you have enough time to complete the steps. The Stockpile Wizard does not have a Save function so once it is started it must be completed in its entirety. If your session of FieldManager times-out you will need to re-enter the stockpile.
1. Select desired contract in the Contracts list window and click Stockpiles on the Application Toolbar (Figure 9-1). The Stockpiles list window opens (Figure 9-2).
Figure 9-1. FieldManager Contracts List Window
2. Click Add on the Window Toolbar (Figure 9-2). The Add Stockpile Wizard window opens (Figure 9-3) with the About the add stockpile wizard information displayed. This information goes over the interactive 4-step method for setting up a stockpile.

FieldManager User Guide – 1/2019 9-2
Figure 9-2. Stockpiles List Window
Figure 9-3. Add Stockpile Wizard Window
3. Click the Next button to proceed to the first step (Figure 9-3).
9.1.1 Stockpile Wizard Setup – Single Category 1. Add Stockpile Wizard Step 1 of 4, Describe the stockpile (Figure 9-5):
a. Stockpile Description : Select the drop-down menu (Figure 9-4). Search for the first 3 numbers of the item you are stockpiling and select the appropriate one. (Required)
Figure 9-4. Stockpile Description Dropdown Menu
Note: There are multiple stockpile types for each item allowing for additional stockpiles to be created for similar items. Once you use a stockpile description from

FieldManager User Guide – 1/2019 9-3
the drop-down menu, it CANNOT be used again. The next one in the sequence will have to be used.
b. Stockpile Comments: Enter Invoice number, item number and item description. (Required)
Figure 9-5. Step 1 of 4 – Add Stockpile Wizard Window - Describe the stockpile
2. Click the Next button to proceed.
3. Add Stockpile Wizard Step 2 of 4, Describe the transaction (Figure 9-6):
a. Transaction Date: The date on the “Request for Payment for Material on Hand”, (NDOT Form 040-015). (Required)
b. Transaction Dollar The total dollar amount of the stockpile request (i.e. Amount: invoice amount). (Required)
c. Transaction Comments: Enter the calculation use to derive the unit price of the stockpile item. (Required)
Note: Refer to the stockpile calculation worksheet to complete the Transaction Comments.
Figure 9-6. Step 2 of 4 – Add Stockpile Wizard Window – Describe the Transaction

FieldManager User Guide – 1/2019 9-4
4. Click the Next button to proceed.
5. Add Stockpile Wizard Step 3 of 4, Assign items to the stockpile and dollar amounts to each item:
a. Click the Add Item button (Figure 9-7). The Items list for the contract opens (Figure 9-8).
Figure 9-7. Step 3 of 4 – Add Stockpile Wizard Window - Add Item
b. Select the item from the list and click the Select button (Figure 9-8). The Assign items to the stockpile and dollar amounts to each item window opens (Figure 9-9).
Figure 9-8. Step 3 of 4 (cont’d.) - Stockpile Wizard – Items List Window
c. Enter the Assigned Dollar Amount (total of invoice for this stockpile) (Figure 9-9).

FieldManager User Guide – 1/2019 9-5
Figure 9-9. Step 3 of 4 (cont’d.) - Add Stockpile Wizard Window - Assigning Dollar Amount
Note: The Transaction Dollar Amount and the Dollar Amount Left to Distribute amounts are generated automatically based on the dollar amount of the stockpile.
DO NOT use the Add Item button! Each stockpile should have only one item.
6. Click the Next button to proceed.
7. Add Stockpile Wizard Step 4 of 4, Assign the recovery factor or recovery quantity to each item (Figure 9-10):
a. Enter the Recovery Factor (the unit price of the stockpile item)
b. Click in the Recovery Quantity (the quantity of the items) field and it will automatically populate. Software calculates the Recovery Quantity based on assigned dollar amount and recovery factor.
Note: Refer to the stockpile calculation worksheet to confirm the Recovery Factor and Recovery Quantity amounts are correct.
Figure 9-10. Step 4 of 4 – Add Stockpile Wizard Window - Assigning Recovery Factor/Quantity
Note: The range of fastest to slowest are generated automatically based on the Recovery Factor and Recovery Quantity.
8. Click the Finish button to complete the stockpile.
9.1.2 Stockpile Wizard Setup – Multiple Categories 1. Add Stockpile Wizard Step 1 of 4, Describe the stockpile (Figure 9-12):

FieldManager User Guide – 1/2019 9-6
a. Stockpile Description : Select the dropdown menu (Figure 9-11). Search for the first 3 numbers of the bid item you are stockpiling and select the appropriate one.
Figure 9-11. Stockpile Description Dropdown Menu
Note: There are multiple stockpile types for each item allowing for additional stockpiles to be created for similar items. Once you use a stockpile description from the drop-down menu, it CANNOT be used again. The next one in the sequence will have to be used.
b. Stockpile Comments: Enter Invoice number, item number and item description. (Required)
Figure 9-12. Step 1 of 4 – Add Stockpile Wizard Window - Describe the stockpile
2. Click the Next button to proceed.
3. Add Stockpile Wizard Step 2 of 4, Describe the transaction (Figure 9-13):
a. Transaction Date: The date on the “Request for Payment for Material on Hand”, (NDOT Form 040-015). (Required)
b. Transaction Dollar The total dollar amount of the stockpile request, i.e Amount: invoice amount. (Required)
c. Transaction Comments: Enter the calculation used to derive the unit price of the stockpile item. Since this item has multiple categories show calculations for each. (Required)
Note: Refer to the stockpile calculation worksheet to complete the Transaction Comments.

FieldManager User Guide – 1/2019 9-7
Figure 9-13. Step 2 of 4 - Add Stockpile Wizard Window – Describe the Transaction (Multiple Categories)
4. Click the Next button to proceed. 5. Add Stockpile Wizard Step 3 of 4, Assign items to the stockpile and dollar amounts to each
item:
a. Click the Add Item button (Figure 9-14). The Items list for the contract opens (Figure 9-8).
Figure 9-14. Step 3 of 4 – Add Stockpile Wizard Window - Add Item
b. Select the item from the list and click the Select button (Figure 9-15). The Multiple Categories for the Item window opens (Figure 9-16).

FieldManager User Guide – 1/2019 9-8
Figure 9-15. Step 3 of 4 (cont’d.) - Add Stockpile Wizard – Items List Window.
c. Select the categories required for this stockpile. To choose more than one category, hold down the Ctrl key while selecting the records. Click the Select button (Figure 9-16). The Assign items to the stockpile and dollar amounts to each item window opens in the first category record (Figure 9-17).
Figure 9-16. Step 3 of 4 (cont’d.) - Add Stockpile Wizard – Multiple Categories Window
d. Enter the Assigned Dollar Amount for the category (Figure 9-17).
Note: Refer to the stockpile calculation worksheet to complete the Assigned Dollar Amounts for each category.

FieldManager User Guide – 1/2019 9-9
Figure 9-17. Step 3 of 4 (cont’d.) – Add Stockpile Wizard Window - Assigning Dollar Amount (Multiple Categories)
e. Select the next category and enter the Assigned Dollar Amount. (Figure 9-18).
Figure 9-18. Step 3 of 4 (cont’d.) – Add Stockpile Wizard Window - Assigning Dollar Amount (Multiple Categories)
f. Repeat this step for each additional category.
Note: The Transaction Dollar Amount and the Dollar Amount Left to Distribute amounts are generated automatically based on the dollar amount of the stockpile.
DO NOT use the Add Item button! Each stockpile should have only one item. 6. Click the Next button to proceed.
7. Add Stockpile Wizard Step 4 of 4, Assign the recovery factor or recovery quantity to each
item:
a. Enter the Recovery Factor (the unit price of the stockpile item) for the first category and tab off the field. The Recovery Quantity (the quantity of the items) will automatically populate (Figure 9-19).
Note: Refer to the stockpile calculation worksheet to confirm the Recover Factor and Recovery Quantity amounts are correct for each category.

FieldManager User Guide – 1/2019 9-10
Figure 9-19. Step 4 of 4 – Add Stockpile Wizard Window - Assigning Recovery Factor/Quantity (Multiple Categories)
b. Select the next category and enter the Recovery Factor (the unit price of the stockpile item) for the first category and tab off the field. The Recovery Quantity (the quantity of the items) will automatically populate (Figure 9-20).
Figure 9-20. Step 4 of 4 – Add Stockpile Wizard Window - Assigning Recovery Factor/Quantity (Multiple Categories)
Note: The range of fastest to slowest are generated automatically based on the Recovery Factor and Recovery Quantity.
8. Click the Finish button to complete the stockpile.
Note: Remember in setting up multiple categories, the Recovery Factor (unit price) is ALWAYS the same!

FieldManager User Guide – 1/2019 9-11
9.2 Deleting a Stockpile A stockpile can be deleted if it hasn’t been included in an estimate that has been generated.
1. Select the contract in the Contracts list window, and click Stockpiles on the Application Toolbar. The Stockpiles list window opens (Figure 9-21).
Figure 9-21. Stockpiles List Window
2. Select the stockpile and click Delete on the Window Toolbar (Figure 9-21).
3. Click the Yes button on the Delete Confirmation message window (Figure 9-22).
Figure 9-22. Stockpile Delete Confirmation Window
9.3 Manually Balancing (Decrementing) Stockpiles If a stockpile has a remaining balance once the item is completed the stockpile can be manually balanced (zeroed out). All stockpiles MUST be balanced before or during the Semi-Final estimate process (See Chapter/Section 13.1 in this user guide). When the manual process to balance a stockpile is completed any remaining balance will be paid on the next estimate.
Note: The manual process to balance a stockpile does NOT need to be completed if the “Balance Stockpiles” option is checked when creating the Semi-Final estimate (See Chapter/Section 13.1 in this user guide).
1. Select the contract in the Contracts list window and click Stockpiles on the Application Toolbar. The Stockpiles list window opens (Figure 9-23).

FieldManager User Guide – 1/2019 9-12
Figure 9-23. Stockpiles List Window
2. Click Change on the Window Toolbar (Figure 9-23). The Change Stockpile Wizard window opens (Figure 9-24) with the About the add stockpile wizard information displayed.
Figure 9-24. Change Stockpile Wizard Window
3. Click the Next button to proceed (Figure 9-24).
4. Change Stockpile Wizard Step 1 of 4, Describe the stockpile (Figure 9-25).
Note: There are no changes made to this step when balancing a stockpile.

FieldManager User Guide – 1/2019 9-13
Figure 9-25. Step 1 of 4 – Change Stockpile Wizard Window - Describe the stockpile
5. Click the Next button to proceed.
6. Change Stockpile Wizard Step 2 of 4, Describe the transaction (Figure 9-26):
a. Transaction Date: Accept the default of the current date.
b. Transaction Dollar Enter the negative amount of the Dollar Amount Amount: Remaining value. (Required)
c. Transaction Comments: Enter a comment explaining this is a manual stockpile balance. (Required)
Figure 9-26. Step 2 of 4 – Change Stockpile Wizard Window – Describe the Transaction
7. Click the Next button to proceed.
-1840.00

FieldManager User Guide – 1/2019 9-14
8. Change Stockpile Wizard Step 3 of 4, Assign items to the stockpile and dollar amounts to each item (Figure 9-27).
a. Enter the Change in Dollar Amount. This is the same negative amount entered in the previous step.
Figure 9-27. Step 3 of 4 - Change Stockpile Wizard Window - Assigning Negative Change in Dollar Amount
b. Click the Next button to proceed.
9. Change Stockpile Wizard Window, Step 4 of 4, Assign the recovery factor or recovery quantity to each item:
a. Enter 0.00 for the Recovery Quantity. The Recovery Factor is already populated with $0.00.
Figure 9-28. Step 4 of 4 - Change Stockpile Wizard Window - Assigning Negative Recovery Quantity
10. Click the Finish button to complete the stockpile.

FieldManager User Guide – 1/2019 9-15
9.4 Viewing the Stockpile Summary Report If you are interested in viewing stockpile information without changing it, the software creates a stockpile summary report.
1. Select the contract in the Contracts list window, and click Stockpiles on the Application Toolbar (Figure 9-1). The Stockpiles list window opens (Figure 9-29).
Figure 9-29. Stockpiles List Window
2. Select the stockpile and click the drop-down arrow next to the Cont Status button on the Window Toolbar. Select SP Summary (Figure 9-29) to view the report (Figure 9-30).
Figure 9-30. Stockpile Summary by Stockpile Report (Multiple Categories)

FieldManager User Guide – 1/2019 9-16
3. Click Close on the Application Toolbar to close the report and return to the Stockpiles list window.

FieldManager User Guide – 01/2019 10-1
10 Contract Modifications A FieldManager® Contract Modification (Cont Mod) modifies the original contract. A contract may be modified for many reasons: new items may need to be added to the contract, quantities of existing contract items may need to be increased or decreased, items may need to be moved from one category to another, changes to working days or completion dates, changes to the contract documents, assessing liquidated damages OR completing the Closeout Cont Mod to reconcile existing items at the time of closeout. Refer to Chapter 3, Contract Modifications and Letters of Authorization, in the Documentation Manual, for requirements and procedures on how to successfully execute a Cont Mod. Refer to Appendix C in this user guide for Step-by-Step directions for creating and processing both Cont Mods and Priors. This step-by-step process includes directions on the DocuSign process for acquiring required signature approvals. Quantity Overruns FieldManager limits overruns by establishing limits which are consistent with the Construction Manual. Any major item ($50,000 or greater) cannot exceed the original quantity by 100%; with no overrun to exceed $100,000. If the threshold is exceeded, a Cont Mod will need to be executed to make a payment again on the item. 10.1 Adding a New Contract Modification
1. Select desired contract in the Contracts list window and click Cont Mods on the Application Toolbar (Figure 10-1). The Contract Modifications list window opens (Figure 10-2).
Figure 10-1 - FieldManager Contracts List Window

FieldManager User Guide – 01/2019 10-2
Figure 10-2. Contract Modifications List Window
2. Select the Add button located in the Window Toolbar (Figure 10-2). The Select Contract Modification Type Window opens (Figure 10-3).
Figure 10-3. Select Contract Modification Type Window
3. Click on the drop-down arrow and select the appropriate Contract Modification Type (see Appendix B, Contract Modification Types, in this user guide for the complete list of available types). Click the OK button. The Add Contract Modification window opens in the General tab (Figures 10-4 & 10-5).
Note: Ensure the appropriate type is selected as it will help determine which internal division the Cont Mod will be routed to for review. It will also be used for reporting purposes. The type cannot be changed after the OK button is selected.
Note: It’s a good idea to SAVE frequently when adding and updating information!
10.1.1 General Tab 1. To complete the General tab (Figures 10-4 and 10-5), enter the following information in the
appropriate fields:
a. Short Enter name and title of who requested the Cont Mod (i.e. RE, Description: Division Head, Contractor, Design Division, 3rd Party). (Required)
b. Description Enter the Cont Mod type on the first line. Then enter the details of the Of Changes: Cont Mod (do not repeat the Cover Letter) followed by the required Standard Clause: (Required)
o Standard Contract Clause for all general Cont Mods “Acceptance of this Contract Modification constitutes an accord and satisfaction and represents payment in full (for both time and money) for any and all costs, impact effect, and/or delays arising out of, or incidental to, the work as herein revised, including present and future extensions of the contract completion time.” (Figure 10-4)
o Prior Standard Contract Clause for all Prior Cont Mods “This Contract Modification is being processed as a Prior Approval in order to authorize the commencement of work and provide an estimate of quantities (and associated payment) to be performed as outlined

FieldManager User Guide – 01/2019 10-3
above and per the direction of the Resident Engineer. The actual quantities required to complete the work per this Prior Approval shall be finalized and paid for accordingly upon completion of the work. Contract Modification #__will be generated to complete and finalize the quantities and associated payment performed under this Contract Modification/Prior Approval.” (Figure 10-5)
Note: Remember to enter the Cont Mod number that is associated with the Prior.
2. Click Save or Save/Close on the Window Toolbar, depending on how you would like to proceed.
Figure 10-4. Add Contract Modification Tab Window – General Tab (Prior Cont Mod)
Figure 10-5. Add Contract Modification Tab Window – General Tab

FieldManager User Guide – 01/2019 10-4
10.1.2 Inc/Dec Tab 1. Click the Inc/Dec tab to increase or decrease the authorized quantity of an item, (Figure 10-6).
Figure 10-6. Add Contract Modification Tab Window – Inc/Dec Tab
2. Click the Add Item button (see blue box in Figure 10-6). The contract Items list opens (Figure 10-7).
DO NOT use the Balance Completed Items button when adding a Standard or Prior Cont Mod. This button is ONLY used when creating the Closeout Cont Mod (Section 10.7).
Figure 10-7. Add Contract Modification Inc/Dec Tab – Contract Items List Window
3. Select the item and click the Select button (Figure 10-7).
Note: If the item selected is in more than one category, the Multiple Categories window opens (Figure 10-8). In that case, select the corresponding category(s) for which to increase or decrease the item quantity, and click the Select button.

FieldManager User Guide – 01/2019 10-5
Figure 10-8. Inc/Dec Multiple Categories Window
4. The Inc/Dec details for the item opens (Figure 10-9).
Figure 10-9. Add Contract Modification Tab Window – Inc/Dec Tab (After Selecting an Item)
5. To complete the Inc/Dec record enter the following information in the appropriate fields (Figure 10-9):
a. Qty Change (+/-): Enter the desired quantity change. (Required)
b. Reason: Enter the reason for the increase or decrease in the item. (Required)
6. Repeat steps 2 thru 5 for increasing or decreasing additional items.
7. Click Save or Save/Close on the Window Toolbar, depending on how you would like to proceed.

FieldManager User Guide – 01/2019 10-6
10.1.3 New Items Tab – Adding a New Item If you need to modify the contract to include an item that wasn’t part of the original contract, follow the steps below. You can either Add a New Item or Attach an item Saved Previously. The latter option allows you to select an unattached item that was added as described in Chapter/Section 5.1 in this user guide. 1. Click the New Items tab (Figure 10-10). Click the Add Item button (see blue box in Figure
10-10). The Items dialog window opens (Figure 10-11).
Figure 10-10. Add Contract Modification Tab Window – New Items Tab
2. Select the Add a New Item option and click the OK button (Figure 10-11). The New Items detail window opens (Figures 10-12 and 10-13).
Figure 10-11. Items Dialog Box
3. To complete the New Items tab record enter the following information in the appropriate fields:
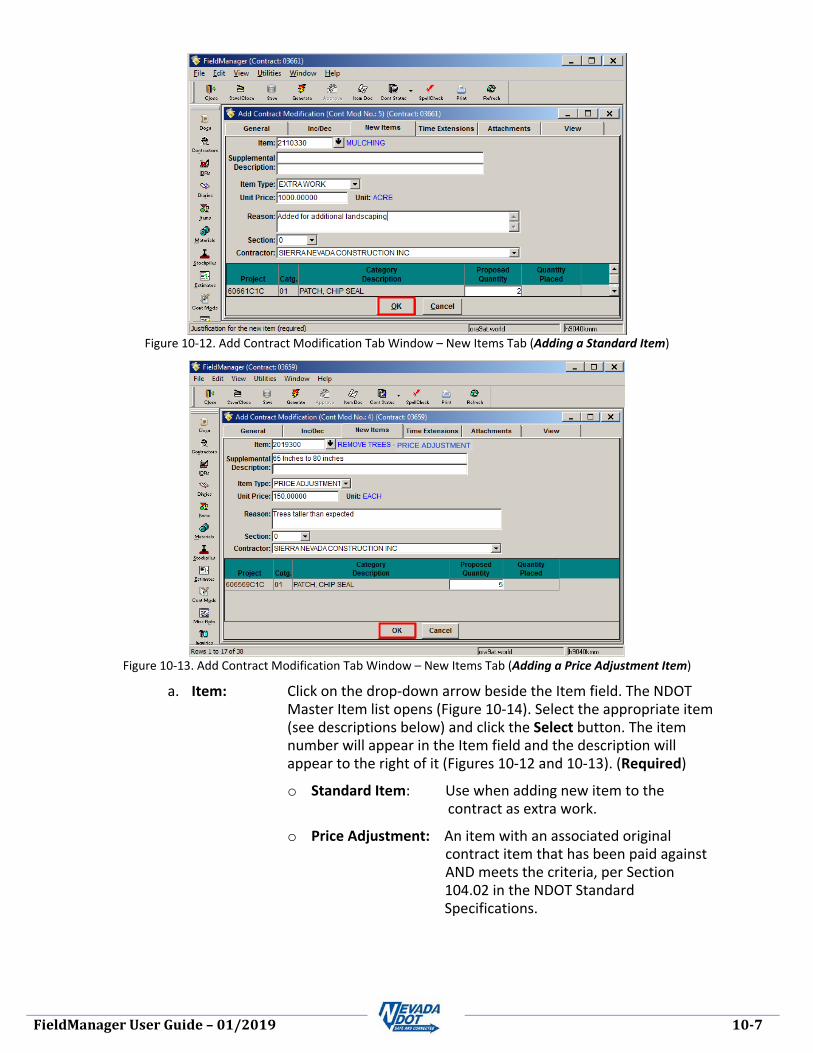
FieldManager User Guide – 01/2019 10-7
Figure 10-12. Add Contract Modification Tab Window – New Items Tab (Adding a Standard Item)
Figure 10-13. Add Contract Modification Tab Window – New Items Tab (Adding a Price Adjustment Item)
a. Item: Click on the drop-down arrow beside the Item field. The NDOT Master Item list opens (Figure 10-14). Select the appropriate item (see descriptions below) and click the Select button. The item number will appear in the Item field and the description will appear to the right of it (Figures 10-12 and 10-13). (Required)
o Standard Item: Use when adding new item to the contract as extra work.
o Price Adjustment: An item with an associated original contract item that has been paid against AND meets the criteria, per Section 104.02 in the NDOT Standard Specifications.
PRICE ADJUSTMENT

FieldManager User Guide – 01/2019 10-8
Figure 10-14. Agency Master Item List
b. Supplemental Enter a description when applicable (Figures 10-12 & 10-13). Description:
Note: The supplemental description will appear on the printed Cont Mod following the item description.
c. Item Type: Select the appropriate option: (Required)
o Extra Work – Additional “Standard” items are being added to the contract. Use with a Standard Item.
o Modified Original – Increasing or decreasing the quantity of an existing contract item.
o Price Adjustment – Increasing or decreasing the unit price of an item. Use Price Adjustment Item (XXX9000 item).
o Liquidated Damages / Penalty – Only used when assessing damages and wage determination (penalty) to the contract.
d. Unit Price: Enter a positive unit price for the new item. (Required)
e. Reason: Enter the reason the item is getting added to the contract. (Required)
f. Section: Always “0”. (Required)
g. Proposed Enter the quantity for the new item. (Required) Quantity:
4. Click the OK button to add the item to the Cont Mod.
5. Click Save or Save/Close on the Window Toolbar, depending on how you would like to proceed.
10.1.4 New Item Tab – Adding an Unattached Item 1. Click the New Items tab (Figure 10-15). Click on the Add Item button (See blue box in Figure
10-15). The Items dialog window opens (Figure 10-16).

FieldManager User Guide – 01/2019 10-9
Figure 10-15. Add Contract Modification Tab Window – New Items Tab
2. Select the Attach an Item saved previously option and click the OK button (Figure 10-16). The Select Unattached Item window opens (Figure 10-17).
Figure 10-16. Items Dialog Box
3. Select the item to attach and click the Select button (Figure 10-17). The New Items detail window opens (Figures 10-18).
Figure 10-17. Select Unattached Item Window
4. To complete the New Items tab record enter the following information in the appropriate fields:

FieldManager User Guide – 01/2019 10-10
Figure 10-18. Add Contract Modification Tab Window – New Items Tab (Adding Unattached Item)
a. Supplemental Enter a description when applicable. Description:
b. Item Type: Select Extra Work. (Required)
Note: The other available Item Types are not applicable when adding an unattached item to contract.
c. Unit Price: Enter unit price for the new item. (Required)
d. Reason: Enter the reason the item is getting added to the contract. (Required)
e. Section: Always “0”. (Required)
f. Proposed Enter the quantity for the new item. (Required) Quantity:
Note: The Quantity Placed fields for each category listed will show if any item postings have been placed for the item and in which category.
5. Click the OK button to add the item to the Cont Mod.
6. Click Save or Save/Close on the Window Toolbar, depending on how you would like to proceed.
10.1.5 Time Extensions Tab 1. Click the Time Extensions tab (Figure 10-19).

FieldManager User Guide – 01/2019 10-11
Figure 10-19. Add Contract Modification Tab Window – Time Extensions Tab (Working Days)
2. To complete the Time Extensions tab record for a Working Day contract enter the following information in the appropriate fields (Figure 10-19):
a. Additional No. of Days: Enter the number of added days. (Required)
b. Reason: Enter the reason for the added days. (Required)
Figure 10-20. Add Contract Modification Tab Window – Time Extensions Tab (Completion Date)
3. To complete the Time Extensions tab record for a Completion Date contract enter the following information in the appropriate fields (Figure 10-20):
a. New Compl. Date: Enter the new date. (Required)
b. Reason: Enter the reason for extending the date. (Required)
4. Click Save or Save/Close on the Window Toolbar, depending on how you would like to proceed.

FieldManager User Guide – 01/2019 10-12
10.1.6 Attachments Tab Only the Cover Letter (this includes Priors) and a copy of the executed Cont Mod (see Section 10.4 in this chapter for details on attaching the executed Cont Mod) should be attached to the Cont Mod.
1. Click on the Attachments tab to add documentation that needs to be included in the Cont
Mod (Figure 10-21).
Figure 10-21. Add Contract Modification Tab Window – Attachments Tab
2. Click on the Add File button (see blue box in Figure 10-21). The Add File Attachment dialog box opens (Figure 10-22).
Figure 10-22. Attachments Tab - – Add File Attachment Dialog Box
3. Enter the Name and Description of the file you are attaching (Figure 10-22).
4. Click on the Browse button (Figure 10-22). The Attach a file window opens (Figure 10-23).
Note: Attachment files must be saved to a network share drive or to an external flash drive. Please do not save files to the computer desktop because the FieldManager software cannot access files in this location.

FieldManager User Guide – 01/2019 10-13
Figure 10-23 Attachments Tab – Attach a File Window
5. Browse to the file you are attaching, select it and click on the Open button (Figure 10-23). The Add File Attachment dialog reopens (Figure 10-24).
Figure 10-24. Attachments Tab – Add File Attachment Dialog Box
6. Select the Add button (Figure 10-24).
7. Once the document is attached you have the option to Change, Delete and View the file by selecting the appropriate buttons (Figure 10-25).
Figure 10-25. Add IDRs Window – Attachments Tab
8. Click Save or Save/Close on the Window Toolbar, depending on how you want to proceed.
Note: NDOT will NOT be adding Links to contracts.

FieldManager User Guide – 01/2019 10-14
10.1.7 View Tab 1. Click on the View tab to open the Draft copy of the Cont Mod (Figure 10-26). It is a good
idea to use the View tab to check the information on a draft Cont Mod.
Note: The View tab may also be used at any time while adding Cont Mods.
Figure 10-26. Add Contract Modifications Window – View Tab
2. Click on either Save or Save/Close on the Window Toolbar depending on how you want to proceed.
10.2 Changing an Existing Contract Modification Cont Mods can be changed when they are in a Draft status (the Cont Mod has been saved but not generated) or if they are in a Pending Approval status (the Cont Mod has been generated and is waiting on approval signatures). Once a Cont Mod has been Approved (the Cont Mod has received necessary review and signatures and is now included in the legal contract) it CANNOT be changed. 1. From the Contract Modifications list window select the Cont Mod and click Change on the
Window Toolbar (Figure 10-27) or double-click on the Cont Mod. The Change Contract Modifications tab window opens in the General tab (Figure 10-28).

FieldManager User Guide – 01/2019 10-15
Figure 10-27. Contract Modifications List Window
2. Review the information in each of the Change Contract Modification tabs (General, Inc/Dec, New Items, Time Extensions, and Attachments) for accuracy. Corrections, additions and deletions can be made in each of the tabs. If corrections are made, the Cont Mod will show a Revision Number in the General tab (Figure 10-28).
Figure 10-28. Change Contract Modification Tab Window – General Tab
3. When you are done reviewing/correcting the Cont Mod, click Save/Close on the Window Toolbar. The Cont Mod is now ready to Generate (see Section 10.4 in this chapter).
10.3 Generating and Printing a Contract Modification After you have completed the setup of your Cont Mod and worked with HQ Construction to ensure it meets necessary requirements you are ready to generate. 1. From the Contract Modifications list window, select the Draft Contract Modification and
click Generate on the Application Toolbar (Figure 10-29).
Note: You can also generate a Cont Mod while it’s open by clicking Generate on the Application Toolbar.

FieldManager User Guide – 01/2019 10-16
Figure 10-29. Contract Modifications List Window
2. Click the Yes button on the Generate window (Figure 10-30). The Print window opens (Figure 10-31).
Figure 10-30. Contract Modification – Generate Confirmation Window
3. The generated Cont Mod MUST be converted to a PDF file, so it can be routed through
DocuSign for the required approval signatures. Select the Microsoft Print to PDF printer option and click the Print button (Figure 10-31). The Save Print Output As window opens (Figure 10-31a).
Figure 10-31. Contract Modification – Print Window
4. Browse to the desired location in crew Contract folders on the server.

FieldManager User Guide – 01/2019 10-17
Figure 10-31a. Save Print Output As window
Note: Once a Cont Mod is generated it will have a status of Pending Approval in the Contract Modification list window.
5. Click the Save button to create the PDF file (Figure 10-31a).
10.4 Approving a Contract Modification Once a Cont Mod has been routed through DocuSign for the required approval signatures it needs to be approved in FieldManager to process related payments. Keep in mind that a Cont Mod must be in pending approval status to be approved; also, it CANNOT be modified or deleted once approved. So, be sure you want to approve it BEFORE doing so. Note: The following steps can only be completed after the signed (executed) Cont Mod has
been received from DocuSign and a copy saved to the appropriate EDOC Contract Files\Contract Files\Division No. 5 - Contract Modification directory.
IMPORTANT: When adding a new category (AEB) through a Cont Mod, DO NOT approve the Cont Mod until a notification from Construction Admin Services is received stating that the new category (AEB) has been funded.
1. From the Contract Modifications list window, select the Cont Mod and click Change on the
Application Toolbar (Figure 10-32).
Figure 10-32. Contract Modifications List Window
2. Click on the Attachments tab to add a copy of the executed Cont Mod file (Figure 10-33).

FieldManager User Guide – 01/2019 10-18
Figure 10-33. Change Contract Modification Tab Window – Attachments Tab
3. Click on the Add File button (see blue box in Figure 10-33). The Add File Attachment dialog box opens (Figure 10-34).
Figure 10-34. Attachments Tab – Add File Attachment Dialog Box
4. Enter the Name and Description of the executed Cont Mod you are attaching (Figure 10-34).
5. Click on the Browse button (Figure 10-34). The Attach a file window opens (Figure 10-35).
Figure 10-35 Attachments Tab – Attach a File Window
6. Browse to the copy of the executed Cont Mod, select it and click on the Open button (Figure 10-35). The Add File Attachment dialog reopens (Figure 10-36).

FieldManager User Guide – 01/2019 10-19
Figure 10-36. Attachments Tab – Add File Attachment Dialog Box
7. Select the Add button (Figure 10-36). 8. Click on Save/Close on the Window Toolbar. 9. Adding the executed copy of the Cont Mod changes the status back to Draft. Generate the
Cont Mod again. 10. Click Approve on the Application Toolbar (Figure 10-37).
Figure 10-37. Contract Modifications List Window
11. Click OK to continue (Figure 10-38). Two additional dialog boxes open to ensure you want to
approve the contract modification (Figures 10-39 and 10-40).
Figure 10-38. Contract Modification Approval Window

FieldManager User Guide – 01/2019 10-20
12. Click Yes on both Approve confirmation windows (Figures 10-39 and 10-40).
Figure 10-39. Contract Modification Approve Window Figure 10-40. Contract Modification Approve Window
Note: Once a Cont Mod is approved it will have a status of Approved in the Contract Modification list window.
13. Click Close on the Application Toolbar to close the Contract Modifications list window and return to the Contracts list window.
10.5 Reviewing a Contract Modification Once a Cont Mod has been approved it can no longer be opened from the Contract Modifications list window, but it can be reviewed. 1. From the Contract Modifications list window, select the Cont Mod and click Review on the
Application Toolbar (Figure 10-41).
Figure 10-41. Contract Modifications List Window
2. The Review Contract Modification tab window opens in the General tab in a mode in which
you can view, but not change the information (Figure 10-42).
Figure 10-42. Review Contract Modification Window
3. Click any of the tabs to review the information for the Cont Mod.

FieldManager User Guide – 01/2019 10-21
Tip: Suggest user selects the View tab to review the entire document.
4. Click Close on the Application Toolbar to close the Review Contract Modification tab window and return to the Contract Modification list window.
10.6 Deleting a Contract Modification A Cont Mod can be deleted if it is in either a Draft (the Cont Mod has been saved but not generated) or a Pending Approval status (the Cont Mod has been generated and is waiting on approval and signatures). The process is the same for both, but the result is different.
10.6.1 Deleting a Draft Contract Modification 1. From the Contract Modifications list window, elect the Draft Contract Modification and click
Delete on the Application Toolbar (Figure 10-43).
Figure 10-43. Contract Modifications List Window (Deleting Draft Cont Mod)
2. Click the Yes button on the Delete Warning message window (Figure 10-44).
Figure 10-44. Draft Contract Modification Delete Warning Window
Note: If this Cont Mod is the LAST one created it will simply be deleted from the list and that Cont Mod number will be used again for the next one created. If this Cont Mod was NOT the last one created, it will be shown with a Deleted status and that Cont Mod number will NOT be re-used.
10.6.2 Deleting a Generated Contract Modification Once a Cont Mod has been generated a status of Deleted will be shown in the listing if that Cont Mod is deleted. You cannot re-use this Cont Mod number. In other words, once a Cont Mod has been generated and then deleted, that number can never be used again. 1. From the Contract Modifications list window, select the Pending Approval Cont Mod and
click Delete on the Application Toolbar (Figure 10-45).

FieldManager User Guide – 01/2019 10-22
Figure 10-45. Contract Modifications List Window (Deleting Generated Cont Mod)
2. Click the Yes button on the Delete Warning message window (Figure 10-46).
Figure 10-46. Generated Contract Modification Delete Warning
10.7 Creating the Closeout (Balancing) Contract Modification The Closeout “Balancing” Cont Mod reconciles the quantities of all items and is completed during the semi-final estimate process, which is performed by the field office. A justification for all items with changes resulting in an increase or decrease of $50,000 is required. This type of modification will be the last modification prepared by the Resident Engineer after creating the semi-final estimate (See Chapter 13 in this user guide for details). The following conditions must be met before this Cont Mod can be added:
• Enter the Time Charges Stop Date (last day time was charged) in the Site Times tab of the Docu icon. (Chapter/Section 3.1.3 in this user guide)
• All IDRs must be generated. (Chapter/Section 7.4 in this user guide)
• All Daily Diaries must be generated. (Chapter/Section 8.4 in this user guide)
• There can be no unattached items. (Chapters/Sections 5.1 & 10.1.4 in this user guide)
• Review all items for accuracy and mark as Complete. (Chapter/Section 5.4 in this user guide)
• Enter the “All Contract Work Completed” date (the date cleanup phase is complete) field in the General folder tab of the Docu icon. (Chapter/Section 3.1.1 in this user guide)
• There can be no unapproved Cont Mods (excluding those with a status of Deleted). (Chapter/Section 10.4 in this user guide)

FieldManager User Guide – 01/2019 10-23
• The Semi-Final estimate must be completed. (Chapter 13 in this user guide).
1. From the Contract Modifications list window click Add on the Application Toolbar (Figure 10-47). The Select Contract Modification Type Window opens (Figure 10-48).
Figure 10-47. Contract Modifications List Window
2. Click on the drop-down arrow, select the 26 CONTRACT CLOSEOUT type, and click the OK button (Figure 10-48). The Add Contract Modification window opens in the General tab (Figure 10-53).
Figure 10-48. Select Contract Modification Type Window
3. To complete the General tab, enter the following information in the appropriate fields (Figure 10-49):
a. Short Enter Resident Engineer’s name and title. (Required) Description:
b. Description Enter “Type 26 - Contract Closeout Contract Modification”. (Required) of Changes:

FieldManager User Guide – 01/2019 10-24
Figure 10-49. Closeout Contract Modification – General Tab
4. Click the Inc/Dec tab, and click Balance Completed Items button (see blue box in Figure 10-50).
Figure 10-50. Closeout Contract Modification – Inc/Dec tab
Note: If you attempt to create the closeout Cont Mod before balancing all stockpiles (Chapter/Section 9.3 in this user guide) a Warning window will display asking if you want to continue anyway. Select Yes (Figure 10-51). The stockpile(s) will be balanced on the Semi-final Estimate (Chapter/Section 13.1 in this user guide).
Figure 10-51. Closeout Contract Modification – Stockpile Warning window
Note: If all the completed contract items were already balanced prior to clicking Balance Completed Items, a Balancing Contract Modification window opens stating that fact (Figure 10-52). In this case you will not need to complete this Contract Closeout Cont

FieldManager User Guide – 01/2019 10-25
Mod. Notify HQ Construction Admin Section staff that the Closeout Cont Mod was not needed.
Figure 10-52. Balancing Contract Modification Items Completed Notification Window
5. The software will examine the item data and create a balancing Quantity Change entry for all the completed contract items that have not been balanced. A “reason” is required for item pay quantity overruns/underruns of $50,000 or greater (see red box in Figure 10-53).
Figure 10-53. Closeout Contract Modification – Inc/Dec Tab
Note: To easily find items that are over/under the $50,000 threshold, double-click two times on the Dollar Value column heading (see blue box in Figure 10-57). This will sort the items by the numerically highest to lowest dollar amounts.
6. Click Save/Close on the Window Toolbar once all the required reasons have been entered.
Note: An error window will open if a required reason missing (Figure 10-54). Click OK on the message. This will take you back to the Reason field with the missing entry.
Figure 10-54. Closeout Contract Modification – Save Error

FieldManager User Guide – 01/2019 10-26
7. Notify HQ Construction Admin Section staff that the Closeout Cont Mod has been created. They will review the Cont Mod and process for approval.

FieldManager User Guide – 1/2019 11-1
11 Estimates The FieldManager software goes through a series of steps each time an estimate is created.
The software first calculates item usage by reviewing all IDR item postings that have not been paid in a prior estimate but are generated. Based on NDOT’s overrun rule, it then calculates the maximum allowable amount that can be paid for each item. It also calculates suggested quantities for percentage (prorated) items based on the NDOT Standard Specifications and the contract’s percent complete awarded amount.
Next, software calculates the stockpile allowances for items on the estimate and adds any new stockpile payments.
The software then calculates the time charges for the project. For completion date sites, software bases calculation on the date of the estimate. For working day sites, FieldManager software bases its calculations on generated Daily Diary records.
In the final step the software breaks down the estimate Total Dollar Amt. to the project/category level.
11.1 Adding Estimates 1. Select desired contract in the Contracts list window and click Estimates on the Application
Toolbar (Figure 11-1). The Estimates list window opens (Figure 11-2).
Figure 11-1. FieldManager Contracts List Window

FieldManager User Guide – 1/2019 11-2
Figure 11-2. Estimates List Window
2. Select the Add button located in the Window Toolbar (Figure 11-2). The Select Estimate Date and Type window opens (Figure 11-3).
Figure 11-3. Select Estimate Date and Type Window
3. The Estimate Date field will default to the current date. Use the calendar drop-down menu to select the estimate cut-off date or type it in directly.
4. Select the Estimate Type from the drop-down list box.
• Semi-monthly - estimate pertains to the cut-off period or bi-weekly payment • Semi-final - used ONLY during the field office closeout process. • Final – used ONLY by HQ Admin Services staff to make the final payment
5. Click OK to continue (Figure 11-3). The Add Estimate tab window opens with the General tab displayed (Figure 11-4).

FieldManager User Guide – 1/2019 11-3
Figure 11-4. Add Estimate Tab Window – General Tab
General Tab 1. Review the estimate details (Figure 11-4).
2. Enter Estimate Comments that might pertain to the estimate. (Not required)
Note: The General tab contains information about retainage. The HQ Construction Admin Section will handle retainage on all construction contracts.
Item Usage Tab 1. Click on the Item Usage tab (Figure 11-6). The Percentage Item Warning window opens
(Figure 11-5).
Figure 11-5. Item Usage Tab - Percentage Item Warning Window
2. The Percentage Item Warning window lists the suggested quantities for the percentage (prorated) items based on the NDOT Standard Specifications and the percent complete awarded amount of the contract. You can either continue with the estimate process, or discontinue the process, create and generate an IDR to adjust the item quantity placed as suggested, and start the Add Estimate process again. Click OK or Print depending how you want to proceed.

FieldManager User Guide – 1/2019 11-4
Note: Once you click OK, the report closes and will not open again during the Add Estimate process for the estimate. It is recommended that this information be printed out if you need to refer to it again.
3. Closely review the items included in the estimate, paying particular attention to the following: (see blue box in Figure 11-6)
• Insuff. Matl: If the box is checked the item had insufficient materials certs.
• Overrun Flag: If the box is checked the quantity placed is greater than the authorized quantity.
• Atten: If the box is checked the item has been marked in the Documentation tab of the Item tab window as needing attention from the Resident Engineer (See Chapter/Section 5.1.2 in this user guide).
Figure 11-6. Add Estimate Tab Window – Item Usage Tab
Note: Only use the Review/Change button in the Item Usage tab for updating Insufficient Material Items (see the next section for details). To comply with federal regulations for documentation and tracking, all other item quantity changes must be made in the IDR where they were originally posted. Discontinue the Add Estimate process, update and re-generate the IDR(s) where item quantities need adjusting and start the Add Estimate process again.
Note: NDOT will not be using the Voucher tab.
Payments with Insufficient Materials The software flags any item as insufficient when the material quantities posted in an IDR exceed the approved material quantity based on required material certifications. If flagged the item WILL NOT be included in the following estimate, regardless if there are enough approved quantities to cover a partial payment of quantities posted. Therefore, a manual override will need to be performed for a partial payment up to the approved amount.
1. Select the Insufficient Material item and click the Review/Change button (Figure 11-7). The Item Usage Change/Review window opens (Figure 11-8).

FieldManager User Guide – 1/2019 11-5
Figure 11-7. Add Estimate Tab Window – Item Usage Tab (Insufficient Material)
2. Update the Quantity this Estimate amount to match the Quantity Approved amount (Figure 11-8).
Figure 11-8. Add Estimate Tab Window – Item Usage Change Window (Insufficient Material Change)
3. Click the OK button to return to the Item Usage tab (Figure 11-8).
Note: The estimate will now include payment for the amount of materials you have approvals for. You will still need to add the remaining approvals for the material. When the approvals are added the remaining payment will automatically be included in the next estimate processed.
View Estimate Tab 1. Click the View Estimate tab (Figure 11-9). The Draft copy of the Construction Pay Estimate
Report opens.

FieldManager User Guide – 1/2019 11-6
Figure 11-9. Add Estimate Tab Window – View Estimate Tab (Construction Pay Estimate Report)
2. Review the report for the items by project and category for which the Prime contractor will receive payment, any stockpile payments and/or decrements, and time charges.
Note: The report can be viewed and printed with three different sort options, by Proposal Line Number, Item Description, or Item Code. To sort according to any of these options, click the Sort Order button at the bottom of the window.
View Amt Bal Tab 1. Click the View Amt Bal tab (Figure 11-10). The Construction Pay Estimate Amount Balance
Report Opens.
Item Types: 00 – Original Bid Item CO* – Extra Work EA* – Modified Original FA* – Price Adjustment SA* – Liq. Damage/Penalty *Items added by Cont Mod

FieldManager User Guide – 1/2019 11-7
Figure 11-10. Add Estimate Tab Window – View Amt Bal Tab (Construction Pay Estimate Amount Balance Report)
2. The Construction Pay Estimate Amount Balance Report displays the quantity paid versus authorized quantity for each contract item.
Note: The report can be viewed and printed with three different sort options, by Proposal Line Number, Item Description, of Item Code. To sort according to any of these options, click the Sort Order button at the bottom of the window.
View Insuff Mtl Tab 1. Click the View Insuff Mtl tab (Figure 11-11). The Insufficient Materials Report opens.

FieldManager User Guide – 1/2019 11-8
Figure 11-11. Add Estimate Tab Window – View Insuff Mtl Tab
2. This report shows the items for which the cumulative material quantity used exceeds the approved material quantity.
Generating the Estimate When all the estimate information has been reviewed for accuracy it can be generated.
Note: If you attempt to close the Add Estimate window before generating the estimate the software displays a warning message. If you close the Add Estimate window without generating the estimate, all the information entered while processing the estimate will be lost.
1. Click Generate on the Window Toolbar (Figure 11-12).

FieldManager User Guide – 1/2019 11-9
Figure 11-12. Add Estimate Tab Window
2. Click the Yes button on the Generate Window (Figure 11-13).
Figure 11-13. Estimate Generate Confirmation Window
3. The Print Dialog box opens for each of the estimate reports (Figure 11-14). The Construction Pay Estimate report is REQUIRED to be signed and filed in Division 7 of our contract files.
Figure 11-14. Print Dialog

FieldManager User Guide – 1/2019 11-10
Note: If your Prime Contractor has a licensed copy of FieldManager Read-Only you will need to export a copy of the contract each time you generate an estimate. See Chapter/Section 14.1 in this user guide for details.
Note: If you are creating an estimate that does not contain any item postings (i.e., you are just charging days) a Generate Estimate Warning window opens (Figure 11-15). Click the Yes button.
Figure 11-15. Generate Estimate Warning Window
Reviewing an Estimate 1. Select the contract in the Contracts list window and click Estimates on the Application
Toolbar.
2. Select the estimate to review and click Review on the Window Toolbar (Figure 11-16).
Figure 11-16. Estimates List Window
3. The Review Estimate tab window opens in the General tab in a mode in which you can view, but not change information (Figure 11-17).

FieldManager User Guide – 1/2019 11-11
Figure 11-17. Review Estimate Tab Window – General Tab
4. Click any tab to review the information for the estimate.
5. Click Close on the Application Toolbar to close the Review Estimate tab window and return to the Estimates list window.


FieldManager User Guide – 1/2019 12-1
12 Contract Retainage Retainage is defined as the funds that are withheld from the contractor payments to encourage timely completion and quality of contract work. FieldManager will automatically calculate and withhold 5% of the contract awarded amount up to a maximum of $50,000 retainage on the contractors pay estimate when the contract amount paid to date reaches 85% of the current contract amount.
12.1 Reviewing Contract Retainage in an Estimate To view retainage on a contract in FieldManager follow these steps:
1. Select the contract from the Contracts list and click on the Estimates icon at the left side of page (Figure 12-1).
Figure 12-1. Contract List
2. From the Estimates list select the estimate you wish to view (Figure 12-2) and select the Review button.

FieldManager User Guide – 1/2019 12-2
Figure 12-2. Estimate List
3. The Review Estimate General Tab will open (Figure 12-3). The General Tab displays the % Complete, Current Contract Amount and Retainage Amount withheld in the pay estimate (see blue boxes in Figure 12-3).
Figure 12-3. Review Estimate Window – General tab
4. Click on the View Estimate Tab, to see how the payment will be affected by the retainage (Figure 12-4).

FieldManager User Guide – 1/2019 12-3
Figure 12-4. View Estimate Tab (Report View) – Retainage Adjustment Area
In the example above you can see that the Retainage Adjustment (bottom left) identifies that there was no retainage withheld previous. However, on this estimate a retainage of $50,000 was withheld due to the contract meeting the 85% completion threshold. This amount will be released during final estimate upon completion of contract closeout by HQ Construction Admin Services staff. The bottom right corner of the estimate in Figure 12-4 shows the Total Estimate Payment Retainage, which is the Total Estimate Payment minus the $50,000 Retainage.
12.2 Reviewing Contract Retainage in the Contractor Payment Summary Report 1. To open this report, click on Utilities in the Toolbar Menu at the top of page. Select the
Contractor Payment Summary Reports from the drop-down list. (Figure 12-5).
Figure 12-5. Utilities > Contractor Payment Summary Reports
2. Double-click on the estimate (Cycle) run date you want to view (Figure 12-5). The
Contractor Payment Summary report includes contract specific information all contracts in

FieldManager User Guide – 1/2019 12-4
FieldManager for the date selected. Contract specific retainage information is also provided (see red box in Figure 12-7).
Figure 12-6. Contractor Payment Summary Reports List
Figure 12-7. Contractor Payment Summary Report
12.3 Reducing Retainage Prior to Final Payment Reducing retention prior to the final payment can ONLY be completed by HQ Construction Admin Services staff when all contract items have been closed and final quantities checked by the field office. Refer to Chapter 2, Contract Administration, Section, Contract Closeout Phase – Acceptance of Contract, in the Construction Manual, for guidelines on reducing retainage. Contact HQ Construction Admin Services staff for details.

FieldManager User Guide – 1/2019 13-1
13 Semi-Final Estimate Procedures When all the contract work is finished, the field office will process a semi-final estimate to pay for items that have remaining unpaid quantities and to charge any additional working days, if needed. More than one semi-final estimate can be run. It is important for the field office to complete several checks and ensure certain items have been completed in FieldManager before proceeding with the semi-final estimate process, otherwise you may encounter multiple warning messages along the way. The following list must be addressed prior to producing a semi-final estimate:
• All required information in the General tab of Docu icon of the contract must be completed. (Chapter/Section 3.1.1 in this user guide)
• Enter the Time Charges Stop Date (last day time was charged) in the Site Times tab of the Docu icon. (Chapter/Section 3. 1.3 in this user guide)
• If additional payments are required, create and generate a Final IDR with the quantities posted to the applicable bid items. If no payments are required, this step may be omitted. (Chapter/Section 7.1 in this user guide).
• All IDRs must be generated. (Chapter/Section 7.4 in this user guide)
• All Daily Diaries for the estimate must be generated. (Chapter/Section 8.4 in this user guide)
• There can be no unattached items. (Chapters/Sections 5.1 & 10.1.4 in this user guide)
• Review all items for accuracy and mark as Complete. (Chapter/Section 5.4 in this user guide)
• Enter the “All Contract Work Completed” date (the date cleanup phase is complete) field in the General folder tab of the Docu icon. (Chapter/Section 3.1.1 in this user guide)
• There can be no unapproved contract modifications (excluding those with a status of Deleted). (Chapter/Section 10.4 in this user guide)
• There can be no insufficient materials. (Chapter/Section 6.2 in this user guide)
• All stockpiles, in all categories, must equal zero. This can be done manually (Chapter/Section 9.3 in this user guide) or the “Balance Stockpiles” option, in the Estimates window, while creating the semi-final estimate.
13.1 Creating the Semi-Final Estimate When all checks and conditions have been made, and the R.E. is satisfied that the final quantities accurately reflect work performed on the project you are ready to run a semi-final estimate.
1. Select the desired contract from the Contracts list window and click Estimates on the Application Toolbar (13-1). The Estimates list window opens (Figure 13-2).

FieldManager User Guide – 1/2019 13-2
Figure 13-1. FieldManager Contract List Window
2. Select the Add button located in the Window Toolbar (Figure 13-2). The Select Estimate Date and Type window opens (Figure 13-3). The estimate date MUST be a cut-off date.
Figure 13-2. Estimates List Window
Figure 13-3. Select Estimate Date and Type Window
3. Use calendar drop-down menu to select the Semi-Final estimate date or type it in directly (Figure 13-3).

FieldManager User Guide – 1/2019 13-3
4. Select the Estimate Type of SEMI-FINAL from the drop-down list box.
5. Click OK to continue (Figure 13-3). The Add Estimate tab window opens with the General tab displayed (Figure 13-4).
Note: The software runs a series of checks and calculations when creating the estimate.
Figure 13-4. Add Estimate Tab Window – General Tab
13.2 Editing and Reviewing the Semi-Final Estimate 1. In the Estimate Comments field enter “Semi-Final Estimate” (Figure 13-4).
2. Check the Balance Stockpile box if you have stockpiles that do not equal zero (Figure 13-4).
3. Review the Item Usage and View Estimate tabs for accuracy (Chapter/Sections 11.2.2 and 11.2.4 in this user guide).
13.3 Contractor Item Quantity Review It is highly recommended that the Resident Engineer provide the contract item quantities paid to date to the prime contractor, so they can review the quantities. The best option for this review is to send a copy of the Semi-Final Construction Pay Estimate Amount Balance Report. 1. Select the View Amt Bal tab to open the Construction Pay Estimate Amount Balance Report
(Figure 13-5). Print this report to a PDF file and email to the contractor.

FieldManager User Guide – 1/2019 13-4
Figure 13-5. Construction Pay Estimate Amount Balance Report
Note: Other Options for Quantity Review by Contractor: If your contractor has FieldManager Read-Only, provide a read-only copy of the contract after generating your Semi-Final estimate (Chapter/Section 14.1 in this user guide).
Refer the contractor to the NDOT website: https://www.nevadadot.com/doing-business/about-ndot/ndot-divisions/operations/construction/fieldmanager
2. If the contractor does not agree with the quantities, the Resident Engineer must reconcile the difference and if changes are needed do so through an IDR with adjusted posting to item(s) then create and Generate another Semi-Final estimate.
13.4 Generating and Printing the Semi-Final 1. Once you have checked all the information and are sure the estimate is correct, click
Generate on the Window Toolbar (Figure 13-6). You will receive a Generate Window (Figure 13-7).
Note: If you attempt to close the Add Estimate window before generating the estimate the software displays a warning message. If you close the Add Estimate window without generating the estimate, all the information entered while processing the estimate will be lost.

FieldManager User Guide – 1/2019 13-5
Figure 13-6. Add Estimate Tab Window – General Tab
2. Click the Yes button on the Generate Window (Figure 13-7).
Figure 13-7. Estimate Generate Confirmation Window
3. The Print Dialog box opens for each of the estimate reports (Figure 13-8). The Construction Pay Estimate report is REQUIRED to be printed, signed and filed in Division 7.
Figure 13-8. Estimate Reports Print Dialog Box
4. Click on Print or Cancel for the other reports depending on if you want a hard copy.
7?

FieldManager User Guide – 1/2019 13-6
Note: If your Prime Contractor has a licensed copy of FieldManager Read-Only you will need to export a copy of the contract each time you generate an estimate. See Chapter/Section 14.1 in this user guide for details.
Note: Create the Closeout Contract Modification (refer to Chapter/Section 10.7 in this user guide). Notify HQ Construction Admin Services staff when Draft has been created.

FieldManager User Guide – 1/2019 14-1
14 Exporting A Contractor Read-Only File Working with FieldManager software requires frequent exchange of information between FieldManager and contractor computers with the FieldManager Read-Only application.
14.1 Exporting Read-Only Contract File to FieldManager Read-Only (Prime Contractor)
Prime Contractors have the option to purchase FieldManager Read-Only directly from the vendor, Info Tech (https://www.infotechfl.com/field_manager), so they can review their contract data in the software. The contractor will make a request to the RE to receive an exported copy of the FieldManager contract file.
Bi-weekly, after you generate estimates, you will need to export and email the read-only contract file to the contractor, so they can import it into FieldManager Read-Only. This will refresh their contract file, so they have the most current contract information (i.e. quantities, payments and Contract Modification).
1. To export the read-only contract, select the desired contract from the Contracts list. From the File menu choose Export, and then choose Transfer Contracts… from the Export submenu. As shown in Figure 14-1, you will need to select the contract that you want to export and then click on the Select button.
Figure 14-1. Select Contracts to Transfer to Another FieldManager Machine Window
2. The Transfer Contract to Another FieldManager window will appear (Figure 14-2). Select the
Create a contractor read-only copy of the contract option (DO NOT include attachments) and click on the Ok button.

FieldManager User Guide – 1/2019 14-2
Figure 14-2. Transfer Contract to Another FieldManager Window
3. The Select Transfer File window will appear (Figure 14-3). Click on the dropdown arrow in
the Save In box and select your Removable Disk E or a share drive. Change the File Name to your contract ID (i.e. 03582.cro). Click on the Save button.
Figure 14-3. Select Transfer File Window
4. The contract will export and the Export window (Figure 14-4) will open when it has
completed. Click on OK.
Figure 14-4. Export Window
5. Attach the exported contract file (i.e. 03582.cro) to an email and send it to the contractor.

FieldManager User Guide – 1/2019 15-1
15 Using Inquiries: General Information FieldManager includes inquiries that are brief views of contract information you can print or view on screen to review contract activity. Inquiries are informal views of information grouped in several different and useful formats. You can access Inquiries & Reports by selecting inquiries from the icons at the left side of the window, after selecting the contract you wish to view (Figure 15-1).
Figure 15-1. Inquiries List Window
15.1 Viewing and Printing Inquiries Using Inquiries, you get brief views of contract information you can review contract activity, and print if needed. An added option is to set your preference on how the inquiry displays the information. In the Window Toolbar select Utilities > and User Preferences is the first option.

FieldManager User Guide – 1/2019 15-2
Figure 15-2. User preferences Select the Inquiries Tab and you have the option of sorting the information in the order you want to see it, with the use of 3 radio buttons. You can also save these preference settings for future viewing. Another helpful feature in locating an inquiry is the “Quick Query” button on the toolbar. Field Manager software displays a fly-out set of buttons, one for each type of inquiry you can view. To use, open the contract from the Contract list and click on the function you wish to query, for example Items. Click on the Cont Status “Quick Query” menu arrow, and the fly-out menu drops down with the available queries regarding items in general (Figure 15-3).

FieldManager User Guide – 1/2019 15-3
Figure 15-3. Items list window - Fly-out buttons
If you want to query a specific item, for example Hydro-seeding, double-click on the item, and click on the Quick Query fly-out menu and you will see the inquiries available for the item selected (Figure 15-4).
Figure 15- 4. Hydro-seeding - Available inquiries
You can choose to view the status of a single item or all items in one or more categories. By selecting Item Status and using the filter and sort functions. The Item Status Inquiry report opens (Figure 15-5).

FieldManager User Guide – 1/2019 15-4
Figure 15-5. Item Status Inquiry Report
15.2 Viewing and Printing Inquiries from the Inquiries List If a window associated with a contract is open, the Application Toolbar will always display an Inquiries button. Click to display the list of Inquiries to view and print for the selected contract. There are approximately 55 inquiries that show detailed information about item postings, items, contract modifications, stockpiles, estimates, and much more. Filter and sort is available just like any other window. The Contractor Payment Summary report can be printed to view all activity to date per cutoff cycle much like the CM04 Report (Figure 15-6).

FieldManager User Guide – 1/2019 15-5
Figure 15-6. Contractor Payment Summary (FM version of CM04 Report)
15.3 Inquiries Details The following list is a sampling of the various Inquiries of which reports can be printed for review: INQUIRIES COMMENTS Breakdown Status: N/A -This inquiry refers to the ‘Breakdown’ tab
but is not being utilized by NDOT at present. Breakdowns By Item: N/A – See Comment above. Category Escalation Summary by Estimate: This inquiry displays the Estimate Number &
Date; Type- Semi-monthly, Semi-Final or Final; Total Dollar Amt. (does not include any 736 bid items, escalation or trainee hours); the % Completion (awarded); % Completion Currently.
Category Status: The main screen of this inquiry simply displays the Project, Project Description, Category, & Category Description. You can view each category status separately, or collectively. Note: The last item on the report for this inquiry will state if the Feds are participating in this category. (The second page of this report has some fields which may partially populate, but which NDOT is not currently utilizing.)
Contract Modifications Summary: The inquiry for Cont Mods summarizes each Cont Mod by Date, Status (shows approval date), the inc/dec amount of Cont Mod, Type # and description. In the header, it also states the contractors' name, the contract # and Award

FieldManager User Guide – 1/2019 15-6
Amt, and Current Contract Amt. Quick overview of the status of each Cont Mod created.
Contract Progress: This inquiry displays in graph format the Current/Awarded % of Contract Completed, Site Completion %, along with available working days and % of Time Used.
Contract Status: This inquiry is helpful as it gives an overview of the contract, much as you would see in E-Bidding. It has all the who, what, where, and how much of the contract. The information here is basically what you would see in programming the contract in FieldBuilder.
Contractors by Estimate: The purpose of this inquiry is to list the contractor/item associations that is originally entered by the Field Office. Depending on when the item associations are entered, you may need to open more than one estimate in the list to find the item posting you are looking for.
Estimates Payments by Item: This inquiry is helpful as you can select one or more items and see what qty was paid in which estimates. It lists the Item Name & No, Estimate No, Est. Date, Voucher No, Project, Category, Qty Paid, Unit Price & Dollar Value, and Totals.
Estimate Vouchers by Estimate: This report is in landscape format. 11 columns across the page gives the Project , Voucher No & Date, Transferred Out Date, Date Paid, % Complete (Earnings), % of Project Amt Paid, Gross Earnings, Current Retainage, Liquidated Damages & Net Payment.
Item History to Date: This report is also in landscape format dividing the item history by Projects And Categories, Contractors, Postings, Payments and a section for Notes as well. You can select one or more items to view history on. Each of these headings report information pertaining to the heading. The report begins with the Item Description, Item No, UOM, Type, Price, Authorized Qty, Amt, Place, Paid and Unpaid, if the item is Completed, and if item has been marked for Attention. The Postings list all IDRs by Date, Insp, Seq No, Catg, Contractor, Location, Entry Date, Attn, & Remarks. The Payment section includes the Est No & Qty Paid along with the Dollar Value.
Item Increases and Decreases by Item: By selecting one or more items the report will track any Pending Changes to the Qty in each category. It also lets you see what Qty has been placed and paid, with Dollar Amt. It gives other information as well, for example, Category Description, Project No. and Location.
Item Increases and Decreases That Are Pending: In this inquiry you can view an item which has been increased/decreased, but qty has not been placed or paid. In order to increase/decrease

FieldManager User Guide – 1/2019 15-7
item qty a Contract Modification must be Added & Approved by the R.E and Construction. The report for this inquiry will track the Cont Mod No, Date, Status (Draft or Approved), the Inc/Dec Quantity, Unit Price, Inc/Dec Amount, Category Quantity and the Total Amount.
Item Postings by Breakdown: N/A -This inquiry refers to the ‘Breakdown’ tab in FieldManager, but is not being utilized by NDOT at present.
Item Postings by Contractor: The report for this inquiry pertains to prime & sub- contractors and the item/work which have been associated to them on the project. The Prime Contractor will be in bold, as usual, and includes Vendor Number. This report includes the IDR Date, Insp, Seq No, Project, Catg, Contractor, Qty Posted, Location, Entry Date, Attn, & Remarks.
Item Postings by Entry Date: Much like the report above, this report includes the same information. When you click on the inquiries icon the entry dates from the IDRs are listed. You can filter and sort, and select one or all of the dates. And the report leads off with the Item Description & No. The other column headings are the same as the above inquiry.
Item Postings by Inspector: Item Postings by Item Grouped by Estimate:
Again, this report is formatted like the last two reports. Sorted by Inspector, which appears at the top of the report, this provides the same information. You can select one or all of the inspectors shown in the inquiry. This inquiry creates an audit trail between an estimate and item postings. The inquiry is based on item postings and then groups the postings by estimate. It includes the item IDR Date, Inspector, Quantity Posted and Estimate number.
Item Postings by Item in Breakdown Order: N/A -This inquiry refers to the ‘Breakdown’ tab in FieldManager, but is not being utilized by NDOT at present.
Item Postings by Item in IDR Order (Does Not Include Material Usage):
This inquiry opens a list of all Items (original or other). Select either one or more items. The report will be populated in IDR order, leading with the Item No & Description, UOM, Auth Qty, Qty Placed, Type, Price and Auth Amt and Qty Paid. Note: The important thing to remember when using this report, is that the item shown will not include Material Usage. The column heading reads Qty Posted, Qty Paid will be zero until sufficient material has been approved in house to cover the Posted Qty.
Item Postings by Item That Are Marked For Attention:
This report is good way to track unattached items or items that were not a part of the original bid items, but were added later in a Contract Modification. When you click on this inquiry, and

FieldManager User Guide – 1/2019 15-8
select all, if any of the items have been Marked for Attention by anyone, then they will show up here. It is a field that could be utilized by the R.E. for tracking purposes, or the inspector may use it to indicate something about that item to field office.
Item Postings Summary by Breakdown: N/A -This inquiry refers to the ‘Breakdown’ tab in FieldManager, but is not being utilized by NDOT at present.
Item Postings Summary by Item in Breakdown Order:
N/A -This inquiry refers to the ‘Breakdown’ tab in FieldManager, but is not being utilized by NDOT at present.
Item Progress by Item The report this inquiry displays has an Item Description, the bid Item Code (or Number), Prop. Line (used in Master Configuration List), Item Type, Item Complete, % Complete, Over 100% (of Plan Qty), and Pending Changes, if any.
Item Status: Sorted by Item, the report contains the status of each item, including the Contractor with whom the item is associated with, & pertinent remarks are available. Auth Qtys and Pending Changes, if any are reported. The last column is Allowable Qty Next Estimate.
Item Type Change Amounts by Contract Modification:
After selecting this inquiry, a list appears with Contract Modification information. Starting with the Cont Mod Number, if it was Revised, Date, Status (Draft, Pending Approval or Approved) followed by Date of Approval. The next column is Short Description, Amount, and Cont Mod Description. Open up the Cont Mod you wish to view and the report will have similar columns, will also have Cont. Mod Amt, & Awarded Contract Amt, along with Current Contract Amt, the short description separates the $ amts from the Item Types, Other Chgs Amt (which is auth + pend), and the Other Chgs %, Cont Mod Amt, and Cont Mod %. Total Change Amt. & Total Chg %.
Items by Breakdown: N/A -This inquiry refers to the ‘Breakdown’ tab in FieldManager, but is not being utilized by NDOT at present.
Items by Contractor: This inquiry pertains to the prime and sub-contractors on the project. The Prime Contractor will be in bold type, and the totals given are in direct relation to the prime contractors progress on the project. There is an asterisked note at the top of the report, reminding us that the data given and item % is not broken down per sub-contractor, but reflects what the prime is doing.

FieldManager User Guide – 1/2019 15-9
Items by Material: Items that are associated with material will need to be tracked as regard to an approved status, preferably before the material is placed. In this inquiry, a list of contract items appears, and you can select the item or items you wish to view. The report gives the material w/ bid item code. If the material has been placed, a grid lists the Item Description, Item Code, Usage Factor & Remarks. In bold, above the grid, is the Qty Available (or approved) that can be placed and paid.
Items by Project/Category in Item Order: This inquiry opens to a list of all the projects on the Contract. Click on the one you wish to view, and the report view is a table of all items by category (at the top of the table), then the Item Description, Item Code (bid item number), and the Prop. Line in the Master List of items, in each Project.
Items by Project/Category in Project Line Number Order:
This inquiry opens to a list of all the projects on the Contract. Click on the one you wish to view, and the report view is a table of all items by category (at the top of the table), then Project Line No, Item Description, Item Code (bid item number), and the Prop. Line in the Master List of items, in each Project.
Items by Type: This inquiry could be helpful in displaying the items authorized in the contract. When you click on the Inquiry, you see a small table of the different work types we have currently. They are Adjustment, Extra Work, Modified Original, Original Item, and Unattached. Click on the one you wish to view. If unsure of the item, you can select all, and the report view is a grid like table which separates the different work types into tables and then lists the items under that. There might only be one Work Type on your Contract.
Items Over Authorized Quantity at the Contract Level:
This inquiry proved to be a great help during our testing period. If you run this report prior to an estimate, and the item you wish to pay on is included on it, you might learn that there is material attached that needs approval, or certs needed. This report would be overall, and does not include the project/category, but the next inquiry is specific to a particular project/category.
Items Over Authorized Quantity at the Project/Category Level:
If you have more than one Project/Category, it would be helpful to use this report, rather than the report above.
Items That Are Completed: While this inquiry can be helpful for other reasons, it will prove useful and potentially lighten the load during closeout. You don't have to wait until the end of the contract to mark each

FieldManager User Guide – 1/2019 15-10
item complete. You can do this as you actually finish each item, which will save you time at the end, especially if there are a large amount of bid items. It will also let you know if you have missed paying 100% for an item, or if there is work left to do. The grid format has 10 columns which include the Item, item code, Item Cpt column, Pending Changes, Auth Qty, Qty Placed, & Qty Balance, Unit Price, and the Qty Balance $ Amt.
Items That Are Marked for Attention: This inquiry can provide you with a record of an item you wish to track, for example some force acct, or extra work, or can use for your own purpose. The check box marking it for attention must be used in order for the item to show up in the report here. This box appears when posting items in IDRs, and also if you go to Items icon to the left of the window in the contract you are working in, you can activate the attention box in any item.
Items That Are Not Completed: This inquiry has a report with grid format and 10 columns which include the Item, Item Code, Item Cpt column, Pending Changes, Auth Qty, Qty Placed, & Qty Balance, Unit Price, and the Qty Balance $ Amt.
Items That Are Pending: This inquiry will report what items are pending, such as new items added that are still unattached by adding a Contract Modification. The Cont Mod Number will be blank, the Authorized Amount & Pending Changes Amount columns will remain at zero $ qty until a Cont Mod is approved.
Items with Insufficient Materials: This inquiry is most helpful in providing the office person a record of what items associated with materials still require certs, or if the material still needs qty approvals. The report has only 5 columns, which include the Material Description, the Material Unit, Qty Approved, Qty Used, and Qty Available.
Items with Notes: This report will keep you aware of issues with an item if the R.E., Office Person can make your own notes, or advise Inspectors to make certain the notes field is used when posting an item. Plantmix Surfacing, Type 2, as an example, is an item where you may want to track yield, oil, waste, or hours, whatever you might need notes on. This report will pull all those notes together in one place.
Items with Unbalanced Quantities at the Contract Level:
This inquiry and the next one down, will report the Items with Qtys which have over/under run. These Unbalanced Qtys will have to be addressed before the Contract can be closed. This report is for Unbalanced Qtys at the Contract Level. If you

FieldManager User Guide – 1/2019 15-11
have only one Category, this would be the report to use.
Items with Unbalanced Quantities at the Project/Category Level:
This report functions the same as the one above it, but is broken down at the Project/Category level. If you have more than one category this report will break them out for you.
Items with Unpaid Placed Quantities: The report associated with this inquiry is in landscape format and 9 columns including the Item Description, Item Code, Auth Qty, Qty Placed Qty Paid & Unpaid, Unit Price, Qty Unpaid $ Amount.
Material Approvals by File/Form: This report will help organize your Material Approvals, for example, rebar. The inquiry, when selected, reports all Materials that have been approved. The grid format is organized first by File (3 digits in the item code), File Description, Form (the form number in FieldManager used to track the UOM for the material selected), and the Form Description (which will be Default, as it is assigned to that material & form in the Master Materials File.) You can select one or more Materials File/Form to view. The report includes the File Number, Name, Form Number and then will track how many certs you have for that item, Approved Qty, if any, the Source of the material, Lot No, Remarks, & Entry Date.
Material Approvals by Material: You begin by Selecting the Material you wish to view, or Select All. The report then populates a landscape view of the Material Description, Unit, Qty Approved, Qty Used, Qty Available. A table is below the header which displays 7 columns that include the Form Date, File/Form/Seq. No., Qty Approved, Source, Lot No., Remarks, & Entry Date. The information in this report is will be routinely entered in the appropriate fields in the Approvals tab when Material is approved for placement.
Material History to Date: The Material History is a comprehensive report which collects all pertinent information on Materials placed on the project. The header across the top of this landscape report contains the Material Description along with the Item Code, Unit, Qty Approved, Qty Used, Qty Available, and Qualified by Master Materials List. Next follows sub headings; the first pertains to the Items the Material is Contained In. The Approvals subheading is next, (Date, Qty Apprvd, Source, Lot No, and Remarks). Last is Usage which has the IDR Date, Inspector, Item Description, Unit Item Code, Project, Catg, Item Qty Placed, Material Qty Usage, & Remarks.

FieldManager User Guide – 1/2019 15-12
Material Status: This inquiry is perfect for giving a complete look at the any material place on the project and how much to date has been approved. The grid-like view reports the Material Description, Unit, Qty -Approved, -Used, -Available.
Material Usage by Material: Very much like the inquiry above, this reports the IDR Date, Inspector, Seq No, Item -Description, -Unit, -Code, Prop.Line, Project, Catg, Location, Item Qty Placed, Material Used, & Material Usage Remarks. Useful in tracking material used for a particular location, or material, or activity.
Materials by Item: This report list all the items, with the Unit, Auth -Qty, -Amt, -Placed, and -Paid, and any Pending Chgs. Then, if there was usage to report, a grid is included with 6 columns which report the Material Description, Material Units, Qty Avail, Usage Factor, and Remarks.
Material Summary: This is a quick reference report of Materials used including the Material Description, Unit, Qty Approved, Qty Used and Qty Avail.
Material with Insufficient Quantities: Materials that have not been approved for placement or payment are listed in this report. The Qty Available will show as a negative number until you approve the materials for use.
Project Status: Selecting this inquiry will display a list of the projects numbers and description of the project. If you have multiple projects use care that you select the one you need. The header for the report for Project Status has a comprehensive collection of information on the project such as Awarded Project Amt, Current Project Amt, Project Amt Pd to Date (FM), Project Amt Pd to Date (CAS), % Project Complete (awrd), % Project Complete (curr), Net Change Amount (Auth), Net Change Amount (Pend), Total Net Change Amt, Net Change % (Auth), Net Change % (Pend), Total Net Change %. The next section pertains to Categories, followed by an Item Types heading, with a grid divided into with 7 columns, providing the Type of Work, Auth Amt, % of Project (auth), Pending Amt, % of Project (pend), Total Auth/Pend Amt, % of Project (auth+pend). The columns are totaled here also. Note: Pages 2 & 3 contain fields which are not currently being utilized by NDOT, but could possibly be included for future use.
Project/Categories by Item: The report for this inquiry is broken into Project/Category by Item. The grid is separated into 8 columns including Project, Project Description, Catg, Category Description, Authorized Qty, Pending Changes, Qty Placed, Qty Paid.

FieldManager User Guide – 1/2019 15-13
Project/Categories in the Contract: In grid format, this report is simply a breakdown of the Projects & Categories in the Contract including a category description.
Site Time Status: This reports activity on the Overall Contract Site. The header of the report calls out the Site Number, Site Description, and if the work is a Completion Date job or Working Days. There is also a Days Allowed line w/ the Orig, Auth, and Pending Days; the next line is Days Charged providing the Daily Diary corresponding to the Days Charged and the Estimate the days were charged on.
Stockpile Summary by Stockpile: A landscape report, this summarizes the Stockpiles on the Contract. The header reports the Stockpile Description (Item), Stockpile Type, Stockpile Amount Remaining, Comments. The 10 column grid reports the Seq No, Action Date, Action, Total Transaction $ Amt, Transaction Comments, Recovery Factor, & Qty, Action Dollar Amount, the Estimate Number and Voucher No. This provides a detailed record of the item is stockpiled which can be useful in tracking the payments to it.
Subcontractors Assigned to the Contract: This reports the Prime Contractor and Vendor ID. It also includes a list of the Subcontractors Names, City, Vendor ID, Work Type, and Subcontract Amt.
Time Charges by Site: The inquiry opens to a list of the Overall Contract Site and you select the Overall or if the contract has multiple phases, select the one you wish to view. The report is a list of the Daily Diary Dates, Author, Est No, Est. Date, & Time Charged corresponding to days charged to contract.
Time Extensions by Site: This report helps track the Original/Authorized days and any days Pending. The Columns track the Cont Mod Number, Cont Mod Date, Additional No of Days added, New Completion Date/Days, and the Status of the Cont Mod.


FieldManager User’s Guide A-1
Appendix A: FieldManager Glossary
ADD Button Located on the Window Toolbar, this button allows you to add a
contractual element determined by the window name displayed
on the Title Bar (for example, Items, Materials, IDRs).
Located within certain tab windows, and appended in name by
various contractual elements (for example, Add Item, Add
Posting, Add Site Event), this button allows you to add another
of the currently selected element.
ADD MORE Button Located within certain tab windows, this task-dependent button
allows the user to add more of what is already being added (for
example, item postings, material approvals, and material usage).
ADD ROW Button Located within an advanced filter window, this button allows
you to add an additional row of filter criteria at the bottom of the
list of criteria rows. See also: ADVANCED Button.
ADJUST TIME
RECORDS Button Located within the SITE TIMES tab of the Change Daily Diary tab
window, this button allows you to enter the number of days
charged on available day contracts.
ADVANCED Button Located within a filter window, this button opens an advanced
filter window to allow the user to apply an advanced filter to the
current list window.
Agency
Configuration
Program
A program that allows an agency to customize FieldManager
software to adhere to that agency's specific regulations. It lets the
agency choose from several options such as setting the allowable
day charge increment, defining overrun payment rules, and
establishing partial payment items. It even allows an agency to
incorporate its own logo and report headers into FieldManager
reports.

A-2 FieldManager Glossary
Agency Master
Reference Lists Five agency master reference lists are available in FieldManager
software via the Utilities menu, one each for materials, items,
vendors, codes (code tables), and percentage items. These lists
are maintained by each agency. Agencies that do not implement
the Materials functionality will not have materials listed in the
Master Material Reference List.
Allowable
Quantity The unpaid placed quantity for an item that does not exceed the
cap set by your agency.
Application
Toolbar Located in the far-left portion of the Application Window, this
toolbar displays buttons that access FieldManager software’s
functionality and specific contract information. The buttons
available on this toolbar remain constant despite changes in the
active window.
APPLY Button Located in sort and advanced filter windows, this button applies
the chosen sort order or filter to the current list window.
APPROVE Button Located on the Window Toolbar, this button appears in
conjunction with the Contract Modifications functionality, and is
used to approve contract modifications.
Archive Contract The procedure to remove a fully complete and closed contract
from the FieldManager database and copy it to a designated
historical area.
Authorized
Quantity The current contract quantity for an item. If an item has not been
changed by contract modification, it is the original quantity in
the bid proposal. If an item has been changed by contract
modification, it is the result of the original contract quantity plus
and minus all authorized changes.
Automatic
Payment Item An item that has a set schedule for payment can be designated as
an automatic payment item (autopay item). FieldManager
software, as well as other agency contract administration
systems, automatically pays these items when designated
thresholds are reached. Contract quantities on autopay items may
not be changed, and supporting Inspectors’ Daily Reports are not
necessary for these items. Payments for autopay items cannot be
withheld once thresholds are crossed, nor may they be
accelerated beyond the scheduled threshold limits.
Autopay Item See Automatic Payment Item.

FieldManager User’s Guide A-3
Available
(Working) Day
Site
A site for which the contractor must complete the contract work
within a specific number of days. For this type of site, it is
necessary for the project manager to keep track of the days
charged to the contractor for the site.
Award Contract
Amount The dollar amount originally awarded for a contract.
Backup The procedure to make a copy of the FieldManager or FieldBook
database periodically to protect against accidental loss of the
active FieldManager database. Most agencies have a specified
schedule for backing up databases.
BACKUP Button Located within the Backup Database window, this button allows
you to save a FieldManager database backup.
BALANCE
COMPLETED ITEMS
Button
Located on the INC/DEC tab of the Add Contract Modification tab
window, this button takes into account all completed items to
create a balancing contract modification.
BALANCE QTY
Button Calculates the quantity to balance (Quantity Placed - Authorized
Qty + Pending Changes). The value automatically displays in the
Qty. Change (+/-) field.
Breakdowns A facility in FieldManager software to accommodate items
broken down into groups such as plan sheets, structures, or
categories of work. Breakdown items are an agency option which
are at their most effective when created during the plan
development process, then downloaded to FieldManager
software along with the contract, and then downloaded to the
FieldBook component.
BRING IN
TEMPERATURES
Button
Located on the GENERAL tab of the Add Daily Diary tab window,
this button brings into the Low Temperature and High
Temperature fields information from inspectors’ reports for the
Diary Date selected. The lowest reported temperature will
display in the Low Temperature field, and the highest reported
temperature will display in the High Temperature field.
BRING IN WEATHER
AND COMMENTS
Button
Located on the GENERAL tab of the Add Daily Diary tab window,
this button brings into the Comments field any weather
information and comments from inspectors’ reports for the Diary
Date selected.
BROWSE Button Located in certain import and transfer file windows, this button
allows you to do a directory search to identify a desired file
location.
A-4 FieldManager Glossary
Calendar Day Site A site for which the contractor must complete the contract work
by a specified number of calendar days. FieldManager software
automatically calculates progress on this type of site.
CANCEL Button Located in certain tab and modal windows, this button cancels
the activity associated with the current window and closes that
window.
Category A category is a subdivision of a project, with each category
representing one or more related work items having the same
funding sources. An item will have one or more associated
categories.
Category
Description A short description of a category's purpose that designates the
funding breakdown and details the specific responsible agency.
Category Number A unique identifier for a project category that functions as a link
between the funding agency and the item.
Central Office The office that houses an agency’s central office contract
administration system.
CHANGE Button Located on the Window Toolbar, this button allows you to
change a contractual element determined by the window name
displayed on the Title Bar (for example, Items, Materials, IDRs).
Located within certain tab windows, and appended in name by
various contractual elements (for example, Change Item, Change
Posting, Change Approval), this button allows you to change the
currently selected element.
Change Order A written order issued by the engineer to the contractor, which
covers permissible adjustments and minor plan changes or
corrections and rulings with respect to omissions, discrepancies
or intent of the plans and specifications, but does not include any
extra work or other alterations that must be covered by a
supplemental agreement.
CHANGE SELECT
Button Located within certain inquiry windows, this button allows you
to change the selection on which the inquiry information being
viewed is based.
Check Box Located within certain tab windows, this is a square box that can
be clicked on or off just as with light switches. When you click
in a check box, an X or check mark displays in the box to
indicate the option is selected. To deselect the box, simply click
in the box again.

FieldManager User’s Guide A-5
CLOSE Button Located on the Window Toolbar and within the backup and
restore database windows, this button closes the current window
without saving any work completed in that window.
Located within an advanced filter window, this button closes the
window without applying or saving the chosen filter.
Completion Date
Site A site for which the contractor must complete the contract work
by a specified completion date. FieldManager software
automatically calculates progress on this type of site.
Combine Outbox
Files The procedure to consolidate payment and/or contract
modification files to assist with routing those files to and from
your agency’s central office contract administration system. This
procedure is unnecessary if your agency uses the FieldNet
system to transfer contract files.
Construction Start
Date The date contract work begins.
CONT DOCU Button Located on the Window Toolbar, this button appears in
conjunction with the GENERAL tab of the Add Estimate, Add
Contract Modification, and Change Contract Modification tab
windows. When clicked, this button opens the Update Contract
Documentation window in which to update contract
documentation.
CONT MODS Button Located on the Application Toolbar, this button opens the
Contract Modifications list window, accessing FieldManager
software’s Contract Modifications functionality.
Contract A contract represents all the work awarded a contractor in a legal
contract. A contract is made up of one or more projects. In
FieldManager software, all progress is recorded at the contract
level, and there are two different types of contracts: working
contracts and read-only contracts.
Contract
Description A short overview of the types of work specified in the contract.
Contract
Federal/State
Project Number
The unique federal/state project number associated with a
particular contract.
Contract ID A unique identifier for a proposal or contract.
Contract Location A short description of the primary location of the work for a
contract.

A-6 FieldManager Glossary
Contract Locks A menu option found within the Utilities menu and the System
Management submenu that displays the Locked Contracts
window allowing you to remove a lock that has been placed on a
contract.
Contract
Modification A document that contains changes to a contract. It is used to add
items to the contract, increase or decrease contract item
quantities, add time extensions to the contract, and/or to make
any other miscellaneous change to the contract, such as a
wording change. Once approved, a contract modification cannot
be modified or deleted.
Contract
Modification
Number
A unique identifier for a specific contract modification.
Contract Primary
District The primary area (district) in which a project is located.
Contract Site
Number A unique identifying number for a particular construction site.
See Site Number.
Contractor Someone who agrees to perform work or services for a specified
price, especially for construction work. Includes all
subcontractors as well as the prime contractor.
Contractor Read-
only Contract See Read-only contract.
CONTRACTS Button This button only displays if the Contracts list window is closed.
Clicking this button re-opens the Contracts list window.
Daily Diary A contract-level record of the activities on the contract site for
one day. In FieldManager software, the Daily Diary draws on
information entered on IDRs for the same date. For available day
sites, time is charged to a specific site through a Daily Diary
entry.
Datasource A client/server or standalone database instance.
Date of Estimate The date an estimate was generated.
Date Open to
Traffic The date a specific contract site was opened to traffic.
Days Charged to
Date The days charged to a particular site to date.

FieldManager User’s Guide A-7
DELETE Button Located on the Window Toolbar, this button deletes the current
selection.
Located within certain tab windows, and appended in name by
various contractual elements (for example, Delete Item, Delete
Posting, Delete Site Event, Delete Diary Time Record), this
button deletes the currently selected element(s).
DELETE ROW
Button Located within an advanced filter window, this button allows
you to delete a selected row of filter criteria.
DIARIES Button Located on the Application Toolbar, this button opens the Daily
Diaries list window, accessing FieldManager software’s Daily
Diaries functionality.
DOCU Button Located on the Application Toolbar, this button opens the
Change Contract Documentation tab window, allowing you to
alter a specific contract’s documentation information.
Draft Document A document in FieldManager software that is in an ungenerated
state.
Drop-down List
Box A text box with an accompanying arrow to the right of the field
that the user can click to obtain a list of valid values for the field
from which to choose.
Earnings to Date The total amount earned to date on a contract or project.
Engineer A unique identifier indicating the engineer in charge of the
district, area office, residency, or field office.
Equipment Any mechanical tool or contrivance that must be bought, rented,
or leased.
Estimate A contract-level listing of item progress payments (one or more
voucher payments) owed to the contractor. Information from the
estimate may be loaded into a central office contract
administration system and used to generate vouchers.
ESTIMATES Button Located on the Application Toolbar, this button opens the
Estimates list window, accessing FieldManager software’s
Estimates functionality.
Event Any worthy-of-note instance that takes place at a particular time
(for example, an accident at the contract site).

A-8 FieldManager Glossary
EXITFLDMGR Button This button only displays if the Contracts list window is closed.
Clicking this button shuts down the FieldManager software
application.
EXPORT-FB Button Located on the Window Toolbar, this button allows the user to
export contracts to the FieldBook component.
Federal/State
Project Number The federal or state project number identifying a particular
project.
Field Office The office that houses the FieldManager software system.
FieldBook Primarily the IDR functionality from the FieldManager module.
Inspectors run the FieldBook component on laptop computers to
record information in the field for exporting to the FieldManager
module.
FieldBuilder FieldBuilder is used for the initial setup of an entire contract. It
does not communicate interactively with FieldManager software
in the same way as many agencies’ central office contract
administration systems; however, with FieldBuilder you can
create and modify contract structure and detail information for
projects, categories, contract items, and contract sites. In
addition, you can use FieldBuilder to maintain your agency’s
master item list, vendor list, material list, item material
association list, and FieldManager code table.
FieldManager A PC-based system for documenting construction progress,
initiating contractor payment, and communicating with your
agency’s central office contract administration system.
FieldNet The communication link between FieldManager software
applications. The FieldNet system functions as an E-mail utility,
allowing the user to easily transfer and receive files. In addition,
supervisors can use the FieldNet system to approve or deny
contract modifications and estimates.
FILTER Button Located on the Window Toolbar and within certain modal list
windows, this button allows the user to filter the records in the
current list window.

FieldManager User’s Guide A-9
Final Estimate The last estimate created for a contract before that contract is
closed. The final estimate takes into account all of the
information necessary to close out the contract, including item,
material, IDR, Daily Diary, contract modification, and stockpile
information. Once you have created a final estimate,
FieldManager software automatically marks the contract as
closed.
Find Text Box A text box found in the top left corner of most list windows used
to advance to a specific record. While entering the first few
numbers or letters of the value for the field identified in the text
box label, the highlight in the list window advances to the first
record in the list that matches the information specified for the
field.
FINISH Button Located within the Stockpile Wizard, this button saves the work
completed on a stockpile and closes the Stockpile Wizard.
Force Account A force account is an item of work that the SHA (State Highway
Agency) pays at the contractor’s cost rather than at a bid price.
The cost is determined by the materials, labor, and equipment the
contractor actually uses to perform the work plus state-specified
allowances for overhead and profit. The cost of labor and
equipment are usually determined from state-specified schedules
rather than the contractor’s actual payments.
Force account items are typically used when there is too much
uncertainty in the work involved in the item for it to be bid
knowledgeably. Examples include utilities relocation and toxic
waste removal. Because the item is paid at cost, the unit of
measure is dollars; therefore, force account items are often
estimated as if they were lump sum. Because a force account is
not a bid item, it is not passed to your agency’s central office
contract administration system, and therefore requires a contract
modification approved for payment.
Generate In the FieldManager module and the FieldBook component, the
term used for the process of finalizing a document such as an
IDR, Daily Diary, estimate, or contract modification. It is
equivalent to final completion of the document. Prior to being
generated, a document is considered to be only a “draft” version.
Only items in generated IDRs will be considered for payment
and only time charges in generated Daily Diaries will be charged
against the site time. In general, a generated document can still
be changed with certain exceptions; however, it will revert to
non-generated status when changed.

A-10 FieldManager Glossary
GENERATE Button Located on the Window Toolbar, this button is used to generate
selected IDRs, Daily Diaries, estimates, and contract
modifications.
GET MAIL Button Located on the Window Toolbar in conjunction with the
FieldNet Mail Box window, this button retrieves and displays
any mail messages received since the button was last invoked.
HELP Button Located in certain modal windows, this button accesses
FieldManager software’s Online Help, which offers instruction
on performing various tasks in FieldManager software.
IDRS Button Located on the Application Toolbar, this button opens the
Inspector’s Daily Reports list window, accessing FieldManager
software’s IDRs functionality.
IMPORT-FB Button Located on the Window Toolbar, this button allows the user to
import IDRs from the FieldBook component.
INQUIRIES Button Located on the Application Toolbar, this button opens the
Inquiries list window, accessing FieldManager software’s
Inquiries functionality.
Inquiry In both the FieldManager module and the FieldBook component,
a brief view of contract information which may be accessed at
almost any time while the contract is being processed. An
inquiry is a “snapshot” of the status of contract information at
the current time. An inquiry can be printed if desired.
INSERT ROW Button Located within an advanced filter window, this button allows
you to insert an additional row of filter criteria above the
currently selected criteria row.
Inspector The agent in the field who reports on construction contract
progress.
Inspector’s Daily
Report (IDR) The basic FieldManager or FieldBook document for recording
item quantities, contractor personnel and equipment, comments,
and, in agencies implementing the Materials functionality,
material usage. IDRs can be created and generated in the
FieldBook component by an inspector and then imported into
FieldManager software, or they can be created and generated
directly in FieldManager software.
Insufficient
Material The condition that exists, if the Materials functionality has been
implemented by an agency, for a contract when a cumulative
material quantity used for an item(s) exceeds the approved
material quantity.

FieldManager User’s Guide A-11
Item The smallest unit of work identified within a project. Items can
represent biddable work or non-biddable work, such as rights-of-
way and force accounts. Groups of items can be defined to
represent alternate design possibilities and the quantity of work
for an item can be divided across multiple categories within a
project.
Item Awarded
Quantity The original quantity of work specified for an item when the
contract was awarded.
ITEM Button Located within the POSTINGS tab of the Add IDR and Change
IDR tab windows, this button is used to return to the Items
Posting area of the POSTINGS tab after reviewing the material
usage for an item.
Item Code The identifier assigned to a work item as defined in the agency
specifications and listed in the Agency Master Item List.
ITEM DOC Button Located on the Window Toolbar, this button appears in
conjunction with the INC/DEC and NEW ITEMS tabs of the Add
Contract Modification and Change Contract Modification tab
windows. It also appears in conjunction with the ITEM USAGE tab
of the Add Estimate tab window, and the POSTINGS tab of the
Add IDR and Change IDR tab windows. When clicked, this
button opens a window in which to update item documentation.
Item Price The unit price of an item.
Item Quantity The number of units of work to be performed for an item.
Item
Supplemental
Description
Typically used in the case of a non-standard item, this is
additional project-specific descriptive information for a project
item.
ITEMS Button Located on the Application Toolbar, this button opens the Items
list window, accessing FieldManager software’s Items
functionality.
List Window A window which displays a list of records with which to work.
Typically, list windows only display the most important
information about each record displayed.
Location A short, two-line description of the primary location of the work
for the proposal. The project location may be printed on some
reports from your agency’s central office contract administration
system, but is not used in any processing.

A-12 FieldManager Glossary
Lump Sum Item An item with a single price for a clearly defined amount of work.
Unlike typical work items, a lump sum item is not associated
with a specific quantity. However, FieldManager software
requires a quantity for each item, so the quantity of one is used to
indicate there is a single price for the work item. This quantity
cannot be modified.
MAIL REQUEST
Button Located in the Reference Request to FieldNet window, which is
accessed via the Utilities menu, this button can either mail a
request to the FieldNet system for an agency’s most recent set of
reference files, or it can request that the agency create and
forward an updated reference file at the time the request is
received.
Maintain Material
Files/Forms/
Sources
A menu option found within the Utilities menu that displays the
Material Files/Forms/Sources window. Within this window you
can add, change, and delete material files, forms, and sources.
Maintain Users A menu option found within the Utilities menu and the System
Management submenu that displays the Users window allowing
you to add, change, and delete information about a user.
Material Any quantifiable physical entity that is consumed in the
performance of an item of work.
Material
Allowance The amount paid for stockpiled materials on a contract.
Material
Allowance Unit
Price
The unit price of a stockpiled material.
Material Type An identifier indicating the kind of material being stockpiled.
Material Usage The quantity of a specific material used in an item quantity
placed. Posting of material usage is only required when an
agency has implemented the Materials functionality.
MATERIALS Button Located on the Application Toolbar, this button opens the
Materials list window, accessing FieldManager software’s
Materials functionality.
Located within the POSTINGS tab of the Add IDR and Change
IDR tab windows, this button, when enabled, accesses material
usage information for the item being posted on the IDR.

FieldManager User’s Guide A-13
Materials
Functionality The functionality in FieldManager software for controlling
payment for item quantity by sufficiency of material tests or
certifications. Implementation of the Materials functionality is an
agency option. If the Material functionality is not implemented
by an agency, there is no requirement for associating materials
with items on the MATERIALS tab of the Items functionality in
FieldManager software or for posting materials usage on the
POSTINGS tab of the IDRs functionality.
Menu Bar Located in the upper portion of the Application Window, this bar
contains names to click on to display drop-down lists of
commands (for example, File, Edit, View, Utilities).
Modal Window This type of window requires a response before continuing in the
application.
Modification
Amount The dollar amount of a contract modification.
MORE Button Located within a sort window, this button allows the user to add
more criteria by which to sort the current list window.
Net Payment The total amount to pay the contractor for a project, which
equals the estimate amount minus any withholdings (for
example, liquidated damages, retainage).
NETWORK Button Located within certain import and transfer file windows, this
button allows you to map a network drive to your computer so
that a network navigational path may be chosen.
New Completion
Date The new approved date for a time extension.
New Number of
Days Only applicable to available and calendar day sites, this is the
new total number of days of site work as specified in a time
extension.
NEXT Button Located within certain tab windows and the Stockpile Wizard,
this button allows the user to move to the subsequent item,
material, or step.
NEXT PAGE Button Located within certain view and inquiry windows, this button
allows the user to see the next page of a multi-page document.
Notice to Proceed The written notice to the contractor to proceed with the contract
work including, when applicable, the date contract time begins.

A-14 FieldManager Glossary
Notice to Proceed
Date The date the contractor was notified that work could begin on a
contract.
Number of Days The number of calendar days that are available for completion of
a contract site.
Number of Days
Charged The number of days charged to a site.
Original Number
of Days The original number of days that was specified for a site when
the contract was awarded.
Original Specified
Completion Date The original completion date that was specified for a site when
the contract was awarded.
Pay Estimate The amount the contractor will be paid for the estimated work
performed on the contract during a given pay period. The pay
estimate is based on item progress and adjustments made for
various reasons. FieldManager software’s Pay Estimate Report
lists this information.
Payment
Adjustment 1,2,3 The total adjustments of each type applied to contract project
payments to date.
Payment Quantity The quantity of a category item that will be paid for in a specific
pay estimate.
Pending Change The quantity for a work item on currently pending (not yet
approved) contract modifications. When the contract
modification is approved in FieldManager software, the pending
quantity is added to the authorized quantity.
Percent Complete
(Earnings) The percentage of the contract that is complete on the basis of
contract earnings.
Percent Complete
Threshold A percent of contract completion that determines if an item
should be paid automatically.
Percent of
Quantity Paid The percentage of the current item quantity to be paid to date at
an automatic payment threshold.
Percentage Item In FieldManager software, a special class of item with a
prescribed payment schedule, usually pre-defined in agency
specifications. Mobilization and Traffic Control are examples of
items that often have a prescribed payment schedule.
FieldManager software accommodates such items, and also
allows the user to override the prescribed payment schedule
during the estimate preparation process.

FieldManager User’s Guide A-15
Personnel The personnel on site for a day. Used in the IDR functionality.
Posting The generic term for recording item quantity placed. This term is
also used for recording material test approvals and usage where
the agency has implemented the Materials functionality.
Post Final
Estimate An estimate created for a contract after that contract has been
closed via a final estimate. To produce a post final estimate for a
contract, you must first re-open the contract in FieldManager
software.
PREV Button Located within certain tab windows and the Stockpile Wizard,
this button allows the user to move to the prior item, material, or
step.
PREVIOUS PAGE
Button Located within certain view and inquiry windows, this button
allows the user to see the previous page of a multi-page
document.
Primary District The primary district in which the work for a contract or project
will be performed.
Prime Contractor The prime contractor is the contractor who is the winning
bidder for a contract and is responsible for overseeing the
contract and making sure the work is complete based on contract
specifications. Prime contractors hire subcontractors to work on
a contract.
PRINT Button Located on the Window Toolbar, this button may be used to
print inquiries, reports, and list window contents.
PROCESS/VIEW
Button Located on the Window Toolbar in conjunction with the
FieldNet Mail Box window, this button first determines the
nature of selected incoming messages, and then it appropriately
processes and allows you to view those messages.
Project A project represents all work identified by a single project
number. It is the level at which payment vouchers are produced.
One or more projects make up a contract.
Project Control
Number A unique number or alphanumeric that identifies a particular
project.
Project
Description Two lines of data you enter to create a short description of the
project. This description is printed on some reports from your
agency’s central office contract administration system.

A-16 FieldManager Glossary
Project Item
Sequence Number A unique sequential identifier for an item within a project.
Project Line
Number See Project Item Sequence Number.
Project Number See Project Control Number.
Proposal Line
Number (Propline) The line number assigned to each work item in the bid proposal.
Qualified/Certified
Product A material that is pre-approved for use on the site so test reports
are not needed. Qualified/certified product usage can still be
tracked with FieldManager software even though approvals are
not an issue.
Quantity Allowed See Allowable Quantity.
Quantity Change An increase or decrease to a category item's authorized quantity
as specified by a change order.
Quantity Placed The quantity posted to an item.
Quick Query Fly-
out Toolbar
Button
Located on the Window Toolbar, this changeable button
accesses the inquiry currently displayed as its label. Clicking on
the down arrow beside this button displays “fly-out” buttons for
accessing other specific inquiries appropriate to the active
window. The default setting for this button is Cont Status, for
the Contract Status inquiry; however, if you select another
inquiry, that inquiry will show on the button instead of the Cont
Status inquiry.
Radio Button Located within certain tab windows, this is a circular recessed
button that can be clicked in to make a restricted selection. When
you click in a radio button, the circle is filled to indicate that the
option is selected.

FieldManager User’s Guide A-17
Read-only
Contract A copy of a contract in FieldManager software that may be
viewed but not modified. There are two types of read-only
contracts:
A regular read-only copy of a contract is an unmodifiable copy
of the contract that contains all contract information.
A contractor read-only copy of a contract is an unmodifiable
copy of a contract that has confidential or inappropriate
information removed by the owning agency. The contractor read-
only can refer to the electronic file created that would be loaded
into FieldManager software or it can refer to the contract after it
has been loaded into FieldManager software. Both are
considered read-only copies.
When a read-only contract is selected, an R/O or Contractor
R/O notation (depending on type) will appear in the Title Bar of
all windows.
Recovery Factor In FieldManager software's Stockpiles functionality, the dollar
amount that a stockpile payment will be recovered per unit of
item paid. To assign an item to a stockpile, yet postpone the
effect of the stockpile on item payment, specify a $0 recovery
factor. If a recovery factor is specified, the recovery quantity will
automatically display when exiting the Recovery Factor field.
Recovery Quantity In FieldManager software's Stockpiles functionality, the number
of units of an item that you want to use to recover the stockpile
payment. This number must fall within a range of fastest and
slowest values set by FieldManager software. If a recovery
quantity is specified, the recovery factor will automatically
display when exiting the Recovery Quantity field.
Regular Read-only
Contract See Read-only contract.
REMOVE LOCK
Button Located within the Locked Contracts window, accessed via the
Utilities menu, this button is not typically enabled; however, if a
contract is locked within FieldManager software, this button may
be used to unlock it, making the contract available for revision.
Before removing a lock from a contract, consult your system
administrator to ensure that you are taking the proper action.
RESET Button Located within a sort window, this button returns the chosen sort
criteria to their previous settings.

A-18 FieldManager Glossary
RESET SETTINGS
Button Located within the LIST WINDOW tab of the User Preferences tab
window, which is accessed via the Utilities menu, this button
resets all window displays back to their original settings in terms
of column order, column width, and sort order.
Restore The process of restoring through backup a FieldManager or
FieldBook database after accidental loss of the database.
RESTORE Button Located in the Restore Database window, this button allows you
to restore a FieldManager database.
RESTORE DATABASE
Button Located in the FieldBook component’s Import Contracts
window, this button makes it possible to restore a FieldBook
database on a different computer than the one where the database
originated.
REVIEW Button Located on the Window Toolbar, this button allows you to
review a contractual element determined by the window name
displayed on the Title Bar (for example, IDRs, Items, Estimates).
REVIEW/CHANGE
Button Located on the lower portion of the ITEM USAGE tab of the Add
Estimate tab window, this button allows you to review the item
usage by category, and to review insufficient materials for an
item. It also allows you to change the Quantity this Estimate for
item usage by category.
SAVE Button Located on the Window Toolbar, this button saves all work
completed in a window without closing that window.
Located within an advanced filter window, this button saves the
chosen filter so that it may readily be used again.
SAVE/CLOSE Button Located on the Window Toolbar, this button saves all work
completed in a window and then closes that window.
Section A section represents an informal grouping of proposal work
items. Sections are created by grouping all items of the same
work type. FieldManager software does not rely on this type of
grouping to organize items, but it does allow for the use of
sections to define item groups.
SELECT Button Located within certain modal list windows, this button allows
the user to make a selection upon which the activity in the
following window will be based.
SELECT ALL Button Located within certain modal list windows, this button allows
the user to select all the listed elements, and the activity in the
following window will be based upon that selection.

FieldManager User’s Guide A-19
SEND OUTBOX
Button Located on the Window Toolbar in conjunction with the
FieldNet Mail Box window, this button sends all files located in
your outbox to the FieldNet system.
SET AGENCY
NAME/LOGO Button Located within the GENERAL tab of the Change Contract
Documentation tab window, this button allows the user to
specify an agency name and logo to be displayed on any
inquiries or reports for the selected contract.
SHOW ALL Button Located within a filter window, this button removes any filter
which has been applied so that all records in the current list
window will display.
Site Proposal sites represent work locations for which time charges
are accrued. The default situation is for a single site of time
charges to be accrued on the contract as a whole; however, if
several project entities (for example, bridges) are to be
constructed as part of a single contract, each project entity can be
treated as a separate site to assign completion time and assess
liquidated damages.
Site Description A short description of the proposal site.
Site Event Located on the Change Contract Documentation tab window,
this button offers a facility the ability to document major events
that occur on a site.
Site Number A unique identifying sequence number for each site. Each
contract must have a Site 00 representing the contract as a whole
in addition to any other sites.
Site Time The time allowed by the contract for performing work on the
contract. Often, the contract will also specify intermediate times
for performing specific stages, or subdivisions, of the work.
When this occurs, FieldManager software will display site time
for the overall contract and for each intermediate time specified
in the contract.
SORT Button Located on the Window Toolbar, this button allows the user to
sort the records in the current list window.
Spec Year See Specification Book Year.

A-20 FieldManager Glossary
Specification
Book Year Because an agency’s central office contract administration
system will contain projects that were designed at different
times, the reference information about each item (such as
description and unit) cannot be changed since doing so would
change the meaning of projects already in progress. Instead,
entirely new reference item lists can be created when needed.
These lists are identified by a "spec year."
Specification Year See Specification Book Year.
Specified
Completion Date The projected date when work will be completed for a given site.
Specified Start
Date The projected date when work will be started at a given site.
SPELLCHECK
Button Located on the Window Toolbar, this button activates
FieldManager software’s spell check utility, which examines the
current tab window for every modifiable text field that contains
information.
Status Area Various types of status areas detailing information on a selected
record may display in FieldManager software depending on the
functionality of the associated tab window (for example, Item
Status Area, Stockpile Status Area, and so on). Text in blue
within a status area cannot be modified.
Status Bar Located in the lower portion of the Application Window, this bar
changes as the user performs various tasks, displaying helpful
information about FieldManager software’s various
functionality.
Stockpile Material stockpiled at an approved location for later
incorporation into the work for which payment has been
advanced to the contractor in accordance with agency
specification. Such advanced payments must be recovered as
work on the item is paid for.
STOCKPILES Button Located on the Application Toolbar, this button opens the
Stockpiles list window, accessing FieldManager software’s
Stockpiles functionality.
Subcontractor An individual, firm, or corporation to which the prime
contractor sublets part of a contract. Any contractor who is not
the prime contractor.
Supplemental
Description See Item Supplemental Description.

FieldManager User’s Guide A-21
System
Configuration A menu option found within the Utilities menu and the System
Management submenu that displays the System Configuration
tab window, allowing you to adjust the system configuration
settings.
Tab Window A type of window that contains dividing tabs, and which
provides details about a record, allows a record’s data to be
changed, and allows new records to be created.
TEST
CONFIGURATION
Button
Located within the FIELDNET tab of the System Configuration
window, which is accessed via the Utilities menu, this button
allows the user to check to be sure a computer is properly set up
to send and receive FieldNet messages.
Threshold Percent The percentage of work completed for a contract at which a
given event should occur.
Time Charge For an available day contract, this is the time charged for a given
pay period.
Time Charges
Start Date The date time charges began accruing. This value must be
documented for each site specified in the contract so that
liquidated damages may be properly computed.
Time Charges
Stop Date The date time charges were stopped. This value must be
documented for each site specified in the contract so that
liquidated damages may be properly computed.
Time Extension A type of contract amendment modifying (usually increasing) the
time a contractor can work on a contract without incurring a
penalty. A time extension must be approved through the
Contract Modification process.
Title Bar Located in the upper portion of the Application Window, this bar
contains standard Windows controls for minimizing,
maximizing, and closing the current window.
Type of Days An identifier indicating whether contract time is based on
available days, calendar days, or a completion date.
Type of Item An identifier indicating the kind of item being paid (for example,
original item, force account, or supplemental agreement).
Type of Vendor An identifier indicating the classification of the vendor.
Unattached Item A new item that is available for day-to-day posting, but that has
not yet been associated with a contract through a contract
modification.

A-22 FieldManager Glossary
Unit of Measure An identifier indicating the type of measurement used to
determine the units of the item.
Vendor The vendor file of your agency’s central office contract
administration system is used to maintain information about
contractors, subcontractors, suppliers, surety companies, surety
agents, and escrow agents. It can also be used to store
information on counties, municipalities, and utilities that
perform relevant work.
Vendor Name
(Long) The vendor name (long description).
Vendor Name
(Short) The vendor name (short description).
Vendor Number A unique identifier for a vendor.
VIEW Button Located on the Window Toolbar, this button allows you to view
a selected inquiry.
Voucher A project-level listing of item progress payments owed to the
contractor. It is the vehicle for payment to the contractor. The
voucher is produced by a central office voucher generation
program based on the estimate data from FieldManager software.
Voucher Number The sequential identifier for a progress payment voucher.
Voucher Status An identifier indicating how often a voucher is produced (for
example, semi-monthly, monthly, semi-final, or final).
Window Toolbar Located in the upper portion of the Application Window, this
toolbar shows the commands that may be invoked for the active
window. The buttons available on this toolbar change depending
on the window chosen.
Working Contract A copy of a contract in FieldManager software that may be
modified. Among all computers running FieldManager software,
there may only be one working copy of a contract.
ZOOM IN Button Located in certain view and inquiry windows, this button
increases the size of the text in the window while decreasing the
amount of the document displayed.
ZOOM OUT Button Located in certain view and inquiry windows, this button
increases the amount of the document displayed while
decreasing the size of the text in the window.

B-1
Appendix B - Contract Modification Types
FIELDMANAGER
CONTRACT MODIFICATION TYPES NUMBER
TYPE DESCRIPTION
1 Errors or Omissions on Plans 2 Construction Stakeout Errors
3 Utilities Conflicts
4 Traffic Control (Temporary conditions - striping, pavement markings, phasing changes)
5 ITS Changes or Additions (Signals, lighting, permanent signs and electrical)
6 Roadway Changes 7 Fencing / Right of Way (gates, change of access) 8 Drainage (pipe extensions, DI=s, RCB, anything underground) 9 Structural Items
10 Material and Testing (alternate pits, if existing pit to materials only, materials, lime treatment, sieve changes, test methods, material spec changes)
11 Safety and Traffic (Permanent conditions - guardrail, barrier rail, guideposts, striping, pavement markings)
12 Specifications Changes (no materials or traffic control phasing) 13 Miscellaneous 14 Flaggers 15 Non-specification Material Allowed to Remain in Place 16 Obsolete 17 Claims and Dispute Resolution 18 Value Added Work 19 Activate Fuel Escalation 20 Landscape & Aesthetic Treatments 21 VEP: Value Engineering Proposal 22 Stormwater 23 (Blank) 24 Environmental 25 Adjusting Incentive / Disincentive (Crew Administrative) 26 Contract Closeout (Crew Administrative) 27 Quantity Overrun ($100k) (Crew Administrative) 28 Reducing Escalation Quantity (Crew Administrative) 29 Category Adjustment (Crew Administrative) 30 HQ Administrative (HQ Admin ONLY) 31 Liquidated Damage: Environmental (Crew Administrative) 32 (Blank) 33 Penalty: Labor Compliance (Crew Administrative)

B-2
34 Liquidated Damage: Material (Crew Administrative) 35 Liquidated Damage: Time (Crew Administrative)
901 Prior - Errors or Omissions on Plans 903 Prior - Utilities Conflicts
904 Prior - Traffic Control (Temporary conditions - striping, pavement markings, phasing changes)
905 Prior - ITS Changes or Additions (Signals, lighting, permanent signs and electrical)
906 Prior - Roadway Changes 909 Prior - Structural Items
911 Prior - Safety and Traffic (Permanent conditions - guardrail, barrier rail, guideposts, striping, pavement markings)
912 Prior - Specifications Changes (no materials or traffic control phasing) 913 Prior - Miscellaneous 914 Prior - Flaggers 918 Prior - Value added work 920 Prior - Landscape & Aesthetic Treatments 921 Prior - VEP: Value Engineering Proposal 922 Prior - Environmental

C-1
Appendix C – Contract Modification Step-By-Step Guidelines C.1 Creating Contract Modifications
1. Click Cont Mods in the Application toolbar. 2. Click Add in the Window toolbar. 3. Select the appropriate Cont Mod Type. Please note that this cannot be changed after you hit the
“OK” button. It’s important to select the most appropriate type. The complete list of Cont Mod Types can be found at the end of this Appendix.
4. The Add Contract Modification window opens in the General Tab. Fill out the information in each of the Cont Mod tabs as required/needed. • General tab -
o Short Description must contain the name and title of the person who requested the Cont Mod.
o Description of Changes must include the following information: - Cont Mod type (first line only) - Brief description of Cont Mod – (keep it brief -do not repeat the Cover Letter) - Insert the appropriate Standard Clause at the end of description:
Clause required for Cont Mods the require a Contractor’s signature: Acceptance of this Contract Modification constitutes an accord and satisfaction and represents payment in full (for both time and money) for any and all costs, impact effect, and/or delays arising out of, or incidental to the work, as herein revised, including present and future extension of the contract completion time.
Clause required for all PRIOR Cont Mods: This Contract Modification is being processed as a Prior Approval in order to authorize the commencement of work and provide an estimate of quantities (and associated payment) to be performed as outlined above and per the direction of the Resident Engineer. The actual quantities required to complete the work per this Prior Approval shall be finalized and paid for accordingly upon completion of the work. Contract Modification #__will be generated to complete and finalize the quantities and associated payment performed under this Contract Modification/Prior Approval.
• Inc/Dec tab, if applicable - o Click the Add Item button. o Highlight the Item that needs to be increased or decreased. o Click the Select button or double-click on Item. o Enter a Qty Change (+/-)
- For a disincentive to be assessed you will need to enter a negative Qty Change to bring the item quantity to zero (0).
o Enter a Reason (keep brief). o Click Save in the Window toolbar.
• New Item tab, if applicable - o Click the Add Item button. o Select Add a New Item or Attach an Item saved previously, then click
- If “Add a New item” was selected:
From drop-down arrow select the new item.

C-2
Enter a Supplemental Description when applicable. Select the Item Type from drop-down arrow.
o Extra Work – Additional items are being added to the contract. o Modified Original – Increasing or decreasing the quantity of an item. Adding
an existing item to another category. o Price Adjustment – Increasing or decreasing the unit price of an item. (Use
Price Adjustment items XXX9000 items) o Liquidated Damages / Penalty – Assessing damages and wage
determination to the contract. Note that FieldManager does not have a direct way to assess Liquidated Damages (LDs). These are the ONLY items entered as a negative proposed quantity. The following items have been set up for LDs and Penalties. - 9992000 LD (Environmental) - 9999000 LD (Material) - 9991000 LD (Time) - 9992500 Penalty (Labor Compliance)
Enter the Unit Price. Enter a Reason. Section will always be 0. Select the Prime Contractor (only). Enter the Proposed Quantity.
o If assessing LD/Penalty this MUST be a negative number. Select Ok.
- If “Attach an Item saved previously” was selected: (refer to Chapter/Section 5.1, Working With Items - Adding New Unattached Items, in this user guide) Select the item from Unattached Item window. Enter a Supplemental Description when applicable. Select Extra Work from Item Type. Enter the Unit Price (must be a positive number). Enter a Reason. Enter the Proposed Quantity. Click Ok.
• Time Extensions tab, if applicable - o Enter the Additional No. of Days/New Compl. Date.
- Days can be removed by entering negative number. o Enter a Reason. o Click Save in the Window toolbar.
• Attachments tab - o Click the Add File button. o Click the Browse button. o Navigate to the file that needs to be attached, select the file, and click Open.
- Only attach the following: Cover Letter, signed FHWA Pre-Authorization form (on PoDI contracts), and copy of signed (executed) Prior if this cont mod is associated with a Prior.
o Enter the Name and Description of document, then click Add. (Suggested naming convention: contract ID, Cont Mod number, type of file, i.e. 1234CM2-CoverLetter)
5. Select the View tab to review the draft copy of the Cont Mod.

C-3
6. Click Save/Close in the Window toolbar. 7. RE creates/sends an email to appropriate Assistant Construction Chief and Construction Admin
staff stating that the DRAFT Cont Mod is ready for review in FieldManager. • All supporting documentation for the Cont Mod must be attached to this email.
8. HQ Construction will review Cont Mod DRAFT and supporting documentation. The Assistant Construction Chief will notify RE when the Cont Mod is ready to generate. Note: If this is a Prior Cont Mod, create a corresponding Cont Mod immediately
following creation of the Prior. It is important that they are sequential.
C.2 Generating Contract Modifications When the Assistant Construction Chief notifies RE that the DRAFT Cont Mod is ready to be generated, follow these steps. 1. Click Cont Mods in the Application toolbar. 2. Highlight the Cont Mod to be generated. 3. Click Generate in the Window toolbar. 4. The Generate window will open, click Yes. 5. The Print window will open. In the Select Printer area select Microsoft Print to PDF (you may
have to scroll over to find this option). 6. Click the Print button. 7. Save the PDF file to the appropriate directory on the crew share drive (EDOC Contract
Files\Contract Files\Division No. 5 – Contract Modification\5.X Contract Modification No. X), using this naming convention: XXXX(contract ID)CM(No.)-(Date MMDDYY).pdf. • Example: 1234CM1-070815.pdf
8. The Cont Mod is now in Pending Approval status. 9. Upload the FieldManager Cont Mod PDF file and ALL supporting documentation (as separate
files) to DocuSign to initiate the execution process for obtaining approval signatures. Refer to Chapter 3, Contract Modifications and Letters of Authorization, of the Documentation Manual for the Contract Modification Execution Workflow and the How to Send Cont Mod in DocuSign Using a Template document for detailed instructions on this process.
C.3 Approving Executed Contract Modifications Once RE receives the “Completed” DocuSign email follow these steps.
1. Open the DocuSign email containing the attached copies of the completed signed (executed) Cont Mod and supporting documents.
2. Save the signed (executed) Cont Mod PDF file to the appropriate directory on the crew share drive (EDOC Contract Files\Contract Files\Division No. 5 – Contract Modification\5.X Contract Modification No. X) and rename the file using this naming convention: XXXX(contract ID)Cont Mod(No.)Executed-(Date MMDDYY).pdf • Example: 1234CM1Executed071715.pdf Note: It is important to complete this step before proceeding.
3. In FieldManager click on Cont/Mod button on left side menu bar. 4. Double-click on the Cont Mod to be approved. 5. Click on the Attachments tab. 6. Click on Add File at the bottom of the screen 7. Click on Browse and navigate to the copy of the executed Cont Mod PDF file saved in Step 2. 8. Highlight the file and click Open

C-4
9. Type Name and Description of PDF file, then click Add Note: If this Cont Mod is part of a Prior make sure to attach the executed Prior PDF file to
the associated Cont Mod as backup documentation. 10. Click the Generate button in top menu bar. 11. The Generate window will open, click Yes. 12. The Print window will open, click Cancel. 13. Click the Approve button in top menu bar 14. Enter approval date and click OK. 15. Click Yes to both messages.

Appendix D – NDOT Materials Approval Process (EDOC)
D-1
R.E. RECEIVES"MATERIALS SAMPLING & TESTING CHECKLIST",
WHICH IS CONTRACT SPECIFIC, FROM
MATERIALS DIVISION AND THE PRELIMINARY
"ACCEPTANCE AND TESTING SUMMARY
SHEET" (ATSS), WHICH INCLUDES THE ITEMS OF
WORK THAT REQUIRE TESTING, FROM
CONSTRUCTION DIVISION
ALL MATERIALS MUST HAVE A CERTIFICATE OF
COMPLIANCE. (MATERIALS DIVISION
WILL SEND GENERIC FORM WITH CHECKLIST)
ALL MATERIALS INCORPORATED INTO THE PROJECT MUST MEET THE REQUIREMENTS OF THE
CONTRACT PLANS/SPECS.
ORIGINAL (PREFERRED)CERTIFICATE OF
COMPLIANCE IS RECEIVED FROM MANUFACTURER
ALONG WITH ANY WARRANTIES,
INSTRUCTIONS, OR PARTS LISTS RETAINED IN FIELD
OFFICE.
IF CONTRACT IS A FEDERAL PROJECT AND IT
IS STATED IN SPECIAL PROVISIONS, R.E. MUST
REQUEST A "BUY AMERICA" CERT FOR STEEL
& IRON.
ALL CERTS ARE SUBMITTED BY
INSPECTORS TO OFFICE ENGINEER, WHO WILL
SUBMIT (SCAN & EMAIL) TO MATERIALS DIVISION
USING NDOT TRANSMITTAL FORM 020-
018 ALONG WITH ANY REQUIRED SAMPLES IN
ACCORDANCE WITH THE MATERIALS SAMPLING &
TESTING CHECKLIST.
R.E. TRACK MATERIALS INCORPORATED INTO
PROJECT ON ACCEPTANCE AND
TESTING SUMMARY SHEET (ATSS).
MATERIALS DIVISION NOTIFIES R.E. IF THE
MATERIALS SUBMITTED MEETS NDOT STANDARD
SPECIFICATIONS.
THE QUANTITY REPRESENTED IN A CERT IS
APPROVED IN FIELDMANAGER & WILL BE
INCLUDED IN A PAY ESTIMATE BASED ON INSPECTORS DAILY
REPORT (IDR) POSTINGS FOR THE ITEM.