02 HCA Properties
15
Chapter 2—HCA Properties The Home Control Assistant 1 Chapter 2 HCA Properties You control the functions of the Home Control Assistant through properties. These properties are accessible though the HCA Application Bubble “HCA Options” button. Because the HCA properties apply to all home designs, you can review or modify them at any time, even when there is no design loaded. This chapter discusses HCA properties and how you set them to control the way the Home Control Assistant works for you. The first section in this chapter describes the similarities of all HCA properties, and tells you how to access them. The following sections describe each individual HCA property tab: About Properties Startup Client Server Clock Color and Theme Control Interface Design Pane Display Pane Hardware Visual Programmer Web Advanced Legacy Extra
-
Upload
alainbravopaez -
Category
Documents
-
view
12 -
download
0
Transcript of 02 HCA Properties

Chapter 2—HCA Properties
The Home Control Assistant 1
Chapter 2HCA Properties
You control the functions of the Home Control Assistant through properties. These properties are accessible though the HCA Application Bubble “HCA Options” button. Because the HCA properties apply to all home designs, you can review or modify them at any time, even when there is no design loaded.
This chapter discusses HCA properties and how you set them to control the way the Home Control Assistant works for you. The first section in this chapter describes the similarities of all HCA properties, and tells you how to access them. The following sections describe each individual HCA property tab:
About Properties
Startup
Client Server
Clock
Color and Theme
Control Interface
Design Pane
Display Pane
Hardware
Visual Programmer
Web
Advanced
Legacy
Extra
Chapter 2—HCA Properties
2 The Home Control Assistant
About Properties
It is important to recognize the difference between properties of HCA and the properties of a particular home design.
HCA properties are stored in the Windows registry and your choices are in effect regardless of what home design is loaded.
Home design properties are saved in their .HCA files and affect only that design.
The following table provides a quick reference on the differences between the two sets of properties.
Home design properties HCA properties
Saved in their .HCA files Stored in the Windows registry
Affect only that design Affect HCA, regardless of what home design is loaded
Created as you complete wizards
Created with defaults when HCA is installed. Modified via HCA properties
Some are accessed from the Design category, most are available from popup menu on icon or design elements
Accessed from HCA Options
Review or modify them only when the design is loaded
Review or modify them at any time, even if no design is loaded
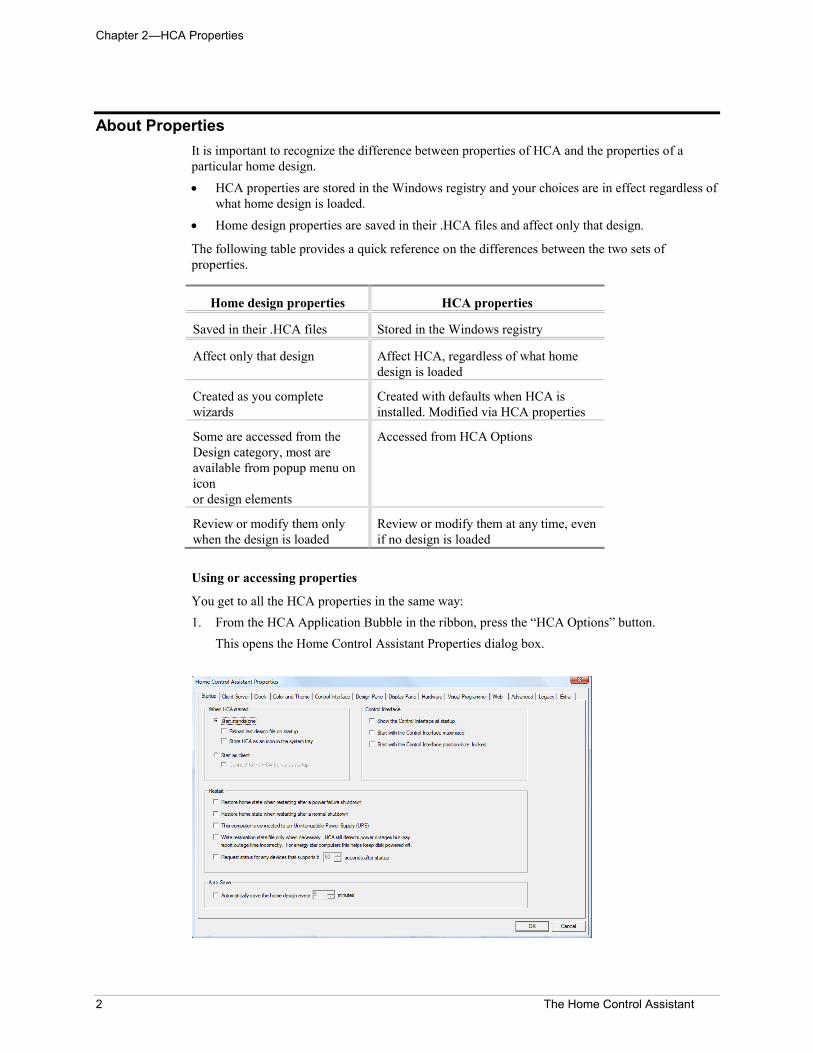
Using or accessing properties
You get to all the HCA properties in the same way:
1. From the HCA Application Bubble in the ribbon, press the “HCA Options” button.
This opens the Home Control Assistant Properties dialog box.
Chapter 2—HCA Properties
The Home Control Assistant 3
2. Click the tab for the properties that you want to view or change. This brings that tab to the front.
3. Make the changes that you want, and click another tab if you want to view or modify other properties.
4. When you are done, click OK to accept the changes and close the dialog box. The new properties will take effect as soon as you click OK.
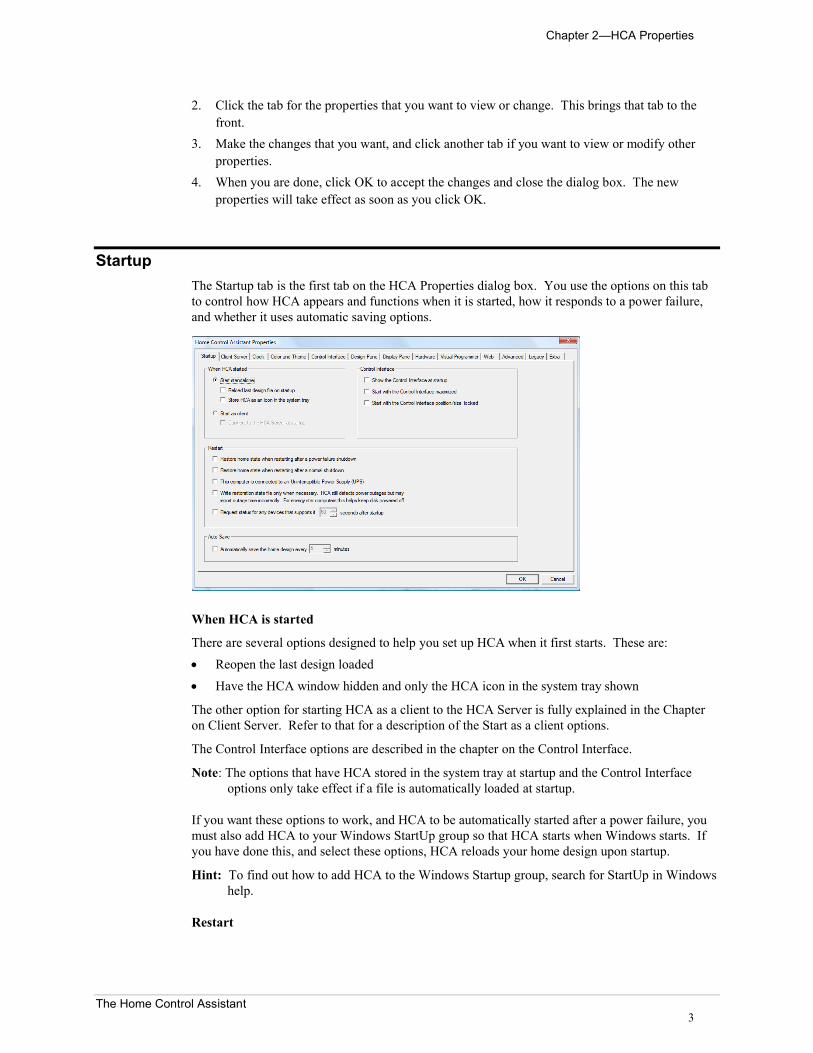
Startup
The Startup tab is the first tab on the HCA Properties dialog box. You use the options on this tab to control how HCA appears and functions when it is started, how it responds to a power failure, and whether it uses automatic saving options.
When HCA is started
There are several options designed to help you set up HCA when it first starts. These are:
Reopen the last design loaded
Have the HCA window hidden and only the HCA icon in the system tray shown
The other option for starting HCA as a client to the HCA Server is fully explained in the Chapter on Client Server. Refer to that for a description of the Start as a client options.
The Control Interface options are described in the chapter on the Control Interface.
Note: The options that have HCA stored in the system tray at startup and the Control Interface options only take effect if a file is automatically loaded at startup.
If you want these options to work, and HCA to be automatically started after a power failure, you must also add HCA to your Windows StartUp group so that HCA starts when Windows starts. If you have done this, and select these options, HCA reloads your home design upon startup.
Hint: To find out how to add HCA to the Windows Startup group, search for StartUp in Windows help.
Restart
Chapter 2—HCA Properties
4 The Home Control Assistant
This area has five additional options dealing with restart. What these options do is covered in the chapter on Restart.
Auto Save
The last setting on this property tab tells HCA to automatically save changes (or not) at the time increment that you specify. This is useful so that changes to HCA are kept and not lost in the event of a power failure, or if you forget to save the file.
For example, you may work with HCA one day and make some changes to your design and forget to save them. Since HCA is always executing on your computer, it may be a long time (weeks or even months) until HCA terminates. That is too late to remind you to save the file.
Use this property to have HCA save your design periodically if the file has been modified and needs saving.
Chapter 2—HCA Properties
The Home Control Assistant 5
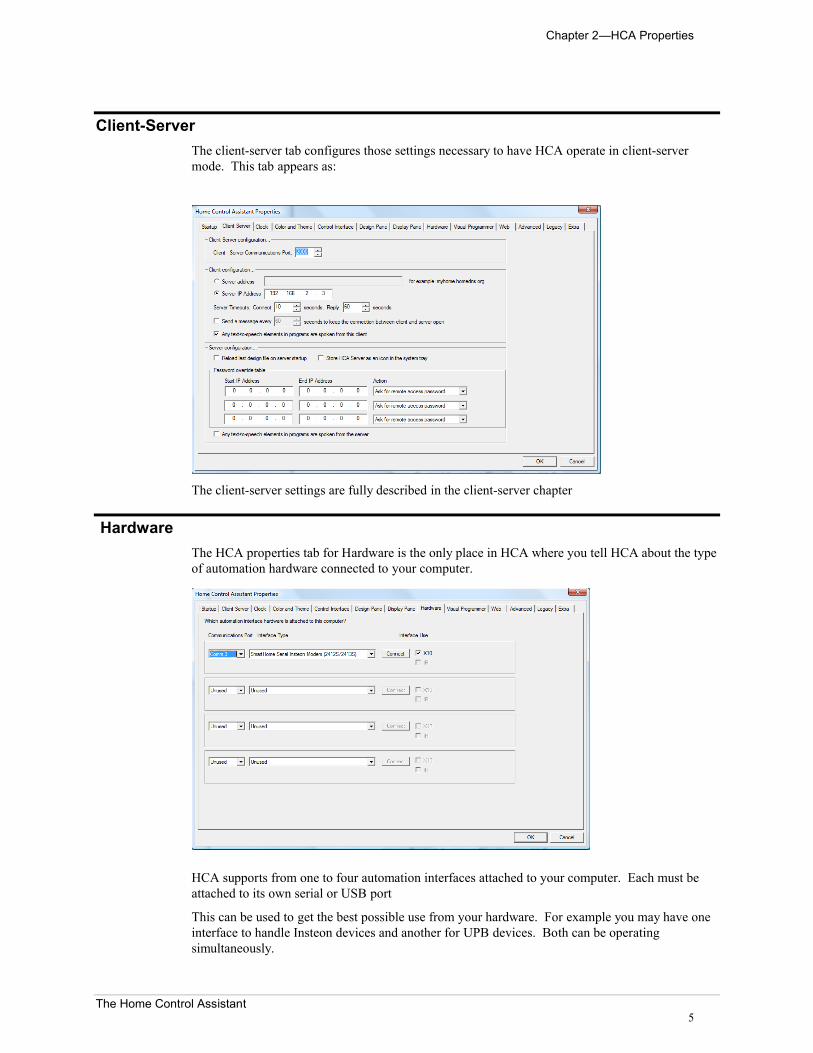
Client-Server
The client-server tab configures those settings necessary to have HCA operate in client-server mode. This tab appears as:
The client-server settings are fully described in the client-server chapter
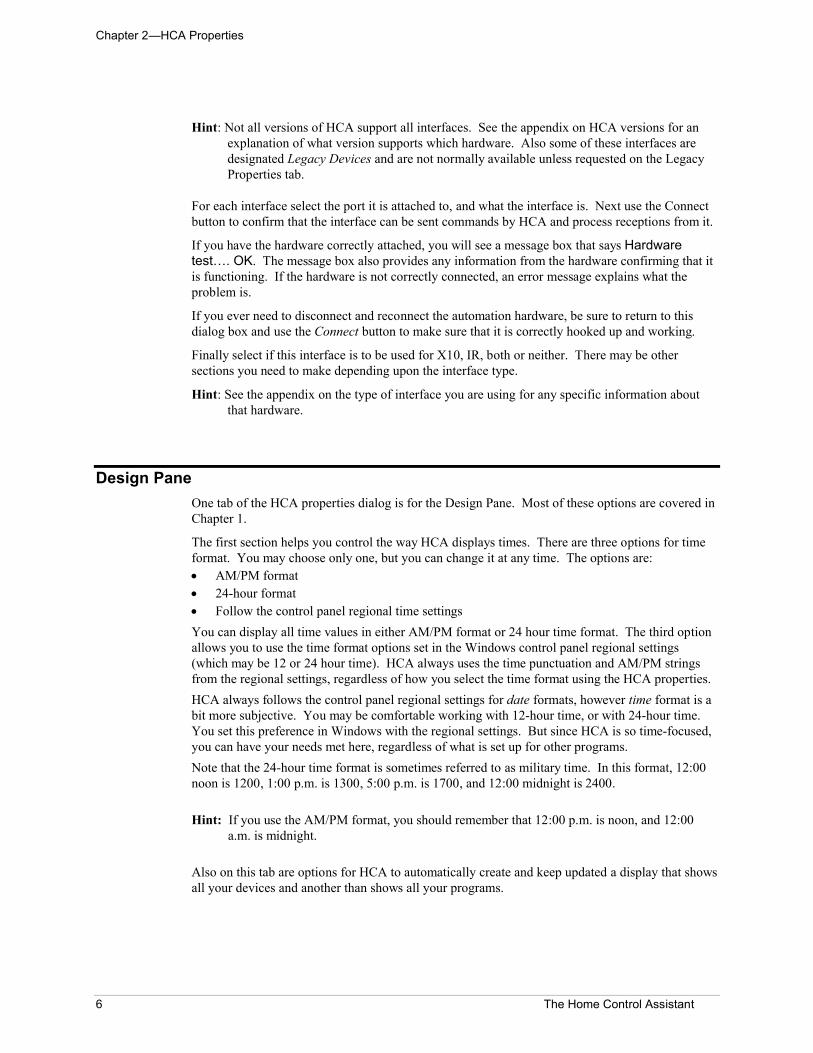
Hardware
The HCA properties tab for Hardware is the only place in HCA where you tell HCA about the type of automation hardware connected to your computer.
HCA supports from one to four automation interfaces attached to your computer. Each must be attached to its own serial or USB port
This can be used to get the best possible use from your hardware. For example you may have one interface to handle Insteon devices and another for UPB devices. Both can be operating simultaneously.
Chapter 2—HCA Properties
6 The Home Control Assistant
Hint: Not all versions of HCA support all interfaces. See the appendix on HCA versions for an explanation of what version supports which hardware. Also some of these interfaces are designated Legacy Devices and are not normally available unless requested on the Legacy Properties tab.
For each interface select the port it is attached to, and what the interface is. Next use the Connectbutton to confirm that the interface can be sent commands by HCA and process receptions from it.
If you have the hardware correctly attached, you will see a message box that says Hardware test…. OK. The message box also provides any information from the hardware confirming that it is functioning. If the hardware is not correctly connected, an error message explains what the problem is.
If you ever need to disconnect and reconnect the automation hardware, be sure to return to this dialog box and use the Connect button to make sure that it is correctly hooked up and working.
Finally select if this interface is to be used for X10, IR, both or neither. There may be other sections you need to make depending upon the interface type.
Hint: See the appendix on the type of interface you are using for any specific information about that hardware.
Design Pane
One tab of the HCA properties dialog is for the Design Pane. Most of these options are covered in Chapter 1.
The first section helps you control the way HCA displays times. There are three options for time format. You may choose only one, but you can change it at any time. The options are: AM/PM format 24-hour format Follow the control panel regional time settings
You can display all time values in either AM/PM format or 24 hour time format. The third option allows you to use the time format options set in the Windows control panel regional settings (which may be 12 or 24 hour time). HCA always uses the time punctuation and AM/PM strings from the regional settings, regardless of how you select the time format using the HCA properties.
HCA always follows the control panel regional settings for date formats, however time format is a bit more subjective. You may be comfortable working with 12-hour time, or with 24-hour time. You set this preference in Windows with the regional settings. But since HCA is so time-focused, you can have your needs met here, regardless of what is set up for other programs.
Note that the 24-hour time format is sometimes referred to as military time. In this format, 12:00 noon is 1200, 1:00 p.m. is 1300, 5:00 p.m. is 1700, and 12:00 midnight is 2400.
Hint: If you use the AM/PM format, you should remember that 12:00 p.m. is noon, and 12:00 a.m. is midnight.
Also on this tab are options for HCA to automatically create and keep updated a display that shows all your devices and another than shows all your programs.
Chapter 2—HCA Properties
The Home Control Assistant 7
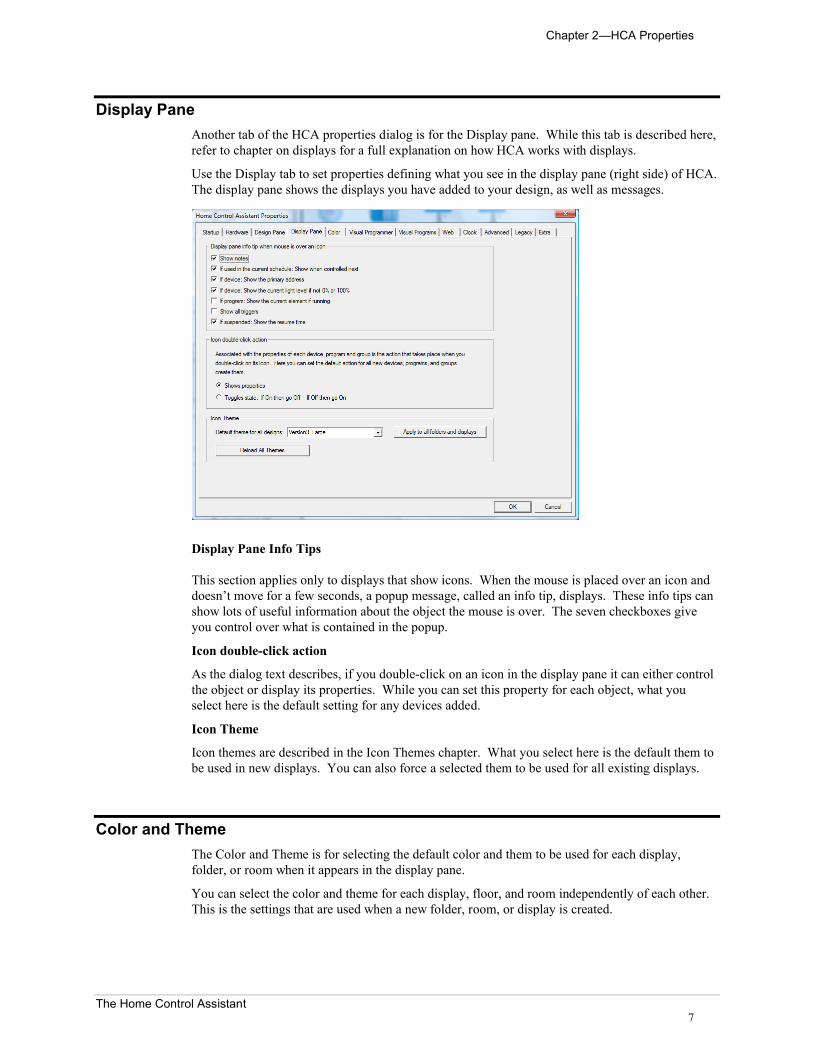
Display Pane
Another tab of the HCA properties dialog is for the Display pane. While this tab is described here, refer to chapter on displays for a full explanation on how HCA works with displays.
Use the Display tab to set properties defining what you see in the display pane (right side) of HCA. The display pane shows the displays you have added to your design, as well as messages.
Display Pane Info Tips
This section applies only to displays that show icons. When the mouse is placed over an icon and doesn’t move for a few seconds, a popup message, called an info tip, displays. These info tips can show lots of useful information about the object the mouse is over. The seven checkboxes give you control over what is contained in the popup.
Icon double-click action
As the dialog text describes, if you double-click on an icon in the display pane it can either control the object or display its properties. While you can set this property for each object, what you select here is the default setting for any devices added.
Icon Theme
Icon themes are described in the Icon Themes chapter. What you select here is the default them to be used in new displays. You can also force a selected them to be used for all existing displays.
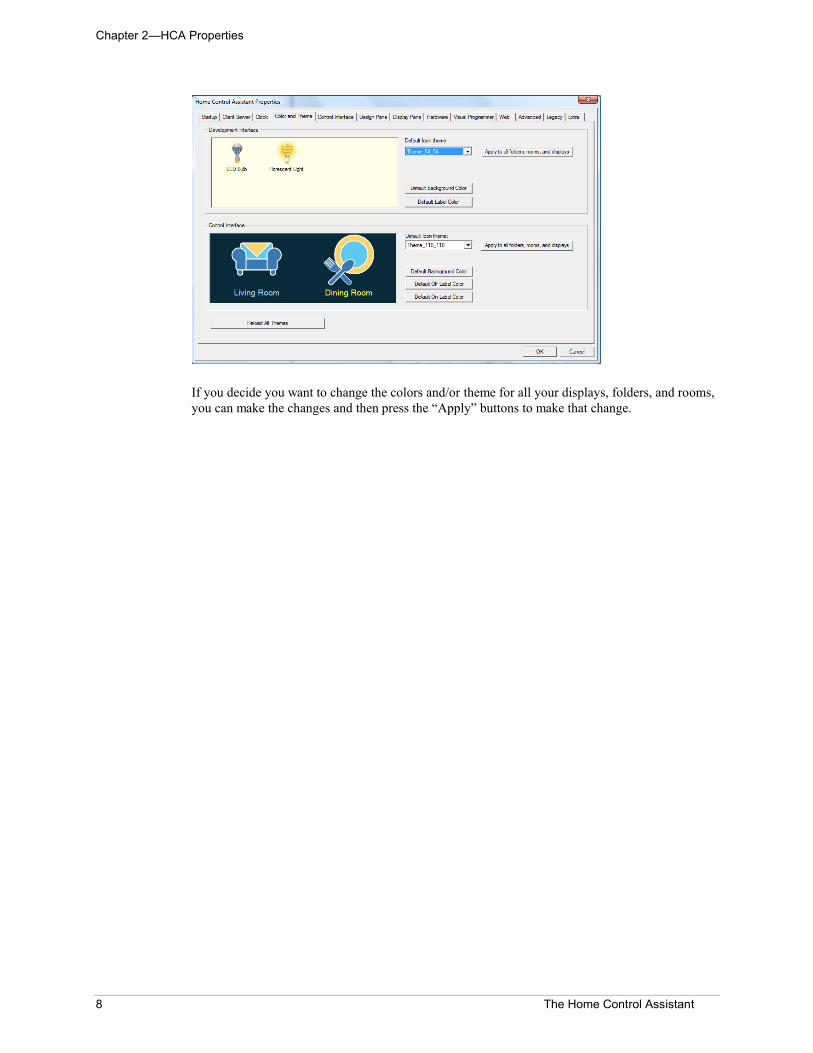
Color and Theme
The Color and Theme is for selecting the default color and them to be used for each display, folder, or room when it appears in the display pane.
You can select the color and theme for each display, floor, and room independently of each other. This is the settings that are used when a new folder, room, or display is created.
Chapter 2—HCA Properties
8 The Home Control Assistant
If you decide you want to change the colors and/or theme for all your displays, folders, and rooms, you can make the changes and then press the “Apply” buttons to make that change.
Chapter 2—HCA Properties
The Home Control Assistant 9
Visual Programmer
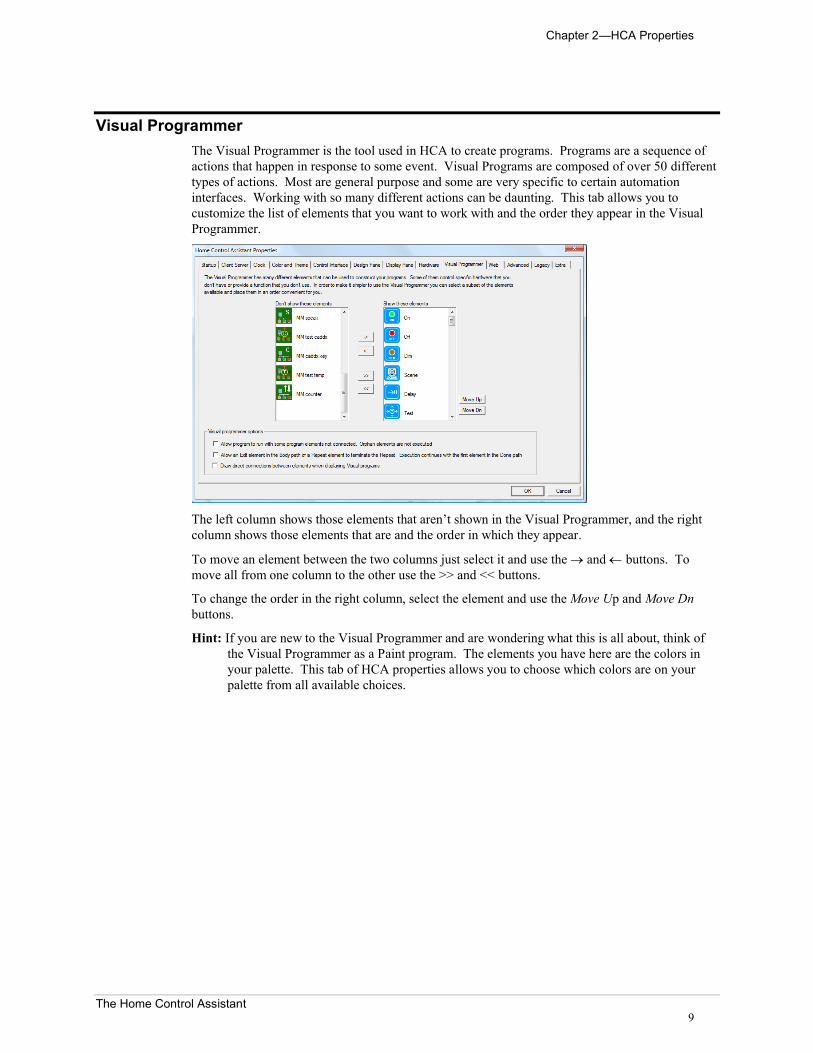
The Visual Programmer is the tool used in HCA to create programs. Programs are a sequence of actions that happen in response to some event. Visual Programs are composed of over 50 different types of actions. Most are general purpose and some are very specific to certain automation interfaces. Working with so many different actions can be daunting. This tab allows you to customize the list of elements that you want to work with and the order they appear in the Visual Programmer.
The left column shows those elements that aren’t shown in the Visual Programmer, and the right column shows those elements that are and the order in which they appear.
To move an element between the two columns just select it and use the and buttons. To move all from one column to the other use the >> and << buttons.
To change the order in the right column, select the element and use the Move Up and Move Dnbuttons.
Hint: If you are new to the Visual Programmer and are wondering what this is all about, think of the Visual Programmer as a Paint program. The elements you have here are the colors in your palette. This tab of HCA properties allows you to choose which colors are on your palette from all available choices.
Chapter 2—HCA Properties
10 The Home Control Assistant
Web
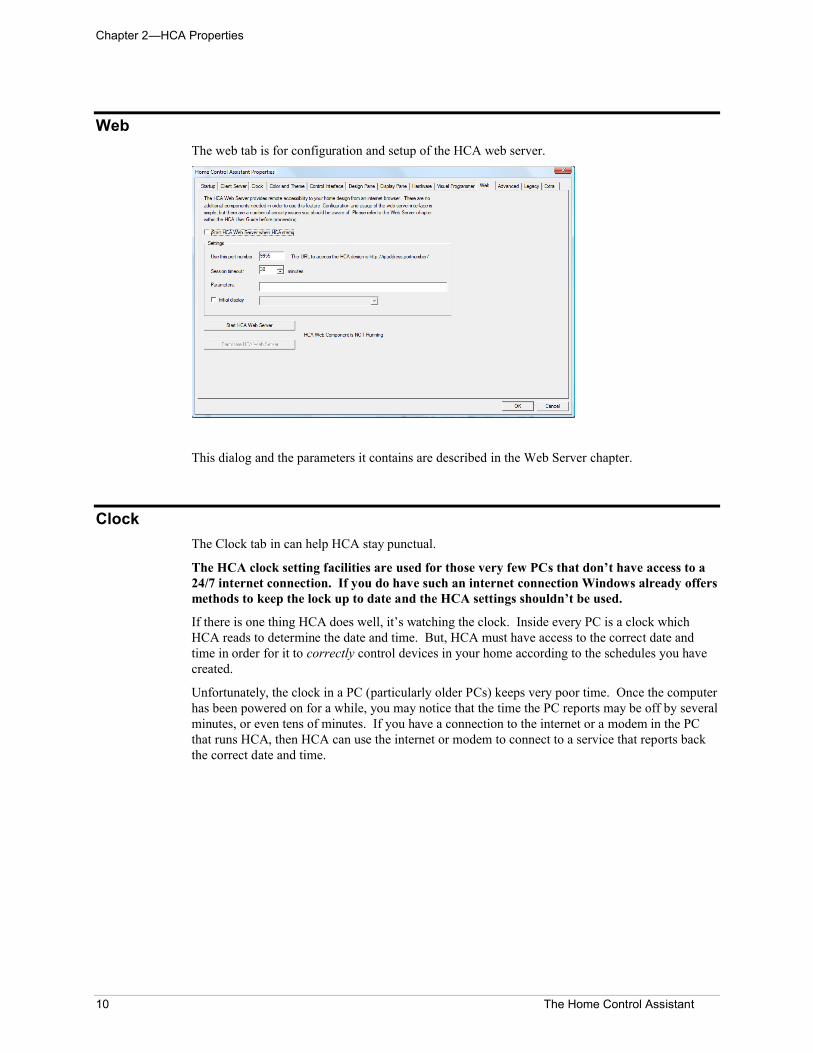
The web tab is for configuration and setup of the HCA web server.
This dialog and the parameters it contains are described in the Web Server chapter.
Clock
The Clock tab in can help HCA stay punctual.
The HCA clock setting facilities are used for those very few PCs that don’t have access to a 24/7 internet connection. If you do have such an internet connection Windows already offers methods to keep the lock up to date and the HCA settings shouldn’t be used.
If there is one thing HCA does well, it’s watching the clock. Inside every PC is a clock which HCA reads to determine the date and time. But, HCA must have access to the correct date and time in order for it to correctly control devices in your home according to the schedules you have created.
Unfortunately, the clock in a PC (particularly older PCs) keeps very poor time. Once the computer has been powered on for a while, you may notice that the time the PC reports may be off by several minutes, or even tens of minutes. If you have a connection to the internet or a modem in the PC that runs HCA, then HCA can use the internet or modem to connect to a service that reports back the correct date and time.

Chapter 2—HCA Properties
The Home Control Assistant 11
This dialog box has extensive instructions, and you may not need any other information on using it. However, here are a few details:
Automatic clock correction enabled
This checkbox must be checked, or no adjustments will be made to the PC’s clock, regardless of the other settings.
Clock is corrected ________ at ___
Select the day of the month and the time that you would like the PC’s clock set.
If using a modem, it typically takes under 10 seconds to check the time, from the time the telephone time service answers until the call terminates. It is important that you select a time of the day when the phone line HCA is connected to is not being used.
Service
HCA provides three options for time services:
National Institute of Standards and Technology in Boulder, Colorado, at 303-494-4774
United States Naval Observatory, Washington, D.C., at 202-762-1594
The internet. This is done by having HCA start a windows program called NISTime32.exe
HCA comes with these options and phone numbers already listed; you only need to choose the one you want to use. If using a modem, you may want to choose the number of the service that is geographically closer to you. (We provide the numbers here for backup.)
Modem
This is the modem used to make the call. HCA lists the options that are available on your PC. If your PC has more than one type of modem line, click the arrow on the list box, and select the one that you want to use. This is not available if using the internet.
Dialing from
This is the number you are calling from. HCA lists the choices available on your PC. You can select any option listed. This is not available if using the internet.
Hint: HCA uses the information from the Modems Properties dialog box (the Modems applet in the Windows Control Panel) to gather information and present options in the Modem and Dialing from boxes.
Call and set time now
Chapter 2—HCA Properties
12 The Home Control Assistant
You can use this button to override the pre-set time, and make the time check right now.
Hint: If you want to use the modem time set feature, after you select the modem and dialing location, use the “Call now” button to make sure that you have your modem configured correctly, and that all works well.
The checkbox option “When a time change is noted…” tells HCA to determine the next entry in the current schedule each time the clock on the PC changes. This could be due to an automatic time change if you have Automatic Clock Correction enabled, or Daylight Saving Time changes twice a year. Each time HCA notes that the PC clock has changed it creates a log entry.
Several more points about using the HCA clock options:
There are several general tips that can help you make the best use of your PC time settings, and the Home Control Assistant clock options:
You should use Windows Control Panel Date/Time option to check that your time zone is correctly selected. You should also select the option so that Windows can make changes to daylight saving time if you live in an area of the country that makes daylight saving time changes.
If using a modem, in the Windows Control Panel Modems applet, there may be a way to set the volume of your modem’s speaker. If so, you could set it low or off so you won’t hear strange noises in the night from your HCA computer when it checks the time.
If using a modem, and if the time service does not answer or is very busy, HCA will retry the call once. If that fails, then HCA puts off setting the clock until the next scheduled time. To see if the clock check worked, check the log. You do have logging enabled, don’t you?
Even if you check the option for “Automatic Clock Correction Enabled,” it does not happen unless HCA is active.
Chapter 2—HCA Properties
The Home Control Assistant 13
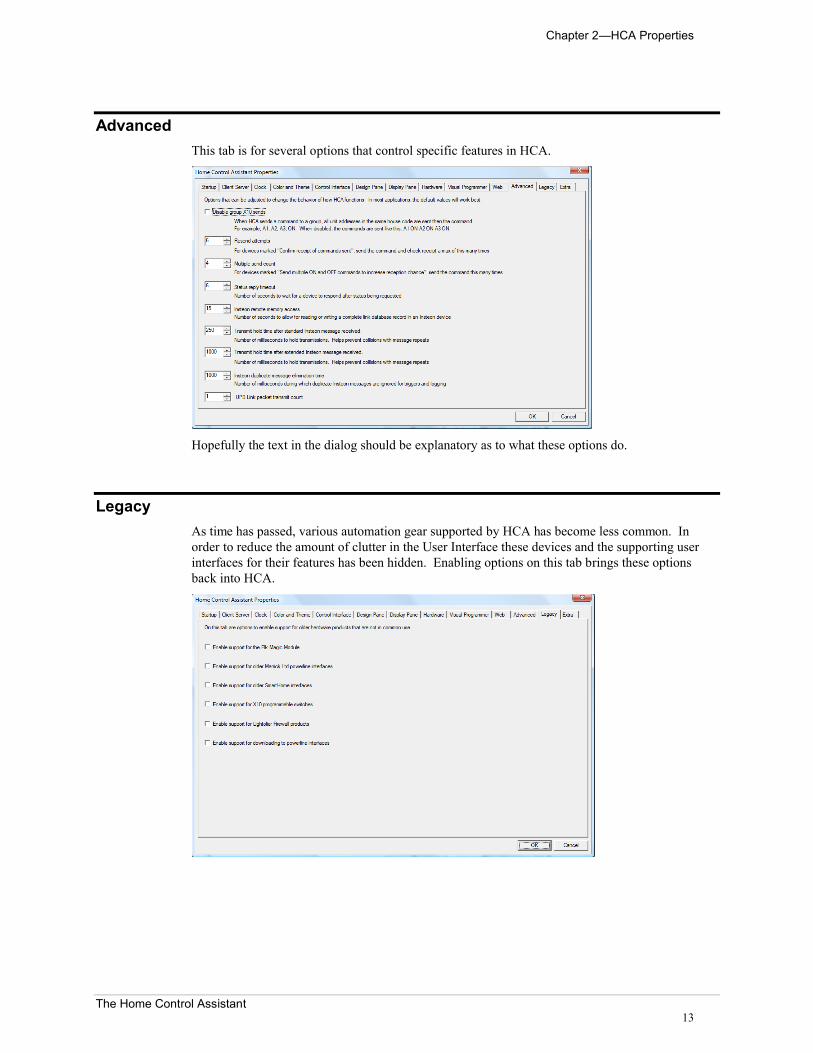
Advanced
This tab is for several options that control specific features in HCA.
Hopefully the text in the dialog should be explanatory as to what these options do.
Legacy
As time has passed, various automation gear supported by HCA has become less common. In order to reduce the amount of clutter in the User Interface these devices and the supporting user interfaces for their features has been hidden. Enabling options on this tab brings these options back into HCA.
Chapter 2—HCA Properties
14 The Home Control Assistant
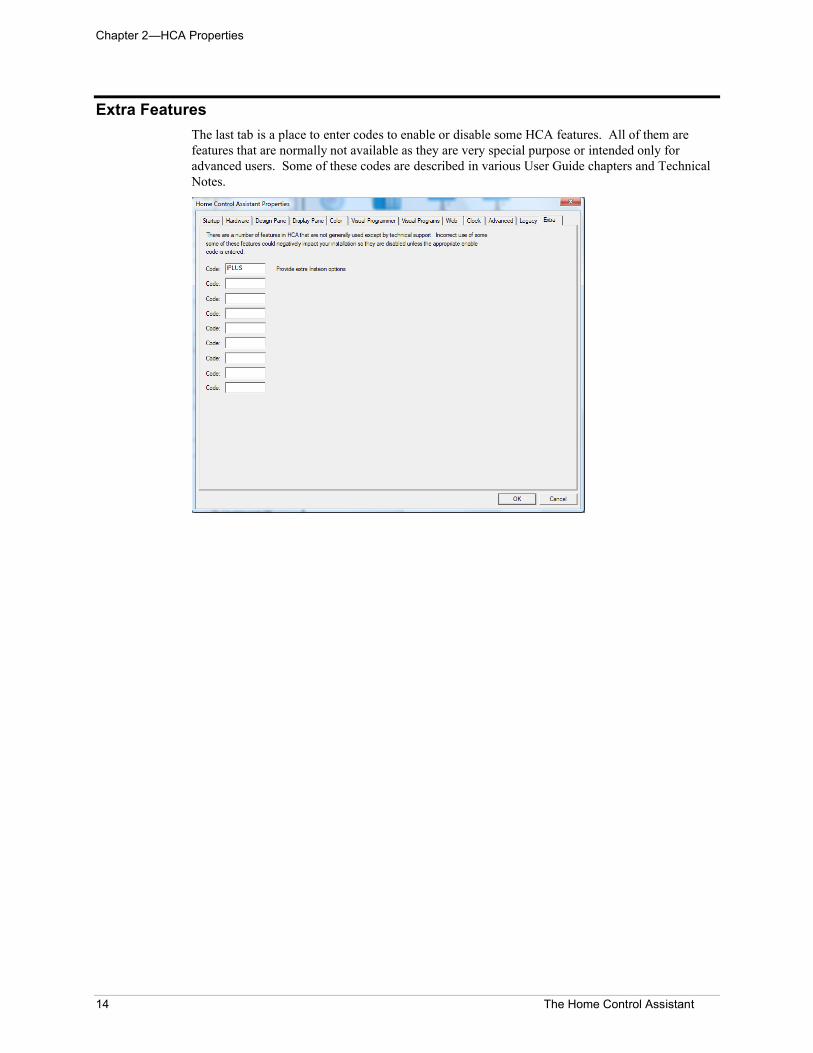
Extra Features
The last tab is a place to enter codes to enable or disable some HCA features. All of them are features that are normally not available as they are very special purpose or intended only for advanced users. Some of these codes are described in various User Guide chapters and Technical Notes.

Chapter 2—HCA Properties
The Home Control Assistant 15