


Languages
Pages
Legal

Lucy Turnbull

Design Process Portfolio 2
Lucy Turnbull
MDes Fashion and Textiles 2010 - 2011

Contents
Introduction...............................................................................................................................................................................5
Part I: Fashion and Textiles Studio
Jumping Jackets.........................................................................................................................................................................9
Stage Two Officially Begins...............................................................................................................................................22
The ‘T’ Word............................................................................................................................................................................30
Sampling....................................................................................................................................................................................40
The Marriage of Two techniques.....................................................................................................................................60
Crunch Time- Interm Review...........................................................................................................................................69
Fashion, Embroidery and Stitch.......................................................................................................................................78
Tying up Loose Ends............................................................................................................................................................80
Part II: Core Research- Aesthetics in Creative Practice
First Impressions...................................................................................................................................................................85
The Ugly and the Beautiful................................................................................................................................................87
A Sense of Nostalgia.............................................................................................................................................................92
Conclusion................................................................................................................................................................................99
Image List...............................................................................................................................................................................102
Bibliography..........................................................................................................................................................................109

7
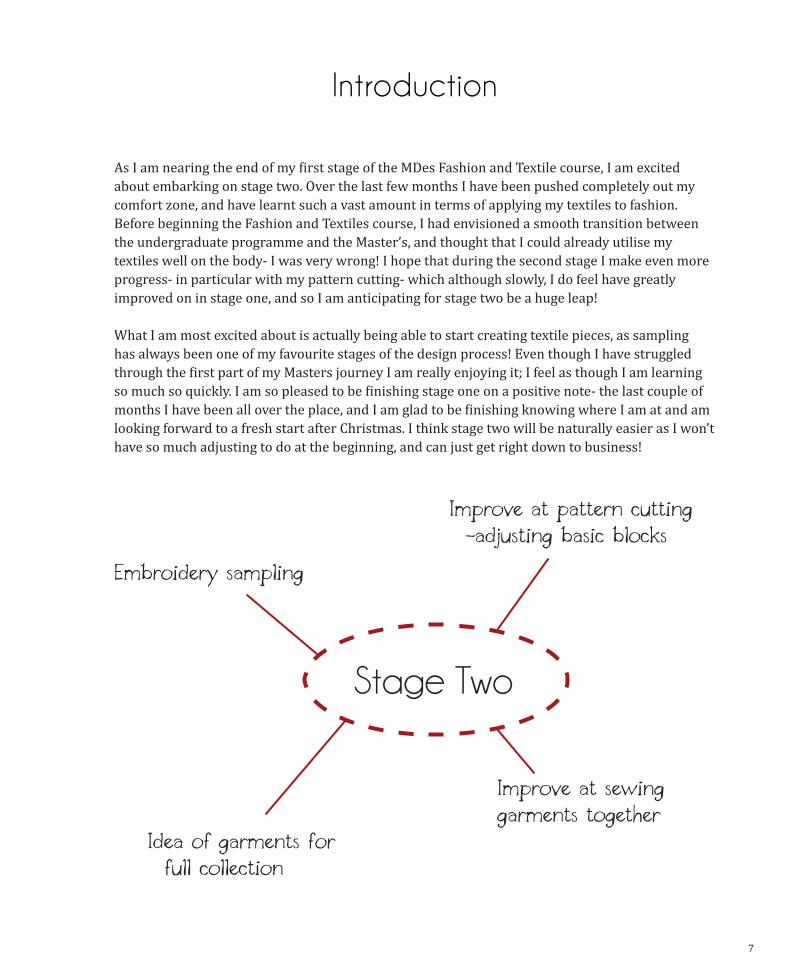
Introduction
As I am nearing the end of my first stage of the MDes Fashion and Textile course, I am excited about embarking on stage two. Over the last few months I have been pushed completely out my comfort zone, and have learnt such a vast amount in terms of applying my textiles to fashion. Before beginning the Fashion and Textiles course, I had envisioned a smooth transition between the undergraduate programme and the Master’s, and thought that I could already utilise my textiles well on the body- I was very wrong! I hope that during the second stage I make even more progress- in particular with my pattern cutting- which although slowly, I do feel have greatly improved on in stage one, and so I am anticipating for stage two be a huge leap!
What I am most excited about is actually being able to start creating textile pieces, as sampling has always been one of my favourite stages of the design process! Even though I have struggled through the first part of my Masters journey I am really enjoying it; I feel as though I am learning so much so quickly. I am so pleased to be finishing stage one on a positive note- the last couple of months I have been all over the place, and I am glad to be finishing knowing where I am at and am looking forward to a fresh start after Christmas. I think stage two will be naturally easier as I won’t have so much adjusting to do at the beginning, and can just get right down to business!
Improve at pattern cutting -adjusting basic blocksEmbroidery sampling
Stage Two
Improve at sewing garments together
Idea of garments for full collection

8
By the end of stage two, I hope to have mastered my embroidery sampling and have a fairly sturdy idea of what my final collection is going to look like. I have come so far from the beginning of stage one and have high hopes for stage two!
Part I: Fashion and Textiles Studio

11
Jumping Jackets
Week beginning 3rd January 2011
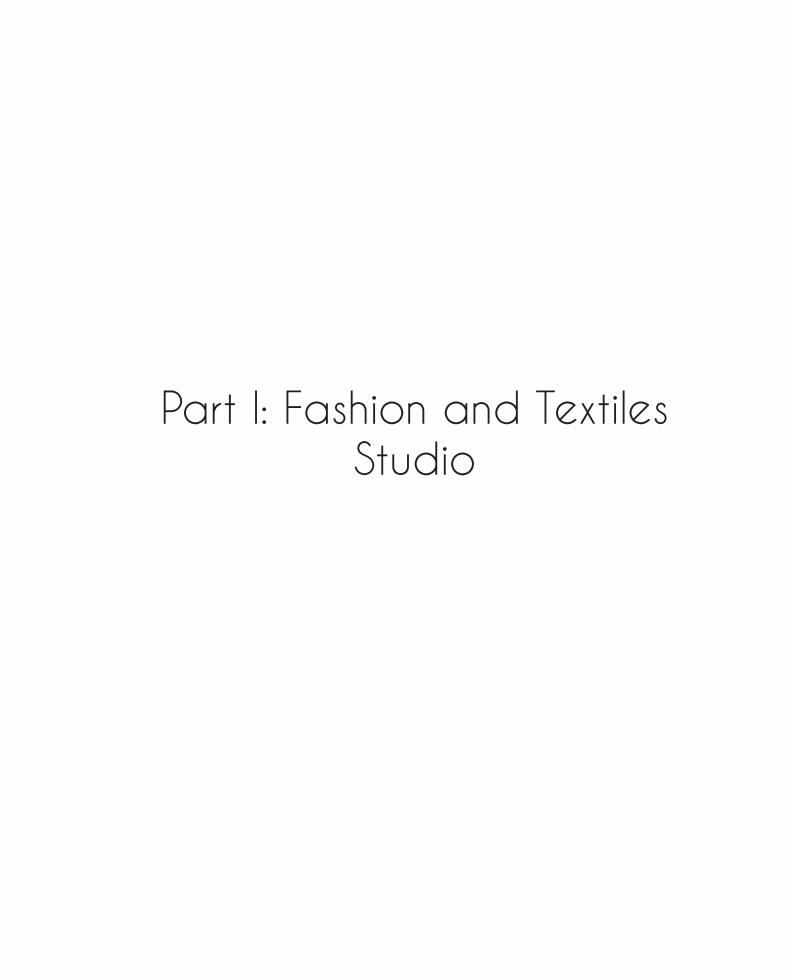
This first week back after Christmas I have been continuing to work on my silhouette, in particular thinking about what kind of jacket is going to be going on top of the loose dress I had been working on before the holidays.
Figure 1: Twist and tuck placement on dress toile
Previously I had wanted a tight, matador like shape jacket that tied at the front with a long ribbondraping over the front of the body. However when I considered what this would look like on top of my dress with the twisted and tucked details, I think it would appear far too bulky at the front- a tight jacket would not sit right on top my loose dress.
12 Jumping Jackets
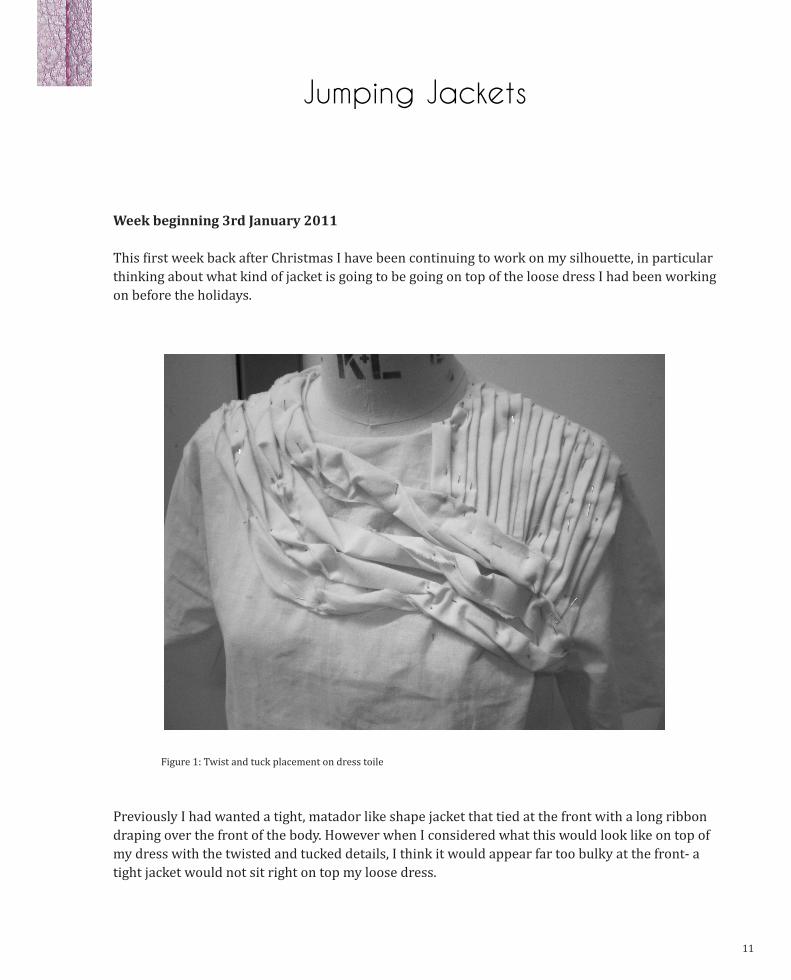
Instead I am now thinking a cardigan type jacket- quite loose and plain, perhaps with embroidered or pleated details on the pockets, which I think would look amazing!
Figure 2: McCalls jacket pattern slip Figure 3: Cardigan jacket pattern slip
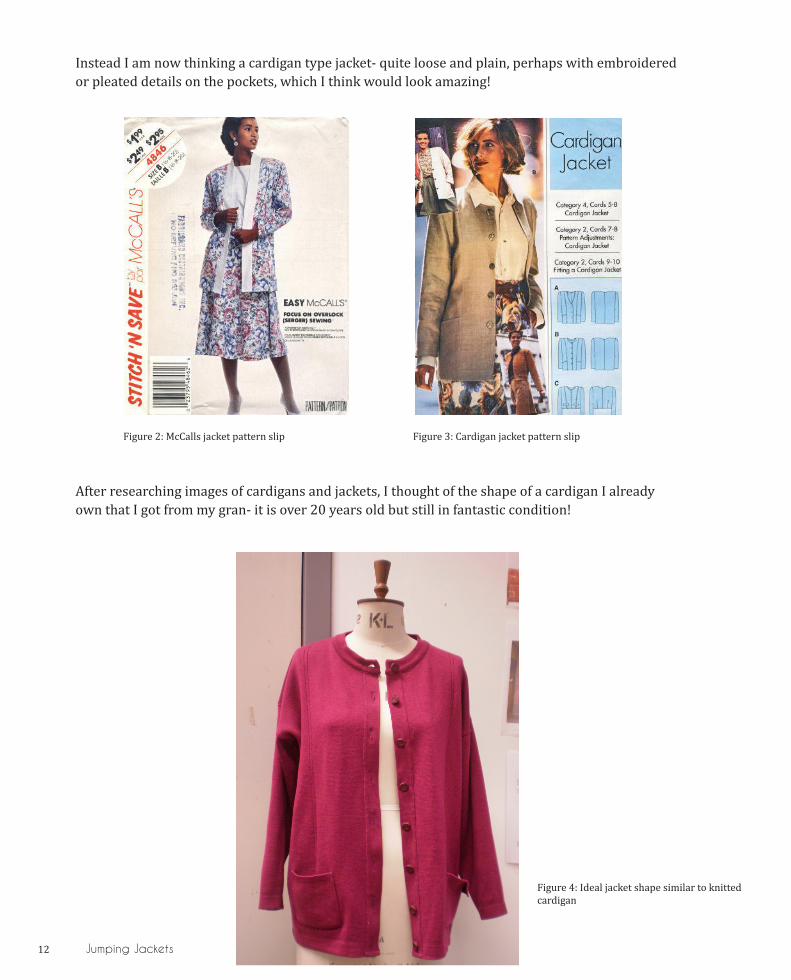
After researching images of cardigans and jackets, I thought of the shape of a cardigan I already own that I got from my gran- it is over 20 years old but still in fantastic condition!
Figure 4: Ideal jacket shape similar to knitted cardigan
Jumping Jackets 13
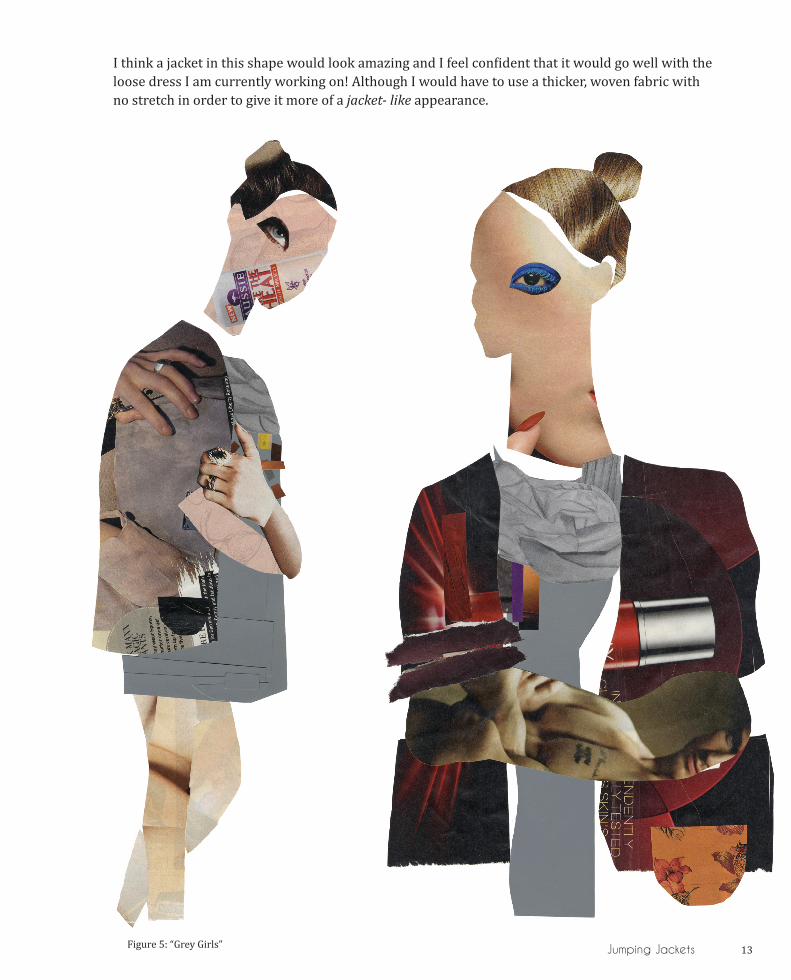
I think a jacket in this shape would look amazing and I feel confident that it would go well with the loose dress I am currently working on! Although I would have to use a thicker, woven fabric with no stretch in order to give it more of a jacket- like appearance.
Figure 5: “Grey Girls”
14 Jumping Jackets
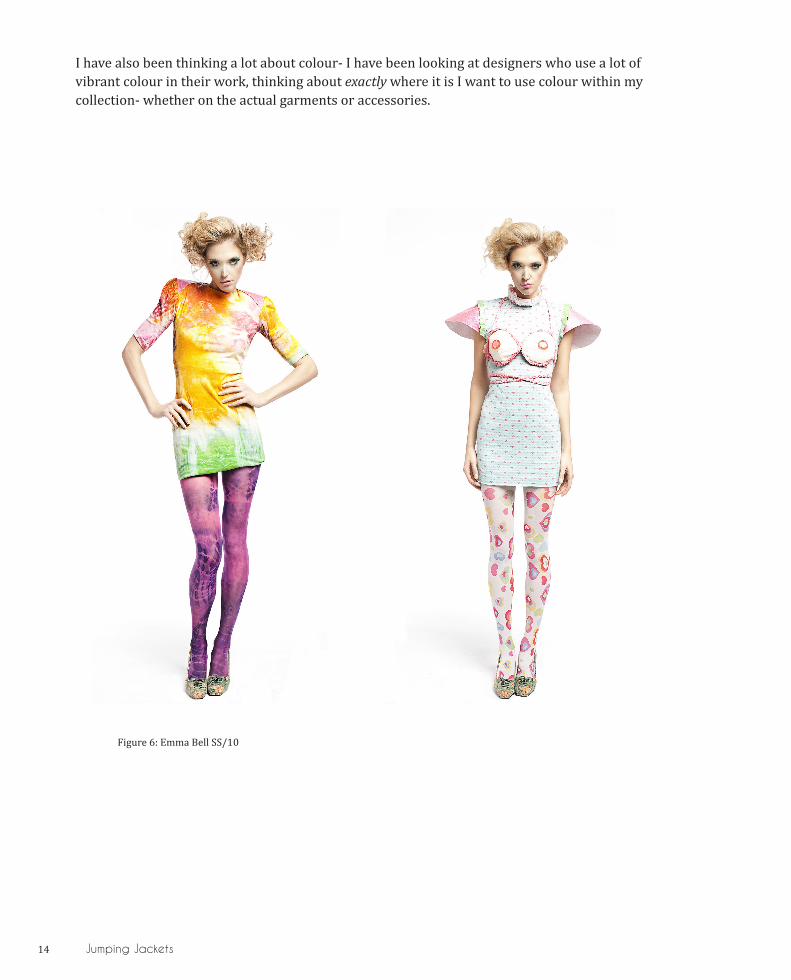
I have also been thinking a lot about colour- I have been looking at designers who use a lot of vibrant colour in their work, thinking about exactly where it is I want to use colour within my collection- whether on the actual garments or accessories.
Figure 6: Emma Bell SS/10

Jumping Jackets 15
Although I don’t think the colours in some of these garments are actually wearable, I do find these very inspiring images. I think my tutor would have a fit if I put these rainbows down the runway!

16 Jumping Jackets
This week I also found out I had been selected as one of four Madeira sponsored students to exhibit in the Fashion, Embroidery and Stitch show at the NEC Birmingham in March. I am so excited at the prospect of showing my work in one of biggest exhibition centres in the UK and definitely want to go! There is expected to be around 29,000 visitors over the four days, so I will get the chance to exhibit my work to a very wide and varied audience!
Week beginning 10th January 2011
On Monday we had our group presentations in front of the class, which went a lot better than I had expected! These sessions make me really nervous as I often find it quite difficult to articulate myself, and so need to do quite a lot of preparation in advance. I was much more satisfied with this presentation than I was for the previous one, and the fact that I went first and got it over and done with really helped! I realised that I need to do a lot of work on my dress shape, which I will do with Juliet in pattern cutting class next week. My tutor Beca brought up the idea of making my silhouette less ‘girly,’ as the Celine image I was looking at was constructed with a mixture of feminine and masculine elements.
Figure 7: Ready- to- wear Celine SS/11
Less feminine More strong
Juliet had then suggested that the Celine garment looked more like a kaftan with no inset sleeve, however I want to have an insert sleeve in order to incorporate this patchwork organza sleeve idea into the garment also. I explained that I wanted my embroidery placement to be down the front of the dress like a panel, however the more I think about it the more I would like my embroidery to
Jumping Jackets 17
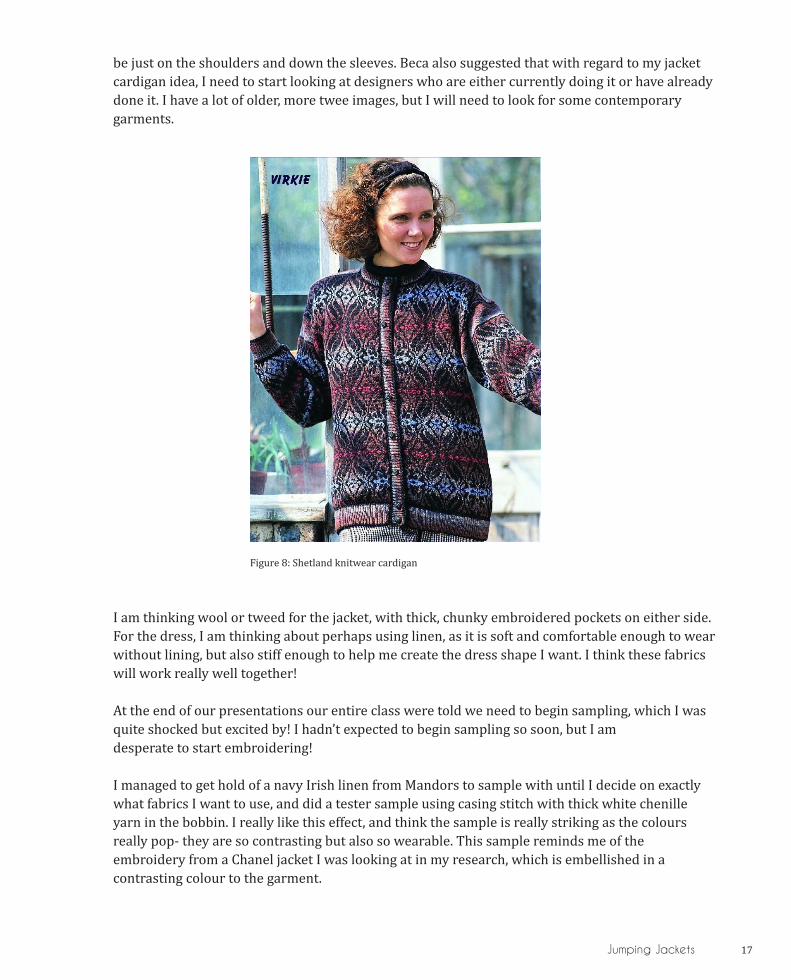
be just on the shoulders and down the sleeves. Beca also suggested that with regard to my jacket cardigan idea, I need to start looking at designers who are either currently doing it or have already done it. I have a lot of older, more twee images, but I will need to look for some contemporary garments.
Figure 8: Shetland knitwear cardigan
I am thinking wool or tweed for the jacket, with thick, chunky embroidered pockets on either side. For the dress, I am thinking about perhaps using linen, as it is soft and comfortable enough to wear without lining, but also stiff enough to help me create the dress shape I want. I think these fabrics will work really well together!
At the end of our presentations our entire class were told we need to begin sampling, which I was quite shocked but excited by! I hadn’t expected to begin sampling so soon, but I am desperate to start embroidering!
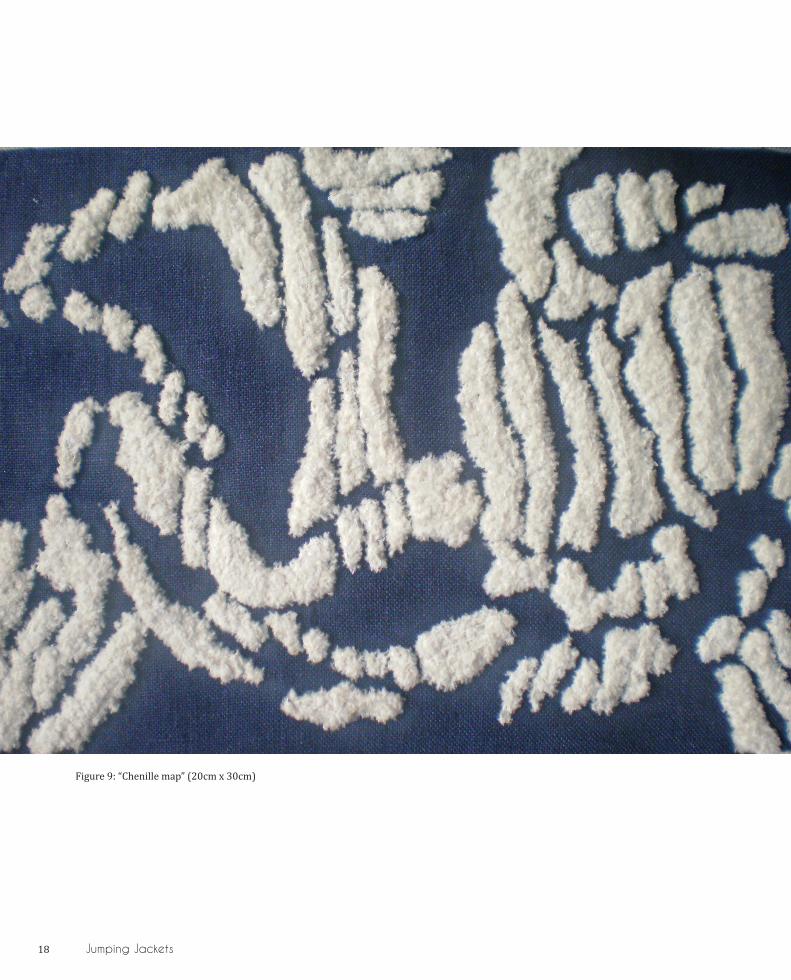
I managed to get hold of a navy Irish linen from Mandors to sample with until I decide on exactly what fabrics I want to use, and did a tester sample using casing stitch with thick white chenille yarn in the bobbin. I really like this effect, and think the sample is really striking as the colours really pop- they are so contrasting but also so wearable. This sample reminds me of the embroidery from a Chanel jacket I was looking at in my research, which is embellished in a contrasting colour to the garment.
18 Jumping Jackets
Figure 9: “Chenille map” (20cm x 30cm)
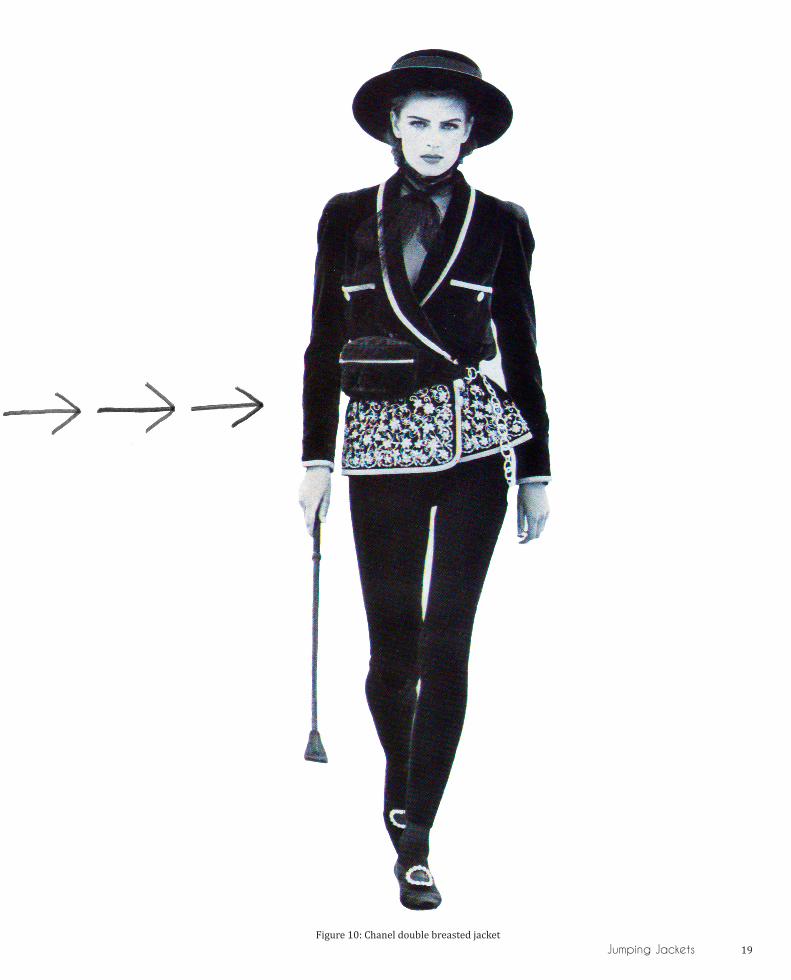
Jumping Jackets 19Figure 10: Chanel double breasted jacket
20 Jumping Jackets
I currently only have this chenille in white, and so will need to keep looking for other suppliers if I want to achieve a similar effect in different colours.
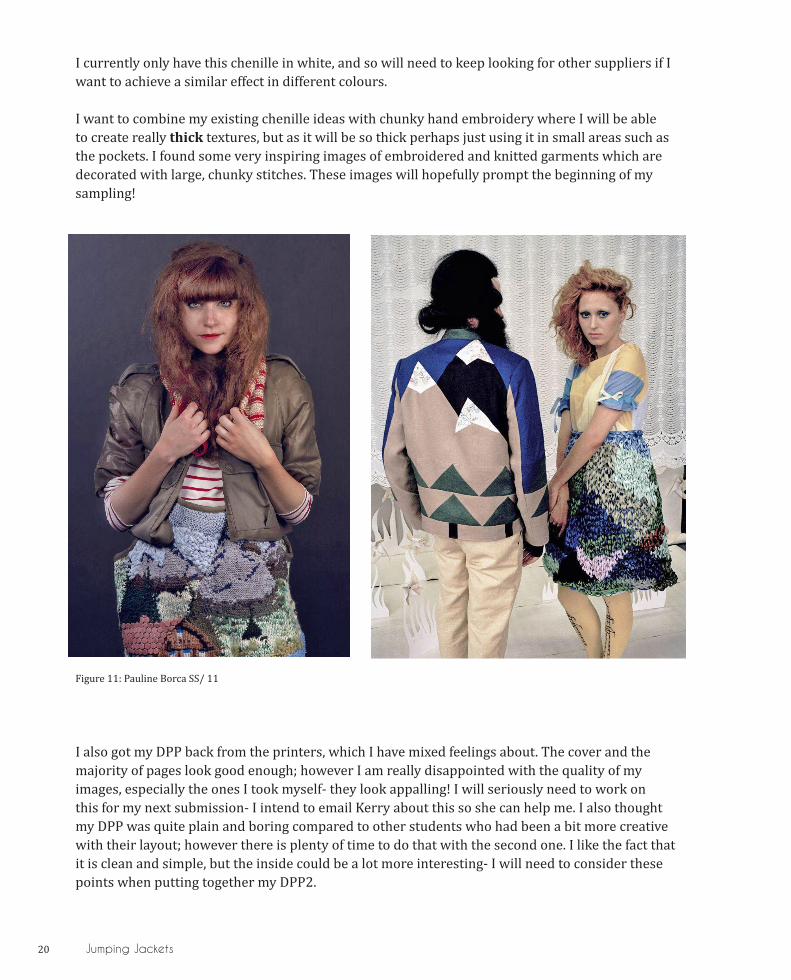
I want to combine my existing chenille ideas with chunky hand embroidery where I will be able to create really thick textures, but as it will be so thick perhaps just using it in small areas such as the pockets. I found some very inspiring images of embroidered and knitted garments which are decorated with large, chunky stitches. These images will hopefully prompt the beginning of my sampling!
Figure 11: Pauline Borca SS/ 11
I also got my DPP back from the printers, which I have mixed feelings about. The cover and the majority of pages look good enough; however I am really disappointed with the quality of my images, especially the ones I took myself- they look appalling! I will seriously need to work on this for my next submission- I intend to email Kerry about this so she can help me. I also thought my DPP was quite plain and boring compared to other students who had been a bit more creative with their layout; however there is plenty of time to do that with the second one. I like the fact that it is clean and simple, but the inside could be a lot more interesting- I will need to consider these points when putting together my DPP2.
Jumping Jackets 21
Week beginning 17th January 2011
On Monday I went through all my yarn shade cards and samples from different suppliers and selected a number of different yarns I was thinking about using in my casing stitch samples. I am looking at a lot of thick, ropey yarns that will create heavy textures on top of my fabric, and decided that what I wanted to take forward was:
• Char million soft cashmere yarn • Baby merino wool • Chenille • Boucle • Castoro 4ply • Futtuccina ribbon
I have ordered small quantities of these yarns to sample with, so hopefully they will arrive by next week so I can begin sampling properly! I am unsure of colours, as originally I was thinking very bright embroidery contrasting with neutral fabrics, but after seeing the white chenille on dark navy linen I am rethinking my palette as I really like the extreme bold contrast between the two. I will need to investigate this further...
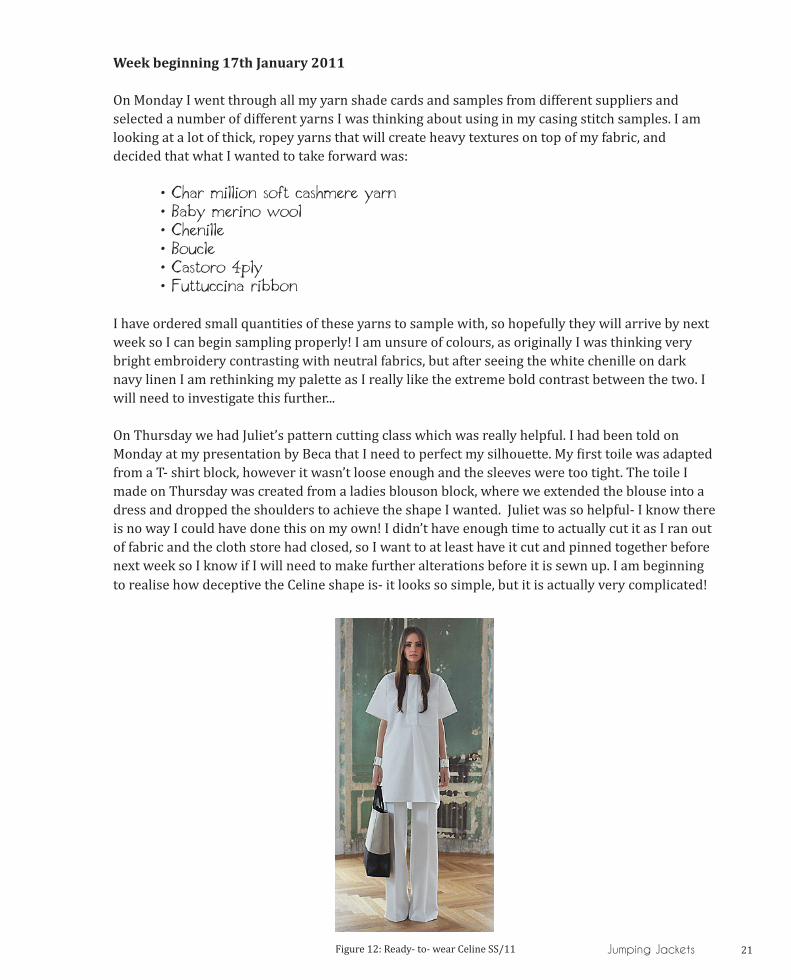
On Thursday we had Juliet’s pattern cutting class which was really helpful. I had been told on Monday at my presentation by Beca that I need to perfect my silhouette. My first toile was adapted from a T- shirt block, however it wasn’t loose enough and the sleeves were too tight. The toile I made on Thursday was created from a ladies blouson block, where we extended the blouse into a dress and dropped the shoulders to achieve the shape I wanted. Juliet was so helpful- I know there is no way I could have done this on my own! I didn’t have enough time to actually cut it as I ran out of fabric and the cloth store had closed, so I want to at least have it cut and pinned together before next week so I know if I will need to make further alterations before it is sewn up. I am beginning to realise how deceptive the Celine shape is- it looks so simple, but it is actually very complicated!
Figure 12: Ready- to- wear Celine SS/11
22 Jumping Jackets
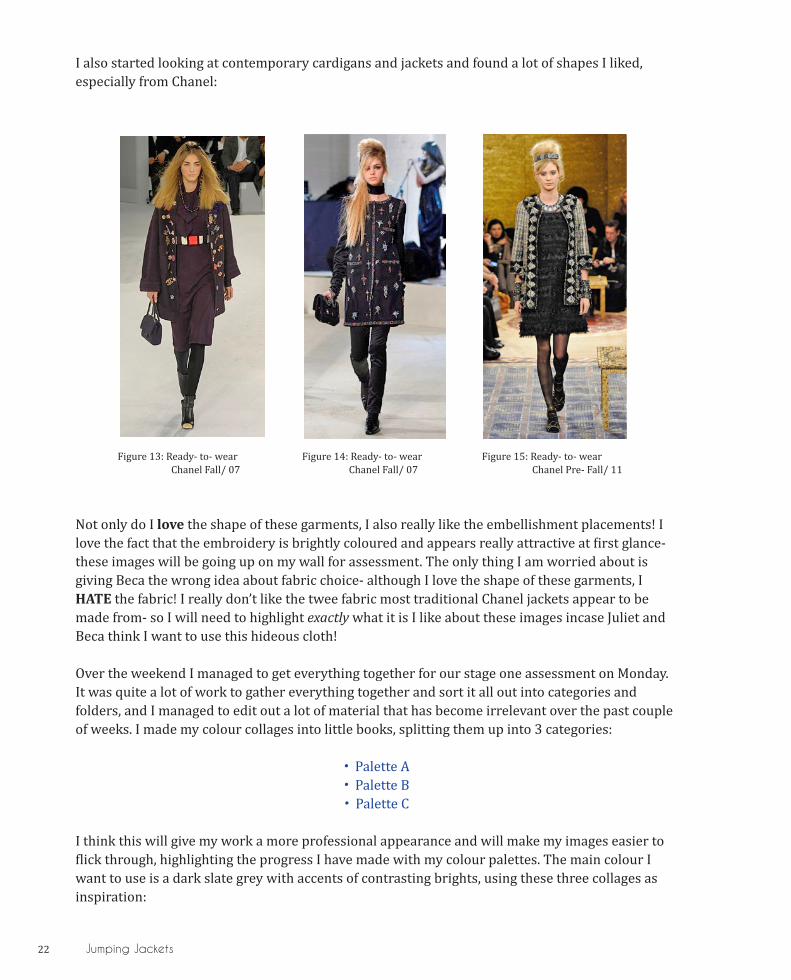
I also started looking at contemporary cardigans and jackets and found a lot of shapes I liked, especially from Chanel:
Figure 13: Ready- to- wear Figure 14: Ready- to- wear Figure 15: Ready- to- wear Chanel Fall/ 07 Chanel Fall/ 07 Chanel Pre- Fall/ 11
Not only do I love the shape of these garments, I also really like the embellishment placements! I love the fact that the embroidery is brightly coloured and appears really attractive at first glance- these images will be going up on my wall for assessment. The only thing I am worried about is giving Beca the wrong idea about fabric choice- although I love the shape of these garments, I HATE the fabric! I really don’t like the twee fabric most traditional Chanel jackets appear to be made from- so I will need to highlight exactly what it is I like about these images incase Juliet and Beca think I want to use this hideous cloth!
Over the weekend I managed to get everything together for our stage one assessment on Monday. It was quite a lot of work to gather everything together and sort it all out into categories and folders, and I managed to edit out a lot of material that has become irrelevant over the past couple of weeks. I made my colour collages into little books, splitting them up into 3 categories:
• Palette A• Palette B• Palette C
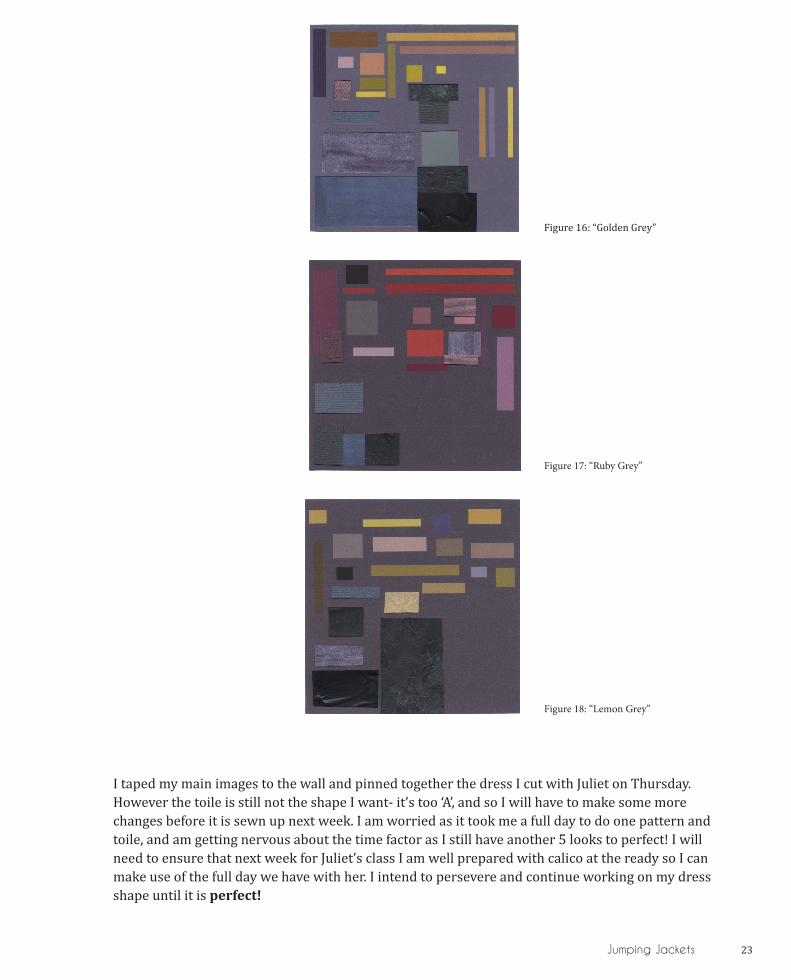
I think this will give my work a more professional appearance and will make my images easier to flick through, highlighting the progress I have made with my colour palettes. The main colour I want to use is a dark slate grey with accents of contrasting brights, using these three collages as inspiration:
Jumping Jackets 23
Figure 16: “Golden Grey”
Figure 17: “Ruby Grey”
Figure 18: “Lemon Grey”
I taped my main images to the wall and pinned together the dress I cut with Juliet on Thursday. However the toile is still not the shape I want- it’s too ‘A’, and so I will have to make some more changes before it is sewn up next week. I am worried as it took me a full day to do one pattern and toile, and am getting nervous about the time factor as I still have another 5 looks to perfect! I will need to ensure that next week for Juliet’s class I am well prepared with calico at the ready so I can make use of the full day we have with her. I intend to persevere and continue working on my dress shape until it is perfect!
24
Stage Two Officially Begins....
Week beginning 24th January 2011
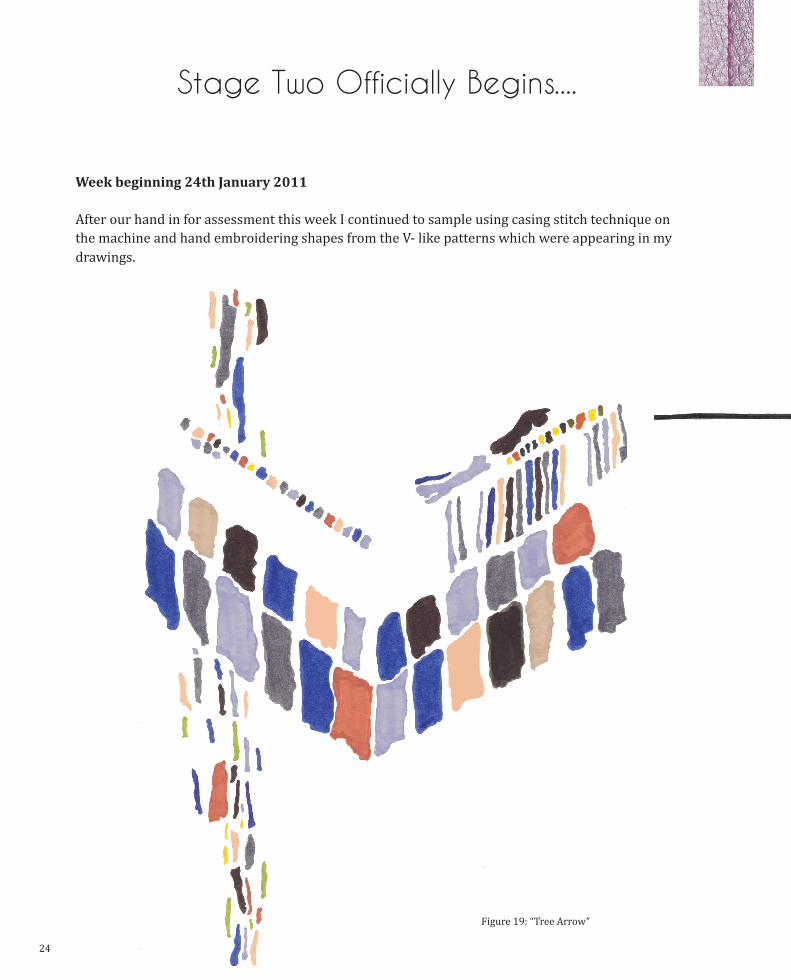
After our hand in for assessment this week I continued to sample using casing stitch technique on the machine and hand embroidering shapes from the V- like patterns which were appearing in my drawings.
Figure 19: “Tree Arrow”
Stage Two Begins... 25
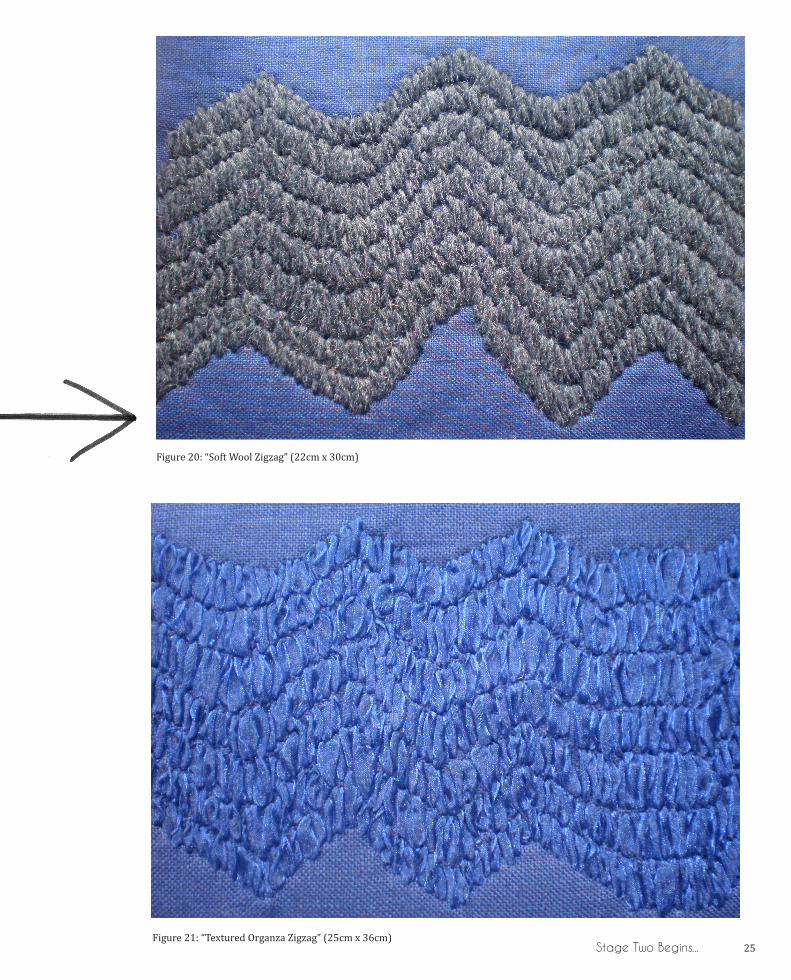
Figure 20: “Soft Wool Zigzag” (22cm x 30cm)
Figure 21: “Textured Organza Zigzag” (25cm x 36cm)
26 Stage Two Begins...
I like both samples; however I think the organza ribbon works better as it creates a thicker more random texture, whereas a lot of the detail is lost in the wool stitches as they merge into blocks. I will need to continue to experiment using this technique and see what other materials can create this effect!
On Thursday we were formally briefed for the second stage of the Fashion and Textile course. I am looking forward to sketching out design ideas out on paper, and so will need to create and perfect a figure template to work from- which I think I will do next week.
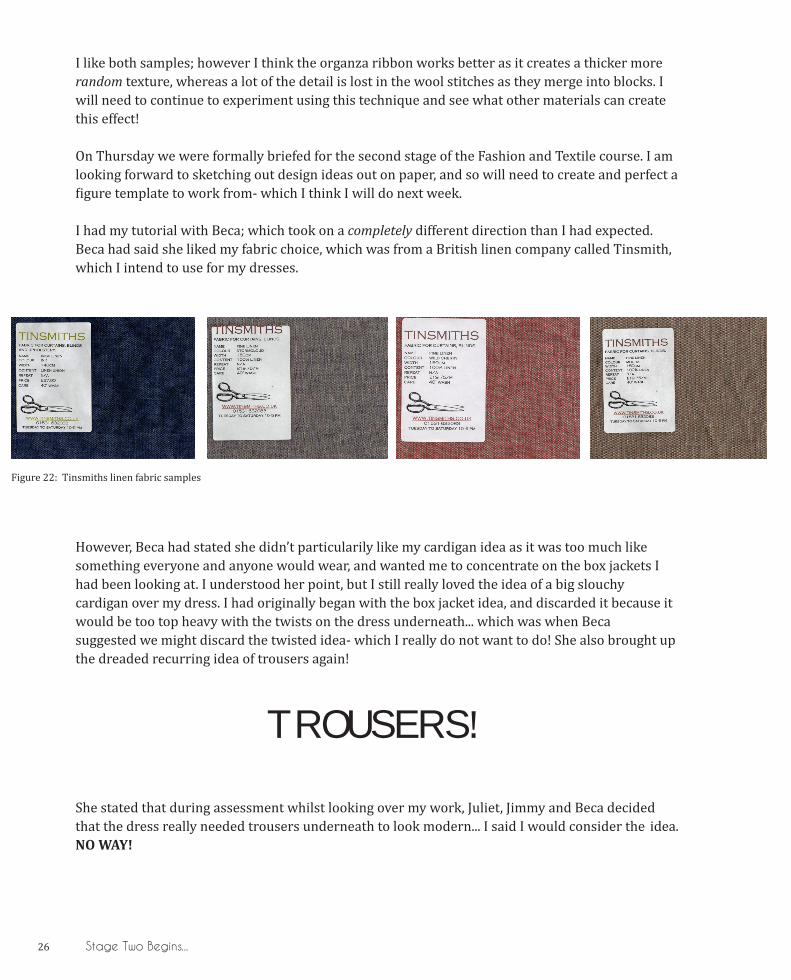
I had my tutorial with Beca; which took on a completely different direction than I had expected. Beca had said she liked my fabric choice, which was from a British linen company called Tinsmith, which I intend to use for my dresses.
However, Beca had stated she didn’t particularily like my cardigan idea as it was too much like something everyone and anyone would wear, and wanted me to concentrate on the box jackets I had been looking at. I understood her point, but I still really loved the idea of a big slouchy cardigan over my dress. I had originally began with the box jacket idea, and discarded it because it would be too top heavy with the twists on the dress underneath... which was when Beca suggested we might discard the twisted idea- which I really do not want to do! She also brought up the dreaded recurring idea of trousers again!
TROUSERS!
She stated that during assessment whilst looking over my work, Juliet, Jimmy and Beca decided that the dress really needed trousers underneath to look modern... I said I would consider the idea. NO WAY!
Figure 22: Tinsmiths linen fabric samples

Stage Two Begins... 27
Lucys Collection:No trousers
Allowed
28 Stage Two Begins...
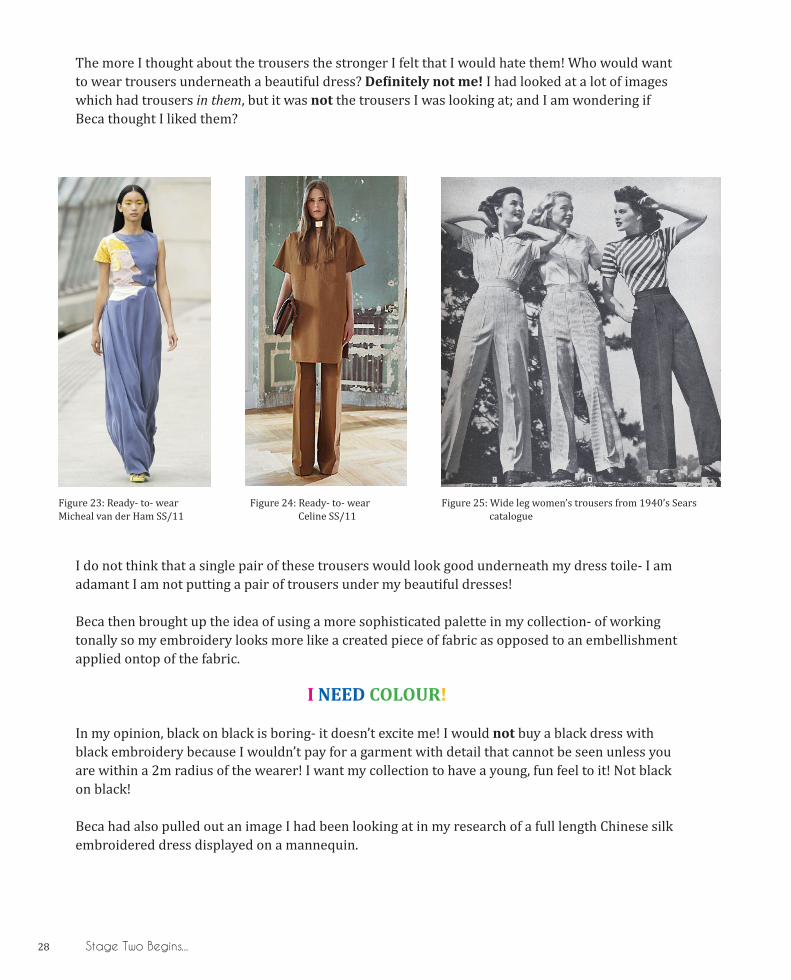
The more I thought about the trousers the stronger I felt that I would hate them! Who would want to wear trousers underneath a beautiful dress? Definitely not me! I had looked at a lot of images which had trousers in them, but it was not the trousers I was looking at; and I am wondering if Beca thought I liked them?
I do not think that a single pair of these trousers would look good underneath my dress toile- I am adamant I am not putting a pair of trousers under my beautiful dresses!
Beca then brought up the idea of using a more sophisticated palette in my collection- of working tonally so my embroidery looks more like a created piece of fabric as opposed to an embellishment applied ontop of the fabric.
I NEED COLOUR!
In my opinion, black on black is boring- it doesn’t excite me! I would not buy a black dress with black embroidery because I wouldn’t pay for a garment with detail that cannot be seen unless you are within a 2m radius of the wearer! I want my collection to have a young, fun feel to it! Not black on black!
Beca had also pulled out an image I had been looking at in my research of a full length Chinese silk embroidered dress displayed on a mannequin.
Figure 23: Ready- to- wear Figure 24: Ready- to- wear Figure 25: Wide leg women’s trousers from 1940’s Sears Micheal van der Ham SS/11 Celine SS/11 catalogue
Stage Two Begins... 29
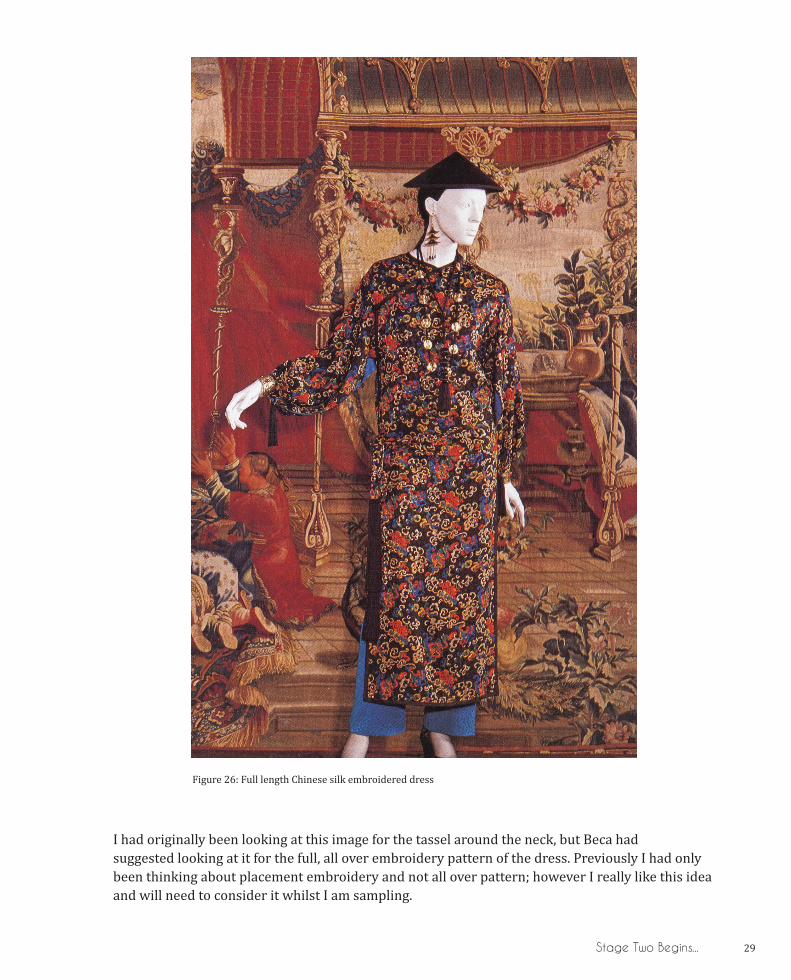
Figure 26: Full length Chinese silk embroidered dress
I had originally been looking at this image for the tassel around the neck, but Beca had suggested looking at it for the full, all over embroidery pattern of the dress. Previously I had only been thinking about placement embroidery and not all over pattern; however I really like this idea and will need to consider it whilst I am sampling.
30 Stage Two Begins...
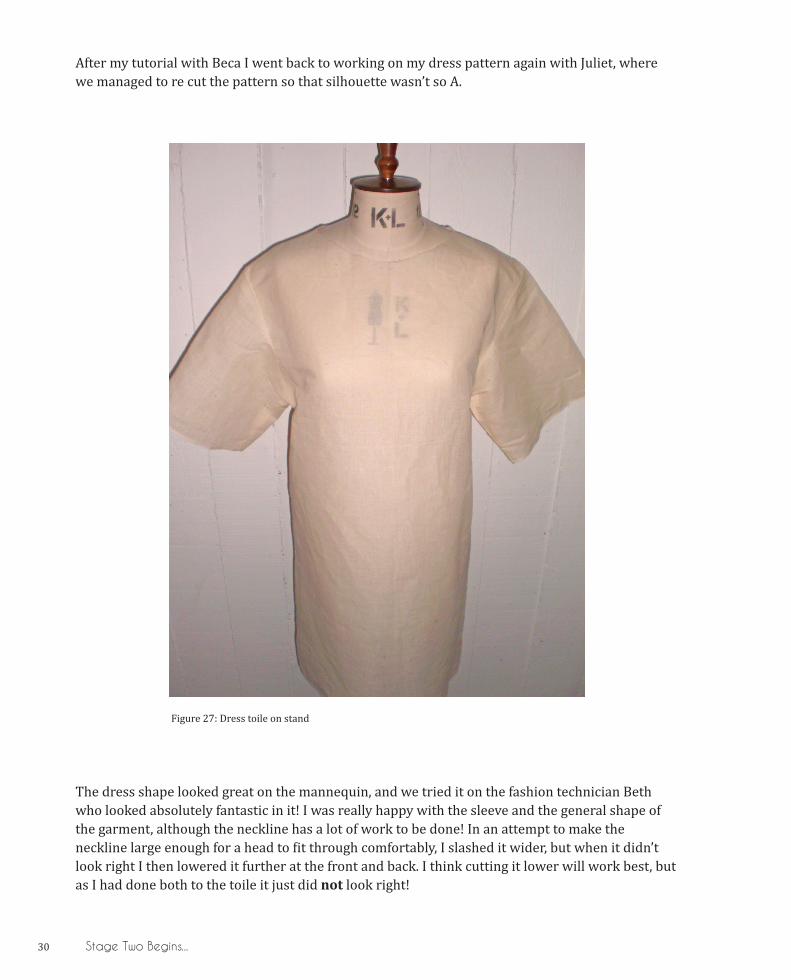
After my tutorial with Beca I went back to working on my dress pattern again with Juliet, where we managed to re cut the pattern so that silhouette wasn’t so A.
Figure 27: Dress toile on stand
The dress shape looked great on the mannequin, and we tried it on the fashion technician Beth who looked absolutely fantastic in it! I was really happy with the sleeve and the general shape of the garment, although the neckline has a lot of work to be done! In an attempt to make the neckline large enough for a head to fit through comfortably, I slashed it wider, but when it didn’t look right I then lowered it further at the front and back. I think cutting it lower will work best, but as I had done both to the toile it just did not look right!
Stage Two Begins... 31
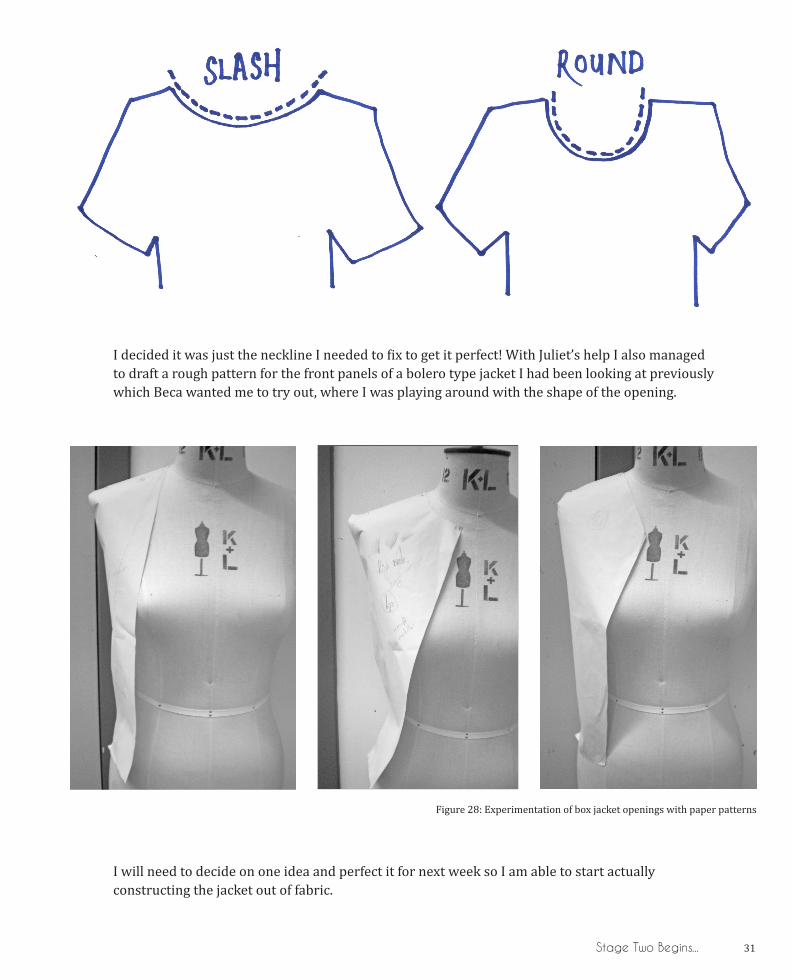
I decided it was just the neckline I needed to fix to get it perfect! With Juliet’s help I also managed to draft a rough pattern for the front panels of a bolero type jacket I had been looking at previously which Beca wanted me to try out, where I was playing around with the shape of the opening.
I will need to decide on one idea and perfect it for next week so I am able to start actually constructing the jacket out of fabric.
Figure 28: Experimentation of box jacket openings with paper patterns
32
The ‘T’ Word
Week beginning 31st January 2011
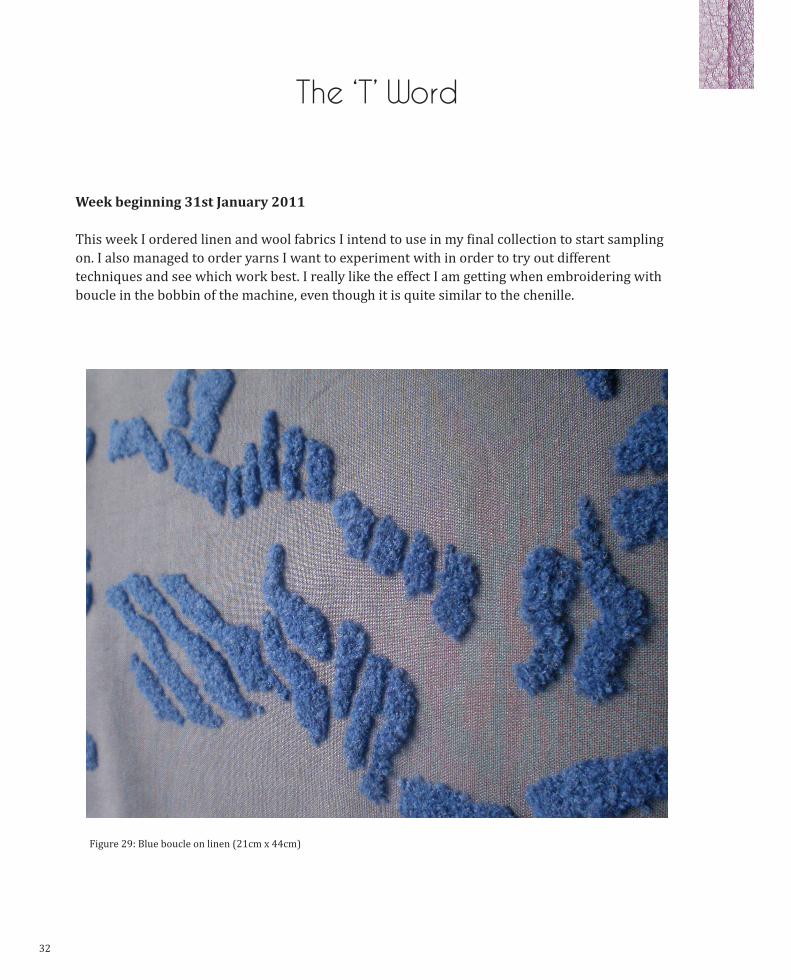
This week I ordered linen and wool fabrics I intend to use in my final collection to start sampling on. I also managed to order yarns I want to experiment with in order to try out different techniques and see which work best. I really like the effect I am getting when embroidering with boucle in the bobbin of the machine, even though it is quite similar to the chenille.
Figure 29: Blue boucle on linen (21cm x 44cm)
The ‘T’ Word 33
I tried to embroider pin tucks on top of linen, but the fabric is so heavy that the technique is not working- instead of giving a raised ridge effect, the pin tuck foot is just creating two straight flatrunning stitches.
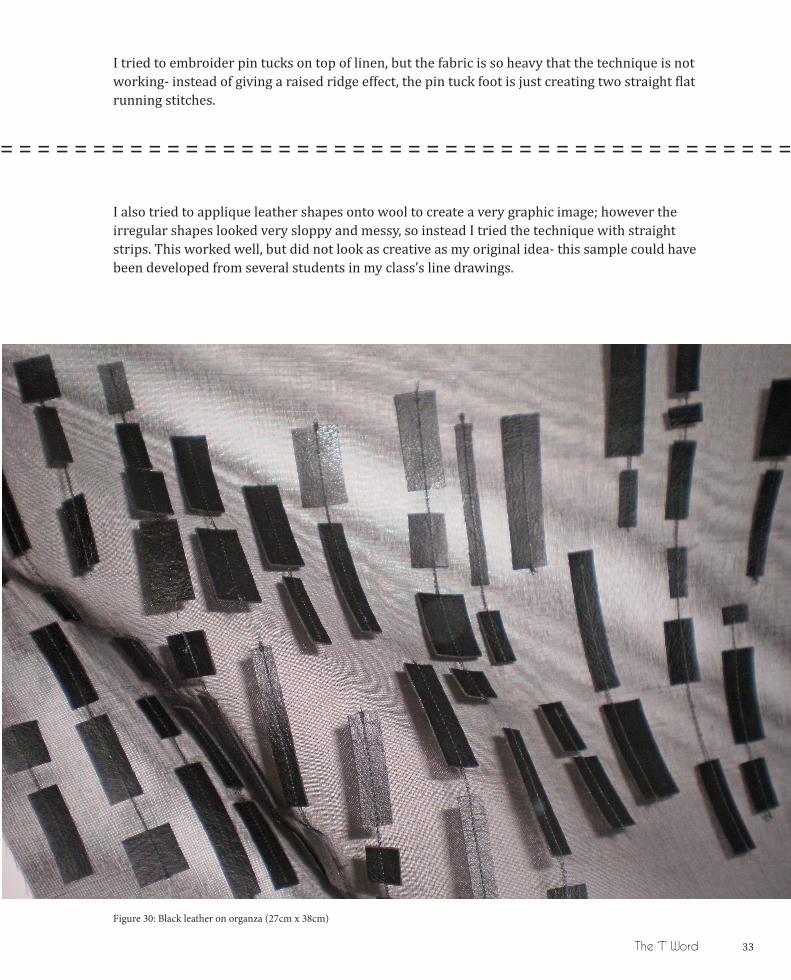
I also tried to applique leather shapes onto wool to create a very graphic image; however theirregular shapes looked very sloppy and messy, so instead I tried the technique with straight strips. This worked well, but did not look as creative as my original idea- this sample could have been developed from several students in my class’s line drawings.
= = = = = = = = = = = = = = = = = = = = = = = = = = = = = = = = = = = = = = = = = = =
Figure 30: Black leather on organza (27cm x 38cm)
34 The ‘T’ Word
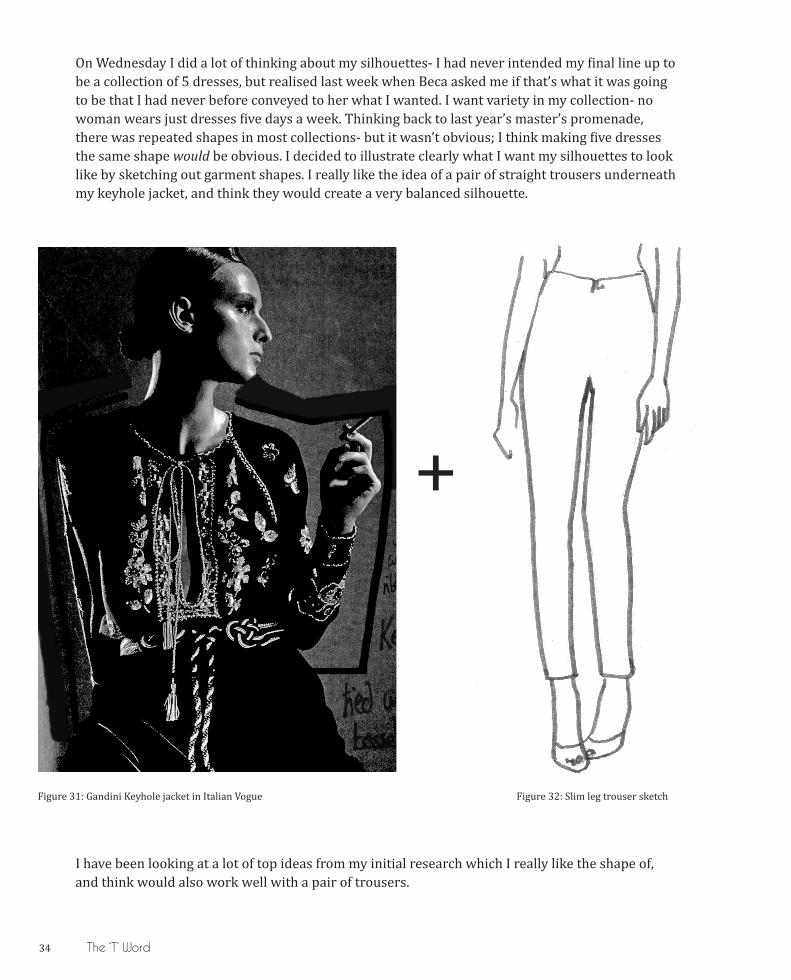
On Wednesday I did a lot of thinking about my silhouettes- I had never intended my final line up to be a collection of 5 dresses, but realised last week when Beca asked me if that’s what it was going to be that I had never before conveyed to her what I wanted. I want variety in my collection- no woman wears just dresses five days a week. Thinking back to last year’s master’s promenade, there was repeated shapes in most collections- but it wasn’t obvious; I think making five dresses the same shape would be obvious. I decided to illustrate clearly what I want my silhouettes to look like by sketching out garment shapes. I really like the idea of a pair of straight trousers underneath my keyhole jacket, and think they would create a very balanced silhouette.
+
I have been looking at a lot of top ideas from my initial research which I really like the shape of, and think would also work well with a pair of trousers.
Figure 31: Gandini Keyhole jacket in Italian Vogue Figure 32: Slim leg trouser sketch
The ‘T’ Word 35
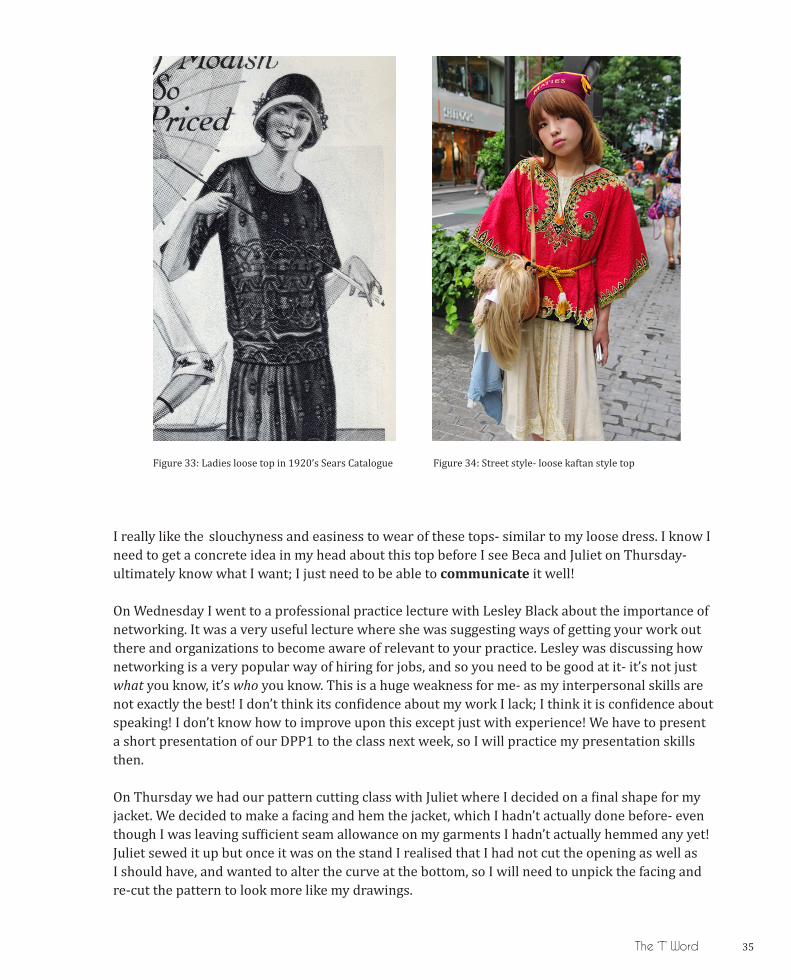
Figure 33: Ladies loose top in 1920’s Sears Catalogue Figure 34: Street style- loose kaftan style top
I really like the slouchyness and easiness to wear of these tops- similar to my loose dress. I know I need to get a concrete idea in my head about this top before I see Beca and Juliet on Thursday- ultimately know what I want; I just need to be able to communicate it well!
On Wednesday I went to a professional practice lecture with Lesley Black about the importance of networking. It was a very useful lecture where she was suggesting ways of getting your work out there and organizations to become aware of relevant to your practice. Lesley was discussing how networking is a very popular way of hiring for jobs, and so you need to be good at it- it’s not just what you know, it’s who you know. This is a huge weakness for me- as my interpersonal skills are not exactly the best! I don’t think its confidence about my work I lack; I think it is confidence about speaking! I don’t know how to improve upon this except just with experience! We have to present a short presentation of our DPP1 to the class next week, so I will practice my presentation skills then.
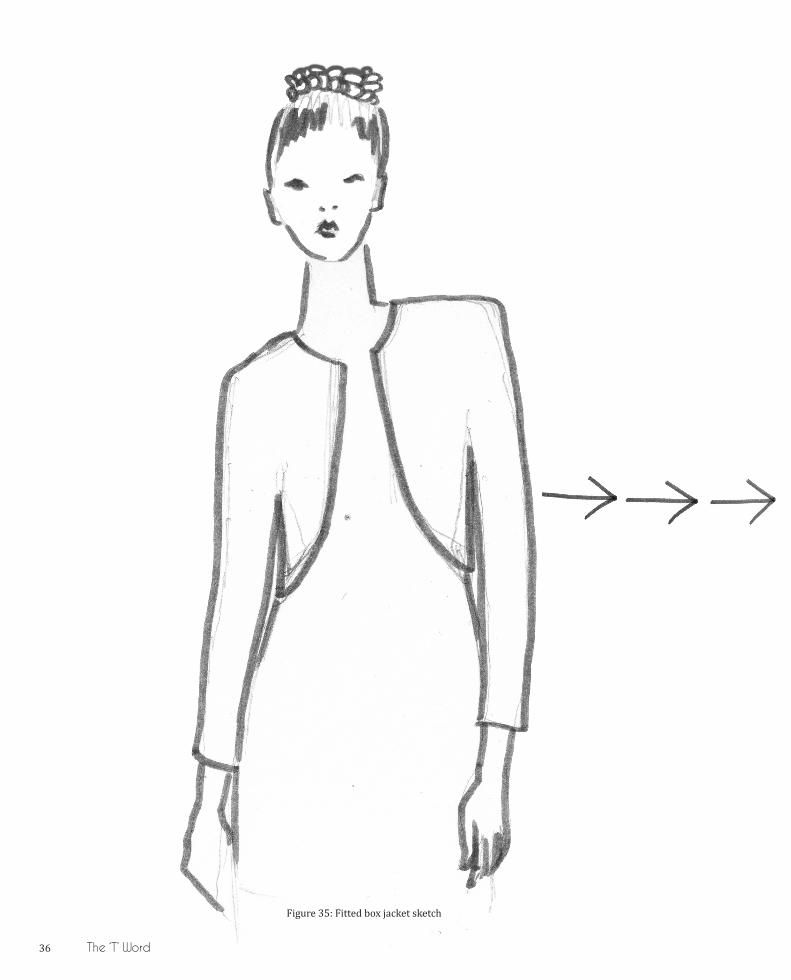
On Thursday we had our pattern cutting class with Juliet where I decided on a final shape for my jacket. We decided to make a facing and hem the jacket, which I hadn’t actually done before- even though I was leaving sufficient seam allowance on my garments I hadn’t actually hemmed any yet! Juliet sewed it up but once it was on the stand I realised that I had not cut the opening as well as I should have, and wanted to alter the curve at the bottom, so I will need to unpick the facing and re-cut the pattern to look more like my drawings.
36 The ‘T’ Word
Figure 35: Fitted box jacket sketch
The ‘T’ Word 37
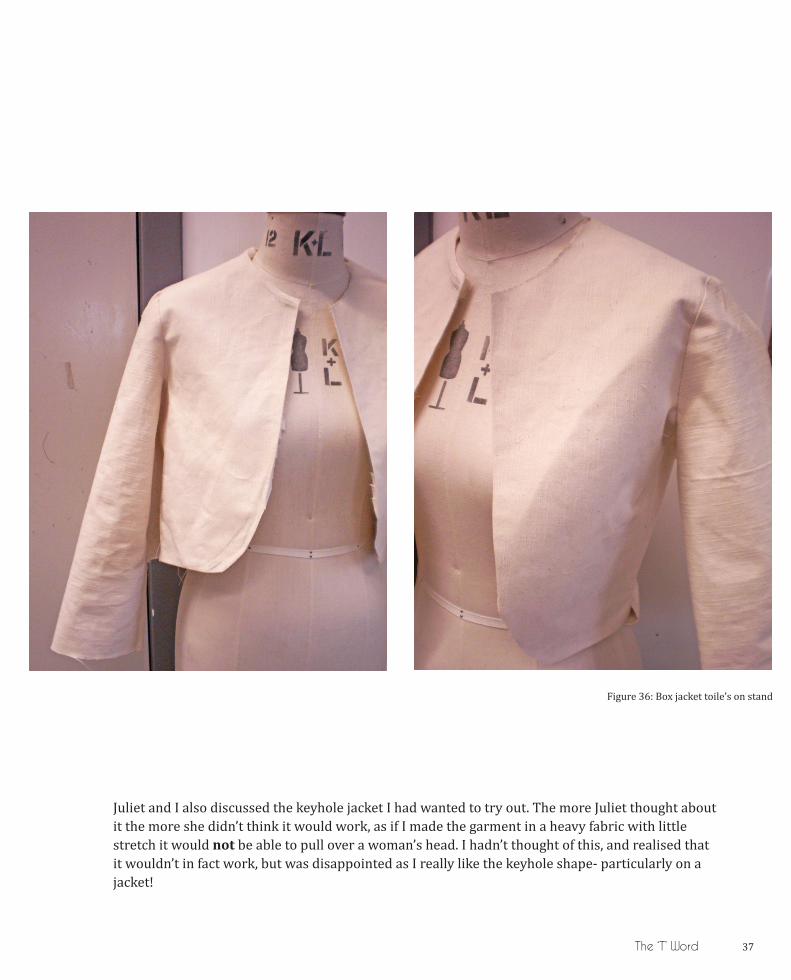
Juliet and I also discussed the keyhole jacket I had wanted to try out. The more Juliet thought about it the more she didn’t think it would work, as if I made the garment in a heavy fabric with little stretch it would not be able to pull over a woman’s head. I hadn’t thought of this, and realised that it wouldn’t in fact work, but was disappointed as I really like the keyhole shape- particularly on a jacket!
Figure 36: Box jacket toile’s on stand
38 The ‘T’ Word
Juliet suggested incorporating the keyhole idea into one of my dresses, which I thought would appear too little- girl like and young, but thought it would look good on the tops I had been looking at. The tops were simple, loose shapes too, but slightly more fitted and with no dropped shoulder.
My main aim is to make all my garments appear as unfussy and easy to wear as possible, but still be fun and feminine. I want to create a collection where you can quickly throw on a dress or a jacket and look fantastic! I will need to put a lot of thought into this top idea and toile it up!
I also had a short tutorial with Beca where we looked at my samples and ran through what I was working on with Juliet currently- then the T word was brought up again! I told her that I felt very strongly that I didn’t want trousers under my dresses, but Beca said that I need to toile them and try them out before I can make judgement on whether I like them or not. I understand that she wants me to keep an open mind, but I don’t mean I don’t like trousers under my dresses, I mean I don’t like ANY kind of trousers worn under ANY kind of dress! However, Beca obviously has much more experience than I do, so I will make them and see...
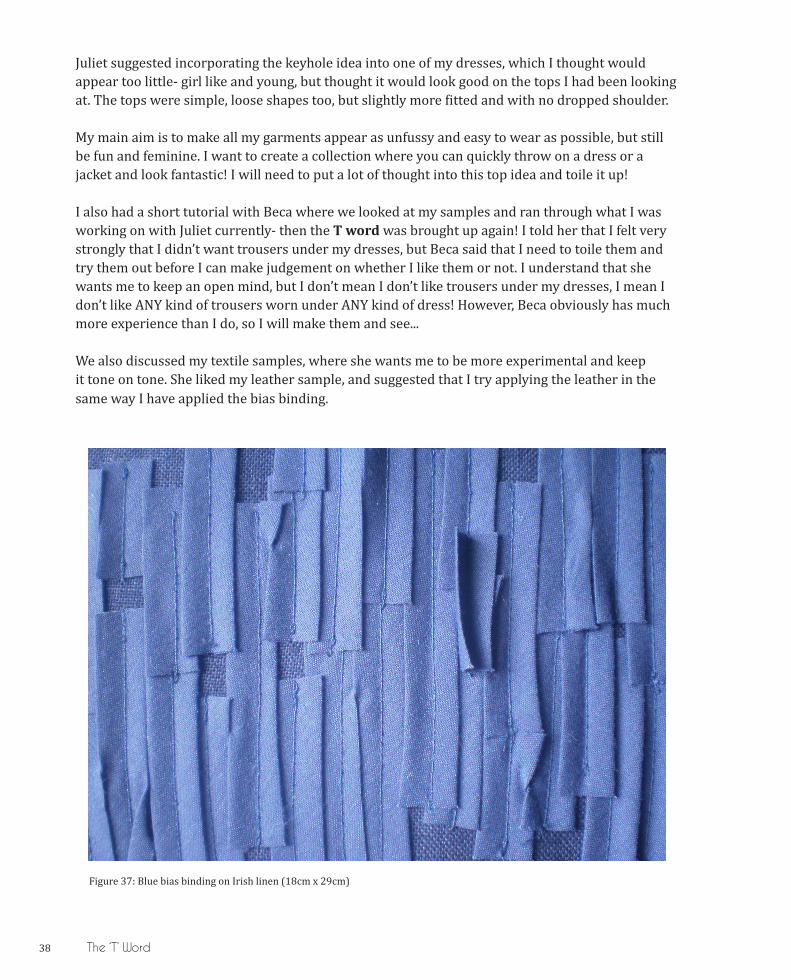
We also discussed my textile samples, where she wants me to be more experimental and keep it tone on tone. She liked my leather sample, and suggested that I try applying the leather in the same way I have applied the bias binding.
Figure 37: Blue bias binding on Irish linen (18cm x 29cm)

The ‘T’ Word 39
I think this is a really good idea and am going to try this technique out over the weekend. I am unsure how Beca feels about my samples; I am finding it quite difficult to gauge where I am, as everyone is so different I am unable to compare myself to anyone and we have been given no indication so far as to how we are doing. During tutorials we discuss what’s working and what’s not, and what I need to be doing for the following week, but I am unsure if I have actually been able to hit the ‘Masters standard’ yet. This has made me feel quite nervous about my marks for the first stage, which is the LAST thing I want to start worrying about!
At the end of the day I drafted a pattern for a top in a similar style to my dress with a keyhole slit down the front. I think I have gotten to the point where I am so slow at working on a Thursday that I just need to do things myself and show Juliet and Beca after I have attempted.
Figure 38: Keyhole top toile on body
40 The ‘T’ Word
I love the top! I am surprised at how much I like it! The pattern still needs to be perfected round the neckline and be about 5cm longer so it reaches the hips, but I am very pleased! I am really excited to start working on this with Juliet next week!
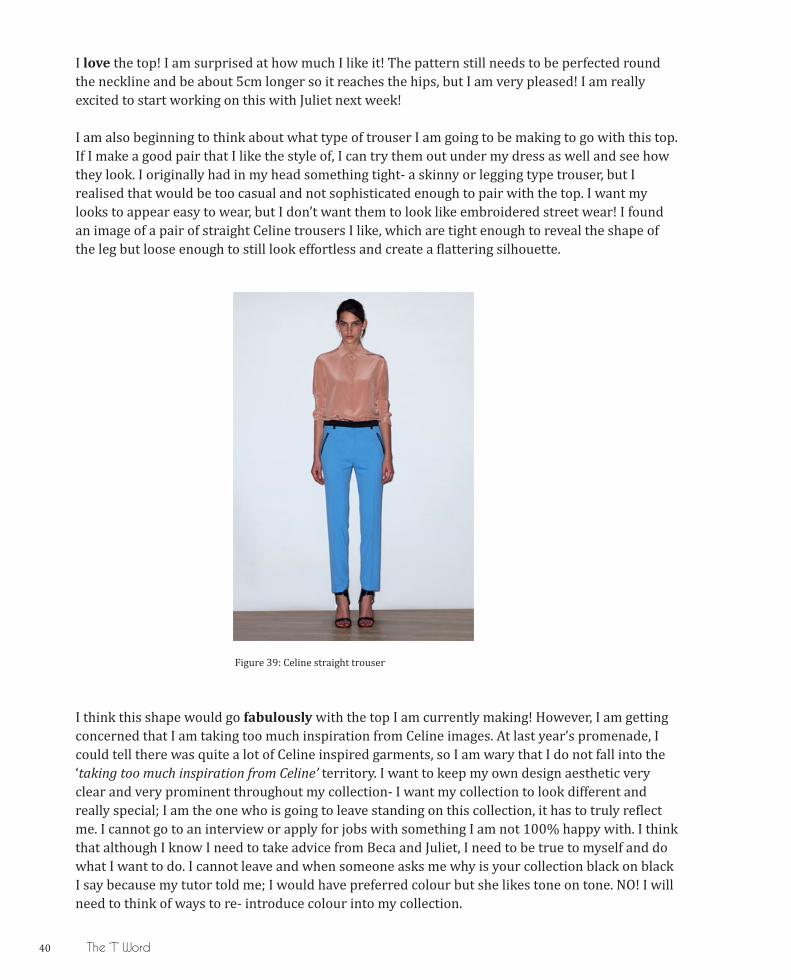
I am also beginning to think about what type of trouser I am going to be making to go with this top. If I make a good pair that I like the style of, I can try them out under my dress as well and see how they look. I originally had in my head something tight- a skinny or legging type trouser, but I realised that would be too casual and not sophisticated enough to pair with the top. I want my looks to appear easy to wear, but I don’t want them to look like embroidered street wear! I found an image of a pair of straight Celine trousers I like, which are tight enough to reveal the shape of the leg but loose enough to still look effortless and create a flattering silhouette.
Figure 39: Celine straight trouser
I think this shape would go fabulously with the top I am currently making! However, I am getting concerned that I am taking too much inspiration from Celine images. At last year’s promenade, I could tell there was quite a lot of Celine inspired garments, so I am wary that I do not fall into the ‘taking too much inspiration from Celine’ territory. I want to keep my own design aesthetic very clear and very prominent throughout my collection- I want my collection to look different and really special; I am the one who is going to leave standing on this collection, it has to truly reflect me. I cannot go to an interview or apply for jobs with something I am not 100% happy with. I think that although I know I need to take advice from Beca and Juliet, I need to be true to myself and do what I want to do. I cannot leave and when someone asks me why is your collection black on black I say because my tutor told me; I would have preferred colour but she likes tone on tone. NO! I will need to think of ways to re- introduce colour into my collection.
The ‘T’ Word 41
Bright Colourful embroidery lining
Ways to introduce colour
Bright accessories Bright border eg. bags around dresses
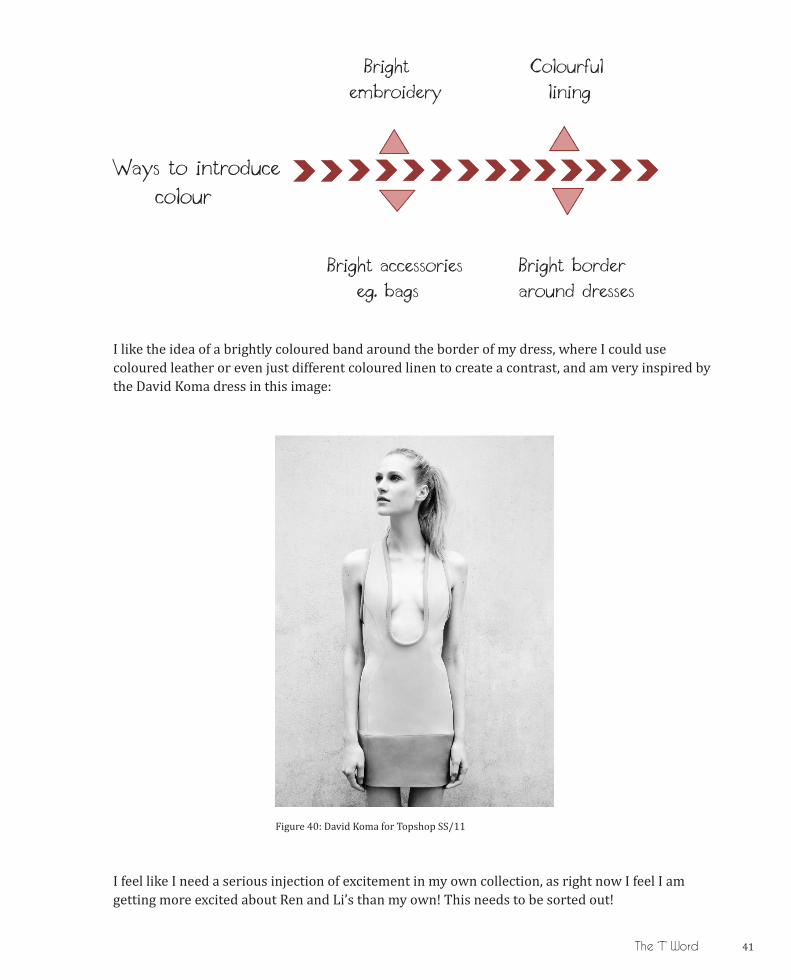
I like the idea of a brightly coloured band around the border of my dress, where I could use coloured leather or even just different coloured linen to create a contrast, and am very inspired by the David Koma dress in this image:
Figure 40: David Koma for Topshop SS/11
I feel like I need a serious injection of excitement in my own collection, as right now I feel I am getting more excited about Ren and Li’s than my own! This needs to be sorted out!
42
Sampling
Week beginning 7th February 2011
On Tuesday we had our feedback tutorials for DPP1 with Helen and Beca. I was looking forward to the session as I was very curious to see everyone in my classes DPP! It was very interesting to see how different students tackled their log and how visually attractive some peoples final submissions were. Ruby’s was very striking as she had used lot of fabulous bold colours throughout the pages of her DPP, making it very eye-catching! Dora and Li’s image quality was fantastic and their images were so clean! I realise that this is definitely something I need to work on for my next submission- I will have to improve the quality of my images by 100% and make my DPP much more visually appealing. This is really important- as even today when I was looking at other peoples I was not reading what they had written, I was flicking through their images. I really need to concentrate on this!
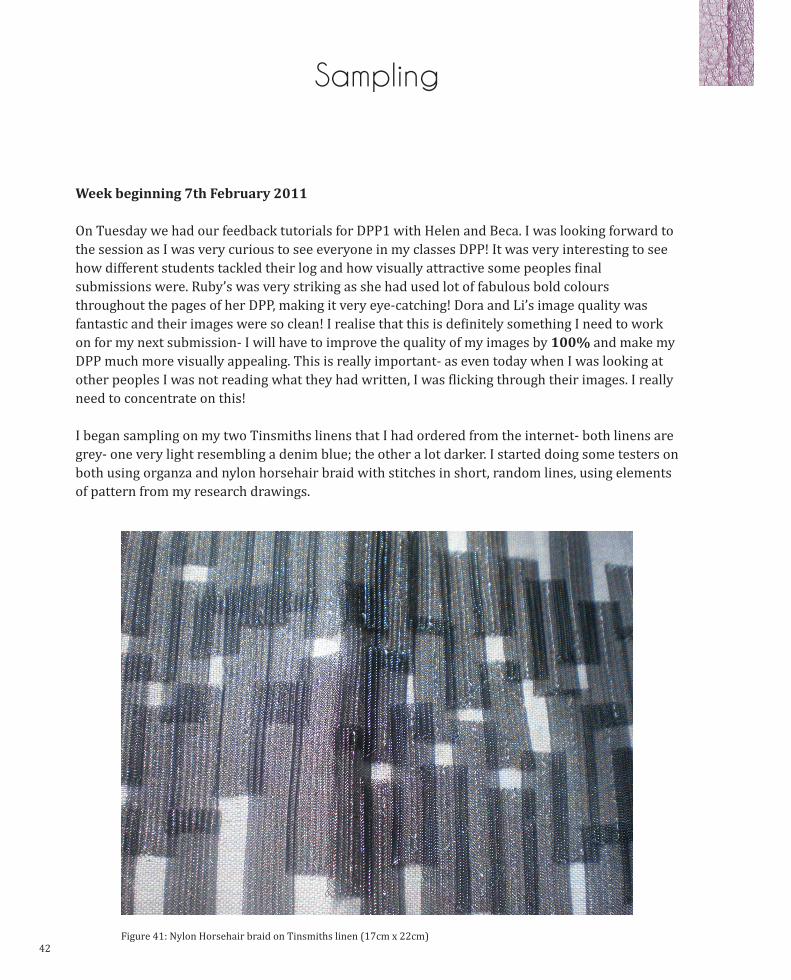
I began sampling on my two Tinsmiths linens that I had ordered from the internet- both linens are grey- one very light resembling a denim blue; the other a lot darker. I started doing some testers on both using organza and nylon horsehair braid with stitches in short, random lines, using elements of pattern from my research drawings.
Figure 41: Nylon Horsehair braid on Tinsmiths linen (17cm x 22cm)
Sampling 43
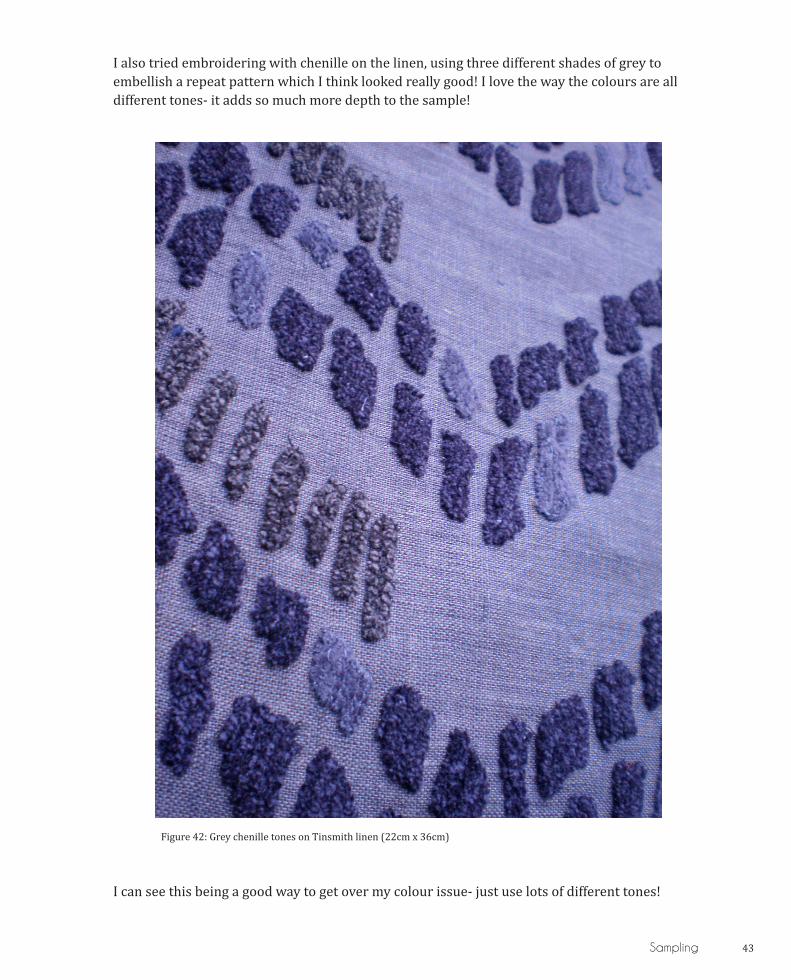
I also tried embroidering with chenille on the linen, using three different shades of grey to embellish a repeat pattern which I think looked really good! I love the way the colours are all different tones- it adds so much more depth to the sample!
Figure 42: Grey chenille tones on Tinsmith linen (22cm x 36cm)
I can see this being a good way to get over my colour issue- just use lots of different tones!
44 Sampling
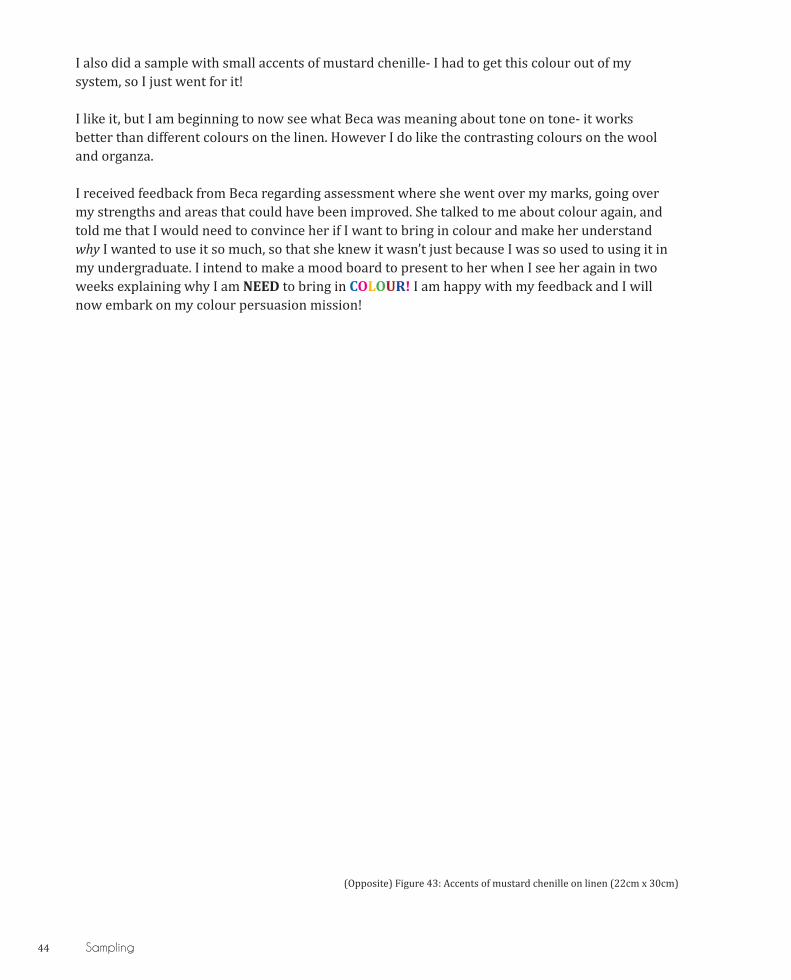
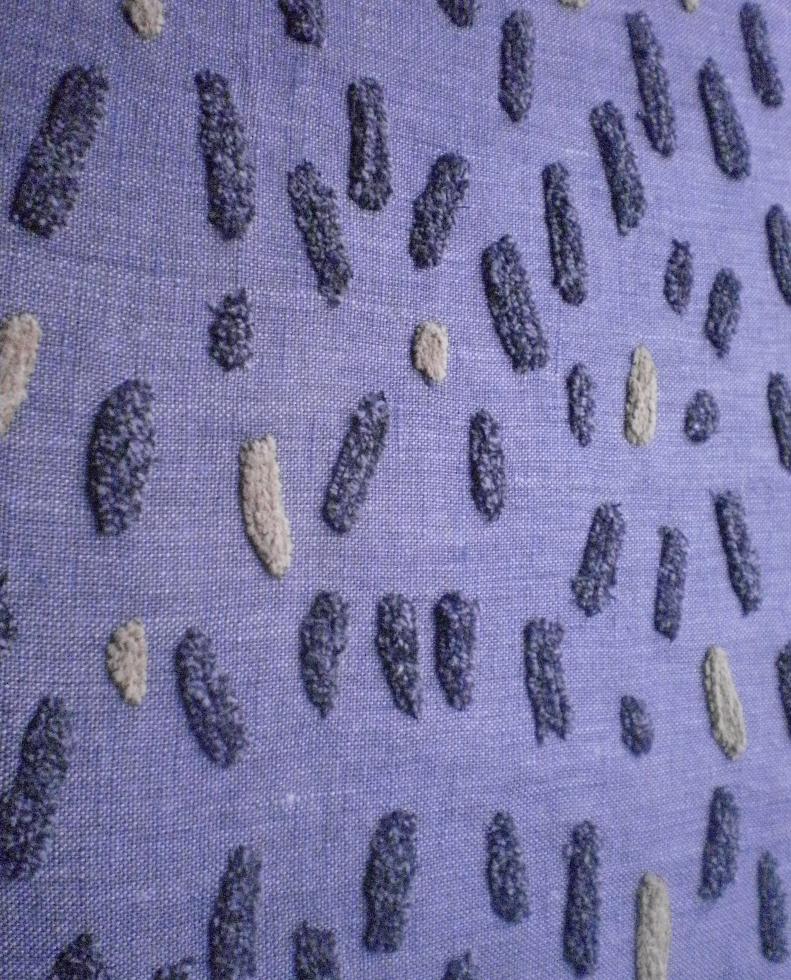
I also did a sample with small accents of mustard chenille- I had to get this colour out of mysystem, so I just went for it!
I like it, but I am beginning to now see what Beca was meaning about tone on tone- it works better than different colours on the linen. However I do like the contrasting colours on the wool and organza.
I received feedback from Beca regarding assessment where she went over my marks, going over my strengths and areas that could have been improved. She talked to me about colour again, and told me that I would need to convince her if I want to bring in colour and make her understand why I wanted to use it so much, so that she knew it wasn’t just because I was so used to using it in my undergraduate. I intend to make a mood board to present to her when I see her again in two weeks explaining why I am NEED to bring in COLOUR! I am happy with my feedback and I will now embark on my colour persuasion mission!
(Opposite) Figure 43: Accents of mustard chenille on linen (22cm x 30cm)
46 Sampling
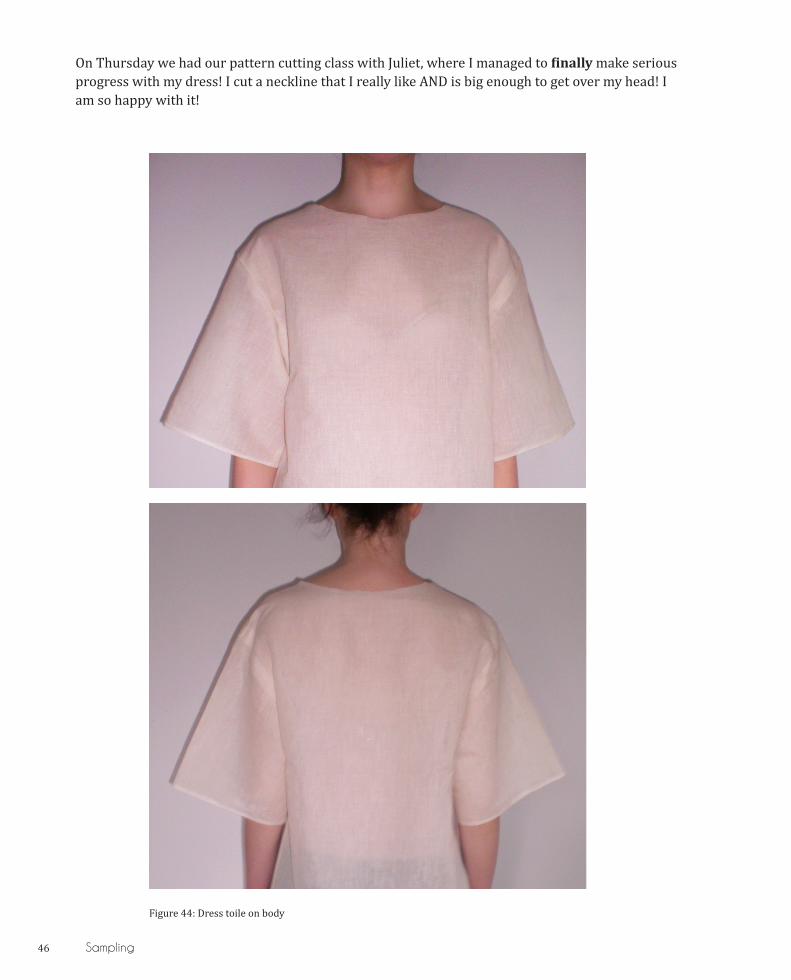
On Thursday we had our pattern cutting class with Juliet, where I managed to finally make serious progress with my dress! I cut a neckline that I really like AND is big enough to get over my head! I am so happy with it!
Figure 44: Dress toile on body
Sampling 47
I will be able to use this same pattern for the neckline of my keyhole top, which I was also working on today. Although Juliet still isn’t convinced about this keyhole idea, I really want to push for it- I love it and really want to use it! I drafted another pattern for the top and made it a lot longer so that I can adapt the length on an actual body- I am very wary of making it too short as I have a real pet hate of stomach on show! I left the keyhole uncut and slashed it after the pattern had been cut and sewn up. This toile looks a lot better than the one I made last week where the keyhole was shaped, and it sits a lot better. I intend for the keyhole to be tied closed with a ribbon- maybe with a bow, but will need to see what it looks like on an actual body before I decide!
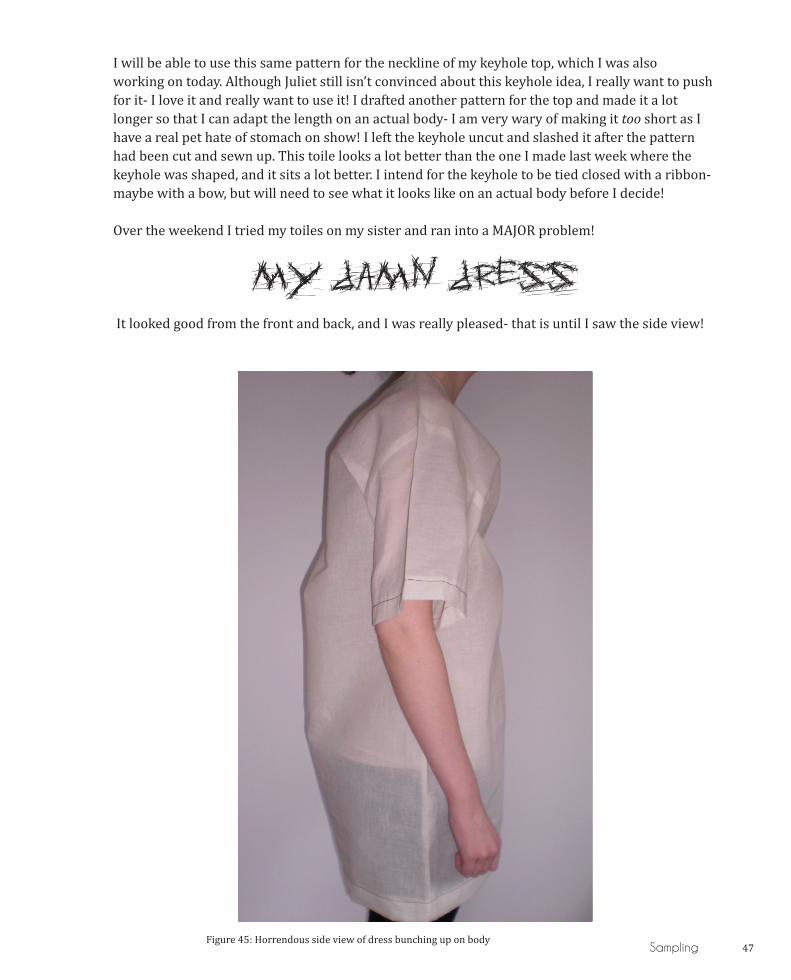
Over the weekend I tried my toiles on my sister and ran into a MAJOR problem!
MY daMN dreSS It looked good from the front and back, and I was really pleased- that is until I saw the side view!
Figure 45: Horrendous side view of dress bunching up on body
48 Sampling
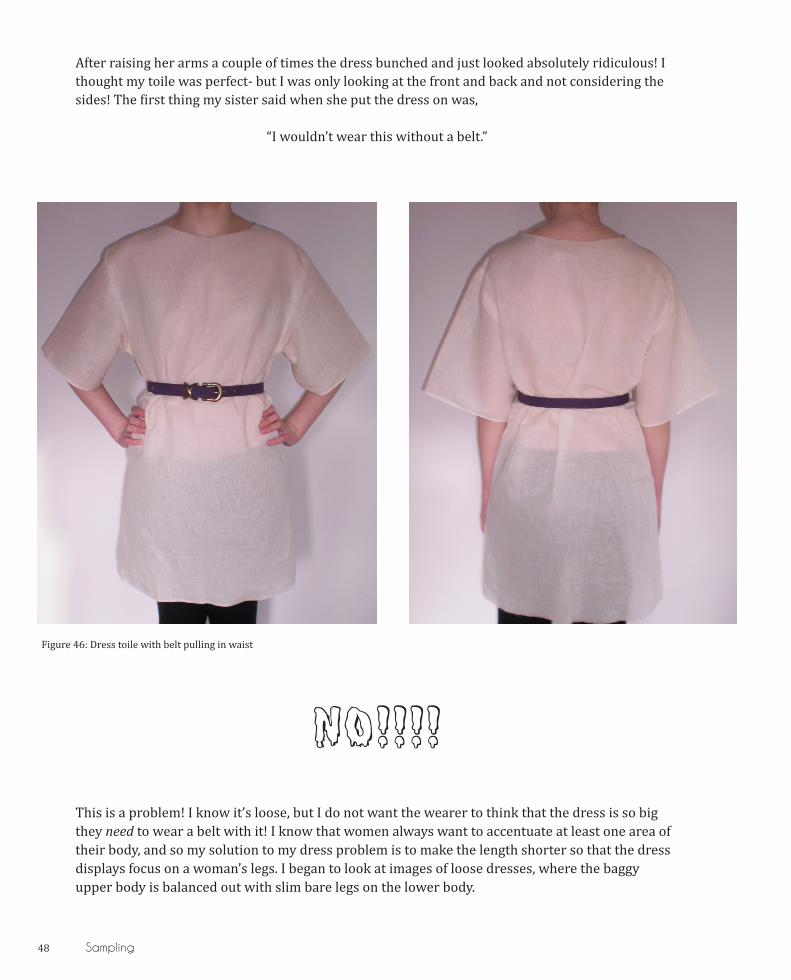
After raising her arms a couple of times the dress bunched and just looked absolutely ridiculous! I thought my toile was perfect- but I was only looking at the front and back and not considering the sides! The first thing my sister said when she put the dress on was,
“I wouldn’t wear this without a belt.”
no!!!!
This is a problem! I know it’s loose, but I do not want the wearer to think that the dress is so big they need to wear a belt with it! I know that women always want to accentuate at least one area of their body, and so my solution to my dress problem is to make the length shorter so that the dress displays focus on a woman’s legs. I began to look at images of loose dresses, where the baggy upper body is balanced out with slim bare legs on the lower body.
Figure 46: Dress toile with belt pulling in waist
Sampling 49
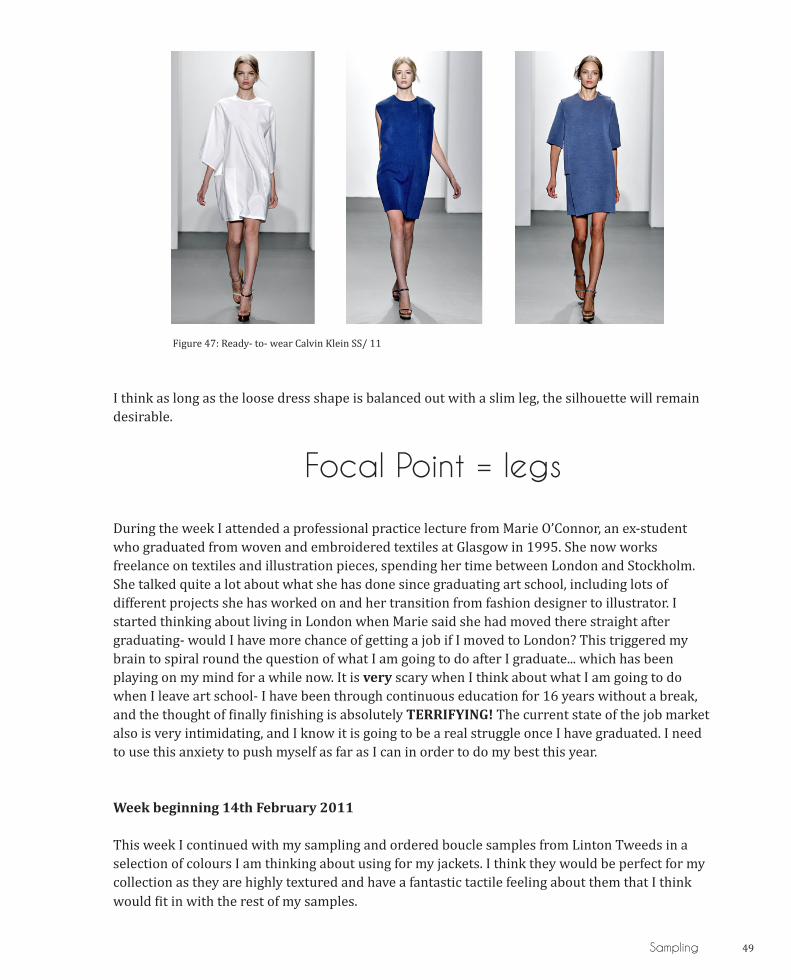
Figure 47: Ready- to- wear Calvin Klein SS/ 11
I think as long as the loose dress shape is balanced out with a slim leg, the silhouette will remain desirable.
Focal Point = legs
During the week I attended a professional practice lecture from Marie O’Connor, an ex-student who graduated from woven and embroidered textiles at Glasgow in 1995. She now works freelance on textiles and illustration pieces, spending her time between London and Stockholm. She talked quite a lot about what she has done since graduating art school, including lots of different projects she has worked on and her transition from fashion designer to illustrator. I started thinking about living in London when Marie said she had moved there straight after graduating- would I have more chance of getting a job if I moved to London? This triggered my brain to spiral round the question of what I am going to do after I graduate... which has been playing on my mind for a while now. It is very scary when I think about what I am going to do when I leave art school- I have been through continuous education for 16 years without a break, and the thought of finally finishing is absolutely TERRIFYING! The current state of the job market also is very intimidating, and I know it is going to be a real struggle once I have graduated. I need to use this anxiety to push myself as far as I can in order to do my best this year.
Week beginning 14th February 2011
This week I continued with my sampling and ordered boucle samples from Linton Tweeds in a selection of colours I am thinking about using for my jackets. I think they would be perfect for my collection as they are highly textured and have a fantastic tactile feeling about them that I think would fit in with the rest of my samples.
50 Sampling
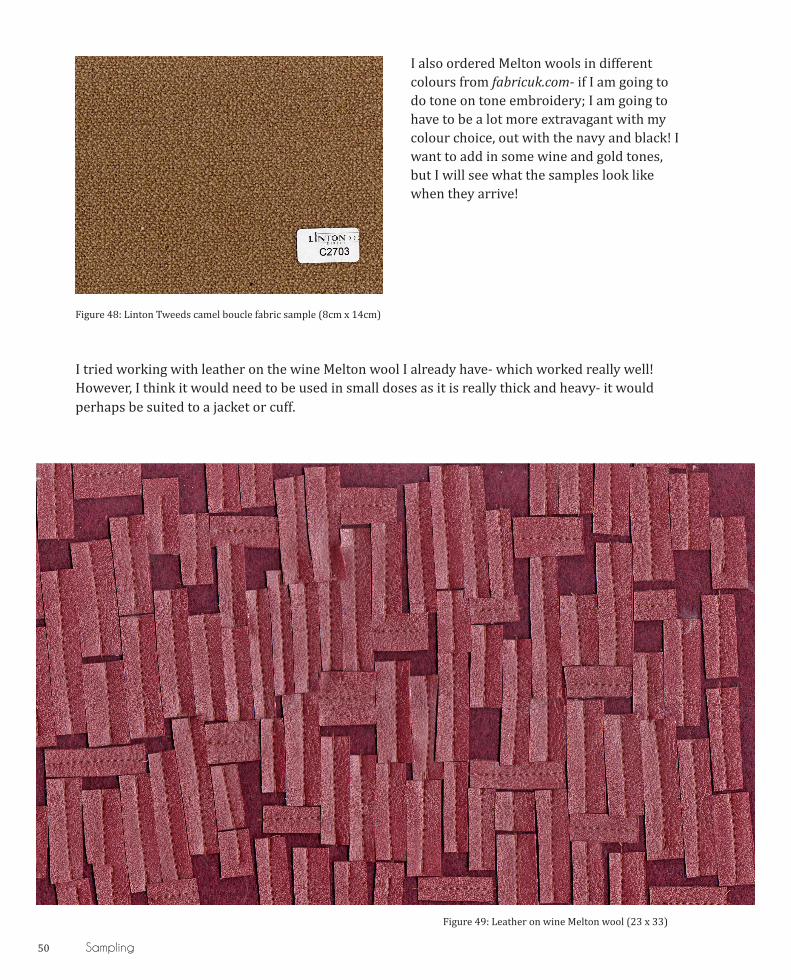
I also ordered Melton wools in different colours from fabricuk.com- if I am going to do tone on tone embroidery; I am going to have to be a lot more extravagant with my colour choice, out with the navy and black! I want to add in some wine and gold tones, but I will see what the samples look like when they arrive!
Figure 48: Linton Tweeds camel boucle fabric sample (8cm x 14cm)
I tried working with leather on the wine Melton wool I already have- which worked really well! However, I think it would need to be used in small doses as it is really thick and heavy- it would perhaps be suited to a jacket or cuff.
Figure 49: Leather on wine Melton wool (23 x 33)
Sampling 51
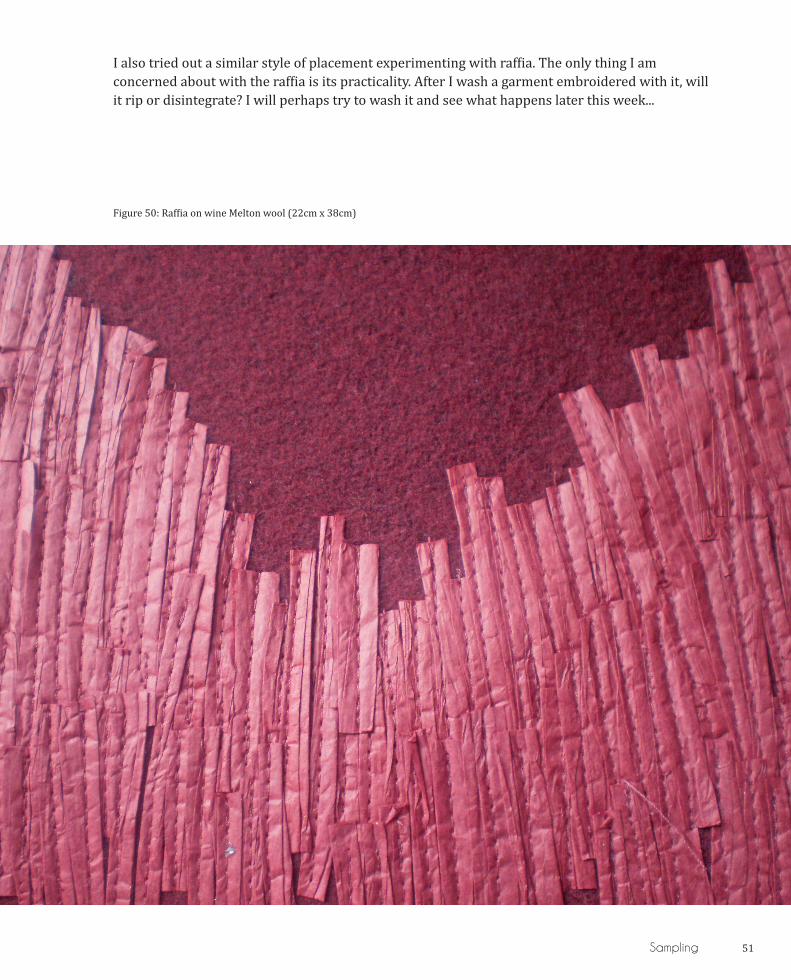
I also tried out a similar style of placement experimenting with raffia. The only thing I am concerned about with the raffia is its practicality. After I wash a garment embroidered with it, will it rip or disintegrate? I will perhaps try to wash it and see what happens later this week...
Figure 50: Raffia on wine Melton wool (22cm x 38cm)
52 Sampling
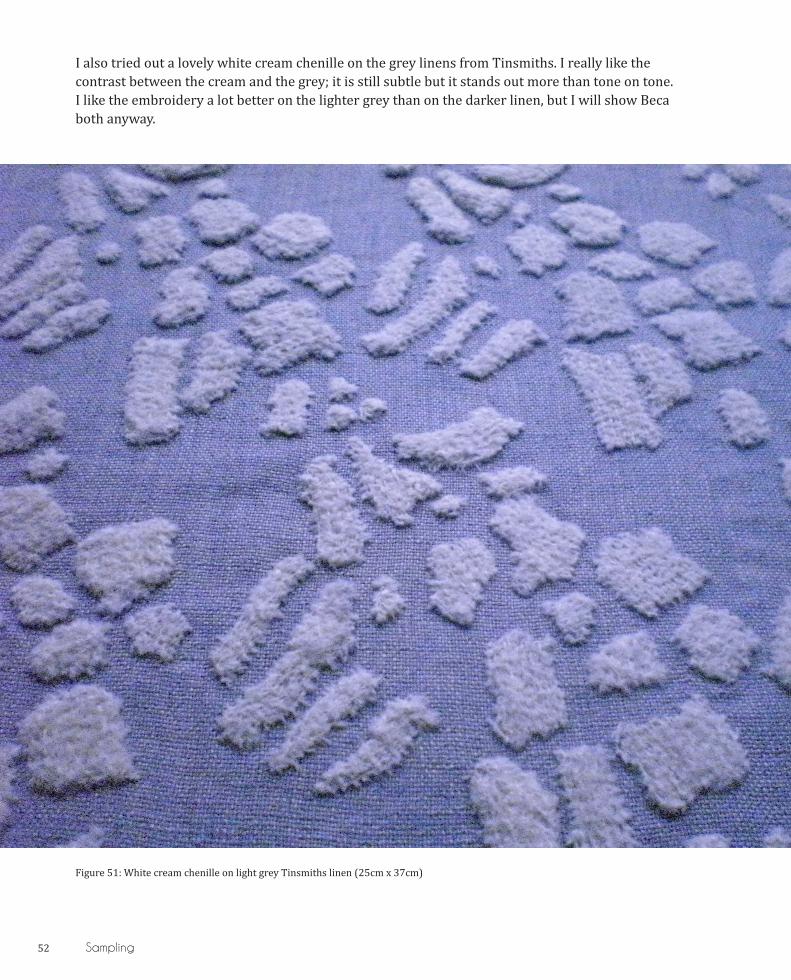
I also tried out a lovely white cream chenille on the grey linens from Tinsmiths. I really like the contrast between the cream and the grey; it is still subtle but it stands out more than tone on tone. I like the embroidery a lot better on the lighter grey than on the darker linen, but I will show Beca both anyway.
Figure 51: White cream chenille on light grey Tinsmiths linen (25cm x 37cm)

Sampling 53
Figure 52: White cream chenille on dark grey Tinsmiths linen (27cm x 30cm)
54
I experimented with tucked sections that I had been working on before Christmas- I still really like the idea of tucks on my dresses and was thinking about how to translate this onto my toile.
Figure 53: Twisted and tucked placement on dress toile
I cut about strips roughly 8cm long and hemmed them all individually before sewing themtogether to create a tucked effect. I tried a couple of failed attempts at sewing different sections together, but soon realised that it actually looked better when the fabric was tucked as one entire piece as opposed to several different strips sewn together. I need to take into consideration the fact that I want to shape the tucks around the neckline, which I am not sure will be possible to do. I think I will need Juliet’s help with this as it is more of a fabric construction problem as opposed to an embroidery problem, and need to think of ways of perfecting this.
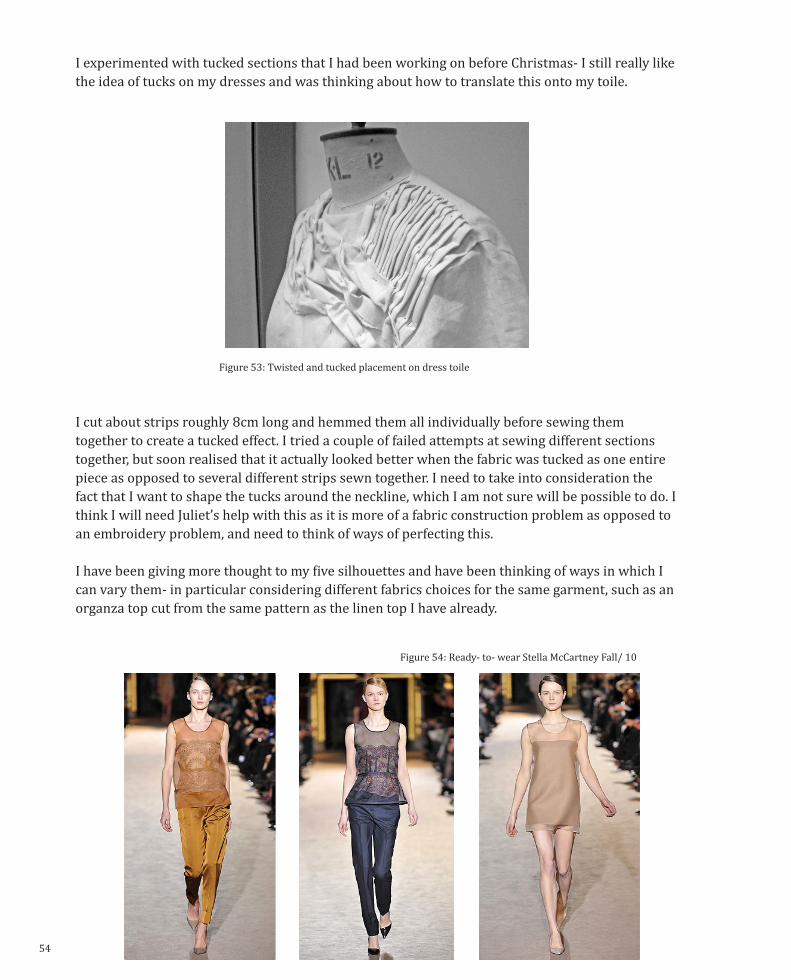
I have been giving more thought to my five silhouettes and have been thinking of ways in which I can vary them- in particular considering different fabrics choices for the same garment, such as an organza top cut from the same pattern as the linen top I have already.
Figure 54: Ready- to- wear Stella McCartney Fall/ 10
Sampling 55
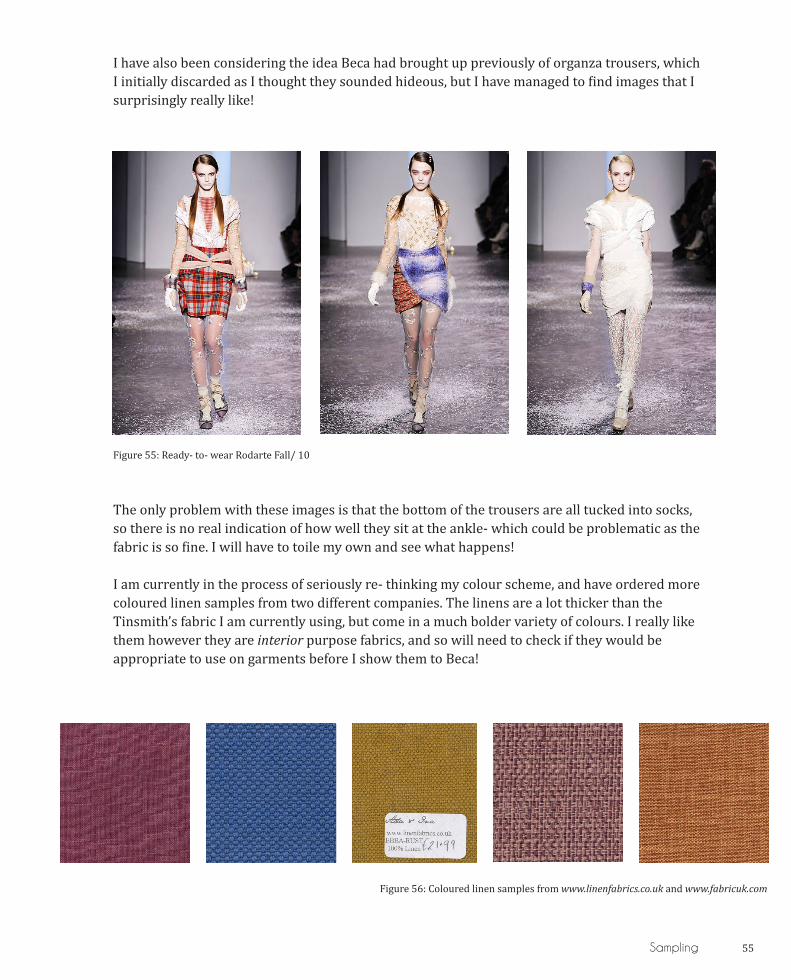
I have also been considering the idea Beca had brought up previously of organza trousers, which I initially discarded as I thought they sounded hideous, but I have managed to find images that I surprisingly really like!
Figure 55: Ready- to- wear Rodarte Fall/ 10
The only problem with these images is that the bottom of the trousers are all tucked into socks, so there is no real indication of how well they sit at the ankle- which could be problematic as the fabric is so fine. I will have to toile my own and see what happens!
I am currently in the process of seriously re- thinking my colour scheme, and have ordered more coloured linen samples from two different companies. The linens are a lot thicker than the Tinsmith’s fabric I am currently using, but come in a much bolder variety of colours. I really like them however they are interior purpose fabrics, and so will need to check if they would be appropriate to use on garments before I show them to Beca!
Figure 56: Coloured linen samples from www.linenfabrics.co.uk and www.fabricuk.com

Sampling 57
I have put together an A3 mood board, making it as bright as possible to try and convince Beca how much I NEED to inject colour back into my collection!
I intend to hopefully persuade Beca into ‘allowing’ me to use more colour in my collection. As my embroidery is going to be largely tone on tone, I really need to broaden my colour choice for my fabric- I want my garments to be bright and exciting!
On Thursday we had our pattern cutting class with Juliet, as even though it was reading week she suggested that we run right through. I altered my dress shape so it is slightly more fitted at the top, which does make the shape look slightly more A line, but needed to be done in order for the dress to sit right on the body. I am really pleased with it! I now need to concentrate on the sleeve length and the actual length of the dress itself and then my toile will be perfect! I am also starting to think about the different jackets I want in my collection. I like the original jacket pattern I have perfected, and have drafted a similar pattern which I will hopefully cut next week along with my trousers.
Week beginning 21st February 2011
On Tuesday I went into the studio to re-cut the neckline on my dress- after thinking I had made the perfect toile last Thursday with Juliet- with facing and everything, I discovered at the weekend I had added too much seam allowance and could NOT get my head through it! I was really angry at myself as I had the shape perfect, but had just not considered the seam allowance properly! I unpicked the facing and re-cut the neck on both the toile and the original pattern- this time it definitely fits! Hopefully Juliet will be able to sew up first thing on Thursday morning.
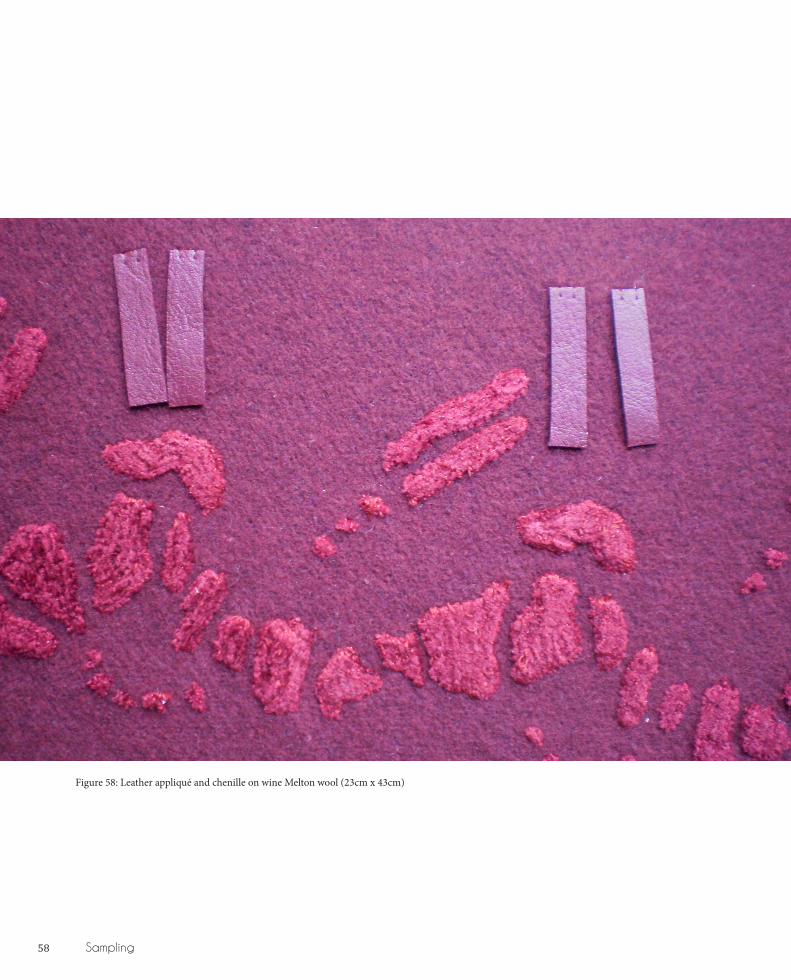
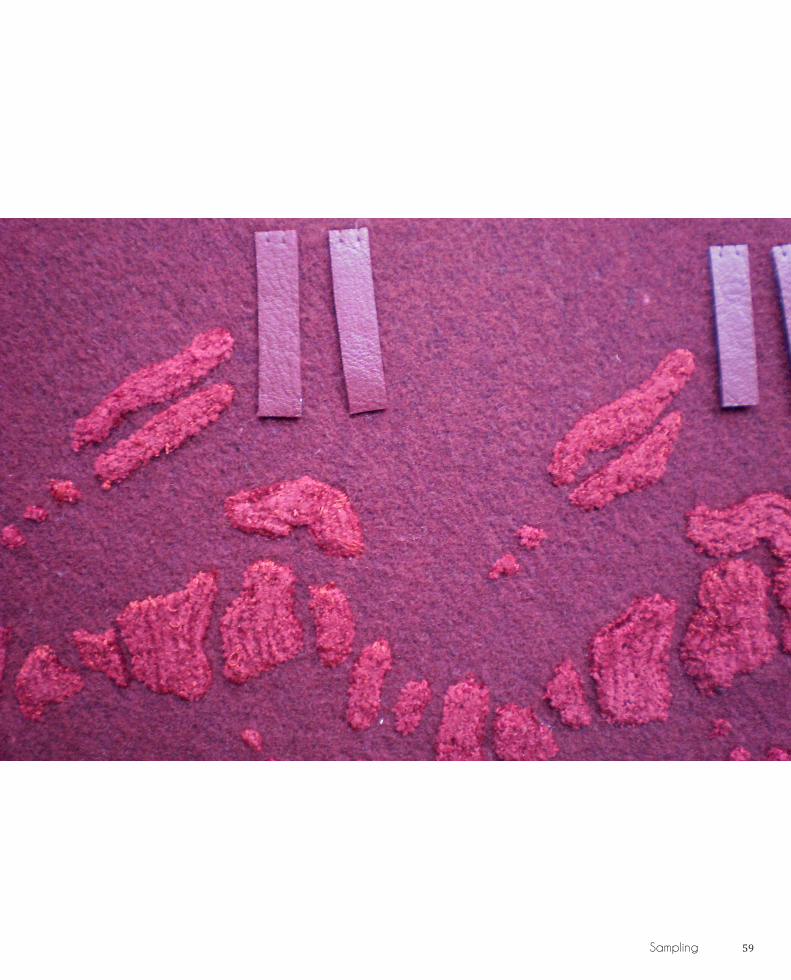
The rest of the week I continued sampling and experimenting with the wine coloured wool that I want to use for my little jackets. I tried out chenille and leather appliqué which I think looks amazing- I think the placement would work well as a border round a jacket!
(Oppostie) Figure 57: Colour moodboard (42cm x 58cm)
58 Sampling
Figure 58: Leather appliqué and chenille on wine Melton wool (23cm x 43cm)
Sampling 59

60 Sampling
I have been thinking about the practicality of my textiles more and more recently, and will need to continue to do so whilst I am sampling this week before my next tutorial with Beca- I don’t want to be sampling unpractical embroidery I will be unable to use in actual garments. I have planned key samples that I need to do before I see her again next Monday:
• Leather at bottom of linen- border • Boucle embroidery on navy organza • Organza ribbon on linen
On Thursday we had our pattern cutting class with Juliet which went really well! I managed to get in early and Juliet sewed up the new facing for my dress and the facing for my keyhole top. The dress is now perfect and the keyhole top toile looks amazing! I absolutely love it! I love the fact that the slit is not shaped, it is just cut straight down, and now only need to think about how I am going to attach the ribbons at the top- if they are going to be attached to the actual top itself or through an eyelet.
Figure 59: Finished keyhole top toile on body
Sampling 61
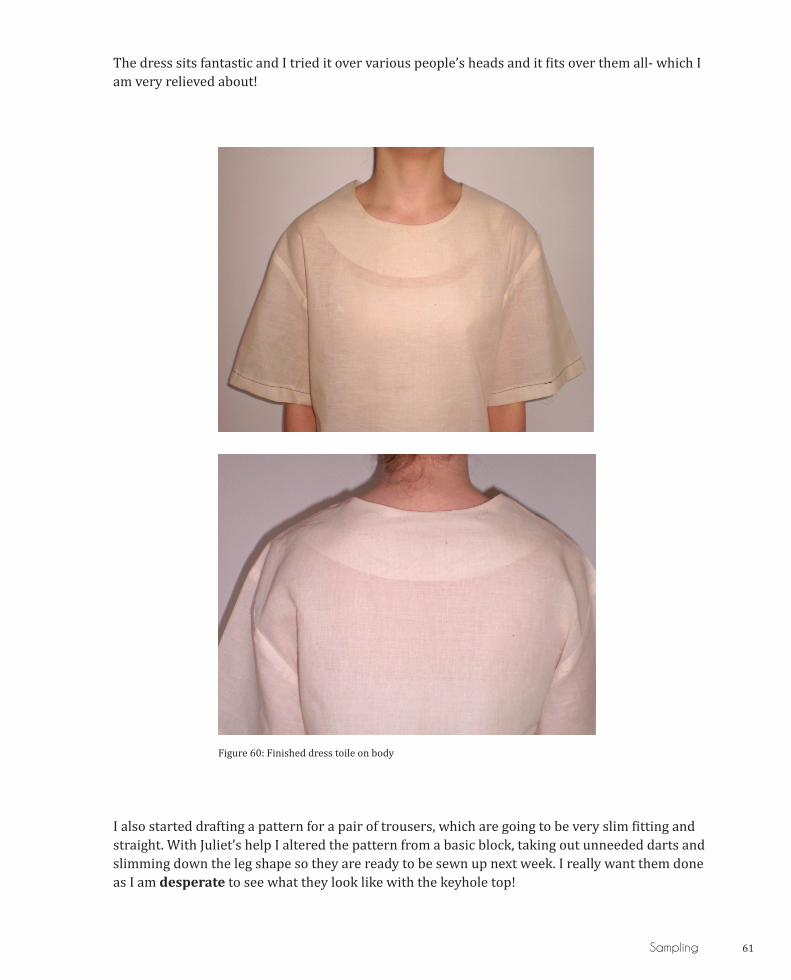
The dress sits fantastic and I tried it over various people’s heads and it fits over them all- which I am very relieved about!
Figure 60: Finished dress toile on body
I also started drafting a pattern for a pair of trousers, which are going to be very slim fitting and straight. With Juliet’s help I altered the pattern from a basic block, taking out unneeded darts and slimming down the leg shape so they are ready to be sewn up next week. I really want them done as I am desperate to see what they look like with the keyhole top!

62
The Marriage of Two Techniques
Week beginning 28th February 2011
On Monday I had my first tutorial with Beca for about three weeks where I showed her how I was getting on with sampling so far. We looked through all my samples, picking out which ones I liked and which ones Beca liked- which were very different! Beca suggested that I continue to sample but in more experimental ways, marrying together techniques I have used separately into single samples. I find this idea interesting and think it will work well, and so will try this out later on in the week. The only thing that worried me about my tutorial was the fact that Beca liked the textile samples I did not, and vice versa. We both compromised and picked out the samples that were going to be taken forward.
Figure 61: Grey boucle on Tinsmith linen (29cm x 33cm)
The Marriage of Two Techniques 63
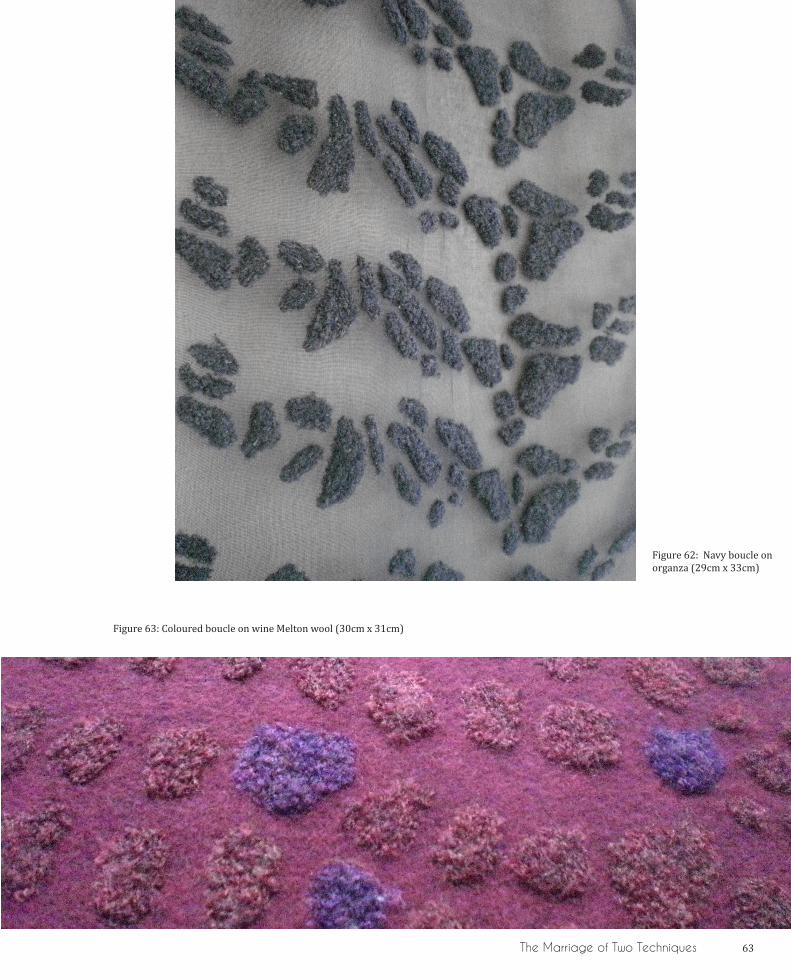
Figure 63: Coloured boucle on wine Melton wool (30cm x 31cm)
Figure 62: Navy boucle on organza (29cm x 33cm)
64 The Marriage of Two Techniques
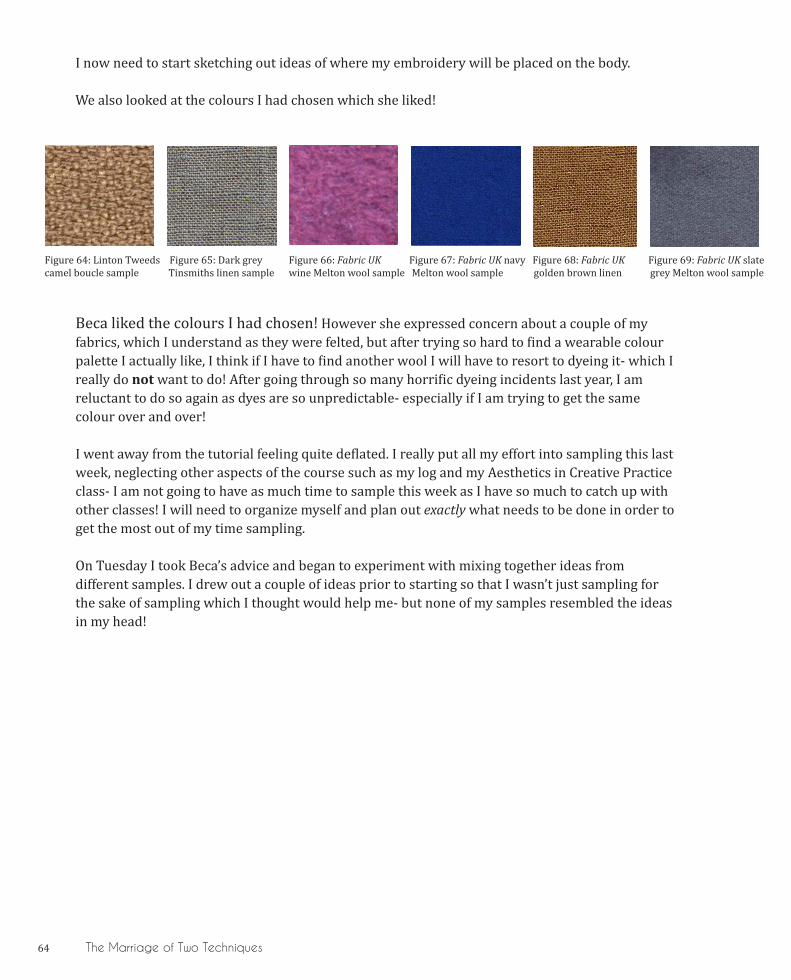
I now need to start sketching out ideas of where my embroidery will be placed on the body.
We also looked at the colours I had chosen which she liked!
Beca liked the colours I had chosen! However she expressed concern about a couple of my fabrics, which I understand as they were felted, but after trying so hard to find a wearable colour palette I actually like, I think if I have to find another wool I will have to resort to dyeing it- which I really do not want to do! After going through so many horrific dyeing incidents last year, I am reluctant to do so again as dyes are so unpredictable- especially if I am trying to get the same colour over and over!
I went away from the tutorial feeling quite deflated. I really put all my effort into sampling this last week, neglecting other aspects of the course such as my log and my Aesthetics in Creative Practice class- I am not going to have as much time to sample this week as I have so much to catch up with other classes! I will need to organize myself and plan out exactly what needs to be done in order to get the most out of my time sampling.
On Tuesday I took Beca’s advice and began to experiment with mixing together ideas from different samples. I drew out a couple of ideas prior to starting so that I wasn’t just sampling for the sake of sampling which I thought would help me- but none of my samples resembled the ideas in my head!
Figure 64: Linton Tweeds Figure 65: Dark grey Figure 66: Fabric UK Figure 67: Fabric UK navy Figure 68: Fabric UK Figure 69: Fabric UK slatecamel boucle sample Tinsmiths linen sample wine Melton wool sample Melton wool sample golden brown linen grey Melton wool sample
The Marriage of Two Techniques 65
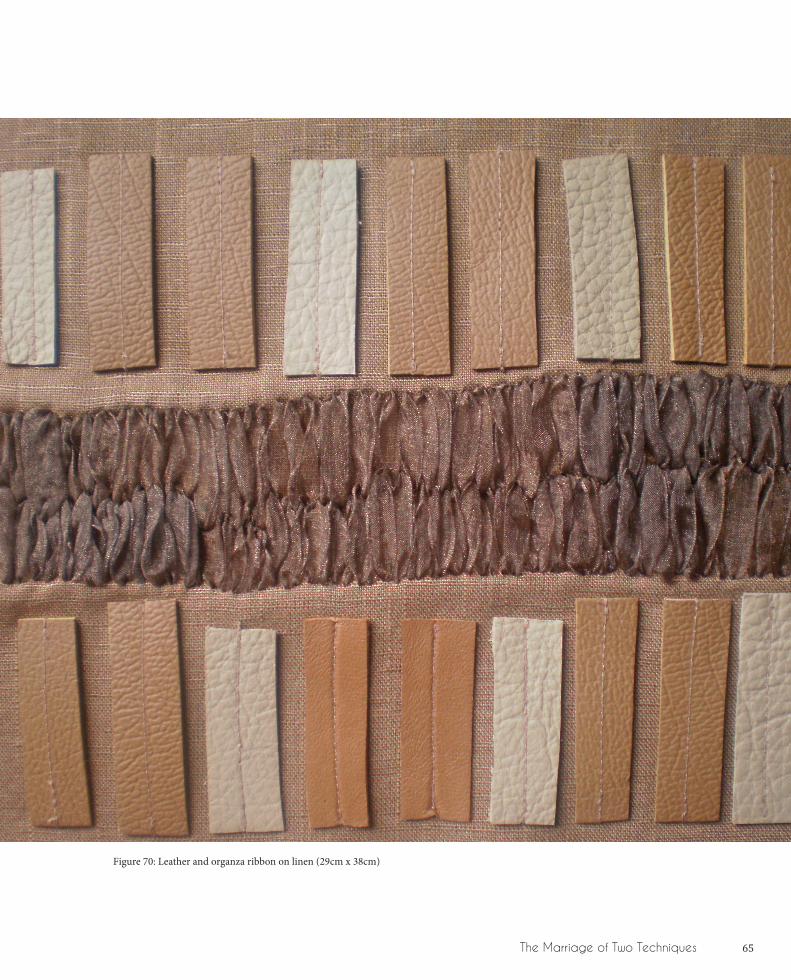
Figure 70: Leather and organza ribbon on linen (29cm x 38cm)
66 The Marriage of Two Techniques
On Thursday we had our pattern cutting class with Juliet where I was working on my trousers. At my tutorial with Beca on Monday, she suggested leaving the slim leg trouser and to begin working on the organza trousers that were to go under my dresses, which were more like a legging with an elastic waistband. It took quite a while to draft the pattern and cut the fabric for the organza trousers- and even longer for Juliet to sew up as she kindly French seamed the whole thing for me! After they were made up, I tried them on a third year student- they were far too big for her! At first I was really panicking, however I realised that she would probably be smaller than the models we will actually be using for the show. Juliet suggested leaving the trousers as they are until my review with herself and Beca on the 17th, where the trousers can be tried on a proper model and we can discuss what needs to be done to them then. I am worried for the fitting as none of my garments are actually properly finished- none have lining and as I have sewed up a lot of them myself they look very hap hazard- especially under the arms! However if this is the only way I can improve my sewing I will just need to continue to stitch up the toile’s that I can myself until I get better!
Week beginning 7th March 2011
On Monday I had my tutorial with Helen about my second Design Process Portfolio. It went well, where we primarily discussed my DPP1 and went over changes that could be made to improve my next submission. It is only now I realise how soon the deadline is! I will really need to get a move on with my DPP2! I am excited to start putting it together as I really enjoyed compiling my first submission; the final result is such a motivation as I thought everyone in my classes DPP1 looked so professional!
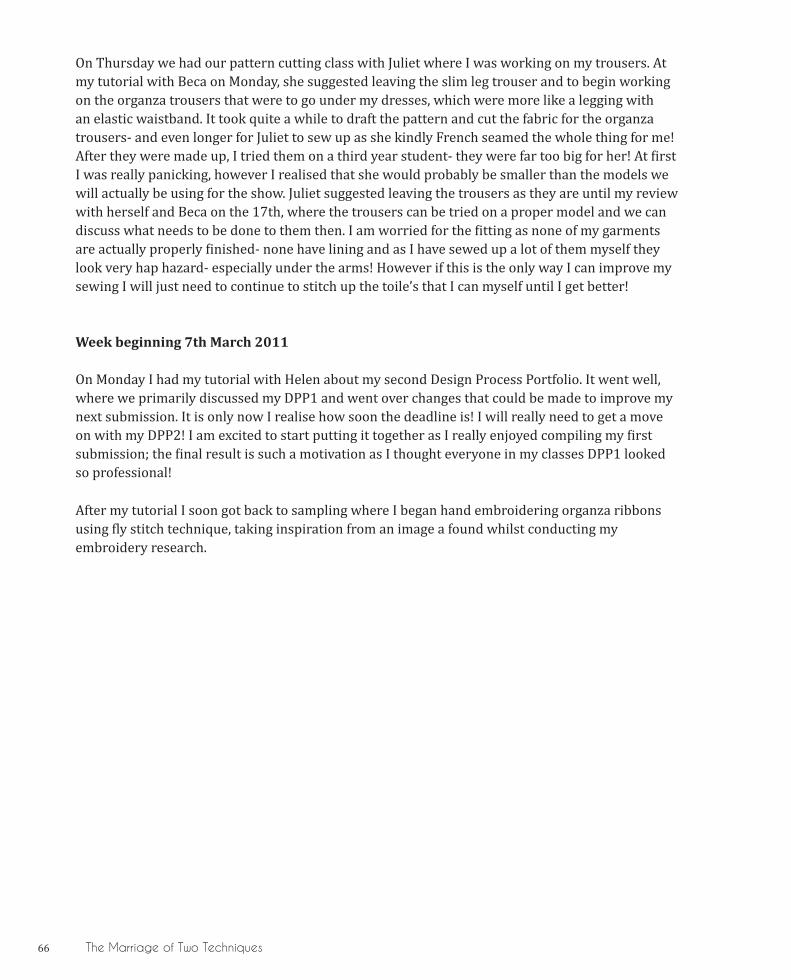
After my tutorial I soon got back to sampling where I began hand embroidering organza ribbons using fly stitch technique, taking inspiration from an image a found whilst conducting my embroidery research.
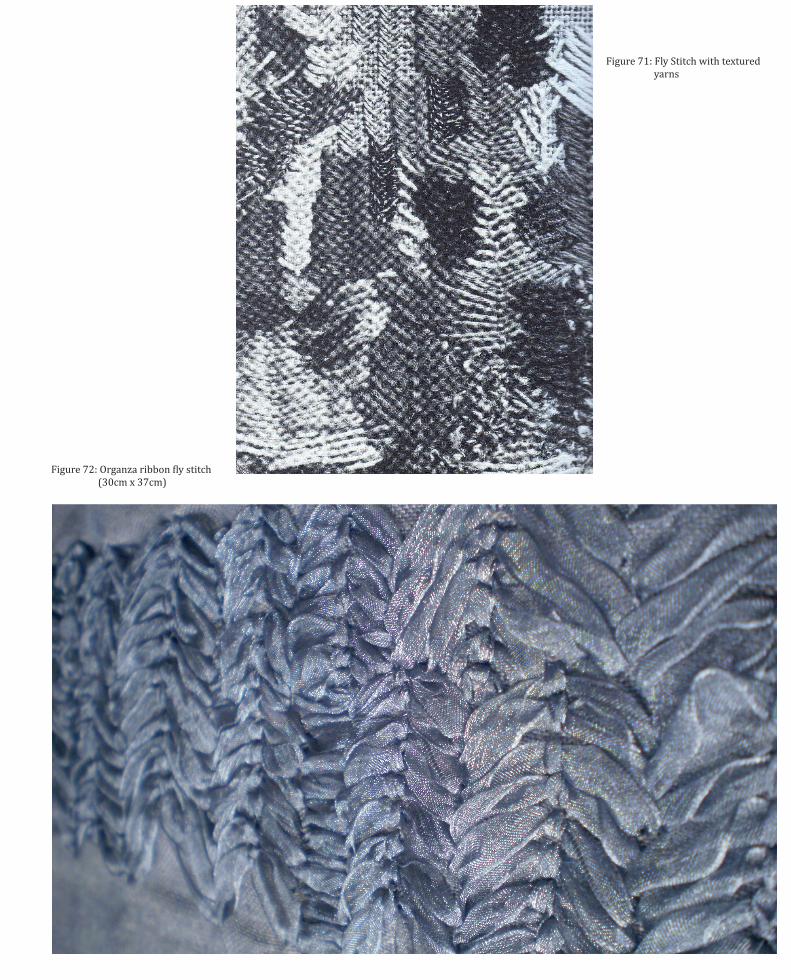
Figure 71: Fly Stitch with textured yarns
Figure 72: Organza ribbon fly stitch (30cm x 37cm)
68 The Marriage of Two Techniques
Although I really like the texture this creates, I used 15m of ribbon for this small band of sample! This technique eats up materials heavily! I will continue to experiment with different stitches before I see Beca and Juliet next week... I am determined to have a good tutorial!
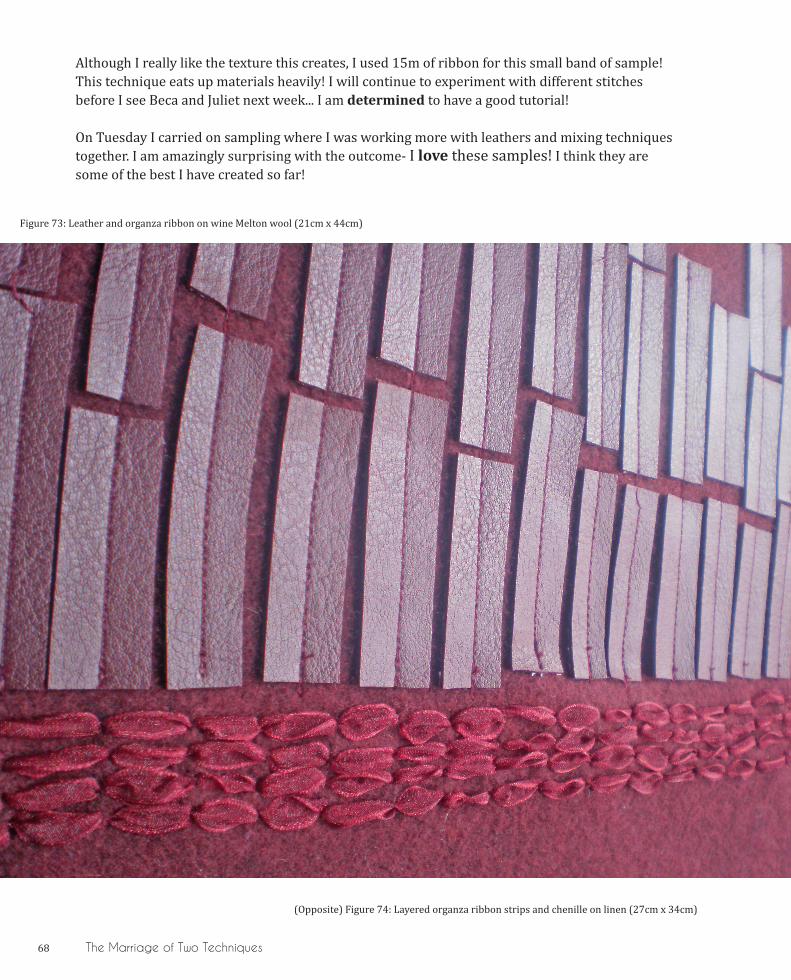
On Tuesday I carried on sampling where I was working more with leathers and mixing techniques together. I am amazingly surprising with the outcome- I love these samples! I think they are some of the best I have created so far!
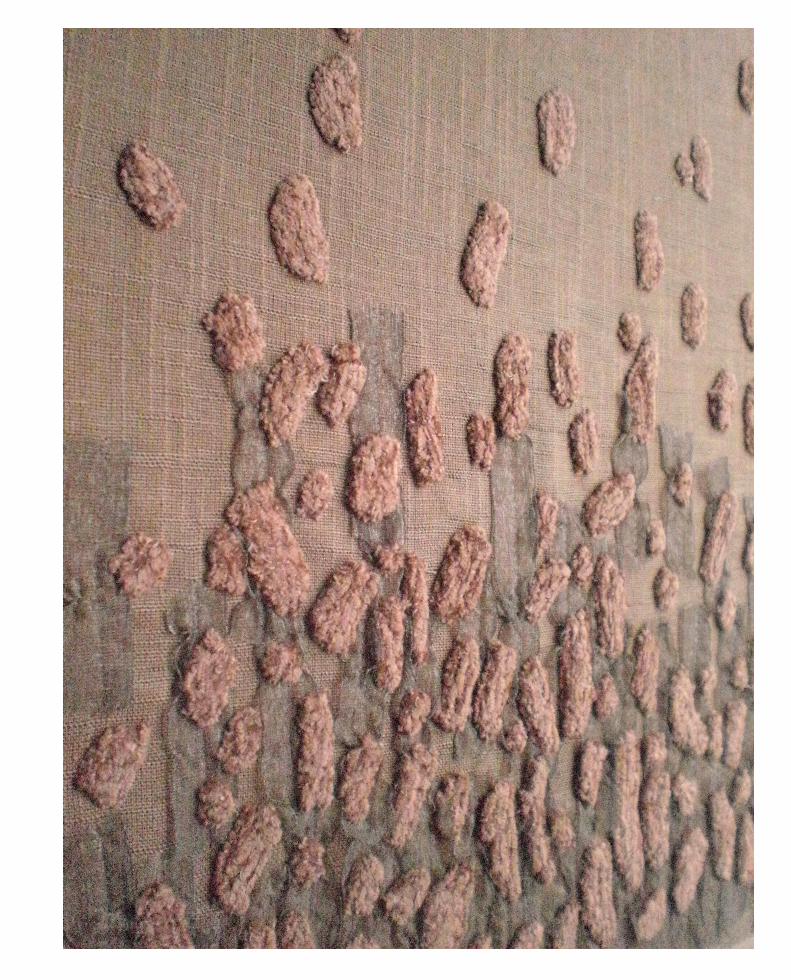
(Opposite) Figure 74: Layered organza ribbon strips and chenille on linen (27cm x 34cm)
Figure 73: Leather and organza ribbon on wine Melton wool (21cm x 44cm)
70 The Marriage of Two Techniques
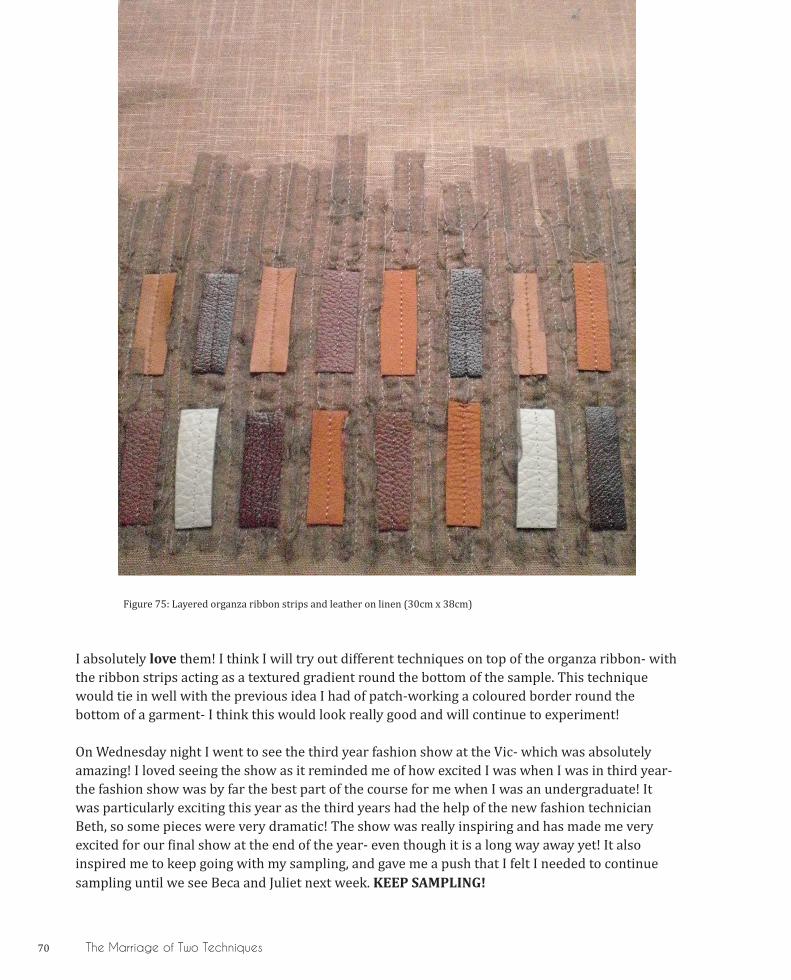
Figure 75: Layered organza ribbon strips and leather on linen (30cm x 38cm)
I absolutely love them! I think I will try out different techniques on top of the organza ribbon- with the ribbon strips acting as a textured gradient round the bottom of the sample. This technique would tie in well with the previous idea I had of patch-working a coloured border round the bottom of a garment- I think this would look really good and will continue to experiment!
On Wednesday night I went to see the third year fashion show at the Vic- which was absolutely amazing! I loved seeing the show as it reminded me of how excited I was when I was in third year- the fashion show was by far the best part of the course for me when I was an undergraduate! It was particularly exciting this year as the third years had the help of the new fashion technician Beth, so some pieces were very dramatic! The show was really inspiring and has made me very excited for our final show at the end of the year- even though it is a long way away yet! It also inspired me to keep going with my sampling, and gave me a push that I felt I needed to continue sampling until we see Beca and Juliet next week. KEEP SAMPLING!
Crunch Time- Interm Review
Week beginning 14th March 2011
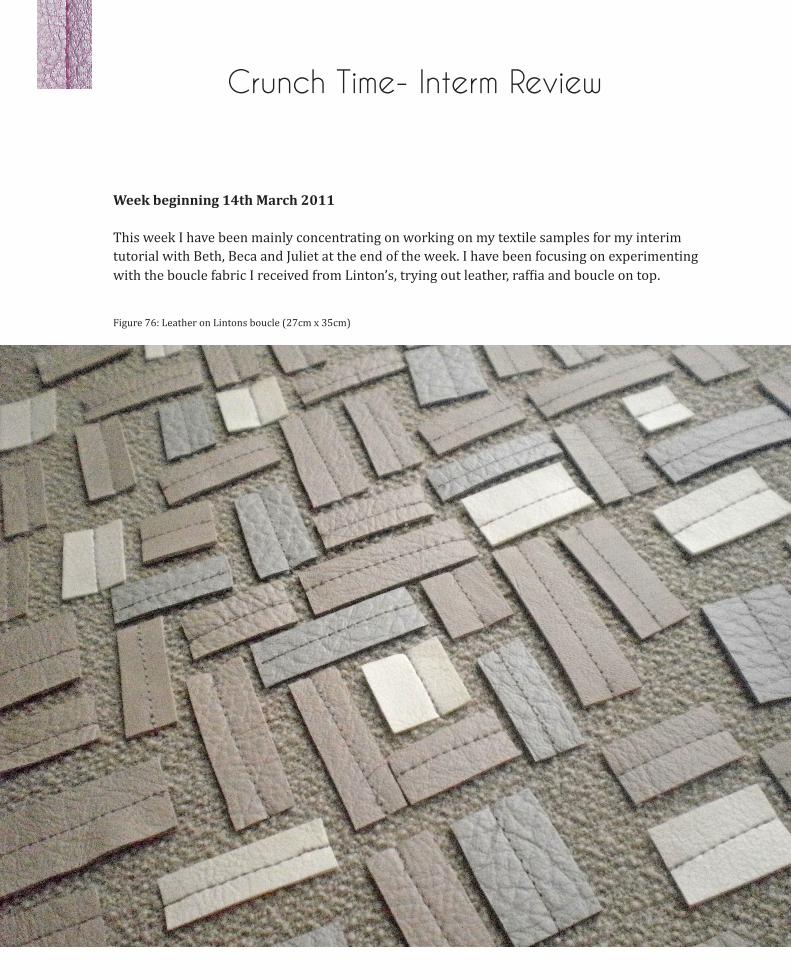
This week I have been mainly concentrating on working on my textile samples for my interim tutorial with Beth, Beca and Juliet at the end of the week. I have been focusing on experimenting with the boucle fabric I received from Linton’s, trying out leather, raffia and boucle on top.
Figure 76: Leather on Lintons boucle (27cm x 35cm)
72 The Marriage of Two Techniques
I really like the colour of the boucle and think it fits in well with my collection. Although I really like the fact that it’s so heavily textured, I think the reason it works so well is because it will be used in moderation! I think too much boucle could look old-fashioned; however it works well in small doses. I have also found a great supplier for coloured wools which I managed to get from Beth the amazing fashion technician! I am really lucky to have found a supplier which stocks wools in the colours I want- I am so glad I won’t have to resort to dyeing!
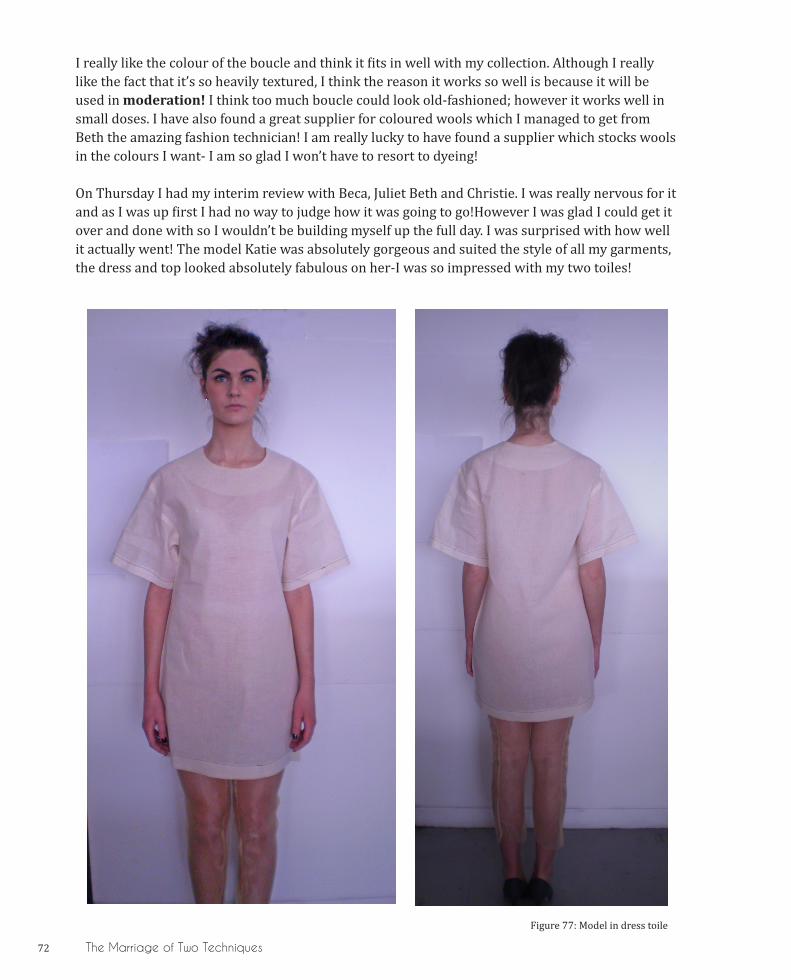
On Thursday I had my interim review with Beca, Juliet Beth and Christie. I was really nervous for it and as I was up first I had no way to judge how it was going to go!However I was glad I could get it over and done with so I wouldn’t be building myself up the full day. I was surprised with how well it actually went! The model Katie was absolutely gorgeous and suited the style of all my garments, the dress and top looked absolutely fabulous on her-I was so impressed with my two toiles!
Figure 77: Model in dress toile
The Marriage of Two Techniques 73
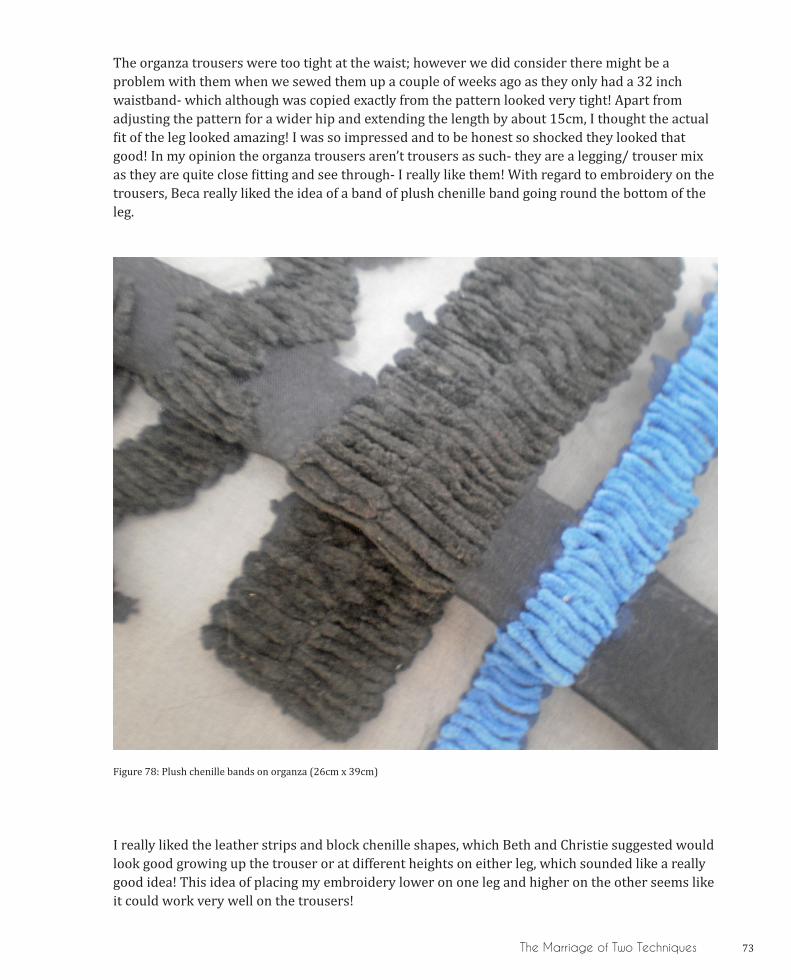
The organza trousers were too tight at the waist; however we did consider there might be a problem with them when we sewed them up a couple of weeks ago as they only had a 32 inch waistband- which although was copied exactly from the pattern looked very tight! Apart from adjusting the pattern for a wider hip and extending the length by about 15cm, I thought the actual fit of the leg looked amazing! I was so impressed and to be honest so shocked they looked that good! In my opinion the organza trousers aren’t trousers as such- they are a legging/ trouser mix as they are quite close fitting and see through- I really like them! With regard to embroidery on the trousers, Beca really liked the idea of a band of plush chenille band going round the bottom of the leg.
Figure 78: Plush chenille bands on organza (26cm x 39cm)
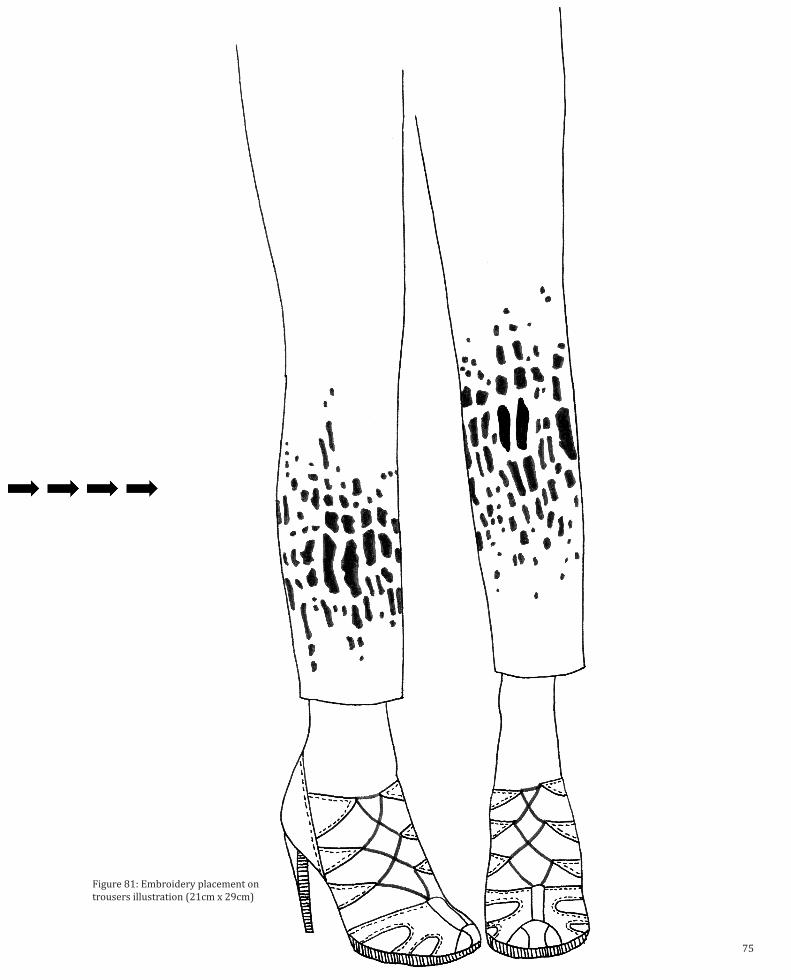
I really liked the leather strips and block chenille shapes, which Beth and Christie suggested would look good growing up the trouser or at different heights on either leg, which sounded like a really good idea! This idea of placing my embroidery lower on one leg and higher on the other seems like it could work very well on the trousers!
74
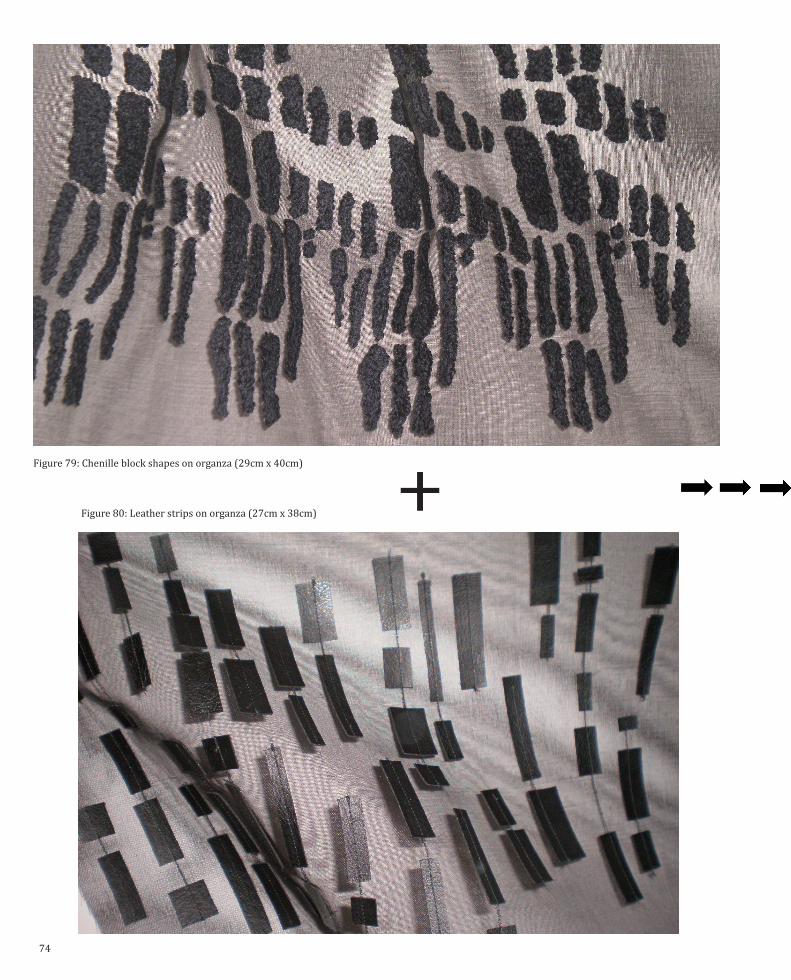
+Figure 79: Chenille block shapes on organza (29cm x 40cm)
Figure 80: Leather strips on organza (27cm x 38cm)
75
Figure 81: Embroidery placement on trousers illustration (21cm x 29cm)
76 The Marriage of Two Techniques
Beca suggested I begin to sample on longer pieces of fabric such as the shape of a leg- so instead of my samples being big rectangles, it would be possible to actually place them over the body to suggest exactly where the embroidery placement is going. I really like this idea- but the amount of fabric I will need to use for the length of a leg is making me very nervous!
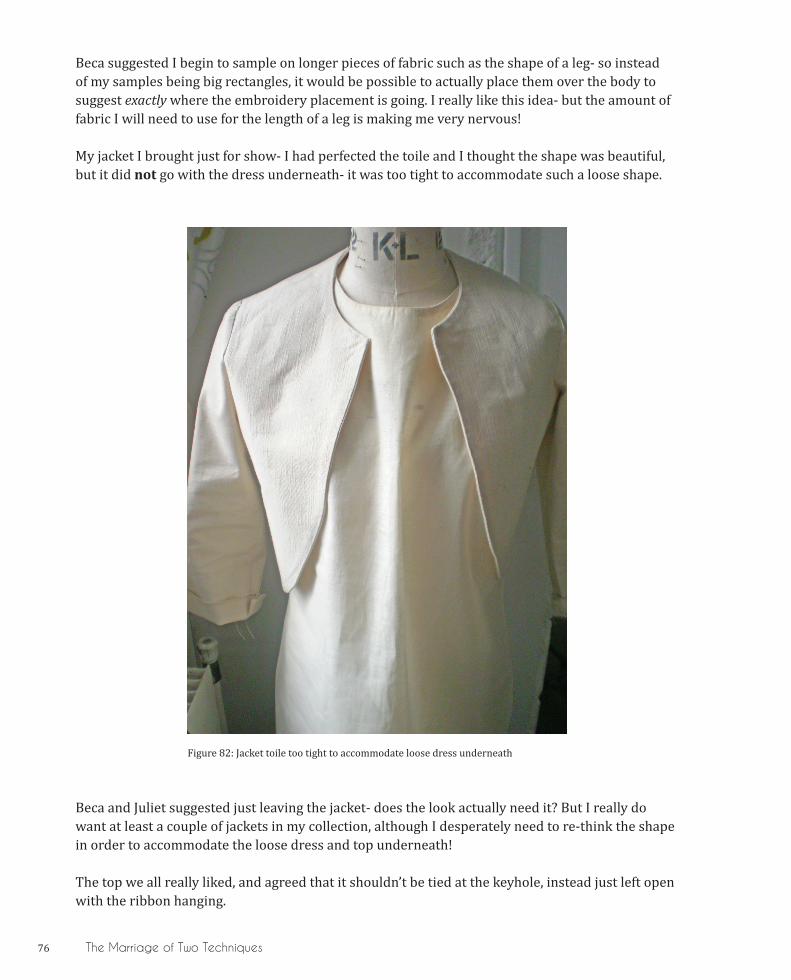
My jacket I brought just for show- I had perfected the toile and I thought the shape was beautiful, but it did not go with the dress underneath- it was too tight to accommodate such a loose shape.
Figure 82: Jacket toile too tight to accommodate loose dress underneath
Beca and Juliet suggested just leaving the jacket- does the look actually need it? But I really do want at least a couple of jackets in my collection, although I desperately need to re-think the shape in order to accommodate the loose dress and top underneath!
The top we all really liked, and agreed that it shouldn’t be tied at the keyhole, instead just left open with the ribbon hanging.

77
Figure 84: Front view of model in keyhole top
Figure 83: Different ways of styling tie at top of keyhole top
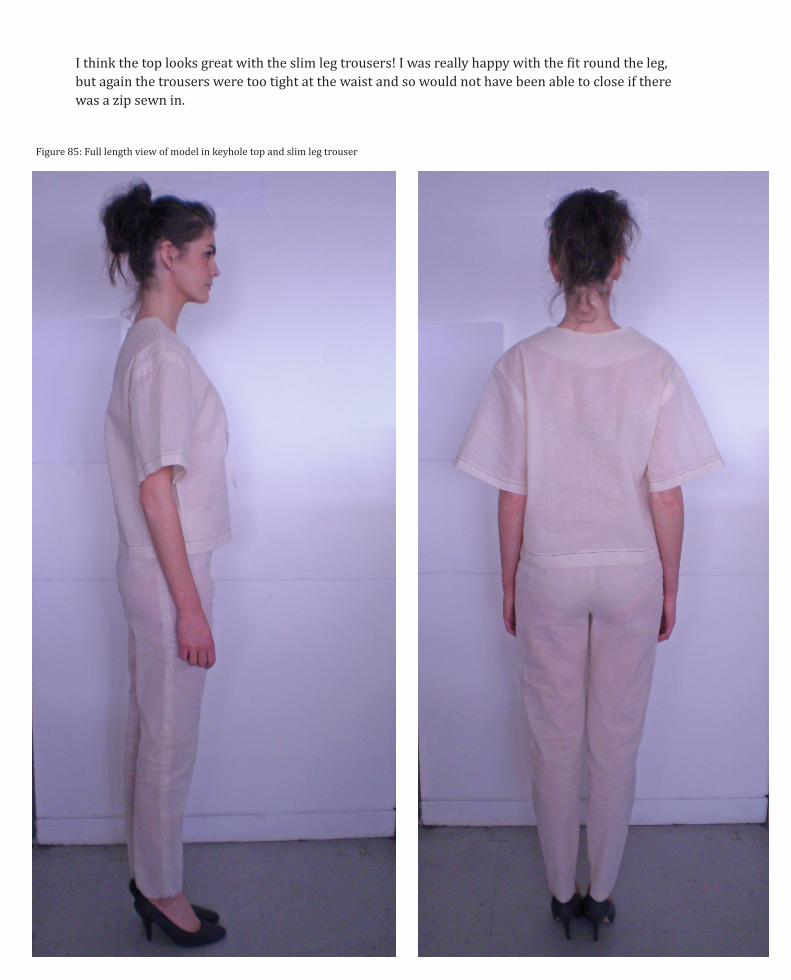
I think the top looks great with the slim leg trousers! I was really happy with the fit round the leg, but again the trousers were too tight at the waist and so would not have been able to close if there was a zip sewn in.
Figure 85: Full length view of model in keyhole top and slim leg trouser
The Marriage of Two Techniques 79
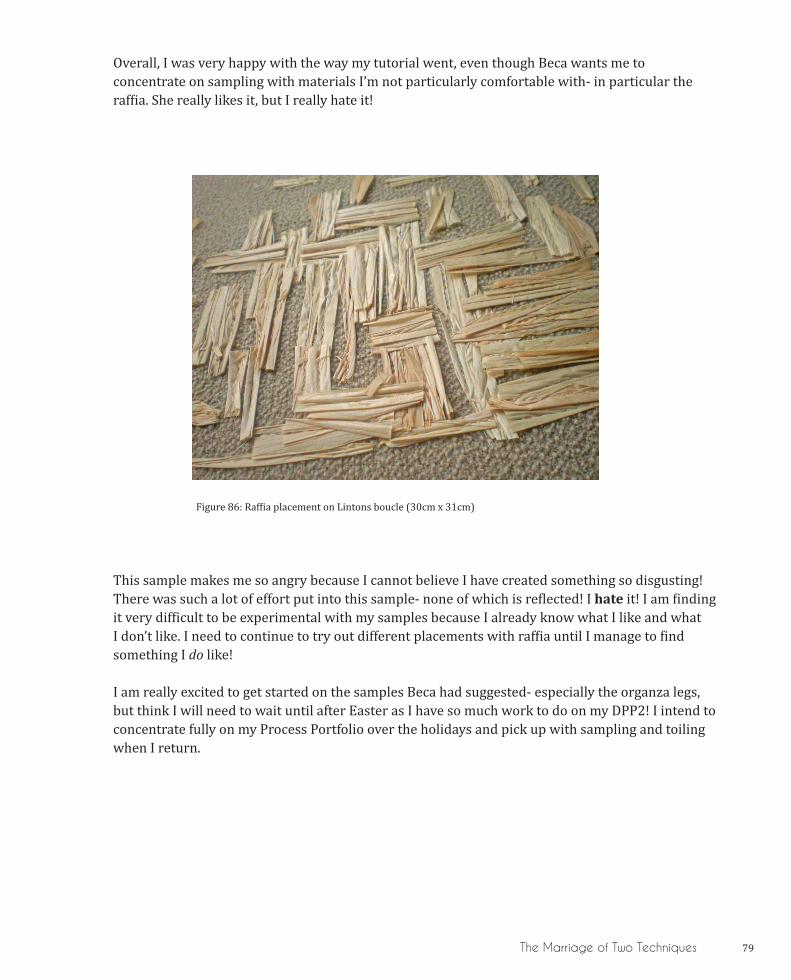
Overall, I was very happy with the way my tutorial went, even though Beca wants me to concentrate on sampling with materials I’m not particularly comfortable with- in particular the raffia. She really likes it, but I really hate it!
Figure 86: Raffia placement on Lintons boucle (30cm x 31cm)
This sample makes me so angry because I cannot believe I have created something so disgusting! There was such a lot of effort put into this sample- none of which is reflected! I hate it! I am finding it very difficult to be experimental with my samples because I already know what I like and what I don’t like. I need to continue to try out different placements with raffia until I manage to find something I do like!
I am really excited to get started on the samples Beca had suggested- especially the organza legs, but think I will need to wait until after Easter as I have so much work to do on my DPP2! I intend to concentrate fully on my Process Portfolio over the holidays and pick up with sampling and toiling when I return.
80
Fashion, Embroidery and Stitch
Week beginning 21st March 2011
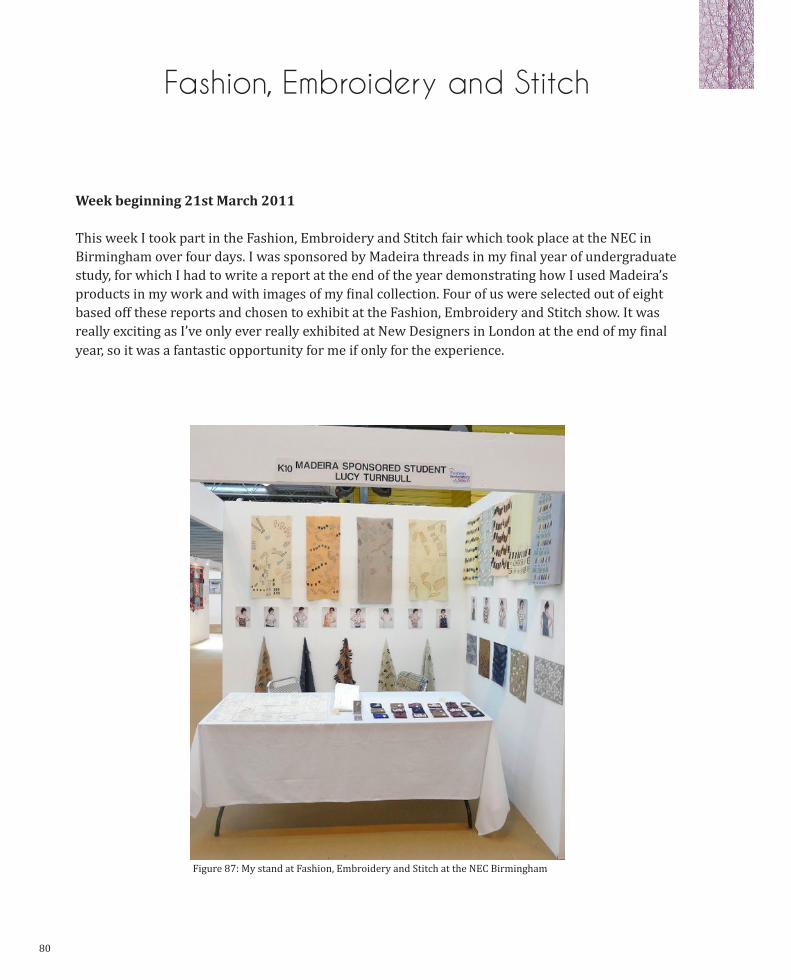
This week I took part in the Fashion, Embroidery and Stitch fair which took place at the NEC in Birmingham over four days. I was sponsored by Madeira threads in my final year of undergraduate study, for which I had to write a report at the end of the year demonstrating how I used Madeira’s products in my work and with images of my final collection. Four of us were selected out of eight based off these reports and chosen to exhibit at the Fashion, Embroidery and Stitch show. It was really exciting as I’ve only ever really exhibited at New Designers in London at the end of my final year, so it was a fantastic opportunity for me if only for the experience.
Figure 87: My stand at Fashion, Embroidery and Stitch at the NEC Birmingham
Fashion, Embroidery and Stitch 81
On Thursday the doors opened to the public and I was feeling very nervous! I found that particularly because it said the word ‘student’ in my title, I was asked a lot of questions- some about my inspiration and embroidery, and some utterly bizarre! I got a lot of comments fromvisitors describing my work as very fun, which I realised I am missing from my current collection this year. I have finally come to grips with my colour work, but there is no real element of fun in my work which I really enjoyed last year. I don’t know if this is a good thing- meaning my work appears more sophisticated instead of young and ‘fun,’ or that my embroidery is lacking energy; I will assess this when I get back to sampling after the Easter holidays.
I also got the importance of online activity drilled into me! The enormous amount of people who asked if I had a website has really made me realise the importance of being online!
GET_ONLINE!
Throughout the exhibition I received lots of positive feedback about my work, met lots of new people and generated a lot of new ideas about my work. I really enjoyed exhibiting and the experience of showing my work to a huge variety of different people. The one thing I definitely realised is that I do not want my work to become in any way ‘crafty.’ A lot of exhibiting textile artists encouraged me to try out felt making and quilting which I know I do not want to do! However I really did enjoy the show- it was definitely an experience!
Tying up Loose Ends
Week beginning 28th March 2011
This week I have been thinking a lot about the jackets that I want to incorporate into my collection, and have been looking at looser, less fitted garments that would tie in well with what I already have.
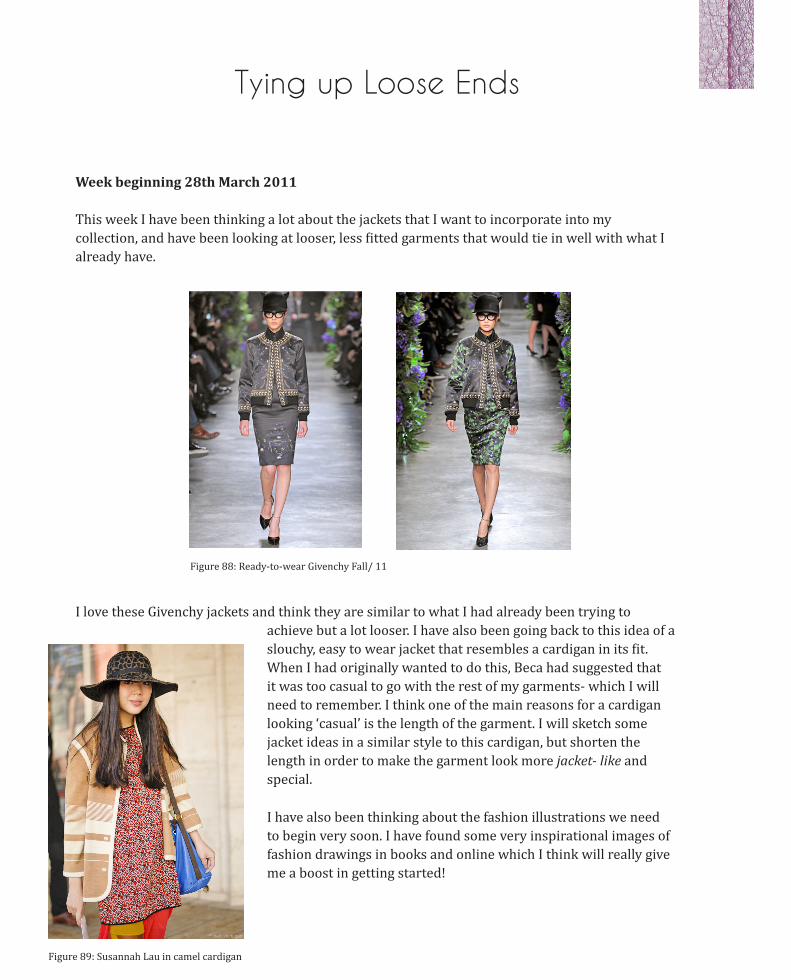
Figure 88: Ready-to-wear Givenchy Fall/ 11
I love these Givenchy jackets and think they are similar to what I had already been trying to achieve but a lot looser. I have also been going back to this idea of a slouchy, easy to wear jacket that resembles a cardigan in its fit. When I had originally wanted to do this, Beca had suggested that it was too casual to go with the rest of my garments- which I will need to remember. I think one of the main reasons for a cardigan looking ‘casual’ is the length of the garment. I will sketch some jacket ideas in a similar style to this cardigan, but shorten the length in order to make the garment look more jacket- like and special.
I have also been thinking about the fashion illustrations we need to begin very soon. I have found some very inspirational images of fashion drawings in books and online which I think will really give me a boost in getting started!
Figure 89: Susannah Lau in camel cardigan
Tying Up Loose Ends 83
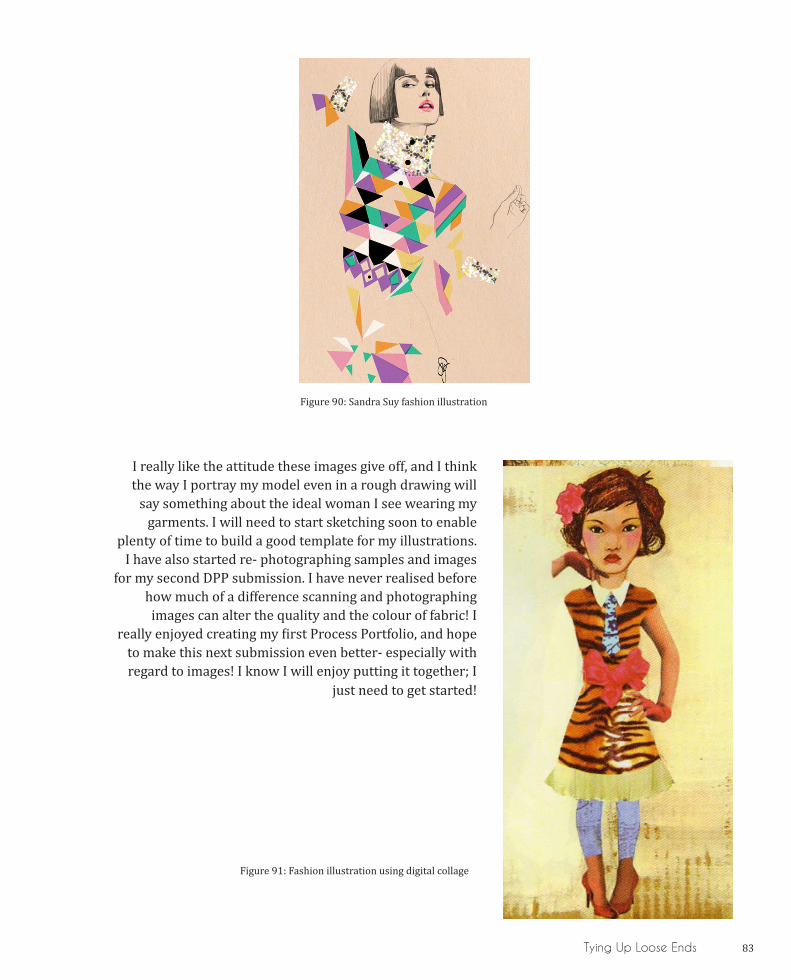
Figure 90: Sandra Suy fashion illustration
Figure 91: Fashion illustration using digital collage
I really like the attitude these images give off, and I think the way I portray my model even in a rough drawing will
say something about the ideal woman I see wearing my garments. I will need to start sketching soon to enable
plenty of time to build a good template for my illustrations. I have also started re- photographing samples and images
for my second DPP submission. I have never realised beforehow much of a difference scanning and photographing images can alter the quality and the colour of fabric! I
really enjoyed creating my first Process Portfolio, and hope to make this next submission even better- especially with regard to images! I know I will enjoy putting it together; I
just need to get started!


Part II: Core Research
Aesthetics in Creative Practice

87
First Impressions
Friday 28th January 2011
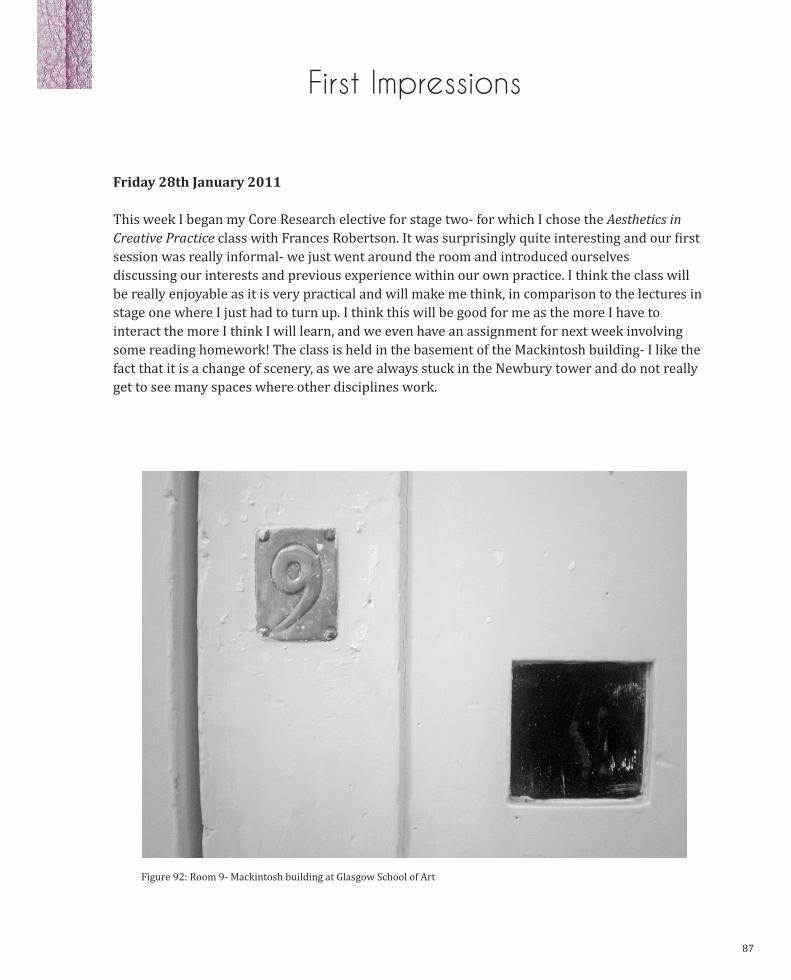
This week I began my Core Research elective for stage two- for which I chose the Aesthetics in Creative Practice class with Frances Robertson. It was surprisingly quite interesting and our first session was really informal- we just went around the room and introduced ourselves discussing our interests and previous experience within our own practice. I think the class will be really enjoyable as it is very practical and will make me think, in comparison to the lectures in stage one where I just had to turn up. I think this will be good for me as the more I have to interact the more I think I will learn, and we even have an assignment for next week involving some reading homework! The class is held in the basement of the Mackintosh building- I like the fact that it is a change of scenery, as we are always stuck in the Newbury tower and do not really get to see many spaces where other disciplines work.
Figure 92: Room 9- Mackintosh building at Glasgow School of Art
88 First Impressions
The room we have been allocated is a small intimate room where we will all be sitting round a large table enabling us to see everyone in the class, which I like. The class is made up of all of the Fashion and Textiles students- we all chose it after being advised, and four other students- two from Research Practice, one from Visual Communication, and one from EuropeanDesign. I think it is good that there is a mixture of students from different disciplines- that is as long as I don’t need to do an interdisciplinary group project with them!
Friday 4th February 2011
On Friday we had our second Aesthetics in Creative Practice class with Frances Robertson. It was a lot more practical discussion than the lectures with Glyn during the first stage. Although I do like this, it is such a change and we are discussing issues I am new to and so am beginning to feel slightly out my comfort zone. So far, we have been discussing the beautiful and the ugly in a very general sense, whereas I had previously imagined the course being very specific to fashion. I can apply what we are discussing to my own practice, but it is discussed in very general, open terms. One thing that I do like about the class is that Frances is so lovely, and she treats everyone very equal, making the sessions feel a lot more informal and relaxed. I much prefer this to the previous Core Research classes as I felt with them I was disadvantaged as most of the lectures were Fine Art based, and the majority of the time I wasn’t really too sure what was going on. However, we have only had two sessions so far, one of which was an introduction session- so we will have so see how it goes over the next couple of weeks!
89
The Ugly and the Beautiful
Friday 18th February 2011
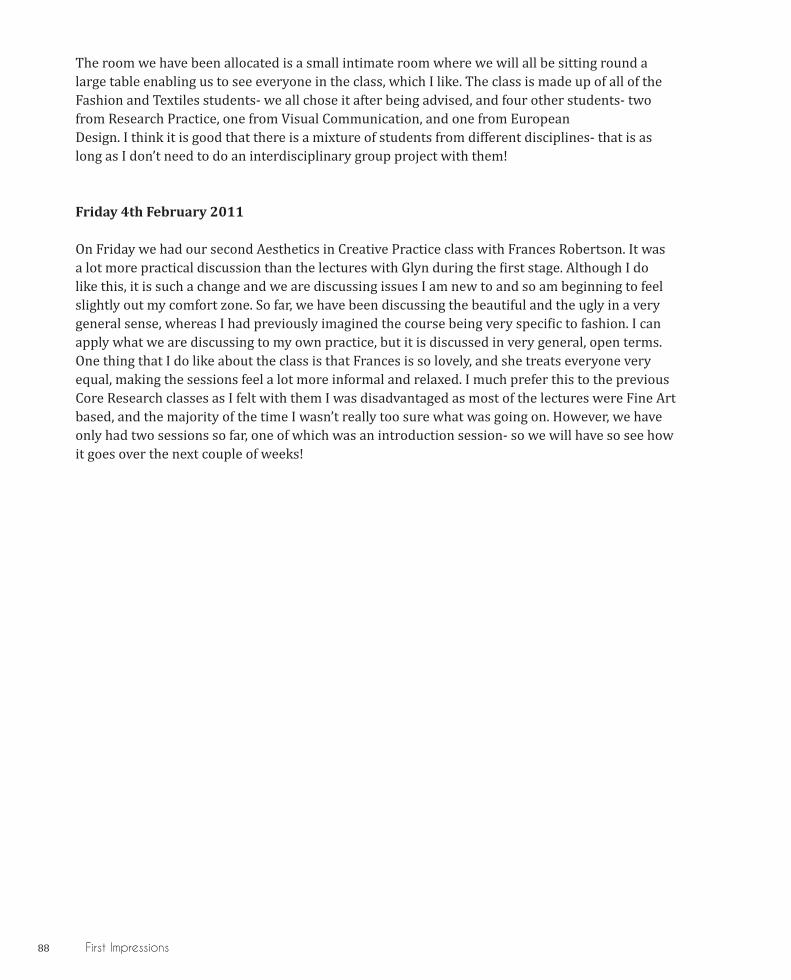
This week I read over the text we had been given in class two weeks previously. It was interesting, but at the same time very difficult to read! The text was dealing with the theme of the ‘Monstrous Woman’ in cinema and horror films, talking about vampires, witches and female villains. We have been given the task of writing a short presentation to give to the class about how the text relates to our work- but I certainly didn’t find any similarities between the text and my work! I don’t actually think it will relate to anyone in the classes work! I decided that the only relevant topic I would be able to talk about was horror films I have seen- which I must admit is not many, and have prepared some points on the two cult films Ginger Snaps (2000) and The Craft (1996.)
Figure 93: The Craft (1996)
Both films portray women who come into power from supernatural sources- one transforms into a werewolf and the other a witch. I think these films link to the text as there was a lot of mention of supernatural creatures and cinema, and I find I can relate a lot more to these films than the horror films referenced throughout the text such as Alien, Psycho and Carrie- all of which I have never seen! I will need to go over my notes sometime before next week’s class as it took me about an hour and a half to read over the full text, so I don’t think I will have time to read over it again before next week!
90 The Ugly and the Beautiful
My Fashion Textiles
Pretty Dresses Bright Colours
Embroidery
The Ugly and the Beautiful 91
Monsterous Feminine
= no links!
92 The Ugly and the Beautiful
Friday 25th February 2011
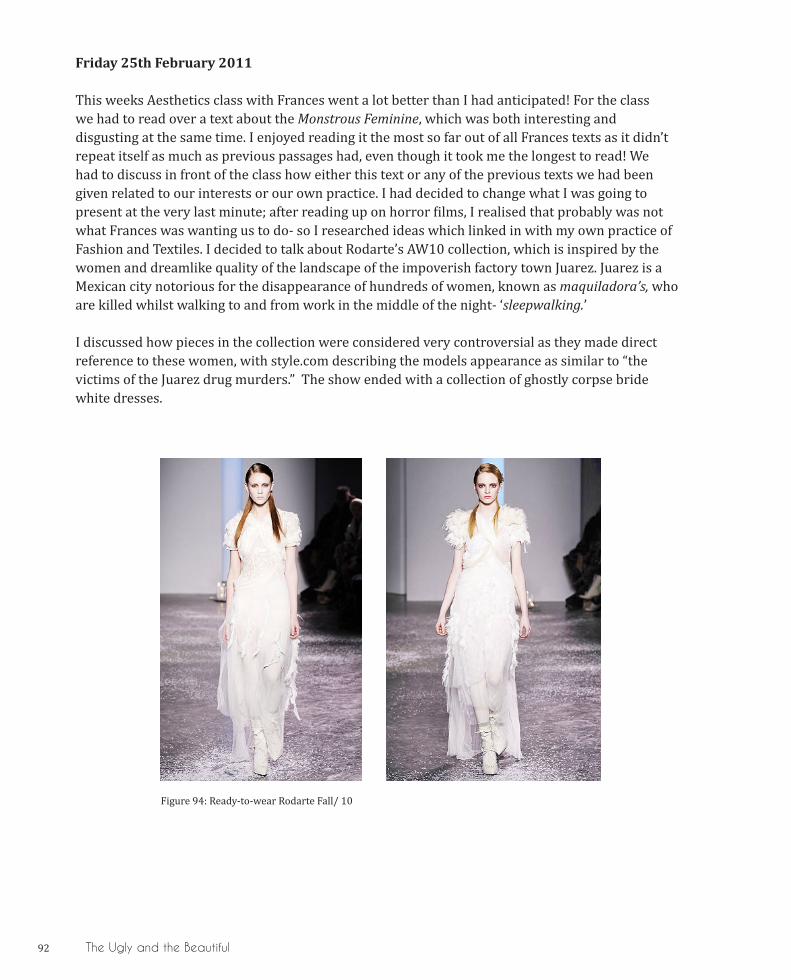
This weeks Aesthetics class with Frances went a lot better than I had anticipated! For the classwe had to read over a text about the Monstrous Feminine, which was both interesting and disgusting at the same time. I enjoyed reading it the most so far out of all Frances texts as it didn’t repeat itself as much as previous passages had, even though it took me the longest to read! We had to discuss in front of the class how either this text or any of the previous texts we had been given related to our interests or our own practice. I had decided to change what I was going to present at the very last minute; after reading up on horror films, I realised that probably was not what Frances was wanting us to do- so I researched ideas which linked in with my own practice of Fashion and Textiles. I decided to talk about Rodarte’s AW10 collection, which is inspired by the women and dreamlike quality of the landscape of the impoverish factory town Juarez. Juarez is a Mexican city notorious for the disappearance of hundreds of women, known as maquiladora’s, who are killed whilst walking to and from work in the middle of the night- ‘sleepwalking.’
I discussed how pieces in the collection were considered very controversial as they made direct reference to these women, with style.com describing the models appearance as similar to “the victims of the Juarez drug murders.” The show ended with a collection of ghostly corpse bride white dresses.
Figure 94: Ready-to-wear Rodarte Fall/ 10
The Ugly and the Beautiful 93
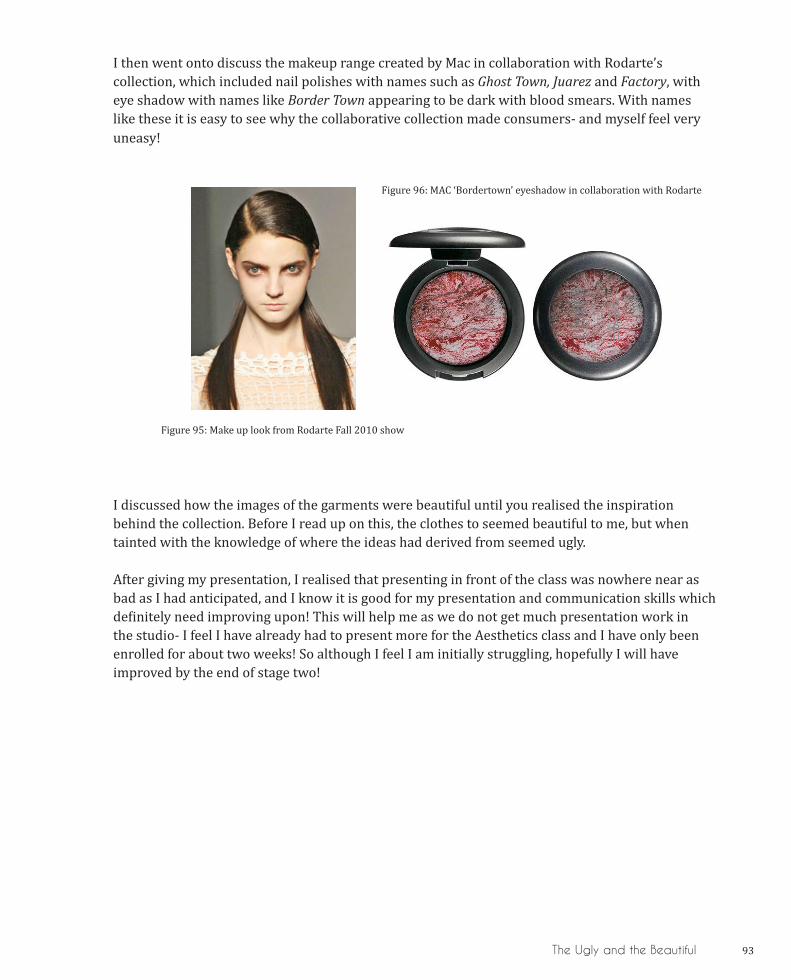
I then went onto discuss the makeup range created by Mac in collaboration with Rodarte’s collection, which included nail polishes with names such as Ghost Town, Juarez and Factory, with eye shadow with names like Border Town appearing to be dark with blood smears. With names like these it is easy to see why the collaborative collection made consumers- and myself feel very uneasy!
Figure 96: MAC ‘Bordertown’ eyeshadow in collaboration with Rodarte
Figure 95: Make up look from Rodarte Fall 2010 show
I discussed how the images of the garments were beautiful until you realised the inspiration behind the collection. Before I read up on this, the clothes to seemed beautiful to me, but when tainted with the knowledge of where the ideas had derived from seemed ugly.
After giving my presentation, I realised that presenting in front of the class was nowhere near as bad as I had anticipated, and I know it is good for my presentation and communication skills which definitely need improving upon! This will help me as we do not get much presentation work in the studio- I feel I have already had to present more for the Aesthetics class and I have only been enrolled for about two weeks! So although I feel I am initially struggling, hopefully I will have improved by the end of stage two!
A Sense of Nostalgia...
Friday 4th March 2011
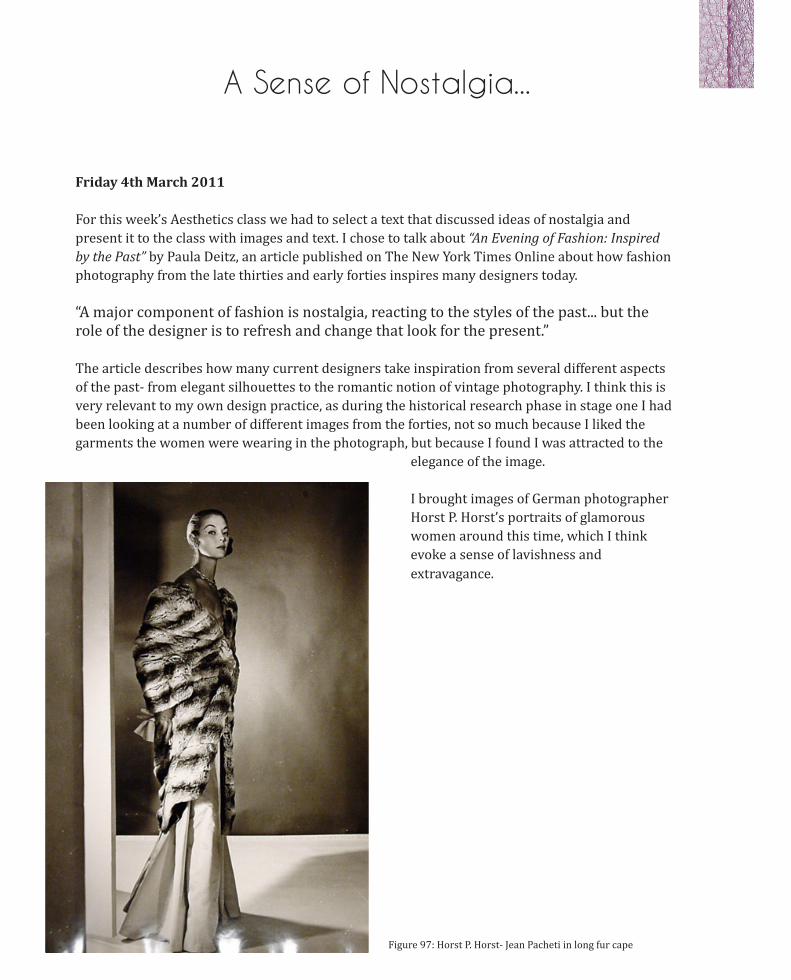
For this week’s Aesthetics class we had to select a text that discussed ideas of nostalgia and present it to the class with images and text. I chose to talk about “An Evening of Fashion: Inspired by the Past” by Paula Deitz, an article published on The New York Times Online about how fashion photography from the late thirties and early forties inspires many designers today.
“A major component of fashion is nostalgia, reacting to the styles of the past... but the role of the designer is to refresh and change that look for the present.”
The article describes how many current designers take inspiration from several different aspects of the past- from elegant silhouettes to the romantic notion of vintage photography. I think this is very relevant to my own design practice, as during the historical research phase in stage one I had been looking at a number of different images from the forties, not so much because I liked the garments the women were wearing in the photograph, but because I found I was attracted to the elegance of the image.
I brought images of German photographer Horst P. Horst’s portraits of glamorous women around this time, which I think evoke a sense of lavishness and extravagance.
Figure 97: Horst P. Horst- Jean Pacheti in long fur cape
A Sense of Nostalgia 95
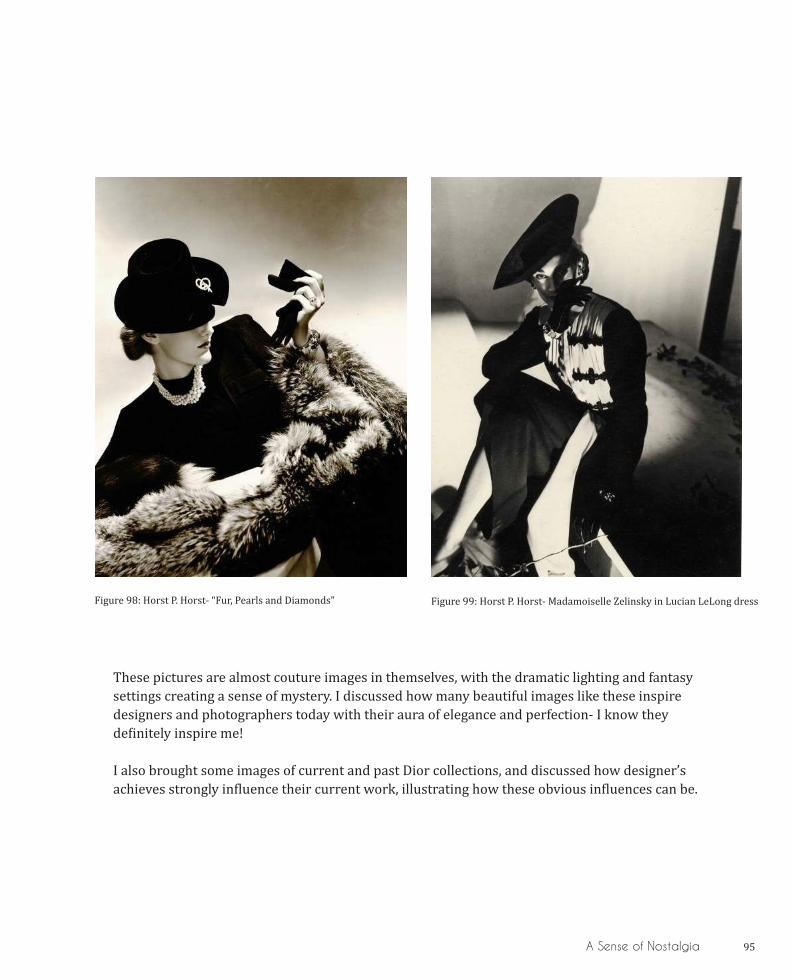
These pictures are almost couture images in themselves, with the dramatic lighting and fantasy settings creating a sense of mystery. I discussed how many beautiful images like these inspire designers and photographers today with their aura of elegance and perfection- I know they definitely inspire me!
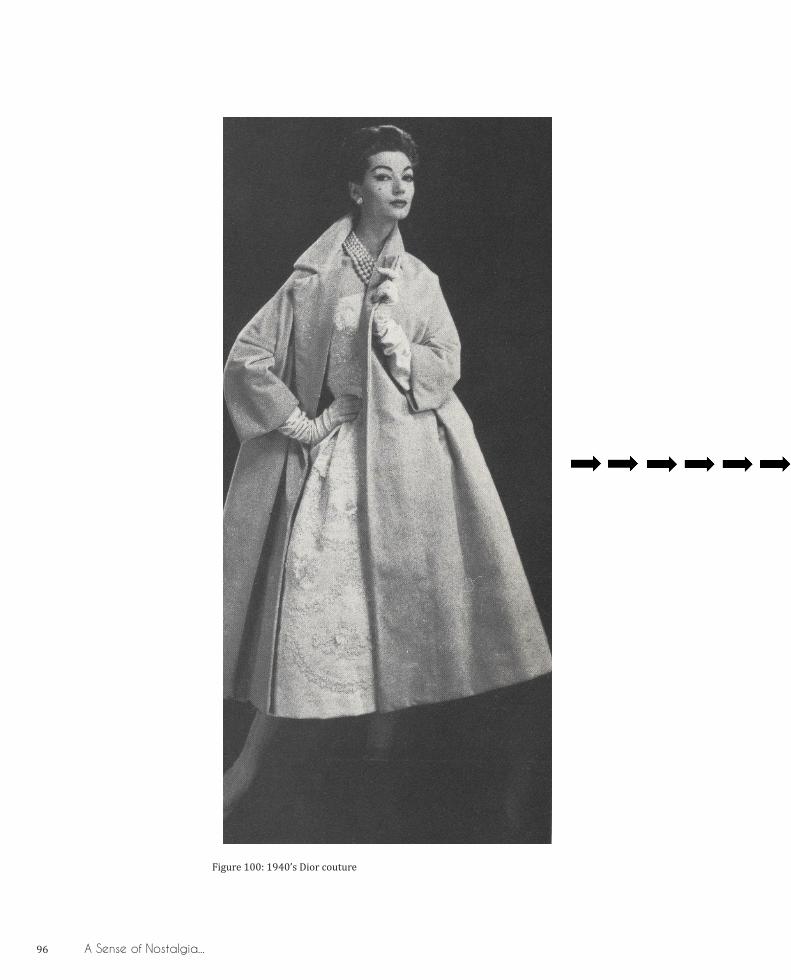
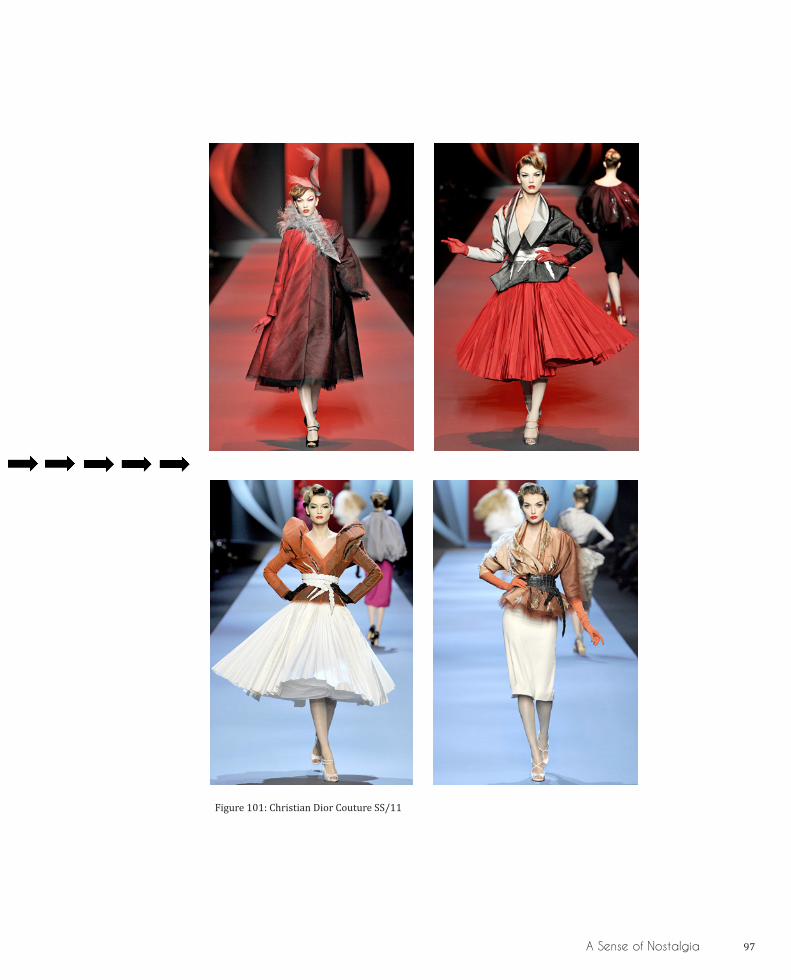
I also brought some images of current and past Dior collections, and discussed how designer’s achieves strongly influence their current work, illustrating how these obvious influences can be.
Figure 99: Horst P. Horst- Madamoiselle Zelinsky in Lucian LeLong dressFigure 98: Horst P. Horst- “Fur, Pearls and Diamonds”
96 A Sense of Nostalgia...
Figure 100: 1940’s Dior couture
A Sense of Nostalgia 97
Figure 101: Christian Dior Couture SS/11
98 A Sense of Nostalgia...
I feel I am getting better at presenting in this class, as I was not as nervous as I was last week. The only thing I dread and really struggle with is the content of my presentations- I always feel that although it relates, I never really answer the question posed to us by Frances the week before. However I think this may be Frances’s intention- to set a very vague brief in order to see what we come up with on our own. Reading her texts and gathering images takes a lot of time, and for next week we have to make a physical object! I am not looking forward to the next session!
Friday 10th March 2011
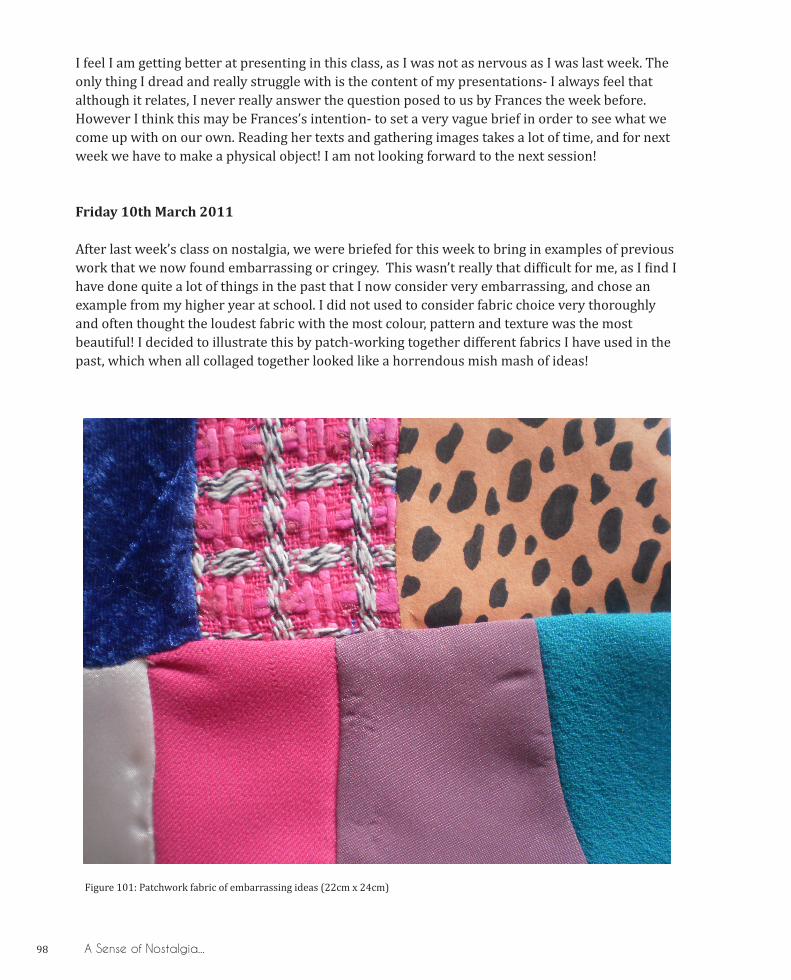
After last week’s class on nostalgia, we were briefed for this week to bring in examples of previous work that we now found embarrassing or cringey. This wasn’t really that difficult for me, as I find I have done quite a lot of things in the past that I now consider very embarrassing, and chose an example from my higher year at school. I did not used to consider fabric choice very thoroughly and often thought the loudest fabric with the most colour, pattern and texture was the most beautiful! I decided to illustrate this by patch-working together different fabrics I have used in the past, which when all collaged together looked like a horrendous mish mash of ideas!
Figure 101: Patchwork fabric of embarrassing ideas (22cm x 24cm)

A Sense of Nostalgia 99
I feel very embarrassed about how I used to work- with regard to materials and creative decisions I made. I think through learning about textile design I have been educated a lot in good and bad taste. I used to have the mindset of the more the better- the brighter the better, the louder the better, the more sequins the better- whereas now I have the understanding that less is more. This has also affected my embroidery- where I used to want to incorporate lots of different techniques and materials into one piece, I now understand the importance of placement and how important it is to use embroidery in a clever way.
This task has really made me realise how much I have learnt over the years and how much my personal style has developed, which I had never really considered before. I feel this task will feed into my studio work by emphasising the importance of not overworking pieces, which I will need to bear in mind whilst working on my collection!

101
Conclusion
I began the second stage of the Master’s course with high expectations that stage two would come a lot easier to me than stage one- for which I was very wrong! I feel I have rollercoastered since Christmas experimenting with a lot of new things and going through a lot of ups and downs! I have really enjoyed the sampling stage of my studio work, as I love embroidering and now can think in terms of 3D placement on a body. I feel as though I have been a lot busier with my studio work during stage two in comparison to stage one, which I think is down to the fact that I am a lot more sure of what I want to and what I need to do be doing, whereas I was getting lost quite a lot during stage one.
With regards to pattern cutting class I think I have also improved greatly. I can now look at my toile’s and identify ways to develop them, whereas before I could see problems but could not see solutions. I am beginning to consider full looks and not just single garments, and have finally come around to the idea of the dreaded trousers (which has turned out to be not so dreaded after all!) Although I put up a good fight at the beginning, I think I have been able to reach a good compromise and still remained true to myself- no Aladdin costume trousers!
In particular I have come to really love putting together my Design Process Portfolio. I found that I started stage two not recording as much as I had previously as I had so much studio work to do, but once I got back into the swing of it I began to really enjoy it again. I think what I like is the notion of presenting a final piece which is visually attractive and professional looking. When I submitted my studio work at the end of stage one, nothing was final; it was still an ongoing process, whereas what I like about DPP is that’s it! I cannot add any more to it, edit it or change it- when it’s finished its finished there’s no going back! I am very excited and looking forward to taking this idea and applying it to my studio work and exit portfolio in the third and final stage which will be taking place in Sky Park!
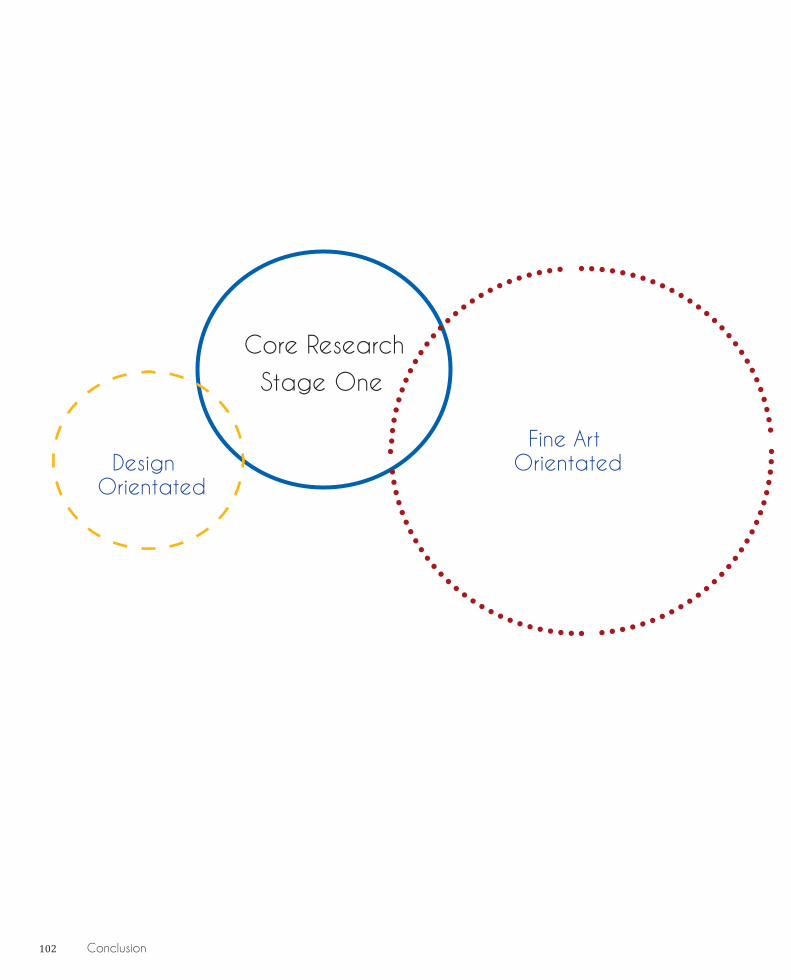
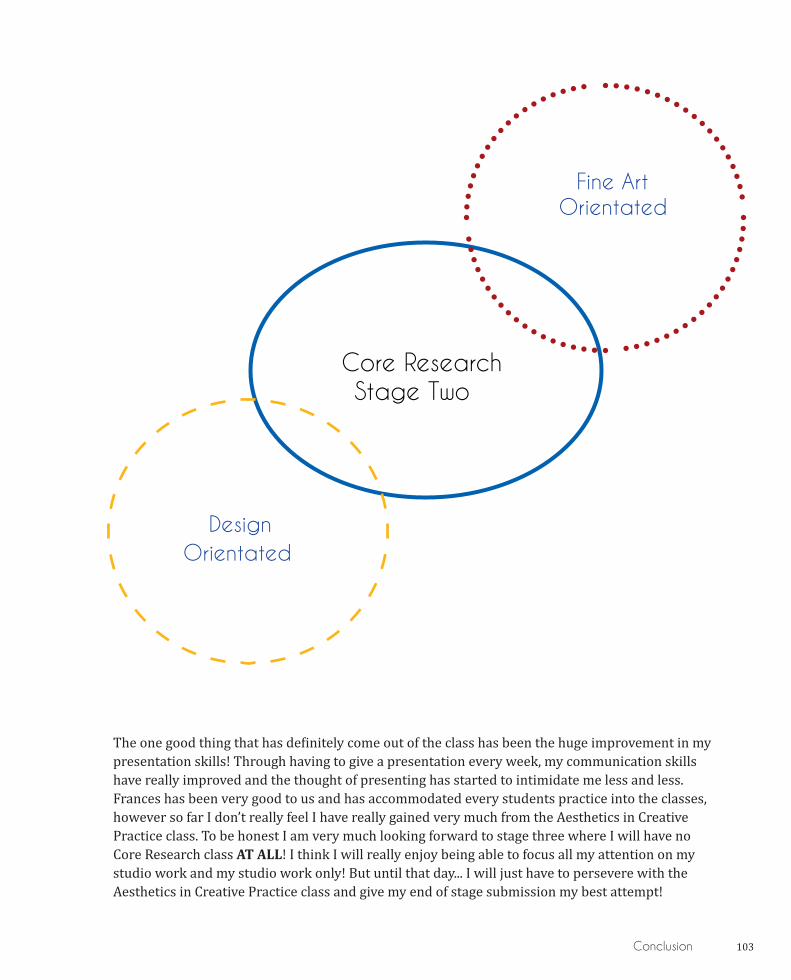
I feel I have been quite surprised by my Core Research class- although I do feel I have enjoyed it more than stage one, I still don’t necessarily see any links to my studio work. Even though the course is definitely more equally split between Fine Art and Design orientated, I feel as though every week it is getting harder and harder to research for a presentation that I don’t even really understand, and I’m unsure if I’m actually learning anything. I initially thought that the Aesthetics class would heavily feed into my studio work, and in particular help me with my DPP, but I still do not see any real links between the two classes.
102 Conclusion
Core Research Stage One
Fine Art Design Orientated Orientated
Conclusion 103
The one good thing that has definitely come out of the class has been the huge improvement in my presentation skills! Through having to give a presentation every week, my communication skills have really improved and the thought of presenting has started to intimidate me less and less. Frances has been very good to us and has accommodated every students practice into the classes, however so far I don’t really feel I have really gained very much from the Aesthetics in Creative Practice class. To be honest I am very much looking forward to stage three where I will have no Core Research class AT ALL! I think I will really enjoy being able to focus all my attention on my studio work and my studio work only! But until that day... I will just have to persevere with the Aesthetics in Creative Practice class and give my end of stage submission my best attempt!
Fine Art Orientated
Core Research Stage Two
Design Orientated
104
Image List
Figure 1: Twist and tuck placement on dress toile, p9Turnbull, L. (November 2010) [photograph]
Figure 2: McCalls jacket pattern slip, p10“Ioffer: A Place to Buy, Sell and Trade: BURDA 8876: Sewing Pattern coat jacket 8- 20” [online]URL: http://www.ioffer.com/i/BURDA-8876-Sewing-PATTERN-COAT-JACKET-HOOD-IE-8-20-148239775(3/01/2011)
Figure 3: Cardigan jacket pattern slip, p10“Ioffer: A Place to Buy, Sell and Trade: Jacket blouse Skirt misses 18- 20” [online]URL: http://www.ioffer.com/i/see-sew-now-4427-jacket-blouse-skirt-misses-18-22-126937585(3/01/2011)
Figure 4: Ideal jacket shape similar to knitted cardigan, p10Turnbull, L. (January 2011) [photograph]
Figure 5: “Grey Girls” Collage on paper, p11Turnbull, L. (January 2011) 42cm x 58cm each
Figure 6: Emma Bell SS/10, p12“Emma Bell Spring Summer 2011: collection” [online]URL: http://emma-bell.com/collections/spring-summer-2010/ (10/01/2011)
Figure 7: Ready- to- wear Celine SS/11, p14“Celine Spring 2011 Ready-to-wear collection on style.com: complete collection” [online] URL: http://www.style.com/fashionshows/complete/S2011RTW-CELINE (10/03/2011)
Figure 8: Shetland knitwear cardigan, p15“Shetland Knitwear: The Collection” [online]URL: http://www.shetland-knitwear.com/symbister.html (20/1/2011)
Figure 9: “Chenille map” Chenille on Irish linen, p16Turnbull, L (January 2011) 20cm x 30cm [photograph]
Figure 10: Chanel double breasted jacket, p17British Vogue (September 1990)
Figure 11: Pauline Borca SS/ 11, p18“Pauline Borca Spring Collection Men/ Women 2011” [online]URL: http://www.paulineborca.com/textile/spring-2011/(17/1/2011)
Image List 105
Figure 12: Ready- to- wear Celine SS/11, p19“Celine Spring 2011 Ready-to-wear collection on style.com: complete collection” [online] URL: http://www.style.com/fashionshows/complete/S2011RTW-CELINE (10/03/2011)
Figure 13: Ready- to- wear Chanel Fall/ 07, p20“Chanel Fall 2007 Ready-to-wear collection on style.com: complete collection” [online]URL: http://www.style.com/fashionshows/complete/F2007RTW-CHANEL(21/1/2011)
Figure 14: Ready- to- wear Chanel Fall/ 07, p20“Chanel Fall 2007 Ready-to-wear collection on style.com: complete collection” [online]URL: http://www.style.com/fashionshows/complete/F2007RTW-CHANEL(21/1/2011)
Figure 15: Ready- to- wear Chanel Pre- Fall/ 11, p20“Chanel Pre-Fall 2011 Ready-to-wear collection on style.com: complete collection” [online]URL: http://www.style.com/fashionshows/complete/2011PF-CHANEL(21/1/2011)
Figure 16: “Golden Grey” colour collage, p21Turnbull, L. (October 2010) collage on paper (12cm x 12cm)
Figure 17: “Ruby Grey” colour collage, p21Turnbull, L. (October 2010) collage on paper (12cm x 12cm)
Figure 18: “Lemon Grey” colour collage, p21Turnbull, L. (October 2010) collage on paper (12cm x 12cm)
Figure 19: “Tree Arrow” Pen drawing, p22Turnbull, L. (November 2010) 18cm x 29cm
Figure 20: “Soft Wool Zigzag” Wool on Irish linen, p23Turnbull, L. (January2011) 22cm x 30cm [photograph]
Figure 21: “Textured Organza Zigzag” Organza ribbon on Irish linen, p23Turnbull, L. (January 2011) 25cm x 36cm [photograph]
Figure 22: Tinsmiths linen fabric samples, p24Turnbull, L. (January 2011) 10cm x 15cm each
Figure 23: Ready- to- wear Micheal van der Ham SS/11, p26“Micheal van der Ham Spring 2011 Ready-to-wear collection on style.com: complete collection” [online] URL: http://www.style.com/fashionshows/review/S2011RTW-MVDHAM/ (27/2/2011)
Figure 24: Ready- to- wear Celine SS/11, p26“Celine Spring 2011 Ready-to-wear collection on style.com: complete collection” [online] URL: http://www.style.com/fashionshows/complete/S2011RTW-CELINE (10/03/2011)
Figure 25: Wide leg women’s trousers from 1940’s Sears Catalogue, p26Olian, J. (1992). Everyday Fashions of the 40’s as Pictured in Sears Catalogs, New York: Dover Publications
106 Image List
Figure 26: Full length Chinese silk embroidered dress, p27Steele, V. (1997) Fifty Years of Fashion: New Look to Now, London: Yale University Press
Figure 27: Dress toile on stand, p28Turnbull, L. (January 2011) [photograph]
Figure 28: Experimentation of box jacket openings with paper patterns, p29Turnbull, L. (January 2011) [photograph]
Figure 29: Blue boucle on linen, p30Turnbull, L. (February 2011) 21cm x 44cm [photograph]
Figure 30: Black leather on organza, p31Turnbull, L. (February 2011) 27cm x 38cm [photograph]
Figure 31: Gandini Keyhole jacket in Italian Vogue, p32Vogue Italia (September 1999)
Figure 32: Slim leg trouser sketch, Pen drawing, p32Turnbull, L. (February 2011) 21cm x 39cm
Figure 33: Ladies loose top in 1920’s Sears Catalogue, p33Blum, S. (1981) Everyday Fashions of the Twenties as Pictured in Sears and Other Catalogs, New York: Constable
Figure 34: Street style- loose kaftan style top, p33“Tokyo Fashion- Street Style” [online]URL: http://tokyofashion.com/japanese-hat-wearing-girl-in-harajuku/(1/4/2011)
Figure 35: Fitted box jacket sketch, Pen drawing, p34Turnbull, L. (February 2011) 21cm x 39cm
Figure 36: Box jacket toile’s on stand, p35Turnbull, L. (February 2011) [photograph]
Figure 37: Blue bias binding on Irish linen, p36Turnbull, L. (February 2011) 18cm x 29cm [photograph]
Figure 38: Keyhole top toile on body, p37Turnbull, L. (February 2011) [photograph]
Figure 39: Celine straight trouser, p38“Geometricsleep Fashion Blog: Resort 2010: Philo’s back, alright!” [online]URL: http://www.geometricsleep.com/2009/06/resort-2010-philos-back-alright.html(1/4/2011)
Figure 40: David Koma for Topshop SS/11, p39“Style Bubble: Koma, wait for me!” [online]URL: http://www.stylebubble.co.uk/style_bubble/2011/02/koma-wait-for-me.html(7/2/2011)
Figure 41: Nylon Horsehair braid on Tinsmiths linen, p40Turnbull, L. (February 2011) 17cm x 22cm [photograph]
Image List 107
Figure 42: Grey chenille tones on Tinsmith linen, p41Turnbull, L. (February 2011) 22cm x 36cm [photograph]
Figure 43: Accents of mustard chenille on linen, p43Turnbull, L. (February 2011) 22cm x 30cm [photograph]
Figure 44: Dress toile on body, p44Turnbull, L. (February 2011) [photograph]
Figure 45: Horrendous side view of dress bunching up on body, p45Turnbull, L. (February 2011) [photograph]
Figure 46: Dress toile with belt pulling in waist, p46Turnbull, L. (February 2011) [photograph]
Figure 47: Ready- to- wear Calvin Klein SS/ 11, p47“Calvin Klein Spring 2011 Ready-to-wear collection on style.com: complete collection” [online] URL: http://www.style.com/fashionshows/complete/S2011RTW-CKLEIN(10/2/2011)
Figure 48: Linton Tweeds camel boucle fabric sample, p48Turnbull, L. (February 2011) 8cm x 14cm [photograph]
Figure 49: Leather on wine Melton wool, p48Turnbull, L. (February 2011) 23cm x 33cm [photograph]
Figure 50: Raffia on wine Melton wool, p49Turnbull, L. (February 2011) 22cm x 38cm [photograph]
Figure 51: White cream chenille on light grey Tinsmiths linen, p50Turnbull, L. (February 2011) 25cm x 37cm [photograph]
Figure 52: White cream chenille on dark grey Tinsmiths linen, p51Turnbull, L. (February 2011) 27cm x 30cm [photograph]
Figure 53: Twisted and tucked placement on dress toile, p52Turnbull, L. (February 2011) [photograph]
Figure 54: Ready- to- wear Stella McCartney Fall/ 10, p52“Stella McCartney Fall 2010 Ready-to-wear collection on style.com: complete collection” [online] URL: http://www.style.com/fashionshows/complete/F2010RTW-SMCCARTN(27/2/2011)
Figure 55: Ready- to- wear Rodarte Fall/ 10, p53“Rodarte Fall 2010 Ready-to-wear collection on style.com: complete collection” [online] URL: http://www.style.com/fashionshows/review/F2010RTW-RODARTE/(27/2/2011)
Figure 56: Coloured linen samples from linenfabrics.co.uk and fabricuk.com, p53Turnbull, L. (February 2011) [photograph]
Figure 57: Colour moodboard, p54Turnbull, L. (February 2011) 42cm x 58cm
108 Image List
Figure 58: Leather appliqué and chenille on wine Melton wool, p56Turnbull, L. (February 2011) 23cm x 43cm [photograph]
Figure 59: Finished keyhole top toile on body, p58Turnbull, L. (February 2011) [photograph]
Figure 60: Finished dress toile on body, p59Turnbull, L. (February 2011) [photograph]
Figure 61: Grey boucle on Tinsmith linen, p60Turnbull, L. (February 2011) 29cm x 33cm [photograph]
Figure 62: Navy boucle on organza, p61Turnbull, L. (February 2011) 29cm x 33cm [photograph]
Figure 63: Coloured boucle on wine Melton wool, p61Turnbull, L. (February 2011) 30cm x 31cm [photograph]
Figure 64: Linton Tweeds camel boucle sample, p62 Turnbull, L. (February 2011) [photograph]
Figure 65: Dark grey Tinsmiths linen sample, p62Turnbull, L. (February 2011) [photograph]
Figure 66: Fabric UK wine Melton wool sample, p62Turnbull, L. (February 2011) [photograph]
Figure 67: Fabric UK navy Melton wool sample, p62Turnbull, L. (February 2011) [photograph]
Figure 68: Fabric UK golden brown linen sample, p62Turnbull, L. (February 2011) [photograph]
Figure 69: Fabric UK slate grey Melton wool sample, p62Turnbull, L. (February 2011) [photograph]
Figure 70: Leather and organza ribbon on linen, p63Turnbull, L. (March 2011) 29cm x 38cm [photograph]
Figure 71: Fly Stitch with textured yarns, p65Beaney, J. (1978) Embroidery: New Approaches, London: Transatlantic Arts Inc.
Figure 72: Organza ribbon fly stitch, p65Turnbull, L. (March 2011) 30cm x 37cm [photograph]
Figure 73: Leather and organza ribbon on wine Melton wool, p66Turnbull, L. (March 2011) 21cm x 44cm [photograph]
Figure 74: Layered organza ribbon strips and chenille on linen, p67Turnbull, L. (March 2011) 27cm x 34cm [photograph]
Figure 75: Layered organza ribbon strips and leather on linen, p68Turnbull, L. (March 2011) 30cm x 38cm [photograph]
Figure 76: Leather on Lintons boucle, p69Turnbull, L. (March 2011) 27cm x 35cm [photograph]
Image List 109
Figure 77: Model in dress toile, p70Turnbull, L. (March 2011) [photograph]
Figure 78: Plush chenille bands on organza, p71Turnbull, L. (March 2011) 26cm x 39cm [photograph]
Figure 79: Chenille block shapes on organza, p72Turnbull, L. (March 2011) 29cm x 40cm [photograph]
Figure 80: Leather strips on organza, p72Turnbull, L. (March 2011) 27cm x 38cm [photograph]
Figure 81: Embroidery placement on trousers illustration, Pen drawing, p73Turnbull, L. (March 2011) 21cm x 29cm
Figure 82: Jacket toile too tight to accommodate loose dress underneath, p74Turnbull, L. (March 2011) [photograph]
Figure 83: Different ways of styling tie at top of keyhole top, p75Turnbull, L. (March 2011) [photograph]
Figure 84: Front view of model in keyhole top, p75Turnbull, L. (March 2011) [photograph]
Figure 85: Full length view of model in keyhole top and slim leg trouser, p76Turnbull, L. (March 2011) [photograph]
Figure 86: Raffia placement on Lintons boucle, p77Turnbull, L. (March 2011) 30cm x 31cm [photograph]
Figure 87: My stand at Fashion, Embroidery and Stitch at the NEC Birmingham, p78Turnbull, L. (March 2011) [photograph]
Figure 88: Ready-to-wear Givenchy Fall/ 11, p80“Givenchy Fall 2011 Ready-to-wear collection on style.com: complete collection” [online] URL: http://www.style.com/fashionshows/designerdirectory/GIVENCHY/seasons/(1/4/2011)
Figure 89: Susannah Lau in camel cardigan, p80“Style Bubble: I like big hats and I cannot lie” [online]URL: http://www.stylebubble.co.uk/style_bubble/2011/03/i-like-big-hats-and-i-cannot-lie.html(1/4/2011)
Figure 90: Sandra Suy fashion illustration, p81“Sandra Sue Illustration: Portfolio” [online]URL: http://sandrasuy.com/ (17/4/2011)
Figure 91: Fashion illustration using digital collage, p81McKelvey, K. (2007) Illustrating Fashion, Oxford : Blackwell,
Figure 92: Room 9- Mackintosh building at Glasgow School of Art, p85Turnbull, L. (April 2011) [photograph]
110 Image List
Figure 93: The Craft (1996), p87“The Witching hour: Best Witches Ever” [online]URL: http://themediawitches.blogspot.com/2011/01/best-witches-ever.html(18/2/2011)
Figure 94: Ready-to-wear Rodarte Fall/ 10, p90“Rodarte Fall 2010 Ready-to-wear collection on style.com: complete collection” [online] URL: http://www.style.com/fashionshows/review/F2010RTW-RODARTE/(27/2/2011)
Figure 95: Make up look from Rodarte Fall 2010 show, p91“Bellasugar: Mac pulls Rodartes make up collection” [online]URL: http://www.bellasugar.com/MAC-Pulls-Rodarte-Makeup-Collection-10288514(1/3/2011)
Figure 96: MAC ‘Bordertown’ eyeshadow in collaboration with Rodarte, p91“Rouge Deluxe: Thoughts on the MAC Rodarte make up collection” [online]URL: http://rougedeluxe.blogspot.com/2010/07/thoughts-on-mac-rodarte-controversy.html(1/3/2011)
Figure 97: Horst P. Horst- Jean Pacheti in long fur cape, p92“Horst P Horst: Fashion- Jean Pacheti in long fur cape” [online]URL: http://www.horstphorst.com/works.php?cat=&display=full&invno=yw125(4/3/2011)
Figure 98: Horst P. Horst- “Fur, Pearls and Diamonds,” p93“Horst P Horst: Fur, Pearls and Diamonds” [online]URL: http://www.horstphorst.com/works.php?cat=fashion&display=full&invno=yw083(4/3/2011)
Figure 99: Horst P. Horst- Madamoiselle Zelinsky modelling in Lucian LeLong dress, p93“Horst P Horst: Madamoiselle Zelinsky modelling a Lucian LeLong dress for French Vogue” [online]URL: http://www.horstphorst.com/works.php?cat=fashion&display=full&invno=yw082(4/3/2011)
Figure 100: 1940’s Dior couture, p94Pochna, M. (1996) Dior: Fashion Memoirs, London: Thames and Hudson
Figure 101: Christian Dior Couture SS/11, p95“Christian Dior Spring Summer Couture 2011 collection on style.com: complete collection” [online] URL: http://www.style.com/fashionshows/review/S2011CTR-CDIOR(4/3/2011)
Figure 101: Patchwork fabric of embarrassing ideas, p96Turnbull, L. (March 2011)22cm x 24cm [photograph]
111
Bibliography
Beaney, J. (1978) Embroidery: New Approaches, London: Transatlantic Arts Inc.
Blum, S. (1981) Everyday Fashions of the Twenties as Pictured in Sears and Other Catalogs, New York: Constable
Cousins, M. (1994) The Ugly, The Annals of the Architectural Association Files 28: 61
Dawber, M. (2005) New Fashion Illustration, London: Batsford
Creed, B. (1993) ‘Introduction’ and ‘Kristeva, Femininity, Abjection’ in The Monstrous-Feminine: Film, Feminism, and Psychoanalysis, New York: Routledge
De Marly, D. (1990) Christian Dior, London: Batsford
Douglas, M. (1966) Purity and Danger, London: Routledge & Kegan Paul
Lorand, R (1993) Beauty and Its Opposites, The Journal of Aesthetics and Art Criticism 52(4); 399-406.
McKelvey, K. (2007) Illustrating Fashion, Oxford : Blackwell
Morris, B. (2006) Fashion Illustrator, London: Laurence King
Olian, J. (1992). Everyday Fashions of the 40’s as Pictured in Sears Catalogs, New York: Dover Publications
Pochna, M. (1996) Dior: Fashion Memoirs, London: Thames and Hudson
Steele, V. (1997). Fifty Years of Fashion: New Look to Now, London: Yale University Press
Websites
Ada and Ima linen FabricsURL: http://www.linenfabrics.co.uk/(17/4/2011)
Alice Peters URL: http://www.alicepeters.co.uk/index.html (20/1/2011)
Bellasugar URL: http://www.bellasugar.com/(1/3/2011)
Emma Bell URL: http://emma-bell.com/collections/spring-summer-2010/ (10/01/2011)
112 Bibliography
Fabric UKURL: http://www.fabricuk.com/(20/2/2011)
Geometricsleep Fashion URL: http://www.geometricsleep.com/ (1/4/2011)
Hainsworth FabricsURL: http://www.hainsworth.co.uk/(17/4/2011)
Hilary LaingURL: http://hilarylaing.com/newSite/content.php?content=gallery (2/2/2011)
Horst P. Horst Classic PhotographyURL: http://www.horstphorst.com/(4/4/2011)
IofferURL: http://www.ioffer.com/i/ (3/01/2011)
Linton Tweeds DirectURL: http://www.lintondirect.co.uk/(17/4/2011)
Louise grayURL: http://www.louisegraylondon.com/ss08.html (4/2/2011)
Pauline BorcaURL: http://www.paulineborca.com/textile/spring-2011/(17/1/2011)
Rouge DeluxeURL: http://rougedeluxe.blogspot.com/(1/3/2011)
Sandra Sue IllustrationURL: http://sandrasuy.com/ (17/4/2011)
Shetland KnitwearURL: http://www.shetland-knitwear.com/symbister.html (20/1/2011)
Style bubbleURL: http://stylebubble.typepad.com/ (17/4/2011)
Style.comURL: http://www.style.com/(10/3/2011)

Bibliography 113
The Witching hourURL: http://themediawitches.blogspot.com/2011/01/best-witches-ever.html(18/2/2011)
Tinsmiths Natural FabricsURL: http://shop.tinsmiths.co.uk/(17/4/2011)
Tokyo Fashion- Street StyleURL: http://tokyofashion.com/japanese-hat-wearing-girl-in-harajuku/(1/4/2011)
Film
Fawcett, J. (2000) Ginger Snaps, [DVD] Toronto: Unapix Entertainment
Fleming, A. (1996) The Craft, [DVD] Los Angeles: Columbia Pictures
Top Related