Word ch10
53
Chapter 10 Creating a Template for an Online Form Microsoft Word 2013
-
Upload
kristin-harrison -
Category
Education
-
view
58 -
download
0
Transcript of Word ch10

Chapter 10
Creating a Template for an Online Form
Microsoft
Word 2013

• Save a document as a template
• Change paper size
• Change page color
• Insert a borderless table in a form
• Show the DEVELOPER tab
• Insert plain text, drop-down list, check box, rich text, combo box, and date picker content controls
Creating a Template for an Online Form 2
Objectives

• Edit placeholder text
• Change properties of content controls
• Insert and format a rectangle shape
• Customize a theme
• Protect a form
• Open a new document based on a template
• Fill in a form
Creating a Template for an Online Form 3
Objectives
Creating a Template for an Online Form 4
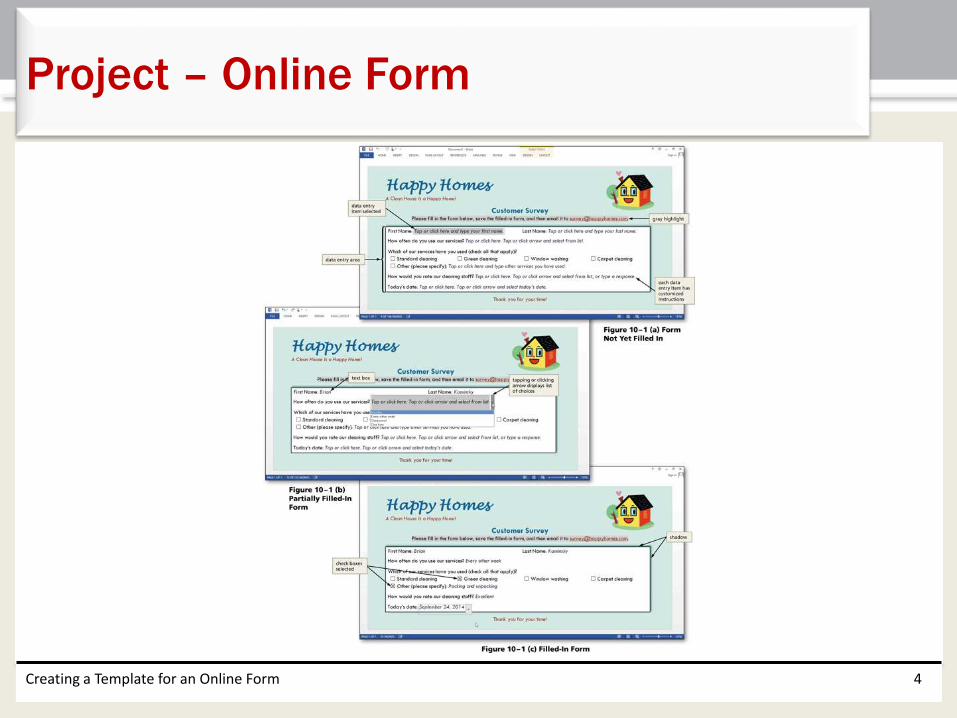
Project – Online Form

• Save a document as a template
• Set form formats for the template
• Enter text, graphics, and content controls in the form
• Protect the form
• Use the form
Creating a Template for an Online Form 5
Roadmap
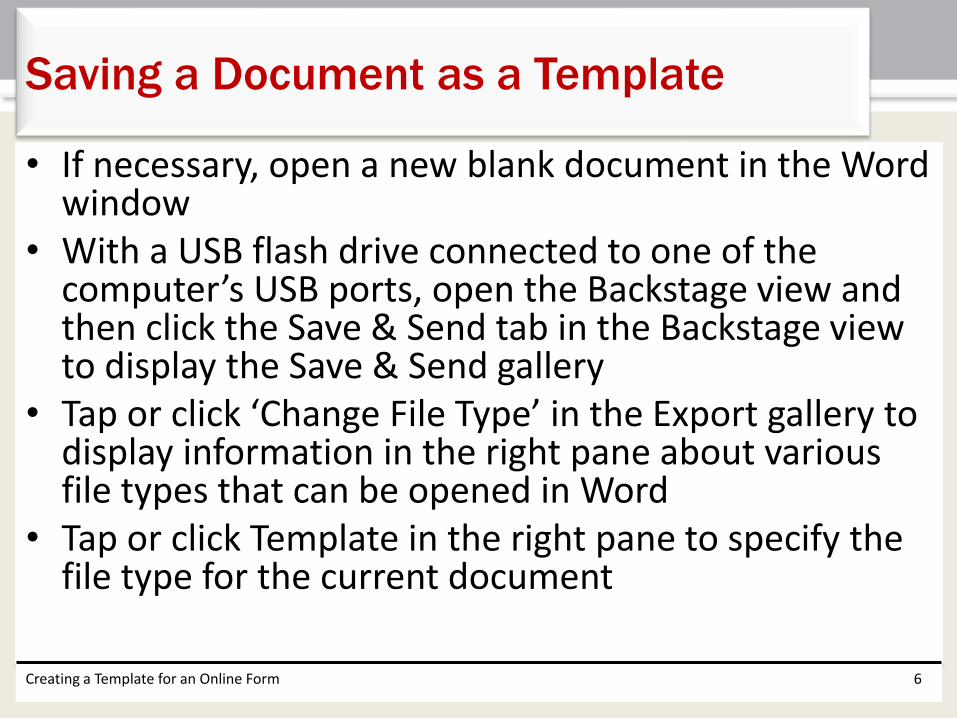
• If necessary, open a new blank document in the Word window
• With a USB flash drive connected to one of the computer’s USB ports, open the Backstage view and then click the Save & Send tab in the Backstage view to display the Save & Send gallery
• Tap or click ‘Change File Type’ in the Export gallery to display information in the right pane about various file types that can be opened in Word
• Tap or click Template in the right pane to specify the file type for the current document
Creating a Template for an Online Form 6
Saving a Document as a Template
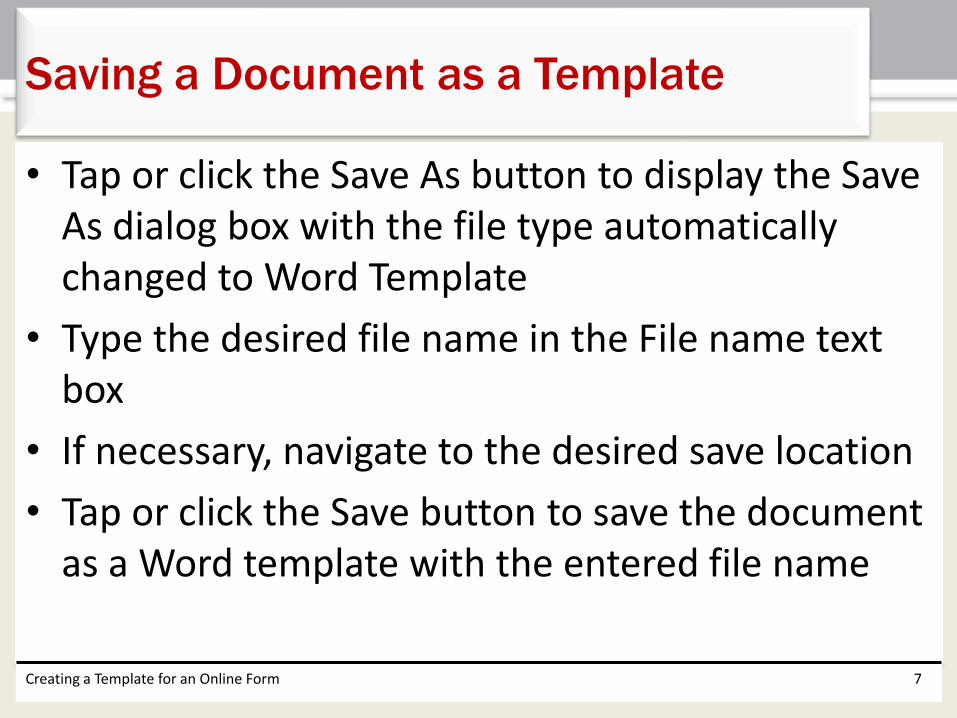
• Tap or click the Save As button to display the Save As dialog box with the file type automatically changed to Word Template
• Type the desired file name in the File name text box
• If necessary, navigate to the desired save location
• Tap or click the Save button to save the document as a Word template with the entered file name
Creating a Template for an Online Form 7
Saving a Document as a Template

Creating a Template for an Online Form 8
Saving a Document as a Template

• Tap or click the ‘Choose Page Size’ button (PAGE LAYOUT tab | Page Setup group) to display the Choose Page Size gallery
• Select the desired page size or click ‘More Paper Sizes’ in the Page Size gallery to display the Paper sheet in the Page Setup dialog box
• If you chose More Paper Sizes, type the desired height and width in the Page Setup dialog box
• Tap or click the OK button to change the paper size to the entered measurements
Creating a Template for an Online Form 9
Changing Paper Size

Creating a Template for an Online Form 10
Changing Paper Size

• Tap or click the Page Color button (DESIGN tab | Page Background group) to display the Page Color gallery
• Tap or click the desired page color
Creating a Template for an Online Form 11
Adding a Page Color

• Tap or click the Page Color button (DESIGN tab | Page Background group) to display the Page Color gallery
• Tap or click Fill Effects in the Page Color gallery to display the Fill Effects dialog box
• Tap or click the Pattern tab to display the Pattern sheet in the dialog box
• Tap or click the desired pattern
• Tap or click the OK button to add the selected pattern to the current page color
Creating a Template for an Online Form 12
Adding a Pattern Fill Effect
to a Page Color

Creating a Template for an Online Form 13
Adding a Pattern Fill Effect
to a Page Color

• Position the insertion point where the table should be inserted
• Tap or click the ‘Add a Table’ button (INSERT tab | Tables group) to display the Add a Table gallery
• Tap or click the cell corresponding to the dimensions of the table you wish to insert
• Select the table• Tap or click the Borders arrow (TABLE TOOLS DESIGN tab |
Table Styles group) to display the Borders gallery• Tap or click No Border in the Borders gallery to remove the
borders from the table• Tap or click the first cell in the table to remove the selection
Creating a Template for an Online Form 14
Using a Table to Control Layout

Creating a Template for an Online Form 15
Using a Table to Control Layout

Creating a Template for an Online Form 16
Content Controls

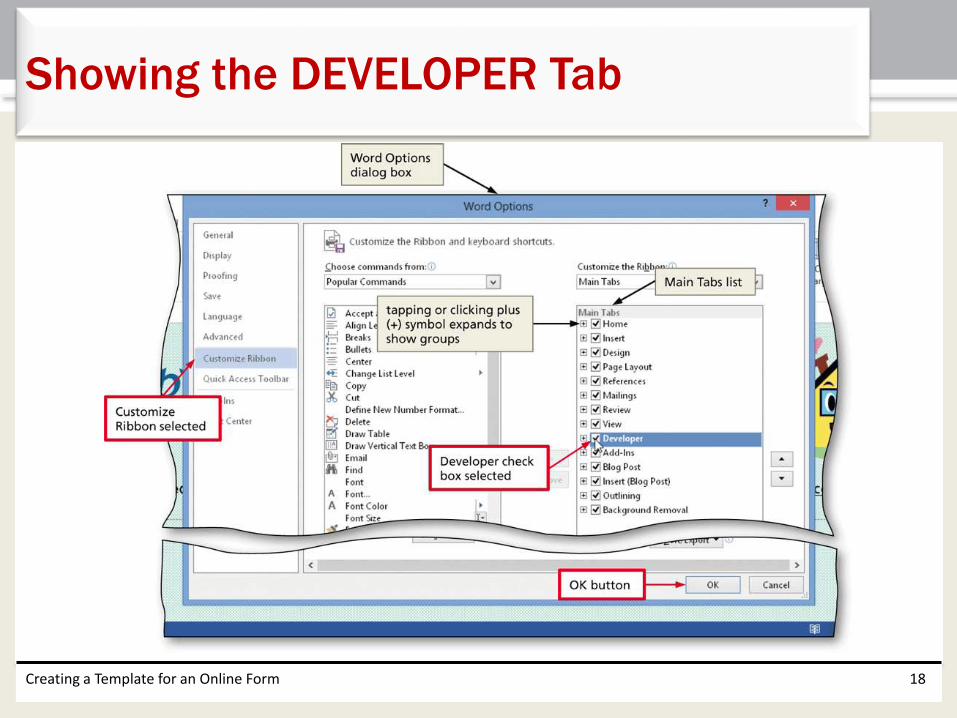
• Open the Backstage view
• Tap or click the Options button in the Backstage view to display the Word Options dialog box
• Tap or click Customize Ribbon in the left pane
• Place a check mark in the Developer check box in the Main Tabs list
• Tap or click the OK button to show the DEVELOPER tab on the ribbon
Creating a Template for an Online Form 17
Showing the DEVELOPER Tab
Creating a Template for an Online Form 18
Showing the DEVELOPER Tab

• Tap or click the ‘Plain Text Content Control’ button (DEVELOPER tab | Controls group) to insert a plain text content control at the location of the insertion point
Creating a Template for an Online Form 19
Inserting a Plain Text Content Control

• With the plain text content control selected, tap or click the Design Mode button (DEVELOPER tab | Controls group) to turn on Design mode, which displays tags at the beginning and ending of the placeholder text
• Edit the placeholder text as desired
• Tap or click the Design Mode button (DEVELOPER tab | Controls group) to turn off Design mode
Creating a Template for an Online Form 20
Editing Placeholder Text

Creating a Template for an Online Form 21
Editing Placeholder Text

• With content control selected, tap or click the Control Properties button (DEVELOPER tab | Controls group) to display the Content Control Properties dialog box
• Make the desired changes, and then tap or click the OK button
Creating a Template for an Online Form 22
Changing the Properties of a Plain Text
Content Control

Creating a Template for an Online Form 23
Changing the Properties of a Plain Text
Content Control

• Tap or click the ‘Drop-Down List Content Control’ button (DEVELOPER tab | Controls group) to insert a drop-down list content control at the location of the insertion point
Creating a Template for an Online Form 24
Inserting a Drop-Down List
Content Control

• With the drop-down list content control selected, tap or click the Control Properties button (DEVELOPER tab | Controls group) to display the Content Control Properties dialog box
• Make the desired changes, and then tap or click the OK button
Creating a Template for an Online Form 25
Changing the Properties
of a Drop-Down List Content Control

Creating a Template for an Online Form 26
Changing the Properties
of a Drop-Down List Content Control

• Tap or click the ‘Check Box Content Control’ button (DEVELOPER tab | Controls group) to insert a check box content control at the location of the insertion point
Creating a Template for an Online Form 27
Inserting a Check Box Content Control

• Tap or click the ‘Rich Text Content Control’ button (DEVELOPER tab | Controls group) to insert a rich text content control at the location of the insertion point
Creating a Template for an Online Form 28
Inserting a Rich Text Content Control

• Tap or click the ‘Combo Box Content Control’ button (DEVELOPER tab | Controls group) to insert a combo box content control at the location of the insertion point
Creating a Template for an Online Form 29
Inserting a Combo Box Content Control

Creating a Template for an Online Form 30
Inserting a Combo Box Content Control

• With content control selected, tap or click the Control Properties button (DEVELOPER tab | Controls group) to display the Content Control Properties dialog box
• Make the desired changes, and then tap or click the OK button
Creating a Template for an Online Form 31
Changing the Properties of a Combo Box
Content Control

Creating a Template for an Online Form 32
Changing the Properties of a Combo Box
Content Control

• Tap or click the ‘Date Picker Content Control’ button (DEVELOPER tab | Controls group) to insert a date picker content control at the location of the insertion point
Creating a Template for an Online Form 33
Inserting a Date Picker Content Control

• With content control selected, tap or click the Control Properties button (DEVELOPER tab | Controls group) to display the Content Control Properties dialog box
• Make the desired changes, and then tap or click the OK Button
Creating a Template for an Online Form 34
Changing the Properties of a Date Picker
Content Control

Creating a Template for an Online Form 35
Changing the Properties of a Date Picker
Content Control

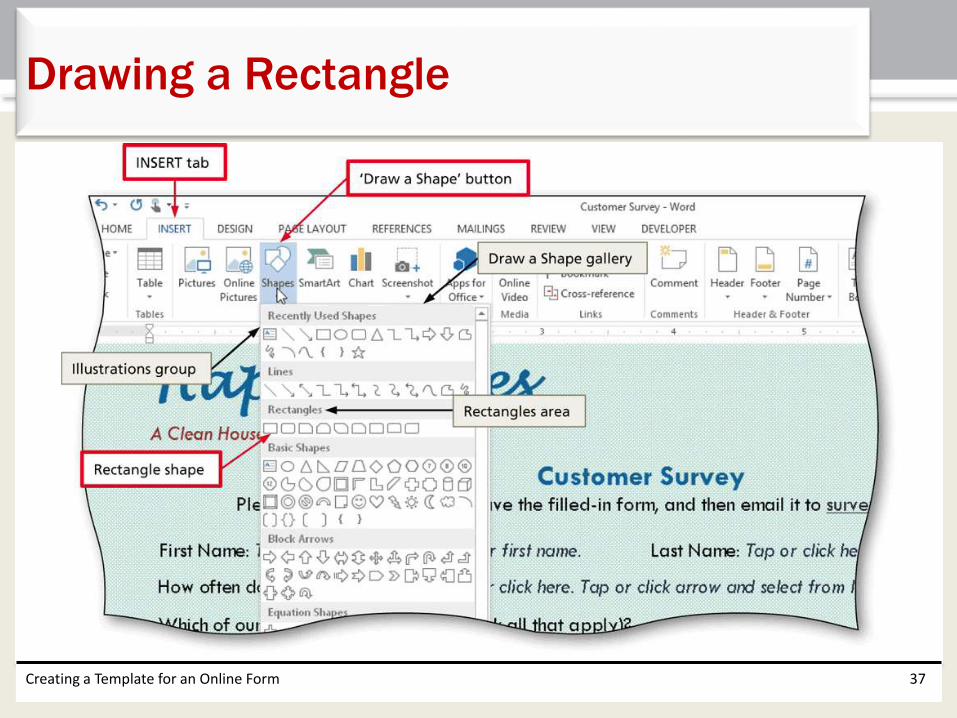
• Tap or click the ‘Draw a Shape’ button (INSERT tab | Illustrations group) to display the Shapes gallery
• Tap or click the rectangle shape in the Rectangles area of the Draw a Shape gallery, so that you can draw a rectangle on the screen
• Position the crosshair mouse pointer at the top-left corner for the rectangle
• Drag the mouse pointer downward and rightward to form a rectangle
• Release the mouse button to draw the rectangle shape
Creating a Template for an Online Form 36
Drawing a Rectangle
Creating a Template for an Online Form 37
Drawing a Rectangle

• With the graphic selected, tap or click the Layout Options button attached to the graphic to display the Layout Options gallery
• Tap or click Behind Text in the Layout Options gallery to position the graphic behind the text
• Tap or click the Close button in the Layout Options gallery to close the gallery
Creating a Template for an Online Form 38
Sending a Graphic behind Text

Creating a Template for an Online Form 39
Sending a Graphic behind Text

• With the shape selected, tap or point to Shadow on the Shape Effects menu to display the Shadow gallery
• Tap or click the desired shadow effect to apply the selected shadow to the selected shape
Creating a Template for an Online Form 40
Adding a Shadow to a Shape

Creating a Template for an Online Form 41
Adding a Shadow to a Shape

• Select the text to be highlighted
• Tap or click the ‘Text Highlight Color’ arrow (HOME tab | Font group) to display the Text Highlight Color gallery
• Tap or click the desired highlight color to highlight the selected text in the selected highlight color
Creating a Template for an Online Form 42
Highlighting Text

Creating a Template for an Online Form 43
Highlighting Text

• Tap or click the Theme Colors button (DESIGN tab | Document Formatting group) to display the Theme Colors gallery
• Tap or click Customize Colors in the Theme Colors gallery to display the Create New Theme Colors dialog box
• Tap or click the button corresponding to the theme color you wish to customize
• Tap or click the desired theme color• Repeat the previous two steps for each theme color you
wish to customize• Type the desired theme name in the Name text box• Tap or click the Save button to save the modified theme
with the entered nameCreating a Template for an Online Form 44
Customizing a Theme Color
and Saving It with a New Theme Name

Creating a Template for an Online Form 45
Customizing a Theme Color
and Saving It with a New Theme Name

• Tap or click the Restrict Editing button (DEVELOPER tab | Protect group) to display the Restrict Formatting and Editing task pane
• In the Editing restrictions area, place a check mark in the ‘Allow only this type of editing in the document’ check box and then tap or click its arrow to display a list of the types of allowed restrictions
• Tap or click ‘Filling in forms’ in the list to instruct Word that the only editing allowed in this document is to the content controls
• In the Start enforcement area, tap or click the ‘Yes, Start Enforcing Protection’ button, which displays the Start Enforcing Protection dialog box
• Tap or click the OK button to protect the document without a password
• Close the Restrict Formatting and Editing task pane to show the protected form
Creating a Template for an Online Form 46
Protecting a Form

Creating a Template for an Online Form 47
Protecting a Form

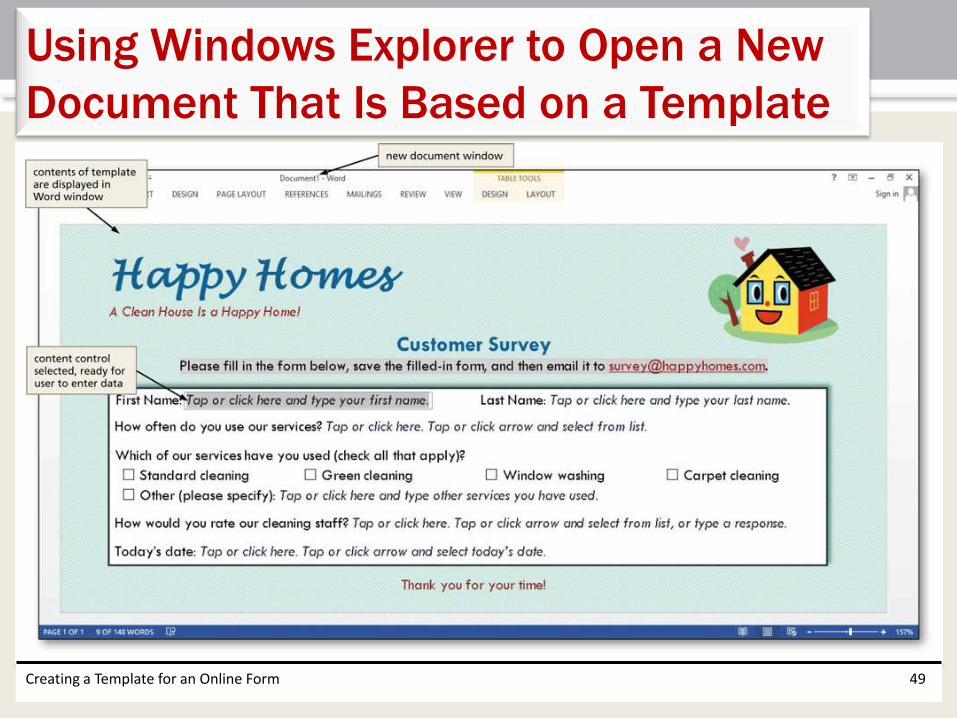
• Tap or click the File Explorer app button on the Windows taskbar to open the File Explorer window
• Navigate to the location of the saved template
• Double-tap or double-click the file corresponding to the theme for which you want to create the new document
Creating a Template for an Online Form 48
Using File Explorer to Create a New
Document That is Based on a Template
Creating a Template for an Online Form 49
Using Windows Explorer to Open a New
Document That Is Based on a Template

Creating a Template for an Online Form 50
Filling In a Form and Saving It
• Save a document as a template
• Change paper size
• Change page color
• Insert a borderless table in a form
• Show the DEVELOPER tab
• Insert plain text, drop-down list, check box, rich text, combo box, and date picker content controls
Creating a Template for an Online Form 51
Chapter Summary

• Edit placeholder text
• Change properties of content controls
• Insert and format a rectangle shape
• Customize a theme
• Protect a form
• Open a new document based on a template
• Fill in a form
Creating a Template for an Online Form 52
Chapter Summary

Chapter 10 Complete
Microsoft
Word 2013