
User‘s Guide - SSK speed of 35 meter per second, which is approx. 70% of typical freefall speed,...
66
User‘s Guide CYPRES 2 User’s Guide - english version - CYPRES 2 Reliability made in Germany
Transcript of User‘s Guide - SSK speed of 35 meter per second, which is approx. 70% of typical freefall speed,...

User‘s Guide
CYPRES 2 User’s Guide - english version -CYPRES 2
Reliability made in Germany

- CYPRES 2 User’s Guide - page 1
CYPRES 2 User’s Guide - english version -
Congratulations on your choice of CYPRES, the safest and most accurate AAD currently available. Like most skydivers, you probably assume you will always have time to deploy your reserve canopy yourself, and that situations requiring use of an automatic activation device always happen to others. We do hope you will never have such trouble, and that your CYPRES will never have to try to save your life.Should CYPRES ever decide to cut your reserve closing loop, it will most likely happen at a moment which, no matter how experienced and cautious you are, justifies that you haven‘t left your safety to chance.
Airtec GmbH & Co. KG Safety Systems
Dieses Handbuch ist in Deutsch erhältlich.Ce manuel est disponible en français.Dit Handboek is ook in het Nederlands verkrijgbar.Este manual está disponivel em Português.Este manual está disponible en español.Questo manuale è disponibile in italiano.Ez a kézikönyv magyar nyelven kapható.Tento manual je k dostání v èeštinì.Ta instrukcja jest dotstêpna w jêzyku polskim.Türkçe kullanici el kätabi bulunmaktadir.このマニュアルは英語版もあります。提供中文版说明书.ھذا الدلیل التشغیلي متوفر باللغة العربیة
CYPRES 2Reliability made in Germany
page 2 - CYPRES 2 User’s Guide -
Contents1. Function ...................................................... 31.1 Design philosophy ..................................... 31.2 Components ............................................... 51.3 How CYPRES works ................................. 61.4 Power supply .............................................. 81.5 Operational safety ...................................... 92. Product overview...................................... 102.1 Expert CYPRES ........................................112.2 Tandem CYPRES ......................................112.3 Student CYPRES ..................................... 122.4 Speed CYPRES ........................................ 132.5 changeable MODE CYPRES ................... 143. Installation ................................................ 164. How to operate CYPRES 2 ..................... 184.1 Handling the control unit ......................... 184.2 Switching CYPRES on ............................ 194.3 When to switch on or reset ....................... 204.4 Changing settings ..................................... 21
4.4.1 Dropzone Offset ................................. 214.4.2 User-selectable activation altitude ...... 244.4.3 User-selectable activation altitude setting
procedure ............................................ 26
4.4.4 User selectable activation altitude & dropzone offset feature combined .. 27
4.4.5 Changing the scale .............................. 274.5 Access to unit information ....................... 284.6 CYPRES 2 and Water jumps ................... 294.7 Changing the filter .................................... 305. Error Display ........................................... 316. Changing the release unit(s) .................... 327. Technical service ....................................... 348. Important Notes ....................................... 378.1 Important notes for jump pilots ................ 378.2 Important notes for users ......................... 399. Repacking of reserves .............................. 4010. The CYPRES Loop and Disc System ... 4211. Abbreviated User‘s Guide ..................... 4412. Switching Rigs ........................................ 4413. Regarding Air Travel ............................. 4514. Technical Data ........................................ 4615. Warranty ................................................. 4816. Disclaimer ............................................... 4917. Index ........................................................ 5018. Packing List ............................................ 52Trade Marks ................................................. 52

- CYPRES 2 User’s Guide - page 3
1. Function
1.1 Design philosophy
CYPRES, which is the acronym of „CYbernetic Parachute RElease System“, is an automatic ac-tivation device which meets all needs, require-ments, and desires of today‘s skydivers. Once it is installed, you can‘t hear it, you can‘t feel it and you can‘t see it.The operation is easy: If you jump from your DZ into your DZ just switch it on prior to the first jump of the day. It is not necessary to switch it off, because CYPRES will do this itself.The weather is constantly checked by CYPRES over the day by measuring the air pressure twice a minute. This means that the unit is always cali-brated to the precise ground level. The various CYPRES model parameters have been chosen to cover the needs of the vast majority of skydivers, and also not to restrict them during com-mon skydiving operations. Close to 100 Million jumps since 1991 have proven the proper design of these parameters. (Special activities may require special consideration or CYPRES settings.)
Vertical speed of 35 meter per second, which is approx. 70% of typical freefall speed, at a low altitude causes CYPRES to take action.The CYPRES family of AAD‘s work with remark-able reliability. To date CYPRES units have saved the lives of far more than 3000 skydivers, without a single unit ever refusing to activate and cut through the loop when the conditions were met.CYPRES is surely the most reliable piece of sky-diving equipment ever produced.
CYPRES is not able to open your reserve. It is only intended to sever your reserve closing loop.CYPRES is strictly a backup device and does not replace proper training or timely execution of emergency procedures. It may display a wrong status, fail whenever and for whatever reason and may cause injury or death. If you are not comfortable with these risks you must not use CYPRES. You must make sure that the loop passes through the cutter’s passing hole. If you loan, rent or sell your CYPRES to somebody it is your responsibility to inform him about the above circumstances.

page 4 - CYPRES 2 User’s Guide -
The CYPRES 2 combines tried and true quality and reliability with new achievements, technology and discoveries made during all the years of continued research and development since 1991. Compared to the CYPRES 1 the CYPRES 2 of-fers numerous additional features and attributes including:- unit is waterproof for up to 24 hours down to a
depth of 5 feet (1.5 meters) in fresh or saltwater- power supply of CYPRES 2 costs zero money
for the user. There is no need to observe a replacement date, record the number of jumps made, monitor the voltage during self-test, watch for a ‘low bat’ sign, purchase a battery, or have a rigger open or repack the reserve for this reason.
- several unit information are accessible from the display: flight counter, serial number, next maintenance due date, settings
- reminds you when the maintenance date is near- smaller and lighter- robust, rigger friendly case, with rounded cor-
ners and edges, and in addition it is waterproof- extended maintenance window: +/- 6 months
from month of manufacture, no down-time during the busy part of the year regardless of month of manufacture
- self-test is completed in 10 seconds
The handling of the CYPRES 2 is simple: After you have purchased it, your rigger installs it correctly into the factory integrated CYPRES set up and it is ready to work for 4 years.*Then you have the maintenance done and it is ready for another 4 years.*Then you have another maintenance done and it is ready for another 4 years. *
* Please switch it on at the DZ before the first jump of the day and change the filter if you have landed in water. Always respect the total contents of this User’s Guide.

- CYPRES 2 User’s Guide - page 5
processing unit
control unit
release unit(cutter)
1.2 Components
CYPRES consists of a control unit, a processing unit and one release unit (cutter) for 1-pin reserve container or two release units (cutters) for 2-pin reserve container.
Do not pull, lift, carry or throw CYPRES by the cables
SAFETY INSTRUCTIONS

page 6 - CYPRES 2 User’s Guide -
1.3 How CYPRES works
Every time CYPRES is switched on, it measures the air pressure several times in a short period of time, takes the average value as the value for ground level, thus „zeroing“ itself. This happens during the integrated self-test.While it is in use, CYPRES constantly checks the air pressure while on the ground and, if necessary, adjusts to changing weather conditions. Even though you might need to reset your altimeter before a jump, CYPRES takes care of itself. This very accurate cali-bration is the basis for CYPRES to recognize exactly the activation altitude and speed.The processing unit contains a factory programmed microprocessor that is capable of real-time calcula-tions of the jumper‘s altitude and rate of descent based on barometric pressure.By monitoring this data, certain criteria are generated from which conclusions are drawn. Should the con-clusion be that the jumper is in a dangerous situation (i.e. still in freefall at a low altitude) the processing unit triggers the release unit to initiate the reserve container opening sequence.
The release unit (cutter) system for the reserve con-tainer is completely independent of the rig‘s primary system, because it does not pull the ripcord pin out of the closing loop, but rather cuts the loop inside the reserve container to initiate the opening sequence.The reserve closing loop has to pass through the cutters passing hole.Initiating the opening sequence of a reserve container by cutting the loop is a method invented and patented by the founder of Airtec, Helmut Cloth, in 1987.The CYPRES‘ activation system has these advan-tages:• The reserve container opening sequence can be
initiated in two different ways. One method is by the jumper manually pulling the reserve release handle. The other method is by CYPRES when it automatically cuts the closing loop.
• Mechanical components are reduced to a single movable piston in the release unit.
• The activation system is located inside the reserve container where it is not exposed to excessive shock or other adverse influences.

- CYPRES 2 User’s Guide - page 7
The distance which the piston moves in case of an activation is approx. 5 mm.
The release unit (cutter) is a unique design specifi-cally developed for CYPRES. Features include a completely self-contained enclosure to avoid expelling anything during activation.
During an 18 month long investigation by BAM (Bundesanstalt für Materialprüfung), Berlin, 99 release units were tested. The result is that BAM and the U.S. DOT have classified the CYPRES as being non-hazardous.
Due to its high reliability and other properties, the CYPRES release unit is currently being used in aerospace applications (satellites).
• The system is unobtrusive and can be installed so that it is undetectable from the outside.
Release unit (cutter) with
elastic keeper
Functional diagram:
reserve closing loop
blade plastic guide
stainlesssteel body

page 8 - CYPRES 2 User’s Guide -
actually
no scheduling
no shipping costs
no battery costs
no installation costs
no repack costs
no downtime
don’t worry, go skydiving
1.4 Power supply
No user attention or cost is needed to the power supply of CYPRES 2.The unit is designed to function from the date of manufacture until the first maintenance, from the first maintenance to the second maintenance, and from the second maintenance until the end of warranty time without limitations concerning the number of jumps. If CYPRES 2 should cease to function due to a faulty power supply prior to the maintenance due date, Airtec will take care of this with the highest priority.

- CYPRES 2 User’s Guide - page 9
1.5 Operational safety
There are two important points to remember re-garding the operational safety of CYPRES:
1. CYPRES self-tests automatically every time it is switched on. After every switch-on procedure, CYPRES executes a self-test routine during which all important internal functions are checked. A positive outcome to this self-test should assure you of a trou-ble-free operation for up to 14 hours. When the display unit shows , the self-test has been completed successfully. If the self-test has resulted in errors or discrepancies, CYPRES will not assume operating mode but will switch itself off after displaying an error code. This error code indicates why the self-test process was aborted (see chapter 5).
2. CYPRES has fail-safe error detection. Two processes are activated in CYPRES once the unit has been switched on: a primary work-ing process and an independently operating
controlling process that monitors the working process continuously. In case of errors while the working process is active, the backup con-trolling process will switch the unit off. Depending on the type and potential impact of the error, CYPRES can either be switched on again or it will stay in shut-down mode permanently. With certain error codes (see er-ror code list in chapter 5), it is not possible for the user to reactivate the unit. In such cases, CYPRES must be sent to the manufacturer or service center for inspection and adjustment.
Malfunction can result in false activation / no activation: Every technical device can fail. So everything imaginable can happen with the CYPRES, including, but not limited to: displaying a status which is not true, failing to function, or functioning at a wrong moment or at a wrong occasion. Such inappropriate act can easy injure or kill you or others. If you or your friends or relatives are not willing to accept these uncertainties and risks, then you must not use CYPRES.

page 10 - CYPRES 2 User’s Guide -
2. Product overviewCYPRES 2 is available in five models:
Expert CYPRES 2 Student CYPRES 2 Tandem CYPRES 2 Speed CYPRES 2 changeable MODE CYPRES 2
Converting modelsA conversion between the four CYPRES 2 models Expert - Student - Tandem - Speed is possible. This procedure has to be performed by the manu-facturer or the service center. This includes new settings, a new color corresponding button, a new label, and a complete functional test. All of this will be executed on your request and at no charge.
Use in a 1-pin reserve container andthe use in a 2-pin reserve container All CYPRES can be used in both container types. With the plug-and-socket cutter connection a swap from 1-pin cutter to 2-pin cutter or vice versa can be simply done by unplugging and plugging-in without opening the unit and without the use of any tools. (See chapter 6)
Feet / Meter versionEvery new CYPRES can either display altitude in feet or meters. If your CYPRES does not meet your personal preference, see chapter 4.4.5 for changing the scale of the dropzone offset from feet to meter or vice versa. Once you have set it, leave it as long as the unit is in your use.(If your CYPRES does not show or on the display when changing the dropzone offset, then it is an older version that is not capable of switching the scales.)

- CYPRES 2 User’s Guide - page 11
2.2 Tandem CYPRES
The Tandem CYPRES can be recognized by the blue button with the imprint „Tandem“ on the control unit.It activates the release unit when it detects a rate of descent higher than approx. 78 mph (35 m/sec) at an altitude of approx. 1900 (approx. 580 meters) feet AGL.Like the Expert CYPRES, the Tandem CYPRES ceases operation below approx. 130 feet (approx. 40 meters) AGL.
2.1 Expert CYPRES
The Expert CYPRES can be recognized by the red button on the control unit.It activates the release unit when it detects a rate of descent higher than approx. 78 mph (35 m/sec) at an altitude of approx. 750 feet (approx. 225 meters) above ground level (AGL). In the event of a cutaway CYPRES will operate down to approx. 130 feet AGL. Below approx. 130 feet (approx. 40 meters) AGL opening is no longer useful. For this reason, CYPRES ceases operation below ap-proximately 130 feet AGL.
High speed at low altitude: If you exceed the vertical speed of 78mph (35 meters per second) at an altitude below 1000 feet (300 meters) under your main canopy, then your Expert CYPRES will cut the reserve closing loop. That can cause injury or death. Never do that.
For your information: 35 meters per second is ap-proximately 70% of freefall speed.

page 12 - CYPRES 2 User’s Guide -
2.3 Student CYPRES
The Student CYPRES can be recognized by the yellow button with the imprint „Student“ on the control unit. It activates the release unit when it detects a rate of descent higher than approx. 29 mph (13 meters per second). The activation altitude is split. In the case of rate of descent being approx. that of free fall, the opening altitude is at approx. 750 feet (the same as with Expert CYPRES). However, should the rate of descent be lower than that of freefall but still above the limit of 29 mph (e.g. with partially opened canopy, or after a cutaway), then Student CYPRES activates the release unit when the altitude falls below approx. 1000 feet (approx. 300 meters) above ground level. The student will then have more time to prepare for landing. Like the Expert CYPRES, the Student CYPRES ceases operation below approx. 130 feet AGL.
Unlike the Expert and Tandem CYPRES models, we recommend that the Student CYPRES be switched off in the aircraft prior to descent if the jump is aborted and the student will land with the plane, because the vertical speed of a descending jump plane will exceed the activation speed of Student CYPRES.
Activation on board: If a jump plane is descending with students still on board, switch the Student CYPRES off before reaching 1500 ft (450 meters) above ground. If this is not possible, the descent rate of the plane must not exceed 1500 ft/min below 1500 feet above ground. Close open doors.
Vertical Speed: Be aware that it is possible to exceed a vertical speed of 29 mph (13 meters per second) under a fully inflated canopy! Don’t do that when using a Student CYPRES. That can cause injury or death.

- CYPRES 2 User’s Guide - page 13
2.4 Speed CYPRES
The Speed CYPRES can be recognized by the red button with the white imprint „Speed“ on the control unit.It will activate the release unit when it detects a rate of descent higher than approx. 102 mph (ap-prox. 46 m/s) at an altitude below approx. 750 feet (approx. 225 meters) above ground level (AGL). Unlike the Expert CYPRES, the Speed CYPRES ceases operation below approx. 330 feet (approx. 100 meters) AGL.The Speed CYPRES is designed to allow extreme canopy piloting. The high activation speed plus the feature that the unit ceases operation below 330 feet are tailored for this discipline. The Speed CYPRES is designed to activate reli-ably in all „regular“ free fall situations (without special equipment or pilot chute) when no canopy or drogue is out.Although the 35 m/s (78 mph) vertical speed re-quired for an Expert CYPRES to activate had not
been reached under canopy for decades, nowadays an increasing number of skydivers try and manage to exceed that speed using low turns and small canopies.The number of fatalities involving fully open para-chutes show that these actions truly enhance the risk of skydiving dramatically.Please take all these facts into consideration and use common sense before making a choice. Airtec will modify your CYPRES 2 into a Speed CYPRES 2 free of charge, see section 2.
For some activities, the Speed CYPRES may not be suitable. For instance, already the Expert CYPRES might not activate during a wingsuit jump because the vertical speed can be too low, and there is even less chance that a Speed CYPRES will activate. Speed CYPRES will activate under an open main if the vertical speed is pushed above 46 meters per second near or below the activation altitude. In case you exceed this vertical speed, then have your Speed CYPRES switched off.

page 14 - CYPRES 2 User’s Guide -
2.5 changeable MODE CYPRES
The changeable MODE CYPRES can be recog-nized by the magenta button with the white imprint „changeable MODE” on the control unit.The user can switch this unit between the modes Exp - Stu - Tan - Spe on his own. The device param-eters are identical with the ones from the CYPRES models Expert - Student - Tandem - Speed. All handling is fully identical to these models - except of changing the mode.When the unit is on, the current mode is always indicated by a digit below the appropriate engraved mode.
Note: Default delivery setting of new changeable MODE units is: Type Expert, scale feet, user selectable altitude adjustment A0 (see chapter 4.4.2)
unit set in Tandem mode
digit indicating the mode
Inappropriate mode can result in false activation / no activation.Using an inappropriate mode is most likely to injure or kill you or others.Always use the unit in the appropriate mode.Never, under no circumstances and for no reason, use the device in an inappropriate mode.
- CYPRES 2 User’s Guide - page 15
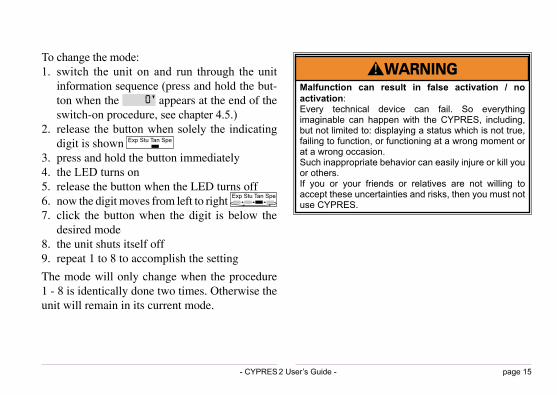
To change the mode:1. switch the unit on and run through the unit
information sequence (press and hold the but-ton when the appears at the end of the switch-on procedure, see chapter 4.5.)
2. release the button when solely the indicating digit is shown
3. press and hold the button immediately 4. the LED turns on5. release the button when the LED turns off6. now the digit moves from left to right 7. click the button when the digit is below the
desired mode8. the unit shuts itself off9. repeat 1 to 8 to accomplish the setting
The mode will only change when the procedure 1 - 8 is identically done two times. Otherwise the unit will remain in its current mode.
Malfunction can result in false activation / no activation: Every technical device can fail. So everything imaginable can happen with the CYPRES, including, but not limited to: displaying a status which is not true, failing to function, or functioning at a wrong moment or at a wrong occasion. Such inappropriate behavior can easily injure or kill you or others. If you or your friends or relatives are not willing to accept these uncertainties and risks, then you must not use CYPRES.

page 16 - CYPRES 2 User’s Guide -
tions of the different harness/container systems, should not create any negative influence on the original function of the CYPRES unit, which is the cutting of the reserve closing loop. It had to be assured that the initiation of the reserve open-ing (severing the closing loop) did not hinder the reserve development in any way.All CYPRES installations should be performed and approved by the harness/container manufacturer in collaboration with the AAD manufacturer. Should you wish to install a CYPRES into a con-tainer which does not have a CYPRES set-up, you should contact the harness/container manufacturer for advice and instructions.
3. InstallationDuring the first years after introduction of the CYPRES AAD it was necessary to establish a testing and evaluation procedure for the installa-tion of this new AAD into the existing harness/
container systems, as there was no such AAD concept on the market.The installation had to be tested and ap-proved. This was solely done at Airtec GmbH & Co. KG in Germany until 2012. Airtec GmbH & Co. KG undertook this task in preference to the harness/container
manufacturers to find out the best and safest pos-sible installation for each system. The resulting installation instructions, in all it´s variations, originated from the different construc-
„Each parachute manufacturer approves the installation of the AAD
on their equipment.“ 12/04/13 AC No:105-2E Page 4 part 2.b. of Advisory Circular of U.S. Department of Transportation, Federal Aviation Administration
Retrofit: Comply with the specific retrofit instructions of the harness/container manufacturers.

- CYPRES 2 User’s Guide - page 17
CYPRES can be assembled into rigs with exist-ing setups. Please refer to the harness/container manufacturer if in doubt. It is necessary to place the processing unit into the pouch so that the cables lay flat on the bottom of the pouch. Control unit cable and cutter cable(s) must be placed without tension.Excess cable is stowed in the flat part of the pocket underneath the velcro-adjustable flap. If you have to stow both the thinner cutter cable and the thicker control unit cable, be sure to place the thicker cable so that it lays on top of the thinner one. Cables should be placed in a circle in order to avoid twists. Always avoid pulling, bending, twisting, or kinking the cables.
right
wrong- cables not flat on
bottom- unit is inserted up
side down- thin cable on top
of thicker cable- cable is bentInappropriate installation can result in inappropriate
container opening performance. That can cause injury or death. Never install a CYPRES by trial and error.
Removal of CYPRES can be done by the owner without any problems. Do not pull on the cables, instead push the processing unit, cutter and control unit from their keepers.

page 18 - CYPRES 2 User’s Guide -
4. How to operate CYPRES 2
4.1 Handling the control unit
The button on the control unit should be pressed with the fingertip; please do not use a fingernail or any other object. Use a short click action in the middle of the button.
You should familiarize yourself with switch-ing CYPRES 2 on and off (see chapter 4.2) and changing the dropzone offset (see chapter 4.4.1) prior to use.
The button is the only means the user has for controlling CYPRES 2 functions. For a skydiver necessary handling is reduced to the following actions:
• switching on
• switching off
• increasing dropzone offset
• decreasing dropzone offset
• viewing the flight counter viewing the serial number viewing the next maintenance date
• adjusting the activation altitude
• changing the scale, feet / meterThe following sections provide thorough descrip-tions of these procedures.

- CYPRES 2 User’s Guide - page 19
wait!
click
wait! wait!click click
self-test andcalibration unit
switched onclick
lightappears
lightappears
lightappears
4.2 Switching CYPRES on
CYPRES is switched on by pressing the button (pushbutton switch) four times with very short clicks. Start the switch-on cycle by clicking the button once. After approx. one second, the red LED-light will glow. You must acknowledge the red light immediately by clicking the button again. This sequence - a click following appearance of the red light - will be repeated two more times. After a total of four clicks, CYPRES goes into self-test mode.If you do not act promptly after seeing the LED-light, or if you push the button too soon, CYPRES will ignore the switch-on attempt. This four-click initiation cycle has been designed to avoid accidental switch-on.
Once the switch-on procedure is finished, the unit will run through its self-test. Initially, the display will show the number , and then a count-down ending in . When the with the arrow down is shown, the unit should be func-tional for the next 14 hours. After 14 hours have passed, the unit will switch itself off automatically. A manual switch-off is always possible using the button. If the self-test is not successful, an error code is shown for approximately 2 seconds. The meaning of this error code can be seen in chapter 5.The manual switch-off sequence is the same as the switch-on procedure (click, light, click, light, click, light, click). This routine is designed to avoid accidental switch-off.

page 20 - CYPRES 2 User’s Guide -
4.3 When to switch on or reset
As a rule, CYPRES has to be switched on at the takeoff site on the ground. Just prior to donning your rig is an ideal time. It should never be switched on inside an aircraft, helicopter, balloon, etc. To reset CYPRES, switch off and then on again. The unit will then re-calibrate and „zero“ itself to this elevation. When the takeoff airfield and intended dropzone are in the same location, and all jumping activity is restricted to that place, an initial switch-on at the dropzone will suffice for any number of jumps, provided they all take place within 14 hours. Should any of the following situations occur, CYPRES must be reset before the next jump:• The dropzone is missed and the landing takes
place in an area with an elevation greater than 30 feet (10 m) above or below the dropzone level. Or, on the return journey to the dropzone the ground elevation changes similarly.
• The unit is taken away from the airfield/drop-zone by vehicle or on foot and later brought back again.
• If the total time for a flight or a flight with jump (takeoff to landing) exceeds one and a half hours, CYPRES will function normally, but must be reset after landing as the weather could have changed the ambient air pressure significantly in the meantime.
General recommendation: If in doubt, reset CYPRES.
When the takeoff airfield and intended dropzone are in different locations, CYPRES must be switched on at the departure airfield. Prior to each jump, on return to the airfield from the dropzone, it must be reset again before takeoff.
When the takeoff airfield and intended dropzone are at different elevations, CYPRES must be switched on at the departure airfield and adjusted to the elevation of the dropzone (see chapter 4.4.1).This is extremely important when making demonstration/display jumps. Prior to each jump, on return to the airfield from the dropzone, it must be reset before jumping again.

- CYPRES 2 User’s Guide - page 21
DZ 360 feet below airfield
4.4 Changing settings
4.4.1 Dropzone OffsetYou must set the dropzone offset whenever the airfield and the dropzone where you intend to land are at different elevations. CYPRES allows for adjustments of up to plus/minus 3000 feet, or plus/minus 1000 meters. If an adjustment has been made, either „meter“ or „ft“ is shown on the display. If „meter“ is shown, the displayed value is in meters. If „ft“ is shown, the value is in feet. Switch on CYPRES only at the takeoff site on the ground. In order to make the dropzone offset adjustment, simply leave your finger pressed firmly on the button when you press it for the fourth time during switch-on. CYPRES will continue with its self-test, and once it has finished, it will display 30 feet (or 10 meters) with an arrow pointing up (). If you are going to jump to an elevation which is 30 feet higher than your take off, then release the button.If you keep it pressed, then CYPRES displays 30 feet (10 meters) with an arrow pointing
DZ 360 feet above airfield
down (). If you are going to jump to a 30 feet lower elevation, then release the button.If you keep pressed, then CYPRES displays 60 feet (20 meters) with an arrow pointing up (). If you are going to jump to a 60 feet higher elevation, then release the button.If you keep pressed, then CYPRES displays...This carries on until 3000 feet (1000 meters).

page 22 - CYPRES 2 User’s Guide -
So you have the possibility to adjust to a higher or lower landing elevation of up to 3000 feet (1000 meters) in a real simple way.The dropzone offset that you select will remain indicated on the display, and CYPRES will adjust automatically for this change during the next jump (only).Even the shortest release of the button during the self-test cycle causes an interruption in the pro-cess and CYPRES will ignore further attempts to change the dropzone offset. In such cases the unit will run through its self-test and end with on the display, ready for operation (without adjust-ment). Simply repeat the procedure as necessary.If you need to make changes, you have to start over again by switching off then back on.Once you have made a dropzone offset adjust-ment, it will be displayed until the jump has been made, or until CYPRES switches itself off or is switched off by you.

- CYPRES 2 User’s Guide - page 23
On landing, CYPRES will accept the new ground level as its actual „Ground Zero“ reference, when the preset altitude has been hit precisely or if the landing elevation is lower than the one set. This action can be observed by noticing that immediately after the landing (within a maximum of 30 seconds), the preset dropzone offset is au-tomatically replaced by .It would then be possible to take off from and land at this location again under canopy without doing any further adjustment. But, if you take off at this location and jump into a dropzone with a different elevation you have to do another dropzone offset adjustment.If the landing elevation is higher than set, the unit will not change to zero display right away. In such a case, CYPRES must be recalibrated to the correct Ground Zero by switching it off and on again prior to the next jump. Do this on the airfield where the aircraft will take off.
In case you want the same dropzone setting, that you have used on your last jump to another eleva-tion: your CYPRES 2 makes it easy for you. It automatically offers you this value immediately after the end of the self-test and before it starts to offer the regular steps. You can choose this setting again by just releasing the button while you see its value on the display.
Dropzone Offset: It is necessary to do a dropzone offset adjustment before each individual jump, whenever the airfield and the dropzone where you intend to land are at different elevations.Not doing so can cause injury or death.

page 24 - CYPRES 2 User’s Guide -
indicating 100 ft (30 m) increase to activation altitude during self-test
indicating 100 ft (30 m) increase to activation altitude after self-test ( operating mode display)
left digit blinks
4.4.2 User-selectable activation altitudeCYPRES 2 offers (since 01 2013) users the option of increasing the activation altitude up to 9 steps of approximately 100 feet (30 meters) each. The steps are named “A 1” thru “A 9” (“A” for altitude). “A 1” indicates approximately a 100 ft. (30 me-ters) increase to the standard CYPRES activation altitude, “A 2” indicates approximately a 200 ft. (60 meters) increase to the standard activation altitude, etc. If selected, the thru is displayed during the self-test countdown between the “10” and the “0”. (For example, if “A 1” is selected, the self-test countdown will be: 10; 9; 8; 7; 6; 5; 4; 3; 2; A 1; 0 )
Also, after the self-test is complete, the selected number (1-9) will blink on the far left location of the display.Note: All activation altitude references in this User’s Guide are based on the standard setting with no user-selectable activation altitude selection. Note: The CYPRES 2 disarm altitudes of approx. 130 ft (40 meters), [approx. 330 ft (100 meters) on a Speed CYPRES 2], do not change with user-selectable modification.Note: Default delivery setting of new units is A0.

- CYPRES 2 User’s Guide - page 25
Malfunction: A malfunction can easily injure or kill you or others. Every technical device can fail. So everything imaginable can happen with the CYPRES, including, but not limited to: displaying a status which is not true, failing to function, or functioning at a wrong moment or at a wrong occasion. If you or your friends or family are not willing to accept these uncertainties and risks, then you must not use CYPRES.
An inappropriate activation altitude is likely to injure or kill you or others.Always use this unit set at the appropriate activation altitude. Never, under no circumstances and for no reason at an inappropriate activation altitude.
Higher / lower activation altitude: The higher the CYPRES activation altitude, the more likely that a two-canopy out scenario will occur if your main canopy is deployed low. The lower the CYPRES activation altitude, the greater the possibility of your reserve not being fully inflated at a sufficient altitude.Both secenarios can cause injury or death.
Making a decision: The decision to increase the activation altitude, and by how much, is the user’s choice and decision, and may be taken in consultation with the reserve & main canopy and harness/container manufacturers.
SAFETY INSTRUCTIONS
Opening altitude: Always plan your main container opening altitude and skydive to have your main canopy functionally open (fully open, flying, controllable, even landable) a minimum of 1000 ft. above your CYPRES activation altitude. For example, if your CYPRES activation altitude is 750 ft above ground level then your minimum functionally open altitude is 1,750 ft. above ground level; if your CYPRES activation altitude is 850 ft. above ground level then your minimum functionally open altitude is 1,850 ft. above ground level, etc. Take into consideration your altitude loss during main canopy deployment (opening characteristics of main canopy, main container opening characteristics, type of skydive, reaction time, etc.)
SAFETY INSTRUCTIONS

page 26 - CYPRES 2 User’s Guide -
4.4.3 User-selectable activation altitude setting procedure
If you decide to select a different CYPRES activa-tion altitude, you must enter the unit information area by pressing the button down immediately when the zero has appeared at the end of the self-test, and then keep it pressed down (see User’s Guide section 4.5). • After your CYPRES 2 has shown the flight
counter, the serial number, the next mainte-nance date, it shows the feet or meter setting*. The next information you will see is the current Activation Altitude Setting ( , etc.).
• After ½ second release the button and imme-diately press it again.
• The LED (red indicator light) will turn on.• When the LED turns off, immediately release
the button.• Then you see the sequence A 0; A 1; A 2; A 3;
A 4; A 5; A 6; A 7; A 8; A 9; (repeated) on the display.
• Click once on your choice of number and CYPRES will shut down.
Next for safety purposes (to make certain that this setting is never changed accidentally), you have to repeat this same procedure once more, confirming the new setting.During the confirmation, if you do anything else other than the identical procedure, your attempt is invalid and you will have to start over again (performing the procedure two times).Once a User-Selectable Activation Altitude has been set on your CYPRES, it remains in effect until another setting is selected. During the self-test your CYPRES will indicate this setting by displaying it ( to ) at the appropriate time during the self-test countdown. After the self-test is complete, the selected number (1-9) will blink on the very left location of the display as long as your CYPRES is on.The procedure takes 80 seconds and can not be unintentionally executed.Because of the variables involved, it is the user alone who bears all responsibility and consequenc-es of the activation altitude setting. Airtec GmbH & Co. KG, the manufacturer of the CYPRES device, does not take any responsibilities thereof.

- CYPRES 2 User’s Guide - page 27
100 ft. activation altitude increase (left digit blinks)
dropzone offset 120 ft. up
4.4.4 User selectable activation altitude & dropzone offset feature combined
The User-Selectable Activation Altitude feature (sections 4.4.2 & 4.4.3 and the Dropzone Offset feature (section 4.4.1) can be used independently or in combination. When used in combination, the selected Activation Altitude Setting number blinks on the very left location of the display, and the Dropzone Offset (up to +/- 3000 ft. or +/- 1000 meters) is shown on the right side of the display when CYPRES is on.
4.4.5 Changing the scaleIf your CYPRES 2 Dropzone Offset scale is set in meters and you want feet or vice-versa, you must enter the unit information area by pressing the but-ton down immediately when the zero has appeared at the end of the self-test, and then keep it pressed down (see User’s Guide section 4.5). After your CYPRES 2 has shown the flight counter, the serial number, the next maintenance date, it shows the feet or meter setting*. • Just release the button ½ second after the cur-
rent feet or meter setting is displayed, • immediately press it again, • release it when the LED turns off, • then click on your choice of feet or meter and
CYPRES will shut down. This procedure only needs to be done one time.(Note: For units produced or updated after 01/2013 this procedure replaces the one described in the last paragraph of User’s Guide Section 4.4 edition 1/2012 and earlier.)*Feet or meter selection option not available on CYPRES 2 manufactured prior to August 2005.

page 28 - CYPRES 2 User’s Guide -
4.5 Access to unit informationCYPRES 2 provides an easy way to view
1. the flight counter, 2. the units serial number, 3. the next maintenance date* 4. the scale meter or feet 5. the user selected activation altitude
To view the unit informations press the button immediately when the appears at the end of the switch-on procedure and hold it.Each value is displayed for 5 seconds, then the next value shows up.You can stop the information sequence whenever you want by just releasing the button. * After the 8 year maintenance has been performed, the words ‘maint. no’ and the date of the total lifetime (end of life) is shown.
3. next maintenance due in 09 / 2016
2. display of the serial number
1. display of the flight counter 5. user selected activation altitude setting
4. display of the scale feet (meter)

- CYPRES 2 User’s Guide - page 29
CYPRES 2 allows water jumps without removal of the unit. CYPRES 2 is waterproof for a duration of up to 24 hours down to a water depth of 5 feet (1.5 meters). This is achieved through a water-resistant casing, sealed plug connections, a sealed cutter, a sealed control unit, and a special filter. The filter al-lows precise measurement of the air pressure and at the same time keeps water away from the inside of the unit. As long as there is no contact with water, the filter never needs to be replaced by the user.After water contact, the unit must be switched off immediately after exiting the water. The filter must be replaced before next use.The CYPRES 2 filter changer tool is made from stainless steel, specifically for the purpose of filter removal and replacement. Filter replacement (see chapter 4.7) can be done by your rigger (packer). After water contact, the rig and the reserve must be dried according to the manufacturers instructions. After that the rig and CYPRES 2 with the new filter can be used again.
4.6 CYPRES 2 and Water jumps

page 30 - CYPRES 2 User’s Guide -
4.7 Changing the filter
Filter Removal: Hold the CYPRES filter changer on the non-slotted end and push it straight (without tilting) onto the filter up to the stop position.
Tightly grip the filter changer, twist off by turn-ing in a counterclockwise direction and remove the filter. If there is water in the casing (behind the filter), thoroughly dry
it with an absorbent soft cloth. Remove the old filter from the filter changer by pushing with your finger or with the eraser end of a pencil. Discard it.
Filter Installation: Place the new filter with the labeled side toward and into the slotted end of the filter changer up to the stop (flush) position. Do not angle.
Hold the filter changer by the non-slotted end, gently slide the filter fitting into the unit holding it straight without tilting. Turn the filter changer clockwise, initially there will be little resistance. Continue turning the filter changer until it slips on the filter. (The filter stops turning but the changer continues to turn.) Remove the filter changer from the filter by pulling straight back.
Do not use other tools!
The unit must be switched off before filter change.

- CYPRES 2 User’s Guide - page 31
5. Error Display If there is an error condition detected during the self-test countdown, CYPRES 2 shows an error code on the display for approx. 2 seconds, then it switches itself off. (Display goes blank).Error code number / error code description:
or : One or both of the attached re-lease units are not correctly electrically connected to the unit. The reason may be a cable break, the cutter plug could be disconnected, or the release unit(s) may have activated.
: Excessive variations in ambient air pressure have been measured during the self-test period. The unit is unable to obtain consistent values for the ambient air pressure at ground level. Possible reasons could be that an attempt to switch CYPRES on has been made in a car driving uphill or downhill, in an elevator or in a flying aircraft. The switch-on procedure can be performed several times after a error was displayed. If is displayed, the unit has successfully gone through the self-test.
Additional error codes for units produced / serviced on or after January 2013.
Power Down Checksum Error Pressure Sensor Error
After one of these three error codes appears, the unit switches off and cannot be switched on again. Please discontinue use and send the unit in for service. If other error codes appear in the display, if the unit switches itself off and can not be switched on again, if the unit does not switch off after 14 hours, if there is no red light when the button is pressed, or if anything else unusual occurs please record the error code and contact Airtec or SSK before further use!
Malfunction: A malfunction can easily injure or kill you or others. Every technical device can fail. So everything imaginable can happen with the CYPRES, including, but not limited to: displaying a status which is not true, failing to function, or functioning at a wrong moment or at a wrong occasion. If you or your friends or family are not willing to accept these uncertainties and risks, then you must not use CYPRES.

page 32 - CYPRES 2 User’s Guide -
1-pin Cutter 2-pin Cutter
6. Changing the release unit(s)After an activation the release unit can be changed by any rigger (packer) via the plug-and-socket connection.
Disconnecting the release unit:Hold plug and socket by their aluminium grips and pull them apart using a smooth straight motion. Do not twist!
Connecting the release unit(s):Hold plug and socket by their aluminium grips. Place the plug directly in front of the socket and connect them by pushing together with a smooth straight motion until it is completely seated. Do not twist!
It is easy to change a 1-pin CYPRES to a 2-pin CYPRES or vice-versa, by swapping cutter types.

- CYPRES 2 User’s Guide - page 33
Notes:
1. CYPRES 1 field replaceable cutters (no alumi-num grip) can be used with CYPRES 2 They will function properly, however this combination is not water-resistant.
CYPRES 2 cutters (identified by aluminum grip) can be used with any CYPRES 1 with the field replaceable cutter connector. They function properly - but this combination is not water-resistant.
2. Release units (cutters) are numbered via a heat shrink tubing placed on the cable. This number identifies the cutter. A table of cutter numbers with corresponding dates of manufacture are available at www.cypres.cc
3. It is possible that the cutter plug could separate from the socket after a CYPRES activation. In the rare combination of this and a water landing, the socket must be dried out before further use. Do that by tapping the open end of the socket flat onto a flat surface such as a table top. Once
no additional water comes out while tapping on the table top, store the CYPRES with the open end of the socket hanging downward for another 24 hours in a dry area, to allow the socket to dry out completely. When completely dry, insert the plug of the new cutter.
4. Use a one-pin cutter in a one-pin container and a two-pin cutter in a two-pin container.
Non serviced cutter: Do not use release units (cutters) after the Lifetime Warranty period.Release units (cutters) also require technical service (maintenance) every four years. Please send cutters more than four years old, that have not been attached to a CYPRES during maintenance to Airtec or SSK for a free no-charge inspection prior to use.

page 34 - CYPRES 2 User’s Guide -
7. Technical serviceThe extremely reliable function of CYPRES is based on 4 facts: exclusive use of carefully pretreated and approved parts, strict detailed manufacturing procedures, continuous quality control and monitoring through the manufactur-ing process, and regular periodic technical service (maintenance). 4 and 8 years after the original date of manufacture, maintenance procedures accord-ing to the manufacturers guidelines are necessary. There are 4 primary reasons for the maintenance: 1. Deviations between nominal and actual values
are corrected to ideal values. Every detail is observed. It is common that signs of wear and tear are corrected and sometimes even ‘cosmetic’ treatment is done.
2. The technical condition of each unit is ana-lyzed. The fact that a very high percentage of units are returned for the periodic maintenance gives the ability to see statistical trends and to predict potential problems at a very early
stage. The advantage: often it’s possible to prevent situations by modifications during the maintenance procedures, rather than having to fix problems with downtime later.
3. Experience shows that during a period of 4 years, changes and improvements do happen. Applicable updates are performed during maintenance. Such updates may have the background of technical improvements, or enhancement of knowledge, or may result from environmental changes or changes in the sport (e.g. new disciplines), which Airtec is always researching and taking into consideration.
4. The most important part of the maintenance is the individual pre-adjustment of each unit for the next 4 years. A unit will not be returned before a high confidence level is reached regarding the prediction of the unit’s proper function for the next 4 years.

- CYPRES 2 User’s Guide - page 35
At any time it’s possible to check the date of the next maintenance. (See chapter 4.5)
If the unit enters 6 months before maintenance due date, the maintenance date (next maint. in month / year) will automatically be shown at each self-test. 6 months after the due date the display will change to: ‘next maint. now’.
All displayed dates are only a reminder. Please choose a suitable date during the 13 month time frame for a convenient performance of the maintenance. According to experience, the number of maintenances and the necessary time to do them increases February-May. For quicker service, a date between June and January is a better choice.
The maintenance has to be performed 4 and 8 years after the original date of manufacture. The earliest possible date for the CYPRES 2 maintenance is 6 months early, the latest 6 months after the month of manufacture.
A delayed maintenance has no advantage. It does not save any cost as the Lifetime Warranty remains the same. It’s smart to choose a suitable time dur-ing the 13 month window for sending the unit in for maintenance, rather than waiting until the last possible moment, or until the beginning of the next season. Because of the 178,000+ maintenance procedures performed to date on CYPRES, and lots of improve-ments incorporated into the design of CYPRES 2, Airtec has determined that it is possible to extend the maintenance window to 13 months on CYPRES 2. This maintenance window gives you more free-dom, and avoids maintenance down-time at the wrong time of the year - please use this new feature wisely!

page 36 - CYPRES 2 User’s Guide -
After the 8-year maintenance, CYPRES 2 should be airworthy for the complete Lifetime period.
CYPRES 2 maintenance cost is a flat-rate (always the same), even when a unit requires extensive re-pairs. During the CYPRES 2 Lifetime, the skydiver should not have any operation costs other than the 2 maintenance fees (except for an activated cutter or filter).
Please contact your local CYPRES Dealer or Ser-vice Center concerning the maintenance. The list of Airtec Dealers is available at www.cypres.cc
The CYPRES Service Center for the USA, Canada, South America and other Western Hemisphere countries is:
SSK Industries, Inc., 1008 Monroe Road
Lebanon, OH 45036 - USATel: ++ 1 513 934 3201 Fax: ++ 1 513 934 3208
email: [email protected]

- CYPRES 2 User’s Guide - page 37
8. Important Notes
8.1 Important notes for jump pilots• A Student, Expert or Speed CYPRES will not
work if the aircraft is exited before it reaches 1500 feet (450m) above the airfield takeoff elevation and 1500 feet (450m) above the intended dropzone elevation. In the case of a Tandem CYPRES 3000 feet (900m) has to be reached.
• After take off please ascend at more than 180 feet per minute (1 meter per second) for at least 30 seconds.
• Never descend to an altitude below the airfield takeoff elevation.
• If CYPRES has been adjusted to a dropzone elevation above airfield takeoff elevation and the aircraft has climbed above the intended dropzone elevation, it must not descend below the intended dropzone elevation again.
• If CYPRES has been adjusted to a drop zone elevation altitude below the airfield takeoff elevation, the aircraft must not descend below the intended dropzone elevation.
A simply rule: Never descend below the elevation of the takeoff airfield or the intended DZ! • When using an aircraft capable of pressuriza-
tion, make sure that the cabin remains open when the turbines are started up. Leave a window, a door, or the ramp open a bit until after lift-off. It has to be ensured that the cabin pressure cannot build up above the air pressure on the ground. (Hint, skydivers altimeters should never go below „0“.)
It is the skydiver‘s responsibility to make sure that jump pilots are informed of these circumstances that will interfere with the proper function of CYPRES. Should a jump pilot be unable to comply with these requirements, or should you discover after a jump that the requirements have not been met, you should switch CYPRES off and on again prior to the next jump. Note that the above conditions will only lead to a low, or no activa-tion - therefore there is no risk of a high activation.Take care to not exceed the activation velocity near

page 38 - CYPRES 2 User’s Guide -
1500 ft
NO !1500 ft
or below the activation altitude(s) when descend-ing with skydivers. Our measurements indicate that extraordinary rates of descent are achieved in turbine aircraft, as the pilot is concentrating on max airspeed, and typical aircraft VSI instruments are heavily damped and “peg” at 3,000 ft./minute.
Note: in the case of Student CYPRES, always make sure the jumpmaster has switched them off prior to descent in ANY aircraft.
Flight limitations: • Never fly below the airfield takeoff elevation• Always go above 1500 feet (450 meters), for
Tandems 3000 feet ( 900 meters) • If dropzone offset has been adjusted, never fly
below the intended DZ elevationNot respecting the limitations can cause injury or death.

- CYPRES 2 User’s Guide - page 39
8.2 Important notes for users
• CYPRES must not be used for parascending or paragliding/sailing.
• CYPRES cannot be used for base jumps (jumps from fixed objects), and must be switched off prior to making a base jump.
• A Student, Expert or Speed CYPRES will not activate if the aircraft is exited before it reaches 1500 feet (450m) above the airfield and intended DZ. In case of a Tandem CYPRES 3000 feet (900m) must be reached.
• A two canopy scenario can be generated via a CYPRES activation, if the main deploys too low.
• CYPRES is shielded against radio transmitter signals. Extreme concerted efforts have been taken to protect CYPRES 2 from „radio pol-lution“. Although the extraordinary shielding system of CYPRES 2 has been investigated thoroughly, it is impossible to have 100% protection. It is still recommended to avoid strong radio transmitters. Please contact Airtec if you have questions.
• A release unit that has activated builds up a high internal pressure and will remain pres-surized. Never attempt to open it by force. It can, however, be stored safely for an indefinite period of time, provided that it has not been damaged.
• The reserve container closing loop must be under a tension, caused by the pilot chute spring, of at least 10 pounds (approx. 5 kg).
• A good reserve pilot chute is an important safety factor. On systems with an internally-mounted pilot chute, we recommend that owners equip their rigs with one that has been Airtec tested and subsequently qualified by the h/c manufacturer in collaboration with Airtec. Typically the rig manufacturer delivers these pilot chutes with the rig. If there is any doubt, If in doubt, please contact your h/c manufacturer.
• Don‘t forget: After water contact shut your CYPRES 2 off and change the filter.
• Make sure that the reserve closing loop passes through the cutter’s passing hole.

page 40 - CYPRES 2 User’s Guide -
9. Repacking of reservesThe following tips are only brief suggestions. Please contact the harness/container manu-facturer for advice and detailed packing in-structions for riggers (packers or equivalent) concerning the CYPRES AAD Installation and rigging specifications.
General:
The reserve container closing loop must be under a tension, caused by the pilot chute spring, of at least 10 pounds (approx. 5 kg).Please closely check the grommets at each repack.Grommets with rough edges ultimately will destroy any loop. Replace damaged grommets immedi-ately. Use original CYPRES loops / loop material, pull ups, and discs when a CYPRES is installed in the container. Even if you do not have an AAD in your container, a CYPRES loop will markedly improve your safety. The use of CYPRES ac-cessories (loops, discs, setups) with other brand AADs is prohibited as we have not performed any compatibility tests.
LOR-loops for Parachute de France rigs are an original PdF spare part and can be purchased only from PdF dealers. Non adjustable loops which are attached to a CYPRES disc and are mounted in containers with internal pilot chute should be re-placed at each repack. After attachment to the disc, CYPRES loops should be treated with CYPRES loop silicone on the upper 4 centimeter. The loops provided by Airtec are impregnated on the first 4 centimeters already.

- CYPRES 2 User’s Guide - page 41
Tips for Riggers (packers):
The ‘Packer’s Kit’ is available from CYPRES dealers. It contains a lot of things that make life easier, including:
A filter changer, 50 meter spool loop material, finger trapping needles, discs, temporary pins, silicone, a user’s guide and the ‘AAD Rigging Tips”. For specific instructions, please contact your h/c manufacturer.
Repack: Please follow your country‘s requirements concerning repack cycles and authorizations for reserve pack jobs.
SAFETY INSTRUCTIONS
1-Pin Pop Top:
Please check the loop carefully and replace if necessary. On all adjustable loops, silicone should not be used. The adjustment will not remain fixed.
2-Pin Pop Top:
Please contact the harness/container manufacturer for advice and detailed packing instructions for riggers (packers or equivalent) concerning the CYPRES AAD Installation and rigging specifica-tions.

page 42 - CYPRES 2 User’s Guide -
worked on this issue. In 1991 and 1992 we designed a loop and disc solution to reduce these risks as much as we could.The CYPRES loop is woven like a tube, so it can be inserted into itself to create the closing loops eye. At the same time it is only 11/16 inch in diameter (1.8 mm), is extremely flexible and has an extra smooth surface to make it extremely slippery. In addition CYPRES loops are treated with a special silicone on the upper 1.5 inch (4 centimeters) to maximize the smoothness of its surface giving it even less friction when passing through the reserve container grommets and the cutter.Although the loop is really narrow, its breaking strength is in excess of 408 lbs (185 Kp).The CYPRES disc (often called a smiley because of its looks) is a small piece of artwork. It is a round aluminium disc with no sharp edges. Within its surface it has 3 passing holes.The fingertrapped loop is threaded through the middle hole and then through the left hole, the loop then gets threaded through the right hole, and knotted.
10. The CYPRES Loop and Disc SystemPrevious reserve container closing loops were made from old parachute suspension lines or similar mate-rial consisting of Kevlar, Dacron, Spectra etc. They were often thick, rough and became stiff while under tension in a packed container for a long period of time. As a result these loops could delay the reserve container opening or even avoid it after the ripcord was pulled because they became trapped between the grommets. A number of skydivers died because the reserve flaps did not open in time.To fasten the reserve closing loops in the container bottom riggers and packers used normal metal washers. Sometimes these washers had sharp edges. A loop which is under a lot of tension in the con-tainer could be damaged and cut accidentally by those sharp edges. Especially from vibration in a car or in an aircraft.Skydivers were killed by premature reserve open-ings, caused by fraying loops. Even an aircraft crashed because of a premature reserve opening.Our intention is to make skydiving safer, so we

- CYPRES 2 User’s Guide - page 43
With this, the knot only realizes one third of the force when the loop is under tension. Without reducing the extreme tension the knot will shrink and pull it through the disc. The three holes have no sharp edges. It is a very extensive procedure to manufacture this disc, but loop tearing has reduced to almost zero by using this product.
Both the loop and disc together as a system has cer-tainly made skydiving significantly safer during the last two decades. Totally separate from CYPRES.Since the system was introduced to the scene in1992, approx. 900,000 discs and well above 3,000,000 loops have been manufactured by Airtec and given to rig manufacturers, riggers, and pack-ers worldwide to improve safety in the sport.Nowadays it‘s unlikely to find a rig worldwide, with a reserve container that is not closed by the CYPRES Closing Loop System. In addition to making its technical effect inside the reserve container, this CYPRES Loop System has another advantage. It reduces the necessary pull force on the reserve ripcord handle by up to 50%. A huge help for all those skydivers who, for one reason or another, have difficulties with the pull force.Like to view the genuine CYPRES Loop System? Take a look at your reserve container; it will most likely be there.
“Smiley“
CYPRES Loop
- no sharp edges- minimal loop tearing
- extremely flexible- extremely slippery- breaking strength: 408 lbs- diameter: 11/16 inch
CYPRES disc

page 44 - CYPRES 2 User’s Guide -
12. Switching RigsSwitching your CYPRES to another CYPRES ready rig will require only a few moments of work for your rigger. If the container swap requires a change in the number of release elements (cutters), this can be done quickly on-site by unplugging the old cutter and swapping with the required type cutter (1-pin or 2-pin). It is not necessary to send the CYPRES to the manufacturer. The necessary cutter can be purchased at any CYPRES dealer.
11. Abbreviated User‘s Guide
Switch CYPRES on only when you are at the dropzone on the ground !
When airfield and dropzone are at the same place, always switch CYPRES off and back on again when:• CYPRES arrives at the dropzone by any
means other than under an open canopy (e.g., by car, or by walking back from landing away from the dropzone.)
• total flight time (leaving the ground until back to the ground) was longer than 1.5 hours.
If airfield and dropzone are at different locations:• Before every jump, switch CYPRES off
and then back on at the airfield where your aircraft takes off from, and change the drop-zone offset as appropriate.
General recommendation: If in doubt, reset CYPRES by switching it off and on again.

- CYPRES 2 User’s Guide - page 45
123
4
5
1
2
45
Die
rot
num
mer
iert
en O
bjek
te z
eige
n di
e C
YPR
ES E
lem
ente
(1.
Zen
-tr
alei
nhei
t, 2.
Cut
ter,
3. C
utte
rkab
el, 4
. Bed
ient
eilk
abel
, 5. B
edie
ntei
l) 3
The
red
num
bere
d ob
ject
s sh
ow th
e C
YPR
ES e
lem
ents
(1. c
entr
alun
it, 2
. cut
ter,
3. c
utte
r cab
el, 4
. con
trol
uni
t cab
le, 5
. con
trol
uni
t )
ab
If you’ve lost the card, you can get a new one from Airtec or SSK.
orig
inal
car
d lo
cate
d in
the
back
cov
er
13. Regarding Air TravelA CYPRES equipped rig may be transported in freight and passenger airplanes without re-strictions. All its components (e.g. measuring technique, electronics, power supply, loop cutter, control unit, plugs, cables, casing) as well as the complete system, contain parts and materials that are approved by U.S. DOT and other agencies worldwide, and are not subject to any transport regulations.Because of the size of a rig we recommend to check it in as normal luggage and to not take it on board as hand luggage. In case of questions or objec-tions of the security personnel, please use the card shown on the right which you’ll find in the back cover of this book. The card shows an X-ray of a complete rig with CYPRES 2. Depending on type and design of the rig the X-ray on the security’s screen may vary. The Parachute Industry Association and the USPA have worked with the Transportation Security Agency concerning traveling with parachutes.
Refer to USPA’s web site (www.USPA.org) for the latest recommendations and documents.

page 46 - CYPRES 2 User’s Guide -
Data common to Expert, Tandem, Student, Speed and changeable Mode models:Length, width, height of the processing unit: ..................................................approx. 85 x 43 x 32 mmLength, width, height of the control unit: .......................................................approx. 65 x 18 x 6,5 mmLength, diameter of the release unit: ..........................................................................approx. 43 x 8 mmCable length of the release unit (including release unit): ..............................................approx. 500 mmStorage temperature: ............................................................................................... +71° to -25° CelsiusStorage pressure: ....................................................................200 to 1070 hPa ( 5.906 to 31.597 In.Hg)Working temperature: ......................................................................................... +63° to -20° Celsius *Maximum allowable humidity: ......................................................................up to 99,9 % rel. humidityWaterproof: ......................................................... up to 24 hours down to a depth of 5 feet (1.5 meters)Dropzone offset adjustment limits: ..................................................................... ±3000 feet or ±1000 mOperating range below / above sea level: ...................-1500 feet to +26,000 feet (-500 m to +8000 m)Functioning period: ...........................................................................................14 hours from switch-onPower supply:........................................................................................................... lifetime warranty**Maintenance: ....................................................................... 4 and 8 years from date of manufacture***Warranty Period: ........................................................................12.5 years from date of manufacture*** These temperature limits do not mean the outside (ambient) temperatures but rather temperatures
inside the processing unit. Therefore, these limits won‘t have any meaning until the processing unit itself has reached the temperatures in question. In actual fact, these limits will rarely be reached due to the location of the CYPRES in the reserve container, and the insulating properties of the process-ing unit pouch and parachute canopies.
** If required maintenance has been performed.*** According to the present knowledge base.
14. Technical Data

- CYPRES 2 User’s Guide - page 47
Special data for EXPERT CYPRES:Cable length of control unit: ..... approx. 650 mmVolume: ..................................... approx. 139 cm³Weight: ...................................approx. 188 gramsActivation altitude: ........... approx. 750 - 130 feet ...................................... (approx. 225 - 40 meter)Activation speed: .....approx. > 78 mph (35 m/s)
Special data for TANDEM CYPRES:Cable length of control unit: ..... approx. 650 mmVolume: ..................................... approx. 139 cm³Weight: ...................................approx. 188 gramsActivation altitude: ......... approx. 1900 - 130 feet ...................................... (approx. 580 - 40 meter)Activation speed: .....approx. > 78 mph (35 m/s)
Special data for STUDENT CYPRES:Cable length of control unit: .... approx. 1000mmVolume: ..................................... approx. 144 cm³Weight: ...................................approx. 205 gramsActivation altitude: approx. 1000 / 750 - 130 feet ............................. (approx. 300 / 225 - 40 meter)Activation speed: ......approx. > 29 mph (13 m/s)
Special data for SPEED CYPRES:Cable length of control unit: ..... approx. 650 mmVolume: ..................................... approx. 139 cm³Weight: ...................................approx. 188 gramsActivation altitude: ........... approx. 750 - 330 feet .................................... (approx. 225 - 100 meter)Activation speed: ...approx. > 102 mph (46 m/s)
Special data for changeable MODE CYPRES:Cable length of control unit: ..... approx. 650 mmVolume: ..................................... approx. 139 cm³Weight: ...................................approx. 188 gramsActivation altitude: .........according to set MODE Activation speed: ...........according to set MODE
In the event of a cutaway, activation will not occur until CYPRES has verified all necessary para meters.
Activation altitude: All activation altitude references in this User’s Guide are based on the standard setting with no User-selectable activation altitude selection.
SAFETY INSTRUCTIONS

page 48 - CYPRES 2 User’s Guide -
15. WarrantyAirtec GmbH & Co. KG provides a 2 year war-ranty on all CYPRES models and parts within. In spite of that Airtec has always repaired all defects during the entire service life of each CYPRES free of charge, except for damages done intention-ally, due to negligent, or use without the required maintenance.The manufacturer reserves the right to decide whether the unit will be repaired or replaced. Neither repair nor replacement will affect the original warranty. When a CYPRES 2 unit is returned to the manu-facturer or service center, it must be packed in the original box or an equivalent shipping package.No claims will be accepted if the unit has been damaged or has been opened by an unauthorized individual, or if an opening of the processing unit, release unit (cutter) or control unit has been attempted.

- CYPRES 2 User’s Guide - page 49
16. DisclaimerIn designing and manufacturing CYPRES, the aim of Airtec GmbH & Co. KG Safety Systems, is that the device should not accidentally sever the loop but should try to sever the reserve closing loop when the activation criteria are met.All investigations and experiments performed dur-ing the product‘s development and all laboratory and field tests accompanying trial and production phases have indicated that CYPRES meets both these goals.However, as an electro-mechanical device the pos-sibility of CYPRES malfunctioning cannot be ex-cluded. Such may cause injuries or death. We accept no responsibility for damages and consequences resulting from any malfunction.Airtec GmbH & Co. KG Safety Systems also ac-cepts no responsibility for damages or problems which are caused by the use of non-original Airtec parts and supplies.The use of CYPRES is voluntary, and does not automatically prevent injury or death. Risk can be reduced by assuring that each component has been installed in strict compliance with the manufac-turer‘s instructions, by obtaining proper instruction in the use of this system, and by operating each
component of the system in strict compliance with this User‘s Guide.Automatic activation devices (AADs) sometimes display a wrong status, fail to operate or operate properly, and sometimes activate when they should not, even when properly installed and operated. Therefore the user risks serious injury or even death to themselves and others during each use.By using or allowing others to use CYPRES, you acknowledge that you accept responsibility for the proper use of the device, as well as accepting the consequences of any and all use of this device.Airtec GmbH & Co. KG Safety Systems, their Deal-ers, Service Centers, and Agents total and complete responsibility is limited to the repair or replacement of any defective device.CYPRES is strictly a backup device, and is not intended to replace proper training or timely execu-tion of appropriate emergency procedures. If you, your friends, or family are not in agreement of these disclaimers please do not use CYPRES. Please note that even though CYPRES has an extraordinary track record, your results may vary.

page 50 - CYPRES 2 User’s Guide -
17. Index
AAD ....................................................... 1Abbreviated User‘s Guide .................. 44Accessories .......................................... 40Activation altitude .............................. 47Activation speed ................................. 47Air Travel ............................................. 45Base jump ............................................ 39Cable length ................................... 46,47Canopy piloting .................................. 13Changeable Mode CYPRES 14-15,46,47Changing the container ..................... 44Changing the scale ........................ 10,27Components ..................................... 5,45Container manufacturer 16-17,25,40-41Control unit ........... 5,11-14,17-18,29,46Converting models ............................. 10Cutter ................. 5-7,10,29,31-33,44-46Delivered items ................................... 52Disc ............................................. 40,42,52Disclaimer ........................................... 49
Display .................................... 9,19,28,31Display of maintenance date ............. 28Display of serial number ................... 28Dropzone Offset ............ 21-23,27,44,46Error code ............................................ 31Error display ........................................ 31Expert CYPRES ............. 11,37,39,46,47Fail-safe error detection ....................... 9Field replaceable cutter ................. 32,33Filter ................................................ 29,30Filter changer ................................. 29,30Flight counter ...................................... 28Functioning period ............................ 46Hand luggage ...................................... 45Humidity ............................................. 46Installation ...................................... 16,17Jump pilots .......................................... 37Lifetime warranty .......................... 46,48Loop ................................................ 42,43Loop material ................................. 40,42

- CYPRES 2 User’s Guide - page 51
Maintenance .................................. 34-36Maintenance date .......................... 28,35Operating range .................................. 46Parascending / paragliding ................ 39Patent ..................................................... 6Power supply .................................... 8,46Pressurization...................................... 37Processing unit ......................... 5,6,17,46Release unit. ............................. see CutterRemoval ............................................... 17Reserves ............................................... 40Rigger .............................. 29,32,40,41,44Scale of dropzone offset ..................... 10Serial number ................................. 18,28Service center .............................. 9,10,36Setup ................................................ 17,40Silicone ........................................... 40-42Speed CYPRES ............... 13,37,39,46,47Student CYPRES ............ 12,37-39,46,47Tandem CYPRES ........... 11,37-39,46,47
Temperature ........................................ 46User-selectable activation altitude .......... ...................................................... 24,26-28Volume ................................................. 47Water contact ...................................... 29Water depth ......................................... 29Water jumps ........................................ 29Waterproof .................................. 4,29,46Weather change.................................. 3,6Weight .................................................. 47X-ray ..................................................... 45
page 52 - CYPRES 2 User’s Guide -
Trade MarksCYPRES is a trade mark of Airtec GmbH & Co. KG Safety Systems. All rights reserved. No part of this publication may be reproduced or transmit-ted in any form or by any means, electronic or mechanical, including photocopying, microfilm, recording, or by any information storage and re-trieval system, without permission in writing from Airtec GmbH & Co. KG Safety Systems. No patent liability will be accepted with regard to the use of information contained in this manual. This manual was compiled with due care. Airtec GmbH & Co. KG Safety Systems and all persons and institutions involved in the translation of this publication do not accept any liability for mistakes, omissions or for any resultant damages.Copyright © 2003 - 2014 by AIRTEC GmbH & Co. KG Safety Systems, Mittel-straße 69, 33181 Bad Wünnenberg, Germany, tel: +49 2953 98990 fax: +49 2953 1293CYPRES 2 User Guide as revised 1 / 2014. Subject to change without notice. This revision replaces and supercedes all previous versions. See www.cypres.cc to verify / obtain the latest version.Printed on chlorine-free bleached paper.
18. Packing ListIn addition to the CYPRES 2 unit and the user’s guide, the following items will be delivered:
For 1-pin CYPRES 2:
2 1-pin Loops1 pull up 1 disc
For 2-pin CYPRES 2:
1 2-pin Loop 2 pull ups2 soft bodkins 2 discs

- CYPRES 2 User’s Guide - page 53
If your rig is lost or stolen it maybe helpful to have this data:
ContainerManufacturer + Model:
Size / Color:
Options:
Serial Number:
Date of Manufacture:
Purchased from:
Date:
AADModel:
Serial Number:
Date of Manufacture:
Purchased from:
Date:

page 54 - CYPRES 2 User’s Guide -
Main CanopyManufacturer + Model:
Size / Options:
Color / Pattern:
Serial Number:
Date of Manufacture:
Purchased from:
Date:
Reserve CanopyManufacturer + Model:
Size:
Color / Pattern:
Serial Number:
Date of Manufacture:
Purchased from:
Date:

- CYPRES 2 User’s Guide - page 55
Personal Info

In case someone from the security personnel has concerns:


Luftf
ahrt-
Bund
esam
t, Au
ßens
telle
Rau
nhei
m, S
achg
ebie
t Gef
ahrg
ut, K
elst
erba
cher
Str.
23,
654
79
Rau
nhei
m, T
el.:
061
42 /
94 6
1 - 0
, F
ax: 0
6142
/ 94
61
– 59
Er
stel
lt am
: 3.1
1.20
10
Sei
te 1
von
8
Das
Luf
tfahr
t-Bun
desa
mt
Sach
gebi
et G
efah
rgut
info
rmie
rt
Sich
erhe
itssy
stem
für F
alls
chirm
sprin
ger
Es
wird
dar
auf h
inge
wie
sen,
das
s de
r pyr
otec
hnis
che
Geg
enst
and
im S
iche
rhei
tssy
stem
fü
r Fal
lsch
irmsp
ringe
r „C
YPR
ES
“ kom
plet
tiert
mit
den
Bes
tand
teile
n:
Elek
tron
isch
e Se
ilkap
pvor
richt
ung
ESK
V11
(Ele
ctric
al R
ope
Cut
ter E
SKV
11)
KEI
N G
efah
rgut
im S
inne
der
Tra
nspo
rtvor
schr
iften
ist.
Auf
den
folg
ende
n S
eite
n fin
den
Sie
die
Bes
chei
nigu
ngen
der
/ de
s:
- Bun
desa
nsta
lt fü
r Mat
eria
lfors
chun
g un
d -p
rüfu
ng (B
AM
), D
euts
chla
nd
- U.S
. Dep
artm
ent o
f Tra
nspo
rtatio
n, U
SA
- Civ
il A
viat
ion
Aut
horit
y, U
nite
d K
ingd
om
- Civ
il A
viat
ion
Saf
ety
Aut
horit
y, A
ustra
lia
- Civ
il A
viat
ion
Aut
horit
y, N
ew Z
eala
nd
- Dire
ctio
n gé
néra
le d
e l'a
viat
ion
civi
le, F
ranc
e


Parachu
ting
Skydiving rigs w
ith an
d with
out A
utom
atic Activation
Devices (A
AD
) are permitted as a carry-on
or as ch
ecked luggage.
Typically, a rig will m
ove through the checked luggage or carry-on security screening process without
need for physical inspection. How
ever, TSA screeners have a duty to thoroughly inspect any item
that raises suspicion. If screeners determ
ine that it is necessary to open a rig for complete inspection, then
the owner of the rig m
ust be present and will be allow
ed to assist. For this reason
, skydivers are advised to add at least 30 m
inutes to th
e airline's recom
men
ded arrival win
dow w
hen
traveling
with
their parach
ute.
The following recom
mendations are provided to assist skydivers traveling w
ith parachutes: C
heckin
g the Parach
ute as Lu
ggage
Pack the rig separately without any other item
s in the bag. Additional item
s, if suspicious, could trigger an inspection of the entire bag. Screeners w
ill not unpack a parachute without the ow
ner present to provide assistance. This m
eans that the passenger will be paged and asked to return to the ticket counter, so they can
be present for inspection. Depending on the size of the airport and passenger volum
e, it is likely that the checked rig w
ill be screened within 30 m
inutes. Rem
ain in the area of the air carrier ticket counter and pay close attention to airport announcem
ents for up to 30 minutes
after checking in. If TSA
cannot locate the parachute owner, the uncleared parachute w
ill not be transported on the flight. Parachute ow
ners may assist TSA
screeners to unpack and repack the rig. C
arry the Parach
ute on
the A
ircraft
Pack the rig separately without any other item
s in the bag. Additional item
s, if suspicious, could trigger an inspection of the entire bag. If a further search is required, all efforts w
ill be made to search the item
without out opening
the chute(s). If a chute is opened, the ow
ner can assist. The search may be done in a location aw
ay from
the checkpoint to provide adequate space for the search, and space for the owner to repack
the rig. Parach
utists sh
ould th
orough
ly inspect th
eir parachutes at th
eir destination
to ensu
re that it h
as not
been tam
pered with
or damaged in
a man
ner th
at renders it u
nsafe.
TRAN
SPOR
TATION
SECU
RITY AD
MIN
ISTRATIO
N
Page 1 of 1
REV. 2, 10-2003

This page intentionally left blank.

This page intentionally left blank.

CYPRES 2 User’s Guide - english version -CYPRES 2
Reliability made in Germany