Umbau auf MPS Montageplatten Change to MPS mounting … fileder Modelle in den Artikulator. The...
20
Made in Germany Umbau auf MPS Montageplatten Change to MPS mounting plates
Transcript of Umbau auf MPS Montageplatten Change to MPS mounting … fileder Modelle in den Artikulator. The...

Made inGermany
Umbau auf MPS MontageplattenChange to MPS mounting plates

UM
BA
U
AU
F
MS
P
/
EX
CH
AN
GE
T
O
MP
S
2
3
UM
BA
U
AU
F
MS
P
/
EX
CH
AN
GE
T
O
MP
S
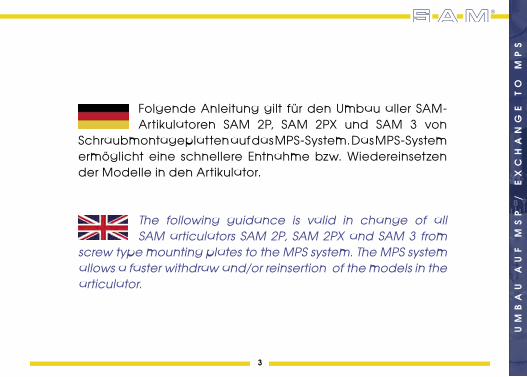
Folgende Anleitung gilt für den Umbau aller SAM-Artikulatoren SAM 2P, SAM 2PX und SAM 3 von
Schraubmontageplatten auf das MPS-System. Das MPS-System ermöglicht eine schnellere Entnahme bzw. Wiedereinsetzen der Modelle in den Artikulator.
The following guidance is valid in change of all SAM articulators SAM 2P, SAM 2PX and SAM 3 from
screw type mounting plates to the MPS system. The MPS system allows a faster withdraw and/or reinsertion of the models in the articulator.
UM
BA
U
AU
F
MS
P
/
EX
CH
AN
GE
T
O
MP
S
4
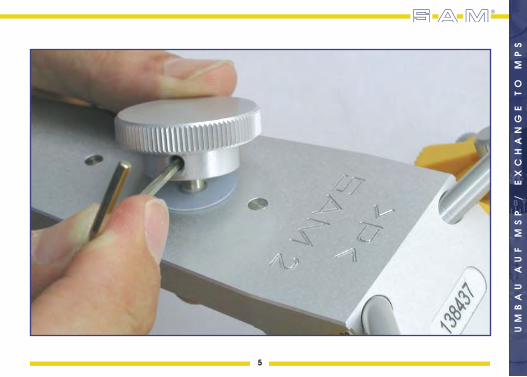
Mit 2 mm Sechskant Schraubendreher (Imbusschlüssel) ART 511 die Madenschraube herausdrehen. Zur Vermeidung des Verlusts von Teilen die Rändelschraube abziehen, den herausfallenden Gewindestift mit den Beilagscheiben in die Rändelschraube zurücksetzen und mit der Madenschraube wieder festziehen.
Unscrew the headless set-screw with 2 mm hexagonal screwdriver (hex wrench) ART 511. Take the knurled-head screw off. To the avoidance of the loss of parts put back the falling out threaded pin in knurled-head screw with the washer and tighten it with the headless set-screw again.
01
5
UM
BA
U
AU
F
MS
P
/
EX
CH
AN
GE
T
O
MP
S
UM
BA
U
AU
F
MS
P
/
EX
CH
AN
GE
T
O
MP
S
6
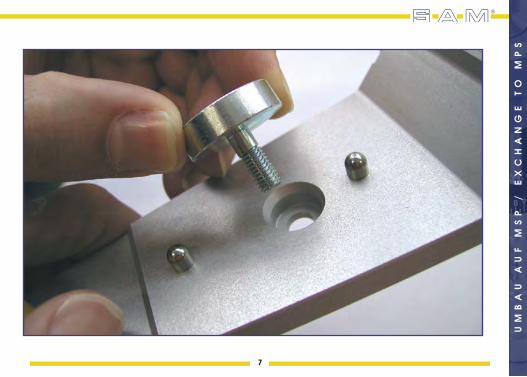
Magnettopf (MPS 190) mit dem Gewinde in die Bohrung einsetzen.
Insert magnet cup (MPS 190) begin with the thread into the drilling
02
7
UM
BA
U
AU
F
MS
P
/
EX
CH
AN
GE
T
O
MP
S

UM
BA
U
AU
F
MS
P
/
EX
CH
AN
GE
T
O
MP
S
8
Die Hutmutter (MPS 186) nur locker auf das Gewinde des Magnettopf (MPS 190) aufdrehen.
Screw the acorn nut (MPS 186) only loosely on the thread of the magnet pot (MPS 190).
03

9
UM
BA
U
AU
F
MS
P
/
EX
CH
AN
GE
T
O
MP
S

UM
BA
U
AU
F
MS
P
/
EX
CH
AN
GE
T
O
MP
S
10
Die Montageplatte vollständig auf die Stifte des Artikulatorsmit dem Magnettopf drücken.
Press the mounting plate completely on the pins of the articulatorwith the magnet pot.
04

11
UM
BA
U
AU
F
MS
P
/
EX
CH
AN
GE
T
O
MP
S
UM
BA
U
AU
F
MS
P
/
EX
CH
AN
GE
T
O
MP
S
12
Den lockeren Magnettopf mit der Zentrierlehre (MPS 111) zentrieren
Center the loose magnet pot with the up positioner (MPS 111)
05

13
UM
BA
U
AU
F
MS
P
/
EX
CH
AN
GE
T
O
MP
S

UM
BA
U
AU
F
MS
P
/
EX
CH
AN
GE
T
O
MP
S
14
Die Hutmutter nur mit dem Kunststoffschlüssel (MPS 110) festdrehen.Achtung: Keinen Gabelschlüssel aus Metall verwenden.
Seize up acorn nut only with the plastic wrench (MPS 110)Attention: Don’t use fork spanner made of metal.
06

15
UM
BA
U
AU
F
MS
P
/
EX
CH
AN
GE
T
O
MP
S

UM
BA
U
AU
F
MS
P
/
EX
CH
AN
GE
T
O
MP
S
16
Nun ist der Magnettopf in der Montageplatte zentral positioniert.
Now the magnet pot is positioned central in the mounting plate.
07

17
UM
BA
U
AU
F
MS
P
/
EX
CH
AN
GE
T
O
MP
S
UM
BA
U
AU
F
MS
P
/
EX
CH
AN
GE
T
O
MP
S
18
Montageplatte abheben und eine Haftplatte in die MPS Platte einsetzen. Immer die Montageplatte mit der eingelegten Haftplatte aufsetzen.
Bei Verwendung der gedrehten Haftplatte MSF 110 wird die Magnethaftkraft erhöht.
Lift off the mounting plate and insert a adhesion plate into the MPS plate.Always draft the mounting plate inserted a adhesion plate.
If turned adhesion plate MSF 110 is in use, the adhesive power of the magnet increases.
08

19
UM
BA
U
AU
F
MS
P
/
EX
CH
AN
GE
T
O
MP
S
AXIOGRAPH® • AXIOSPLIT® • AXIOQUICK® • AXIOSAW® • AXIOPIN® • AXIODRILL®
AXIOSIM® • AXIOCOMP® • AXIOWAX® • AXIOTRON® • SAM-NORM® • SAM-DDIS® • SAM®
S A M ® P R Ä Z I S I O N S T E C H N I K G M B H
Fussbergstrasse 1 • 82131 Gauting • GermanyFon: +49 89 800654 -0 • Fax: +49 89 800654 -32
www.sam-dental.de • [email protected]
Bei Fragen zu unseren Produkten wenden Sie sich bitte an uns oder besuchen Sie
unsere regelmäßigen Anwenderschulungen.
With questions to our products please contact us or participate one of our regularly user trainings.
sind eingetragene Warenzeichen der SAM® Präzisionstechnik GmbH
are registered trade marks of the der SAM® Präzisionstechnik GmbH
Die Firma SAM ist seit 1997 nach DIN EN ISO 9001:2000 zertifiziert.
The company SAM is certified since 1997 according to DIN EN ISO 9001:2000.