Trinitron Color Graphic Display
104
Trinitron Color Graphic Display 3-861-576-61 (1) © 1999 by Sony Corporation FR GDM-400PST9 GDM-500PST9 DE ES Operating Instructions Mode d’emploi Bedienungsanleitung Manual de instrucciones Instruzioni per l’uso GB IT
Transcript of Trinitron Color Graphic Display

Trinitron ColorGraphic Display
3-861-576-61 (1)
© 1999 by Sony Corporation
FR
GDM-400PST9GDM-500PST9
DE
ES
Operating Instructions
Mode d’emploi
Bedienungsanleitung
Manual de instrucciones
Instruzioni per l’uso
GB
IT

2
Dieses Garät entspricht den folgenden europäischen EMV-Vorschriften für Betrieb in Wohngebieten, gewerblicher Gebletenund Leichtindustriegebieten.
EN55022/1994 Klasse BEN50082-1/1992EN61000-3-2/1995
Hinweise• Aus ergonomischen Gründen wird empfohlen, die
Grundfarbe Blau nicht auf dunklem Untergrund zuverwenden (schlechte Erkennbarkeit, Augenbelastung bei zugeringem Zeichenkontrast).
• Aus ergonomischen Gründen (flimmern) sollten nurDarstellungen bei Vertikalfrequenzen ab 70 Hz (ohneZeilensprung) verwendet werden.
• Die Konvergenz des Bildes kann sich auf Grund desMagnetfeldes am Ort der Aufstellung aus der korrektenGrundeinstellung verändern. Zur Korrektur empfiehlt es sichdeshalb, die Regler an der Frontseite für Konvergenz soeinzustellen, daß die getrennt sichtbaren Farblinien für Rot,Grün und Blau bei z.B. der Darstellung eines Buchstabens zurDeckung (Konvergenz) gelangen.Siehe hierzu auch die Erklärungen zu Konvergenz.
NOTICEThis notice is applicable for USA/Canada only.If shipped to USA/Canada, install only a UL LISTED/CSALABELLED power supply cord meeting the followingspecifications:SPECIFICATIONS
Plug Type Nema-Plug 5-15pCord Type SVT or SJT, minimum 3 × 18 AWGLength Maximum 15 feetRating Minimum 7 A, 125 V
NOTICECette notice s’applique aux Etats-Unis et au Canadauniquement.Si cet appareil est exporté aux Etats-Unis ou au Canada,utiliser le cordon d’alimentation portant la mention ULLISTED/CSA LABELLED et remplissant les conditionssuivantes:SPECIFICATIONS
Type de fiche Fiche Nema 5-15 brochesCordon Type SVT ou SJT, minimum 3 × 18 AWGLongueur Maximum 15 piedsTension Minimum 7 A, 125 V
As an ENERGY STAR Partner, SonyCorporation has determined that thisproduct meets the ENERGY STARguidelines for energy efficiency.
This monitor complies with theTCO’99 guidelines.
Owner’s RecordThe model and serial numbers are located at the rear of the unit.Record the serial number in the space provided below. Refer tothese numbers whenever you call upon your dealer regarding thisproduct.
Model No. Serial No.
WARNINGTo prevent fire or shock hazard, do not exposethe unit to rain or moisture.Dangerously high voltages are present insidethe unit. Do not open the cabinet. Refer servicingto qualified personnel only.
FCC NoticeThis equipment has been tested and found to comply with thelimits for a Class B digital device, pursuant to Part 15 of the FCCRules. These limits are designed to provide reasonable protectionagainst harmful interference in a residential installation. Thisequipment generates, uses, and can radiate radio frequency energyand, if not installed and used in accordance with the instructions,may cause harmful interference to radio communications.However, there is no guarantee that interference will not occur in aparticular installation. If this equipment does cause harmfulinterference to radio or television reception, which can bedetermined by turning the equipment off and on, the user isencouraged to try to correct the interference by one or more of thefollowing measures:– Reorient or relocate the receiving antenna.– Increase the separation between the equipment and receiver.– Connect the equipment into an outlet on a circuit different from that
to which the receiver is connected.– Consult the dealer or an experienced radio/TV technician for help.You are cautioned that any changes or modifications not expresslyapproved in this manual could void your authority to operate thisequipment.
EN 55022 Compliance (Czech Republic Only)This device belongs to category B devices as described in EN55022, unless it is specifically stated that it is a category Adevice on the specification label. The following applies todevices in category A of EN 55022 (radius of protection up to30 meters). The user of the device is obliged to take all stepsnecessary to remove sources of interference totelecommunication or other devices.
Pokud není na typovém štítku počítače uvedeno, že spadá dodo třídy A podle EN 55022, spadá automaticky do třídy Bpodle EN 55022. Pro zařízení zařazená do třídy A (ochrannépásmo 30m) podle EN 55022 platí následující. Dojde-li k rušenítelekomunikačních nebo jiných zařízeni, je uživatel povinnenprovést taková opatřgní, aby rušení odstranil.
INFORMATIONThis product complies with Swedish National Council forMetrology (MPR) standards issued in December 1990 (MPR II) forvery low frequency (VLF) and extremely low frequency (ELF).
INFORMATIONCe produit est conforme aux normes du Swedish National Councilfor Metrology de décembre 1990 (MPR II) en ce qui concerne lesfréquences très basses (VLF) et extrêmement basses (ELF).
HinweisDieses Gerät erfüllt bezüglich tieffrequenter (very low frequency)und tiefstfrequenter (extremely low frequency) Strahlung dieVorschriften des „Swedish National Council for Metrology (MPR)“vom Dezember 1990 (MPR II).
INFORMACIÓNEste producto cumple las normas del Consejo Nacional Sueco paraMetrología (MPR) emitidas en diciembre de 1990 (MPR II) parafrecuencias muy bajas (VLF) y frecuencias extremadamente bajas(ELF).
(GDM-500PST9 only)
3
Getting Started
F
D
ES
GB
I
Getting StartedPrecautions ........................................................................................................................... 4Identifying Parts and Controls .......................................................................................... 5Setup ...................................................................................................................................... 6Automatically Adjusting the Size and Centering of the Picture ................................... 7Selecting the On-screen Display Language ..................................................................... 7Selecting the Input Signal ................................................................................................... 8
Customizing Your MonitorAdjusting the Picture Brightness and Contrast ............................................................... 9Introducing the On-screen Display System ..................................................................... 9Using the CENTER On-screen Display .......................................................................... 10Using the SIZE On-screen Display .................................................................................. 10Using the GEOM (Geometry) On-screen Display ......................................................... 11Using the ZOOM On-screen Display .............................................................................. 12Using the COLOR On-screen Display ............................................................................ 12Using the SCREEN On-screen Display ........................................................................... 13Using the OPTION On-screen Display ........................................................................... 15Using the LANG (Language) On-screen Display ......................................................... 17Resetting the Adjustments ............................................................................................... 17
Technical FeaturesPreset and User Modes ..................................................................................................... 18Power Saving Function ..................................................................................................... 19Damper Wires .................................................................................................................... 19Plug & Play ......................................................................................................................... 19
Additional InformationWarning Messages ............................................................................................................. 20Troubleshooting ................................................................................................................. 20Self-diagnosis Function ..................................................................................................... 22Specifications ...................................................................................................................... 22
AppendixTOC’99 Eco-document ......................................................................................................... i
TABLE OF CONTENTS
• Macintosh is a trademark licensed to Apple Computer, Inc., registeredin the U.S.A. and other countries.
• Windows® and MS-DOS are registered trademarks of MicrosoftCorporation in the United States and other countries.
• IBM PC/AT and VGA are registered trademarks of IBM Corporation ofthe U.S.A.
• VESA is a trademark of Video Electronics Standard Association.• All other product names mentioned herein may be the trademarks or
registered trademarks of their respective companies.• Furthermore, “™” and “®" are not mentioned in each case in this
manual.

4
Getting Started
Precautions
Installation
• Prevent internal heat build-up by allowing adequate aircirculation. Do not place the monitor on surfaces (rugs,blankets, etc.) or near materials (curtains, draperies) thatmay block the ventilation holes.
• Do not install the monitor near heat sources such asradiators or air ducts, or in a place subject to directsunlight, excessive dust, mechanical vibration or shock.
• Do not place the monitor near equipment which generatesmagnetism, such as a transformer or high voltage powerlines.
Maintenance
• Clean the cabinet, panel and controls with a soft clothlightly moistened with a mild detergent solution. Do notuse any type of abrasive pad, scouring powder or solvent,such as alcohol or benzine.
• Do not rub, touch, or tap the surface of the screen withsharp or abrasive items such as a ballpoint pen orscrewdriver. This type of contact may result in a scratchedpicture tube.
• Clean the screen with a soft cloth. If you use a glasscleaning liquid, do not use any type of cleanercontaining an anti-static solution or similar additive asthis may scratch the screen’s coating.
Transportation
When you transport this monitor for repair or shipment, usethe original carton and packing materials.
Use of the Tilt-Swivel
With the tilt-swivel, this monitor can be adjusted to thedesired angle within 180° horizontally and 20° vertically.To turn the monitor vertically and horizontally, hold it atthe bottom with both hands as illustrated below.
Getting Started
90°
90°
15°
5°
Warning on power connection
• Use an appropriate power cord for your local powersupply.For the customers in the UKIf you use the monitor in the UK, please use the suppliedUK cable with the UK plug.
Examples of plug types
• Before disconnecting the power cord, wait at least 30seconds after turning off the power to allow the staticelectricity on the CRT display surface to discharge.
• After the power has been turned on, the CRT isdemagnetized (degaussed) for about 3 seconds. Thisgenerates a strong magnetic field around the metal frame,which may affect the data stored on magnetic tapes anddisks near the bezel. Place magnetic recording equipment,tapes and disks away from this monitor.
The outlet should be installed near the equipmentand be easily accessible.
for 100 to 120 V AC for 200 to 240 V AC for 240 V AC only

5
Getting StartedGetting Started
FR
DE
ES
GB
IT
Identifying Parts and ControlsSee the pages in parentheses for further details.GDM-500PST9 is used for illustration purposes throughoutthis manual.
Front
1 RESET (reset) button (page 17)Resets the adjustments to the factory settings.
2 ASC (auto sizing and centering) button(page 7)Automatically adjusts the size and centering of theimages.
3 INPUT (input) button and HD15/BNCindicators (page 8)Selects the HD15 or 5BNC video input signal. Each timeyou press this button, the input signal andcorresponding indicator alternate.
4 ¨ (brightness) (./>) buttons (pages 8 –17)Adjust the picture brightness.
Function as the (./>) buttons when adjusting otheritems.
5 MENU (menu) button (pages 8 – 17)Displays the MENU OSD.
6 > (contrast) (?//) buttons (pages 8 – 17,22)Adjust the contrast.
Function as the (?//) buttons when adjusting otheritems.
7 u (power) switch and indicator (pages 19,22)Turns the monitor on or off.The indicator lights up in green when the monitor isturned on, and either flashes in green and orange orlights up in orange when the monitor is in powersaving mode.
Pin No.
1
2
3
4
5
6
7
Pin No.
8
9
10
11
12
13
14
15
Rear
8 AC IN connectorProvides AC power to the monitor.
9 Video input 1 connector (HD15)Inputs RGB video signals (0.700 Vp-p, positive) andSYNC signals.
* Display Data Channel (DDC) Standard of VESA
!º Video input 2 connector (5 BNC)Inputs RGB video signals (0.700 Vp-p, positive) andSYNC signals.
Signal
Red
Green(CompositeSync on Green)
Blue
ID (Ground)
DDC Ground*
Red Ground
Green Ground
Signal
Blue Ground
DDC + 5V*
Ground
ID (Ground)
Bi-DirectionalData (SDA)*
H. Sync
V. Sync
Data Clock (SCL)*
5 4 3 2 1678910
1112131415
MENUINPUTRESET
ASC HD15 BNC

6
Getting Started
SetupBefore using this monitor, check that the following items areincluded in your carton:• Monitor (1)• Power cord (1)• HD15 video signal cable (1)• Macintosh adapter (1)• Windows Monitor Information Disk (1)• Warranty card (1)• These operating instructions (1)
This monitor works with any IBM or compatible systemequipped with VGA or greater graphics capability.Although this monitor works with other platforms runningat horizontal frequencies between 30 and 94 kHz (GDM-400PST9), 30 and 107 kHz (GDM-500PST9), includingMacintosh and Power Macintosh systems, a cable adapter isrequired. Please consult your dealer for advice on whichadapter is suitable for your needs.
Step 1: Connect the monitor to thecomputer
With the computer switched off, connect the video signalcable to the monitor using the supplied HD15 video signalcable.• If you are using an IBM PC/AT or compatible computer,
refer to the section below.• If you are using a Macintosh or compatible computer,
refer to the following section, “Connecting to a Macintoshor compatible computer.”
• If you want to use the 5 BNC connectors, refer to thesection, “Connecting to the 5 BNC connectors.”
Connecting to an IBM PC/AT or compatiblecomputer
* The HD15 - HD15 adapter may be needed for some models.
If your PC system is not compatible with DDC2ABand DDC2B+This monitor uses the No. 9 pin in the video signal connector forDDC2AB and DDC2B+ compatibility.Some PC systems which are not compatible with either DDC2AB orDDC2B+ may not accept the No. 9 pin. If you are not sure whetheryour PC system accepts the No. 9 pin or not, use the HD15 (Female)- HD15 (Male without the No. 9 pin) adapter (not supplied). Makesure the male side (without the No. 9 pin) is connected to thecomputer.
Connecting to a Macintosh or compatiblecomputer
About the supplied Macintosh adapterThe supplied Macintosh adapter is compatible with Macintosh LC,Performa, Quadra, Power Macintosh and Power Macintosh G3series computers.Macintosh II series and some older versions of Power Book modelsmay need an adapter with micro switches (not supplied).
Connecting to the 5 BNC connectors
To connect the 5 BNC connectors, use the SMF-400 videosignal cable (sold separately). Connect the cables from left toright in the following order: Red–Green–Blue–HD–VD.
Notes• Do not short the pins of the video signal cable.• The DDC standard does not apply to the 5 BNC connectors. If
you use the DDC standard, connect the HD15 connector to thecomputer with the supplied video signal cable.
to HD15
to video output
HD15 - HD15 adapter(not supplied)*
IBM PC/AT orcompatiblecomputer
HD15 videosignal cable(supplied)
to video output
Macintosh adapter(supplied)
Macintosh orcompatiblecomputer HD15 video
signal cable(supplied)
to HD15
to VIDEO IN R/G/B
Connect to the computer inthe same way as for the HD15connector.
to SYNC IN HD/VD

7
Getting StartedGetting Started
FR
DE
ES
GB
IT
Automatically Adjusting the Sizeand Centering of the PictureBy pressing the auto sizing and centering (ASC) button, thesize and centering of the picture are automatically adjustedto fit the screen.
1 Turn on the monitor and computer.
2 Press the ASC button.The picture is adjusted to fit the center of the screen.
Notes• This function is intended for use with a computer running
Windows or similar graphic user interface software thatprovides a full-screen picture. It may not work properly if thebackground color is dark or if the input picture does not fill thescreen to the edges (such as an MS-DOS prompt).
• The screen may go blank for a few seconds while performing theauto-sizing function. This is not a malfunction.
• Although the signals for picture aspect ratio 5:4 (resolution: 1280× 1024) do not fill the screen to the edges, the picture isaccurately displayed.
Selecting the On-screen DisplayLanguageIf you need to change the OSD language, see “Using theLANG (Language) On-screen Display” on page 17.The default setting is English.
Step 2: Connect the power cord
With the monitor switched off, connect one end of thepower cord to the monitor and the other end to a poweroutlet.
Step 3: Turn on the monitor and computer
The installation of your monitor is complete.
NoteIf “OUT OF SCAN RANGE” or “NO INPUT SIGNAL” appears onthe screen, see “Warning Messages” on page 20.
For customers using Windows 95/98To maximize the potential of your monitor, install the new modelinformation file from the supplied Windows Monitor InformationDisk onto your PC.This monitor complies with the “VESA DDC” Plug & Playstandard. If your PC/graphics board complies with DDC, select“Plug & Play Monitor (VESA DDC)” or this monitor’s model nameas the monitor type in the “Control Panel” of Windows 95/98.If your PC/graphics board has difficulty communicating with thismonitor, load the Windows Monitor Information Disk and selectthis monitor’s model name as the monitor type.
For customers using Windows NT4.0Monitor setup in Windows NT4.0 is different from Windows 95/98and does not involve the selection of monitor type. Refer to theWindows NT4.0 instruction manual for further details on adjustingthe resolution, refresh rate, and number of colors.
ASC
to a power outlet to AC IN
Power cord (supplied)

8
Getting Started
Selecting the Input SignalThis monitor has two signal input connectors (HD15 and5BNC) and can be connected to two computers. When thepower of both computers is on, select the input signal youwant to view as follows.
1 Turn on the monitor and both computers.
2 Press the INPUT button to select the HD15 or 5BNCinput signal.Each time you press the INPUT button, the input signaland corresponding indicator alternate.
Selecting the INPUT signal mode
This monitor has two modes of input signal selection,“AUTO” and “MANUAL.”
When “AUTO” is selected
If no signal is input from the selected connector, the monitorautomatically selects the other connector’s signal. When yourestart the computer you want to view, or that computer isin power saving mode, the monitor may automaticallyselect the other connector’s signal. This is because themonitor switches from the interrupted signal to the constantsignal. If this happens, manually select the desired signalusing the INPUT button.
When “MANUAL” is selected
Even if no signal is input from the selected connector, themonitor does not select the other connector’s signal.
1 Press the MENU button.The MENU OSD appears.
2 Press the ¨./> and >?// buttons to select“ OPTION,” and press the MENU button again.The OPTION OSD appears.
3 Press the ¨./> buttons to select “ (INPUT).”
4 Press the >?// buttons to select “AUTO” or“MANUAL.”
The OPTION OSD automatically disappears after about 30seconds.To close the OSD, press the MENU button again.
For more information on using the OSD, see “Introducingthe On-screen Display System” on page 9.
HD15 BNC INPUT
ON
MANUAL DEGAUSS
UNLOCK1 MIN
OPTION
ZZ...
AUTO
ZZ...
INPUT
1 MIN
OPTION
UNLOCK
MANUAL
MENU
EXIT
CENTER
SIZE
GEOM
COLOR
LANG
ZOOM
SCREEN
OPTION
OK MENU
MENU

9
Getting StartedCustomizing Your Monitor
FR
DE
ES
GB
IT
Customizing Your Monitor
HorizontalFrequency*
VerticalFrequency*
Before adjusting
• Connect the monitor and the computer, and turn them on.• Select “ LANG” in the MENU OSD, then select
“ENGLISH” (see page 17).
Adjusting the Picture Brightnessand ContrastOnce the setting is adjusted, it will be stored in memory forall input signals received.
1 Press the ¨ (brightness) ./> or > (contrast) ?//buttons.The BRIGHTNESS/CONTRAST OSD appears.
2 For brightness adjustmentPress the ¨./> buttons.
> . . . for more brightness. . . . for less brightness
For contrast adjustmentPress the >?// buttons.
/ . . . for more contrast? . . . for less contrast
The OSD automatically disappears after about 3 seconds.
To reset, press the RESET button while the OSD is on. Thebrightness and contrast are both reset to the factory settings.
* The horizontal and vertical frequencies for the received inputsignal appear in the BRIGHTNESS/CONTRAST OSD.
BRIGHTNESS/CONTRAST
26 26
80.0kHz/ 75Hz
Introducing the On-screenDisplay SystemMost adjustments are made using the MENU OSD.
MENU OSD
Press the MENU button to display the MENU OSD.This MENU OSD contains links to the other OSDs describedbelow.
1 COLORDisplays the COLOR OSD for adjusting the colortemperature.
2 CENTERDisplays the CENTER OSD for adjusting the centeringof the picture.
3 SCREENDisplays the SCREEN OSD for adjusting the verticaland horizontal convergence, etc.
4 ZOOMDisplays the ZOOM OSD for enlarging and reducingthe picture.
5 OPTIONDisplays the OPTION OSD for adjusting the OSDposition and degaussing the screen, etc.
6 SIZEDisplays the SIZE OSD for adjusting the picture size.
7 LANGDisplays the LANGUAGE OSD for selecting thelanguage.
8 GEOMDisplays the GEOMETRY OSD for adjusting the picturerotation and pincushion, etc.
9 EXITCloses the MENU OSD.
MENU
MENU
EXIT
CENTER
SIZE
GEOM
COLOR
LANG
ZOOM
SCREEN
OPTION
OK MENU

Customizing Your Monitor
10
Using the CENTER On-screenDisplayThe CENTER settings allow you to adjust the centering ofthe picture.Once the setting is adjusted, it will be stored in memory forthe current input signal.
1 Press the MENU button.The MENU OSD appears.
2 Press the ¨./> and >?// buttons to select“ CENTER,” and press the MENU button again.The CENTER OSD appears.
3 For horizontal adjustmentPress the >?// buttons.
/ . . . to move the picture right? . . . to move the picture left
For vertical adjustmentPress the ¨./> buttons.
> . . . to move the picture up. . . . to move the picture down
The OSD automatically disappears after about 30 seconds.To close the OSD, press the MENU button again.
To reset, press the RESET button while the OSD is on.The horizontal and vertical centerings are both reset to thefactory settings.
MENU
Using the SIZE On-screen DisplayThe SIZE settings allow you to adjust the size of the picture.Once the setting is adjusted, it will be stored in memory forthe current input signal.
1 Press the MENU button.The MENU OSD appears.
2 Press the ¨./> and >?// buttons to select“ SIZE,” and press the MENU button again.The SIZE OSD appears.
3 For horizontal adjustmentPress the >?// buttons.
/ . . . to increase picture size? . . . to decrease picture size
For vertical adjustmentPress the ¨./> buttons.
> . . . to increase picture size. . . . to decrease picture size
The OSD automatically disappears after about 30 seconds.To close the OSD, press the MENU button again.
To reset, press the RESET button while the OSD is on.The horizontal and vertical sizes are both reset to the factorysettings.
MENU
CENTER
26
73
SIZE
26
73

11
Getting StartedCustomizing Your Monitor
FR
DE
ES
GB
IT
Select
ROTATION
PINCUSHION
PIN BALANCE
KEYSTONE
KEY BALANCE
Using the GEOM (Geometry) On-screen DisplayThe GEOM (Geometry) settings allow you to adjust theshape and orientation of the picture.Once the rotation is adjusted, it will be stored in memory forall input signals received. All other adjustments will bestored in memory for the current input signal.
1 Press the MENU button.The MENU OSD appears.
2 Press the ¨./> and >?// buttons to select“ GEOM,” and press the MENU button again.The GEOMETRY OSD appears.
3 Press the ¨./> buttons to select the item you wantto adjust.
To
adjust the picture rotation
adjust the picture sides
adjust the picture side balance
adjust the picture width
adjust the picture shape balance
MENU
4 Press the >?// buttons to adjust the settings.
The OSD automatically disappears after about 30 seconds.To close the OSD, press the MENU button again.
To reset, press the RESET button while the OSD is on.The selected item is reset to the factory setting.
For
ROTATION
PINCUSHION
PIN BALANCE
KEYSTONE
KEY BALANCE
Press
/ . . . to rotate the picture clockwise
? . . . to rotate the picture counterclockwise
/ . . . to expand the picture sides
? . . . to contract the picture sides
/ . . . to move the picture sides to the right
? . . . to move the picture sides to the left
/ . . . to increase the picture width at thetop
? . . . to decrease the picture width at thetop
/ . . . to move the top of the picture tothe right
? . . . to move the top of the picture tothe left
ROTATION
GEOMETRY
26

Customizing Your Monitor
12
Using the ZOOM On-screenDisplayThe ZOOM settings allow you to enlarge or reduce thepicture.Once the setting is adjusted, it will be stored in memory forthe current input signal.
1 Press the MENU button.The MENU OSD appears.
2 Press the ¨./> and >?// buttons to select“ ZOOM,” and press the MENU button again.The ZOOM OSD appears.
3 Press the >?//buttons to adjust the picture zoom.
/ . . . to enlarge the picture? . . . to reduce the picture
The OSD automatically disappears after about 30 seconds.To close the OSD, press the MENU button again.
To reset, press the RESET button while the OSD is on.
NoteThe picture zoom adjustment will stop as soon as either thehorizontal or vertical size reaches its maximum or minimum value.
MENU
Using the COLOR On-screenDisplayYou can change the monitor’s color temperature. Forexample, you can adjust or change the colors of a picture onthe screen to match the actual colors of the printed picture.Once the setting is adjusted, it will be stored in memory forall input signals received.
1 Press the MENU button.The MENU OSD appears.
2 Press the ¨./> and >?// buttons to select“ COLOR,” and press the MENU button again.The COLOR OSD appears.
3 Press the >?// buttons to select the colortemperature.
There are three color temperature modes in the OSD.The preset adjustments are:5000K, 6500K, 9300K
MENU
COLOR
R BIAS
5000K 6500K
50G BIAS 50B B IAS 50R GAIN 50G GAIN 50B GAIN 50
9300K
ZOOM
73V26H

13
Getting StartedCustomizing Your Monitor
FR
DE
ES
GB
IT
Using the SCREEN On-screenDisplayYou can adjust convergence settings to eliminate red or blueshadows that may appear around objects on the screen.Adjust the CANCEL MOIRE function to eliminate wavy orelliptical patterns that may appear on the screen.Adjust the LANDING function to correct color imbalancesat the four corners of the screen due to influence from theearth’s magnetism.Once CANCEL MOIRE is adjusted, it will be stored inmemory for the current input signal. All other adjustmentswill be stored in memory for all input signals received.
1 Press the MENU button.The MENU OSD appears.
2 Press the ¨./> and >?// buttons to select“ SCREEN,” and press the MENU button again.The SCREEN OSD appears.
3 Press the ¨./> buttons to select the item you wantto adjust.
MENU
4 Fine tuning the color temperaturePress the ¨./> buttons to select an item and adjust bypressing the >?// buttons.
Select R (red), G (green), or B (blue) BIAS to adjust theblack level of each color’s signal.
Select R (red), G (green), or B (blue) GAIN to adjust thewhite level of each color’s signal.
The “5000K,” “6500K” or “9300K” disappears and thenew color settings are memorized for each of the threecolor modes.The color temperature modes change as follows:5000Kn 1, 6500Kn 2, 9300Kn 3
The OSD automatically disappears after about 30 seconds.To close the OSD, press the MENU button again.
To reset, press the RESET button while the OSD is on. Theselected item is reset to the factory settings.
Select
H CONVERGENCE
V CONVERGENCE
TOP
V CONVER TOP
BOT
V CONVER BOTTOM
To
adjust the horizontal convergence
adjust the vertical convergence
adjust the screen’s upper verticalconvergence
adjust the screen’s lower verticalconvergence
(continued)
SCREEN
TOPBOT
H CONVERGENCE
26ADJ
COLOR
6500K 9300K
G BIAS 50B B IAS 50R GAIN 50G GAIN 50B GAIN 50
R B IAS 76
1

Customizing Your Monitor
14
* Moire is a type of natural interference which produces soft orwavy lines on your screen. It may appear due to interferencebetween the regulated pattern of the picture from the inputsignal and the phosphor pitch pattern of the CRT.
Example of moire:
4 Press the >?// buttons to adjust the settings.
NoteThe picture may become fuzzy when CANCEL MOIRE is set to“ON.”
The OSD automatically disappears after about 30 seconds.To close the OSD, press the MENU button again.
To reset, press the RESET button while the OSD is on.The selected item is reset to the factory setting.
ONOFF
ONOFF
50
For
TOP
V CONVER TOP
BOT
V CONVER BOTTOM
LANDING
ADJ
LANDING ADJUST
CANCEL MOIRE
ADJ
MOIRE ADJUST
Press
/ . . . to shift red shadows up and blueshadows down
? . . . to shift red shadows down andblue shadows up
/ . . . to shift red shadows up and blueshadows down
? . . . to shift red shadows down andblue shadows up
/ or ? . . . to select the corner of thescreen you want to adjust
: top left : top right
: bottom left : bottom right
/ or ? . . . to reduce any irregularities inthe color to a minimum
/ . . . to turn CANCEL MOIRE “ON”
? . . . to turn CANCEL MOIRE “OFF”
/ or ? . . . to adjust the screen until themoire is at a minimum
Select
LANDING
ADJ
LANDING ADJUST
CANCEL MOIRE *
ADJ
MOIRE ADJUST
To
select one of the four corners thatneeds color correction due toinfluence from the earth’s magnetism
correct the color at one of the fourcorners of the screen
turn the moire cancellation function“ON” or “OFF.” CANCEL MOIREmust be “ON” for “ ADJ (MOIREADJUST)” to appear on the screen.
adjust the degree of moirecancellation
50
For
H CONVERGENCE
V CONVERGENCE
Press
/ . . . to shift red shadows to the rightand blue shadows to the left
? . . . to shift red shadows to the leftand blue shadows to the right
/ . . . to shift red shadows up and blueshadows down
? . . . to shift red shadows down andblue shadows up

15
Getting StartedCustomizing Your Monitor
FR
DE
ES
GB
IT
Using the OPTION On-screenDisplayThe OPTION OSD allows you to manually degauss thescreen and adjust settings such as the OSD position andpower saving delay time. It also allows you to lock thecontrols.
Degaussing the screen
The monitor screen is automatically degaussed(demagnetized) when the power is turned on.You can also manually degauss the monitor.
1 Press the MENU button.The MENU OSD appears.
2 Press the ¨./> and >?// buttons to select“ OPTION,” and press the MENU button again.The OPTION OSD appears.
3 Press the ¨./> buttons to select “ (MANUALDEGAUSS).”
4 Press the > / button.The screen is degaussed for about 3 seconds.
If you need to degauss the screen a second time, wait for atleast 20 minutes before repeating the steps above.
The OPTION OSD automatically disappears after about 30seconds.To close the OSD, press the MENU button again.
Changing the on-screen display position
You can change the OSD position (for example, when youwant to adjust the picture behind the OSD).
1 Press the MENU button.The MENU OSD appears.
2 Press the ¨./> and >?// buttons to select“ OPTION,” and press the MENU button again.The OPTION OSD appears.
3 Press the ¨./> buttons to select “ (OSD HPOSITION)” or “ (OSD V POSITION).”Select “ (OSD H POSITION)” to adjust the horizontalposition.
Select “ (OSD V POSITION)” to adjust the verticalposition.
4 Press the >?// buttons to move the OSD to thedesired position.
The OPTION OSD automatically disappears after about 30seconds.To close the OSD, press the MENU button again.
To reset, press the RESET button while the OSD is on.
MENU
ON
MANUAL DEGAUSS
UNLOCK1 MIN
OPTION
ZZ...
MENU
ON
MANUAL DEGAUSS
UNLOCK1 MIN
OPTION
ZZ...
ZZ...
OSD H POSITION
UNLOCK1 MIN
OPTION
ZZ...
OSD V POSITION
UNLOCK
OPTION
AUTO

16
Customizing Your Monitor
Locking the controls
The control lock function disables all of the buttons on thefront panel except the u (power) switch and MENU button.
1 Press the MENU button.The MENU OSD appears.
2 Press the ¨./> and >?// buttons to select“ OPTION,” and press the MENU button again.The OPTION OSD appears.
3 Press the ¨./> buttons to select “ (CONTROLLOCK).”
4 Press the >?// buttons to select “LOCK.”
The OPTION OSD automatically disappears after about 30seconds.To close the OSD, press the MENU button again.
Once you select “LOCK,” you cannot select any itemsexcept “EXIT” and ” OPTION” in the MENU OSD.If you press any button other than the u (power) switch andMENU button, the mark appears on the screen.
To cancel the control lock
Repeat steps 1 through 3 above and press the >?//buttons to select “UNLOCK.”
Setting the power saving delay time
You can set the delay time before the monitor enters thepower saving mode. See page 19 for more information onthis monitor’s power saving capabilities.
1 Press the MENU button.The MENU OSD appears.
2 Press the ¨./> and >?// buttons to select“ OPTION,” and press the MENU button again.The OPTION OSD appears.
3 Press the ¨./> buttons to select “ ZZ... (PWR SAVEDELAY).”
4 Press the >?// buttons to select the desired time.
When PWR SAVE DELAY is set to “OFF,” the monitordoes not go into power saving mode.
The OPTION OSD automatically disappears after about 30seconds.To close the OSD, press the MENU button again.
To reset, press the RESET button while the OSD is on.
MENU
ON
MANUAL DEGAUSS
UNLOCK1 MIN
OPTION
ZZ...
MENU
ON
MANUAL DEGAUSS
UNLOCK1 MIN
OPTION
ZZ...
ZZ...
PWR SAVE DELAY
OPTION
5 SEC60 MIN
1 MINOFF
AUTO ZZ...
CONTROL LOCK
OPTION
UNLOCK LOCK
AUTO
17
Getting StartedCustomizing Your Monitor
FR
DE
ES
GB
IT
Using the LANG (Language) On-screen DisplayEnglish, French, German, Spanish, Italian and Japaneseversions of the OSDs are available.
1 Press the MENU button.The MENU OSD appears.
2 Press the ¨./> and >?// buttons to select“ LANG,” and press the MENU button again.The LANGUAGE OSD appears.
3 Press the ¨./> buttons to select the desiredlanguage.
ENGLISH: English, FRANÇAIS: French,DEUTSCH: German, ESPAÑOL: Spanish,ITALIANO: Italian, or : Japanese.
The OSD automatically disappears after about 30 seconds.To close the OSD, press the MENU button again.
To reset to English, press the RESET button while the OSDis on.
MENU
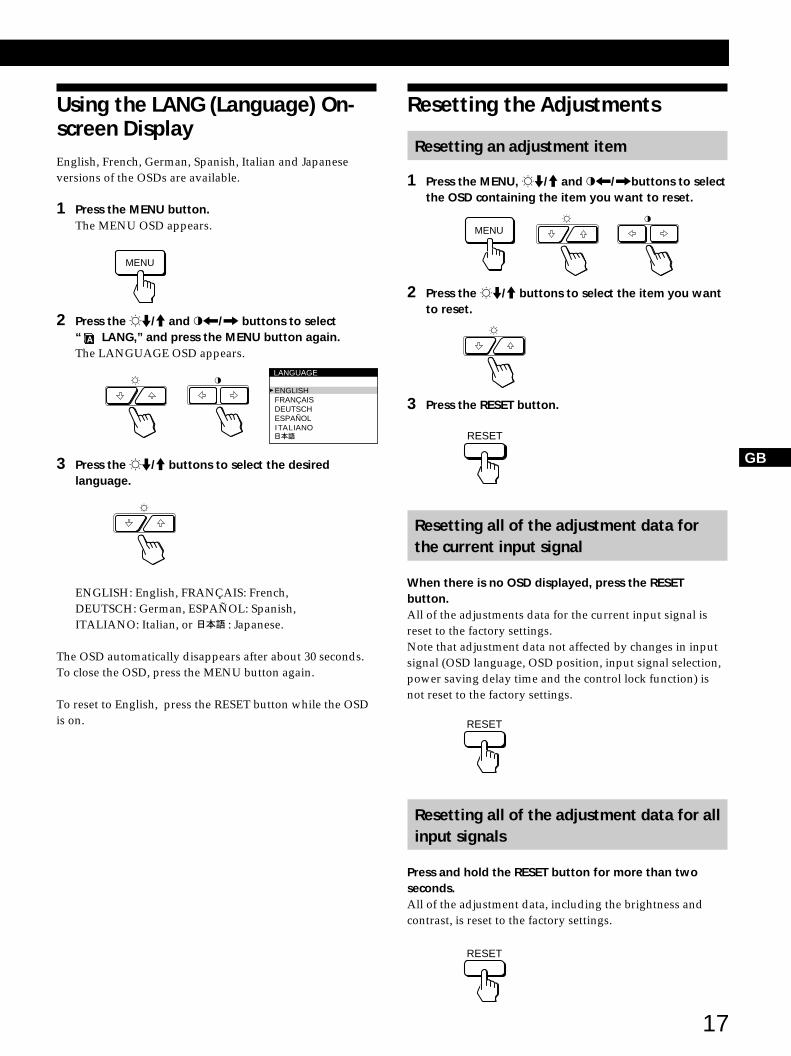
RESET
RESET
MENU
RESET
Resetting the Adjustments
Resetting an adjustment item
1 Press the MENU, ¨./> and >?//buttons to selectthe OSD containing the item you want to reset.
2 Press the ¨./> buttons to select the item you wantto reset.
3 Press the RESET button.
Resetting all of the adjustment data forthe current input signal
When there is no OSD displayed, press the RESETbutton.All of the adjustments data for the current input signal isreset to the factory settings.Note that adjustment data not affected by changes in inputsignal (OSD language, OSD position, input signal selection,power saving delay time and the control lock function) isnot reset to the factory settings.
Resetting all of the adjustment data for allinput signals
Press and hold the RESET button for more than twoseconds.All of the adjustment data, including the brightness andcontrast, is reset to the factory settings.
ENGLISHFRANÇAISDEUTSCHESPAÑOLITALIANO
LANGUAGE

18
Technical Features
Preset and User ModesThis monitor has factory preset modes for the most popularindustry standards for true “plug and play” compatibility.
When a new input signal is entered, the monitor selects theappropriate factory preset mode and momentarily adjuststhe phase calibration to provide a high quality picture to thecenter of the screen. The calibration is stored in memoryand is immediately recalled whenever the same input signalis received.
No.
1
2
3
4
5
6
7
8
9
10
11
12
13
14
15
16
17
18
19
20
21
22
23
24
25
26
27 *
Resolution(dots × lines)
640 × 350
640 × 480
640 × 480
640 × 480
720 × 400
720 × 400
800 × 600
800 × 600
800 × 600
832 × 624
1024 × 768
1024 × 768
1024 × 768
1024 × 768
1024 × 768
1152 × 864
1152 × 870
1280 × 960
1280 × 960
1280 × 1024
1280 × 1024
1280 × 1024
1600 × 1200
1600 × 1200
1600 × 1200
1600 × 1200
1600 × 1200
HorizontalFrequency
31.5 kHz
31.5 kHz
37.5 kHz
43.3 kHz
31.5 kHz
37.9 kHz
37.9 kHz
46.9 kHz
53.7 kHz
49.7 kHz
48.4 kHz
56.5 kHz
60.0 kHz
60.2 kHz
68.7 kHz
67.5 kHz
68.7 kHz
60.0 kHz
85.9 kHz
64.0 kHz
80.0 kHz
91.1 kHz
75.0 kHz
81.3 kHz
87.5 kHz
93.8 kHz
106.3 kHz
VerticalFrequency
70 Hz
60 Hz
75 Hz
85 Hz
70 Hz
85 Hz
60 Hz
75 Hz
85 Hz
75 Hz
60 Hz
70 Hz
75 Hz
75 Hz
85 Hz
75 Hz
75 Hz
60 Hz
85 Hz
60 Hz
75 Hz
85 Hz
60 Hz
65 Hz
70 Hz
75 Hz
85 Hz
Graphics Mode
MCGA
VGA-G
EVGA
VESA
VGA-Text
VESA
SVGA
ESVGA
VESA
Macintosh16” Color
VESA
VESA
EUVGA
Macintosh19” Color
VESA
VESA
Macintosh21” Color
VESA
VESA
VESA
VESA
VESA
VESA
VESA
VESA
VESA
VESA
Technical Features
For input signals that do not match one of the factory presetmodes, the digital Multiscan technology of this monitorperforms all of the adjustments necessary to ensure that aclear picture appears on the screen for any timing in themonitor’s frequency range. However, it may be necessaryto fine tune the horizontal/vertical size and centering.Simply press the ASC button or adjust the monitoraccording to the adjustment instructions. The adjustmentsare stored automatically as a user mode and recalledwhenever the corresponding input signal is received.
Recommended horizontal and vertical timingconditionsHorizontal sync width duty should be: >4.8% of total horizontaltime.Horizontal blanking width should be: >2.5 µsec.Vertical blanking width should be: > 450 µsec.
Note for Windows usersFor Windows users, check your video board manual or the utilityprogram which comes with your graphic board and select thehighest available refresh rate to maximize monitor performance.
Adjusting the monitor’s resolution and colornumberAdjust the monitor’s resolution and color number by referring toyour computer’s instruction manual. The color number may varyaccording to your computer or video board. The color palettesetting and the actual number of colors are as follows:• High Color (16 bit) n 65,536 colors• True Color (24 bit) n about 16.77 million colorsIn true color mode (24 bit), speed may be slower.
* GDM-500PST9 only

19
Getting StartedTechnical Features
FR
DE
ES
GB
IT
Power Saving FunctionThis monitor meets the power-saving guidelines set byVESA and Energy Star, as well as the more stringentNUTEK .If the monitor is connected to a computer or video graphicsboard that is VESA DPMS (Display Power ManagementSignaling) compliant, the monitor will automatically reducepower consumption in three stages as shown below.
1
2
3
4
5
Recovery time
—
Approx. 3 sec.
Approx. 3 sec.
Approx. 10 sec.
—
u indicator
Green
Green and orangealternate
Green and orangealternate
Orange
Off
Power consumption
≤ 145 W (GDM-500PST9)
≤ 125 W (GDM-400PST9)
Approx. 72 W (GDM-500PST9)
Approx. 65 W (GDM-400PST9)
Approx. 8 W
Approx. 4 W
0 W
Power consumptionmode
Normal operation
Standby (1st mode)
Suspend (2nd mode)
Active-off (3rd mode)
Power-off
Screen
active
blank
blank
blank
––
Horizontalsync signal
present
absent
present
absent
––
Verticalsync signal
present
present
absent
absent
––
You can set the delay time before the monitor enters thepower saving mode using the OSD. Set the time accordingto “Setting the power saving delay time” on page 16.
NoteIf no video signal is input to the monitor, the “NO INPUTSIGNAL” message (page 20) appears. After the delay time haspassed, the power saving function automatically puts the monitorinto the active-off mode and the u indicator lights up orange. Oncethe horizontal and vertical sync signals are detected, the monitorautomatically resumes its normal operation mode.
Damper WiresWhen viewing a white background, very thin horizontallines may be visible on the screen as shown below. Theselines are the shadows of the damper wires and arecharacteristic of CRTs that use aperture grilles. The wiresare attached to the aperture grille on the inside of theTrinitron tube and prevent the vibration of the aperturegrille.
Damper wires
Plug & PlayThis monitor complies with the DDC1, DDC2B, DDC2ABand DDC2B+ Display Data Channel (DDC) standards ofVESA.When a DDC1 host system is connected, the monitorsynchronizes with the V. CLK in accordance with the VESAstandards and outputs the EDID (Extended DisplayIdentification Data) to the data line.When a DDC2B, DDC2AB or DDC2B+ host system isconnected, the monitor automatically switches to theappropriate standard.
DDC is a trademark of the Video Electronics StandardAssociation.
NoteWhen using Windows 95/98, the DDC standard does not apply tothe 5 BNC connectors. If you use the DDC standard, connect theHD15 connector to the computer with the supplied video signalcable.

20
Additional Information
Warning MessagesIf there is something wrong with the input signal, one of thefollowing messages appears.
Additional Information
1 The input signal condition
“OUT OF SCAN RANGE” indicates that the input signalis not supported by the monitor’s specifications.
“NO INPUT SIGNAL” indicates that no signal is input, orthe input signal from the selected input connector is notreceived.
2 The selected input connector
Indicates which input connector is receiving the wrongsignal.If there is something wrong with the signal from bothinput connectors, “HD15” and “BNC” are displayedalternately.
To solve these problems, see “Troubleshooting” below.
TroubleshootingThis section may help you isolate the cause of a problem and as a result, eliminate the need to contact technical support.
Symptom Check these items
No picture
If the u indicator is not lit
If the “NO INPUT SIGNAL”message appears on the screen,or if the u indicator is eitherorange or alternating betweengreen and orange
If the “OUT OF SCAN RANGE”message appears on the screen
If no message is displayed andthe u indicator is green orflashing orange
If using a Macintosh system
If using Windows 95/98
Picture is scrambled
• Check that the power cord is properly connected.• Check that the u (power) switch is in the “on” position.
• The screen is blank when the monitor is in power saving mode. Try pressing any key on thecomputer keyboard.
• Check that your computer power switch is in the “on” position.• Check that the input select setting is correct.• Check that the video signal cable is properly connected and all plugs are firmly seated in
their sockets.• Check that the 5 BNCs are connected in the correct order (from left to right: Red–Green–
Blue–HD–VD) (page 6).• Ensure that no pins are bent or pushed in the HD15 video input connector.• Check that the video board is completely seated in the proper bus slot.
• Check that the video frequency range is within that specified for the monitor.Horizontal: 30 – 94 kHz (GDM-400PST9), 30 – 107 kHz (GDM-500PST9)Vertical: 48 – 160 HzRefer to your computer‘s instruction manual to adjust the video frequency range.
• If you are using a video signal cable adapter, check that it is correct.
• See “Self-diagnosis Function” (page 22).
• Check that the Macintosh adapter and the video signal cable are properly connected(page 6).
• If you replaced an old monitor with this monitor, reconnect the old monitor and do thefollowing. Install the Windows Monitor Information Disk (page 7) and select “GDM-400PST9” or “GDM-500PST9” from among the Sony monitors in the Windows 95/98monitor selection screen. If you choose to select “Plug and Play,” connect the monitor to thecomputer with the HD15 video signal. You cannot use the five BNC connectors.
• Check your graphics board manual for the proper monitor setting.• Check this manual and confirm that the graphics mode and the frequency you are trying to
operate at is supported. Even if the frequency is within the proper range, some videoboards may have a sync pulse that is too narrow for the monitor to sync correctly.
INFORMATION
OUT OF SCAN RANGE
INPUT : HD15

21
Getting StartedAdditional Information
FR
DE
ES
GB
IT
Symptom Check these items
Color is not uniform
You cannot adjust the monitorwith the buttons on the frontpanel
White does not look white
Screen image is not centered orsized properly
Edges of the image are curved
White lines show red or blueshadows at edges
Picture is fuzzy
Picture bounces or has wavyoscillations
Picture is flickering
Picture appears to be ghosting
Wavy or elliptical (moire)pattern is visible
Two fine horizontal lines(wires) are visible
Hum is heard right after thepower is turned on
• Degauss the monitor (page 15).If you place equipment which generates a magnetic field, such as a loudspeaker, near themonitor, or you change the direction of the monitor, color may lose uniformity.The degauss function demagnetizes the metal frame of the CRT to obtain a neutral field foruniform color reproduction. If a second degauss cycle is needed, allow a minimum intervalof 20 minutes for the best result.
• Adjust the landing (pages 13 – 14).
• If the control lock function is set to on, set it to off using the OPTION OSD (page 16).
• Adjust the color temperature (pages 12 - 13).• Check that the 5 BNCs are connected in the correct order (from left to right: Red–Green–
Blue–HD–VD) (page 6).
• Press the ASC button (page 7).• Adjust the size or centering (page 10).• Some video modes do not fill the screen to the edges. This problem tends to occur with
certain video boards.
• Adjust the geometry (page 11).
• Adjust the convergence (pages 13 – 14).
• Adjust the contrast and brightness (page 9).• Degauss the monitor (page 15).
If you place equipment which generates a magnetic field, such as a loudspeaker, near themonitor, or you change the direction of the monitor, color may lose uniformity.The degauss function demagnetizes the metal frame of the CRT to obtain a neutral field foruniform color reproduction. If a second degauss cycle is needed, allow a minimum intervalof 20 minutes for the best result.
• If red or blue shadows appear along the edges of images, adjust the convergence(pages 13 – 14).
• If the moire is cancelled, the picture may become fuzzy. Decrease the moire cancellationeffect (pages 13 – 14).
• Isolate and eliminate any potential sources of electric or magnetic fields. Common causesfor this symptom are electric fans, fluorescent lighting or laser printers.
• If you have another monitor close to this monitor, increase the distance between them toreduce the interference.
• Try plugging the monitor into a different AC outlet, preferably on a different circuit.• Try the monitor on a different computer in a different room.
• Set the refresh rate on the computer to obtain the best possible picture by referring to thecomputer’s manual.
• Eliminate the use of video cable extensions and/or video switch boxes if this symptomoccurs. Excessive cable length or a weak connection can produce this symptom.
• Cancel the moire (pages 13 – 14).The moire may be modified depending on the connected computer.
• Due to the relationship between resolution, monitor dot pitch and the pitch of some imagepatterns, certain screen backgrounds sometimes show moire. Change your desktop pattern.
• These wires stabilize the vertically striped aperture grille (page 19). This aperture grilleallows more light to pass through to the screen giving the Trinitron CRT more color andbrightness.
• When the power is turned on, the auto-degauss cycle is activated. While the auto-degausscycle is activated (3 seconds), a hum may be heard. The same hum is heard when themonitor is manually degaussed. This is not a malfunction.

22
Additional Information
Self-diagnosis FunctionThis monitor is equipped with a self-diagnosis function. Ifthere is a problem with your monitor or computer(s), thescreen will go blank and the u indicator will either light upgreen or flash orange.
If the uuuuu indicator is green
1 Remove any plugs from the video input 1 and 2connectors, or turn off the connected computer(s).
2 Press and hold the >/ button for 2 seconds.
If all four color bars appear (white, red, green, blue), themonitor is working properly. Reconnect the video inputcables and check the condition of your computer(s).
If the color bars do not appear, there is a potentialmonitor failure. Inform your authorized Sony dealer ofthe monitor’s condition.
If the uuuuu indicator is flashing orange
Press the uuuuu button to turn the monitor off and on.
If the u indicator lights up green, the monitor isworking properly.
If the u indicator is still flashing, there is a potentialmonitor failure. Count the number of seconds betweenorange flashes of the u indicator and inform yourauthorized Sony dealer of the monitor’s condition. Besure to note the model name and serial number of yourmonitor. Also note the make and model of yourcomputer and video board.
u indicator
SpecificationsGDM-400PST9
Picture tube 0.25 – 0.27 mm aperture grille pitch19 inches measured diagonally90-degree deflection
Viewable image size Approx. 365 × 273 mm (w/h)(14 3/8 × 10 3/4 inches)18.0” viewing image
Resolution Horizontal: Max. 1600 dotsVertical: Max. 1200 lines
Standard image area Approx. 330 × 264 mm (w/h)(13 × 10 1/2 inches)orApprox. 352 × 264 mm (w/h)(13 7/8 × 10 1/2 inches)
Deflection frequency Horizontal: 30 to 94 kHzVertical: 48 to 160 Hz
AC input voltage/current100 to 240 V, 50 – 60 Hz, 1.8 – 1.0 A
Power consumption Max. 125 WDimensions 444 × 467 × 453 mm (w/h/d)
(17 1/2 × 18 1/2 × 17 7/8 inches)Mass Approx. 25 kg (55 lb 2 oz)Supplied accessories See page 6
GDM-500PST9
Picture tube 0.25 – 0.27 mm aperture grille pitch21 inches measured diagonally90-degree deflection
Viewable image size Approx. 403.8 × 302.2 mm (w/h)(16 × 12 inches)19.8” viewing image
Resolution Horizontal: Max. 1600 dotsVertical: Max. 1200 lines
Standard image area Approx. 388 × 291 mm (w/h)(15 3/8 × 11 1/2 inches)orApprox. 364 × 291 mm (w/h)(14 3/8 × 11 1/2 inches)
Deflection frequency Horizontal: 30 to 107 kHzVertical: 48 to 160 Hz
AC input voltage/current100 to 240 V, 50 – 60 Hz, 2.0 – 1.0 A
Power consumption Max. 145 WDimensions 498 × 505 × 474 mm (w/h/d)
(19 5/8 × 20 × 18 3/4 inches)Mass Approx. 31 kg (68 lb 5 oz)Supplied accessories See page 6
Design and specifications are subject to change withoutnotice.

3
FR
PréparationPrécautions ........................................................................................................................... 4Identification des composants et des commandes .......................................................... 5Installation ............................................................................................................................ 6Réglage automatique de la taille et du centrage de l’image .......................................... 7Sélection de la langue d’affichage des menus ................................................................. 7Sélection du signal d’entrée ............................................................................................... 8
Personnalisation de l’affichageRéglage de la luminosité et du contraste de l’image ...................................................... 9Présentation du système d’écrans de menu..................................................................... 9Utilisation de l’écran de menu CENTRE (centrage) ..................................................... 10Utilisation de l’écran de menu TAILLE .......................................................................... 10Utilisation de l’écran de menu GEOM (géométrie) ...................................................... 11Utilisation de l’écran de menu ZOOM ........................................................................... 12Utilisation de l’écran de menu COUL. (couleur) .......................................................... 12Utilisation de l’écran de menu ECRAN ......................................................................... 13Utilisation de l’écran de menu OPTION ........................................................................ 15Utilisation de l’écran de menu LANG (langue d’affichage) ........................................ 17Réinitialisation des réglages ............................................................................................. 17
Caractéristiques techniquesModes présélectionné et utilisateur ................................................................................ 18Fonction d’économie d’énergie ........................................................................................ 19Fils d’amortissement ......................................................................................................... 19Un moniteur prêt à l’emploi (“Plug & Play”) ................................................................ 19
Informations complémentairesMessages d’avertissement ................................................................................................ 20Guide de dépannage ......................................................................................................... 20Fonction d’autodiagnostic ................................................................................................ 22Spécifications ...................................................................................................................... 22
AppendixTCO’99 Eco-document ......................................................................................................... i
TABLE DES MATIERES
• Macintosh est une marque de commerce de Apple Computer, Inc.,déposée aux Etats-unis et dans d’autres pays.
• Windows et MS-DOS sont des marques de commerce de MicrosoftCorporation déposées aux Etats-Unis et dans d’autres pays.
• IBM PC/AT et VGA sont des marques de commerce de IBMCorporation déposées aux Etats-Unis.
• VESA est une marque de commerce de Video Electronics StandardAssociation.
• Tous les autres noms de produits mentionnés dans ce mode d’emploisont des marques de commerce ou des marques déposées de leurdétenteurs respectifs.
• Par ailleurs, “” et “” ne sont pas repris à chaque fois dans le moded’emploi.

4
Préparation
Avertissement sur le raccordement à lasource d’alimentation
• Utilisez un cordon d’alimentation convenant à votrealimentation secteur locale.Pour les clients au Royaume-UniSi vous utilisez ce moniteur au Royaume-Uni, utilisez lecordon et la fiche pour le Royaume-Uni, utilisez le cordonet la fiche pour le Royaume-Uni fournis.
Modèles de fiches :
• Avant de débrancher le cordon d’alimentation, attendezau moins 30 secondes après avoir actionné lecommutateur d’alimentation de manière à permettre ladécharge de l’électricité statique à la surface de l’écran àtube cathodique (CRT).
• Après que le courant a été branché, le CRT estdémagnétisé pendant environ 3 secondes. Cela génère unpuissant champ magnétique autour de l’encadrementmétallique qui peut affecter les données mémorisées surune bande magnétique ou des disquettes situées àproximité. Placez ces systèmes d’enregistrementmagnétique et ces bandes/disquettes à l’écart de cemoniteur.
La prise murale doit être installée à proximité del’équipement et être aisément accessible.
Préparation
90°
90°
15°
5°
Précautions
Installation
• Veillez à assurer une circulation d’air adéquate pouréviter une surchauffe interne de l’appareil. Ne placez pasle moniteur sur des surfaces textiles (tapis, couvertures,etc.) ni à proximité de rideaux ou de draperiessusceptibles d’obstruer les orifices de ventilation.
• N’installez pas le moniteur à proximité de sources dechaleur comme un radiateur ou une bouche d’air chaud,ni dans un endroit exposé au rayonnement solaire direct,à des poussières en excès, à des vibrations ou à des chocsmécaniques.
• N’installez pas le moniteur à proximité d’équipements quigénèrent un champ magnétique tels un convertisseur oudes lignes à haute tension.
Entretien
• Nettoyez le châssis, le panneau et les commandes à l’aided’un chiffon doux légèrement imprégné d’une solutiondétergente neutre. N’utilisez jamais de tampons abrasifs,de poudre à récurer ou de solvants tels que de l’alcool oudu benzine.
• Ne frottez pas, ne touchez pas et ne tapotez pas la surfacede l’écran avec des objets abrasifs ou aux arêtes vivescomme un stylo à bille ou un tournevis. Ce type decontact risque en effet de rayer le tube image.
• Nettoyez l’écran à l’aide d’un chiffon doux. Si vousutilisez un nettoyant liquide pour vitres, veillez àn’utiliser aucun type de produit contenant une solutionantistatique ni d’additifs similaires, car ils risqueraient derayer la couche de revêtement de l’écran.
Transport
Pour transporter ce moniteur en vue de réparations ou deson expédition, utilisez le carton d’emballage et lesmatériaux de conditionnement d’origine.
Utilisation du support pivotant
Le support pivotant permet de régler ce moniteur suivantl’angle de vision de votre préférence dans une plage de 180°horizontalement et 20° verticalement.Pour faire pivoter le moniteur verticalement ethorizontalement, maintenez-le des deux mains par la basecomme illustré ci-dessous.
pour 100 à 120 V CA pour 200 à 240 V CA pour 240 V CAuniquement

5
Préparation
FR
Identification des composants etdes commandesPour plus de détails, reportez-vous aux pages indiquéesentre parenthèses.C’est le modèle GDM-500PST9 qui est représenté dans lesillustrations de ce mode d’emploi.
Partie frontale
1 Touche RESET (réinitialisation) (page 17)Réinitialise les réglages aux valeurs par défaut.
2 Touche ASC (taille et centrageautomatiques) (page 7)Ajuste automatiquement la taille et le centrage desimages.
3 Touche INPUT (entrée) et indicateurs HD15/BNC (page 8)Sélectionne le signal d’entrée vidéo HD15 ou 5BNC.Chaque fois que vous appuyez sur cette touche, lesignal d’entrée et l’indicateur correspondant alternent.
4 Touches ¨ (luminosité) (./>) (pages 8 – 17)Règlent la luminosité de l’image.
Servent de touches (./>) pour le réglage d’autresparamètres.
5 Touche MENU (menu) (pages 8 – 17)Affiche l’écran MENU.
6 Touches > (contraste) (?//) (pages 8 – 17,22)Règlent le contraste de l’image.
Servent de touches (?//) pour le réglage d’autresparamètres.
7 Commutateur et indicateur d’alimentationu (pages 19, 22)Met le moniteur sous et hors tension.L’indicateur s’allume en vert lorsque le moniteur estsous tension et clignote en vert et orange ou s’allume enorange lorsque le moniteur se trouve en moded’économie d’énergie.
Partie arrière
8 Connecteur AC INAssure l’alimentation du moniteur.
9 Connecteur d’entrée vidéo 1 (HD15)Entrée des signaux vidéo RVB (0,700 Vcc, positif) et dessignaux SYNC.
* Norme Display Data Channel (DDC) de VESA
!º Connecteur d’entrée vidéo 2 (5 BNC)Entrée des signaux vidéo RVB (0,700 Vcc, positif) et dessignaux SYNC.
Broche n°
1
2
3
4
5
6
7
8
Signal
Rouge
Vert(synchronisationcompositesur le vert)
Bleu
ID (Masse)
Masse DDC*
Masse rouge
Masse vert
Masse bleu
Signal
DDC + 5V*
Masse
ID (Masse)Donnéesbidirectionnelles(SDA)*
Sync H
Sync V
Donnéesd’horloge(SCL)*
Broche n°
9
10
1112
13
14
15
5 4 3 2 1678910
1112131415
MENUINPUTRESET
ASC HD15 BNC

6
Préparation
vers HD15
vers la sortie vidéo
vers VIDEO IN R/G/B
Raccordez-le à l’ordinateurcomme pour le connecteurHD15.
PC/AT IBM ouordinateurcompatible
Câble designal vidéoHD15 (fourni)
vers la sortie vidéo
Macintosh ouordinateurcompatible
vers SYNC INHD/VD
vers HD15
Câble designal vidéoHD15 (fourni)
Si votre système PC n’est pas compatible avecDDC2AB et DDC2B+Ce moniteur utilise la broche n° 9 du connecteur de signal vidéopour la compatibilité avec DDC2AB et DDC2B+.Il se peut que certains systèmes PC, qui ne sont pas compatiblesavec DDC2AB ou DDC2B+, n’acceptent pas la broche n° 9. Si vousn’êtes pas sûr que votre système PC accepte la broche n° 9, utilisezun adaptateur HD15 (femelle) - HD15 (mâle sans la broche n° 9)(non fourni). Branchez le côté mâle (sans la broche n° 9) surl’ordinateur.
Raccordement à un Macintosh ou un ordinateurcompatible
A propos de l’adaptateur Macintosh fourniL’adaptateur Macintosh fourni est compatible avec les ordinateursMacintosh LC, Performa, Quadra, Power Macintosh et PowerMacintosh G3.Il se peut que les ordinateurs Macintosh II et certaines anciennesversions de Power Book requièrent un adaptateur doté demicrocommutateurs (non fourni).
Raccordement aux 5 connecteurs BNC
Pour raccorder les 5 connecteurs BNC, utilisez le câble designal vidéo SMF-400 (vendu séparément). Raccordez lescâbles de la gauche vers la droite dans l’ordre suivant :Rouge-Vert-Bleu-HD-VD.
Remarques• Ne court-circuitez pas les broches du câble de signal vidéo.• La norme DDC ne s’applique pas aux 5 connecteurs BNC. Si
vous utilisez la norme DDC, raccordez le connecteur HD15 àl’ordinateur à l’aide du câble de signal vidéo fourni.
InstallationAvant de mettre ce moniteur en service, vérifiez si tous lesaccessoires suivants se trouvent bien dans le carton :• Moniteur (1)• Cordon d’alimentation (1)• Câble de signal vidéo HD15 (1)• Adaptateur Macintosh (1)• Windows Monitor Information Disk (1)• Carte de garantie (1)• Ce mode d’emploi (1)
Ce moniteur fonctionne avec n’importe quel système IBMou compatible doté d’une capacité graphique VGA ousupérieure. Bien que ce moniteur fonctionne avec d’autresplates-formes tournant à des fréquences horizontalescomprises entre 30 et 94 kHz (GDM-400PST9), 30 et 107 kHz(GDM-500PST9), y compris des systèmes Macintosh etPower Macintosh, un adaptateur de câble est nécessaire.Veuillez consulter votre revendeur pour des conseils surl’adaptateur correspondant à vos besoins.
1re étape: Raccordez le moniteur àl’ordinateur
L’ordinateur étant hors tension, raccordez le câble de signalvidéo HD15 fourni au moniteur.• Si vous utilisez un PC/AT IBM ou un ordinateur
compatible, reportez-vous à la section ci-dessous.• Si vous utilisez un Macintosh ou un ordinateur
compatible, reportez-vous à la section “Raccordement àun Macintosh ou un ordinateur compatible” ci-après.
• Si vous voulez utiliser les 5 connecteurs BNC, reportez-vous à la section “Raccordement aux 5 connecteurs BNC”ci-après.
Raccordement à un PC/AT IBM ou à unordinateur compatible
* L’adaptateur HD15 - HD15 peut être nécessaire pour certainsmodèles.
AdaptateurMacintosh (fourni)
Adaptateur HD15 -HD15 (non fourni)*

7
Préparation
FR
vers une prisemurale
Cordon d’alimentation (fourni)
Réglage automatique de la tailleet du centrage de l’imageUne pression sur la touche (ASC) permet de réglerautomatiquement la taille et le centrage de l’image pourl’adapter à l’écran.
1 Mettez le moniteur et l’ordinateur sous tension.
2 Appuyez sur la touche ASC.L’image est ajustée pour s’adapter au centre de l’écran.
Remarques• Cette fonction est prévue pour une utilisation sous Windows ou
avec un logiciel à interface graphique similaire qui fournit uneimage plein écran. Il se peut qu’elle ne fonctionne pascorrectement si la couleur d’arrière-plan est sombre ou si l’imaged’entrée ne remplit pas l’écran jusqu’aux bords (telle que l’invitedu MS-DOS).
• Il se peut que l’écran devienne blanc pendant quelques secondeslorsque vous vous exécutez la fonction de réglage automatiquede la taille. Il ne s’agit pas d’un dysfonctionnement.
• Bien que les signaux du rapport d’image 5:4 (résolution:1280 × 1024) ne remplissent pas l’écran jusqu’aux bords, l’imageest affichée de manière précise.
Sélection de la langued’affichage des menusPour changer la langue d’affichage des écrans de menu, voirla section “Utilisation de l’écran de menu LANG (langued’affichage)” à la page 17.Le réglage par défaut est l’anglais.
vers AC IN
2e étape: Branchez le cordond’alimentation
Le moniteur étant hors tension, branchez le cordond’alimentation au moniteur et l’autre extrémité à une prisemurale.
3e étape: Mettez le moniteur etl’ordinateur sous tension
L’installation de votre moniteur est à présent terminée.
RemarqueSi le message “HORS PLAGE DE BALAYAGE” ou “PAS ENTREEVIDEO” apparaît à l’écran, voir “Messages d’avertissement” à lapage 20.
Pour les clients utilisant Windows 95/98Pour maximaliser le potentiel de votre moniteur, installez sur votreordinateur le nouveau fichier d’informations modèle depuis ladisquette “Windows Monitor Information Disk”.Ce moniteur est conforme à la norme Plug & Play “VESA DDC”. Sivotre PC/carte graphique est conforme à la norme DDC,sélectionnez “Plug & Play Monitor (VESA DDC)” ou la désignationde ce moniteur comme type de moniteur dans le “Control Panel”sous Windows 95/98. Si votre PC/carte graphique a des difficultésà communiquer avec ce moniteur, chargez la disquette “WindowsMonitor Information Disk” et sélectionnez la désignation de cemoniteur comme type de moniteur.
Pour les utilisateurs de Windows NT4.0L’installation du moniteur sous Windows NT4.0 est différente decelle sous Windows 95/98 et n’implique pas la sélection du type demoniteur. Reportez-vous au mode d’emploi de Windows NT4.0pour plus de détails sur le réglage de la résolution, le taux derégénération et le nombre de couleurs.
ASC

8
Préparation
Sélection du signal d’entréeCe moniteur est doté de deux connecteurs d’entrée de signal(HD15 et 5BNC) et peut être raccordé à deux ordinateurs.Lorsque les deux ordinateurs sont sous tension, sélectionnezle signal que vous voulez visualiser selon la procéduresuivante.
1 Mettez le moniteur et les deux ordinateurs soustension.
2 Appuyez sur la touche INPUT pour sélectionner lesignal d’entrée HD15 ou 5BNC.Chaque fois que vous appuyez sur la touche INPUT, lesignal d’entrée et l’indicateur correspondant alternent.
Sélection du mode de signal d’entrée
Ce moniteur a deux modes de sélection du signal d’entrée,“AUTO” et “MANUEL”.
Si “AUTO” est sélectionné
Si aucun signal n’est entré via le connecteur sélectionné, lemoniteur sélectionne automatiquement le signal de l’autreconnecteur. Si vous redémarrez l’ordinateur que vousvoulez utiliser ou si cet ordinateur se trouve en moded’économie d’énergie, il se peut que le moniteur sélectionneautomatiquement le signal de l’autre connecteur. La raisonen est que le moniteur est passé du signal interrompu ausignal constant. Si cela se produit, sélectionnezmanuellement le signal voulu à l’aide de la touche INPUT.
Si “MANUEL” est sélectionné
Même si aucun signal n’est entré via le connecteursélectionné, le moniteur ne sélectionne pas le signal del’autre connecteur.
1 Appuyez sur la touche MENU.L’écran MENU apparaît.
HD15 BNC INPUT
MENU
OUI
DEGAUSS MANUEL
DEVERR1 MIN
OPTION
ZZ...
2 Appuyez sur les touches ¨./> et >?// poursélectionner “ OPTION” et appuyez à nouveau surla touche MENU.L’écran OPTION apparaît.
3 Appuyez sur les touches ¨./> pour sélectionner“ (ENTREE)”.
4 Appuyez sur les touches >?// pour sélectionner“AUTO” ou “MANUEL”.
L’écran OPTION disparaît automatiquement au boutd’environ 30 secondes.Pour désactiver l’écran de menu, appuyez à nouveau sur latouche MENU.
Pour plus de détails sur l’utilisation des écrans de menu, voir“Présentation du système d’écrans de menu” à la page 9.
AUTO
ZZ...
ENTREE
1 MIN
OPTION
DEVERR
MANUEL
MENU
QUITTE
CENTRE
TAILLE
GEOM
COUL.
LANG
ZOOM
ECRAN
OPTION
OK MENU

9
Personnalisation de l’affichagePersonnalisation de l’affichage
FR
Personnalisation de l’affichage
MENU
Présentation du système d’écransde menuLa plupart des réglages sont effectués à l’aide de l’écran demenu MENU.
Ecran MENU
Appuyez sur la touche MENU pour afficher l’écranMENU.Cet écran MENU contient des liens avec les autres écrans demenu décrits ci-dessous.
1 COUL.Affiche l’écran de menu COULEUR pour le réglage dela température des couleurs.
2 CENTREAffiche l’écran de menu CENTRAGE pour le réglage ducentrage de l’image.
3 ECRANAffiche l’écran de menu ECRAN pour le réglage de laconvergence verticale et horizontale, etc.
4 ZOOMAffiche l’écran de menu ZOOM pour agrandir etréduire la taille de l’image.
5 OPTIONAffiche l’écran de menu OPTION pour ajuster laposition de l’écran de menu et démagnétiser l’écran, etc.
6 TAILLEAffiche l’écran de menu TAILLE pour le réglage de lataille de l’image.
7 LANGAffiche l’écran de menu LANGUAGE pour sélectionnerla langue d’affichage.
8 GEOMAffiche l’écran de menu GEOMETRIE pour régler larotation et la distorsion en coussin de l’image, etc.
9 QUITTEReferme l’écran MENU.
Avant le réglage
• Raccordez le moniteur et l’ordinateur et mettez-les soustension.
• Sélectionnez “ LANG” dans l’écran MENU etsélectionnez ensuite “FRANÇAIS” (voir page 17).
Réglage de la luminosité et ducontraste de l’imageUne fois le réglage effectué, il sera conservé en mémoirepour tous les signaux d’entrée reçus.
1 Appuyez sur les touches ¨ (luminosité) ./> ou> (contraste) ?//.L’écran LUMINOSITE/CONTRASTE apparaît.
2 Pour le réglage de la luminositéAppuyez sur les touches ¨./>.
> . . . pour augmenter la luminosité. . . . pour diminuer la luminosité
Pour le réglage du contrasteAppuyez sur les touches >?// .
/ . . . pour augmenter le contraste? . . . pour diminuer le contraste
L’écran de menu disparaît automatiquement au boutd’environ 3 secondes.
Pour ramener le réglage à sa valeur par défaut, appuyez surla touche RESET alors que le menu est affiché. La luminositéest simultanément ramenée à la valeur de réglage pardéfaut.
* Les fréquences horizontale et verticale pour le signal d’entréereçu apparaissent dans l’écran de menu LUMINOSITE/CONTRASTE.
Fréquencehorizontale*
Fréquenceverticale*
LUMINOSITE/CONTRASTE
26 26
80.0kHz/ 75Hz
Personnalisation de l'affichage
MENU
QUITTE
CENTRE
TAILLE
GEOM
COUL.
LANG
ZOOM
ECRAN
OPTION
OK MENU

10
Personnalisation de l’affichage
Utilisation de l’écran de menuCENTRE (centrage)Les réglages CENTRE vous permettent d’ajuster le centragede l’image.Une fois que le réglage est effectué, il sera conservé enmémoire pour le signal d’entrée en cours.
1 Appuyez sur la touche MENU.L’écran MENU apparaît.
2 Appuyez sur les touches ¨./> et >?// poursélectionner “ CENTRE” et appuyez ensuite ànouveau sur la touche MENU.L’écran de menu CENTRAGE apparaît.
3 Pour le réglage horizontalAppuyez sur les touches >?//.
/ . . . pour déplacer l’image vers ladroite
? . . . pour déplacer l’image vers lagauche
Pour le réglage verticalAppuyez sur les touches ¨./>.
> . . . pour déplacer l’image vers le haut. . . . pour déplacer l’image vers le bas
L’écran de menu disparaît automatiquement au boutd’environ 30 secondes.Pour refermer l’écran de menu, appuyez à nouveau sur latouche MENU.
Pour réinitialiser les valeurs de réglage, appuyez sur latouche RESET pendant que l’écran est affiché.Les centrages horizontal et vertical sont tous deux ramenésaux valeurs de réglage par défaut.
MENU
CENTRAGE
26
73
Utilisation de l’écran de menuTAILLELes réglages TAILLE vous permettent d’ajuster la taille del’image.Une fois que le réglage est effectué, il sera conservé enmémoire pour le signal d’entrée en cours.
1 Appuyez sur la touche MENU.L’écran MENU apparaît.
2 Appuyez sur les touches ¨./> et >?// poursélectionner “ TAILLE” et appuyez ensuite ànouveau sur la touche MENU.L’écran de menu TAILLE apparaît.
3 Pour le réglage horizontalAppuyez sur les touches >?//.
/ . . . pour augmenter la taille del’image
? . . . pour réduire la taille de l’image
Pour le réglage verticalAppuyez sur les touches ¨./>.
> . . . pour augmenter la taille del’image
. . . . pour réduire la taille de l’image
L’écran de menu disparaît automatiquement au boutd’environ 30 secondes.Pour refermer l’écran de menu, appuyez à nouveau sur latouche MENU.
Pour réinitialiser les valeurs de réglage, appuyez sur latouche RESET pendant que l’écran est affiché.Les tailles horizontale et verticale sont toutes deux ramenéesaux valeurs de réglage par défaut.
MENU
TAILLE
26
73

11
Personnalisation de l’affichagePersonnalisation de l’affichage
FR
Personnalisation de l’affichage
Sélectionnez
ROTATION
COUSSIN
CORR CYL
TRAPEZE
CORR PARAL
Pour
régler la rotation de l’image
régler les côtés de l’image
régler la correction cylindrique del’image
régler la largeur de l’image
régler l’inclinaison de l’image
MENU
Utilisation de l’écran de menuGEOM (géométrie)La GEOM (géométrie) vous permet d’ajuster la forme etl’orientation de l’image.Une fois que la rotation est réglée, elle sera conservée enmémoire pour tous les signaux d’entrée reçus. Tous lesautres réglages seront mémorisés pour le signal d’entrée encours.
1 Appuyez sur la touche MENU.L’écran MENU apparaît.
2 Appuyez sur les touches ¨./> et >?// poursélectionner “ GEOM” et appuyez ensuite ànouveau sur la touche MENU.L’écran GEOMETRIE apparaît.
3 Appuyez sur les touches ¨./> pour sélectionner leparamètre que vous voulez régler.
ROTATION
GEOMETRIE
26
4 Appuyez sur les touches >?// pour ajuster lesréglages.
Pour
ROTATION
COUSSIN
CORR CYL
TRAPEZE
CORR PARAL
Appuyez sur
/ . . . pour faire pivoter l’image dans lesens horaire
? . . . pour faire pivoter l’image dans le sensantihoraire
/ . . . pour élargir les côtés de l’image
? . . . pour resserrer les côtés de l’image
/ . . . pour déplacer les côtés de l’imagevers la droite
? . . . pour déplacer les côtés de l’imagevers la gauche
/ . . . pour augmenter la largeur del’image dans le haut
? . . . pour diminuer la largeur de l’imagedans le haut
/ . . . pour déplacer le haut de l’imagevers la droite
? . . . pour déplacer le haut de l’image versla gauche
L’écran de menu disparaît automatiquement au boutd’environ 30 secondes.Pour refermer l’écran de menu, appuyez à nouveau sur latouche MENU.
Pour réinitialiser les valeurs de réglage, appuyez sur latouche RESET pendant que l’écran est affiché.Le paramètre sélectionné est ramené à la valeur de réglagepar défaut.

12
Personnalisation de l’affichage
Utilisation de l’écran de menuZOOMLes réglages ZOOM vous permettent d’agrandir ou deréduire l’image.Une fois que le réglage est effectué, il sera conservé enmémoire pour le signal d’entrée en cours.
1 Appuyez sur la touche MENU.L’écran MENU apparaît.
2 Appuyez sur les touches ¨./> et >?// poursélectionner “ ZOOM” et appuyez ensuite ànouveau sur la touche MENU.L’écran de menu ZOOM apparaît.
3 Appuyez sur les touches >?// pour régler le zoomsur l’image.
/ . . . pour agrandir l’image? . . . pour réduire l’image
L’écran de menu disparaît automatiquement au boutd’environ 30 secondes.Pour refermer l’écran de menu, appuyez à nouveau sur latouche MENU.
Pour réinitialiser les valeurs de réglage, appuyez sur latouche RESET pendant que l’écran est affiché.
RemarqueLe zoom sur l’image s’arrête dès que la taille horizontale ouverticale atteint sa valeur maximum ou minimum.
MENU
MENU
ZOOM
73V26H
Personnalisation de l’affichage
COULEUR
R BIAS
5000K 6500K
50V B IAS 50B B IAS 50R GAIN 50V GAIN 50B GAIN 50
9300K
Utilisation de l’écran de menuCOUL. (couleur)Vous pouvez modifier la température de couleur dumoniteur. Par exemple, vous pouvez régler ou modifier lescouleurs d’une image à l’écran pour qu’elles correspondentaux couleurs réelles de l’image imprimée.Une fois que le réglage est effectué, il sera conservé enmémoire pour tous les signaux d’entrée reçus.
1 Appuyez sur la touche MENU.L’écran MENU apparaît.
2 Appuyez sur les touches ¨./> et >?// poursélectionner “ COUL.” et appuyez ensuite ànouveau sur la touche MENU.L’écran de menu COULEUR apparaît.
3 Appuyez sur les touches >?// pour sélectionner latempérature des couleurs.
L’écran de menu propose trois modes de températuredes couleurs.Les réglages par défaut sont :5000K, 6500K, 9300K

13
Personnalisation de l’affichage
FR
Sélectionnez
CONVERGENCE H
CONVERGENCE V
TOP
CONVER V HAUT
BOT
CONVER V BAS
Pour
régler la convergence horizontale
régler la convergence verticale
régler la convergence verticale dansle haut de l’écran
régler la convergence verticale dansle bas de l’écran
MENU
Utilisation de l’écran de menuECRANVous pouvez régler les valeurs de convergence pouréliminer les ombres rouge et bleue qui pourraient apparaîtreautour des objets de l’écran. Réglez la fonction ELIMMOIRAGE pour éliminer les motifs ondulatoires ouelliptiques qui pourraient apparaître à l’écran.Réglez la fonction PURETE COULEUR pour corriger lesirrégularités de couleurs dans les quatre coins de l’écran dusà l’influence du magnétisme terrestre.Une fois que ELIM MOIRAGE est réglé, il sera mémorisépour le signal d’entrée en cours. Tous les autres réglagesseront mémorisés pour tous les signaux d’entrée reçus.
1 Appuyez sur la touche MENU.L’écran de menu MENU apparaît.
2 Appuyez sur les touches ¨./> et >?// poursélectionner “ ECRAN” et appuyez ensuite ànouveau sur la touche MENU.L’écran de menu ECRAN apparaît.
3 Appuyez sur les touches ¨./> pour sélectionner leparamètre à régler.
ECRAN
TOPBOT
CONVERGENCE H
26ADJ
(suite)
COULEUR
6500K 9300K
V B IAS 50B B IAS 50R GAIN 50V GAIN 50B GAIN 50
R B IAS 76
1
4 Réglage fin de la température de couleurAppuyez sur les touches ¨./> pour sélectionner unparamètre et réglez-le en appuyant sur les touches>?//.
Sélectionnez R (rouge), V (vert) ou B (bleu) BIAS pourrégler le niveau de noir de chaque signal de couleur.
Sélectionnez R (rouge), V (vert) ou B (bleu) GAIN pourrégler le niveau de blanc de chaque signal de couleur.
L’indication “5000K”, “6500K” ou “9300K” disparaît etles nouveaux réglages des couleurs sont mémorisés pourchacun des trois modes de couleur.Les modes de température changent comme suit:5000Kn 1, 6500Kn 2, 9300Kn 3
L’écran de menu disparaît automatiquement après environ30 secondes.Pour faire disparaître l’écran de menu, appuyez de nouveausur la touche MENU.
Pour réinitialiser, appuyez sur la touche RESET lorsquel’écran de menu apparaît. Le paramètre sélectionné estréinitialisé aux valeurs par défaut définies en usine.

14
Personnalisation de l’affichage
RemarqueIl se peut que l’image devienne floue lorsque ELIM MOIRAGE estréglé sur “OUI”.
L’écran de menu disparaît automatiquement au boutd’environ 30 secondes.Pour refermer l’écran de menu, appuyez à nouveau sur latouche MENU.
Pour réinitialiser les valeurs de réglage, appuyez sur latouche RESET pendant que l’écran est affiché.Le paramètre sélectionné est ramené à la valeur de réglagepar défaut.
Pour
CONVERGENCE H
CONVERGENCE V
Appuyez sur
/ . . . pour décaler les ombres rouges vers ladroite et les ombres bleues vers lagauche
? . . . pour décaler les ombres rouges vers lagauche et les ombres bleues vers ladroite
/ . . . pour décaler les ombres rouges vers lehaut et les ombres bleues vers le bas
? . . . pour décaler les ombres rouges vers lebas et les ombres bleues vers le haut
4 Appuyez sur les touches >?// pour ajuster lesréglages.
Sélectionnez
PURETE COULEUR
ADJ
PURETE COULEUR
ELIM MOIRAGE*
ADJ
REGLAGE MOIRE
Pour
sélectionner l’un des quatre coinsnécessitant la correction de couleuren raison de l’influence dumagnétisme terrestre.
corriger la couleur dans l’un desquatre coins de l’écran
activer (“OUI”) ou désactiver(“NON”) l’annulation de moiré.ELIM MOIRAGE doit être réglé sur“OUI” pour que “ ADJ(REGLAGE MOIRE)” apparaisse àl’écran.
régler le degré d’annulation de moiré
* Le moiré est un type d’interférence naturelle qui produit deslignes douces ou ondulatoires sur votre écran. Il peut apparaîtreen raison des interférences entre le motif régulé du signald’entrée et le motif des luminophores du TRC.
Motif des luminophores:
Pour
TOP
CONVER V HAUT
BOT
CONVER V BAS
PURETE COULEUR
ADJ
PURETE COULEUR
ELIM MOIRAGE
ADJ
REGLAGE MOIRE
Appuyez sur
/ . . . pour décaler les ombres rouges vers lehaut et les ombres bleues vers le bas
? . . . pour décaler les ombres rouges vers lebas et les ombres bleues vers le haut
/ . . . pour décaler les ombres rouges vers lehaut et les ombres bleues vers le bas
? . . . pour décaler les ombres rouges vers lebas et les ombres bleues vers le haut
/ ou ? . . . pour sélectionner le coin del’écran que vous désirez régler
: en haut à gauche : en haut à droite
: en bas à gauche : en bas à droite
/ ou ? . . .pour réduire au minimum lesirrégularités dans la couleur
/ . . . pour activer ELIM MOIRAGE (“OUI”)
? . . . pour désactiver ELIM MOIRAGE(“NON”)
/ ou ? . . .pour régler l’écran jusqu’à ceque le moiré est au minimum
50
50
OUINON
OUINON

15
Personnalisation de l’affichage
FR
Utilisation de l’écran de menuOPTIONL’écran de menu OPTION vous permet de démagnétisermanuellement l’écran et d’ajuster les réglages tels que laposition des écrans de menu et le délai d’activation dumode d’économie d’énergie. Il vous permet également deverrouiller la commande.
Démagnétisation de l’écran
L’écran du moniteur est automatiquement démagnétisé à lamise sous tension.Vous pouvez aussi démagnétiser manuellement l’écran.
1 Appuyez sur la touche MENU.L’écran MENU apparaît.
2 Appuyez sur les touches ¨./> et >?// poursélectionner “ OPTION” et appuyez ensuite ànouveau sur la touche MENU.L’écran de menu OPTION apparaît.
3 Appuyez sur les touches ¨./> pour sélectionner“ (DEGAUSS MANUEL)”.
4 Appuyez sur la touche > /.L’écran est démagnétisé pendant environ 3 secondes.
Si vous devez démagnétiser l’écran une seconde fois,attendez au moins 20 minutes avant de répéter cetteprocédure.
L’écran de menu OPTION disparaît automatiquement aubout d’environ 30 secondes.Pour refermer l’écran de menu, appuyez à nouveau sur latouche MENU.
Changement de la position d’affichage desécrans de menu
Vous pouvez changer la position d’affichage des écrans demenu (par exemple, lorsque vous voulez régler l’imagederrière un écran de menu).
1 Appuyez sur la touche MENU.L’écran MENU apparaît.
2 Appuyez sur les touches ¨./> et >?// poursélectionner “ OPTION” et appuyez ensuite ànouveau sur la touche MENU.L’écran de menu OPTION apparaît.
3 Appuyez sur les touches ¨./> pour sélectionner“ (POSITION OSD H)” ou “ (POSITION OSD V)”.Sélectionnez “ (POSITION OSD H)” pour ajuster laposition horizontale.
Sélectionnez “ (POSITION OSD V)” pour ajuster laposition verticale.
4 Appuyez sur les touches >?// pour amener l’écrande menu à la position voulue.
L’écran de menu OPTION disparaît automatiquement aubout d’environ 30 secondes.Pour refermer l’écran de menu, appuyez à nouveau sur latouche MENU.
Pour réinitialiser les valeurs de réglage, appuyez sur latouche RESET pendant que l’écran est affiché.
MENU
MENU
OUI
DEGAUSS MANUEL
DEVERR1 MIN
OPTION
ZZ...
OUI
DEGAUSS MANUEL
DEVERR1 MIN
OPTION
ZZ...
ZZ...
POSITION OSD H
DEVERR1 MIN
OPTION
ZZ...
POSITION OSD V
DEVERR
OPTION
AUTO

16
Personnalisation de l’affichage
Verrouillage des commandes
La fonction de verrouillage des commandes désactive toutesles touches du panneau frontal, à l’exception ducommutateur d’alimentation u et de la touche MENU.
1 Appuyez sur la touche MENU.L’écran MENU apparaît.
2 Appuyez sur les touches ¨./> et >?// poursélectionner “ OPTION” et appuyez ensuite ànouveau sur la touche MENU.L’écran de menu OPTION apparaît.
3 Appuyez sur les touches ¨./> pour sélectionner“ (VERROU REGLAGES)”.
4 Appuyez sur les touches >?// pour sélectionner“VERR”.
L’écran de menu OPTION disparaît automatiquement aubout d’environ 30 secondes.Pour refermer l’écran de menu, appuyez à nouveau sur latouche MENU.
Lorsque vous avez sélectionné “VERR”, vous ne pouvezplus sélectionner aucun paramètre à l’exception de“QUITTE” et “ OPTION” dans l’écran MENU.Si vous appuyez sur une autre touche que le commutateurd’alimentation u ou la touche MENU, le repère apparaît à l’écran.
Pour désactiver le verrouillage des commandes
Répétez les étapes 1 à 3 ci-dessus et appuyez sur les touches>?// pour sélectionner “DEVERR”.
Réglage du délai d’activation du moded’économie d’énergie
Vous pouvez définir le délai au terme duquel le moniteurpasse en mode d’économie d’énergie. Voir page 19 pour desinformations plus détaillées sur les capacités d’économied’énergie de ce moniteur.
1 Appuyez sur la touche MENU.L’écran MENU apparaît.
2 Appuyez sur les touches ¨./> et >?// poursélectionner “ OPTION” et appuyez ensuite ànouveau sur la touche MENU.L’écran de menu OPTION apparaît.
3 Appuyez sur les touches ¨./> pour sélectionner“ ZZ... (ECONOMIE TEMPO)”.
4 Appuyez sur les touches >?// pour sélectionner ledélai voulu.
Lorsque ECONOMIE TEMPO est réglé sur “NON”, lemoniteur ne passe pas en mode d’économie d’énergie.
L’écran de menu OPTION disparaît automatiquement aubout d’environ 30 secondes.Pour refermer l’écran de menu, appuyez à nouveau sur latouche MENU.
Pour réinitialiser les valeurs de réglage, appuyez sur latouche RESET pendant que l’écran est affiché.
MENU
MENU
OUI
DEGAUSS MANUEL
DEVERR1 MIN
OPTION
ZZ...
OUI
DEGAUSS MANUEL
DEVERR1 MIN
OPTION
ZZ...
ZZ...
ECONOMIE TEMPO
OPTION
5 SEC60 MIN
1 MINNON
AUTO
ZZ...
VERROU REGLAGES
OPTION
DEVERR VERR
AUTO

17
Personnalisation de l’affichage
FR
Utilisation de l’écran de menuLANG (langue d’affichage)Vous avez le choix entre l’anglais, le français, l’allemand,l’espagnol, l’italien et le japonais pour l’affichage desmenus.
1 Appuyez sur la touche MENU.L’écran MENU apparaît.
2 Appuyez sur les touches ¨./> et >?// poursélectionner “ LANG” et appuyez ensuite ànouveau sur la touche MENU.L’écran de menu LANGUAGE apparaît.
3 Appuyez sur les touches ¨./> pour sélectionner lalangue d’affichage de votre choix.
ENGLISH : anglais, FRANÇAIS : français,DEUTSCH : allemand, ESPAÑOL : espagnol,ITALIANO: italien, ou : japonais.
L’écran de menu disparaît automatiquement au boutd’environ 30 secondes. Pour refermer l’écran de menu,appuyez à nouveau sur la touche MENU.
Pour réinitialiser les valeurs de réglage, appuyez sur latouche RESET pendant que l’écran est affiché.
MENU
RESET
RESET
MENU
RESET
Réinitialisation des réglages
Réinitialisation d’un paramètre
1 Appuyez sur les touches MENU, ¨./> et >?//pour sélectionner l’écran de menu contenant leparamètre que vous voulez réinitialiser.
2 Appuyez sur les touches ¨./> pour sélectionner leparamètre que vous voulez réinitialiser.
3 Appuyez sur la touche RESET.
Réinitialisation de toutes les données deréglage pour le signal d’entrée en cours
Alors qu’aucun écran de menu n’est affiché, appuyez surla touche RESET.Toutes les données de réglage pour le signal d’entrée encours sont ramenées aux valeurs de réglage par défaut.Attention que les données de réglage qui ne sont pasaffectées par les changements du signal d’entrée (langue etposition d’affichage des écrans de menu, sélection du signald’entrée, délai d’activation du mode d’économie d’énergieet fonction de verrouillage des commandes) ne sont pasramenées aux valeurs de réglage par défaut.
Réinitialisation de toutes les données deréglage pour tous les signaux d’entrée
Maintenez la touche RESET enfoncée pendant au moinsdeux secondes.Toutes les données de réglage, y compris la luminosité et lecontraste, sont ramenées aux valeurs de réglage par défaut.
ENGLISHFRANÇAISDEUTSCHESPAÑOLITALIANO
LANGUAGE

18
Caractéristiques techniques
Modes présélectionné et utilisateurCe moniteur est présélectionné pour les modes defonctionnement les plus fréquemment utilisés de manière àgarantir une vraie compatibilité “Plug & Play”.
Lorsqu’un nouveau signal d’entrée est reçu, le moniteursélectionne le mode de présélection d’usine et ajustemomentanément le calibrage de phase pour fournir uneimage de haute qualité au centre de l’image. Le calibrage estmémorisé et est immédiatement rappelé chaque fois que lemême signal d’entrée est reçu.
N°
1
2
3
4
5
6
7
8
9
10
11
12
13
14
15
16
17
18
19
20
21
22
23
24
25
26
27 *
Résolution(points × lignes)
640 × 350
640 × 480
640 × 480
640 × 480
720 × 400
720 × 400
800 × 600
800 × 600
800 × 600
832 × 624
1024 × 768
1024 × 768
1024 × 768
1024 × 768
1024 × 768
1152 × 864
1152 × 870
1280 × 960
1280 × 960
1280 × 1024
1280 × 1024
1280 × 1024
1600 × 1200
1600 × 1200
1600 × 1200
1600 × 1200
1600 × 1200
Fréquencehorizontale
31,5 kHz
31,5 kHz
37,5 kHz
43,3 kHz
31,5 kHz
37,9 kHz
37,9 kHz
46,9 kHz
53,7 kHz
49,7 kHz
48,4 kHz
56,5 kHz
60,0 kHz
60,2 kHz
68,7 kHz
67,5 kHz
68,7 kHz
60,0 kHz
85,9 kHz
64,0 kHz
80,0 kHz
91,1 kHz
75,0 kHz
81,3 kHz
87,5 kHz
93,8 kHz
106,3 kHz
Fréquenceverticale
70 Hz
60 Hz
75 Hz
85 Hz
70 Hz
85 Hz
60 Hz
75 Hz
85 Hz
75 Hz
60 Hz
70 Hz
75 Hz
75 Hz
85 Hz
75 Hz
75 Hz
60 Hz
85 Hz
60 Hz
75 Hz
85 Hz
60 Hz
65 Hz
70 Hz
75 Hz
85 Hz
Mode graphique
MCGA
VGA-G
EVGA
VESA
VGA-Text
VESA
SVGA
ESVGA
VESA
Macintosh16” couleur
VESA
VESA
EUVGA
Macintosh19” couleur
VESA
VESA
Macintosh21” couleur
VESA
VESA
VESA
VESA
VESA
VESA
VESA
VESA
VESA
VESA
Caractéristiques techniques
Pour les signaux d’entrée qui ne correspondent pas à l’undes modes présélectionnés, la technologie numériqueMultiscan de ce moniteur effectue tous les réglagesnécessaires pour veiller à ce qu’une image claire apparaisseà l’écran pour n’importe quelle synchronisation dans saplage de fréquences. Toutefois, il se peut que vous deviezeffectuer le réglage fin de la taille horizontale/verticale et lecentrage. Appuyez simplement sur la touche ASC ou réglezle moniteur en fonction des instructions de réglage. Lesréglages sont conservés automatiquement comme modeutilisateur et sont rappelés chaque fois qu’un signalcorrespondant est reçu.
Conditions de synchronisation horizontale etverticale préconiséesLa largeur de synchronisation horizontale doit être de : > 4,8% de ladurée horizontale totale.La largeur de neutralisation horizontale doit être de : > 2,5 µs.La largeur de neutralisation verticale doit être de : > 450 µs.
Remarque pour les utilisateurs WindowsVérifiez le mode d’emploi de votre carte vidéo ou le programmeutilitaire fourni avec la carte graphique et sélectionnez le taux derégénération le plus élevé de manière à maximiser les performancesdu moniteur.
Réglage de la résolution du moniteur et du nombrede couleursAjustez la résolution du moniteur et le nombre de couleurs en vousréférant au mode d’emploi de votre ordinateur. Le nombre decouleurs peut varier selon votre ordinateur ou votre carte vidéo. Leréglage de la palette de couleurs et le nombre réel de couleurs seprésentent comme suit:• High Color (16 bit) n 65.536 couleurs• True Color (24 bit) n environ 16,77 millions de couleursEn mode True Color (24 bit), la vitesse peut être inférieure.
* GDM-500PST9 uniquement

19
Caractéristiques techniques
FR
Fonction d’économie d’énergieCe moniteur répond aux directives d’économie d’énergieétablies par VESA et Energy Star, ainsi qu’aux normes plussévères de NUTEK.Si le moniteur est raccordé à un ordinateur ou à une cartegraphique vidéo compatible VESA DPMS (Display PowerManagement Signaling), le moniteur réduiraautomatiquement la consommation de courant en troisétapes, comme indiqué ci-dessous.
Un moniteur prêt à l’emploi(“Plug & Play”)Ce moniteur satisfait aux normes Display Data Channel(DDC) DDC1, DDC2B, DDC2AB et DDC2B+ de VESA.Si un serveur DDC1 est raccordé, le moniteur se synchronisesur V. CLK conformément aux normes VESA et sort l’EDID(Extended Display Identification Data) vers la ligne dedonnées.Si un serveur DDC2B, DDC2AB ou DDC2B+ est raccordé, lemoniteur commute automatiquement sur la normeappropriée.
DDC est une marque déposée de Video ElectronicsStandard Association.
RemarqueSi vous utilisez Windows 95/98, la norme DDC ne s’applique pasaux 5 connecteurs BNC. Si vous utilisez la norme DDC, raccordez leconnecteur HD15 à l’ordinateur au moyen du câble de signal vidéofourni.
Vous pouvez définir le délai au terme duquel le moniteurpasse en mode d’économie d’énergie à l’aide des écrans demenu. Définissez cette durée conformément à la procédurede “Réglage du délai d’activation du mode d’économied’énergie” à la page 16.
RemarqueSi aucun signal vidéo n’est entré sur le moniteur, le message “PASENTREE VIDEO” (page 20) apparaît. Lorsque le délai est écoulé, lafonction d’économie d’énergie fait automatiquement passer lemoniteur en mode inactif et l’indicateur u s’allume en orange.Lorsque les signaux de synchronisation horizontale et verticale sontdétectés, le moniteur repasse automatiquement en mode defonctionnement normal.
Fils d’amortissementSur un fond blanc, il se peut que vous observiez sur l’écrande très fines lignes horizontales comme illustré ci-dessous. Ils’agit des ombres des fils d’amortissement. Ce phénomèneest typique pour les tubes cathodiques, qui utilisent desgrilles d’ouverture. Les fils d’amortissement sont fixés à lagrille d’ouverture à l’intérieur du tube Trinitron de façon àamortir les vibrations de la grille d’ouverture.
Fils d’amortissement
1
2
3
4
5
Mode deconsommationd’énergie
Fonctionnementnormal
Veille(1er mode)
Interruption(2e mode)
Inactif(3e mode)
Hors tension
Ecran
actif
inactif
inactif
inactif
—
Horizontalsignal desynchro
présent
absent
présent
absent
—
Verticalsignal desynchro
présent
présent
absent
absent
—
Consommation
électrique
≤ 145 W (GDM-500PST9)≤ 125 W (GDM-400PST9)
Approx. 72 W (GDM-500PST9)Approx. 65 W (GDM-400PST9)
Approx. 8 W
Approx. 4 W
0 W
Temps dereprise
—
Approx.3 s
Approx.3 s
Approx.10 s
—
Indicateur u
Vert
Vert et orange enalternance
Vert et orange enalternance
Orange
Désactivé

20
Informations complémentaires
Messages d’avertissementLorsqu’une anomalie du signal d’entrée est détectée, l’undes messages suivants apparaît.
Informations complémentaires
1 Condition du signal d’entrée
”HORS PLAGE DE BALAYAGE” indique que le signald’entrée n’est pas supporté par les spécifications dumoniteur.
”PAS ENTREE VIDEO” indique qu’aucun signal n’estentré ou que le signal entré via le connecteur d’entréesélectionné n’est pas reçu.
2 Le connecteur d’entrée sélectionné
Indique quel connecteur d’entrée reçoit le signal erroné.Si une anomalie se produit avec le signal transmis viales deux connecteurs d’entrée, “HD15” et “BNC”s’affichent alternativement.
Pour remédier à ces problèmes, reportez-vous à la sectionde “Guide de dépannage” ci-dessous.
INFORMATIONS
HORS PLAGE DE BALAYAGE
ENTREE : HD15
Guide de dépannageCette section peut vous aider à localiser un problème et, par conséquent, vous éviter de consulter un service technique.
Symptôme Vérifiez
Pas d’image
Si l’indicateur u n’est pasallumé
Si le message “PAS ENTREEVIDEO” apparaît à l’écran ou sil’indicateur u est orange oupasse alternativement del’orange au vert
Si le message “HORS PLAGEDE BALAYAGE” apparaît àl’écran
Si aucun message n’est affichéet si l’indicateur u est vert ouclignote en orange
Si vous utilisez un systèmeMacintosh.
Si vous utilisez Windows 95/98
L’image est brouillée.
• Vérifiez si le cordon d’alimentation est correctement branché.• Vérifiez que l’interrupteur u (alimentation) est réglé sur la position “on”.
• L’écran est vide lorsque le moniteur est en mode d’économie d’énergie. Appuyez sur unetouche quelconque du clavier de l’ordinateur.
• Vérifiez si l’interrupteur d’alimentation de votre ordinateur est réglé sur la position “on”.• Vérifiez si le réglage de la sélection d’entrée est correct.• Vérifiez si le câble de signal vidéo est correctement branché et si toutes les fiches sont
fermement enfoncées dans les prises.• Vérifiez si les 5 BNC sont connectés dans le bon ordre (de gauche à droite : Rouge–Vert–
Bleu–HD–VD) (page 6).• Assurez-vous qu’aucune broche n’est pliée ou enfoncée dans le connecteur d’entrée vidéo
HD15.• Vérifiez si la carte vidéo est correctement enfoncée dans la fente de bus adéquate.
• Vérifiez si la plage de fréquence vidéo correspond à la plage spécifiée pour le moniteur.Horizontale : 30 – 94 kHz (GDM-400PST9), 30 – 107 kHz (GDM-500PST9)Verticale : 48 – 160 HzReportez-vous au mode d’emploi de votre ordinateur pour régler la plage de fréquencevidéo.
• Si vous utilisez un adaptateur de câble de signal vidéo, vérifiez s’il est correct.
• Voir “Fonction d’autodiagnostic” (page 22).
• Vérifiez si l’adaptateur Macintosh et le câble de signal vidéo sont correctement branchés(page 6).
• Si vous remplacez un ancien moniteur par ce moniteur, reconnectez l’ancien moniteur etprocédez comme suit. Installez la disquette “Windows Monitor Information Disk” (page 7) etsélectionnez “GDM-400PST9” ou “GDM-500PST9” parmi les moniteurs Sony dans l’écran desélection de moniteur de Windows 95/98. Si vous choisissez de sélectionner “Plug & Play”,connectez le moniteur à l’ordinateur à l’aide du câble de signal vidéo HD15. Vous ne pouvezpas utiliser les cinq connecteurs BNC.
• Consultez le mode d’emploi de votre carte graphique pour le réglage approprié du moniteur.• Consultez ce mode d’emploi et vérifiez si le mode graphique et la fréquence que vous
essayez d’utiliser sont supportés. Même si la fréquence est comprise dans la plage requise,certaines cartes vidéo peuvent avoir une impulsion de synchronisation trop étroite pour unesynchronisation correcte du moniteur.

21
Informations complémentaires
FR
Symptôme Vérifiez
Les couleurs ne sont pasuniformes
Vous ne parvenez pas à réglerle moniteur à l’aide des touchesdu panneau frontal
Le blanc n’est pas blanc
L’image à l’écran n’est pascentrée ou dimensionnéecorrectement
Les bords de l’image sontincurvés
Le rebord des lignes blanchesest ombré de rouge ou de bleu
L’image est floue
L’image sautille ou oscillefortement
L’image scintille
Apparition d’images fantômes
Apparition d’un motifondulatoire ou elliptique(moiré)
Deux fines lignes horizontales(fils) sont visibles
Un souffle est audible justeaprès la mise sous tension
• Démagnétisez le moniteur (page 15).Si vous placez près du moniteur un appareil qui génère un champ magnétique comme unhaut-parleur ou si vous changez l’orientation du moniteur, il est possible que les couleursperdent leur uniformité. Cette fonction sert à démagnétiser le cadre métallique du tubecathodique de façon à obtenir un champ neutre pour une reproduction uniforme descouleurs. Si un second cycle de démagnétisation est nécessaire, laissez s’écouler unintervalle d’au moins 20 minutes pour obtenir les meilleurs résultats.
• Réglez “Pureté couleur” (pages 13 – 14 ).
• Si la fonction de verrouillage des commandes est activée, désactivez-la dans le menuOPTION (page 16).
• Réglez la température des couleurs (pages 12 – 13).• Vérifiez si les 5 BNC sont connectés dans le bon ordre (de gauche à droite : Rouge–Vert–
Bleu–HD–VD) (page 6).
• Appuyez sur la touche ASC (page 7).• Réglez le centrage ou la taille de l’image (page 10).• Certains modes vidéo ne remplissent pas l’écran jusqu’aux bords. Ce problème a tendance à
se manifester avec certaines cartes vidéo.
• Réglez la géométrie (page 11).
• Réglez la convergence (pages 13 – 14).
• Réglez le contraste et la luminosité (page 9).• Démagnétisez le moniteur (page 15).
Si vous placez près du moniteur un appareil qui génère un champ magnétique comme unhaut-parleur ou si vous changez l’orientation du moniteur, il est possible que les couleursperdent leur uniformité.Cette fonction sert à démagnétiser le cadre métallique du tube cathodique de façon àobtenir un champ neutre pour une reproduction uniforme des couleurs. Si un second cyclede démagnétisation est nécessaire, laissez s’écouler un intervalle d’au moins 20 minutespour obtenir les meilleurs résultats.
• Si le contour des images est ombré de bleu ou de rouge, procédez au réglage de laconvergence (pages 13 – 14).
• Lorsque le moiré a été supprimé, il arrive que l’image devienne floue. Réduisez l’effet desuppression du moiré (pages 13 – 14).
• Isolez et éliminez toute source potentielle de champs électriques ou magnétiques. C’estgénéralement le cas des ventilateurs électriques, des éclairages fluorescents, desimprimantes laser.
• Si un autre moniteur se trouve à proximité de celui-ci, éloignez-les de façon à réduire lesinterférences.
• Branchez le moniteur sur une autre prise d’alimentation, de préférence sur un circuitdifférent.
• Essayez le moniteur sur un ordinateur différent dans une autre pièce.
• Réglez le taux de régénération de l’ordinateur pour obtenir la meilleure image possible envous référant au mode d’emploi de l’ordinateur.
• Si ce symptôme se manifeste, débranchez les câbles prolongateurs vidéo et/ou les boîtiersde commutation vidéo. Une longueur de câble excessive ou des connexions lâches peuventêtre à l’origine de l’apparition de ce symptôme.
• Supprimez le moiré (pages 13 – 14).Le moiré peut varier suivant l’ordinateur connecté.
• Suivant le rapport entre la résolution, le pas des points du moniteur et le pas de certainestrames d’image, il arrive que des arrière-plans présentent un effet de moiré. Cet effet demoiré ne peut être éliminé qu’en changeant le motif de votre bureau.
• Ces fils stabilisent la grille d’ouverture rayée verticalement (page 19). Cette grille permet lepassage d’une plus grande quantité de lumière dans l’écran, assurant ainsi au tubecathodique Trinitron des couleurs et une luminosité plus éclatantes.
• Le cycle de démagnétisation est activé à la mise sous tension. Pendant que le cycle dedémagnétisation est activé (3 secondes), un souffle peut se faire entendre. Ce même souffleest audible lors de la démagnétisation manuelle. Il ne s’agit pas d’un dysfonctionnement.
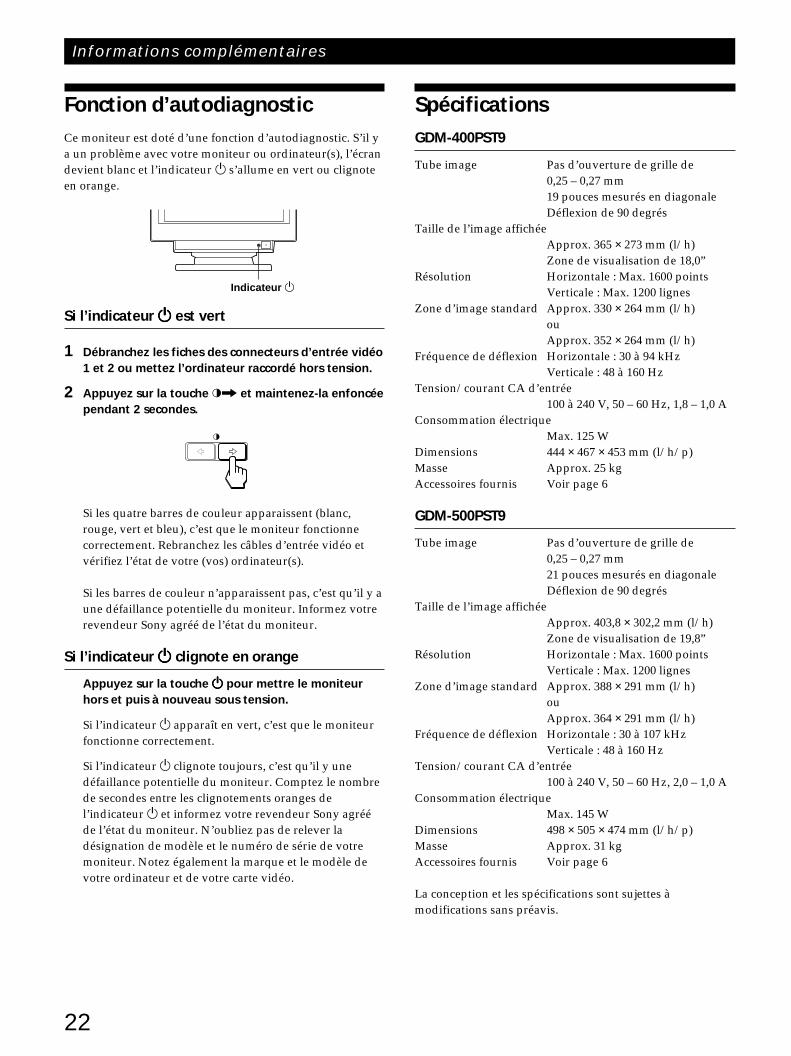
22
Informations complémentaires
Fonction d’autodiagnosticCe moniteur est doté d’une fonction d’autodiagnostic. S’il ya un problème avec votre moniteur ou ordinateur(s), l’écrandevient blanc et l’indicateur u s’allume en vert ou clignoteen orange.
Si l’indicateur uuuuu est vert
1 Débranchez les fiches des connecteurs d’entrée vidéo1 et 2 ou mettez l’ordinateur raccordé hors tension.
2 Appuyez sur la touche >/ et maintenez-la enfoncéependant 2 secondes.
Si les quatre barres de couleur apparaissent (blanc,rouge, vert et bleu), c’est que le moniteur fonctionnecorrectement. Rebranchez les câbles d’entrée vidéo etvérifiez l’état de votre (vos) ordinateur(s).
Si les barres de couleur n’apparaissent pas, c’est qu’il y aune défaillance potentielle du moniteur. Informez votrerevendeur Sony agréé de l’état du moniteur.
Si l’indicateur uuuuu clignote en orange
Appuyez sur la touche uuuuu pour mettre le moniteurhors et puis à nouveau sous tension.
Si l’indicateur u apparaît en vert, c’est que le moniteurfonctionne correctement.
Si l’indicateur u clignote toujours, c’est qu’il y unedéfaillance potentielle du moniteur. Comptez le nombrede secondes entre les clignotements oranges del’indicateur u et informez votre revendeur Sony agrééde l’état du moniteur. N’oubliez pas de relever ladésignation de modèle et le numéro de série de votremoniteur. Notez également la marque et le modèle devotre ordinateur et de votre carte vidéo.
Indicateur u
SpécificationsGDM-400PST9
Tube image Pas d’ouverture de grille de0,25 – 0,27 mm19 pouces mesurés en diagonaleDéflexion de 90 degrés
Taille de l’image affichéeApprox. 365 × 273 mm (l/h)Zone de visualisation de 18,0”
Résolution Horizontale : Max. 1600 pointsVerticale : Max. 1200 lignes
Zone d’image standard Approx. 330 × 264 mm (l/h)ouApprox. 352 × 264 mm (l/h)
Fréquence de déflexion Horizontale : 30 à 94 kHzVerticale : 48 à 160 Hz
Tension/courant CA d’entrée100 à 240 V, 50 – 60 Hz, 1,8 – 1,0 A
Consommation électriqueMax. 125 W
Dimensions 444 × 467 × 453 mm (l/h/p)Masse Approx. 25 kgAccessoires fournis Voir page 6
GDM-500PST9
Tube image Pas d’ouverture de grille de0,25 – 0,27 mm21 pouces mesurés en diagonaleDéflexion de 90 degrés
Taille de l’image affichéeApprox. 403,8 × 302,2 mm (l/h)Zone de visualisation de 19,8”
Résolution Horizontale : Max. 1600 pointsVerticale : Max. 1200 lignes
Zone d’image standard Approx. 388 × 291 mm (l/h)ouApprox. 364 × 291 mm (l/h)
Fréquence de déflexion Horizontale : 30 à 107 kHzVerticale : 48 à 160 Hz
Tension/courant CA d’entrée100 à 240 V, 50 – 60 Hz, 2,0 – 1,0 A
Consommation électriqueMax. 145 W
Dimensions 498 × 505 × 474 mm (l/h/p)Masse Approx. 31 kgAccessoires fournis Voir page 6
La conception et les spécifications sont sujettes àmodifications sans préavis.

3
DE
Getting Started
VorbereitungenSicherheitsmaßnahmen ....................................................................................................... 4Lage und Funktion der Teile und Bedienelemente ........................................................ 5Anschließen des Geräts ....................................................................................................... 6Automatisches Einstellen der Größe und Zentrierung des Bildes ............................... 7Auswählen der Sprache für die Bildschirmanzeigen ..................................................... 7Auswählen des Eingangssignals ....................................................................................... 8
Einstellen des MonitorsEinstellen von Bildhelligkeit und Kontrast ...................................................................... 9Das Bildschirmmenüsystem............................................................................................... 9Die Bildschirmanzeige BILDLG (Bildlage) .................................................................... 10Die Bildschirmanzeige GRÖSSE ...................................................................................... 10Die Bildschirmanzeige GEOM (Geometrie) ................................................................... 11Die Bildschirmanzeige ZOOM ........................................................................................ 12Die Bildschirmanzeige FARBE ........................................................................................ 12Die Bildschirmanzeige BILD ............................................................................................ 13Die Bildschirmanzeige OPTION ..................................................................................... 15Die Bildschirmanzeige LANG (Sprache) ........................................................................ 17Zurücksetzen der Einstellungen ...................................................................................... 17
Technische MerkmaleVordefinierte Modi und Benutzermodi .......................................................................... 18Energiesparfunktion .......................................................................................................... 19Dämpfungsdrähte .............................................................................................................. 19Plug & Play ......................................................................................................................... 19
Weitere InformationenWarnmeldungen ................................................................................................................ 20Störungsbehebung ............................................................................................................. 20Selbstdiagnosefunktion ..................................................................................................... 22Technische Daten ............................................................................................................... 22
AppendixTCO’99 Eco-document ......................................................................................................... i
INHALT
• Macintosh ist ein Warenzeichen der Apple Computer, Inc., in den USAund anderen Ländern.
• Windows® und MS-DOS sind eingetragene Warenzeichen derMicrosoft Corporation in den USA und anderen Ländern.
• IBM PC/AT und VGA sind eingetragene Warenzeichen der IBMCorporation in den USA.
• VESA ist ein Warenzeichen der Video Electronics Standard Association.• Alle anderen in diesem Handbuch erwähnten Produktnamen können
Warenzeichen oder eingetragene Warenzeichen der jeweiligenEigentümer sein.
• Im Handbuch sind die Warenzeichen und eingetragenen Warenzeichennicht ausdrücklich durch „™“ bzw. „®“ gekennzeichnet.

4
Vorbereitungen
Sicherheitsmaßnahmen
Aufstellung
• Achten Sie auf ausreichende Luftzufuhr, damit sich imMonitor kein Wärmestau bildet. Stellen Sie den Monitornicht auf Oberflächen wie Teppichen oder Decken oder inder Nähe von Materialien wie Gardinen undWandbehängen auf, die die Lüftungsöffnungenblockieren könnten.
• Stellen Sie den Monitor nicht in der Nähe vonWärmequellen wie Heizkörpern oder Warmluftauslässenoder an Orten auf, an denen er direktem Sonnenlicht,außergewöhnlich viel Staub, mechanischen Vibrationenoder Stößen ausgesetzt ist.
• Stellen Sie den Monitor nicht in der Nähe anderer Geräteauf, die ein starkes Magnetfeld generieren, wie zumBeispiel ein Transformator oder eineHochspannungsleitung.
Wartung
• Reinigen Sie Gehäuse, Bedienfeld und Bedienelementemit einem weichen Tuch, das Sie leicht mit einem mildenReinigungsmittel angefeuchtet haben. Verwenden Siekeine Scheuermittel, Scheuerschwämme oderLösungsmittel wie Alkohol oder Benzin.
• Berühren Sie die Bildschirmoberfläche nicht mit scharfen,rauhen oder spitzen Gegenständen wie zum BeispielKugelschreibern oder Schraubenziehern. Andernfallskönnte die Bildschirmoberfläche zerkratzt werden.
• Reinigen Sie den Bildschirm mit einem weichen Tuch.Wenn Sie ein Glasreinigungsmittel verwenden, achten Siedarauf, daß es keine Antistatik-Lösung oder ähnlicheZusätze enthält, da diese zu Kratzern auf derBeschichtung des Bildschirms führen könnten.
Transport
Wenn Sie den Monitor einmal transportieren müssen,verpacken Sie ihn wieder mit Hilfe derOriginalverpackungsmaterialien im Originalkarton.
Der dreh- und neigbare Ständer
Mit dem dreh- und neigbaren Ständer können Sie denMonitor so einstellen, wie es Ihnen angenehm ist. Dabeikönnen Sie ihn horizontal um bis zu 180° drehen undvertikal um bis zu 20° neigen.Wenn Sie den Monitor drehen oder neigen, stützen Sie ihnbitte mit beiden Händen unten ab, wie auf der Abbildungunten gezeigt.
für 100 bis 120 VWechselstrom
für 200 bis 240 VWechselstrom
Vorbereitungen
90°
90°
15°
5°
nur für 240 VWechselstrom
Warnhinweis zum Netzanschluß
• Verwenden Sie das für die Stromversorgung in IhremLand geeignete Netzkabel.Für Kunden in GroßbritannienWenn Sie den Monitor in Großbritannien verwenden,benutzen Sie bitte das mitgelieferte Kabel mit dem fürGroßbritannien geeigneten Stecker.
Beispiele für Steckertypen
• Warten Sie nach dem Ausschalten des Geräts mindestens30 Sekunden, bevor Sie das Netzkabel lösen. In dieser Zeitkann sich die statische Elektrizität auf der Oberfläche derKathodenstrahlröhre entladen.
• Wenn Sie das Gerät einschalten, wird dieKathodenstrahlröhre etwa 3 Sekunden langentmagnetisiert. Dadurch entsteht um den Metallrand derRöhre ein starkes magnetisches Feld, das Daten aufMagnetbändern oder anderen Datenträgern in der Nähebeschädigen kann. Legen Sie magnetische Datenträgerund Bänder/Disketten daher nicht zu nahe bei diesemMonitor ab.
Die Netzsteckdose sollte sich in der Nähe des Gerätsbefinden und leicht zugänglich sein.

5
DE
Getting StartedVorbereitungen
Lage und Funktion der Teile undBedienelementeWeitere Informationen finden Sie auf den in Klammernangegebenen Seiten.Die Abbildungen in der gesamten Anleitung zeigen dasModell GDM-500PST9.
Vorderseite
1 Rücksetztaste RESET (Seite 17)Zum Zurücksetzen der Werte auf die werkseitigenEinstellungen.
2 Taste ASC (Größe/Zentrierung automatischeinstellen) (Seite 7)Zum automatischen Einstellen der Größe undZentrierung der Bilder.
3 Taste INPUT (Eingang) und HD15/BNC-Anzeigen (Seite 8)Zum Auswählen des HD15- oder 5BNC-Videoeingangssignals. Mit jedem Tastendruck wechselndas Eingangssignal und die entsprechende Anzeige.
4 Tasten ¨ (Helligkeit) (./>) (Seite 8 – 17)Zum Einstellen der Bildhelligkeit.
Darüber hinaus werden auch andere Optionen mit denTasten (./>) eingestellt.
5 Taste MENU (Menü) (Seite 8 – 17)Zum Aufrufen der Bildschirmanzeige MENU.
6 Tasten > (Kontrast) (?//) (Seite 8 – 17,22)Zum Einstellen des Kontrasts.
Darüber hinaus werden auch andere Optionen mit denTasten (?//) eingestellt.
7 Netzschalter und -anzeige u (Seite 19, 22)Zum Ein- und Ausschalten des Monitors.Die Anzeige leuchtet grün, wenn der Monitoreingeschaltet ist, und blinkt grün und orange bzw.leuchtet orange, wenn der Monitor sich imEnergiesparmodus befindet.
Rückseite
8 Netzeingang AC INZur Stromversorgung des Monitors.
9 Videoeingang 1 (HD15)Zum Einspeisen von RGB-Videosignalen (0,700 Vp-p,positiv) und SYNC-Signalen.
* DDC-Standard (DDC = Display Data Channel) nach VESA
!º Videoeingang 2 (5 BNC)Zum Einspeisen von RGB-Videosignalen (0,700 Vp-p,positiv) und SYNC-Signalen.
Stift Nr.
1
2
3
4
5
6
7
Signal
Rot
Grün(zusammengesetztesGrünsignal mitSynchronisation)
Blau
ID (Masse)
DDC-Masse*
Masse Rot
Masse Grün
Signal
Masse Blau
DDC + 5V*
Masse
ID (Masse)
BidirektionaleDaten (SDA)*
H. Sync
V. Sync
Datentakt (SCL)*
Stift Nr.
8
9
10
11
12
13
14
15
5 4 3 2 1678910
1112131415
MENUINPUTRESET
ASC HD15 BNC

6
Vorbereitungen
Wenn Ihr PC nicht mit DDC2AB und DDC2B+kompatibel istDieser Monitor verwendet Stift Nr. 9 im Videosignalanschluß fürDDC2AB- und DDC2B+-Kompatibilität.An einige PC-Systeme, die mit DDC2AB oder DDC2B+ nichtkompatibel sind, können Sie Stift Nr. 9 möglicherweise nichtanschließen. Wenn Sie nicht sicher sind, ob Ihr PC-System den StiftNr. 9 unterstützt, verwenden Sie den Adapter HD15 (weiblich) -HD15 (männlich, ohne Stift Nr. 9) (nicht mitgeliefert). Achten Siedarauf, den männlichen Stecker (ohne Stift Nr. 9) an den Computeranzuschließen.
Anschließen an einen Macintosh- oderkompatiblen Computer
Der mitgelieferte Macintosh-AdapterDer mitgelieferte Macintosh-Adapter ist kompatibel mit MacintoshLC, Performa, Quadra, Power Macintosh und der Power MacintoshG3-Serie.Bei Modellen der Serie Macintosh II und älteren Power Book-Versionen ist möglicherweise ein Adapter mit Mikroschaltern (nichtmitgeliefert) erforderlich.
Verbinden über den 5-BNC-Anschluß
Für den 5-BNC-Anschluß verwenden Sie dasVideosignalkabel SMF-400 (gesondert erhältlich). SchließenSie die Kabel von links nach rechts in der folgendenReihenfolge an: Rot–Grün–Blau–HD–VD.
Hinweise• Schließen Sie die Stifte des Videosignalkabels nicht kurz.• Der DDC-Standard gilt nicht für den 5-BNC-Anschluß. Wenn
Sie mit dem DDC-Standard arbeiten wollen, verbinden Sie denHD15-Anschluß und den Computer über das mitgelieferteVideosignalkabel.
Macintosh-Adapter(mitgeliefert)
Macintosh- oderkompatiblerComputer HD15-
Videosignalkabel(mitgeliefert)
an Videoausgang
an VIDEO IN R/G/B an SYNC IN HD/VD
Die Verbindung mit demComputer erfolgt wie beimHD15-Anschluß.
an HD15
IBM PC/AT oderkompatiblerComputer
HD15-Videosignalkabel(mitgeliefert)
an Videoausgang
an HD15
Anschließen des GerätsBevor Sie mit dem Monitor arbeiten, überprüfen Sie bitte, obfolgende Teile mitgeliefert wurden:• Monitor (1)• Netzkabel (1)• HD15-Videosignalkabel (1)• Macintosh-Adapter (1)• Windows Monitor Information Disk (1)• Garantiekarte (1)• Diese Bedienungsanleitung (1)
Dieser Monitor arbeitet mit allen IBM- oder kompatiblenSystemen mit VGA oder höheren Grafikfunktionen. Siekönnen diesen Monitor mit Geräten anderer Plattformeneinsetzen, die mit Horizontalfrequenzen zwischen 30 und94 kHz (GDM-400PST9) bzw. 30 und 107 kHz (GDM-500PST9) arbeiten, einschließlich Macintosh- und PowerMacintosh-Systemen. In diesem Fall ist jedoch einKabeladapter erforderlich. Bei Ihrem Händler können Sieerfahren, welchen Adapter Sie gegebenenfalls benötigen.
Schritt 1: Schließen Sie den Monitor anden Computer an
Schließen Sie bei ausgeschaltetem Computer den Monitormit dem mitgelieferten HD15-Videosignalkabel an denComputer an.• Wenn Sie mit einem IBM PC/AT oder Kompatiblen
arbeiten, fahren Sie mit dem Abschnitt unten fort.• Wenn Sie mit einem Macintosh- oder einem kompatiblen
Computer arbeiten, fahren Sie mit dem folgendenAbschnitt, „Anschließen an einen Macintosh- oderkompatiblen Computer“, fort.
• Wenn Sie den 5-BNC-Anschluß verwenden wollen, fahrenSie mit dem Abschnitt „Verbinden über den 5-BNC-Anschluß“ fort.
Anschließen an einen IBM PC/AT oderKompatiblen
* Bei einigen Modellen ist möglicherweise ein HD15-HD15-Adapter erforderlich.
HD15-HD15-Adapter(nicht mitgeliefert)*

7
DE
Getting StartedVorbereitungen
ASC
an AC INan eineNetzsteckdose
Netzkabel (mitgeliefert)
Automatisches Einstellen derGröße und Zentrierung des BildesWenn Sie die Taste ASC drücken, werden Größe undZentrierung des Bildes automatisch so eingestellt, daß es aufden Bildschirm paßt.
1 Schalten Sie Monitor und Computer ein.
2 Drücken Sie die Taste ASC.Das Bild wird an die Bildschirmmitte angepaßt.
Hinweise• Diese Funktion ist speziell für Computer unter Windows oder
einer Software mit einer ähnlichen grafischenBenutzeroberfläche konzipiert, bei der das Bild den ganzenBildschirm ausfüllt. Die Funktion arbeitet möglicherweise nichtkorrekt, wenn die Hintergrundfarbe dunkel ist oder daseingespeiste Bild den Bildschirm nicht ganz ausfüllt, wie z. B.die MS-DOS-Eingabeaufforderung.
• Während der automatischen Größeneinstellung wirdmöglicherweise einige Sekunden lang ein leerer Bildschirmangezeigt. Dies ist keine Fehlfunktion.
• Bei Signalen für ein Bildseitenverhältnis von 5:4 (Auflösung:1280 × 1024) wird das Bild richtig angezeigt, füllt aber nicht denganzen Bildschirm.
Auswählen der Sprache für dieBildschirmanzeigenWenn Sie die Sprache für die Bildschirmanzeigen ändernwollen, schlagen Sie unter „Die Bildschirmanzeige LANG(Sprache)“ auf Seite 17 nach.Die Standardeinstellung ist Englisch.
Schritt 2: Schließen Sie das Netzkabel an
Schließen Sie bei ausgeschaltetem Monitor das Netzkabel anden Monitor an, und stecken Sie den Netzstecker in dieNetzsteckdose.
Schritt 3: Schalten Sie Monitor undComputer ein
Die Installation des Monitors ist damit abgeschlossen.
HinweisWird „NICHT IM ABTASTBEREICH“ oder „KEIN EING SIGNAL“auf dem Bildschirm angezeigt, schlagen Sie unter„Warnmeldungen“ auf Seite 20 nach.
Für Benutzer von Windows 95/98Damit Sie den Monitor optimal nutzen können, installieren Sie dieDatei mit den neuen Modellinformationen von der mitgeliefertenDiskette „Windows Monitor Information Disk“ auf Ihrem PC.Dieser Monitor entspricht dem Plug-and-Play-Standard „VESADDC“. Wenn Ihr PC bzw. Ihre Grafikkarte dem DDC-Standardentspricht, geben Sie bitte „Plug & Play Monitor (VESA DDC)“ oderden Modellnamen dieses Monitors als Monitortyp in der „ControlPanel“ von Windows 95/98 an. Wenn bei der Kommunikationzwischen Ihrem PC bzw. Ihrer Grafikkarte und dem MonitorProbleme auftreten, legen Sie die Diskette „Windows MonitorInformation Disk“ ein, und wählen Sie den Modellnamen diesesMonitors als Monitortyp aus.
Für Benutzer von Windows NT 4.0Die Installation des Monitors unter Windows NT 4.0 ist anders alsunter Windows 95/98. So brauchen Sie z.B. den Monitortyp nichtauszuwählen. Näheres zum Einstellen der Auflösung, derBildwiederholrate und der Anzahl der Farben finden Sie imBenutzerhandbuch zu Windows NT 4.0.

8
Vorbereitungen
2 Wählen Sie mit den Tasten ¨./> und >?// denBefehl „ OPTION“ aus, und drücken Sie die TasteMENU erneut.Die Bildschirmanzeige OPTION erscheint.
3 Wählen Sie mit den Tasten ¨./> die Option„ (EINGANG)“ aus.
4 Wählen Sie mit den Tasten >?// die Einstellung„AUTO“ oder „MANU“ aus.
Die Bildschirmanzeige OPTION wird nach etwa 30Sekunden automatisch ausgeblendet.Sie können die Bildschirmanzeige jedoch auch ausblenden,indem Sie die Taste MENU erneut drücken.
Weitere Informationen zum Arbeiten mit denBildschirmanzeigen finden Sie unter „DasBildschirmmenüsystem“ auf Seite 9.
HD15 BNC INPUT
MENU
MENU
ENDE
BILDLG
GRÖSSE
GEOM
FARBE
LANG
ZOOM
BILD
OPTION
OK MENU
EIN
MAN ENTMAGNET
FREIGB1 MIN
OPTION
ZZ...
Auswählen des EingangssignalsDieser Monitor ist mit zwei Signaleingängen (HD15 und5BNC) ausgestattet und kann an zwei Computerangeschlossen werden. Wenn beide Computer eingeschaltetsind, wählen Sie das anzuzeigende Eingangssignalfolgendermaßen aus.
1 Schalten Sie den Monitor und beide Computer ein.
2 Wählen Sie mit der Taste INPUT das HD15- oder5BNC-Eingangssignal aus.Mit jedem Tastendruck auf die Taste INPUT wechselndas Eingangssignal und die entsprechende Anzeige.
Auswählen des Eingangssignalmodus
Dieser Monitor verfügt über zwei Modi zurEingangssignalwahl, „AUTO“ (automatisch) und „MANU“(manuell).
Wenn „AUTO“ ausgewählt ist
Wenn am ausgewählten Anschluß kein Signal eingeht,wählt der Monitor automatisch das Signal des anderenAnschlusses aus. Wenn Sie den Computer, dessen Signalangezeigt werden soll, neu starten oder wenn sich derComputer im Energiesparmodus befindet, wählt derMonitor möglicherweise automatisch das Signal desanderen Computers aus. Dies ist darauf zurückzuführen,daß der Monitor vom unterbrochenen zum konstantenSignal wechselt. Wählen Sie das gewünschte Signal ineinem solchen Fall manuell mit der Taste INPUT aus.
Wenn „MANU“ ausgewählt wird:
Auch wenn am ausgewählten Anschluß kein Signal eingeht,wählt der Monitor nicht das Signal des anderenAnschlusses aus.
1 Drücken Sie die Taste MENU.Die Bildschirmanzeige MENU erscheint.
AUTO
ZZ...
EINGANG
1 MIN
OPTION
FREIGB
MANU

9
DE
Einstellen des Monitors
Vorbereitungen
• Verbinden Sie den Monitor mit dem Computer, undschalten Sie beide Geräte ein.
• Wählen Sie in der Bildschirmanzeige MENU die Option„ LANG“, und wählen Sie dann „DEUTSCH“ (sieheSeite 17).
Einstellen von Bildhelligkeit undKontrastDer Wert, den Sie hier einstellen, gilt für alle eingespeistenEingangssignale.
1 Drücken Sie die Tasten ¨ (Helligkeit) ./> oder >(Kontrast) ?//.Die Bildschirmanzeige „HELLIGKEIT/KONTRAST“erscheint.
2 Zum Einstellen der HelligkeitDrücken Sie die Tasten ¨./>.
> . . . Das Bild wird heller.. . . . Das Bild wird dunkler.
Zum Einstellen des KontrastsDrücken Sie die Tasten >?//.
/ . . . Der Kontrast wird stärker.? . . . Der Kontrast wird schwächer.
Die Bildschirmanzeige wird nach etwa 3 Sekundenautomatisch ausgeblendet.
Drücken Sie zum Zurücksetzen des Wertes die TasteRESET, bevor die Bildschirmanzeige ausgeblendet wird.Helligkeit und Kontrast werden damit auf die werkseitigenEinstellungen zurückgesetzt.
* Die Horizontal- und Vertikalfrequenzen des geradeeingespeisten Eingangssignals erscheinen in derBildschirmanzeige HELLIGKEIT/KONTRAST.
Horizontalfrequenz* Vertikalfrequenz*
HELLIGKEIT/KONTRAST
26 26
80.0kHz/ 75Hz
Einstellen des Monitors
Das BildschirmmenüsystemDie meisten Einstellungen nehmen Sie über dieBildschirmanzeige MENU vor.
Bildschirmanzeige MENU
Rufen Sie mit der Taste MENU die BildschirmanzeigeMENU (das Menü) auf.Die Bildschirmanzeige MENU enthält Befehle zumAufrufen weiterer Bildschirmanzeigen, die im folgendenbeschrieben werden.
1 FARBEZum Aufrufen der Bildschirmanzeige FARBE, mit derSie die Farbtemperatur einstellen können.
2 BILDLGZum Aufrufen der Bildschirmanzeige BILDLAGE, mitder Sie die Zentrierung des Bildes einstellen können.
3 BILDZum Aufrufen der Bildschirmanzeige BILD, mit der Siedie vertikale und horizontale Konvergenz usw.einstellen können.
4 ZOOMZum Aufrufen der Bildschirmanzeige ZOOM, mit derSie das Bild vergrößern und verkleinern können.
5 OPTIONZum Aufrufen der Bildschirmanzeige OPTION, mit derSie die Position der Bildschirmanzeigen einstellen undden Bildschirm entmagnetisieren können usw.
6 GRÖSSEZum Aufrufen der Bildschirmanzeige GRÖSSE, mit derSie die Bildgröße einstellen können.
7 LANGZum Aufrufen der Bildschirmanzeige LANGUAGE, mitder Sie die Sprache auswählen können.
8 GEOMZum Aufrufen der Bildschirmanzeige GEOMETRIE,mit der Sie die Bildrotation und Kissenverzeichnungusw. korrigieren können.
9 ENDEZum Schließen der Bildschirmanzeige MENU.
MENU
MENU
ENDE
BILDLG
GRÖSSE
GEOM
FARBE
LANG
ZOOM
BILD
OPTION
OK MENU

10
Einstellen des Monitors
Die Bildschirmanzeige GRÖSSEMit der Bildschirmanzeige GRÖSSE können Sie die Größedes Bildes einstellen.Der Wert, den Sie hier einstellen, wird nur für das geradeeingespeiste Eingangssignal gespeichert.
1 Drücken Sie die Taste MENU.Die Bildschirmanzeige MENU erscheint.
2 Wählen Sie mit den Tasten ¨./> und >?// denBefehl „ GRÖSSE“ aus, und drücken Sie die TasteMENU erneut.Die Bildschirmanzeige GRÖSSE erscheint.
3 Zum Einstellen der BildbreiteDrücken Sie die Tasten >?//.
/ . . . Das Bild wird breiter? . . . Das Bild wird schmaler
Zum Einstellen der BildhöheDrücken Sie die Tasten ¨./>.
> . . . Das Bild wird höher. . . . Das Bild wird niedriger
Die Bildschirmanzeige wird nach etwa 30 Sekundenautomatisch ausgeblendet.Sie können die Bildschirmanzeige jedoch auch ausblenden,indem Sie die Taste MENU erneut drücken.
Drücken Sie zum Zurücksetzen des Wertes die TasteRESET, bevor die Bildschirmanzeige ausgeblendet wird.Bildbreite und -höhe werden damit auf die werkseitigenEinstellungen zurückgesetzt.
MENU
GRÖSSE
26
73
Die Bildschirmanzeige BILDLG(Bildlage)Mit der Bildschirmanzeige BILDLAGE können Sie dieZentrierung des Bildes einstellen.Der Wert, den Sie hier einstellen, wird nur für das geradeeingespeiste Eingangssignal gespeichert.
1 Drücken Sie die Taste MENU.Die Bildschirmanzeige MENU erscheint.
2 Wählen Sie mit den Tasten ¨./> und >?// denBefehl „ BILDLG“ aus, und drücken Sie die TasteMENU erneut.Die Bildschirmanzeige BILDLAGE erscheint.
3 Zum Einstellen der horizontalen BildpositionDrücken Sie die Tasten >?//.
/ . . . Das Bild wird nach rechtsverschoben
? . . . Das Bild wird nach linksverschoben
Zum Einstellen der vertikalen BildpositionDrücken Sie die Tasten ¨./>.
> . . . Das Bild wird nach obenverschoben
. . . . Das Bild wird nach untenverschoben
Die Bildschirmanzeige wird nach etwa 30 Sekundenautomatisch ausgeblendet.Sie können die Bildschirmanzeige jedoch auch ausblenden,indem Sie die Taste MENU erneut drücken.
Drücken Sie zum Zurücksetzen des Wertes die Taste RESET,bevor die Bildschirmanzeige ausgeblendet wird.Horizontale und vertikale Bildposition werden damit aufdie werkseitigen Einstellungen zurückgesetzt.
BILDLAGE
26
73
MENU

11
DE
Einstellen des Monitors
Die Bildschirmanzeige GEOM(Geometrie)Mit der Einstellung GEOM (Geometrie) können Sie Formund Ausrichtung des Bildes festlegen.Der Wert für die Bildrotation, den Sie hier einstellen, wirdfür alle eingespeisten Eingangssignale gespeichert. Alleanderen Einstellungen werden nur für das geradeeingespeiste Eingangssignal gespeichert.
1 Drücken Sie die Taste MENU.Die Bildschirmanzeige MENU erscheint.
2 Wählen Sie mit den Tasten ¨./> und >?// denBefehl „ GEOM“ aus, und drücken Sie die TasteMENU erneut.Die Bildschirmanzeige GEOMETRIE erscheint.
3 Wählen Sie mit den Tasten ¨./> die einzustellendeOption aus.
Option
ROTATION
KISSEN
KISSEN BALANCE
TRAPEZ
TRAPEZ BALANCE
Zum
Korrigieren der Bildrotation
Einstellen der Bildränder
Einstellen der Balance der Bildränder
Einstellen der Bildform
Einstellen der Balance der Bildform
MENU
ROTATION
GEOMETRIE
26
4 Stellen Sie mit den Tasten >?// die Option ein.
Einzustellende Option
ROTATION
KISSEN
KISSEN BALANCE
TRAPEZ
TRAPEZ BALANCE
Taste
/ . . . Das Bild wird im Uhrzeigersinngedreht
? . . . Das Bild wird gegen denUhrzeigersinn gedreht
/ . . . Das Bild wird an den Seitennach außen gewölbt
? . . . Das Bild wird an den Seitennach innen gewölbt
/ . . . Das Bild wird an den Seitennach rechts gewölbt
? . . . Das Bild wird an den Seitennach links gewölbt
/ . . . Der obere Rand des Bildes wirdverlängert
? . . . Der obere Rand des Bildes wirdverkürzt
/ . . . Der obere Rand des Bildes wirdnach rechts verschoben
? . . . Der obere Rand des Bildes wirdnach links verschoben
Die Bildschirmanzeige wird nach etwa 30 Sekundenautomatisch ausgeblendet.Sie können die Bildschirmanzeige jedoch auch ausblenden,indem Sie die Taste MENU erneut drücken.
Drücken Sie zum Zurücksetzen des Wertes die TasteRESET, bevor die Bildschirmanzeige ausgeblendet wird.Die ausgewählte Option wird auf die werkseitigeEinstellung zurückgesetzt.

12
Einstellen des Monitors
Die Bildschirmanzeige FARBESie können die Farbtemperatur des Monitors ändern. Solassen sich zum Beispiel die Farben eines Bildes auf demBildschirm präzise auf die Farben eines gedruckten Bildesabstimmen.Der Wert, den Sie hier einstellen, wird für alle eingespeistenEingangssignale gespeichert.
1 Drücken Sie die Taste MENU.Die Bildschirmanzeige MENU erscheint.
2 Wählen Sie mit den Tasten ¨./> und >?// denBefehl „ FARBE“ aus, und drücken Sie die TasteMENU erneut.Die Bildschirmanzeige FARBE erscheint.
3 Wählen Sie mit den Tasten >?// dieFarbtemperatur aus.
In der Bildschirmanzeige stehen dreiFarbtemperaturmodi zur Verfügung.Folgende Werte sind voreingestellt:5000K, 6500K, 9300K
MENU
FARBE
R BIAS
5000K 6500K
50G BIAS 50B B IAS 50R GAIN 50G GAIN 50B GAIN 50
9300K
Die Bildschirmanzeige ZOOMMit der Bildschirmanzeige ZOOM können Sie das Bildvergrößern bzw. verkleinern.Der Wert, den Sie hier einstellen, wird nur für das geradeeingespeiste Eingangssignal gespeichert.
1 Drücken Sie die Taste MENU.Die Bildschirmanzeige MENU erscheint.
2 Wählen Sie mit den Tasten ¨./> und >?// denBefehl „ ZOOM“ aus, und drücken Sie die TasteMENU erneut.Die Bildschirmanzeige ZOOM erscheint.
3 Stellen Sie mit den Tasten >?// den Zoom für dasBild ein.
/ . . . Das Bild wird vergrößert? . . . Das Bild wird verkleinert
Die Bildschirmanzeige wird nach etwa 30 Sekundenautomatisch ausgeblendet.Sie können die Bildschirmanzeige jedoch auch ausblenden,indem Sie die Taste MENU erneut drücken.
Drücken Sie zum Zurücksetzen des Wertes die Taste RESET,bevor die Bildschirmanzeige ausgeblendet wird.
HinweisSobald die maximale bzw. minimale Höhe bzw. Breite des Bildeserreicht ist, läßt sich der Zoom nicht weiter ändern.
MENU
ZOOM
73V26H

13
DE
Einstellen des MonitorsEinstellen des Monitors
FARBE
6500K 9300K
G BIAS 50B B IAS 50R GAIN 50G GAIN 50B GAIN 50
R B IAS 76
1
Die Bildschirmanzeige BILDUnter Umständen erscheinen um Objekte auf demBildschirm rote oder blaue Schatten. Sie können in diesemFall die Konvergenz einstellen, so daß die Schattenverschwinden. Erscheinen auf dem Bildschirmwellenförmige oder elliptische Muster, können Sie diese mitder Funktion MOIREKORREKTUR eliminieren.Wenn an den vier Ecken des Bildschirms durch denErdmagnetismus verursachte Farbunreinheiten auftreten,korrigieren Sie diese mit der FARBREINHEIT-Funktion.Der Wert für MOIREKORREKTUR, den Sie hier einstellen,wird nur für das gerade eingespeiste Eingangssignalgespeichert. Alle anderen Einstellungen werden für alleeingespeisten Eingangssignale gespeichert.
1 Drücken Sie die Taste MENU.Die Bildschirmanzeige MENU erscheint.
2 Wählen Sie mit den Tasten ¨./> und >?// denBefehl „ BILD“ aus, und drücken Sie die TasteMENU erneut.Die Bildschirmanzeige BILD erscheint.
3 Wählen Sie mit den Tasten ¨./> die einzustellendeOption aus.
Option
H KONVERGENZ
V KONVERGENZ
TOP
V KONVER OBEN
BOT
V KONVER UNTEN
Zum
Einstellen der horizontalen Konvergenz
Einstellen der vertikalen Konvergenz
Einstellen der vertikalen Konvergenz imoberen Bildschirmbereich
Einstellen der vertikalen Konvergenz imunteren Bildschirmbereich
MENU
BILD
TOPBOT
H KONVERGENZ
26ADJ
(Fortsetzung)
4 Feineinstellen der FarbtemperaturWählen Sie mit den Tasten ¨./> eine Option aus, undstellen Sie diese mit den Tasten >?// ein.
Wählen Sie R (rot), G (grün) oder B (blau) BIAS, umden Schwarzwert der einzelnen Farbsignale einzustellen.
Wählen Sie R (rot), G (grün) oder B (blau) GAIN, umden Weißwert der einzelnen Farbsignale einzustellen.
Der Wert „5000K”, „6500K” bzw. „9300K” wirdausgeblendet, und die neuen Farbtemperaturwerte fürdie drei Farbtemperaturmodi werden gespeichert.Der Farbtemperaturmodus wechselt wie folgt:5000Kn 1, 6500Kn 2, 9300Kn 3
Die Bildschirmanzeige wird nach etwa 30 Sekundenautomatisch ausgeblendet.Sie können die Bildschirmanzeige jedoch auch ausblenden,indem Sie die Taste MENU erneut drücken.
Drücken Sie zum Zurücksetzen des Wertes die TasteRESET, bevor die Bildschirmanzeige ausgeblendet wird. Dieausgewählte Option wird auf die werkseitigenEinstellungen zurückgesetzt.

14
Einstellen des Monitors
EinzustellendeOption
TOP
V KONVER OBEN
BOT
V KONVER UNTEN
FARBREINHEIT
ADJ
FARBREINHEIT
MOIREKORREKTUR
ADJ
MOIRE EINST
Taste
/ . . . Die Rotkomponente wird nach oben, dieBlaukomponente nach unten verschoben
? . . . Die Rotkomponente wird nach unten, dieBlaukomponente nach oben verschoben
/ . . . Die Rotkomponente wird nach oben, dieBlaukomponente nach unten verschoben
? . . . Die Rotkomponente wird nach unten, dieBlaukomponente nach oben verschoben
/ oder ? . . . Hiermit wählen Sie die Eckedes Bildschirms aus, die korrigiert werden soll.
: oben links : oben rechts
: unten links : unten rechts
/ oder ? . . . Farbstörungen jeglicher Artwerden möglichst geringgehalten.
/ . . . MOIREKORREKTUR wird auf „EIN“eingestellt
? . . . MOIREKORREKTUR wird auf „AUS“eingestellt
/ oder ? . . . Der Monitor wird so eingestellt,daß der Moiré-Effekt möglichstgering ausfällt.
EinzustellendeOption
H KONVERGENZ
V KONVERGENZ
Taste
/ . . . Die Rotkomponente wird nach rechts, dieBlaukomponente nach links verschoben
? . . . Die Rotkomponente wird nach links, dieBlaukomponente nach rechts verschoben
/ . . . Die Rotkomponente wird nach oben, dieBlaukomponente nach unten verschoben
? . . . Die Rotkomponente wird nach unten, dieBlaukomponente nach oben verschoben
4 Stellen Sie mit den Tasten >?// die Option ein.
Option
FARBREINHEIT
ADJ
FARBREINHEIT
MOIREKORREKTUR*
ADJ
MOIRE EINST
Zum
Auswählen einer der vier Ecken, beidenen aufgrund des Erdmagnetismuseine Farbkorrektur erforderlich ist
Korrigieren der Farbe in einer dervier Ecken des Bildschirms
Ein- und Ausschalten der Moiré-Korrektur („EIN“ oder „AUS“).MOIREKORREKTUR muß auf „EIN“eingestellt sein, damit„ ADJ (MOIRE EINST)“ auf demBildschirm angezeigt wird.
Einstellen des Grads der Moiré-Korrektur
* Moiré ist eine natürliche Interferenz, die wellenförmige Linienauf dem Bildschirm verursacht. Diese Linien können durch dieInterferenz zwischen dem geregelten Bildmuster desEingangssignals und dem Phosphor-Pitch-Muster derKathodenstrahlröhre verursacht werden.
Beispiel für Moiré-Effekt:
50
EINAUS
EINAUS
50
HinweisDas Bild kann verschwommen sein, wenn MOIREKORREKTUR auf„EIN“ gesetzt ist.
Die Bildschirmanzeige wird nach etwa 30 Sekundenautomatisch ausgeblendet.Sie können die Bildschirmanzeige jedoch auch ausblenden,indem Sie die Taste MENU erneut drücken.
Drücken Sie zum Zurücksetzen des Wertes die TasteRESET, bevor die Bildschirmanzeige ausgeblendet wird.Die ausgewählte Option wird auf die werkseitigeEinstellung zurückgesetzt.

15
DE
Einstellen des Monitors
Die Bildschirmanzeige OPTIONMit der Bildschirmanzeige OPTION können Sie denBildschirm von Hand entmagnetisieren sowie die Positionder Bildschirmanzeige und die Verzögerung für dieEnergiesparfunktion einstellen. Außerdem können Sie dieBedienelemente sperren.
Entmagnetisieren des Bildschirms
Der Monitorbildschirm wird automatisch entmagnetisiert,wenn das Gerät eingeschaltet wird.Sie können den Monitor aber auch von Handentmagnetisieren.
1 Drücken Sie die Taste MENU.Die Bildschirmanzeige MENU erscheint.
2 Wählen Sie mit den Tasten ¨./> und >?// denBefehl „ OPTION“ aus, und drücken Sie die TasteMENU erneut.Die Bildschirmanzeige OPTION erscheint.
3 Wählen Sie mit den Tasten ¨./> die Option „(MAN ENTMAGNET)“ aus.
4 Drücken Sie die Taste >/.Der Bildschirm wird etwa 3 Sekunden langentmagnetisiert.
Wenn Sie den Bildschirm ein zweites Mal entmagnetisierenwollen, warten Sie mindestens 20 Minuten, bevor Sie dieoben erläuterten Schritte erneut ausführen.
Die Bildschirmanzeige OPTION wird nach etwa 30Sekunden automatisch ausgeblendet.Sie können die Bildschirmanzeige jedoch auch ausblenden,indem Sie die Taste MENU erneut drücken.
MENU
MENU
EIN
MAN ENTMAGNET
FREIGB1 MIN
OPTION
ZZ...
EIN
MAN ENTMAGNET
FREIGB1 MIN
OPTION
ZZ...
ZZ...
POSITION H
FREIGB1 MIN
OPTION
ZZ...
POSITION V
FREIGB
OPTION
AUTO
Ändern der Position derBildschirmanzeigen
Sie können die Bildschirmanzeigen verschieben, wenn Sie z. B.den Bereich hinter einer Bildschirmanzeige einstellen wollen.
1 Drücken Sie die Taste MENU.Die Bildschirmanzeige MENU erscheint.
2 Wählen Sie mit den Tasten ¨./> und >?// denBefehl „ OPTION“ aus, und drücken Sie die TasteMENU erneut.Die Bildschirmanzeige OPTION erscheint.
3 Wählen Sie mit den Tasten ¨./> die Option „(POSITION H)“ oder „ (POSITION V)“.Wählen Sie „ (POSITION H)“, um die Position in derHorizontalen einzustellen.
Wählen Sie „ (POSITION V)“, um die Position in derVertikalen einzustellen.
4 Verschieben Sie die Bildschirmanzeige mit den Tasten>?// an die gewünschte Position.
Die Bildschirmanzeige OPTION wird nach etwa 30Sekunden automatisch ausgeblendet.Sie können die Bildschirmanzeige jedoch auch ausblenden,indem Sie die Taste MENU erneut drücken.
Drücken Sie zum Zurücksetzen des Wertes die TasteRESET, bevor die Bildschirmanzeige ausgeblendetwird.

16
Einstellen des Monitors
Einstellen der Verzögerung für dieEnergiesparfunktion
Sie können eine Verzögerungszeit angeben, nach der derMonitor in den Energiesparmodus wechselt. WeitereInformationen zu der Energiesparfunktion dieses Monitorsfinden Sie auf Seite 19.
1 Drücken Sie die Taste MENU.Die Bildschirmanzeige MENU erscheint.
2 Wählen Sie mit den Tasten ¨./> und >?// denBefehl „ OPTION“ aus, und drücken Sie die TasteMENU erneut.Die Bildschirmanzeige OPTION erscheint.
3 Wählen Sie mit den Tasten ¨./> die Option„ ZZ... (STROMSPAREINST)“ aus.
4 Wählen Sie mit den Tasten >?// die gewünschteVerzögerungszeit aus.
Wenn STROMSPAREINST auf „AUS“ eingestellt ist,wechselt der Monitor nicht in den Energiesparmodus.
Die Bildschirmanzeige OPTION wird nach etwa 30Sekunden automatisch ausgeblendet.Sie können die Bildschirmanzeige jedoch auch ausblenden,indem Sie die Taste MENU erneut drücken.
Drücken Sie zum Zurücksetzen des Wertes die TasteRESET, bevor die Bildschirmanzeige ausgeblendet wird.
MENU
MENU
EIN
MAN ENTMAGNET
FREIGB1 MIN
OPTION
ZZ...
Sperren der Bedienelemente
Mit der Tastensperrfunktion können Sie alleBedienelemente an der Vorderseite mit Ausnahme desNetzschalters u und der Taste MENU sperren.
1 Drücken Sie die Taste MENU.Die Bildschirmanzeige MENU erscheint.
2 Wählen Sie mit den Tasten ¨./> und >?// denBefehl „ OPTION“ aus, und drücken Sie die TasteMENU erneut.Die Bildschirmanzeige OPTION erscheint.
3 Wählen Sie mit den Tasten ¨./> die Option„ (TASTATUR)“ aus.
4 Wählen Sie mit den Tasten >?// die Option„SPER“ aus.
Die Bildschirmanzeige OPTION wird nach etwa 30Sekunden automatisch ausgeblendet.Sie können die Bildschirmanzeige jedoch auch ausblenden,indem Sie die Taste MENU erneut drücken.
Nachdem Sie „SPER“ ausgewählt haben, können Sie in derBildschirmanzeige MENU nur noch die Befehle „ENDE“und „ OPTION“ wählen.Wenn Sie ein anderes Bedienelement als den Netzschalter uund die Taste MENU betätigen, erscheint das Symbol auf dem Bildschirm.
So heben Sie die Tastensperre wieder auf
Gehen Sie wie in Schritt 1 bis 3 oben erläutert vor, undwählen Sie mit den Tasten >?// die Option „FREIGB“ aus.
EIN
MAN ENTMAGNET
FREIGB1 MIN
OPTION
ZZ...
ZZ...
STROMSPAREINST
OPTION
5 SEC60 MIN
1 MINAUS
AUTO
ZZ...
TASTATUR
OPTION
FREIGB SPER
AUTO

17
DE
Einstellen des Monitors
MENU
RESET
RESET
RESET
Zurücksetzen der Einstellungen
Zurücksetzen einer einzelnen eingestelltenOption
1 Wählen Sie mit den Tasten MENU, ¨./> und>?// die Bildschirmanzeige mit derzurückzusetzenden Option aus.
2 Wählen Sie mit den Tasten ¨./> diezurückzusetzende Option aus.
3 Drücken Sie die Taste RESET.
Zurücksetzen aller Einstellungen für dasaktuelle Eingangssignal
Drücken Sie die Taste RESET, wenn keineBildschirmanzeige zu sehen ist.Alle Einstellungen für das aktuelle Eingangssignal werdenauf die werkseitigen Einstellungen zurückgesetzt.Beachten Sie bitte, daß Einstellungen, die von einemWechsel des Eingangssignals nicht beeinflußt werden(Sprache der Bildschirmanzeigen, Bildlage,Eingangssignalauswahl, Verzögerung fürEnergiesparfunktion und Sperrung der Bedienelemente),nicht auf die werkseitigen Einstellungen zurückgesetztwerden.
Zurücksetzen aller Einstellungen für alleEingangssignale
Halten Sie die Taste RESET mehr als zwei Sekunden langgedrückt.Alle Einstellungen einschließlich Helligkeit und Kontrastwerden auf die werkseitigen Werte zurückgesetzt.
Die Bildschirmanzeige LANG(Sprache)Für die Bildschirmanzeigen stehen die Sprachen Englisch,Französisch, Deutsch, Spanisch, Italienisch und Japanischzur Verfügung.
1 Drücken Sie die Taste MENU.Die Bildschirmanzeige MENU erscheint.
2 Wählen Sie mit den Tasten ¨./> und >?// denBefehl „ LANG“ aus, und drücken Sie die TasteMENU erneut.Die Bildschirmanzeige LANGUAGE erscheint.
3 Wählen Sie mit den Tasten ¨./> die gewünschteSprache aus.
ENGLISH: Englisch, FRANÇAIS: Französisch,DEUTSCH: Deutsch, ESPAÑOL: Spanisch,ITALIANO: Italienisch oder : Japanisch
Die Bildschirmanzeige wird nach etwa 30 Sekundenautomatisch ausgeblendet. Sie können dieBildschirmanzeige jedoch auch ausblenden, indem Sie dieTaste MENU erneut drücken.
Drücken Sie zum Zurücksetzen des Wertes auf Englisch dieTaste RESET, bevor die Bildschirmanzeige ausgeblendetwird.
MENU
ENGLISHFRANÇAISDEUTSCHESPAÑOLITALIANO
LANGUAGE

18
Technische Merkmale
Vordefinierte Modi undBenutzermodiDieser Monitor verfügt über werkseitig vordefinierte Modifür die gängigsten Industriestandards und bietet somitechte “Plug & Play”-Unterstützung.
Wenn ein neues Eingangssignal eingespeist wird, wählt derMonitor den geeigneten werkseitig vordefinierten Modusaus und nimmt eine Phasenkalibrierung in bezug auf dieBildschirmmitte vor, so daß eine hohe Bildqualität erzieltwerden kann. Die Kalibrierungseinstellung wirdgespeichert und sofort abgerufen, wann immer dasselbeEingangssignal eingeht.
Nr.1
2
3
4
5
6
7
8
9
10
11
12
13
14
15
16
17
18
19
20
21
22
23
24
25
26
27 *
Auflösung(Punkte ×Zeilen)640 × 350
640 × 480
640 × 480
640 × 480
720 × 400
720 × 400
800 × 600
800 × 600
800 × 600
832 × 624
1024 × 768
1024 × 768
1024 × 768
1024 × 768
1024 × 768
1152 × 864
1152 × 870
1280 × 960
1280 × 960
1280 × 1024
1280 × 1024
1280 × 1024
1600 × 1200
1600 × 1200
1600 × 1200
1600 × 1200
1600 × 1200
Horizontal-frequenz31,5 kHz
31,5 kHz
37,5 kHz
43,3 kHz
31,5 kHz
37,9 kHz
37,9 kHz
46,9 kHz
53,7 kHz
49,7 kHz
48,4 kHz
56,5 kHz
60,0 kHz
60,2 kHz
68,7 kHz
67,5 kHz
68,7 kHz
60,0 kHz
85,9 kHz
64,0 kHz
80,0 kHz
91,1 kHz
75,0 kHz
81,3 kHz
87,5 kHz
93,8 kHz
106,3 kHz
Vertikal-frequenz70 Hz
60 Hz
75 Hz
85 Hz
70 Hz
85 Hz
60 Hz
75 Hz
85 Hz
75 Hz
60 Hz
70 Hz
75 Hz
75 Hz
85 Hz
75 Hz
75 Hz
60 Hz
85 Hz
60 Hz
75 Hz
85 Hz
60 Hz
65 Hz
70 Hz
75 Hz
85 Hz
GrafikmodusMCGA
VGA-G
EVGA
VESA
VGA-Text
VESA
SVGA
ESVGA
VESA
Macintosh16” Farbe
VESA
VESA
EUVGA
Macintosh19” Farbe
VESA
VESA
Macintosh21” Farbe
VESA
VESA
VESA
VESA
VESA
VESA
VESA
VESA
VESA
VESA
Technische Merkmale
Bei Eingangssignalen, die keinem der werkseitigvoreingestellten Modi entsprechen, führt der Monitor mitHilfe seiner digitalen Multiscan-Technologie alleEinstellungen durch, die bei einem beliebigen Timinginnerhalb des für den Monitor gültigen Frequenzbereichsfür ein scharfes Bild nötig sind. Es kann jedoch mituntererforderlich werden, die Bildhöhe und -breite sowie diehorizontale und vertikale Zentrierung feineinzustellen.Drücken Sie dazu einfach die Taste ASC, oder stellen Sieden Monitor wie in dieser Anleitung beschrieben ein. DieEinstellungen werden automatisch als Benutzermodusgespeichert und abgerufen, wann immer das betreffendeEingangssignal eingeht.
Empfohlene Werte für das horizontale undvertikale TimingEmpfohlenes horizontales Synchronbreitenverhältnis: >4,8% deshorizontalen Gesamt-Timing.Empfohlene horizontale Austastbreite: >2,5 µsek.Empfohlene vertikale Austastbreite: >450 µsek.
Hinweis für Benutzer von WindowsWenn Sie mit Windows arbeiten, sehen Sie in der Dokumentationoder im Dienstprogramm zu Ihrer Grafikkarte nach, welches diehöchste Auffrischungsrate ist, und wählen Sie diese aus, um dieLeistung des Geräts zu optimieren.
Einstellen der Auflösung des Monitors und derAnzahl der FarbenStellen Sie die Auflösung des Monitors und die Anzahl der Farbenanhand der Anweisungen im Benutzerhandbuch zu IhremComputer ein. Die Anzahl der Farben kann je nach Computer oderGrafikkarte variieren. Je nach der Einstellung unter „Farbpalette“werden unterschiedlich viele Farben dargestellt:• High Color (16 Bit) n 65.536 Farben• True Color (24 Bit) n ca. 16,77 Mio. FarbenIm True Color-Modus (24 Bit) kann sich die Geschwindigkeitverringern.
* nur für GDM-500PST9

19
DE
Technische MerkmaleTechnische Merkmale
EnergiesparfunktionDieser Monitor entspricht den Energiesparrichtlinien derVESA und des Energy Star-Programms sowie des engergefaßten NUTEK-Standards.Wenn der Monitor an einen Computer oder eine Grafikkarteangeschlossen ist, der bzw. die VESA DPMS unterstützt(Display Power Management Signaling) wird derStromverbrauch des Geräts in drei Stufen, wie untenerläutert reduziert.
DämpfungsdrähteBei einem weißen Hintergrund können, wie untenabgebildet, sehr dünne, horizontale Linien auf demBildschirm zu sehen sein. Diese Linien sind Schatten derDämpfungsdrähte und eine Charakteristik vonKathodenstrahlröhren mit Streifenmaske. Die Drähtebefinden sich an der Streifenmaske auf der Innenseite derTrinitron-Röhre und dämpfen Vibrationen derStreifenmaske.
Plug & PlayDieser Monitor entspricht den DDC-Standards (DDC =Display Data Channel) DDC1, DDC2B, DDC2AB undDDC2B+ der VESA.Ist der Monitor an ein DDC1-Host-System angeschlossen,wird er gemäß dem VESA-Standard mit V.CLKsynchronisiert und gibt EDID-Signale (EDID = ExtendedDisplay Identification Data) an die Datenleitung aus.Ist der Monitor an ein DDC2B-, DDC2AB- oder DDC2B+-Host-System angeschlossen, schaltet er automatisch auf denentsprechenden Standard um.
DDC ist ein Warenzeichen der Video Electronics StandardAssociation.
HinweisWenn Sie mit Windows 95/98 arbeiten, gilt der DDC-Standardnicht für den 5-BNC-Anschluß. Wenn Sie mit dem DDC-Standardarbeiten wollen, verbinden Sie den HD15-Anschluß und denComputer über das mitgelieferte Videosignalkabel.
Sie können über die entsprechende Bildschirmanzeige eineVerzögerungszeit angeben, nach der der Monitor in denEnergiesparmodus wechselt. Stellen Sie dieVerzögerungszeit wie unter „Einstellen der Verzögerungfür die Energiesparfunktion“ auf Seite 16 beschrieben ein.
HinweisWird kein Videosignal in den Monitor eingespeist, erscheint dieMeldung „KEIN EING SIGNAL“ (siehe Seite 20). Wenn dieVerzögerungszeit verstrichen ist, schaltet die Energiesparfunktionden Monitor automatisch in den deaktivierten Modus, und dieAnzeige u leuchtet orange. Sobald jedoch horizontale und vertikaleSynchronisationssignale eingehen, schaltet der Monitorautomatisch wieder in den normalen Betriebsmodus.
Dämpfungsdrahte
1
2
3
4
5
Energie-sparstufe
Normalbetrieb
Bereitschaft(1. Stufe)
Unterbrechung(2. Stufe)
Deaktiviert(3. Stufe)
Ausgeschaltet
Bildschirm
aktiv
leer
leer
leer
—
HorizontalesSynchronisationssignal
vorhanden
nicht vorhanden
vorhanden
nicht vorhanden
—
VertikalesSynchronisationssignal
vorhanden
vorhanden
nicht vorhanden
nicht vorhanden
—
Leistungsaufnahme
≤ 145 W (GDM-500PST9)≤ 125 W (GDM-400PST9)
ca. 72 W (GDM-500PST9)ca. 65 W (GDM-400PST9)
ca. 8 W
ca. 4 W
0 W
Netzanzeige u
Grün
Abwechselndgrün und orange
Abwechselndgrün und orange
Orange
Aus
Zeit fürReaktivierung
—
ca. 3 Sek.
ca. 3 Sek.
ca. 10 Sek.
—

20
Weitere Informationen
WarnmeldungenWenn mit dem Eingangssignal etwas nicht in Ordnung ist,erscheint eine der folgenden Meldungen.
1 Status des Eingangssignals„NICHT IM ABTASTBEREICH“ gibt an, daß dasEingangssignal nicht den technischen Daten desMonitors entspricht.„KEIN EING SIGNAL“ gibt an, daß kein Signaleingespeist wird oder daß das Eingangssignal vomausgewählten Eingang am Monitor nicht eingeht.
2 Ausgewählter EingangZeigt an, an welchem Eingang das fehlerhafte Signaleingespeist wird.Wenn mit dem Eingangssignal von beiden Eingängenetwas nicht in Ordnung ist, wird abwechselnd „HD15“und „BNC“ angezeigt.
Hinweise zum Beheben solcher Probleme finden Sie imfolgenden unter „Störungsbehebung“.
Weitere Informationen
INFORMATION
NICHT IM ABTASTBEREICH
EINGANG : HD15
StörungsbehebungSie können die Ursache eines Problems gegebenenfalls anhand dieses Abschnitts erkennen und beheben, ohne daß Sie sich anden Kundendienst wenden müssen.
Symptom Überprüfen Sie bitte folgendes:
Kein Bild
Die Anzeige u leuchtet nicht
Die Meldung „KEIN EINGSIGNAL“ erscheint auf demBildschirm, oder die Anzeige uleuchtet orange bzw.abwechselnd grün und orange
Die Meldung „NICHT IMABTASTBEREICH“ erscheintauf dem Bildschirm
Es wird keine Meldungangezeigt, und die Anzeige uleuchtet grün oder blinkt orange
Sie arbeiten mit einemMacintosh-System
Sie arbeiten mit einemWindows 95/98-System
Das Bild ist gestört
• Das Netzkabel muß korrekt angeschlossen sein.• Der Netzschalter u muß sich in der Position „on“ befinden.
• Der Bildschirm ist leer, wenn sich der Monitor im Energiesparmodus befindet. Drücken Sieeine beliebige Taste auf der Computer-Tastatur.
• Der Netzschalter des Computers muß sich in der Position „on“ befinden.• Das Eingangssignal muß korrekt ausgewählt sein.• Das Videosignalkabel muß korrekt angeschlossen sein, und alle Stecker müssen fest in den
Buchsen sitzen.• Der 5-BNC-Anschluß muß in der richtigen Reihenfolge angeschlossen sein (von links nach
rechts: Rot–Grün–Blau–HD–VD) (Seite 6).• Achten Sie darauf, daß am HD15-Videoeingangsanschluß keine Stifte verbogen oder
eingedrückt sind.• Die Videokarte muß korrekt im richtigen Bus-Steckplatz sitzen.
• Die Videofrequenz muß im für den Monitor angegebenen Bereich liegen.Horizontal: 30 – 94 kHz (GDM-400PST9), 30 – 107 kHz (GDM-500PST9)Vertikal: 48 – 160 HzSchlagen Sie in der Bedienungsanleitung zum Computer nach, und stellen Sie denVideofrequenzbereich ein.
• Wenn Sie einen Videosignalkabeladapter verwenden, überprüfen Sie, ob Sie den richtigenAdapter angeschlossen haben.
• Siehe „Selbstdiagnosefunktion“ (Seite 22).
• Überprüfen Sie, ob der Macintosh-Adapter und das Videosignalkabel korrektangeschlossen sind (Seite 6).
• Wenn Sie einen älteren Monitor durch diesen Monitor ersetzt haben, schließen Sie den altenMonitor wieder an, und gehen Sie folgendermaßen vor: Installieren Sie die Diskette„Windows Monitor Information Disk“ (Seite 7), und wählen Sie aus den Sony-Monitorenim Auswahlfenster für Monitore in Windows 95/98 den Eintrag „GDM-400PST9“ oder„GDM-500PST9“aus. Wenn Sie „Plug & Play“ wählen, schließen Sie den Monitor über dasHD15-Videosignalkabel an den Computer an. Den 5-BNC-Anschluß können Sie nichtverwenden.
• Schlagen Sie in der Anleitung zur Grafikkarte die korrekte Monitoreinstellung nach.• Lesen Sie in dieser Anleitung nach, ob der Grafikmodus und die Frequenz, mit der der
Monitor arbeitet, unterstützt werden. Auch wenn die Frequenz innerhalb des unterstütztenBereichs liegt, arbeiten einige Grafikkarten möglicherweise mit einemSynchronisationsimpuls, der für eine korrekte Synchronisation des Monitors zu kurz ist.

21
DE
Weitere Informationen
Symptom Überprüfen Sie bitte folgendes:
Die Farbe ist nicht gleichmäßig
Der Monitor läßt sich mit denBedienelementen vorn nichteinstellen
Weiß sieht nicht weiß aus
Die Bildschirmanzeige ist nichtzentriert oder die Bildgröße istnicht korrekt
Die Bildränder sind gekrümmt
An den Rändern weißer Liniensind rote oder blaue Schatten zusehen
Das Bild ist verschwommen
Das Bild springt oder oszilliert
Das Bild flimmert
Doppelbilder sind zu sehen
Wellenförmige oder elliptischeMoiré-Effekte sind sichtbar
Zwei dünne horizontale Linien(Drähte) sind sichtbar
Unmittelbar nach demEinschalten ist ein Summgeräuschzu hören
• Entmagnetisieren Sie den Monitor (Seite 15).Wenn Sie ein Gerät, das ein Magnetfeld erzeugt (z. B. einen Lautsprecher), in der Nähe desMonitors aufstellen oder wenn Sie die Richtung des Monitors ändern, sind die Farbenmöglicherweise nicht mehr gleichmäßig.Mit der Entmagnetisierungsfunktion wird der Metallrahmen der Kathodenstrahlröhreentmagnetisiert, so daß ein neutrales Feld entsteht, in dem eine gleichmäßige Farbwiedergabemöglich ist. Ist ein zweiter Entmagnetisierungszyklus erforderlich, warten Sie nach dem erstenZyklus mindestens 20 Minuten. Auf diese Weise erreichen Sie die besten Ergebnisse.
• Stellen Sie die Farbreinheit ein (Seite 13 – 14).
• Wenn die Tastensperrfunktion eingeschaltet ist, schalten Sie sie über die BildschirmanzeigeOPTION aus (Seite 16).
• Stellen Sie die Farbtemperatur ein (Seite 12 – 13).• Der 5-BNC-Anschluß muß in der richtigen Reihenfolge angeschlossen sein (von links nach rechts:
Rot-Grün-Blau-HD-VD) (Seite 6).
• Drücken Sie die Taste ASC (Seite 7).• Stellen Sie die die Bildgröße bzw. Zentrierung ein (Seite 10).• Bei bestimmten Videomodi füllt die Anzeige nicht den gesamten Bildschirm. Dieses Problem tritt in
der Regel bei bestimmten Videokarten auf.
• Stellen Sie die Geometrie ein (Seite 11).
• Stellen Sie die Konvergenz ein (Seite 13 – 14).
• Stellen Sie Kontrast und Helligkeit ein (Seite 9).• Entmagnetisieren Sie den Monitor (Seite 15).
Wenn Sie ein Gerät, das ein Magnetfeld erzeugt (z. B. einen Lautsprecher), in der Nähe desMonitors aufstellen oder wenn Sie die Richtung des Monitors ändern, sind die Farbenmöglicherweise nicht mehr gleichmäßig.Mit der Entmagnetisierungsfunktion wird der Metallrahmen der Kathodenstrahlröhreentmagnetisiert, so daß ein neutrales Feld entsteht, in dem eine gleichmäßige Farbwiedergabemöglich ist. Ist ein zweiter Entmagnetisierungszyklus erforderlich, warten Sie nach dem erstenZyklus mindestens 20 Minuten. Auf diese Weise erreichen Sie die besten Ergebnisse.
• Erscheinen entlang der Bildränder rote oder blaue Schatten, stellen Sie die Konvergenz ein (Seite 13 – 14).• Wenn der Moiré-Effekt weitgehend eliminiert wurde, kann das Bild verschwommen sein.
Schwächen Sie in diesem Fall die Moiré-Korrektur ab (Seite 13 – 14).
• Stellen Sie elektrische bzw. magnetische Geräte, die aufgrund elektrischer oder magnetischer FelderInterferenzen mit dem Monitor verursachen können, weiter vom Monitor entfernt auf, oderentfernen Sie sie ganz. Typischerweise werden solche Störungen durch Geräte wie Ventilatoren,Leuchtstoffröhren und Laser-Drucker verursacht.
• Steht sehr nahe bei diesem Gerät ein zweiter Monitor, vergrößern Sie den Abstand zwischen beidenGeräten, um die Interferenzen zu verringern.
• Schließen Sie das Netzkabel des Monitors an eine andere Steckdose, möglichst an einem anderenStromkreis, an.
• Testen Sie den Monitor an einem anderen Computer in einem anderen Raum.
• Schlagen Sie in der Dokumentation zum Computer nach, und setzen Sie die Bildwiederholrate amComputer auf den Wert ein, mit dem Sie die besten Bilder erzielen.
• Verwenden Sie keine Bildschirmverlängerungskabel und/oder Videoschaltboxen, wenn diesesPhänomen auftritt. Zu lange Kabel oder eine störanfällige Verbindung können dieses Problem auslösen.
• Korrigieren Sie den Moiré-Effekt (Seite 13 – 14).Der Moiré-Effekt muß je nach angeschlossenem Computer behoben werden.
• Wegen der Zusammenwirkung von Auflösung, Bildpunktdichte des Monitors und Bildpunktdichteeiniger Bildmuster kann es bei einigen Hintergrundeinstellungen zu einem Moiré-Effekt kommen.Wählen Sie ein anderes Muster für Ihren Desktop.
• Bei diesen Linien handelt es sich um Dämpfungsdrähte zur Stabilisierung der vertikalenStreifenmaske (Seite 19). Aufgrund dieser Streifenmaske gelangt mehr Licht auf denBildschirm, so daß Farben und Helligkeit bei der Trinitron-Kathodenstrahlröhre besondersintensiv sind.
• Wenn Sie den Monitor einschalten, wird der Entmagnetisierungszyklus aktiviert. EinSummgeräusch ist zu hören, während der automatische Entmagnetisierungszyklus aktiviert wird(3 Sekunden). Dasselbe Geräusch ist bei der manuellen Entmagnetisierung zu hören. Dies ist keineFehlfunktion.

22
Weitere Informationen
SelbstdiagnosefunktionDieser Monitor verfügt über eine Selbstdiagnosefunktion.Wenn an dem Monitor oder dem/den Computer(n) einProblem auftritt, erscheint ein leerer Bildschirm, und dieAnzeige u leuchtet grün auf oder blinkt orange.
Wenn die Anzeige uuuuu grün leuchtet
1 Ziehen Sie alle Stecker aus denVideoeingangsanschlüssen 1 und 2, oder schalten Sieden/die angeschlossenen Computer aus.
2 Halten Sie die Taste >/ 2 Sekunden lang gedrückt.
Wenn alle vier Farbbalken (weiß, rot, grün, blau)angezeigt werden, funktioniert der Monitorordnungsgemäß. Schließen Sie die Videoeingangskabelwieder an, und überprüfen Sie den Zustand Ihres/IhrerComputer.
Wenn die Farbbalken nicht erscheinen, liegtmöglicherweise ein Fehler am Monitor vor. Wenden Siesich mit der Beschreibung des Problems an einenautorisierten Sony-Händler.
Wenn die Anzeige uuuuu orange blinkt
Schalten Sie den Monitor mit der Taste uuuuu aus undwieder ein.
Wenn die Anzeige u jetzt grün leuchtet, funktioniert derMonitor ordnungsgemäß.
Wenn die Anzeige u immer noch blinkt, liegtmöglicherweise ein Fehler am Monitor vor. Ermitteln Siedas Intervall, in dem die Anzeige u orange blinkt (inSekunden), und wenden Sie sich mit der Beschreibungdes Problems an einen autorisierten Sony-Händler.Notieren Sie sich unbedingt die Modellbezeichnung unddie Seriennummer des Monitors. Notieren Sie sichaußerdem das Fabrikat und Modell Ihres Computersund der Grafikkarte.
Netzanzeige u
Technische DatenGDM-400PST9
Bildröhre Streifenabstand 0,25 – 0,27 mmBildschirmdiagonale 49cm (19 Zoll)Ablenkung 90 Grad
Effektive Bildgröße ca. 365 × 273 mm (B/H)Sichtbares Bild 46cm (18,0 Zoll)
Auflösung Horizontal: max. 1600 PunkteVertikal: max. 1200 Zeilen
Standardanzeigegröße ca. 330 × 264 mm (B/H)oderca. 352 × 264 mm (B/H)
Ablenkfrequenz Horizontal: 30 bis 94 kHzVertikal: 48 bis 160 Hz
Betriebsspannung 100 bis 240 V Wechselstrom,50 – 60 Hz, 1,8 – 1,0 A
Leistungsaufnahme max. 125 WAbmessungen 444 × 467 × 453 mm (B/H/T)Gewicht ca. 25 kgMitgeliefertes Zubehör Siehe Seite 6.
GDM-500PST9
Bildröhre Streifenabstand 0,25 – 0,27 mmBildschirmdiagonale 54cm (21 Zoll)Ablenkung 90 Grad
Effektive Bildgröße ca. 403,8 × 302,2 mm (B/H)Sichtbares Bild 51cm (19,8 Zoll)
Auflösung Horizontal: max. 1600 PunkteVertikal: max. 1200 Zeilen
Standardanzeigegröße ca. 388 × 291 mm (B/H)oderca. 364 × 291 mm (B/H)
Ablenkfrequenz Horizontal: 30 bis 107 kHzVertikal: 48 bis 160 Hz
Betriebsspannung 100 bis 240 V Wechselstrom,50 – 60 Hz, 2,0 – 1,0 A
Leistungsaufnahme max. 145 WAbmessungen 498 × 505 × 474 mm (B/H/T)Gewicht ca. 31 kgMitgeliefertes Zubehör Siehe Seite 6.
Änderungen, die dem technischen Fortschritt dienen,bleiben vorbehalten.

3
ES
Procedimientos inicialesPrecauciones ......................................................................................................................... 4Funciones de los controles .................................................................................................. 5Instalación ............................................................................................................................. 6Ajuste automático del tamaño y centrado de la imagen ................................................ 7Selección del idioma de la indicación en pantalla .......................................................... 7Selección de la señal de entrada ........................................................................................ 8
Personalización del monitorAjuste del brillo y contraste de la imagen ........................................................................ 9Introducción al sistema de indicación en pantalla .......................................................... 9Uso de la indicación en pantalla CENTR (Centrado) ................................................... 10Uso de la indicación en pantalla TAMAÑO .................................................................. 10Uso de la indicación en pantalla GEOM (Geometría) .................................................. 11Uso de la indicación en pantalla ZOOM ........................................................................ 12Uso de la indicación en pantalla COLOR....................................................................... 12Uso de la indicación en pantalla PANTAL (Pantalla) .................................................. 13Uso de la indicación en pantalla OPCION..................................................................... 15Uso de la indicación en pantalla LANG (Idioma)......................................................... 17Restauración de los ajustes de fábrica ............................................................................ 17
Funciones técnicasModos predefinidos y de usuario ................................................................................... 18Función de ahorro de energía .......................................................................................... 19Hilos de amortiguación .................................................................................................... 19Función Plug & Play .......................................................................................................... 19
Información adicionalMensajes de aviso .............................................................................................................. 20Solución de problemas ...................................................................................................... 20Función de autodiagnóstico ............................................................................................. 22Especificaciones ................................................................................................................. 22
AppendixTCO’99 Eco-document ......................................................................................................... i
INDICE
• Macintosh es una marca comercial licenciada a Apple Computer, Inc.,registrada en EE.UU. y otros países.
• Windows y MS-DOS son marcas comerciales registradas de MicrosoftCorporation en Estados Unidos y otros países.
• IBM PC/AT y VGA son marcas comerciales registradas de IBMCorporation, de los Estados Unidos.
• VESA es una marca comercial de Video Electronics StandardAssociation.
• El resto de los productos mencionados en este manual pueden sermarcas comerciales o marcas comerciales registradas de sus respectivascompañías.
• Además, “™” y “” no se mencionan en cada caso en este manual.

4
Procedimientos iniciales
Aviso sobre la conexión de la alimentación
• Utilice un cable de alimentación adecuado al suministroeléctrico local.Para los clientes del Reino UnidoSi emplea el monitor en el Reino Unido, utilice el cablecon enchufe para dicho país suministrado.
Ejemplos de formas de enchufes
• Para desconectar el cable de alimentación, espere almenos 30 segundos después de apagar la unidad parapermitir la descarga de la electricidad estática acumuladaen la superficie del TRC.
• Tras activar la alimentación, el TRC se desmagnetizadurante 3 segundos aproximadamente. Este procesogenera un intenso campo magnético alrededor del marcometálico, que puede alterar los datos contenidos en lascintas o discos magnéticos situados en las proximidades.Por este motivo, es aconsejable mantener los equipos degrabación magnéticos y las cintas y discos alejados de estemonitor.
La toma de corriente debe instalarse cerca de launidad en una zona accesible.
Procedimientos iniciales
90°
90°
15°
5°
Precauciones
Instalación
• Coloque el monitor en un lugar debidamente ventiladopara evitar el recalentamiento interno. No lo sitúe sobresuperficies (alfombras, mantas, etc.) o cerca de materiales(cortinas, tapices) que puedan bloquear los orificios deventilación.
• No instale el monitor cerca de fuentes de calor comoradiadores o tubos de ventilación, ni lo exponga a la luzdirecta del sol, a polvo excesivo, o a vibraciones osacudidas mecánicas.
• Mantenga el monitor alejado de equipos que generancampos magnéticos, como transformadores o líneaseléctricas de alto voltaje.
Mantenimiento
• Limpie el exterior, el panel y los controles con un pañosuave ligeramente humedecido en una solucióndetergente poco concentrada. No utilice ningún tipo deestropajo, productos de limpieza en polvo ni disolventes,como alcohol o bencina.
• Procure no friccionar, tocar ni golpear la superficie de lapantalla con objetos puntiagudos o abrasivos, como unbolígrafo o un destornillador. De lo contrario, este tipo decontacto puede dañar el tubo de imagen.
• Limpie la pantalla con un paño suave. Si utiliza unproducto líquido limpiador de cristal, no emplee ningúntipo de limpiador que contenga soluciones antiestáticas oaditivos similares, ya que puede arañar la superficie de lapantalla.
Transporte
Al transportar este monitor para su reparación o traslado,embálelo en la caja de cartón y con los materiales deembalaje originales.
Uso del soporte basculante giratorio
El soporte basculante giratorio permite ajustar el ángulo devisualización del monitor dentro de un rango de 180° ensentido horizontal y 20° en sentido vertical.Para girar el monitor en sentido vertical y horizontal,sujételo por la parte inferior con ambas manos, tal como semuestra en la ilustración.
para 100 hasta120 V CA
para 200 hasta240 V CA
sólo para240 V CA

5
Procedimientos iniciales
ES
Funciones de los controlesConsulte las páginas que se indican entre paréntesis paraobtener descripciones más detalladas.El modelo GDM-500PST9 es el utilizado en las ilustracionesde este manual.
Parte frontal
1 Botón RESET (restauración) (página 17)Recupera los niveles predefinidos de fábrica.
2 Botón ASC (tamaño y centradoautomáticos) (página 7)Ajusta automáticamente el tamaño y centrado de lasimágenes.
3 Botón INPUT (entrada) e indicadoresHD15/BNC (página 8)Selecciona la señal de entrada de vídeo HD15 o 5BNC.Cada vez que pulsa este botón, se alternan la señal deentrada y el indicador correspondiente.
4 Botones ¨ (brillo) (./>) (páginas 8 – 17)Ajustan el brillo de la imagen.
Funcionan como los botones (./>) al ajustar otrasopciones.
5 Botón MENU (menú) (páginas 8 – 17)Muestra la indicación en pantalla MENU.
6 Botones > (contraste) (?//) (páginas8 – 17, 22)Ajustan el contraste.
Funcionan como los botones (?//) al ajustar otrasopciones.
7 Interruptor e indicador de encendido u(páginas 19, 22)Enciende o apaga el monitor.El indicador se ilumina en color verde cuando elmonitor está encendido, y parpadea en color verde ynaranja o bien se ilumina en color naranja cuando dichomonitor se encuentra en el modo de ahorro de energía.
Nº determinal
1
2
3
4
5
6
7
8
9
Señal
Rojo
Verde(sincronizacióncompuesta enverde)
Azul
Identificación(masa)
Masa de DDC*
Masa de rojo
Masa de verde
Masa de azul
DDC + 5V*
Señal
Masa
Identificación(masa)
Datosbidireccionales(SDA)*
Sincronizaciónhorizontal
Sincronizaciónvertical
Reloj de datos(SCL)*
Nº determinal
10
11
12
13
14
15
5 4 3 2 1678910
1112131415
MENUINPUTRESET
ASC HD15 BNC
Parte posterior
8 Conector AC INPermite enchufar un cable de alimentación de CA almonitor.
9 Conector de entrada de vídeo 1 (HD15)Entrada de las señales de vídeo RVA (0,700Vp-p,positivo) y SYNC.
* Norma Canal de Datos de Visualización (DDC) de VESA
!º Conector de entrada de vídeo 2 (5 BNC)Entrada de las señales de vídeo RVA (0,700 Vp-p,positivo) y SYNC.

6
Procedimientos iniciales
a HD15
InstalaciónAntes de utilizar este monitor, compruebe que en el paquetese incluyen los siguientes artículos:• Monitor (1)• Cable de alimentación (1)• Cable de señal de vídeo HD15 (1)• Adaptador Macintosh (1)• Windows Monitor Information Disk (1)• Tarjeta de garantía (1)• Este manual de instrucciones (1)
Este monitor funciona con cualquier sistema IBM ocompatible equipado con capacidad gráfica VGA o superior.Aunque este monitor funciona con otras plataformas queempleen frecuencias horizontales comprendidas entre 30 y94 kHz (GDM-400PST9), 30 y 107 kHz (GDM-500PST9),incluidos los sistemas Macintosh y Power Macintosh, espreciso utilizar un adaptador de cable. Póngase en contactocon su proveedor para obtener información sobre eladaptador más apropiado para su sistema.
Paso 1: Conecte el monitor al ordenador
Con el ordenador apagado, conecte al monitor el cable deseñal de vídeo HD15 suministrado.• Si emplea un ordenador IBM PC/AT o compatible,
consulte la próxima sección.• Si utiliza un ordenador Macintosh o compatible, consulte
la siguiente sección, “Conexión a un ordenador Macintosho compatible”.
• Si desea utilizar los conectores 5 BNC, consulte la sección“Uso de los conectores 5 BNC”.
Conexión a un ordenador IBM PC/AT ocompatible
* Es posible que algunos modelos requieran el adaptador HD15 -HD15.
Si el sistema PC no es compatible con DDC2AB yDDC2B+Este monitor utiliza el terminal nº 9 en el conector de señal de vídeopara asegurar la compatibilidad con DDC2AB y DDC2B+.Algunos sistemas PC que no son compatibles con DDC2AB oDDC2B+ pueden no aceptar el terminal nº 9. Si no sabe conseguridad si su sistema acepta este terminal, utilice el adaptadorHD15 (hembra) - HD15 (macho sin terminal nº 9) (no suministrado).Asegúrese de que el lado macho (sin el terminal nº 9) está conectadoal ordenador.
Conexión a un ordenador Macintosh ocompatible
Acerca del adaptador Macintosh suministradoEl adaptador Macintosh suministrado es compatible con losordenadores de las series Macintosh LC, Performa, Quadra, PowerMacintosh y Power Macintosh G3.Es posible que las series Macintosh II y algunas versiones anterioresde Power Book requieran un adaptador con microinterruptores (nosuministrado).
Uso de los conectores 5 BNC
Para enchufar los conectores 5 BNC, utilice el cable de señalde vídeo SMF-400 (que se adquiere por separado). Conectelos cables de izquierda a derecha en este orden: Rojo-Verde-Azul-HD-VD.
Notas• No cortocircuite los terminales del cable de señal de vídeo.• La norma DDC no se aplica a los conectores 5 BNC. Si utiliza la
norma DDC, enchufe el conector HD15 al ordenador mediante elcable de señal de vídeo suministrado.
a la salida de vídeo
Adaptador Macintosh(suministrado)
OrdenadorMacintosh ocompatible
a HD 15
a VIDEO IN R/G/B a SYNC INHD/VD
Conecte el ordenador de lamisma manera que para elconector HD15.
Cable de señalde vídeo HD15(suministrado)
a la salida de vídeo
Ordenador IBMPC/AT ocompatible
Adaptador HD15 - HD15(no suministrado)*
Cable de señalde vídeo HD15(suministrado)

7
Procedimientos iniciales
ES
Ajuste automático del tamaño ycentrado de la imagenAl pulsar el botón de tamaño y centrado automático (ASC),dichos elementos de la imagen se ajustan automáticamentea la pantalla.
1 Encienda el monitor y el ordenador.
2 Pulse el botón ASC.La imagen se ajusta de manera que quede centrada en lapantalla.
Notas• Esta función está diseñada para utilizarse con ordenadores que
empleen Windows o un software similar de interface gráfica deusuario que proporcione imágenes de pantalla completa. Esposible que no funcione correctamente si el color de fondo esoscuro o si la imagen de entrada no llena la pantalla hasta losbordes (como un indicativo de MS-DOS).
• Es posible que la pantalla aparezca en blanco momentáneamentemientras se ajusta el tamaño. No se trata de un funcionamientodefectuoso.
• Aunque las señales para la relación de aspecto 5:4 de la imagen(resolución: 1280 × 1024) no llenan la pantalla por completo, laimagen aparece con precisión.
Selección del idioma de laindicación en pantallaSi necesita cambiar el idioma de la indicación en pantalla,consulte “Uso de la indicación en pantalla LANG (Idioma)”en la página 17.El ajuste por omisión es el idioma inglés.
ASC
Paso 2: Conecte el cable de alimentación
Con el monitor apagado, conecte un extremo del cable dealimentación al monitor y el otro a una toma de corriente.
Paso 3: Encienda el monitor y el ordenador
La instalación del monitor está finalizada.
NotaSi aparece en pantalla el mensaje “FUERA DE RANGOEXPLORACION” o “NO SEÑAL”, consulte “Mensajes de aviso” enla página 20.
Para los usuarios que utilicen Windows 95/98Para aumentar el potencial del monitor, instale en el PC el archivode información sobre el nuevo modelo del disquete WindowsMonitor Information Disk suministrado.Este monitor cumple con el estándar Plug & Play “VESA DDC”. Sisu PC/tarjeta gráfica cumple con DDC, seleccione “Plug & PlayMonitor (VESA DDC)” o el nombre de modelo de este monitorcomo tipo de monitor en “Control Panel” de Windows 95/98. Si suPC/tarjeta gráfica presenta dificultades de comunicación con estemonitor, cargue el disquete Windows Monitor Information Disk yseleccione el nombre de modelo de este monitor como tipo demonitor.
Para usuarios que utilicen Windows NT4.0La configuración del monitor en Windows NT4.0 es diferente a lade Windows 95/98 y en ella no es necesario seleccionar el tipo demonitor. Consulte el manual de instrucciones de Windows NT4.0para obtener información detallada sobre el ajuste de la resolución,la frecuencia de barrido y el número de colores.
a una toma decorriente
Cable de alimentación(suministrado)
a AC IN

8
Procedimientos iniciales
2 Pulse los botones ¨./> y >?// para seleccionar“ OPCION” y vuelva a pulsar el botón MENU.Aparece la indicación en pantalla OPCION.
3 Pulse los botones ¨./> para seleccionar“ (ENTRADA)”.
4 Pulse los botones >?// para seleccionar “AUTO” o“MANUAL”.
La indicación en pantalla OPCION desapareceautomáticamente pasados unos 30 segundos.Para cerrar la indicación, vuelva a pulsar el botón MENU.
Para más información sobre el uso de las indicaciones enpantalla, consulte “Introducción al sistema de indicación enpantalla” en la página 9.
HD15 BNC INPUT
MENU
MENU
SALIR
CENTR
TAMAÑO
GEOM
COLOR
LANG
ZOOM
PANTAL
OPCION
OK MENU
Selección de la señal de entradaEste monitor tiene dos conectores de entrada de señal(HD15 y 5BNC) y puede conectarse a dos ordenadores.Cuando esté encendida la alimentación de ambosordenadores, seleccione la señal de entrada que deseevisualizar de la siguiente manera.
1 Encienda el monitor y ambos ordenadores.
2 Pulse el botón INPUT para seleccionar la señal deentrada HD15 o 5BNC.Cada vez que pulse el botón INPUT, cambian la señal deentrada y el indicador correspondiente.
Selección de modo de la señal de entrada
Este monitor dispone de dos modos de selección de señal deentrada: “AUTO” y “MANUAL”.
Si se selecciona “AUTO”
Si no se selecciona ninguna señal del conector seleccionado,el monitor selecciona automáticamente la señal del otroconector. Al reiniciar el ordenador que desee visualizar, o elque se encuentre en modo de ahorro de energía, es posibleque el monitor seleccione la señal del otro conectorautomáticamente. Esto se debe a que el monitor pasa de laseñal interrumpida a la constante. En este caso, seleccionemanualmente la señal deseada utilizando el botón INPUT.
Cuando “MANUAL” está seleccionado
Incluso si no se recibe ninguna señal del conectorseleccionado, el monitor no selecciona la señal del otroconector.
1 Pulse el botón MENU.Aparece la indicación en pantalla MENU.
SI
DESMAGNET MANU
DESBLO1 MIN
OPCION
ZZ...
AUTO
ZZ...
ENTRADA
1 MIN
OPCION
DESBLO
MANUAL

9
Personalización del monitor
ES
Personalización del monitor
Antes de realizar los ajustes
• Conecte el monitor y el ordenador y enciéndalos.• Seleccione “ LANG” en la indicación en pantalla
MENU y, a continuación, seleccione “ESPAÑOL”(consulte la página 17).
Ajuste del brillo y contraste de laimagenUna vez realizado el ajuste, se almacenará en la memoriapara todas las señales de entrada recibidas.
1 Pulse los botones ¨ (brillo) ./> o > (contraste)?//.Aparece la indicación en pantalla BRILLO/CONTRASTE.
2 Para realizar el ajuste de brilloPulse los botones ¨./>.
> . . . para aumentar el brillo. . . . para disminuir el brillo
Para realizar el ajuste de contrastePulse los botones >?//.
/ . . . para aumentar el contraste? . . . para disminuir el contraste
La indicación desaparece automáticamente después de unos3 segundos.
Para reajustar, pulse el botón RESET mientras la indicaciónen pantalla aún se encuentre activada. Se restauran losvalores de brillo y contraste predefinidos de fábrica.
* Las frecuencias horizontal y vertical para la señal de entradarecibida aparecen en la indicación BRILLO/CONTRASTE.
Frecuenciahorizontal*
Frecuenciavertical*
BRILLO/CONTRASTE
26 26
80.0kHz/ 75Hz
MENU
Introducción al sistema deindicación en pantallaLa mayoría de los ajustes se realizan con la indicación enpantalla MENU.
Indicación MENU
Pulse el botón MENU para visualizar la indicación MENU.Esta indicación MENU contiene vínculos con las otrasindicaciones en pantalla descritas a continuación.
1 COLORMuestra la indicación COLOR para ajustar latemperatura de color.
2 CENTRMuestra la indicación CENTRADO para ajustar elcentrado de la imagen.
3 PANTALMuestra la indicación PANTALLA para ajustar laconvergencia vertical y horizontal, etc.
4 ZOOMMuestra la indicación ZOOM para ampliar y reducir laimagen.
5 OPCIONMuestra la indicación OPCION para ajustar la posiciónde la indicación en pantalla, desmagnetizar la pantalla,etc.
6 TAMAÑOMuestra la indicación TAMAÑO para ajustar el tamañode la imagen.
7 LANGMuestra la indicación LANGUAGE para seleccionar unidioma.
8 GEOMMuestra la indicación GEOMETRIA para ajustar larotación y distorsión de la imagen, etc.
9 SALIRCierra la indicación MENU.
MENU
SALIR
CENTR
TAMAÑO
GEOM
COLOR
LANG
ZOOM
PANTAL
OPCION
OK MENU

Personalización del monitor
10
Uso de la indicación en pantallaCENTR (Centrado)Los parámetros de CENTRADO permiten ajustar elcentrado de la imagen.Una vez realizado el ajuste, se almacenará en memoria parala señal de entrada actual.
1 Pulse el botón MENU.Aparece la indicación MENU.
2 Pulse los botones ¨./> y >?// para seleccionar“ CENTR” y vuelva a pulsar el botón MENU.Aparece la indicación CENTRADO.
3 Para el ajuste horizontalPulse los botones >?//.
/ . . . para desparazar la imagen haciala derecha
? . . . para desplazar la imagen hacia laizquierda
Para el ajuste verticalPulse los botones ¨./>.
> . . . para desplazar la imagen haciaarriba
. . . . para desplazar la imagen haciaabajo
La indicación desaparece automáticamente después de unos30 segundos.Para cerrar la indicación en pantalla, vuelva a pulsar elbotón MENU.
Para reajustar, pulse el botón RESET mientras la indicaciónaún esté activada.Se restauran los valores predefinidos de fábrica de centradohorizontal y vertical.
Uso de la indicación en pantallaTAMAÑOLos ajustes de TAMAÑO permiten ajustar el tamaño de laimagen.Una vez realizado el ajuste, se almacenará en memoria parala señal de entrada actual.
1 Pulse el botón MENU.Aparece la indicación MENU.
2 Pulse los botones ¨./> y >?// para seleccionar“ TAMAÑO” y vuelva a pulsar el botón MENU.Aparece la indicación TAMAÑO.
3 Para el ajuste horizontalPulse los botones >?//.
/ . . . para aumentar el tamaño de laimagen
? . . . para reducir el tamaño de laimagen
Para el ajuste verticalPulse los botones ¨./>.
> . . . para aumentar el tamaño de laimagen
. . . . para reducir el tamaño de laimagen
La indicación desaparece automáticamente después de unos30 segundos.Para cerrar la indicación en pantalla, vuelva a pulsar elbotón MENU.
Para reajustar, pulse el botón RESET mientras la indicaciónaún esté activada.Se restauran los valores predefinidos de fábrica de tamañohorizontal y vertical.
MENU MENU
CENTRADO
26
73
TAMAÑO
26
73

11
Personalización del monitor
ES
Seleccione
ROTACION
DIST COJIN
BAL COJIN
DIST TRAP
BAL TRAP
Para
ajustar la rotación de la imagen
ajustar los lados de la imagen
ajustar el balance lateral de la imagen
ajustar la anchura de la imagen
ajustar el balance de la forma de la imagen
MENU
Uso de la indicación en pantallaGEOM (Geometría)Los ajustes de GEOM (geometría) permiten ajustar la formay orientación de la imagen.Una vez ajustada la rotación, se almacenará en memoriapara todas las señales de entrada recibidas. El resto deajustes se almacenarán en memoria para la señal de entradaactual.
1 Pulse el botón MENU.Aparece la indicación MENU.
2 Pulse los botones ¨./> y >?// para seleccionar“ GEOM” y vuelva a pulsar el botón MENU.Aparece la indicación GEOMETRIA.
3 Pulse los botones ¨./> para seleccionar la opciónque desee ajustar.
ROTACION
GEOMETRIA
26
La indicación desaparece automáticamente después de unos 30segundos.Para cerrar la indicación en pantalla, vuelva a pulsar el botónMENU.
Para reajustar, pulse el botón RESET mientras la indicación aúnesté activada.La opción seleccionada recupera el valor predefinido de fábrica.
Para
ROTACION
DIST COJIN
BAL COJIN
DIST TRAP
BAL TRAP
Pulse
/ . . . para rotar la imagen en el sentido delas agujas del reloj
? . . . para rotar la imagen en el sentidocontrario de a agujas del reloj
/ . . . para ampliar los lados de la imagen
? . . . para contraer los lados de la imagen
/ . . . para desplazar los lados de laimagen hacia la derecha
? . . . para desplazar los lados de laimagen hacia la izquierda
/ . . . para aumentar la anchura de laimagen en la parte superior
? . . . para reducir la anchura de la imagenen la parte superior
/ . . . para desplazar la parte superior dela imagen hacia la derecha
? . . . para desplazar la parte superior dela imagen hacia la izquierda
4 Pulse los botones >?// para realizar los ajustes.

Personalización del monitor
12
Uso de la indicación en pantallaZOOMLos ajustes de ZOOM permiten ampliar o reducir el tamañode la imagen.Una vez realizado el ajuste, se almacenará en memoria parala señal de entrada actual.
1 Pulse el botón MENU.Aparece la indicación en pantalla MENU.
2 Pulse los botones ¨./> y >?// para seleccionar“ ZOOM” y vuelva a pulsar el botón MENU.Aparece la indicación en pantalla ZOOM.
3 Pulse los botones >?// para ajustar el zoom de laimagen.
/ . . . para ampliar la imagen? . . . para reducir la imagen
La indicación desaparece automáticamente después de unos30 segundos.Para cerrar la indicación en pantalla, vuelva a pulsar elbotón MENU.
Para reajustar, pulse el botón RESET mientras la indicaciónaún se encuentre activada.
NotaEl ajuste de zoom de la imagen se detendrá en cuanto el tamañohorizontal o vertical alcanza su valor máximo o mínimo.
MENU
ZOOM
73V26H
MENU
COLOR
R BIAS
5000K 6500K
50V B IAS 50A B IAS 50R GAIN 50V GAIN 50A GAIN 50
9300K
Uso de la indicación en pantallaCOLORPuede cambiar la temperatura de color del monitor. Porejemplo, puede ajustar o cambiar los colores de una imagenen pantalla para que coincidan con los colores de la imagenimpresa.Una vez realizado el ajuste, se almacenará en memoria paratodas las señales de entrada recibidas.
1 Pulse el botón MENU.Aparece la indicación MENU.
2 Pulse los botones ¨./> y >?// para seleccionar“ COLOR” y vuelva a pulsar el botón MENU.Aparece la indicación COLOR.
3 Pulse los botones >?// para seleccionar latemperatura de color.
Existen tres modos de temperatura de color en laindicación en pantalla.Los tres ajustes predefinidos son:5000K, 6500K, 9300K

13
Personalización del monitor
ES
4 Ajuste fino de la temperatura de colorPulse los botones ¨./> para seleccionar un elemento yrealice los ajustes pulsando los botones >?//.
Seleccione BIAS R (rojo), V (verde) o A (azul) paraajustar el nivel de negro de cada señal de color.
Seleccione GAIN R (rojo), V (verde) o A (azul) paraajustar el nivel de blanco de la señal de cada uno de loscolores.
“5000K”, “6500K” o “9300K” desaparecerá y sememorizarán los nuevos valores de color de cada uno delos tres modos de color.Los modos de temperatura de color cambian de lasiguiente manera:5000Kn 1, 6500Kn 2, 9300Kn 3
La indicación en pantalla desaparece automáticamentetranscurridos unos 30 segundos.Para cerrar la indicación en pantalla, pulse otra vez el botónMENU.
Para restaurar, pulse el botón RESET mientras la indicaciónen pantalla está activada. Se restaurarán los valorespredefinidos de fábrica del elemento seleccionado.
Uso de la indicación en pantallaPANTAL (Pantalla)Puede ajustar los valores de convergencia para eliminar lassombras rojas o azules que puedan aparecer alrededor delos objetos en pantalla. Ajuste la función CANCELARMUARE para eliminar los patrones ondulados o elípticosque puedan aparecer en pantalla.Ajuste la función PUREZA para corregir los problemas dedesequilibrios de color en las cuatro esquinas de la pantallaprovocados por el magnetismo terrestre.Una vez ajustado CANCELAR MUARE , dicho ajuste sealmacenará en memoria para la señal de entrada actual.Todos los demás ajustes se almacenarán en memoria paratodas las señales de entrada recibidas.
1 Pulse el botón MENU.Aparece la indicación en pantalla MENU.
2 Pulse los botones ¨./> y >?// para seleccionar“ PANTAL” y vuelva a pulsar el botón MENU.Aparece la indicación PANTALLA.
3 Pulse los botones ¨./> para seleccionar la opciónque desee ajustar.
Seleccione
CONVERGENCIA H
CONVERGENCIA V
TOP
CONVER V SUP
BOT
CONVER V INF
Para
ajustar la convergencia horizontal
ajustar la convergencia vertical
ajustar la convergencia verticalsuperior de la pantalla
ajustar la convergencia verticalinferior de la pantalla
MENU
(continuación)
PANTALLA
TOPBOT
CONVERGENCIA H
26ADJ
COLOR
6500K 9300K
V B IAS 50A B IAS 50R GAIN 50V GAIN 50A GAIN 50
R B IAS 76
1

Personalización del monitor
14
NotaEs posible que la imagen aparezca borrosa al ajustar CANCELARMUARE en “SI”.
La indicación desaparece automáticamente después de unos30 segundos.Para cerrar la indicación en pantalla, vuelva a pulsar elbotón MENU.
Para reajustar, pulse el botón RESET mientras la indicaciónaún esté activada.Se restaura el ajuste predefinido de fábrica de la opciónseleccionada.
Seleccione
PUREZA
ADJ
AJUS PUREZA
CANCELAR MUARE*
ADJ
AJUSTE MUARE
Para
seleccione una de las cuatro esquinasen las que sea necesario corregir elcolor debido a la influencia delmagnetismo terrestre
corrija el color en una de las cuatroesquinas de la pantalla
Active (“SI”) o desactive (“NO”) lacancelación del efecto muaré.CANCELAR MUARE debe estaractivado (“SI”) para que aparezca“ ADJ (AJUSTE MUARE)” en lapantalla.
ajuste el grado de cancelación delefecto muaré
Para
CONVERGENCIA H
CONVERGENCIA V
Pulse
/ . . . para desplazar las sombras rojashacia la derecha y las azules hacia laizquierda
? . . . para desplazar las sombras rojashacia la izquierda y las azules haciala derecha
/ . . . para desplazar las sombras rojashacia arriba y las azules hacia abajo
? . . . para desplazar las sombras rojashacia abajo y las azules hacia arriba
* El efecto muaré es un tipo de interferencia natural que producelíneas suaves u onduladas en pantalla. Puede aparecer debido ala interferencia entre el patrón regulado de la imagen de la señalde entrada y el patrón de puntos fluorescentes del TRC.
Ejemplo de efecto muaré:
4 Pulse los botones >?// para realizar los ajustes.
Para
TOP
CONVER V SUP
BOT
CONVER V INF
PUREZA
ADJ
AJUS PUREZA
CANCELAR MUARE
ADJ
AJUSTE MUARE
Pulse
/ . . . para desplazar las sombras rojashacia arriba y las azules hacia abajo
? . . . para desplazar las sombras rojashacia abajo y las azules hacia arriba
/ . . . para desplazar las sombras rojashacia arriba y las azules hacia abajo
? . . . para desplazar las sombras rojashacia abajo y las azules hacia arriba
/ o ? . . . para seleccionar la esquina dela pantalla que desee ajustar
: superior izquierda
: superior derecha
: inferior izquierda
: inferior derecha
/ o ? . . . para reducir al mínimo lasirregularidades del color
/ . . . para activar CANCELAR MUARE
? . . . para desactivar CANCELAR MUARE
/ o ? . . . para ajustar la pantalla hastaque el efecto muaré se reduzcaal mínimo
50
SINO
SINO
50

15
Personalización del monitor
ES
Uso de la indicación en pantallaOPCIONLa indicación OPCION permite desmagnetizarmanualmente la pantalla y ajustar parámetros como laposición de la indicación en pantalla y el tiempo de retardodel modo de ahorro de energía. También sirve parabloquear los controles.
Desmagnetización de la pantalla
La pantalla del monitor se desmagnetiza automáticamentecuando se enciende la unidad.También es posible desmagnetizarla de forma manual.
1 Pulse el botón MENU.Aparece la indicación MENU.
2 Pulse los botones ¨./> y >?// para seleccionar“ OPCION” y vuelva a pulsar el botón MENU.Aparece la indicación OPCION.
3 Pulse los botones ¨./> para seleccionar “(DESMAGNET MANU)”.
4 Pulse el botón > /.La pantalla se desmagnetiza durante unos 3 segundos.
Si necesita desmagnetizar la pantalla por segunda vez,espero al menos 20 minutos antes de repetir los pasosanteriores.
La indicación OPCION desaparece automáticamentedespués de unos 30 segundos.Para cerrar la indicación en pantalla, vuelva a pulsar elbotón MENU.
Cambio de la posición de la indicación enpantalla
Es posible cambiar la posición de la indicación (por ejemplo,si desea ajustar la imagen que se encuentra detrás de ella).
1 Pulse el botón MENU.Aparece la indicación MENU.
2 Pulse los botones ¨./> y >?// para seleccionar“ OPCION” y vuelva a pulsar el botón MENU.Aparece la indicación OPCION.
3 Pulse los botones ¨./> para seleccionar “ (POSICION MENU H)” o “ (POSICION MENUV)”.Seleccione “ (POSICION MENU H)” para ajustar laposición horizontal.
Seleccione “ (POSICION MENU V)” para ajustar laposición vertical.
4 Pulse los botones >?// para desplazar laindicación en pantalla hasta la posición que desee.
La indicación OPCION desaparece automáticamentedespués de unos 30 segundos.Para cerrar la indicación en pantalla, vuelva a pulsar elbotón MENU.
Para reajustar, pulse el botón RESET mientras laindicación aún se encuentre activada.
MENU
MENU
SI
DESMAGNET MANU
DESBLO1 MIN
OPCION
ZZ...
SI
DESMAGNET MANU
DESBLO1 MIN
OPCION
ZZ...
ZZ...
POSICION MENU H
DESBLO1 MIN
OPCION
ZZ...
POSICION MENU V
DESBLO
OPCION
AUTO

Personalización del monitor
16
Bloqueo de los controles
La función de bloqueo de los controles desactiva todos losbotones del panel frontal excepto el interruptor u(encendido) y el botón MENU.
1 Pulse el botón MENU.Aparece la indicación MENU.
2 Pulse los botones ¨./> y >?// para seleccionar“ OPCION” y vuelva a pulsar el botón MENU.Aparece la indicación OPCION.
3 Pulse los botones ¨./> para seleccionar“ (BLOQUEO DE AJUS)”.
4 Pulse los botones >?// para seleccionar “BLOQ”.
La indicación OPCION desaparece automáticamentedespués de unos 30 segundos.Para cerrar la indicación en pantalla, vuelva a pulsar elbotón MENU.
Tras seleccionar “BLOQ”, no podrá seleccionar másopciones excepto “SALIR” y “ OPCION” en laindicación MENU.Si pulsa algún botón aparte del interruptor u (encendido) oel botón MENU, aparece la marca en pantalla.
Para cancelar el bloqueo de los controles
Repita los anteriores pasos 1 a 3 y pulse los botones>?// para seleccionar “DESBLO”.
Ajuste del tiempo de retardo de ahorro deenergía
Puede ajustar el tiempo de retardo que debe transcurrirantes de que el monitor entre en el modo de ahorro deenergía. Consulte la página 19 para más información sobrelas funciones de ahorro de energía de este monitor.
1 Pulse el botón MENU.Aparece la indicación MENU.
2 Pulse los botones ¨./> y >?// para seleccionar“ OPCION” y vuelva a pulsar el botón MENU.Aparece la indicación OPCION.
3 Pulse los botones ¨./> para seleccionar “ ZZ...
(RETARDO A.ENERG)”.
4 Pulse los botones >?// para seleccionar el tiempoque desee.
Cuando RETARDO A.ENERG se ajusta en “NO”, elmonitor no entra en el modo de ahorro de energía.
La indicación OPCION desaparece automáticamentedespués de unos 30 segundos.Para cerrar la indicación en pantalla, vuelva a pulsar elbotón MENU.
Para reajustar, pulse el botón RESET mientras la indicaciónaún esté activada.
MENU
MENU
SI
DESMAGNET MANU
DESBLO1 MIN
OPCION
ZZ...
SI
DESMAGNET MANU
DESBLO1 MIN
OPCION
ZZ...
ZZ...
RETARDO A.ENERG
OPCION
5 SEC60 MIN
1 MINNO
AUTO
ZZ...
BLOQUEO DE AJUS
OPCION
DESBLO BLOQ
AUTO

17
Personalización del monitor
ES
Uso de la indicación en pantallaLANG (Idioma)Existen versiones de la indicación en pantalla en inglés,francés, alemán, español, italiano y japonés.
1 Pulse el botón MENU.Aparece la indicación MENU.
2 Pulse los botones ¨./> y >?// para seleccionar“ LANG” y vuelva a pulsar el botón MENU.Aparece la indicación en pantalla LANGUAGE.
3 Pulse los botones ¨./> para seleccionar el idiomaque desee.
ENGLISH: inglés, FRANÇAIS: francés,DEUTSCH: alemán, ESPAÑOL: español,ITALIANO: italiano, o : japonés.
La indicación desaparece automáticamente después de unos30 segundos. Para cerrar la indicación en pantalla, vuelva apulsar el botón MENU.
Para reajustar, pulse el botón RESET mientras la indicaciónaún se encuentre activada.
MENU
RESET
MENU
RESET
Restauración de los ajustes defábrica
Reajuste de una opción
1 Pulse los botones MENU, ¨./> y >?// paraseleccionar la indicación que contiene la opción quedesee reajustar.
2 Pulse los botones ¨./> para seleccionar la opciónque desee reajustar.
3 Pulse el botón RESET.
Restauración de todos los datos de ajustepara la señal de entrada actual
Sin ninguna indicación en pantalla, pulse el botónRESET.Se restauran los ajustes predefinidos de fábrica de todos losdatos de ajuste para la señal de entrada actual.Tenga presente que los datos de ajuste que no se venafectados por los cambios de señal de entrada (idioma yposición de la indicación en pantalla, selección de la señalde entrada, tiempo de retardo del modo de ahorro deenergía y función de bloqueo de los controles) no recuperanlos valores predefinidos de fábrica.
Restauración de todos los datos de ajustepara todas las señales de entrada
Pulse y mantenga pulsado el botón RESET durante másde dos segundos.Se restauran los ajustes predefinidos de fábrica de todos losdatos de ajuste, incluidos el brillo y contraste.
RESET
ENGLISHFRANÇAISDEUTSCHESPAÑOLITALIANO
LANGUAGE

18
Funciones técnicas
Modos predefinidos y de usuarioEste monitor dispone de modos predefinidos de fábricacorrespondientes a las normas más utilizadas en el sectorpara posibilitar la compatibilidad “plug and play”.
Al introducir una señal de entrada nueva, el monitorselecciona el modo predefinido de fábrica apropiado y ajustamomentáneamente la calibración de fase para proporcionarimágenes de alta calidad en el centro de la pantalla. Lacalibración se almacena en memoria y se recuperainmediatamente al recibirse la misma señal de entrada.
Nº
1
2
3
4
5
6
7
8
9
10
11
12
13
14
15
16
17
18
19
20
21
22
23
24
25
26
27 *
Resolución(puntos ×líneas)
640 × 350
640 × 480
640 × 480
640 × 480
720 × 400
720 × 400
800 × 600
800 × 600
800 × 600
832 × 624
1024 × 768
1024 × 768
1024 × 768
1024 × 768
1024 × 768
1152 × 864
1152 × 870
1280 × 960
1280 × 960
1280 × 1024
1280 × 1024
1280 × 1024
1600 × 1200
1600 × 1200
1600 × 1200
1600 × 1200
1600 × 1200
Frecuenciahorizontal
31,5 kHz
31,5 kHz
37,5 kHz
43,3 kHz
31,5 kHz
37,9 kHz
37,9 kHz
46,9 kHz
53,7 kHz
49,7 kHz
48,4 kHz
56,5 kHz
60,0 kHz
60,2 kHz
68,7 kHz
67,5 kHz
68,7 kHz
60,0 kHz
85,9 kHz
64,0 kHz
80,0 kHz
91,1 kHz
75,0 kHz
81,3 kHz
87,5 kHz
93,8 kHz
106,3 kHz
Frecuenciavertical
70 Hz
60 Hz
75 Hz
85 Hz
70 Hz
85 Hz
60 Hz
75 Hz
85 Hz
75 Hz
60 Hz
70 Hz
75 Hz
75 Hz
85 Hz
75 Hz
75 Hz
60 Hz
85 Hz
60 Hz
75 Hz
85 Hz
60 Hz
65 Hz
70 Hz
75 Hz
85 Hz
Modo gráfico
MCGA
VGA-G
EVGA
VESA
VGA-Texto
VESA
SVGA
ESVGA
VESA
Macintosh16” Color
VESA
VESA
EUVGA
Macintosh19” Color
VESA
VESA
Macintosh21” Color
VESA
VESA
VESA
VESA
VESA
VESA
VESA
VESA
VESA
VESA
Funciones técnicas
Con respecto a las señales de entrada que no coincidan conuno de los modos predefinidos de fábrica, la tecnologíadigital Multiscan de este monitor realiza todos los ajustesnecesarios para garantizar la presentación en pantalla deimágenes nítidas de cualquier sincronización dentro delmargen de frecuencia del monitor. No obstante, es posibleque sea necesario realizar el ajuste con precisión del tamañoy centrado horizontal/vertical. Basta con pulsar el botónASC o con ajustar el monitor según las instrucciones deajuste. Los ajustes se almacenan automáticamente comomodo de usuario y se recuperan al recibirse lacorrespondiente señal de entrada.
Condiciones recomendadas de sincronizaciónhorizontal y verticalEl rendimiento de anchura de sincronización horizontal debe ser:
> 4,8% del tiempo horizontal total.La anchura de supresión horizontal debe ser: > 2,5 µseg.La anchura de supresión vertical debe ser: > 450 µseg.
Nota para los usuarios de WindowsConsulte el manual de la tarjeta de vídeo o el programa de utilidadsuministrado con la tarjeta y seleccione el índice de barrido más altodisponible para optimizar el rendimiento del monitor.
Ajuste de la resolución y número de colores delmonitorConsulte el manual de instrucciones del ordenador para ajustar laresolución y número de colores del monitor. El número de colorespuede variar en función del ordenador o de la tarjeta de vídeo. Elajuste de la paleta de colores y el número real de colores es de lasiguiente forma:• High Color (16 bits) n 65.536 colores• True Color (24 bits) n aproximadamente 16,77 millones de
coloresEn el modo True Color (24 bits), la velocidad puede ser menor.
* sólo para GDM-500PST9

19
Funciones técnicas
ES
Función de ahorro de energíaEste monitor cumple las directrices de ahorro de energíaestablecidas por VESA y Energy Star, así como las másexigentes directrices de NUTEK.Si el monitor está conectado a un ordenador o tarjeta gráficade vídeo que cumpla con VESA DPMS (Display PowerManagement Signaling), dicho monitor reduciráautomáticamente el consumo de energía en tres fases, comose muestra a continuación.
Puede utilizar la indicación en pantalla para definir eltiempo de retardo para que el monitor entre en el modo deahorro de energía. Ajuste este valor según las instruccionesdel apartado “Ajuste del tiempo de retardo de ahorro deenergía” en la página 16.
NotaSi no se introduce ninguna señal de vídeo al monitor, aparece elmensaje “NO SEÑAL” (página 20). Una vez transcurrido el tiempode retardo, la función de ahorro de energía hace que el monitorpase automáticamente al modo activo - inactivo y se ilumina elindicador u de color naranja. Cuando se han detectado las señalesde sincronización horizontal y vertical, el monitor reanudaautomáticamente el modo de funcionamiento normal.
1
2
3
4
5
Recovery time
—
Aprox. 3 seg.
Aprox. 3 seg.
Aprox. 10 seg.
—
Indicador u
Verde
Verde/naranja
Verde/naranja
Naranja
Apagado
Consumo de energía
≤ 145 W (GDM-500PST9)≤ 125 W (GDM-400PST9)
Aprox. 72 W (GDM-500PST9)Aprox. 65 W (GDM-400PST9)
Aprox. 8 W
Aprox. 4 W
0 W
Modo de ahorrode energía
Funcionamientonormal
Modo de espera(1er estado)
Modo de espera(2º estado)
Activo-inactivo(3er estado)
Apagado
Pantalla
activa
en blanco
en blanco
en blanco
—
Señal desincronizaciónhorizontal
presente
ausente
presente
ausente
—
Señal desincronizaciónvertical
presente
presente
ausente
ausente
—
Hilos de amortiguaciónAl visualizar un fondo blanco, es posible que se vean enpantalla líneas horizontales muy finas, como se muestra acontinuación. Dichas líneas son las sombras de los hilos deamortiguación y son características de los TRC con rejillasde apertura. Los hilos están unidos a la rejilla de aperturadel interior del tubo Trinitron y evitan la vibración de dicharejilla.
Hilos de amortiguación
Función Plug & PlayEste monitor cumple, las normas de Canal de Datos deVisualización (DDC) DDC1, DDC2B, DDC2AB y DDC2B+de VESA.Cuando se conecta un sistema central DDC1, el monitor sesincroniza con V. CLK de acuerdo con las normas VESA ytransmite los Datos de Identificación de VisualizaciónExtendidos (EDID) a la línea de datos.Cuando se conecta con un sistema central DDC2B, DDC2ABo DDC2B+, el monitor cambia automáticamente a la normaadecuada.
DDC es una marca comercial de Video ElectronicsStandard Association.
NotaAl utilizar Windows 95/98, la norma DDC no se aplica a losconectores 5 BNC. Si emplea la norma DDC, enchufe el conectorHD15 al ordenador mediante el cable de señal de vídeosuministrado.

20
Información adicional
Mensajes de avisoSi existe algún problema con la señal de entrada, apareceuno de los siguientes mensajes.
Información adicional
1 El estado de la señal de entrada“FUERA DE RANGO EXPLORACION” indica que lasespecificaciones del monitor no admiten la señal deentrada.“NO SEÑAL” indica que no se recibe ninguna señal, oque no se recibe la señal procedente del conector deentrada seleccionado.
2 El conector de entrada seleccionadoIndica qué conector de entrada está recibiendo la señalincorrecta.Si existe algún problema con la señal procedente deambos conectores de entrada, los mensajes “HD15” y“BNC” aparecen de forma alterna.
Para resolver estos problemas, consulte “Solución deproblemas” a continuación.
INFORMACION
FUERA DE RANGO EXPLORACION
ENTRADA : HD15
Solución de problemasEsta sección puede ayudarle a localizar un problema y, por consiguiente, eliminar la necesidad de llamar al soporte técnico.
Síntoma Compruebe lo siguiente
No aparece ninguna imagen
No está iluminado elindicador u
Si el mensaje “NO SEÑAL”aparece en la pantalla, o si elindicador u se ilumina ennaranja o alterna entre elverde y el naranja
Si el mensaje “FUERA DERANGO EXPLORACION”aparece en pantalla
Si no aparece ningún mensajey el indicador u se iluminaen color verde o parpadea encolor naranja
Si utiliza un sistemaMacintosh
Si trabaja con Windows 95/98
La imagen aparece codificada
• Asegúrese de que el cable de alimentación está correctamente conectado.• Compruebe que el interruptor u (de encendido) se encuentra en la posición “on”.
• Si el monitor se encuentra en modo de ahorro de energía, la pantalla aparece en blanco. Pulsecualquier tecla del teclado del ordenador.
• Cerciórese de que el interruptor de encendido del ordenador está en la posición “on”.• Compruebe que el ajuste de selección de entrada sea correcto.• Asegúrese de que el cable de señal de vídeo está debidamente conectado y que todos los
enchufes están perfectamente encajados en las clavijas.• Compruebe que los 5 BNC se han conectado en el orden correcto (de izquierda a derecha: Rojo-
Verde-Azul-HD-VD) (página 6).• Asegúrese de que el conector de entrada de vídeo HD15 no tiene terminales torcidos o
arrancados.• Compruebe que la tarjeta de vídeo está perfectamente encajada en la ranura de bus apropiada.
• Verifique que el rango de frecuencia de vídeo está dentro de los límites especificados para elmonitor.Horizontal: 30 – 94 kHz (GDM-400PST9), 30 – 107 kHz (GDM-500PST9)Vertical: 48 – 160 HzConsulte el manual de instrucciones del ordenador para ajustar el rango de frecuencia de vídeo.
• Si utiliza un adaptador de señal de vídeo, compruebe que sea correcto.
• Consulte “Función de autodiagnóstico” (página 22).
• Compruebe que se han conectado correctamente el adaptador Macintosh y el cable de señal devídeo (página 6).
• Si ha sustituido un monitor antiguo por este, vuelva a conectar el antiguo y realice lo siguiente. Instaleel disquete Windows Monitor Information Disk (página 7) y seleccione “GDM-400PST9” o “GDM-500PST9” entre los diferentes monitores de Sony en la pantalla de selección de monitores de Windows95/98. Si selecciona “Plug and Play”, conecte el monitor al ordenador con la señal de vídeo HD15. Noes posible utilizar los cinco conectores BNC.
• Consulte el ajuste de monitor apropiado en el manual de la tarjeta gráfica.• Revise este manual y confirme que se admiten el modo gráficos y la frecuencia a la que está
operando. Incluso si la frecuencia está en el intervalo adecuado, algunas tarjetas de vídeopueden tener un impulso de sincronización demasiado estrecho para que el monitor sesincronice correctamente.

21
Información adicional
ES
Síntoma Compruebe lo siguiente
El color no es uniforme
No puede ajustar el monitorcon los botones del panel defrontal
El blanco no parece blanco
La imagen no está centrada enpantalla o tiene un tamañoincorrecto
Los bordes de la imagen soncurvos
Las líneas blancas muestransombras rojas o azules en losbordes
La imagen aparece borrosa
La imagen salta o sufreoscilaciones
La imagen parpadea
Aparecen imágenes fantasma
Se observa en pantalla unpatrón ondulado o elíptico(muaré)
Se observan dos líneashorizontales finas
Se oye un zumbido trasencender la unidad
• Desmagnetice el monitor (página 15).Si sitúa un equipo que genera un campo magnético, como un altavoz, cerca del monitor ocambia la dirección de éste, el color puede dejar de ser uniforme.Esta función permite desmagnetizar el armazón metálico del TRC a fin de obtener un camponeutro en el que la reproducción de los colores es uniforme. Si necesita aplicar un segundociclo de desmagnetización, deje que transcurran al menos 20 minutos para obtener unosresultados óptimos.
• Ajuste la recepción (páginas 13 – 14 ).
• Si la función de bloqueo de los controles está activada, desactívela mediante la indicación enpantalla OPCION (página 16).
• Ajuste la temperatura de color (páginas 12 – 13 ).• Compruebe que los 5 BNC se han conectado en el orden correcto (de izquierda a derecha:
Rojo-Verde-Azul-HD-VD) (página 6).
• Pulse el botón ASC (página 7).• Ajuste el tamaño o centrado (página 10).• En algunos modos de vídeo la imagen no ocupa toda la pantalla hasta los bordes. Este
problema suele producirse con determinadas tarjetas de vídeo.
• Ajuste la geometría (página 11).
• Ajuste la convergencia (páginas 13 – 14).
• Ajuste el contraste y brillo (página 9).• Desmagnetice el monitor (página 15).
Si sitúa un equipo que genera un campo magnético, como un altavoz, cerca del monitor ocambia la dirección de éste, el color puede dejar de ser uniforme.Esta función permite desmagnetizar el armazón metálico del TRC a fin de obtener un camponeutro en el que la reproducción de los colores es uniforme. Si necesita aplicar un segundociclo de desmagnetización, deje que transcurran al menos 20 minutos para obtener unosresultados óptimos.
• Si aparecen sombras rojas o azules a lo largo de los bordes de las imágenes, ajuste laconvergencia (páginas 13 – 14).
• Si se cancela el efects muaré, la imagen puede aparecer borrosa. Reduzca el efecto decancelación de muaré (páginas 13 – 14).
• Aísle y elimine las fuentes potenciales de campos eléctricos o magnéticos. Algunas causasfrecuentes de este síntoma son los ventiladores eléctricos, las lámparas fluorescentes y lasimpresoras láser.
• Si ha instalado otro monitor en las inmediaciones, aumente la distancia entre ambos parareducir la interferencia.
• Enchufe el monitor a una toma de CA diferente, a ser posible en un circuito distinto.• Pruebe el monitor con otro ordenador y en una habitación distinta.
• Defina el índice de barrido en el ordenador para obtener una imagen con la mayor calidadposible; para ello, consulte el manual del ordenador.
• Si detecta este síntoma, evite el uso de cables prolongadores de vídeo y/o de cajasconmutadoras. Puede deberse a la longitud excesiva de los cables o a una conexión débil.
• Cancele el efecto muaré (páginas 13 – 14).El efecto muaré puede modificarse en función del ordenador conectado.
• Debido a la relación entre la resolución, el paso de puntos del monitor y el paso de algunospatrones de imagen, determinados fondos de pantalla, muestran ocasionalmente efectomuaré. Cambie el patrón de escritorio.
• Estas líneas estabilizan la rejilla de apertura de disposición vertical (página 19). Esta rejilla deapertura permite que pase mayor cantidad de luz a la pantalla proporcionando el TRCTrinitron más color y brillo.
• Cuando se enciende el monitor, se activa el ciclo de desmagnetización. Es posible que oiga unzumbido mientras este ciclo se encuentra activado (3 segundos). Se oye el mismo zumbido aldesmagnetizar el monitor manualmente. No se trata de un funcionamiento defectuoso.

22
Información adicional
Función de autodiagnósticoEl monitor está equipado con una función deautodiagnóstico. Si el monitor o el ordenador u ordenadorespresentan algún problema, la pantalla se mostrará en blancoy el indicador u se iluminará en verde o parpadeará ennaranja.
Si el indicador u se ilumina en color verde
1 Desconecte los enchufes de los conectores 1 y 2 deentrada de vídeo o apague los ordenadoresconectados.
2 Pulse y mantenga pulsado el botón >/ durante 2segundos.
Si aparecen las cuatro barras de color (blanco, rojo,verde, azul), el monitor funciona correctamente. Vuelvaa conectar los cables de entrada de vídeo y compruebe elestado de los ordenadores.
Si las barras de color no aparecen, es posible que se debaa un fallo del monitor. Póngase en contacto con elproveedor Sony más próximo.
Si el indicador u parpadea en color naranja
Pulse el botón u para apagar y encender el monitor.
Si el indicador u se ilumina en color verde, el monitorestá funcionando correctamente.
Si el indicador u sigue parpadeando, es posible que sehaya producido un fallo del monitor. Cuente lossegundos entre los parpadeos y póngase en contacto conel proveedor Sony más próximo. No olvide anotar elnombre de modelo y número de serie de la unidad, asícomo la marca y modelo del ordenador y tarjeta de vídeo.
u Indicador
EspecificacionesGDM-400PST9
Tubo de imagen Paso de rejilla de apertura de0,25 – 0,27 mm19 pulgadas en diagonalDeflexión, 90 grados
Tamaño de la imagen visualizableAprox. 365 × 273 mm (an/al)Imagen de visualización de18,0 pulgadas
Resolución Horizontal: Máx. 1600 puntosVertical: Máx. 1200 líneas
Area estándar de la imagenAprox. 330 × 264 mm (an/al)oAprox. 352 × 264 mm (an/al)
Frecuencia de deflexión Horizontal: 30 a 94 kHzVertical: 48 a 160 Hz
Tensión/intensidad de entrada CA100 a 240 V, 50 – 60 Hz, 1,8 – 1,0 A
Consumo de energía Máx. 125 WDimensiones 444 × 467 × 453 mm (an/al/pf)Peso Aprox. 25 kgAccesorios suministrados
Consulte la página 6.
GDM-500PST9
Tubo de imagen Paso de rejilla de apertura de0,25 – 0,27 mm21 pulgadas en diagonalDeflexión, 90 grados
Tamaño de la imagen visualizableAprox. 403,8 × 302,2 mm (an/al)Imagen de visualización de19,8 pulgadas
Resolución Horizontal: Máx. 1600 puntosVertical: Máx. 1200 líneas
Area estándar de la imagenAprox. 388 × 291 mm (an/al)oAprox. 364 × 291 mm (an/al)
Frecuencia de deflexión Horizontal: 30 a 107 kHzVertical: 48 a 160 Hz
Tensión/intensidad de entrada CA100 a 240 V, 50 – 60 Hz, 2,0 – 1,0 A
Consumo de energía Máx. 145 WDimensiones 498 × 505 × 474 mm (an/al/pf)Peso Aprox. 31 kgAccesorios suministrados
Consulte la página 6.
Diseño y especificaciones sujetos a cambios sin previo aviso.

3
IT
Operazioni preliminariPrecauzioni ........................................................................................................................... 4Identificazione dei componenti e dei comandi ............................................................... 5Installazione .......................................................................................................................... 6Regolazione automatica della dimensione e centratura dell’immagine ...................... 7Selezione della lingua per l’indicazione a schermo (OSD) ............................................ 7Selezione del segnale d’ingresso ....................................................................................... 8
Personalizzazione del monitorRegolazione della luminosità e del contrasto dell’immagine ....................................... 9Il sistema di indicazione a schermo .................................................................................. 9Uso dell’indicazione a schermo CENTR (Centratura) ................................................. 10Uso dell’indicazione a schermo DIMENS (Dimensione) ............................................. 10Uso dell’indicazione a schermo GEOM (Geometria) ................................................... 11Uso dell’indicazione a schermo ZOOM ......................................................................... 12Uso dell’indicazione a schermo COLORE ..................................................................... 12Uso dell’indicazione a schermo SCHERM (Schermo) .................................................. 13Uso dell’indicazione a schermo OPZION (Opzioni) .................................................... 15Uso dell’indicazione a schermo LANG (Lingua) .......................................................... 17Reimpostazione dei dati preimpostati ............................................................................ 17
Caratteristiche tecnicheModo preimpostato e modo utente ................................................................................. 18Funzione di risparmio energetico ................................................................................... 19Cavi di smorzamento ........................................................................................................ 19Uso immediato ................................................................................................................... 19
Informazioni aggiuntiveFunzione di avvertimento del segnale d’ingresso ........................................................ 20Guida alla soluzione dei problemi .................................................................................. 20Funzione di autodiagnostica ............................................................................................ 22Caratteristiche tecniche ..................................................................................................... 22
AppendixTCO’99 Eco-document ......................................................................................................... i
INDICE
• Macintosh, é un marchio concesso in licenza a Apple Computer, Inc.registrato negli USA e in altri paesi.
• Windows® e MS-DOS sono marchi registrati di Mircosoft Corporationnegli USA e in altri paesi.
• IBM PC/AT e VGA sono marchi registrati di IBM corporation degliUSA.
• VESA é un marchio di Video Electronics Standard Association.• Tutti i nomi degli altri prodotti citati in questo manuale potrebbero
essere marchi o marchi registrati delle rispettive compagnie.• Inoltre “™” e “®” non sempre vengono riportati nel manuale.

Operazioni preliminari
4
Avvertenza per i collegamenti dialimentazione
• Usare un cavo di alimentazione adeguatoall’alimentazione del paese in cui ci si trova.Per i clienti nel Regno UnitoSe si utilizza il monitor nel Regno Unito, utilizzare il cavoin dotazione con la spina per il Regno Unito.
Esempi di forme di spina
• Prima di scollegare il cavo di alimentazione, attenderealmeno 30 secondi dallo spegnimento dell’apparecchioper consentire la dispersione dell’elettricità statica sullasuperficie del tubo catodico.
• Non appena si accende l’apparecchio, il tubo catodicoviene smagnetizzato per circa 3 secondi. Questaoperazione crea un forte campo magnetico attorno altelaio metallico, che potrebbe danneggiare i dati di dischio i nastri magnetici situati nelle immediate vicinanze.Collocare eventuali apparecchiature di registrazione edischi o nastri lontano dal monitor.
La presa di rete dovrebbe essere situata in prossimitàdell’apparecchiatura ed essere facilmente accessibile.
per CA da 100 a120 V
per CA da 200 a240 V
Operazioni preliminari
90°
90°
15°
5°
solo per CA 240 V
Precauzioni
Installazione
• Evitare il surriscaldamento interno consentendoun’adeguata circolazione dell’aria. Non collocare ilmonitor su tappetini o coperte, né in prossimità ditendaggi che potrebbero bloccarne le prese diventilazione.
• Non installare il monitor vicino a fonti di calore qualiradiatori o condotti d’aria calda, né in luoghi esposti allaluce diretta del sole, a polvere eccessiva, a vibrazionimeccaniche o urti.
• Non collocare il monitor accanto ad apparecchi generatoridi campi magnetici, quali convertitori o linee ad altatensione.
Manutenzione
• Pulire il rivestimento, il pannello ed i comandi con unpanno morbido leggermente inumidito con una soluzionedetergente. Non utilizzare alcun tipo di spugnetta opolvere abrasiva, né solventi quali alcool o benzene.
• Non strofinare, toccare o tamburellare sulla superficiedello schermo con oggetti appuntiti o abrasivi quali pennea sfera o cacciaviti. Ciò potrebbe infatti graffiare ilcinescopio a colori.
• Pulire lo schermo con un panno morbido. Se si utilizza undetergente per il vetro, assicurarsi di non utilizzare undetergente che contenga una soluzione antistatica o unadditivo simile perché potrebbe graffiare il rivestimentodello schermo.
Trasporto
Se si deve spedire il presente monitor o lo si deve inviare inriparazione, imballarlo nella scatola originaria.
Uso del sistema orientabile
Grazie al sistema di orientamento il monitor può essereregolato per consentire la visione all’inclinazione desiderata,compresa fra 180° in orizzontale e 20° in verticale.Per ruotare il monitor orizzontalmente e verticalmente,afferrarlo alla base con entrambe le mani, come illustratonella figura.

Operazioni preliminari
5
IT
Identificazione dei componenti edei comandiPer maggiori dettagli consultare le pagine indicate traparentesi.Il modello GDM-500PST9 viene usato su questo manuale ascopi illustrativi.
Parte anteriore
1 Tasto RESET (ripristina) (pagina 17)Per ripristinare le impostazioni effettuate in fabbrica.
2 Tasto ASC (centratura e dimensionamentoautomatici) (pagina 7)Per regolare automaticamente la dimensione e lacentratura delle immagini.
3 Tasto INPUT (ingresso) ed indicatori HD15/BNC (pagina 8)Per selezionare il segnale di ingresso video HD15 o5BNC. Ogni volta che si preme questo tasto, il segnaledi ingresso e l’indicatore corrispondente si alternano.
4 Tasti ¨ (luminosità) (./>) (pagine 8 – 17)Per regolare la luminosità dell’immagine.
Svolgono la stessa funzione dei tasti (./>) per laregolazione di altre voci.
5 Tasto MENU (menu) (pagine 8 – 17)Per visualizzare l’indicazione a schermo MENU.
6 Tasti > (contrasto) (?//) (pagine 8 – 17,22)Per regolare il contrasto.
Svolgono la stessa funzione dei tasti (?//) per laregolazione di altre voci.
7 Interruttore ed indicatore di accensione u(pagine 19, 22)Per accendere e spegnere il monitor.L’indicatore si illumina in verde quando il monitorviene acceso e lampeggia in verde e arancione o siillumina in arancione quando il monitor è nel modo dirisparmio energetico.
Parte posteriore
8 Connettore AC INCollega un cavo di alimentazione CA al monitor.
9 Connettore di ingresso video 1 (HD15)Il connettore accetta i segnali video RVB (0,700 Vp-p,positivo) e i segnali SYNC.
* Standard del Display Data Channel (DDC) del marchio VESA
!º Connettore d’ingresso video 2 (5 BNC)Il connettore accetta i segnali video RVB (0,700 Vp-p,positivo) e i segnali SYNC.
N. piedino
1
2
3
4
5
6
7
8
Segnale
Rosso
Verde(Sinc. compositosul verde)
Blu
ID (Terra)
Terra DDC*
Terra rosso
Terra verde
Terra blu
Segnale
DDC + 5V*
Terra
ID (Terra)
Datibidirezionali(SDA)*
Sinc O.
Sinc V.
Orologio dati(SCL)*
N. piedino
9
10
11
12
13
14
15
5 4 3 2 1678910
1112131415
MENUINPUTRESET
ASC HD15 BNC

Operazioni preliminari
6
Se il PC non è compatibile con DDC2AB e DDC2B+Per la compatibilità con DDC2AB e DDC2B+ questo monitor usa ilpiedino N. 9 nel connettore del segnale video.È possibile che alcuni PC che non sono compatibili con DDC2AB ocon DDC2B+ non accettino il piedino N. 9. Nel caso di dubbio,utilizzare l’adattatore HD15 (femmina) - HD15 (maschio senza ilpiedino N. 9) (non in dotazione). Accertarsi che il lato del maschio(senza il piedino N. 9) sia collegato al computer.
Collegamento al computer Macintosh ocompatibile
Adattatore Macintosh in dotazioneL’adattatore Macintosh in dotazione è compatibile con i computerdella serie Macintosh LC, Performa, Quadra, Power Macintosh ePower Macintosh G3.Per la serie Macintosh II e per alcune versioni più vecchie deimodelli Power Book è possibile che sia necessario un adattatore conmicrocommutatori (non in dotazione).
Collegamento ai 5 connettori BNC
Per collegare i 5 connettori BNC, utilizzare il cavo di segnalevideo SMF-400 (venduto separatamente). Collegare i cavi dasinistra a destra seguendo il seguente ordine: Rosso-Verde-Blu-HD-VD.
Note• Non accorciare i piedini del cavo del segnale video.• Lo standard DDC non è valido per i 5 connettori BNC. Nel caso
in cui si utilizzi lo standard DDC, collegare il connettore HD15al computer utilizzando il cavo di segnale video in dotazione.
InstallazionePrima di utilizzare il monitor, verificare che la confezionecontenga i seguenti elementi:• Monitor (1)• Cavo di alimentazione (1)• Cavo del segnale video HD15 (1)• Adattatore Macintosh (1)• Windows Monitor Information Disk (1)• Scheda di garanzia (1)• Il presente manuale di istruzioni (1)
Questo monitor funziona con qualsiasi sistema IBM o IBM-compatibile che disponga della funzionalità di grafica VGAo successive. Sebbene questo monitor funzioni con altrepiattaforme funzionanti su frequenze orizzontali tra 30 e 94kHz (GDM-400PST9), 30 e 107 kHz (GDM-500PST9), sistemiMacintosh e Power Macintosh inclusi, è necessario unadattatore per il cavo. Rivolgersi al proprio rivenditore perl’acquisto dell’adattatore appropriato.
Punto 1: Collegare il monitor al computer
Quando il computer è spento, collegare il cavo del segnalevideo HD15 in dotazione al monitor.• Nel caso in cui si utilizzi un computer IBM PC/AT o un
computer IBM compatibile, consultare la sezione riportatadi seguito.
• Nel caso in cui si utilizzi un computer Macintosh o uncomputer compatibile, consultare la sezione,“Collegamento al computer Macintosh o compatibile”.
• Se si desidera utilizzare i 5 connettori BNC, consultare lasezione “Collegamento ai 5 connettori BNC”.
Collegamento al computer IBM PC/AT o IBM-compatibile
* È possibile che per alcuni modelli sia necessario l’adattatoreHD15 - HD15.
all’HD15
all’uscita video
adattatore HD15 - HD15(non in dotazione)*
computerIBM PC/AT oIBM-compatibile cavo di segnale
video HD15(in dotazione)
all’uscita video
Adattatore Macintosh(in dotazione)
Cavo di segnalevideo HD15(in dotazione)
all’ingresso VIDEO IN R/G/B
Effettuare il collegamento alcomputer seguendo la stessaprocedura adottata per ilconnettore HD15.
ComputerMacintosho compatibile
all’ingressoSYNC IN HD/VD
all’HD15

Operazioni preliminari
7
IT
Regolazione automatica delladimensione e centraturadell’immaginePremendo il tasto per la regolazione della dimensione ecentratura automatica (ASC), la dimensione e la centraturadell’immagine vengono automaticamente adattate alloschermo.
1 Accendere il monitor ed il computer.
2 Premere il tasto ASC.L’immagine viene centrata sullo schermo.
Note• Questa funzione è stata ideata per computer su cui gira
Windows o un software di interfaccia grafica simile che forniscaun’immagine a schermo pieno. Potrebbe non funzionarecorrettamente se il colore di sfondo è scuro o se l’immagine diinput non riempie lo schermo fino ai bordi (quale il prompt diMS-DOS).
• È possibile che lo schermo si oscuri per un attimo durante lafunzione di dimensione automatica. Non si tratta di un guasto.
• Nonostante i segnali del rapporto di formato dell’immagine 5:4(risoluzione 1280 × 1024) non riempiano lo schermo fino aibordi, l’immagine viene visualizzata correttamente.
Selezione della lingua perl’indicazione a schermo (OSD)Nel caso in cui occorre cambiare la lingua dell’OSD,consultare “Uso dell’indicazione a schermo LANG(Lingua)” a pagina 17.La lingua inglese é la lingua preimpostata.
ASC
alla presa di rete
Cavo di alimentazione(in dotazione)
all’ingressoAC IN
Punto 2: Collegare il cavo di alimentazione
Con il monitor spento, collegare un capo del cavo dialimentazione al monitor e l’altro capo alla presa di rete.
Punto 3: Accendere il monitor ed ilcomputer
L’installazione del monitor è completata.
NotaSe sullo schermo appare il messaggio “FUORI GAMMA SCANS” o“NO SEGNALE INGR”, consultare “Funzione di avvertimento delsegnale d’ingresso” a pagina 20.
Per gli utenti di Windows 95/98Per potenziare al massimo il monitor, installare sul propriocomputer il nuovo file di informazioni sul modello dal discoWindows Monitor Information Disk.Questo monitor è conforme allo standard Plug & Play “VESADDC”. Se la scheda grafica/PC è conforme a DDC, selezionare“Plug & Play Monitor (VESA DDC)” o il nome del modello diquesto monitor come tipo di monitor dal “Control Panel” diWindows 95/98. Alcune schede grafiche/PC non sono conformi aDDC. Se la scheda grafica/PC ha difficoltà a comunicare con questomonitor, caricare il disco Windows Monitor Information Disk eselezionare il nome del modello di questo monitor come tipo dimonitor.
Per gli utenti di Windows NT4.0L’impostazione del monitor in Windows NT4.0 è differente daWindows 95/98 e non occorre effettuare la selezione del tipo dimonitor. Per informazioni dettagliate sulla regolazione dellarisoluzione, frequenza di refresh e numero di colore, consultare leistruzioni per l’uso di Windows NT4.0.

Operazioni preliminari
8
Selezione del segnale d’ingressoQuesto monitor dispone di due connettori di ingresso delsegnale (HD15 e 5BNC) con capacità di collegamento a duecomputer. Dopo aver acceso i due computer, selezionare ilsegnale di ingresso desiderato nel modo descritto di seguito.
1 Accendere il monitor ed i computer.
2 Premere il tasto INPUT per selezionare il segnale diingresso HD15 o 5BNC.Ad ogni pressione del tasto INPUT, si alternano ilsegnale di ingresso e l’indicatore corrispondente.
Selezione del modo del segnale diINGRESSO
Questo monitor dispone di due modi di selezione delsegnale d’ingresso, “AUTO” e “MANU”.
Quando viene selezionato “AUTO”
Se dal connettore selezionato non viene immesso alcunsegnale, il monitor seleziona automaticamente il segnaledell’altro connettore. Quando viene riavviato il computer dacui si desidera vedere le immagini oppure quando talecomputer è in modo di risparmio energetico, il monitor puòselezionare automaticamente il segnale dell’altro connettore.Questo avviene perché il monitor non riceve più il segnaleinterrotto ma il segnale costante. In questo caso selezionaremanualmente il segnale desiderato utilizzando il tastoINPUT.
Quando è selezionato “MANU”Anche se dal connettore selezionato non viene prodottoalcun segnale, il monitor non seleziona il segnale dell’altroconnettore.
1 Premere il tasto MENU.Appare l’indicazione a schermo MENU.
HD15 BNC INPUT
MENU
2 Premere i tasti ¨./> e >?// per selezionare“ OPZION”, e premere nuovamente il tastoMENU.Appare l’indicazione a schermo OPZIONI.
3 Premere i tasti ̈ ./> per selezionare “(INGRESSO)”.
4 Premere i tasti >?// per selezionare “AUTO” o“MANU”.
Dopo circa 30 secondi l’indicazione a schermo OPZIONIscompare automaticamente.Per spegnere l’indicazione a schermo, premere nuovamenteil tasto MENU.
Per maggiori informazioni riguardanti l’uso delleindicazioni a schermo (OSD), consultare “Il sistema diindicazione a schermo” a pagina 9.
MENU
USCITA
CENTR
DIMENS
GEOM
COLORE
LANG
ZOOM
SCHERM
OPZION
OK MENU
SI
SMAGNET MANUALE
SBLOC1 MIN
OPZIONI
ZZ...
AUTO
ZZ...
INGRESSO
1 MIN
OPZIONI
SBLOC
MANU

9
Personalizzazione del monitor
IT
Frequenzaorizzontale*
Frequenzaverticale*
Operazioni precedenti la regolazione
• Collegare il monitor e il computer, e poi accenderli.• Selezionare “ LANG” nell’indicazione a schermo
MENU, poi selezionare “ITALIANO” (consultare pagina17).
Regolazione della luminosità edel contrasto dell’immagineDopo aver regolato l’impostazione, questa vienememorizzata per tutti i segnali in entrata ricevuti.
1 Premere i tasti ¨ (luminosità) ./> o > (contrasto)?//.Appare l’indicazione a schermo LUMINOSITA/CONTRASTO.
2 Per la regolazione della luminositàPremere i tasti ¨./>.
> . . . per aumentare la luminosità. . . . per diminuire la luminosità
Per la regolazione del contrastoPremere i tasti >?//.
/ . . . aumentare il contrasto? . . . per diminuire il contrasto
L’indicazione a schermo scompare automaticamente dopocirca 3 secondi.
Per reimpostare i valori, premere il tasto RESET mentrel’indicazione a schermo è attiva. Vengono ristabiliti i valoripreimpostati in fabbrica della luminosità e del contrasto.
* Nell’indicazione a schermo LUMINOSITA/CONTRASTOappaiono le frequenze orizzontale e verticale per il segnale diingresso ricevuto.
LUMINOSITA/CONTRASTO
26 26
80.0kHz/ 75Hz
Personalizzazione del monitor
MENU
Il sistema di indicazione aschermoLa maggior parte delle regolazioni vengono effettuateusando il sistema di indicazione a schermo MENU.
Indicazione a schermo MENU
Per visualizzare l’indicazione a schermo MENU premereil tasto MENU.Nell’indicazione a schermo MENU sono inclusi deicollegamenti ad altre indicazioni a schermo descritte diseguito.
1 COLOREVisualizza l’indicazione a schermo COLORE perregolare la temperatura di colore.
2 CENTR (centratura)Visualizza l’indicazione a schermo CENTRATURA perregolare la centratura dell’immagine.
3 SCHERM (schermo)Visualizza l’indicazione a schermo SCHERMO perregolare le convergenze orizzontale e verticale, ecc.
4 ZOOMVisualizza l’indicazione a schermo ZOOM per allargareo ridurre l’immagine.
5 OPZION (opzioni)Visualizza l’indicazione a schermo OPZIONI perregolare la posizione dell’OSD e per smagnetizzare loschermo, ecc.
6 DIMENS (dimensione)Visualizza l’indicazione a schermo DIMENSIONE perregolare la dimensione dell’immagine.
7 LANG (lingua)Visualizza l’indicazione a schermo LANGUAGE perselezionare la lingua.
8 GEOM (geometria)Visualizza l’indicazione a schermo GEOMETRIA perregolare la rotazione e la distorsione a cuscinodell’immagine, ecc.
9 USCITAChiude l’indicazione a schermo MENU.
MENU
USCITA
CENTR
DIMENS
GEOM
COLORE
LANG
ZOOM
SCHERM
OPZION
OK MENU

Personalizzazione del monitor
10
Uso dell’indicazione a schermoCENTR (Centratura)Grazie alle impostazioni di CENTR è possibile effettuare laregolazione della centratura dell’immagine.I dati della regolazione verranno memorizzati per il segnaledi ingresso corrente.
1 Premere il tasto MENU.Appare l’indicazione a schermo MENU.
2 Premere i tasti ¨./> e >?// per selezionare“ CENTR”, e poi premere nuovamente il tastoMENU.Appare l’indicazione a schermo CENTRATURA.
3 Per la regolazione orizzontalePremere i tasti >?//.
/ . . . per spostare l’immagine a destra? . . . per spostare l’immagine a sinistra
Per la regolazione verticalePremere i tasti ¨./>.
> . . . per alzare l’immagine. . . . per abbassare l’immagine
Dopo 30 secondi circa l’indicazione a schermo scompareautomaticamente.Per spegnere l’indicazione a schermo, premere nuovamenteil tasto MENU.
Per reimpostare i valori, premere il tasto RESET mentrel’indicazione a schermo è attiva.Vengono ristabiliti i valori preimpostati in fabbrica dellacentratura orizzontale e verticale.
Uso dell’indicazione a schermoDIMENS (Dimensione)Grazie alle impostazioni di DIMENS è possibile regolare ladimensione dell’immagine.I dati della regolazione verranno memorizzati per il segnaledi ingresso corrente.
1 Premere il tasto MENU.Appare l’indicazione a schermo MENU.
2 Premere i tasti ¨./> e >?// per selezionare“ DIMENS”, e poi premere nuovamente il tastoMENU.Appare l’indicazione a schermo DIMENSIONE.
3 Per la regolazione orizzontalePremere i tasti >?//.
/ . . . per ingrandire l’immagine? . . . per ridurre l’immagine
Per la regolazione verticalePremere i tasti ¨./>.
> . . . per ingrandire l’immagine. . . . per ridurre l’immagine
L’indicazione a schermo scompare automaticamente dopocirca 30 secondi.Per spegnere l’indicazione a schermo, premere nuovamenteil tasto MENU.
Per reimpostare i valori, premere il tasto RESET mentrel’indicazione a schermo è attiva.Vengono ristabiliti i valori preimpostati in fabbrica per ledimensioni orizzontale e verticale.
MENU MENU
CENTRATURA
26
73
DIMENSIONE
26
73

11
Personalizzazione del monitor
IT
Selezionare
ROTAZIONE
DIST A CUSCINO
DISTORS SFERICA
DISTORS TRAP
BILANC ROMBOID
MENU
Uso dell’indicazione a schermoGEOM (Geometria)Le impostazioni GEOM (geometria) consentono laregolazione della forma e dell’orientamento dell’immagine.I dati della regolazione della rotazione verrannomemorizzati per tutti i segnali di ingresso ricevuti. Gli altridati verranno memorizzati per il segnale di ingressocorrente.
1 Premere il tasto MENU.Appare l’indicazione a schermo MENU.
2 Premere i tasti ¨./> e >?// per selezionare“ GEOM”, e premere nuovamente il tasto MENU.Appare l’indicazione a schermo GEOMETRIA.
3 Premere i tasti ¨./> per selezionare la voce per cuisi desidera effettuare la regolazione.
Per
effettuare la regolazione dellarotazione dell’immagine
effettuare la regolazione dei latidell’immagine
effettuare la regolazione delbilanciamento dell’immagine ai lati
effettuare la regolazionedell’ampiezza dell’immagine
effettuare la regolazione delbilanciamento dell’immagine
ROTAZIONE
GEOMETRIA
26
L’indicazione a schermo scompare automaticamente dopo30 secondi.Per spegnere l’indicazione a schermo, premere nuovamenteil tasto MENU.
Per reimpostare il valore, premere il tasto RESET mentrel’indicazione a schermo è attiva.Viene ristabilito il valore preimpostato in fabbrica.
Per
ROTAZIONE
DIST A CUSCINO
DISTORS SFERICA
DISTORS TRAP
BILANC ROMBOID
Premere
/ . . . per ruotare l’immagine in sensoorario
? . . . per ruotare l’immagine in sensoantiorario
/ . . . per espandere i bordidell’immagine
? . . . per ridurre i bordi dell’immagine
/ . . . per spostare a destra i bordidell’immagine
? . . . per spostare a sinistra i bordidell’immagine
/ . . . per aumentare l’ampiezza delbordo superiore dell’immagine
? . . . per diminuire l’ampiezza del bordosuperiore dell’immagine
/ . . . per spostare a destra il bordosuperiore dell’immagine
? . . . per spostare a sinistra il bordosuperiore dell’immagine
4 Premere i tasti >?// per regolare le impostazioni.

Personalizzazione del monitor
12
Uso dell’indicazione a schermoZOOMGrazie alle impostazioni di ZOOM è possibile ingrandire oridurre l’immagine.I dati della regolazione verranno memorizzati per il segnaledi ingresso corrente.
1 Premere il tasto MENU.Appare l’indicazione a schermo MENU.
2 Premere i tasti ¨./> e >?// per selezionare“ ZOOM”, e premere nuovamente il tasto MENU.Appare l’indicazione a schermo ZOOM.
3 Premere i tasti >?// per effettuare la regolazionedello zoom dell’immagine.
/ . . . per ingrandire l’immagine? . . . per ridurre l’immagine
L’indicazione a schermo scompare automaticamente dopocirca 30 secondi.Per spegnere l’indicazione a schermo, premere nuovamenteil tasto MENU.
Per reimpostare i valori, premere il tasto RESET mentrel’indicazione a schermo è attiva.
NotaLa regolazione dello zoom dell’immagine termina non appena per ilbordo orizzontale o verticale viene raggiunto il valore massimo ominimo.
MENU
ZOOM
73V26O
Uso dell’indicazione a schermoCOLOREÈ possibile modificare la temperatura del colore delmonitor. Ad esempio, è possibile regolare o modificare icolori di un’immagine sullo schermo per farli corrispondereai colori reali dell’immagine stampata.I dati della regolazione una volta impostati verrannomemorizzati per tutti i segnali d’ingresso ricevuti.
1 Premere il tasto MENU.Appare l’indicazione a schermo MENU.
2 Premere i tasti ¨./> e >?// per selezionare“ COLORE”, e poi premere nuovamente il tastoMENU.Appare l’indicazione a schermo COLORE.
3 Premere i tasti >?// per selezionare latemperatura di colore.
Nell’indicazione a schermo ci sono tre modi ditemperatura di colore.I valori predefiniti sono:5000K, 6500K, 9300K
MENU
COLORE
R BIAS
5000K 6500K
50V B IAS 50B B IAS 50R GAIN 50V GAIN 50B GAIN 50
9300K

13
Personalizzazione del monitorPersonalizzazione del monitor
IT
4 Sintonizzazione fine della temperatura del colorePremere i tasti ¨./> per selezionare una voce edeffettuare la regolazione premendo i tasti >?//.
Selezionare R (rosso), V (verde) o B (blu) BIAS perregolare il livello del nero di ogni segnale del colore.
Selezionare R (rosso), V (verde) o B (blu) GAIN perregolare il livello del bianco di ogni segnale del colore.
L’indicazione “5000K”, “6500K” o “9300K” scompare ele nuove impostazioni del colore vengono memorizzateper ognuno dei tre modi di colore.I modi di temperatura del colore cambiano comeindicato qui di seguito:5000K n 1, 6500K n 2, 9300K n 3
L’indicazione a schermo scompare automaticamente dopocirca 30 secondi.Per chiudere l’indicazione a schermo, premere di nuovo iltasto MENU.
Per reimpostare, premere il tasto RESET mentrel’indicazione a schermo è attiva. La voce selezionata vienereimpostata sulle impostazioni di fabbrica.
COLORE
6500K 9300K
V B IAS 50B B IAS 50R GAIN 50V GAIN 50B GAIN 50
R B IAS 76
1
Uso dell’indicazione a schermoSCHERM (Schermo)È possibile regolare le impostazioni della convergenza pereliminare le ombre rosse o blu che potrebbero apparireintorno agli oggetti sullo schermo. Regolare la funzioneELIMINA MOIRE per eliminare i disturbi ondulati o ellitticiche potrebbero apparire sullo schermo.Regolare la funzione LANDING per correggere glisbilanciamenti del colore ai quattro angoli dello schermo, acausa dell’influenza del magnetismo terrestre.Dopo che ELIMINA MOIRE è stato regolato, verràmemorizzato per il segnale d’ingresso corrente. Tutte lealtre regolazioni verranno memorizzate per tutti i segnalid’ingresso ricevuti.
1 Premere il tasto MENU.Appare l’indicazione a schermo MENU.
2 Premere i tasti ¨./> e >?// per selezionare“ SCHERM”, e poi premere nuovamente il tastoMENU.Appare l’indicazione a schermo SCHERMO.
3 Premere i tasti ¨./> per selezionare la voce per cuisi desidera effettuare la regolazione.
Selezionare
CONVERG ORIZZ
CONVERG VERT
TOP
CONV VERT SUP
BOT
CONV VERT INF
Per
effettuare la regolazione dellaconvergenza orizzontale
effettuare la regolazione dellaconvergenza verticale
effettuare la regolazione dellaconvergenza verticale superiore delloschermo
effettuare la regolazione dellaconvergenza verticale inferiore delloschermo
MENU
(continua)
SCHERMO
TOPBOT
CONVERG ORIZZ
26ADJ

Personalizzazione del monitor
14
Per
TOP
CONV VERT SUP
BOT
CONV VERT INF
LANDING
ADJ
REGOLAZ LANDING
ELIMINA MOIRE
ADJ
REGOLAZ MOIRE
Premere
/ . . . per spostare in alto le ombre delrosso ed in basso le ombre del blu
? . . . per spostare in basso le ombre delrosso ed in alto le ombre del blu
/ . . . per spostare in alto le ombre delrosso ed in basso le ombre del blu
? . . . per spostare in basso le ombre delrosso ed in basso le ombre del blu
/ o ? . . . per selezionare l’angolo delloschermo che si desidera regolare
: superiore sinistro
: superiore destro
: inferiore sinistro
: inferiore destro
/ o ? . . . per ridurre al minimo qualsiasiirregolarità del colore
/ . . . per attivare la funzione ELIMINAMOIRE (“SI”)
? . . . per disattivare la funzioneELIMINA MOIRE (“NO”)
/ o ? . . . per regolare lo schermo fino aportare l’effetto moiré è alminimo
50
4 Premere i tasti >?// per effettuare la regolazionedelle impostazioni.
Selezionare
LANDING
ADJ
REGOLAZ LANDING
ELIMINA MOIRE*
ADJ
REGOLAZ MOIRE
Per
selezionare uno dei quattro angoli incui occorre effettuare una correzionedel colore a causa dell’influenza delmagnetismo terrestre
correggere il colore in uno dei quattroangoli dello schermo
impostare l’eliminazione dell’effettomoiré su “SI” o “NO”. La voceELIMINA MOIRE deve essereimpostata su “SI” per potervisualizzare “ ADJ (REGOLAZMOIRE)”.
regolare il grado di eliminazionedell’effetto moiré
* L’effetto moiré è un tipo di interferenza naturale che producelinee leggere o ondulate sullo schermo. Questo si verifica a causadell’interferenza tra il motivo regolato dell’immagine dalsegnale di ingresso e il motivo a punti di fosforo del tubo a raggicatodici.
Esempio di effetto moiré:
Per
CONVERG ORIZZ
CONVERG VERT
Premere
/ . . . per spostare a destra le ombre delrosso ed a sinistra le ombre del blu
? . . . per spostare a sinistra le ombre delrosso ed a destra le ombre del blu
/ . . . per spostare in alto le ombre delrosso ed in basso le ombre del blu
? . . . per spostare in basso le ombre delrosso ed in alto le ombre del blu
NotaL’immagine può apparire sfuocata quando la voce ELIMINAMOIRE è impostata su “SI”.
L’indicazione a schermo scompare automaticamente dopo30 secondi circa.Per spegnere l’indicazione a schermo, premere nuovamenteil tasto MENU.
Per reimpostare il valore, premere il tasto RESET mentrel’indicazione a schermo è attiva.Per la voce selezionata viene ristabilito il valorepreimpostato in fabbrica.
50
SINO
SINO

15
Personalizzazione del monitor
IT
Uso dell’indicazione a schermoOPZION (Opzioni)Grazie all’indicazione a schermo OPZION è possibileeffettuare la smagnetizzazione manuale dello schermo edeffettuare la regolazione delle impostazioni quali laposizione dell’indicazione a schermo ed il tempo di ritardodell’attivazione del risparmio energetico. Inoltre consente diattivare la funzione di bloccaggio dei comandi.
Smagnetizzazione dello schermo
Lo schermo del monitor viene smagnetizzatoautomaticamente con l’attivazione dell’alimentazione.È possibile effettuare anche manualmente lasmagnetizzazione dello schermo.
1 Premere il tasto MENU.Appare l’indicazione a schermo MENU.
2 Premere i tasti ¨./> e >?// per selezionare “ OPZION”, e poi premere nuovamente il tastoMENU.Appare l’indicazione a schermo OPZIONI.
3 Premere i tasti ¨./> per selezionare “(SMAGNET MANUALE)”.
4 Premere il tasto > /.Lo schermo si smagnetizza per circa 3 secondi.
Nel caso in cui sia necessario smagnetizzare una secondavolta lo schermo, attendere almeno 20 minuti prima diripetere la procedura sopra indicata.
L’indicazione a schermo OPZIONI scompareautomaticamente dopo circa 30 secondi.Per spegnere l’indicazione a schermo, premere nuovamenteil tasto MENU.
Modifica della posizione dell’indicazione aschermo
È possibile modificare la posizione dell’indicazione aschermo (per esempio, nel caso in cui si desideri effettuarela regolazione dell’immagine dietro l’indicazione aschermo).
1 Premere il tasto MENU.Appare l’indicazione a schermo MENU.
2 Premere i tasti ¨./> e >?// per selezionare“ OPZION”, e poi premere nuovamente il tastoMENU.Appare l’indicazione a schermo OPZIONI.
3 Premere i tasti ¨./> per selezionare “ (POSIZMENU ORIZ)” o “ (POSIZ MENU VERT)”.Selezionare “ (POSIZ MENU ORIZ)” per effettuarela regolazione della posizione orizzontale.
Selezionare “ (POSIZ MENU VERT)” per effettuarela regolazione della posizione verticale.
4 Premere i tasti >?// per spostare l’indicazione aschermo nella posizione desiderata.
L’indicazione a schermo OPZIONI scompare automaticamentedopo circa 30 secondi.Per spegnere l’indicazione a schermo, premere nuovamente iltasto MENU.
Per reimpostare i valori, premere il tasto RESET mentrel’indicazione a schermo è attiva.
MENU
MENU
SI
SMAGNET MANUALE
SBLOC1 MIN
OPZIONI
ZZ...
SI
SMAGNET MANUALE
SBLOC1 MIN
OPZIONI
ZZ...
ZZ...
POSIZ MENU ORIZ
SBLOC1 MIN
OPZIONI
ZZ...
POSIZ MENU VERT
SBLOC
OPZIONI
AUTO

16
Personalizzazione del monitor
Funzione di bloccaggio dei comandi
La funzione di bloccaggio dei comandi disabilita tutti i tasticollocati sul pannello anteriore eccetto il tasto u(accensione) e il tasto MENU.
1 Premere il tasto MENU.Appare l’indicazione a schermo MENU.
2 Premere i tasti ¨./> e >?// per selezionare“ OPZION”, e poi premere nuovamente il tastoMENU.Appare l’indicazione a schermo OPZIONI.
3 Premere i tasti ¨./> per selezionare “ (BLOCCMENU)”.
4 Premere i tasti >?// per selezionare “BLOCC”.
L’indicazione a schermo OPTION scompareautomaticamente dopo 30 secondi circa.Per spegnere l’indicazione a schermo, premere nuovamenteil tasto MENU.
Dopo aver selezionato “BLOCC”, non è possibileselezionare altre voci eccetto “USCITA” e ” OPZION”nell’indicazione a schermo MENU.Se si premono tasti diversi dal tasto u (accensione), e daltasto MENU, sullo schermo appare il contrassegno .
Per annullare il bloccaggio dei comandi
Ripetere le procedure dal punto 1 al punto 3 descritti soprae premere i tasti >?// per selezionare “SBLOC”.
Impostazione del tempo di ritardodell’attivazione del modo di risparmioenergetico
È possibile impostare il tempo di ritardo dell’attivazione delmodo di risparmio energetico. Per ulteriori informazionirelative alle funzionalità di risparmio energetico di questomonitor consultare pagina 19.
1 Premere il tasto MENU.Appare l’indicazione a schermo MENU.
2 Premere i tasti ¨./> e >?// per selezionare“ OPZION”, e poi premere nuovamente il tastoMENU.Appare l’indicazione a schermo OPZIONI.
3 Premere i tasti ¨./> per selezionare “ ZZ...
(RITARDO POW SAV)”.
4 Premere i tasti >?// per selezionare il tempodesiderato.
Quando la voce RITARDO POW SAV è impostata su“NO”, per il monitor non viene attivato il modo dirisparmio energetico.
L’indicazione a schermo OPZIONI scompareautomaticamente dopo 30 secondi circa.Per spegnere l’indicazione a schermo, premere nuovamenteil tasto MENU.
Per reimpostare i valori, premere il tasto RESET mentrel’indicazione a schermo è attiva.
MENU
MENU
ZZ...
RITARDO POW SAV
OPZIONI
5 SEC60 MIN
1 MINNO
AUTO
SI
SMAGNET MANUALE
SBLOC1 MIN
OPZIONI
ZZ...
ZZ...
BLOCC MENU
OPZIONI
SBLOC BLOCC
AUTO
SI
SMAGNET MANUALE
SBLOC1 MIN
OPZIONI
ZZ...

17
Personalizzazione del monitor
IT
Uso dell’indicazione a schermoLANG (Lingua)Per le indicazioni a schermo sono disponibili le versioni inlingua inglese, francese, tedesca, spagnola, italiana egiapponese.
1 Premere il tasto MENU.Appare l’indicazione a schermo MENU.
2 Premere i tasti ¨./> e >?// per selezionare“ LANG”, e poi premere nuovamente il tastoMENU.Appare l’indicazione a schermo LANGUAGE.
3 Premere i tasti ¨./> per selezionare la linguadesiderata.
ENGLISH: inglese, FRANÇAIS: francese,DEUTSCH: tedesco, ESPAÑOL: spagnolo,ITALIANO: italiano oppure : giapponese.
L’indicazione a schermo scompare automaticamente dopo30 secondi circa. Per spegnere l’indicazione a schermo,premere nuovamente il tasto MENU.
Per reimpostare la lingua inglese, premere il tasto RESETmentre l’indicazione a schermo é attiva.
RESET
RESET
MENU
RESET
MENU
Reimpostazione dei datipreimpostati
Reimpostazione dei dati di una regolazione
1 Premere i tasti MENU, ¨./> ed i tasti >?// perselezionare l’indicazione a schermo contenente lavoce di cui si desidera reimpostare il valore.
2 Premere i tasti ¨./> per selezionare la voce il cuivalore si desidera reimpostare.
3 Premere il tasto RESET.
Reimpostazione di tutti i dati dellaregolazione per il segnale di ingressocorrente
Nel caso in cui non sia visualizzata alcuna indicazione aschermo, premere il tasto RESET.Sono ripristinati tutti i valori preimpostati in fabbrica per ilsegnale di ingresso corrente.Notare che non sono ripristinati i valori dei dati dellaregolazione non influenzati dalle modifiche al segnale diingresso (lingua e posizione dell’indicazione a schermo,selezione del segnale di ingresso, tempo di ritardo risparmioenergetico e funzione di bloccaggio dei comandi).
Reimpostazione di tutti i dati dellaregolazione per tutti i segnali di ingresso
Premere e tenere premuto il tasto RESET per oltre duesecondi.Sono ristabiliti tutti i dati di regolazione inclusi quelli dellaluminosità ed il contrasto preimpostati in fabbrica.
ENGLISHFRANÇAISDEUTSCHESPAÑOLITALIANO
LANGUAGE

18
Caratteristiche tecniche
Modo preimpostato e modoutenteQuesto monitor dispone di modi preimpostati in fabbricaper i più noti standard d’industria per un’appropriatacompatibilità “plug and play”.
Quando viene immesso un nuovo segnale, il monitorseleziona il modo preimpostato in fabbrica appropriato eregola momentaneamente la calibrazione di fase in modo dafornire un’immagine di alta qualità al centro dello schermo.La calibrazione viene memorizzata e immediatamenterichiamata quando viene ricevuto lo stesso segnaled’ingresso.
No.
1
2
3
4
5
6
7
8
9
10
11
12
13
14
15
16
17
18
19
20
21
22
23
24
25
26
27*
Risoluzione(punti × righe)
640 × 350
640 × 480
640 × 480
640 × 480
720 × 400
720 × 400
800 × 600
800 × 600
800 × 600
832 × 624
1024 × 768
1024 × 768
1024 × 768
1024 × 768
1024 × 768
1152 × 864
1152 × 870
1280 × 960
1280 × 960
1280 × 1024
1280 × 1024
1280 × 1024
1600 × 1200
1600 × 1200
1600 × 1200
1600 × 1200
1600 × 1200
Frequenzaorizzontale
31,5 kHz
31,5 kHz
37,5 kHz
43,3 kHz
31,5 kHz
37,9 kHz
37,9 kHz
46,9 kHz
53,7 kHz
49,7 kHz
48,4 kHz
56,5 kHz
60,0 kHz
60,2 kHz
68,7 kHz
67,5 kHz
68,7 kHz
60,0 kHz
85,9 kHz
64,0 kHz
80,0 kHz
91,1 kHz
75,0 kHz
81,3 kHz
87,5 kHz
93,8 kHz
106,3 kHz
Frequenzaverticale
70 Hz
60 Hz
75 Hz
85 Hz
70 Hz
85 Hz
60 Hz
75 Hz
85 Hz
75 Hz
60 Hz
70 Hz
75 Hz
75 Hz
85 Hz
75 Hz
75 Hz
60 Hz
85 Hz
60 Hz
75 Hz
85 Hz
60 Hz
65 Hz
70 Hz
75 Hz
85 Hz
Modo grafica
MCGA
VGA-G
EVGA
VESA
VGA-Testo
VESA
SVGA
ESVGA
VESA
Macintosh 16” aColori
VESA
VESA
EUVGA
Macintosh 19” aColori
VESA
VESA
Macintosh 21”Colori
VESA
VESA
VESA
VESA
VESA
VESA
VESA
VESA
VESA
VESA
Caratteristiche tecniche
Per i segnali di ingresso che non corrispondano ai modipreimpostati in fabbrica, la tecnologia Multiscan digitale diquesto monitor esegue tutte le regolazioni necessarie perassicurare che sullo schermo appaia un’immagine chiara perqualsiasi sincronizzazione nella gamma di frequenza delmonitor. Potrebbe comunque essere necessario effettuareuna sintonia fine della centratura e della dimensioneverticale/orizzontale. Premere semplicemente il tasto ASC oregolare il monitor in base alle istruzioni di regolazione. Leregolazioni vengono memorizzate automaticamente comemodo utente e richiamate quando viene ricevuto il segnaled’ingresso corrispondente.
Condizioni di cadenza orizzontale e verticaleraccomandateL’ampiezza del sincronismo orizzontale dovrebbe essere: > 4,8%della durata orizzontale totale.L’ampiezza di oscuramento orizzontale dovrebbe essere: > 2,5 µsec.L’ampiezza di oscuramento verticale dovrebbe essere: > 450 µsec.
Nota per gli utenti di WindowsOccorre che gli utenti Windows, verifichino la frequenza sulmanuale della scheda video o sul programma della utility fornitocon la scheda grafica e selezionino quindi la massima frequenza direfresh per massimizzare le prestazioni dello schermo.
Regolazione della risoluzione del monitor e delnumero di coloreRegolare la risoluzione del monitor e il numero di colore facendoriferimento alle istruzioni per l’uso del proprio computer. Il numerodi colore può variare in base al computer o alla scheda video.L’impostazione della tavolozza di colori e il numero reale dei coloriè descritto qui di seguito:• High Color (16 bit) n 65.536 colori• True Color (24 bit) n circa 16,77 milioni di coloriNel modo True Color (24 bit), la velocità potrebbe essere inferiore.
* solo GDM-500PST9

19
Getting StartedCaratteristiche tecniche
IT
Funzione di risparmio energeticoQuesto monitor è conforme alle direttive sul risparmioenergetico della VESA e Energy Star, così come della piùrigorosa NUTEK.Nel caso in cui il monitor fosse collegato ad un computer oad una scheda grafica video conformi a VESA DPMS(Display Power Management Signaling), il monitor ridurràautomaticamente il consumo energetico in tre stadi comeillustrato qui sotto.
1
2
3
4
5
Tempo direcupero
—
3 sec. circa
3 sec. circa
10 sec. circa
—
Indicatore u
Verde
Verde ed arancioalternato
Verde ed arancioalternato
Arancio
Spento
Consumoenergetico
≤ 145 W (GDM-500PST9)≤ 125 W (GDM-400PST9)
circa 72 W (GDM-500PST9)circa 65 W (GDM-400PST9)
circa 8 W
circa 4 W
0 W
Modo di consumoenergetico
Funzionamentonormale
Attesa(I modo)
Sospeso(II modo)
Attivo-spento(III modo)
Spento
Schermo
attivo
vuoto
vuoto
vuoto
—
Segnale disincronizzazioneorizzontale
presente
assente
presente
assente
—
Segnale disincronizzazioneverticale
presente
presente
assente
assente
—
Tramite l’indicazione a schermo è possibile impostare iltempo di ritardo prima che il monitor entri nel modo dirisparmio energetico. Per maggiori dettagli consultare“Impostazione del tempo di ritardo dell’attivazione delmodo di risparmio energetico” a pagina 16.
AttenzioneSe non viene immesso alcun segnale video nel monitor, appare ilmessagio “NO SEGNALE INGR” (pagina 20). Al termine delladurata del ritardo, la funzione di risparmio energetico attiva ilmodo attivo-spento del monitor e l’indicatore u diventa colorearancio. Quando vengono rilevati nuovamente i segnali disincronismo orizzontale e verticale, il monitor riprendeautomaticamente il modo di funzionamento normale.
Cavi di smorzamentoQuando si utilizza uno sfondo bianco, sullo schermopotrebbero essere visibili delle righe orizzontali moltosottili. Queste righe sono l’ombra dei cavi di smorzamento,caratteristiche dei tubi a raggi catodici che utilizzano legriglie di apertura. I cavi sono collegati alla griglia diapertura all’interno del tubo Trinitron e servono a prevenirele vibrazioni della griglia di apertura.
Uso immediatoIl monitor è conforme con gli standard Display DataChannel (DDC) DDC1, DDC2B, DDC2AB e DDC2B+ diVESA.Quando è collegato un sistema ospite DDC1, il monitor sisincronizza con il V. CLK conformemente con gli standardVESA ed emette dati EDID (Extended Display IdentificationData) nella linea dati.Quando è collegato un sistema ospite DDC2B, DDC2AB oDDC2B+, il monitor passa automaticamente allo standardappropriato.
DDC è un marchio registrato di Video ElectronicsStandard Association.
NotaNel caso in cui si utilizzi Windows 95/98, lo standard DDC non èvalido per i 5 connettori BNC. Nel caso in cui si utilizzi lo standardDDC, collegare il connettore HD15 al computer con il cavo disegnale video in dotazione.
Cavi di smorzamento

20
Informazioni aggiuntive
Guida alla soluzione dei problemiQuesta sezione può rivelarsi utile per identificare e risolvere un problema e di conseguenza eliminare la necessità di rivolgersiad un centro di assistenza tecnica.
Sintomo Controllare quanto segue
Assenza d’immagine
Se l’indicatore u non èilluminato
Se sullo schermo appare ilmessaggio “NO SEGNALEINGR” o se l’indicatore u è dicolore arancione o si alternatra il verde e l’arancione
Se sullo schermo appare ilmessaggio “FUORI GAMMASCANS”
Se non viene visualizzato alcunmessaggio e l’indicatore u èilluminato in verde olampeggia nel colore arancione
Se si utilizza un sistemaMacintosh
Se si utilizza Windows 95/98
L’immagine non è chiara
Funzione di avvertimento delsegnale d’ingressoIn caso di problemi per il segnale d’ingresso, appare uno deiseguenti messaggi.
1 Condizione del segnale di ingresso“FUORI GAMMA SCANS” indica che il segnale diingresso non è supportato dalle caratteristiche tecnichedel monitor.
“NO SEGNALE INGR” avverte che non viene immessoalcun segnale, oppure che non viene ricevuto il segnaledi ingresso dal connettore selezionato.
2 Connettore di ingresso selezionatoIndica quale connettore di ingresso sta ricevendo ilsegnale errato.Nel caso in cui ci siano dei problemi con il segnale dientrambi i connettori di ingresso, sono visualizzatialternativamente “HD15” e “BNC”.
Per risolvere questi problemi, consultare “Guida allasoluzione dei problemi”.
Informazioni aggiuntive
INFORMAZIONE
FUORI GAMMA SCANS
INGRESSO : HD15
• Controllare che il cavo di alimentazione sia collegato correttamente.• Controllare che l’interruttore di accensione u sia sulla posizione “on”.
• Lo schermo è vuoto quando il monitor è nel modo di risparmio energetico. Provare a premereun tasto qualsiasi sulla tastiera del computer.
• Controllare che l’interruttore di accensione del computer sia sulla pozione di “on”.• Controllare che l’impostazione della selezione di ingresso sia corretta.• Controllare che il cavo del segnale video sia collegato correttamente e che tutte le spine siano
saldamente inserite nelle prese.• Controllare che i 5 connettori BNC siano collegati nel corretto ordine (da sinistra a destra:
Rosso–Verde–Blu–HD–VD) (pagina 6).• Assicurarsi che non ci siano piedini piegati o che non siano stati spinti nel connettore di
ingresso video HD15.• Controllare che la scheda video sia completamente inserita nell’apposito alloggiamento del bus.
• Controllare che il campo di frequenza video corrisponda a quello specificato per il monitor.Orizzontale: 30 – 94 kHz (GDM-400PST9), 30 – 107 kHz (GDM-500PST9)Verticale: 48 – 160 HzFare riferimento al manuale delle istruzioni del computer per regolare il campo di frequenzavideo.
• Se si sta utilizzando un adattatore del cavo del segnale video, controllare che sia corretto.
• Consultare “Funzione di autodiagnostica” (pagina 22).
• Controllare che l’adattatore Macintosh ed il cavo di segnale video siano collegati in modoappropriato (pagina 6).
• Se con questo monitor è stato sostituito un vecchio monitor, ricollegare il vecchio monitor eeffettuare le seguenti operazioni. Installare il Windows Monitor Information Disk (pagina 7) eselezionare “GDM-400PST9” o “GDM-500PST9” tra i monitor Sony nella schermata diselezione monitor Windows 95/98. Se si seleziona “Plug and Play,” collegare il monitor alcomputer con il segnale video HD15. Non è possibile usare i cinque connettori BNC.
• Controllare il manuale della scheda grafica per la corretta impostazione del monitor.• Controllare nel presente manuale che il modo grafico e la frequenza in cui si sta operando
siano supportati. Anche se la frequenza rientra nella gamma prevista, alcune schede videopotrebbero avere un impulso sincronico troppo piccolo per permettere al monitor disincronizzarsi correttamente.

21
Getting StartedInformazioni aggiuntive
IT
Sintomo Controllare quanto segue
Il colore non è uniforme
Non è possibile regolare ilmonitor mediante i tasti sulpannello anteriore
Il bianco non è perfetto
L’immagine a schermo non ècentrata o della dimensionecorretta
I bordi dell’immagine sonoincurvati
Le strisce bianche presentanoombrature rosse o blu suibordi
L’immagine è sfuocata
L’immagine salta o ondeggia
L’immagine é tremolante
L’immagine appare sdoppiata
L’immagine presenta strisceondeggianti o ellittiche(effetto moiré)
Compaiono due sottili righeorizzontali (cavi)
Non appena si accendel’apparecchio si sente unronzio
• Smagnetizzare il monitor (pagina 15).Se si colloca vicino al monitor un apparecchio generatore di campo magnetico, ad esempio undiffusore o se si modifica la direzione del monitor, il colore potrebbe non essere uniforme.Questa funzione serve per smagnetizzare il telaio di metallo del tubo catodico per ottenere uncampo neutro per la riproduzione uniforme del colore. Se è necessario un secondo ciclo dismagnetizzazione, attendere come minimo 20 minuti per un migliore risultato.
• Regolare la funzione Landing (pagine 13 – 14)
• Se la funzione di bloccaggio dei comandi è attivata, disattivarla utilizzando l’indicazione aschermo OPZIONI (pagina 16).
• Regolare la temperatura di colore (pagine 12 – 13).• Controllare che i 5 connettori BNC siano collegati nel corretto ordine (da sinistra a destra:
Rosso–Verde–Blu–HD–VD) (pagina 6).
• Premere il tasto ASC (pagina 7).• Regolare la dimensione o la centratura (pagina 10).• Alcuni modi video non riempiono lo schermo fino ai bordi del monitor. Questo problema si
manifesta soprattutto con certe schede video.
• Regolare la geometria (pagina 11).
• Regolare la convergenza (pagine 13 – 14).
• Regolare il contrasto e la luminosità (pagina 9).• Smagnetizzare il monitor (pagina 15).
Se si colloca un apparecchio generatore di campo magnetico, ad esempio un diffusore, vicino almonitor, oppure se si modifica la direzione del monitor, il colore potrebbe non essere uniforme.Questa funzione serve per smagnetizzare il telaio di metallo del tubo catodico per ottenere uncampo neutro per la riproduzione uniforme del colore. Se è necessario un secondo ciclo dismagnetizzazione, attendere come minimo 20 minuti per un migliore risultato.
• Se si riscontrano ombrature rosse o blu sui bordi delle immagini, regolare la convergenza(pagine 13 – 14).
• Se l’effetto moiré viene annullato, l’immagine potrebbe apparire sfuocata. Regolare fino adottenere un’immagine nitida (pagine 13 – 14).
• Isolare ed eliminare le potenziali origini di campi elettrici o magnetici. Le cause più comuni sonocostituite da ventilatori elettrici, illuminazioni fluorescenti, stampanti laser.
• Se accanto al presente monitor si trova un secondo monitor, aumentare la distanza fra di essi inmodo da ridurre al minimo l’interferenza.
• Collegare il monitor ad una diversa presa di rete CA, preferibilmente su un altro circuito.• Collegare il monitor ad un computer completamente diverso, in un’altra stanza.
• Impostare il valore della frequenza di refresh per ottenere un’immagine migliore facendoriferimento al manuale delle istruzioni del computer.
• Eliminare l’uso di prolunghe del cavo video e/o di video cassette di contenimentodell’interruttore se si verifica questo problema. Una lunghezza eccessiva del cavo o uncollegamento debole possono produrre questo sintomo.
• Cancellare l’effetto moiré (pagine 13 – 14).L’effetto moiré può essere modificato a seconda del computer collegato.
• A causa della relazione fra la risoluzione, il passo dei punti del monitor ed il passo di alcuni tipidi immagine, alcuni sfondi di schermo presentano a volte l’effetto moiré. Cambiare laconfigurazione del motivo del desktop.
• Questi cavi stabilizzano la griglia di apertura a strisce verticali (pagina 19). La griglia diapertura fa sì che attraverso lo schermo passi una maggiore quantità di luce conferendo così alTrinitorn CRT più colore e maggior brillantezza.
• Con l’apparecchio acceso, il ciclo di smagnetizzazione automatica è attivato. Durante la fase dismagnetizzazione automatica (3 secondi), si potrebbe udire un ronzio. Lo stesso ronzio si sentequando il monitor viene smagnetizzato manualmente. Questo è normale.

22
Informazioni aggiuntive
Funzione di autodiagnosticaQuesto monitor dispone di una funzione di autodiagnostica.Nel caso in cui il monitor o il computer o i computeravessero dei problemi, lo schermo si oscura e l’indicatore udiventa di colore verde o lampeggia nel colore arancio.
Se l’indicatore uuuuu è verde
1 Rimuovere tutte le spine dai connettori 1 e 2dell’ingresso video o disattivare i computer collegati.
2 Premere e mantenere premuto il tasto >/ per 2secondi.
Se appaiono tutte le quattro barre a colori (bianco, rosso,verde, blu), il monitor funziona in modo corretto.Ricollegare i cavi di ingresso video e controllare lecondizioni del computer o dei computer.
Se le barre a colori non appaiono si tratta di unpotenziale guasto al monitor.Rivolgersi al rivenditore autorizzato Sony.
Se l’indicatore uuuuu lampeggia nel colorearancio
Premere il tasto uuuuu per spegnere e riaccendere ilmonitor.
Se l’indicatore u diventa di colore verde, il monitorfunziona in modo appropriato.
Se l’indicatore u lampeggia ancora, si tratta di unpotenziale guasto al monitor. Contare il numero disecondi tra il lampeggiamento nel colore aranciodell’indicatore u e rivolgersi al rivenditore autorizzatoSony. Verificare di annotare il nome del modello ed ilnumero di serie del monitor. Inoltre, annotare la marcaed il modello del computer e della scheda video.
Indicatore u
Caratteristiche tecnicheGDM-400PST9
Cinescopio Griglia di apertura 0,25 – 0,27 mm19 pollici misurati in diagonaleDeflessione di 90°
Area dell’immagine video365 × 273 mm circa (l/a)Immagine visibile 18,0”
Risoluzione Orizzontale: 1600 punti max.Verticale: 1200 righe max.
Are dell’immagine standard330 × 264 mm circa (l/a)oppure352 × 264 mm circa (l/a)
Frequenza di deflessioneOrizzontale: da 30 a 94 kHzVerticale: da 48 a 160 Hz
Tensione/corrente di ingresso CAda 100 a 240 V, 50 – 60 Hz,1,8 – 1,0 A
Consumo energetico Max. 125 WDimensioni 444 × 467 × 453 mm (l/a/p)Peso 25 kg circaAccessori in dotazione Consultare la pagina 6
GDM-500PST9
Cinescopio Griglia di apertura 0,25 – 0,27 mm21 pollici misurati in diagonaleDeflessione di 90°
Area dell’immagine video403,8 × 302,2 mm circa (l/a)Immagine visibile 19,8”
Risoluzione Orizzontale: 1600 punti max.Verticale: 1200 righe max.
Are dell’immagine standard388 × 291 mm circa (l/a)oppure364 × 291 mm circa (l/a)
Frequenza di deflessioneOrizzontale: da 30 a 107 kHzVerticale: da 48 a 160 Hz
Tensione/corrente di ingresso CAda 100 a 240 V, 50 – 60 Hz,2,0 – 1,0 A
Consumo energetico Max. 145 WDimensioni 498 × 505 × 474 mm (l/a/p)Peso 31 kg circaAccessori in dotazione Consultare la pagina 6
Il design e le caratteristiche tecniche sono soggetti amodifiche senza preavviso.

Getting StartedGetting Started Appendix
i
Congratulations!
You have just purchased a TCO’99 approved and labelled product! Your choice has provided you with a product developedfor professional use. Your purchase has also contributed to reducing the burden on the environment and also to the furtherdevelopment of environmentally adapted electronics products.
Why do we have environmentally labelled computers?
In many countries, environmental labelling has become an established method for encouraging the adaptation of goods andservices to the environment. The main problem, as far as computers and other electronics equipment are concerned, is thatenvironmentally harmful substances are used both in the products and during their manufacture. Since it is not so far possibleto satisfactorily recycle the majority of electronics equipment, most of these potentially damaging substances sooner or laterenter nature.
There are also other characteristics of a computer, such as energy consumption levels, that are important from the viewpointsof both the work (internal) and natural (external) environments. Since all methods of electricity generation have a negativeeffect on the environment (e.g. acidic and climate-influencing emissions, radioactive waste), it is vital to save energy.Electronics equipment in offices is often left running continuously and thereby consumes a lot of energy.
What does labelling involve?
This product meets the requirements for the TCO’99 scheme which provides for international and environmental labelling ofpersonal computers. The labelling scheme was developed as a joint effort by the TCO (The Swedish Confederation ofProfessional Employees), Svenska Naturskyddsforeningen (The Swedish Society for Nature Conservation) and StatensEnergimyndighet (The Swedish National Energy Administration).
Approval requirements cover a wide range of issues: environment, ergonomics, usability, emission of electric and magneticfields, energy consumption and electrical and fire safety.
The environmental demands impose restrictions on the presence and use of heavy metals, brominated and chlorinated flameretardants, CFCs (freons) and chlorinated solvents, among other things. The product must be prepared for recycling and themanufacturer is obliged to have an environmental policy which must be adhered to in each country where the companyimplements its operational policy.
The energy requirements include a demand that the computer and/or display, after a certain period of inactivity, shall reduceits power consumption to a lower level in one or more stages. The length of time to reactivate the computer shall be reasonablefor the user.
(continued)
Appendix
TCO’99 Eco-document

Appendix
ii
Labelled products must meet strict environmental demands, for example, in respect of the reduction of electric and magneticfields, physical and visual ergonomics and good usability.
Below you will find a brief summary of the environmental requirements met by this product. The complete environmentalcriteria document may be ordered from:
TCO DevelopmentSE-114 94 Stockholm, SwedenFax: +46 8 782 92 07Email (Internet): [email protected] information regarding TCO’99 approved and labelled products may also be obtained via the Internet, usingthe address: http://www.tco-info.com/
Environmental requirements
Flame retardants
Flame retardants are present in printed circuit boards, cables, wires, casings and housings. Their purpose is to prevent, or atleast to delay the spread of fire. Up to 30% of the plastic in a computer casing can consist of flame retardant substances. Mostflame retardants contain bromine or chloride, and those flame retardants are chemically related to another group ofenvironmental toxins, PCBs. Both the flame retardants containing bromine or chloride and the PCBs are suspected of givingrise to severe health effects, including reproductive damage in fish-eating birds and mammals, due to the bio-accumulative*processes. Flame retardants have been found in human blood and researchers fear that disturbances in foetus developmentmay occur.
The relevant TCO’99 demand requires that plastic components weighing more than 25 grams must not contain flameretardants with organically bound bromine or chlorine. Flame retardants are allowed in the printed circuit boards since nosubstitutes are available.
Cadmium**
Cadmium is present in rechargeable batteries and in the colour-generating layers of certain computer displays. Cadmiumdamages the nervous system and is toxic in high doses. The relevant TCO’99 requirement states that batteries, the colour-generating layers of display screens and the electrical or electronics components must not contain any cadmium.
Mercury**
Mercury is sometimes found in batteries, relays and switches. It damages the nervous system and is toxic in high doses. Therelevant TCO’99 requirement states that batteries may not contain any mercury. It also demands that mercury is not present inany of the electrical or electronics components associated with the labelled unit.
CFCs (freons)
The relevant TCO’99 requirement states that neither CFCs nor HCFCs may be used during the manufacture and assembly ofthe product. CFCs (freons) are sometimes used for washing printed circuit boards. CFCs break down ozone and therebydamage the ozone layer in the stratosphere, causing increased reception on earth of ultraviolet light with e.g. increased risks ofskin cancer (malignant melanoma) as a consequence.
Lead**
Lead can be found in picture tubes, display screens, solders and capacitors. Lead damages the nervous system and in higherdoses, causes lead poisoning. The relevant TCO’99 requirement permits the inclusion of lead since no replacement has yetbeen developed.
* Bio-accumulative is defined as substances which accumulate within living organisms.** Lead, Cadmium and Mercury are heavy metals which are Bio-accumulative.
Sony Corporation Printed In U.K.
Chlorine free paper- 100% recyclable
Printed on 100% recycled paper