TRADE OF PAINTING & DECORATING - eCollege
21
TRADE OF PAINTING & DECORATING PHASE 2 Module 4 Wall Coverings UNIT: 4 Applications of Emulsions
Transcript of TRADE OF PAINTING & DECORATING - eCollege
TRADE OF PAINTING & DECORATING
PHASE 2
Module 4
Wall Coverings
UNIT: 4
Applications of Emulsions
Module 4 – Unit 4 Application of Emulsions
Painting and Decorating Phase 2 Revision 2.0 December 2013
Table of Contents
Introduction .............................................................................................................. 1 Learning Outcomes .................................................................................................. 1
1.0 Apply Emulsion by Brush and Roller ......................................................... 2
1.1 Surface preparation, use of masking materials ....................................... 2 1.2 Types and uses of sleeves .......................................................................... 3 1.3 Characteristics and types of emulsions .................................................... 7 1.4 Estimating quantities, setting out walls panels by geometric means ... 9 1.5 Following manufacturers specifications ................................................ 11
2.0 Apply Emulsion by Brush and Roller ....................................................... 12
2.1 Health, safety and hygiene, accident prevention, attitude to safety ... 12 2.2 Roller and stock brush techniques ......................................................... 13
3 0 Wash Roller in Preparation for Storage .................................................... 14
3.1 Washing out sleeves, brushes and tools ................................................. 14 3.2 Good housekeeping .................................................................................. 15
4.0 Procedures for Painting Raw Plaster For Painting .................................. 16
4.1 Pattern staining .......................................................................................... 16 4.2 Safety use and storage of blades ............................................................. 17 4.3 Working alone or as part of a team ........................................................ 17 Summary .................................................................................................................. 18 Suggested exercise .................................................................................................. 18 Self test ..................................................................................................................... 18 Suggested reading ................................................................................................... 18
Module 4 – Unit 3 Application of Emulsions
Painting and Decorating Phase 2 1 Revision 2.0 December 2013
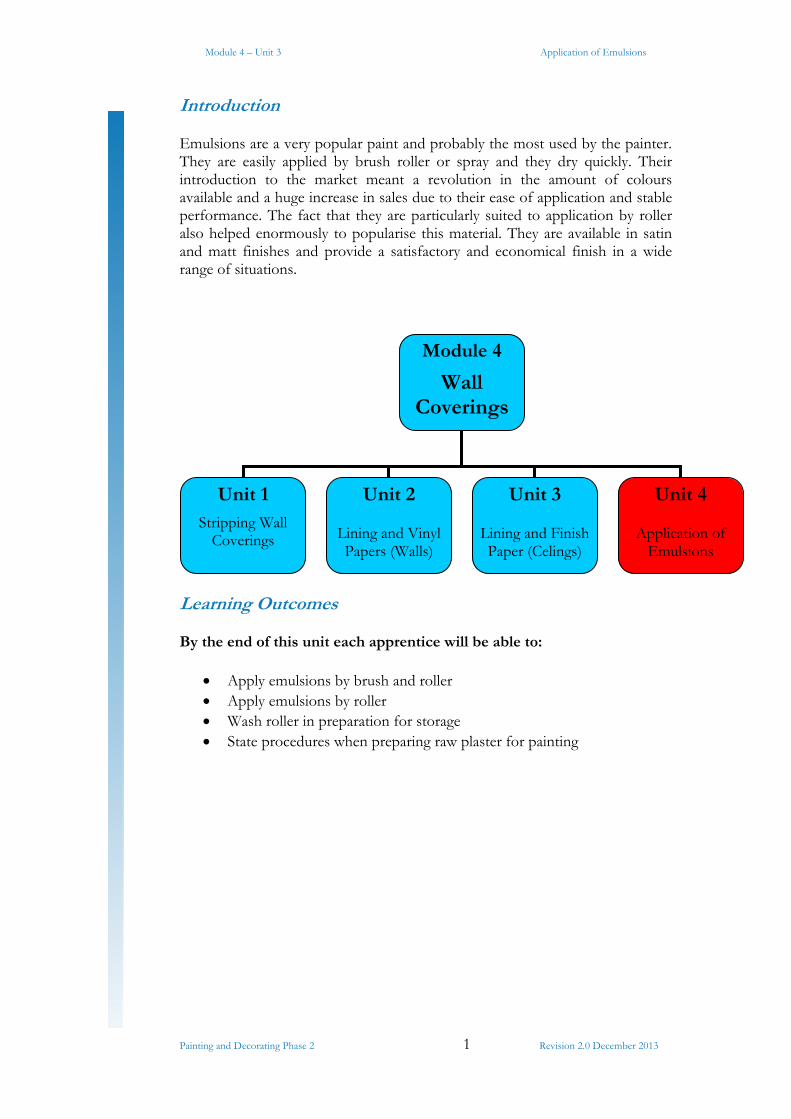
Introduction
Emulsions are a very popular paint and probably the most used by the painter. They are easily applied by brush roller or spray and they dry quickly. Their introduction to the market meant a revolution in the amount of colours available and a huge increase in sales due to their ease of application and stable performance. The fact that they are particularly suited to application by roller also helped enormously to popularise this material. They are available in satin and matt finishes and provide a satisfactory and economical finish in a wide range of situations.
Learning Outcomes
By the end of this unit each apprentice will be able to:
Apply emulsions by brush and roller Apply emulsions by roller Wash roller in preparation for storage State procedures when preparing raw plaster for painting
Module 4
Wall Coverings
Unit 1 Stripping Wall
Coverings
Unit 2
Lining and Vinyl Papers (Walls)
Unit 3
Lining and Finish Paper (Celings)
Unit 4
Application of Emulsions

Module 4 – Unit 3 Application of Emulsions
Painting and Decorating Phase 2 2 Revision 2.0 December 2013
1.0 Apply Emulsion by Brush and Roller
1.1 Surface preparation, use of masking materials
All new surfaces should be:
Allowed to dry out fully Be de-nibbed Given a thinned out coat of emulsion or in cases of staining a coat of
alkali resisting primer
All old surfaces previously coated with emulsion:
Wash down Rake out and fill cracks an d surface imperfections Sand surface fully to remove excess filler, nibs etc. Apply emulsion slightly thinned
The previous lessons on surface preparation can be referred to for extra information
Masking tapes: A wide variety of tapes available from
Wide to narrow. ½” 1” 1½” 22 Low tack and high tack Fine line for painting lines ¼” ½ 1” Fold down masking tape. 1”tape with paper or light plastic attached.
The tape adheres to the top of the surface to be masked and the paper or plastic folded down giving the cover.
The paper fold down type ranges from 3” to 6” The plastic fold down type ranges from 3” to 18
They can all be fitted to masking machines or tools for speed of application”
Taping tools
Module 4 – Unit 3 Application of Emulsions
Painting and Decorating Phase 2 3 Revision 2.0 December 2013
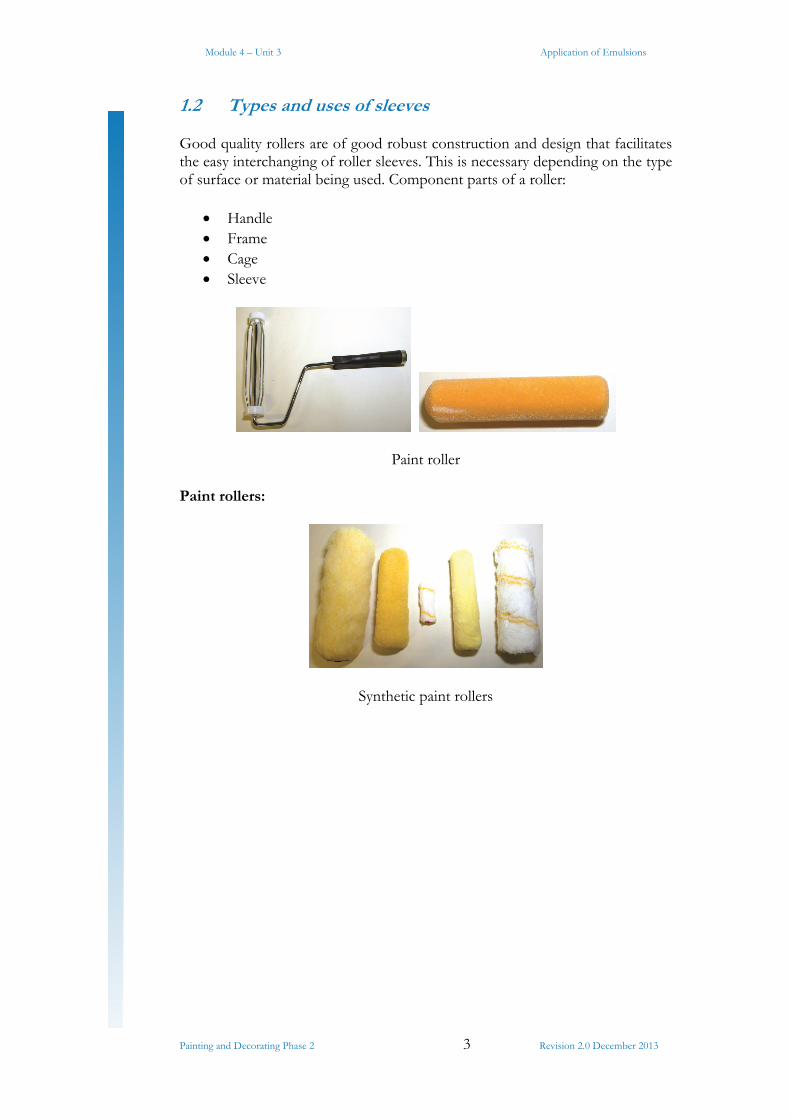
1.2 Types and uses of sleeves
Good quality rollers are of good robust construction and design that facilitates the easy interchanging of roller sleeves. This is necessary depending on the type of surface or material being used. Component parts of a roller:
Handle Frame Cage Sleeve
Paint roller
Paint rollers:
Synthetic paint rollers

Module 4 – Unit 3 Application of Emulsions
Painting and Decorating Phase 2 4 Revision 2.0 December 2013
TYPES: Mohair, Lambswool, Synthetic:
Mohair Very short pile. Leaves very little texture. Ideal for oil paints as it does not become matted. To eliminate the light stipple on gloss or eggshell paints lay off with a brush immediately after application
Lambs wool: (short and medium pile): Very expensive. A good general purpose type roller. Ideal for emulsions and acrylics on smooth surfaces.
Lambswool (long pile): Very expensive. Holds a good quantity of paint. Ideal for heavy textured surfaces. Leaves a heavy texture on smooth surfaces.
Synthetic types: (short and medium pile). The most popular. Much cheaper than lambswool. Hard wearing filaments designed to apply paint with all the desirable properties in a paint roller to smooth surfaces.
Long pile: Ideal for heavy textured surfaces. Leaves a heavy texture on smooth surfaces.
Lambswool
Sponge rollers: are also available. Not as good as the above ones but the small size ones can be handy for small areas. They should not be confused with the specially designed sponge rollers for texture, which are very handy tool for applying patterns to wet texture paints.
Radiator rollers: Small roller on long handle. Ideal for reaching into awkward areas. Interchangeable sleeves. Mohair, medium pile and sponge.
Radiator roller
Module 4 – Unit 3 Application of Emulsions
Painting and Decorating Phase 2 5 Revision 2.0 December 2013
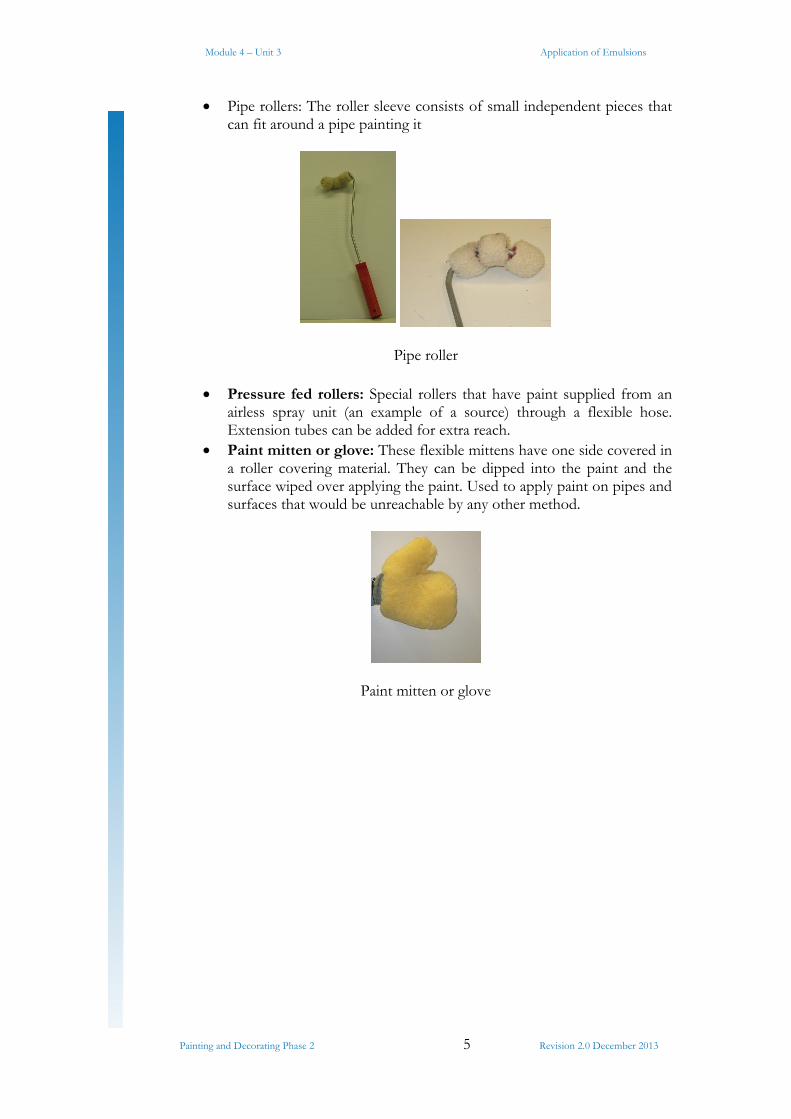
Pipe rollers: The roller sleeve consists of small independent pieces that can fit around a pipe painting it
Pipe roller
Pressure fed rollers: Special rollers that have paint supplied from an airless spray unit (an example of a source) through a flexible hose. Extension tubes can be added for extra reach.
Paint mitten or glove: These flexible mittens have one side covered in a roller covering material. They can be dipped into the paint and the surface wiped over applying the paint. Used to apply paint on pipes and surfaces that would be unreachable by any other method.
Paint mitten or glove

Module 4 – Unit 3 Application of Emulsions
Painting and Decorating Phase 2 6 Revision 2.0 December 2013
Suitable surfaces for rolling:
Large flat areas, Pegboard, acoustic panels, pebble dash, textured papers, wire mesh etc.
Advantages of the paint roller:
Ease of spreading of materials. Less masking up compared to spraying. Less ladder work as extension poles can be added. No brush marks. Refills are cheaper than brushes. Risk of flashing is reduced. Speed of covering areas especially rough surfaces wire mesh etc.
Disadvantages of the paint roller:
Corners and angles must be brushed. It is not a cutting in tool. Unsuitable for small areas. Difficult to clean out if used in oil or industrial paints.
Desirable properties of a paint roller:
To hold a reasonable quantity of paint. To release the paint easily to the surface. To leave the paint film even with a minimum of texture. To apply a full coat of paint.
Most paints can be rolled with the exception of those fast drying paints that are designed for spraying only.
Containers:
Trays: A variety of size trays are available in metal and plastic. Rectangular buckets and troughs: Can be used on ladders and
scaffolds as they can be hung up.
Roller poles: A wide variety of types and sizes available
Module 4 – Unit 3 Application of Emulsions
Painting and Decorating Phase 2 7 Revision 2.0 December 2013
1.3 Characteristics and types of emulsions
Emulsions: A water thinned material available in matt & silk finish
(internal) & and external quality.
Vinyl matt and characteristics of emulsion:
Traditional vinyl matt is generally used in areas of decoration where it will not need regular cleaning. Now a new type is available that can be scrubbed. This like all paints and especially water based paints are seeing a revolution in technology. Emulsions are not suitable for applying to hot water radiators but a new water based paint is available for this purpose.
Suitable for ceilings and walls. Drying method coalescence. Permeable. (moisture vapour will pass through the film.). It is alkali resistant. Excellent adhesion. Flexible film. Available in a large range of colours can be applied by brush roller or
spray. Non toxic. All brushes, rollers & spray equipment to be cleaned out with water
after use. Spray equipment should be flushed out with water and then cellulose
thinners or acetone. Drying time 1-2 hours. Recoat 2-4 hours.
Vinyl silk emulsion:
Similar to matt emulsion but having poorer opacity. Used where an emulsion finish is required and regular light cleaning is
required. Drying to an eggshell or semi gloss finish. Available in a large range of colours It can be applied by brush or roller Drying time 1-2 hours. Recoat 2-4 hours.

Module 4 – Unit 3 Application of Emulsions
Painting and Decorating Phase 2 8 Revision 2.0 December 2013
Exterior emulsion
Its smooth formulation suitable for sound dry masonry unpainted or previously painted. Its smooth formulation makes it easy to apply and it discourages dirt retention and algae growth.
They contain powerful anti mould ingredients are alkali resistant Can be applied by brush roller or spray. Drying time 1- 4 hrs. Thinned with water. Do not apply in wet or frosty conditions. If surface is powdery a stabilising primer must be used.
Masonry paints:
Some masonry paints contain mineral quarts, mica, granite and sand. This gives them a textured finish which is handy to the painter when a coarse type finish is required. They have the same properties and application methods as exterior emulsion.
Others are oil based:
Thinned with white spirit. Will dry in cold conditions Can withstand rainfall 3omins. after application. Very suitable for applying in winter conditions. Recoatable in 1-2 hrs.

Module 4 – Unit 3 Application of Emulsions
Painting and Decorating Phase 2 9 Revision 2.0 December 2013
1.4 Estimating quantities, setting out walls panels by geometric means
This exercise is a repeat of Unit 3 4.3:
Panelling can be a very decorative way of breaking up the walls of a large room that would have been boring with a solid coloured finish. When setting out the panels a china marker should be used instead of a pencil to avoid leaving permanent marks. Stencilling can be added to complete the decoration.
Steps in measuring for panelling:
Measure one wall and draw it to scale on drawing paper. Sketch in panels of different shapes and sizes until the one most
suitable is arrived at. Make a final accurate working scale drawing Do exactly the same for the remaining walls
Panelling

Module 4 – Unit 3 Application of Emulsions
Painting and Decorating Phase 2 10 Revision 2.0 December 2013
Working on the wall:
Tools and materials required: Plumb bob, level, self chalking line, china marker and low tack masking tape.
Mark out the top and bottom line measurements and snap lines. Taking the measurements from the scale drawing and using plumb bob
or level mark out the first panel and check. If checked measurements are OK proceed to the next one and so on. Tape up panels carefully and accurately. Fill in with emulsion
When applying emulsion that will be taped up an additive that increases the adhesion of the emulsion should be added to avoid the emulsion being damaged when the tape is taken off.
A laser level can also be used to mark out this work accurately. This will show long horizontal or vertical lines in the desired areas and can be marked off with china markers .The unit can be fixed to the surface by its protruding pins in the desired area. This tool saves a lot of time and effort.
Laser tool
Estimating Quantities:
Estimating quantities of paint is carried out as in Module 1. The Measurements of an area are taken and the spreading rate of the paint obtained. It is a simple procedure to apply the formula using these figures.

Module 4 – Unit 3 Application of Emulsions
Painting and Decorating Phase 2 11 Revision 2.0 December 2013
Sample:
You are requested to estimate the quantity of emulsion required to paint the ceilings and walls of a room that measures 15m.long x 10m wide x 3m high. Two coats required.
Spreading rate of paint = 65 m² per 5 litres
How many litres?
Girth of room = (15+10+15+10) x 3
= 50 x 3 = 150m²
Area of ceiling = 15 X 10 = 150 m²
Total area to be painted = 150 + 150 = 300 m²
Spreading rate of paint = 65 m² per 5 litres
=13m²per litre
Quantity of paint required = 300 ÷ 13 = 23.07
Answer to the nearest litre 23 litres.
1.5 Following manufacturers specifications
Manufacturer’s instructions come with every product and it is important to get into the habit of reading them and following them precisely to obtain the best results from the material. Another reason for doing this is the fact that with modern technology products are regularly changing and the instructions on the packaging will reflect this. Complaints to manufacturers regarding dissatisfaction with their products will not be entertained unless their instructions have been followed and in some cases they may send a technical expert to verify that the material has been used to specification.
Apply emulsion by roller Wash roller in preparation for storage State procedures when preparing raw plaster for painting

Module 4 – Unit 3 Application of Emulsions
Painting and Decorating Phase 2 12 Revision 2.0 December 2013
2.0 Apply Emulsion by Brush and Roller
Key learning points:
Health, safety and hygiene, accident prevention, attitude to safety Roller and stock brush techniques
2.1 Health, safety and hygiene, accident prevention, attitude to safety
Reference Module 4 Unit 3 1.4
Work cannot be carried out in untidy or careless conditions. Dirty conditions also create health hazards.
Health and hygiene:
Keep area clean Wash hands before meals Remove any leftovers of food after meals Wash and change overalls at least weekly
Accident prevention:
Put up signs Keep area tidy Keep drop sheets flat to avoid tripping (A material called “protecta
carpet” is available that adheres to the carpet protecting it. Ideal in corridors of hotels etc.)
Check all ladders and planks regularly Remove any unnecessary materials Remove all cloths every day before leaving
Attitudes to safety:
Are developed over a period of time and constant adherence to the safety guidelines become common practice. Making the workplace a safe place to work in is everyone’s duty. In confined areas or in areas of reduced ventilation wear a respirator.
Module 4 – Unit 3 Application of Emulsions
Painting and Decorating Phase 2 13 Revision 2.0 December 2013
2.2 Roller and stock brush techniques
Roller techniques:
It is generally accepted that an even coating of paint is easier to apply by roller than by brush but this takes judgment and technique. What must be avoided is over spreading and rolling out with dry roller. All work wither by brush or roller must proceed in a systematic fashion completing sections, keeping wet edges alive to avoid flashing. Flashing is reduced by rolling because of its speed but care must be taken to achieve a good blemish free finish.
A roller is not a cutting in tool and a brush must be used to reach into angles and corners. This must be done immediately before rolling and the rolling taken in as close as possible to the angle.
Extension poles can be added to reach areas that if brushing ladders would have to be used.
Brush technique:
Before setting out to apply emulsion to walls and ceilings by brush a simple plan of action should be followed It is important that an uninterrupted application can be carried out keeping the wet edges alive.
To keep wet edges alive reduce ventilation during application and increase to its maximum when complete to assist the drying.
When applying paint to a wall area
Break the wall up into visual sections that are easily manageable. Using step ladder apply the paint liberally to the top section crossing it
and laying off spreading it evenly Continue in the same way with the bottom section Shift the step ladder and begin to apply the paint to the first section
picking up the wet edge. Overlap onto the first section helping the paint to merge with the applied paint.
Continue until area is complete.
When painting into internal angles paint will be applied to the adjoining wall. Feather out this edge to avoid a dry ridge of paint.

Module 4 – Unit 3 Application of Emulsions
Painting and Decorating Phase 2 14 Revision 2.0 December 2013
3 0 Wash Roller in Preparation for Storage
3.1 Washing out sleeves, brushes and tools
The roller sleeve is washed out in the thinner of the paint it has been used to apply. The sleeve having been washed out thoroughly can be spun easily by inserting a brush spinner into it and pumping.
When washed out hang up to dry out before storing. Do not leave lying down on the pile as a flat edge will be created
spoiling the roller sleeve permanently. Some cheaper type of rollers e.g. (sponge) are not worth washing out in
thinners are it would be cheaper to buy a new one.
Storage of paint rollers: When clean and dry store in a clean area to avoid mildew forming on the pile.
Mildew: A minute fungus which causes the discolouration of paint finishes and wallpaper. Mildew spores are usually airborne and when they alight on a surface under suitable conditions they germinate and grow.
Care of paint rollers during work. Roll out excess paint and wrap in a polythene bag to keep soft for short
periods. Specially designed containers called roller mates will keep rollers soft
for longer periods. Keep all moving parts clean to maintain smooth roller action.
Care of Brushes:
The paint brush is the most important tool in the professional painter’s tool kit and proper use care and cleaning are very important. Brushes used in oil paint can be kept suspended in a water pot for a short period of time. The excess paint should be knocked out on a flat board before placing them in the water pot. It is better practice to rinse them out in white spirit so that paint does not accumulate around the stock.
Bristle brushes should be washed out in the thinners of the paint being used and the same applies to synthetic filaments. If the synthetic brush has been used in acrylic paint or any water paint wash out in warm water or warm soapy water. A brush comb is a useful tool to use regularly to help clean through the centre of the brush. It also helps with straightening the filling. After washing thoroughly again spin dry by hand or with spinner. Never tap or strike the brush on a hard surface to remove old paint etc. as this action can loosen the setting in the ferrule. Comb through again to help reshape brush, and hang up to dry. Do not store brush standing on its tip as it will distort the shape of the brush.
Module 4 – Unit 3 Application of Emulsions
Painting and Decorating Phase 2 15 Revision 2.0 December 2013
Brush keeper
They can also be placed in a brush keeper which is designed to hang up the brush on hooks. The large keeper holds a number of brushes but small keepers can accommodate two brushes. A portable metal container fitted with hooks that brushes can be suspended from. They also have as a fixture a bottle and wick. The bottle is filled with a fluid which is transferred on to the wick and the strong fumes of the liquid are circulated in the container.
The fume laden atmosphere keeps the brushes soft without the need to be immersed in water. The keeper must be kept covered at all times for it to be effective. This is a very handy piece of equipment when transporting brushes
3.2 Good housekeeping
Untidiness can be the cause of an unsafe area leading to accidents through trips and falls. It also delays work as constantly shifting equipment to gain access to a surface is always laborious and tiring. Keeping the equipment in the centre of the work area or adjacent to it is more advantageous. Cover and tidy away all materials
At the end of each day
Fold up drop sheets Dampen and remove all cloths Vacuum area. Leave area clean

Module 4 – Unit 3 Application of Emulsions
Painting and Decorating Phase 2 16 Revision 2.0 December 2013
4.0 Procedures for Painting Raw Plaster For Painting
Key learning points
Pattern staining Safety use and storage of blades Working alone or as part of a team
4.1 Pattern staining
This is a disfigurement, which happens principally on ceilings and takes the form of some localised areas becoming much darker than the rest of the surface. It is commonly seen on plaster ceilings where the shape and pattern of the underlying joists are revealed. It is also seen on ceilings constructed with building boards even when the surface has been plastered over, the position of the nails used in fixing the boards being indicated by local darkening.
Pattern staining is due to the deposit of dust particles and smoke deposited on the surface and this is caused by the difference in thermal conductivity between the plaster or building board and the wood or metal of which the joists laths or nails are composed. The staining occurs in ceilings when a room or loft situated above it is at a lower temperature. It is commonly supposed that the staining is caused by the passage of air through the plaster, but this is not so; the actual cause is that the air on the upper side of the ceiling seeks to become equal in temperature to the air in the room below, and, when the warm air of the room strikes the ceiling, heat is transferred from one side to the other. But plaster is a better conductor of heat than wood; where wooden laths and joists exist, therefore, the passage of heat is obstructed, but in the spaces between the laths or joists the passage is clear. More heat can therefore pass through the spaces and consequently more dirt is attracted to these parts. In cases where the underlying structure is of metal, or where the expanded metal lathing has been used, it is the areas backed by the metal that are the better conductors of heat, and it is to these areas that most of the dirt will be attracted. The only real cure for the problem would be to equalise the temperatures in both sides of the ceiling, which is usually impracticable. To some extent the trouble can be alleviated by insulating the spaces between the joists above the ceiling with fibreglass wool or polystyrene.
Insulating the attic area, covering the ceiling with decorative polystyrene board (tiles etc.) texture finishes or heavy relief paper will help to overcome this unsightly problem.

Module 4 – Unit 3 Application of Emulsions
Painting and Decorating Phase 2 17 Revision 2.0 December 2013
4.2 Safety use and storage of blades
All the cutting and trimming tools associated with paperhanging are very sharp and must be treated with respect otherwise injuries will be caused.
Do not put uncovered blades in pocket Follow manufacturer’s instructions for snapping off blades Retract blades when not in use Wrap up used blades before dumping
4.3 Working alone or as part of a team
Working with someone else helps to speed up the process of painting surfaces e.g.
Assistance with the removal of furniture. Ladders and light scaffold moved more easily Drop sheets laid quickly Wet edges are easier to keep open One painter paints the upper section the other the lower Cleaning and tidying up made easier.
Module 4 – Unit 3 Application of Emulsions
Painting and Decorating Phase 2 18 Revision 2.0 December 2013
Summary
The introduction of emulsions to the trade was a revolutionary step and the paint itself was a great step forward in technology. It is a material that is relatively easy to apply and trouble free in relation to its predecessors such as Distemper and Flat Oil Finish, which it largely replaced. However it is necessary to be aware of the fact that various types of emulsions are on the market for different surfaces such as plaster or rough dash, and it is necessary to be able to identify the correct type of brush and roller to be used in each situation. For instance selecting the wrong type of roller can make it next to impossible to produce a quality finish. Correct choice of tools and materials should produce a job that is of good quality, economical and durable.
Suggested exercise
1. Apply two coats of emulsion by brush and roller to ceiling already finished in woodchip paper
Self test
Q.1 List three types of roller sleeves
Q.2 What type of paint would a mohair roller be used to apply
Q.3 State the characteristics of emulsion paint
Q.4 List three types of emulsion.
Q.5 State four advantages of a paint roller
Q.6 State three disadvantages of a paint roller
Q.7 What is pattern staining.
Suggested reading
Painting and decorating ISBN 0-7506- 6737-0
Author Roy Hughes

27-33 Upper Baggot Street Dublin 4