TouchKit TouchScreen Controller User Manual v2.0.10.pdf · TouchKit TouchScreen Controller User...
27
TouchKit Manual foe WinCE v2.0.10 0 TouchKit TouchScreen Controller User Manual for Windows CE Version: 2.0.10
Transcript of TouchKit TouchScreen Controller User Manual v2.0.10.pdf · TouchKit TouchScreen Controller User...
TouchKit Manual foe WinCE v2.0.10 0
TouchKit TouchScreen Controller
User Manual
for Windows CE Version: 2.0.10
TouchKit Manual foe WinCE v2.0.10 1
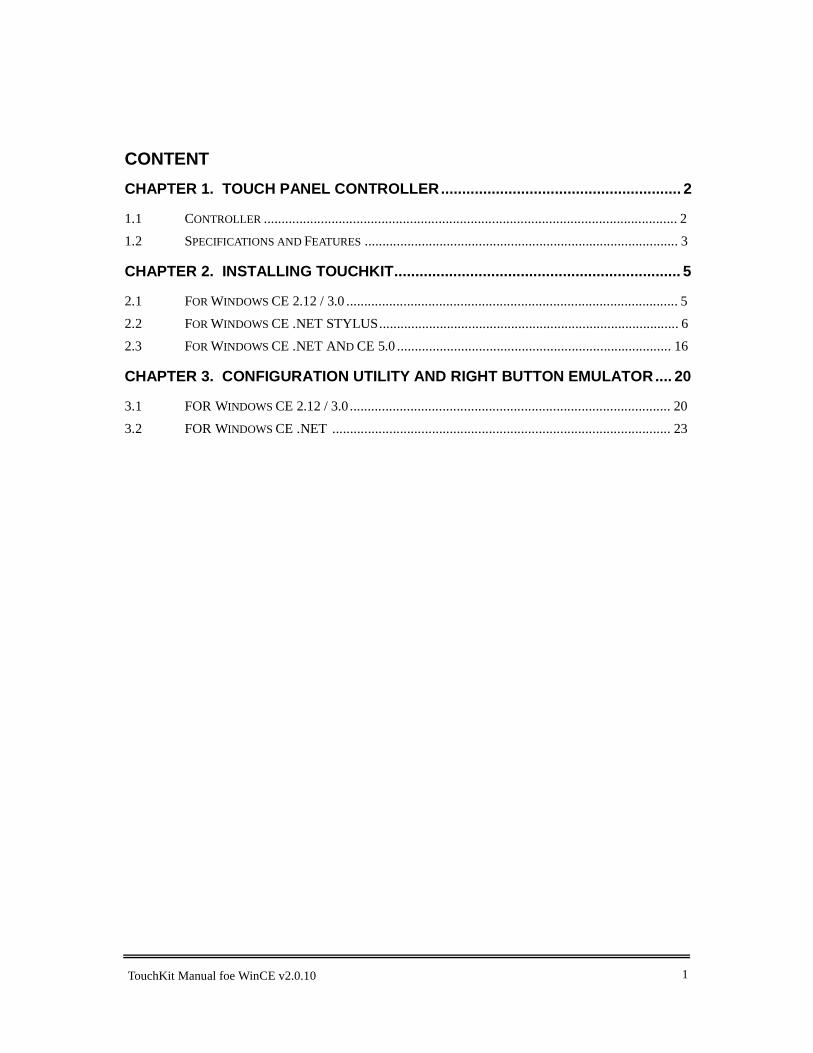
CONTENT CHAPTER 1. TOUCH PANEL CONTROLLER......................................................... 2
1.1 CONTROLLER .................................................................................................................... 2 1.2 SPECIFICATIONS AND FEATURES ........................................................................................ 3
CHAPTER 2. INSTALLING TOUCHKIT.................................................................... 5
2.1 FOR WINDOWS CE 2.12 / 3.0 ............................................................................................. 5 2.2 FOR WINDOWS CE .NET STYLUS.................................................................................... 6 2.3 FOR WINDOWS CE .NET AND CE 5.0 ............................................................................. 16
CHAPTER 3. CONFIGURATION UTILITY AND RIGHT BUTTON EMULATOR.... 20
3.1 FOR WINDOWS CE 2.12 / 3.0 .......................................................................................... 20 3.2 FOR WINDOWS CE .NET ............................................................................................... 23
TouchKit Manual foe WinCE v2.0.10 2
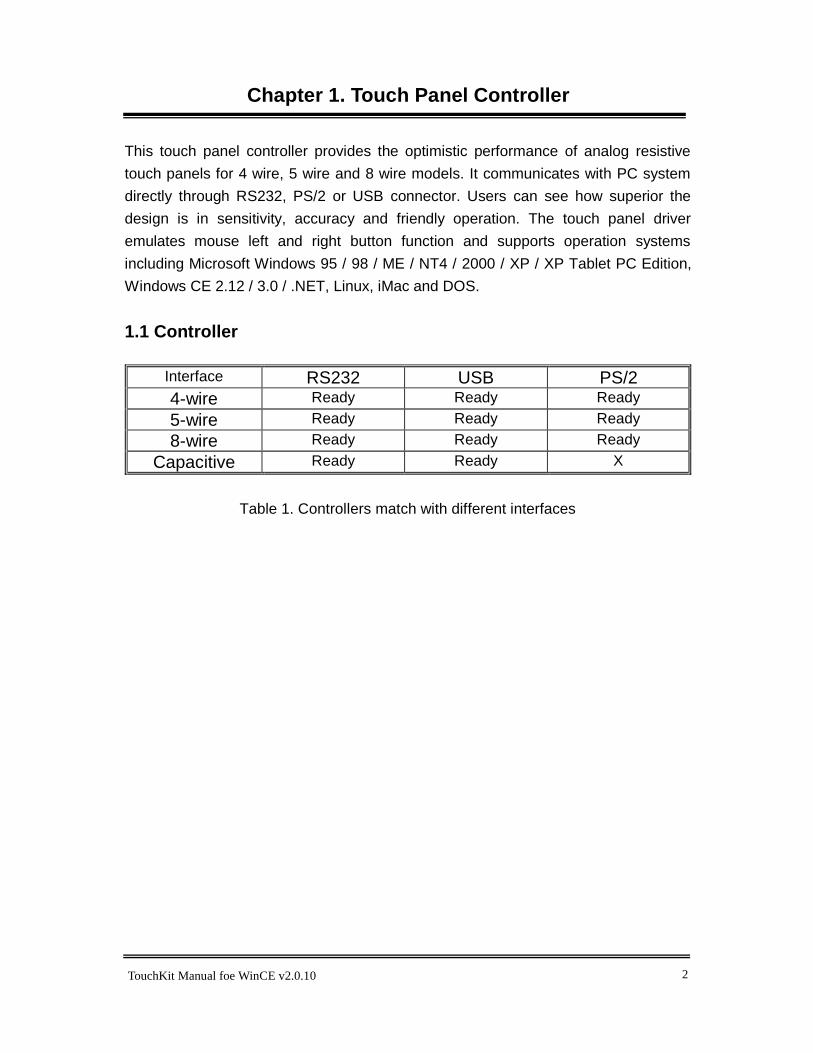
Chapter 1. Touch Panel Controller This touch panel controller provides the optimistic performance of analog resistive touch panels for 4 wire, 5 wire and 8 wire models. It communicates with PC system directly through RS232, PS/2 or USB connector. Users can see how superior the design is in sensitivity, accuracy and friendly operation. The touch panel driver emulates mouse left and right button function and supports operation systems including Microsoft Windows 95 / 98 / ME / NT4 / 2000 / XP / XP Tablet PC Edition, Windows CE 2.12 / 3.0 / .NET, Linux, iMac and DOS. 1.1 Controller
Interface RS232 USB PS/2 4-wire Ready Ready Ready 5-wire Ready Ready Ready 8-wire Ready Ready Ready
Capacitive Ready Ready X
Table 1. Controllers match with different interfaces
TouchKit Manual foe WinCE v2.0.10 3
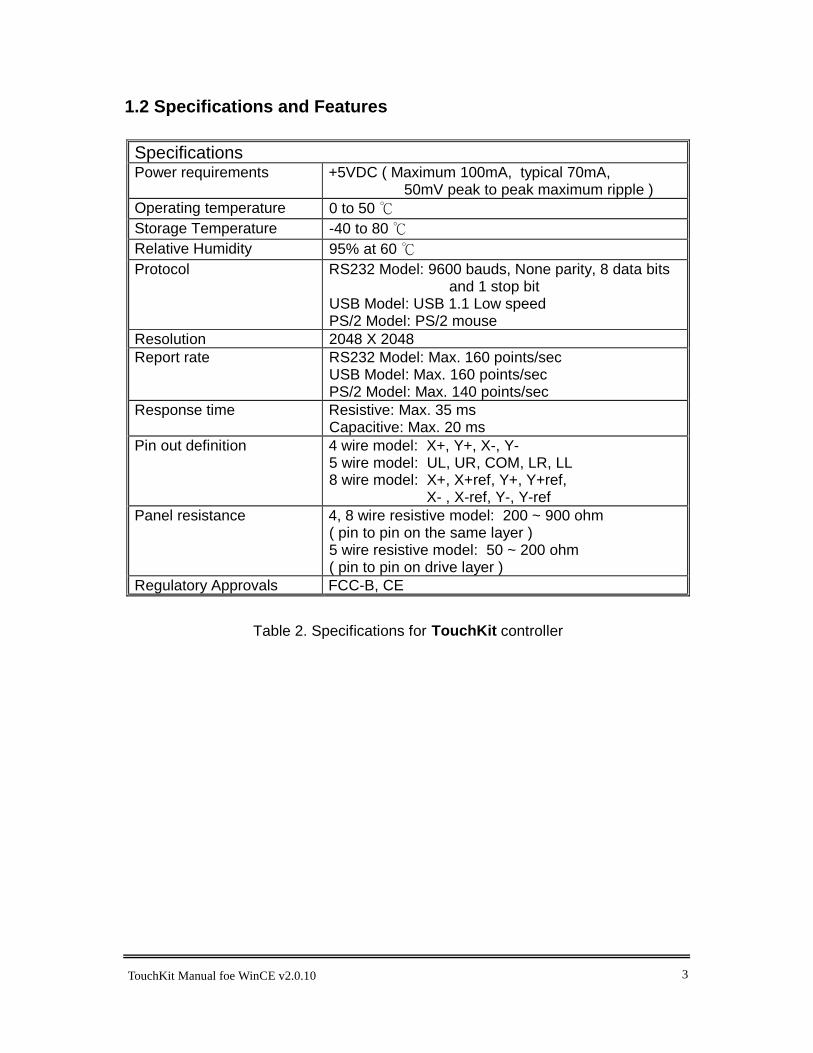
1.2 Specifications and Features
Specifications Power requirements +5VDC ( Maximum 100mA, typical 70mA,
50mV peak to peak maximum ripple ) Operating temperature 0 to 50 ℃ Storage Temperature -40 to 80 ℃ Relative Humidity 95% at 60 ℃ Protocol RS232 Model: 9600 bauds, None parity, 8 data bits
and 1 stop bit USB Model: USB 1.1 Low speed PS/2 Model: PS/2 mouse
Resolution 2048 X 2048 Report rate RS232 Model: Max. 160 points/sec
USB Model: Max. 160 points/sec PS/2 Model: Max. 140 points/sec
Response time Resistive: Max. 35 ms Capacitive: Max. 20 ms
Pin out definition 4 wire model: X+, Y+, X-, Y- 5 wire model: UL, UR, COM, LR, LL 8 wire model: X+, X+ref, Y+, Y+ref,
X- , X-ref, Y-, Y-ref Panel resistance 4, 8 wire resistive model: 200 ~ 900 ohm
( pin to pin on the same layer ) 5 wire resistive model: 50 ~ 200 ohm ( pin to pin on drive layer )
Regulatory Approvals FCC-B, CE
Table 2. Specifications for TouchKit controller
TouchKit Manual foe WinCE v2.0.10 4
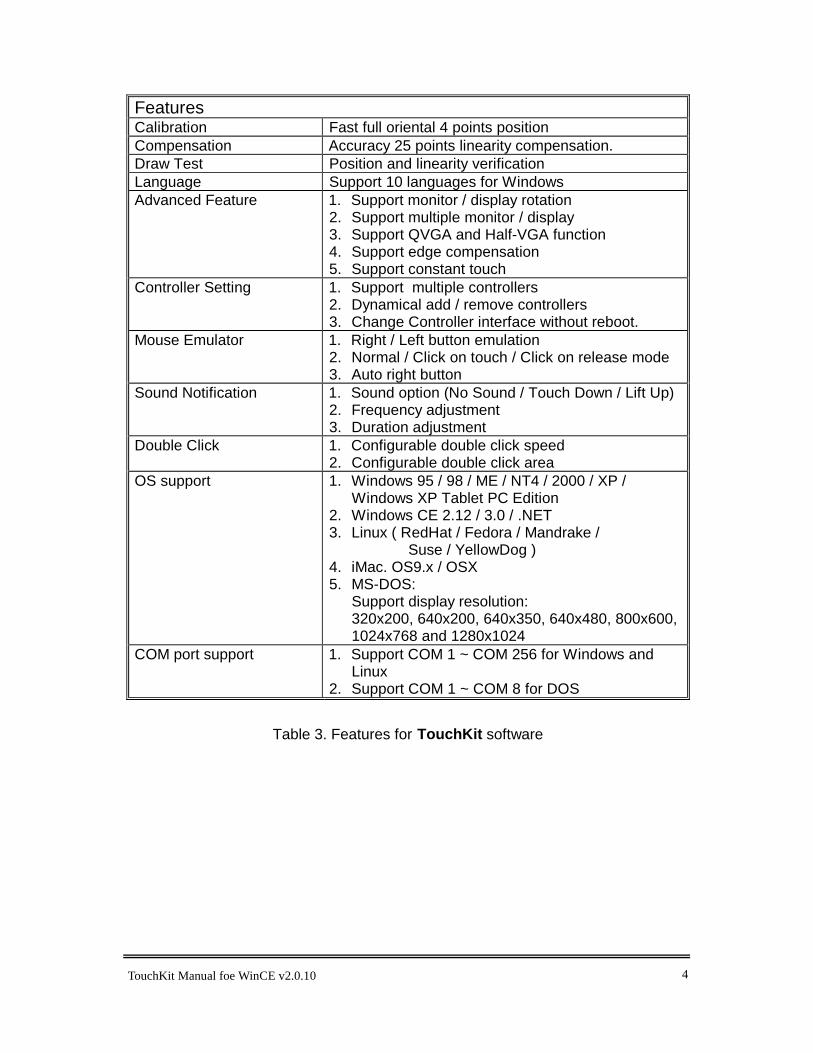
Features Calibration Fast full oriental 4 points position Compensation Accuracy 25 points linearity compensation. Draw Test Position and linearity verification Language Support 10 languages for Windows Advanced Feature 1. Support monitor / display rotation
2. Support multiple monitor / display 3. Support QVGA and Half-VGA function 4. Support edge compensation 5. Support constant touch
Controller Setting 1. Support multiple controllers 2. Dynamical add / remove controllers 3. Change Controller interface without reboot.
Mouse Emulator 1. Right / Left button emulation 2. Normal / Click on touch / Click on release mode 3. Auto right button
Sound Notification 1. Sound option (No Sound / Touch Down / Lift Up) 2. Frequency adjustment 3. Duration adjustment
Double Click 1. Configurable double click speed 2. Configurable double click area
OS support 1. Windows 95 / 98 / ME / NT4 / 2000 / XP / Windows XP Tablet PC Edition
2. Windows CE 2.12 / 3.0 / .NET 3. Linux ( RedHat / Fedora / Mandrake /
Suse / YellowDog ) 4. iMac. OS9.x / OSX 5. MS-DOS:
Support display resolution: 320x200, 640x200, 640x350, 640x480, 800x600, 1024x768 and 1280x1024
COM port support 1. Support COM 1 ~ COM 256 for Windows and Linux
2. Support COM 1 ~ COM 8 for DOS
Table 3. Features for TouchKit software
TouchKit Manual foe WinCE v2.0.10 5
Chapter 2. Installing TouchKit TouchKit is software, which contains drivers, configuration and right button utilities of the touch panel controllers for RS232 and USB on x86 CPU and Windows CE operation system. The two utilities are as follows: • Configuration support
The calibration and draw test of touch panel are done by this support.
• Right button support This is utility for emulating the right and left button of mouse through controlling touch panel. Users can toggle between right or left mouse buttons by this utility.
2.1 For Windows CE 2.12 / 3.0 There are totally five files in the TouchKit for Windows CE directory. Follow these steps to install TouchKit for Windows CE.
TouchKit.dll - driver Touch32ex.dll - specific dynamic linking library TouchTray.exe - right mouse support TouchKit.exe - Configuration Utility TouchKit.reg - information that will be added to registry
1. Make sure that Windows CE has the driver of serial ports. 2. While building Windows CE, users have to assign TouchKit.dll, Touch32ex.dll,
TouchTry.exe and Touchkit.exe to appropriate directory. 3. Add some registry value as the content of TouchKit.reg. 4. Now, build Windows CE with this touch panel driver and utilities. Note: TouchTray.exe is the file of the Right Mouse Utility. It has to be started with
computer booting. So, put this file to appropriate directory to satisfy this specific request.
Now, users can boot this Windows CE version on specific device. The right mouse button utility will be emulated while computer booting and the touch panel driver is also ready.
TouchKit Manual foe WinCE v2.0.10 6
2.2 For Windows CE.NET Stylus There are two driver package versions and showed as below: Use CE.NET bundle calibration utility Use Stylus dedicated configuration utility. USB interface driver installation with CE.NET bundle calibration utility. File List: USBPort.dll - USB touch screen driver Touchp.dll - USB touch screen driver Calibration.exe - provide a program of calibration (Programmer
could choose the path while building the image of CE platform. This program is not necessary for CE.NET)
Note: Users select the UHCI or OHCI USB Host Controller driver into the platform, which supported by the target device, and check the USB mouse can go well at the same port.
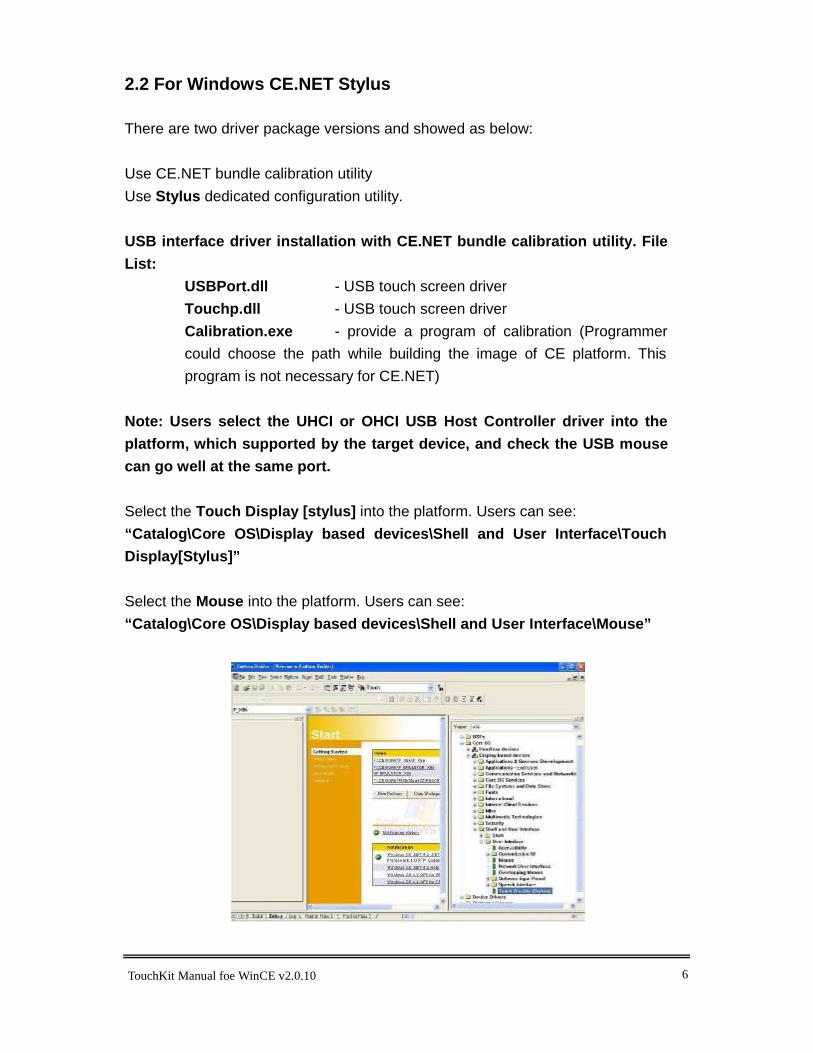
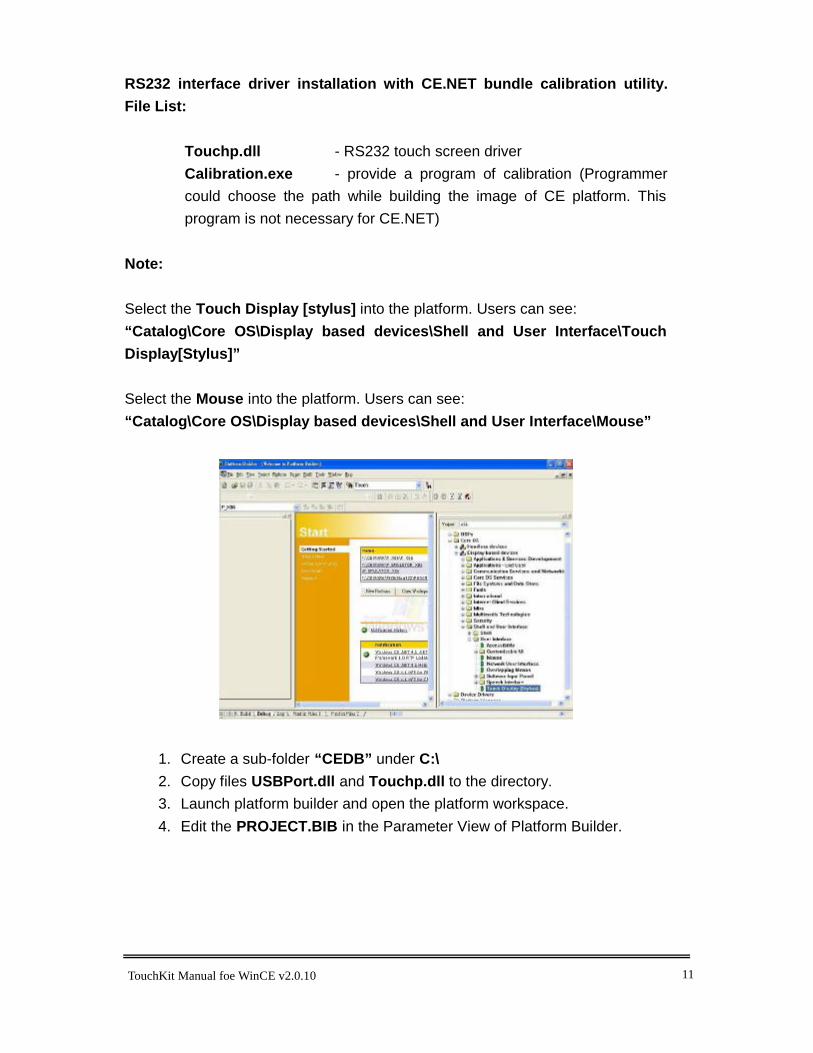
Select the Touch Display [stylus] into the platform. Users can see: “Catalog\Core OS\Display based devices\Shell and User Interface\Touch Display[Stylus]”
Select the Mouse into the platform. Users can see: “Catalog\Core OS\Display based devices\Shell and User Interface\Mouse”
TouchKit Manual foe WinCE v2.0.10 7
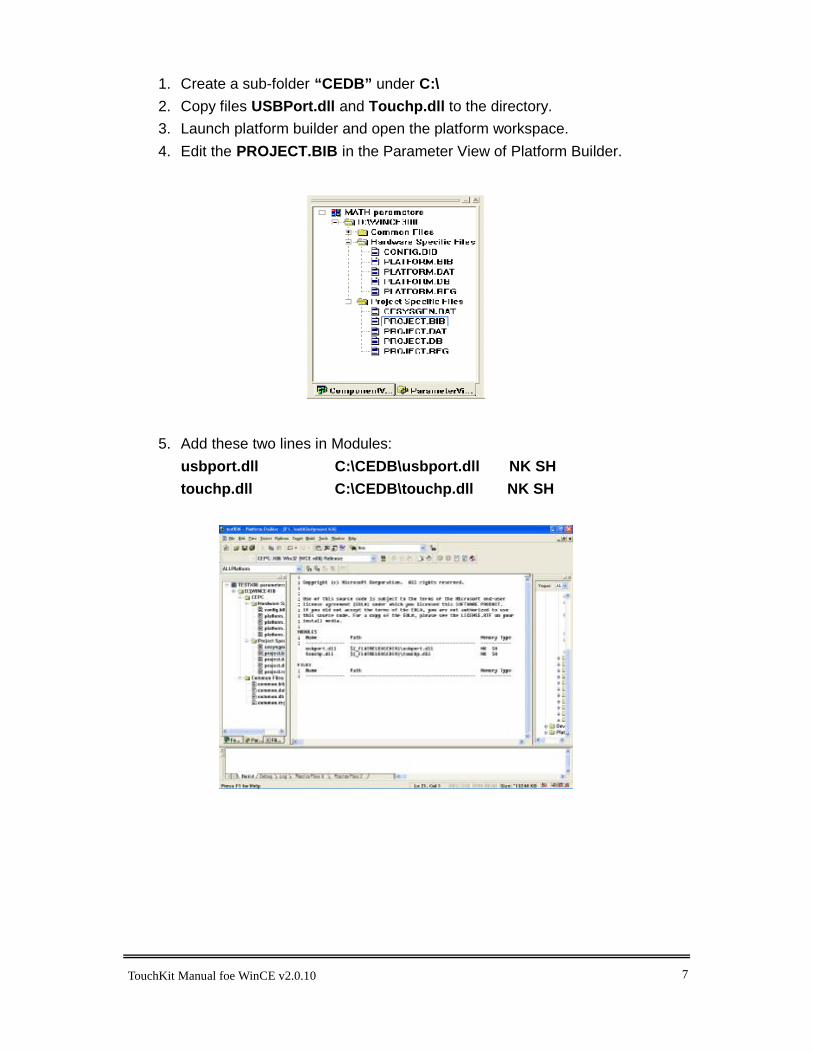
1. Create a sub-folder “CEDB” under C:\ 2. Copy files USBPort.dll and Touchp.dll to the directory. 3. Launch platform builder and open the platform workspace. 4. Edit the PROJECT.BIB in the Parameter View of Platform Builder.
5. Add these two lines in Modules:
usbport.dll C:\CEDB\usbport.dll NK SH touchp.dll C:\CEDB\touchp.dll NK SH

TouchKit Manual foe WinCE v2.0.10 8
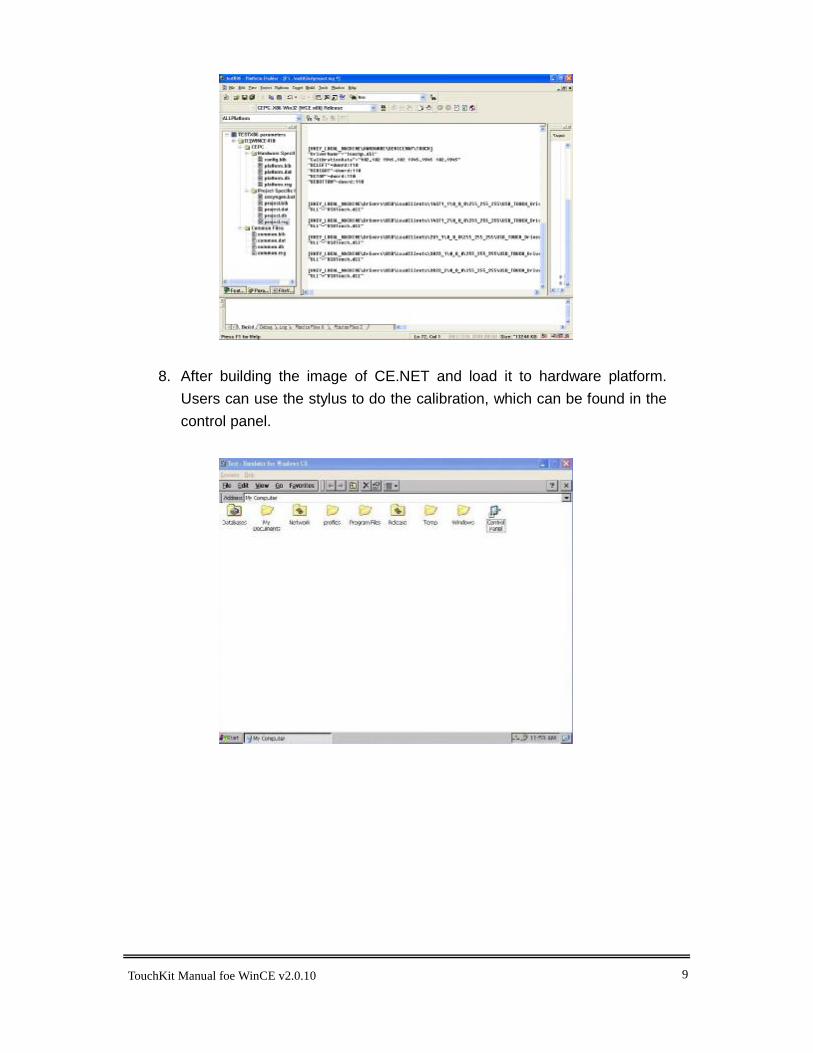
6. Edit the PROJECT.REG in the Parameter View of Platform Builder.
7. Add these lines for registry:
[HKEY_LOCAL_MACHINE\HARDWARE\DEVICEMAP\TOUCH] “DriverName”=”Touchp.dll” “CalibrationData”=”102,102 1945, 102 1945,1945 102,1945” “BCLEFT”=dword:64 “BCRIGHT”=dword:64 “BCTOP”=dword:64 “BCBOTTOM”=dword:64 Then copy the following sentences to the PROJECT.REG [HKEY_LOCAL_MACHINE\Drivers\USB\LoadClients\14371_1\0_0_0\255_255_255\USB_TOUCH_Driver] “DLL”=”USBPort.dll” [HKEY_LOCAL_MACHINE\Drivers\USB\LoadClients\14371_2\0_0_0\255_255_255\USB_TOUCH_Driver] “DLL”=”USBPort.dll” [HKEY_LOCAL_MACHINE\Drivers\USB\LoadClients\4660_1\0_0_0\255_255_255\USB_TOUCH_Driver] “DLL”=”USBPort.dll” [HKEY_LOCAL_MACHINE\Drivers\USB\LoadClients\3823_1\0_0_0\255_255_255\USB_TOUCH_Driver] “DLL”=”USBPort.dll” [HKEY_LOCAL_MACHINE\Drivers\USB\LoadClients3823_2\0_0_0\255_255_255\USB_TOUCH_Driver] “DLL”=”USBPort.dll”
TouchKit Manual foe WinCE v2.0.10 9
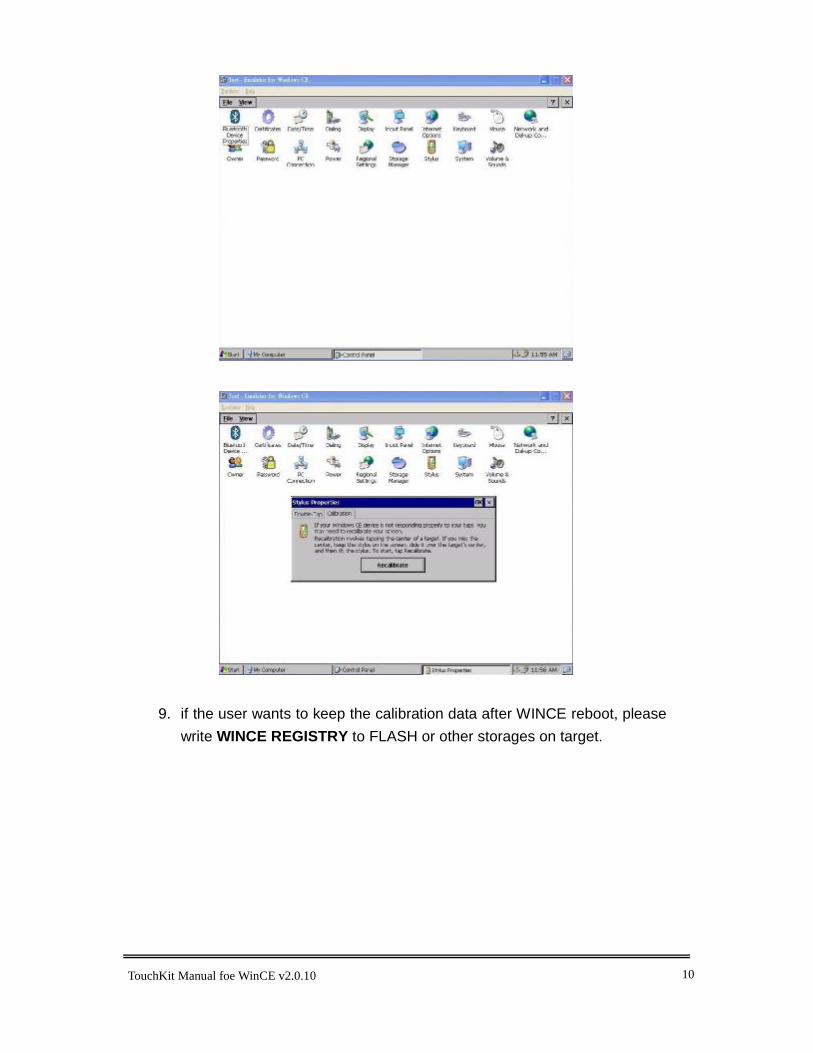
8. After building the image of CE.NET and load it to hardware platform. Users can use the stylus to do the calibration, which can be found in the control panel.
TouchKit Manual foe WinCE v2.0.10 10
9. if the user wants to keep the calibration data after WINCE reboot, please write WINCE REGISTRY to FLASH or other storages on target.
TouchKit Manual foe WinCE v2.0.10 11
RS232 interface driver installation with CE.NET bundle calibration utility. File List: Touchp.dll - RS232 touch screen driver Calibration.exe - provide a program of calibration (Programmer
could choose the path while building the image of CE platform. This program is not necessary for CE.NET)
Note: Select the Touch Display [stylus] into the platform. Users can see: “Catalog\Core OS\Display based devices\Shell and User Interface\Touch Display[Stylus]”
Select the Mouse into the platform. Users can see: “Catalog\Core OS\Display based devices\Shell and User Interface\Mouse”
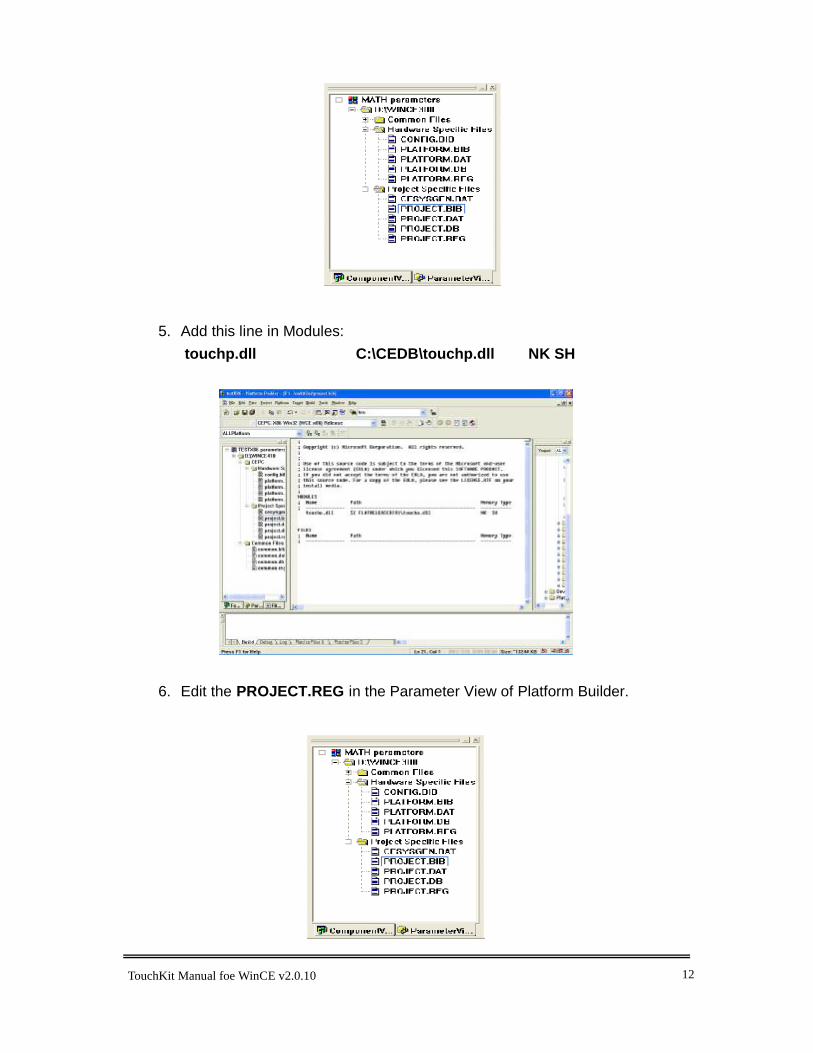
1. Create a sub-folder “CEDB” under C:\ 2. Copy files USBPort.dll and Touchp.dll to the directory. 3. Launch platform builder and open the platform workspace. 4. Edit the PROJECT.BIB in the Parameter View of Platform Builder.
TouchKit Manual foe WinCE v2.0.10 12
5. Add this line in Modules:
touchp.dll C:\CEDB\touchp.dll NK SH
6. Edit the PROJECT.REG in the Parameter View of Platform Builder.
TouchKit Manual foe WinCE v2.0.10 13
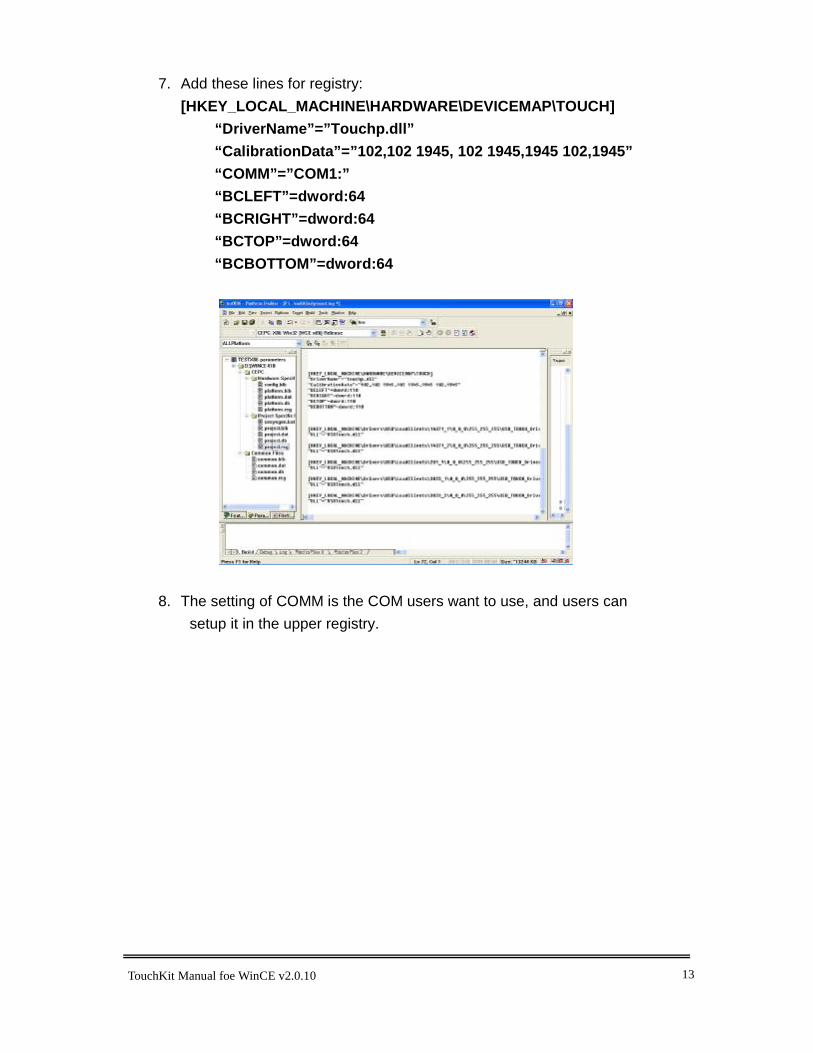
7. Add these lines for registry: [HKEY_LOCAL_MACHINE\HARDWARE\DEVICEMAP\TOUCH] “DriverName”=”Touchp.dll” “CalibrationData”=”102,102 1945, 102 1945,1945 102,1945” “COMM”=”COM1:” “BCLEFT”=dword:64 “BCRIGHT”=dword:64 “BCTOP”=dword:64 “BCBOTTOM”=dword:64
8. The setting of COMM is the COM users want to use, and users can setup it in the upper registry.
TouchKit Manual foe WinCE v2.0.10 14
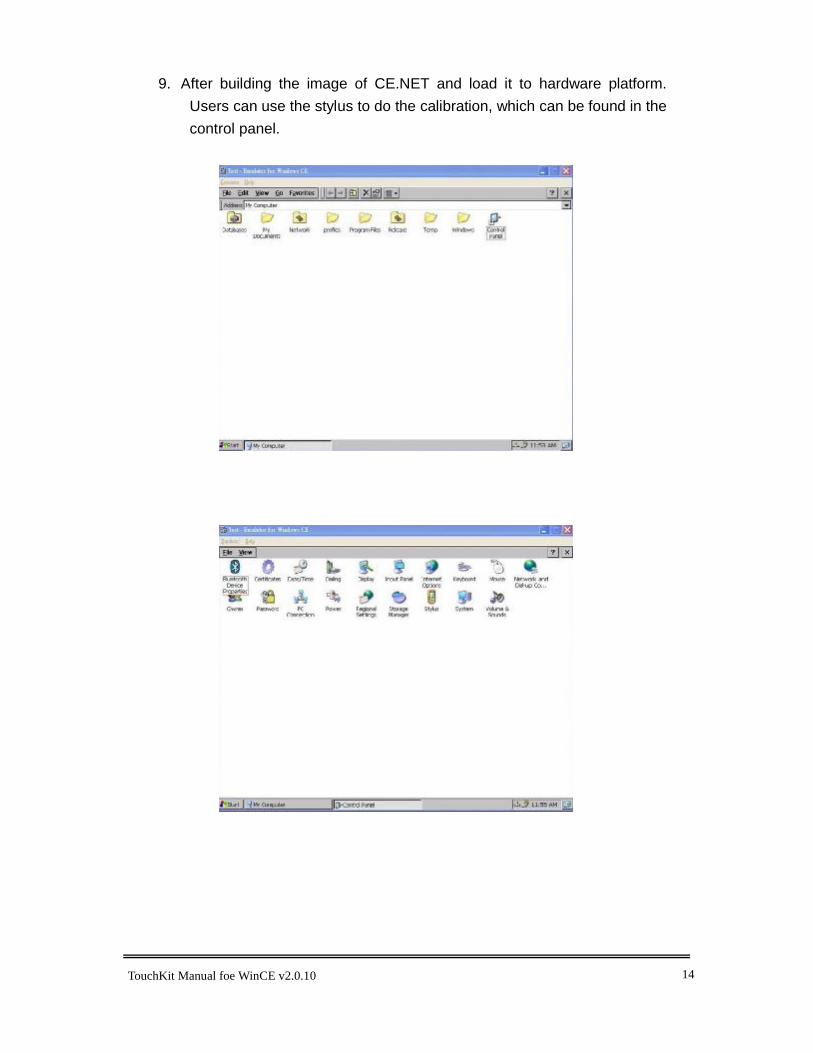
9. After building the image of CE.NET and load it to hardware platform. Users can use the stylus to do the calibration, which can be found in the control panel.
TouchKit Manual foe WinCE v2.0.10 15
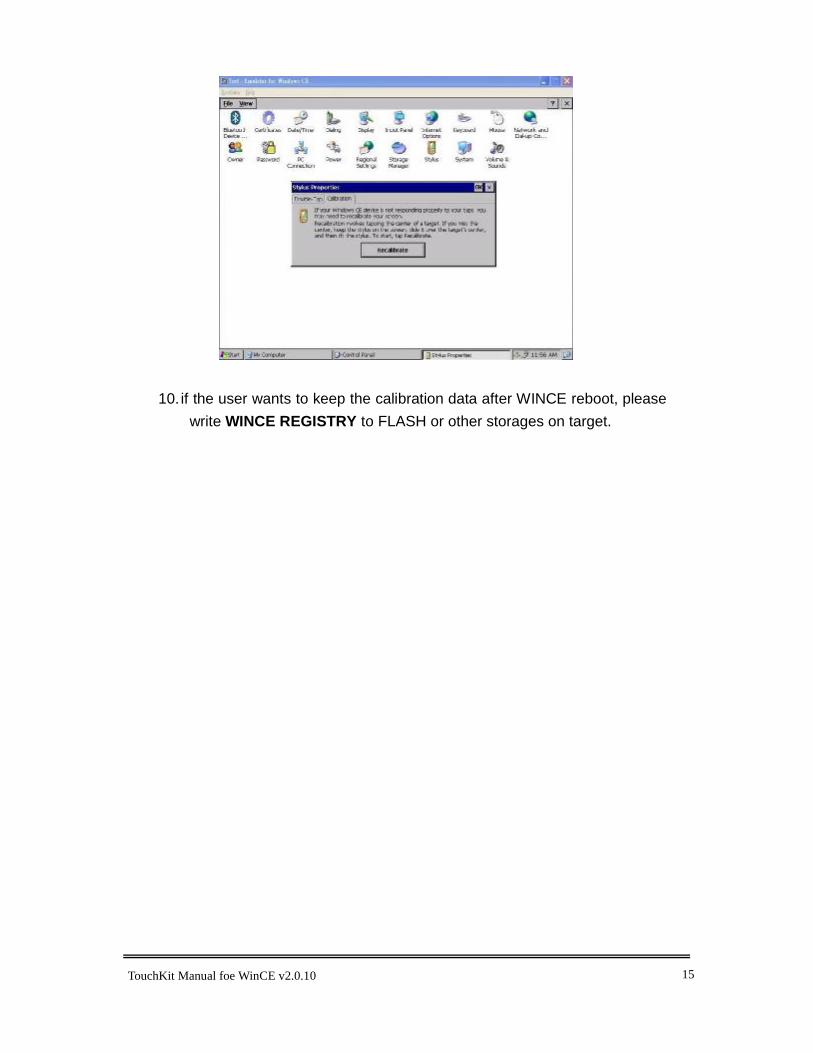
10. if the user wants to keep the calibration data after WINCE reboot, please write WINCE REGISTRY to FLASH or other storages on target.
TouchKit Manual foe WinCE v2.0.10 16
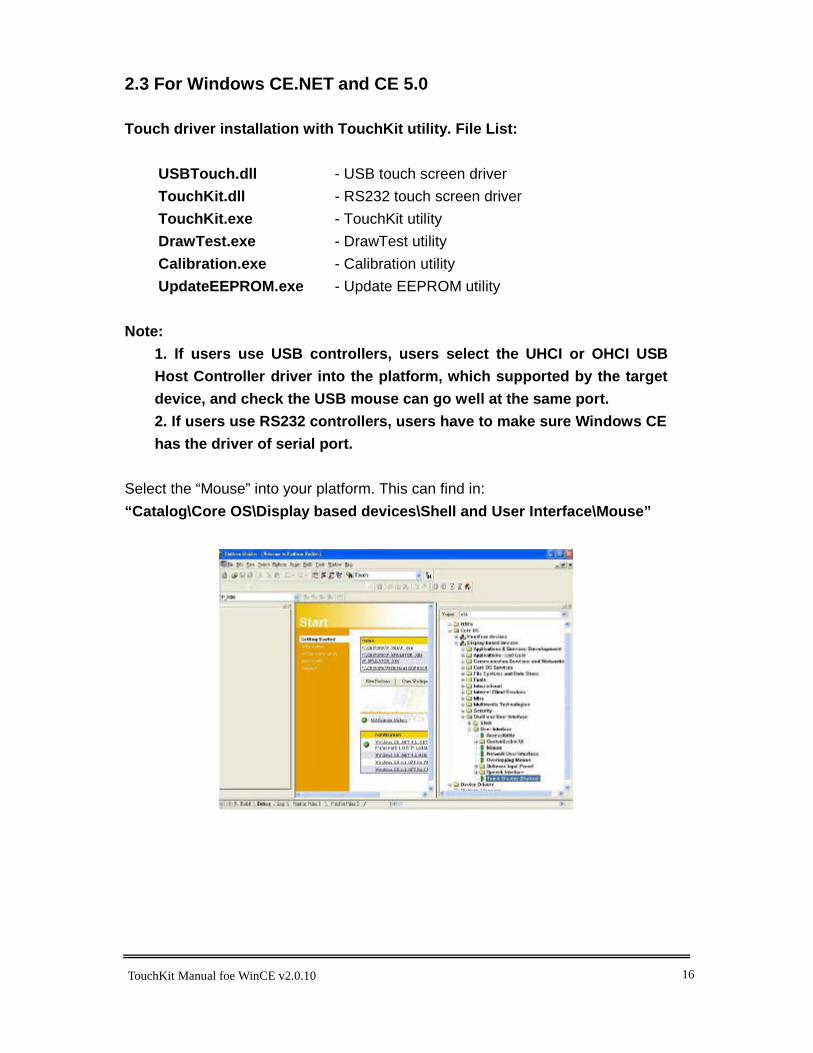
2.3 For Windows CE.NET and CE 5.0 Touch driver installation with TouchKit utility. File List:
USBTouch.dll - USB touch screen driver TouchKit.dll - RS232 touch screen driver TouchKit.exe - TouchKit utility DrawTest.exe - DrawTest utility Calibration.exe - Calibration utility UpdateEEPROM.exe - Update EEPROM utility
Note: 1. If users use USB controllers, users select the UHCI or OHCI USB Host Controller driver into the platform, which supported by the target device, and check the USB mouse can go well at the same port. 2. If users use RS232 controllers, users have to make sure Windows CE has the driver of serial port.
Select the “Mouse” into your platform. This can find in: “Catalog\Core OS\Display based devices\Shell and User Interface\Mouse”
TouchKit Manual foe WinCE v2.0.10 17
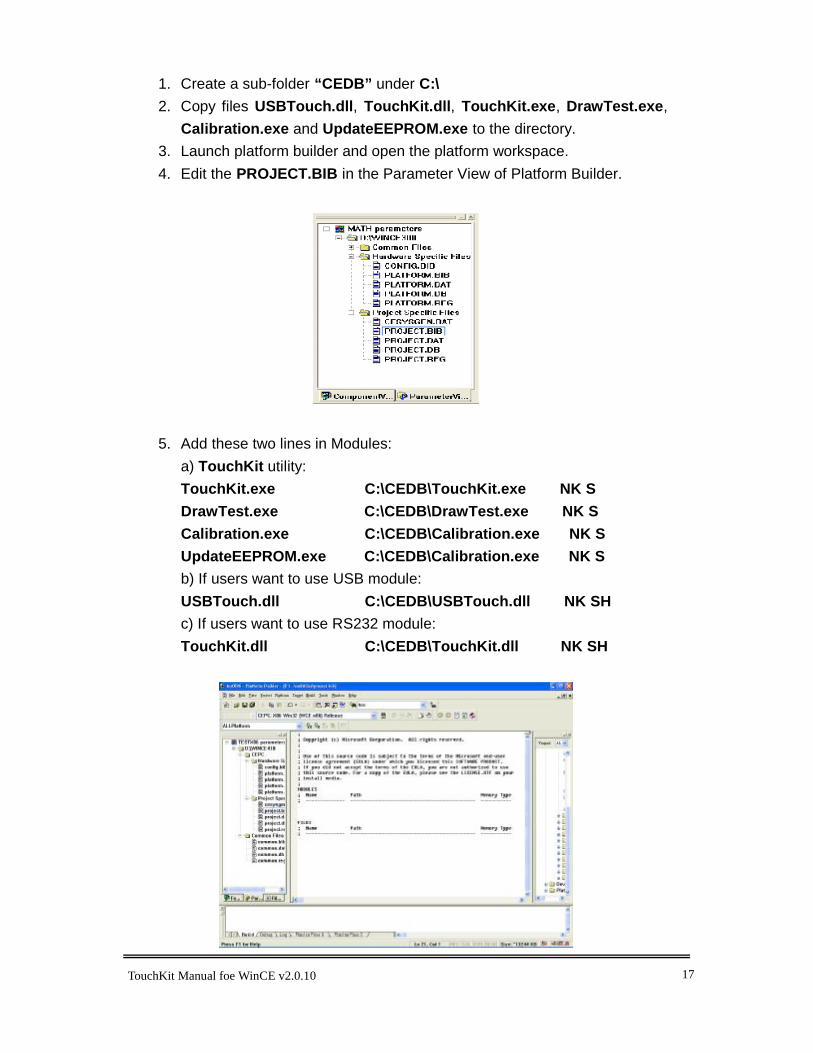
1. Create a sub-folder “CEDB” under C:\ 2. Copy files USBTouch.dll, TouchKit.dll, TouchKit.exe, DrawTest.exe,
Calibration.exe and UpdateEEPROM.exe to the directory. 3. Launch platform builder and open the platform workspace. 4. Edit the PROJECT.BIB in the Parameter View of Platform Builder.
5. Add these two lines in Modules: a) TouchKit utility: TouchKit.exe C:\CEDB\TouchKit.exe NK S DrawTest.exe C:\CEDB\DrawTest.exe NK S Calibration.exe C:\CEDB\Calibration.exe NK S UpdateEEPROM.exe C:\CEDB\Calibration.exe NK S b) If users want to use USB module: USBTouch.dll C:\CEDB\USBTouch.dll NK SH c) If users want to use RS232 module: TouchKit.dll C:\CEDB\TouchKit.dll NK SH
TouchKit Manual foe WinCE v2.0.10 18
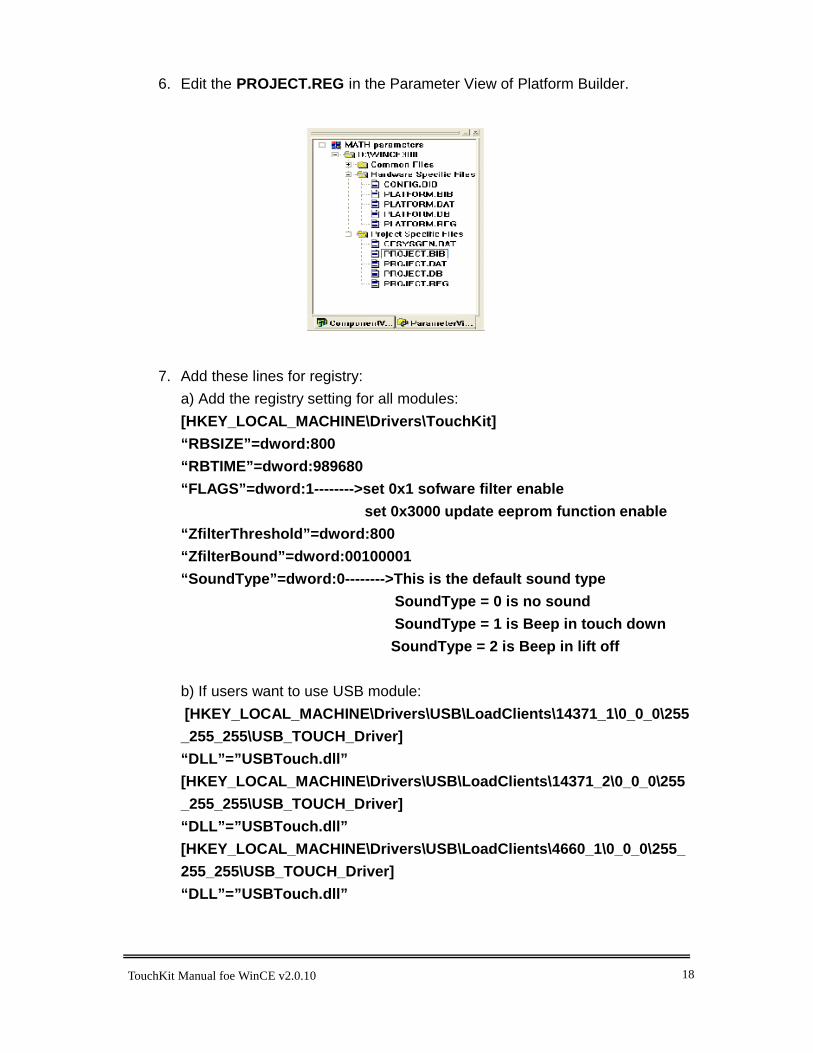
6. Edit the PROJECT.REG in the Parameter View of Platform Builder.
7. Add these lines for registry:
a) Add the registry setting for all modules: [HKEY_LOCAL_MACHINE\Drivers\TouchKit] “RBSIZE”=dword:800 “RBTIME”=dword:989680 “FLAGS”=dword:1-------->set 0x1 sofware filter enable set 0x3000 update eeprom function enable “ZfilterThreshold”=dword:800 “ZfilterBound”=dword:00100001 “SoundType”=dword:0-------->This is the default sound type
SoundType = 0 is no sound SoundType = 1 is Beep in touch down SoundType = 2 is Beep in lift off
b) If users want to use USB module: [HKEY_LOCAL_MACHINE\Drivers\USB\LoadClients\14371_1\0_0_0\255_255_255\USB_TOUCH_Driver] “DLL”=”USBTouch.dll” [HKEY_LOCAL_MACHINE\Drivers\USB\LoadClients\14371_2\0_0_0\255_255_255\USB_TOUCH_Driver] “DLL”=”USBTouch.dll” [HKEY_LOCAL_MACHINE\Drivers\USB\LoadClients\4660_1\0_0_0\255_255_255\USB_TOUCH_Driver] “DLL”=”USBTouch.dll”
TouchKit Manual foe WinCE v2.0.10 19
[HKEY_LOCAL_MACHINE\Drivers\USB\LoadClients\3823_1\0_0_0\255_255_255\USB_TOUCH_Driver] “DLL”=”USBTouch.dll” [HKEY_LOCAL_MACHINE\Drivers\USB\LoadClients3823_2\0_0_0\255_255_255\USB_TOUCH_Driver] “DLL”=”USBTouch.dll”
c) If users want to use RS232 module1: [HKEY_LOCAL_MACHINE\Drivers\BuiltIn\TouchKit1] “Dll”=”TouchKit.dll” “Order”=dword:00000001 “Prefix”=”TKT” “Index”=dword:00000001 “Context”=dword:1;---->This is the COM Port index which users use
If users want to use RS232 module2: [HKEY_LOCAL_MACHINE\Drivers\BuiltIn\TouchKit2] “Dll”=”TouchKit.dll” “Order”=dword:00000001 “Prefix”=”TKT” “Index”=dword:00000002 “Context”=dword:2;---->This is the COM Port index which users use
d) If users want to used other language for user’s utility:
#include "C:\CEDB\language_tch.reg"----------->Chose one language users want to use.
TouchKit Manual foe WinCE v2.0.10 20
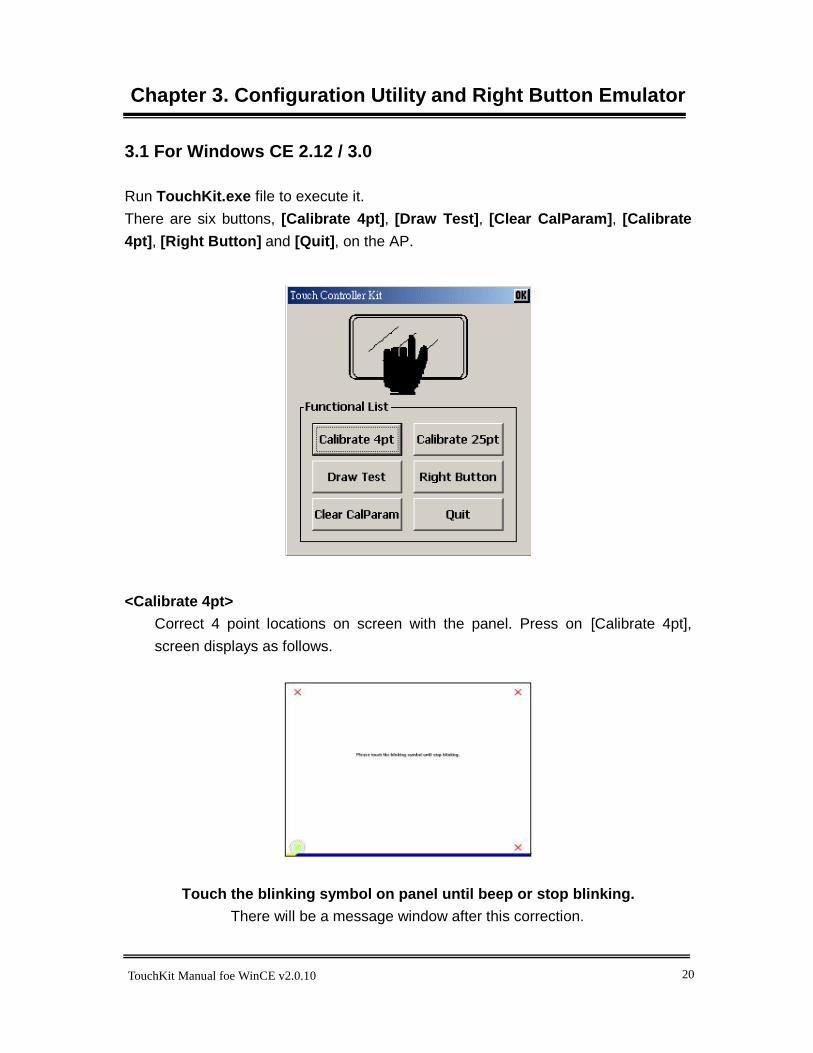
Chapter 3. Configuration Utility and Right Button Emulator 3.1 For Windows CE 2.12 / 3.0 Run TouchKit.exe file to execute it. There are six buttons, [Calibrate 4pt], [Draw Test], [Clear CalParam], [Calibrate 4pt], [Right Button] and [Quit], on the AP.
<Calibrate 4pt>
Correct 4 point locations on screen with the panel. Press on [Calibrate 4pt], screen displays as follows.
Touch the blinking symbol on panel until beep or stop blinking. There will be a message window after this correction.
TouchKit Manual foe WinCE v2.0.10 21
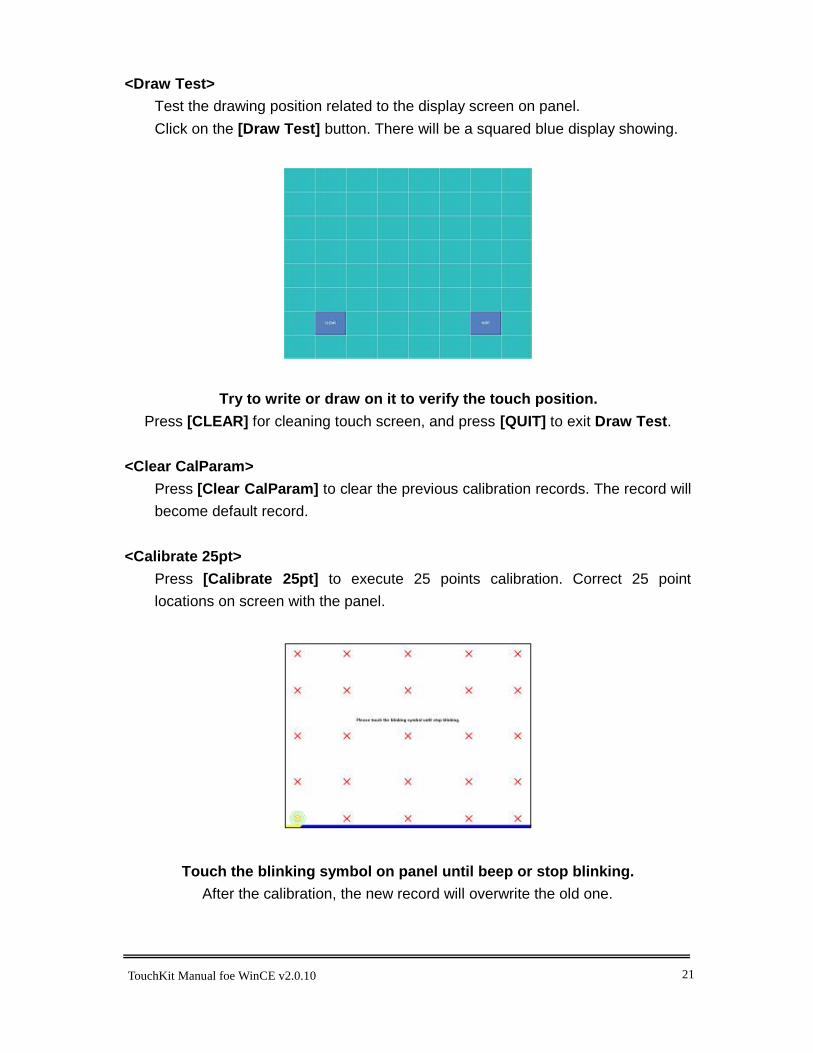
<Draw Test> Test the drawing position related to the display screen on panel. Click on the [Draw Test] button. There will be a squared blue display showing.
Try to write or draw on it to verify the touch position. Press [CLEAR] for cleaning touch screen, and press [QUIT] to exit Draw Test.
<Clear CalParam>
Press [Clear CalParam] to clear the previous calibration records. The record will become default record.
<Calibrate 25pt> Press [Calibrate 25pt] to execute 25 points calibration. Correct 25 point locations on screen with the panel.
Touch the blinking symbol on panel until beep or stop blinking. After the calibration, the new record will overwrite the old one.
TouchKit Manual foe WinCE v2.0.10 22
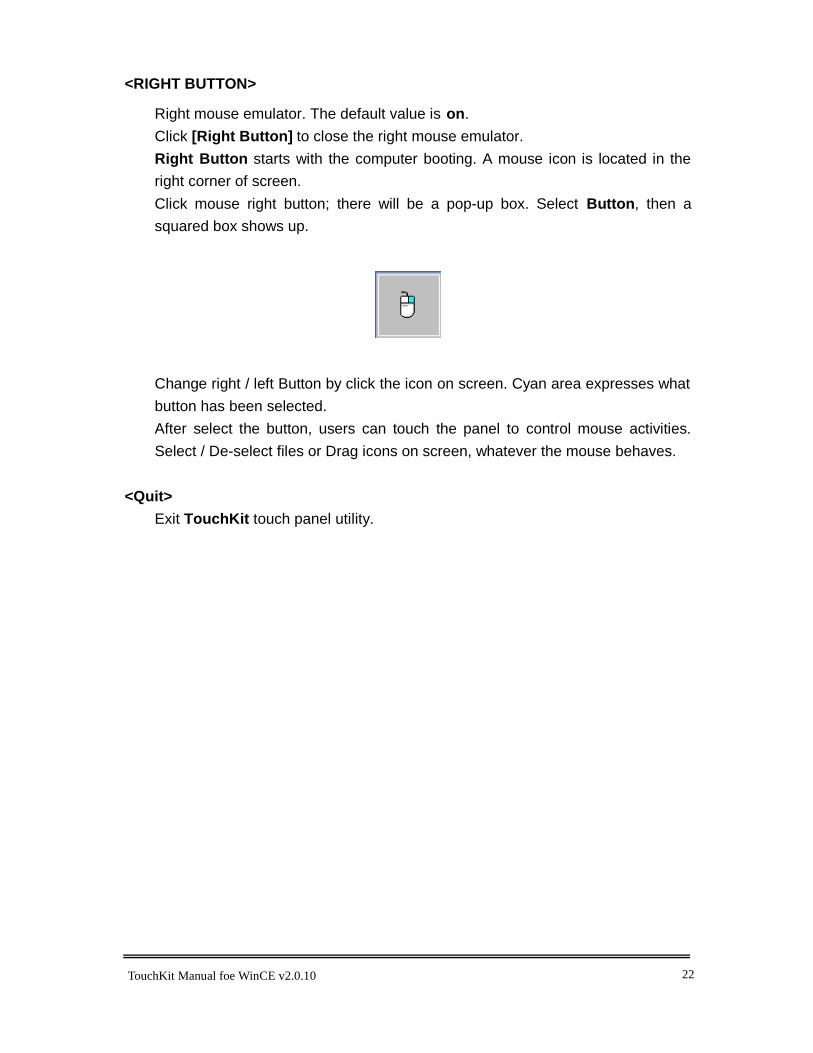
<RIGHT BUTTON>
Right mouse emulator. The default value is on. Click [Right Button] to close the right mouse emulator. Right Button starts with the computer booting. A mouse icon is located in the right corner of screen. Click mouse right button; there will be a pop-up box. Select Button, then a squared box shows up.
Change right / left Button by click the icon on screen. Cyan area expresses what button has been selected. After select the button, users can touch the panel to control mouse activities. Select / De-select files or Drag icons on screen, whatever the mouse behaves.
<Quit> Exit TouchKit touch panel utility.
TouchKit Manual foe WinCE v2.0.10 23
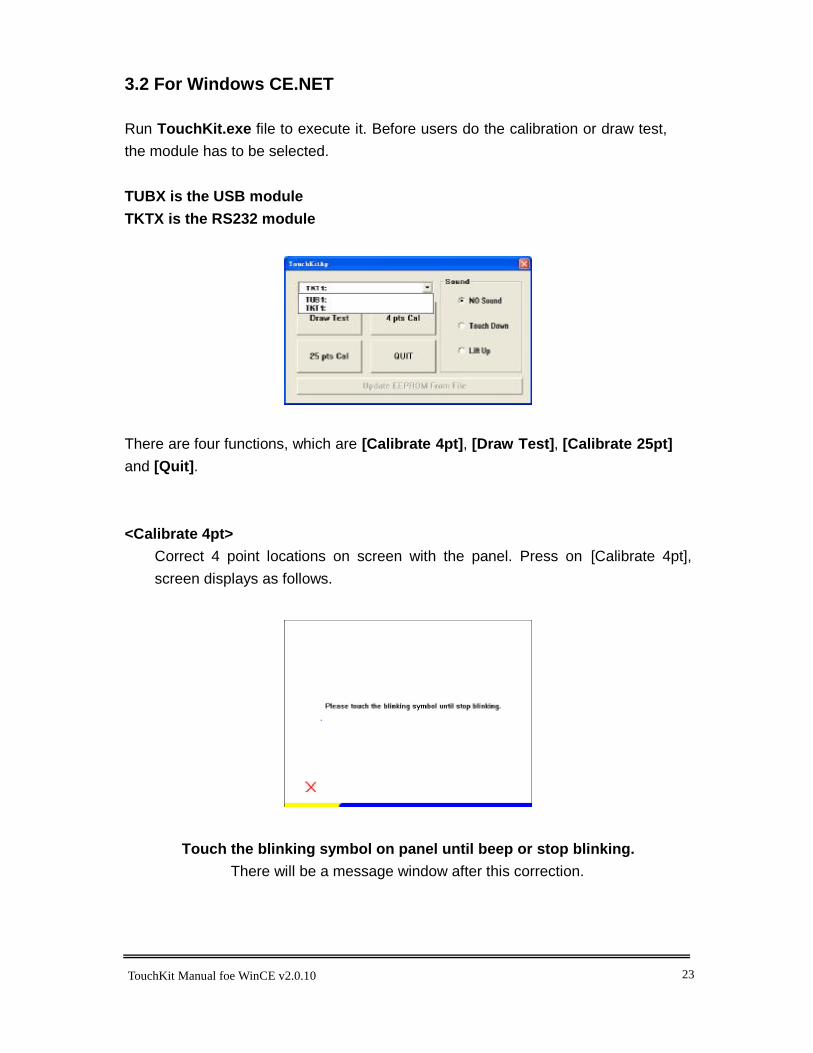
3.2 For Windows CE.NET Run TouchKit.exe file to execute it. Before users do the calibration or draw test, the module has to be selected. TUBX is the USB module TKTX is the RS232 module
There are four functions, which are [Calibrate 4pt], [Draw Test], [Calibrate 25pt] and [Quit]. <Calibrate 4pt>
Correct 4 point locations on screen with the panel. Press on [Calibrate 4pt], screen displays as follows.
Touch the blinking symbol on panel until beep or stop blinking. There will be a message window after this correction.
TouchKit Manual foe WinCE v2.0.10 24
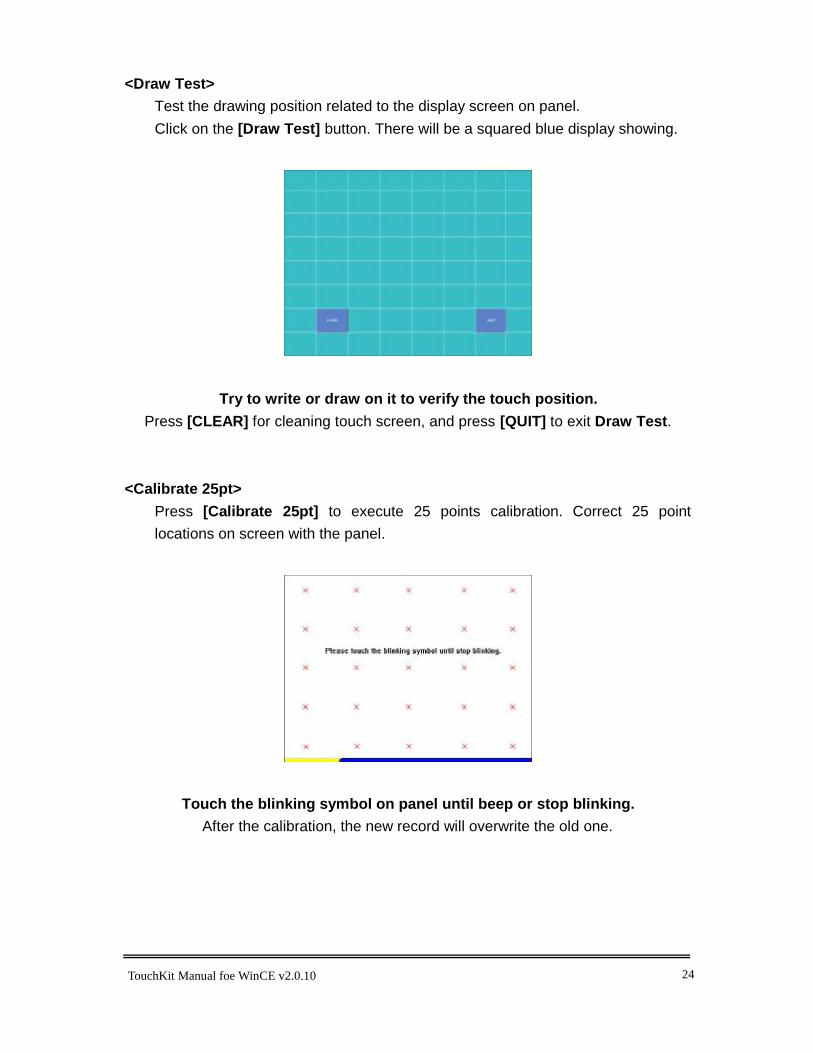
<Draw Test> Test the drawing position related to the display screen on panel. Click on the [Draw Test] button. There will be a squared blue display showing.
Try to write or draw on it to verify the touch position. Press [CLEAR] for cleaning touch screen, and press [QUIT] to exit Draw Test.
<Calibrate 25pt>
Press [Calibrate 25pt] to execute 25 points calibration. Correct 25 point locations on screen with the panel.
Touch the blinking symbol on panel until beep or stop blinking. After the calibration, the new record will overwrite the old one.
TouchKit Manual foe WinCE v2.0.10 25
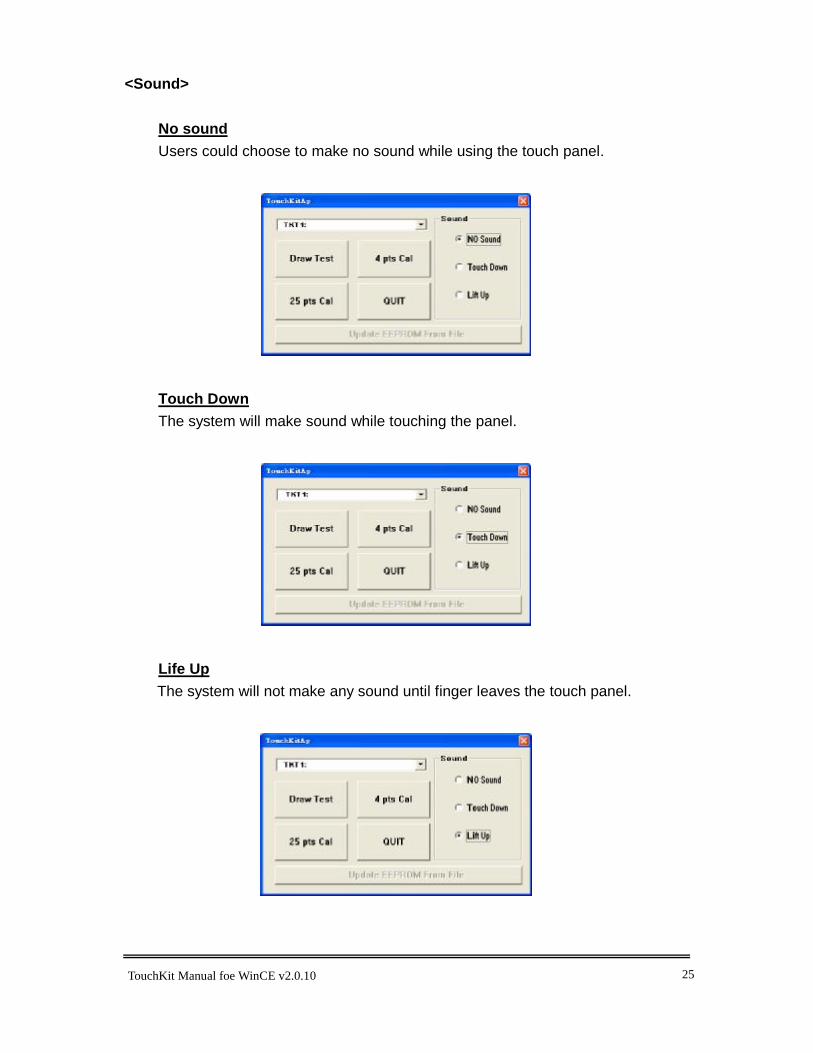
<Sound>
No sound Users could choose to make no sound while using the touch panel.
Touch Down The system will make sound while touching the panel.
Life Up The system will not make any sound until finger leaves the touch panel.
TouchKit Manual foe WinCE v2.0.10 26
<Right Button> If the users want to emulate right button, the users can touch and keep the finger on the panel for two to three seconds. The last touch will be emulated the mouse right button. The users can change the waiting time and the stop size in registry value “RBTIME” and “REVALUE”.
<Quit>
Exit TouchKit touch panel utility.