
Teacher: Kenji Tachibana Digital Photography I. Texture and Fall Color Found Shot Study - 15 slides...
16
Teacher: Kenji Tachibana Digital Digital Photography I Photography I . Texture and Fall Color Texture and Fall Color Found Shot Study - 15 slides Found Shot Study - 15 slides Copyright © 2003 - 2009 Kenji Copyright © 2003 - 2009 Kenji Tachibana Tachibana
-
Upload
caroline-marsh -
Category
Documents
-
view
224 -
download
0
Transcript of Teacher: Kenji Tachibana Digital Photography I. Texture and Fall Color Found Shot Study - 15 slides...
Teacher: Kenji TachibanaDigital Photography IDigital Photography I.
Texture and Fall ColorTexture and Fall Color
Found Shot Study - 15 slidesFound Shot Study - 15 slides
Copyright © 2003 - 2009 Kenji TachibanaCopyright © 2003 - 2009 Kenji Tachibana
Teacher: Kenji TachibanaDigital Photography IDigital Photography ITexture and Fall Color: Image capture processTexture and Fall Color: Image capture process
KKodak Moment:odak Moment:
I found a wonderful story (subject) on the gray wet I found a wonderful story (subject) on the gray wet sidewalk. Follow my shooting process using my sidewalk. Follow my shooting process using my seeing, feeling, thinking, and intuition which flow seeing, feeling, thinking, and intuition which flow together to result in making judgments about the together to result in making judgments about the original and the final image.original and the final image.
My usual instinct is to shoot found objects ‘as they My usual instinct is to shoot found objects ‘as they are’. Although, in this case, I moved the subject to are’. Although, in this case, I moved the subject to gain aesthetic and practical advantages.gain aesthetic and practical advantages.
Teacher: Kenji TachibanaDigital Photography IDigital Photography ITexture and Fall Color: Increase your optionsTexture and Fall Color: Increase your options
PPractical and aesthetic advantages:ractical and aesthetic advantages:
I’m in good physical shape but I am a senior . So, I’m in good physical shape but I am a senior . So, shooting something on the ground is not as easy as shooting something on the ground is not as easy as it use to be. it use to be.
Also getting it off the ground makes it easier to Also getting it off the ground makes it easier to separate the subject from the background using separate the subject from the background using selective focusselective focus. I also gain lighting and staging . I also gain lighting and staging flexibility plus design opportunities.flexibility plus design opportunities.
Teacher: Kenji TachibanaDigital Photography IDigital Photography ITexture and Fall Color: Decision makingTexture and Fall Color: Decision making
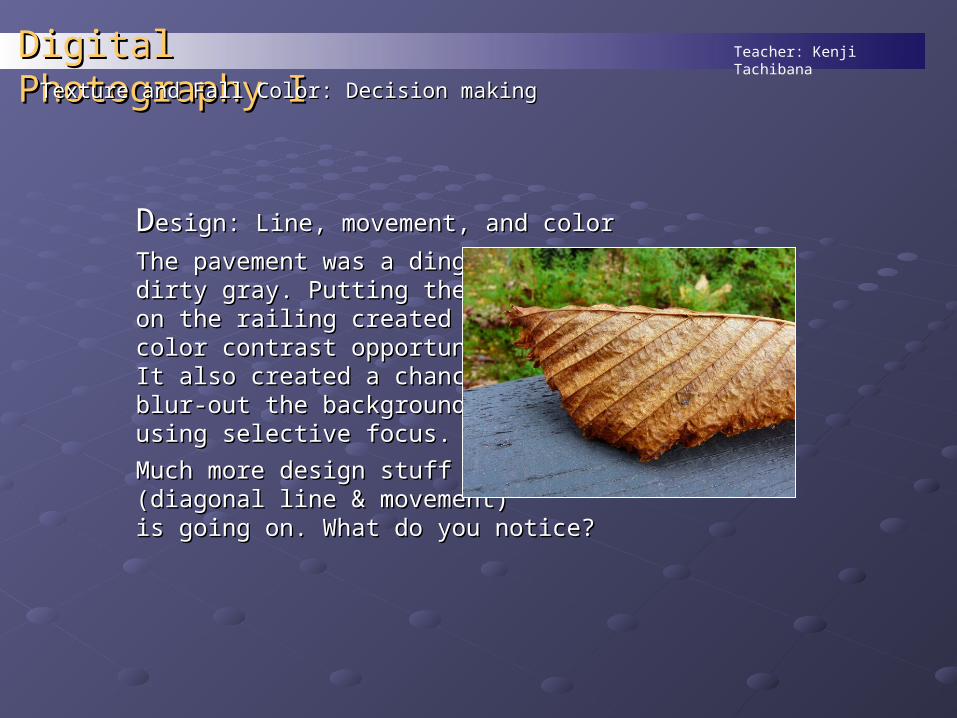
DDesign: Line, movement, and coloresign: Line, movement, and color
The pavement was a dingy The pavement was a dingy dirty gray. Putting the leafdirty gray. Putting the leafon the railing created a on the railing created a color contrast opportunity.color contrast opportunity.It also created a chance toIt also created a chance toblur-out the backgroundblur-out the backgroundusing selective focus.using selective focus.
Much more design stuffMuch more design stuff(diagonal line & movement)(diagonal line & movement)is going on. What do you notice?is going on. What do you notice?
Teacher: Kenji TachibanaDigital Photography IDigital Photography ITexture and Fall Color: Fully processed (not camera original)Texture and Fall Color: Fully processed (not camera original)
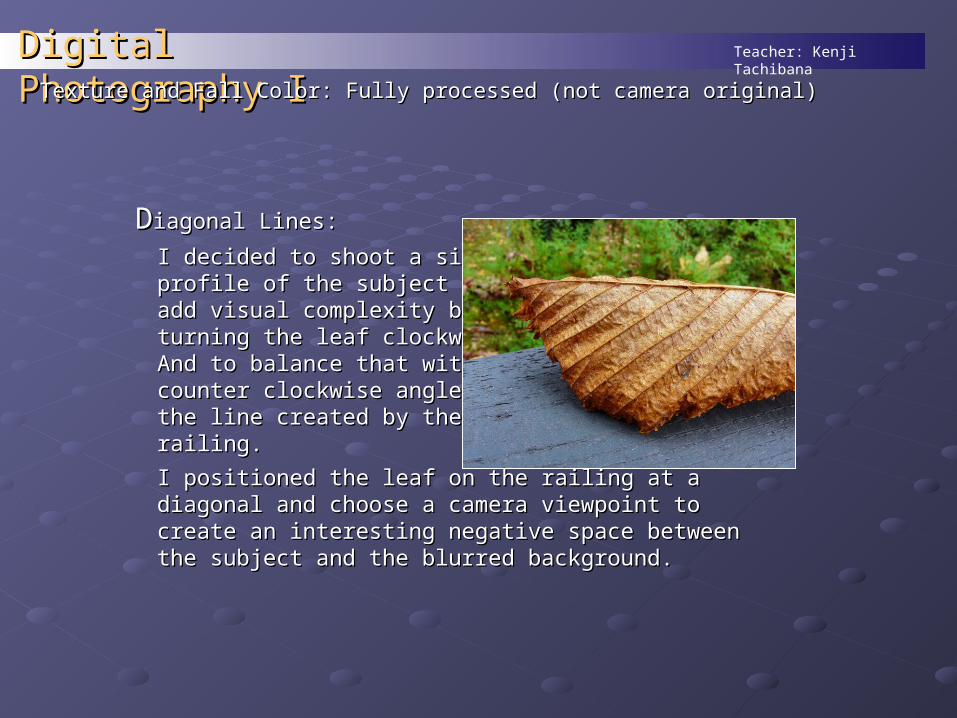
DDiagonal Lines:iagonal Lines:
I decided to shoot a simpleI decided to shoot a simpleprofile of the subject and toprofile of the subject and toadd visual complexity byadd visual complexity byturning the leaf clockwise.turning the leaf clockwise.And to balance that with aAnd to balance that with acounter clockwise angle ofcounter clockwise angle ofthe line created by the the line created by the railing.railing.
I positioned the leaf on the railing at a diagonal and choose I positioned the leaf on the railing at a diagonal and choose a camera viewpoint to create an interesting negative space a camera viewpoint to create an interesting negative space between the subject and the blurred background.between the subject and the blurred background.
Teacher: Kenji TachibanaDigital Photography IDigital Photography ITexture and Fall Color: Do your homeworkTexture and Fall Color: Do your homework
BBe Prepared: e Prepared:
Make sure that your camera setting are Make sure that your camera setting are exactly what you want before leaving home. exactly what you want before leaving home. Look up anything that you’re unsure of in the Look up anything that you’re unsure of in the camera manual or online at dpreview.com or camera manual or online at dpreview.com or Google. Google.
Also make sure the battery is fully charged Also make sure the battery is fully charged and that the lens is perfectly clean using a and that the lens is perfectly clean using a micro fiber tissue. micro fiber tissue. Carry your camera so that Carry your camera so that it is protected but easy to access.it is protected but easy to access.

Teacher: Kenji TachibanaDigital Photography IDigital Photography ITexture and Fall Color: Capture itTexture and Fall Color: Capture it
GGet the Shot:et the Shot:
If you did your homework properly, you will If you did your homework properly, you will be ready to capture that Kodak Moment. And be ready to capture that Kodak Moment. And you will be able to do so quickly so that the you will be able to do so quickly so that the story is not lost. Life happens and it doesn’t story is not lost. Life happens and it doesn’t wait for you to figure out your camera at the wait for you to figure out your camera at the last minute.last minute.
Getting a quick shot doesn’t mean ‘rushing Getting a quick shot doesn’t mean ‘rushing the process’. The capture process must be the process’. The capture process must be done with awareness and care. And done with awareness and care. And remember to remember to squeeze the 2-stage shutter squeeze the 2-stage shutter buttonbutton..
Teacher: Kenji TachibanaDigital Photography IDigital Photography ITexture and Fall Color: You’re only half doneTexture and Fall Color: You’re only half done
PPlayback: Critical reviewlayback: Critical review
The capture process is not done until it’s critically reviewed The capture process is not done until it’s critically reviewed in the Playback Mode on your digital camera. Set the in the Playback Mode on your digital camera. Set the camera to Playback to check:camera to Playback to check:
1.1.Exposure – learn to use your naked eyes to determine if Exposure – learn to use your naked eyes to determine if the image is light, dark, or just right. Get built-in help by the image is light, dark, or just right. Get built-in help by viewing the exposure graph, Histogram. Reading the viewing the exposure graph, Histogram. Reading the exposure graph will also take practice.exposure graph will also take practice.
2.2.Focus – use the magnifier (set to maximum) to inspect the Focus – use the magnifier (set to maximum) to inspect the sharpness on the subject and especially the focal point. sharpness on the subject and especially the focal point. Press the ‘T’ on the zoom switch until the magnifier is at the Press the ‘T’ on the zoom switch until the magnifier is at the maximum point (8 to 16x range).maximum point (8 to 16x range).
Teacher: Kenji TachibanaDigital Photography IDigital Photography ITexture and Fall Color: Do it allTexture and Fall Color: Do it all
PPlayback: Last but not the leastlayback: Last but not the least
3.3. Color - use the assignment recommended Color - use the assignment recommended SkylightSkylight light light source with the camera source with the camera WBWB set to Auto set to Auto. This method is . This method is almost foolproof but it will takes practice to get it right.almost foolproof but it will takes practice to get it right.
You will have to learn to recognize Skylight and the You will have to learn to recognize Skylight and the desirable environmental conditions to turn the soft light desirable environmental conditions to turn the soft light into a side light on your subject.into a side light on your subject.
There are many different kinds and types of light sources There are many different kinds and types of light sources from hard to soft and warm to cool. Keep it simple for from hard to soft and warm to cool. Keep it simple for yourself by sticking with Sklylight.yourself by sticking with Sklylight.
Using other light sources or multiple light sources can make Using other light sources or multiple light sources can make color correction difficult to nightmare impossible.color correction difficult to nightmare impossible.
Teacher: Kenji TachibanaDigital Photography IDigital Photography ITexture and Fall Color: Back to the example shootTexture and Fall Color: Back to the example shoot
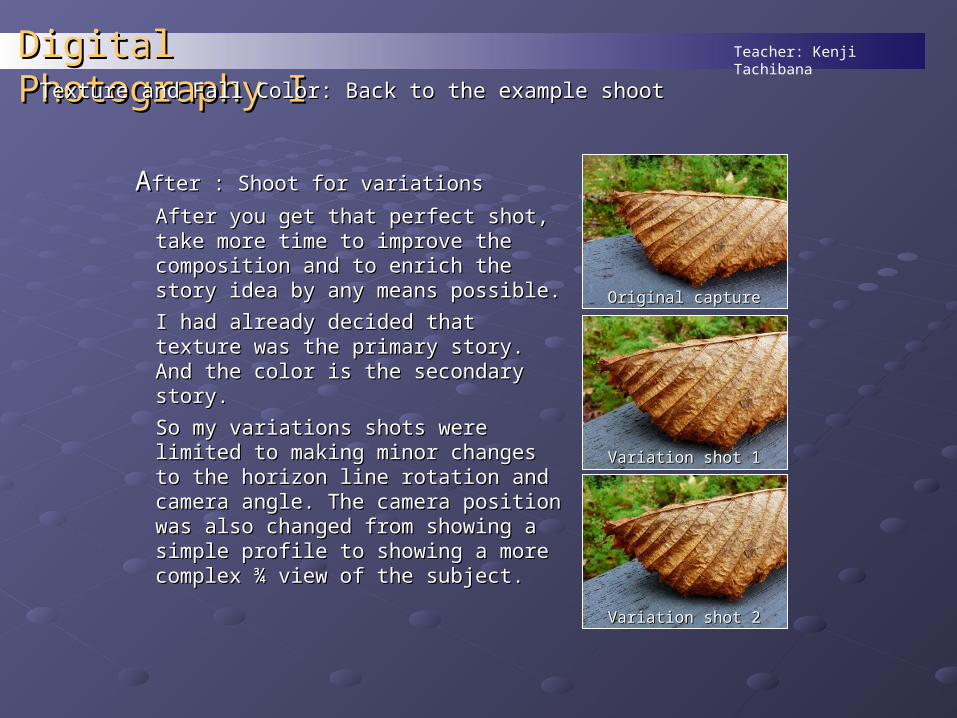
AAfter : Shoot for variationsfter : Shoot for variations
After you get that perfect shot, take After you get that perfect shot, take more time to improve the composition more time to improve the composition and to enrich the story idea by any and to enrich the story idea by any means possible.means possible.
I had already decided that texture was I had already decided that texture was the primary story. And the color is the the primary story. And the color is the secondary story. secondary story.
So my variations shots were limited to So my variations shots were limited to making minor changes to the horizon making minor changes to the horizon line rotation and camera angle. The line rotation and camera angle. The camera position was also changed camera position was also changed from showing a simple profile to from showing a simple profile to showing a more complex ¾ view of showing a more complex ¾ view of the subject.the subject.
Original captureOriginal capture
Variation shot 1Variation shot 1
Variation shot 2Variation shot 2
Teacher: Kenji TachibanaDigital Photography IDigital Photography ITexture and Fall Color: More to do at homeTexture and Fall Color: More to do at home
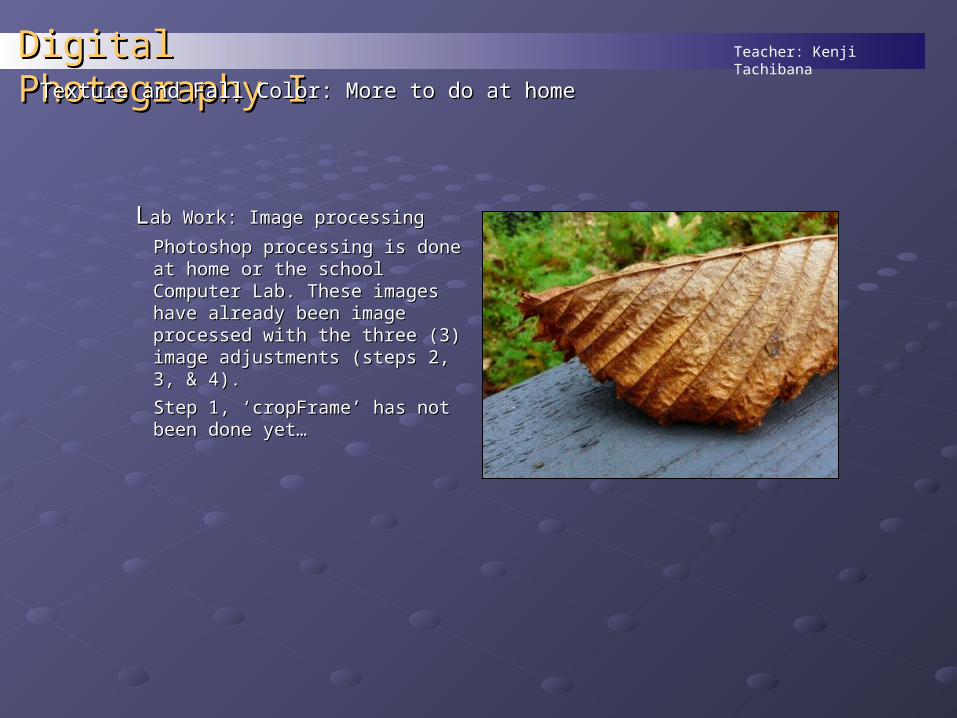
LLab Work: Image processingab Work: Image processing
Photoshop processing is done at Photoshop processing is done at home or the school Computer home or the school Computer Lab. These images have already Lab. These images have already been image processed with the been image processed with the three (3) image adjustments three (3) image adjustments (steps 2, 3, & 4). (steps 2, 3, & 4).
Step 1, ‘cropFrame’ has not been Step 1, ‘cropFrame’ has not been done yet…done yet…

Teacher: Kenji TachibanaDigital Photography IDigital Photography ITexture and Fall Color:Texture and Fall Color:
AAside: Crop in the cameraside: Crop in the camera
‘‘Filling the frame’ is a very important to an Filling the frame’ is a very important to an image maker. And no matter the physical size image maker. And no matter the physical size or the megapixel count of the sensor chip, it’s or the megapixel count of the sensor chip, it’s far from being enough.far from being enough.
In that ‘not enough’ environment, maximizing In that ‘not enough’ environment, maximizing on the limited resource (sensor chip) will on the limited resource (sensor chip) will require you to ‘frame’ ecologically. That means require you to ‘frame’ ecologically. That means to use the maximum amount of pixel to draw to use the maximum amount of pixel to draw your subject by filling the frame up to 85% with your subject by filling the frame up to 85% with the subject.the subject.
Teacher: Kenji TachibanaDigital Photography IDigital Photography ITexture and Fall Color: More to do at homeTexture and Fall Color: More to do at home
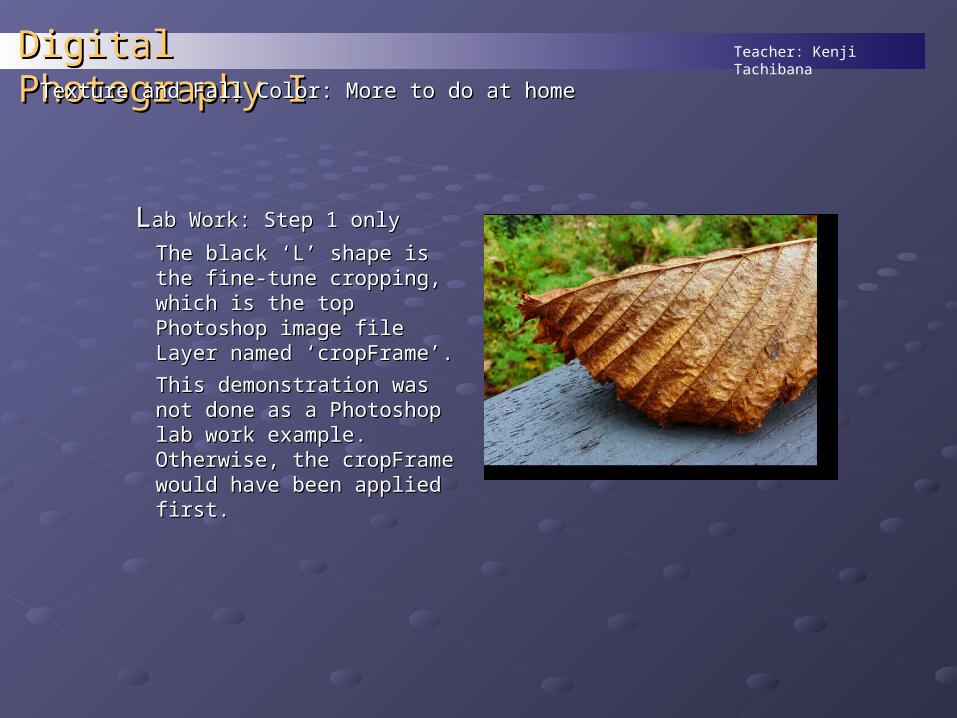
LLab Work: Step 1 onlyab Work: Step 1 only
The black ‘L’ shape is the The black ‘L’ shape is the fine-tune cropping, which is fine-tune cropping, which is the top Photoshop image file the top Photoshop image file Layer named ‘cropFrame’.Layer named ‘cropFrame’.
This demonstration was not This demonstration was not done as a Photoshop lab done as a Photoshop lab work example. Otherwise, work example. Otherwise, the cropFrame would have the cropFrame would have been applied first.been applied first.
Teacher: Kenji TachibanaDigital Photography IDigital Photography I..
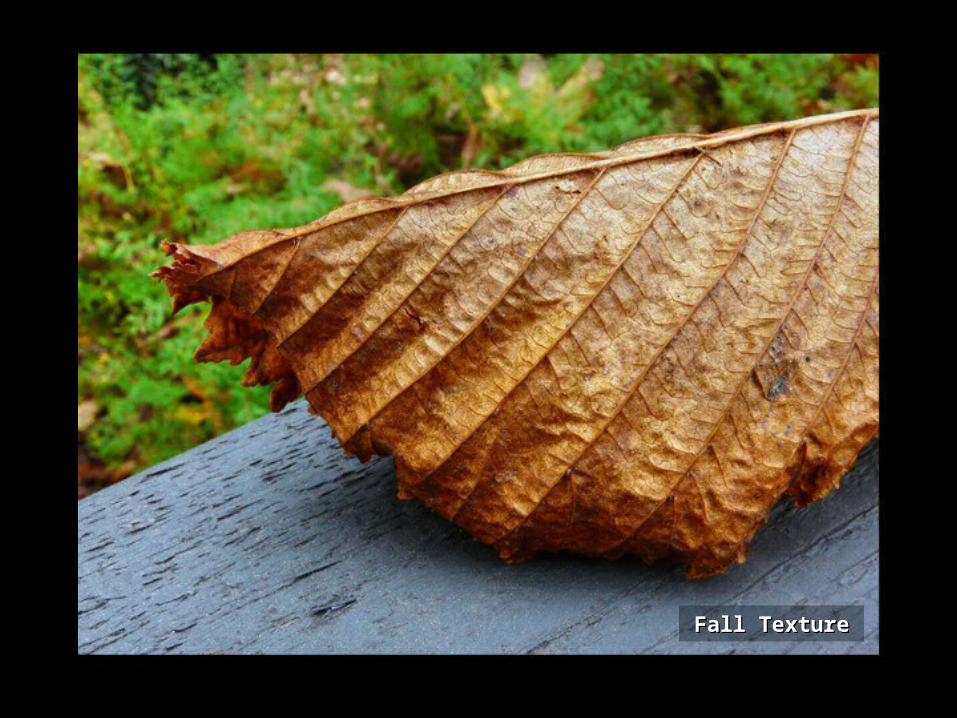
Fall TextureFall Texture
Teacher: Kenji TachibanaDigital Photography IDigital Photography ITexture and Fall Color: Process exampleTexture and Fall Color: Process example
SSummary: Keep it simpleummary: Keep it simple
I started out with a ‘direct experience’ great I started out with a ‘direct experience’ great texture shot idea. That got amplified with a texture shot idea. That got amplified with a color contrast secondary story. I further color contrast secondary story. I further enhanced the image with a very sharp enhanced the image with a very sharp foreground and a blurred yard background. foreground and a blurred yard background.
Design ideas about line, rotation, movement, Design ideas about line, rotation, movement, and negative space were added to the story and negative space were added to the story about texture and color to further flesh out the about texture and color to further flesh out the simple story.simple story.
My story telling goal is for you to visually My story telling goal is for you to visually experience the texture and color without experience the texture and color without involving the right side of your brain.involving the right side of your brain.
Teacher: Kenji TachibanaDigital Photography IDigital Photography I
xx
EndEnd