Stony Brook Update
16
1 Stony Brook Update T.K. Hemmick for the Stony Brook Crew
-
Upload
kasper-chase -
Category
Documents
-
view
41 -
download
1
description
Stony Brook Update. T.K. Hemmick for the Stony Brook Crew. Many things in these past 2 weeks. Two dry runs of the production were done. Item addressed from evaporation through to the HBD vessel itself (dry runs revealed areas for improvement). - PowerPoint PPT Presentation
Transcript of Stony Brook Update

1
Stony Brook Update
T.K. Hemmick for the Stony Brook Crew

2
Many things in these past 2 weeks
• Two dry runs of the production were done.• Item addressed from evaporation through
to the HBD vessel itself (dry runs revealed areas for improvement).
• Easiest way to discuss is to follow the path of a GEM through the system and discuss the items in that order.
• Life begins in the Evaporator…

3
Quantum Efficiency
• Some suspicion of QE trouble:– Photocathode read
normal current.– PMT read higher than
normal current.– QE low by ~20%.
• Chicklet test shows that trouble is likely a repair made to PMT system that increased its current without changing the cathodes.
• Quantum Efficiency is the normal good result when measured in Bob’s system.

4
If cryos are cold, Why is it smoking?
• Cryo pump compressor makes smoke.• After phone tag:
– That is only our brand name, we don’t service it.– Nope, we sold it to them, they have to help you.
• Bill opened up the unit and found that the main power switch had developed a resistive character and burned. Rest seems OK.

5
Need to make QE system faster.
• After bad measurement, no fears to change circuit.• Want QE scan to be faster.• New wiring scheme:
– pAmmeter no longer floats at 166 V.– Read into LabVIEW DAQ.– PMT and cathode read at same time.

6
The Low Rider…
• First Dry Run revealed that the Evaporator Box was too high when on the rails.
• Low Rider: leading wheels go down gentle incline.• Removable bridge: back wheels to drop in slot.• Low work surface.• Locked in place.
Removable Bridge

7
Gain Box modifications.
• The lid of the Gain box is difficult to position in glove box.• The gloves get caught in the bolts/nuts.• Nuts now welded to the underside of top lip.• 3 bolts are upright to act as guides to align lid accurately.• Still heavy…what to do…hmmmm…
8
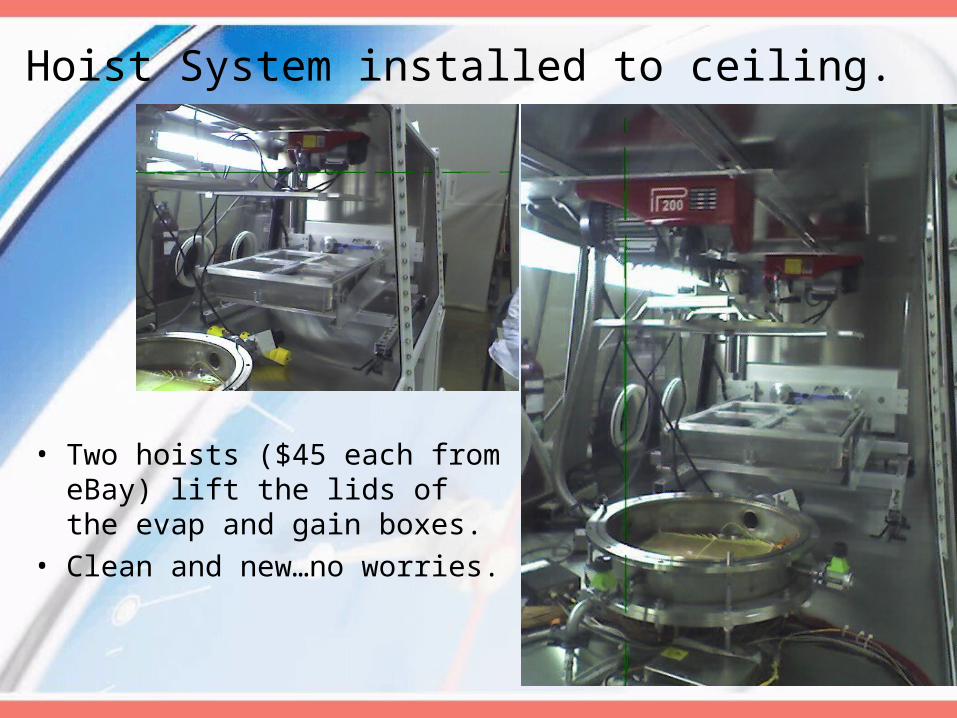
Hoist System installed to ceiling.
• Two hoists ($45 each from eBay) lift the lids of the evap and gain boxes.
• Clean and new…no worries.

9
More efficient data collection from GB
• Maestro (PC-based MCA software).– Automated Gain Saturation Curves:
• One spectrum every 5 minutes.• Root macros to plot gain curve.
– Automated Gain Map:• Prompts user VOCALLY to move cable to next signal.• New patch panel eliminates 50-ohm terminators.• Complete map (56 pads) in one hour!

10
Finally…the HBD is here.
• First (as requested) we cleaned it up on the outside.

11
Then we mounted it to rotating fixture.
• As requested HBD is held principally by straps that run the perimeter.
• These straps are made from Industrial Velcro:– Two mushroom-head pieces.– No fuzzies.– Strong, but not extreme.

12
Then we put it in the glove box.
• Frame fits with HBD on it (we knew that).• HBD can be lowered a few inches (no electronics yet).• Rotation allows all but two end-most pieces to be installed
nearly perfectly vertically.

13
Issue: Gas piping!!
• These are TWO gas inlet and TWO gas outlet connectors.
• Notice that the HV cover boxes (imagine them WITH the SHV) are in the way of a straight connection between these.
• Anyhow, do we REALLY want a SS tube running across the active area?
• NOTE: The HBD body cannot support the weight of the 3-way valve on the inlet side!
• Idea:– Cap one side (North, away from gas supply).– Other side has 3-way valve on flexible bellows hanging
now from rotating frame and later from support mounts.
Two Connectors

14
Issue: Debris
• With continual use we noticed a few small flecks of debris on the gloves in the glove box.– Dust means microscopic and often airborne.– Debris are tiny pieces of solid.
• Searched for and FOUND source: TOOLS!• Removed all tools from glovebox.• Setup (anew) Ultrasound cleaning station.• More thorough cleaning procedure:
– Old: Students would alcohol-wipe everything with non-dust wipe.
– New: • 60o C-de-ionized water.• 5 minutes each Ultrasonic frequency• Alcohol chase (removes the water).• Argon or nitrogen blow-dry (removes the alcohol).

15
Miscellaneous
• We’re working on a wiki to keep our procedures in:– http://hbd.on-wiki.net/
• Some sections are now quite detailed.• Some meager detail.• Some just playing around.• Please browse by and add pages.

16
Schedules for Photo-cathode.
• Start this weekend or early next week.• Original (leisurely schedule):
– 7 days per shot…3 shots…3 weeks.
• Reasonable schedule:– 4 days per shot…3 shots…2 weeks.
• Outrageous schedule:– 3 days per shot…3 shots…10 days.
• These are not particularly accurate until we begin.
• Real soon now….