Sophos Wireless Access Points: AP10, AP30 and AP50
4
Quick Start Guide Sophos Access Points
Transcript of Sophos Wireless Access Points: AP10, AP30 and AP50
Quick Start GuideSophos Access Points
Sophos Access Points Quick Start Guide
IntroductionUTM Wireless Protection simplifies the operation of secure and reliable wireless networks. It combines affordable and configuration-less access points through a built-in wireless controller in the in Sophos UTM. The wireless controller itself centrally manages all wireless access points, all you need to do is plug in the device anywhere in your network. The access point will find the controller, fetch its configuration and become operable within seconds. In addition, it easily provides wireless guest Internet access during the initial setup, unless you explicitly deny automatic configuration.
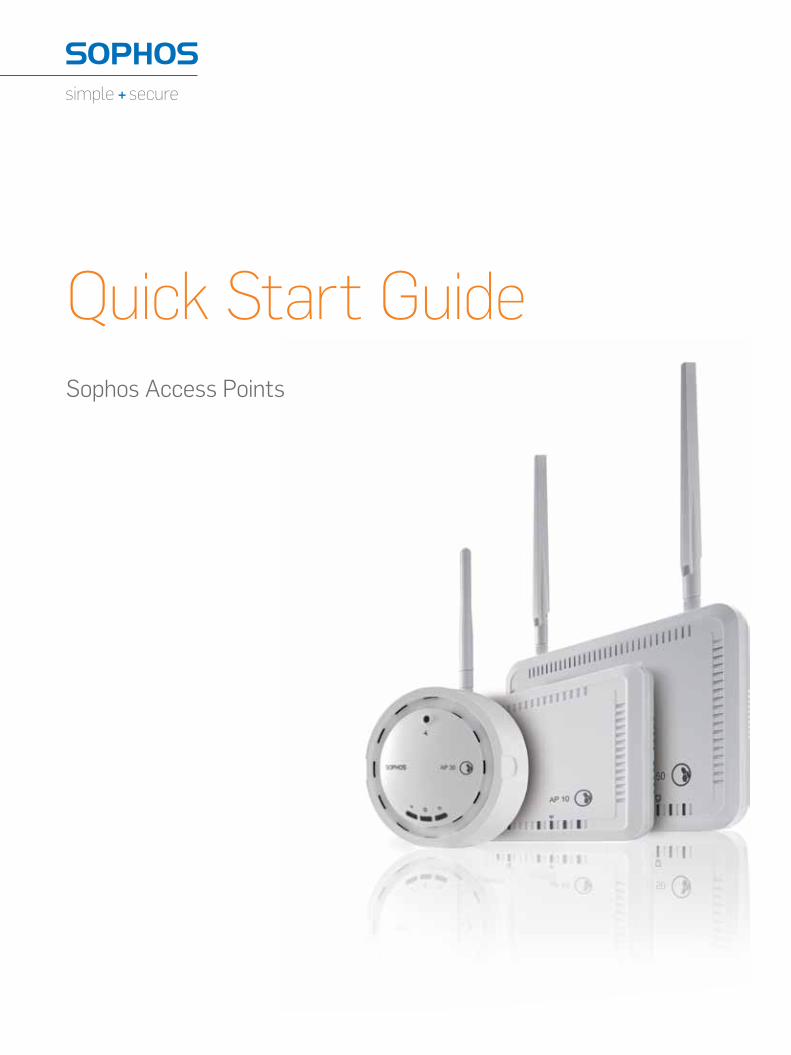
Scope of Supply: Sophos AP10
Scope of Supply: Sophos AP30
Scope of Supply: Sophos AP50
Mount the Access Points according to their intended use and update the UTM appliance.
All access points can be put on a stable horizontal surface or can be mounted on the wall. The Sophos AP30 can also be mounted on the ceiling.
Please update your UTM appliance to the latest version available. Sophos UTM version 7.508 (or higher) is required to use UTM Wireless Protection.
Note that you also need a valid UTM Wireless Protection subscription to operate the Sophos Access Points.
AP 30
Sophos AP10 Security Notes Power supply Detachable dipole antenna Ethernet cable
Security Notes and
Regulatory Compliance
Sophos Access Points
Sophos AP50 Security Notes Power-over-Ethernet (PoE) 2 detachable antennas Ethernet cable injector + power cord
Security Notes and
Regulatory Compliance
Sophos Access Points
Sophos AP30 Security Notes Power-over-Ethernet (PoE) 2 screws and dowels Ethernet cable injector + power cord
Security Notes and
Regulatory Compliance
Sophos Access Points
Sophos Access Points Quick Start Guide
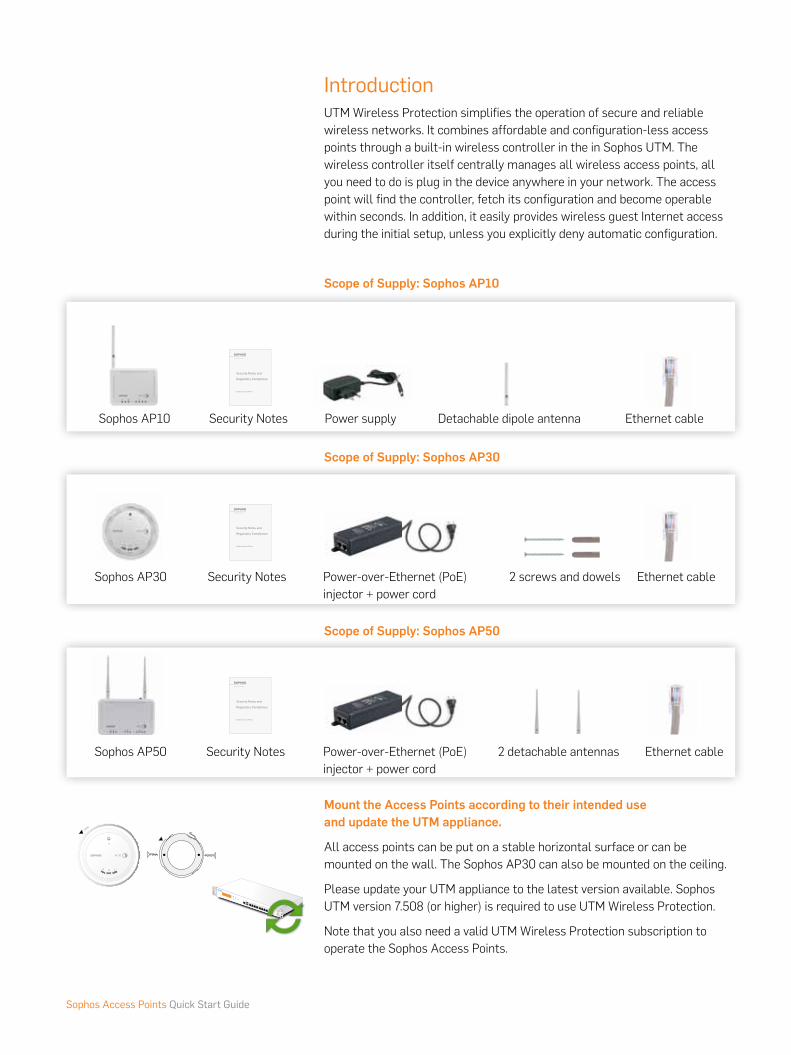
Connect the Access Point to the Internal NetworkThe AP30 and AP50 are powered directly through the Ethernet interface (Power over Ethernet). It is also possible to realise the power supply by a PoE-enabled switch.
Please also note the details about the PoE injectors given in the accompanying Operating Instructions.
Connect the Access Point to the Power SupplyConnect the device to the power supply. Please use the power supply found in the scope of supply.
Start the Communication between the Access Point and the UTM ApplianceWhen connected to the network, the Access Points will try to receive an IP address via DHCP. Therefore, you need either the UTM appliance (with a DHCP server enabled and listening on the interface the Access Points are connected to) or any other DHCP server to provide an IP address for the Access Points.
After successfully receiving an IP address, the Access Points will communicate with the UTM appliance. For this to happen, the UTM appliance needs to be situated in the upstream of the Access Points, either being the default gateway of the Access Points (which was provided by the DHCP service) or on the default route (most likely your route to the Internet). Please note that the actual Internet access is not necessary to use UTM Wireless Protection. While waiting for DHCP and searching for the UTM appliance, the Access Point power LEDs will blink slowly.
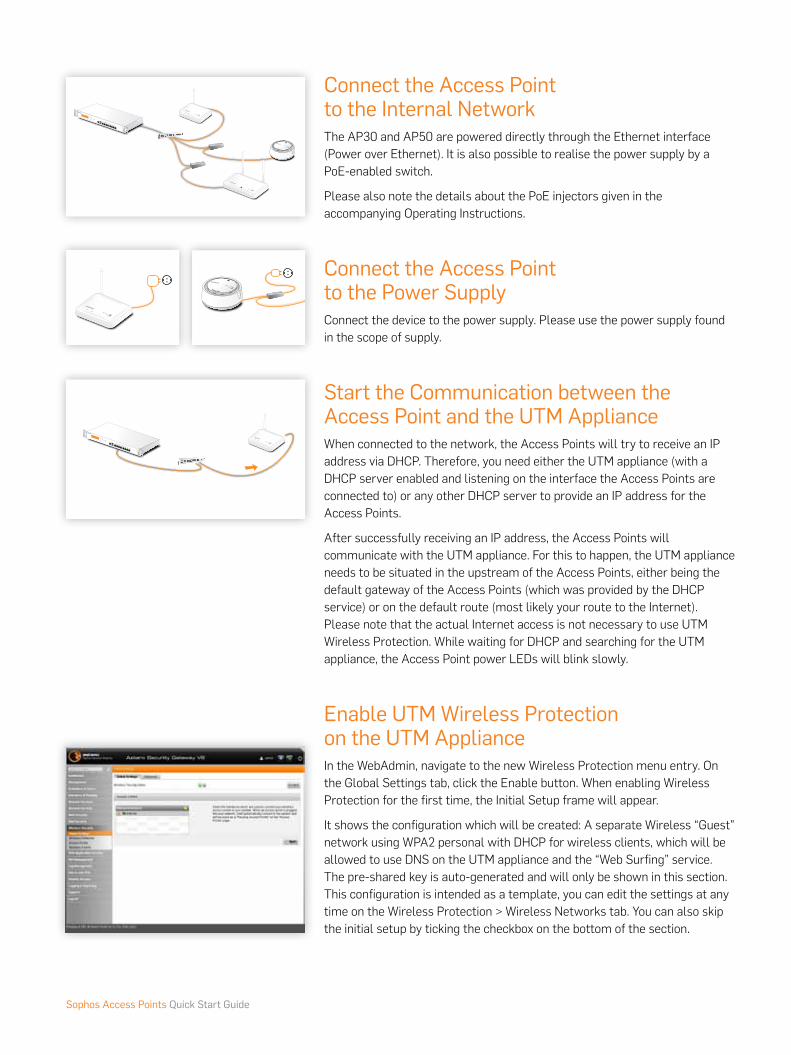
Enable UTM Wireless Protection on the UTM ApplianceIn the WebAdmin, navigate to the new Wireless Protection menu entry. On the Global Settings tab, click the Enable button. When enabling Wireless Protection for the first time, the Initial Setup frame will appear.
It shows the configuration which will be created: A separate Wireless “Guest” network using WPA2 personal with DHCP for wireless clients, which will be allowed to use DNS on the UTM appliance and the “Web Surfing” service. The pre-shared key is auto-generated and will only be shown in this section. This configuration is intended as a template, you can edit the settings at any time on the Wireless Protection > Wireless Networks tab. You can also skip the initial setup by ticking the checkbox on the bottom of the section.
Sophos Access Points Quick Start Guide
United Kingdom Sales: Tel: +44 (0)8447 671131 Email: [email protected]
North American Sales: Toll Free: 1-866-866-2802 Email: [email protected]
Australia & New Zealand Sales Tel: +61 2 9409 9100 Email: [email protected]
Boston, USA | Oxford, UK © Copyright 2012. Sophos Ltd. All rights reserved. All trademarks are the property of their respective owners.
Sophos Quick Start Guide 02.12v1.dNA
In the Access Control section, you need to add at least one network interface to the Allowed interfaces field. By clicking on the folder icon on the top right, you can select the interface(s) by which the Access Points connect to the UTM appliance and drag it into the input field. By clicking the Apply button, the configuration will be saved and take effect.
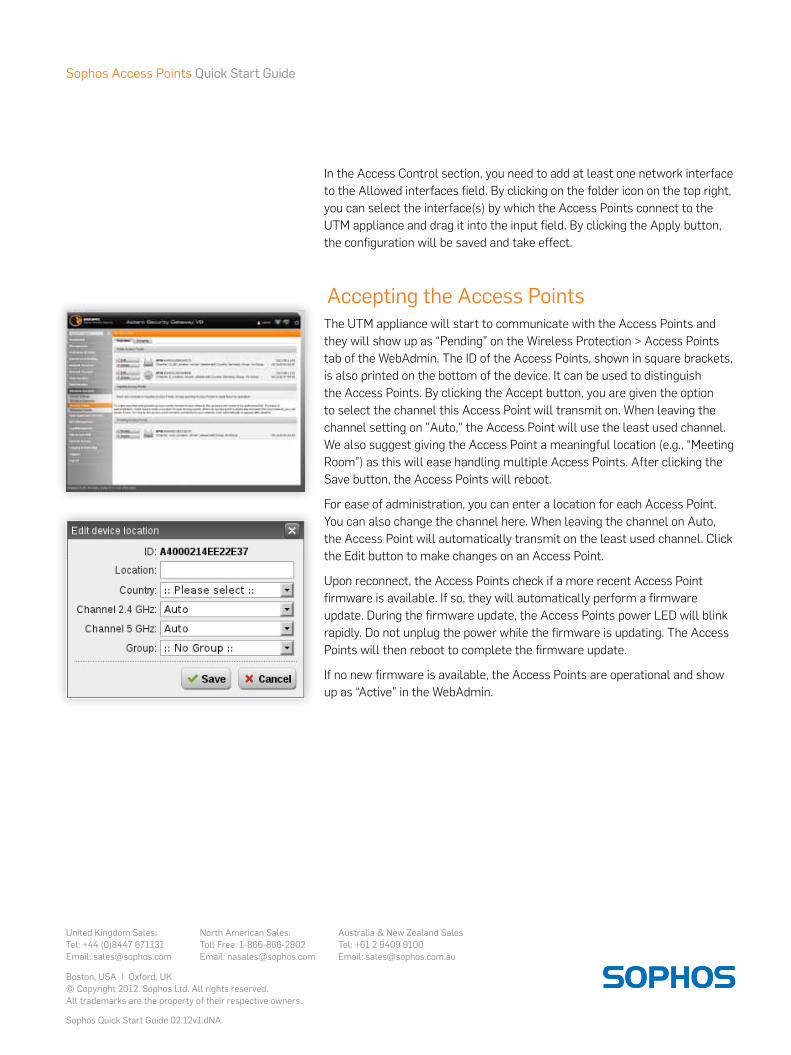
Accepting the Access PointsThe UTM appliance will start to communicate with the Access Points and they will show up as “Pending” on the Wireless Protection > Access Points tab of the WebAdmin. The ID of the Access Points, shown in square brackets, is also printed on the bottom of the device. It can be used to distinguish the Access Points. By clicking the Accept button, you are given the option to select the channel this Access Point will transmit on. When leaving the channel setting on "Auto," the Access Point will use the least used channel. We also suggest giving the Access Point a meaningful location (e.g., “Meeting Room”) as this will ease handling multiple Access Points. After clicking the Save button, the Access Points will reboot.
For ease of administration, you can enter a location for each Access Point. You can also change the channel here. When leaving the channel on Auto, the Access Point will automatically transmit on the least used channel. Click the Edit button to make changes on an Access Point.
Upon reconnect, the Access Points check if a more recent Access Point firmware is available. If so, they will automatically perform a firmware update. During the firmware update, the Access Points power LED will blink rapidly. Do not unplug the power while the firmware is updating. The Access Points will then reboot to complete the firmware update.
If no new firmware is available, the Access Points are operational and show up as “Active” in the WebAdmin.