
ESOP Committees – How They Interact & Setting up a Communications Committee

Setting Up Email with Windows 8 Mail
1) Press the Start / Windows button on
your keyboard. You should see Mail highlighted. Click on the Mail tile.
If you don’t see the Mail tile, begin typing Mail on your keyboard, then click on Mail.
2. If this is your first time using Mail, you will need to login with a Windows Live (Microsoft) account to start. Enter your account credentials here to get started.
Choose “Sign In”.
3) To access the Settings charm, move your cursor to the bottom-right corner of the screen.
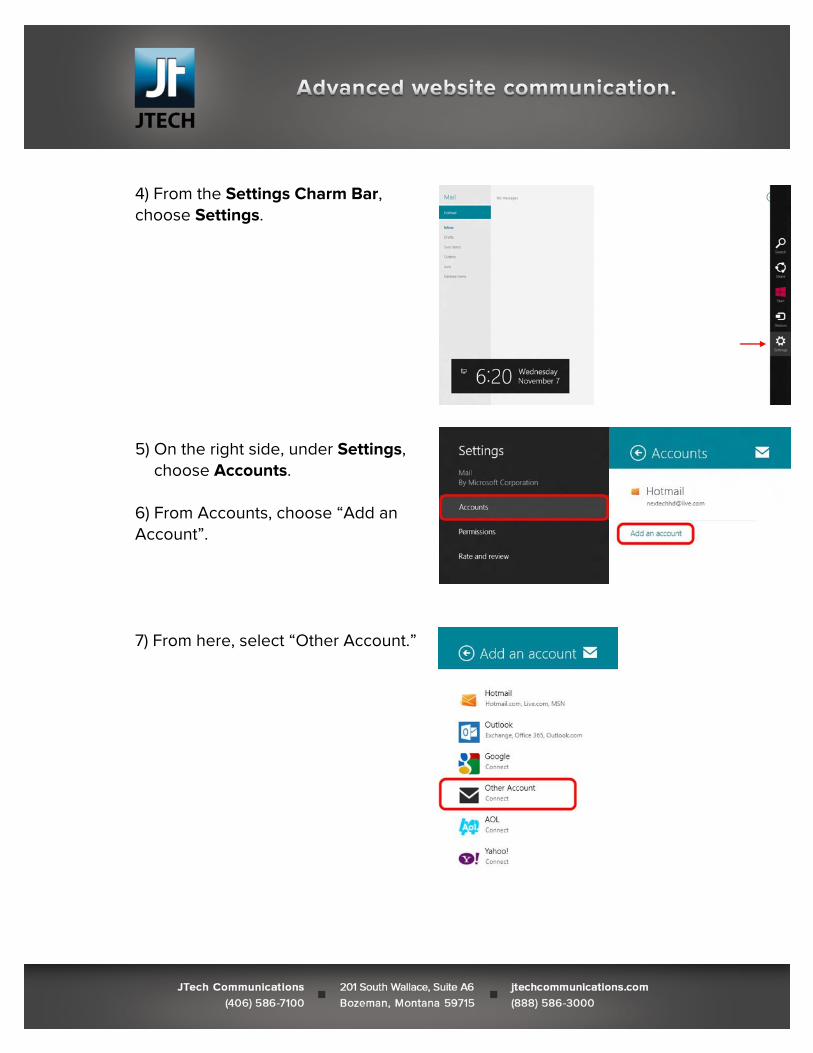
4) From the Settings Charm Bar,choose Settings.
5) On the right side, under Settings, choose Accounts.
6) From Accounts, choose “Add an Account”.
7) From here, select “Other Account.”

8) Enter your email address andPassword, then choose “Connect”.
9) Enter you email address, username(identical to email address), and password.
For Incoming (IMAP) email server, enter mail.jtechcommunications.com
Check the box next to “Incoming server requires SSL”.
For Outgoing (SMTP) email server, enter mail.jtechcommunications.com
Check the box next to “Incoming server requires SSL,” check “Outgoing server requires authentication” and check “Use the same username and password to send and receive email.”
Click “Connect”.
Great, the account has been created! But wait, there’s more...
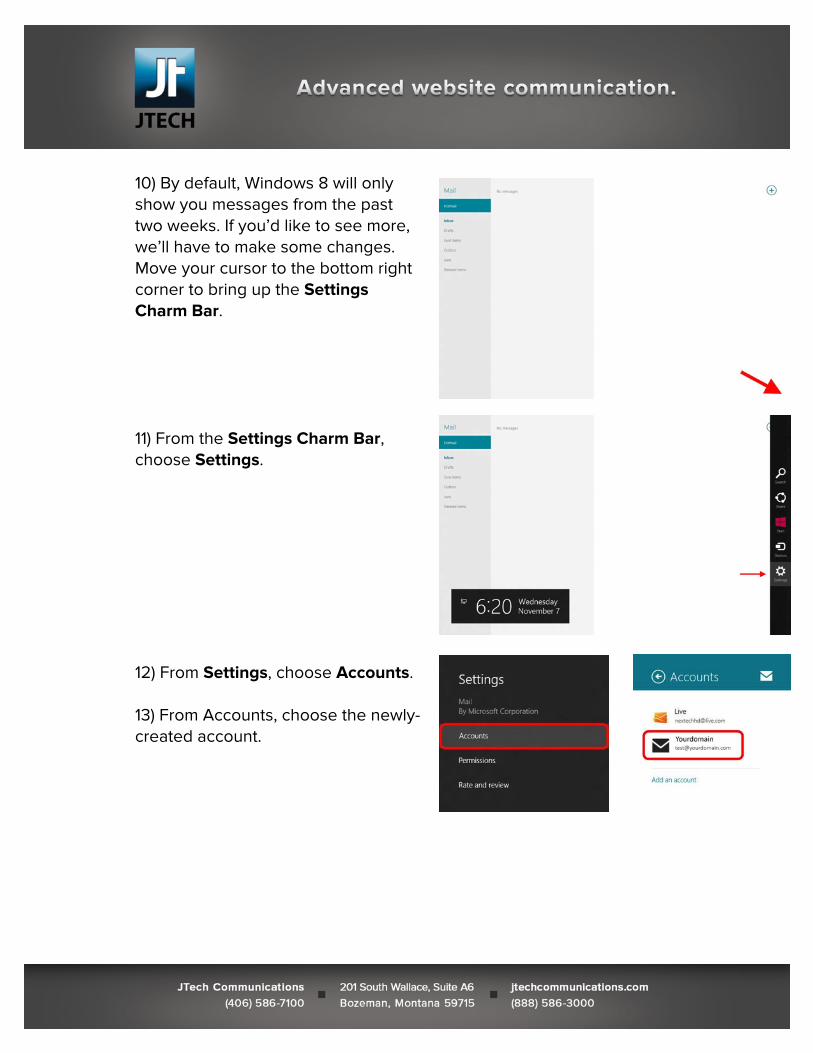
10) By default, Windows 8 will onlyshow you messages from the past two weeks. If you’d like to see more, we’ll have to make some changes. Move your cursor to the bottom right corner to bring up the Settings Charm Bar.
11) From the Settings Charm Bar, choose Settings.
12) From Settings, choose Accounts.
13) From Accounts, choose the newly-created account.
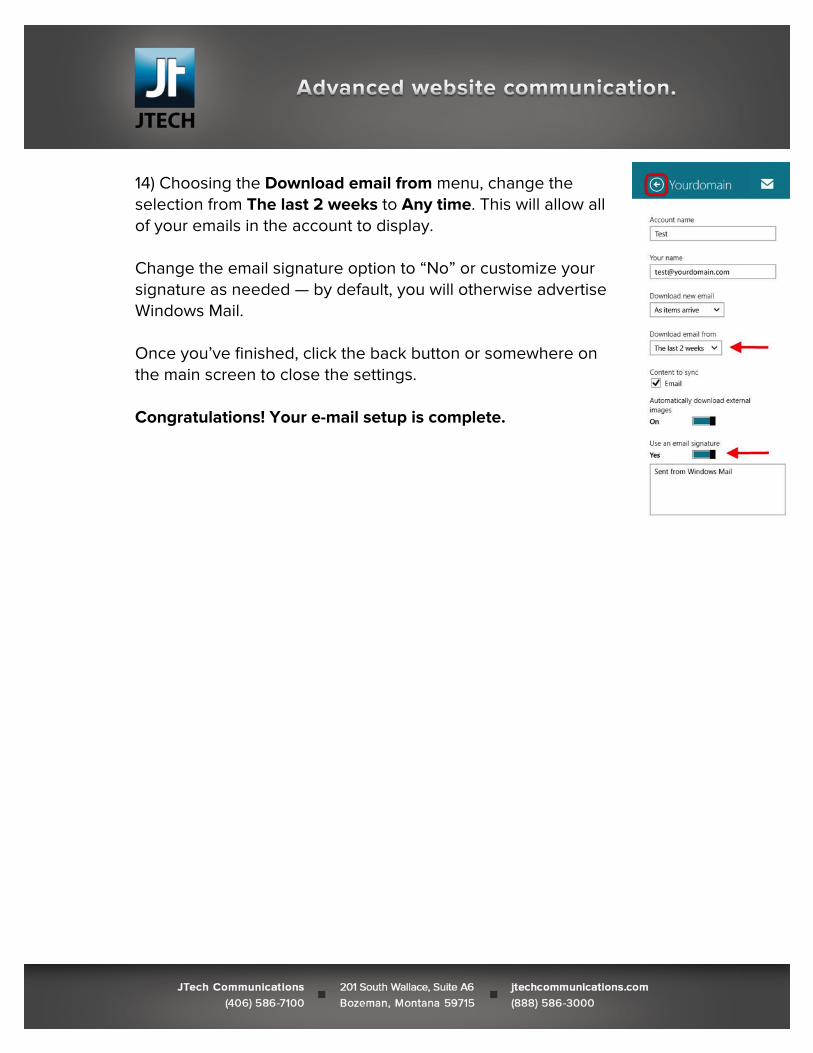
14) Choosing the Download email from menu, change theselection from The last 2 weeks to Any time. This will allow all of your emails in the account to display.
Change the email signature option to “No” or customize your signature as needed — by default, you will otherwise advertise Windows Mail.
Once you’ve finished, click the back button or somewhere on the main screen to close the settings.
Congratulations! Your e-mail setup is complete.


