SBCUSD – IT Training Program
14
SAP Ad Hoc Query SBCUSD – IT Training SBCUSD – IT Training Program SAP Ad Hoc Query Revised – 2/14/2018
Transcript of SBCUSD – IT Training Program

SAP Ad Hoc Query
SBCUSD – IT Training
SBCUSD – IT Training Program
SAP
Ad Hoc Query
Revised – 2/14/2018
SAP Ad Hoc Query
SBCUSD – IT Training
CONTENTS
Getting Started with Ad Hoc Queries ............................................................................................................................ 1
SAP Ad Hoc Query Transaction ................................................................................................................................. 1
Add Transaction Code to your Favorites List ................................................................................................................. 1
Open Existing Query ...................................................................................................................................................... 2
InfoSet Query Window .................................................................................................................................................. 3
Selecting Fields for Output ............................................................................................................................................ 4
Building Records with Field Output ........................................................................................................................... 4
Common Output Fields ............................................................................................................................................. 4
Output Type .............................................................................................................................................................. 4
Finding/Identifying Fields via the PA20 Transaction...................................................................................................... 5
Running a Second (PA20 Transaction) Window ........................................................................................................ 5
Finding Fields in PA20 ............................................................................................................................................... 5
Developing Query Conditions with Selection Fields ...................................................................................................... 6
Filtering Records Using Selection Fields .................................................................................................................... 6
Common Selection Fields .......................................................................................................................................... 6
Query Selection Conditions - Single Values ................................................................................................................... 7
Selection Condition – Single Value ............................................................................................................................ 7
Selection Condition - Options (Comparison Types) ................................................................................................... 7
Query Selection Conditions - Multiple Values ............................................................................................................... 8
Selection Condition – Further/Multiple Values ......................................................................................................... 8
Selection Condition - Options (Comparison Types) ................................................................................................... 8
Reporting Period ........................................................................................................................................................... 9
Generating and Saving the Query Report ................................................................................................................... 10
Hit List ..................................................................................................................................................................... 10
Output ..................................................................................................................................................................... 10
Saving Queries ............................................................................................................................................................. 11
SAP Query In Action .................................................................................................................................................... 12
Insert note about STOP TRANSACTION

SAP Ad Hoc Query
SBCUSD - IT Training Page 1
GETTING STARTED WITH AD HOC QUERIES
Simply put, a query is a question. In computing, it is a way to ask for correlated data from within a database. In our case, we extract data from field groups and field names from employee records which fit certain criteria. The resulting list of employees and their data is the query result. So we may wish list employee’s names, Org Units, Job Tiles, etc. who have been hired the prior month.
SAP AD HOC QUERY TRANSACTION 1. From the SAP Easy Access menu, in the Command Field, enter s_ph0_48000510 (all zeros) and press
Enter
The Create New Query – InfoSet Selection window will appear
2. In the Create New Query – InfoSet Selection window click on the Row Select button for the row containing the info set ZSBCUSD_HR_ADM
3. In the Work Area drop down list, select Global area (cross-client)
4. In the User Group drop down list, select HR: Personnel Administration (SAPQUERY/H2)
5. Click on the Continue green check button
ADD TRANSACTION CODE TO YOUR FAVORITES LIST
1. Click on the Favorites menu and choose Insert Transaction
2. In the Transaction Code field, enter the AD HOC Query transaction code of s_ph0_48000510
3. Click the Continue green check button

SAP Ad Hoc Query
SBCUSD - IT Training Page 2
OPEN EXISTING QUERY
1. From the InfoSet Query window, click on the Open Query button
2. Scroll through the list of Queries
3. Click on the Row Select button for the row containing the Query you wish to open
4. Click on the Continue button
You may modify this query to produce the results you’re looking for.
IMPORTANT: Do not save this Query. It has been saved by another District user.
5. If you have modified the Query and wish to use it again the future, click on the Query Menu and choose Save As
6. In the Save Query window enter a Name for the query
The name should contain a keyword or two that identifies the nature of the query.
Note – You may wish to add a string of very unique characters in the beginning of the query so that each of your queries are listed together and it’s easy to locate them later in the list.
7. In Title field enter a brief description which better identifies the nature of the query
8. Click on Continue

SAP Ad Hoc Query
SBCUSD - IT Training Page 3
INFOSET QUERY WINDOW
1 2
3

SAP Ad Hoc Query
SBCUSD - IT Training Page 4
SELECTING FIELDS FOR OUTPUT
Selecting output fields results in the value of those fields to be returned and included in the resulting records. So if you select the first name, last name, and organizational unit fields for output, the records the query returns will list first names, last names and their organizational units.
BUILDING RECORDS WITH FIELD OUTPUT 9. Click through the folder tree in the Field groups/fields section of the InfoSet Query window
10. Locate the field in the SAP database you wish to see in the report
11. Click on the Output check box for that field
This field will appear below in the example Output Preview area of the window.
12. Continue to locate fields you wish to see in the report, checking their Output check box
COMMON OUTPUT FIELDS Field Folder Personnel number Key Fields Organizational unit Organizational assignment Employee Subgroup Organizational assignment Personnel Area Organizational assignment
OUTPUT TYPE 1. Right-click on the Output check box for a field you wish to contain in your report
2. Point to Output and choose the desire output type
NOTE – Not all fields maintain text only or text and value options. Using the Value and text feature will result in a field/column for both in the returned records.
Note – At this point you have only asked to output field data/values. Without any selection criteria, you’ll have simply listed your chosen output data for all employees in the District.

SAP Ad Hoc Query
SBCUSD - IT Training Page 5
FINDING/IDENTIFYING FIELDS VIA THE PA20 TRANSACTION
No matter how much experience you have working with SAP, you may often find yourself looking for a known field in the Field groups/fields section of the InfoSet Query window. Looking at the dataset via the PA20 Transaction can offer help.
RUNNING A SECOND (PA20 TRANSACTION) WINDOW 1. While running the Query InfoSet Transaction (s_ph0_48000510), click on the Create New Session button
This will run another Easy Access window, while allowing your Query InfoSet Transaction window to continue to run.
2. In the new Easy Access window, double-click on the PA20 Transaction
You can now at any time quickly use the PA20 Transaction and then quickly switch back to the Query InfoSet Transaction.
FINDING FIELDS IN PA20 1. From within the Display HR Master Data (PA20) window, enter your Personnel Number in the Personnel
No field and press Enter
Note – If no Personnel Number is added, you will not be able to display any tables.
2. Click through the tabs and their Infotypes lists (tables)
Each tab (category) maintains a list of Infotypes (tables), which are the active tables being used by the District in that category (tab).
3. Locate the category (tab) and table (Infotypes) you believe the field in question to be found in
4. Click on the Select box to the left of the Infotype to select that Infotype
This Infotype as it is listed here will be the folder you look in back in the Field groups/fields section of the InfoSet Query window.
5. Click on the Display button in the upper left
6. Note the field names to the left of their data entries which are present in this table
These field names will be the field names you look in back in the Field groups/fields section of the InfoSet Query window.

SAP Ad Hoc Query
SBCUSD - IT Training Page 6
DEVELOPING QUERY CONDITIONS WITH SELECTION FIELDS
A Query with only output selections will simply return all your selected Output Field values for all employees. Adding Selection fields allows you to create conditions that would filter the results based on that selection field and the values you’re testing for. So, rather than returning all employees in the database, set Selection Fields with criteria, for example, which includes only part time, certificated employees in a particular Organizational Unit.
FILTERING RECORDS USING SELECTION FIELDS 1. Click through the folder tree in the Field groups/fields section of the InfoSet Query window
2. Locate the field in the SAP database you wish to use as Selection field
3. Click on the Selection check box for that field
This field will appear to the right in the Selections area of the window.
4. Continue to locate fields you wish to use as Selection fields, checking their Selection check box
Note – When utilizing more than a single Selection Field, the resulting query logic is AND. So, Selection Field1 criteria must be met AND Selection Field2 AND 3 and so on.
COMMON SELECTION FIELDS Field Folder Organizational unit Organizational assignment Employee group Organizational assignment Employee subgroup Organizational assignment Personnel area Organizational assignment Personnel subarea Organizational assignment Action type Action Reason for action Action Valid from date Action Entry date Action
5. Click on the Hit list button to reveal who many records are returned.
6. Click on the Display hit list button
This will produce a quick list of employees and their name (regardless of name output field being selected). Use this list to get an idea if your query is built well.
Note – At this point you have only designated which fields you will use as conditional fields, but have yet to develop the conditional criteria. You will now want to enter Values and Option comparisons.
SAP Ad Hoc Query
SBCUSD - IT Training Page 7
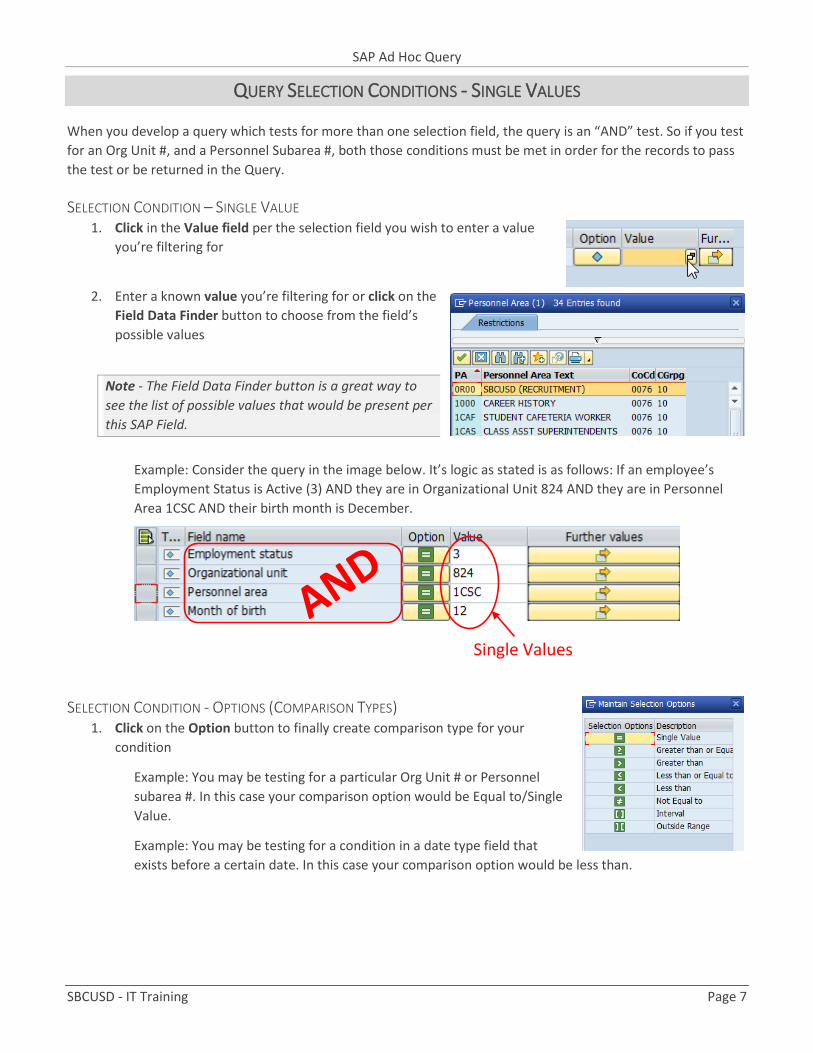
QUERY SELECTION CONDITIONS - SINGLE VALUES
When you develop a query which tests for more than one selection field, the query is an “AND” test. So if you test for an Org Unit #, and a Personnel Subarea #, both those conditions must be met in order for the records to pass the test or be returned in the Query.
SELECTION CONDITION – SINGLE VALUE 1. Click in the Value field per the selection field you wish to enter a value
you’re filtering for
2. Enter a known value you’re filtering for or click on the Field Data Finder button to choose from the field’s possible values
Note - The Field Data Finder button is a great way to see the list of possible values that would be present per this SAP Field.
Example: Consider the query in the image below. It’s logic as stated is as follows: If an employee’s Employment Status is Active (3) AND they are in Organizational Unit 824 AND they are in Personnel Area 1CSC AND their birth month is December.
SELECTION CONDITION - OPTIONS (COMPARISON TYPES) 1. Click on the Option button to finally create comparison type for your
condition
Example: You may be testing for a particular Org Unit # or Personnel subarea #. In this case your comparison option would be Equal to/Single Value.
Example: You may be testing for a condition in a date type field that exists before a certain date. In this case your comparison option would be less than.
Single Values

SAP Ad Hoc Query
SBCUSD - IT Training Page 8
QUERY SELECTION CONDITIONS - MULTIPLE VALUES
SELECTION CONDITION – FURTHER/MULTIPLE VALUES 1. Click on the Further Values button if you wish
to test for multiple values, or a range of values to be tested (usually dates)
2. Enter any number of values you wish in the Select Single Value rows available
Example: You may be looking for a condition found within a range of dates.
Note – Entering multiple values and or entering a range of values in the Value entry field creates an OR condition.
Consider the query in the image below. It’s logic as stated is as follows: If an employee’s Employment Status is Active (3) AND they are in Organizational Unit 824 OR 321 OR 211 AND they are in Personnel Area 1CSC AND their birth month is December OR September.
Note – In the Multiple Selections window, under the Select Single Values tab, you can use the Multiple Selection button the select multiple values at one time via checking (check mark) each value you’re looking for.
SELECTION CONDITION - OPTIONS (COMPARISON TYPES) 1. Click on the Option button to finally create comparison type for your
condition
Example 1: You may be testing for a particular Org Unit # or Personnel subarea #. In this case your comparison option would be Equal to/Single Value.
Example 2: You may be testing for a condition in a date type field that exists before a certain date. In this case your comparison option would be less than.
Multiple Values = OR

SAP Ad Hoc Query
SBCUSD - IT Training Page 9
REPORTING PERIOD
You can use the Reporting Period feature to maintain an overall “date filter” for any and all queries you may decide to run which on their own do not contain any date field types with date comparisons. This will allow you to exclude or include entire time periods in a query that otherwise has no date type conditions.
1. Click on the Reporting Period button in the Query InfoSet window
2. Select the desired date filter
From this point forward while you have a Reporting Period set your queries will function from only within this date period.
Note – If you create a query that maintains date criteria or conditions in your queries while also utilizing a Reporting Period, the date criteria must operate from within the date range you have set in Reporting Period.

SAP Ad Hoc Query
SBCUSD - IT Training Page 10
GENERATING AND SAVING THE QUERY REPORT
HIT LIST 1. Once you have created your query, click on the Hit List button
2. Adjust your query if needed and click on the Hit List button
3. Click on the Display Hit List button to display a quick list of which employees are returned by the query to further help you determine if your query is sound
Note - Adjusting your query and using the Hit List button and the Display hit list button often helps you determine if you’re developing the query or the query logic correctly.
OUTPUT 1. Once you have confirmed the Hit List, click on the Refresh Data button in Output area below
This will give you a preview of all the records which the query returned.
2. Click on the Export button and choose Local File
3. In the Save list in file window, choose Spreadsheet
4. Choose a Directory location
5. Enter a file name
6. Click on Generate
Note – You can perform Sorts, Filters, and a number of spreadsheet feature here in the Preview Output area. Because you have excel available, you may wish to perform such tasks in Excel after you have exported the output.
SAP Ad Hoc Query
SBCUSD - IT Training Page 11
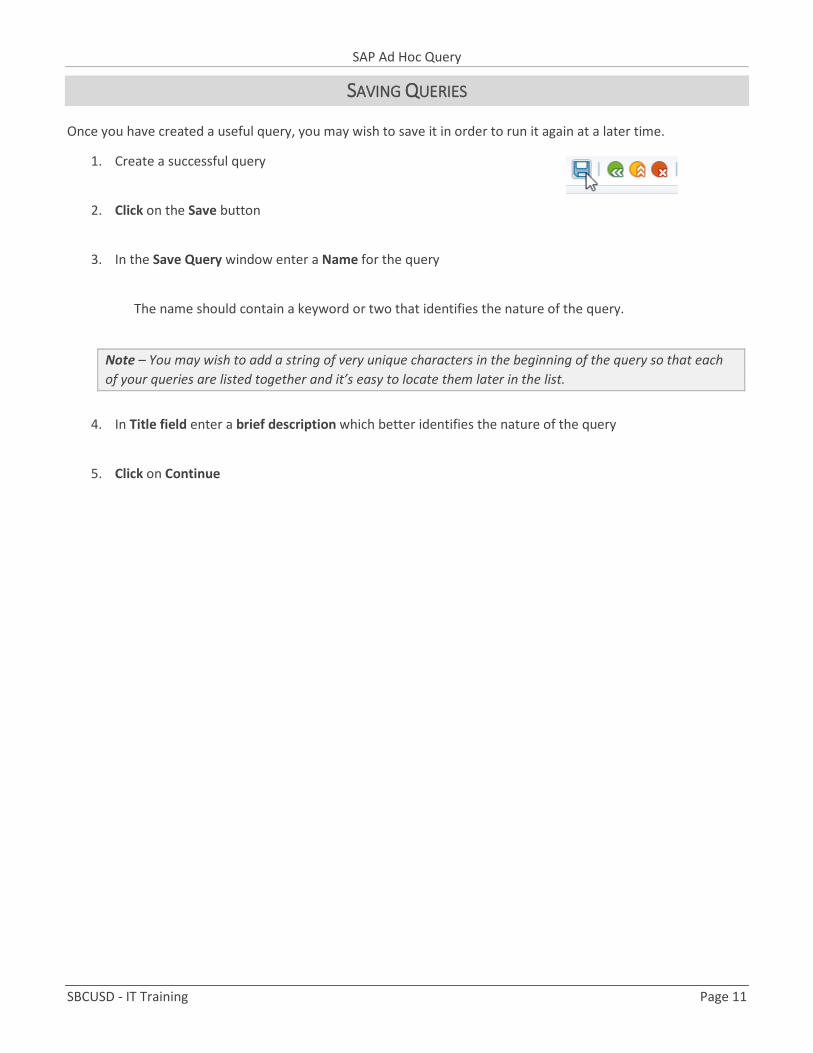
SAVING QUERIES
Once you have created a useful query, you may wish to save it in order to run it again at a later time.
1. Create a successful query
2. Click on the Save button
3. In the Save Query window enter a Name for the query
The name should contain a keyword or two that identifies the nature of the query.
Note – You may wish to add a string of very unique characters in the beginning of the query so that each of your queries are listed together and it’s easy to locate them later in the list.
4. In Title field enter a brief description which better identifies the nature of the query
5. Click on Continue

SAP Ad Hoc Query
SBCUSD - IT Training Page 12
SAP QUERY IN ACTION
1. Create a query and find all active speech therapists in the District. List their first and last name, their ID number, their position number and how many months they work a year.
2. Create a new query and find out all the ACTIVE employees in the IT Department or your department who had any CHANGE IN PAY.
3. Open existing query 00_WKLY_NHR_RP and run the report.
4. Edit your own query to find out all the FULL TIME employees in the district where the departments/Org unit are Payroll, Fiscal and IT.
5. Edit your own query to find out all the ACTIVE employees in the district using a few selected Personal Areas of your choice.
6. Create a new query and find out all the ACTIVE employee in the IT Department or your department who had CHANGE IN PAY and SEPERATED.
7. Open existing query to find Location, Position, and Date of Interns.
8. Edit your own query to find out all the PART TIME employees in the district where the departments/Org units are Certificated and display some types of personal information.