
Rapid Intervention Program (256) Student Guide May 2012...approved SCBA breathing air supply...
99
Rapid Intervention Program (256) Student Guide May 2012 Massachusetts Firefighting Academy Department of Fire Services State Road Stow, MA 01776 978-567-3100
Transcript of Rapid Intervention Program (256) Student Guide May 2012...approved SCBA breathing air supply...

Rapid Intervention Program (256) Student Guide
May 2012
Massachusetts Firefighting Academy Department of Fire Services
State Road Stow, MA 01776
978-567-3100
2
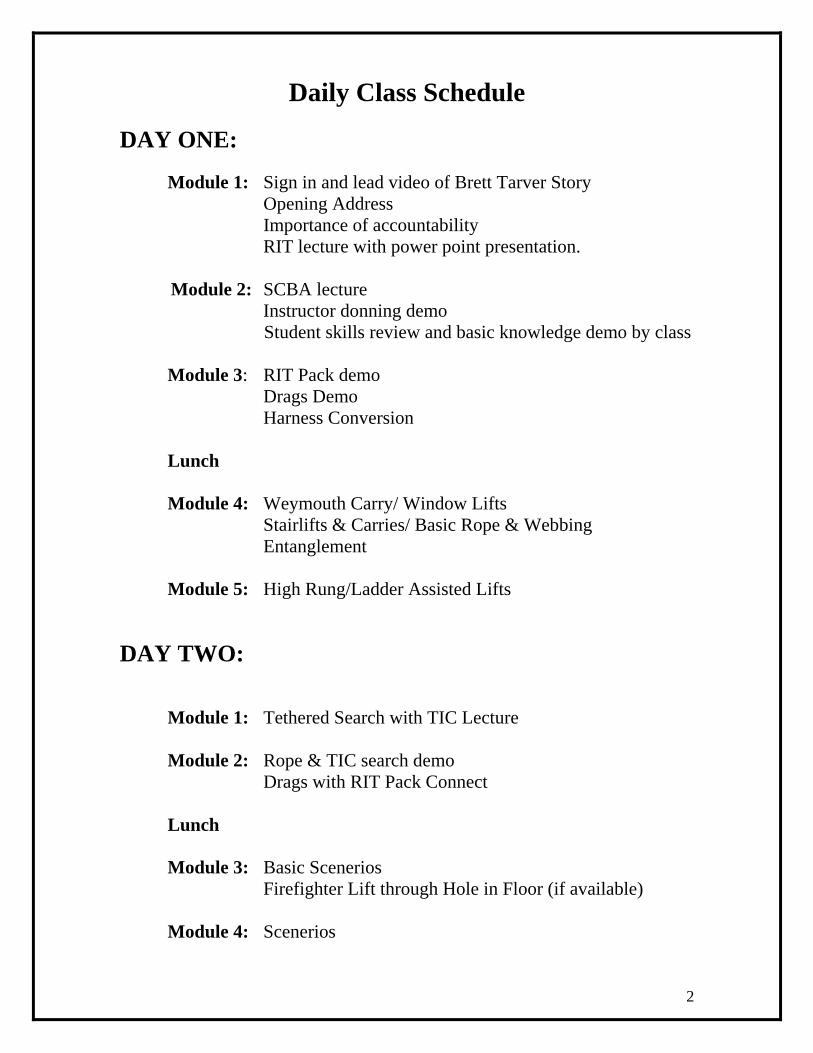
Daily Class Schedule DAY ONE:
Module 1: Sign in and lead video of Brett Tarver Story Opening Address Importance of accountability RIT lecture with power point presentation. Module 2: SCBA lecture Instructor donning demo Student skills review and basic knowledge demo by class Module 3: RIT Pack demo Drags Demo Harness Conversion Lunch Module 4: Weymouth Carry/ Window Lifts Stairlifts & Carries/ Basic Rope & Webbing
Entanglement Module 5: High Rung/Ladder Assisted Lifts
DAY TWO: Module 1: Tethered Search with TIC Lecture Module 2: Rope & TIC search demo Drags with RIT Pack Connect Lunch Module 3: Basic Scenerios Firefighter Lift through Hole in Floor (if available)
Module 4: Scenerios

3
DAY ONE
4
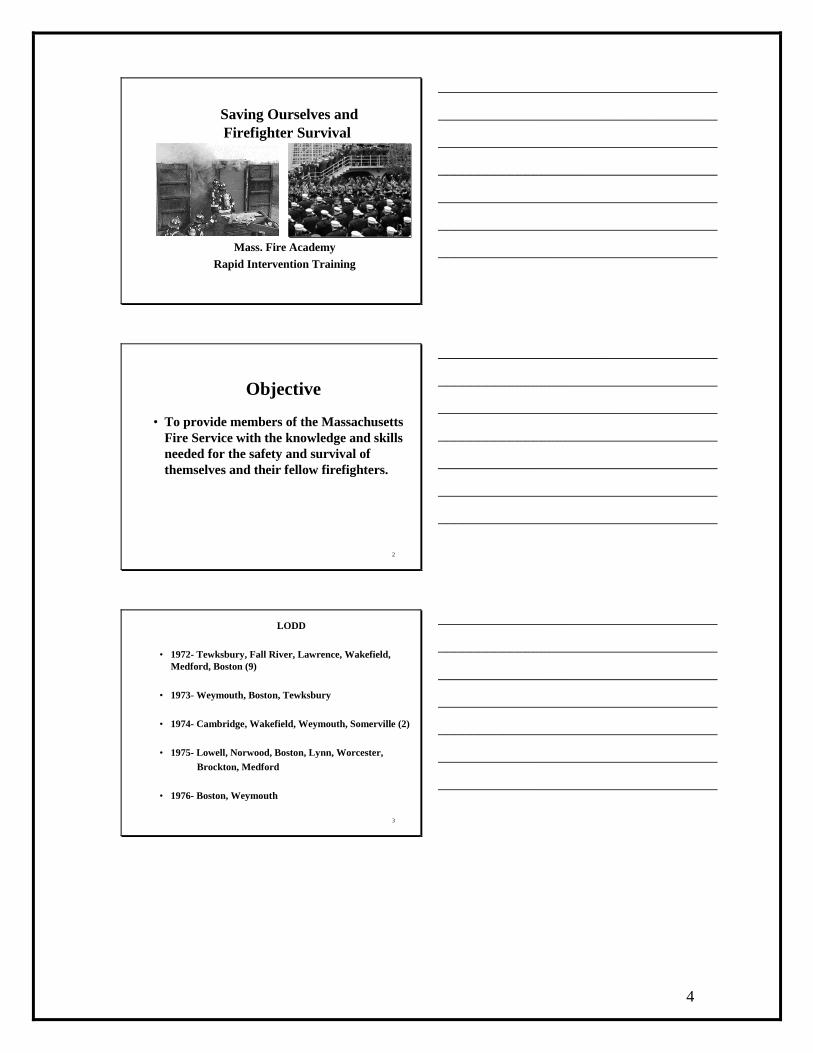
Saving Ourselves andFirefighter Survival
Mass. Fire AcademyRapid Intervention Training
___________________________________
___________________________________
___________________________________
___________________________________
___________________________________
___________________________________
___________________________________
2
Objective
• To provide members of the Massachusetts Fire Service with the knowledge and skills needed for the safety and survival of themselves and their fellow firefighters.
___________________________________
___________________________________
___________________________________
___________________________________
___________________________________
___________________________________
___________________________________
3
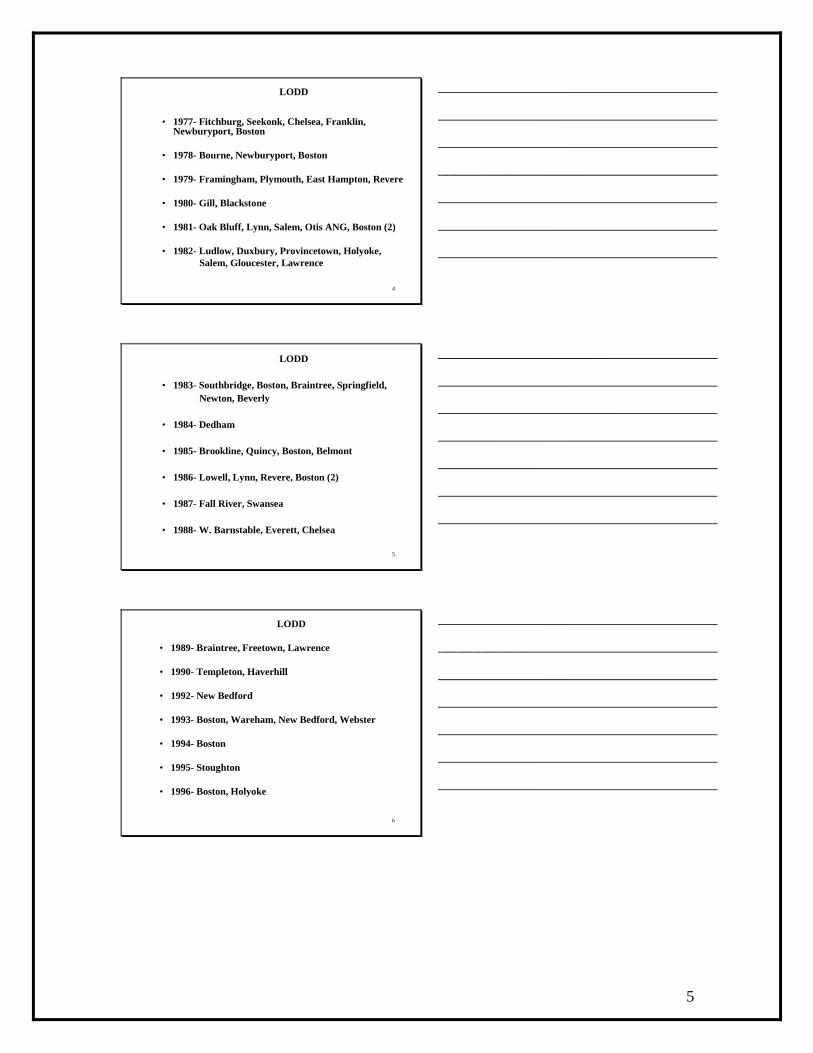
LODD
• 1972- Tewksbury, Fall River, Lawrence, Wakefield, Medford, Boston (9)
• 1973- Weymouth, Boston, Tewksbury
• 1974- Cambridge, Wakefield, Weymouth, Somerville (2)
• 1975- Lowell, Norwood, Boston, Lynn, Worcester,Brockton, Medford
• 1976- Boston, Weymouth
___________________________________
___________________________________
___________________________________
___________________________________
___________________________________
___________________________________
___________________________________
5
4
LODD
• 1977- Fitchburg, Seekonk, Chelsea, Franklin, Newburyport, Boston
• 1978- Bourne, Newburyport, Boston
• 1979- Framingham, Plymouth, East Hampton, Revere
• 1980- Gill, Blackstone
• 1981- Oak Bluff, Lynn, Salem, Otis ANG, Boston (2)
• 1982- Ludlow, Duxbury, Provincetown, Holyoke,Salem, Gloucester, Lawrence
___________________________________
___________________________________
___________________________________
___________________________________
___________________________________
___________________________________
___________________________________
5
LODD
• 1983- Southbridge, Boston, Braintree, Springfield,Newton, Beverly
• 1984- Dedham
• 1985- Brookline, Quincy, Boston, Belmont
• 1986- Lowell, Lynn, Revere, Boston (2)
• 1987- Fall River, Swansea
• 1988- W. Barnstable, Everett, Chelsea
___________________________________
___________________________________
___________________________________
___________________________________
___________________________________
___________________________________
___________________________________
6
LODD
• 1989- Braintree, Freetown, Lawrence
• 1990- Templeton, Haverhill
• 1992- New Bedford
• 1993- Boston, Wareham, New Bedford, Webster
• 1994- Boston
• 1995- Stoughton
• 1996- Boston, Holyoke
___________________________________
___________________________________
___________________________________
___________________________________
___________________________________
___________________________________
___________________________________

6
7
LODD
• 1999- Dunstable, Revere, Russell, Everett, NantucketBoston (2), Worcester (6)
• 2000- Somerville
• 2001- Centerville
• 2002- Fall River, Brookline
• 2003- Cambridge, Lancaster, MA Wildfire Crew/Pittsfield
___________________________________
___________________________________
___________________________________
___________________________________
___________________________________
___________________________________
___________________________________
8
LODD
2004- Brookline, W. Bridgewater
2007- Boston, Boston (2)
___________________________________
___________________________________
___________________________________
___________________________________
___________________________________
___________________________________
___________________________________
9
THE NATURE OFTHE PROBLEM
• Lost & Disoriented• Freelancing• Unfamiliar with
SCBA• Trapped or Pinned
___________________________________
___________________________________
___________________________________
___________________________________
___________________________________
___________________________________
___________________________________

7
10
THE NATURE OFTHE PROBLEM (CONT.)
• Failure to use PASS device
• Improper personal size-up
• Failure to follow procedures
___________________________________
___________________________________
___________________________________
___________________________________
___________________________________
___________________________________
___________________________________
11
LOST AND DISORIENTED• Operating ahead of the
hoseline• Operating above the fire
floor alone• Large open areas• Rapidly changing
conditions• Complex structures and
renovations
___________________________________
___________________________________
___________________________________
___________________________________
___________________________________
___________________________________
___________________________________
12
FREELANCING• Understand the ICS system in your department• Use the personal accountability system• Always maintain VOICE, VISUAL, TOUCH contact with
your assigned crew • Follow departmental procedures
___________________________________
___________________________________
___________________________________
___________________________________
___________________________________
___________________________________
___________________________________

8
13
Failure to follow departmental standard guidelines will impact
fire ground operations.
___________________________________
___________________________________
___________________________________
___________________________________
___________________________________
___________________________________
___________________________________
14
UNFAMILIAR WITH SCBA• Lack of everyday use and experience• Improper donning ( straps, mask, etc. )• Overextending usable air capacity• Failure to anticipate
– Facepiece failure– Hose damage– Regulator damage
___________________________________
___________________________________
___________________________________
___________________________________
___________________________________
___________________________________
___________________________________
15
TRAPPED OR PINNED
• Localized Collapse• Firefighter falling through holes,
shafts, stairways• Fire behind the attack or rescue crew• Entanglement in false
ceilings, wires, etc.
___________________________________
___________________________________
___________________________________
___________________________________
___________________________________
___________________________________
___________________________________
9
16
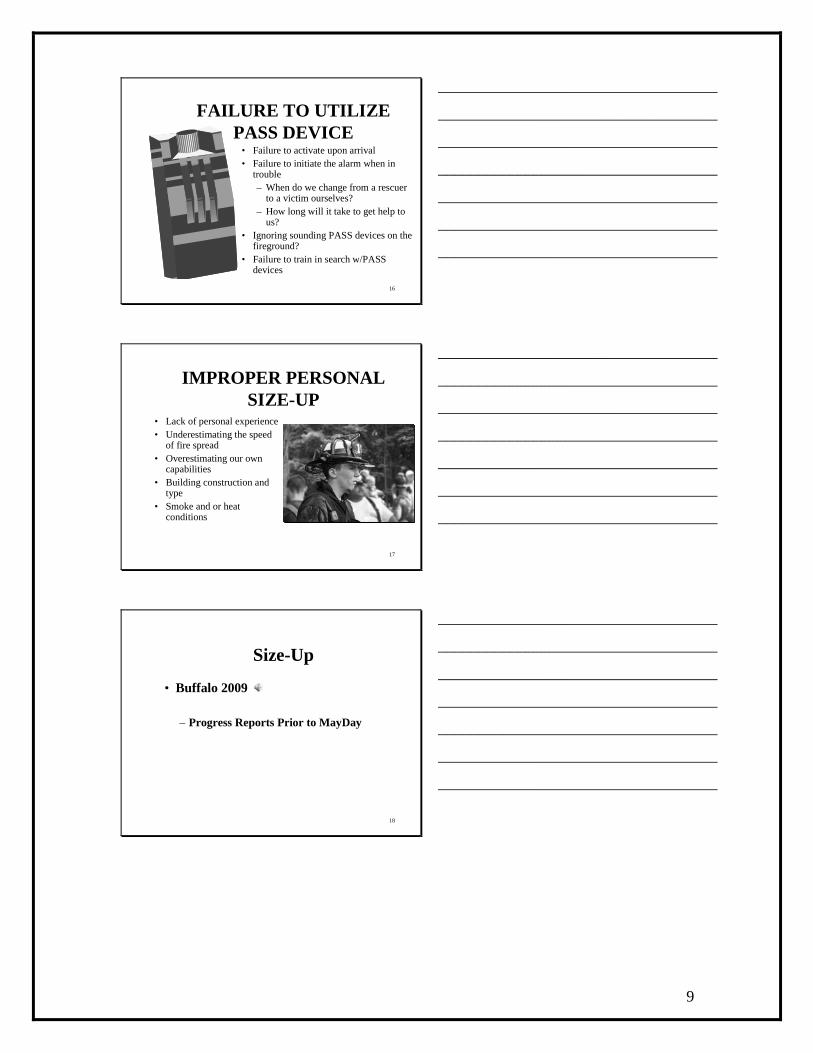
FAILURE TO UTILIZEPASS DEVICE
• Failure to activate upon arrival• Failure to initiate the alarm when in
trouble– When do we change from a rescuer
to a victim ourselves?– How long will it take to get help to
us?• Ignoring sounding PASS devices on the
fireground?• Failure to train in search w/PASS
devices
___________________________________
___________________________________
___________________________________
___________________________________
___________________________________
___________________________________
___________________________________
17
IMPROPER PERSONALSIZE-UP
• Lack of personal experience• Underestimating the speed
of fire spread• Overestimating our own
capabilities• Building construction and
type• Smoke and or heat
conditions
___________________________________
___________________________________
___________________________________
___________________________________
___________________________________
___________________________________
___________________________________
18
Size-Up
• Buffalo 2009
– Progress Reports Prior to MayDay
___________________________________
___________________________________
___________________________________
___________________________________
___________________________________
___________________________________
___________________________________
10
19
Be accountable:• For your actions
• For your crew
• For yourself
___________________________________
___________________________________
___________________________________
___________________________________
___________________________________
___________________________________
___________________________________
20
SCBA • Be familiar with your SCBA equipment• Know emergency procedures• Always check your SCBA before use• Follow proper maintenance always• Continue to train as much as possible• Knowing your SCBA will save your life!
___________________________________
___________________________________
___________________________________
___________________________________
___________________________________
___________________________________
___________________________________
21
REPORTING AN URGENT AND OR MAYDAY
• URGENT is for critical information where life is not in jeopardy. Example: Noticing a bulging wall.
• MAYDAY is for a time where life safety is in extreme danger. Example:A down firefighter in the building.
___________________________________
___________________________________
___________________________________
___________________________________
___________________________________
___________________________________
___________________________________
11
22
REPORTING A MAYDAY• Declare “Mayday, Mayday, Mayday”• Give location - If unknown give the door
you entered through• Company your with and your name • Problem - trapped, out of air, disoriented• Attempt self rescue or get to a corner and
get in protective position
• Buffalo 2009 Audio
___________________________________
___________________________________
___________________________________
___________________________________
___________________________________
___________________________________
___________________________________
23
L.I.P.S. Acronym • L – Location
• I – Identification
• P – Problem
• S- Survival
___________________________________
___________________________________
___________________________________
___________________________________
___________________________________
___________________________________
___________________________________
12
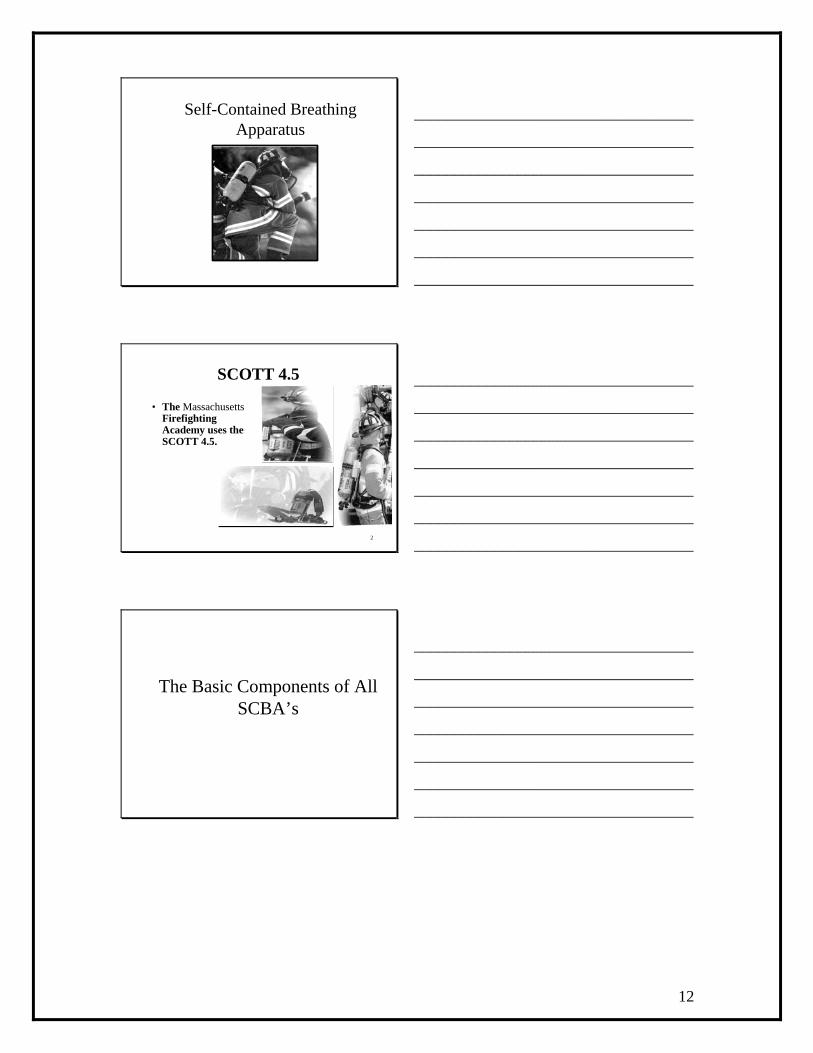
Self-Contained Breathing Apparatus
___________________________________
___________________________________
___________________________________
___________________________________
___________________________________
___________________________________
___________________________________
SCOTT 4.5
• The MassachusettsFirefighting Academy uses the SCOTT 4.5.
2
___________________________________
___________________________________
___________________________________
___________________________________
___________________________________
___________________________________
___________________________________
The Basic Components of AllSCBA’s
___________________________________
___________________________________
___________________________________
___________________________________
___________________________________
___________________________________
___________________________________
13
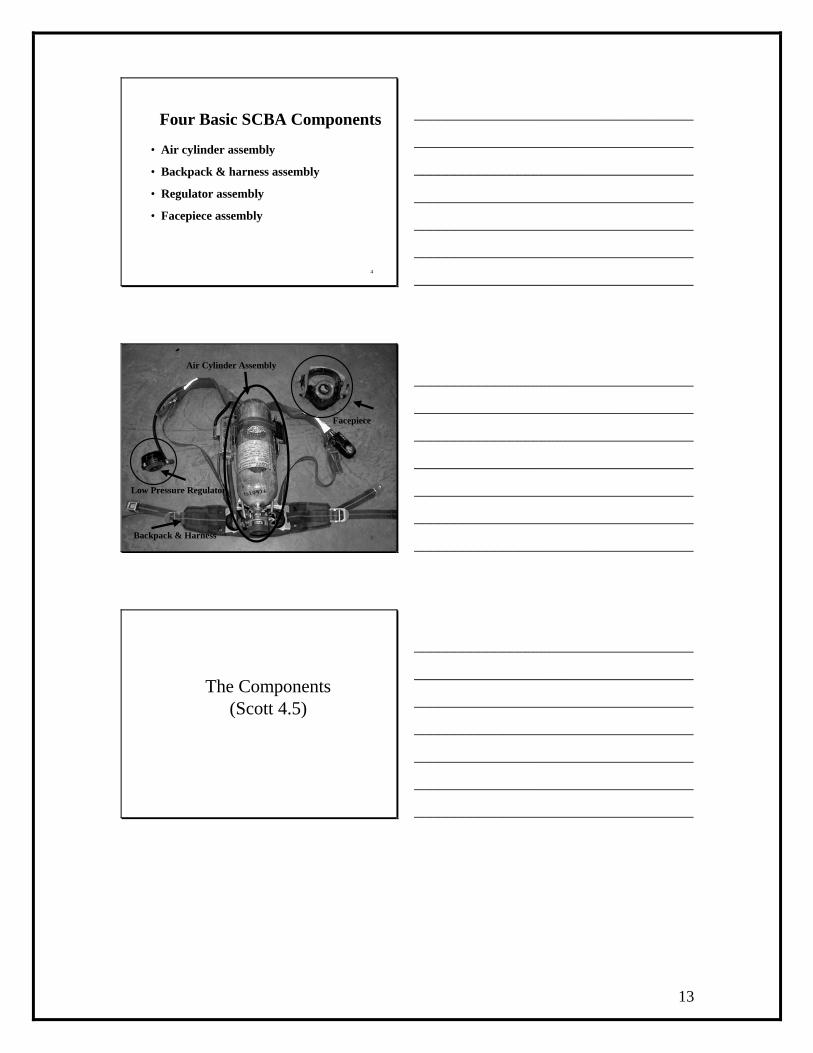
Four Basic SCBA Components
• Air cylinder assembly
• Backpack & harness assembly
• Regulator assembly
• Facepiece assembly
4
___________________________________
___________________________________
___________________________________
___________________________________
___________________________________
___________________________________
___________________________________
Backpack & Harness
Air Cylinder Assembly
Facepiece
Low Pressure Regulator
5
___________________________________
___________________________________
___________________________________
___________________________________
___________________________________
___________________________________
___________________________________
The Components(Scott 4.5)
___________________________________
___________________________________
___________________________________
___________________________________
___________________________________
___________________________________
___________________________________

14
Facepiece Head Harness
FacepieceSeal
Cylinder ValveHigh Pressure Hose
Waist Belt
Cylinder Gauge
Purge Valve
Pressure Reducer Hi Pressure Regulator
Low Pressure Regulator
ThumbClip
DonningSwitch
Harness Gauge
PASS
7
___________________________________
___________________________________
___________________________________
___________________________________
___________________________________
___________________________________
___________________________________
Cylinder Sizes
• 30 minutes
• 45 minutes
• 60 minutes
8
___________________________________
___________________________________
___________________________________
___________________________________
___________________________________
___________________________________
___________________________________
Cylinder Valve Assembly
• Always fully open the cylinder valve
9
___________________________________
___________________________________
___________________________________
___________________________________
___________________________________
___________________________________
___________________________________
15
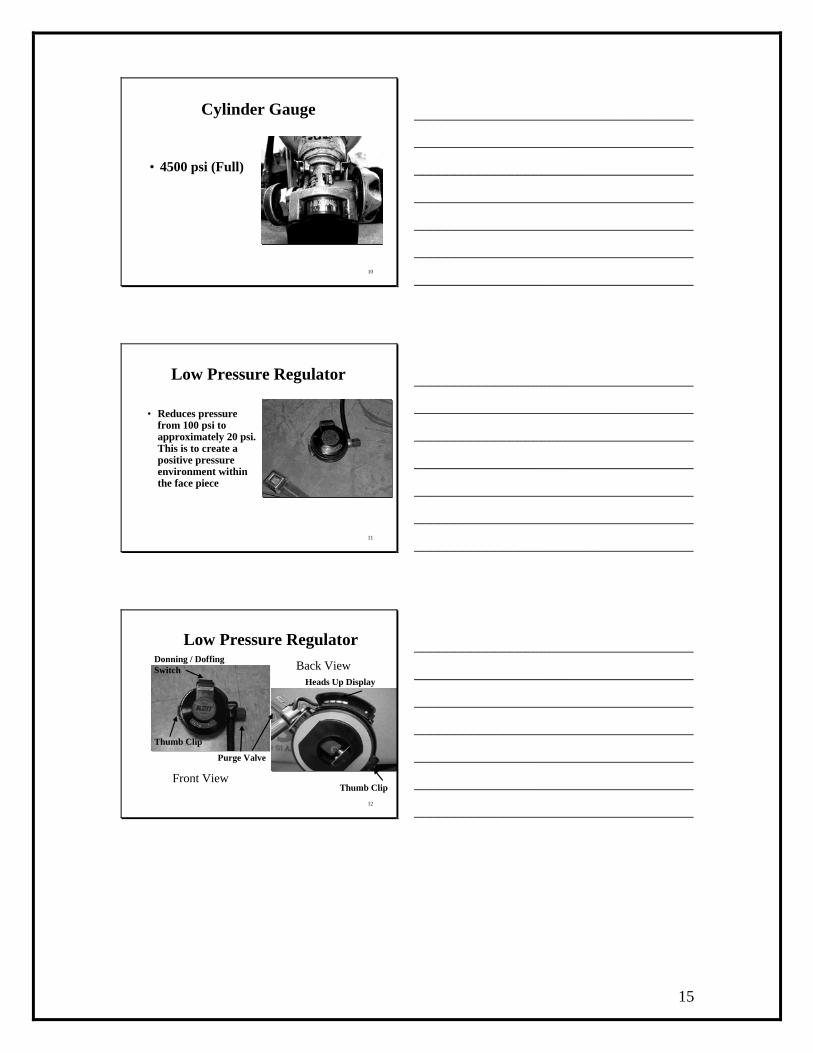
Cylinder Gauge
• 4500 psi (Full)
10
___________________________________
___________________________________
___________________________________
___________________________________
___________________________________
___________________________________
___________________________________
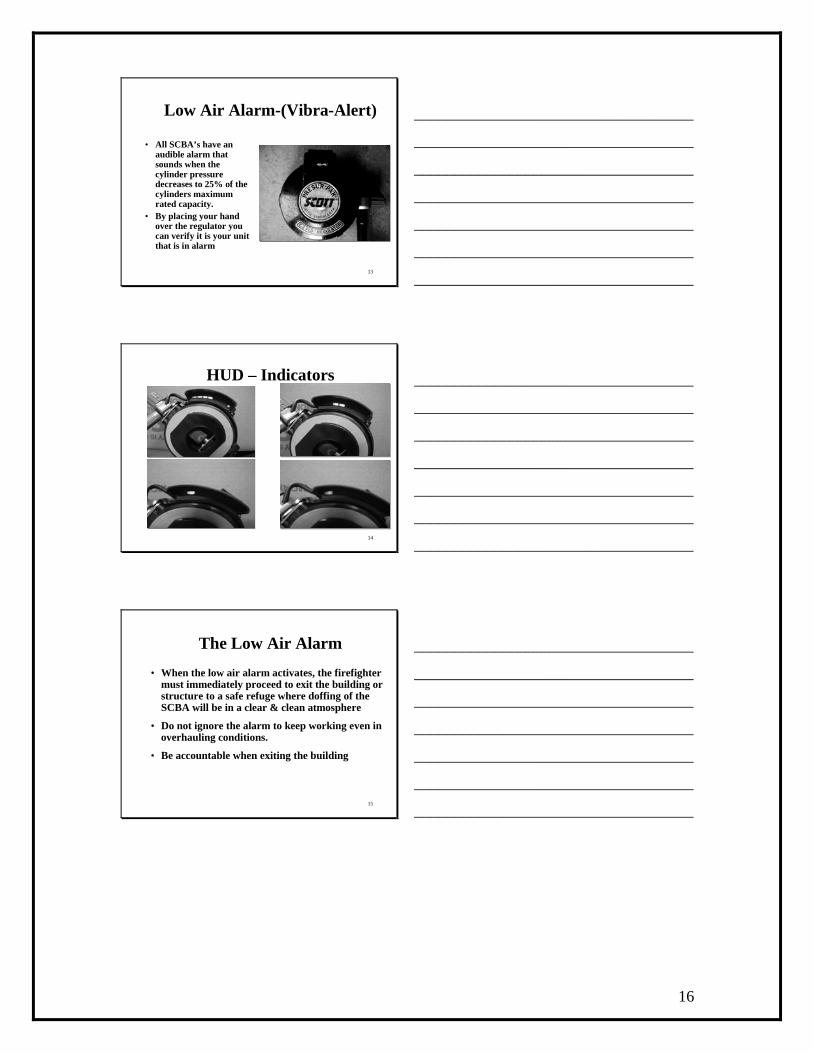
Low Pressure Regulator
• Reduces pressure from 100 psi to approximately 20 psi. This is to create a positive pressure environment within the face piece
11
___________________________________
___________________________________
___________________________________
___________________________________
___________________________________
___________________________________
___________________________________
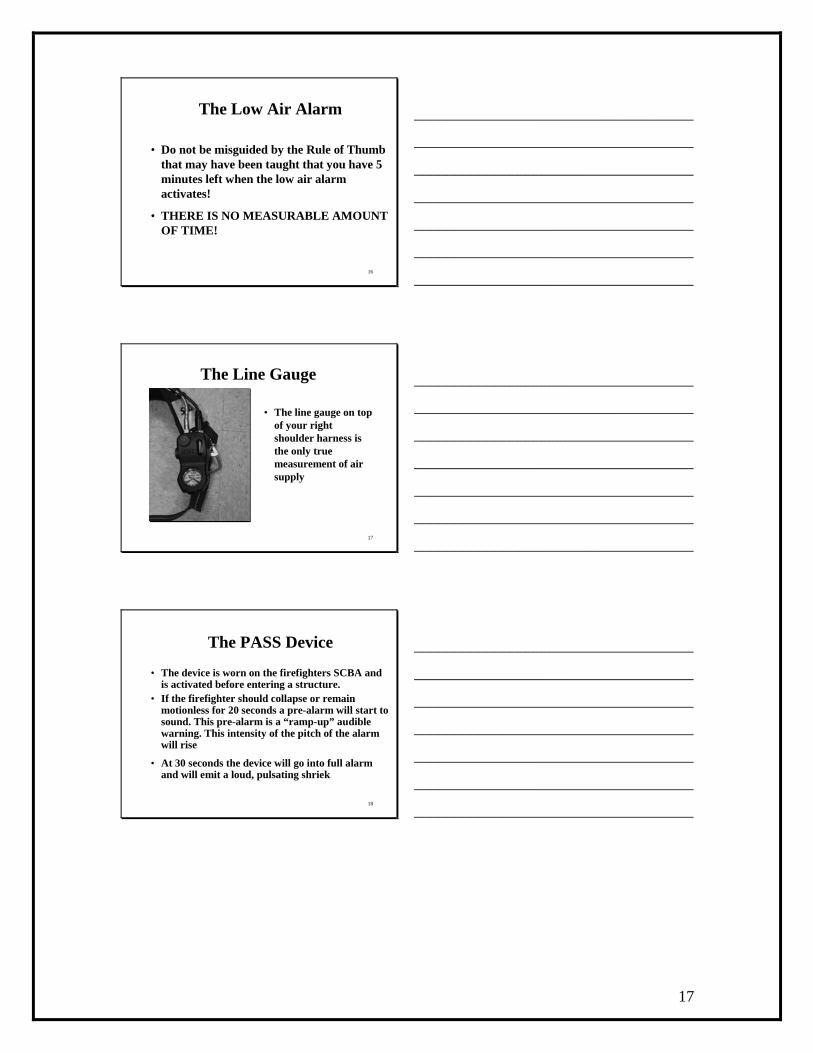
Low Pressure Regulator
Purge Valve
Donning / Doffing Switch
Thumb Clip
Front View
Back ViewHeads Up Display
Thumb Clip12
___________________________________
___________________________________
___________________________________
___________________________________
___________________________________
___________________________________
___________________________________
16
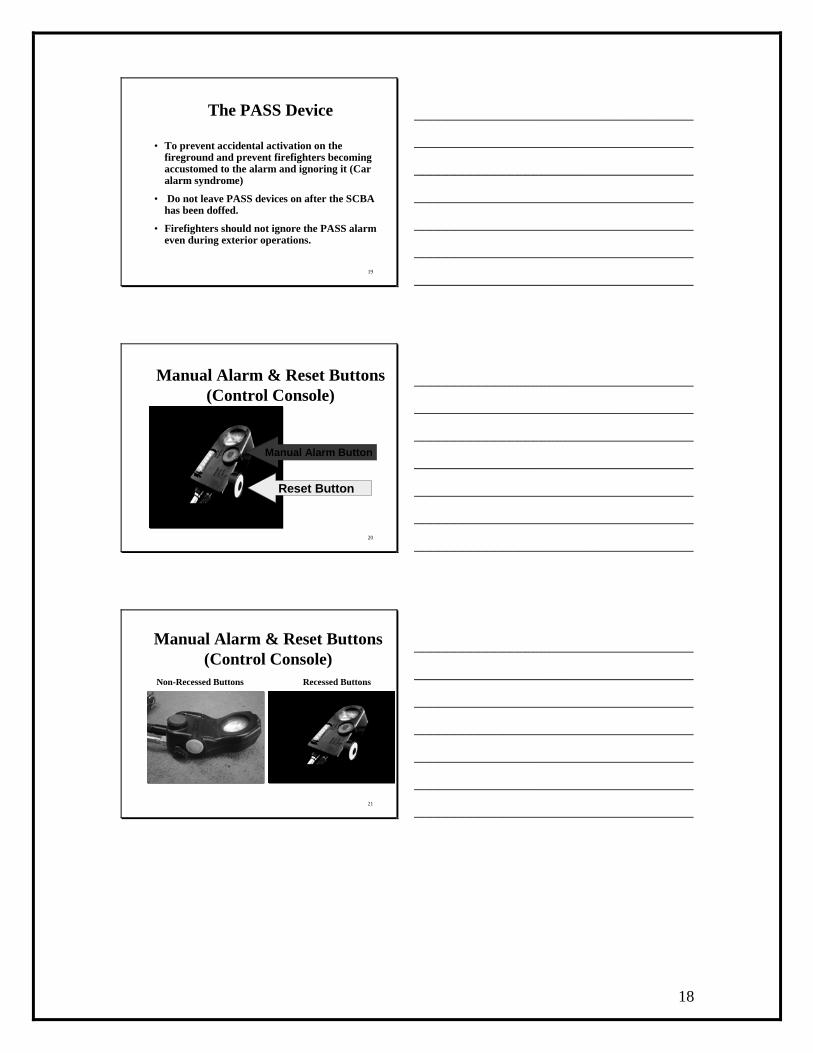
Low Air Alarm-(Vibra-Alert)
• All SCBA’s have an audible alarm that sounds when the cylinder pressure decreases to 25% of the cylinders maximum rated capacity.
• By placing your hand over the regulator you can verify it is your unit that is in alarm
13
___________________________________
___________________________________
___________________________________
___________________________________
___________________________________
___________________________________
___________________________________
HUD – Indicators
14
___________________________________
___________________________________
___________________________________
___________________________________
___________________________________
___________________________________
___________________________________
The Low Air Alarm• When the low air alarm activates, the firefighter
must immediately proceed to exit the building or structure to a safe refuge where doffing of the SCBA will be in a clear & clean atmosphere
• Do not ignore the alarm to keep working even in overhauling conditions.
• Be accountable when exiting the building
15
___________________________________
___________________________________
___________________________________
___________________________________
___________________________________
___________________________________
___________________________________
17
The Low Air Alarm
• Do not be misguided by the Rule of Thumb that may have been taught that you have 5 minutes left when the low air alarm activates!
• THERE IS NO MEASURABLE AMOUNT OF TIME!
16
___________________________________
___________________________________
___________________________________
___________________________________
___________________________________
___________________________________
___________________________________
The Line Gauge
• The line gauge on top of your right shoulder harness is the only true measurement of air supply
17
___________________________________
___________________________________
___________________________________
___________________________________
___________________________________
___________________________________
___________________________________
The PASS Device
• The device is worn on the firefighters SCBA and is activated before entering a structure.
• If the firefighter should collapse or remain motionless for 20 seconds a pre-alarm will start to sound. This pre-alarm is a “ramp-up” audible warning. This intensity of the pitch of the alarm will rise
• At 30 seconds the device will go into full alarm and will emit a loud, pulsating shriek
18
___________________________________
___________________________________
___________________________________
___________________________________
___________________________________
___________________________________
___________________________________
18
The PASS Device
• To prevent accidental activation on thefireground and prevent firefighters becoming accustomed to the alarm and ignoring it (Car alarm syndrome)
• Do not leave PASS devices on after the SCBA has been doffed.
• Firefighters should not ignore the PASS alarm even during exterior operations.
19
___________________________________
___________________________________
___________________________________
___________________________________
___________________________________
___________________________________
___________________________________
Manual Alarm & Reset Buttons (Control Console)
Manual Alarm Button
Reset Button
20
___________________________________
___________________________________
___________________________________
___________________________________
___________________________________
___________________________________
___________________________________
Manual Alarm & Reset Buttons (Control Console)
Non-Recessed Buttons Recessed Buttons
21
___________________________________
___________________________________
___________________________________
___________________________________
___________________________________
___________________________________
___________________________________
19
Pre-Alarm• Remember the motion sensor is in the sensor
module under the air cylinder valve and is not in the control console
• Actual movement of the system back frame or using the re-set button on the control console in Pre-Alarm
• Shaking the Control Console will not reset the distress alarm
22
___________________________________
___________________________________
___________________________________
___________________________________
___________________________________
___________________________________
___________________________________
Full-Alarm• The full alarm can only be silenced by
pressing the reset (yellow) button two (2) consecutive times. This prevents accidental deactivation if the operator moves during self-rescue
• The PASS will remain activated with the green light flashing upon reset
23
___________________________________
___________________________________
___________________________________
___________________________________
___________________________________
___________________________________
___________________________________
Manual Alarm
• If the operator is in a situation where immediate assistance is required, the PASS provides a manual (red) alarm button located on the front of the control console
• The manual alarm can be activated at any time by pressing the red button even if the system is not pressurized
24
___________________________________
___________________________________
___________________________________
___________________________________
___________________________________
___________________________________
___________________________________
20
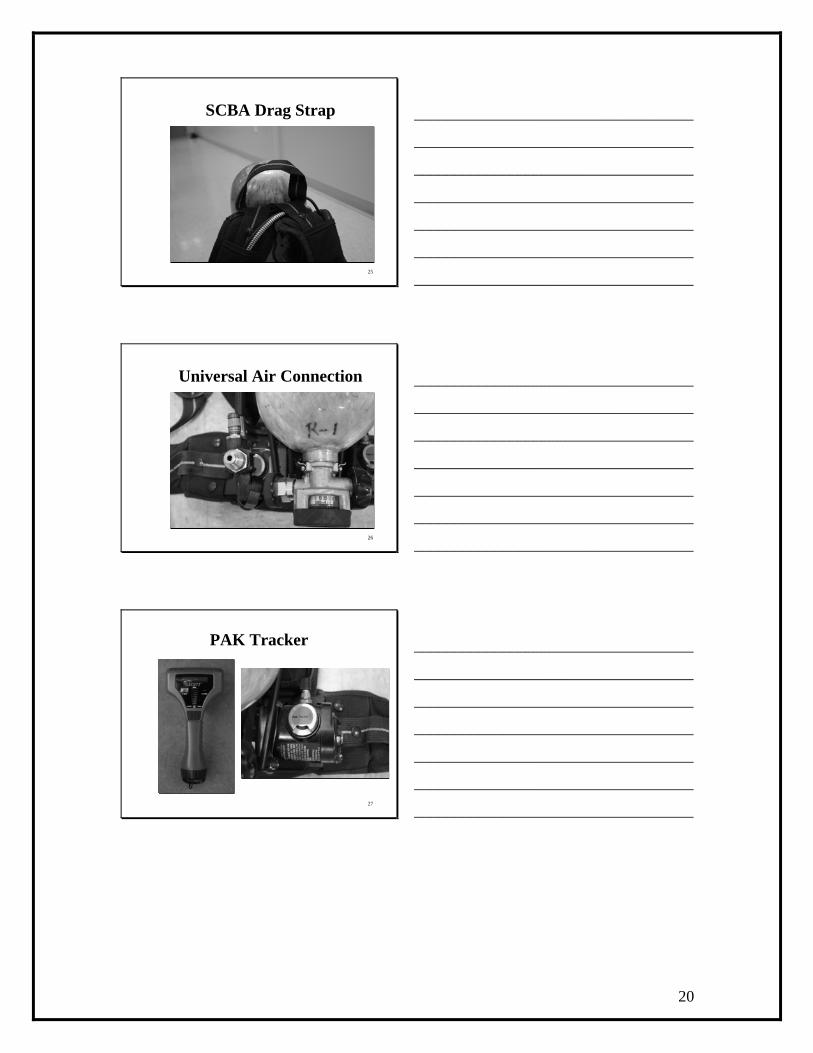
SCBA Drag Strap
25
___________________________________
___________________________________
___________________________________
___________________________________
___________________________________
___________________________________
___________________________________
Universal Air Connection
26
___________________________________
___________________________________
___________________________________
___________________________________
___________________________________
___________________________________
___________________________________
PAK Tracker
27
___________________________________
___________________________________
___________________________________
___________________________________
___________________________________
___________________________________
___________________________________
21
SCBA Summary• Be familiar with your SCBA equipment
• Know emergency procedures
• Always check your SCBA before use
• Follow proper maintenance always
• Continue to train as much as possible
• Knowing your SCBA will save your life!
28
___________________________________
___________________________________
___________________________________
___________________________________
___________________________________
___________________________________
___________________________________
22
RIT PACK RIT-Pak Familiarization and UAC Emergency Use WARNING: The RIC UAC (Rapid Intervention Crew Universal Air Connection) system is for emergency use only. Improper use of the system may lead to a malfunction of the equipment, which could cause serious injury or death. Do Not use the Scott RIC/RIT UAC assembly to charge an SCBA air cylinder while the SCBA is being worn unless there is a compelling reason to assume the risk of injury. At no time should the MFA instructors or staff demonstrate the use of the RIC UAC system by actually filling a cylinder (use 2 empty cylinders to show use or just talk the audience through the procedure). AIR-PAK respirators in compliance with NFPA 1981 are fitted with a Rapid Intervention Crew Universal Air Connection System, which permits emergency replenishment of an approved SCBA breathing air supply cylinder on a user’s respirator from an approved air supply source while in use. This is not a quick charge attachment and must not be used for routine recharging of the cylinder, for “buddy breathing”, for transferring air from another SCBA, or any unapproved use. Equipment: RIT-Pak (with empty 1hr. cylinder), SCBA equipped with RIC UAC (and an empty 30 min. cylinder), Firefighter manikin, and any packs with buddy breathing hoses supplied by the hosting communities. Demonstrate how to check if the firefighter has air in their SCBA if they cannot visually check the gauges: Have the firefighters gently pull the face piece away from the firefighters face by holding on to the regulator. This should only be done, so that the seal between the face piece and the firefighter is slightly broken. As this occurs the RIT crewmember should hold their breath and listen for the air leaking. Also at this time they should be confirming that they have the FF they were looking for (Face or helmet shield). Make sure the firefighter’s cylinder is open. Explain to the group that the RIT Pack cylinder is in the off position when it is being brought in to the downed firefighter. Attaching the RIT Pack to the downed firefighter:
1. First the situation and atmosphere must be taken into account before using, as the
downed firefighter may be temporarily exposed to a hazardous condition. If the area appears to be too hazardous to remove the firefighter’s regulator then move them or begin to attach the RIT Pack to the UAC.
2. Make sure the cylinder valve is open on the RIT Pack. 3. Minimize the time that the firefighter will be exposed to the atmosphere by
activating the low-pressure regulator so that it will operate normally (do not rely on the purge valve at this time as it can exceed 200 liters per minute which could reduce the time and air available in the RIT-Pak).
23
4. Once the RIT-Pak’s regulator is flowing remove the firefighter’s regulator if you have not already and quickly replace it with the RIT-Pak regulator. At this time an attempt can be made to remove any contaminates that entered the face piece by gently pulling out on the regulator, such that the face piece seal slightly breaks and allows the air to purge from the face piece.
5. If the firefighters face piece is damaged use the spare face piece in the RIT-Pak
bag, which should be attached to the regulator or supplied in one of the pouches. Before connecting it to the regulator make sure the regulator is operating (jumpstart the air flow), then connect it to the face piece. This also works when there is a non-compatible SCBA unit.
6. After the RIT Pack regulator is attached to the firefighter then use a
carabiner to attach the RIT Pack to the firefighter’s waist or shoulder strap. 7. The RIT-Pak regulator is not supplied with a Vibra-alert mechanism even though
it may say that it has one. With this in mind the RIT team must monitor the level of the RIT-Pak cylinder.
Important!
It’s important to note that the procedures used to jumpstart the low pressure regulator may cause it to malfunction. Each procedure should be done with this in mind. If the low pressure regulator is not an option then begin the following procedure:
Important!
At no time will Academy staff demonstrate an actual Trans fill. This procedure is to be used only if there is a compelling reason such as a downed firefighter.
8. Visually inspect the downed firefighter’s cylinder and cylinder valve for dents or
gouges in the metal or fiber wrapping. If damage is visible or evidence of exposure to high heat or flame, such as paint turned brown or black, decals charred or missing, gauge lens melted or elastomeric bumper distorted, the decision must be made whether the cylinder is suitable for recharging by this method. If there is any suspicion that the cylinder is not safe, find another method of supplying air to the respirator user.
9. Then visually inspect the hose and regulator assembly, plus the condition and attachment of the face piece.
10. Be certain that the cylinder, which you are charging is compatible with the
complete respirator, it is installed on (i.e. there must be a 2216 psig cylinder installed on a Model 2.2 respirator; there must be a 4500 psig cylinder installed on a Model 4.5 respirator, etc.). Verify this by comparing the label on the high-pressure reducer and the markings on the cylinder.
24
11. Never charge a cylinder to more than the rated pressure marked on the cylinder. 12. Verify that the cylinder valve on the user’s respirator is fully open by turning the
cylinder valve knob fully counterclockwise (approximately 2 ½ full turns). Note: Always start the trans fill procedures with the cylinder in the off position (due to the dangers, for training purposes we will not actually trans fill). 13. Remove the dust cap from the RIC UAC coupling on the respirator and from the
matching coupling on the RIC UAC filling hose assembly. Visually inspect both couplings for dirt or damage. Remove any dirt or contamination from the couplings.
• If the RIC UAC filling hose assembly coupling appears damaged, do not
attempt to connect the RIC UAC filling hose assembly to the respirator. Find an alternate RIC UAC filling hose assembly.
• If the RIC UAC coupling on the respirator appears damaged, do not
attempt to connect the RIC UAC filling hose assembly to the respirator. Find an alternate method of supplying air to the respirator user
14. Connect the RIC UAC filling hose assembly by pushing the quick disconnect
coupling on the RIC UAC filling hose assembly on to the coupling on the respirator until the quick disconnect sleeve “clicks” into place
15. Talk about how at this time you would slowly open the RIC UAC filling hose
assembly valve to pressurize the supply line and begin airflow to the cylinder.
NOTE
If at any time during the filling process a leak is detected, immediately discontinue the filling procedure and leave the IDLH atmosphere if possible. Continuing to fill a respirator that has exhibited a leak may cause a failure of the equipment, which may result in injury or death. If it is not possible and there are irregularities in the fill process it may result in a need to remove the respirator (low pressure regulator). If this is the case the hazardous or IDLH atmosphere must be taken into consideration, as the removal of the respirator may result in serious injury or death. 16. Continually monitor the filling process for any irregularities. The Scott RIT-
PAK air supply will stop flowing when the pressure in the respirator’s cylinder equals the remaining pressure in the portable air supply (pressures will balance). At this time disconnect the RIC UAC filling hose assembly.
17. To disconnect the RIC UAC filling hose assembly, pull the coupling sleeve away
from the respirator until the coupling disengages. Then reinstall the dust caps on both couplings.

25
18. Charging of the cylinder will increase the temperature of the air in the cylinder. When charging is complete and the cylinder cools to ambient temperature, the pressure in the cylinder will fall slightly. If practical in the situation, top off the cylinder.
19. After charging is complete, monitor the cylinder pressure on the downed
firefighter and repeat the above procedure as needed or until the firefighter is removed from the IDLH atmosphere.
NOTE
The RIC UAC manifold is fitted with a relief valve (some are pre-set and some are manually set) to vent air if the rated pressure of the respirator is exceeded. If this occurs, shut off the air from the RIC UAC filling hose assembly and disconnect the air supply. The relief valve will reset after excess pressure is released. The RIC UAC assembly is designed with integral protection devices. Do not disassemble or modify any part of this assembly.
Demonstrate the use of the RIT-Pak using the above information making sure that the warnings and cautions are conveyed. Then have the firefighters each try both applications. If time permits show the firefighters the Dual EBSS system.
1. Approved SCBA may be equipped with either a buddy-breathing device or a quick disconnect valve, even if the use of these devises are not certified by NIOSH.
2. Until and unless NIOSH approves an auxiliary device for buddy-breathing, the
practice of buddy-breathing is not endorsed in any way. 3. The main problem being is that both users will be breathing off the same bottle;
therefore cylinder duration is halved. 4. Further the practice of passing the SCBA face piece or regulator back and forth
between 2 users is considered unsafe. 5. Protocols should be designed by their own departments to handle such situations. 6. It is the Academy’s intent, by showing the use of this accessory, that we can
explain the hazard of buddy-breathing.

26
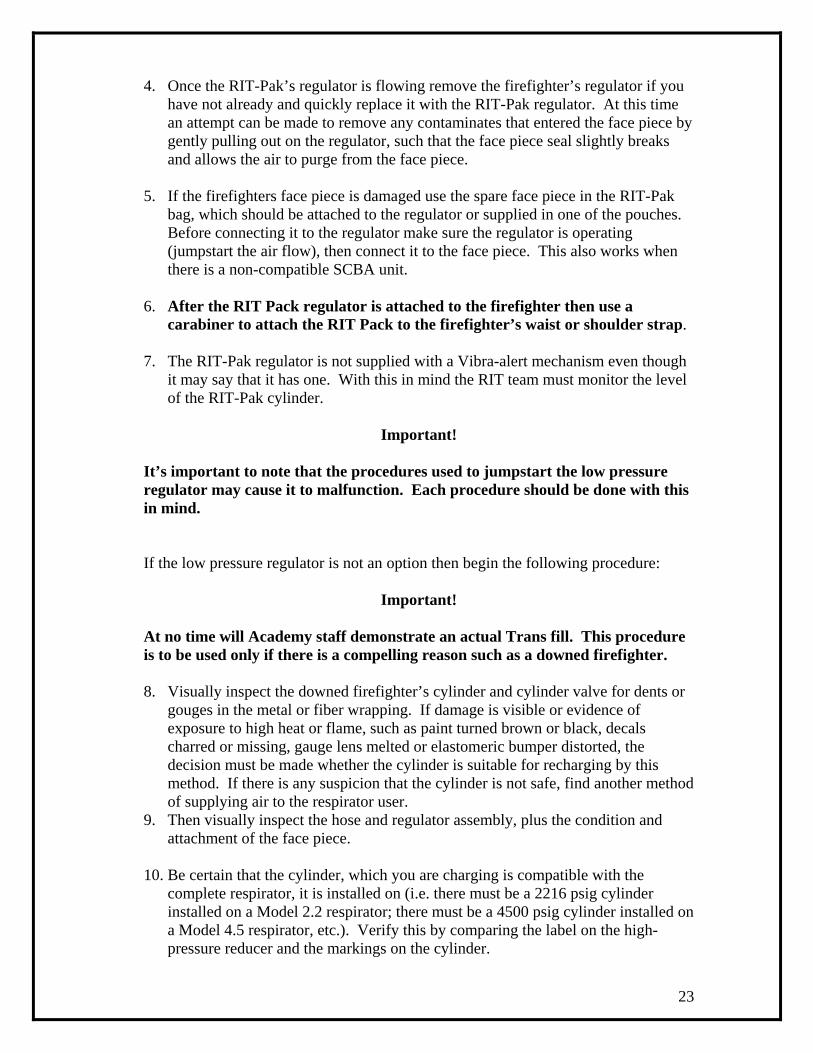
Harness Conversion Objective: Convert a firefighter’s SCBA to a harness to afford safe, strong and reliable grip points for rescuers to drag or hoist an injured firefighter. Teaching Point: If it is safe to do so convert the SCBA to a harness before dragging or carrying a victim. Begin by loosening the waist strap of the harness.
Do not disconnect the buckle at this time. (Note: for large firefighters you may have to release the shoulder straps before you complete the conversion) Next position the downed firefighter so you can place one leg over your shoulder.
. Reach around the Firefighter’s leg and grip the waist buckle Disconnect the buckle and bring it under his/her leg. Do not let go the buckle! Reconnect the buckle so that is between the legs.
27
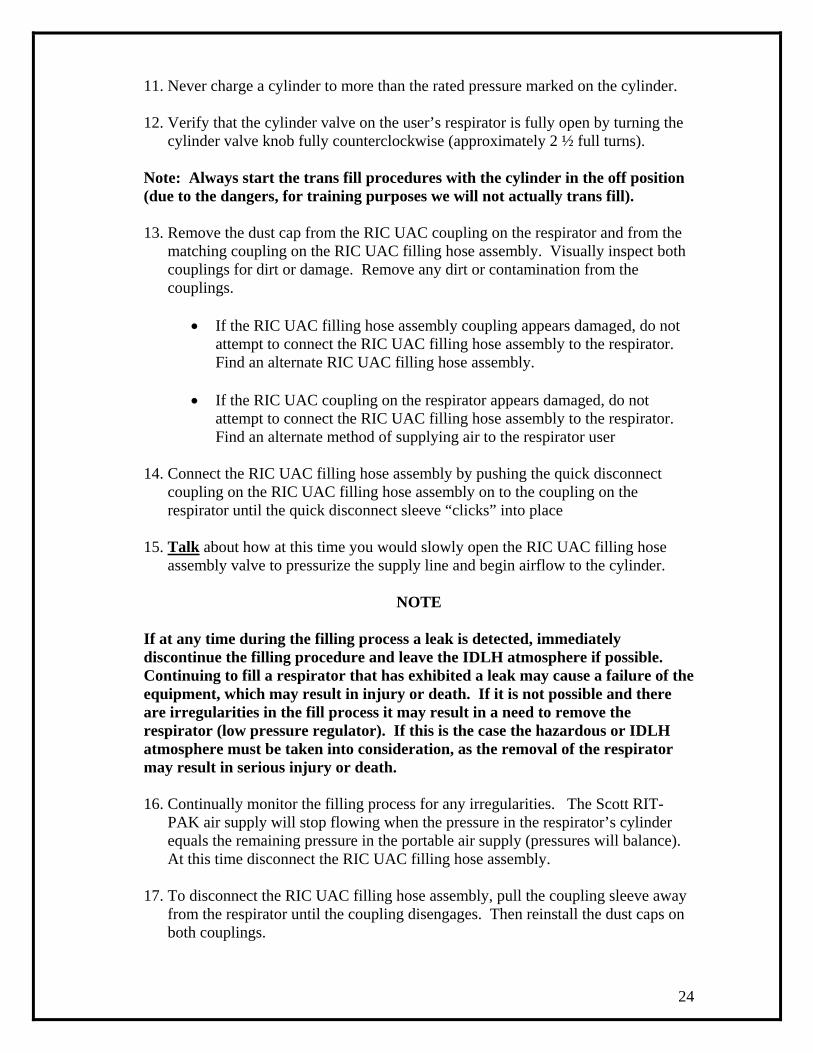
Tighten the waist strap. Tighten the shoulder strap and tie off if possible. Note: All new NFPA Compliant turnouts are equipped with a Drag Rescue Device (DRD). The DRD affords a convenient and efficient means of dragging a downed firefighter horizontally. It is our opinion that a RIT may encounter an assortment of obstacles in the removal of the firefighter. Therefore we advise that the harness conversion be a standard practice in the event that the horizontal rescue could result in a vertical lift/ lowering or encountering stairs. It is also a more secure method of going around corners and affords 2 grab points to allow 2 rescuers to drag or to lift from the shoulder straps of the converted SCBA.
28
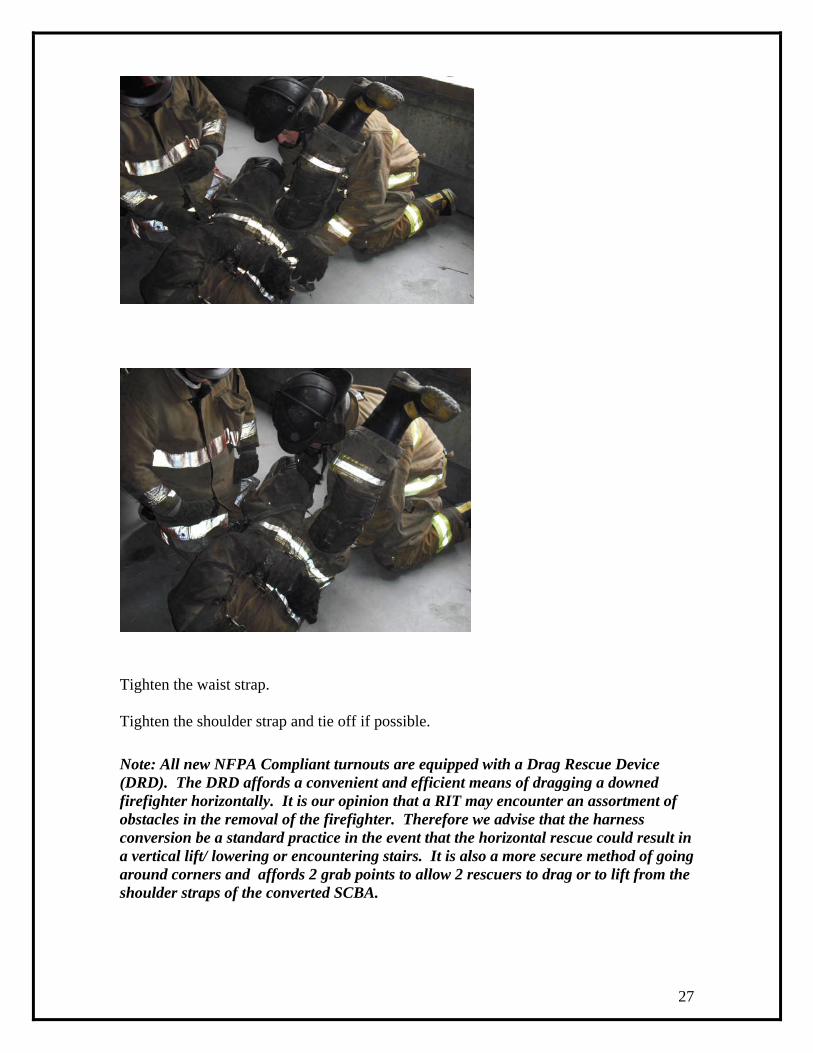
High Rung
Objective: To give hands on training in an alternate method of removing a firefighter or Lowering a heavier firefighter. This is a simple lowering device without the use of specialized equipment and can be quickly deployed. Stress the friction points of the rope rubbing on the rung and the 3 to 1 advantage system that will significantly reduce the weight factor of the firefighter being lowered.
Equipment: 1 24’ or 28’ ladder, 1 200’ rope bag, 2 carabiners, 1 rescue manikin, 1 SCBA. Set-up: Place ladder above window as required. Tensionless hitch over rung with a carabiner.
Place ladder 2-3 rungs above the top of the window.
59
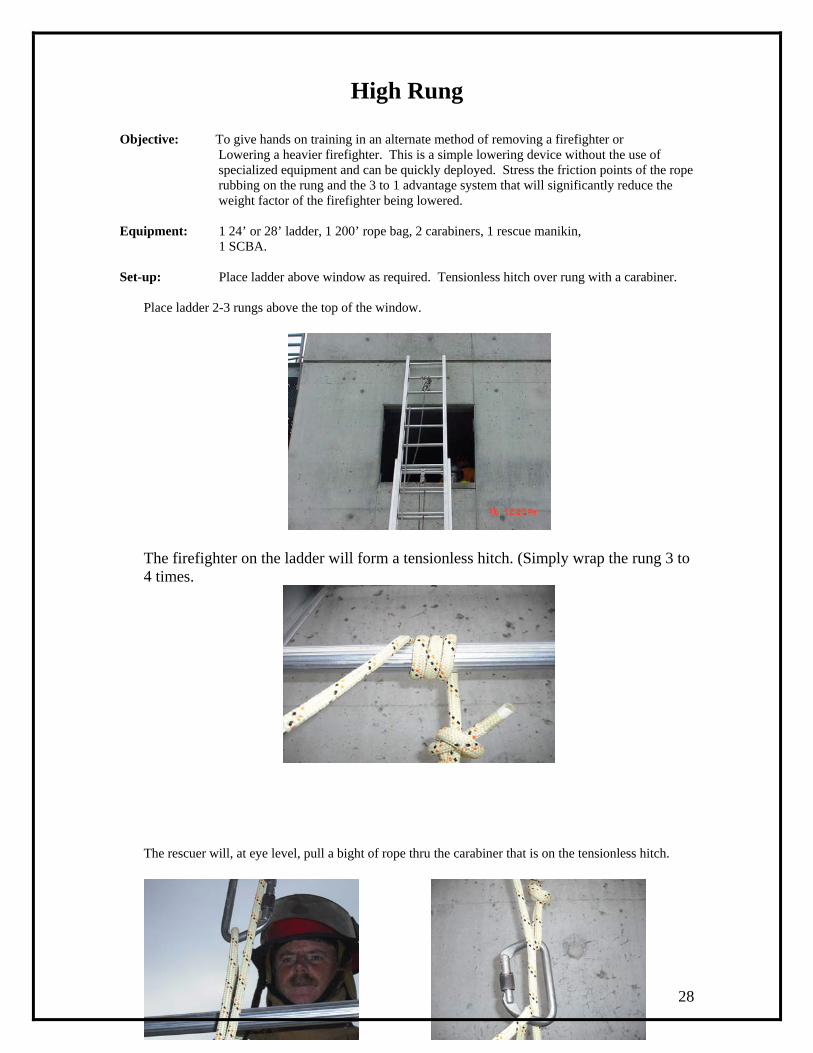
The firefighter on the ladder will form a tensionless hitch. (Simply wrap the rung 3 to 4 times.
The rescuer will, at eye level, pull a bight of rope thru the carabiner that is on the tensionless hitch.
29
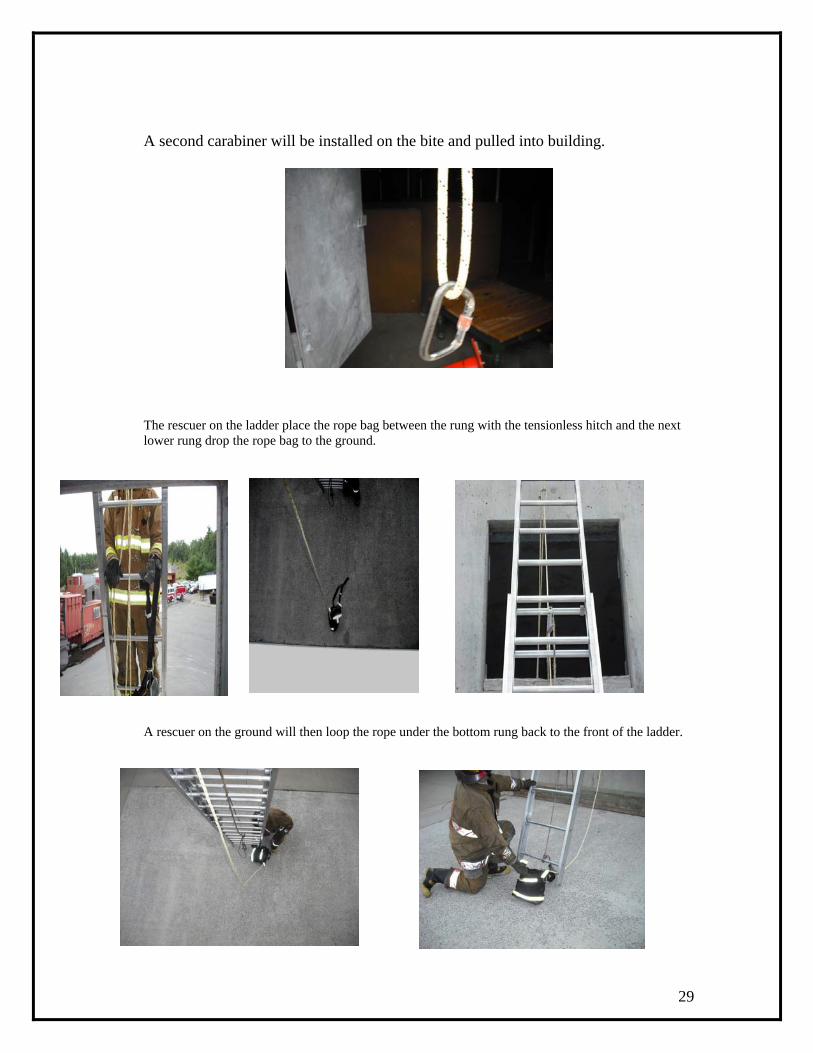
A second carabiner will be installed on the bite and pulled into building.
The rescuer on the ladder place the rope bag between the rung with the tensionless hitch and the next lower rung drop the rope bag to the ground.
A rescuer on the ground will then loop the rope under the bottom rung back to the front of the ladder.
30
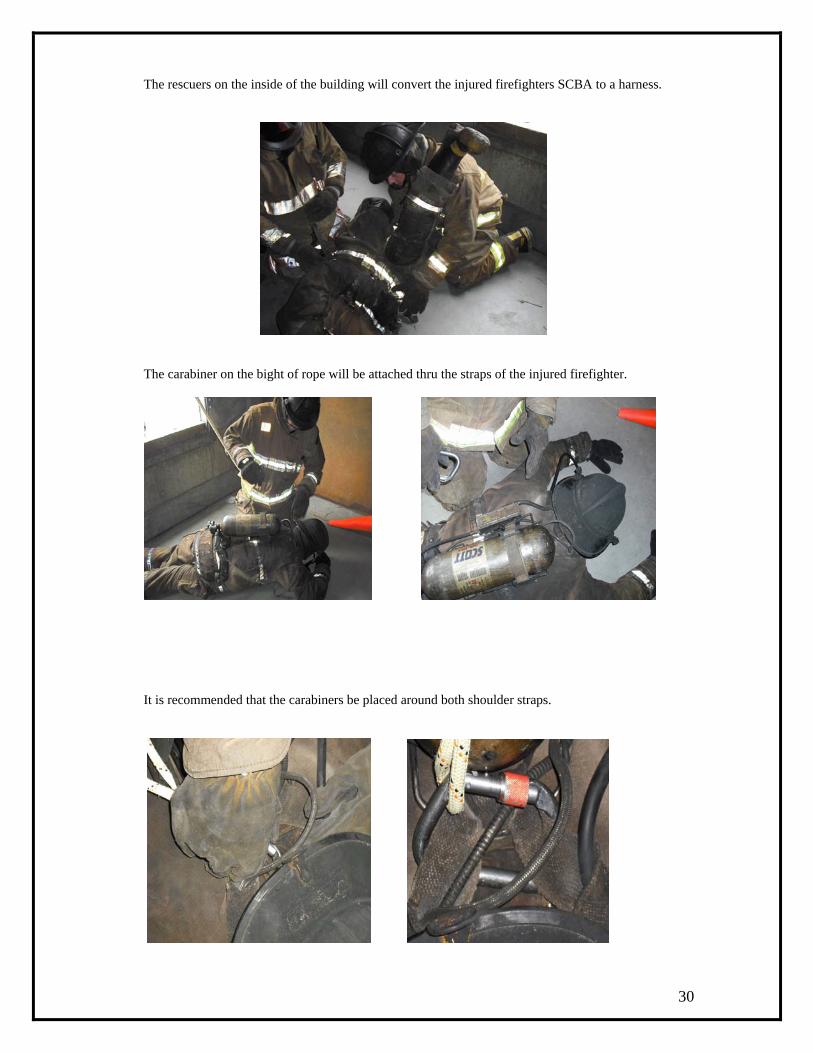
The rescuers on the inside of the building will convert the injured firefighters SCBA to a harness.
The carabiner on the bight of rope will be attached thru the straps of the injured firefighter.
It is recommended that the carabiners be placed around both shoulder straps.
31
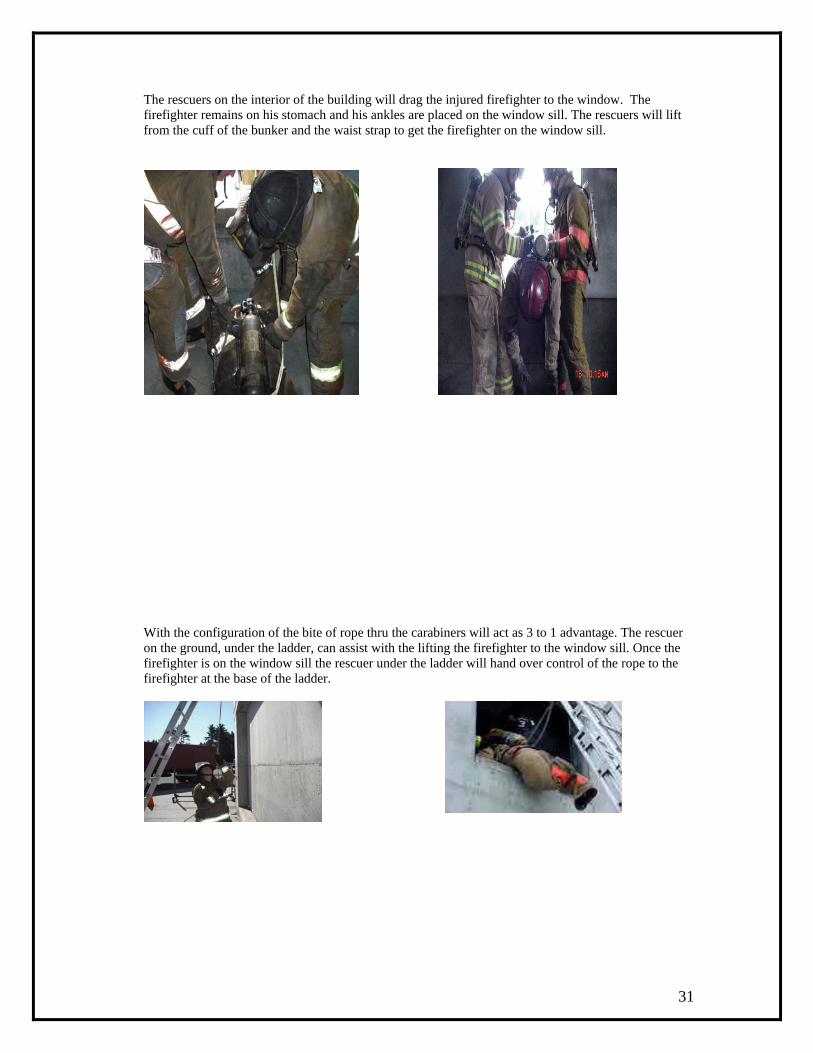
The rescuers on the interior of the building will drag the injured firefighter to the window. The firefighter remains on his stomach and his ankles are placed on the window sill. The rescuers will lift from the cuff of the bunker and the waist strap to get the firefighter on the window sill.
62 With the configuration of the bite of rope thru the carabiners will act as 3 to 1 advantage. The rescuer on the ground, under the ladder, can assist with the lifting the firefighter to the window sill. Once the firefighter is on the window sill the rescuer under the ladder will hand over control of the rope to the firefighter at the base of the ladder.

32
The rescuer under the ladder will the step back towards the ladder and another rescuer will the do the lowering. The friction on the lowest rung in conjunction with the 3 to 1 will make it very easy for one rescuer to lower the firefighter to the ground. The rescuer must foot the ladder for safety.

33
Weymouth Carry of Downed Firefighter Objective: To teach a skill too safely carry a firefighter down a ladder and how to balance the weight of a downed firefighter on the ladder for safe decent to the ground. Equipment: 1 28’ ladder 1 Rescue Manikin w/scba 2 Ladder Dogs Skill: Explain that placing a firefighter on the ladder face down allows the rescuer on the ladder the ability to press his body weight against the injured firefighter which in turn will become “sandwiched” between the rescuer and the ladder giving much better control during the operation. Teaching Points to Stress: In descending the ladder the rescuer must keep their hands in contact with
the beams of the ladder at all times.
Weymouth Carry rescuer uses the BEAMS, NOT THE RUNGS
The ladder will be thrown in the normal fashion for rescue, with a more gradual or shallow angle.
The two Rescuers in the building will lift the downed firefighter to the window sill so that his/her legs are facing out and the firefighter is face down resting them on their stomach with the SCBA facing up.
34
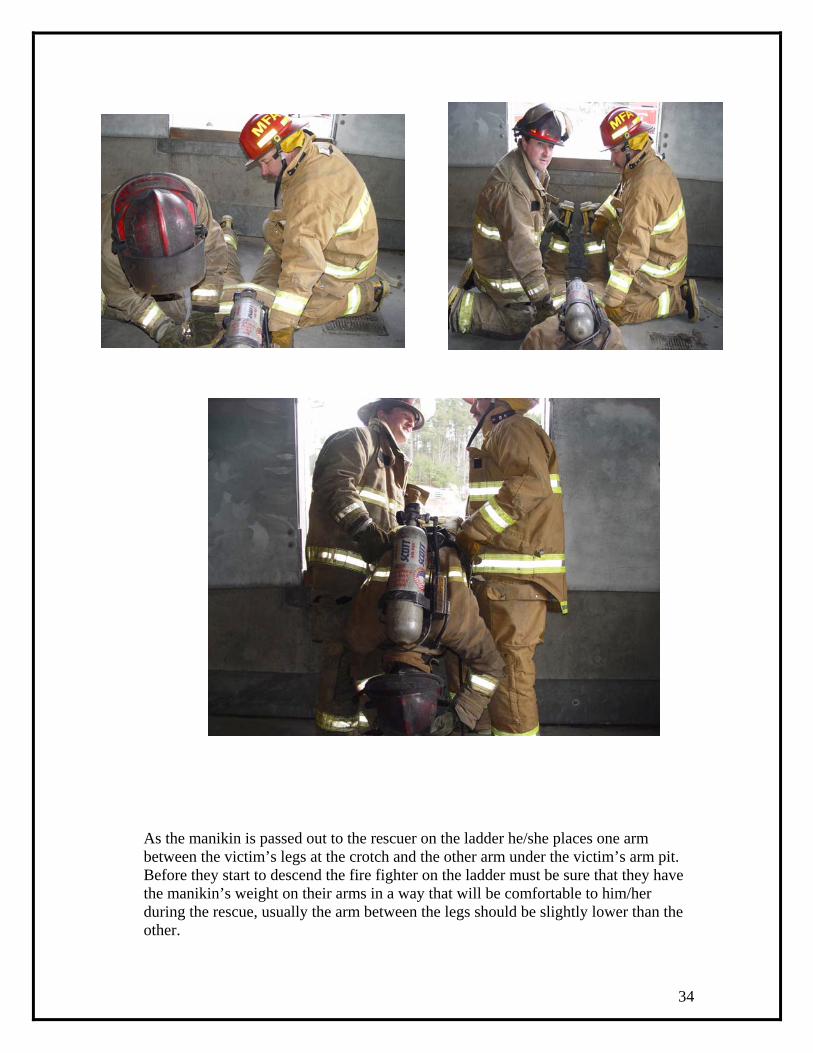
As the manikin is passed out to the rescuer on the ladder he/she places one arm between the victim’s legs at the crotch and the other arm under the victim’s arm pit. Before they start to descend the fire fighter on the ladder must be sure that they have the manikin’s weight on their arms in a way that will be comfortable to him/her during the rescue, usually the arm between the legs should be slightly lower than the other.
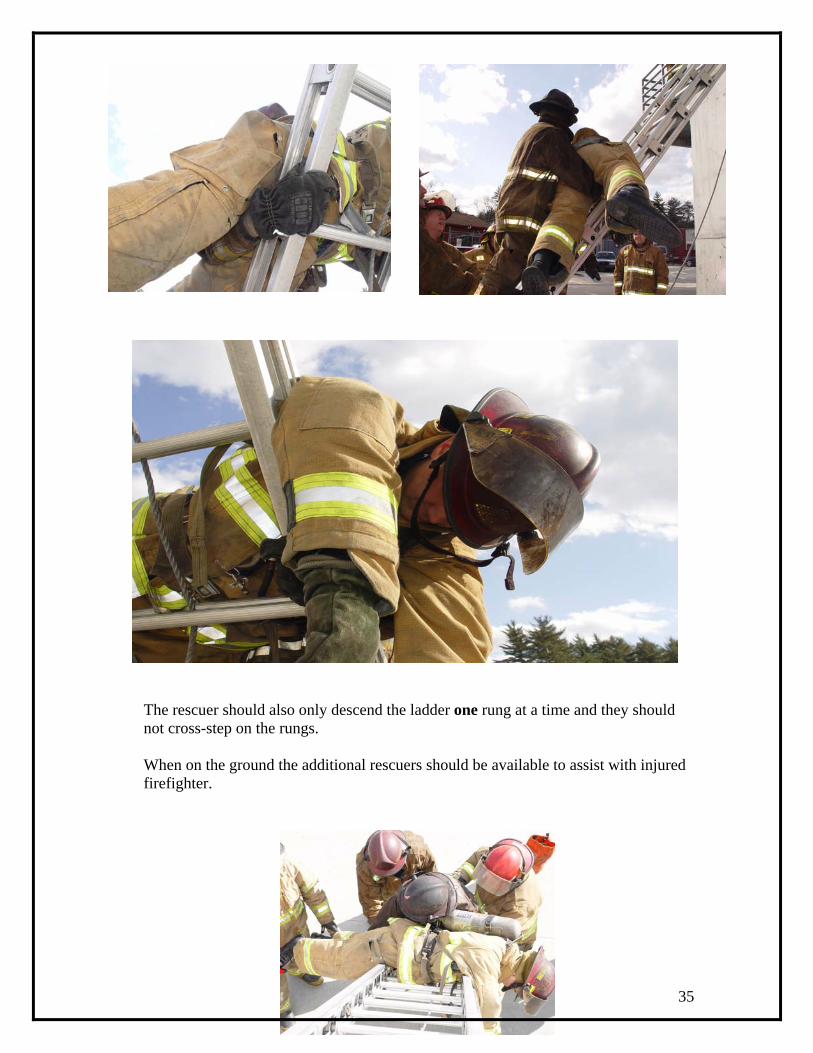
35
The rescuer should also only descend the ladder one rung at a time and they should not cross-step on the rungs. When on the ground the additional rescuers should be available to assist with injured firefighter.
36
After stepping on the ground the rescuer should roll the victim to him so that he will be cradled and easier to carry. The fire fighter performing the rescue should be in full turnout gear, as well as the victim. NOTES: Each student is to take part in this rescue operation and is to take turns in passing the manikin out the window and carrying the manikin. All rescuers must be in full turn-out gear. The ladder is raised in the regular manner and placed so that the top is just below the sill of the window for rescue. The top of the ladder should be dogged to the sill and a fire fighter should be placed at the base of the ladder to secure it during rescue.
The fire fighter, who is doing the carry, climbs the ladder to a position at the top, but below the window. They should have their hands on the beams of the ladder and even with the window. The downed firefighter is passed out the window by two fire fighters to the fire fighter on the ladder. The victim should be placed in the arms of the rescuer so that he will face the ladder. His head should be higher than his feet and the weight should be evenly distributed on the fire fighter who is to perform the rescue.
37
Window Lift Objective: To teach firefighters a method of lifting a downed firefighter from the floor up to the sill and out a window. The method taught will work for either a ladder carry or the high rung (point) anchor maneuver of lowering a firefighter from upper floors. Equipment: Either a window prop or a first floor window unless the method is going to be used to lower a firefighter (If a firefighter is to be lowered an approved belay system must be used for the downed firefighter or a manikin can be used). All firefighters participating in the drill must be in full PPE including SCBA. Skill:
• The downed firefighter may or may not have their SCBA converted into a harness (but if the firefighter is to be lowered using the high rung anchor this must be done before the window lift begins).
• Have a student positioned as a downed firefighter lying on his/her stomach with
their feet pointing towards the window (If the firefighter was dragged to this window then spin him/her while they are still on their back and then roll them to their stomach).
• With two firefighters positioned on the right and left side of the downed
firefighter have them grab the pant cuff and the SCBA waist strap. • From this position use the “Ready – Ready – Go” and slide the downed firefighter
to the window resting his/her feet on the sill of the window and the shins against the wall.
• While still in the same grasp use the “Ready – Ready – Go” signal and lift the
firefighter’s legs and waist up on to the sill of the window. • Once you have brought the firefighter to a resting position on the sill, re-position
your hands. Bring the hand that was holding the cuffs of the turnout pants up to replace the hand on the waist strap. Then move the other hand up to the collar of the turnout coat or shoulder strap.
• Before continuing make sure the firefighter on the ladder or the firefighters
manning the lowering device are ready to receive. • If everyone is ready continue to move the firefighter, using the “Ready – Ready –
Go” method, out the window keeping in contact with the firefighter on the ladder while positioning the firefighter to be lowered.
38
Ladder Assisted window lift Objective: Demonstrate an alternate method of lifting a firefighter up to what may be a higher window similar to a situation found in a basement. Equipment: A pencil ladder or roof (straight wall ladder) and a firefighter manikin with SCBA. Skill: While still at the window prop:
• The ladder is sent in through the window to the firefighters. • Place one end of the ladder on the sill. • Position the firefighter manikin on the ladder with its head pointing towards
the window.
• Position the removed SCBA forward of the firefighter (the SCBA is removed
to reduce the profile of the firefighter if needed, and it should be positioned with the valve stem pointing towards the window similar to the reduced profile maneuver).
• Demonstrate the lift and removal of the firefighter
o With a minimum of two firefighters on either side of the ladder, lift the ladder so that it is even with the sill
o Start pushing the ladder through the window, as the firefighters pull from outside.
• The ladder can be sent back in for the rescuing firefighters if other exits are
unsuitable.
39
Carries Up Stairs Objective: To teach a method of carrying a firefighter up a set of stairs and demonstrate some options if space or equipment is available. Equipment: Webbing, Axe, and a SCBA Skill: First begin by explaining why the following maneuvers are being used.
• Turn a firefighter around and show the group the rear of the SCBA • Point-out the valve stem and/or the UAC and explain how they catch on the stairs,
especially if the stair has a bull-nosed tread • If there is a staircase available point-out a bull-nosed tread.
Then demonstrate the skill using members from the group
• With the SCBA harness already converted drag the downed firefighter to the
bottom of the stairs. • If working in a narrow stairway with 2 rescuers the victim shall be placed sitting
up at the base of the stairs with legs facing away. • The top rescuer shall grip the shoulder straps and stand one to two stairs above;
the second rescuer shall grab the victim’s legs at the calf or behind the knee like a wheelbarrow. The top Rescuer controls the lift. (Ready, ready, go).
• After the team has moved the downed firefighter up approximately 3 stairs the bottom team member kneels down and places the victim’s legs over his/her shoulder, and grab the waist strap or coat pockets of the downed firefighter (have them reach under the firefighter cradling their arms, and then stand).
• From this position the team can decide to either lift the firefighter one step at a time or lift the firefighter up and walk up the stairs.
Have each group member rotate through each position. Demonstrate: More options
• If the stairs are wide enough two Rescuers maybe used at the top position either with:
o A tool which can be inserted thru the top straps as a handle, making sure that the team members keep their hands close to the shoulder straps.
o Webbing attached with a girth hitch and each member in the top position
handles one end of the webbing. o Explain that for balance the members can use the railings if they are
available. o Both methods work best with a third member managing the legs as in the
other carries.
o Two rescuers may be used on the legs also by attaching webbing with a girth hitch in the knee area and giving one end to each firefighter.
40
Carries Down Stairs Objective: Demonstrate methods how a downed firefighter should be carried or dragged down stairs. Equipment: Firefighters in full PPE with SCBA
Skill: Place the firefighter at the top of the stairs on their back and their head pointing down. • Reach under the downed firefighters head with your right hand and grasp his/her
left shoulder strap. • Pull the firefighter to the edge of the stairs.
• At the edge reach under the head with your left hand and grasp the right shoulder
strap.
• The firefighters head should be cradled in your arms.
• Pull the fire fighter down the stairs protecting his/her head.
• Emphasize that the rescuer should keep one foot forward so the weight of the firefighter and gravity does not over take him/her.
• If the stairs are wide enough demonstrate this maneuver with two fire fighters.

41
Entanglement Prop Objective: To place firefighters in a situation simulating a failed ceiling system with wires dropping to the floor. Firefighters should learn that they are in a Mayday situation and some skills to begin untangling themselves from the wires. Equipment: Entanglement prop, full PPE, and smoke trainer face shields. Skill:
• Have the firefighter enter the prop staying to the right wall (hinges will be on the left), and once they have fully entered the prop the instructor will begin to slowly close the prop.
• If the firefighter does not call a Mayday prompt them to do so. • The firefighter should then be instructed to lower themselves to their belly and
turn slightly on to their right (do not allow them to roll their cylinder up against the side wall).
• Their left hand should be brought to their face piece and then slowly moved down their turnout coat, not allowing any wires under the gloved hand. It should be emphasized that it is best to go slow here as it will be hard to feel the wires.
o Note: some will try to remove their glove or say they would, but if it was hot enough to have the ceiling fail, this would not be feasible.
• Their hand should travel on top of the turnout until it comes to the SCBA’s cylinder valve. At this time the firefighter should make sure that no wires have wrapped around the valve, and if there are clear them.
• After they have made sure that all the wires are clear from the valve the firefighter should continue to roll on to their right placing the cylinder in the corner of the wall and floor.
• The left hand should then continue to the wall and move up towards the helmet, again making sure that wires do not get in-between their glove and the wall.
• Once their hand is over the helmet it should paddle forward like a swimming breast stroke clearing wires. At this time the firefighter should use their legs to move them forward through the area they have just cleared.
• As the hand is paddled forward it should stop when it is level with the regulator, and it should bend bringing the hand back to the regulator, after they have moved forward.
• The firefighter should then again move the left hand down the turnout coat staying under all the wires. This time though the hand can move right to the wall and slide forward. Once the hand is over the helmet again paddle it forward, and push with your legs (It should be pointed out that if they feel a doorway in their travels that they should attempt to make entry as this may be a safe haven).
• Each time we have done this it has presented us with different results. Some firefighters pass right through, and some are tangled up further then when the prop first closed on them. It is the instructors that typically get these firefighters out by either slowing them down, sometimes calming them down, or by giving
42
them instruction as to how to get themselves out. The lessons here are many as it shows the firefighters:
o Within the prop and watching how difficult it is and how long it may take (many times consuming a full cylinder)
o It emphasizes the need to call a Mayday immediately o It brings up conversation as to what we should be carrying in our pockets
(wire cutters) o It shows an example of what we may be up against during a RIT response o It explains why the P in LIPS is important as it may require the response
team bring in different tools
43
5/23/12 Entanglement Prop
Turtle Method
MODULE 5a Objective: To place firefighters in a situation simulating a failed ceiling system with wires dropping to the floor. The method will simulate the Firefighter advancing a line, where normally he/she would be away from the wall. Firefighters should learn that they are in a Mayday situation and some skills to begin untangling themselves from the wires. Equipment: Entanglement prop, 50’ of 1 ¾” hose with air chuck system, nozzle, full PPE, and smoke trainer face shields. Set-up: Lay 50’ of 1 ¾” hose thru entanglement prop. Have the firefighter enter as if he/she is going to the nozzle. Skill:
• Have the firefighter enter the prop along a 1 ¾” line in the center of the prop. • The instructor will slowly lower the hinged prop onto the firefighter. • If the firefighter does not call a Mayday prompt them to do so. • The firefighter should then be instructed to lower themselves to their belly. • They should then prepare themselves as they would for a low profile maneuver.
1. Loosen waist strap and do not disconnect the buckle. 2. Loosen both shoulder straps. Remove right are from right strap. 3. Grasp the left strap with the right hand at the low-pressure air hose, and slide the
left arm out of the left strap. Pulling the air pack underneath them. 4. The firefighter will be lying with his/her belly on the base plate and the air bottle
will be on the ground, they will be balancing on top of the bottle. Emphasize always have control of the shoulder straps by donning the pack backwards. This keeps the firefighter oriented and does not allow them to lose control of the pack.
5. The fire fighter will rotate 180 degrees if needed. This will allow the firefighter to retreat down the hose line towards the pump.
6. The firefighter should start moving forward and clearing wires only that stop their progression.
7. Once the firefighter is clear of the obstruction the SCBA is donned using the coat method.

44
DAY TWO
45
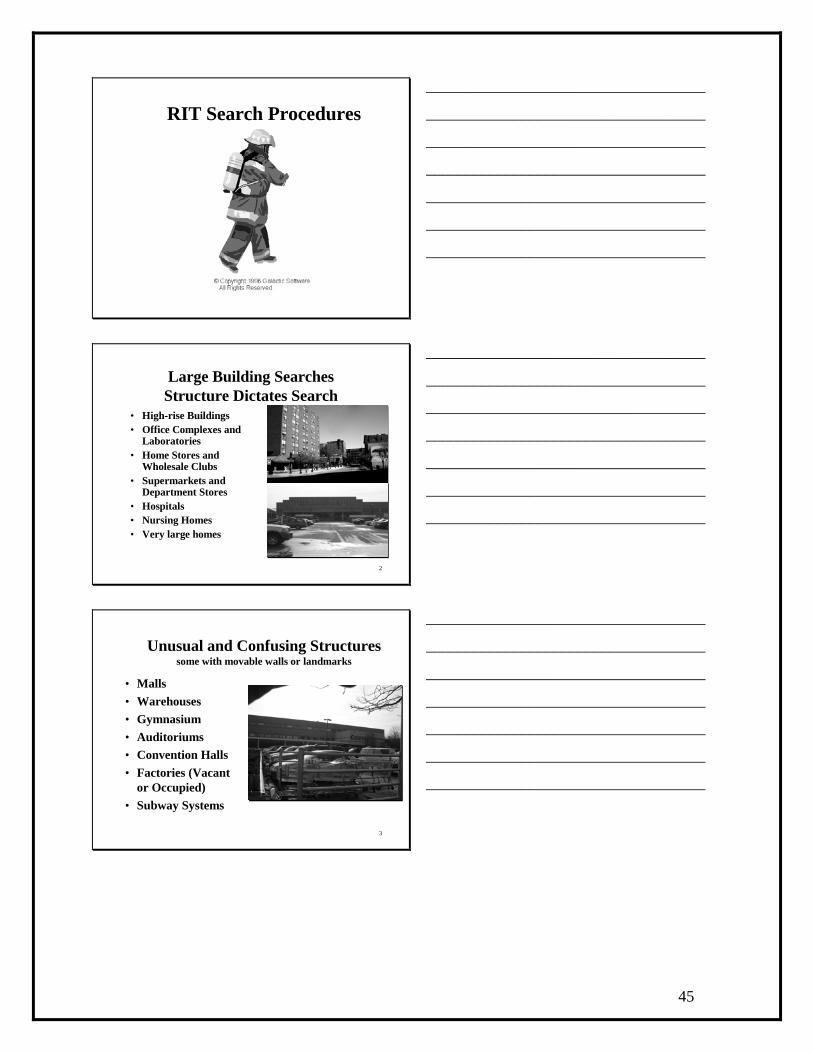
RIT Search Procedures___________________________________
___________________________________
___________________________________
___________________________________
___________________________________
___________________________________
___________________________________
Large Building SearchesStructure Dictates Search
• High-rise Buildings• Office Complexes and
Laboratories • Home Stores and
Wholesale Clubs • Supermarkets and
Department Stores• Hospitals• Nursing Homes• Very large homes
2
___________________________________
___________________________________
___________________________________
___________________________________
___________________________________
___________________________________
___________________________________
Unusual and Confusing Structuressome with movable walls or landmarks
• Malls• Warehouses• Gymnasium• Auditoriums• Convention Halls• Factories (Vacant
or Occupied)• Subway Systems
3
___________________________________
___________________________________
___________________________________
___________________________________
___________________________________
___________________________________
___________________________________

46
Tethered Searches
• Use for all RIT operations
• Designed to maintain accountability
• Maintains a direct exit route
• Provides a pipeline for needed equipment or help
• Can be adapted to almost any structure
4
___________________________________
___________________________________
___________________________________
___________________________________
___________________________________
___________________________________
___________________________________
Preparing for a Search• Train for different situations and adapt
basic patterns to the building involved• Designate a leader• Each member must know what is
expected 1. During search2. When they reach the firefighter or victim
• Be ready to enter - SCBAon and full, and all tools neededat the front door* or in staging
5
© Copyright 1996 Galactic Software. All Rights Reserved.
___________________________________
___________________________________
___________________________________
___________________________________
___________________________________
___________________________________
___________________________________
RIT Equipment
6
• SCBA (1 hour)• 200’ Kevlar search line• RIT pack• Forcible entry tools• Portable radio• Flashlights• Thermal Imager• Stokes basket
Consider - wire cutters, door wedges, tubular webbing, etc.
___________________________________
___________________________________
___________________________________
___________________________________
___________________________________
___________________________________
___________________________________
47
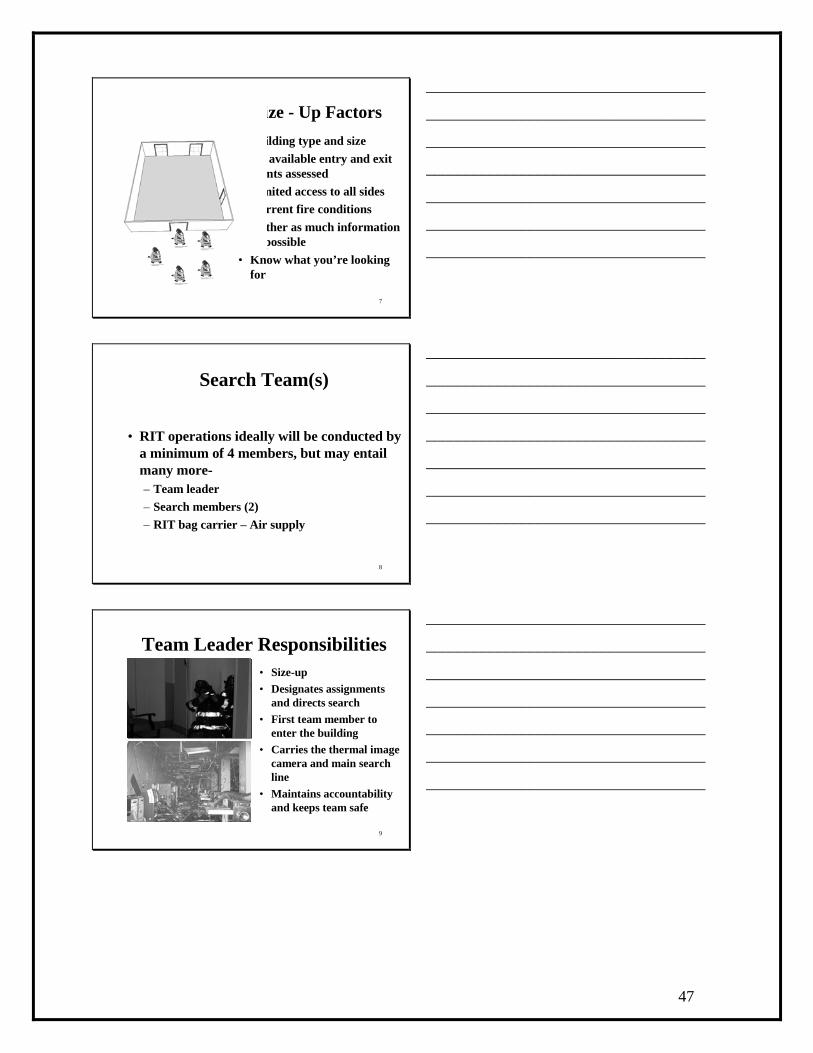
Preliminary Size - Up Factors• Building type and size• All available entry and exit
points assessed• Limited access to all sides• Current fire conditions• Gather as much information
as possible• Know what you’re looking
for
7
___________________________________
___________________________________
___________________________________
___________________________________
___________________________________
___________________________________
___________________________________
Search Team(s)
• RIT operations ideally will be conducted by a minimum of 4 members, but may entail many more-– Team leader– Search members (2)– RIT bag carrier – Air supply
8
___________________________________
___________________________________
___________________________________
___________________________________
___________________________________
___________________________________
___________________________________
Team Leader Responsibilities• Size-up • Designates assignments
and directs search• First team member to
enter the building• Carries the thermal image
camera and main search line
• Maintains accountability and keeps team safe
9
___________________________________
___________________________________
___________________________________
___________________________________
___________________________________
___________________________________
___________________________________
48
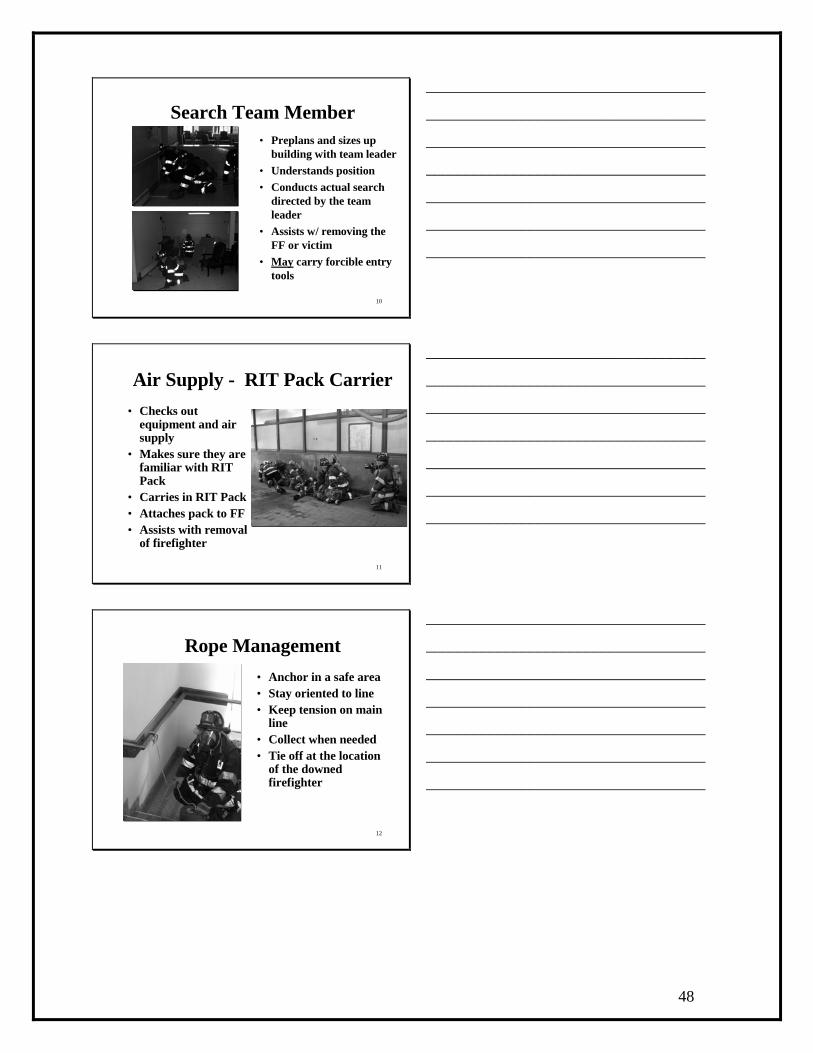
Search Team Member• Preplans and sizes up
building with team leader• Understands position • Conducts actual search
directed by the team leader
• Assists w/ removing the FF or victim
• May carry forcible entry tools
10
___________________________________
___________________________________
___________________________________
___________________________________
___________________________________
___________________________________
___________________________________
Air Supply - RIT Pack Carrier• Checks out
equipment and air supply
• Makes sure they are familiar with RIT Pack
• Carries in RIT Pack• Attaches pack to FF• Assists with removal
of firefighter
11
___________________________________
___________________________________
___________________________________
___________________________________
___________________________________
___________________________________
___________________________________
Rope Management• Anchor in a safe area• Stay oriented to line• Keep tension on main
line• Collect when needed• Tie off at the location
of the downed firefighter
12
___________________________________
___________________________________
___________________________________
___________________________________
___________________________________
___________________________________
___________________________________
49
Controlling a RIT• Assign positions before you enter• Use clear and concise orders• Stage companies to keep tight areas clear• Take charge of your team and the back-up
team working for you• Work within your limitations and air
supply* Have team members declare air
supply changes13
___________________________________
___________________________________
___________________________________
___________________________________
___________________________________
___________________________________
___________________________________
HUD – Air Consumption
14
___________________________________
___________________________________
___________________________________
___________________________________
___________________________________
___________________________________
___________________________________
RIT Sector Officer
Briefs Team on:• Conditions• Who they are looking for and their last known
locationRecords:• RIT Team members names or assignments• Location(s)• Time of entry
15
___________________________________
___________________________________
___________________________________
___________________________________
___________________________________
___________________________________
___________________________________
50
RIT Sector OfficerControls:• Entry time and continues to check with entry
team as per their air supply • Communication with search teamRequests from Command:• Back-up team• Additional RIT companies• Additional assistance (engine company,
EMS…)
16
___________________________________
___________________________________
___________________________________
___________________________________
___________________________________
___________________________________
___________________________________
Communications• When the incident requires, assign an
additional Fireground Channel– Down Firefighter, RIT Sector Officer, and
Rapid Intervention Team should remain on original Fireground Channel
– Other members on the fireground switch to another Fireground Channel
• Buffalo 2009 Audio
17
___________________________________
___________________________________
___________________________________
___________________________________
___________________________________
___________________________________
___________________________________
18
RIT Operations
Apartment, Dormitories, Hospitals, Hotels….
RITBag
___________________________________
___________________________________
___________________________________
___________________________________
___________________________________
___________________________________
___________________________________
51
19
Apartment Buildings___________________________________
___________________________________
___________________________________
___________________________________
___________________________________
___________________________________
___________________________________
Apartment Buildings
20
___________________________________
___________________________________
___________________________________
___________________________________
___________________________________
___________________________________
___________________________________
Apartment Buildings
21
L ivin g R oomB edr oo m
B edr oo m
B a th
K itc henD in in g
H a llw a y
B edr oo m
B edr oo m
B a th
L iving R o om
D in in g K itc hen
A n ch or
R I TB a g
___________________________________
___________________________________
___________________________________
___________________________________
___________________________________
___________________________________
___________________________________
52
Universities, Office Complexes, Laboratories…
22
A d j o i n i n g A r e a s
C u b i c l e s
F u r n i t u r e
T a b l e s
D e s k
R I TB a g
H a l l w a y
___________________________________
___________________________________
___________________________________
___________________________________
___________________________________
___________________________________
___________________________________
Home Stores, Supermarkets, Warehouses…..
23
___________________________________
___________________________________
___________________________________
___________________________________
___________________________________
___________________________________
___________________________________
Home Stores, Supermarkets, Warehouses…
24
___________________________________
___________________________________
___________________________________
___________________________________
___________________________________
___________________________________
___________________________________
53
Buildings with Multiple Halls
25
RITBag
RITBag
___________________________________
___________________________________
___________________________________
___________________________________
___________________________________
___________________________________
___________________________________
Gymnasium, Warehouse, Factory..
26
___________________________________
___________________________________
___________________________________
___________________________________
___________________________________
___________________________________
___________________________________
Search Line Use
27
___________________________________
___________________________________
___________________________________
___________________________________
___________________________________
___________________________________
___________________________________

54
Finding the Firefighter• Work as a team
1. One member should – Reset PASS– Assess the FF’s air supply– Confirm that it’s the FF they were sent for– Convert the harness for dragging
2. Team leader should give a report to Command and request the assistance needed
3. One member should attach the RIT Pack4. Stay with your assigned job if possible
28
___________________________________
___________________________________
___________________________________
___________________________________
___________________________________
___________________________________
___________________________________
Backing Up a RIT Team
• Be ready to enter• Know exactly what
is needed before entering
• Ensure that you follow correct line– Lines should be
marked or added to initial lines
29
___________________________________
___________________________________
___________________________________
___________________________________
___________________________________
___________________________________
___________________________________
Backing Up a RIT Team
• Orient the team to the structure
• Remain in control of the RIT pack
• Have original team exit before you!
30
___________________________________
___________________________________
___________________________________
___________________________________
___________________________________
___________________________________
___________________________________
55
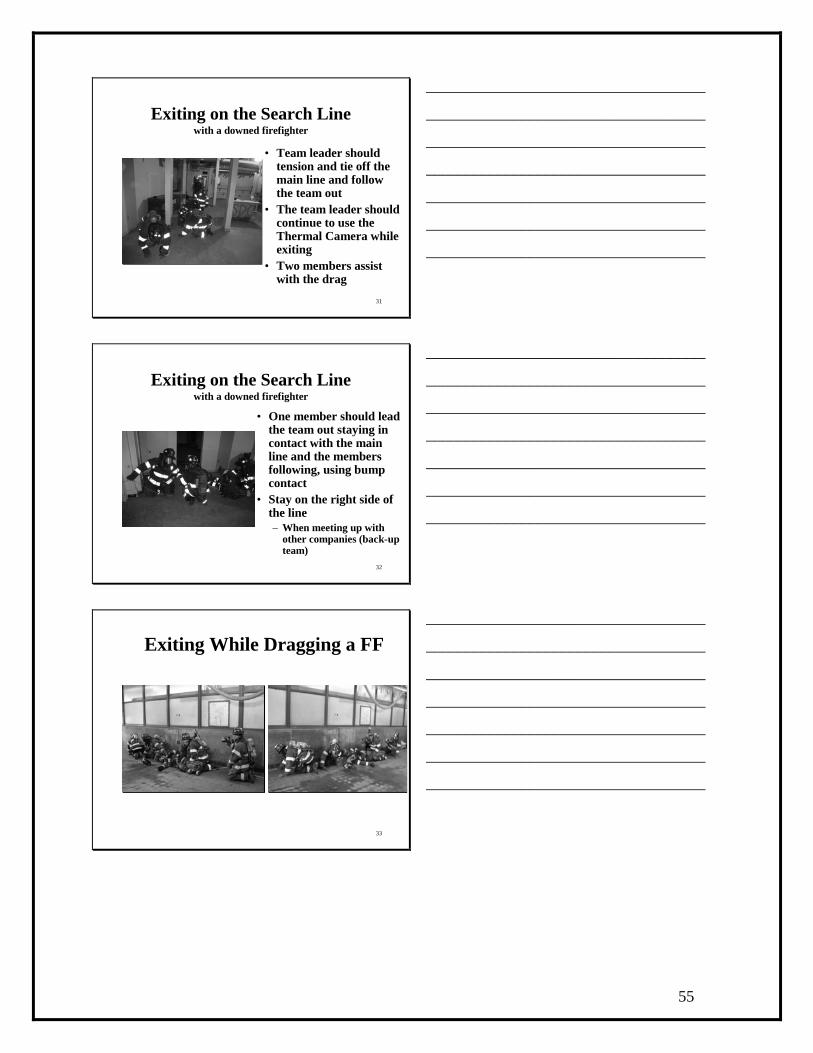
Exiting on the Search Linewith a downed firefighter
• Team leader should tension and tie off the main line and follow the team out
• The team leader should continue to use the Thermal Camera while exiting
• Two members assist with the drag
31
___________________________________
___________________________________
___________________________________
___________________________________
___________________________________
___________________________________
___________________________________
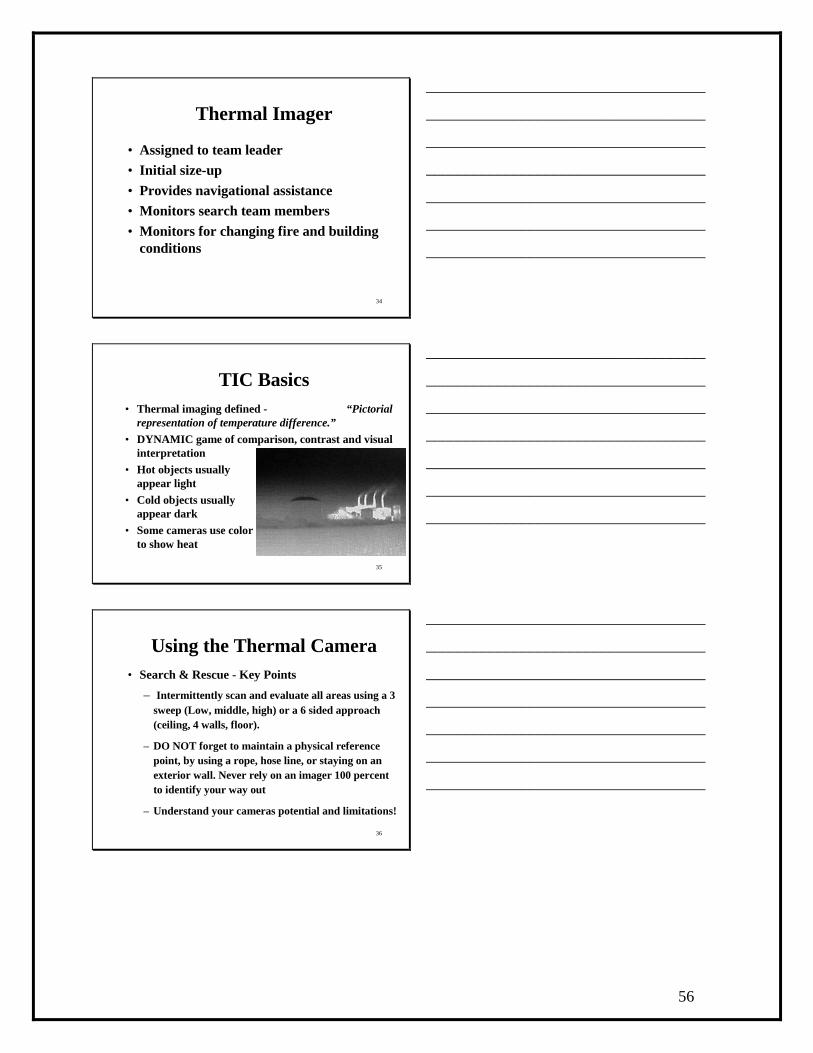
Exiting on the Search Linewith a downed firefighter
• One member should lead the team out staying in contact with the main line and the members following, using bump contact
• Stay on the right side of the line– When meeting up with
other companies (back-up team)
32
___________________________________
___________________________________
___________________________________
___________________________________
___________________________________
___________________________________
___________________________________
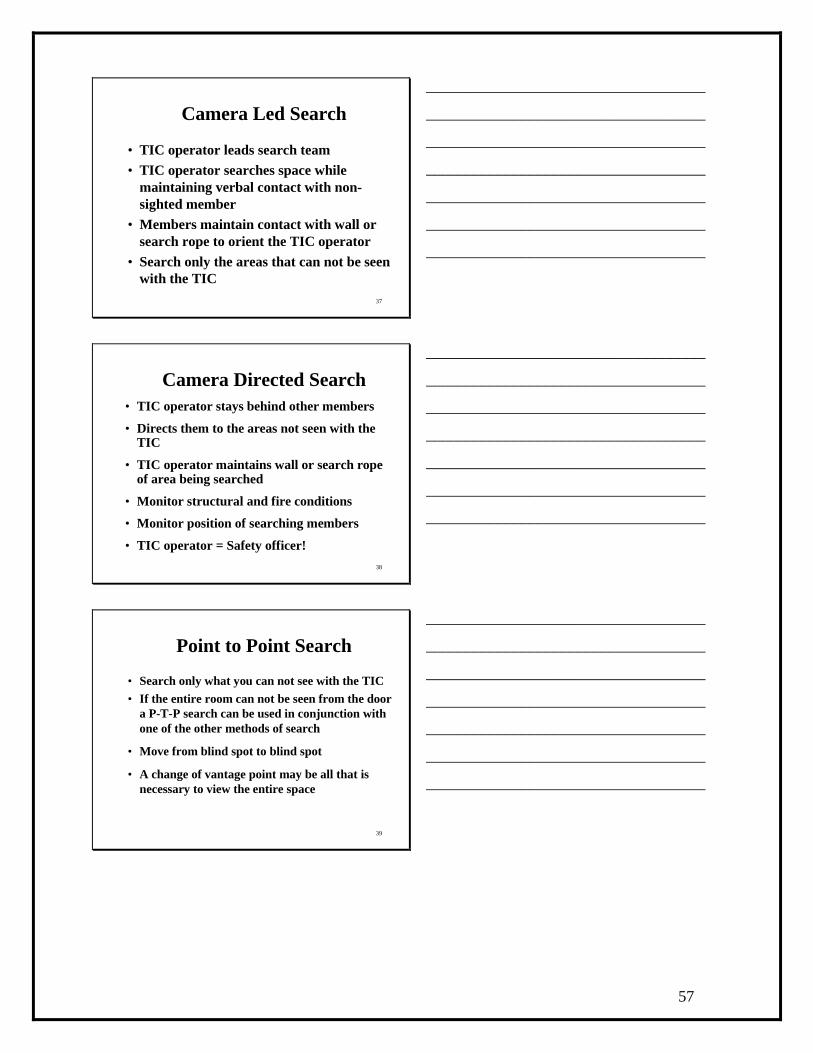
Exiting While Dragging a FF
33
___________________________________
___________________________________
___________________________________
___________________________________
___________________________________
___________________________________
___________________________________
56
Thermal Imager
• Assigned to team leader• Initial size-up• Provides navigational assistance• Monitors search team members• Monitors for changing fire and building
conditions
34
___________________________________
___________________________________
___________________________________
___________________________________
___________________________________
___________________________________
___________________________________
TIC Basics• Thermal imaging defined - “Pictorial
representation of temperature difference.”• DYNAMIC game of comparison, contrast and visual
interpretation• Hot objects usually
appear light • Cold objects usually
appear dark• Some cameras use color
to show heat
35
___________________________________
___________________________________
___________________________________
___________________________________
___________________________________
___________________________________
___________________________________
Using the Thermal Camera• Search & Rescue - Key Points
– Intermittently scan and evaluate all areas using a 3 sweep (Low, middle, high) or a 6 sided approach (ceiling, 4 walls, floor).
– DO NOT forget to maintain a physical reference point, by using a rope, hose line, or staying on an exterior wall. Never rely on an imager 100 percent to identify your way out
– Understand your cameras potential and limitations!
36
___________________________________
___________________________________
___________________________________
___________________________________
___________________________________
___________________________________
___________________________________
57
Camera Led Search
• TIC operator leads search team• TIC operator searches space while
maintaining verbal contact with non-sighted member
• Members maintain contact with wall or search rope to orient the TIC operator
• Search only the areas that can not be seen with the TIC
37
___________________________________
___________________________________
___________________________________
___________________________________
___________________________________
___________________________________
___________________________________
Camera Directed Search• TIC operator stays behind other members
• Directs them to the areas not seen with the TIC
• TIC operator maintains wall or search rope of area being searched
• Monitor structural and fire conditions
• Monitor position of searching members
• TIC operator = Safety officer!38
___________________________________
___________________________________
___________________________________
___________________________________
___________________________________
___________________________________
___________________________________
Point to Point Search
• Search only what you can not see with the TIC• If the entire room can not be seen from the door
a P-T-P search can be used in conjunction with one of the other methods of search
• Move from blind spot to blind spot
• A change of vantage point may be all that is necessary to view the entire space
39
___________________________________
___________________________________
___________________________________
___________________________________
___________________________________
___________________________________
___________________________________
58
Looking for Shapes
40
___________________________________
___________________________________
___________________________________
___________________________________
___________________________________
___________________________________
___________________________________
Looking for Shapes
41
___________________________________
___________________________________
___________________________________
___________________________________
___________________________________
___________________________________
___________________________________
Thermal Image
42
___________________________________
___________________________________
___________________________________
___________________________________
___________________________________
___________________________________
___________________________________
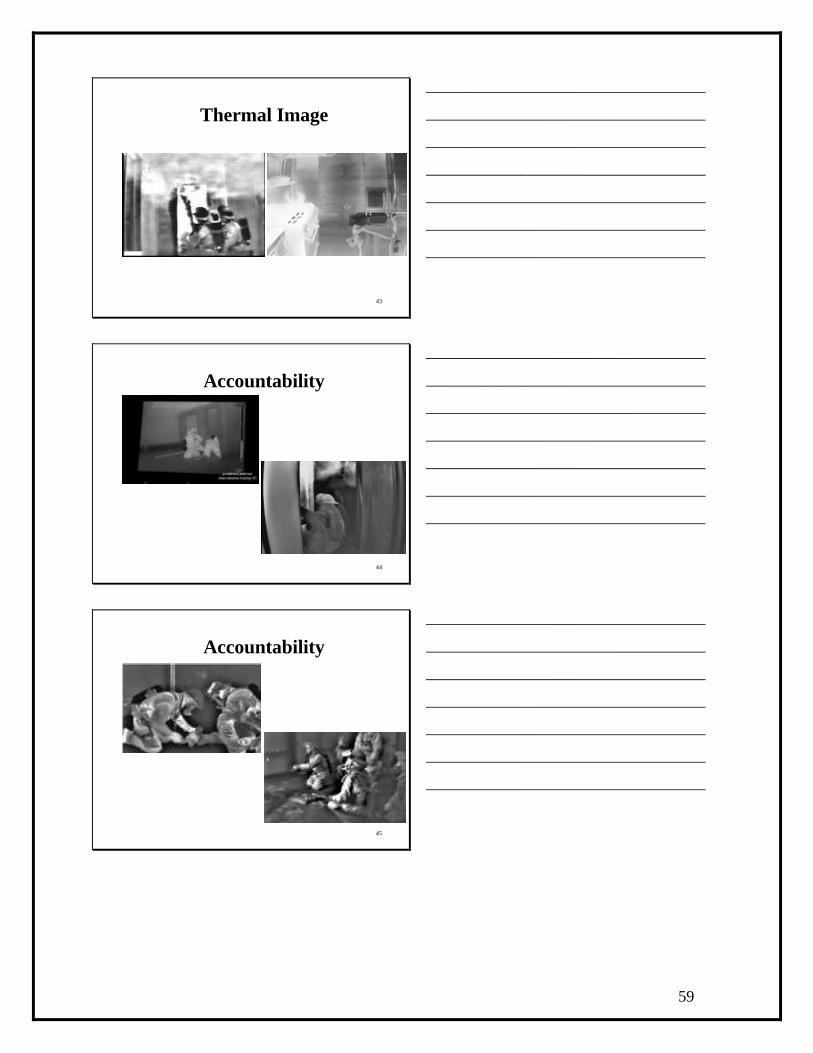
59
Thermal Image
43
___________________________________
___________________________________
___________________________________
___________________________________
___________________________________
___________________________________
___________________________________
Accountability
44
___________________________________
___________________________________
___________________________________
___________________________________
___________________________________
___________________________________
___________________________________
Accountability
45
___________________________________
___________________________________
___________________________________
___________________________________
___________________________________
___________________________________
___________________________________
60
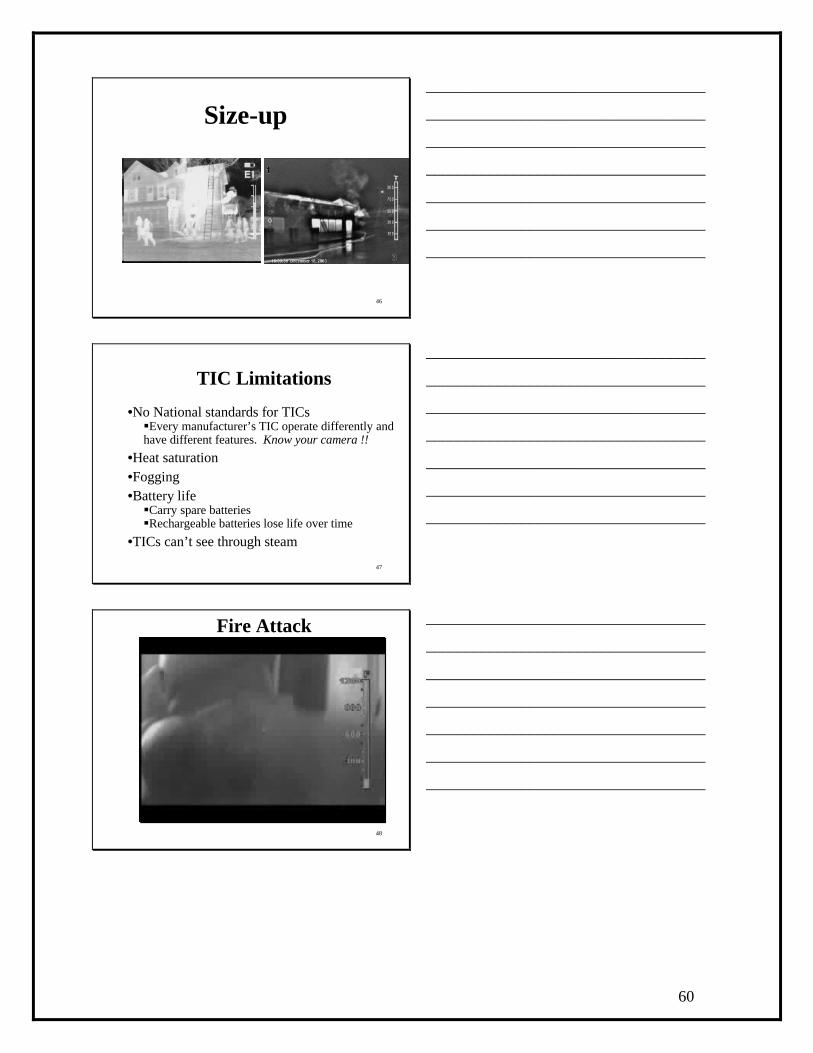
Size-up
46
___________________________________
___________________________________
___________________________________
___________________________________
___________________________________
___________________________________
___________________________________
TIC Limitations
47
•No National standards for TICsEvery manufacturer’s TIC operate differently and
have different features. Know your camera !!•Heat saturation•Fogging•Battery life
Carry spare batteries Rechargeable batteries lose life over time
•TICs can’t see through steam
___________________________________
___________________________________
___________________________________
___________________________________
___________________________________
___________________________________
___________________________________
Fire Attack
48
___________________________________
___________________________________
___________________________________
___________________________________
___________________________________
___________________________________
___________________________________
61
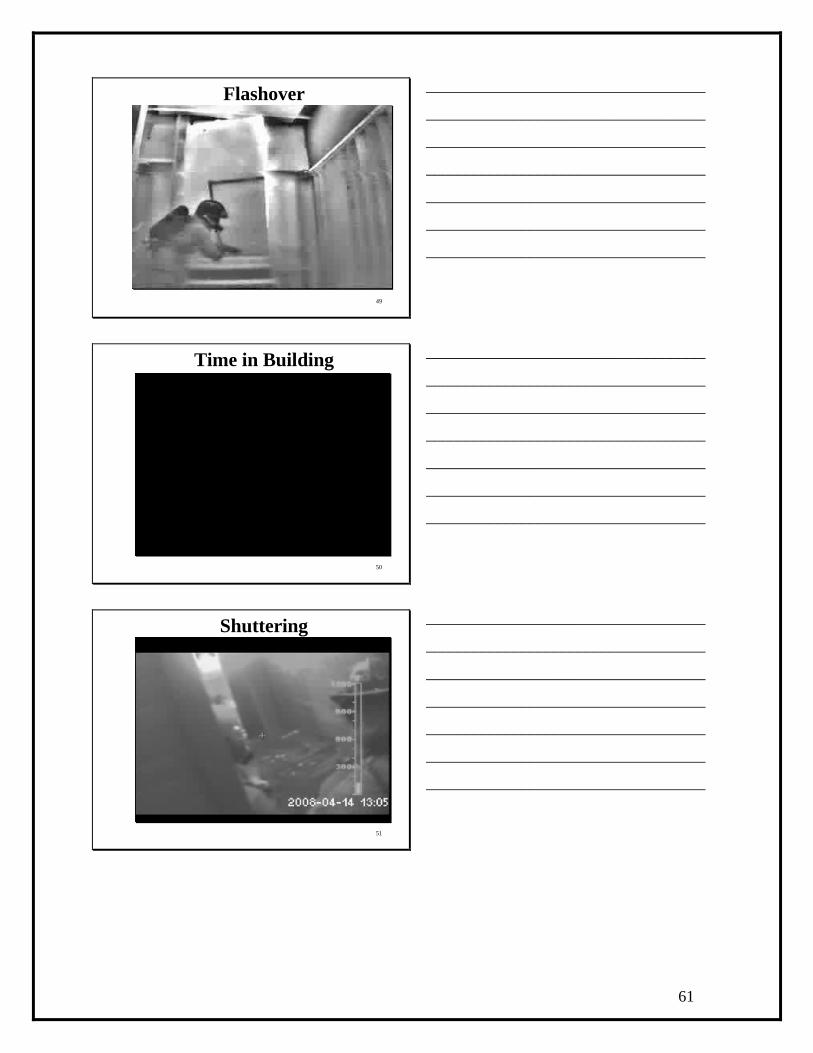
Flashover
49
___________________________________
___________________________________
___________________________________
___________________________________
___________________________________
___________________________________
___________________________________
Time in Building
50
___________________________________
___________________________________
___________________________________
___________________________________
___________________________________
___________________________________
___________________________________
Shuttering
51
___________________________________
___________________________________
___________________________________
___________________________________
___________________________________
___________________________________
___________________________________
62
Lost Firefighter
52
___________________________________
___________________________________
___________________________________
___________________________________
___________________________________
___________________________________
___________________________________
Summary
• Train all members in the use of this procedure
• This will be done in rapidly deteriorating and difficult conditions
• When used in conjunction with ICS and standard accountability it will save lives!
53
___________________________________
___________________________________
___________________________________
___________________________________
___________________________________
___________________________________
___________________________________

63
DOWNED FIREFIGHTER DRAGS
Objective: of this evolution is to demonstrate skills needed to rescue a downed firefighter efficiently and safely. We will be concentrating on two skills. The first is the AIR PACK CONVERSION and the second will be a TWO PERSON DRAG TECHNIQUE.
Upon locating a downed firefighter:
1: Reset PASS device.
2: Check air supply.
3: Confirm identity.
4: Report to command findings.
5: Convert SCBA to harness.
POINTS TO STRESS
• The victims face piece and regulator should remain in place at all time unless the victim’s cylinder is empty.
• If the PASS device has been activated it should be reset at this time.
• Assess the situation of the team and downed firefighter and report to Command if
equipment or manpower is needed. NOTE: The READY, READY, GO command format is used in order to keep the communication brief and simple. READY, READY, GO COMMANDS
1. The firefighter at the head position is always in charge and will issue all commands.
2. When two-firefighters are removing a victim the firefighter in charge will
ask READY prior to any movement being ordered. 3. The assisting firefighter will respond with READY if prepared to complete
the command issued. 4. The firefighter in command will respond with GO. 5. On the GO command, both firefighters will perform the movement
technique selected.
64
6. If you are not ready say nothing, so not to confuse the situation.
AIR PACK CONVERSION this is done for fire fighter removals if conditions permit. 1. Have the victim in a face down position 2. The victim is rolled over onto his/her back. This is accomplished best buy kneeling at the victim’s waist, grab the waist area and roll the body towards your thighs.
3. Place the victims arms up over his/her head.
4. Tighten the SCBA shoulder straps if you plan to move he firefighter vertically. If Attaching the RIT pack at this time do not tighten the waist strap until the carabiner of the RIT pack is attached. (assist team member at this time)
5. Next loosen the victim’s waist straps to full extension.
6. With waist straps extended disconnect the buckle.
7. Feed one of the waist straps between the victim’s legs and reconnect the buckle.
8. Tighten the waist strap as tight as possible securing the SCBA harness to the victim.
TWO PERSON PUSH/PULL TECHNIQUES.
1- The victim is prepared for removal using the AIR PACK CONVERSION TECHNIQUE as previously described.
2- One rescuer is positioned at the head of the victim (this individual gives
commands). 3- The second rescuer is positioned at the feet of the victim. 4- The firefighter at the head positions him/her and places the palm of his hand
under the shoulder straps. 5- The firefighter at the feet will kneel between the victim’s legs. 6- The firefighter at the feet will place one of the victim’s legs over his/her
shoulder and place their face and shoulders into the groin area.
65
7- The firefighter in charge will issue the command to move the victim. 8- With the command given, working as a unit both rescuers will lean forward
moving the victim. 9- The firefighter at the head will lean forward dragging the victim. 10- The firefighter at the legs will push the victim forward
ALL THE PARTICIPANTS SHOULD ATTEMPT THIS TECHNIQUE
If conditions are two volatile firefighters may chose to move the downed firefighter
before converting the harness.

66
RIT Pack Practical
Module 13 Objective: To give hands on training in attaching the RIT Pack to a downed firefighter in a reduced visibility situation. Equipment: RIT Pack with a full cylinder (carabiners attached), face piece, FF manikin with an empty SCBA attached, smoke trainers for face pieces, and floor protection if needed. Set-up: Place some masonite down to protect equipment, and arrange a firefighter manikin at one end. The manikin should have full gear including an SCBA on, and the SCBA cylinder should be empty with the regulator attached. Demonstrate:
1. Show the students how to approach the firefighter and deactivate PASS, check their air supply, and at this time explain how they should also be confirming that this is the firefighter that they were looking for.
2. If they realize that the firefighter is out of air and the conditions permit the
regulator should be removed from the firefighters face piece (otherwise they are suffocating).
3. The second RIT member should then arrive with the RIT Pack and the first should
position them at the face of the downed firefighter. 4. The first RIT member should begin to convert the harness of the firefighter to be
used as a drag tool (if the downed firefighters face piece is damaged this RIT member may have to assist in donning the new face piece, by holding the FF seated upright).
5. The second RIT member should open the RIT Pack and turn on the cylinder then
either:
• Separate the face piece from the regulator, jumpstart the air flow, and attach the regulator to the downed firefighter or;
• Remove the damaged face piece from the downed firefighter, jump start the air flow in the RIT Pack regulator, and attach the face piece to the firefighter.
6. Once the air is supplied to the downed firefighter the RIT Pack should be attached to the firefighter. The first RIT member can assist with this.
7. After everything has been prepared have the team start to drag the manikin a short distance.
8. After the demonstration have each student participate in the drill, and if time permits have them try each position.

67
THROUGH THE FLOOR If a firefighter falls through the floor: Conscious:
• Locate the firefighter • Remove some doors off their hinges and put them around the hole to
spread the weight. • If the firefighter is impinged by fire, operate the hose line to cool the area. • Pass a bight of hose down to the firefighter and have them stand on it and
wrap their arms around the hose. • Have two firefighters on each side pull the down firefighter up. • The firefighters farthest away from the hole holds the hose while the
firefighters closets to the hole reset. • Continue this process until the down firefighter is removed from the hole.
Unconscious:
• Pass a bight of hose down and on the side opposite the nozzle have two firefighters hold it while the rescuer slides down the hose like a fire pole.
• Have the rescuer watch their hand placement as they make the transfer from above to below the floor.
• The rescuers still up above make a handcuff knot with their personal rope and lower it down to the rescuer in the hole.
• The rescuer in the hole pus the handcuff knot over the down firefighter’s forearms.
• The firefighters above pull up the down firefighter as they did with the fire hose as mentioned above.
• The rescuer in the hole assists the down firefighter up the hole as far as they can reach.
• The rescuer in the hole now gets raised like the conscious firefighter.

68
PRACTICE SCENARIO Search and Rescue of a Firefighter victim by firefighting crews already operating in the area of the Mayday Scenario: During the interior fire attack on a fire in a 2 ½ story wood frame occupancy, a firefighter on the radio anxiously reports a mayday. The firefighter reports being low on air, disoriented and lost. The fire is extending through vertical voids and smoke conditions are becoming heavy. Interior crews operating in the area may be assigned as initial search crews to assist the trapped Firefighter. If the firefighter is located, they may begin removal or assistance. Note: This Firefighter may report his position as above or below grade, may be entangled, may need to be reached by reduced or low profile maneuvers and may be conscious or unconscious when found depending on the degree of difficulty that is desired. The original means of egress may also be blocked to present another problem if desired. Equipment: Radios RIT Pac TIC Rope bag—200’ 11mm rope Hose Line Hand Tools Webbing
69
Objectives: 1. Search for a missing firefighter using a single entry point. 2. Provide emergency SCBA air to the firefighter victim using an SCBA or RIT Pac
as needed. 3. Begin removal of firefighter using personal equipment.
FF Skills:
• Search for and Locate firefighter • Assess firefighter needs • Reset PASS, Assess air supply needs, Confirm ID, Notify RIT
command, call for RIT and convert harness if needed. • Possible disentanglement • Assist or remove of Firefighter from building • Consider additional means of egress
Command Skills: • Identify the mayday • Identify the firefighters location, Company (identification) and problem • Maintain Fire control • Assign RIT sector command • Deploy RIT operation • Additional manpower requirements
70
Combat Drills
The following contains drills that will aid in honing the combined skills of this program. Being able to complete the evolutions will demonstrate a firefighter’s ability
to effectively be part of a Rapid Intervention Team
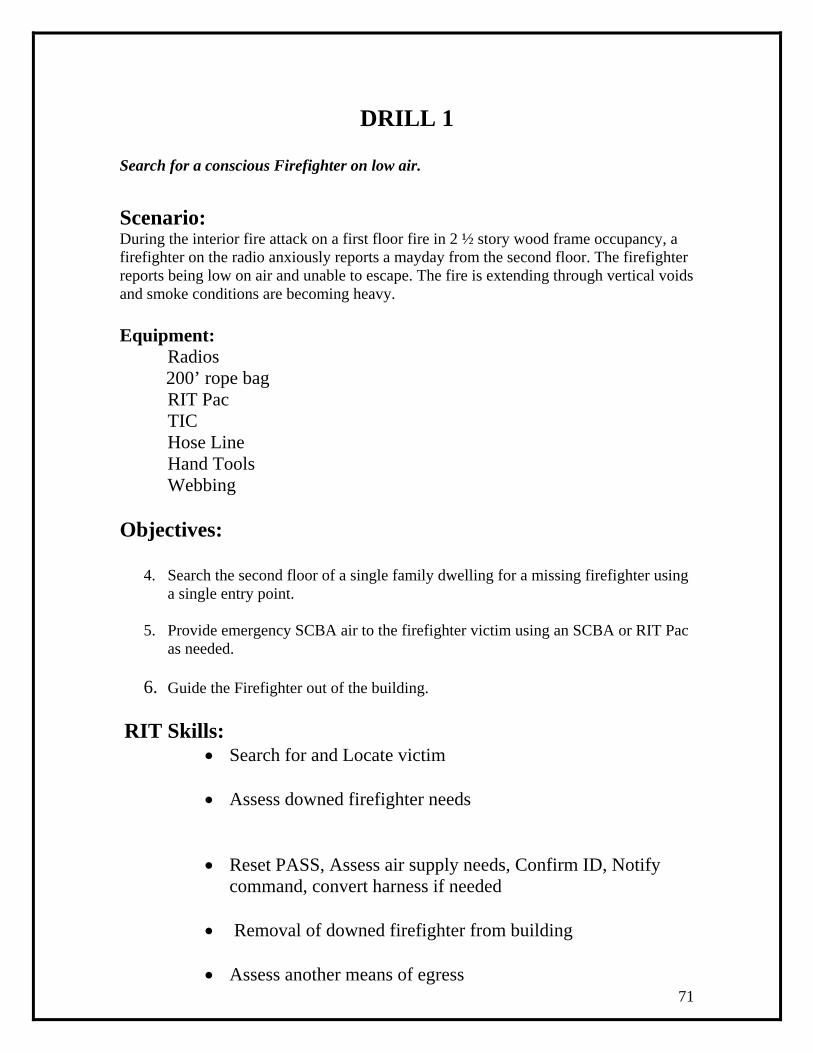
71
DRILL 1
Search for a conscious Firefighter on low air.
Scenario: During the interior fire attack on a first floor fire in 2 ½ story wood frame occupancy, a firefighter on the radio anxiously reports a mayday from the second floor. The firefighter reports being low on air and unable to escape. The fire is extending through vertical voids and smoke conditions are becoming heavy. Equipment: Radios 200’ rope bag RIT Pac TIC Hose Line Hand Tools Webbing Objectives:
4. Search the second floor of a single family dwelling for a missing firefighter using a single entry point.
5. Provide emergency SCBA air to the firefighter victim using an SCBA or RIT Pac
as needed.
6. Guide the Firefighter out of the building. RIT Skills:
• Search for and Locate victim • Assess downed firefighter needs
• Reset PASS, Assess air supply needs, Confirm ID, Notify
command, convert harness if needed • Removal of downed firefighter from building
• Assess another means of egress
72
Command Skills: • Identify the mayday • Identify the firefighters location, Company (identification) and
problem
• Deploy RIT operation
• Maintain Fire control
• Assign RIT sector command
• Assess RIT manpower needs
• LIPS
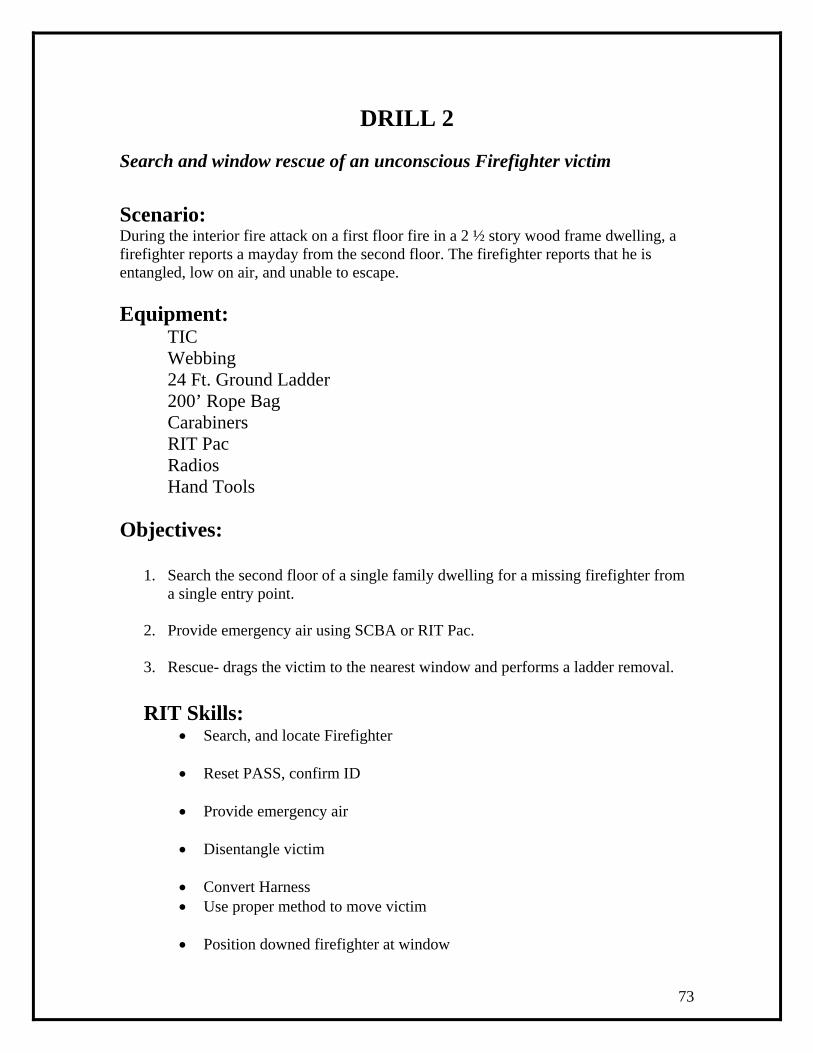
73
DRILL 2
Search and window rescue of an unconscious Firefighter victim Scenario: During the interior fire attack on a first floor fire in a 2 ½ story wood frame dwelling, a firefighter reports a mayday from the second floor. The firefighter reports that he is entangled, low on air, and unable to escape. Equipment: TIC Webbing 24 Ft. Ground Ladder 200’ Rope Bag Carabiners RIT Pac Radios Hand Tools Objectives:
1. Search the second floor of a single family dwelling for a missing firefighter from a single entry point.
2. Provide emergency air using SCBA or RIT Pac. 3. Rescue- drags the victim to the nearest window and performs a ladder removal. RIT Skills:
• Search, and locate Firefighter
• Reset PASS, confirm ID
• Provide emergency air
• Disentangle victim
• Convert Harness • Use proper method to move victim • Position downed firefighter at window
74
• SCBA removal if needed
Command Skills: • Identify the mayday • Identify the firefighters location, Company (identification) and problem
• Deploy RIT operation
• Maintain Fire control
• Assign RIT sector command
• Assess RIT manpower needs
• LIPS

75
DRILL 3
Search and rescue of an unconscious Firefighter. Scenario: During the interior fire attack on a first floor fire in a 2 ½ story wood frame dwelling, a firefighter reports a mayday from the second floor. The firefighter, from a two man search team, reports that he and his partner are low on air, disoriented and unable to find the stairway. (Upon entry to division two, the RIT team will find a civilian child in the hallway. This scenario may utilize one or 2 fire fighters as victims). Equipment: TIC Webbing 24 Ft. Ground Ladder Rope Bag- 200’ 11 mm rope Carabiners RIT Pac Radios Hand Tools Objectives:
1. Search the second floor of a single family dwelling for a missing firefighter. 2. Assess situation and make necessary adjustments to manage rescues. 3. Request additional assistance. 4. Provide emergency air using SCBA or RIT Pac if necessary.
5. Remove all victims.
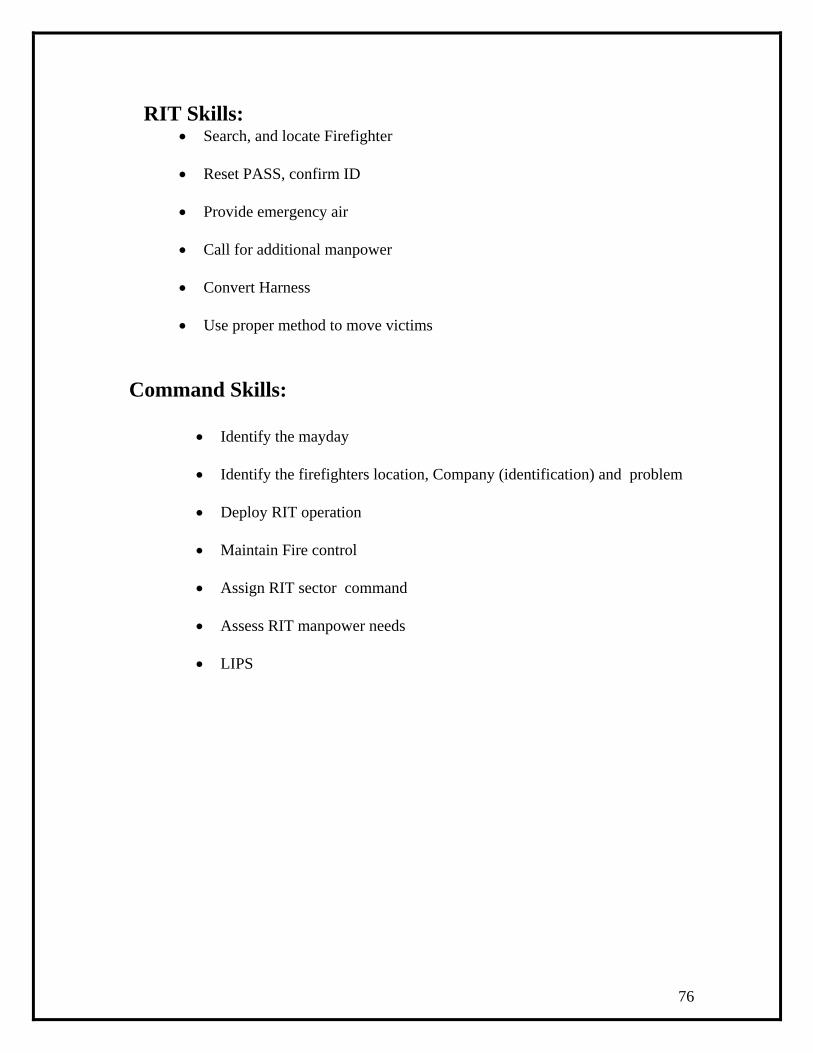
76
RIT Skills:
• Search, and locate Firefighter • Reset PASS, confirm ID
• Provide emergency air
• Call for additional manpower
• Convert Harness
• Use proper method to move victims
Command Skills:
• Identify the mayday • Identify the firefighters location, Company (identification) and problem
• Deploy RIT operation
• Maintain Fire control
• Assign RIT sector command
• Assess RIT manpower needs
• LIPS
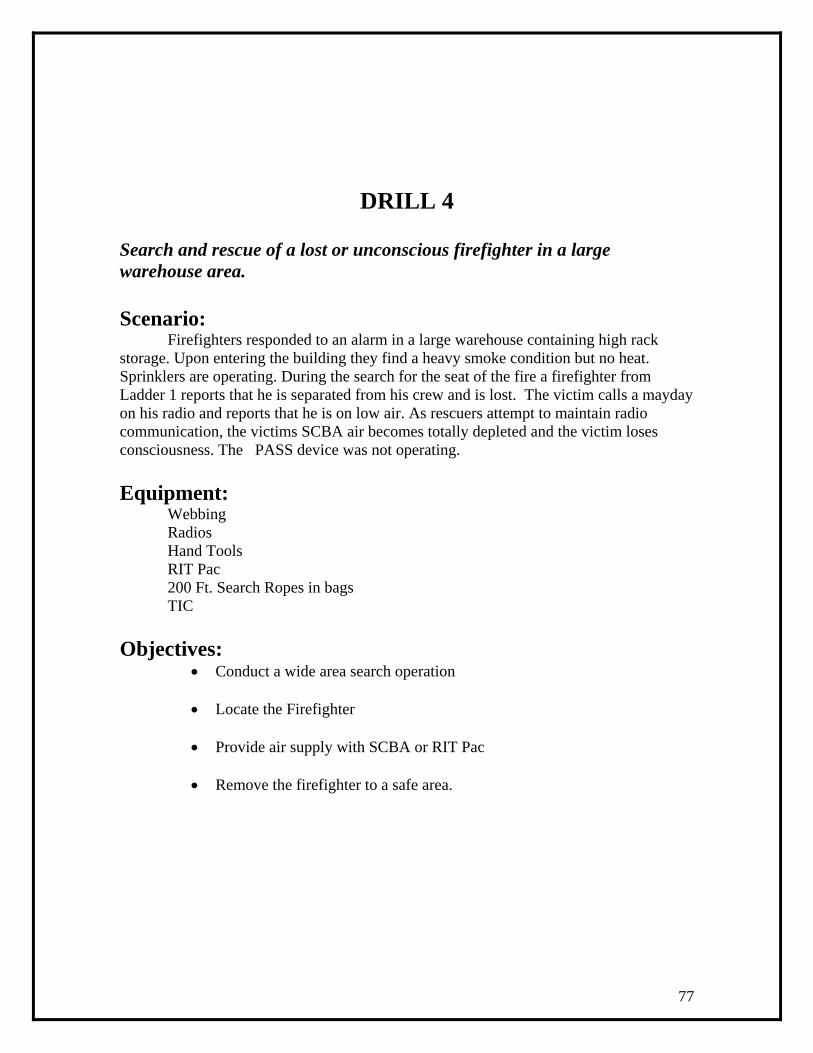
77
DRILL 4 Search and rescue of a lost or unconscious firefighter in a large warehouse area. Scenario: Firefighters responded to an alarm in a large warehouse containing high rack storage. Upon entering the building they find a heavy smoke condition but no heat. Sprinklers are operating. During the search for the seat of the fire a firefighter from Ladder 1 reports that he is separated from his crew and is lost. The victim calls a mayday on his radio and reports that he is on low air. As rescuers attempt to maintain radio communication, the victims SCBA air becomes totally depleted and the victim loses consciousness. The PASS device was not operating. Equipment: Webbing Radios Hand Tools RIT Pac 200 Ft. Search Ropes in bags TIC Objectives:
• Conduct a wide area search operation • Locate the Firefighter
• Provide air supply with SCBA or RIT Pac
• Remove the firefighter to a safe area.
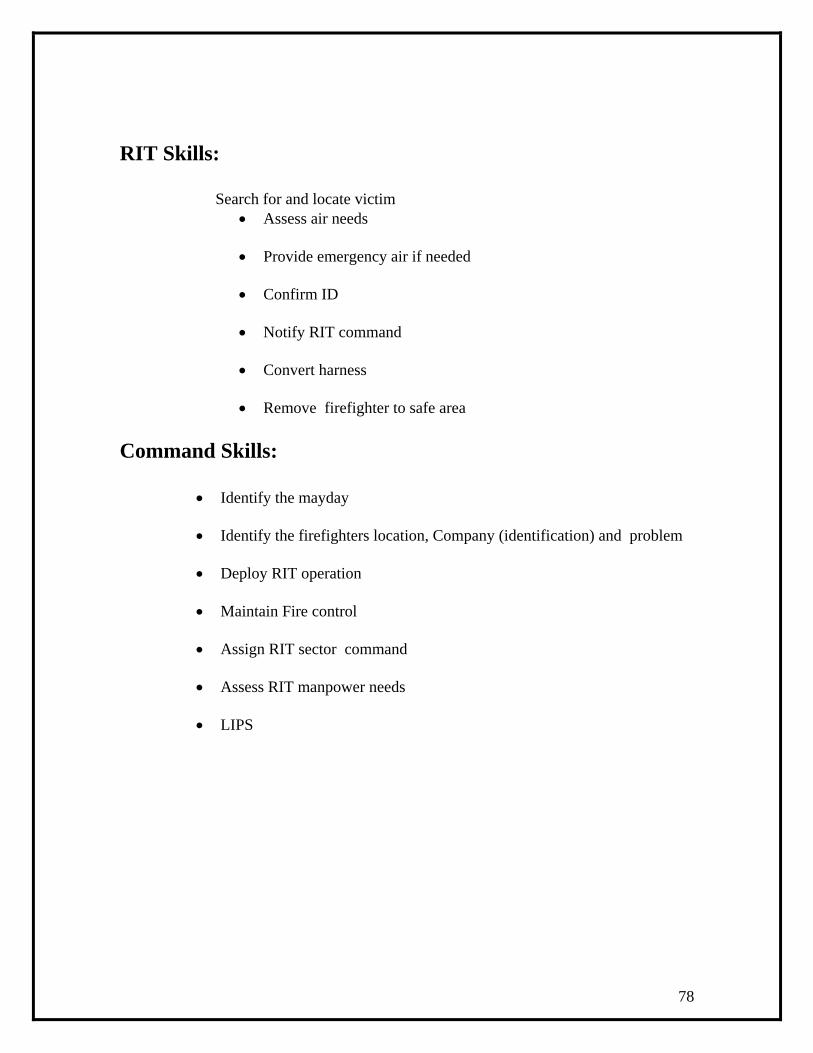
78
RIT Skills: Search for and locate victim
• Assess air needs • Provide emergency air if needed
• Confirm ID
• Notify RIT command
• Convert harness
• Remove firefighter to safe area
Command Skills:
• Identify the mayday • Identify the firefighters location, Company (identification) and problem
• Deploy RIT operation
• Maintain Fire control
• Assign RIT sector command
• Assess RIT manpower needs
• LIPS

79
Reference Materials
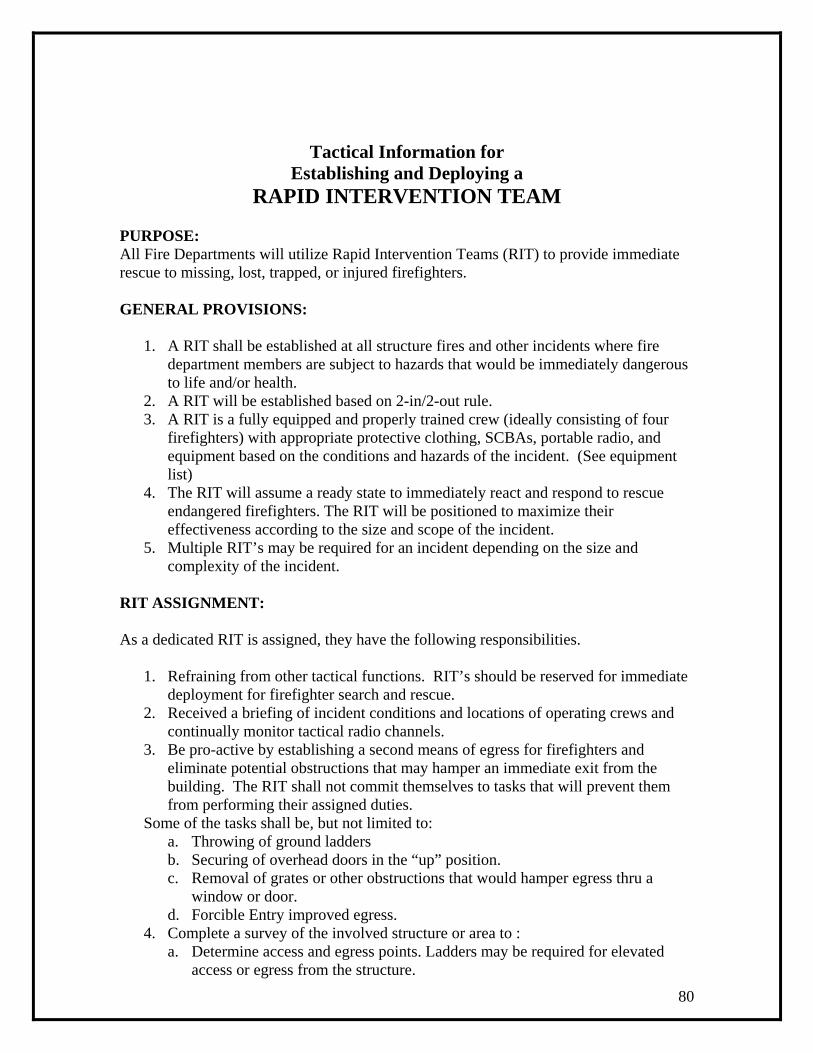
80
Tactical Information for Establishing and Deploying a
RAPID INTERVENTION TEAM
PURPOSE: All Fire Departments will utilize Rapid Intervention Teams (RIT) to provide immediate rescue to missing, lost, trapped, or injured firefighters. GENERAL PROVISIONS:
1. A RIT shall be established at all structure fires and other incidents where fire department members are subject to hazards that would be immediately dangerous to life and/or health.
2. A RIT will be established based on 2-in/2-out rule. 3. A RIT is a fully equipped and properly trained crew (ideally consisting of four
firefighters) with appropriate protective clothing, SCBAs, portable radio, and equipment based on the conditions and hazards of the incident. (See equipment list)
4. The RIT will assume a ready state to immediately react and respond to rescue endangered firefighters. The RIT will be positioned to maximize their effectiveness according to the size and scope of the incident.
5. Multiple RIT’s may be required for an incident depending on the size and complexity of the incident.
RIT ASSIGNMENT: As a dedicated RIT is assigned, they have the following responsibilities.
1. Refraining from other tactical functions. RIT’s should be reserved for immediate deployment for firefighter search and rescue.
2. Received a briefing of incident conditions and locations of operating crews and continually monitor tactical radio channels.
3. Be pro-active by establishing a second means of egress for firefighters and eliminate potential obstructions that may hamper an immediate exit from the building. The RIT shall not commit themselves to tasks that will prevent them from performing their assigned duties.
Some of the tasks shall be, but not limited to: a. Throwing of ground ladders b. Securing of overhead doors in the “up” position. c. Removal of grates or other obstructions that would hamper egress thru a
window or door. d. Forcible Entry improved egress.
4. Complete a survey of the involved structure or area to : a. Determine access and egress points. Ladders may be required for elevated
access or egress from the structure.
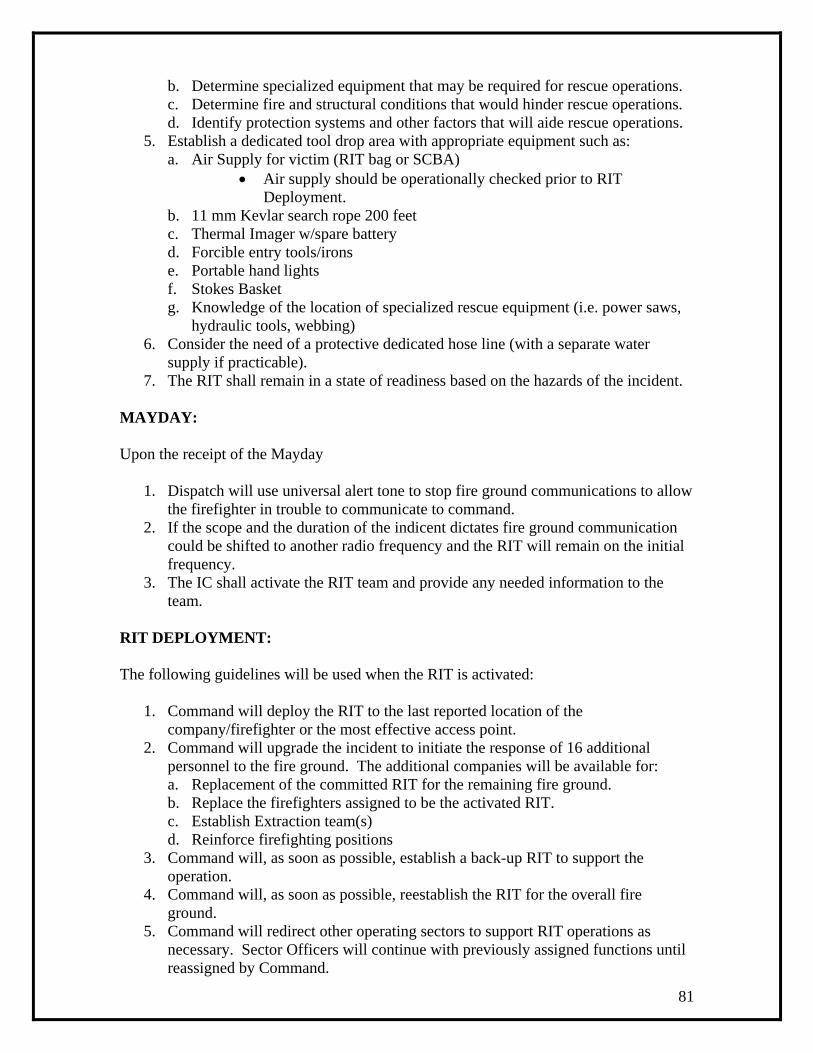
81
b. Determine specialized equipment that may be required for rescue operations. c. Determine fire and structural conditions that would hinder rescue operations. d. Identify protection systems and other factors that will aide rescue operations.
5. Establish a dedicated tool drop area with appropriate equipment such as: a. Air Supply for victim (RIT bag or SCBA)
• Air supply should be operationally checked prior to RIT Deployment.
b. 11 mm Kevlar search rope 200 feet c. Thermal Imager w/spare battery d. Forcible entry tools/irons e. Portable hand lights f. Stokes Basket g. Knowledge of the location of specialized rescue equipment (i.e. power saws,
hydraulic tools, webbing) 6. Consider the need of a protective dedicated hose line (with a separate water
supply if practicable). 7. The RIT shall remain in a state of readiness based on the hazards of the incident.
MAYDAY: Upon the receipt of the Mayday
1. Dispatch will use universal alert tone to stop fire ground communications to allow the firefighter in trouble to communicate to command.
2. If the scope and the duration of the indicent dictates fire ground communication could be shifted to another radio frequency and the RIT will remain on the initial frequency.
3. The IC shall activate the RIT team and provide any needed information to the team.
RIT DEPLOYMENT: The following guidelines will be used when the RIT is activated:
1. Command will deploy the RIT to the last reported location of the company/firefighter or the most effective access point.
2. Command will upgrade the incident to initiate the response of 16 additional personnel to the fire ground. The additional companies will be available for: a. Replacement of the committed RIT for the remaining fire ground. b. Replace the firefighters assigned to be the activated RIT. c. Establish Extraction team(s) d. Reinforce firefighting positions
3. Command will, as soon as possible, establish a back-up RIT to support the operation.
4. Command will, as soon as possible, reestablish the RIT for the overall fire ground.
5. Command will redirect other operating sectors to support RIT operations as necessary. Sector Officers will continue with previously assigned functions until reassigned by Command.

82
6. The RIT will operate using the procedures set forth in the RIT Initiative.

83
KNOTS
for RIT operations
___________________________________
___________________________________
___________________________________
___________________________________
___________________________________
___________________________________
___________________________________
Ropes & Webbing
• Life Safety Rope
• Personal Rope
• Tubular Webbing
___________________________________
___________________________________
___________________________________
___________________________________
___________________________________
___________________________________
___________________________________
Knot Characteristics Required
• Knots with more than one use• Easy to tie – even in the dark• Easy to untie• Life safety knots• Knots that can be pre-tied and will stay tied• KEEP IT SIMPLE !!
___________________________________
___________________________________
___________________________________
___________________________________
___________________________________
___________________________________
___________________________________

84
Life Safety Rope• Usually ½” Static kernmantle
• Carried in a bag: just stuff it in
• 50, 100, 200 Foot Lengths
• Multiple colors: differentiates lines for hauling, etc
• Carabiners can be pre-attached
___________________________________
___________________________________
___________________________________
___________________________________
___________________________________
___________________________________
___________________________________
1/2” static Kernmantle
___________________________________
___________________________________
___________________________________
___________________________________
___________________________________
___________________________________
___________________________________
Personal Rope• Easy to carry• 8-11mm KEVLAR• 40-50’ in a pocket• Strong -- 8MM rated at 2875 lbs mbs• Also carried in bags attached to SCBA• Easily deployable• Many uses: search, guide, hauling, emergency
escape• Cheap to buy and replace • 8 mm is Approx. 0.52 ft
___________________________________
___________________________________
___________________________________
___________________________________
___________________________________
___________________________________
___________________________________

85
8mm personal rope
___________________________________
___________________________________
___________________________________
___________________________________
___________________________________
___________________________________
___________________________________
Personal Rope Bags
___________________________________
___________________________________
___________________________________
___________________________________
___________________________________
___________________________________
___________________________________
The Knots
• Figure 8 on a bight : Anchor & attachment points
• Clove hitch: securing line, handcuff knot
• Tensionless hitch : high point anchor
• Water knot or water bend : webbing
___________________________________
___________________________________
___________________________________
___________________________________
___________________________________
___________________________________
___________________________________
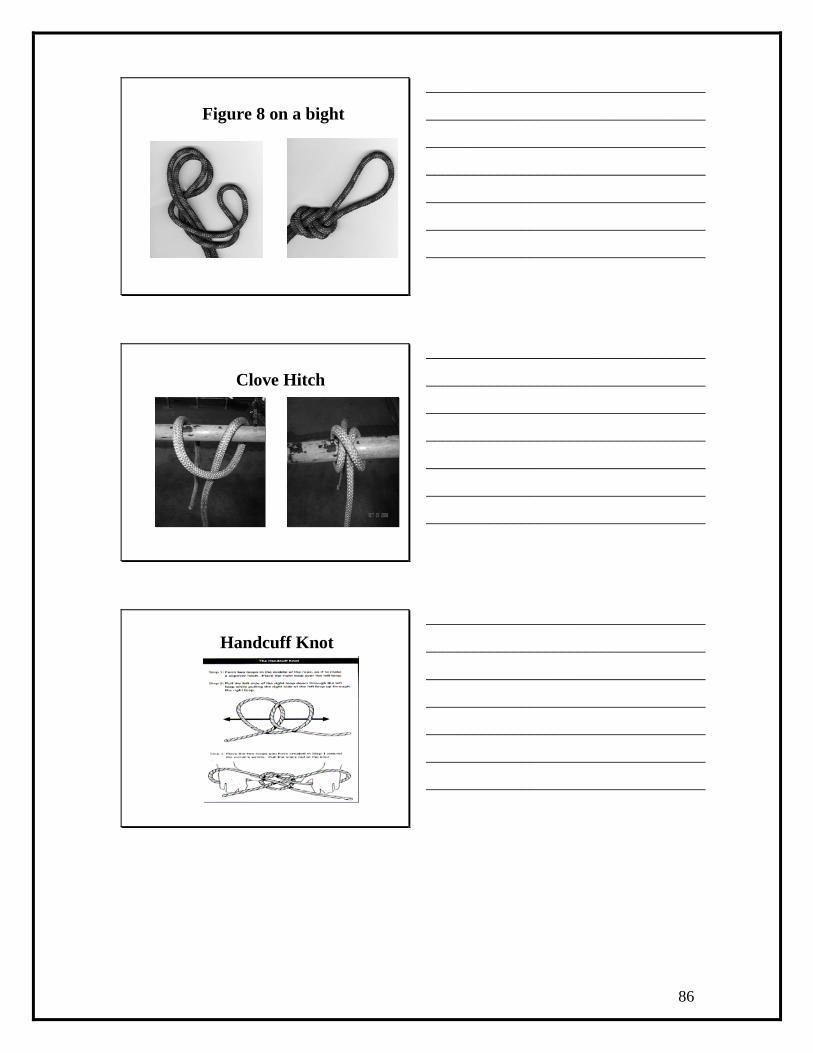
86
Figure 8 on a bight
___________________________________
___________________________________
___________________________________
___________________________________
___________________________________
___________________________________
___________________________________
Clove Hitch
___________________________________
___________________________________
___________________________________
___________________________________
___________________________________
___________________________________
___________________________________
Handcuff Knot
___________________________________
___________________________________
___________________________________
___________________________________
___________________________________
___________________________________
___________________________________
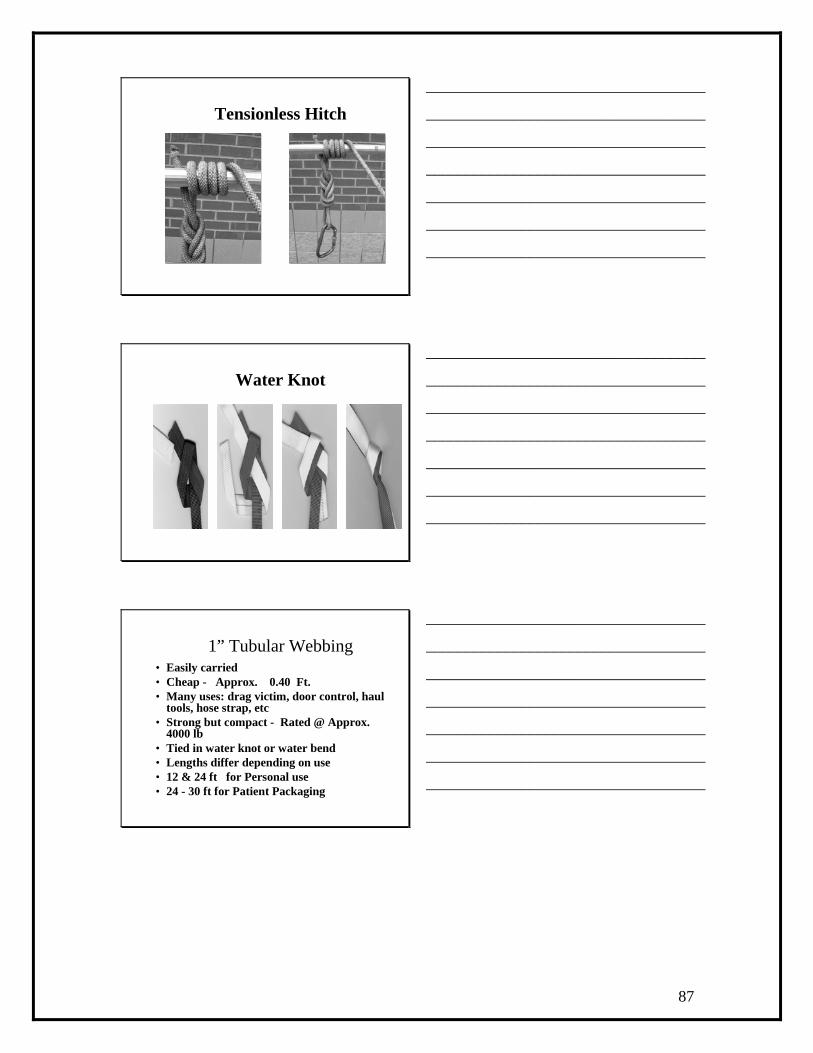
87
Tensionless Hitch
___________________________________
___________________________________
___________________________________
___________________________________
___________________________________
___________________________________
___________________________________
Water Knot
___________________________________
___________________________________
___________________________________
___________________________________
___________________________________
___________________________________
___________________________________
1” Tubular Webbing• Easily carried• Cheap - Approx. 0.40 Ft.• Many uses: drag victim, door control, haul
tools, hose strap, etc• Strong but compact - Rated @ Approx.
4000 lb• Tied in water knot or water bend• Lengths differ depending on use• 12 & 24 ft for Personal use• 24 - 30 ft for Patient Packaging
___________________________________
___________________________________
___________________________________
___________________________________
___________________________________
___________________________________
___________________________________
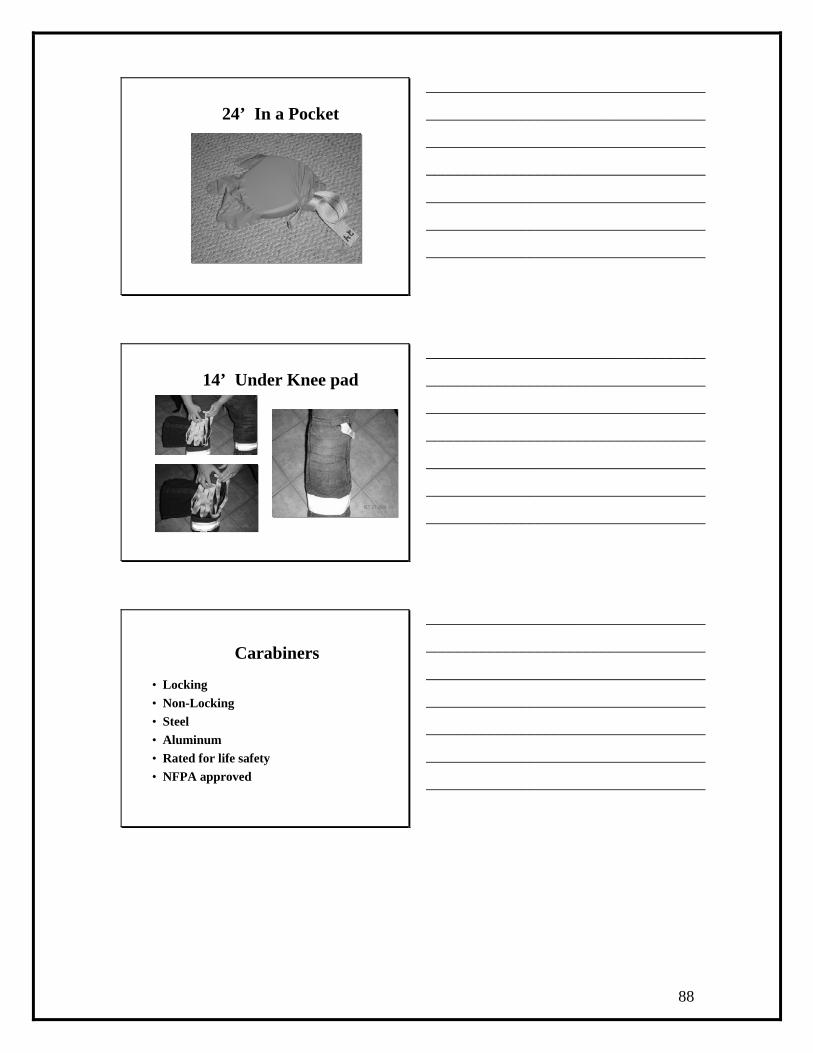
88
24’ In a Pocket
___________________________________
___________________________________
___________________________________
___________________________________
___________________________________
___________________________________
___________________________________
14’ Under Knee pad
___________________________________
___________________________________
___________________________________
___________________________________
___________________________________
___________________________________
___________________________________
Carabiners
• Locking • Non-Locking• Steel • Aluminum• Rated for life safety• NFPA approved
___________________________________
___________________________________
___________________________________
___________________________________
___________________________________
___________________________________
___________________________________
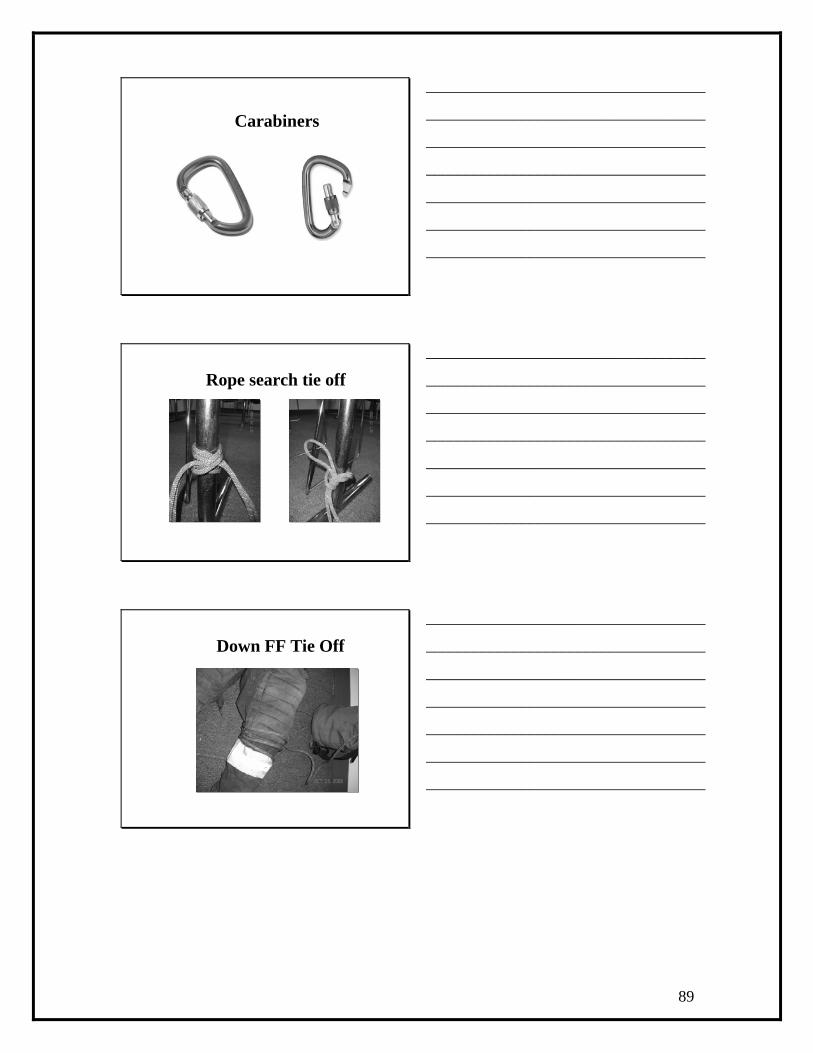
89
Carabiners
___________________________________
___________________________________
___________________________________
___________________________________
___________________________________
___________________________________
___________________________________
Rope search tie off
___________________________________
___________________________________
___________________________________
___________________________________
___________________________________
___________________________________
___________________________________
Down FF Tie Off
___________________________________
___________________________________
___________________________________
___________________________________
___________________________________
___________________________________
___________________________________
90
Review
• Pre-tie knots when possible
• Always have more than one plan in mind.
• KEEP IT SIMPLE ! !
___________________________________
___________________________________
___________________________________
___________________________________
___________________________________
___________________________________
___________________________________
For more information go to www.animatedknots.com
___________________________________
___________________________________
___________________________________
___________________________________
___________________________________
___________________________________
___________________________________
91
ROPES & KNOTS
Review all Basic Knots
Square Knot – Used for joining two ropes of equal diameter
Becket Bend – Joins two ropes, works well with two ropes having unequal diameters,
and rarely slips even when rope is wet.
Open Clove Hitch – Two half hitches, principal use is to attach a rope to an object, such
as a pole or hose, one method for developing a clove hitch is in the “open”.
Closed Clove Hitch – Two half hitches, principal use is to attach a rope to an object,
such as a pole or hose, one method for developing a clove hitch is in the “closed”.
Bowline – Forms a loop that does not slip under strain, unties easily, can be tied in the
open or around an object.
Figure of 8 – Basic knot can replace the bowline, easy to tie and untie, less damaging to
rope than the bowline.
Half Hitch – To stabilize tall objects when hauling, always used in conjunction with an
anchor knot.
Hand Cuff Knot- To place over the unconscious fire fighters hands and elbows to lift
through a hole in the floor for extrication. Review using 2 so that one is at the elbows
and one is on the forearms.
Bight Round Turn – Consist of further bending one side of the loop.
92
Teach Figure of 8 on a Bight
Figure of 8 on a bight – Preferred for synthetic ropes, can be tied anywhere in the rope,
for an anchor or a harness where a loop in the rope is needed.
Teach Overhand Safety Knot and use in the review.
Overhand safety Knot – Easily tied and untied, alone it will slip, but serves as a good
method of securing the running end of another knot which is designed to carry the load,
eliminates the danger of the end of the rope slipping back through the knot which could
cause the knot to fail.
The figure of 8 is the only knot mentioned today that is considered a life safety knot, the
overhand safety knot is used in conjunction with all knots including life safety knots, all
others are utility knots.
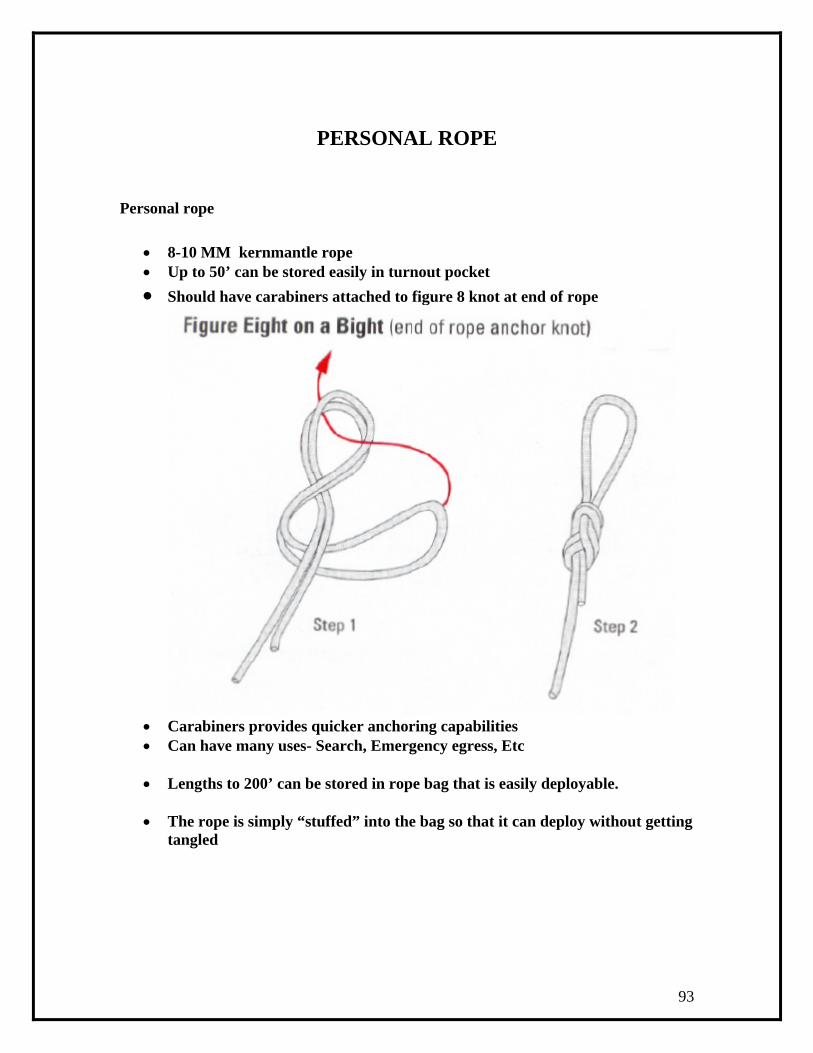
93
PERSONAL ROPE Personal rope
• 8-10 MM kernmantle rope • Up to 50’ can be stored easily in turnout pocket • Should have carabiners attached to figure 8 knot at end of rope
• Carabiners provides quicker anchoring capabilities • Can have many uses- Search, Emergency egress, Etc • Lengths to 200’ can be stored in rope bag that is easily deployable.
• The rope is simply “stuffed” into the bag so that it can deploy without getting
tangled
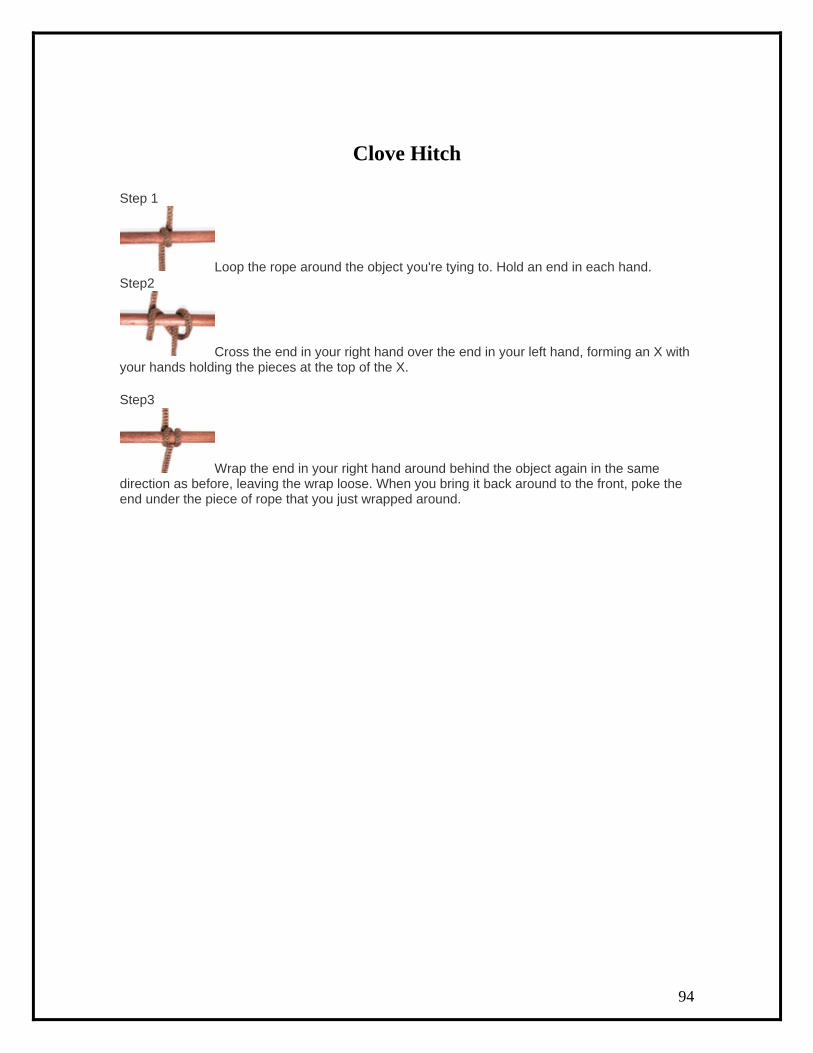
94
Clove Hitch Step 1
Loop the rope around the object you're tying to. Hold an end in each hand. Step2
Cross the end in your right hand over the end in your left hand, forming an X with your hands holding the pieces at the top of the X. Step3
Wrap the end in your right hand around behind the object again in the same direction as before, leaving the wrap loose. When you bring it back around to the front, poke the end under the piece of rope that you just wrapped around.

95
HANDCUFF KNOT Handcuff Knot
• Can be used to raise firefighter from vertical opening • Can be used in any situations where confined space may be a problem • Firefighter may be conscious, trapped and incapable of moving through debris or
up stairs. Considerations when using the handcuff knot
• Is there a potential for collapse in the rescue area? • Fire and heat conditions • Are the personnel making the rescue adequately trained? • Are hose lines in place for protection? • Building construction- Is it lightweight? • Is Area around the hole stable? • Is edge shoring necessary? Are doors, ladders, pallets or other materials
available for the edge? Rescue Operation
• Two different color ropes should be used for rescue • Identify the middle of the rope • Tie the handcuff knot big enough to be identified by the Firefighter in the hole or
the firefighters assisting with the rescue.

96
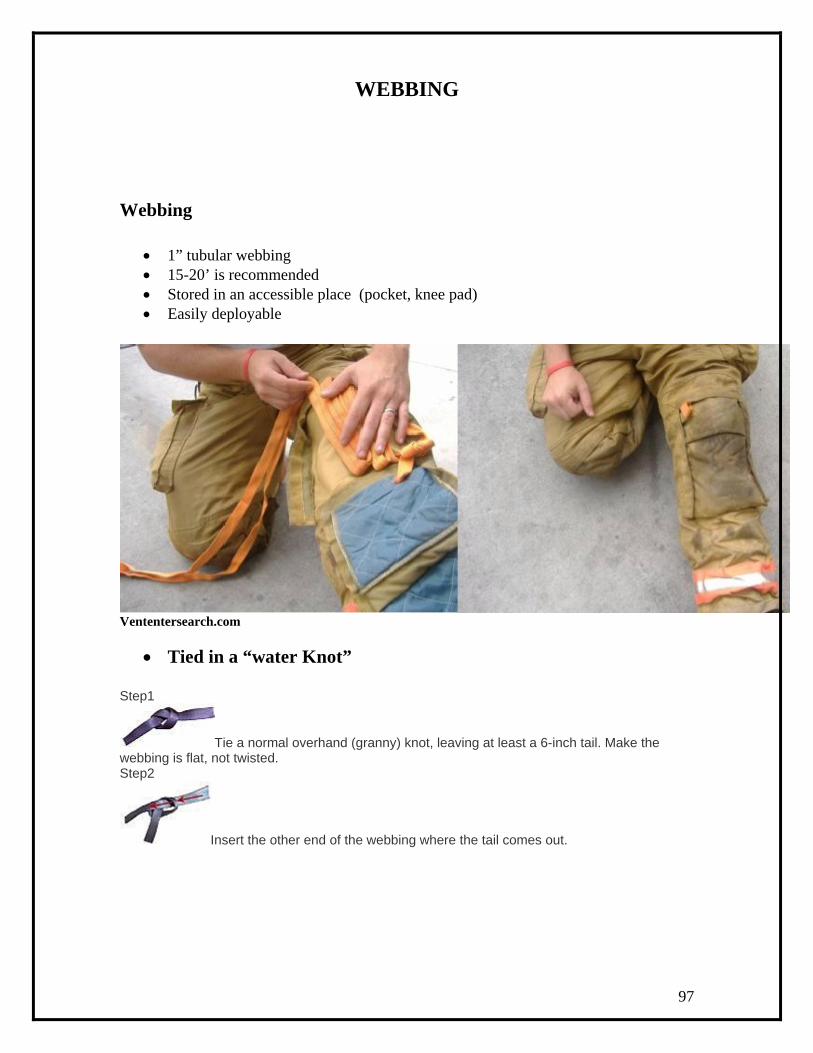
97
WEBBING
Webbing
• 1” tubular webbing • 15-20’ is recommended • Stored in an accessible place (pocket, knee pad) • Easily deployable
Vententersearch.com
• Tied in a “water Knot”
Step1
Tie a normal overhand (granny) knot, leaving at least a 6-inch tail. Make the webbing is flat, not twisted. Step2
Insert the other end of the webbing where the tail comes out.
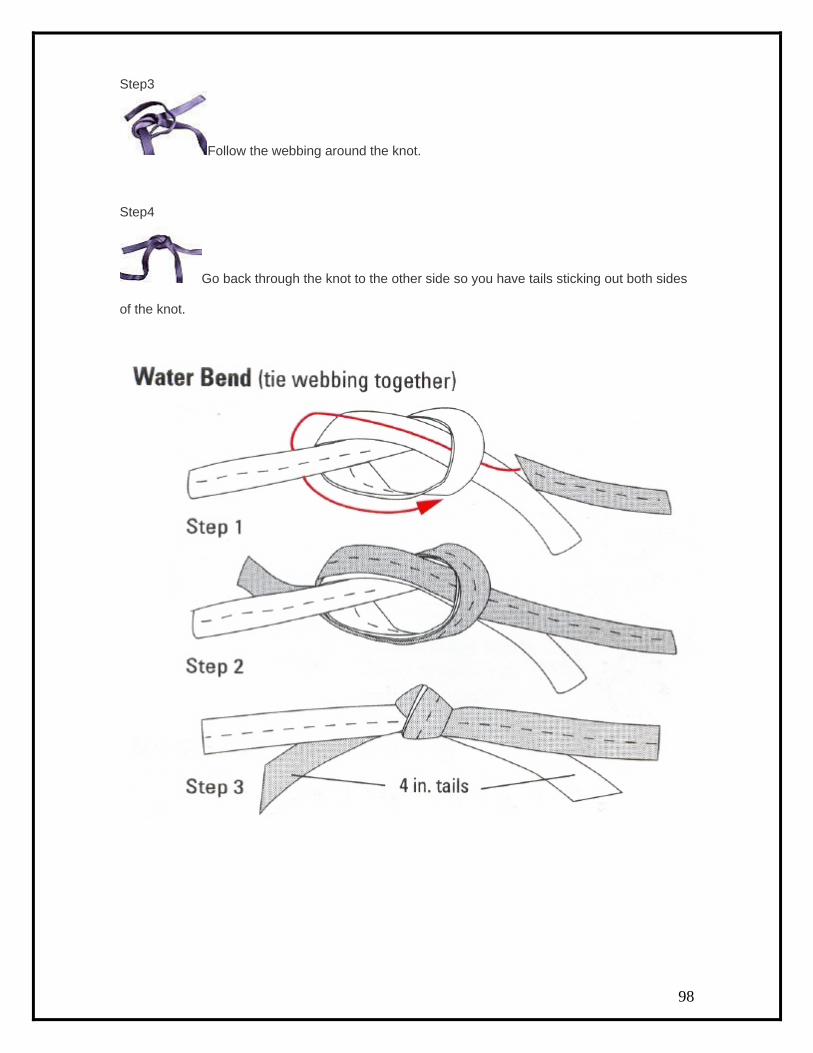
98
Step3
Follow the webbing around the knot. Step4
Go back through the knot to the other side so you have tails sticking out both sides of the knot.

99
Webbing can be used in many situations. • Girth hitch • Chest wrap • Handcuff knot
A carabiner should be added for speed and ease in use. (Clip in instead of taking the time to tie a knot)
Another advantage - webbing is inexpensive and easy to replace.
– Formed by simply bending the rope back on itself while keeping the sides parallel.
Loop – Made by crossing the side of a bight over the standing part.


