QNX Neutrino Realtime Operating System · QNX Neutrino Realtime Operating System ... Note to...
937
QNX Neutrino Realtime Operating System Photon microGUI Programmer’s Guide For QNX Neutrino 6.3.0 2006, QNX Software Systems GmbH & Co. KG.
Transcript of QNX Neutrino Realtime Operating System · QNX Neutrino Realtime Operating System ... Note to...

QNX Neutrino Realtime
Operating SystemPhoton microGUIProgrammer’s Guide
For QNX Neutrino 6.3.0
2006, QNX Software Systems GmbH & Co. KG.

1995 – 2006, QNX Software Systems. All rights reserved.
Published under license by:
QNX Software Systems International Corporation175 Terence Matthews CrescentKanata, OntarioK2M 1W8CanadaVoice: +1 613 591-0931Fax: +1 613 591-3579Email: [email protected]:http://www.qnx.com/
Publishing history
November 1995 First edition
December 1996 Second edition
April 1998 Third edition
July 2004 Fourth edition
Electronic edition published 2006.
Technical support options
To obtain technical support for any QNX product, visit theTechnical Support section in theServices area on our website(www.qnx.com). You’ll find a wide range of support options, including our free web-basedDeveloper Support Center.
QNX, Neutrino, Photon, Photon microGUI, Momentics, and “Build a More Reliable World” are trademarks, registered in certain jurisdictions, of QNX
Software Systems GmbH & Co. KG and are used under license by QNX Software Systems International Corporation. All other trademarks belong to their
respective owners.
Contents
About This Guide xxxiTypographical conventions xxxiii
Note to Windows users xxxiv
What you’ll find in this guide xxxv
What’s new in Photon for QNX Neutrino 6.3 xxxvii
New content xxxvii
What’s new in Photon for QNX Neutrino 6.2.1xxxviii
New contentxxxviii
Errataxxxviii
What’s new in Photon for QNX Neutrino 6.2.0 xxxix
New content xxxix
What’s new in Photon for QNX Neutrino 6.0 xxxix
Introduction 11Overview of the Photon architecture 3
Photon Application Builder (PhAB) 6
Widget concepts 8
Widget life cycle 13
Widget geometry 14
Programming paradigm 17
Text-mode application 18
Non-PhAB application 19
PhAB application 20
Photon libraries 21
API categories and libraries 21
November 2, 2006 Contents iii

2006, QNX Software Systems GmbH & Co. KG.
Versions and platforms 23
Building applications with PhAB—an overview 24
Step 1: Create modules 25
Step 2: Add widgets 25
Step 3: Attach callbacks 26
Step 4: Generate code 27
Step 5: Run your application 27
Step 6: Repeat any previous step 28
Writing applications without PhAB 28
Tutorials 292Before you start... 31
Creating a Photon project and starting PhAB 31
PhAB’s Interface 32
Tutorial 1 — Hello, world 34
Creating the application 34
Generating code 36
Want more info? 38
Tutorial 2 — editing resources 38
Adding a button widget 39
Changing the bevel width 39
Changing the font 40
Changing the text alignment 42
Setting flags 43
Changing the fill color 44
Editing a pixmap 45
Editing multiline text 46
Editing a list of text items 48
Creating a template 50
Want more info? 53
Tutorial 3 — creating menus and menubars 54
About link callbacks 54
About instance names 55
iv Contents November 2, 2006
2006, QNX Software Systems GmbH & Co. KG.
Creating a menubar 55
Creating the File menu module 56
Adding menu items 57
Creating the Help menu module 59
Attaching link callbacks 59
Setting up the code 62
Want more info? 63
Tutorial 4 — creating dialogs 63
About dialogs 64
More on instance names 64
Attaching a dialog module 65
Adding widgets to the dialog 66
Adding a callback to the Done button 69
Modifying a generated code function 70
Compiling and Running 71
Want more info? 72
Tutorial 5 — creating windows 72
Creating a window 73
Attaching callbacks 73
Adding widgets 74
Generating and modifying the code 77
Compiling and running 81
Want more info? 81
PhAB’s Environment 833Menus 85
File menu 85
Edit menu 86
Project menu 88
Build menu 89
Widget menu 91
View menu 92
Window menu 93
November 2, 2006 Contents v

2006, QNX Software Systems GmbH & Co. KG.
Help menu 94
Toolbars 95
Control panels 98
Widget palette 99
Modes (create vs select) 101
Resources panel 102
Callbacks panel 104
Module Tree panel 106
Module Links panel 108
Browse Files panel 109
Search dialog 111
Customizing your PhAB environment 112
General preferences 113
Color preferences 115
Dragging preferences 115
Grid preferences 116
Working with Applications 1194Creating an application 121
Opening an application 123
Saving an application 125
From the IDE 125
From standalone PhAB 126
Closing an application 128
Specifying project properties 128
Startup Windows tab 129
Generate Options tab 133
Run options 137
Build and Debug options 138
Importing files 139
Importing PhAB modules from other applications 140
Importing XBM images 140
Importing graphics images 141
vi Contents November 2, 2006

2006, QNX Software Systems GmbH & Co. KG.
Exporting files 141
Working with Modules 1435Module types 145
Anatomy of a module 145
Selecting a module 147
How modules are saved 148
Changing module resources 148
Creating a new module 148
Deleting a module 149
Iconifying modules 149
Displaying modules at run time 150
Positioning a module 150
Finding lost modules and icons 152
Window modules 152
Resizing a window module 153
Dialog modules 153
Resizing a dialog module 154
Predefined dialogs 154
Menu modules 155
Opening the menu editor 156
Specifying instance names 158
Creating hotkeys and shortcuts 158
Resizing a menu module 159
Creating command items 159
Creating submenu items 161
Creating separator items 161
Creating toggle items 162
Creating function items 162
Moving menu items 163
Using a menu module 163
Picture modules 164
Displaying a picture 165
November 2, 2006 Contents vii
2006, QNX Software Systems GmbH & Co. KG.
Using pictures as widget databases 166
Resizing a picture module 166
Creating Widgets in PhAB 1676Types of widgets 169
Instance names 170
Default instance name 170
When to assign a unique name 171
Instance names and translations 171
Duplicate names 172
Creating a widget 172
Creating several widgets 173
Canceling create mode 173
Selecting widgets 174
A single widget 174
Multiple widgets 175
Widgets within a group 178
Hidden widgets 178
Aligning widgets 179
To another widget 179
To a parent container 180
Distributing widgets 181
Common User Access (CUA) and handling focus 181
Changing focus with the keyboard 181
Controlling focus 182
Focus callbacks 183
Focus-handling functions 183
Ordering widgets 184
Dragging widgets 186
Setting a widget’s x and y coordinates 187
Transferring widgets between containers 187
Resizing widgets and modules 188
Clipboard 189
viii Contents November 2, 2006

2006, QNX Software Systems GmbH & Co. KG.
Cutting and copying 189
Pasting 191
Duplicating widgets and containers 192
Deleting widgets or modules 193
Matching widget resources and callbacks 193
Importing graphic files 195
Changing a widget’s class 196
Templates 196
Creating templates 197
Adding a widget class 199
Editing templates 201
Deleting templates 201
Editing Resources and Callbacks in7PhAB 203
Editing widget resources 205
Pixmap editor 206
Setting the pixmap’s size 207
How to draw and erase 208
Choosing colors 208
Drawing freehand 209
Drawing lines, rectangles, and circles 209
Filling an enclosed area 209
Selecting an area 210
Nudging an area 210
Using the Pixmap toolbar 211
Other pixmap controls 211
Color editor 212
Full color editor 212
Quick color editor 214
Flag/choice editor 214
Flag resources 215
Option list resources 216
November 2, 2006 Contents ix
2006, QNX Software Systems GmbH & Co. KG.
Font editor 216
List editor 218
Editing existing list items 220
Deleting list items 220
Number editor 220
Text editors 221
Code editor 224
Layout editors 225
Fill layout info editor 225
Row layout info editor 226
Grid layout info editor: 227
Row layout data editor 228
Grid layout data editor 229
Callbacks 230
Editing callbacks 232
Module callbacks 234
Prerealize setup function 236
Postrealize setup function 236
Setup functions are stored in stub files 237
Code callbacks 237
Callback functions are stored in stub files 238
Hotkey callbacks 238
Hotkeys — the basics 238
Specifying the hotkey label 239
Specifying the callback 240
Processing hotkeys 242
Disabling hotkeys 242
Event handlers — raw and filter callbacks 244
Geometry Management 2478Container widgets 249
Geometry negotiation 249
Resize policy 251
x Contents November 2, 2006

2006, QNX Software Systems GmbH & Co. KG.
Absolute positioning 255
Aligning widgets using groups 256
Joining widgets into a group 257
Accessing widgets in a group 257
Aligning widgets horizontally or vertically 257
Aligning widgets in rows and columns 258
Using the Group flags 259
Splitting apart a group 261
Constraint management using anchors 262
Anchor resources 265
Using layouts 267
PtFillLayout 271
PtRowLayout 274
PtGridLayout 279
Using hints 291
Enforcing position or size constraints without anchors or layouts295
Generating, Compiling, and Running9Code 297
Using the Build menu 299
Building your application 300
Generating application code 302
What PhAB generates 303
Version control 305
Function prototypes 306
How application files are organized 309
Multiplatform applications 310
Single-platform applications 311
Converting to Eclipse 312
Editing source 312
Choosing an editor or browser 314
Creating a source module 314
November 2, 2006 Contents xi

2006, QNX Software Systems GmbH & Co. KG.
Changing the file display 314
Compiling and linking 315
Specifying additional libraries 315
Runningmake 316
Customizing the build process 317
Running the application 318
Debugging 319
Managing targets 320
The Build menu 321
Including non-PhAB files in your application 322
Eclipse Project applications 322
Multiplatform applications 322
Single-platform applications 323
Adding libraries 323
Making a DLL out of a PhAB application 324
Compiling and linking 324
Initializing your DLL 324
Unloading your DLL 326
Working with Code 32710Variables and manifests 329
Widget variables and manifests 329
Using the global variable and widget manifest 330
Handling multiple instances of a window 331
Internal link manifests 333
Global header file 333
Function names and filenames 335
Initialization function 336
Processing command-line options 338
Module setup functions 340
Code-callback functions 341
Geometry data types 343
Timers 344
xii Contents November 2, 2006
2006, QNX Software Systems GmbH & Co. KG.
UsingPtTimer 345
RtTimer*functions 346
Initializing menus 346
Enabling, disabling, or toggling menu items 347
Changing menu-item text 348
Generating menu items 348
Delaying and forcing updates to the display 354
Globally 355
For a specific container 355
Forcing updates 356
Manipulating Resources in Application11Code 357
Argument lists 359
Setting resources 361
Argument lists for setting resources 361
Calling PtSetResources() 367
Setting one resource 368
Getting resources 369
Not using pointers 370
Using pointers 371
Calling PtGetResources() 377
Getting one resource 377
Application-level resources 378
Setting resources 379
Removing callbacks 380
Getting callbacks 380
Managing Widgets in Application Code 38312Creating widgets 385
Ordering widgets 386
Working in the widget family 387
Callbacks 388
November 2, 2006 Contents xiii

2006, QNX Software Systems GmbH & Co. KG.
Adding callbacks 389
Callback invocation 391
Removing callbacks 392
Examining callbacks 393
Event handlers 393
Adding event handlers 394
Removing event handlers 395
Event handler invocation 396
Widget styles 397
Photon hook 402
Control Surfaces 40713What’s a control surface? 409
Limitations 409
Binding actions to control surfaces 410
Referring to control surfaces 410
Control-surface API 411
Creating and destroying control surfaces 411
Finding IDs for control surfaces 412
Calculating geometry for control surfaces 412
Drawing control surfaces 413
Activating control surfaces 414
Enabling and disabling control surfaces 414
Finding control surfaces 415
Hiding and showing control surfaces 415
Ordering control surfaces 416
Storing user data with control surfaces 416
Example 417
Accessing PhAB Modules from Code 42114Creating internal links 424
Using internal links in your code 425
Manifests 425
xiv Contents November 2, 2006
2006, QNX Software Systems GmbH & Co. KG.
Internal-link functions 426
Example — displaying a menu 427
Using widget databases 428
Creating a database 429
Preattaching callbacks 429
Assigning unique instance names 429
Creating a dynamic database 429
Widget-database functions 430
International Language Support 43515Application design considerations 437
Size of text-based widgets 437
Justification 438
Font height 440
Hard-coded strings 440
Use of @ in instance names 442
Bilingual applications 443
Common strings 444
Generating a language database 444
Message databases 445
Language editor 446
Starting the Language Editor within PhAB 447
Starting the Language Editor as a stand-alone application 447
Creating a new translation file 448
Editing an existing translation file 449
Translating the text 449
Hotkeys 450
Help resources 451
Translation functions 451
Running your application 452
Distributing your application 454
Context-Sensitive Help 45716
November 2, 2006 Contents xv

2006, QNX Software Systems GmbH & Co. KG.
Referring to help topics 459
Universal Resource Locator (URL) 459
Topic path 459
Connecting help to widgets 460
Displaying help in the Helpviewer 460
Displaying help in a balloon 461
Help without the ? icon 461
Accessing help from your code 462
Interprocess Communication 46517Connections 468
Naming conventions 469
Typical scenario 469
Local connections 471
Example 472
Sending QNX messages 475
Receiving QNX messages 477
Adding an input handler 478
Removing an input handler 481
Message buffer size 481
Example — logging error messages 482
Photon pulses 484
Photon application that receives a pulse 484
Photon application that delivers a pulse 490
Processing signals 490
Adding a signal-processing function 491
Removing a signal-processing function 492
Other I/O mechanisms 492
Parallel Operations 49518Overview 497
Background processing 498
Work procedures 499
xvi Contents November 2, 2006
2006, QNX Software Systems GmbH & Co. KG.
Threads 505
Locking the Photon library 505
Multiple event-processing threads 506
Realtime threads 508
Non-Photon and Photon threads 509
Modal operations and threads 510
Exiting a multithreaded program 511
Threads and work procedures 514
Raw Drawing and Animation 51519PtRaw widget 517
Raw drawing function 518
Color 526
Drawing attributes 527
General attributes 528
Text attributes 528
Fill attributes 529
Stroke (line) attributes 530
Arcs, ellipses, polygons, and rectangles 531
Rectangles 532
Rounded rectangles 533
Beveled boxes, rectangles, and arrows 534
Polygons 536
Arcs, circles, chords, and pies 538
Spans — complex shapes 540
Lines, pixels, and pixel arrays 541
Text 542
Bitmaps 545
Images 546
Palette-based images 547
Direct-color images 548
Gradient-color images 548
Creating images 548
November 2, 2006 Contents xvii

2006, QNX Software Systems GmbH & Co. KG.
Caching images 549
Transparency in images 550
Displaying images 551
Manipulating images 552
Releasing images 552
Animation 554
Creating a series of snapshots 555
Cycling through the snapshots 556
Flickerless animation 557
Direct mode 559
Example 562
Video memory offscreen 563
Offscreen locks 568
Alpha blending support 569
Chroma key support 570
Extended raster operations 571
Video modes 573
Gradients 575
Driver-level gradients 575
Application-level gradients 575
Video overlay 576
Example 577
Layers 580
Surfaces 581
Viewports 582
Layer API 583
Using layers 584
Example 585
OpenGL 588
The QNXGL Framework 589
Using the QNXGL library 590
Example 591
xviii Contents November 2, 2006

2006, QNX Software Systems GmbH & Co. KG.
Using the GLPh extension functions 593
Fonts 59720Symbol metrics 599
Font function libraries 600
Font names 604
Querying available fonts 605
FontDetails structure 606
Generating font names 606
Example 607
Writing text in a rectangular area 611
Repairing damage to proportional text 615
Printing 62121Print contexts 624
Creating a print context 624
Modifying a print context 624
Starting a print job 625
Printing the desired widgets 628
Printing a new page 629
Printing widgets that scroll 629
Suspending and resuming a print job 631
Ending a print job 632
Freeing the print context 632
Example 632
Drag and Drop 63722Transport mechanism 639
Using drag and drop 640
Starting drag and drop 641
Receiving drag-and-drop events 645
Canceling drag and drop 650
Registering new transport types 650
November 2, 2006 Contents xix

2006, QNX Software Systems GmbH & Co. KG.
A simple data structure 651
A more complicated structure 653
Transport functions 660
Regions 66323Photon coordinate space 665
Region coordinates 666
Region origins 666
Initial dimensions and location 666
About child regions 669
Regions and event clipping 669
Placement and hierarchy 670
Region hierarchy 670
Parent region 671
Brother regions 672
Default placement 672
Specific placement 675
Using regions 676
Opening a region 676
Placing regions 676
System information 678
Events 68124Pointer events 683
Emitting events 686
Targeting specific regions 687
Targeting specific widgets 688
Emitting key events 689
Event coordinates 690
Event handlers — raw and filter callbacks 691
Collecting events 694
Event compression 694
Dragging 694
xx Contents November 2, 2006

2006, QNX Software Systems GmbH & Co. KG.
Initiating dragging 695
Handling drag events 699
Window Management 70325Window-management flags 705
Window-rendering flags 706
Window-managed flags 707
Window-notify flags 708
Notification callback 710
Example: verifying window closure 710
Getting and setting the window state 712
Managing multiple windows 715
Window-manager functions 715
Running a standalone application 716
Modal dialogs 716
Programming Photon without PhAB 72526Basic steps 727
Compiling and linking a non-PhAB application 728
Sample application 729
What’s going on 729
Connecting application code to widgets 732
Callbacks 733
Event handling 733
Complete sample application 733
Photon Architecture 737AEvent space 739
Regions and events 740
Events 740
Initial rectangle set 740
Collected rectangle set 741
Regions 741
November 2, 2006 Contents xxi

2006, QNX Software Systems GmbH & Co. KG.
Sensitivity 743
Opacity 743
Attribute summary 744
Event logging 744
Event modification 744
Parent/child relationships 744
Photon coordinate space 745
Root region 745
Event types 746
How region owners are notified of events 746
Polling 746
Synchronous notification 747
Asynchronous notification 747
Device region 747
Pointer focus 748
Keyboard focus 748
Drag events 749
Drag-and-drop events 749
Photon drivers 749
Input drivers 749
Output drivers 750
Photon window manager 752
Window-frame regions 752
Focus region 753
Workspace region 753
Backdrop region 753
Widgets at a Glance 755B
Unicode Multilingual Support 765CWide and multibyte characters 767
Unicode 768
UTF-8 encoding 768
xxii Contents November 2, 2006

2006, QNX Software Systems GmbH & Co. KG.
Conversion functions 770
Other encodings 772
Keyboard drivers 773
Example: text widgets 773
Dead keys and compose sequences 774
Photon compose sequences 774
Photon in Embedded Systems 781DAssumptions 783
Introduction 783
Photon Server 784
Graphics subsystem 784
Font support 784
Input support 785
User applications 785
Steps to boot into Photon 785
The basics 786
Files needed 787
Files needed 791
Files needed 792
Files needed 793
Caveats 793
mkifs 793
Flash filesystems 794
Graphics 795
Miscellaneous 795
Example 796
Required binaries 796
Required libraries 797
Required fonts 798
Putting it all together 799
Troubleshooting 803
Example: Using the IDE’s System Builder 804
November 2, 2006 Contents xxiii
2006, QNX Software Systems GmbH & Co. KG.
Advanced Topics 806
Configuring fonts 807
Adding a splash screen 812
Using PhAB under Microsoft Windows 815EPhoton in a single window 817
Exiting PhAB 817
Advanced options 818
PHINDOWSOPTS 818
Transferring PhAB projects 819
Debugger launch line 819
Custom widget development and PhAB 820
Using custom TrueType fonts and PhAB 822
Photon Hook DLLs 822
PhAB Keyboard Shortcuts 825FProject management shortcuts 827
Editing shortcuts 827
Adding items shortcuts 828
Building shortcuts 829
Widget management shortcuts 829
View and window shortcuts 830
Other shortcuts 830
Glossary 831
Index 853
xxiv Contents November 2, 2006

List of Figures
Photon’s event space from the user’s perspective. 4
The Photon widget hierarchy. 11
Life cycle of a widget. 13
Anatomy of aPtBasic widget. 15
Widget position and dimensions. 16
Origin of a widget and the position of its children. 17
Structure of a text-mode application. 18
Structure of a Photon application written without PhAB. 20
Structure of a Photon application written with PhAB. 21
Overview of PhAB’s user interface. 33
PhAB’s menubar. 85
PhAB’s toolbars. 95
The nudge tool’s components. 98
PhAB’s widget palette. 100
The Resources panel. 103
The Callbacks panel. 105
The Module Tree panel. 106
The menu for the Module Tree panel. 107
The Module Links panel. 108
The Browse Files panel. 110
The Search dialog. 111
Setting PhAB preferences. 113
Grid Preferences. 116
Choosing the style of the base window. 122
The Open button on PhAB’s toolbar. 123
Application Selector dialog. 124
November 2, 2006 List of Figures xxv
2006, QNX Software Systems GmbH & Co. KG.
The Save button on PhAB’s toolbar. 127
The Project Properties dialog. 129
The Project Properties dialog—Startup Windows tab. 130
Build and Debug Options tab of the Project Properties dialog.134
Run Options tab on the Project Properties dialog. 137
Build and Debug Options tab of the Project Properties dialog.138
Anatomy of a typical PhAB module. 146
The Work menu for a module. 146
Location dialog. 151
The icon for a Window module. 152
The icon for a Dialog module. 154
The icon for a Menu module. 156
PhAB’s Menu editor. 157
The icon for a Picture module. 165
Editing a widget’s instance name. 170
Multiple selected widgets. 176
Distributed widgets. 181
Match resources and callbacks dialog. 195
The dialog for creating new templates. 197
Common buttons for resource editors. 205
Sample pixmap editor session. 207
The Pixmap Editor’s toolbar. 211
Full color editor. 213
Quick color editor. 214
Flag/Choice editor. 215
Font editor. 217
List editor. 219
Number editor. 221
Text editor. 222
Multiline text editor. 222
Code editor. 224
xxvi List of Figures November 2, 2006
2006, QNX Software Systems GmbH & Co. KG.
Fill layout info editor. 225
Row layout info editor. 226
Grid layout info editor. 227
Row layout data editor. 228
Grid layout data editor. 229
Callback editor. 233
Callback editor fields for module-type link callbacks. 235
Hotkey field in the callback editor. 241
Event Mask field in the callback editor. 245
Event selector. 245
Example of anchoring. 264
Fill layout initial. 272
Fill layout after resizing. 273
Vertical fill layout. 273
Vertical fill layout after resizing. 273
Initial row layout. 275
Row layout after resizing. 275
Initial window withoutPt ROW WRAP set. 276
After shrinking withoutPt ROW WRAP set. 276
Initial window withoutPt ROW PACK set. 276
After resizing withoutPt ROW PACK set. 276
Initial window with Pt ROW JUSTIFY set. 277
After resizing withPt ROW JUSTIFY set. 277
Initial window with Pt LAYOUT VERTICAL set. 277
After resizing withPt LAYOUT VERTICAL set. 277
Initial window. 278
After stretching. 278
After shrinking. 279
One column (n cols=1). 281
Two columns (n cols=2). 281
Three columns (n cols=3). 281
Sketch of grid layout. 285
November 2, 2006 List of Figures xxvii

2006, QNX Software Systems GmbH & Co. KG.
Complex grid layout — initial. 290
Complex grid layout — resize. 291
Initial Hints example. 294
Hints example after resizing. 295
Directories for a PhAB application. 309
Browse Files palette. 313
Manage Targets dialog. 320
A sample search window. 332
Internal Module Links dialog. 424
Widget database used for PhAB’s interface. 428
PhAB Language Editor. 446
Language Selection dialog. 448
Filled and stroked rectangles. 533
A beveled box. 534
Beveled rectangles and arrows. 536
Filling a simple polygon. 537
Filling an overlapping polygon. 538
Filled and stroked arcs. 540
Lines created by the drawing primitives. 542
Text created by the drawing primitives. 545
A bitmap with a transparent background. 546
A backfilled bitmap. 546
Communication in normal (nondirect) mode. 560
Communication in direct mode. 560
Source and destination viewports. 582
Symbol metrics. 599
Font architecture usingio-graphics with a resource managerfont instance 601
Every application with its own private font server. 602
Applications sharing a common font server. 603
Shared and private font servers. 604
Packed data and headers. 640
Photon coordinate space. 665
xxviii List of Figures November 2, 2006

2006, QNX Software Systems GmbH & Co. KG.
Regions and event clipping. 670
Hierarchy of regions for a typical Photon system. 671
An event’s rectangle set. 741
Exploded view of Photon’s regions. 742
November 2, 2006 List of Figures xxix


About This Guide
November 2, 2006 About This Guide xxxi


2006, QNX Software Systems GmbH & Co. KG. Typographical conventions
Typographical conventionsThroughout this manual, we use certain typographical conventions todistinguish technical terms. In general, the conventions we useconform to those found in IEEE POSIX publications. The followingtable summarizes our conventions:
Reference Example
Code examples if( stream == NULL )
Command options -lR
Commands make
Environment variables PATH
File and pathnames /dev/null
Function names exit()
Keyboard chords Ctrl – Alt – Delete
Keyboard input something you type
Keyboard keys Enter
Program output login:
Programming constants NULL
Programming data types unsigned short
Programming literals 0xFF, "message string"
Variable names stdin
User-interface componentsCancel
We format single-step instructions like this:
➤ To reload the current page, pressCtrl – R.
We use an arrow (→) in directions for accessing menu items, like this:
November 2, 2006 About This Guide xxxiii

Typographical conventions 2006, QNX Software Systems GmbH & Co. KG.
You’ll find the Other... menu item underPerspective→Show View.
We use notes, cautions, and warnings to highlight importantmessages:
Notes point out something important or useful.☞
CAUTION: Cautions tell you about commands or procedures thatmay have unwanted or undesirable side effects.!
WARNING: Warnings tell you about commands or proceduresthat could be dangerous to your files, your hardware, or evenyourself.
Note to Windows usersIn our documentation, we use a forward slash (/) as a delimiter inallpathnames, including those pointing to Windows files.
We also generally follow POSIX/UNIX filesystem conventions.
xxxiv About This Guide November 2, 2006

2006, QNX Software Systems GmbH & Co. KG. What you’ll find in this guide
What you’ll find in this guideThe PhotonProgrammer’s Guideis intended for developers of Photonapplications. It describes how to create applications and the widgetsthat make up their user interfaces, with and without using the PhotonApplication Builder (PhAB).
If you’re familiar with earlier versions of Photon, you should read:
� What’s new in Photon for QNX Neutrino 6.3
� What’s new in Photon for QNX Neutrino 6.2.1
� What’s new in Photon for QNX Neutrino 6.2.0
� What’s new in Photon for QNX Neutrino 6.0
to find out how Photon and its widgets have changed in this release.
☞
This table may help you find what you need in this book:
For information about: See:
Photon, widgets, and PhAB Introduction
Getting started with PhAB Tutorials
PhAB’s user interface PhAB’s Environment
Creating, opening, and savingapplications in PhAB
Working with Applications
PhAB modules, such aswindows, dialogs, and menus
Working with Modules
Adding, deleting, andmodifying widgets in PhAB
Creating Widgets in PhAB
Initializing a widget’s resourcesand callbacks
Editing Resources andCallbacks in PhAB
continued. . .
November 2, 2006 About This Guide xxxv
What you’ll find in this guide 2006, QNX Software Systems GmbH & Co. KG.
For information about: See:
Setting the sizes of a widget andits children
Geometry Management
Getting PhAB to generate code Generating, Compiling, andRunning Code
Editing code generated byPhAB
Working with Code
Getting and setting widgetresources
Manipulating Resources inApplication Code
Adding or modifying widgets“on the fly” at runtime
Managing Widgets inApplication Code
Building special areas into awidget
Control Surfaces
Using internal links to refer toPhAB modules
Accessing PhAB Modules fromCode
Developing a multilingualapplication
International Language Support
Adding help information toyour application
Context-Sensitive Help
Communicating with a Photonapplication
Interprocess Communication
Threads, work procedures, andbackground processing
Parallel Operations
UsingPtRaw and Photon’slow-level drawing routines
Raw Drawing and Animation
Photon’s fonts Fonts
Printing in a Photon application Printing
Transferring data from onewidget or application to another
Drag and Drop
continued. . .
xxxvi About This Guide November 2, 2006

2006, QNX Software Systems GmbH & Co. KG. What’s new in Photon for QNX Neutrino 6.3
For information about: See:
Photon’s regions Regions
Interaction betweenapplications, users, and thePhoton server
Events
Working with windows andmodal dialogs
Window Management
Developing applications “byhand” without PhAB
Programming Photon withoutPhAB
Photon’s implementation Photon Architecture
PhAB’s widget icons Widgets at a Glance
Handling internationalcharacters
Unicode Multilingual Support
Building an embedded system Photon in Embedded Systems
Differences between theWindows and native QNXNeutrino versions of PhAB
Using PhAB under MicrosoftWindows
Photon terminology Glossary
What’s new in Photon for QNX Neutrino 6.3New content
� The PhAB’s Environment — PhAB’s interface has changed,including an updated menu and simplified toolbar.
� The Geometry Management chapter now describes how to uselayouts to manage widget placement.
� The directory structure for PhAB projects has changed, and isdescribed in How application files are organized.
� The Generating, Compiling and Running Code chapter nowdescribes how you can Manage targets.
November 2, 2006 About This Guide xxxvii

What’s new in Photon for QNX Neutrino 6.2.1 2006, QNX Software Systems GmbH & Co. KG.
� The Raw Drawing and Animation chapter now describes how youcan use layers.
� The Raw Drawing and Animation chapter also describes how youcan use the OpenGL API with the new QNXGLOpenGL-compatible API.
� The Fonts chapter is updated with information about the new fontlibrary.
� The Photon in Embedded Systems appendix has a new example ofcreating a floppy containing Photon and some applications, and isupdated with new font library information pertinent to embeddedsystems.
What’s new in Photon for QNX Neutrino 6.2.1New content
� Listed the supported platforms; see “Versions and platforms” inthe Introduction.
� The Interprocess Communication chapter has a better descriptionof how to use Photon connections.
� There’s a new section, “Layers,” in the Raw Drawing andAnimation chapter.
� Added a description of thePHINDOWSOPTS environmentvariable to the Using PhAB under Microsoft Windows appendix.
Errata� The libraries in/usr/photon/lib are provided for runtime
compatibility with Photon for QNX Neutrino 6.0 (x86 only). Thecurrent libraries are in/usr/lib. For more information about thelibraries, see “Photon libraries” in the Introduction.
� Corrected the call toionotify() in “Sending the pulse message tothe deliverer” in the Interprocess Communication chapter.
xxxviii About This Guide November 2, 2006

2006, QNX Software Systems GmbH & Co. KG. What’s new in Photon for QNX Neutrino 6.2.0
� The instructions for printing aPtMultiText widget have beencorrected.
� The order of the options to theon command have been correctedin “Putting it all together” in the Photon in Embedded Systemsappendix.
� If you want to use a graphical debugger when developing inWindows, use the IDE that’s part of the QNX MomenticsProfessional Edition.
What’s new in Photon for QNX Neutrino 6.2.0New content
� The Edit menu now includes Undo and Redo commands. For moreinformation, see the chapter on PhAB’s Environment.
� PhAB can’t import QNX Windows picture files any more.
� You can now specify a list of library callback functions when youstart PhAB. For more information, seeappbuilder in the QNXNeutrinoUtilities Reference.
� “Making a DLL out of a PhAB application” in the Generating,Compiling, and Running Code chapter
� “Widget styles” in the Managing Widgets in Application Codechapter
� “Offscreen locks” in the Raw Drawing and Animation chapter.
� Using PhAB under Microsoft Windows appendix
What’s new in Photon for QNX Neutrino 6.0This section doesn’t try to describe all the changes to PhAB’s userinterface; most you’ll discover by trying it yourself or by scanningthis manual. Instead, this section lists only the major changes.
November 2, 2006 About This Guide xxxix

What’s new in Photon for QNX Neutrino 6.0 2006, QNX Software Systems GmbH & Co. KG.
Introduction� The geometry of a widget has changed slightly; it now includes the
widget’s border. For more information, see “Widget geometry.”
PhAB’s Environment� You no longer need to pressEnter after giving an instance name to
a widget.
Working with Applications� It’s no longer possible to override the standard Photon mainloop
function.
Working with Modules� PtWindow widgets (which are used to instantiate Window
modules) no longer include an icon resource. You must now usePhAB to associate an icon with the window.
� You can no longer create “other” modules (file selectors ormessages) in PhAB, although they’re still supported for existingapplications. Instead of the file selector, use one of:
- PtFileSel
- PtFileSelection()
Instead of the message module, use one of:
- PtAlert()
- PtMessageBox()
- PtNotice()
- PtPrompt()
For more information, see the PhotonLibrary Reference.
Creating Widgets in PhAB� You can now create templates, or customized widgets, to use as the
basis when creating other widgets.
xl About This Guide November 2, 2006
2006, QNX Software Systems GmbH & Co. KG. What’s new in Photon for QNX Neutrino 6.0
Geometry Management� In the current version of the Photon microGUI, widgets are
anchored immediately upon creation. In earlier versions,anchoring is done when the widgets are realized.
� If the resize policy conflicts with the anchors, thePt ARG RESIZEFLAGSoverridePt ARG ANCHOROFFSETSandPt ARG ANCHORFLAGS.
Working with Code
New sections:
� Timers
Manipulating Resources in Application Code
New sections:
� Setting image resources
� Setting one resource
� Getting image resources (pointer method)
� Getting one resource
Other changes:
� When setting string resources, the fourth argument toPtSetArg()isthe number of bytes to copy; if it’s 0,strlen()is used to determinethe length of the string.
� Changes to the widget’s state may invalidate the pointers returnedby PtGetResources(); use them promptly.
Managing Widgets in Application Code
New sections:
� Ordering widgets
November 2, 2006 About This Guide xli
What’s new in Photon for QNX Neutrino 6.0 2006, QNX Software Systems GmbH & Co. KG.
Context-Sensitive Help� ThePxHelp* functions are now namedPtHelp* and are in the
main Photon library,ph.
Interprocess Communication
New sections:
� Connections — the best method of IPC for Photon applications.
Other changes:
� As described in “Adding an input handler,” an input handler mustreturn one of the following:
Pt CONTINUE
The input handler doesn’t recognize the message. Ifthere are other input handlers attached to the sameprocess ID, they’re called. If there are no inputhandlers attached specifically to this process ID, or ifall input handlers attached specifically to this processID returnPt CONTINUE, the library looks for inputhandlers attached to pid 0. If all the input handlersreturnPt CONTINUE, the library replies to themessage with anENOSYS.
Pt END The message has been recognized and processed andthe input handler needs to be removed from the list.No other input handlers are called for this message.
Pt HALT The message has been recognized and processed butthe input handler needs to stay on the list. No otherinput handlers are called for this message.
This creates several incompatibilities with earlier versions of thePhoton microGUI:
- If an input handler replies to the message and returnsPt CONTINUE (or if the message is from a proxy/pulse),everything should be OK. The current library tries and fails toreply again, but that’s harmless. Still, it’s a good idea to change
xlii About This Guide November 2, 2006
2006, QNX Software Systems GmbH & Co. KG. What’s new in Photon for QNX Neutrino 6.0
the code to returnPt HALT; this prevents the library fromcalling other input handlers or replying.
- If an input handler returnsPt CONTINUE without replying tothe message, the old library doesn’t reply either, but the currentone does. You need to change the code to returnPt HALT.
- If an input handler returnsPt END (which is the most obviousvalue other thanPt CONTINUE), the only situation that cancause a problem is when you have multiple input handlersattached to the same process ID.
- If an input handler returns a value other thanPt CONTINUE orPt END, the old library removes it from the list but the newlibrary doesn’t. You need to change the code to returnPt END.
Parallel Operations
New sections:
� Threads
Raw Drawing and Animation
New sections:
� Direct mode
� Video memory offscreen
� Alpha blending support
� Chroma key support
� Extended raster operations
� Video modes
� Gradients
Other changes:
� If you usePxLoadImage()to load an transparent image, setPX TRANSPARENTin theflagsmember of thePxMethods t
November 2, 2006 About This Guide xliii
What’s new in Photon for QNX Neutrino 6.0 2006, QNX Software Systems GmbH & Co. KG.
structure. If you do this, the function automatically makes theimage transparent; you don’t need to create a transparency mask.See “Transparency in images.”
Fonts
New chapter.
Printing
The entire API has been made simpler. Applications that call the oldroutines should still work, but you should reread this chapter.
Drag and Drop
New chapter.
Events
New sections:
� Pointer events
� Event handlers
xliv About This Guide November 2, 2006

Chapter 1
Introduction
In this chapter. . .Overview of the Photon architecture 3Photon Application Builder (PhAB) 6Widget concepts 8Programming paradigm 17Photon libraries 21Building applications with PhAB—an overview 24Writing applications without PhAB 28
November 2, 2006 Chapter 1 � Introduction 1


2006, QNX Software Systems GmbH & Co. KG. Overview of the Photon architecture
By now, you’ve probably seen and tried various Photonapplications—the window manager, Helpviewer, games, and soon—and you’re ready to develop your own. This chapter introducesyou to the basic terms and concepts you’ll use when developing aPhoton application.
Overview of the Photon architectureThe Photon manager runs as a small server process, implementingonly a few fundamental primitives. It creates a three-dimensionalevent spacepopulated byregionsandevents. This manager can’tdraw anything or manage a mouse, keyboard, or pen.
External, optional processes — including device drivers and windowand other managers — implement the higher-level functionality of thewindowing system. They communicate by emitting events throughthe Photon event space.
A Photon application consists of one or more flat, rectangular regionsthat act as its “agents” in the event space. The application drawsinside the regions. Regions are stacked on top of each other in thePhoton event space. A region can have a parent region as well assiblings.
The user sits outside the event space, looking in from the front. Thevery back of the event space is a special region called theroot region.
November 2, 2006 Chapter 1 � Introduction 3

Overview of the Photon architecture 2006, QNX Software Systems GmbH & Co. KG.
Event space
Root region
Application region
Child application region
Photon’s event space from the user’s perspective.
When you run the application, you interact with it, and it interactswith other applications and Photon, in many ways: you press keys andmouse buttons, the application performs graphical operations, and soon.
These interactions are calledevents; they travel between regions in theevent space likephotonsor particles of light. For example:
� When you press a mouse button, the device driver emits an eventand sends it back through the event space (toward the root region).A region that’s interested in the event can catch it and process it,activating a push button or other UI element.
4 Chapter 1 � Introduction November 2, 2006
2006, QNX Software Systems GmbH & Co. KG. Overview of the Photon architecture
� When your application wants to draw something, it emits an eventand sends it toward the front of the event space (toward the user).A driver can catch the event and render the drawing on the screen.
Each region can determine which events it’s interested in by setting itssensitivityandopacity:
� A region that’s sensitive to a type of event notifies the applicationwhenever such an event intersects it.
� A region that’s opaque to a type of event blocks it by clipping itsown area out of the event’s area.
For more information, see the Photon Architecture appendix in thisguide.
Photon uses adraw bufferto queue a series of draw commands (calledthedraw stream) for the application. Once the buffer is full or theapplication callsPgFlush(), the list of commands is sent to the Photonserver. After that it’s typically sent toio-graphics (see theUtilitiesReference), which then interprets and renders the draw stream.
You can change the size of the draw buffer by callingPgSetDrawBufferSize(). The optimal size depends on what you’redrawing and how often you flush the buffer.
Your application can work innormalor direct mode; buffering worksin both modes.
Normal mode The application sends the draw stream to thePhoton server, which then does some work on it,such as adding clipping to represent the regions orwindows above the application and sending thedraw stream to the regions that are sensitive todraw events (e.g.io-graphics, phrelay).
Direct mode The draw stream is sent directly toio-graphics.The Photon server doesn’t see it or process it, sothere are fewer context switches (switching fromone process to another) and fewer operations done
November 2, 2006 Chapter 1 � Introduction 5
Photon Application Builder (PhAB) 2006, QNX Software Systems GmbH & Co. KG.
on the stream, which results in a significantly fasterway of drawing.
For more information, see “Direct mode” in theRaw Drawing and Animation chapter.
Photon Application Builder (PhAB)The Photon microGUI includes a very powerful development toolcalled thePhoton Application Builder(PhAB). It’s a visual designtool that generates the underlying C and/or C++ code to implementyour application’s user interface. With PhAB, you can dramaticallyreduce the amount of programming required to build an application.You can save time not only in writing the user interface portion ofyour code, but also in debugging and testing. PhAB helps you getyour applications to market sooner and with more professional results.
If you’re using the Windows-hosted version of PhAB, you shouldread the appendix, Using PhAB under Microsoft Windows.
☞
PhAB takes care of designing and creatingmodules(e.g. windows,menus, dialogs, and icons), andwidgets(e.g. buttons and labels). Italso helps you createwidget callbacks, special resources that connecta widget to your application’s code or link a widget to a PhABmodule. For more information, see “Widget concepts” later in thischapter.
PhAB lets you access and create PhAB modules within your owncode. It also provides a number of utility functions to set up databasesof widgets that you can reuse as many times as you need, rather thancreate widgets from scratch.
Get immediate results
PhAB lets you bypass the trial-and-error process of creating a userinterface by hand. Instead of having to write code for every button,window, or other widget, you just “point and click” to create thewidgets you want.
6 Chapter 1 � Introduction November 2, 2006

2006, QNX Software Systems GmbH & Co. KG. Photon Application Builder (PhAB)
As soon as you create a widget, PhAB displays it on the screen, alongwith all the resources that control how the widget looks and behaves.Changing any widget resource is easy—just click on the resource,choose a new value, and you’re done. It’s just as easy to move orresize a widget—simply click and drag the widget.
Concentrate on functionality
Like other GUI development environments, PhAB lets you attachcode functions to a widget’s callbacks so you can implement yourapplication’s main functionality. For example, you can attach a codefunction to a button so that the function is invoked whenever the userclicks the button.
In addition, PhAB doesn’t force you to write and attach the codeneeded to “glue” the different parts of your interface together. Instead,you can attach a widget’s callbacks directly to any window, dialog, ormenu. The only code you have to worry about is the code specific toyour application.
Create prototypes without writing code
Once you’ve completed any part of a user interface, you can havePhAB generate all the C and/or C++ code required to bring theinterface to life. Which means you can create a complete prototypewithout having to write a single line of code.
After you’ve generated and compiled the code, you can run theprototype to see how the interface works. For example, if you link abutton to a dialog, clicking on the button causes the dialog to pop up.You immediately get a sense of how the interface will “feel” to theuser. In fact, PhAB makes the process of building and testing soefficient that you can even sit down with your users and designprototypes together.
After you’ve finished a prototype, you can build it into your workingapplication. Or you can stop prototyping at any point, write somecallback functions, experiment with your application to see how itworks, and then return to prototyping. You’re always free to fine-tune
November 2, 2006 Chapter 1 � Introduction 7

Widget concepts 2006, QNX Software Systems GmbH & Co. KG.
all aspects of your application until it looks and works just the wayyou want.
Cut code size
Your application may need to use the same widgets in several parts ofits interface. With PhAB, you don’t have to set up these widgets everytime they’re needed. Instead, you define the widgets just once, placethem in a widget database, and then, using C functions provided byPhAB, reuse the widgets as often as you want. By taking thisapproach, you can reduce the code required to create a widget to asingle line.
Create consistent applications
With PhAB, you rarely have to build an application from scratch. Forexample, if you’ve already created windows and dialogs for anexisting application, you’re free to drop these into a new application.You can also create a central database of widgets that you import intoall your applications to create a consistent look and feel.
Create all kinds of applications
With PhAB, you can speed up development without compromisingfunctionality, so you’re free to create all kinds of applications. Forexample, we used PhAB to build almost all the applications that shipwith Photon, including the Helpviewer, Terminal application, DesktopManager, Snapshot, all games and demos—even PhAB itself!
The best introduction to PhAB is using it, so start by working throughthe tutorials. Within a very short time, you’ll be able to put togethervery detailed prototypes. When you’re ready to start programmingyour application, you can then read the sections pertaining to thewidgets you’re trying to use.
Widget conceptsWhen creating a new user interface (UI), you’ll find it much simplerto compose the interface from a set of standard components, such assliders, lists, menus, and buttons, than to implement each UI element
8 Chapter 1 � Introduction November 2, 2006
2006, QNX Software Systems GmbH & Co. KG. Widget concepts
from scratch. Each standard component included in the UI is anobject called awidget.
Photon widgets implement a set of UI components that are more orless consistent with other windowing systems you may have seen.
The widget set is built on an object-oriented framework loosely basedon the X Toolkit Intrinsics library (Xt). If you’re already familiar withXt, you’ll see that many of the same concepts apply here.
A widget combines the data and operations required to implement aparticular UI element. Grouping data and operations into an objectlike this is calledencapsulation. A widget encapsulates theknowledge of how to:
� draw itself
� respond to user events (e.g. pressing a pointer button)
� repair itself by redrawing when it’sdamaged(for example, when awindow that obscures it closes).
In addition, there are some widgets calledcontainersthat hold otherwidgets and manage their layout.
A widget also hides the details of how it performs theseresponsibilities from the outside world. This principle, known asinformation hiding, separates the widget’s internal implementationfrom its public interface.
The public interface consists of all the attributes visible to otherobjects as well as the operations other objects may perform on thewidget. The attributes in the widget’s public interface are calledresources.
The advantage to you as a programmer is that you don’t have to knowthe implementation details of a widget to use it—you just need toknow the public interface for the widget, how to create and destroythe widget, and how to manipulate its resources.
☞
November 2, 2006 Chapter 1 � Introduction 9
Widget concepts 2006, QNX Software Systems GmbH & Co. KG.
Not every object is unique. Objects that perform the same functionand provide the same public interface belong to the sameclass.Widgets that provide the same UI component belong to the samewidget class. The window’sclass methodsimplement the commonfunctionality by the class.
Several widget classes may have attributes and operations in common.In such cases, these widget classes may be categorized assubclassesof the samesuperclassor parentclass. The attributes and operationsare encapsulated in the superclass; the subclassesinherit them fromthe parent class. The subclasses themselves are said to be inheritedfrom the superclass.
The Photon library allows a widget class to be inherited from onlyone widget class. This relationship is known assingle inheritance.The relationships between all of the widget classes can be drawn as atree known as theclass hierarchy.
10 Chapter 1 � Introduction November 2, 2006

2006, QNX Software Systems GmbH & Co. KG. Widget concepts
PtWidget
PtBasic
PtTimer
PtContainer
PtGauge
PtGraphic
PtLabel
PtRaw
PtSeparator
PtTrend
PtButtonPtMenuLabelPtTab
PtCalendar
PtClock
PtToggleButton
PtOnOffButton
PtBezier
PtEllipsePtGrid
PtLine
PtPixel
PtPolygonPtRect
PtArc
PtMeter
PtScrollbar
PtSlider
PtProgress
PtText
PtCompound
PtGroup
PtMenuBar
PtBkgd
PtScrollArea
PtTerminal PtTty
PtFontSel
PtPrintSel
PtOSContainer
PtPanelGroup
PtDisjoint
PtClient PtWebClient
PtToolbar
PtToolbarGroup
PtMenu
PtRegion
PtWindow
PtServer
PtFlash
PtPane
PtComboBox
PtDivider
PtGenList
PtMenuButton
PtMultiTextPtNumericFloat
PtNumericIntegerPtNumeric
PtColorSelPtColorSelGroup
PtColorPanel
PtColorPatch
PtColorWell
PtTree
PtFileSelPtRawTree
PtList
PtGenTree
PtRawList
PtScrollContainer
PtBarGraph
PtMTrend
PtUpDown
PtImageArea
The Photon widget hierarchy.
The nesting of widget instances in your application’s GUI producesanother widget hierarchy, called thewidget familyto distinguish itfrom the widget class hierarchy.
November 2, 2006 Chapter 1 � Introduction 11

Widget concepts 2006, QNX Software Systems GmbH & Co. KG.
The Photon widget library acts like a widget factory. It provides a setof functions that let you to create a new widget of a particular widgetclass and then manipulate that widget. Once created, the widget hasall the characteristics of the widget class. Because of inheritance, italso has all the characteristics of the superclasses of its widget class.
The new widget is aninstanceof the widget class. Creating a newwidget of a particular class is thus also calledinstantiatingthe widget.This term isn’t entirely accurate, however, because you’re reallyinstantiating the widgetclass. This reflects a tendency foundthroughout this guide to refer tobothwidgets and widget classessimply as “widgets.”
The widget’s resources are used to configure its appearance orbehavior. You can edit resources in PhAB, and after the widget hasbeen created you can change many of them with a call toPtSetResource()or PtSetResources(). Resources are used extensivelyto control the data displayed by a widget and to customize how it’sdisplayed. For example:
� ThePt ARGTEXT STRINGresource for aPtLabel widget is thestring that it displays.
� the resources for aPtButton widget specify whether the buttondisplays a string and/or an image, its text, image, color, and whathappens when the user selects the button.
How you get and set widget resources in your application codedepends on the type of resource. For more information, see theManipulating Resources in Application Code chapter.
☞
An important type of resource provided by widgets is thecallbacklist, which is a list of functions that the widget invokes in response tosome significant user event. For example, a text field widget calls thefunctions in one of its callback lists whenever the user enters a newvalue and pressesEnter. When you develop an application, you canaddcallbacksto a widget’s callback list in order to perform theappropriate action in response to a user event.
12 Chapter 1 � Introduction November 2, 2006

2006, QNX Software Systems GmbH & Co. KG. Widget concepts
For more information about adding callbacks, see:
� “Callbacks” in the Editing Resources and Callbacks in PhABchapter
� “Callbacks” in the Managing Widgets in Application Code chapter.
Widget life cycleA widget has an inherent life cycle, as shown below.
Create
Realize
Unrealize
Destroy
Life cycle of a widget.
1 When the widget is required, it’screatedor instantiated. Afterbeing created, its attributes may be manipulated, or operationsmay be performed on it.
2 After a widget has been created, it’s not immediately visible inthe UI. It must berealized. If you’re using PhAB, your widgetsare realized automatically; if you’re not using PhAB, you mustrealize them usingPtRealizeWidget().
Realizing a widget automatically realizes all its descendants.Photon guarantees that all the descendants are realized beforethe widget itself, so the widget can calculate its initial size
November 2, 2006 Chapter 1 � Introduction 13

Widget concepts 2006, QNX Software Systems GmbH & Co. KG.
based on the sizes of its children. To have the applicationnotified that the widget has been realized, you can register acallback on thePt CB REALIZEDcallback list.
3 You can temporarily hide a widget from the UI byunrealizingitusingPtUnrealizeWidget(). As with realization, you can notifythe application, using thePt CB UNREALIZEDcallbackresource.
4 When the widget is no longer required, you can destroy it.
You can destroy a widget by callingPtDestroyWidget(). Thecall doesn’t actually destroy the widget immediately—it’smarked to be deleted by the toolkit at an appropriate time andadded to a list of widgets to be destroyed. These widgets arenormally destroyed within the main loop of the application,after all the callbacks associated with an event have beeninvoked.
Your application can definePt CB DESTROYEDcallbacks forany widget. These callbacks are invoked when the widgets aremarked for destruction.
To have the application notified when the widget is actuallydestroyed, you can register a function with the destroy callbacklist (Pt CB IS DESTROYED) for the widget. This is especiallyuseful for cleaning up data structures associated with thewidget.
Widget geometryYou can think of a widget as a painting or mounted photograph. Thewidget is held by a frame called aborder. For a widget, the border isthe set of outlines as well as the beveled edge that may be drawnaround the outside.
The part of a widget that’s used for drawing is called thecanvas. ForPtWidget, this is the area inside the widget’s borders. ForPtBasic
and its descendants, the canvas is the area inside the widget’s borderandmargins. Other widgets, such asPtLabel, define other margins.The margins form a matt and obscure any part of the canvas extending
14 Chapter 1 � Introduction November 2, 2006
2006, QNX Software Systems GmbH & Co. KG. Widget concepts
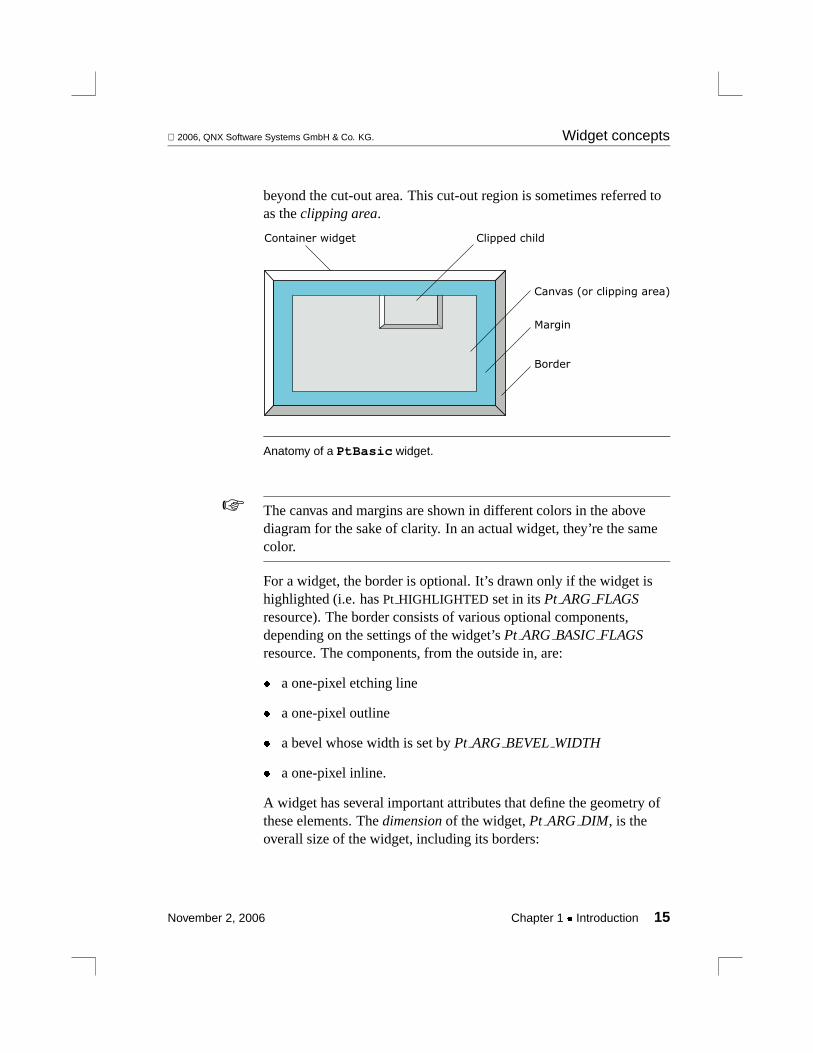
beyond the cut-out area. This cut-out region is sometimes referred toas theclipping area.
Container widget
Border
Margin
Canvas (or clipping area)
Clipped child
Anatomy of a PtBasic widget.
The canvas and margins are shown in different colors in the abovediagram for the sake of clarity. In an actual widget, they’re the samecolor.
☞
For a widget, the border is optional. It’s drawn only if the widget ishighlighted (i.e. hasPt HIGHLIGHTED set in itsPt ARG FLAGSresource). The border consists of various optional components,depending on the settings of the widget’sPt ARG BASICFLAGSresource. The components, from the outside in, are:
� a one-pixel etching line
� a one-pixel outline
� a bevel whose width is set byPt ARG BEVELWIDTH
� a one-pixel inline.
A widget has several important attributes that define the geometry ofthese elements. Thedimensionof the widget,Pt ARG DIM , is theoverall size of the widget, including its borders:
November 2, 2006 Chapter 1 � Introduction 15

Widget concepts 2006, QNX Software Systems GmbH & Co. KG.
POS (x, y)
Origin of parent
x
y
Marginwidth
Margin height
Margin height
DIM (width)
Bevel width
DIM(height)
Widget position and dimensions.
Pt ARG MARGIN WIDTH defines the width of the margins on theleft and right of the canvas;Pt ARG MARGIN HEIGHT defines theheight of the margins above and below the canvas. These resourcesare defined byPtBasic.
Other widget classes define their own margin resources, which maybe added to the basic margin width or height. For example, the labelwidget provides separate margins for the left, right, top, and bottom ofthe widget. These are added to the basic margin width and height todetermine the amount of space to leave on each side of the canvas.
The origin of the widget (for the purposes of any drawing it performsor positioning of any children) is theupper left cornerof the canvas.All coordinates specified for the widget are relative to this location, asare the coordinates of all events that the widget receives. For example,if the widget is a container, the positions of all the children arerelative to this point:
16 Chapter 1 � Introduction November 2, 2006
2006, QNX Software Systems GmbH & Co. KG. Programming paradigm
POS (x, y)
POS (x, y)
Origin of container
Container widget
Child widget
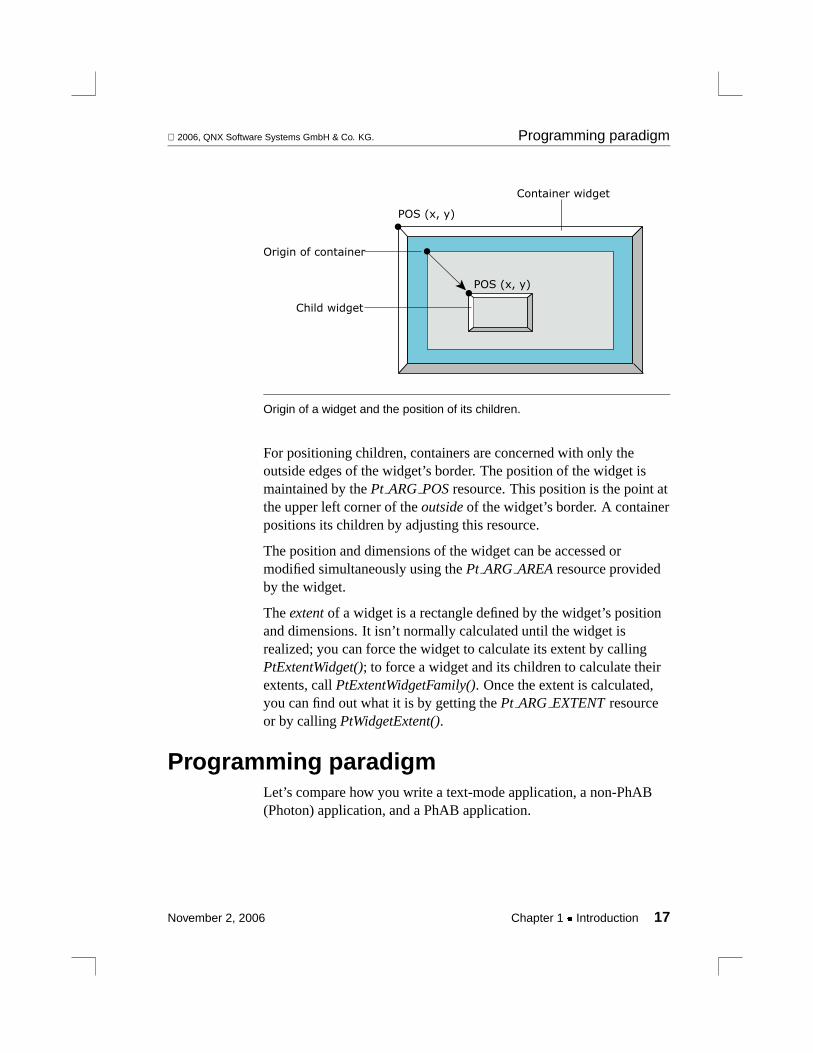
Origin of a widget and the position of its children.
For positioning children, containers are concerned with only theoutside edges of the widget’s border. The position of the widget ismaintained by thePt ARG POSresource. This position is the point atthe upper left corner of theoutsideof the widget’s border. A containerpositions its children by adjusting this resource.
The position and dimensions of the widget can be accessed ormodified simultaneously using thePt ARG AREAresource providedby the widget.
Theextentof a widget is a rectangle defined by the widget’s positionand dimensions. It isn’t normally calculated until the widget isrealized; you can force the widget to calculate its extent by callingPtExtentWidget(); to force a widget and its children to calculate theirextents, callPtExtentWidgetFamily(). Once the extent is calculated,you can find out what it is by getting thePt ARG EXTENTresourceor by callingPtWidgetExtent().
Programming paradigmLet’s compare how you write a text-mode application, a non-PhAB(Photon) application, and a PhAB application.
November 2, 2006 Chapter 1 � Introduction 17

Programming paradigm 2006, QNX Software Systems GmbH & Co. KG.
Text-mode applicationWhen you write a non-Photon (text-mode) application, you generallyconcentrate on the main program, from which you do such things as:
� initialize the application
� set up signal handlers
� send and receive messages
� iterate
� call subroutines, as required
� communicate with the console
� and eventually exit.
Main program
Signals
Messages
Console
Signal
handlers
exit()
Message
handler
functions
Message
handler
Structure of a text-mode application.
18 Chapter 1 � Introduction November 2, 2006
2006, QNX Software Systems GmbH & Co. KG. Programming paradigm
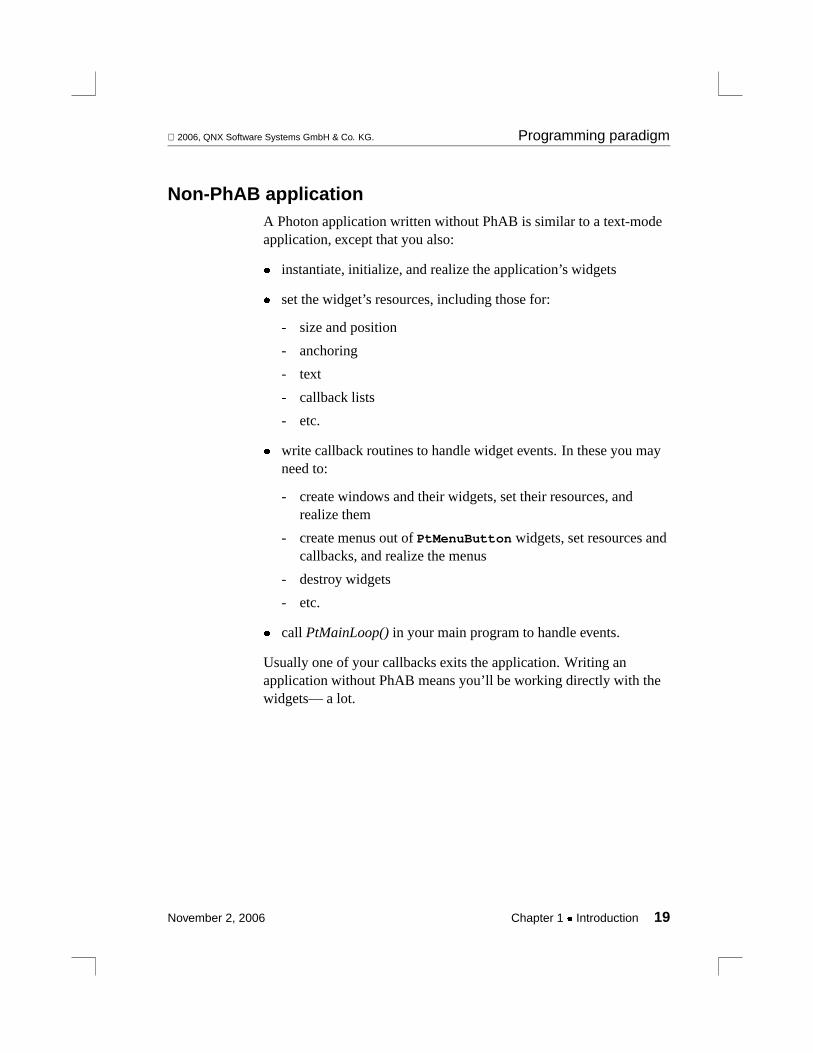
Non-PhAB applicationA Photon application written without PhAB is similar to a text-modeapplication, except that you also:
� instantiate, initialize, and realize the application’s widgets
� set the widget’s resources, including those for:
- size and position
- anchoring
- text
- callback lists
- etc.
� write callback routines to handle widget events. In these you mayneed to:
- create windows and their widgets, set their resources, andrealize them
- create menus out ofPtMenuButton widgets, set resources andcallbacks, and realize the menus
- destroy widgets
- etc.
� call PtMainLoop()in your main program to handle events.
Usually one of your callbacks exits the application. Writing anapplication without PhAB means you’ll be working directly with thewidgets— a lot.
November 2, 2006 Chapter 1 � Introduction 19

Programming paradigm 2006, QNX Software Systems GmbH & Co. KG.
Main program
Signals
MessagesPtMainLoop()
exit()
Photon events
Graphics
driver
Callbacks
- Create, realize,
destroy other
windows
- Handle interrupts
manually
- Create menus
- Create widgets
- Create dialogs
- Create widget
callbacks
- ...
Signal
functions
Message
handler
functions
Initialize application
Create top-level window
and icon
Attach callbacks
Attach handlers
Structure of a Photon application written without PhAB.
PhAB applicationWhen you develop a PhAB application, the main program is providedfor you. Instead of worrying about the main program, you:
� provide a function that initializes the application
� set up signal handlers, which process the signals as they arrive andcall signal-processing functions that you write
� set up input functions for messages
� write callbacks to handle events from the widgets.
The main program loops forever, processing events as they occur.Usually one of your callbacks ends the application. PhAB handles a
20 Chapter 1 � Introduction November 2, 2006
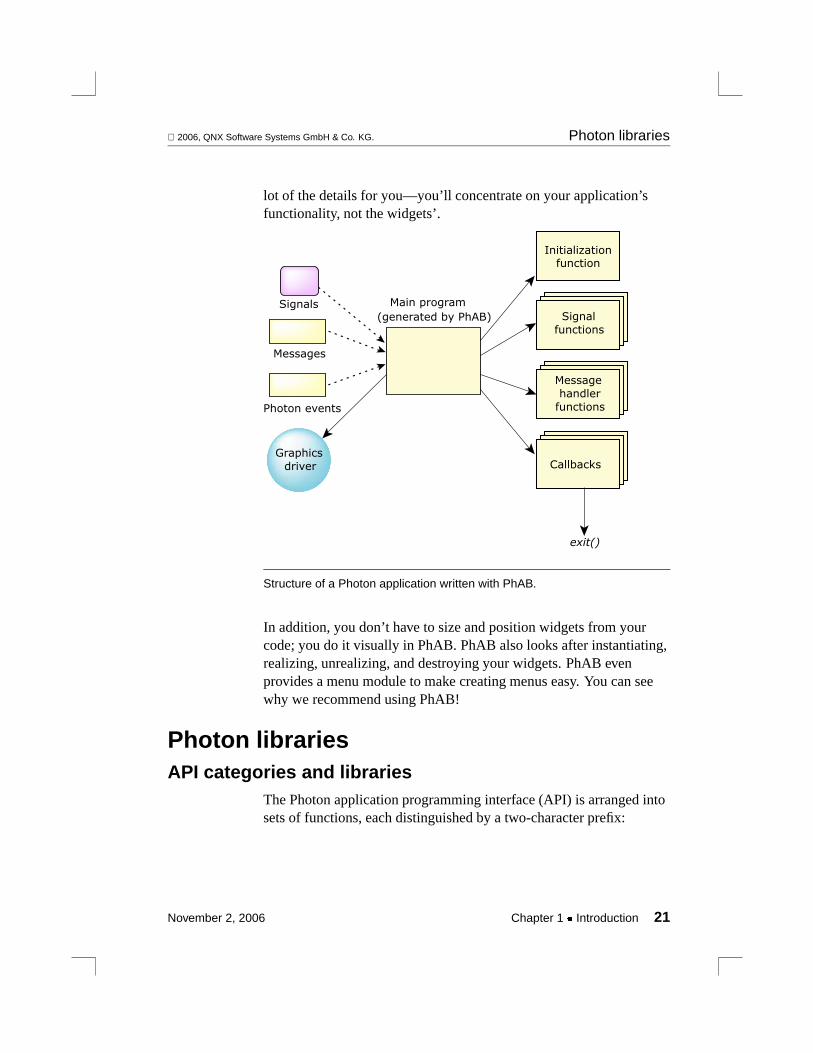
2006, QNX Software Systems GmbH & Co. KG. Photon libraries
lot of the details for you—you’ll concentrate on your application’sfunctionality, not the widgets’.
Main programSignals
Messages
exit()
Initializationfunction
Photon events
Graphics
driver
Signal
functions
Callbacks
Message
handler
functions
(generated by PhAB)
Structure of a Photon application written with PhAB.
In addition, you don’t have to size and position widgets from yourcode; you do it visually in PhAB. PhAB also looks after instantiating,realizing, unrealizing, and destroying your widgets. PhAB evenprovides a menu module to make creating menus easy. You can seewhy we recommend using PhAB!
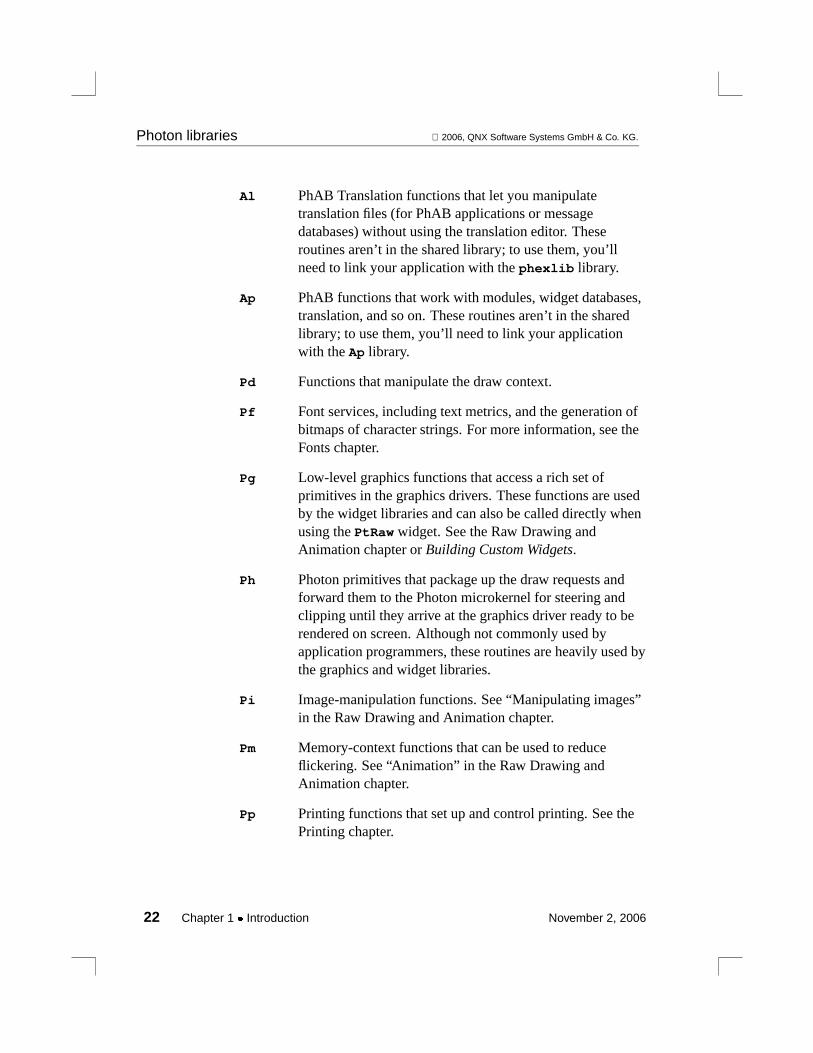
Photon librariesAPI categories and libraries
The Photon application programming interface (API) is arranged intosets of functions, each distinguished by a two-character prefix:
November 2, 2006 Chapter 1 � Introduction 21
Photon libraries 2006, QNX Software Systems GmbH & Co. KG.
Al PhAB Translation functions that let you manipulatetranslation files (for PhAB applications or messagedatabases) without using the translation editor. Theseroutines aren’t in the shared library; to use them, you’llneed to link your application with thephexlib library.
Ap PhAB functions that work with modules, widget databases,translation, and so on. These routines aren’t in the sharedlibrary; to use them, you’ll need to link your applicationwith theAp library.
Pd Functions that manipulate the draw context.
Pf Font services, including text metrics, and the generation ofbitmaps of character strings. For more information, see theFonts chapter.
Pg Low-level graphics functions that access a rich set ofprimitives in the graphics drivers. These functions are usedby the widget libraries and can also be called directly whenusing thePtRaw widget. See the Raw Drawing andAnimation chapter orBuilding Custom Widgets.
Ph Photon primitives that package up the draw requests andforward them to the Photon microkernel for steering andclipping until they arrive at the graphics driver ready to berendered on screen. Although not commonly used byapplication programmers, these routines are heavily used bythe graphics and widget libraries.
Pi Image-manipulation functions. See “Manipulating images”in the Raw Drawing and Animation chapter.
Pm Memory-context functions that can be used to reduceflickering. See “Animation” in the Raw Drawing andAnimation chapter.
Pp Printing functions that set up and control printing. See thePrinting chapter.
22 Chapter 1 � Introduction November 2, 2006

2006, QNX Software Systems GmbH & Co. KG. Photon libraries
Pt Widget toolkit functions for creating, realizing, anddestroying widgets, getting and setting resources, and so on.Besides using the widgets in the Photon widget library, youcan use third-party widgets or your own custom widgets.
Px Extended functions that deal with loading images, workingwith configuration files, and other useful routines. Theseroutines aren’t in the shared library; to use them, you’llneed to link your application with thephexlib library.
Rt Realtime timer functions. See “Timers” in the Workingwith Code chapter.
utf8 UTF-8 character string functions. See the appendix onUnicode multilingual support.
wc Wide-character string functions. See the appendix onUnicode multilingual support.
The functions and data structures in these libraries are described inthe PhotonLibrary Reference.
ThePd, Pf, Pg, Ph, Pi, Pm, Pp, Pt, Rt, utf8, andwc routines are inPhoton’s main library,ph. Routines that are used to rasterize thePhoton draw stream are in thephrender library. Theph, phrender,andAp libraries are available in shared and static forms.
You may want to link your applications with the shared libraries;doing so makes your application much smaller. For more information,see “Choosing the libraries” in the Generating, Compiling, andRunning Code chapter.
TheAl andPx routines are included in the extended library,phexlib, which is available only in static form.
Versions and platformsThe Photon libraries currently support the following platforms:
� ARM little endian
November 2, 2006 Chapter 1 � Introduction 23

Building applications with PhAB—an overview 2006, QNX Software Systems GmbH & Co. KG.
� MIPS little endian
� PowerPC big endian
� SH-4 little endian
� x86 little endian
CAUTION:
Thelibphoton.so.1 library is for applications created with version1.14 of the Photon microGUI only. Don’t combine this library withthe current libraries or header files, or your application won’t runproperly.
The libraries in/usr/photon/lib are provided for runtimecompatibility with Photon for QNX Neutrino 6.0 (x86 only). Thecurrent libraries are in/usr/lib.
!
If you need to determine the version number of the libraries, you canuse:
� Ph LIB VERSION(defined in<PhT.h>) when you compile or runyour application
� PhLibVersion()at runtime.
Both of these express the version number as:
major version * 100 + minor version
Building applications with PhAB—anoverview
24 Chapter 1 � Introduction November 2, 2006
2006, QNX Software Systems GmbH & Co. KG. Building applications with PhAB—an overview
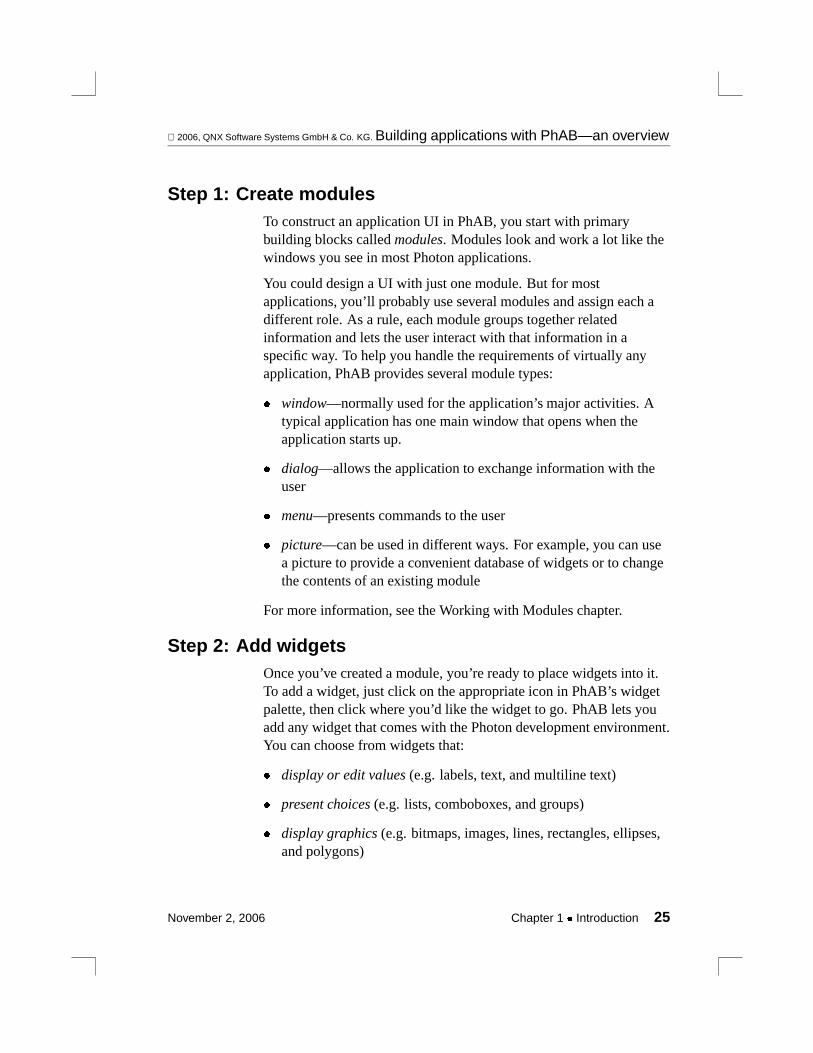
Step 1: Create modulesTo construct an application UI in PhAB, you start with primarybuilding blocks calledmodules. Modules look and work a lot like thewindows you see in most Photon applications.
You could design a UI with just one module. But for mostapplications, you’ll probably use several modules and assign each adifferent role. As a rule, each module groups together relatedinformation and lets the user interact with that information in aspecific way. To help you handle the requirements of virtually anyapplication, PhAB provides several module types:
� window—normally used for the application’s major activities. Atypical application has one main window that opens when theapplication starts up.
� dialog—allows the application to exchange information with theuser
� menu—presents commands to the user
� picture—can be used in different ways. For example, you can usea picture to provide a convenient database of widgets or to changethe contents of an existing module
For more information, see the Working with Modules chapter.
Step 2: Add widgetsOnce you’ve created a module, you’re ready to place widgets into it.To add a widget, just click on the appropriate icon in PhAB’s widgetpalette, then click where you’d like the widget to go. PhAB lets youadd any widget that comes with the Photon development environment.You can choose from widgets that:
� display or edit values(e.g. labels, text, and multiline text)
� present choices(e.g. lists, comboboxes, and groups)
� display graphics(e.g. bitmaps, images, lines, rectangles, ellipses,and polygons)
November 2, 2006 Chapter 1 � Introduction 25

Building applications with PhAB—an overview 2006, QNX Software Systems GmbH & Co. KG.
� display scrolling areas(e.g. scrollbars and scrolling containers)
� initiate actions(e.g. buttons that contain text or images)
To customize how a widget looks and works, you set its attributes orresources. PhAB’s Control panels and Resource editors make it easyto do this. Just click on the resource you want to change, then selector enter a new value.
You can even customize a widget and then save it as a template to useto create similar widgets.
For more information, see the Editing Resources and Callbacks inPhAB chapter.
Step 3: Attach callbacksYou’ve created your modules and placed widgets into them. Nowyou’re ready to define how the application works. To do this, you usecallbacks.
Every Photon widget supports several callback types. To attach codefunctions to a callback, you set a resource or use a providedconvenience function. The widget invokes the code functionwhenever the callback’s conditions are met.
With PhAB, you’re free to concentrate on writing application-specificcode in your callbacks—you don’t have to create code to “glue”interface components together. That’s because PhAB provideslinkcallbacks. Using link callbacks, you can attach a widget’s callbackresource directly to windows, dialogs, menus, and many other thingsbesides application code.
Link callbacks also let you add functionality that isn’t available whenyou attach callbacks “by hand.” For example, if you link a dialog to abutton widget, you can specify where the dialog is to appear. You canalso specify a setup function that’s automatically called before thedialog is realized, after the dialog is realized, or both.
The extended functionality provided by link callbacks makes it mucheasier to design a user interface. In fact, you can prototype an entireapplicationwithout having to write any code.
26 Chapter 1 � Introduction November 2, 2006

2006, QNX Software Systems GmbH & Co. KG. Building applications with PhAB—an overview
For more information, see the Editing Resources and Callbacks inPhAB chapter.
Step 4: Generate codeYou’ve created your application’s modules and created the linkcallbacks to glue the various components together. Now you’re readyto generate and compile code to turn your application design into aworking executable.
The way you generate the code depends on whether you’re usingPhAB standalone, or through the IDE, and is described in theGenerating, Compiling, and Running Code chapter.
When using PhAB from the IDE, you generate the application’s userinterface in PhAB, and then build the project from the IDE. In PhAB,selectBuild→Generate UI. If the application is new and no targetsare added, theSelect New Platform dialog is displayed and you’reasked to add a target for your application. Then you switch to theIDE, and build the application. See Building projects in theDeveloping C/C++ Programs chapter of the IDEUser’s Guideformore information.
Using standalone PhAB, you use theBuild menu. SelectBuild→Build. If the application is new and no targets are added, theSelect New Platform dialog is displayed and you are asked to add atarget for your application. Your application is then generated andbuilt. A file manager is included in one of PhAB’s palettes (underWindow→Show Project ) so you can edit the source code andmanipulate files — without having to leave the PhAB environment.
For more information, see the Generating, Compiling, and RunningCode chapter.
Step 5: Run your applicationAfter you’ve generated, compiled, and linked your application, youcan execute it. Again, how you do this depends on whether you’rerunning PhAB standalone or from the IDE.
November 2, 2006 Chapter 1 � Introduction 27

Writing applications without PhAB 2006, QNX Software Systems GmbH & Co. KG.
If you’re running PhAB from the IDE, follow the instructions inRunning projects in the Developing C/C++ Programs chapter of theIDE User’s Guide.
If you’re using PhAB standalone, run the application from the Build& Run dialog. Using this same dialog, you can even launch yourapplication under a debugger for seamless debugging.
For more information, see the Generating, Compiling, and RunningCode chapter.
Step 6: Repeat any previous stepAfter you’ve generated and compiled your application, you’re free tochange the interface, attach callbacks, and regenerate the code asoften as you like.
Writing applications without PhABWe recommend that you use PhAB to develop your application.However, even if you don’t plan to use PhAB, you should readthrough this guide completely (especially the Programming Photonwithout PhAB chapter) in order to familiarize yourself with all thePhoton fundamentals before you can start creating applications. Youshould then refer to theWidget Reference.
28 Chapter 1 � Introduction November 2, 2006
Chapter 2
Tutorials
In this chapter. . .Before you start... 31PhAB’s Interface 32Tutorial 1 — Hello, world 34Tutorial 2 — editing resources 38Tutorial 3 — creating menus and menubars 54Tutorial 4 — creating dialogs 63Tutorial 5 — creating windows 72
November 2, 2006 Chapter 2 � Tutorials 29


2006, QNX Software Systems GmbH & Co. KG. Before you start...
The best way to get to know PhAB is to use it. This chapter provideshands-on sessions to give you a jump start on creating applications.We’ll take a closer look at using PhAB in the chapters that follow.
The first two tutorials cover the basics: creating widgets, changinghow widgets look and behave, generating code, running yourapplication, and so on.
The remaining tutorials go beyond the basics to show you how tocreate working menus, dialogs, and windows. When you’vecompleted these tutorials, you’ll be ready to start building almost anyPhoton application.
Before you start...If you’re developing Photon applications in the IDE, the way you usePhAB there is slightly different than from standalone PhAB. Thedifferences are:
� New projects — When using the IDE, you create a QNX PhotonAppbuilder project in the IDE, and then use PhAB to create theuser interface. Using standalone PhAB, you create the projectfrom within PhAB.
� Editing code — The IDE allows you to edit your project’s code,and take advantage of features like syntax highlighting. When youuse standalone PhAB, you use an external editor, such asvi, toedit code.
� Building and compiling — The IDE manages building and runningyour application, and you have to set up a target to run and debugthe application on. Using standalone PhAB, you can build and runyour application from within PhAB. Note that in both cases youneed to configure targets within PhAB.
Creating a Photon project and starting PhAB
November 2, 2006 Chapter 2 � Tutorials 31
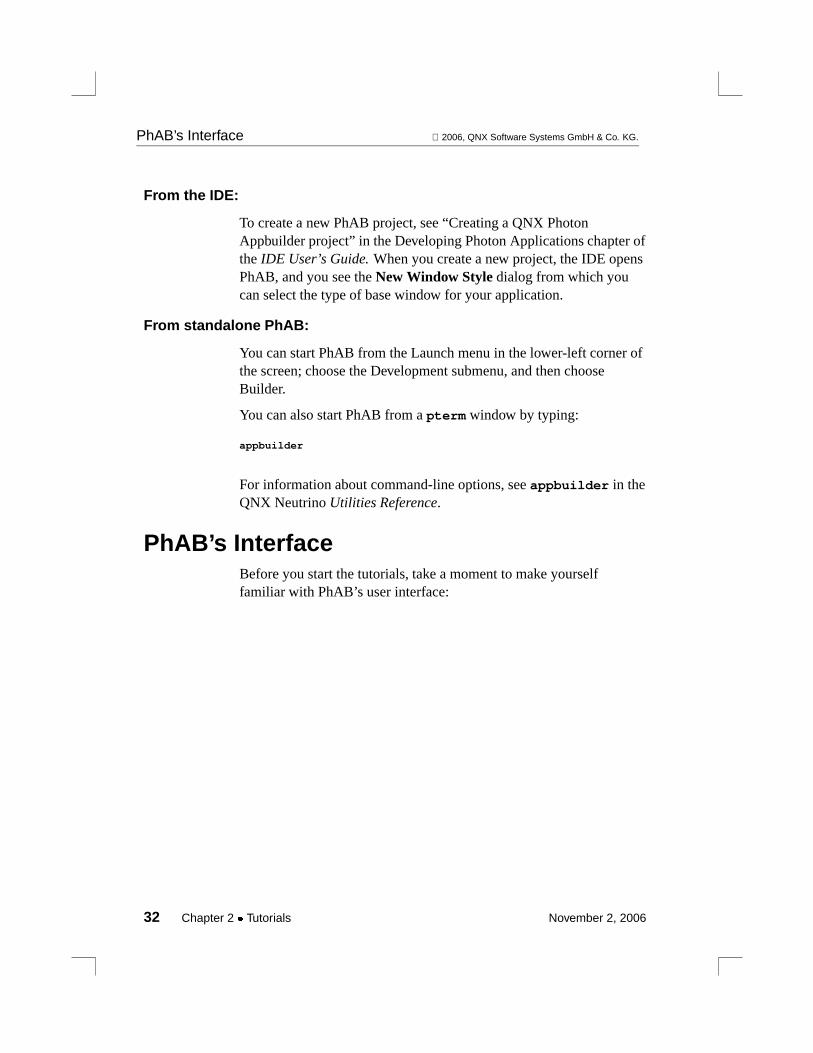
PhAB’s Interface 2006, QNX Software Systems GmbH & Co. KG.
From the IDE:
To create a new PhAB project, see “Creating a QNX PhotonAppbuilder project” in the Developing Photon Applications chapter oftheIDE User’s Guide.When you create a new project, the IDE opensPhAB, and you see theNew Window Style dialog from which youcan select the type of base window for your application.
From standalone PhAB:
You can start PhAB from the Launch menu in the lower-left corner ofthe screen; choose the Development submenu, and then chooseBuilder.
You can also start PhAB from apterm window by typing:
appbuilder
For information about command-line options, seeappbuilder in theQNX NeutrinoUtilities Reference.
PhAB’s InterfaceBefore you start the tutorials, take a moment to make yourselffamiliar with PhAB’s user interface:
32 Chapter 2 � Tutorials November 2, 2006
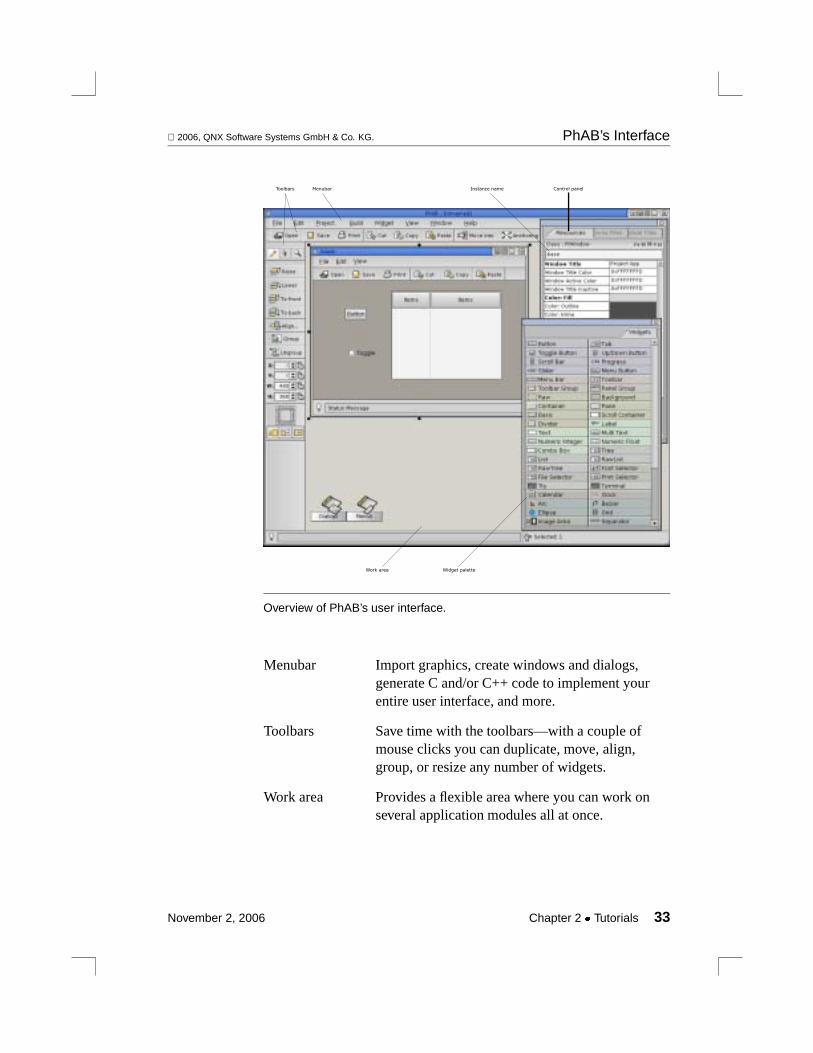
2006, QNX Software Systems GmbH & Co. KG. PhAB’s Interface
Toolbars Menubar Instance name Control panel
Work area Widget palette
Overview of PhAB’s user interface.
Menubar Import graphics, create windows and dialogs,generate C and/or C++ code to implement yourentire user interface, and more.
Toolbars Save time with the toolbars—with a couple ofmouse clicks you can duplicate, move, align,group, or resize any number of widgets.
Work area Provides a flexible area where you can work onseveral application modules all at once.
November 2, 2006 Chapter 2 � Tutorials 33

Tutorial 1 — Hello, world 2006, QNX Software Systems GmbH & Co. KG.
Widget palette Makes it easy to add widgets to your application.Just click the widget you want, then click whereyou want it.
Control panels Let you fully customize your application’swidgets. You can choose text fonts, modify colors,customize bitmaps, and attach callbacks that willpop up dialogs or invoke C and/or C++ codeyou’ve supplied.
The widget palette and control panels are initially in the samewindow, but you can drag any of them into a different window. Toswitch between panels in a window, click the tab at the top andchoose a panel from the menu.
If you close a control panel, you can redisplay it by selecting theappropriate item from the View menu.
Tutorial 1 — Hello, worldIn this tutorial you learn how to use PhAB to create and compile asimple application.
Creating the application1 Create a new project. See “Creating a Photon project and
starting PhAB” above.
2 PhAB displays a dialog to let you choose the style for the newapplication’s default base window:
34 Chapter 2 � Tutorials November 2, 2006

2006, QNX Software Systems GmbH & Co. KG. Tutorial 1 — Hello, world
3 Choose a style and click Done; PhAB creates the base windowand displays it.
4 Whenever you create a new application within standalonePhAB, it’s a good idea to save the application and give it aname. (If you’re running PhAB from the IDE, you’ve alreadysaved the application when you created the project).
From the File menu, choose Save As to open the ApplicationSelector dialog. Click the Application Name field, typetut1,then pressEnter or click Save Application.
5 Look at PhAB’s titlebar. It now indicates that the currentapplication is namedtut1.
6 If the widget palette isn’t displayed, click the tab at the top ofthe current control panel and choose Widgets from the menuthat appears.
7 Drag the widget palette away from the other control panels bypointing to the left of its tab, holding down the mouse button,and pointing to PhAB’s work area.
November 2, 2006 Chapter 2 � Tutorials 35

Tutorial 1 — Hello, world 2006, QNX Software Systems GmbH & Co. KG.
8 If you wish, resize the widget palette and control panels.
9 Go to the widget palette and click thePtLabel widget icon:
10 Move the pointer into the application’s base window (thepointer changes to a crosshair) and click anywhere near thecenter of the window.
PhAB automatically:
� creates a newPtLabel widget
� selects the widget so you can edit its resources
� places resize handles around the widget
� displays the widget’s resources in the Resources andCallbacks control panels.
11 Go to the Resources control panel and highlight the textLabel
beside theLabel Text resource.
12 Change the text toHello World. As you type, the text in thewidget changes:
Generating codeNow you’re ready to generate, compile, and execute the application.How you perform this step depends on whether you’re using PhABfrom the IDE or standalone.
From the IDE
When running PhAB from the IDE, PhAB generates the code for yourapplication’s user interface, and the IDE compiles and executes theapplication. You’ll notice that only theGenerate UI item is availablein PhAB’s Build menu.
36 Chapter 2 � Tutorials November 2, 2006

2006, QNX Software Systems GmbH & Co. KG. Tutorial 1 — Hello, world
1 In PhAB, choseGenerate UI from theBuild menu to generatethe user interface code.
2 Switch to the IDE.
3 To build the the application, follow the instructions in Buildingprojects in the Developing C/C++ Programs chapter of theIDEUser’s Guide.
4 To run the application, follow the instructions in Runningprojects in the Developing C/C++ Programs chapter of theIDEUser’s Guide.
From standalone PhAB1 From theBuild menu, chooseBuild & Run. PhAB displays a
dialog for selecting a platform, which is a combination of theoperating system, computer, compiler, and endian format.Choose the appropriate platform for your application. Forexample, if you’re using the Neutrino OS on an Intel x86machine and thegcc compiler, choose X86 (Little Endian).
2 Click Done once you’ve made your platform selection. Yourapplication will be generated, compiled and linked. PhABdisplays a dialog for entering run arguments. ClickOK. Yourapplication runs.
The application will appear in its own window, with the text “HelloWorld” in the center and the default title “My Application” in the titlebar:
November 2, 2006 Chapter 2 � Tutorials 37
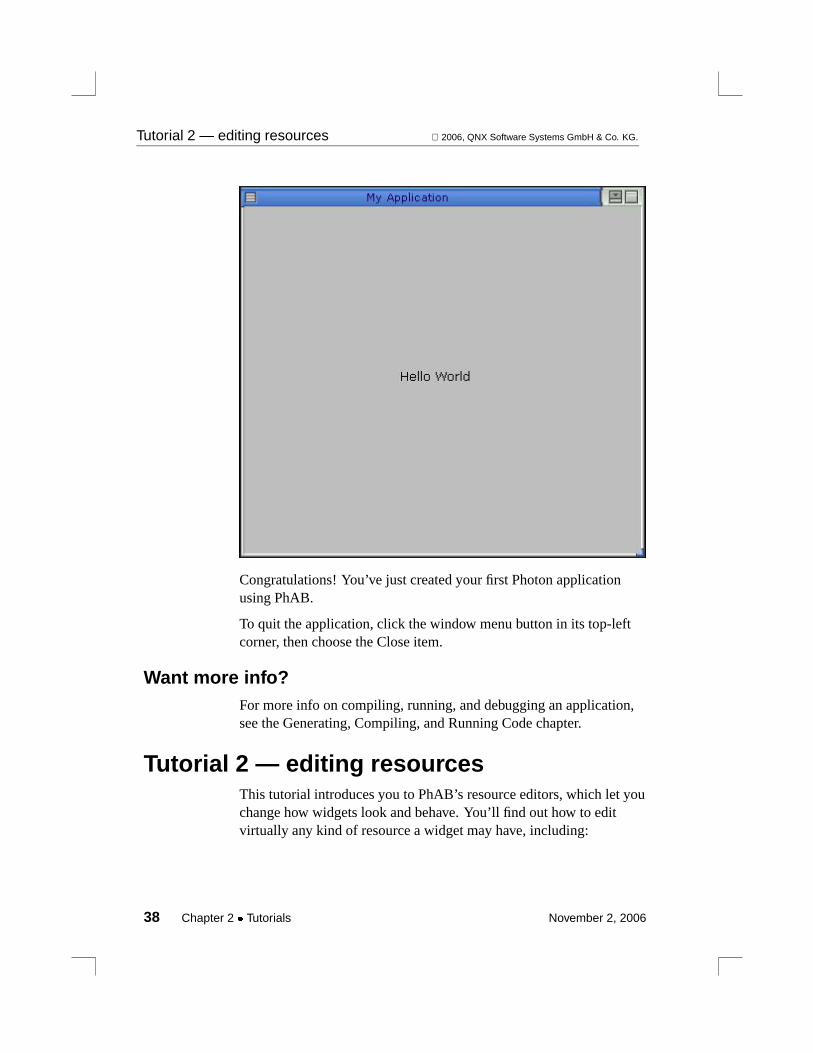
Tutorial 2 — editing resources 2006, QNX Software Systems GmbH & Co. KG.
Congratulations! You’ve just created your first Photon applicationusing PhAB.
To quit the application, click the window menu button in its top-leftcorner, then choose the Close item.
Want more info?For more info on compiling, running, and debugging an application,see the Generating, Compiling, and Running Code chapter.
Tutorial 2 — editing resourcesThis tutorial introduces you to PhAB’s resource editors, which let youchange how widgets look and behave. You’ll find out how to editvirtually any kind of resource a widget may have, including:
38 Chapter 2 � Tutorials November 2, 2006
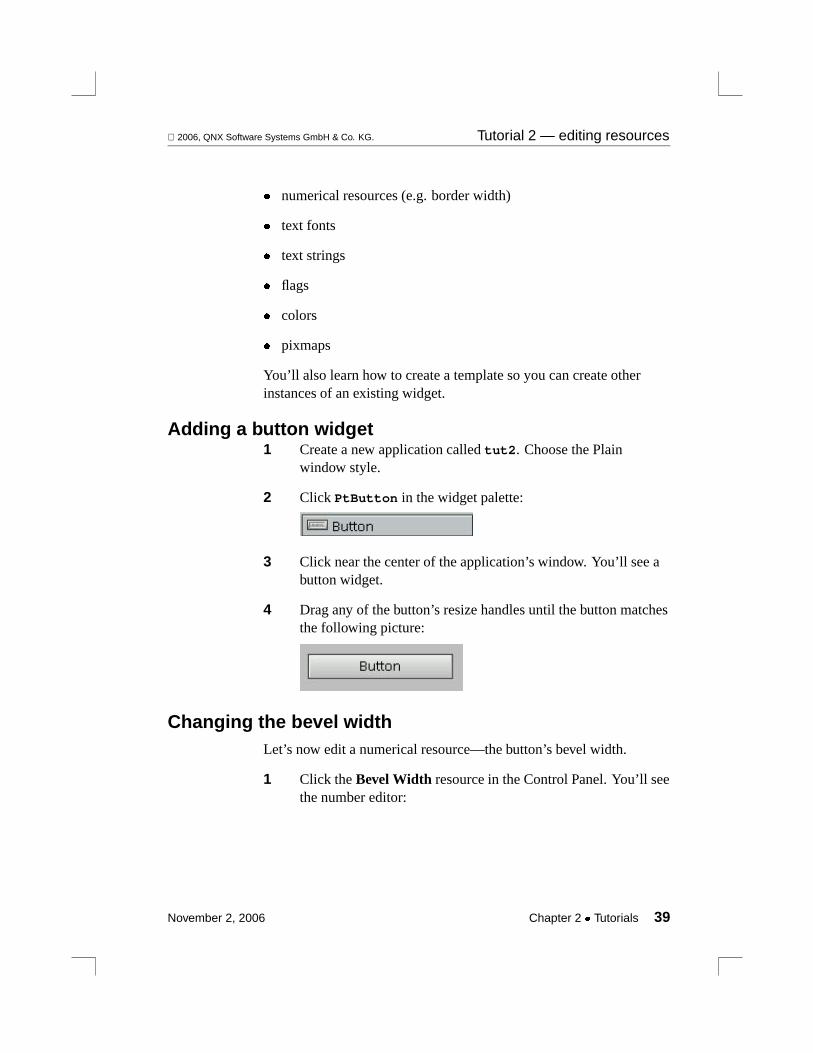
2006, QNX Software Systems GmbH & Co. KG. Tutorial 2 — editing resources
� numerical resources (e.g. border width)
� text fonts
� text strings
� flags
� colors
� pixmaps
You’ll also learn how to create a template so you can create otherinstances of an existing widget.
Adding a button widget1 Create a new application calledtut2. Choose the Plain
window style.
2 Click PtButton in the widget palette:
3 Click near the center of the application’s window. You’ll see abutton widget.
4 Drag any of the button’s resize handles until the button matchesthe following picture:
Changing the bevel widthLet’s now edit a numerical resource—the button’s bevel width.
1 Click theBevel Width resource in the Control Panel. You’ll seethe number editor:
November 2, 2006 Chapter 2 � Tutorials 39
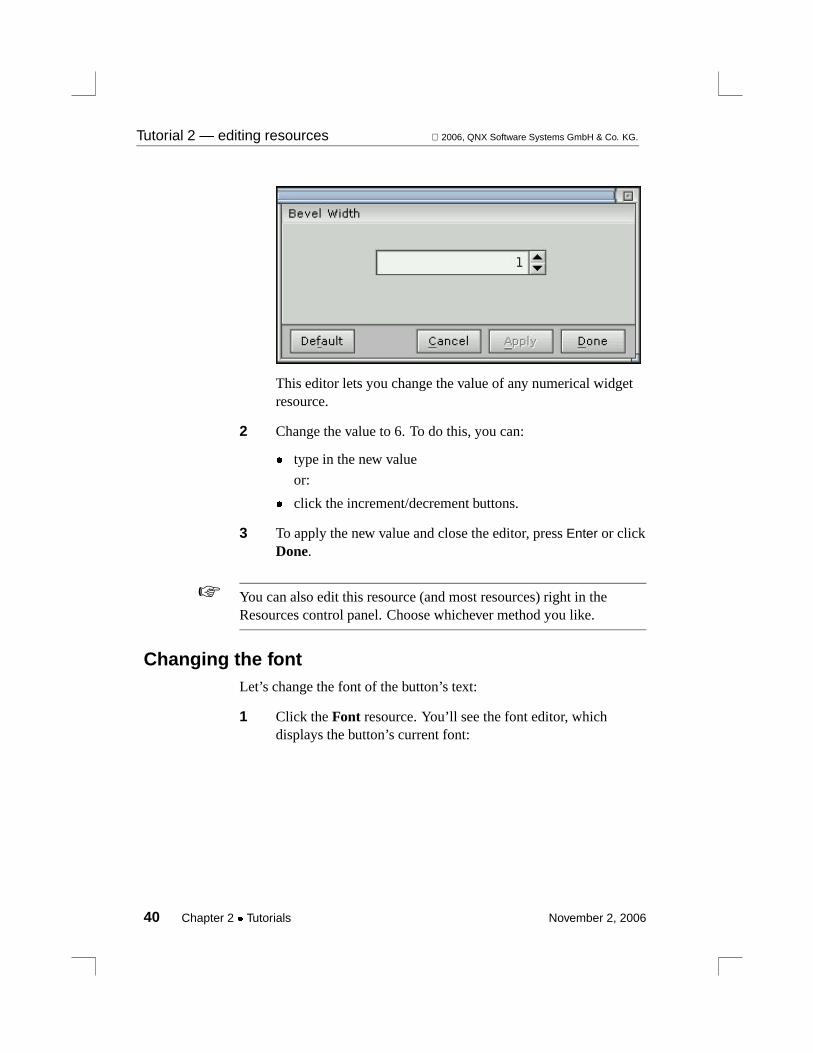
Tutorial 2 — editing resources 2006, QNX Software Systems GmbH & Co. KG.
This editor lets you change the value of any numerical widgetresource.
2 Change the value to 6. To do this, you can:
� type in the new value
or:
� click the increment/decrement buttons.
3 To apply the new value and close the editor, pressEnter or clickDone.
You can also edit this resource (and most resources) right in theResources control panel. Choose whichever method you like.
☞
Changing the fontLet’s change the font of the button’s text:
1 Click theFont resource. You’ll see the font editor, whichdisplays the button’s current font:
40 Chapter 2 � Tutorials November 2, 2006

2006, QNX Software Systems GmbH & Co. KG. Tutorial 2 — editing resources
This editor lets you change the text font of any widget that hastext.
2 Click the Font box or the Size box, select a typeface or sizefrom the displayed list, and click Apply. The button displaysthe new font.
3 Click Default. The editor displays the widget’s default font, butdoesn’t apply the font to the widget.
4 If you want to keep the new font that you selected, click Cancelto ignore the default. If you want to apply the default, clickDone. Either way, the editor closes.
November 2, 2006 Chapter 2 � Tutorials 41

Tutorial 2 — editing resources 2006, QNX Software Systems GmbH & Co. KG.
Changing the text alignmentNow let’s change the button’s horizontal text alignment:
1 Scroll through the Resources control panel to find theHorzAlignment resource, then click it. You’ll see the flag/optioneditor, which displays the widget’s current text alignment:
This editor serves a dual purpose in PhAB:
� It modifies any resource—such as text alignment—that canhave one of several preset values.
� It selects one or more flags in any flag resource
2 Click Pt LEFT or Pt RIGHT, then click Apply. You’ll see thebutton text move to the left or right edge of the button.
3 Click Done.
42 Chapter 2 � Tutorials November 2, 2006

2006, QNX Software Systems GmbH & Co. KG. Tutorial 2 — editing resources
You can also set this resource right in the Resources control panel.
Setting flagsLet’s now use the flag/option editor to set one of the widget’s flags:
1 Scroll through the Resources control panel to find theBasicFlags resource, then click it. The flag/option editor reopens, butthis time it shows the widget’s currentPtBasic flag settings:
The bits in this flag resource aren’t mutually exclusive, so thistime you can use the editor to select multiple options, if desired.
2 Set thePt TOP INLINE, Pt BOTTOM INLINE, Pt LEFT INLINE,andPt RIGHT INLINE flags, then click Done. PhAB draws thebutton with an inner border:
November 2, 2006 Chapter 2 � Tutorials 43

Tutorial 2 — editing resources 2006, QNX Software Systems GmbH & Co. KG.
Changing the fill colorLet’s change a color resource—the button’s fill color.
1 Click the button’sColor: Fill resource. You’ll see the coloreditor, which displays the current fill color:
This editor lets you edit any color resource. It provides severalpreset base colors, which should work well with all graphicdrivers, and 48 customizable colors for drivers that support 256or more colors.
2 Click any color in the Base Colors set, then click on Apply. Thebutton is filled with the color you selected.
3 Select a color from the Custom Colors set. The sliders willdisplay the color’s Red/Green/Blue (RGB) values. Changethese values till you get a color you want, then apply yourchanges.
44 Chapter 2 � Tutorials November 2, 2006

2006, QNX Software Systems GmbH & Co. KG. Tutorial 2 — editing resources
If you’d like to experiment with the Hue/Saturation/Brightness(HSB) color model, click the HSB Model button.
4 Click Done when you’ve finished experimenting with the editor.
Your button should now look something like this:
Don’t delete this widget; we’ll use it to create a template later on, sothat you can create other widgets like it.
Editing a pixmapLet’s now use the pixmap editor to edit aPtLabel widget. Thiseditor is called “pixmap” instead of “bitmap” since it lets you editmany types of image resources besides bitmaps.
A PtLabel widget display text and/or an image.
1 Click PtLabel in the widget palette:
2 Move the pointer into the main window and click below thebutton widget you created. You’ll see aPtLabel widget.
3 Click the Label Type resource in the Resources control panel,and set it toPt IMAGE.
4 Click the Label Image resource in the Resources control panelto bring up the pixmap editor.
5 Next, bring up the color editor to select a draw color. Just clickthe following button:
November 2, 2006 Chapter 2 � Tutorials 45

Tutorial 2 — editing resources 2006, QNX Software Systems GmbH & Co. KG.
6 Select a color from the pixmap palette. You’ll see that the drawcolor in the pixmap editor changes immediately.
If you click Edit Color, you’ll see the Color Editor, as describedearlier.
7 To draw a simple image, you can:
� click the left mouse button to fill a cell with the draw color
� click the right mouse button to fill a cell with thebackground color
� hold down a mouse button and drag the pointer to drawfreehand
Feel free to try the other drawing tools.
8 When you’re done, click the pixmap editor’s Done button toapply your changes and close the editor.
Editing multiline textNext, we’ll edit a multiline text resource—the text of aPtMultiTextwidget.
1 Click PtMultiText in the widget palette:
2 Move the pointer below the label widget you’ve just created,and drag until the newPtMultiText widget appears bigenough to hold a few lines of text.
3 Click theText String resource in the Resources control panelto bring up the multiline text editor:
46 Chapter 2 � Tutorials November 2, 2006

2006, QNX Software Systems GmbH & Co. KG. Tutorial 2 — editing resources
4 Type a few lines of text. To create a new line, pressEnter. Forexample:
Mary hadEnteraEnterlittle lamb.Enter
5 Click Done. Your text should appear exactly as you typed it. Ifit doesn’t, try resizing the widget—the widget might not bewide enough or tall enough.
6 For a different effect, look for theHorz Alignment resource,click the arrow, and change the text alignment toPt CENTER.As you can see, each line is now centered individually.
7 If you haven’t already, resize the widget by dragging on one ofits resize handles. You’ll see the text update automatically toadjust to the new size. For example:
November 2, 2006 Chapter 2 � Tutorials 47
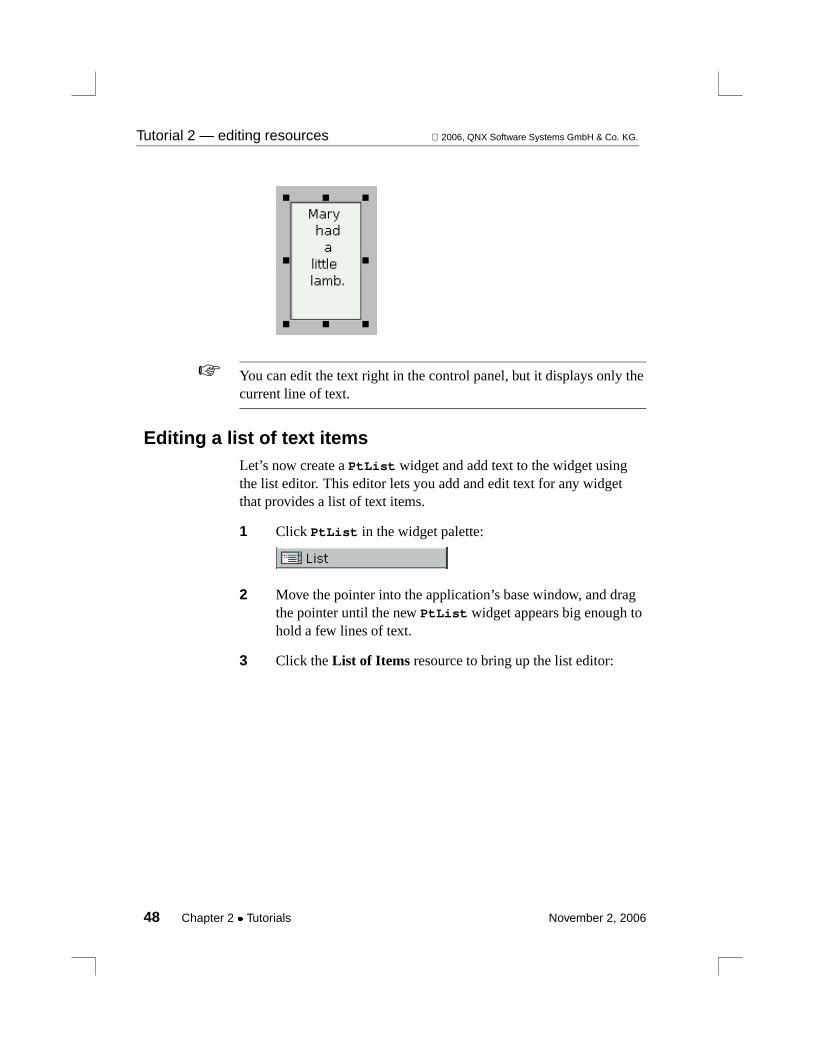
Tutorial 2 — editing resources 2006, QNX Software Systems GmbH & Co. KG.
You can edit the text right in the control panel, but it displays only thecurrent line of text.
☞
Editing a list of text itemsLet’s now create aPtList widget and add text to the widget usingthe list editor. This editor lets you add and edit text for any widgetthat provides a list of text items.
1 Click PtList in the widget palette:
2 Move the pointer into the application’s base window, and dragthe pointer until the newPtList widget appears big enough tohold a few lines of text.
3 Click theList of Items resource to bring up the list editor:
48 Chapter 2 � Tutorials November 2, 2006
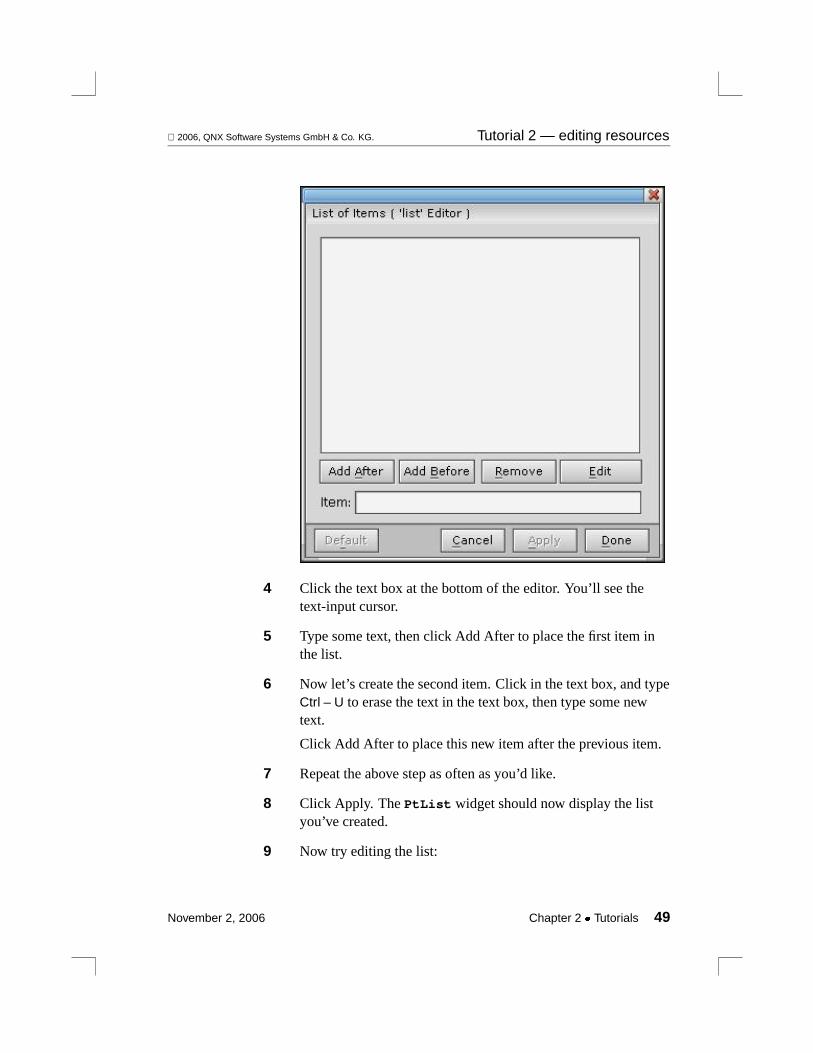
2006, QNX Software Systems GmbH & Co. KG. Tutorial 2 — editing resources
4 Click the text box at the bottom of the editor. You’ll see thetext-input cursor.
5 Type some text, then click Add After to place the first item inthe list.
6 Now let’s create the second item. Click in the text box, and typeCtrl – U to erase the text in the text box, then type some newtext.
Click Add After to place this new item after the previous item.
7 Repeat the above step as often as you’d like.
8 Click Apply. ThePtList widget should now display the listyou’ve created.
9 Now try editing the list:
November 2, 2006 Chapter 2 � Tutorials 49

Tutorial 2 — editing resources 2006, QNX Software Systems GmbH & Co. KG.
� To modify an existing item, click the item, edit the item’stext, then click Edit.
� To delete an item, click the item, then click Remove.
10 When you’re finished experimenting, click on Done to applyyour changes and close the editor.
Creating a templateAt times, you might want to create many widgets that look and behavealike. You can do this by creating a widget, editing its resources, andthen copying and pasting it, but this isn’t always very convenient, anddoesn’t copy certain important elements like callbacks.
PhAB makes it simpler by letting you create atemplatefrom anexisting widget or widgets. PhAB creates a palette, similar to thewidget palette, for your templates.
Let’s create a template from the button that you created earlier in thistutorial.
1 Start by selecting the button.
2 Click the Widget menu, and then choose Define Template. TheDefine Template dialog appears.
3 You need to create a folder in which to store the template, soclick on Add Folder. This dialog is displayed:
50 Chapter 2 � Tutorials November 2, 2006

2006, QNX Software Systems GmbH & Co. KG. Tutorial 2 — editing resources
4 The new folder can be a user folder or a PhAB folder. A userfolder is personal and can’t be viewed by any other PhAB userslogged on to the system. If you choosePhAB folder, the newfolder can be shared between users; you must have thenecessary permissions to create a PhAB folder.
ChooseUser Folder, typeMy templates as the folder’sname, and clickAdd. The dialog closes, and the folder’s nameis displayed in theDefine template dialog.
5 Give the template a name, such asBig green button. Thisis the name that PhAB uses in the palette.
6 You can create an icon for the palette entry for the template. Ifyou do not create an icon for the template entry, a default iconis used for it. To create the icon, click the iconEdit button, andthen follow the instructions given earlier for editing pixmaps.You should make the icon look something like the widget:
7 Optionally, choose the background color for the palette entry byclicking on the Color box. You can use different backgroundcolors in a palette to distinguish widgets that are used fordifferent purposes (e.g. buttons and text widgets).
8 Choose a resize method. This determines whether you drag orjust click when you create instances of your template. For thisbutton, choose the dragging method.
November 2, 2006 Chapter 2 � Tutorials 51

Tutorial 2 — editing resources 2006, QNX Software Systems GmbH & Co. KG.
9 The dialog should now look something like this:
Click Done.
You’ve just created a template! Now, let’s see how to use it.
1 SelectWindow→Show Templates. On the list of items, selectShow My Templates. If the menu item isHide My Templates,it means that My Templates is already displayed and visible onthe screen.
2 Go to the control panels, and click the top tab. The popup menunow includes Mytemplates; choose it to display the palette.
3 Click the icon for your customized button, create an instance ofit, and edit it as you wish:
52 Chapter 2 � Tutorials November 2, 2006

2006, QNX Software Systems GmbH & Co. KG. Tutorial 2 — editing resources
If you wish, you can save, generate, make, and run the application.
Whenever you start PhAB, it automatically loads the palette forMy templates.
Want more info?You now know the basics of editing any widget resource in PhAB. Formore information, see the following sections in the Editing Resourcesand Callbacks in PhAB chapter:
To edit: See this section:
Bitmaps or images Pixmap editor
Colors Color editor
Flags Flag/option editor
Fonts Font editor
Lists of text items List editor
Numbers Number editor or Flag/optioneditor
Single-line or multiline text strings Text editors
November 2, 2006 Chapter 2 � Tutorials 53

Tutorial 3 — creating menus and menubars 2006, QNX Software Systems GmbH & Co. KG.
For more information on templates, see “Templates” in the CreatingWidgets in PhAB chapter.
Tutorial 3 — creating menus and menubarsThis tutorial takes you through the steps required to create menus andmenubars.
About link callbacksIn this tutorial, you’ll learn how to set up alink callback, one of thekey components of PhAB. To understand what a link callback is, let’sstart with some background info on widget callbacks.
Almost all widgets support a variety of callbacks. These callbacksenable your application’s interface to interact with your applicationcode. For example, let’s say you want your application to perform anaction when the user clicks on a button. In that case, you would attacha callback function to the button’s “Activate” callback.
In some windowing environments, you can attach only code functionsto widget callbacks. But whenever you use PhAB to create a callback,you can go one step further and attach entire windows, dialogs,menus, and much more. It’s this extended functionality that we call alink callback.
PhAB provides two basic types of link callbacks:
Module-type link callback
Attaches an application module (such as a window, dialog, ormenu) to any widget callback. The module opens whenever thecallback’s conditions are met. In this tutorial, you’ll link a menumodule to a button’s “Arm” callback.
Code-type link callback
Attaches a code function to any widget callback. The widgetinvokes the function whenever the callback’s conditions aremet. Note that some code-type link callbacks let you close theparent module automatically. In this tutorial, you’ll link a codefunction to a menu item’s callback.
54 Chapter 2 � Tutorials November 2, 2006
2006, QNX Software Systems GmbH & Co. KG. Tutorial 3 — creating menus and menubars
About instance namesTo access a widget from your application code, you must first give thewidget aninstance name. Since all widget instance names reside inthe same global namespace, no two widgets within an application canhave the same instance name.
We recommend that you start every instance name with a moduleprefix. For example, if your base window has aPtButton widgetthat contains the label text “Blue,” you could give this widget aninstance name ofbase blue.
Adopting a naming convention for your widgets will make it easierfor you to work with large applications.
☞
Creating a menubarTo learn about using link callbacks, let’s create two functioningmenus—File and Help—that you can later incorporate into your ownapplications.
In PhAB, menus are built in two pieces:
� a menu button, which you’ll click to display the menu
� a menu module, which contains the menu items.
Using link callbacks, you’ll link the menu modules to the File andHelp buttons in a menubar. You’ll also link a code-type callback tothe Quit menu item in the File menu module. This callback willenable the Quit item to close the application.
1 Create a new application namedtut3. Choose the Plainwindow style.
2 Select thePtMenuBar widget from the widget palette, point atthe top left cornet of the main window’s canvas, and drag untilthe menu bar is the width of the window.
The menubar grows and shrinks as you change the width of thewindow, and it always stays at the top of the window. You can
November 2, 2006 Chapter 2 � Tutorials 55

Tutorial 3 — creating menus and menubars 2006, QNX Software Systems GmbH & Co. KG.
see this by clicking in the titlebar of the window, then resizingthe window by dragging on one of its resize handles.
If you accidentally click the Test button, the window won’t resize oraccept new widgets. If this happens, you just switched into TestMode. To go back to Edit Mode, selectProject→Edit mode.
☞
By the time you’re finished the following steps, the menubarwill look like this:
3 Place aPtMenuButton widget in the menubar you justcreated. The menu button is automatically centered vertically inthe menubar.
4 Go to the Resources control panel and click the widget instancename just below the class name. Change the button’s instancename tobase file:
5 Change the button’s Label Text resource toFile.
6 Place anotherPtMenuButton widget next to the first. Changeits instance name tobase help and its text toHelp.
Creating the File menu moduleNow that you have menu buttons, you need to create your menumodules. Let’s start with the File menu.
1 SelectProject→Add Menu. A new menu module appears.
56 Chapter 2 � Tutorials November 2, 2006
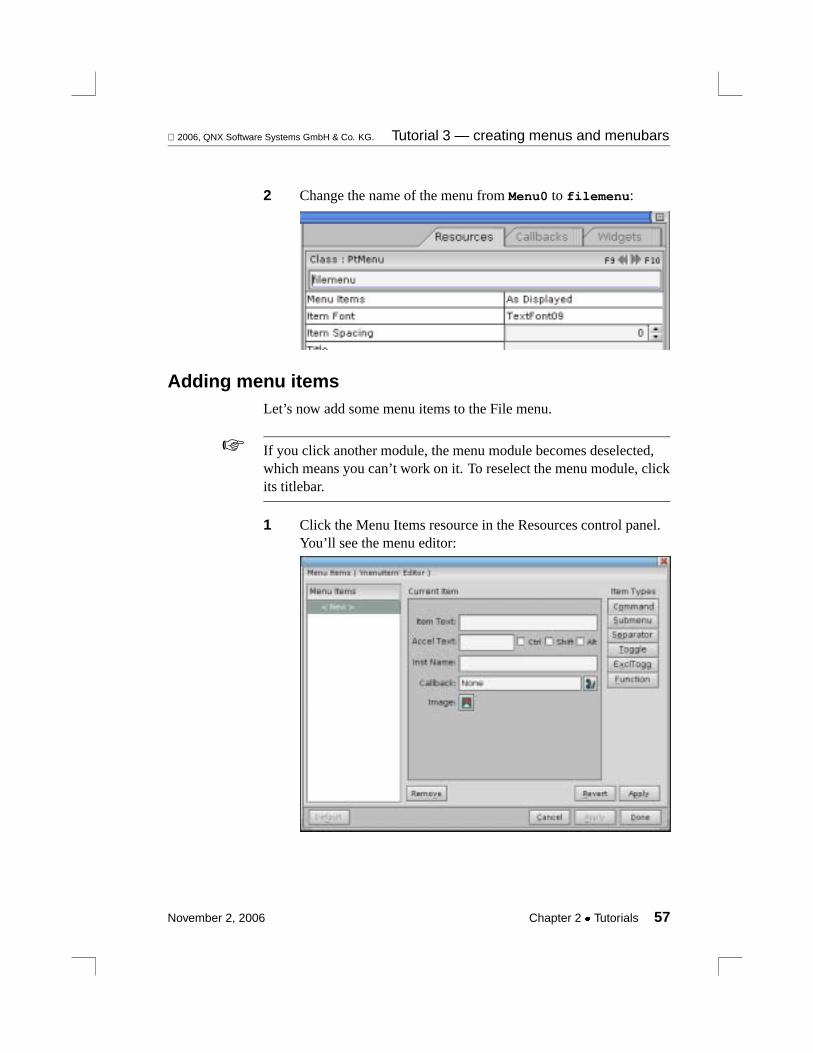
2006, QNX Software Systems GmbH & Co. KG. Tutorial 3 — creating menus and menubars
2 Change the name of the menu fromMenu0 to filemenu:
Adding menu itemsLet’s now add some menu items to the File menu.
If you click another module, the menu module becomes deselected,which means you can’t work on it. To reselect the menu module, clickits titlebar.
☞
1 Click the Menu Items resource in the Resources control panel.You’ll see the menu editor:
November 2, 2006 Chapter 2 � Tutorials 57

Tutorial 3 — creating menus and menubars 2006, QNX Software Systems GmbH & Co. KG.
If you look at the Menu Items list, you’ll see that the<New>item is selected. This special item lets you add menu items tothe menu.
2 To add your first menu item—which also happens to be called“New”—click the Item Text field, then typeNew.
3 Now give the item an instance name. In the Inst Name field,typefile new.
4 Click Apply to add the item to the menu. You’ll see the item’sname in Menu Items list, prefixed byCMD. TheCMD means thisis a Command item; that is, an item that invokes a PhABcallback.
5 Repeat the above steps to create the two menu items labeledSave andSave As. Give these items the instance namesfile save andfile as.
6 Up to now, you’ve added Command-type menu items. You’llnow add a Separator item. Just click on the Separator buttonnear the upper-right corner
7 Click Apply to get the default separator style, which is Etched -in.
8 Now let’s add the Quit item. Click the Command button, thenspecifyQuit as the item text andfile quit as the instancename.
9 You’re finished with this menu module for now, so click Done.The module displays the items you just created:
58 Chapter 2 � Tutorials November 2, 2006
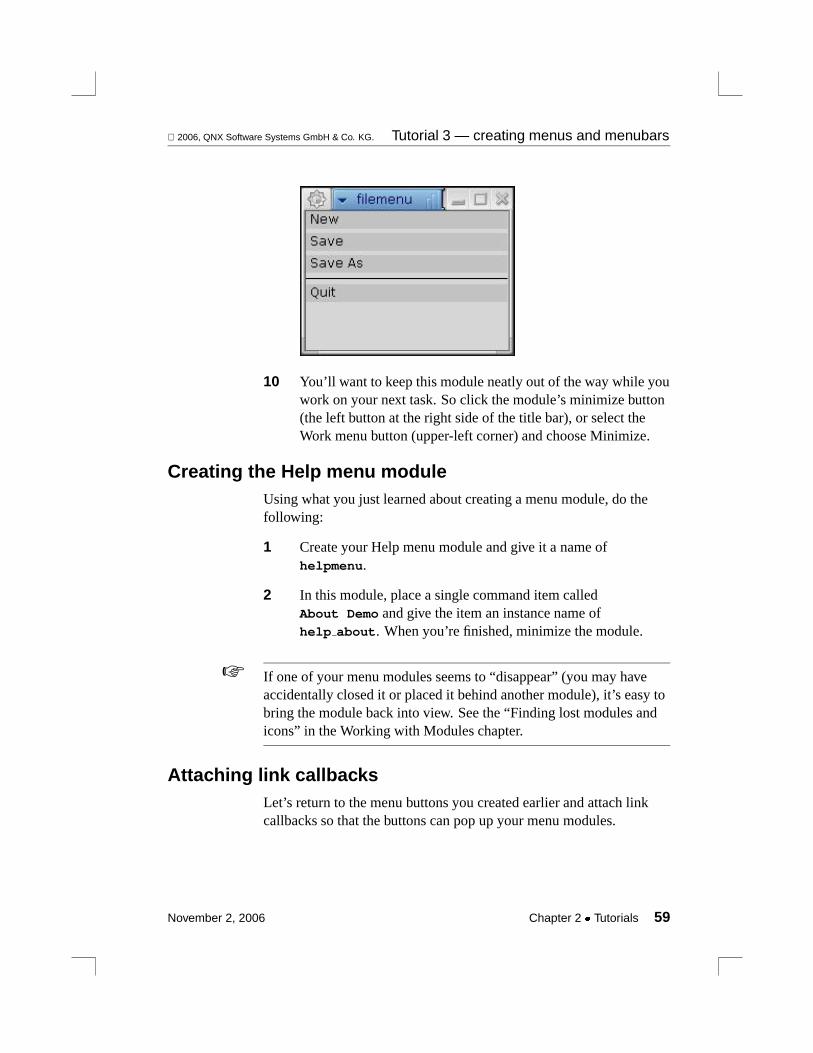
2006, QNX Software Systems GmbH & Co. KG. Tutorial 3 — creating menus and menubars
10 You’ll want to keep this module neatly out of the way while youwork on your next task. So click the module’s minimize button(the left button at the right side of the title bar), or select theWork menu button (upper-left corner) and choose Minimize.
Creating the Help menu moduleUsing what you just learned about creating a menu module, do thefollowing:
1 Create your Help menu module and give it a name ofhelpmenu.
2 In this module, place a single command item calledAbout Demo and give the item an instance name ofhelp about. When you’re finished, minimize the module.
If one of your menu modules seems to “disappear” (you may haveaccidentally closed it or placed it behind another module), it’s easy tobring the module back into view. See the “Finding lost modules andicons” in the Working with Modules chapter.
☞
Attaching link callbacksLet’s return to the menu buttons you created earlier and attach linkcallbacks so that the buttons can pop up your menu modules.
November 2, 2006 Chapter 2 � Tutorials 59

Tutorial 3 — creating menus and menubars 2006, QNX Software Systems GmbH & Co. KG.
Attaching a module-type link callback1 Select the File menu button, then switch to the Callbacks
control panel You’ll see the File button’s callback list:
2 To have the File menu module pop up when you press the Filebutton, you need to attach an Arm callback to the button. Byattaching an Arm callback, you can open the menu using eitherclick-move-clickor press-drag-release.
Click Arm to bring up the callback editor.
60 Chapter 2 � Tutorials November 2, 2006

2006, QNX Software Systems GmbH & Co. KG. Tutorial 3 — creating menus and menubars
3 The Module Types area of the editor let you choose the type ofmodule you wish to link to. Because you want to link the Filebutton to a menu module, click Menu.
4 Click the Name list and typefilemenu (or selectfilemenufrom the list) which is the name you gave your File menumodule. This links the menu button to that module.
You can also selectfilemenu from a popup list of availablemodules. To bring up the list, click the icon to the right of theName field.
5 Click Apply to add the link callback, then click Done to closethe callback editor.
6 Repeat the above steps to link the Help menu button to the Helpmenu module.
Attaching a code-type link callback
Let’s now attach a code-type link callback to the File menu’s Quititem so that it can terminate the application.
1 Double-click the iconifiedfilemenu module. This opens andselects the module.
2 Switch to the Resources control panel, then click the MenuItems resource.
3 Select the Quit item in the Menu Items list.
4 Click the icon next to the Callback field to open the callbackeditor:
5 When the editor opens, the default callback type is Code. Sincethis is the type you want, all you have to do is specify the nameof the function you want to call.
The function should have a meaningful name. So typequit inthe Function field.
November 2, 2006 Chapter 2 � Tutorials 61

Tutorial 3 — creating menus and menubars 2006, QNX Software Systems GmbH & Co. KG.
6 Click Apply to update the Callbacks list, then click Done toclose the editor.
7 Click Done again to close the menu editor.
Setting up the codeYou’ll now generate the code for your application and edit a generatedcode stub so that the Quit item will cause your application to exit.
1 SelectBuild→Generate UI. This generates the necessaryapplication files.
2 After the generation process is complete, open theBrowseFiles palette window by selectionWindow→Show Project.
Scroll through the list until you see thequit.c file. This is thegeneric code template that PhAB generated for yourquit()function.
3 You need to make the function exit the program. To do this,selectquit.c from the file list, click the Edit button, ordouble-clickquit.c, then change thequit() function to thefollowing:intquit( PtWidget t *widget, ApInfo t *apinfo,
PtCallbackInfo t *cbinfo ){
/* eliminate ’unreferenced’ warnings */widget = widget,apinfo = apinfo,cbinfo = cbinfo;
PtExit( EXIT SUCCESS );
/* This statement won’t be reached, but itwill keep the compiler happy. */
return( Pt CONTINUE );}
PtExit() is a function that cleans up the Photon environment andthen exits the application. It’s described in the PhotonLibraryReference.
62 Chapter 2 � Tutorials November 2, 2006
2006, QNX Software Systems GmbH & Co. KG. Tutorial 4 — creating dialogs
If you are using the IDE, you can also edit quit.c, or any other sourcecode file, from the IDE editor by double-clicking the file in the projectnavigator tree.
☞
4 After you’ve edited the code, saved your changes, and closedthe editor, build and run your application.
5 Once your application is running, try clicking on the File buttonto bring up the File menu. Then choose Quit. Your applicationwill immediately terminate and close.
Want more info?For more info on: See the section: In the chapter:
Widget callbacks Callbacks Editing Resourcesand Callbacks inPhAB
Editing callbacks Editing Resourcesand Callbacks inPhAB
Instance names Instance names Creating Widgets inPhAB
Menu modules Menu modules Working withModules
Tutorial 4 — creating dialogsThis tutorial describes how to create a dialog. It also provides a goodexample of how you can use setup code to modify a widget’sresources before the widget appears onscreen.
This tutorial uses the application you created in Tutorial 3.☞
November 2, 2006 Chapter 2 � Tutorials 63

Tutorial 4 — creating dialogs 2006, QNX Software Systems GmbH & Co. KG.
In this tutorial, you’ll:
� link theAbout Demo item in the Help menu to a dialog
� add labels and a Done button to the new dialog
� define a setup function that changes the text of one of the labels todisplay a version number when the dialog is realized.
About dialogsDialog modules are designed to let you obtain additional informationfrom the user. Typically, you use this information to carry out aparticular command or task.
Since you don’t usually need to get the same information twice,dialogs are single-instance modules. That is, you can’t realize thesame dialog more than once at the same time. If you try create asecond instance of a dialog, PhAB simply brings the existing dialog tothe front and gives it focus.
If you need to create a window that supports multiple instances, use awindow module. You’ll learn about window modules in the nexttutorial.
More on instance namesTo make it easier for you to access widgets from within yourapplication code, PhAB generates a global variable and a manifest.Both of these are based on the widget’s instance name.
The global variable, which has the prefixABN , represents thewidget’s name. The manifest, which has the prefixABW , representsthe widget’s instance pointer.
For example, let’s say you have a widget namedabout version.PhAB uses this name to generate a global variable namedABN aboutversionand a manifest namedABW aboutversion.
In this tutorial you’ll learn how to use these generated names.
64 Chapter 2 � Tutorials November 2, 2006
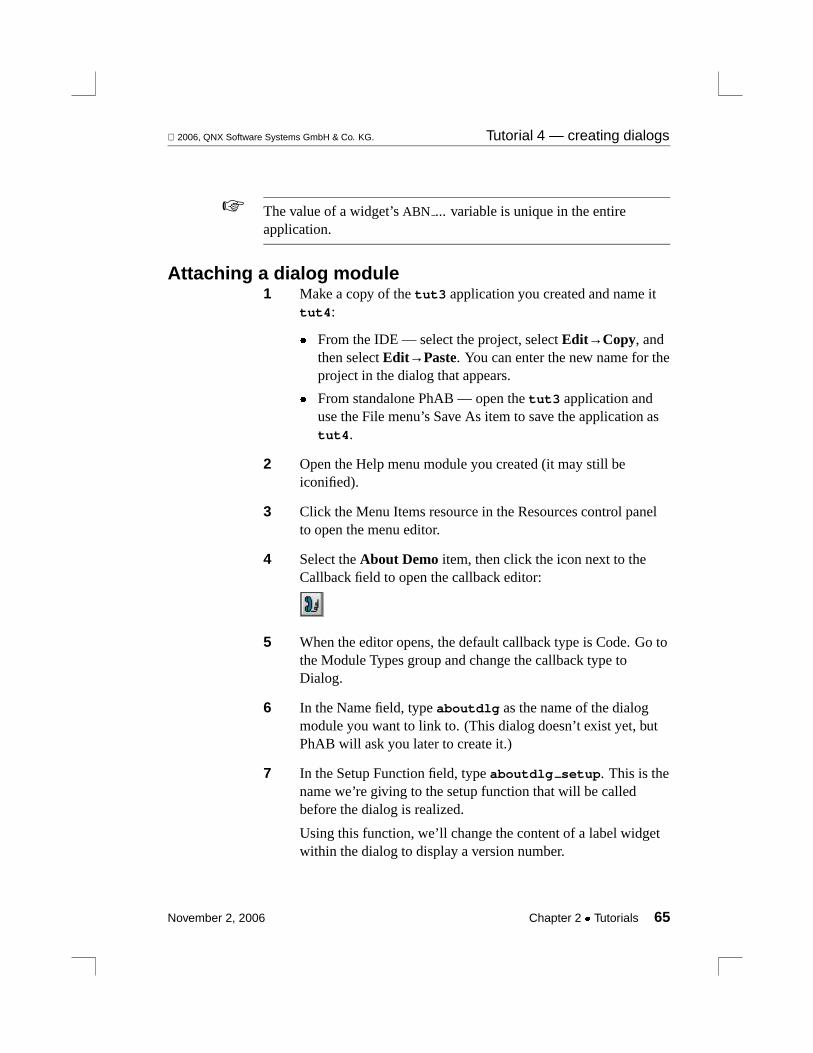
2006, QNX Software Systems GmbH & Co. KG. Tutorial 4 — creating dialogs
The value of a widget’sABN ... variable is unique in the entireapplication.
☞
Attaching a dialog module1 Make a copy of thetut3 application you created and name it
tut4:
� From the IDE — select the project, selectEdit→Copy, andthen selectEdit→Paste. You can enter the new name for theproject in the dialog that appears.
� From standalone PhAB — open thetut3 application anduse the File menu’s Save As item to save the application astut4.
2 Open the Help menu module you created (it may still beiconified).
3 Click the Menu Items resource in the Resources control panelto open the menu editor.
4 Select theAbout Demo item, then click the icon next to theCallback field to open the callback editor:
5 When the editor opens, the default callback type is Code. Go tothe Module Types group and change the callback type toDialog.
6 In the Name field, typeaboutdlg as the name of the dialogmodule you want to link to. (This dialog doesn’t exist yet, butPhAB will ask you later to create it.)
7 In the Setup Function field, typeaboutdlg setup. This is thename we’re giving to the setup function that will be calledbefore the dialog is realized.
Using this function, we’ll change the content of a label widgetwithin the dialog to display a version number.
November 2, 2006 Chapter 2 � Tutorials 65

Tutorial 4 — creating dialogs 2006, QNX Software Systems GmbH & Co. KG.
8 Since you want theaboutdlg setup function to be calledbefore the dialog is realized, make sure the Prerealize button isenabled.
9 Click the Location icon to specify where you want the dialog toappear when it gets realized. (TheCenter Screen location is agood choice.) Click Done.
Your callback information should now look something like this(depending on the location you chose):
10 Click the Apply in the Actions group to add the link callback.Since the dialog module you want to link to doesn’t exist yet,PhAB asks you to choose a style; select Plain and click Done.
You’ll see the new dialog in the work area. You’ll also see thenew callback in the Callbacks list in the callback editor.
11 Click Done to close the callback editor, then click Done againto close the menu editor.
Adding widgets to the dialog1 Open theaboutdlg dialog module.
2 Place twoPtLabel widgets in the top half of the dialog, and aPtButton near the bottom:
66 Chapter 2 � Tutorials November 2, 2006
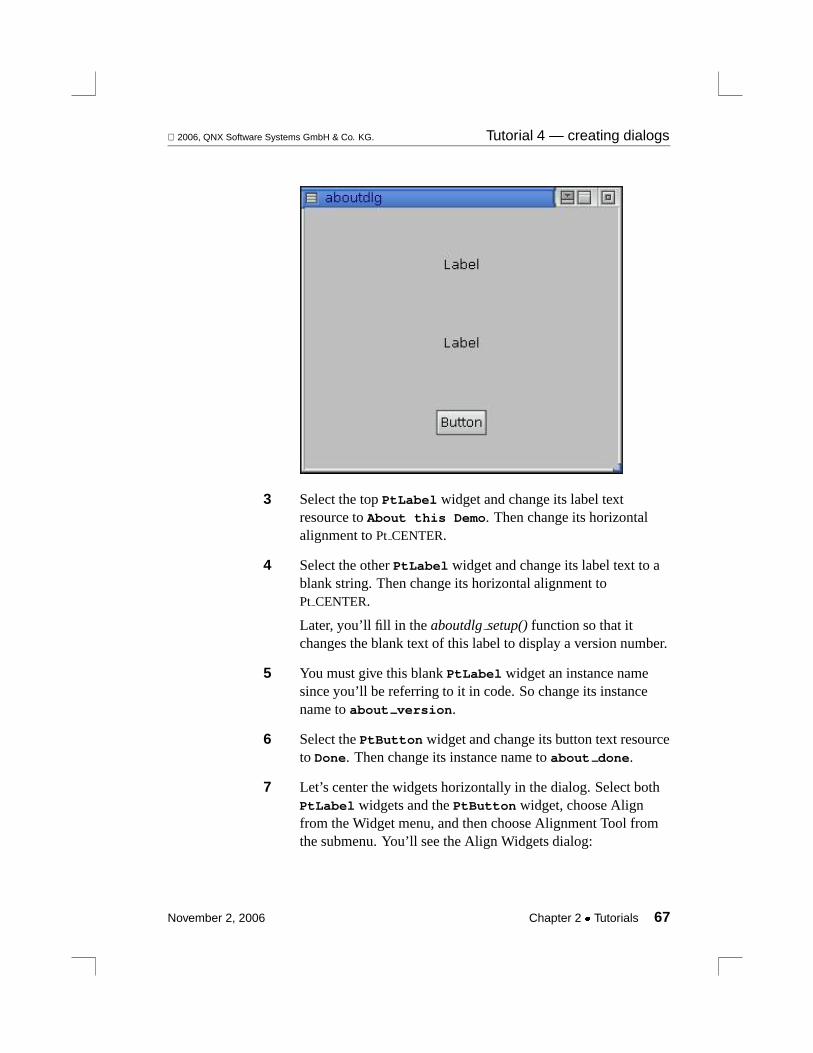
2006, QNX Software Systems GmbH & Co. KG. Tutorial 4 — creating dialogs
3 Select the topPtLabel widget and change its label textresource toAbout this Demo. Then change its horizontalalignment toPt CENTER.
4 Select the otherPtLabel widget and change its label text to ablank string. Then change its horizontal alignment toPt CENTER.
Later, you’ll fill in the aboutdlgsetup()function so that itchanges the blank text of this label to display a version number.
5 You must give this blankPtLabel widget an instance namesince you’ll be referring to it in code. So change its instancename toabout version.
6 Select thePtButton widget and change its button text resourceto Done. Then change its instance name toabout done.
7 Let’s center the widgets horizontally in the dialog. Select bothPtLabel widgets and thePtButton widget, choose Alignfrom the Widget menu, and then choose Alignment Tool fromthe submenu. You’ll see the Align Widgets dialog:
November 2, 2006 Chapter 2 � Tutorials 67

Tutorial 4 — creating dialogs 2006, QNX Software Systems GmbH & Co. KG.
8 In the Horizontal column, click Align Centers and on Align toContainer. Then click the Align button.
The two labels and the button should now be centeredhorizontally within your dialog. Youraboutdlg moduleshould now look like this:
68 Chapter 2 � Tutorials November 2, 2006

2006, QNX Software Systems GmbH & Co. KG. Tutorial 4 — creating dialogs
Adding a callback to the Done buttonNow let’s add a callback to the Done button so that the dialog closeswhen the user clicks on the button.
1 Select the Done button, then switch to the Callbacks controlpanel.
2 Click Activate to add an activate callback. You’ll see thecallback editor.
3 Select the Done code type, then click Apply. Don’t enteranything in the Function field.
Selecting the Done code type tells the widget to perform a“Done” operation when the widget is activated. That is, thewidget calls the function specified in the Function field (if oneis specified) and then closes the dialog module.
4 Close the editor. The callback list now indicates that you’veadded an Activate callback called Done:
November 2, 2006 Chapter 2 � Tutorials 69
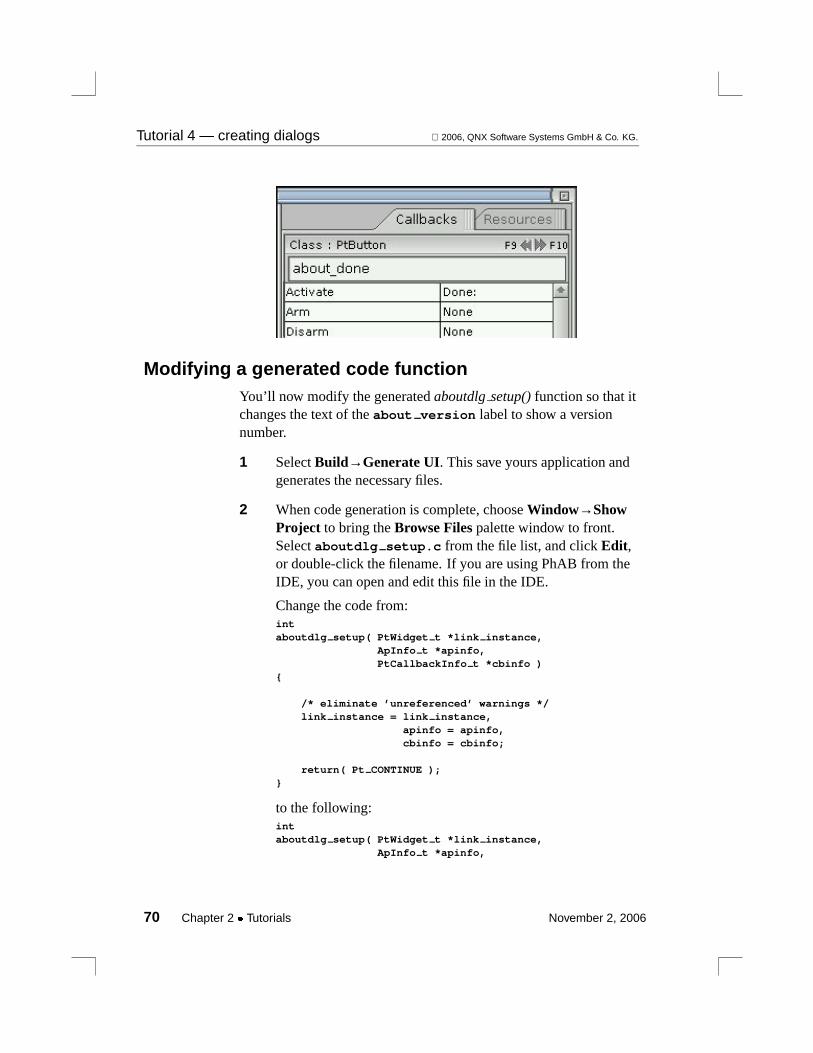
Tutorial 4 — creating dialogs 2006, QNX Software Systems GmbH & Co. KG.
Modifying a generated code functionYou’ll now modify the generatedaboutdlgsetup()function so that itchanges the text of theabout version label to show a versionnumber.
1 SelectBuild→Generate UI. This save yours application andgenerates the necessary files.
2 When code generation is complete, chooseWindow→ShowProject to bring theBrowse Files palette window to front.Selectaboutdlg setup.c from the file list, and clickEdit,or double-click the filename. If you are using PhAB from theIDE, you can open and edit this file in the IDE.
Change the code from:intaboutdlg setup( PtWidget t *link instance,
ApInfo t *apinfo,PtCallbackInfo t *cbinfo )
{
/* eliminate ’unreferenced’ warnings */link instance = link instance,
apinfo = apinfo,cbinfo = cbinfo;
return( Pt CONTINUE );}
to the following:intaboutdlg setup( PtWidget t *link instance,
ApInfo t *apinfo,
70 Chapter 2 � Tutorials November 2, 2006

2006, QNX Software Systems GmbH & Co. KG. Tutorial 4 — creating dialogs
PtCallbackInfo t *cbinfo ){
/* eliminate ’unreferenced’ warnings */link instance = link instance, apinfo = apinfo,
cbinfo = cbinfo;
PtSetResource( ABW about version, Pt ARG TEXT STRING,"1.00", 0);
return( Pt CONTINUE );
}
The code is placing the version number (1.00) into the textstring resource for theabout version widget. To do this, thecode callsPtSetResource()to set the resource for theabout version widget. The code uses the PhAB-generatedmanifestABW about version, which provides access to thewidget’s instance pointer.
We can use this manifest safely since we’re dealing with adialog module—PhAB ensures that only one instance of thedialog will exist at any given time.
3 Save your changes and exit the text editor.
Compiling and RunningYou’re now ready to compile and run the program:
1 Build and run your application. If your program compiles andlinks without errors (which it should if you edited the functioncorrectly), it will run.
2 From the running application, open the Help menu and chooseAbout Demo. The dialog will open, and you’ll see the versionnumber (1.00) under the labelAbout this Demo. Note that thedialog appears in the location you specified.
3 Now try to bring up a second instance of the dialog. As you see,it won’t work. PhAB always ensures that there is only oneinstance of a Dialog widget.
November 2, 2006 Chapter 2 � Tutorials 71

Tutorial 5 — creating windows 2006, QNX Software Systems GmbH & Co. KG.
4 Click Done to close the dialog, then quit the application bychoosingQuit from itsFile menu.
Want more info?
For more info on: See the section: In the chapter:
Using dialogs Dialog modules Working with Modules
Instance names Instance names Creating Widgets in PhAB
Variables and manifests Working with Code
Callbacks Callbacks Editing Resources andCallbacks in PhAB
Code-callback functions Working with Code
Generating code Generating application code Generating, Compiling, andRunning Code
Tutorial 5 — creating windowsIn the previous tutorial, you learned how to handle dialog modules,which support just one instance. In this tutorial you’ll learn how tohandle window modules, which support multiple instances.
This tutorial uses the application you created in Tutorial 4.☞
By supporting multiple instances, window modules provide moreflexibility than dialogs. But to take advantage of this flexibility, youmust keep track of each window’s instance pointer. Doing so ensuresthat you correctly reference the widgets within each instance of awindow. You can’t safely use the generated globalABW xxxmanifestsince it refers only to the last instance created.
72 Chapter 2 � Tutorials November 2, 2006
2006, QNX Software Systems GmbH & Co. KG. Tutorial 5 — creating windows
To simplify the task of working with multiple instances, PhABprovides API library functions that let you access any widget bymeans of its global variable name (ABN xxx).
Creating a windowTo start, let’s create a window module and attach it to the New menuitem in the File menu intut4. This window will contain buttons thatchange the color of another widget.
In the previous tutorial, you created a dialog module from within thecallback editor. But this time you’ll add the window from theProjectmenu. In the future, use whatever method you prefer.
1 Make a copy of thetut4 application and call ittut5.
2 Iconify theaboutdlg dialog module.
3 From theProject menu, selectAdd Window. When PhABprompts you for a window style, choose the Plain style.
4 Change the new window’s instance name fromWindow0 tonewwin, by typing the new name in the instance name field inthe control Panel.
5 The window module should now be the currently selected item.
Attaching callbacksBecause a window module supports multiple instances, you have tocreate code functions that will be called whenever the window opensor closes (i.e. whenever the window is created or destroyed). So let’sfirst set up a callback to detect when the window closes:
1 Switch to the Callbacks control panel, if necessary.
2 From the list of callbacks, choose Window Manager. You wantto use the Window Manager callback since it’s invoked whenthe Photon Window Manager closes the window.
November 2, 2006 Chapter 2 � Tutorials 73

Tutorial 5 — creating windows 2006, QNX Software Systems GmbH & Co. KG.
3 In the Function field, typenewwin close. You don’t have tochoose a callback type since the default, Code, is the one youwant.
Click Apply, then Done.
4 Switch to the Resources control panel and select the Flags:Notify resource. Make sure that thePh WM CLOSEflag is set(i.e. highlighted), then click Done. This flag tells the WindowManager to notify your application when the window is closed.
5 Now let’s set up a function that’s invoked when the windowopens.
Open thefilemenu menu module, then select the Menu Itemsresource in the Resources control panel. You’ll see the menueditor.
6 Make sure the menu’s New item is currently selected in theMenu Items list, then click the Callback icon to open thecallback editor.
7 Choose the Window module type, then click the arrow next tothe Name field. You’ll see the list of existing window modules.
8 Choosenewwin, which is the window you just created.
9 In the Setup Function field, enternewwin setup as the nameof the setup function. Later, you’ll modifynewwinsetup()tohandle the window’s multiple instances.
10 Click Apply, then on Done. Click Done again to close the menueditor.
Adding widgetsLet’s now add some widgets to thenewwin window module. Usingthese widgets, you’ll learn how to update information in the current orother instances of a window module.
1 Add aPtRect widget and fourPtButton widgets as follows:
74 Chapter 2 � Tutorials November 2, 2006
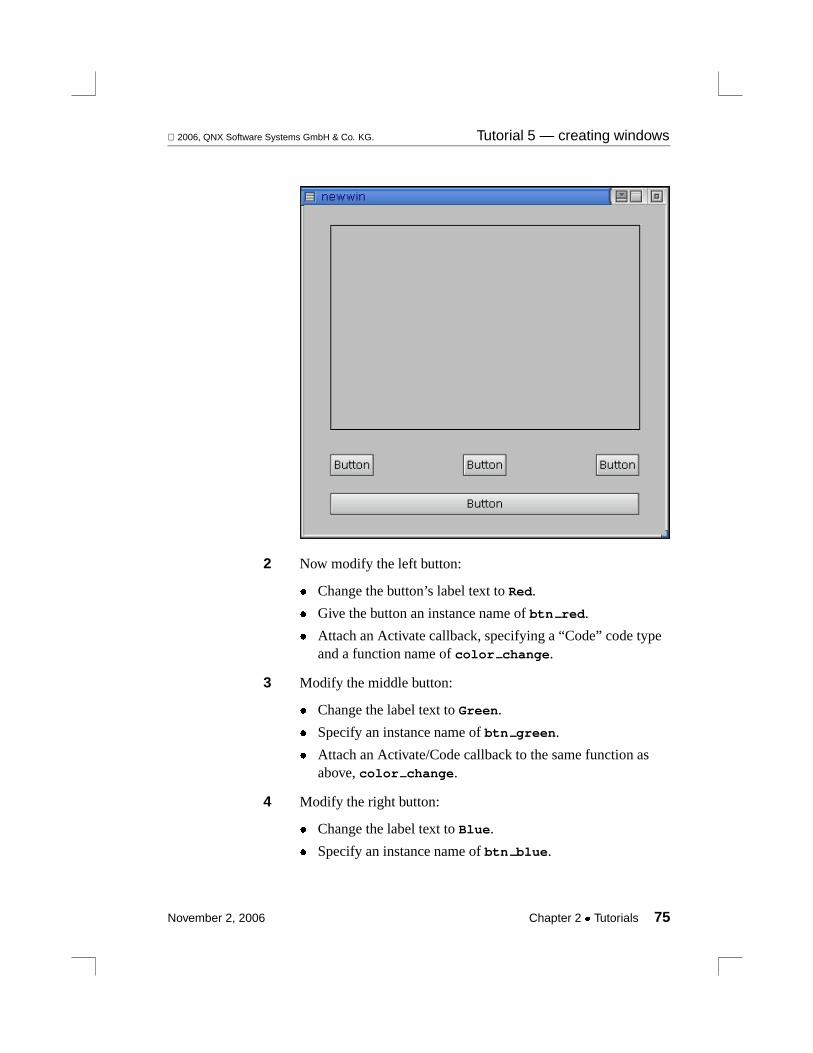
2006, QNX Software Systems GmbH & Co. KG. Tutorial 5 — creating windows
2 Now modify the left button:
� Change the button’s label text toRed.
� Give the button an instance name ofbtn red.
� Attach an Activate callback, specifying a “Code” code typeand a function name ofcolor change.
3 Modify the middle button:
� Change the label text toGreen.
� Specify an instance name ofbtn green.
� Attach an Activate/Code callback to the same function asabove,color change.
4 Modify the right button:
� Change the label text toBlue.
� Specify an instance name ofbtn blue.
November 2, 2006 Chapter 2 � Tutorials 75

Tutorial 5 — creating windows 2006, QNX Software Systems GmbH & Co. KG.
� Attach an Activate/Code callback to the same function asabove.
5 Modify the large button:
� Change the label text toChange previous window’s
color.
� Specify an instance name ofbtn prev.
� Attach an Activate/Code callback to the same function asabove.
6 Last of all, give the rectangle an instance name ofcolor rect. You need to specify this name so that thecolor change()function can change the color of the rectangle.
Your window should now look something like this:
76 Chapter 2 � Tutorials November 2, 2006

2006, QNX Software Systems GmbH & Co. KG. Tutorial 5 — creating windows
Generating and modifying the codeIn the last tutorial, you used the generatedABW xxxmanifest toaccess a dialog’s instance pointer. You can’t use this manifest whendealing with multiple instances of a window module since it refersonly to the last window created. Instead, you have to add code to thegenerated window-setup function so that it stores a copy of eachwindow-instance pointer in a global widget array. In this tutorial,you’ll need these pointers for theChange Previous Window Colorbutton to work.
Generating the code
Open theBuild menu and selectGenerate UI.
Modifying the setup function
Now let’s modify thenewwinsetup()function so that it:
� limits the number of possible instances to five
� stores a copy of each window pointer
� displays a window’s instance number in that window’s titlebar
Edit thenewwin setup.c file as follows:
int win ctr = 0;PtWidget t *win[5];
intnewwin setup( PtWidget t *link instance,
ApInfo t *apinfo,PtCallbackInfo t *cbinfo )
{char buffer[40];
/* eliminate ’unreferenced’ warnings */link instance = link instance, apinfo = apinfo;cbinfo = cbinfo;
/* Note: Returning Pt END in a prerealize setupfunction tells PhAB to destroy the modulewithout realizing it */
/* allow only 5 windows max */
November 2, 2006 Chapter 2 � Tutorials 77

Tutorial 5 — creating windows 2006, QNX Software Systems GmbH & Co. KG.
if ( win ctr == 5 ) {return( Pt END );
}
/* save window-module instance pointer */win[win ctr] = link instance;
sprintf( buffer, "Window %d", win ctr + 1 );PtSetResource( win[win ctr], Pt ARG WINDOW TITLE,
buffer, 0 );win ctr++;
return( Pt CONTINUE );
}
Modifying the color-change function
Now let’s modify thecolor change()function so that:
� pressing a Red, Green, or Blue button changes the rectangle colorto the button color
� pressing the Change Previous Window Color button changes thebackground of the previous window to a color from an array.
If this were a dialog module you could use theABW color rect
manifest to update the color of the rectangle. However, because theseare window modules, you must use the instance pointer for thewindow in which the button is being pressed.
☞
To get the instance pointer of a widget in the current window, youneed to call:
� ApGetInstance()to get a pointer to the window that contains thewidget that invoked the callback
� ApGetWidgetPtr()to get a pointer to the widget with a givenABN ... manifest.
If only one instance of the window were guaranteed, the followingwould work:
78 Chapter 2 � Tutorials November 2, 2006

2006, QNX Software Systems GmbH & Co. KG. Tutorial 5 — creating windows
PtSetResource( ABW color rect, Pt ARG FILL COLOR,buffer, 0 );
But in this casecolor change()has to use:
PtSetResource( ApGetWidgetPtr( ApGetInstance( widget ),ABN color rect ), Pt ARG FILL COLOR,buffer, 0 );
So you need to changecolor change.c to look like:
PgColor t colors[5] = {Pg BLACK, Pg YELLOW,Pg MAGENTA, Pg CYAN,Pg DGREEN};
int base clr = -1;extern int win ctr;extern PtWidget t *win[5];
intcolor change( PtWidget t *widget, ApInfo t *apinfo,
PtCallbackInfo t *cbinfo ){int i, prev;PtWidget t *this window;
/* eliminate ’unreferenced’ warnings */widget = widget, apinfo = apinfo, cbinfo = cbinfo;
/* Get a pointer to the current window. */this window = ApGetInstance( widget );
if ( ApName( widget ) == ABN btn red ) {PtSetResource(
ApGetWidgetPtr( this window, ABN color rect ),Pt ARG FILL COLOR, Pg RED, 0 );
} else if ( ApName( widget ) == ABN btn green ) {PtSetResource(
ApGetWidgetPtr( this window, ABN color rect ),Pt ARG FILL COLOR, Pg GREEN, 0 );
} else if ( ApName( widget ) == ABN btn blue ) {PtSetResource(
ApGetWidgetPtr( this window, ABN color rect ),Pt ARG FILL COLOR, Pg BLUE, 0 );
} else if ( ApName( widget ) == ABN btn prev ) {
November 2, 2006 Chapter 2 � Tutorials 79
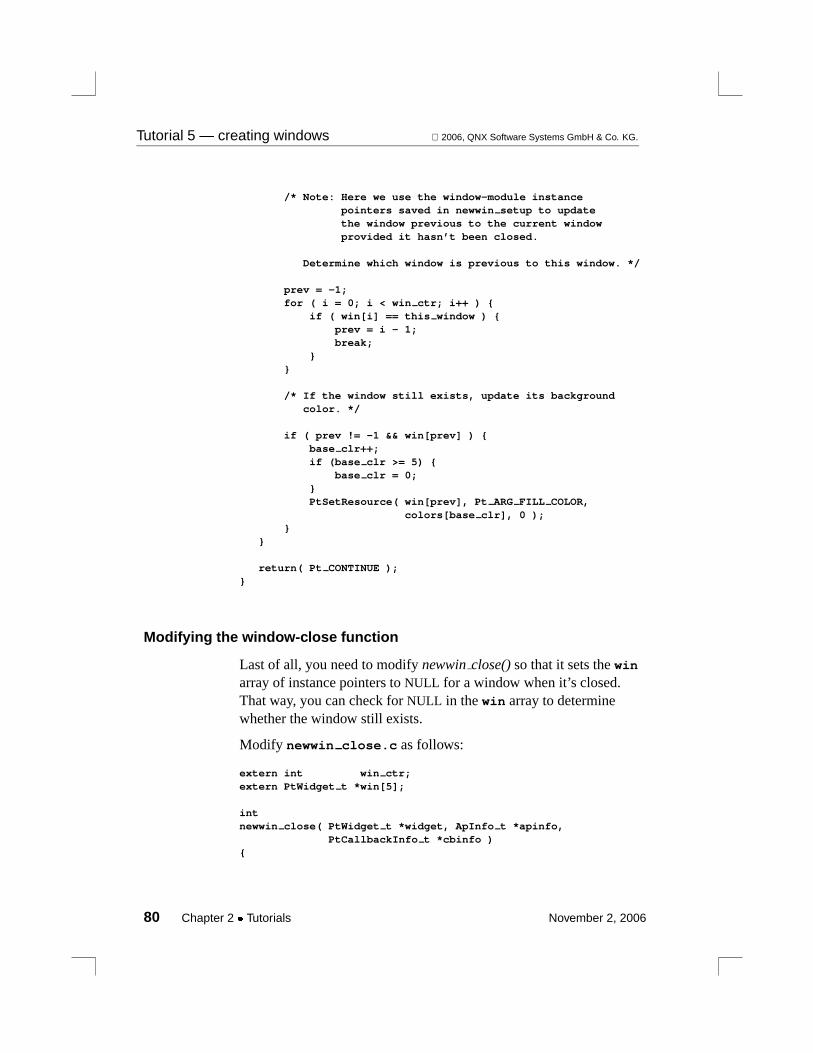
Tutorial 5 — creating windows 2006, QNX Software Systems GmbH & Co. KG.
/* Note: Here we use the window-module instancepointers saved in newwin setup to updatethe window previous to the current windowprovided it hasn’t been closed.
Determine which window is previous to this window. */
prev = -1;for ( i = 0; i < win ctr; i++ ) {
if ( win[i] == this window ) {prev = i - 1;break;
}}
/* If the window still exists, update its backgroundcolor. */
if ( prev != -1 && win[prev] ) {base clr++;if (base clr >= 5) {
base clr = 0;}PtSetResource( win[prev], Pt ARG FILL COLOR,
colors[base clr], 0 );}
}
return( Pt CONTINUE );}
Modifying the window-close function
Last of all, you need to modifynewwinclose()so that it sets thewinarray of instance pointers toNULL for a window when it’s closed.That way, you can check forNULL in thewin array to determinewhether the window still exists.
Modify newwin close.c as follows:
extern int win ctr;extern PtWidget t *win[5];
intnewwin close( PtWidget t *widget, ApInfo t *apinfo,
PtCallbackInfo t *cbinfo ){
80 Chapter 2 � Tutorials November 2, 2006

2006, QNX Software Systems GmbH & Co. KG. Tutorial 5 — creating windows
PhWindowEvent t *we = cbinfo->cbdata;int i;
/* eliminate ’unreferenced’ warnings */apinfo = apinfo;
/* only process WM close events */if ( we->event f != Ph WM CLOSE ) {
return( Pt CONTINUE );}
/* okay it’s a close so who is it? */for ( i = 0; i < win ctr; i++ ) {
if ( win[i] == widget ) {win[i] = NULL;break;
}}
return( Pt CONTINUE );}
Compiling and running1 Make and run the application.
2 From the application’s File menu, choose New several times tocreate multiple windows. You’ll see each window’s relativenumber in its titlebar.
3 Click a color button to make the rectangle change color. Thenclick the Change Previous Window Color button in any windowto change the background color of the previous window.
Want more info?
For more info on: See the section: In the chapter:
Using windows Window modules Working with Modules
continued. . .
November 2, 2006 Chapter 2 � Tutorials 81

Tutorial 5 — creating windows 2006, QNX Software Systems GmbH & Co. KG.
For more info on: See the section: In the chapter:
Instance names Instance names Creating Widgets in PhAB
Variables and manifests Working with Code chapter
Callbacks Callbacks Editing Resources andCallbacks in PhAB
Code-callback functions Working with Code
Generating code Generating application code Generating, Compiling, andRunning Code
Window events Window-management flags Window Management
82 Chapter 2 � Tutorials November 2, 2006
Chapter 3
PhAB’s Environment
In this chapter. . .Menus 85Toolbars 95Control panels 98Widget palette 99Resources panel 102Callbacks panel 104Module Tree panel 106Module Links panel 108Browse Files panel 109Search dialog 111Customizing your PhAB environment 112
November 2, 2006 Chapter 3 � PhAB’s Environment 83


2006, QNX Software Systems GmbH & Co. KG. Menus
This chapter describes PhAB’s environment in more detail, and howyou can customize it.
MenusAcross the top of PhAB’s workspace you’ll see the followingmenubar:
PhAB’s menubar.
File menuCommands that deal with your application and its files:
New Standalone PhAB only* . Create a new application; see“Creating an application” in the Working withApplications chapter.
Open Standalone PhAB only* . Open an existing application;see “Opening an application” in the Working withApplications chapter. This command is also availablethrough PhAB’s toolbars.
Close Standalone PhAB only* . Close the current application;see “Closing an application” in the Working withApplications chapter.
Revert Discard any changes and re-load the project from the lastsaved version.
SaveSave As Save the current application, under the same or a
different name; see “Saving an application” in theWorking with Applications chapter. The Save commandis also available through PhAB’s toolbars.Save As isavailable in Standalone PhAB only* .
November 2, 2006 Chapter 3 � PhAB’s Environment 85

Menus 2006, QNX Software Systems GmbH & Co. KG.
Import Import files created by other applications; see “ImportingPhAB modules from other applications” in the Workingwith Applications chapter.
Export Export the code used to create a module in a file calledmodule.code; see “Export files” in the Working withApplications chapter.
Exit End your current PhAB session. PhAB prompts you ifthere are any changes that you haven’t yet saved.
This menu also lists the last few applications that you edited.
* When using PhAB in the IDE, projects are managed from the IDE,so these menu items are disabled. For more information see “Creatinga QNX Photon Appbuilder Project”, in the Developing PhotonApplications chapter of the IDEUser’s Guide.
Edit menuCommands for editing widgets:
UndoRedo Undo and redo an operation, including:
� creating, deleting, moving, resizing, aligning, andselecting a widget
� changing the order of widgets
� changing a callback resource — PhAB can’tundo/redo any changes you make to a callbackfunction’s code
� pasting
� joining and splitting a group
� editing a resource
� importing images, XBMs, and modules.
� changing a widget’s class, matching widgetresources and callbacks, and transferring widgets
86 Chapter 3 � PhAB’s Environment November 2, 2006
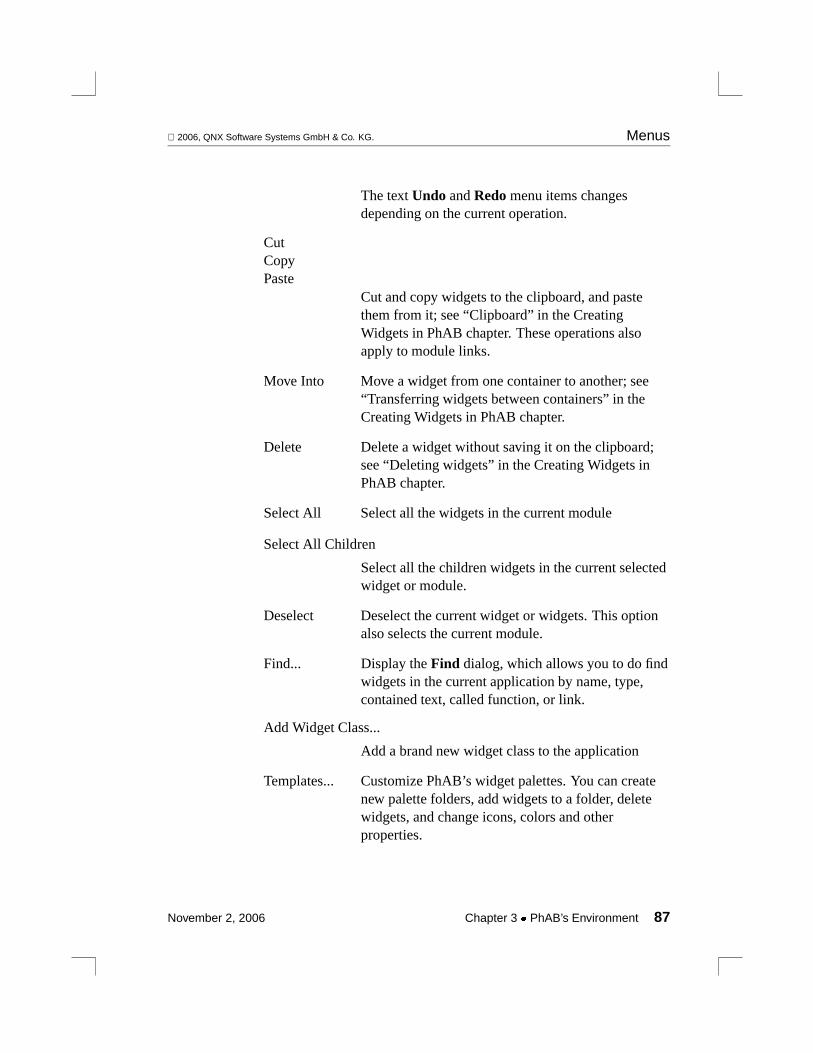
2006, QNX Software Systems GmbH & Co. KG. Menus
The textUndo andRedo menu items changesdepending on the current operation.
CutCopyPaste
Cut and copy widgets to the clipboard, and pastethem from it; see “Clipboard” in the CreatingWidgets in PhAB chapter. These operations alsoapply to module links.
Move Into Move a widget from one container to another; see“Transferring widgets between containers” in theCreating Widgets in PhAB chapter.
Delete Delete a widget without saving it on the clipboard;see “Deleting widgets” in the Creating Widgets inPhAB chapter.
Select All Select all the widgets in the current module
Select All Children
Select all the children widgets in the current selectedwidget or module.
Deselect Deselect the current widget or widgets. This optionalso selects the current module.
Find... Display theFind dialog, which allows you to do findwidgets in the current application by name, type,contained text, called function, or link.
Add Widget Class...
Add a brand new widget class to the application
Templates... Customize PhAB’s widget palettes. You can createnew palette folders, add widgets to a folder, deletewidgets, and change icons, colors and otherproperties.
November 2, 2006 Chapter 3 � PhAB’s Environment 87

Menus 2006, QNX Software Systems GmbH & Co. KG.
Preferences PhAB preferences, such as colors, editingcommands, and styles of resource names.
Many of these commands also appear in PhAB’s toolbars.
Project menuCommands for building and configuring a project:
Add Window Open theNew Window Style dialog to add a newwindow to your project.
Add Dialog Open theNew Dialog Style dialog to add a newdialog to your project.
Add Menu Add a new menu module to your project.
Add Picture Module
Add a new picture module to your project.
Edit Mode Switch to edit mode, which means you can addwidgets and modules to your projects, addcallbacks, and so on. When PhAB is launched, itstarts in this mode.
Test Mode Switch to test mode, which means you can test theappearance of your GUI.
Zoom Mode Allows you to zoom in, zoom out or move around,by using the mouse and keyboard. After zoomingin or out on the desired area, you must return toEdit Mode or Test Mode to continue editing ortesting.
Internal Links Aninternal link is a PhAB mechanism that letsyou access a PhAB module directly from yourapplication’s code; see the Accessing PhABModules from Code chapter.
88 Chapter 3 � PhAB’s Environment November 2, 2006

2006, QNX Software Systems GmbH & Co. KG. Menus
Generate Report Generate a report on the application’s widgets andmodules.
Language editor A menu of commands used to create multilingualversions of your application; see the InternationalLanguage Support chapter.
Properties Information used for the application as a whole,including global headers, initialization function,and which modules to display at startup. For moreinformation, see “Specifying your projectproperties” in the Working with Applicationschapter.
Convert to Eclipse Project
Standalone PhAB only. Explicitly converts yourproject to the Eclipse PhAB Project format, if ithasn’t already been converted. A project must bein this format to be opened by PhAB from theIDE. New projects are created in Eclipse PhABproject format by default, but you must explicitlyconvert multiplatform projects created in aprevious version of PhAB.
Build menuCommands for compiling and running an application:
Build & Run Standalone PhAB only* . Builds the current project,and then runs it. If required, this command willsave open files, generate support files, compile, andlink the application. See the Generating,Compiling, and Running Code chapter.
Build & Debug Standalone PhAB only* . Builds the current project,then launches it inside the preferred debugger. Youcan set breakpoints, step instruction by instruction,etc. See the Generating, Compiling, and RunningCode chapter.
November 2, 2006 Chapter 3 � PhAB’s Environment 89

Menus 2006, QNX Software Systems GmbH & Co. KG.
Rebuild All Standalone PhAB only* . Rebuilds the currentapplication by compiling all the files (equivalent toa “Make Clean” and then a “Build”). See theGenerating, Compiling, and Running Code chapter.
Build Standalone PhAB only* . Builds the currentapplication. If required, this command will saveopen files, generate support files, compile, and linkthe application. See the Generating, Compiling, andRunning Code chapter.
Make Clean Standalone PhAB only* . Runs a “make clean” forall the current target platforms.
Generate UI Generates just the supporting files for the currentapplication. See the Generating, Compiling, andRunning Code chapter.
Run Standalone PhAB only* . Runs the last compiledversion of the current application. See theGenerating, Compiling, and Running Code chapter.
Targets Standalone PhAB only* . Opens theManageTargets dialog, which allows you to add and deletetarget platforms for the current application. See theGenerating, Compiling, and Running Code chapter.
* When using PhAB in the IDE, projects are built and run from theIDE, so these menu items are disabled. For more information see“Building a QNX Photon Appbuilder Project”, in the DevelopingPhoton Applications chapter of the IDEUser’s Guide.
90 Chapter 3 � PhAB’s Environment November 2, 2006
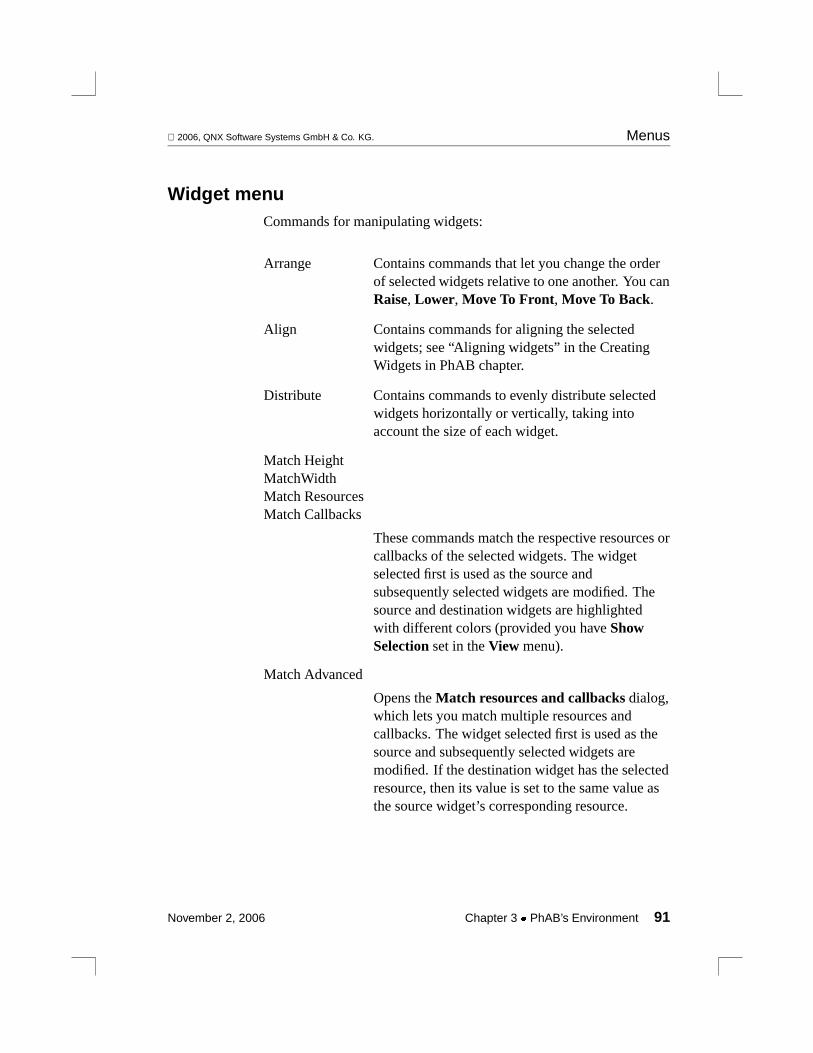
2006, QNX Software Systems GmbH & Co. KG. Menus
Widget menuCommands for manipulating widgets:
Arrange Contains commands that let you change the orderof selected widgets relative to one another. You canRaise, Lower, Move To Front, Move To Back.
Align Contains commands for aligning the selectedwidgets; see “Aligning widgets” in the CreatingWidgets in PhAB chapter.
Distribute Contains commands to evenly distribute selectedwidgets horizontally or vertically, taking intoaccount the size of each widget.
Match HeightMatchWidthMatch ResourcesMatch Callbacks
These commands match the respective resources orcallbacks of the selected widgets. The widgetselected first is used as the source andsubsequently selected widgets are modified. Thesource and destination widgets are highlightedwith different colors (provided you haveShowSelection set in theView menu).
Match Advanced
Opens theMatch resources and callbacks dialog,which lets you match multiple resources andcallbacks. The widget selected first is used as thesource and subsequently selected widgets aremodified. If the destination widget has the selectedresource, then its value is set to the same value asthe source widget’s corresponding resource.
November 2, 2006 Chapter 3 � PhAB’s Environment 91
Menus 2006, QNX Software Systems GmbH & Co. KG.
GroupUngroup Combine selected widgets into a group, or split up
a selected group; see “Aligning widgets usinggroups” in the Geometry Management chapter.
Lock Contains commands to lock the position or size ofthe selected widget.
Change Class Change the class of the selected widgets; see“Changing a widget’s class” in the CreatingWidgets in PhAB chapter.
Define Template
A template is a customized widget that you want touse as the basis for other widgets. This commandopens theDefine template dialog, which lets youcreate or edit a template; see “Templates” in theCreating Widgets in PhAB chapter.
View menuCommands that change the way the modules in the work area aredisplayed:
Zoom InZoom Out Zoom the display in or out. Use these commands
for doing precise alignments of your widgets. Forexample, if you zoom out so that the zoom factor isless than 100%, your workspace is larger, helpingyou work on a 1280x1024 application even if yourdisplay is set to 800x600.
Fit in Window Fits the current selection to the window byadjusting the zoom factor.
Actual Size Returns to 100% zoom, the default screen size.
Show Grid Toggles the grid display. The settings for the gridcan be adjusted on theGrid tab of theAppBuilder
92 Chapter 3 � PhAB’s Environment November 2, 2006

2006, QNX Software Systems GmbH & Co. KG. Menus
Preference Settings dialog. See thePreferencesoption of the Edit menu.
Snap to Grid Toggles the snap to grid option. When this option ison, new or moved widgets are “snapped” to thegrid—that is, they are aligned with the closestvertical and horizontal grid lines. The grid does nothave to be visible for this option to work.
Show Selection
Toggles the widget selection option. When thisoption is on, selected widgets are highlighted withcolored rectangles. When multiple widgets areselected, the first widget has a different selectioncolor than subsequently selected widgets. Thismakes it easier to align or match widgets, where thefirst selected widget is the source. It also makes iteasier to see what’s exactly selected when widgetsoverlap.
Window menuCommands that manipulate PhAB’s windows:
Cascade Arranges the currently open modules so thatthey’re stacked from the upper left to lower rightin PhAB’s workspace.
Arrange Icons Arranges iconified modules in PhAB’s workspacein a grid along the bottom of the workspace.
Send To Back Sends the currently selected module to the back ofthe workspace. Note that a module will alwaysappear in front of the iconified modules.
Close Iconifies the currently selected module. A closedmodule appears as an icon at the bottom of theworkspace.
November 2, 2006 Chapter 3 � PhAB’s Environment 93

Menus 2006, QNX Software Systems GmbH & Co. KG.
Close All Iconifies all the application’s modules.
Show TemplatesShow ResourcesShow CallbacksShow Module LinksShow Module TreeShow Project
These commands show or hide control panels fordefined templates, resources, callbacks, modulelinks, module trees, and project files. If a controlpanel is shown, the corresponding menu commandchanges toHide.
Help menuGet online help information:
Welcome to PhABTutorialsPhAB ConceptsTools + Techniques
Links to the appropriate section of thisprogrammer’s guide.
PhAB Library API
A link to the PhotonLibrary Reference.
About PhAB The version number and copyright information forPhAB.
There are other forms of help available in PhAB:
� Context-sensitive help — To get help on a part of PhAB’s userinterface, click on the question mark button, then click on the itemin question. The Helpviewer displays the information on theselected item.
94 Chapter 3 � PhAB’s Environment November 2, 2006

2006, QNX Software Systems GmbH & Co. KG. Toolbars
� Balloon help — To find out what a button in the widget palette ortoolbars is for, pause the pointer over it. A descriptive balloonappears.
ToolbarsThe toolbars give you quick access to frequently used commandsfrom the menu bar:
PhAB’s toolbars.
Open Standalone PhAB only* . Open an existingapplication; see “Opening an application” in theWorking with Applications chapter. This commandis also available through the File menu.
Save Save the current application; see “Saving anapplication” in the Working with Applications
November 2, 2006 Chapter 3 � PhAB’s Environment 95
Toolbars 2006, QNX Software Systems GmbH & Co. KG.
chapter. The Save command is also availablethrough the File menu.
Print Not implemented.
CutCopyPaste
Delete and copy widgets to the clipboard, and pastethem from it; see “Clipboard” in the CreatingWidgets in PhAB chapter. These commands are alsoavailable through the Edit menu.
Move Into Move a widget from one container to another; see“Transferring widgets between containers” in theCreating Widgets in PhAB chapter. This commandcorresponds to the Move Into command in the Editmenu.
Anchoring on/off
Turn the anchor flags for widgets on or off in thedesign workspace. This setting does not affectrun-time anchoring in your application. For moreinformation on anchoring widgets, see “Constraintmanagement using anchors” in the GeometryManagement chapter.
Edit Mode Switch to edit mode, where you can add widgets andmodules to your project, add callbacks, and so on.This is the default mode when PhAB is launched.This command corresponds to the Edit Modecommand in the Project menu.
Test Mode Switch to test mode, where you can test theappearance of your GUI. This command correspondsto the Test Mode command in the Project menu.
Zoom Mode Switch to zoom mode, where you can increase ordecrease the zoom by using the mouse and keyboard.
96 Chapter 3 � PhAB’s Environment November 2, 2006
2006, QNX Software Systems GmbH & Co. KG. Toolbars
After changing the zoom, you must return to edit ortest mode to continue editing or testing. Thiscommand corresponds to the Zoom Mode commandin the Project menu.
RaiseLowerTo FrontTo Back Move the selected widgets forward or backward in,
or to the front or back of the widgets in thecontainer; see “Ordering widgets” in the CreatingWidgets in PhAB chapter. The To Front and To Backcommands are also available through the Arrangesubmenu of the Widget menu.
Align The most frequently used commands for aligning theselected widgets; see “Aligning widgets” in theCreating Widgets in PhAB chapter. For morechoices of alignment, see the Alignment item in theWidget menu.
GroupUngroup Combine selected widgets into a group, or break up
a selected group; see “Aligning widgets usinggroups” in the Geometry Management chapter.These commands are also available through theWidget menu.
XYWH The coordinates and size of the currently selected
widget. To change them, type the new values andpressEnter.
To avoid changing a coordinate or dimension for thecurrent widget, lock it by clicking on the padlock sothat it closes. You can’t change the field (either bytyping or dragging) until you unlock it, although you
November 2, 2006 Chapter 3 � PhAB’s Environment 97

Control panels 2006, QNX Software Systems GmbH & Co. KG.
can change its position using the nudge tool. Thelocks are saved with your application.
Nudge tool This tool lets you move, expand, or shrink a widget.Click on the button for the desired mode, and thenclick on the frame buttons above:
Frame buttons
Move Shrink Expand
The nudge tool’s components.
Every click on the frame buttons nudges, stretches,or shrinks the selected widget by one pixel. To nudgeby multiple pixels, hold down the mouse button.
You can also use theCtrl key and the numeric keypad to nudge,stretch, or shrink a widget. Each key corresponds to one of the nudgebuttons. PressingCtrl – 5 switches between modes, andCtrl – ↑ workslike the tool’s top frame button.
☞
Control panelsPhAB includes a set of control panels (also referred to as “palettewindows”) that display information about the currently selectedwidget or widgets. They’re displayed by default in PhAB, and youcan move them anywhere you like. If you close a control panel, youcan reopen it by choosing the appropriate item from the View menu.
The control panels include:
98 Chapter 3 � PhAB’s Environment November 2, 2006

2006, QNX Software Systems GmbH & Co. KG. Widget palette
� Widget palette
� Resources panel
� Callbacks panel
� Module Tree panel
� Module Links panel
� Browse Files panel
They’re described in the sections that follow.
The control panels are originally displayed as a stack in aPtPanelGroup widget. If you click on the panel tab, a menu of thepanels appears. If you expand the window enough, all the tabs aredisplayed in a line.
You can drag panels away from this group to customize the display. Ifyou drop it on the background of PhAB’s work area, it becomes a newpanel group. If you drop it on another panel group, the panel joinsthat group. You’re then free to resize the panel groups are you see fit.Depending on your choices in the AppBuilder Preferences Settingsdialog, the arrangement of panels is saved with your application or forall your PhAB sessions.
Widget paletteThe widget palette lets you add widgets to your application.
November 2, 2006 Chapter 3 � PhAB’s Environment 99

Widget palette 2006, QNX Software Systems GmbH & Co. KG.
PhAB’s widget palette.
If you close this panel, you can reopen it by choosing ShowTemplates from the Window menu, then selecting a pallet.
100 Chapter 3 � PhAB’s Environment November 2, 2006

2006, QNX Software Systems GmbH & Co. KG. Widget palette
The predefined Widget palette is a collection of templates groupedinto a folder called “Widgets”. You can create your own templates byselectingWidget→Define Template. You can also customize thetemplates in the Widget palette by choosing Templates from the Editmenu. If a template is permanently removed from the Widget palette,you can always add it back by selecting Add Widget Class from theEdit menu. For more information on templates, see Adding a widgetclass in the Creating Widgets in PhAB chapter..
☞
The widgets are arranged and color-coded by type. The names areoptional; to hide or display them, right-click on the palette and choosethe appropriate item from the pop-up menu.
To find out what widget a button represents if the widget names aren’tdisplayed:
� Pause the pointer over it until a help balloon pops up.
Or
� See the Widgets at a Glance appendix.
For information on using specific widget classes, see the PhotonWidget Reference.
Modes (create vs select)The widget palette has two modes:
Select mode Lets you select existing widgets and modules in thework area.
Create mode Lets you create new widgets.
Determining the mode
To find out which mode you’re in:
� Look at the widget palette—If an icon button is pushed in, you’rein create mode.
November 2, 2006 Chapter 3 � PhAB’s Environment 101
Resources panel 2006, QNX Software Systems GmbH & Co. KG.
� Look at the pointer—If the pointer is a single-headed arrow whenyou move it into the work area, you’re in select mode. If thepointer is anything else, you’re in create mode.
Switching to create mode
To switch to create mode, click on any widget icon in the widgetpalette. You can now create one or more instances of that widget. Formore information, see “Creating a widget” in the Creating Widgets inPhAB chapter.
Switching to select mode
To switch from create mode to select mode, do one of the following:
� Click the right mouse button in a module or on the background ofthe PhAB work area.
Or:
� Click on the background of the PhAB work area. Note that thismight not work if the selected template in the Widget palettecreates a module. In this case, even if you click on the backgroundof PhAB, the module specified by the template is created at thepointer position.
Or:
� Click on the selected widget in the widget palette.
For most widgets, PhAB returns to select mode as soon as you’vecreated a widget, but you can stay in create mode by pressing theCtrl.This allows you to create multiple instances of the widget, one afteranother. Note that PhAB stays in create mode when you create somewidgets (such asPtLine, PtPolygon, andPtPixel).
Resources panelThe Resources panel displays a list of resources for the selectedwidget or widgets. (If more than one widget is selected, this paneldisplays only the resources they have in common.) Here’s an example:
102 Chapter 3 � PhAB’s Environment November 2, 2006

2006, QNX Software Systems GmbH & Co. KG. Resources panel
The Resources panel.
If you close this panel, you can reopen it by choosing ShowResources from the Window menu.
It includes the following:
Widget class The class of the selected widget.
Next and previous buttons
Let you navigate sequentially through widgets inthe current module. These buttons also let youselect multiple widgets or select widgets within a
November 2, 2006 Chapter 3 � PhAB’s Environment 103
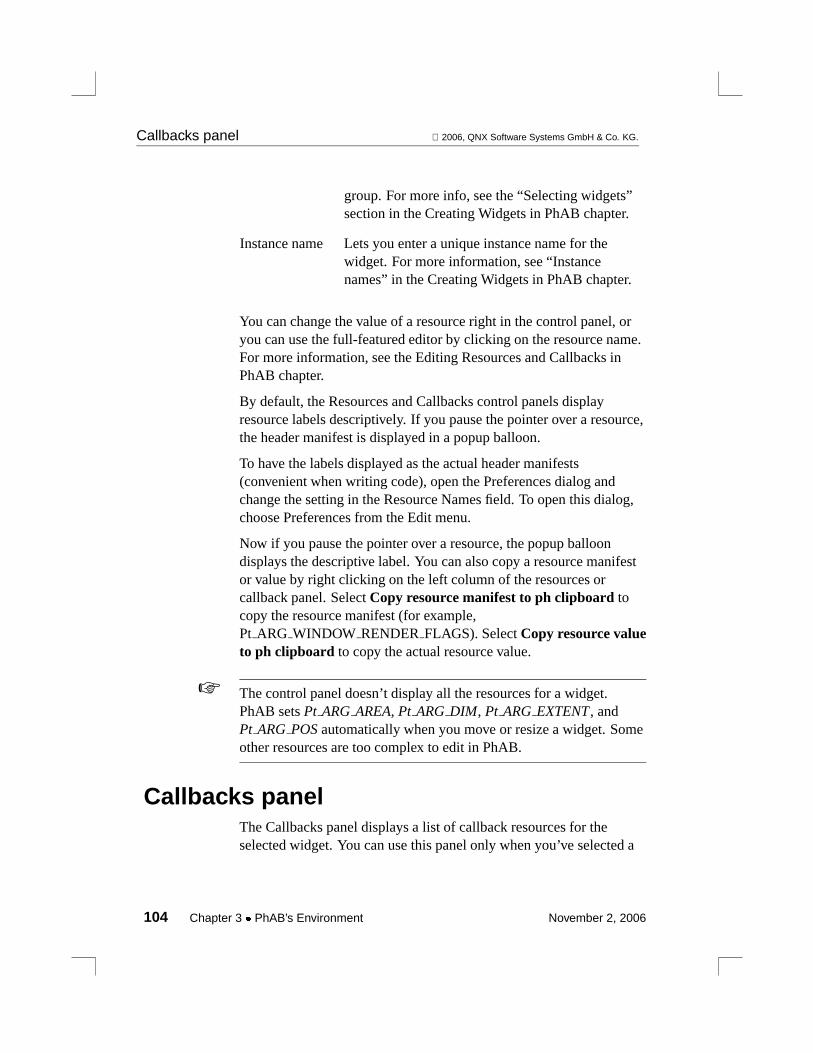
Callbacks panel 2006, QNX Software Systems GmbH & Co. KG.
group. For more info, see the “Selecting widgets”section in the Creating Widgets in PhAB chapter.
Instance name Lets you enter a unique instance name for thewidget. For more information, see “Instancenames” in the Creating Widgets in PhAB chapter.
You can change the value of a resource right in the control panel, oryou can use the full-featured editor by clicking on the resource name.For more information, see the Editing Resources and Callbacks inPhAB chapter.
By default, the Resources and Callbacks control panels displayresource labels descriptively. If you pause the pointer over a resource,the header manifest is displayed in a popup balloon.
To have the labels displayed as the actual header manifests(convenient when writing code), open the Preferences dialog andchange the setting in the Resource Names field. To open this dialog,choose Preferences from the Edit menu.
Now if you pause the pointer over a resource, the popup balloondisplays the descriptive label. You can also copy a resource manifestor value by right clicking on the left column of the resources orcallback panel. SelectCopy resource manifest to ph clipboard tocopy the resource manifest (for example,Pt ARG WINDOW RENDER FLAGS). SelectCopy resource valueto ph clipboard to copy the actual resource value.
The control panel doesn’t display all the resources for a widget.PhAB setsPt ARG AREA, Pt ARGDIM , Pt ARG EXTENT, andPt ARG POSautomatically when you move or resize a widget. Someother resources are too complex to edit in PhAB.
☞
Callbacks panelThe Callbacks panel displays a list of callback resources for theselected widget. You can use this panel only when you’ve selected a
104 Chapter 3 � PhAB’s Environment November 2, 2006
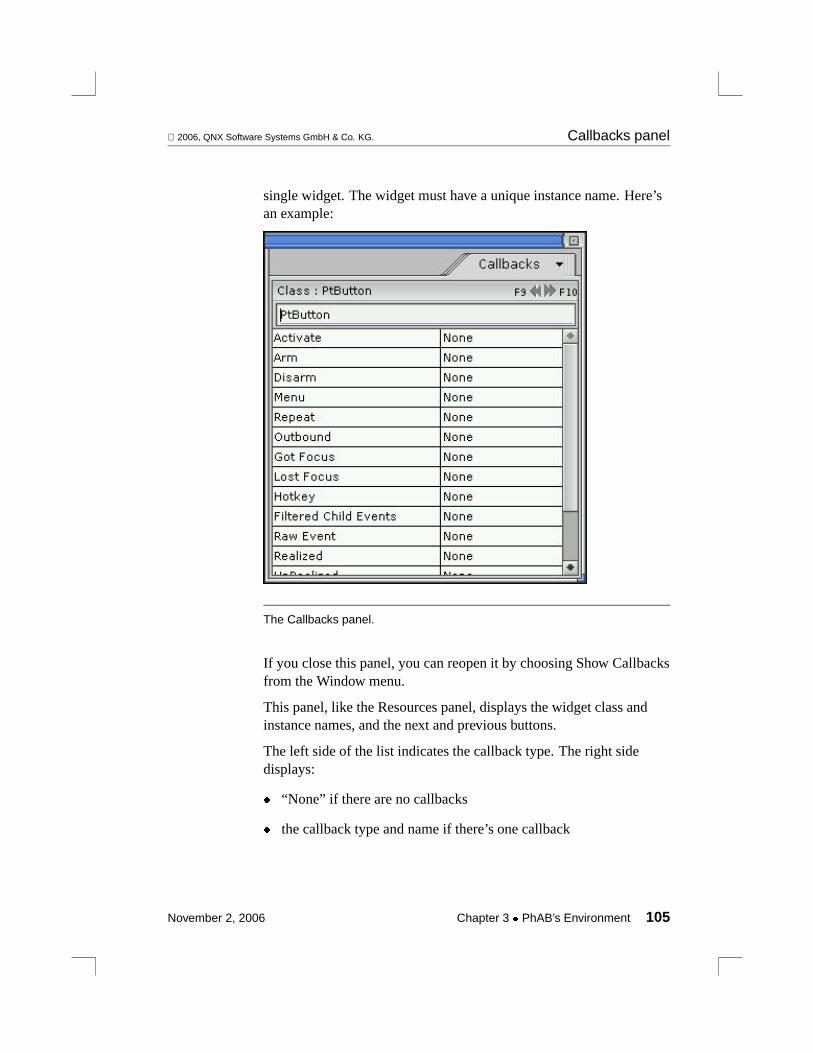
2006, QNX Software Systems GmbH & Co. KG. Callbacks panel
single widget. The widget must have a unique instance name. Here’san example:
The Callbacks panel.
If you close this panel, you can reopen it by choosing Show Callbacksfrom the Window menu.
This panel, like the Resources panel, displays the widget class andinstance names, and the next and previous buttons.
The left side of the list indicates the callback type. The right sidedisplays:
� “None” if there are no callbacks
� the callback type and name if there’s one callback
November 2, 2006 Chapter 3 � PhAB’s Environment 105
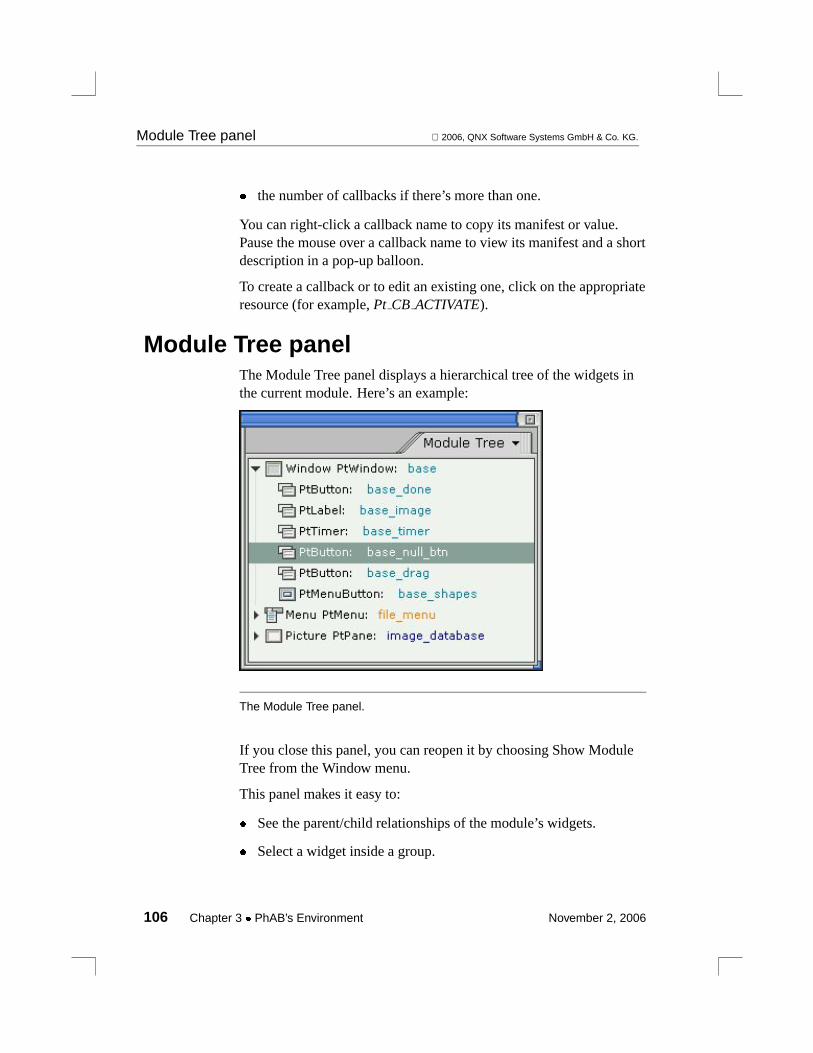
Module Tree panel 2006, QNX Software Systems GmbH & Co. KG.
� the number of callbacks if there’s more than one.
You can right-click a callback name to copy its manifest or value.Pause the mouse over a callback name to view its manifest and a shortdescription in a pop-up balloon.
To create a callback or to edit an existing one, click on the appropriateresource (for example,Pt CB ACTIVATE).
Module Tree panelThe Module Tree panel displays a hierarchical tree of the widgets inthe current module. Here’s an example:
The Module Tree panel.
If you close this panel, you can reopen it by choosing Show ModuleTree from the Window menu.
This panel makes it easy to:
� See the parent/child relationships of the module’s widgets.
� Select a widget inside a group.
106 Chapter 3 � PhAB’s Environment November 2, 2006

2006, QNX Software Systems GmbH & Co. KG. Module Tree panel
� Find a widget by name.
� Select a widget hidden underneath another widget.
To select a widget from the tree, click on the widget’s name.
If you right-click on this panel, a menu appears:
The menu for the Module Tree panel.
November 2, 2006 Chapter 3 � PhAB’s Environment 107

Module Links panel 2006, QNX Software Systems GmbH & Co. KG.
Module Links panelThe Module Links panel displays a list of all link callbacks both toand from the current module. As you can see from the followingexample, the callbacks are displayed in a two-line format:
The Module Links panel.
To do this: Click on the:
Select a widget Instance name (e.g.base file) in line 1
Edit a widget callback Appropriate callback type (e.g. Arm) inline 2
If you close this panel, you can reopen it by choosing Module Linksfrom the View menu.
108 Chapter 3 � PhAB’s Environment November 2, 2006
2006, QNX Software Systems GmbH & Co. KG. Browse Files panel
Browse Files panelThe Browse Files panel is a file browser that you can use to view, edit,delete, print, create, and rename the files related to your application.
November 2, 2006 Chapter 3 � PhAB’s Environment 109

Browse Files panel 2006, QNX Software Systems GmbH & Co. KG.
The Browse Files panel.
Use theFilter to select or enter a regular expression to filter the list offiles. For example,*.c displays only files with a .c extension.
110 Chapter 3 � PhAB’s Environment November 2, 2006

2006, QNX Software Systems GmbH & Co. KG. Search dialog
Search dialogThe Search dialog lets you search your application for widgets of aspecified type, name, text resource, and so on.
The Search dialog.
Open this dialog by choosing Find from the Edit menu.
Just choose the category you want to find from the combo box andspecify the pattern (which is case-sensitive) as appropriate:
Widget Name In the text field, type the exact name of the widgetor a regular expression. For example, a value ofmy button* matches all the widgets whosenames begin withmy button.
Widget Type Type a class name or a regular expression (e.g.PtScroll*), or use the combobox to select awidget class.
Widget Text Type specific text or a regular expression to lookfor in the widgets’ text resources.
Callback Type Search for the widgets that have attached acallback of the type (Code, Done, and so on)selected from the pattern combo box.
November 2, 2006 Chapter 3 � PhAB’s Environment 111
Customizing your PhAB environment 2006, QNX Software Systems GmbH & Co. KG.
Callback Function Name
Type a function name or a regular expression.
Callback Module Name
Type a module name or a regular expression. Allthe widgets that have a callback pointing to amodule whose name matches the pattern areselected.
Next, press the Go button. The matching widgets are displayed in alist. Select entries from the list to select the actual widgets; the PhABmodules they’re in are opened or made visible.
Customizing your PhAB environmentTo customize PhAB to your preferences:
1 Choose Preferences from the Edit menu. You’ll see thePreference Settings dialog:
112 Chapter 3 � PhAB’s Environment November 2, 2006
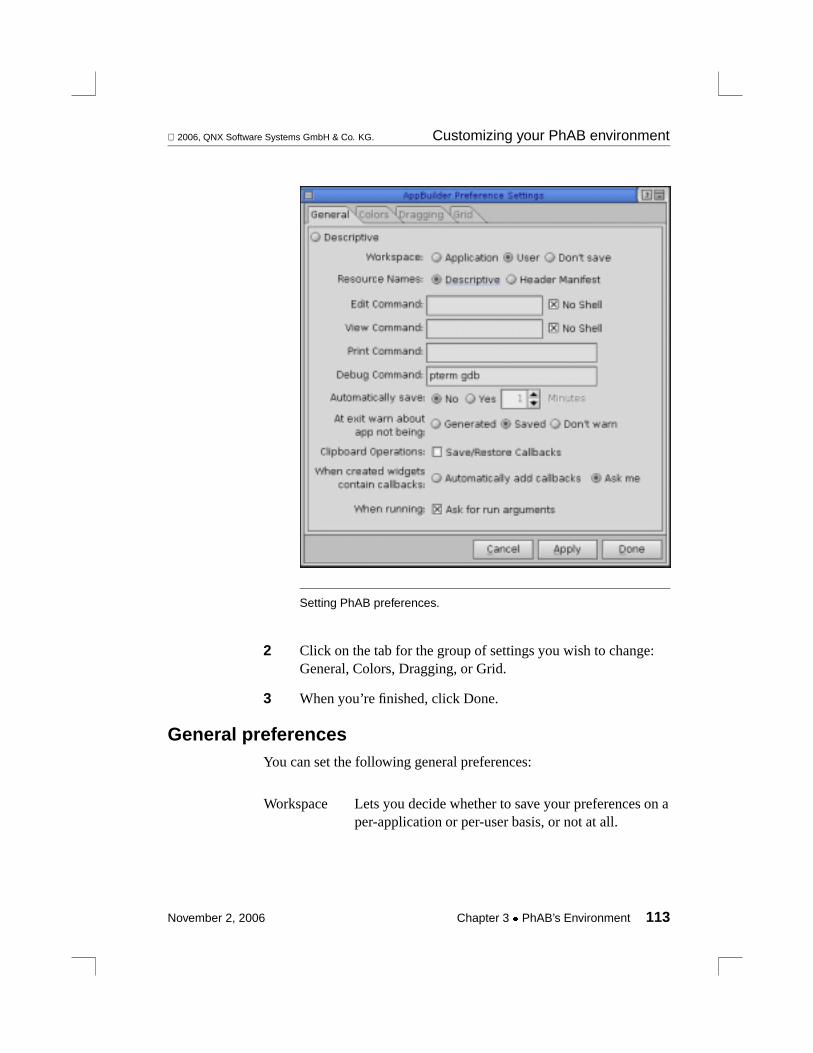
2006, QNX Software Systems GmbH & Co. KG. Customizing your PhAB environment
Setting PhAB preferences.
2 Click on the tab for the group of settings you wish to change:General, Colors, Dragging, or Grid.
3 When you’re finished, click Done.
General preferencesYou can set the following general preferences:
Workspace Lets you decide whether to save your preferences on aper-application or per-user basis, or not at all.
November 2, 2006 Chapter 3 � PhAB’s Environment 113

Customizing your PhAB environment 2006, QNX Software Systems GmbH & Co. KG.
Resource Names
By default, the Resources and Callbacks panelsdisplay resource labels descriptively. This field letsyou display the labels as the actual header manifests,which you may find helpful when writing code. Note,however, that manifests are long and take up morescreen space.
If you pause the pointer over a resource, the label notdisplayed in the control panel is displayed in a popupballoon.
Edit Command
Lets you specify an external editor to edit source files.
View Command
Lets you specify the file viewer to use to view sourcefiles.
Print Command
Lets you specify the print command used to print aselected file (in the Project tab, for example).
Debug Command
Lets you specify the command used to debug yourapplication.
Automatically save
Whether or not to save the application automatically,and how often.
Warnings on exiting
Whether or not to warn you when you exit PhABwithout generating or saving your application.
Clipboard Operations
Lets you specify if callbacks should be saved alongwith widgets when copying from or cutting to theclipboard.
114 Chapter 3 � PhAB’s Environment November 2, 2006

2006, QNX Software Systems GmbH & Co. KG. Customizing your PhAB environment
When created widgets contain callbacks
Lets you specify whether you’re prompted to addcallbacks when newly created widgets containcallbacks.
Ask for run arguments
Lets you specify whether PhAB prompts you to enterruntime arguments when you run an application fromthe Build menu.
Color preferencesYou can set the following color preferences:
Resize HandleNon-Resizable Handle
If you choose a window background that makes it difficult tosee resize handles, use these options to customize the color. (Ifyou select a widget and the resize handles appear in thenonresize color, the widget can’t be resized.)
Selection Color - First Item
The color for the first widget selected. Turn this feature on byselectingView→Show Selection.
Selection Color
The color for widgets selected after the first widget. Turn thisfeature on by selectingView→Show Selection.
Dragging preferencesYou can set the following dragging preferences:
WidgetModule Drag widgets and modules as outlines rather than as full
objects.
November 2, 2006 Chapter 3 � PhAB’s Environment 115

Customizing your PhAB environment 2006, QNX Software Systems GmbH & Co. KG.
Drag Damping Factor
The amount you must drag a widget or module before itmoves. This factor helps avoid the annoyance of movinga widget when you really mean to select it.
Grid preferencesYou can use a grid to position and size widgets.
Grid Preferences.
You can:
116 Chapter 3 � PhAB’s Environment November 2, 2006
2006, QNX Software Systems GmbH & Co. KG. Customizing your PhAB environment
� Choose the color of the grid.
� Specify the origin and spacing of the grid.
November 2, 2006 Chapter 3 � PhAB’s Environment 117


Chapter 4
Working with Applications
In this chapter. . .Creating an application 121Opening an application 123Saving an application 125Closing an application 128Specifying project properties 128Importing files 139Exporting files 141
November 2, 2006 Chapter 4 � Working with Applications 119

2006, QNX Software Systems GmbH & Co. KG. Creating an application
This chapter describes working with an application as a whole inPhAB.
For information on running an application, see the Generating,Compiling, and Running Code chapter.
Creating an applicationThe way you create a new application depends on whether you’reusing PhAB from the IDE or standalone.
From the IDE:
To create a new PhAB project, see “Creating a QNX PhotonAppbuilder project” in the Developing Photon Applications chapter oftheIDE User’s Guide.When you create a new project, the IDE opensPhAB, and you see theNew Window Style dialog where you canselect the type of base window for your application.
Standalone PhAB:
To create a new application, chooseNew from the File menu or pressCtrl – N. If you’re already working on an application, PhAB asks ifyou want to save any changes to that application before closing it.
Choosing a main window style
PhAB creates a new unnamed application that consists of a singlemain window namedbase. PhAB displays a dialog where you mustchoose the style of the base window:
November 2, 2006 Chapter 4 � Working with Applications 121

Creating an application 2006, QNX Software Systems GmbH & Co. KG.
Choosing the style of the base window.
After creating an application, you should:
� if you’re using standalone PhAB, save it, giving it a name
� use the Project Properties dialog to:
- specify a global header file
- specify an initialization function
- enable or disable command-line options
- specify an icon for your application
- specify your startup window, and other startup options
122 Chapter 4 � Working with Applications November 2, 2006
2006, QNX Software Systems GmbH & Co. KG. Opening an application
You should develop a naming convention for all the widgets, modules,functions, and so on. This will make managing your applicationeasier.
☞
Opening an applicationThe way you open an existing application depends on whether you’reusing PhAB in the IDE or standalone.
From the IDE
To open an existing PhAB project, see “Reopening PhAB” in theDeveloping Photon Applications chapter of the IDEUser’s Guide.
Standalone PhAB
To open an existing application, chooseOpen from the File menu,pressCtrl – O, or chooseOpen from PhAB’s toolbar:
The Open button on PhAB’s toolbar.
You’ll see the application selector:
November 2, 2006 Chapter 4 � Working with Applications 123

Opening an application 2006, QNX Software Systems GmbH & Co. KG.
Application Selector dialog.
If the application you want is in another directory, type the directoryname in the Application Directory field, then pressEnter, or browse tothe directory. To enter a directory, double-click it. To go one level upin the directory structure, click the up arrow directory in the top-rightcorner of the dialog, or double-click the.. folder in the file list.
To choose the application, do one of the following:
� Double-click the application.
Or:
� Click the application, then pressEnter or click Open Application.
Or:
124 Chapter 4 � Working with Applications November 2, 2006
2006, QNX Software Systems GmbH & Co. KG. Saving an application
� Type the application’s name, then pressEnter or click OpenApplication.
If someone already has the application open, PhAB won’t open itunless you started PhAB with the-n option.
If you’re using NFS or SMB, you should start PhAB with the-noption because you can’t lock files with either. For more information,seeappbuilder in the QNX NeutrinoUtilities Reference.
☞
Saving an applicationYou can save your application in several ways, as described in thesections below.
To ensure the latest changes to your application are in effect, PhABautomatically saves your application whenever you regenerate ormake your application code.
☞
For information on using version-control software with PhABapplications, see “Version control” in the Generating, Compiling, andRunning Code chapter.
How you save your application depends on whether you’re runningPhAB from the IDE or standalone.
From the IDEWhen you run PhAB from the IDE, all file management is handled bythe IDE. However, you can save the PhAB portion of the project bychoosingSave from the File menu in PhAB. For information onmanaging projects in the IDE, see Developing C/C++ Programs in theIDE User’s Guide.
November 2, 2006 Chapter 4 � Working with Applications 125
Saving an application 2006, QNX Software Systems GmbH & Co. KG.
From standalone PhABNaming or renaming an application
To save a new unnamed application or to save an application underanother name or in a different directory:
1 ChooseSave As from the File menu. You’ll see the applicationselector dialog.
2 The dialog lists the contents of a directory. If you want to saveyour application in another directory, browse to the desireddirectory, or type the directory name in theApplicationDirectory field and pressEnter.
If you type a new directory name, it’s saved. The next time you wantto look in that directory, click the button to the right of the directoryfield and select the directory from the list.
☞
3 Type the name of the application in theApplication Namefield.
4 PressEnter or click Save Application.
126 Chapter 4 � Working with Applications November 2, 2006

2006, QNX Software Systems GmbH & Co. KG. Saving an application
If you rename an application, you’ll find that the name of theexecutable is also renamed if the project is an Eclipse-style project.However, if it’s an older-style project, the application name isn’tchanged. This is because PhAB doesn’t change theMakefile. In thiscase, to change the name of the executable:
� Edit theMakefile manually and change every occurrence of theexecutable’s name.
Or:
� If you haven’t changed theMakefile since it was first generated,delete it and regenerate the application. See the Generating,Compiling, and Running Code chapter.
☞
Saving an existing application
To save an existing application, choose Save from the File menu,pressCtrl – S, or select the Save button on PhAB’s toolbar:
The Save button on PhAB’s toolbar.
Overwriting an existing application
To overwrite an existing application:
1 ChooseSave As from the File menu.
2 Do one of the following:
� Double-click the existing application.
Or:
� Click the existing application, then pressEnter or click SaveApplication.
November 2, 2006 Chapter 4 � Working with Applications 127
Closing an application 2006, QNX Software Systems GmbH & Co. KG.
Closing an applicationWhen using PhAB from the IDE:
1 Close PhAB first usingExit from the File menu.
2 Close the project in the IDE.
To close an application in standalone PhAB, chooseClose from theFile menu. If you’ve made any changes but haven’t saved yourapplication, PhAB asks if you want to save it.
Specifying project propertiesThe Project Properties dialog lets you set up the typical operationsthat are performed when an application starts. You can:
� define startup windows and other initialization features
� set various project generation options
� define run options, such as command line arguments and language
� define build and debug options
To open this dialog:
� Choose Project Properties from the Project menu.
Or
� PressF2.
Here’s the dialog, with some sample information filled in:
128 Chapter 4 � Working with Applications November 2, 2006

2006, QNX Software Systems GmbH & Co. KG. Specifying project properties
The Project Properties dialog.
Once you’ve made your changes, click Done.
Startup Windows tabHere’s the Startup Windows tab, with some sample information filledin:
November 2, 2006 Chapter 4 � Working with Applications 129

Specifying project properties 2006, QNX Software Systems GmbH & Co. KG.
The Project Properties dialog—Startup Windows tab.
You can use this tab to define:
� a startup window
� a global header
� an initialization function.
Define a startup window
When you first create an application, the mandatory base window ispreset as the initial and only startup window. Using the ApplicationStartup Information dialog, you can tell your application to:
� use another window as the initial startup window
� display several windows at startup
� use no startup windows.
130 Chapter 4 � Working with Applications November 2, 2006

2006, QNX Software Systems GmbH & Co. KG. Specifying project properties
The window that appears first in the Windows Opened/Startup list isthe initial startup window:
� It’s the first window to be displayed.
� It acts as the default parent window for all other windows anddialogs.
� Closing it causes the application to end.
Typically, the application’s main window is the first created.
For each window in the startup list, you can specify information that’sidentical to the information used to create a module-type linkcallback, as described in the Editing Resources and Callbacks inPhAB chapter.
The information for each window includes:
Window Name
The name of the window module. To select from a listof existing windows, click the icon next to this field. Ifyou specify the name of a module that doesn’t exist,PhAB asks whether it should create that module.
Window Location
Where the window will appear; see “Positioning amodule” in the Working with Modules chapter.
Setup Function
The function that’s called when the window is realized(optional). To edit the function, click the icon next tothis field.
The buttons below the function name determine whetherthe setup function is called before the window isrealized, after the window is realized, or both.
Apply Applies any changes.
Revert Restores the window information to its original state.
November 2, 2006 Chapter 4 � Working with Applications 131

Specifying project properties 2006, QNX Software Systems GmbH & Co. KG.
Remove Deletes the selected window from the startup list.
Adding a startup window
To add a new window to the startup window list, click<NEW>, fill inthe window information, and click Apply.
Modifying a startup window
To modify an existing startup window, select the window from the“Windows Opened/Startup” list, enter whatever changes are needed inthe window information fields, and then click Apply.
Deleting a startup window
To delete an existing startup window, select the window from the“Windows Opened/Startup” list and click Remove.
Specifying a global header file
Most applications have a global header that’s included in all sourcecode files. If you plan to use a global header in your application, youshould set up the header before PhAB generates any code. This letsPhAB automatically include the header in each file it generates.
To set up a global header:
1 PressF2 or choose Properties from the Project menu. You’ll seethe Project Properties dialog.
2 In the Global Header field, type the name of the header file youplan to use. You don’t have to include the.h extension.
For example, to set up aglobals.h header file, you cansimply enter:globals
3 To edit the header immediately, click the icon next to theGlobal Header field. You can edit the header only if you’venamed the application by saving it. The format of the headerfile is discussed in the Working with Code chapter.
132 Chapter 4 � Working with Applications November 2, 2006
2006, QNX Software Systems GmbH & Co. KG. Specifying project properties
If you specify the header after some code has been generated, you’llhave to go back and manually add the header to the stub files thatwere previously generated.
☞
Initialization function
Your application can include an initialization function that’s calledbefore any modules or widgets are created. In it you can initializedata, open widget databases, set up signal handlers, and so on. To setup an initialization function:
1 PressF2 or choose Properties from the Project menu. You’ll seethe Project Properties dialog.
2 In the Initialization Function field, type the name of theinitialization function.
When you specify a setup function, PhAB generates a stubfunction; for information on specifying the language (C orC++) and the filename, see “Function names and filenames” inthe Working with Code chapter.
3 To edit the function immediately, click the icon next to theInitialization Function field. You can edit the function only ifyou’ve named the application by saving it. The prototype ofthis function is discussed in the Working with Code chapter.
Generate Options tabThe Generate Options tab lets you:
� set window arguments
� include instance names.
Here’s an example of this tab:
November 2, 2006 Chapter 4 � Working with Applications 133

Specifying project properties 2006, QNX Software Systems GmbH & Co. KG.
Build and Debug Options tab of the Project Properties dialog.
By default, all PhAB-generated applications have the followingcommand-line options:
-h height[%] The height of the window, in pixels, or as apercentage of the screen height if% is specified.
-s servername
The name of the Photon server:
If server name is: This server is used:
nodepath nodepath/dev/photon
fullpath fullpath
continued. . .
134 Chapter 4 � Working with Applications November 2, 2006
2006, QNX Software Systems GmbH & Co. KG. Specifying project properties
If server name is: This server is used:
relative path /dev/relative path
-w width[%] The width of the window, in pixels, or as apercentage of the screen width if% is specified.
-x position[%][r]
The x coordinate of the upper-left corner of thewindow, in pixels, or as a percentage of screenwidth if % is specified. Ifr is specified, thecoordinate is relative to the current console.
-y position[%][r]
The y coordinate of the upper-left corner of thewindow, in pixels, or as a percentage of screenheight if% is specified. Ifr is specified, thecoordinate is relative to the current console.
-Si|m|n The initial state of the main window (iconified,maximized, or normal).
By default, all these options are enabled so that users can dynamicallymove or resize the application, or specify its initial state. Forexample, to start an application in console 4 (the center of theworkspace), specify the command-line options:
-x100% -y100%
The PhAB API processes these options before it calls theinitialization function; if you plan to add your own command-lineoptions to an application, make sure you pick options that don’tconflict with these. You should also code your option processing tohandle and ignore these options. If you don’t, you’ll see errors on theconsole when you run the application. See the discussion on theinitialization function in the Working with Code chapter.
If you don’t want users to move or resize the application:
November 2, 2006 Chapter 4 � Working with Applications 135

Specifying project properties 2006, QNX Software Systems GmbH & Co. KG.
1 PressF2 or from the Project menu, choose Properties to openthe Project Properties dialog.
2 Select the Generate Options tab.
3 Unset the toggle buttons for these options as required:
� Enable Window State Arguments
� Enable Window Dimension Arguments
� Enable Window Position Arguments.
Other Generate options
You can set project-generation options for storing widget instancenames, generatingproto.h, and generating release-quality code.
Store Names for ApInstanceName()
PhAB converts your widgets’ instance names intoABN ...manifests that you can use in your code to refer to your widgetsby name. Check this option to include the instance-name textstring in the widgets’ memory.
Including instance names increases the amount of memory required torun your application.
☞
UseApInstanceName()to find this string for a widget—see thePhotonLibrary Referencefor more information.
Scan source files for prototypes
Indicates whether or notproto.h is to be generated — see“Generating function prototypes” in the Generating, Compiling,and Running Code chapter.
Generate release quality code
When your application has passed the development/debugingcycle and is ready for release, you can turn on this option andrebuild your executable. This will build an executable thatrequires less memory to run. The memory savings depend onthe number of named widgets you have in your application, as
136 Chapter 4 � Working with Applications November 2, 2006
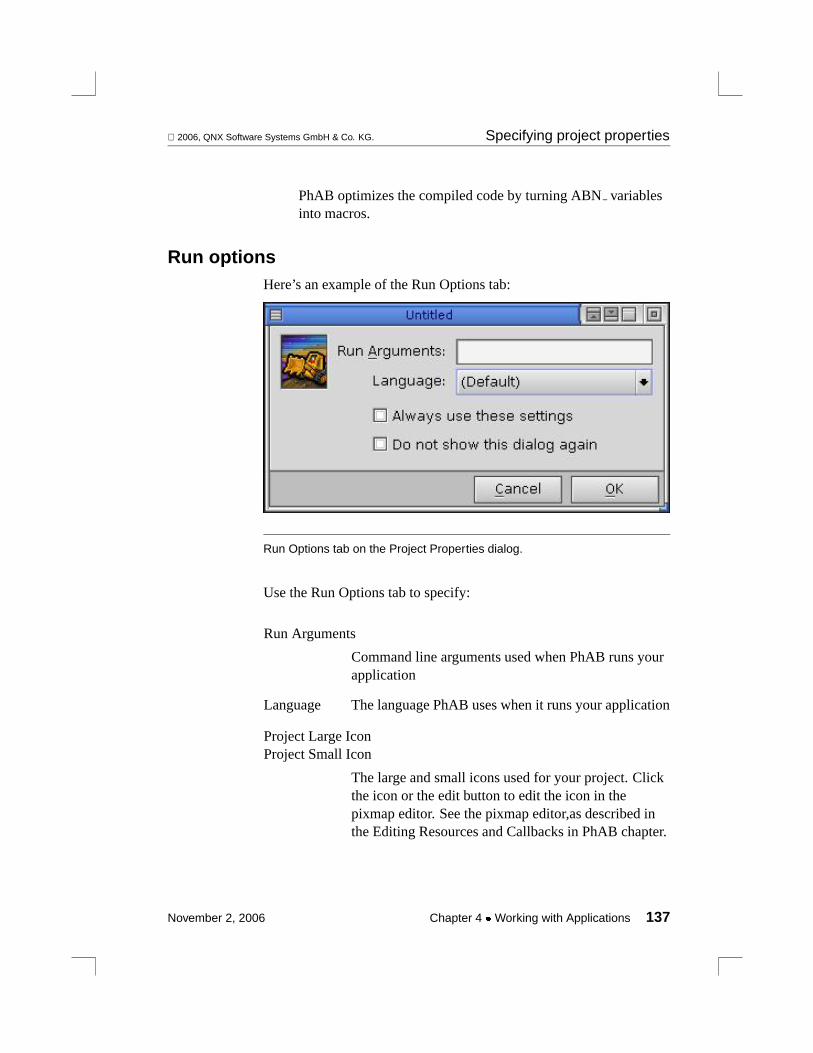
2006, QNX Software Systems GmbH & Co. KG. Specifying project properties
PhAB optimizes the compiled code by turning ABNvariablesinto macros.
Run optionsHere’s an example of the Run Options tab:
Run Options tab on the Project Properties dialog.
Use the Run Options tab to specify:
Run Arguments
Command line arguments used when PhAB runs yourapplication
Language The language PhAB uses when it runs your application
Project Large IconProject Small Icon
The large and small icons used for your project. Clickthe icon or the edit button to edit the icon in thepixmap editor. See the pixmap editor,as described inthe Editing Resources and Callbacks in PhAB chapter.
November 2, 2006 Chapter 4 � Working with Applications 137

Specifying project properties 2006, QNX Software Systems GmbH & Co. KG.
Build and Debug optionsThis tab of the Project Properties dialog lets you specify optionsrelated to the build and debug process. Here is an example of this tab:
Build and Debug Options tab of the Project Properties dialog.
Build version Set to Release to generate the executable withoutdebug information, or Debug if you plan to debugyour application.
Link Libraries Use to specify additional libraries to be used whenyour application is linked. The-l is optional.
You can’t specify link options in this field, exceptfor the-B option, which specifies static or dynamiclinking. For example, you could enter:-Bstatic-lphexlib -Bdynamic.
138 Chapter 4 � Working with Applications November 2, 2006
2006, QNX Software Systems GmbH & Co. KG. Importing files
An exception to this rule is pre-6.3 projects whichare not yet converted usingProject→Convert toEclipse Project. Those projects require the-loption, and take any linker command in this field.
The content of Link Libraries is saved in theindLfiles file and isincluded in the Makefile in the target directory.
☞
Make command Use to specify the command to build yourapplication. The default is “make”.
Debug Command
Use to specify the command to debug yourapplication. The default is “pterm gdb”, whichlaunches a gdb session inside a new terminalwindow.
Targets Use to select one or more targets for the currentapplication. When you select Build or Rebuild Allfrom the Build menu, only the selected targets arebuilt. To add or delete targets, clickManageTargets.
Importing filesPhAB lets you import several types of files by using the Import Filesitem in the file menu:
� PhAB modules
� XBM Header File
� Graphics image files
The steps are the same for all types:
1 ChooseImport Files from the File menu, then choose theappropriate type from the Import Files submenu. You’ll see afile selector.
November 2, 2006 Chapter 4 � Working with Applications 139

Importing files 2006, QNX Software Systems GmbH & Co. KG.
2 The file selector displays the available files of the specified typein the current directory.
3 To select a file, do one of the following:
� double-click the file
� click the file, then pressEnter or click Open
� type the file’s name, then pressEnter or click Open
Importing PhAB modules from other applicationsWhen importing a PhAB module from another application, the fileselector may display several modules. Each type of module has adifferent file extension; see “Module types” in the Working withModules chapter.
Callbacks aren’t imported, only the module and the widgetsthemselves. After importing the module, you can attach newapplication-specific callbacks.
You can copy and paste widgets or modules between two phabsessions in order to preserve the callbacks (you have to make sure theClipboard Operations: Save/Restore callbacks option is set in thePreferences dialog). Or you can save the modules or widgets astemplates, and choose to save the callbacks with the templates.
Normally, PhAB retains the instance name of each imported widget.However, if it detects a duplicate name, it changes that name to thewidget-class name to avoid code-generation errors.
☞
Importing XBM imagesYou can import X bitmap (XBM) files using the Import menu item.XBM image data is mostly found in header files (with a .h fileextension) and in separate XBM bitmap files (with no file extension).To import an XBM image, use the Import menu item to open theheader file containing the image data.
140 Chapter 4 � Working with Applications November 2, 2006
2006, QNX Software Systems GmbH & Co. KG. Exporting files
Importing graphics imagesWhen importing graphics images, the file selector displays all fileswith the following extensions:
� .bmp
� .gif
� .jpg
� .pcx
PhAB imports the graphic as aPtLabel into the currently selectedmodule, and sets the widget’sPt ARG LABEL TYPEresource toPt IMAGE. If you wish to edit the imported image, use the pixmapeditor, as described in the Editing Resources and Callbacks in PhABchapter.
Exporting filesYou can export the code used to create a module. To do this, selectFile→Export. A fragment of C code that creates the widgets in thecurrently selected module is written to the home directory in a filecalledmodule.code.
November 2, 2006 Chapter 4 � Working with Applications 141

Chapter 5
Working with Modules
In this chapter. . .Module types 145Anatomy of a module 145Selecting a module 147How modules are saved 148Changing module resources148Creating a new module 148Deleting a module 149Iconifying modules 149Displaying modules at run time 150Finding lost modules and icons 152Window modules 152Dialog modules 153Menu modules 155Picture modules 164
November 2, 2006 Chapter 5 � Working with Modules 143


2006, QNX Software Systems GmbH & Co. KG. Anatomy of a module
Modules serve as containers to hold your application’s widgets. Somemodules, such as windows and dialogs, are actually Photoncontainer-class widgets and let you place widgets directly inside them.Others, such as icons and menus, have either predefined widgets or aspecialized editor for creating the widgets that they contain.
Module typesPhAB provides a number of types of modules, each with a specificusage. The module type is identified by:
� the control panels if the module is selected
� the icon if the module is minimized
� the extension of the file that PhAB creates for the module whenyou generate your application’s code.
CAUTION: Module files are binary; don’t edit them with a texteditor or you could damage them.!
Module Usage Extension
Window Major application activities .wgtw
Dialog Obtain additional information from theuser
.wgtd
Menu Multilevel text-only menus .wgtm
Picture Change the contents of an existingmodule, or create a widget database
.wgtp
Anatomy of a modulePhAB displays each module as a window in its work area. Likewindows, modules have a set of controls in their frames.
November 2, 2006 Chapter 5 � Working with Modules 145

Anatomy of a module 2006, QNX Software Systems GmbH & Co. KG.
Anatomy of a typical PhAB module.
Most modules include these elements:
Work menu button
Brings up the module’s Work menu:
The Work menu for a module.
The Work menu includes:
� Close — iconify the module.
� Print — print the module.
� Write Code — generate the code for the module.
146 Chapter 5 � Working with Modules November 2, 2006
2006, QNX Software Systems GmbH & Co. KG. Selecting a module
� To Back — put this module behind all other modulesin PhAB’s work area.
Title bar Displays the module’s instance name. To move amodule, point to this bar and drag the pointer.
Collapse buttonMinimize buttonClose button
These buttons iconify the module.
Test button (some modules only)
Like the Test item in the Work menu, this lets you switchthe module into test mode.
When the render flags for a a module’s title bar are off, PhABdisplays an area around the module that you can use to manipulate themodule. This is useful if you are designing embedded applications,which usually have windows with no title bar and no decorations.
☞
Selecting a moduleTo select a module that’s in the PhAB work area:
� Click on the module’s titlebar.
Or
� If the module is iconified, double-click on its icon.
Or
� Select the module in the Module Tree panel (this works for bothiconified and noniconified modules).
Whichever method you choose, you’ll see resize handles that indicatethe module is selected.
November 2, 2006 Chapter 5 � Working with Modules 147
How modules are saved 2006, QNX Software Systems GmbH & Co. KG.
How modules are savedWhen you save your application, PhAB stores all the application’smodules as files within the application’swgt directory. Each moduleis saved in its own file with a file extension based on the module’stype. Later, when you “make” your application, PhAB binds all themodules into the binary executable. This makes the application asingle free-standing program that you can distribute easily.
For more info, see “How application files are organized” in theGenerating, Compiling, and Running Code chapter.
Changing module resourcesWhen you select a module within PhAB, the Resources control panelchanges to display the list of widget resources available for thatmodule’s class. Depending on which resources you change, you maysee no immediate effect. All changes will take effect, however, whenyou run the application.
Because PhAB displays all modules as child windows within its workarea, you can work with any number of modules at the same time.
Creating a new moduleTo create any new module, follow these simple steps:
1 From the Project menu, choose a command for the module typeyou want to create, which is one of:
� Add Window
� Add Dialog
� Add Menu
� Add Picture Module
2 For window and dialog modules, PhAB asks you to choose thestyle from a dialog that displays the available choices.
148 Chapter 5 � Working with Modules November 2, 2006

2006, QNX Software Systems GmbH & Co. KG. Deleting a module
For other types of modules, PhAB simply asks whether or not itshould create the new module. PressEnter or click on Yes.You’ll see the new module in PhAB’s work area.
3 Click on Done.
PhAB creates the module for you. You can change the defaultinstance name on the Resources control panel.
For more info on creating specific types of modules, see the sectionson each type of module in this chapter.
You can also import modules from other PhAB applications. Formore information, see “Importing files” in the Working withApplications chapter.
Deleting a moduleTo delete a module:
1 Select the module you want to delete.
2 Press theDelete key, or selectEdit→Delete.
Deleting a module doesn’t delete the module’s file; it just removes thename from the list. Any callbacks belonging to the module or itschildren are deleted.
☞
Iconifying modulesPhAB’s work area lets you work on several application modules atonce. You can iconify modules to organize your work area. To reduceany module in the work area to an icon:
� Double-click on the module’s Work menu button (upper-left cornerof the module).
Or:
� Click on the Work menu button and choose Close.
November 2, 2006 Chapter 5 � Working with Modules 149

Displaying modules at run time 2006, QNX Software Systems GmbH & Co. KG.
Or:
� Click on the Minimize button in the module’s titlebar.
Once it’s iconified, the module positions itself at the bottom of thework area. You can drag it anywhere in the work area, so (forexample) you can group commonly used or related icons.
Displaying modules at run timeYour application needs a way to make modules appear when you runit. You can:
� Create a widget that uses a callback to display the module. Forexample, you can create aPtButton with a module-type linkcallback that displays the module. For more information, see“Editing callbacks” in the Editing Resources and Callbacks inPhAB chapter.
� Use aninternal link to create the module in your application’scode. See the Accessing PhAB Modules from Code chapter.
Positioning a moduleYou can specify where a module will display when you create a linkcallback from a widget to that module. To do this, you use thelocation dialog.
To open the Location dialog and select a module’s location:
1 When creating or editing a link callback to a module, click onthe Location field or on the icon to the right of the field. You’llsee a list of locations:
150 Chapter 5 � Working with Modules November 2, 2006
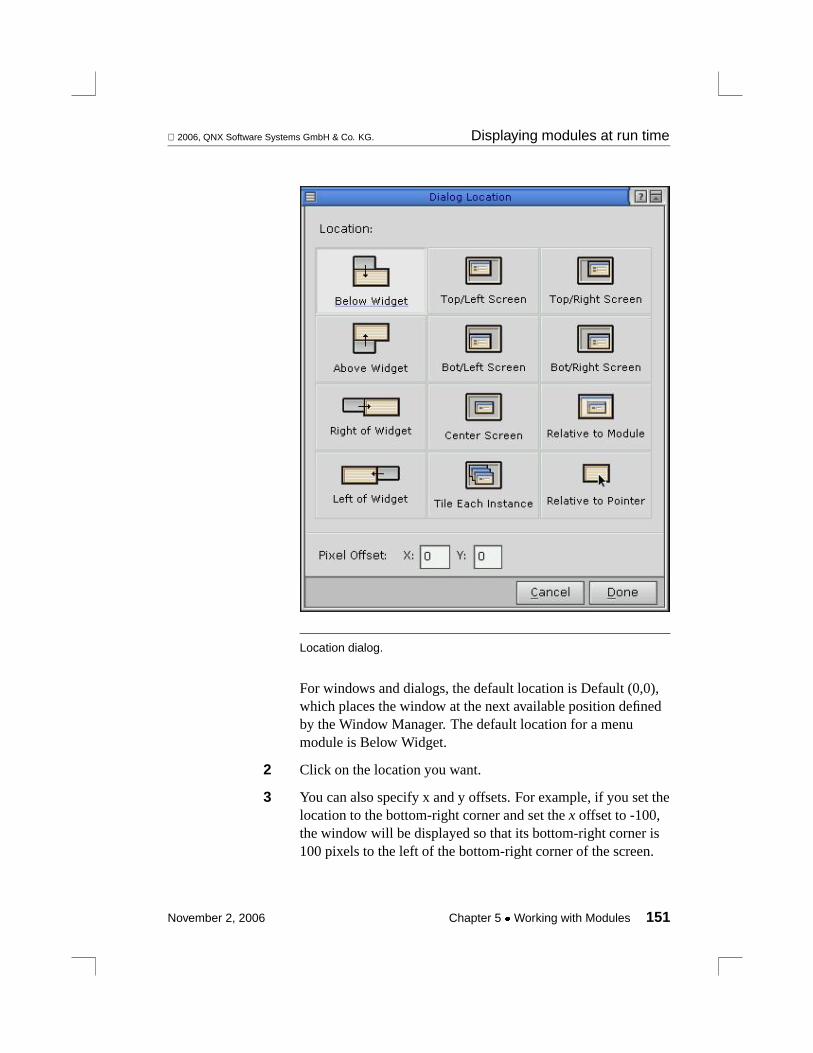
2006, QNX Software Systems GmbH & Co. KG. Displaying modules at run time
Location dialog.
For windows and dialogs, the default location is Default (0,0),which places the window at the next available position definedby the Window Manager. The default location for a menumodule is Below Widget.
2 Click on the location you want.
3 You can also specify x and y offsets. For example, if you set thelocation to the bottom-right corner and set thex offset to -100,the window will be displayed so that its bottom-right corner is100 pixels to the left of the bottom-right corner of the screen.
November 2, 2006 Chapter 5 � Working with Modules 151
Window modules 2006, QNX Software Systems GmbH & Co. KG.
If you choose Default as the location, the offsets are ignored.☞
4 Click on Done.
Finding lost modules and iconsTo find a lost module or icon:
� Choose Cascade from the Window menu. PhAB cascades all openmodules in the PhAB work area.
� Choose Arrange Icons from the Window menu. PhAB rearrangesall existing icons along the bottom of the work area.
Window modules
Widget class File extension Widget creation
PtWindow .wgtw Directly from the widget palette
Typically, you usewindow modulesfor your application’s majoractivities. Since most applications use a window module for theirmain window, PhAB automatically generates a window modulenamedbase when you first create any application. It also presets theapplication’s startup information to make the base window open whenthe application starts up. (See “Specifying your project properties” inthe Working with Applications chapter.)
The icon for a Window module.
152 Chapter 5 � Working with Modules November 2, 2006

2006, QNX Software Systems GmbH & Co. KG. Dialog modules
Window modules can support multiple instances. That is, two or morecopies of the same window module can be displayed at the same time.As a result, you should keep track of each window’s instance pointer,which is generated when you create the window. That way, you’llalways know which window you’re dealing with when you processcallbacks. For more information, see “Handling multiple instances ofa window” in the Working with Code chapter.
Even though your application’s base window is a window module,you usually display it only once, at startup. So unless your applicationneeds to display more than one copy of the base window at the sametime, you don’t have to keep track of the base window’s instancepointer.
For an example of code for handling multiple instances of windowmodules, see “Creating Windows” in the Tutorials chapter.
Resizing a window moduleWhen you set a window module’s size in PhAB, that’s the size it willbe when you run the application.
Dialog modules
Widget class File extension Widget creation
PtWindow .wgtd Directly from the widget palette
Dialog moduleslet you obtain additional information from the user.Typically, you use this information to carry out a particular commandor task.
November 2, 2006 Chapter 5 � Working with Modules 153
Dialog modules 2006, QNX Software Systems GmbH & Co. KG.
The icon for a Dialog module.
Most dialog modules include the following buttons:
� Done—allows users to indicate that they’ve finished enteringinformation
� Cancel or Close—allows users to close the dialog withoutresponding
From PhAB’s perspective, dialog modules are almost identical towindow modules, with one important difference—a dialog modulecan have only one active instance. So if you invoke a dialog that’salready open, the PhAB API simply brings the existing instance of thedialog to the front of the screen. This behavior fits with the nature of adialog—you rarely want to get the same information twice. If for anyreason you need a dialog that can support multiple instances, use awindow module.
Limiting a dialog to a single instance makes callback handling simplersince you can use the widget manifests that PhAB generates to accessthe widgets within the dialog. For more info, see the discussion oninstance names in the Creating Widgets in PhAB chapter.
Resizing a dialog moduleWhen you set a dialog module’s size in PhAB, that’s the size it will bewhen you run the application.
Predefined dialogsThe Photon libraries include convenience functions that definevarious handy dialogs:
154 Chapter 5 � Working with Modules November 2, 2006

2006, QNX Software Systems GmbH & Co. KG. Menu modules
ApError() Display an error message dialog
PtAlert() Display a message and request a response
PtFileSelection()
Create a file-selection dialog
PtFontSelection()
Create a font-selection dialog
PtMessageBox()
Pop up a message box
PtNotice() Display a message and wait for acknowledgment
PtPassword() Prompt for a password
PtPrintPropSelect()
Change the printing options for a selected printervia a modal dialog
PtPrintSelect() Display a custom modal dialog for selecting printoptions
PtPrintSelection()
Display a modal dialog for selecting print options
PtPrompt() Display a message and get textual input from theuser
Menu modules
Widget class File extension Widget creation
PtMenu .wgtm Special editor
November 2, 2006 Chapter 5 � Working with Modules 155

Menu modules 2006, QNX Software Systems GmbH & Co. KG.
A menu moduleprovides a multilevel text-only menu. Unlike mostother modules, a menu module doesn’t let you create widgets directlyinside it. Instead, you use PhAB’s menu editor to create the menu’sitems.
The icon for a Menu module.
Opening the menu editorTo open the menu editor:
1 Select a menu module.
2 Click on Menu Items in the Resources control panel. PhABdisplays the menu editor:
156 Chapter 5 � Working with Modules November 2, 2006
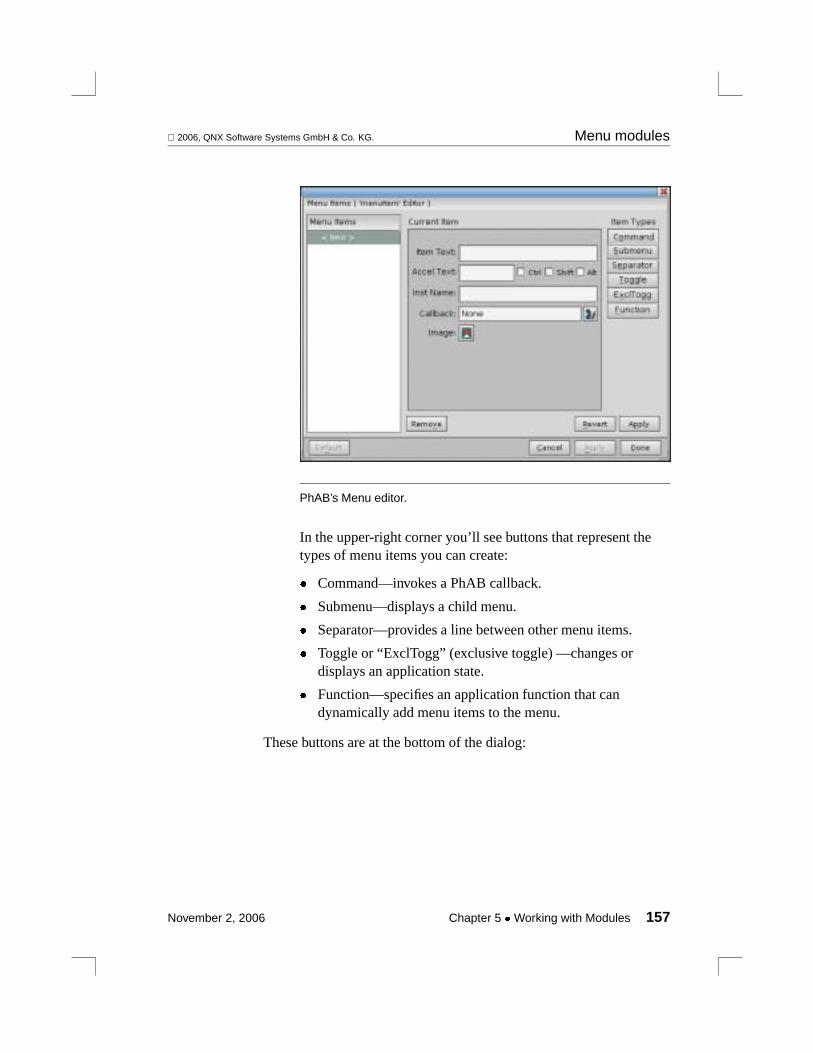
2006, QNX Software Systems GmbH & Co. KG. Menu modules
PhAB’s Menu editor.
In the upper-right corner you’ll see buttons that represent thetypes of menu items you can create:
� Command—invokes a PhAB callback.
� Submenu—displays a child menu.
� Separator—provides a line between other menu items.
� Toggle or “ExclTogg” (exclusive toggle) —changes ordisplays an application state.
� Function—specifies an application function that candynamically add menu items to the menu.
These buttons are at the bottom of the dialog:
November 2, 2006 Chapter 5 � Working with Modules 157

Menu modules 2006, QNX Software Systems GmbH & Co. KG.
When you want to: Use thisbutton:
Apply any changes and close the editor Done
Apply any changes and continue editing the menu Apply
Cancel any changes made since you opened the editor Cancel
Specifying instance namesTo create any command or toggle menu item (that is, any item thatcan invoke a callback), you must enter a unique instancename—PhAB enforces this. The instance name lets you access themenu item from within your application code.
When PhAB generates the code for your application, it generates anABN ... global variable for each menu item that requires it. You usethis variable with the menu-item related API functions,ApModifyItemAccel(), ApModifyItemState(), andApModifyItemText().
For example, let’s say a menu item isn’t available when the user clickson the widget that brings up the menu. Using the instance name, youcan dim that item before displaying the menu. For more information,see “Initializing menus” in the Working with Code chapter.
Creating hotkeys and shortcutsTo help the user select a menu item more quickly, you can:
� provide a keyboard shortcut that selects the item
� provide a hotkey that directly invokes the command that the itemrepresents, even when the menu isn’t visible
A keyboard shortcut works only when the menu is currently visible.A hotkey, on the other hand, should work whether the menu is visibleor not.
Creating a keyboard shortcut is easy. When you’re entering the ItemText, simply place “&” in front of the character that will act as the
158 Chapter 5 � Working with Modules November 2, 2006

2006, QNX Software Systems GmbH & Co. KG. Menu modules
shortcut. For example, let’s say you’re creating a “Save As” item. Youcould enterSave &As, which will underline the “A.” When the menuopens, the user can press eitherA or a to invoke the callbackassociated with “Save As”.
Creating a hotkey takes a bit more work, but it’s still easy to do. First,you want to make sure that the hotkey accelerator appears next to themenu item when the menu is displayed. To do this, use the Accel Textfield. For example, let’s say the hotkey accelerator for a “Save” menuitem will be Ctrl – S. In that case, you would typeS in the Accel Textfield and check the Ctrl toggle button.
Next, you need to create a hotkey callback forCtrl – S. Since themenu might not be created when the user pressesCtrl – S, you can’tattach the hotkey callback to the menu or to the menu item. Rather,you must attach the callback to the application’s main module, whichis usually the base window module. When you specify the hotkeycallback’s function, use the same function you defined for the menuitem’s callback.
If for some reason you need to differentiate between the two methodsof invoking the callback, look at the callback’s reason code. Hotkeysalways have a reason code ofPt CB HOTKEY.
For more info on creating hotkey callbacks, see “Hotkey callbacks” inthe Editing Resources and Callbacks in PhAB chapter.
Resizing a menu moduleFeel free to resize a menu module to make it more readable or take upless space. When you run the application, the actual size of thePtMenu widget will be determined by the menu items.
Creating command itemsA command item lets you invoke application code or display amodule.
November 2, 2006 Chapter 5 � Working with Modules 159
Menu modules 2006, QNX Software Systems GmbH & Co. KG.
Field Description
Item Text The text that will be displayed
Accel Text The hotkey to invoke the command
Inst Name The name used within the application code
Callback The function that will be called when the item isselected
Image The icon to use for the menu item
To create a command item:
1 Click on<NEW>.
2 Click on the Command button in the upper-right corner.
3 In the Item Text field, enter the item’s text. To create a shortcutkey, place “&” in front of the character that will act as theshortcut.
For example, let’s say you enter&File. In that case, the usercan select the item by pressingF.
4 In the Inst Name field, enter the instance name you’ll use.
5 If you plan to have a hotkey callback for this item, enter thehotkey string and modifier key (for example,Ctrl-S) in theAccel Text field. The hotkey is displayed in the menu as areminder to the user.
6 Add a PhAB callback by clicking on the Callback icon:
For more info on creating a callback, see “Editing callbacks” inthe Editing Resources and Callbacks in PhAB chapter.
7 Add an image, if appropriate.
8 Click on Apply to add the item to the menu.
160 Chapter 5 � Working with Modules November 2, 2006

2006, QNX Software Systems GmbH & Co. KG. Menu modules
Creating submenu itemsA submenu item lets you create another menu level.
Field Description
Item Text The text that will be displayed
Inst Name The name used within the application code
To create a submenu item:
1 Click on<NEW>.
2 Click on the Submenu button in the upper-right corner.
3 In the Item Text field, type the name of the submenu. To createa keyboard shortcut, place “&” in front of the character that willact as the shortcut (just like command items, above).
4 Click on Apply.
5 The Menu Items list displays the submenu:
6 You can now add items to the submenu by selecting<NEW> inthe submenu.
Creating separator itemsA separator item lets you add a line between menu items. You’ll findthis item type handy for creating logical groupings of menu items.
To create a menu separator:
November 2, 2006 Chapter 5 � Working with Modules 161

Menu modules 2006, QNX Software Systems GmbH & Co. KG.
1 Click on<NEW>.
2 Click on the Separator button in the upper-right corner.
3 Click on Apply.
Creating toggle itemsA toggle item lets you change or display an application state, whichcan be either on or off.
Field Description
Item Text The text that will be displayed
Accel Text The hotkey to invoke the command
Inst Name The name used within the application code
Callback The function that will be called when the item isselected
Image The icon to use for the menu item
To create a toggle item:
1 Click on<NEW>, then click on the Toggle button.
2 Follow the same procedure used to create command items.
Creating function itemsA function item lets you specify an application function thatdynamically adds menu items to the menu at runtime. For example,you could use a function item in a File menu to display the last threefiles the user worked on.
The PhAB library invokes the specified function as the menu is built.The dynamically created menu items appear where you’ve positionedthe function item in the menu.
162 Chapter 5 � Working with Modules November 2, 2006
2006, QNX Software Systems GmbH & Co. KG. Menu modules
Field Description
Function The function that will be called
To create a function item:
1 Click on<NEW>, then click on the Function button.
2 In the Function field, enter the name of the application functionthat will dynamically add menu items to the menu.
If you specify this function name, PhAB will generate a stubfunction; for information on specifying the language (C orC++) and the filename, see “Function names and filenames” inthe Working with Code chapter.
3 You can edit the function right away by clicking on the buttonto the right of the function name.
4 Click on Apply.
For information on the application function, see “Generating menuitems” in the Working with Code chapter.
Moving menu itemsThe Menu Items scrolling list lets you move a menu item to a newposition in the menu.
Let’s say you want to move an item named Browse so it appears justbefore an item named Edit. You would:
1 Drag the Browse item until its outline is directly over Edit.
2 Release the mouse button. The Browse item appears in its newposition.
Using a menu moduleOnce you’ve created a menu module, you need a way to make yourapplication display it. Typically, you do the following:
November 2, 2006 Chapter 5 � Working with Modules 163
Picture modules 2006, QNX Software Systems GmbH & Co. KG.
1 Create aPtMenuBar at the top of a window.
2 Add aPtMenuButton to the menu bar, giving it an appropriateinstance name and text string.
3 Add a module-link callback to the menu button’sPt CB ARMcallback list.
You could add the callback to thePt CB ACTIVATElist, but adding itto Pt CB ARMallows the user to access it in two ways:
� by pressing the left mouse button on the menu button widget,dragging to highlight a menu item, and releasing to select it.This is known as the press-drag-release (PDR) method.
� by clicking on the menu, and then clicking on a menu item
If you use an Activate callback, the user can only use the secondmethod.
☞
4 Have the callback display the menu module. See “Modulecallbacks” in the Editing Resources and Callbacks in PhABchapter.
5 If you need to initialize the menu whenever it’s displayed,specify a setup function for it. See “Initializing menus” in theWorking with Code chapter.
If you want your menu to appear when you press the right mousebutton while pointing at a widget, you’ll need to use an internal link.For more information, see the Accessing PhAB Modules from Codechapter — there’s even an example.
Picture modules
164 Chapter 5 � Working with Modules November 2, 2006

2006, QNX Software Systems GmbH & Co. KG. Picture modules
Widget class File extension Widget creation
Not applicable .wgtp Directly from the widget palette
Using apicture module, you can change the contents of an existingmodule or create a convenient database of widgets. You alwaysdisplay a picture inside a container-class widget or another module,such as a window or dialog.
The icon for a Picture module.
Like windows, picture modules support multiple instances. So youshould keep track of the instance pointer of the container that eachpicture is placed into. That way, you’ll always know which pictureyou’re dealing with when you process callbacks.
If you’re sure that your application will use only one instance of thepicture at any given point, you don’t have to keep track of instancepointers. Instead, you can use PhAB-generated manifests to accessthe picture’s widgets.
Displaying a pictureYou always access picture modules from within your applicationcode. To access a picture, you must create aninternal link to it. Thistells PhAB to generate a manifest that you can use with PhAB’s APIfunctions, such asApCreateModule(), to access the picture.
For more information, see the Accessing PhAB Modules from Codechapter.
November 2, 2006 Chapter 5 � Working with Modules 165

Picture modules 2006, QNX Software Systems GmbH & Co. KG.
Using pictures as widget databasesYou can use a picture module as awidget database. A widgetdatabase contains predefined widgets that you can copy at any timeinto a window, dialog, or container.
When using a widget database, you don’t have worry about handlingmultiple instances since the generated PhAB widget manifests don’tapply to widget databases: each widget you create is a new instance.The instance pointer is returned to you when you create the widgetusingApCreateWidget(). You’ll need to keep track of this pointermanually if you need to access the widget in the future.
For more info, see “Widget databases” in the Accessing PhABModules from Code chapter.
Resizing a picture moduleIt doesn’t matter how large or small you make a picture module.That’s because it has no associated widget class. Only the widgetsinside the module are used.
166 Chapter 5 � Working with Modules November 2, 2006

Chapter 6
Creating Widgets in PhAB
In this chapter. . .Types of widgets 169Instance names 170Creating a widget 172Selecting widgets 174Aligning widgets 179Distributing widgets 181Common User Access (CUA) and handling focus181Ordering widgets 184Dragging widgets 186Setting a widget’s x and y coordinates187Transferring widgets between containers187Resizing widgets and modules 188Clipboard 189Duplicating widgets and containers 192Deleting widgets or modules 193Matching widget resources and callbacks193Importing graphic files 195Changing a widget’s class 196Templates 196
November 2, 2006 Chapter 6 � Creating Widgets in PhAB 167

2006, QNX Software Systems GmbH & Co. KG. Types of widgets
Once you’ve created or opened an application, you’ll probably wantto add, delete, and modify widgets. This chapter describes how towork with widgets.
For information on using specific widget classes, see:
� the Widgets at a Glance appendix in this guide
� the PhotonWidget Reference
Since widgets inherit a lot of behavior from their parent classes, youshould make yourself familiar with the fundamental classes:PtWidget, PtBasic, PtContainer, and so on.
☞
Types of widgetsThere are two major types of widgets:
� Container widgets, such asPtWindow andPtScrollContainer
� Noncontainer widgets, such asPtButton andPtText.
Container-class widgets can contain other widgets—including othercontainers. Widgets placed inside a container are known aschildwidgets; the hierarchy resulting from this nesting is called thewidgetfamily. Container widgets can look after sizing and positioning theirchildren, as described in the Geometry Management chapter.
When working with container-class widgets in PhAB, remember thefollowing:
� If you move a container, all the container’s child widgets alsomove.
� If you position the pointer inside a container when creating a newwidget, that widget is placed hierarchically within the container.
� If you wish to use the bounding-box method to select widgets in acontainer, you must:
- PressAlt before you start the bounding box.
November 2, 2006 Chapter 6 � Creating Widgets in PhAB 169
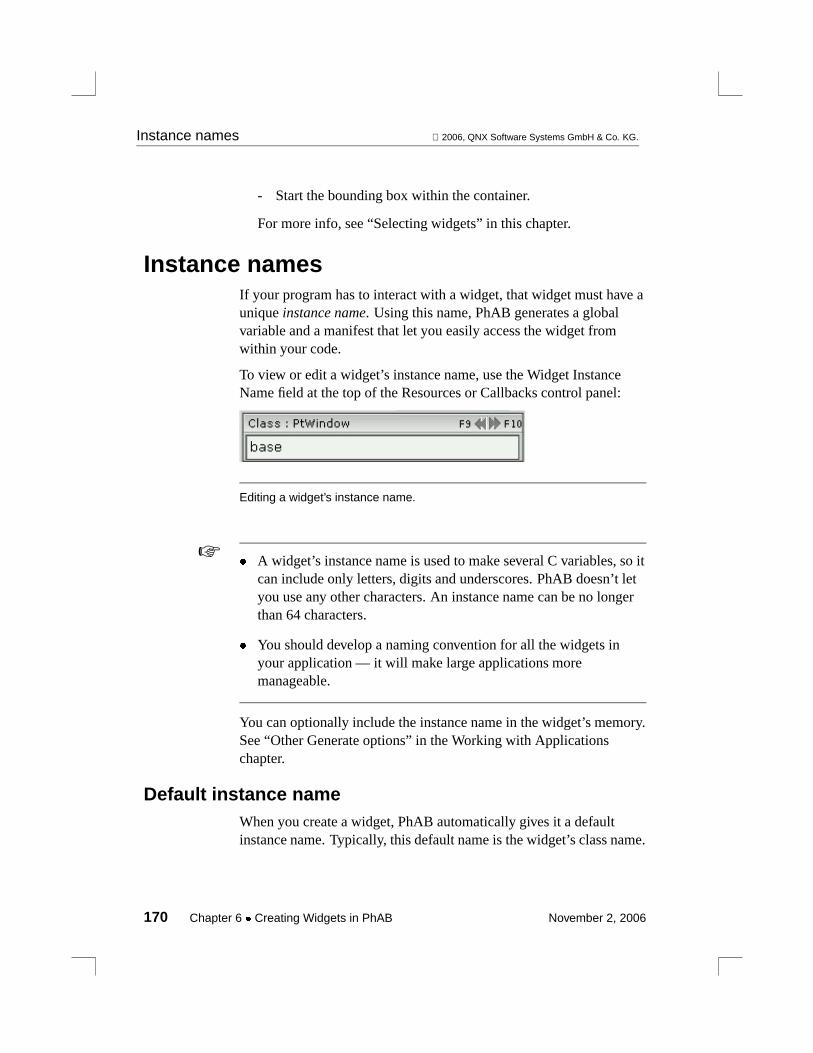
Instance names 2006, QNX Software Systems GmbH & Co. KG.
- Start the bounding box within the container.
For more info, see “Selecting widgets” in this chapter.
Instance namesIf your program has to interact with a widget, that widget must have auniqueinstance name. Using this name, PhAB generates a globalvariable and a manifest that let you easily access the widget fromwithin your code.
To view or edit a widget’s instance name, use the Widget InstanceName field at the top of the Resources or Callbacks control panel:
Editing a widget’s instance name.
� A widget’s instance name is used to make several C variables, so itcan include only letters, digits and underscores. PhAB doesn’t letyou use any other characters. An instance name can be no longerthan 64 characters.
� You should develop a naming convention for all the widgets inyour application — it will make large applications moremanageable.
☞
You can optionally include the instance name in the widget’s memory.See “Other Generate options” in the Working with Applicationschapter.
Default instance nameWhen you create a widget, PhAB automatically gives it a defaultinstance name. Typically, this default name is the widget’s class name.
170 Chapter 6 � Creating Widgets in PhAB November 2, 2006
2006, QNX Software Systems GmbH & Co. KG. Instance names
For example, if you create aPtButton-class widget, the Resourcesand Callbacks control panels displayPtButton as the instance name.
If a widget simply serves as a label or window decoration, it doesn’thave to be accessed from within your application code. So you shouldtell PhAB to ignore the widget’s instance name during codegeneration. To do this:
� Leave the instance name equivalent to the class name (that is, leavethe default alone).
Or:
� Provide a blank instance name.
When to assign a unique nameYou should give a widget a unique name if:
� the widget needs to have a callback attached
� the application needs to change the widget by setting a resource
� the application needs to extract information from the widget
To keep the number of global variables to a minimum, don’t give awidget a unique name unless you really need to access the widgetfrom within your application. If you’ve given a widget a name andlater decide you don’t need the name, just change it back to thewidget’s class name or blank it out.
☞
Instance names and translationsAs described in the chapter on International Language Support, you’llneed an instance name for every text string in your application’s userinterface. These instance names aren’t needed in your code.
To indicate that an instance name isn’t required for code generation,start the name with the@ character. PhAB recognizes such a namewhen generating the text language database, but skips over it whengenerating code.
November 2, 2006 Chapter 6 � Creating Widgets in PhAB 171
Creating a widget 2006, QNX Software Systems GmbH & Co. KG.
If you don’t want to create a unique instance name for a string that’sto be translated, specify a single@ character for the instance name;PhAB appends an internal sequence number to the end.
If you don’t want to create unique instance names, but you want toorganize the text for translation (say by modules), you can give thestrings the same instance name, and PhAB will append a sequencenumber to it. For example, if you assign an instance name of@label
to several strings, PhAB generates@label, @label0, @label1, ...as instance names.
Duplicate namesPhAB resets the instance name of a widget back to the widget classname if it detects a duplicate name when you:
� copy and paste a widget (see “Clipboard”)
� import a widget from another application (see “Importing PhABmodules from other applications” in the Working withApplications chapter)
� duplicate a widget (see “Duplicating widgets and containers”).
Creating a widgetTo create a widget:
1 Click on widget-palette icon for the type of widget you want tocreate (see the Widgets at a Glance appendix to identify thewidget-palette icons).
2 Move the pointer to where you want to create the widget. Thepointer changes to show you what to do next:
� If the pointer is a crosshair and you’re creating aPtPolygon or PtBezier widget, hold down the mousebutton and drag the pointer until the line goes where youwant it to go. To add points, you must start the next point ontop of the last. To close a polygon, place the last point on topof the first.
172 Chapter 6 � Creating Widgets in PhAB November 2, 2006

2006, QNX Software Systems GmbH & Co. KG. Creating a widget
� If the pointer is a crosshair and you’re creating any othertype of widget, click the mouse button.
� If the pointer is a two-headed arrow, hold down the mousebutton and drag the pointer until the widget is the size youwant.
Widgets snap to the grid if it’s enabled. See “Grid preferences” in thechapter on PhAB’s environment.
To improve your application’s performance, avoid overlappingwidgets that are frequently updated.
☞
You can also create a widget by dragging its icon from the widgetpalette to the Module Tree control panel. Where you drop the icondetermines the widget’s place in the family hierarchy.
Creating several widgetsOnce you’ve created a widget, you’re returned to select mode. To stayin create mode so you can create several widgets of the same type:
1 Press and hold downCtrl.
2 Create as many widgets as you want.
3 ReleaseCtrl.
Canceling create modeTo cancel create mode without creating a widget:
� Click anywhere outside a module.
Or:
� Click the right mouse button in a module.
November 2, 2006 Chapter 6 � Creating Widgets in PhAB 173

Selecting widgets 2006, QNX Software Systems GmbH & Co. KG.
Selecting widgetsWhen PhAB is in select mode, the pointer appears as an arrow. To putPhAB into select mode:
� Click anywhere outside a module.
Or:
� Click the right mouse button in a module.
Or:
� Click on the selected widget in the widget palette.
A single widgetTo select a single widget, you can:
� Point and click
Or:
� Use the next and previous buttons in the Resources or Callbackscontrol panel.
� Use the Module Tree control panel.
These methods are described below.
Point-and-click method
To select a single widget using point and click:
1 Make sure you’re in select mode.
2 Click on the widget, using the left mouse button. Resizehandles appear around the widget.
To select the parent of a widget, hold downShift – Alt and click on thewidget. This is a handy way to select aPtDivider or PtToolbar.
174 Chapter 6 � Creating Widgets in PhAB November 2, 2006

2006, QNX Software Systems GmbH & Co. KG. Selecting widgets
You must pressShift and thenAlt for this method to work.☞
Control-panel methods
The Next and Previous buttons in the Resources and Callbackscontrol panels let you select any widget in the current module.
To select the: Click on: Or press:
Previous widget in the current module F9
Next widget in the current module F10
The Module Tree control panel displays a tree of all the widgets in themodule. Using this tree, you can:
� select a widget inside a group
� find a widget by name
� select a widget hidden underneath another widget.
To select a widget from the tree, click on the widget’s name.
Multiple widgetsTo select multiple widgets, you can:
� Use a bounding box
Or:
� Use “Shift and click”
Or:
� Use the control panels.
November 2, 2006 Chapter 6 � Creating Widgets in PhAB 175

Selecting widgets 2006, QNX Software Systems GmbH & Co. KG.
When you select two or more widgets, the Resources control paneldisplays only the resources that those widgets have in common.Editing any of these resources affectsall the selected widgets.
☞
PhAB uses two colors to show selected items if the Show Selectionoption is selected in the View menu. The colors can be customized inthe Preferences dialog.
Multiple selected widgets.
In the example above, the toggle widget is not selected, it just happensto be in the same area as the selected widgets. The widget highlightedby red is the first widget in the selection. The widgets highlighted byblue are the rest of the widgets in the selection. If you use an align ormatch command, the first selected widget is the source widget.
Using a bounding box
A bounding box lets you select several widgets all at once:
1 Position the pointer above and to the left of the widgets youwant to select.
2 If the widgets belong to a container such asPtBkgd, make surethe pointer is within the container, then hold down theAlt key.
176 Chapter 6 � Creating Widgets in PhAB November 2, 2006

2006, QNX Software Systems GmbH & Co. KG. Selecting widgets
3 Hold down the left mouse button, then drag the pointer down tothe right. You’ll see an outline “grow” on the screen.
4 When all the widgets are within the outline, release the mousebutton. You’ll see resize handles appear around the area definedby the selected widgets.
Using “ Shift and click”
To add or remove a widget from the current list of selected widgets,hold downShift and click on the widget. This is also known as theextended selection method.
If the widgetisn’t already selected, it’s added to the list. If the widgetis already selected, it’s removed from the list.
The above methods for selecting multiple widgets work only forwidgets at the same hierarchical level. For example, let’s say you’vejust selected two buttons inside a window. You can’t extend thatselection to include a button that’s inside a pane.
☞
Using the control panels
To select multiple widgets, using the Resources or Callbacks controlpanel’s Next and Previous buttons:
1 Hold downShift.
2 Click on the Next button.
Every time you click, PhAB adds the next widget in the currentmodule to your selection.
To remove the last widget from the current list of selected widgets:
1 Hold downShift.
2 Click on the Previous button.
Every time you click, PhAB removes another widget.
November 2, 2006 Chapter 6 � Creating Widgets in PhAB 177

Selecting widgets 2006, QNX Software Systems GmbH & Co. KG.
Widgets within a groupTo select a widget inside a group, you can use the next and previousbuttons in the Resources or Callbacks control panel, or use theModule Tree control panel.
Using the Module Tree panel
To select a single widget within a group, using the Module Treecontrol panel:
1 Switch to the Module Tree control panel.
2 Find the group in the tree and click on the widget’s name.
3 Shift-click to select additional widgets, if you want.
4 To edit the widget, switch to the Resources or Callbacks controlpanel.
Using the Next and Previous buttons
To select one or more widgets within a group, using the Next andPrevious buttons:
1 Click on any widget within the group to select the entire group.
2 Click on the Resources or Callbacks control panel’s Nextbutton (or pressF10) until the widget you want is selected.
3 To select additional widgets, pressShift, then click again on theNext button.
4 You can now edit the widgets’ resources or callbacks.
Hidden widgetsIf you can’t find a widget (it may be hidden behind another widget oris outside the boundaries of its container), do the following:
1 Use the Next and Previous buttons in the Resources orCallbacks control panel.
178 Chapter 6 � Creating Widgets in PhAB November 2, 2006

2006, QNX Software Systems GmbH & Co. KG. Aligning widgets
2 Select the widget from the Module Tree control panel.
3 Use the Search dialog. SelectEdit→Find to open this dialog.
4 If the widget seems to be outside the current boundaries of itscontainer, bring it back into view by using the X and Y fields inPhAB’s toolbars.
For more information on the toolbars and control panels, see thechapter on PhAB’s environment.
Aligning widgetsYou can align several widgets to another widget or to their parentcontainer.
For simple alignments, select the Align icon from PhAB’s toolbar:
and then choose the alignment from the pop-up menu.
For more complicated alignment options, bring up the Align Widgetsdialog by:
� Choosing the Align icon from PhAB’s toolbar, and then choosingAlignment Tool from the menu
Or:
� Choosing Align from the Widget menu, and then choosingAlignment Tool from the submenu
Or:
� PressingCtrl – A.
To another widgetWhen you use this method to align widgets, the widgets are aligned tothe first widget you select, which is highlighted differently from theother widgets in the selection if the Show Selection option is set in theView menu. To align to another widget:
November 2, 2006 Chapter 6 � Creating Widgets in PhAB 179
Aligning widgets 2006, QNX Software Systems GmbH & Co. KG.
1 Select the first widget.
2 Using the “Shift and click” selection method, select theremaining widgets. (This method is described in “Selectingwidgets. ”)
3 For simple alignments, select the Align icon from PhAB’stoolbar and make a choice from the menu.
4 For more complicated alignment options, bring up the AlignWidgets dialog. Choose one or more alignment options, thenclick on the Align button.Don’t click on an Align to Containerbutton.
To a parent containerTo align widgets to their parent container:
1 Select one or more widgets in any order.
2 Bring up the Align Widgets dialog, choose your alignmentoptions, then click on the appropriate Align to Container button.
If you choose both vertical and horizontal options, be sure to click onboth Align to Container buttons.
☞
3 Click on the Align button.
When aligning widgets to a container you may want the widgets toretain their relative positions to each other. To do this:
1 Group the widgets together (see the section “Aligning widgetsusing groups” in the Geometry Management chapter).
2 Align the widgets.
3 Optionally, break the group apart.
180 Chapter 6 � Creating Widgets in PhAB November 2, 2006

2006, QNX Software Systems GmbH & Co. KG. Distributing widgets
Distributing widgetsYou can quickly and easily distribute widgets horizontally orvertically, to evenly space them out on the GUI. To do this:
1 Select the widgets you want to distribute.
2 From the Widget menu, selectDistribute→Horizontally orDistribute→Vertically.
In the following example, several buttons have been distributedhorizontally and aligned to the top edge:
Distributed widgets.
Common User Access (CUA) and handlingfocusCommon User Access (CUA) is a standard that defines how a usercan change the keyboard focus. A widget isfocusableif it can begiven focus by pressing CUA keys or by calling a focus function.
Changing focus with the keyboardThe following keys move focus only to focusable widgets:
To go to the: Press:
Next widget Tab
Previous widget Shift – Tab
continued. . .
November 2, 2006 Chapter 6 � Creating Widgets in PhAB 181

Common User Access (CUA) and handling focus 2006, QNX Software Systems GmbH & Co.
KG.
To go to the: Press:
First widget in the next container Ctrl – Tab
Last widget in the previous containerCtrl – Shift – Tab
For information on specifying the order in which the widgets aretraversed, see the section “Ordering widgets” in this chapter.
Controlling focusUse the followingPt ARG FLAGSflags to control focus for a widget:
Pt GETSFOCUS
Make the widget focusable.
Pt FOCUSRENDER
Make the widget give a visual indication that it has focus.
In addition, use the followingPt ARG CONTAINERFLAGSflags tocontrol focus for a container:
Pt BLOCK CUA FOCUS
Prevent the CUA keys from being used to enter the container.However, if the user clicks inside the container, or a focusfunction gives it focus, the CUA keys can then be used.
Pt ENABLE CUA
Give the parent widget the chance to control whether or not achild container handles the CUA keys:
� If this flag is set, the widget’s code handles the CUA keys.
� If it isn’t set, the CUA keys are passed up the widget familyuntil an ancestor is found with this flag set. This ancestor (iffound) handles the keys.
Pt ENABLE CUA ARROWS
The same asPt ENABLE CUA, but it applies only to the arrowkeys.
182 Chapter 6 � Creating Widgets in PhAB November 2, 2006
2006, QNX Software Systems GmbH & Co. KG. Common User Access (CUA) and handlingfocus
Focus callbacksAll descendants of thePtBasic widget have the following callbackresources:
� Pt CB GOT FOCUS—called when the widget gets focus
� Pt CB LOSTFOCUS—called when the widget loses focus. Thewidget can even refuse to relinquish focus (for example, if youtype invalid data in a text widget).
PtMultiText andPtText have special versions of these callbacks.☞
For more information, see theWidget Reference.
Focus-handling functionsThe functions listed below deal with focus. They’re described in thePhotonLibrary Reference.
These functions don’t actually change which widget has focus; theytell you where focus can go:
PtFindFocusChild()
Find the closest focusable child widget
PtFindFocusNextFrom()
Find the next widget that can get focus
PtFindFocusPrevFrom()
Find the previous widget that can get focus
You can use these routines to determine which widget has focus:
PtContainerFindFocus()
Find the currently focused widget in the samefamily hierarchy as a widget
PtIsFocused() Determine to what degree a widget is focused
November 2, 2006 Chapter 6 � Creating Widgets in PhAB 183
Ordering widgets 2006, QNX Software Systems GmbH & Co. KG.
You can use these routines to give focus to a widget:
PtContainerFocusNext()
Give focus to the nextPt GETS FOCUSwidget
PtContainerFocusPrev()
Give focus to the previousPt GETSFOCUSwidget
PtContainerGiveFocus()or PtGiveFocus()
Give focus to a widget — these routines are identical.
PtContainerNullFocus()
Nullify the focus of a widget
PtGlobalFocusNext()
Give focus to next widget
PtGlobalFocusNextContainer()
Give focus to another container’s widget
PtGlobalFocusNextFrom()
Give focus to the next widget behind the specified widget
PtGlobalFocusPrev()
Give focus to the previous widget
PtGlobalFocusPrevContainer()
Give focus to a widget in the previous container
PtGlobalFocusPrevFrom()
Give focus to widget previous to the specified widget
Ordering widgetsIn PhAB, each widget exists in front of or behind other widgets. Thisis known as thewidget order, and you can see it when you overlapseveral widgets. The order of the widgets dictates how you can usethe CUA keys to move between widgets.
184 Chapter 6 � Creating Widgets in PhAB November 2, 2006
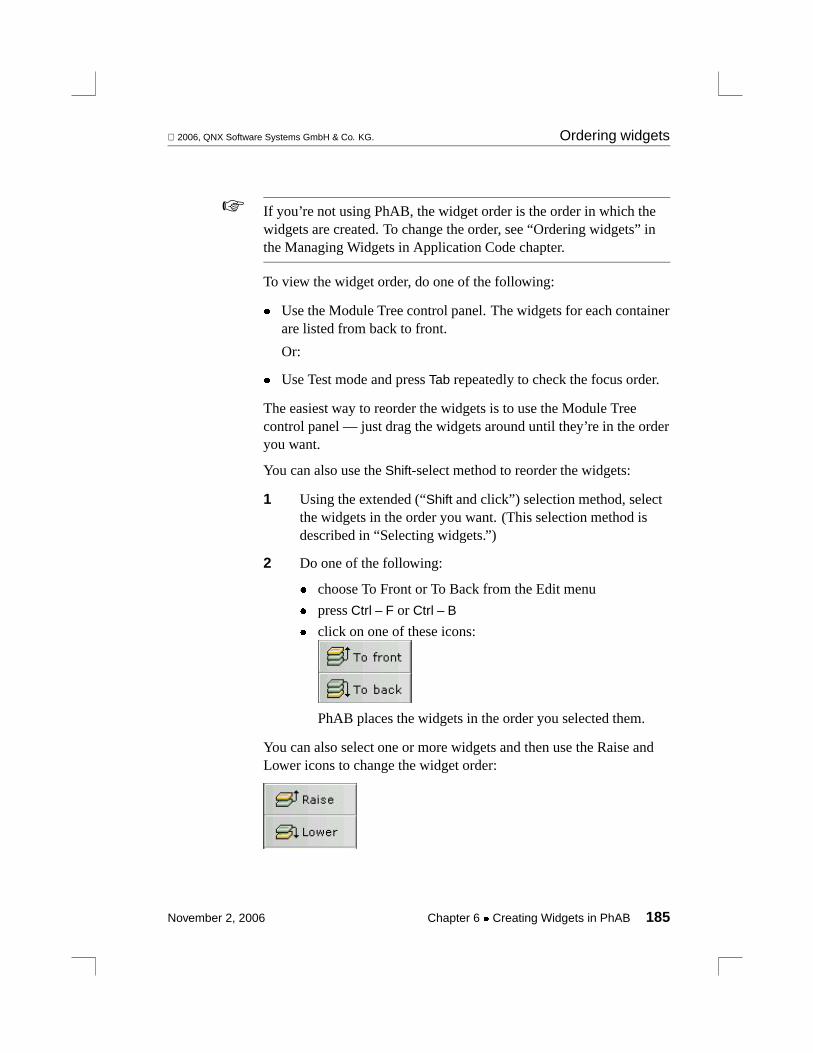
2006, QNX Software Systems GmbH & Co. KG. Ordering widgets
If you’re not using PhAB, the widget order is the order in which thewidgets are created. To change the order, see “Ordering widgets” inthe Managing Widgets in Application Code chapter.
☞
To view the widget order, do one of the following:
� Use the Module Tree control panel. The widgets for each containerare listed from back to front.
Or:
� Use Test mode and pressTab repeatedly to check the focus order.
The easiest way to reorder the widgets is to use the Module Treecontrol panel — just drag the widgets around until they’re in the orderyou want.
You can also use theShift-select method to reorder the widgets:
1 Using the extended (“Shift and click”) selection method, selectthe widgets in the order you want. (This selection method isdescribed in “Selecting widgets.”)
2 Do one of the following:
� choose To Front or To Back from the Edit menu
� pressCtrl – F or Ctrl – B
� click on one of these icons:
PhAB places the widgets in the order you selected them.
You can also select one or more widgets and then use the Raise andLower icons to change the widget order:
November 2, 2006 Chapter 6 � Creating Widgets in PhAB 185

Dragging widgets 2006, QNX Software Systems GmbH & Co. KG.
Dragging widgetsDragging a widget is the easiest way to move a widget in mostsituations since it’s quick and fairly accurate:
1 Select the widgets.
2 Point to one of the selected widgets, press down the mousebutton, then drag the widgets to the new position.
If you want to drag the widgets horizontally, vertically, ordiagonally, hold down theAlt while dragging.
To drag a container horizontally, vertically, or diagonally, pressAltafter pressing the mouse button. (PressingAlt before the mouse buttonselects widgets within the container.)
☞
3 Release the mouse button. Widgets snap to the grid if it’senabled — see “Grid preferences ” in the chapter on PhAB’senvironment.
To cancel a drag operation, pressEsc before releasing the mousebutton.
To move the parent container of a widget, hold downShift – Alt anddrag the child.
Widgets may “disappear” if you move them beyond the boundaries oftheir container. If this happens, use the Previous and Next buttons inthe Resources or Callbacks control panel to select the widgets, thenuse the X and Y fields in PhAB’s toolbar to bring the widgets backinto view.
If you find that you’re unintentionally dragging widgets when you’rejust trying to select them, consider:
� Setting the damping factor, as described in “Draggingpreferences,” below
� Locking the widgets’ coordinates and/or size in PhAB’s toolbar:
186 Chapter 6 � Creating Widgets in PhAB November 2, 2006
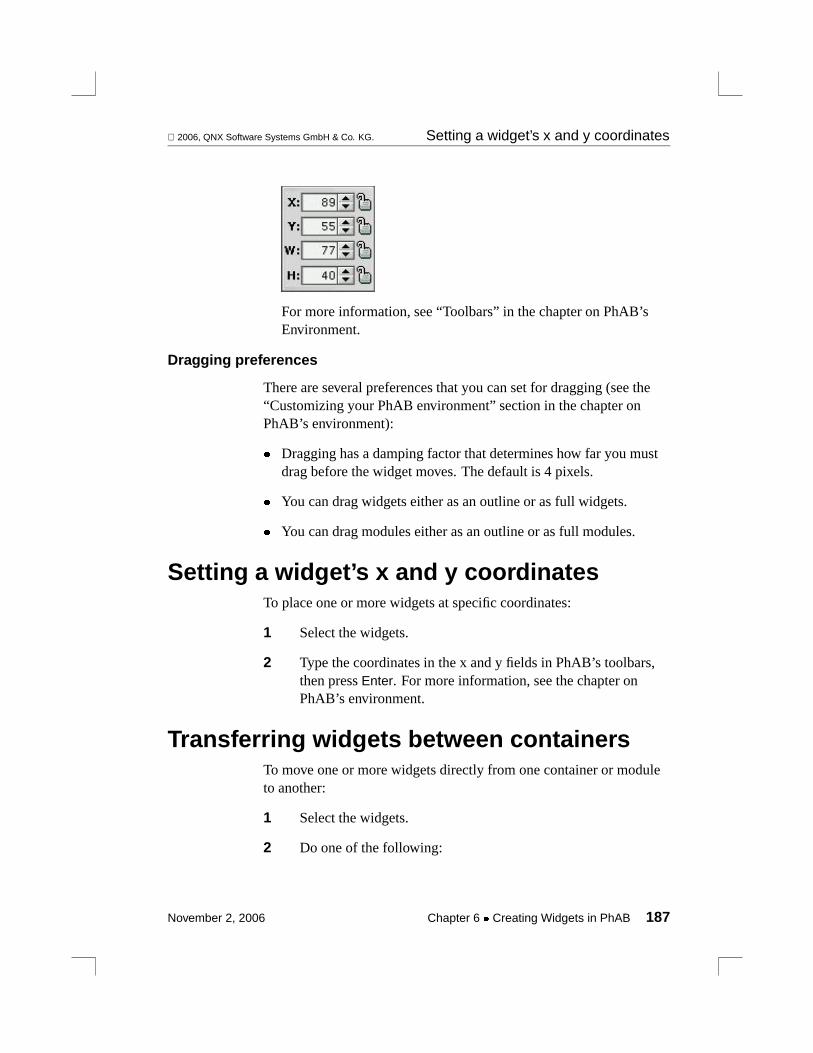
2006, QNX Software Systems GmbH & Co. KG. Setting a widget’s x and y coordinates
For more information, see “Toolbars” in the chapter on PhAB’sEnvironment.
Dragging preferences
There are several preferences that you can set for dragging (see the“Customizing your PhAB environment” section in the chapter onPhAB’s environment):
� Dragging has a damping factor that determines how far you mustdrag before the widget moves. The default is 4 pixels.
� You can drag widgets either as an outline or as full widgets.
� You can drag modules either as an outline or as full modules.
Setting a widget’s x and y coordinatesTo place one or more widgets at specific coordinates:
1 Select the widgets.
2 Type the coordinates in the x and y fields in PhAB’s toolbars,then pressEnter. For more information, see the chapter onPhAB’s environment.
Transferring widgets between containersTo move one or more widgets directly from one container or moduleto another:
1 Select the widgets.
2 Do one of the following:
November 2, 2006 Chapter 6 � Creating Widgets in PhAB 187

Resizing widgets and modules 2006, QNX Software Systems GmbH & Co. KG.
� Choose Move Into from the Edit menu.
Or:
� PressCtrl – T.
Or:
� Click on the Move Into icon in PhAB’s toolbar:
3 Move the pointer into the other container and click the mousebutton.
Resizing widgets and modulesWhen you select a widget or module, you’ll see its height andwidth—including any borders and margins—displayed in thetoolbar’s H and W fields. (These values are maintained by thePt ARG DIM resource; see the description ofPtWidget in theWidget Reference.)
To resize a selected widget, do one of the following:
� Drag one of the widget’s resize handles.
Or:
� Click on the height or width field in PhAB’s toolbars, type in anew value, then pressEnter. For more information, see the chapteron PhAB’s environment.
Or:
� Use the nudge tool in the toolbar.
188 Chapter 6 � Creating Widgets in PhAB November 2, 2006

2006, QNX Software Systems GmbH & Co. KG. Clipboard
If a module is in Test mode, you can’t resize it or its widgets.
If you have trouble seeing a widget’s resize handles because of thebackground color you’ve chosen, you can change the resize-handlecolor. For more info, see “Customizing your PhAB environment” inthe PhAB Environment chapter.
☞
ClipboardPhAB’s clipboard lets you cut, copy, and paste widgets and modulesbetween PhAB instances. You can’t use this clipboard with otherapplications. To do use the clipboard, open two PhAB instances, copyor cut something into clipboard in one instance, and then paste it intothe other instance.
You’ll find the clipboard helpful for these reasons:
� It saves you from creating large numbers of widgets or modulesfrom scratch.
� It helps you create applications whose widgets look and behaveconsistently with each other.
� You can also copy callbacks associated with copied widgets,saving you time. To include callbacks when you copy widgets, youneed to set the Save/Restore Callbacks option on the General tabof the Preferences dialog.
Cutting and copyingA cut operation removes the currently selected widgets from theirmodule and places them in the clipboard. A copy operation copies thecurrently selected widgets to the clipboard without removing themfrom their module.
November 2, 2006 Chapter 6 � Creating Widgets in PhAB 189

Clipboard 2006, QNX Software Systems GmbH & Co. KG.
Whenever you cut or copy, PhAB deletes any widgets already in theclipboard.
☞
To cut or copy one or more widgets:
1 Select the widgets.
2 To cut, do one of the following:
� Choose Cut from the Edit menu.
Or:
� PressCtrl – X.
Or:
� Click on the Cut icon in PhAB’s toolbar:
3 To copy, do one of the following:
� Choose Copy from the Edit menu.
Or:
� PressCtrl – C.
Or:
� Click on the Copy icon in the toolbar:
190 Chapter 6 � Creating Widgets in PhAB November 2, 2006

2006, QNX Software Systems GmbH & Co. KG. Clipboard
� If you want to move a widget to another container but retain itscallbacks, you need to set the Save/Restore Callbacks option onthe General tab of the Preferences dialog. See “Transferringwidgets between containers” in this chapter.
� The Edit menu also contains a Delete command. This commandpermanently removes widgets without copying them to theclipboard.
☞
PastingA paste operation copies widgets from the clipboard into a module.
To paste the contents of the clipboard:
1 Make sure you’re in Select mode.
2 Do one of the following:
� Choose Paste from the Edit menu.
Or:
� PressCtrl – V.
Or:
� Click on the Paste icon in the toolbar:
3 Point to where you’d like the clipboard objects to appear, thenclick the mouse.
November 2, 2006 Chapter 6 � Creating Widgets in PhAB 191

Duplicating widgets and containers 2006, QNX Software Systems GmbH & Co. KG.
� Instance names are normally maintained when you paste. But ifPhAB detects a duplicate name, it ensures that the instance name isunique.
� Because the clipboard state is saved between PhAB applications,you can cut widgets from one PhAB application and paste theminto another.
☞
Duplicating widgets and containersHere’s a quick and easy way to duplicate a widget or container (it’smuch simpler than using the clipboard):
1 Press and hold downCtrl.
2 Point to the widget or container, hold down the left mousebutton, then drag the pointer to where you’d like the newwidget to appear.
3 ReleaseCtrl and the mouse button.
If you want to duplicate many widgets at once:
1 Select the widgets you want to duplicate.
2 Press and hold downCtrl.
3 Point to one of the widgets in the selection and drag to a newposition.
4 ReleaseCtrl and the mouse button.
If you duplicate a container, all its children are duplicated as well.☞
Duplicating is achieved using a copy to clipboard operation and pastefrom clipboard, that are done internally. Therefore the rules forclipboard operations about instance names and callback are also validfor duplicating widgets.
192 Chapter 6 � Creating Widgets in PhAB November 2, 2006

2006, QNX Software Systems GmbH & Co. KG. Deleting widgets or modules
� You can duplicate only one container or widget at a time. If youduplicate a container, all its children are duplicated as well.
� The instance names of the new widgets are reset to be the widgetclass name.
� Callbacks aren’t duplicated.
☞
Deleting widgets or modulesTo permanently remove one or more selected widgets, or to delete amodule:
1 Select the widgets or module.
2 Choose Delete from the Edit menu or pressDelete.
If you want put the widgets or module somewhere else, you shouldcut them, not delete them. For more information, see the section onthe clipboard in this chapter.
Matching widget resources and callbacksYou can copy the resources or callbacks from one widget to one ormore other widgets by using the Matching feature. This features letsyou quickly and easily create several widgets with similarappearances and behavior.
To use the matching feature:
1 Select the widget that is the source for the resources orcallbacks.
2 Select one or more destination widgets.
November 2, 2006 Chapter 6 � Creating Widgets in PhAB 193
Matching widget resources and callbacks 2006, QNX Software Systems GmbH & Co. KG.
If you enable the Show Selection option in the View menu, the widgetselected first highlighted with a different color than other selectedwidgets.
☞
3 Select a match command from the Widget menu:
� Match Height — sets the height of the destination widgetsto the height of the source widget.
� Match Width — sets the width of the destination widgets tothe width of the source widget.
� Match Resources — sets all the resources of the destinationwidgets to the source widget’s. Only the resources that arecommon between the destination and the source arechanged; unique resources are unaffected.
Geometry related resources — PtARG POS, PtARG DIM,Pt ARG AREA — are not copied.
☞
� Match Callbacks — sets all the callbacks of the destinationwidgets to the source widget’s. Only the callbacks that arecommon between the destination and the source arechanged; unique callbacks are unaffected
� Match Advanced — displays the Match resources andcallbacks dialog, which lets you choose exactly theresources and callbacks you want to copy from the sourcewidget to the destination widgets.
194 Chapter 6 � Creating Widgets in PhAB November 2, 2006
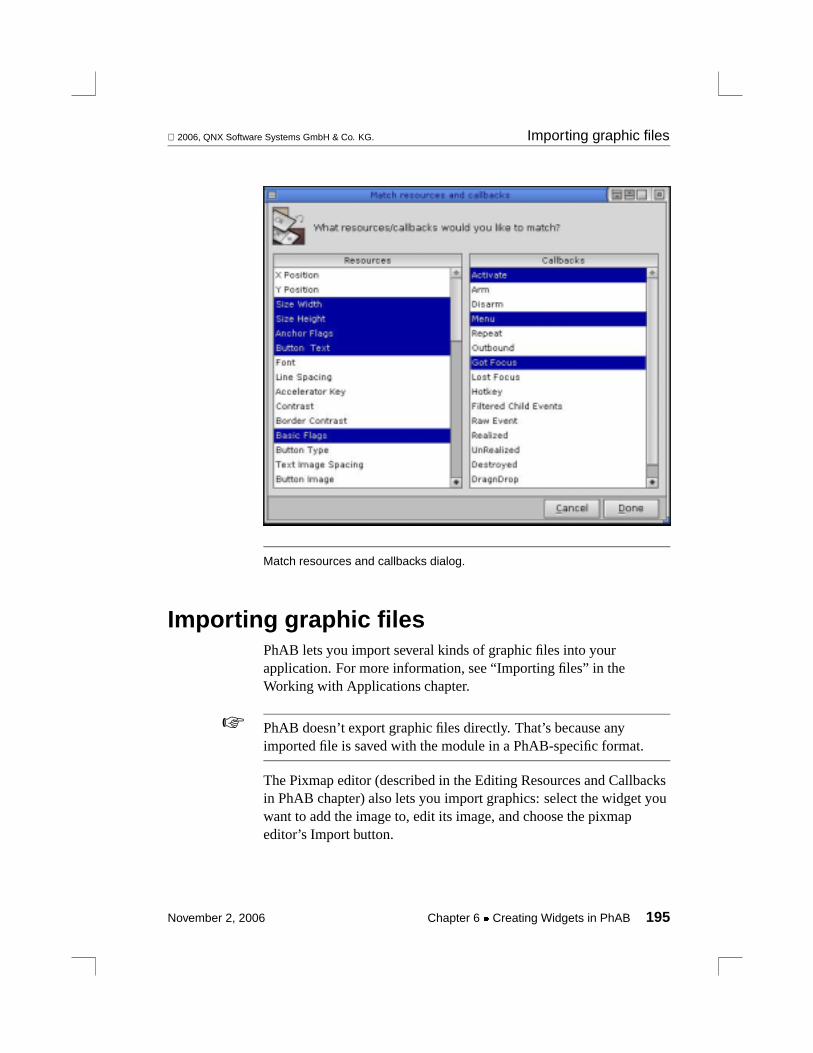
2006, QNX Software Systems GmbH & Co. KG. Importing graphic files
Match resources and callbacks dialog.
Importing graphic filesPhAB lets you import several kinds of graphic files into yourapplication. For more information, see “Importing files” in theWorking with Applications chapter.
PhAB doesn’t export graphic files directly. That’s because anyimported file is saved with the module in a PhAB-specific format.
☞
The Pixmap editor (described in the Editing Resources and Callbacksin PhAB chapter) also lets you import graphics: select the widget youwant to add the image to, edit its image, and choose the pixmapeditor’s Import button.
November 2, 2006 Chapter 6 � Creating Widgets in PhAB 195

Changing a widget’s class 2006, QNX Software Systems GmbH & Co. KG.
Changing a widget’s classYou can change the class of a widget by selecting it and then choosingChange Class from the Widget menu. Choose the new class from thepop-up list, and then click the Change class button.
The resources and callbacks that are compatible with the new widgetclass are kept, along with their values. For example, if you decide thataPtMultitext better suits your needs than aPtButton, you canselect the button, open the Change class dialog by right-clicking onthe widget, or right-clicking in the Module tree or by choosingChange Class from the Widget menu. The widget’s position, size,Pt ARG TEXT STRING, and all the other resources common to theold and new classes are kept.
When you change a widget’s class, some resources and callbacksmight be deleted. Before proceeding, a dialog displays the number ofresources and callbacks that will be removed. You have a chance tocancel the operation.
☞
A container that has children (such as aPtPanel with some widgetsinside it) can be converted this way, but the list of possible newclasses you can choose from is restricted to compatible containerclasses. For instance aPtPane with a button inside can be changedinto aPtBkgd, but not into aPtList or PtTree. An emptyPtTreeor any other empty container can be changed into anything, includinginto non-container widgets. APtTree that has a child (aPtDivider) can be changed into a container widget.
TemplatesA templateis a customized widget, group or hierarchy of widgets thatyou want to use as the basis for other widgets. Templates are usefulwhen you want to create many widgets that look and behave alike.PhAB automatically loads your templates, so you can easily createinstances of your widgets in any application.
196 Chapter 6 � Creating Widgets in PhAB November 2, 2006
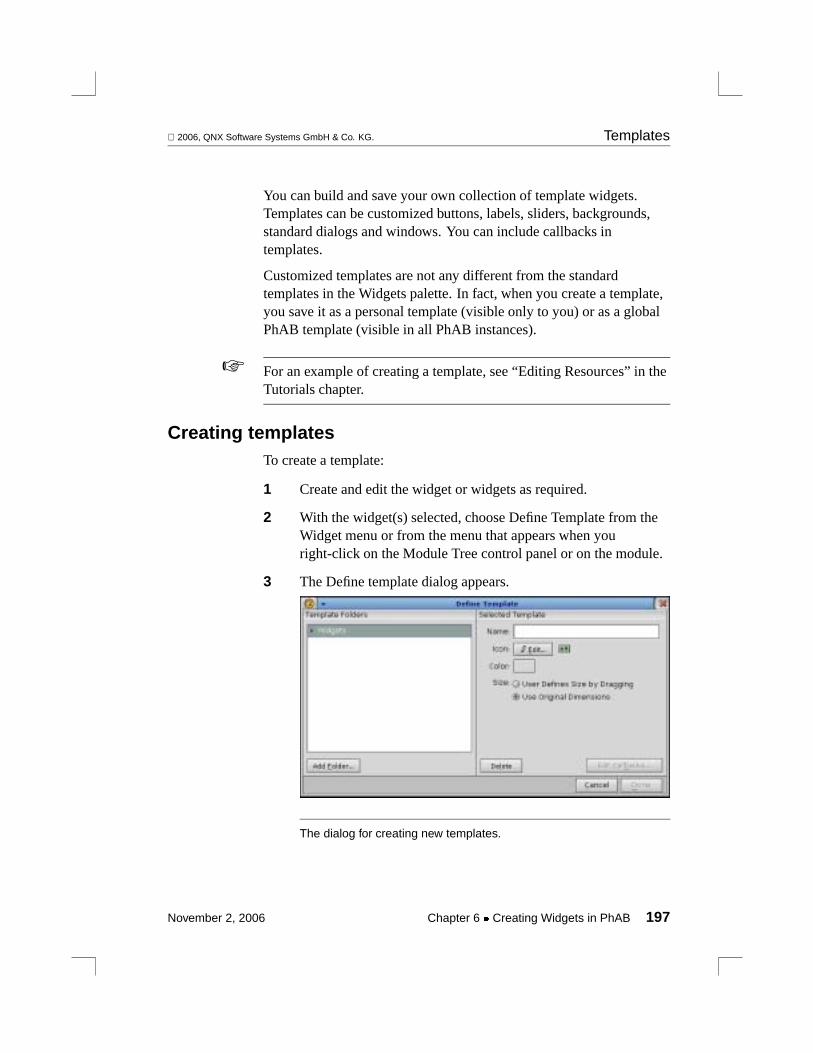
2006, QNX Software Systems GmbH & Co. KG. Templates
You can build and save your own collection of template widgets.Templates can be customized buttons, labels, sliders, backgrounds,standard dialogs and windows. You can include callbacks intemplates.
Customized templates are not any different from the standardtemplates in the Widgets palette. In fact, when you create a template,you save it as a personal template (visible only to you) or as a globalPhAB template (visible in all PhAB instances).
For an example of creating a template, see “Editing Resources” in theTutorials chapter.
☞
Creating templatesTo create a template:
1 Create and edit the widget or widgets as required.
2 With the widget(s) selected, choose Define Template from theWidget menu or from the menu that appears when youright-click on the Module Tree control panel or on the module.
3 The Define template dialog appears.
The dialog for creating new templates.
November 2, 2006 Chapter 6 � Creating Widgets in PhAB 197
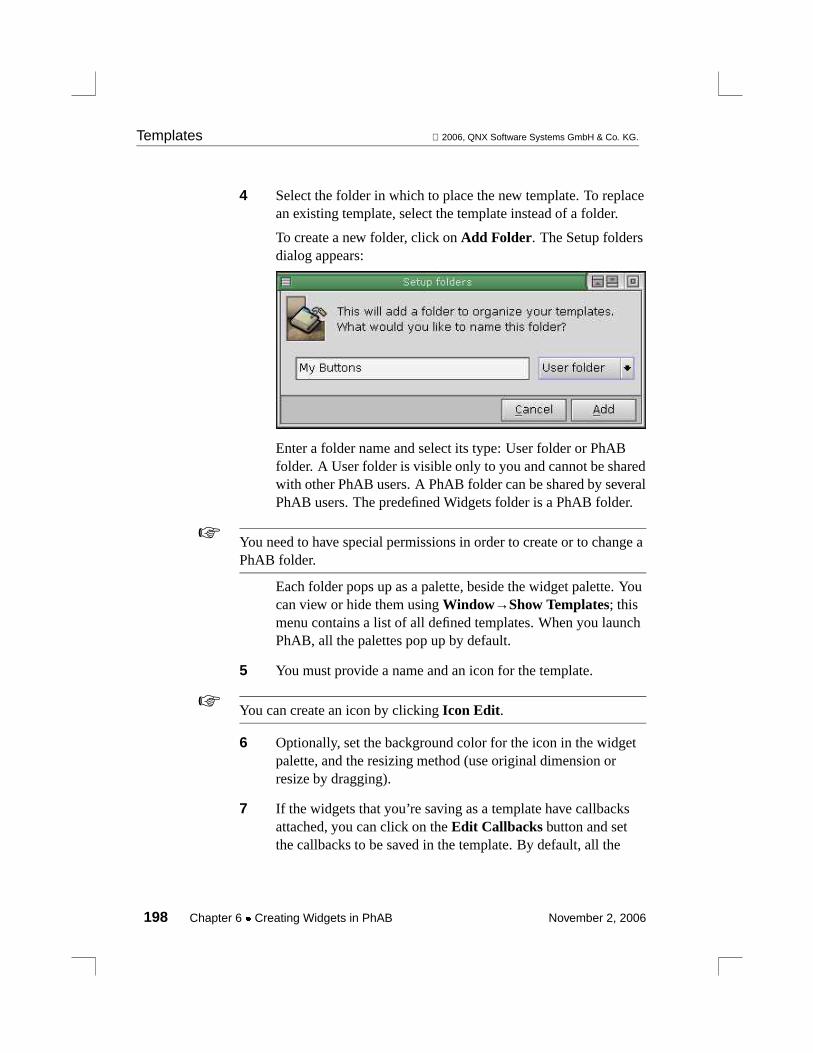
Templates 2006, QNX Software Systems GmbH & Co. KG.
4 Select the folder in which to place the new template. To replacean existing template, select the template instead of a folder.
To create a new folder, click onAdd Folder. The Setup foldersdialog appears:
Enter a folder name and select its type: User folder or PhABfolder. A User folder is visible only to you and cannot be sharedwith other PhAB users. A PhAB folder can be shared by severalPhAB users. The predefined Widgets folder is a PhAB folder.
You need to have special permissions in order to create or to change aPhAB folder.
☞
Each folder pops up as a palette, beside the widget palette. Youcan view or hide them usingWindow→Show Templates; thismenu contains a list of all defined templates. When you launchPhAB, all the palettes pop up by default.
5 You must provide a name and an icon for the template.
You can create an icon by clickingIcon Edit.☞
6 Optionally, set the background color for the icon in the widgetpalette, and the resizing method (use original dimension orresize by dragging).
7 If the widgets that you’re saving as a template have callbacksattached, you can click on theEdit Callbacks button and setthe callbacks to be saved in the template. By default, all the
198 Chapter 6 � Creating Widgets in PhAB November 2, 2006
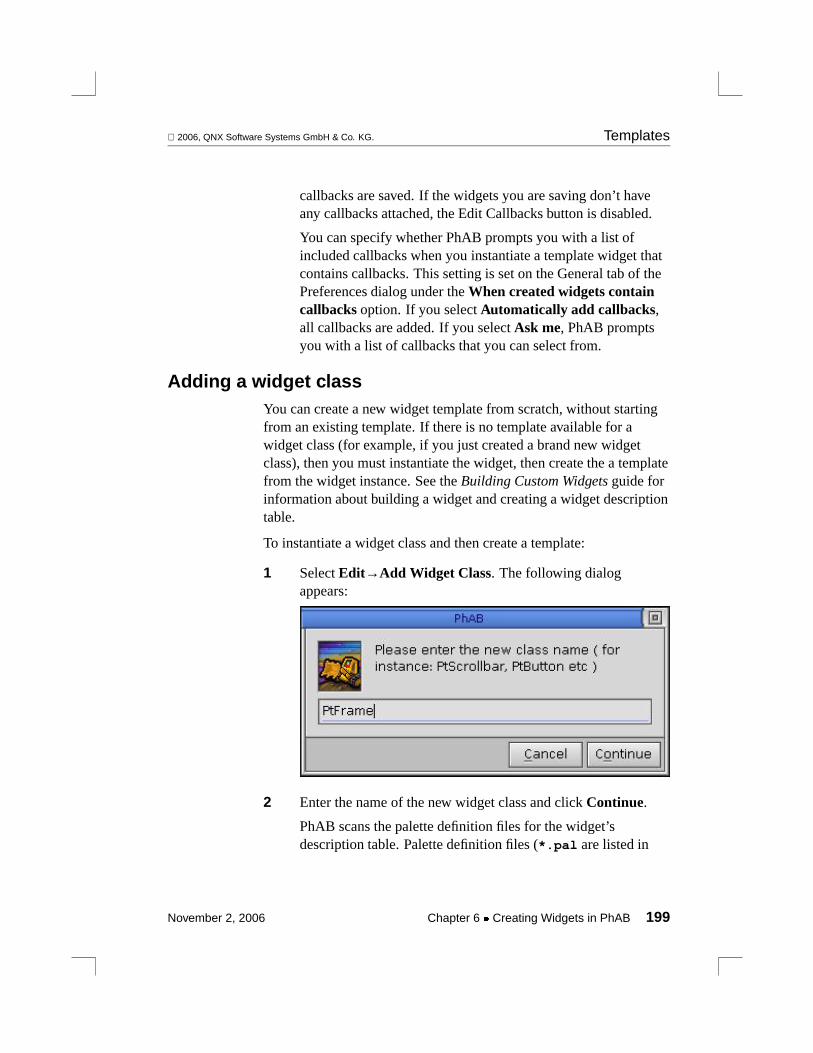
2006, QNX Software Systems GmbH & Co. KG. Templates
callbacks are saved. If the widgets you are saving don’t haveany callbacks attached, the Edit Callbacks button is disabled.
You can specify whether PhAB prompts you with a list ofincluded callbacks when you instantiate a template widget thatcontains callbacks. This setting is set on the General tab of thePreferences dialog under theWhen created widgets containcallbacks option. If you selectAutomatically add callbacks,all callbacks are added. If you selectAsk me, PhAB promptsyou with a list of callbacks that you can select from.
Adding a widget classYou can create a new widget template from scratch, without startingfrom an existing template. If there is no template available for awidget class (for example, if you just created a brand new widgetclass), then you must instantiate the widget, then create the a templatefrom the widget instance. See theBuilding Custom Widgetsguide forinformation about building a widget and creating a widget descriptiontable.
To instantiate a widget class and then create a template:
1 SelectEdit→Add Widget Class. The following dialogappears:
2 Enter the name of the new widget class and clickContinue.
PhAB scans the palette definition files for the widget’sdescription table. Palette definition files (*.pal are listed in
November 2, 2006 Chapter 6 � Creating Widgets in PhAB 199
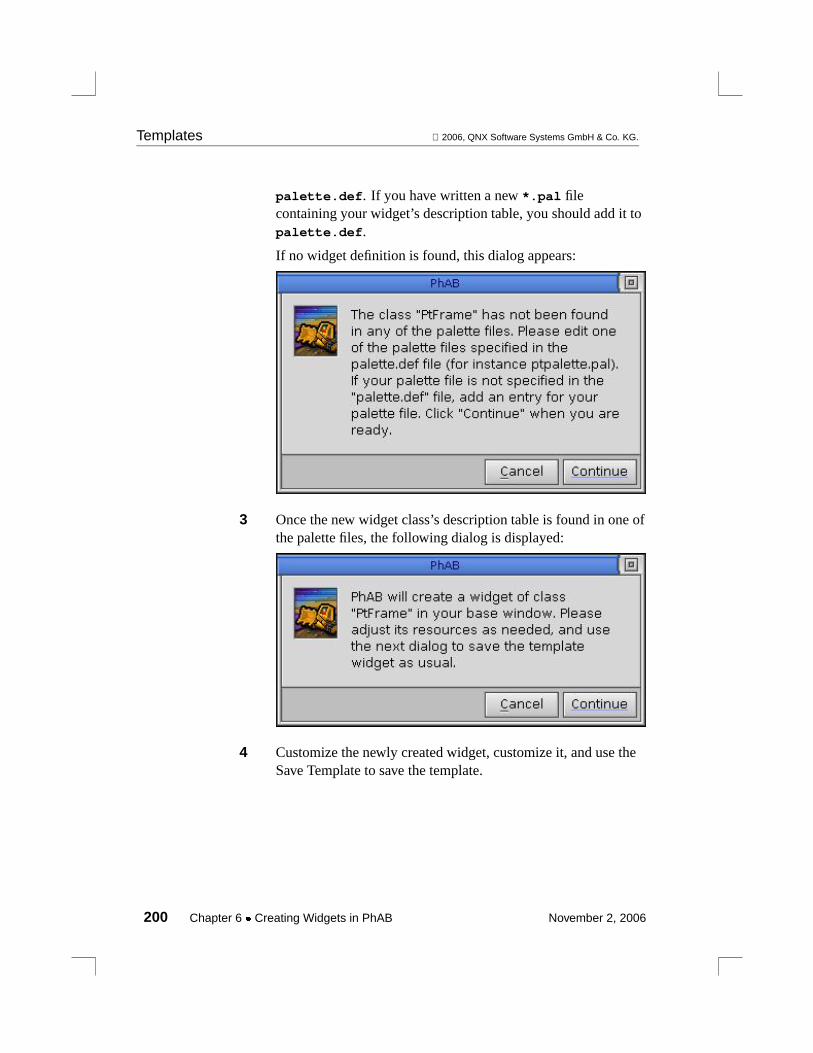
Templates 2006, QNX Software Systems GmbH & Co. KG.
palette.def. If you have written a new*.pal filecontaining your widget’s description table, you should add it topalette.def.
If no widget definition is found, this dialog appears:
3 Once the new widget class’s description table is found in one ofthe palette files, the following dialog is displayed:
4 Customize the newly created widget, customize it, and use theSave Template to save the template.
200 Chapter 6 � Creating Widgets in PhAB November 2, 2006
2006, QNX Software Systems GmbH & Co. KG. Templates
Editing templatesYou can change a template definition at any time by editing thetemplates. To edit an existing template:
1 Choose Templates from the Edit menu.
2 The Edit Templates dialog appears.
3 Edit the template as desired and then save the results.
You can change the template’s name, the template’s foldername, and the template’s icon. Using drag and drop, you canmove the templates between folders, and you can reorder thetemplates inside the same folder. Note that you can only move atemplate between folders of the same type (e.g. from a Userfolder to a User folder).
Deleting templatesTo delete a template:
1 Choose Edit Templates from the Edit menu.
2 A dialog similar to that used to create a template is displayed.
3 Choose the template folder, and click Delete.
November 2, 2006 Chapter 6 � Creating Widgets in PhAB 201

Chapter 7
Editing Resources and Callbacks inPhAB
In this chapter. . .Editing widget resources 205Pixmap editor 206Color editor 212Flag/choice editor 214Font editor 216List editor 218Number editor 220Text editors 221Code editor 224Layout editors 225Callbacks 230Editing callbacks 232Module callbacks 234Code callbacks 237Hotkey callbacks 238Event handlers — raw and filter callbacks244
November 2, 2006 Chapter 7 � Editing Resources and Callbacks in PhAB 203

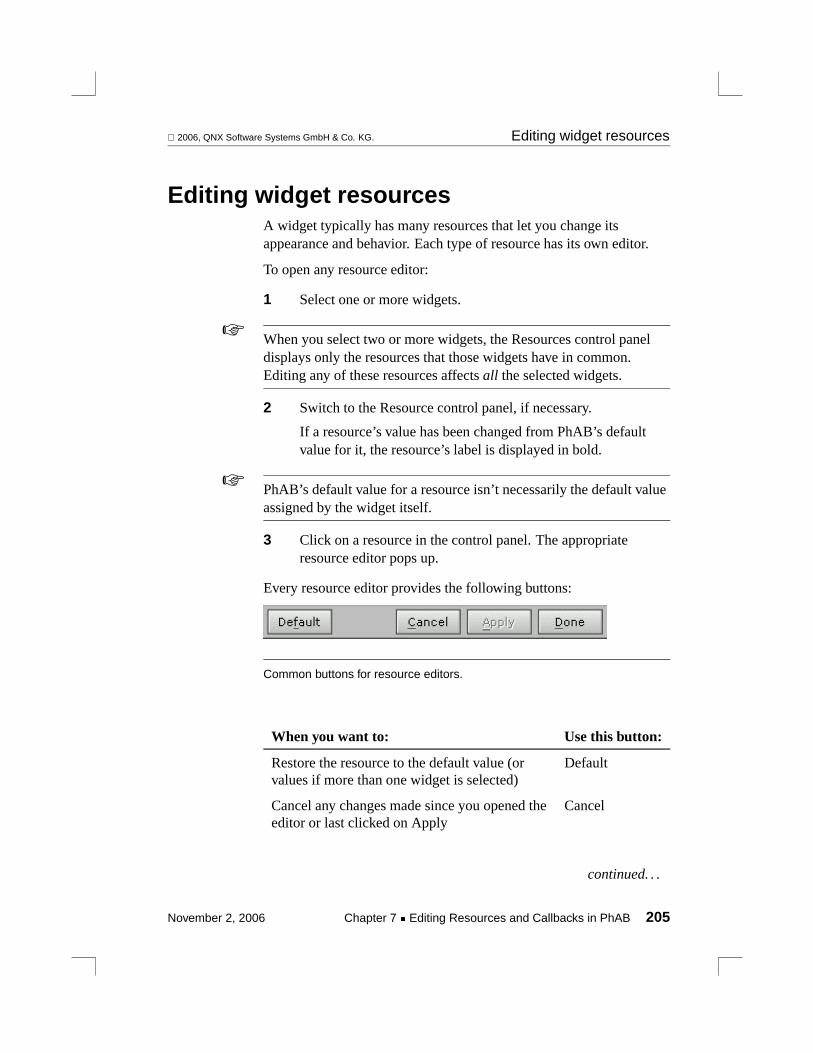
2006, QNX Software Systems GmbH & Co. KG. Editing widget resources
Editing widget resourcesA widget typically has many resources that let you change itsappearance and behavior. Each type of resource has its own editor.
To open any resource editor:
1 Select one or more widgets.
When you select two or more widgets, the Resources control paneldisplays only the resources that those widgets have in common.Editing any of these resources affectsall the selected widgets.
☞
2 Switch to the Resource control panel, if necessary.
If a resource’s value has been changed from PhAB’s defaultvalue for it, the resource’s label is displayed in bold.
PhAB’s default value for a resource isn’t necessarily the default valueassigned by the widget itself.
☞
3 Click on a resource in the control panel. The appropriateresource editor pops up.
Every resource editor provides the following buttons:
Common buttons for resource editors.
When you want to: Use this button:
Restore the resource to the default value (orvalues if more than one widget is selected)
Default
Cancel any changes made since you opened theeditor or last clicked on Apply
Cancel
continued. . .
November 2, 2006 Chapter 7 � Editing Resources and Callbacks in PhAB 205

Pixmap editor 2006, QNX Software Systems GmbH & Co. KG.
When you want to: Use this button:
Apply any changes and continue editing Apply
Apply any changes and close the editor Done
The editors for different types of resources are described in thesections that follow.
To edit: See this section:
Images Pixmap editor
Colors Color editor
Flags Flag/choice editor
Fonts Font editor
Lists of text items List editor
Numbers Number editor
Single-line or multiline text strings Text editors
Functions Code editor
Layouts Layout editors
Pixmap editorThe pixmap editor lets you customize a widget’s pixmap. The editorprovides a complete range of tools, so you can draw virtually anypixmap your application might need.
➤ To open the pixmap editor for any widget that can contain animage (for example,PtLabel, PtButton), click on thewidget, then click on a Image resource in the Resources controlpanel.
206 Chapter 7 � Editing Resources and Callbacks in PhAB November 2, 2006

2006, QNX Software Systems GmbH & Co. KG. Pixmap editor
Sample pixmap editor session.
The editor has several drawing modes and tools, which are describedin the sections that follow. The default is freehand mode—you simplydrag the pointer across the drawing grid.
Setting the pixmap’s sizeThe editor contains fields for the pixmap’s height and width, bothspecified in pixels. To change a dimension, edit the field and pressEnter.
November 2, 2006 Chapter 7 � Editing Resources and Callbacks in PhAB 207

Pixmap editor 2006, QNX Software Systems GmbH & Co. KG.
If you reduce the size of a pixmap, part of the image may be cut off.☞
How to draw and eraseThe following applies to all drawing tools:
In order to: Use the:
Draw in the current color Left mouse button
Erase a pixel or area (i.e. draw in thebackground color)
Right mouse button
Choosing colorsTo choose the draw color:
1 Click on the following color selector:
2 The palette color selector is displayed. Click on the color ofyour choice. All drawing is done in that color until you select anew color.
Choosing a background color
The background (or erase) color is used when you draw with the rightmouse button. To choose the background color:
1 Click on the following color selector:
2 Click on the color of your choice.
For more info, see the Color editor section.
208 Chapter 7 � Editing Resources and Callbacks in PhAB November 2, 2006

2006, QNX Software Systems GmbH & Co. KG. Pixmap editor
Drawing freehandThe freehand tool lets you draw freeform lines and erase single pixelsfor quick fix-ups.
To draw in freehand mode:
1 Click on the freehand tool:
2 Point to where you’d like to start drawing.
3 Drag the pointer, moving it as if you were drawing with apencil, then release the mouse button when you’re done.
You can repeat this step as often you’d like.
➤ To erase the pixel under the pointer, click the right mousebutton.
Drawing lines, rectangles, and circlesTo draw lines, rectangles, or circles, you use one standard method:
1 Click on the appropriate tool.
2 Point to where you’d like the object to begin.
3 Drag the pointer to where you’d like the object to end, thenrelease the mouse button.
You can repeat this step as often as you’d like.
Filling an enclosed areaTo fill any enclosed area (i.e. any area made up of a single color):
1 Click on the fill tool:
2 Move the pointer inside the area you wish to fill, then click.
November 2, 2006 Chapter 7 � Editing Resources and Callbacks in PhAB 209

Pixmap editor 2006, QNX Software Systems GmbH & Co. KG.
If an outline area has a break, the fill operation spills out of the holeand might fill the entire pixmap display.
☞
Selecting an areaTo use some tools, you first select an area of the pixmap.
To select an area:
1 Click on the Select tool:
2 Point to where you’d like the selection to begin.
3 Drag the pointer to where you’d like the selection to end, thenrelease the mouse button.
You can now “nudge” the area or perform any of the operationsdescribed in “Using the Pixmap toolbar,” below.
Nudging an areaTo nudge a selected area one pixel at a time:
1 Select the area you wish to nudge.
2 Click a nudge arrow or press an arrow key:
Some things to note:
� PhAB overwrites any pixels in the direction of the nudge.
� A nudge can’t push an area out of the pixmap.
� PhAB introduces blank space into the pixmap to fill the space leftby the area you’ve nudged.
210 Chapter 7 � Editing Resources and Callbacks in PhAB November 2, 2006
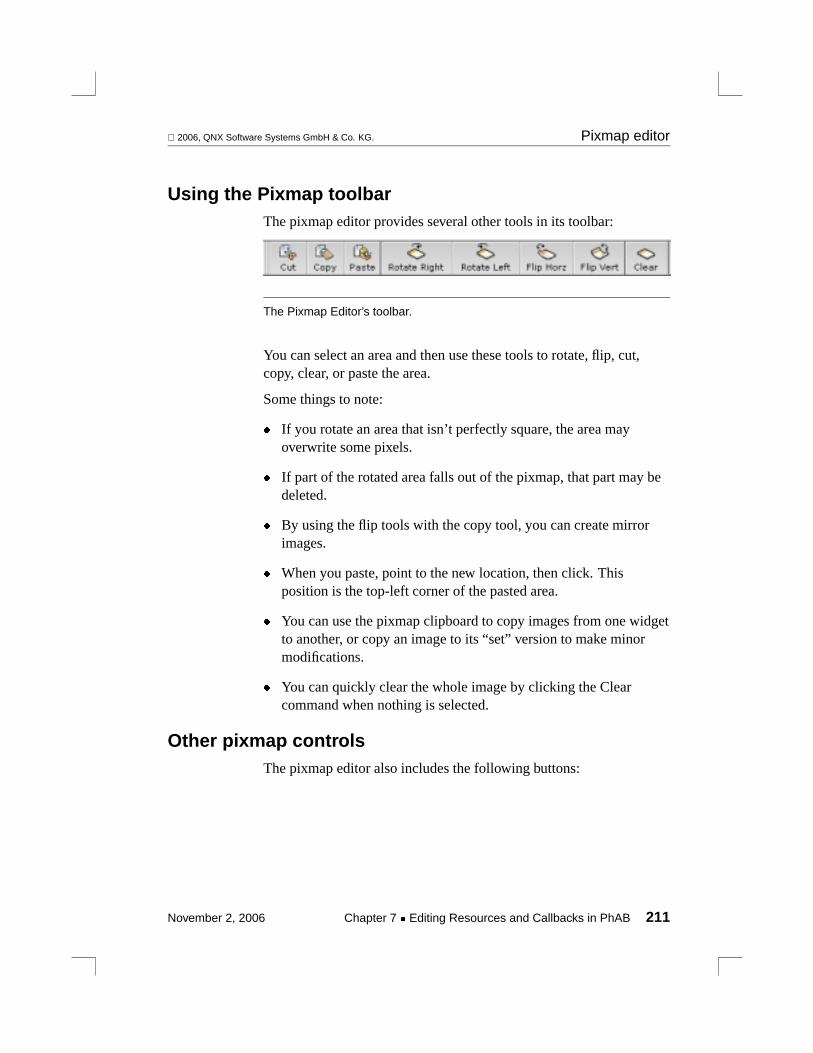
2006, QNX Software Systems GmbH & Co. KG. Pixmap editor
Using the Pixmap toolbarThe pixmap editor provides several other tools in its toolbar:
The Pixmap Editor’s toolbar.
You can select an area and then use these tools to rotate, flip, cut,copy, clear, or paste the area.
Some things to note:
� If you rotate an area that isn’t perfectly square, the area mayoverwrite some pixels.
� If part of the rotated area falls out of the pixmap, that part may bedeleted.
� By using the flip tools with the copy tool, you can create mirrorimages.
� When you paste, point to the new location, then click. Thisposition is the top-left corner of the pasted area.
� You can use the pixmap clipboard to copy images from one widgetto another, or copy an image to its “set” version to make minormodifications.
� You can quickly clear the whole image by clicking the Clearcommand when nothing is selected.
Other pixmap controlsThe pixmap editor also includes the following buttons:
November 2, 2006 Chapter 7 � Editing Resources and Callbacks in PhAB 211
Color editor 2006, QNX Software Systems GmbH & Co. KG.
When you want to: Use this control:
Toggle the grid on and off Show Grid
Examine smaller or larger areas of the pixmap Zoom
Delete the pixmap Delete
Import an image (for image-type resourcesonly)
Import
Create a new, empty image New
For a description of the standard editor buttons at the bottom of theeditor, see the “Editing widget resources” section.
Color editorThe color editor lets you modify any color resource. Where you clickin the Resource control panel determines which color editor you see:
To use the: Click on the color resource’s:
Full color editor Name or description
Quick color editor Current value
Full color editorIf you click on the resource name or description (i.e. the left side inthe Resource control panel), the full color editor is displayed:
212 Chapter 7 � Editing Resources and Callbacks in PhAB November 2, 2006

2006, QNX Software Systems GmbH & Co. KG. Color editor
Full color editor.
The full color editor gives you the choice of:
� 16 base colors that you can’t change
� transparent
� 48 additional colors that you can customize using the sliders, ineither theRGB(red/green/blue) or theHSB(hue/saturation/brightness) color model.
Using a transparent fill might introduce flickering and worsen yourapplication’s performance, especially if your application modifies thedisplay a lot.
☞
For a description of the standard editor buttons at the bottom of theeditor, see the “Editing widget resources” section.
November 2, 2006 Chapter 7 � Editing Resources and Callbacks in PhAB 213

Flag/choice editor 2006, QNX Software Systems GmbH & Co. KG.
Quick color editorIf you click on the value of a color resource (i.e. the right side in theResource control panel), the quick color editor is displayed:
Quick color editor.
To change the value, move the slider on the left. To change the hue,click or drag in the color patch on the right.
Flag/choice editorWhenever you click on a flags resource or on a resource that lets youselect only one of several preset values, you’ll see the flag/choiceeditor. For example:
214 Chapter 7 � Editing Resources and Callbacks in PhAB November 2, 2006

2006, QNX Software Systems GmbH & Co. KG. Flag/choice editor
Flag/Choice editor.
Flag resourcesIf you click on a flag resource, this editor lets you make multipleselections from the displayed list.
To edit a flag list:
1 Select (or deselect) the flags you want. Since each flag is aseparate toggle, you can select any number of flags or leavethem all unselected. Some flags contain groups of mutuallyexclusive flag bits. Selecting one of these bits de-selects anycorresponding mutually exclusive bits.
2 Apply your changes. The widget changes to reflect the newflags.
November 2, 2006 Chapter 7 � Editing Resources and Callbacks in PhAB 215

Font editor 2006, QNX Software Systems GmbH & Co. KG.
Option list resourcesIf you click on a resource that can have only one value, the flag/choiceeditor lets you make only one selection from the displayed list.
To choose an option from a list:
1 Click on the option. The previously selected option isdeselected.
2 Apply your changes. The widget changes to reflect the newoption.
For a description of the standard editor buttons at the bottom of theeditor, see the “Editing widget resources” section.
Font editorWhenever you select any font resource in the Resources control panelyou’ll see the font editor:
216 Chapter 7 � Editing Resources and Callbacks in PhAB November 2, 2006
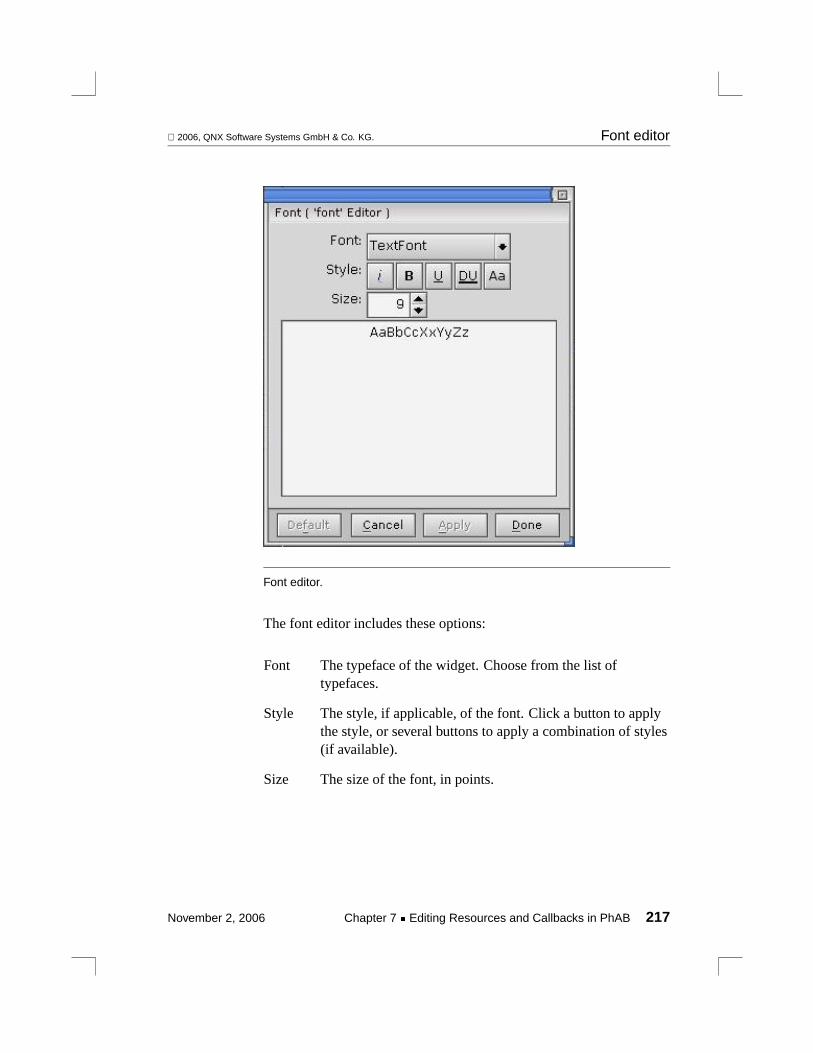
2006, QNX Software Systems GmbH & Co. KG. Font editor
Font editor.
The font editor includes these options:
Font The typeface of the widget. Choose from the list oftypefaces.
Style The style, if applicable, of the font. Click a button to applythe style, or several buttons to apply a combination of styles(if available).
Size The size of the font, in points.
November 2, 2006 Chapter 7 � Editing Resources and Callbacks in PhAB 217
List editor 2006, QNX Software Systems GmbH & Co. KG.
If a typeface doesn’t support an applied style at a given type size, thecorresponding style becomes dimmed or unselectable.
☞
For a description of the standard editor buttons at the bottom of theeditor, see the “Editing widget resources” section.
List editorWidgets such asPtList provide a list of text-based items. To edit thelist, you use PhAB’s list editor.
To open the editor and add the first item:
1 Select the widget, then click on the appropriate resource in theResources control panel (usually “List of Items”). You’ll seethe editor:
218 Chapter 7 � Editing Resources and Callbacks in PhAB November 2, 2006
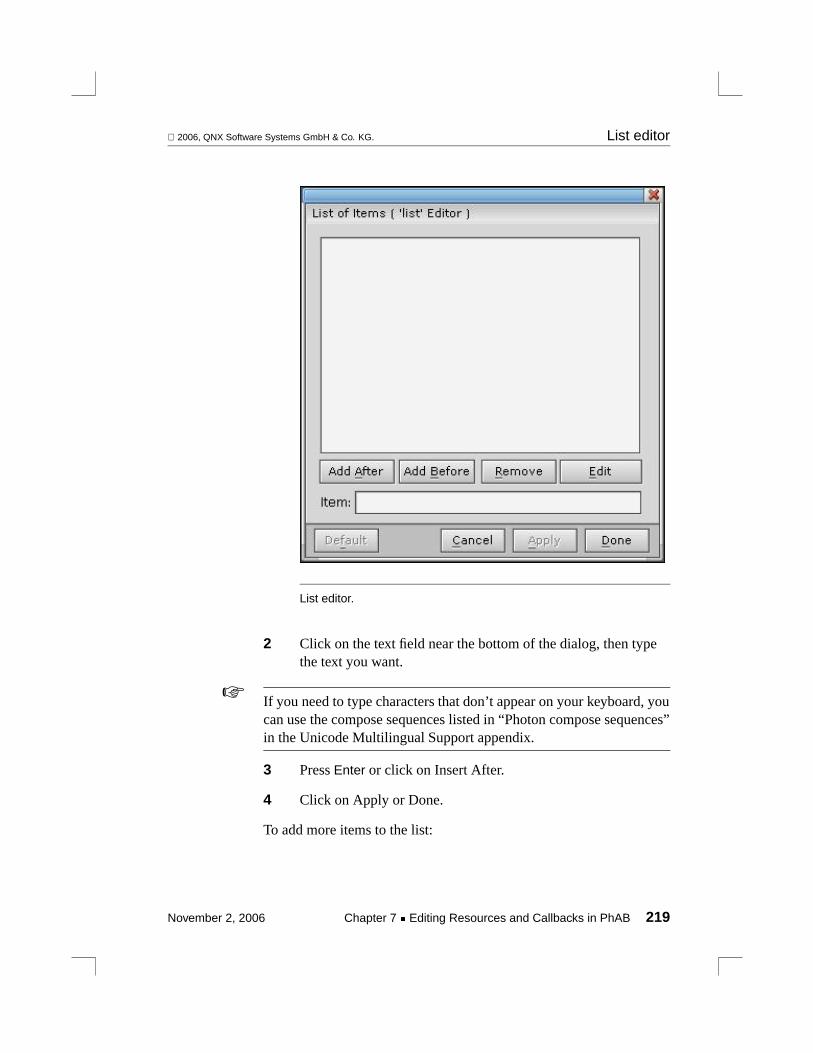
2006, QNX Software Systems GmbH & Co. KG. List editor
List editor.
2 Click on the text field near the bottom of the dialog, then typethe text you want.
If you need to type characters that don’t appear on your keyboard, youcan use the compose sequences listed in “Photon compose sequences”in the Unicode Multilingual Support appendix.
☞
3 PressEnter or click on Insert After.
4 Click on Apply or Done.
To add more items to the list:
November 2, 2006 Chapter 7 � Editing Resources and Callbacks in PhAB 219
Number editor 2006, QNX Software Systems GmbH & Co. KG.
1 Click on an existing item, then click on Insert After or InsertBefore. You’ll see a new item added to the list.
2 Using the text field, edit the new item’s text.
3 Click on Edit, then click on Apply or Done.
You can’t create blank lines within the list of items.☞
Editing existing list itemsTo edit an existing item:
1 Click on the item.
2 Edit the item’s text.
3 Click on Edit, then click on Apply or Done.
For text-editing shortcuts, see “Text editors.”☞
Deleting list itemsTo delete an item:
1 Click on the item, then click on Delete.
2 Click on Apply or Done.
For a description of the standard editor buttons at the bottom of theeditor, see the “Editing widget resources” section.
Number editorYou can edit the value of a numeric resource right in the Resourcescontrol panel, or you can click on the resource name to use thenumber editor:
220 Chapter 7 � Editing Resources and Callbacks in PhAB November 2, 2006

2006, QNX Software Systems GmbH & Co. KG. Text editors
Number editor.
To change the value that the editor displays, you can:
� Use the text-editing techniques described in “Text editors.”
Or:
� Click on the editor’s increase/decrease buttons.
For a description of the standard editor buttons at the bottom of theeditor, see the “Editing widget resources” section.
Text editorsYou can edit a text resource right in the Resources control panel, oryou can click on the resource to display a text editor. There are twotext editors: one for single-line text, and one for multiline.
Whenever you click on a single-line text resource in the Resourcescontrol panel (e.g. the Text String resource forPtText), you’ll seethe text editor:
November 2, 2006 Chapter 7 � Editing Resources and Callbacks in PhAB 221

Text editors 2006, QNX Software Systems GmbH & Co. KG.
Text editor.
When you select any multiline text resource—such as the Text Stringresource of aPtLabel or PtMultiText widget—you’ll see themultiline text editor:
Multiline text editor.
The single-line and multiline editors are similar — here are thecommon operations:
222 Chapter 7 � Editing Resources and Callbacks in PhAB November 2, 2006
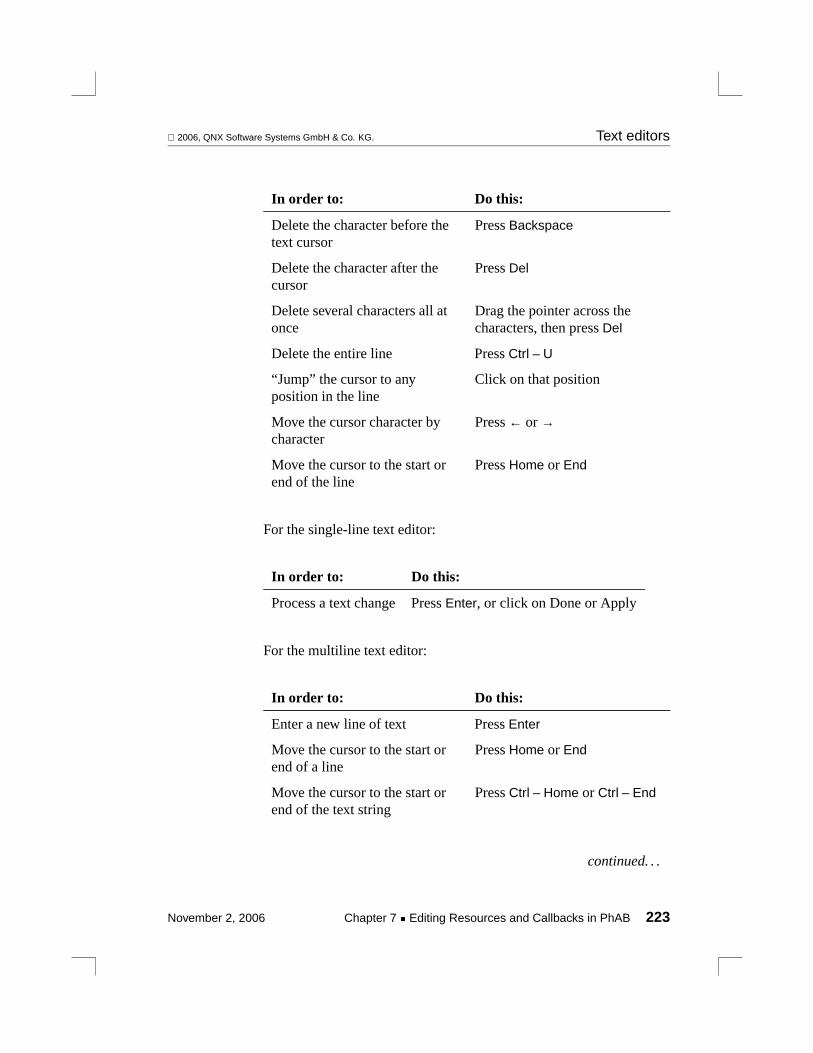
2006, QNX Software Systems GmbH & Co. KG. Text editors
In order to: Do this:
Delete the character before thetext cursor
PressBackspace
Delete the character after thecursor
PressDel
Delete several characters all atonce
Drag the pointer across thecharacters, then pressDel
Delete the entire line PressCtrl – U
“Jump” the cursor to anyposition in the line
Click on that position
Move the cursor character bycharacter
Press← or →
Move the cursor to the start orend of the line
PressHome or End
For the single-line text editor:
In order to: Do this:
Process a text change PressEnter, or click on Done or Apply
For the multiline text editor:
In order to: Do this:
Enter a new line of text PressEnter
Move the cursor to the start orend of a line
PressHome or End
Move the cursor to the start orend of the text string
PressCtrl – Home or Ctrl – End
continued. . .
November 2, 2006 Chapter 7 � Editing Resources and Callbacks in PhAB 223
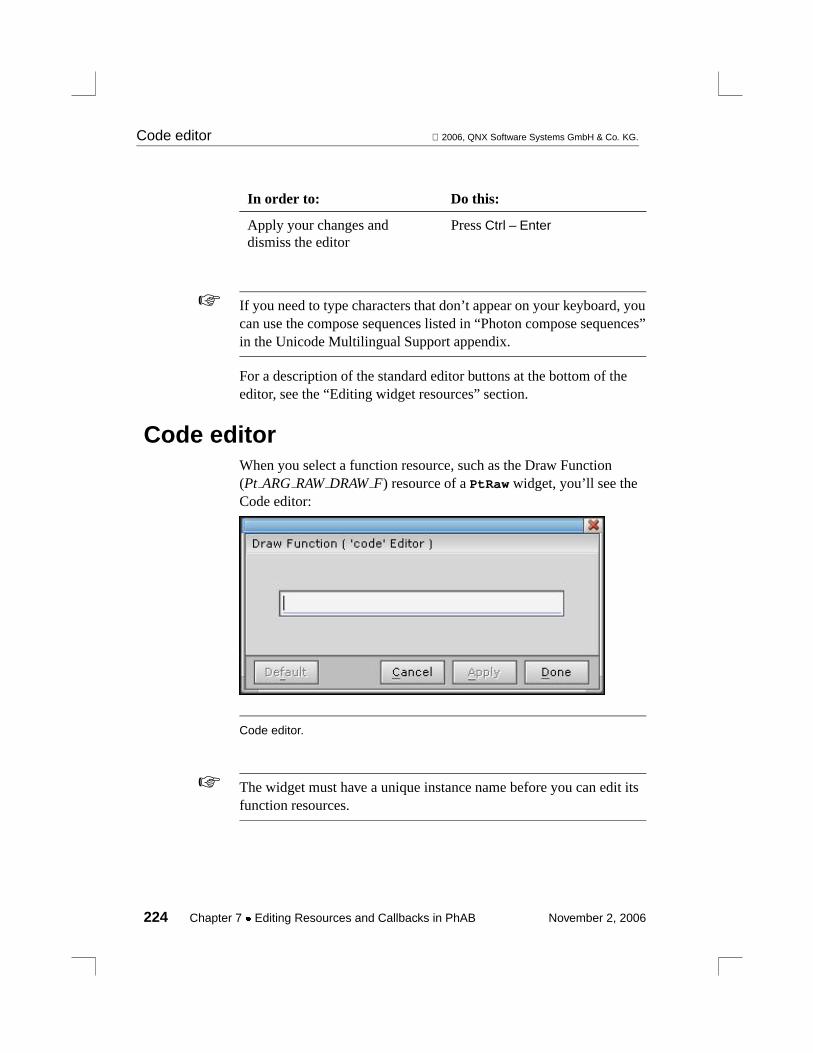
Code editor 2006, QNX Software Systems GmbH & Co. KG.
In order to: Do this:
Apply your changes anddismiss the editor
PressCtrl – Enter
If you need to type characters that don’t appear on your keyboard, youcan use the compose sequences listed in “Photon compose sequences”in the Unicode Multilingual Support appendix.
☞
For a description of the standard editor buttons at the bottom of theeditor, see the “Editing widget resources” section.
Code editorWhen you select a function resource, such as the Draw Function(Pt ARG RAWDRAWF) resource of aPtRaw widget, you’ll see theCode editor:
Code editor.
The widget must have a unique instance name before you can edit itsfunction resources.
☞
224 Chapter 7 � Editing Resources and Callbacks in PhAB November 2, 2006
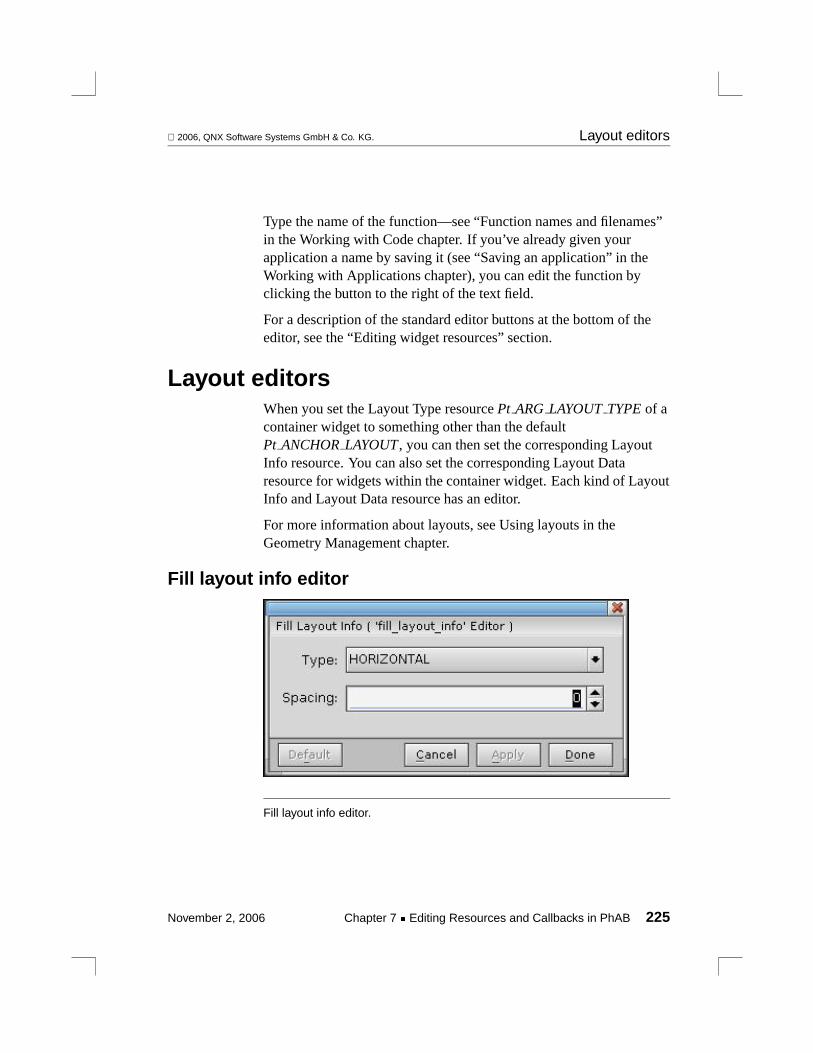
2006, QNX Software Systems GmbH & Co. KG. Layout editors
Type the name of the function—see “Function names and filenames”in the Working with Code chapter. If you’ve already given yourapplication a name by saving it (see “Saving an application” in theWorking with Applications chapter), you can edit the function byclicking the button to the right of the text field.
For a description of the standard editor buttons at the bottom of theeditor, see the “Editing widget resources” section.
Layout editorsWhen you set the Layout Type resourcePt ARG LAYOUTTYPEof acontainer widget to something other than the defaultPt ANCHORLAYOUT, you can then set the corresponding LayoutInfo resource. You can also set the corresponding Layout Dataresource for widgets within the container widget. Each kind of LayoutInfo and Layout Data resource has an editor.
For more information about layouts, see Using layouts in theGeometry Management chapter.
Fill layout info editor
Fill layout info editor.
November 2, 2006 Chapter 7 � Editing Resources and Callbacks in PhAB 225
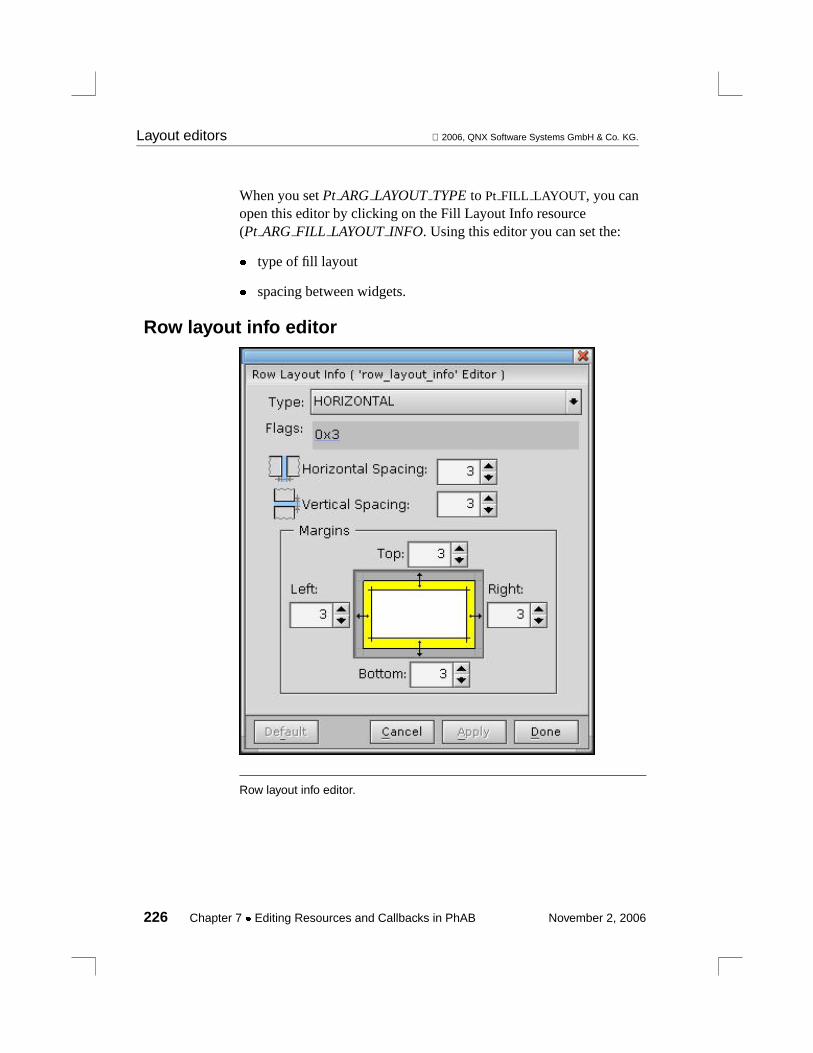
Layout editors 2006, QNX Software Systems GmbH & Co. KG.
When you setPt ARG LAYOUTTYPEto Pt FILL LAYOUT, you canopen this editor by clicking on the Fill Layout Info resource(Pt ARG FILL LAYOUTINFO. Using this editor you can set the:
� type of fill layout
� spacing between widgets.
Row layout info editor
Row layout info editor.
226 Chapter 7 � Editing Resources and Callbacks in PhAB November 2, 2006
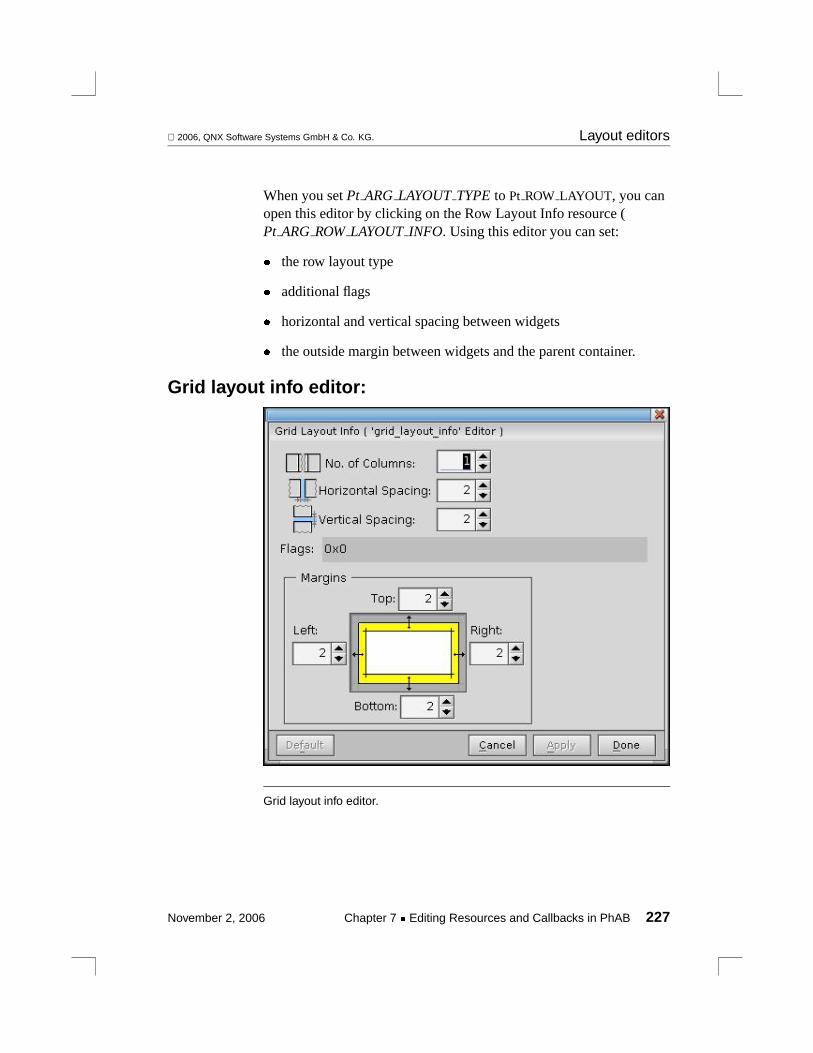
2006, QNX Software Systems GmbH & Co. KG. Layout editors
When you setPt ARG LAYOUTTYPEto Pt ROW LAYOUT, you canopen this editor by clicking on the Row Layout Info resource (Pt ARG ROWLAYOUTINFO. Using this editor you can set:
� the row layout type
� additional flags
� horizontal and vertical spacing between widgets
� the outside margin between widgets and the parent container.
Grid layout info editor:
Grid layout info editor.
November 2, 2006 Chapter 7 � Editing Resources and Callbacks in PhAB 227

Layout editors 2006, QNX Software Systems GmbH & Co. KG.
When you setPt ARG LAYOUTTYPEto Pt GRID LAYOUT, you canopen this editor by clicking on the Grid Layout Info resource(Pt ARG GRID LAYOUTINFO. Using this editor you can set:
� the number of columns in the grid
� additional flags
� horizontal and vertical spacing between widgets
� the outside margin between widgets and the parent container.
Row layout data editor
Row layout data editor.
When you setPt ARG LAYOUTTYPEto Pt ROW LAYOUT of acontainer widget, you can open this editor by clicking on the RowLayout Data resource (Pt ARG Row LAYOUTDATAof any childwidget. Using this editor you can set the:
� width spacing hint
� height spacing hint.
228 Chapter 7 � Editing Resources and Callbacks in PhAB November 2, 2006
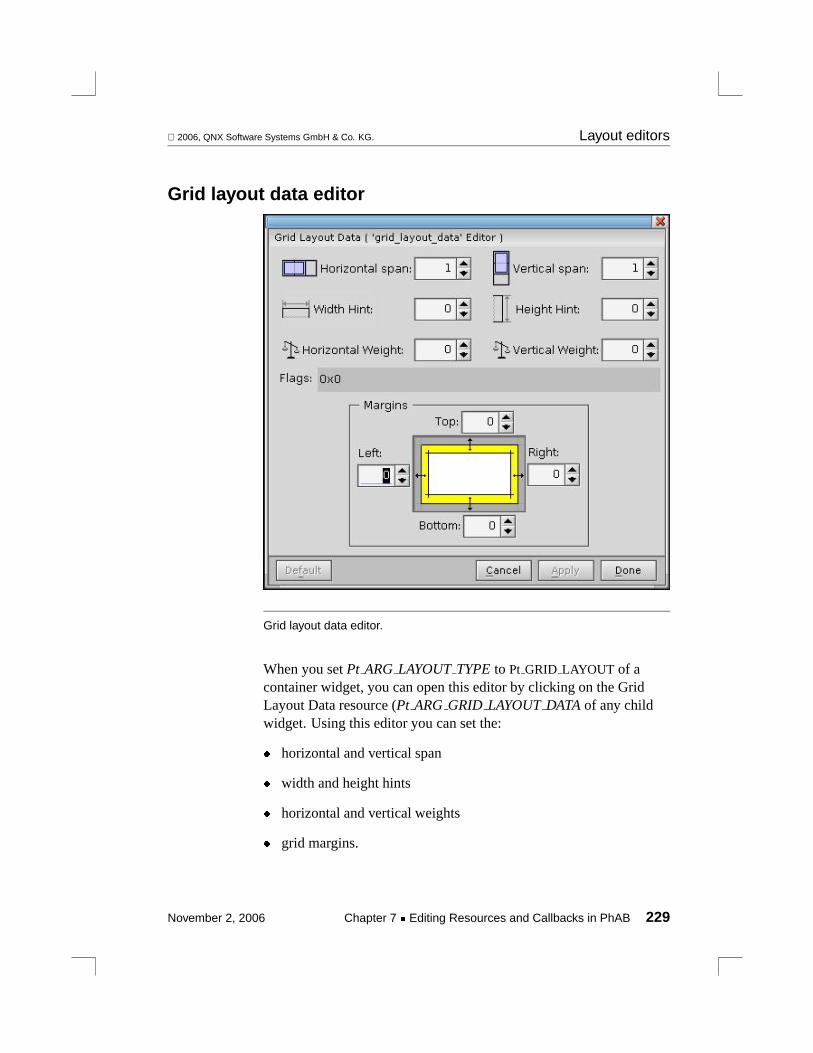
2006, QNX Software Systems GmbH & Co. KG. Layout editors
Grid layout data editor
Grid layout data editor.
When you setPt ARG LAYOUTTYPEto Pt GRID LAYOUT of acontainer widget, you can open this editor by clicking on the GridLayout Data resource (Pt ARG GRID LAYOUTDATAof any childwidget. Using this editor you can set the:
� horizontal and vertical span
� width and height hints
� horizontal and vertical weights
� grid margins.
November 2, 2006 Chapter 7 � Editing Resources and Callbacks in PhAB 229

Callbacks 2006, QNX Software Systems GmbH & Co. KG.
For a description of the standard editor buttons at the bottom of theseeditors, see the “Editing widget resources” section.
CallbacksCallbacks form the link between your application interface and yourapplication code. For example, let’s say you want your application toperform an action when the user selects a certain button. In that case,you would attach a callback function to that button’s Activatecallback. When the user selects the button, the widget invokes thecallback function, and your application takes the appropriate action inthe callback code.
Almost all widgets support several types of callbacks. Thesecallbacks can be specific to the widget or inherited from its parentclasses. Some of these types (defined in thePtBasic widget) aredefined in the following table:
Type Resource Typically invoked when the user:
Activate Pt CB ACTIVATE Presses and releases the left mousebutton
Arm Pt CB ARM Presses the left mouse button
Disarm Pt CB DISARM Releases the left mouse button
Repeat Pt CB REPEAT Holds down the left mouse button
Menu Pt CB MENU Presses the right mouse button
For more information about these callbacks, see theWidget Reference.If you’re interested in usingPt CB MENU to display a menu module,see the Accessing PhAB Modules from Code chapter.
All Photon widgets inherit two other types of callbacks:
230 Chapter 7 � Editing Resources and Callbacks in PhAB November 2, 2006

2006, QNX Software Systems GmbH & Co. KG. Callbacks
Hotkey callbacks
Attach callback code to a key or keychord. When theapplication window gets focus, the hotkeys become active.Pressing one invokes the appropriate hotkey link callback.
Event handlers(Rawor Filter callbacks)
Attach callbacks directly to Photon events
In the development environments for some windowing systems, youcan attach only callback code functions to a widget’s callbacks. Butwhenever you use PhAB to create a callback, you can go one stepfurther and attach windows, dialogs, menus, and much more. As wementioned earlier, this extended functionality is provided by PhAB’sspecial form of callback, called thelink callback.
Link callbacks also let you add functionality that isn’t available whenyou attach callbacks “by hand.” For example, if you link a dialog to abutton widget, you can specify where the dialog appears. You canalso specify a setup function that’s automatically called before thedialog is realized, after the dialog is realized, or both.
PhAB provides two general categories of link callbacks:
module-type link callbacks
let you attach an application module to any widget callback.PhAB provides the following categories of module-type linkcallbacks:
� Dialog
� Window
� Menu
� Picture
For more information, see “Module callbacks” later in thischapter.
November 2, 2006 Chapter 7 � Editing Resources and Callbacks in PhAB 231
Editing callbacks 2006, QNX Software Systems GmbH & Co. KG.
code-type link callbacks
let you run a code function when the widget’s callback isinvoked. PhAB provides the following categories of code-typelink callbacks:
� Code
� Done
� Cancel
The Done and Cancel types provide an additional feature:they’ll automatically close or destroy the widget’s parentmodule after the callback function is called. You’ll find thesetypes useful for creating any button that closes a dialog window.
A Done callback in the base window exits the application. A Cancelcallback in the base window closes the application’s windows butdoesn’texit the application.
☞
For more information, see “Code callbacks” later in this chapter.
Editing callbacksThe callback editor lets you add, change, delete, or view a widget’slist of callbacks.
To add a callback to a command item or toggle item in a menu, see“Menu modules” in the Working with Modules chapter.
If you’re adding a link callback to a widget, the widget’s instancename must be unique. If PhAB tells you the name isn’t unique, usethe Resources or Callbacks control panel’s Widget Instance Namefield to edit the name.
☞
To open the callback editor and edit a widget’s list of callbacks:
1 Select the widget, then switch to the Callbacks control panel, ifnecessary.
232 Chapter 7 � Editing Resources and Callbacks in PhAB November 2, 2006
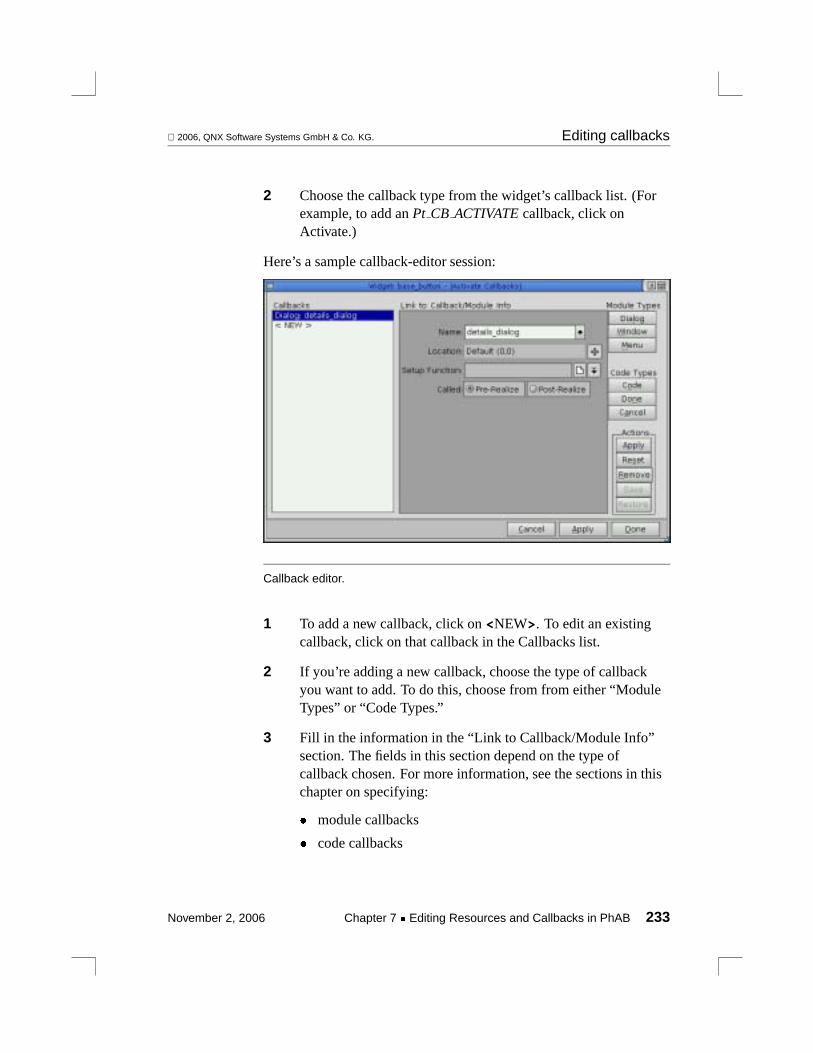
2006, QNX Software Systems GmbH & Co. KG. Editing callbacks
2 Choose the callback type from the widget’s callback list. (Forexample, to add anPt CB ACTIVATEcallback, click onActivate.)
Here’s a sample callback-editor session:
Callback editor.
1 To add a new callback, click on<NEW>. To edit an existingcallback, click on that callback in the Callbacks list.
2 If you’re adding a new callback, choose the type of callbackyou want to add. To do this, choose from from either “ModuleTypes” or “Code Types.”
3 Fill in the information in the “Link to Callback/Module Info”section. The fields in this section depend on the type ofcallback chosen. For more information, see the sections in thischapter on specifying:
� module callbacks
� code callbacks
November 2, 2006 Chapter 7 � Editing Resources and Callbacks in PhAB 233

Module callbacks 2006, QNX Software Systems GmbH & Co. KG.
� hotkey callbacks
� event handlers (raw and filter callbacks)
4 After you’ve added or edited any callback, click on theappropriate button:
� Apply—Apply any changes; be sure to do this before youstart working on other callbacks.
� Reset—Restore the callback information to the originalvalues.
� Remove—Delete the callback from the callback list.
Module callbacksA module-type link callback can be used to connect a widget to amodule. For example, selecting a button could create a module.
When you use a module-type link callback to create a module, themodule becomes a child of your application’s base window, not achild of the module that contains the widget that the link callback isdefined for.
If you want the new module’s parent to be something other than thebase window, you need to use aninternal link to create the module inyour application’s code. For more information about internal linksand other cases where you’d use them, see the Accessing PhABModules from Code chapter.
☞
Depending on the kind of module-type link callback you’re creating,PhAB’s callback editor displays some or all of these fields:
234 Chapter 7 � Editing Resources and Callbacks in PhAB November 2, 2006

2006, QNX Software Systems GmbH & Co. KG. Module callbacks
Callback editor fields for module-type link callbacks.
Name The name of the module. If you click on the icon next tothis field, you’ll see a list of existing modules. Eitherchoose from this list or enter the name of a module thatdoesn’t exist (PhAB creates the module for you whenyou add the callback).
Location Lets you specify where the module is displayed. Bydefault, a menu module is located below the widget thatinvokes it. For all other modules, the default location isdetermined by the Window Manager. For moreinformation, see “Positioning a module” in the Workingwith Modules chapter.
Setup Function
Lets you specify a function that can be called at twodifferent times (as specified by the Called field):
� before the module is displayed ( prerealize)
� after the module is displayed ( postrealize)
You can specify only one setup function—the PhABAPI calls the same function for both pre- andpostrealization of the module. To distinguish which passis being invoked, check the PhAB reason code.
Click on the icons beside the Setup Function field to editthe function or select from the existing callbacks.
November 2, 2006 Chapter 7 � Editing Resources and Callbacks in PhAB 235

Module callbacks 2006, QNX Software Systems GmbH & Co. KG.
Hotkey—(hotkey callbacks only)
The keyboard key and modifier (such asAlt or Ctrl) thattrigger the callback. See the section “ Specifying hotkeycallbacks.”
Event Mask—(event handlers only)
Lets you specify which Photon events the widget issensitive to. See “Event handlers — raw and filtercallbacks.”
Prerealize setup functionThe prerealize setup function lets you preset a module. For example,let’s say your application needs to “fill in the blanks” of a dialogbefore displaying that dialog. In the setup function, you would usePhAB-generated manifest names to preset the resources of thedialog’s various widgets.
After the setup function runs, it returnsPt CONTINUE. The dialog isthen realized and displayed on the screen, using all the preset values.
Postrealize setup functionThe postrealize function works much like the prerealize function,except that it’s called after the dialog is displayed on the screen. Youtypically use this type of function when you need to update themodule after it’s become visible. PhAB’s code-generation dialogprovides a good example. It displays on the screen and then, using apostrealize function, updates a progress bar continuously as theapplication code is generated.
The setup function for a menu module is called only before the menuis displayed. For most applications, you would use this function to setthe initial states of the menu items. For example, you could use it todisable certain menu items before the menu is displayed.
☞
236 Chapter 7 � Editing Resources and Callbacks in PhAB November 2, 2006

2006, QNX Software Systems GmbH & Co. KG. Code callbacks
Setup functions are stored in stub filesWhen you specify a setup function, PhAB generates a stub function;for information on specifying the language (C or C++) and thefilename, see “Function names and filenames” in the Working withCode chapter.
Code callbacksThis type of callback lets you run a code function when the widget’scallback is invoked.
You can add code callbacks from your application’s code, but it’seasier to do in PhAB. For more information, see “Callbacks” in theManaging Widgets in Application Code chapter.
☞
When you’re creating a code-type link callback, the callback editorasks you to specify the following:
Function This is the function that’s called when the widgetinvokes the callback. For the Done and Cancel types,this function is optional, so you can attach the callbackjust to close the module.
As described above, Done and Cancel are similar,except that a Done callback in the base window exitsthe application, while a Cancel callback closes thewindow but doesn’t exit the application. There’s no realdifference between the Done and Cancel callbackfunctions — they simply provide different reason codesin the callback.
For example, let’s say you have a dialog with a Donebutton and a Cancel button. If you attach a Done-typecallback to the Done button and a Cancel-type callbackto the Cancel button, you could use the same codefunction in both and just look at the reason code todetermine which button the user selected.
November 2, 2006 Chapter 7 � Editing Resources and Callbacks in PhAB 237
Hotkey callbacks 2006, QNX Software Systems GmbH & Co. KG.
Hotkey—(Hotkey callbacks only)
The keyboard key and modifier (such asAlt or Ctrl) thattrigger the callback. See the section “Hotkey callbacks.”
Event Mask—(event handlers only)
Lets you specify which Photon events the widget issensitive to. See “Event handlers — raw and filtercallbacks.”
Callback functions are stored in stub filesWhen you specify a callback function, PhAB generates a stubfunction; for information on specifying the language (C or C++) andthe filename, see “Function names and filenames” in the Workingwith Code chapter.
Hotkey callbacksWidgets supporthotkey callbacks. These callbacks let you attachkeyboard keys to specific callback functions. When the applicationwindow gets focus, the hotkeys become active. Pressing one invokesthe appropriate hotkey link callback.
Hotkeys — the basicsHere’s some basic information about hotkeys:
� Hotkeys are a combination of a character key and a modifier key(Alt, Shift or Ctrl). Most of the time,Alt is used for hotkeys.
� You can use a modifier on its own as a hotkey, but it’s probably nota good idea.
� A hotkey isn’t invoked if any ancestor of the widget that owns it isblocked.
� A hotkey is processedafter the widgets have been given the keyevent. If a widget consumes the event, no hotkey callback is called.So when a text field has focus, theEnter key, arrow keys,Space,
238 Chapter 7 � Editing Resources and Callbacks in PhAB November 2, 2006
2006, QNX Software Systems GmbH & Co. KG. Hotkey callbacks
and all displayable characters won’t work as hotkeys because thewidget consumes those events. This is usually the desired behavior(consider editing in an application which has hotkeys defined forall the arrow keys).
You can force the hotkey processing to be done first by settingPt HOTKEYS FIRSTin thePt ARG CONTAINERFLAGSresourceof the container widget (window, pane,. . . ) that contains thewidgets that would normally consume your would-be hotkeyevents. Setting this flag on the window guarantees all hotkeyprocessing is done before any widgets get the key event. For moreinformation, see “Processing hotkeys,” below.
� Widgetsmustbe selectable for their hotkeys to be active (with theexception of disjoint widgets such as windows and menus). Makesure the widget’sPt ARG FLAGShasPt SELECTABLEandPt GETSFOCUSset.
If the widget isn’t normally selectable and you don’t want itsappearance to change when selected, you’ll also want to set thePt SELECTNOREDRAWwidget flag.
� Often it doesn’t matter which widget a callback is connected to. Inthose cases, just attach the hotkey to the window.
Specifying the hotkey labelSetting up a hotkey isn’t enough—you need to tell your user about it!You should display a hotkey label in the widget invoked by thehotkey:
� For most widgets, edit the Accelerator Key (Pt ARG ACCEL KEY) resource. Specify the character in thewidget’s label that you want underlined. You can’t include anymodifier keys in the label.
� For menu items, the underlined character is the shortcut that youcan use to select an item when the menu’s displayed. The hotkeylabel is displayed separately, to the right of the menu item’s label.Specify the hotkey (including the modifier keys) in the menueditor’s Accel Text field.
November 2, 2006 Chapter 7 � Editing Resources and Callbacks in PhAB 239
Hotkey callbacks 2006, QNX Software Systems GmbH & Co. KG.
Specifying the callbackIn PhAB, each widget’s callback list displays an entry called“Hotkey” or Pt CB HOTKEYthat you use to define hotkeys. Beforeyou define the hotkey, you need to determinewhereto do so. Whereyou define the hotkey callback depends on:
� where you want a module (such as a menu) to appear
� what widget you need in the callback function
� where the user is going to type the hotkey.
Where you want a module to appear
When you define the hotkey, you can specify where the module is toappear. For example, if the hotkey is meant to display the menumodule associated with aPtMenuButton widget in your window’sPtMenuBar, define the hotkey in the menu button. Use the Locationdialog to have the menu appear under the menu button. For moreinformation, see “Positioning a module” in the Working withModules chapter.
What widget you need in the callback function
The widget that owns the callback is the one passed to the callbackfunction.
Where the user is going to type the hotkey
For example, if the hotkey is an accelerator for a menu item, add thehotkey to the window in which the menu is used, not to the menumodule.
240 Chapter 7 � Editing Resources and Callbacks in PhAB November 2, 2006

2006, QNX Software Systems GmbH & Co. KG. Hotkey callbacks
� The hotkeys in a given module should be unique. If you define thesame hotkey more than once, the last one is used.
� If you’re developing a multilingual application, you’ll need tochoose hotkeys carefully so they’ll be relevant in each language, oryou’ll need a different set of hotkeys for each language. See theInternational Language Support chapter for more information.
☞
When you select thePt CB HOTKEYcallback, the callback editorpops up with a Hotkey field in the link-information area:
Hotkey field in the callback editor.
You must fill in the Hotkey field when creating a hotkey callback.There are two ways to set up the hotkey: one easy, the other not soeasy.
� the not-so-easy way—you can type the hotkey value, in hex, inthe Hotkey field. To find the value for the keycap you want to use,see the header file<photon/PkKeyDef.h>, and search for thename of the keycap, prefixed byPk .
Use lowercase letters for hotkeys; uppercase letters won’t work. Forexample, for a hotkeyAlt – F, look up the hex value forPk f, notPk F.
☞
The field also has 3 toggle buttons—Ctrl, Shift, and Alt—to letyou specify modifiers for the hotkey value.
November 2, 2006 Chapter 7 � Editing Resources and Callbacks in PhAB 241

Hotkey callbacks 2006, QNX Software Systems GmbH & Co. KG.
� the easy way—press the button to the right of the Alt togglebutton, then press the keychord you want to use for the hotkey.PhAB automatically determines the key and modifiers you pressed.
Processing hotkeysHere’s how a hotkey works:
� When a key event arrives at a window, the window passes theevent to its child widgets.
� If a child consumes the event, nothing further happens.
� Otherwise, the event is checked against the window’s list ofhotkeys. If the hotkey is found, its callback is invoked.
� If the hotkey isn’t found, the parent window’s hotkey list issearched, and so on up the hierarchy of windows.
ThePt ARG CONTAINERFLAGSresource of container-classwidgets includes some flags that affect the processing of hotkeys:
Pt HOTKEY TERMINATOR
Prevent the hotkey search from going up to the parent container.
ThePt HOTKEY TERMINATOR flag works only if it’s set in adisjoint container-class widget.
Pt HOTKEYS FIRST
Process key events that reach this container as hotkeys beforepassing them to the container’s children. If the event is a hotkey,it’s consumed, so it isn’t passed to the children.
Disabling hotkeysGiving the user a visual indication that a hotkey is disabled isdifferent from actually disabling the hotkey.
To give the visual indication, use the technique appropriate to thewidget:
242 Chapter 7 � Editing Resources and Callbacks in PhAB November 2, 2006

2006, QNX Software Systems GmbH & Co. KG. Hotkey callbacks
� If the hotkey is associated with a button, set thePt GHOSTflag andremove thePt SELECTABLEandPt GETS FOCUSflags in thebutton’sPt ARG FLAGSresource.
� If the hotkey is associated with a menu item created in PhAB, callApModifyItemState().
� ...
To disable the hotkey, use one of the following techniques:
� Don’t disable the hotkey. Instead, as the first thing you do in yourhotkey’s callback code, check to see if anything should be done. Ifnot, just return from the callback. For example, if the hotkeycallback is the one for pasting text, check to see if there’s anythingto paste. If there isn’t, simply return.
Or
� With the exception of disjoint widgets, if the widget that thehotkey callback is attached to isn’t selectable, the hotkey is treatedas if it didn’t exist. For a widget to be selectable, thePt SELECTABLEflag must be set in thePt ARG FLAGSresource.
One good reason for this approach is that it works even if yourapplication has the same hotkey defined in more than one window.For example, we might have an Edit menu in the base window andan Erase button in a child window, both withAlt – E as a hotkey. Ifthe child window currently has focus and the user pressesAlt – E,the child window’s Erase button callback is called.
Now, if we disable the Erase button in the child window, we wouldwantAlt – E to cause the base window’s Edit menu to appear. Inthis scenario, as long as the Erase button is selectable, its callbackwould be called. So we simply make the Erase button unselectable.Now when the user pressesAlt – E, the base window’s Edit menuappears, even though the child window still has focus.
Or
� You could callPtRemoveHotkeyHandler()to remove the hotkeyand later callPtAddHotkeyHandler()to enable it again.
November 2, 2006 Chapter 7 � Editing Resources and Callbacks in PhAB 243

Event handlers — raw and filter callbacks 2006, QNX Software Systems GmbH & Co. KG.
Event handlers — raw and filter callbacksEvent handlerslet you respond directly to Photon events. You canattach event handlers to any widget; they’re like other widgetcallbacks, but with the addition of an event mask. Using this mask,you can choose which events your callbacks receive.
You’ll find them particularly useful for getting thePh EV DRAGevents for a particular window. For more information on dragging, see“ Dragging” in the Events chapter.
PtWidget defines the following event-handler resources:
Pt CB FILTER
Invokedbeforethe event is passed to the widget.
Pt CB RAW Invoked after the widget has processed the event(even if the widget consumes the event).
For a description of raw and filter event handlers and how they’reused, see “Event handlers — raw and filter callbacks” in the Eventschapter.
For information on adding event handlers in application code, see“Event handlers” in the Managing Widgets in Application Codechapter.
☞
To attach a raw or filter callback:
1 Select the widget, then switch to the Callbacks control panel, ifnecessary.
2 Click on thePt CB RAW(Raw Event) orPt CB FILTER(Filter) resource to open the callback editor.
3 The editor pops up with an Event Mask field in the linkinformation area:
244 Chapter 7 � Editing Resources and Callbacks in PhAB November 2, 2006

2006, QNX Software Systems GmbH & Co. KG. Event handlers — raw and filter callbacks
Event Mask field in the callback editor.
The Event Mask field lets you specify which Photon events youwant the widget to be sensitive to. When any of those low-levelevents occur, the widget invokes the callback.
Click on the icon next to this field to open the event selector:
Event selector.
4 Select the events you want the widget to be sensitive to, thenclose the selector.
For more info, see the event types described for thePhEvent t
structure in the PhotonLibrary Reference.
November 2, 2006 Chapter 7 � Editing Resources and Callbacks in PhAB 245

Chapter 8
Geometry Management
In this chapter. . .Container widgets 249Geometry negotiation 249Absolute positioning 255Aligning widgets using groups 256Constraint management using anchors262Using layouts 267Enforcing position or size constraints without anchors or layouts
295
November 2, 2006 Chapter 8 � Geometry Management 247


2006, QNX Software Systems GmbH & Co. KG. Container widgets
This chapter discusses how to set up or fine-tune your widgets’geometry.
Container widgetsA containerwidget is a child of thePtContainer widget class.Container widgets are the only widgets that can have children. Anywidget that doesn’t have a window of its own is always renderedwithin the boundaries of its parent. Only widgets belonging to asubclass of thePtWindow widget class get a window of their own.
Container widgets are responsible for performing geometrymanagement. A container widget’s primary responsibility is toposition each child and size itself appropriately to accommodate allits children at their desired locations. The container may also imposesize constraints on its children (for example, forcing them all to be thesame size). The container must also constrain the children so that theydon’t appear outside the container’s boundaries. This is normallydone by clipping the child.
To understand how different containers handle geometrymanagement, it’s important to understand thegeometryof a widget.See “Widget Geometry” in the Introduction to this guide.
Geometry negotiationWhen a widget is realized, a geometry negotiation process is initiatedin all the widgets in the widget family hierarchy. Each child of thewidget is given the opportunity to calculate its size. This ripples downthrough all the widgets in the family, resulting in a calculation of thesize of each of the descendants first.
Once each child has calculated its desired size, the parent widget mayattempt to determine the layout for its children. The layout that thewidget performs depends on:
� the widget’s layout policy
� any size that has been set for the widget
November 2, 2006 Chapter 8 � Geometry Management 249

Geometry negotiation 2006, QNX Software Systems GmbH & Co. KG.
� the dimensions and desired position of each of the children.
If the application has specified a size for the widget, then it maychoose to lay out the children using only that available space. This isinfluenced by the resize policy set for the widget. ThePt ARG RESIZEFLAGSresource is a set of flags that determine theresizing policy for the widget. The flags specify a separate resizingpolicy for the width and height of the widget. If no policy is specifiedfor either dimension, the widget doesn’t attempt to resize itself in thatdimension when performing the layout. Any other resize policyallows the widget to grow in that dimension to accommodate itschildren. For more details, see “Resize policy,” below.
If the widget doesn’t have a predetermined size, it tries to size itself toaccommodate all the children using the appropriate layout policy. Itdoes so by first attempting to determine a correct layout and thendetermining the space required to accommodate it.
The layout process determines the desired location of each child. Thelayout policy used by the widget controls how the layout attempts toposition the children relative to each other. It must take into accountthe dimensions of the children. The container is responsible for fixingthe position of each child, so the layout policy may choose whether ornot to take into account the position attributes of the children.
In performing the layout, the widget may also take the resize policyinto account. Based on this policy, it determines whether it mustadjust its width or height, or change the layout to account for spacerestrictions. The widget tries to choose a layout that best meets theconstraints imposed by any size restrictions and by the layout policy.
After determining the desired position of each of its children, thewidget calculates the width and height it needs to accommodate thechildren at these locations. It changes its dimensions, if necessary, tofit each of the children at the desired position. If this isn’t possiblebecause the resize policy doesn’t allow it, the widget recalculates thepositions to fit the children within the space available.
250 Chapter 8 � Geometry Management November 2, 2006

2006, QNX Software Systems GmbH & Co. KG. Geometry negotiation
Once the layout is successfully established, the widget sets theposition of each of the children by altering the child’s positionattribute.
Resize policyAny change to a widget that may affect the amount of space requiredto display its contents can result in the widget’s resizing itself to fit itscontents. This is governed by the resize policy enforced by the widget.
The resize policy affects both basic widgets and containers. Acontainer checks its resize policy when it lays out its children todetermine whether it should resize itself to accommodate all thechildren at their desired locations. Through the geometry negotiationprocess, this effect is propagated up the widget family until the size ofthe window widget is determined.
ThePt ARG RESIZEFLAGSresource controls the resize policy. Thisresource consists of a separate set of flags for the width and theheight. The values of the flags determine the conditions under whichthe widget recalculates the corresponding dimension. The values arechecked whenever the widget is realized or its contents change.
If the resize policy conflicts with the anchors, thePt ARG RESIZEFLAGSoverridePt ARG ANCHOROFFSETSandPt ARG ANCHORFLAGS.
☞
The resize flags are as follows:
Pt RESIZEX ALWAYS
Recalculates the widget’s size whenever the value of thexdimension changes. The widget grows or shrinks horizontallyas its contents change.
For example, the following figure shows a button with thePt RESIZEX ALWAYS flag set as the label changes fromHelloto Hello, world to Hi:
November 2, 2006 Chapter 8 � Geometry Management 251

Geometry negotiation 2006, QNX Software Systems GmbH & Co. KG.
Pt RESIZEY ALWAYS
Recalculates the widget’s size whenever the value of theydimension changes. The widget grows or shrinks vertically asits contents change.
Pt RESIZEXY ALWAYS
Recalculates the widget’s size whenever the value of thex or ydimension changes. The widget grows or shrinks in bothdirections as its contents change.
ThePt RESIZE XY ALWAYS flag isn’t defined in PhAB. It’s providedfor your convenience when setting resize flags from your code.
☞
Pt RESIZEX AS REQUIRED
Recalculates the widget’s size whenever thex dimensionchangesandno longer fits within the current space available.
For example, the following figure shows a button with thePt RESIZEX AS REQUIREDflag set as the label changes fromHello to Hello, world to Hi.
Pt RESIZEY AS REQUIRED
Recalculates the widget’s size whenever they dimensionchangesandno longer fits within the current space available.
Pt RESIZEXY AS REQUIRED
Recalculates the widget’s size whenever thex or y dimensionchangesandno longer fits within the current space available.
252 Chapter 8 � Geometry Management November 2, 2006

2006, QNX Software Systems GmbH & Co. KG. Geometry negotiation
ThePt RESIZE XY AS REQUIREDflag isn’t defined in PhAB. It’sprovided for your convenience when setting resize flags from yourcode.
☞
These flags may also be modified by the values of another set of flags,namely:
� Pt RESIZEX INITIAL
� Pt RESIZEY INITIAL
� Pt RESIZEXY INITIAL
ThePt RESIZE XY INITIAL flag isn’t defined in PhAB. It’s providedfor your convenience when setting resize flags from your code.
☞
If you set any of these “initial” flags, the widget doesn’t resize inresponse to a change in the data — it changes its size only during thegeometry negotiation processwhenever it’s realized. The widgeteither makes itself exactly the right size for its contents, or grows to fitits contents if the dimensions it has at the time aren’t large enough.
If none of the resize flags is set, the widget doesn’t try to calculate itsown dimensions, but uses whatever dimensions have been set by theapplication (thereby possibly clipping the widget’s contents as aresult).
For example, the following figure shows a button with no resize flagsset as the label changes fromHello to Hello, world to Hi.
☞
November 2, 2006 Chapter 8 � Geometry Management 253

Geometry negotiation 2006, QNX Software Systems GmbH & Co. KG.
Setting the resize policy in PhAB
You can set these flags in PhAB by editing the container’s resize flags,Pt ARG RESIZEFLAGS, as shown below:
Setting the resize policy in your application’s code
You can also set the container’s resize flags in your code, if required,using the method described in the Manipulating Resources inApplication Code chapter.
Bit masks are provided for controlling which bits are set. There’s onebit mask for each of the x and y resize policies:
� Pt RESIZEX BITS
� Pt RESIZEY BITS
254 Chapter 8 � Geometry Management November 2, 2006
2006, QNX Software Systems GmbH & Co. KG. Absolute positioning
� Pt RESIZEXY BITS
For example, to make a container grow to fit all its children if it isn’tlarge enough when it’s realized, set both theinitial andrequiredresizeflags forx andy:
PtSetResource (ABW my container, Pt ARG RESIZE FLAGS,(Pt RESIZE XY INITIAL|Pt RESIZE XY AS REQUIRED),Pt RESIZE X BITS|Pt RESIZE Y BITS);
To set up the argument list to clear the x resize policy:
PtSetResource (ABW my container, Pt ARG RESIZE FLAGS,Pt FALSE, Pt RESIZE X BITS);
There are also some constants that simplify the setting of these flags.For example, there’s a constant representing the bitmask for settingboth the x and y flags simultaneously, and there are constants for eachflag with the x or y shift applied. All these constants are defined in the<photon/PtWidget.h> header file.
Absolute positioningThe most basic form of layout a container can provide is to positionits children without imposing any size or positioning constraints onthem. In such a situation, a child widget is pinned to a particularlocation within the container, and the container doesn’t change itssize.
A widget employing this layout policy is somewhat analogous to abulletin board. You can pin items to the bulletin board, and they staywherever they’re pinned. All container widgets can perform absolutepositioning.
The easiest way to position and size each child is to use the mouse inPhAB.
To position each of the children from your application’s code, youmust set thePt ARG POSresource for each child. If the widgets mustbe a consistent or predetermined size, you must also set thePt ARG DIM resource for each child. The position you specify is
November 2, 2006 Chapter 8 � Geometry Management 255

Aligning widgets using groups 2006, QNX Software Systems GmbH & Co. KG.
relative to the upper left corner of the parent’s canvas, so you candisregard the parent’s margins when positioning children.
By default, all widgets that perform absolute positioning use a resizepolicy of Pt AS REQUIREDandPt INITIAL . In other words, thecontainer’s initial size is chosen when it’s realized. The container ismade large enough to fit all the children at their specified locations,given their size after they’ve been realized.
The simplest way to do absolute positioning is to place and positionwidgets within the mainPtWindow widget of the application. If youneed to create a container widget that does absolute positioning aspart of another container, you can use aPtContainer widget.
Aligning widgets using groupsPtGroup widgets are container-class widgets that can manage thegeometry of their children. You’ll find them useful for aligningwidgets horizontally, vertically, or in a matrix. They also have theunique ability to stretch child widgets.
PhAB extends the usefulness of this widget class by turning it into anaction-oriented “Group” command. Using this command, you canselect several widgets within a module and group them together toform a single group widget. If you try to select any widget in thegroup by clicking on it, the entire group is selected instead.
When you select a group, the Resources control panel shows theresources available to thePtGroup widget class. These includeresources that allow you to align the widgets inside the group and toset up exclusive-selection behavior.
ThePtGroup widget can be used to arrange a number of widgets in arow, column, or matrix. Several resources are used to control this, andthey’re interpreted slightly differently depending on the desiredarrangement of the children.
256 Chapter 8 � Geometry Management November 2, 2006
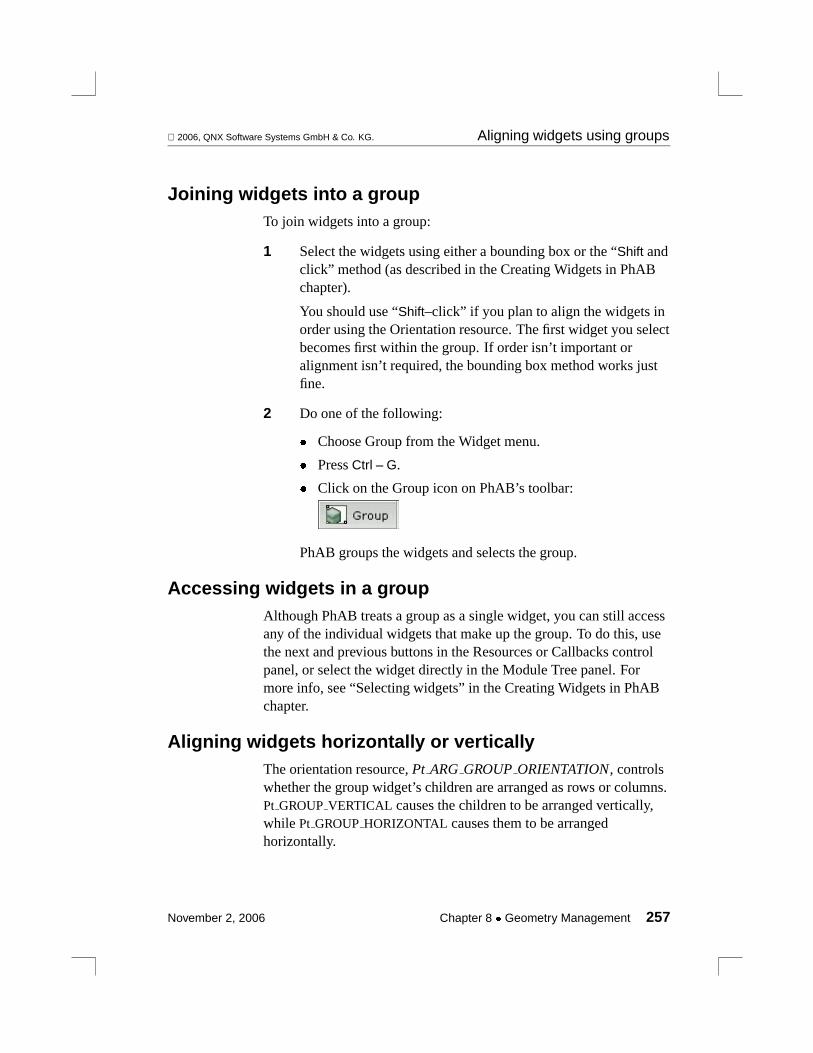
2006, QNX Software Systems GmbH & Co. KG. Aligning widgets using groups
Joining widgets into a groupTo join widgets into a group:
1 Select the widgets using either a bounding box or the “Shift andclick” method (as described in the Creating Widgets in PhABchapter).
You should use “Shift–click” if you plan to align the widgets inorder using the Orientation resource. The first widget you selectbecomes first within the group. If order isn’t important oralignment isn’t required, the bounding box method works justfine.
2 Do one of the following:
� Choose Group from the Widget menu.
� PressCtrl – G.
� Click on the Group icon on PhAB’s toolbar:
PhAB groups the widgets and selects the group.
Accessing widgets in a groupAlthough PhAB treats a group as a single widget, you can still accessany of the individual widgets that make up the group. To do this, usethe next and previous buttons in the Resources or Callbacks controlpanel, or select the widget directly in the Module Tree panel. Formore info, see “Selecting widgets” in the Creating Widgets in PhABchapter.
Aligning widgets horizontally or verticallyThe orientation resource,Pt ARG GROUPORIENTATION, controlswhether the group widget’s children are arranged as rows or columns.Pt GROUPVERTICAL causes the children to be arranged vertically,while Pt GROUPHORIZONTAL causes them to be arrangedhorizontally.
November 2, 2006 Chapter 8 � Geometry Management 257

Aligning widgets using groups 2006, QNX Software Systems GmbH & Co. KG.
You can control the amount of space to be left between the widgetsarranged in the group widget by using thePt ARG GROUPSPACINGresource. The value of the resource givesthe number of pixels to be left between widgets.
The following example shows how several children are laid out if thegroup uses vertical orientation with a space of five pixels betweenchildren:
If the orientation is changed to horizontal, the group appears like this:
When first realized, the group widget initially sizes itself to be largeenough to hold all the children after they’ve been arranged.
Aligning widgets in rows and columnsThe group widget may also be used to layout children in both rowsand columns for creating tables or spreadsheets by setting the value ofPt ARG GROUPROWSCOLSresource to some value other thanone.
The interpretation of this resource depends on the orientation:
� When the orientation is vertical, this resource specifies the numberof rows to be displayed; the number of columns is calculated basedon the number of widgets to yield the correct number of rows.
258 Chapter 8 � Geometry Management November 2, 2006

2006, QNX Software Systems GmbH & Co. KG. Aligning widgets using groups
� Otherwise, the value specifies the number of columns, and thewidget calculates the number of rows.
The last row or column may have fewer widgets than the others.
When the elements of a group are laid out in rows and columns, thewidgets themselves may either be tightly packed or they may bespaced out equally as rows and/or columns. This is controlled by thePt ARG GROUPSPACINGresource.
Using the Group flagsThePtGroup widget includes a set of flags,Pt ARG GROUPFLAGS, that can be used to control how the childwidgets can be selected, sized, and stretched:
Pt GROUPEXCLUSIVE
Allow only one child to be set at a time. This flag can be used tomake a group of toggle buttons into radio buttons (that is, a setof mutually exclusive choices).
Pt GROUPEQUAL SIZE
Lay out the widgets in a grid, using a cell size chosen by thegroup based on the width of the widest child and the height ofthe tallest child. The dimensions of all the children are set tothis size when they’re laid out.
November 2, 2006 Chapter 8 � Geometry Management 259

Aligning widgets using groups 2006, QNX Software Systems GmbH & Co. KG.
Pt GROUPEQUAL SIZE HORIZONTAL
Make all the children the width of the widest one.
Pt GROUPEQUAL SIZE VERTICAL
Make all the children the height of the tallest one.
Pt GROUPNO SELECT ALLOWED
Set this flag for an exclusive group if it’s valid not to have anychild set. The user can unselect the currently set child byclicking on it again.
Pt GROUPNO KEYS
Don’t allow the user to move inside the group by pressing thearrow keys.
Pt GROUPNO KEY WRAP HORIZONTAL
Don’t wrap around to the other side of the group when using theleft and right arrow keys.
Pt GROUPNO KEY WRAP VERTICAL
Don’t wrap around to the top or bottom of the group whenusing the up and down arrow keys.
Pt GROUPSTRETCHVERTICAL
Stretch the bottom row of widgets as the group expands.
Pt GROUPSTRETCHHORIZONTAL
Stretch the right column of widgets as the group expands.
260 Chapter 8 � Geometry Management November 2, 2006
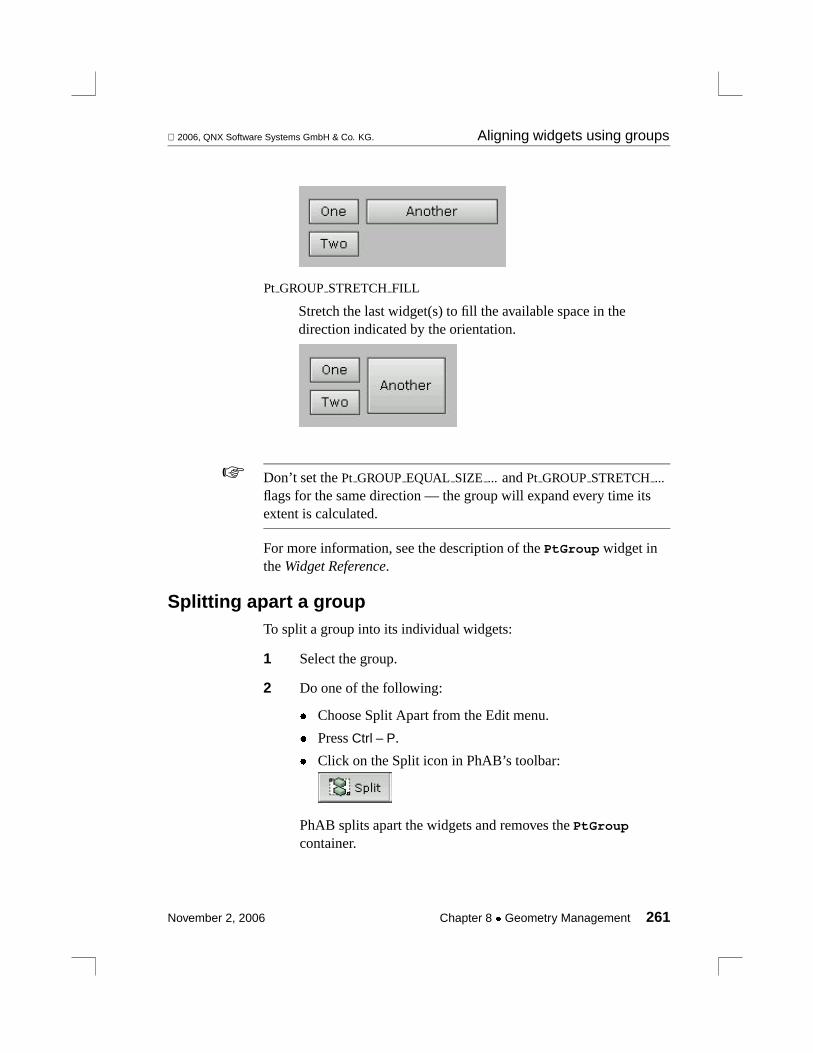
2006, QNX Software Systems GmbH & Co. KG. Aligning widgets using groups
Pt GROUPSTRETCHFILL
Stretch the last widget(s) to fill the available space in thedirection indicated by the orientation.
Don’t set thePt GROUPEQUAL SIZE ... andPt GROUPSTRETCH...flags for the same direction — the group will expand every time itsextent is calculated.
☞
For more information, see the description of thePtGroup widget intheWidget Reference.
Splitting apart a groupTo split a group into its individual widgets:
1 Select the group.
2 Do one of the following:
� Choose Split Apart from the Edit menu.
� PressCtrl – P.
� Click on the Split icon in PhAB’s toolbar:
PhAB splits apart the widgets and removes thePtGroup
container.
November 2, 2006 Chapter 8 � Geometry Management 261

Constraint management using anchors 2006, QNX Software Systems GmbH & Co. KG.
Constraint management using anchorsHere’s a common layout situation that’s not handled by any of thelayout policies we’ve examined. Suppose a container is divided into anumber of panes that have constraints on their size and position.Normally, we don’t want the panes to overlap, and we want controlover how the panes are resized if the container itself grows or shrinks.A constraint mechanism provides this control.
Anchorsare provided as a constraint mechanism on the position andsize of any widget used within any container. The position attributeand the anchors of each of the children are always used to determinetheir positions.
In the current version of the Photon microGUI, widgets are anchoredimmediately upon creation. In earlier versions, anchoring is donewhen the widgets are realized.
☞
An anchor may be specified for any side of a child widget. Theanchor is attached to one of the sides of the parent. It maintains thecorresponding side of the child at a fixed distance, theanchor offsetfrom the anchoring side of the parent. The anchor offset may also beexpressed as a proportion of the canvas width or height of the parent.
It’s possible — but not always desirable — to anchor a widget’s edgesbeyond its parent’s canvas.
Any time the parent is resized, the child’s position (and possibly size)is altered to maintain this relationship. If any side of the child is notanchored to the parent, it’s allowed to float freely. If you explicitly setthe size and/or position of an anchored widget, its anchor offsets arerecalculated automatically.
262 Chapter 8 � Geometry Management November 2, 2006
2006, QNX Software Systems GmbH & Co. KG. Constraint management using anchors
When using PhAB, you don’t specify anchor offsets. Instead youposition the widgets at the desired offset by setting the position(Pt ARG POS) and dimension (Pt ARG DIM) resources. PhABcalculates the anchor offsets automatically, based on the relative sizesand positions of the parent and the anchored child.
You can turn anchoring on or off using theAnchoring on/off buttonon the PhAB toolbar. If a parent widget has children that areanchored, and you want to change the size of the parent widgetwithout affecting size of the children, turn anchoring off.
☞
The width of the child widget is influenced by the anchors for its leftand right sides; the height is influenced by the anchors for the top andbottom. If either of an opposing pair of edges is allowed to float, theconstraints are met by altering only the position of the widget in thecorresponding dimension. This means that the widget may slide inany of the four directions to satisfy the anchor constraints. If bothedges are anchored, the widget must be resized in that dimension aswell.
November 2, 2006 Chapter 8 � Geometry Management 263

Constraint management using anchors 2006, QNX Software Systems GmbH & Co. KG.
Example of anchoring.
If the resize policy conflicts with the anchors, thePt ARG RESIZEFLAGSoverridePt ARG ANCHOROFFSETSandPt ARG ANCHORFLAGS.
☞
Creating an application’s main window provides a simple example ofusing anchor resources. The window commonly has at least two partsto it: the menu bar and the work area. If we consider an applicationthat has a group widget for the work area, we can identify the types ofanchors necessary to make it resize correctly in response to a changein the size of the window widget.
Each edge of the work area is anchored to the corresponding edge ofthe window. The left and top anchor offsets are set to be the same as
264 Chapter 8 � Geometry Management November 2, 2006

2006, QNX Software Systems GmbH & Co. KG. Constraint management using anchors
the position attribute for the widget. This must be calculated to sitbelow the menu bar. The dimensions of the widget are set to thedesired amount of work space.
When realized, the window positions the work area at the locationspecified by its position attribute. The window’s size is set to be largeenough to contain the work area.
If the window is resized, the width and height of the work area areresized accordingly, since all the edges are anchored. If the anchoroffsets were specified correctly, the position of the widget aren’taltered.
We don’t have to do anything for the menu bar, because it’sautomatically anchored to the top and sides of the window.
Anchor resourcesThePt ARG ANCHORFLAGSresource (defined byPtWidget)controls the anchor attachments. Within the anchor flags, there arethree flags associated with each edge of the widget; these three flagsallow each edge to be anchored in one of two possible ways:
� anchored to the corresponding edge of its parent
� anchored to the opposite edge of its parent
These flags use this naming scheme:
Pt edge ANCHORED anchor
where:
edge is the name of the edge to be anchored, and must beTOP,LEFT, RIGHT, or BOTTOM.
anchor is the name of the parentedgeit’s to be anchored to.
Thus, the following flags are defined:
� Pt LEFT ANCHORED LEFT
November 2, 2006 Chapter 8 � Geometry Management 265

Constraint management using anchors 2006, QNX Software Systems GmbH & Co. KG.
� Pt LEFT ANCHORED RIGHT
� Pt RIGHT ANCHORED LEFT
� Pt RIGHT ANCHORED RIGHT
� Pt TOP ANCHORED BOTTOM
� Pt TOP ANCHORED TOP
� Pt BOTTOM ANCHORED BOTTOM
� Pt BOTTOM ANCHORED TOP
Setting anchor flags in PhAB
To set the anchor flags, click on the anchor flags(Pt ARG ANCHORFLAGS) resource and use PhAB’s flag editor:
266 Chapter 8 � Geometry Management November 2, 2006

2006, QNX Software Systems GmbH & Co. KG. Using layouts
Setting anchor flags in your application’s code
You can also set these flags from your code, using the methoddescribed in the Manipulating Resources in Application Code chapter.For convenience, each set of flags has an associated bit mask:
� Pt LEFT IS ANCHORED— isolates the bits responsible forspecifying an anchor for theleft edge.
� Pt RIGHT IS ANCHORED— isolates the bits responsible forspecifying an anchor for theright edge.
� Pt TOP IS ANCHORED— isolates the bits responsible forspecifying an anchor for thetopedge.
� Pt BOTTOM IS ANCHORED— isolates the bits responsible forspecifying an anchor for thebottomedge.
So to set the left and right edge for our menu bar in the exampleabove, the argument list element would be initialized as follows:
PtSetArg(&arg[n], Pt ARG ANCHOR FLAGS,Pt LEFT ANCHORED LEFT|Pt RIGHT ANCHORED RIGHT|Pt TOP ANCHORED TOP,Pt LEFT IS ANCHORED|Pt RIGHT IS ANCHORED|Pt TOP IS ANCHORED);
When setting anchor flags from your application’s code, all the anchoroffsets are specified using thePt ARG ANCHOROFFSETSresource.This resource takes aPhRect t structure (see the PhotonLibraryReference) as a value. The upper left corner of the rectangle is used tospecify the anchor offset for the top and left edges of the widget, andthe lower right corner of the rectangle indicates the anchor offset forthe right and bottom edges.
Using layoutsIf you wish to maintain more complex relationships among thepositions of children relative to the container, or relative to each other,consider using layouts. Alayout is a property of container widgets
November 2, 2006 Chapter 8 � Geometry Management 267

Using layouts 2006, QNX Software Systems GmbH & Co. KG.
that sizes and organizes its children when the container or its childrenchange size.
Layouts are an alternative to the direct geometry management of thewidgets usingPt ARG POS, Pt ARG DIM , andPt ARG AREA.Instead of calculating positions and sizes of the widgets in your code,your code describes the rules of how the widgets should be laid out.This proves to be very efficient and doesn’t require additional code tohandle resize operations. Layouts usually guarantee that widgets arenot overlapping, which is an important feature for many multilingualapplications. Each type of layout has its own method of sizing andpositioning the children in its container. Each child widget can havedetailed info of how it should be sized and positioned in its parent. Ifa child is a container, it can have its own layout for its children.
These are the layout types in the Photon Widget Library:
� PtFillLayout — a simple layout that “fills” widgets into acontainer.
� PtRowLayout — a layout that organizes widgets into rows.
� PtGridLayout — a layout that organizes widgets into a grid pattern.
� PtAnchorLayout — the default layout using widget anchors.
You set layouts using resources in the container widget. You canrefine the way layouts place widgets by setting resources on the childwidgets. Below are the resources involved in using layouts.
PtContainer has these layout-related resources:
Pt ARG LAYOUT
This is a generic resource that lets you set the active layout ofthe container and optionally the layout information structure.Here’s an example of setting both for a fill layout:
PtArg t args[20];int i = 0;PtFillLayoutInfo t info;
268 Chapter 8 � Geometry Management November 2, 2006
2006, QNX Software Systems GmbH & Co. KG. Using layouts
info.type = Pt LAYOUT HORIZONTAL;info.spacing = 2;PtSetArg( &args[i++], Pt ARG LAYOUT, PtFillLayout, &info );
Pt ARG LAYOUTINFO*
This is a generic resource to specify layout info, which you canuse to set or get any of thePt ARG * LAYOUTINFO resources.
Pt CB LAYOUT
This callback is called when the layout is about to start layingout children and when it’s finished. Thecbinfo->reasonsubtypeindicates which situation called it, and is one of:
� Pt LAYOUT INIT — layout is about to start laying out
� Pt LAYOUT DONE — layout has finished laying outchildren.
You can use this callback to fine-tune the layout procedure.
Pt ARG LAYOUTTYPE
This is an alternative method of setting or getting the activelayout type and optionally the layout information structure(Pt ARG * LAYOUTINFO). Here’s an example of setting bothfor a fill layout:
PtArg t args[20];int i = 0;PtFillLayoutInfo t info;
info.type = Pt LAYOUT HORIZONTAL;info.spacing = 2;PtSetArg( &args[i++], Pt ARG LAYOUT TYPE, Pt FILL LAYOUT,
&info );
Pt ARG FILL LAYOUTINFO*
Used only to set thePtFillLayoutInfo t structure for thePtFillLayout layout type.
November 2, 2006 Chapter 8 � Geometry Management 269
Using layouts 2006, QNX Software Systems GmbH & Co. KG.
Pt ARG ROWLAYOUTINFO*
Used only to set thePtRowLayoutInfo t structure for thePtRowLayout layout type.
Pt ARG GRID LAYOUTINFO*
Used only to set thePtGridLayoutInfo t structure for thePtGridLayout layout type.
* You can set all thePt ARG * LAYOUTINFO resources at the sametime. The active layout will look for its type of info structure toperform the layout.
PtWidget has these layout-related resources:
Pt ARG LAYOUTDATA*
This is the generic method of setting/getting layout data for awidget.
Pt ARG ROWLAYOUTDATA*
Used only to set thePtRowLayoutData t structure for thePtRowLayout layout type.
Pt ARG GRID LAYOUTDATA*
Used only to set thePtGridLayoutData t structure for thePtGridLayout layout type.
Pt ARG EFLAGS
If this resource hasPt SKIP LAYOUT set, the container doesn’tapply the layout to the widget. This is useful if you havewidgets that you want to place by hand.
* You can set all thePt ARG * LAYOUTDATAresources at the sametime. The active layout of the widget’s parent will look for its type ofdata structure to perform the layout.
These are the structures used to set layout-related resources:
270 Chapter 8 � Geometry Management November 2, 2006
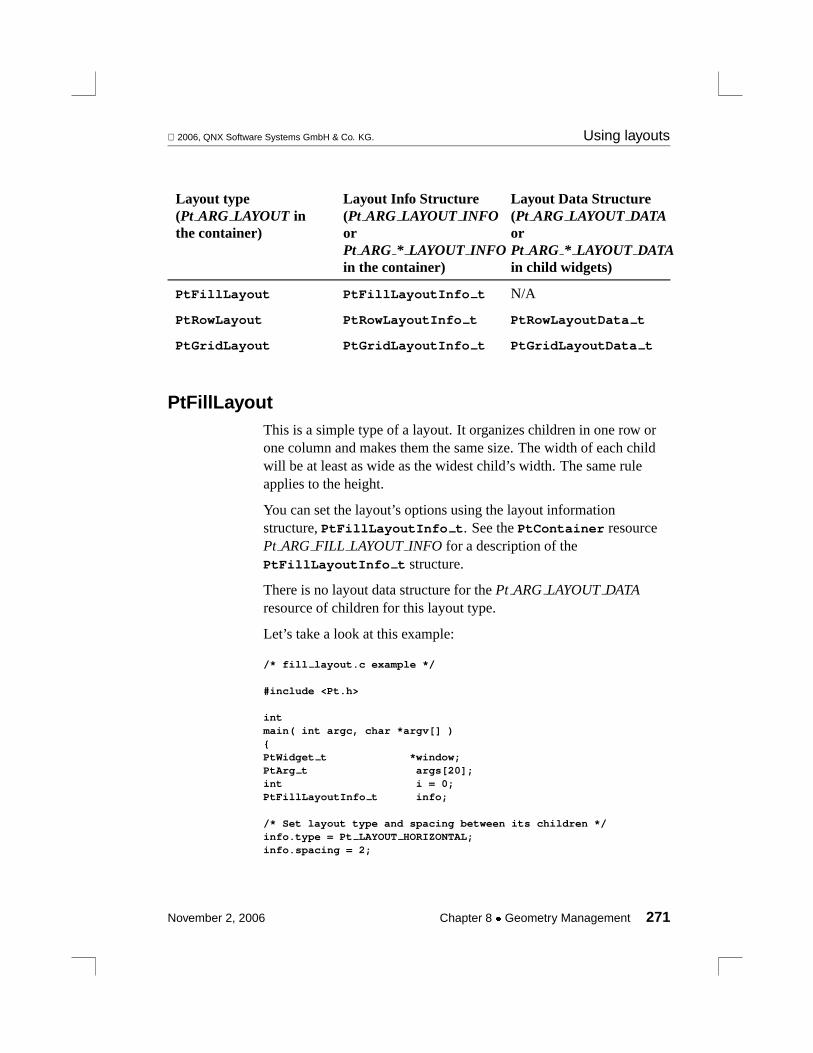
2006, QNX Software Systems GmbH & Co. KG. Using layouts
Layout type(Pt ARG LAYOUT inthe container)
Layout Info Structure(Pt ARG LAYOUT INFOorPt ARG * LAYOUT INFOin the container)
Layout Data Structure(Pt ARG LAYOUT DATAorPt ARG * LAYOUT DATAin child widgets)
PtFillLayout PtFillLayoutInfo t N/A
PtRowLayout PtRowLayoutInfo t PtRowLayoutData t
PtGridLayout PtGridLayoutInfo t PtGridLayoutData t
PtFillLayoutThis is a simple type of a layout. It organizes children in one row orone column and makes them the same size. The width of each childwill be at least as wide as the widest child’s width. The same ruleapplies to the height.
You can set the layout’s options using the layout informationstructure,PtFillLayoutInfo t. See thePtContainer resourcePt ARG FILL LAYOUTINFO for a description of thePtFillLayoutInfo t structure.
There is no layout data structure for thePt ARG LAYOUTDATAresource of children for this layout type.
Let’s take a look at this example:
/* fill layout.c example */
#include <Pt.h>
intmain( int argc, char *argv[] ){PtWidget t *window;PtArg t args[20];int i = 0;PtFillLayoutInfo t info;
/* Set layout type and spacing between its children */info.type = Pt LAYOUT HORIZONTAL;info.spacing = 2;
November 2, 2006 Chapter 8 � Geometry Management 271

Using layouts 2006, QNX Software Systems GmbH & Co. KG.
/* Create a window */i = 0;PtSetArg( &args[i++], Pt ARG WINDOW TITLE, "PtFillLayout",0 );PtSetArg( &args[i++], Pt ARG LAYOUT, PtFillLayout, &info);if( NULL == ( window = PtAppInit( NULL, &argc, argv, i,args ) ) ) {
perror( "PtAppInit()" );return 1;
}
/* Create buttons */i = 0;PtSetArg( &args[i++], Pt ARG TEXT STRING, "Input (stdin)",0 );PtCreateWidget( PtButton, window, i, args );
i = 0;PtSetArg( &args[i++], Pt ARG TEXT STRING, "Output (stdout)", 0);PtCreateWidget( PtButton, window, i, args );
i = 0;PtSetArg( &args[i++], Pt ARG TEXT STRING, "Error (stderr)", 0);PtCreateWidget( PtButton, window, i, args );
PtRealizeWidget( window );PtMainLoop();return 0;}
Build and run the application:
Fill layout initial.
272 Chapter 8 � Geometry Management November 2, 2006
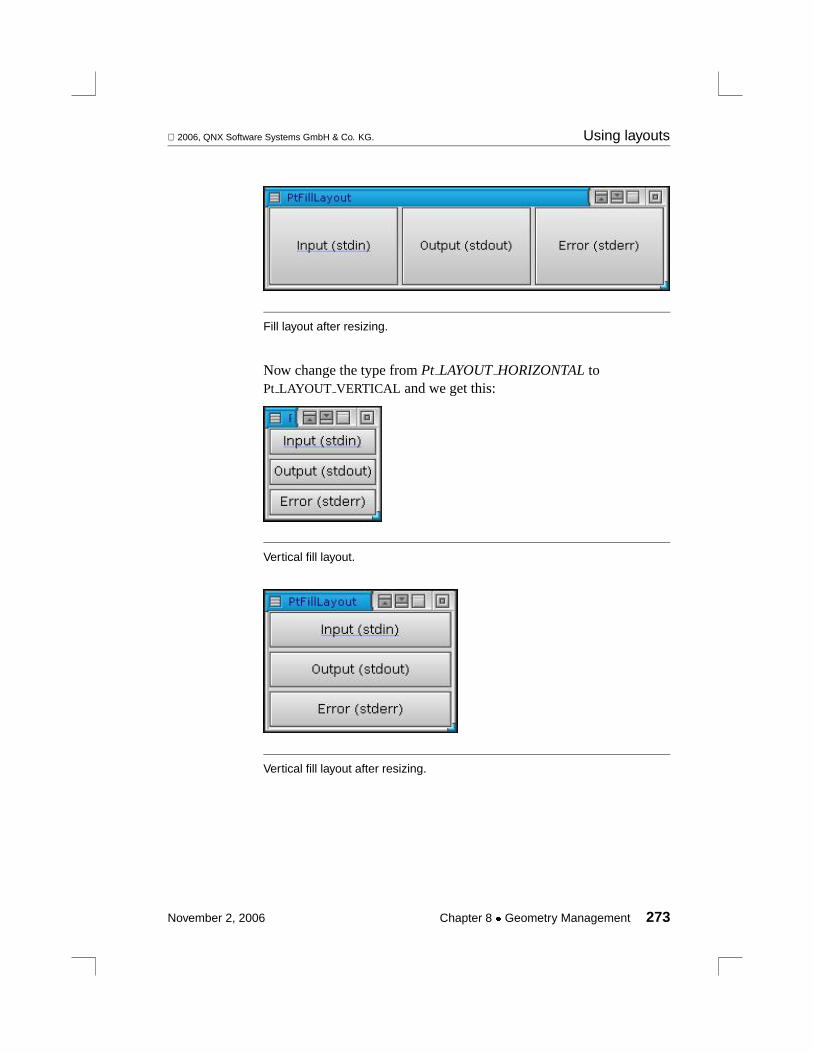
2006, QNX Software Systems GmbH & Co. KG. Using layouts
Fill layout after resizing.
Now change the type fromPt LAYOUTHORIZONTALtoPt LAYOUT VERTICAL and we get this:
Vertical fill layout.
Vertical fill layout after resizing.
November 2, 2006 Chapter 8 � Geometry Management 273

Using layouts 2006, QNX Software Systems GmbH & Co. KG.
PtRowLayoutThe row layout is similar to the fill layout but it has a very importantdifference — it can wrap, so it can place children in more than onerow or column. When theflagsmember of thePtRowLayoutInfo t
structure has thePt ROW WRAP flag set, and there is not enoughspace in the row to fit the next child, the child is moved to thebeginning of the next row. The row layout also has margins (the spacearound all the widgets) and the children of the container can havetheir own data (in theirPt ARG LAYOUTDATAresources) which canbe used to fine-tune the layout.
See thePtContainer resourcePt ARG ROWLAYOUTINFO for adescription of thePtRowLayoutInfo t structure. ThePtRowLayoutData t structure is described in thePtWidgetresourcePt ARG ROWLAYOUTDATA.
Let’s take a look at an example:
#include <Pt.h>
intmain( int argc, char *argv[] ){PtWidget t *window, *b1, *b2, *b3;PtArg t args[20];int i = 0;PtRowLayoutInfo t info;
/* Set layout type and layout info */info.type = Pt LAYOUT HORIZONTAL;info.flags = Pt ROW PACK | Pt ROW WRAP;info.margin.ul.x = 3;info.margin.ul.y = 3;info.margin.lr.x = 3;info.margin.lr.y = 3;info.h spacing = 3;info.v spacing = 3;
/* Create a window */i = 0;PtSetArg( &args[i++], Pt ARG WINDOW TITLE, "PtRowLayout",0 );PtSetArg( &args[i++], Pt ARG LAYOUT, PtRowLayout, &info);if( NULL == ( window = PtAppInit( NULL, &argc, argv, i,args ) ) ) {
274 Chapter 8 � Geometry Management November 2, 2006

2006, QNX Software Systems GmbH & Co. KG. Using layouts
perror( "PtAppInit()" );return 1;
}
/* Create buttons */i = 0;PtSetArg( &args[i++], Pt ARG TEXT STRING, "Input", 0 );b1 = PtCreateWidget( PtButton, window, i, args );
i = 0;PtSetArg( &args[i++], Pt ARG TEXT STRING, "Output (stdout)", 0);b2 = PtCreateWidget( PtButton, window, i, args );
i = 0;PtSetArg( &args[i++], Pt ARG TEXT STRING, "Err", 0 );b3 = PtCreateWidget( PtButton, window, i, args );
PtRealizeWidget( window );PtMainLoop();return 0;}
When you build and run this application, you’ll see:
Initial row layout.
Row layout after resizing.
Let’s look at what happens when we set and unset somePtRowLayoutInfo t flags.
November 2, 2006 Chapter 8 � Geometry Management 275

Using layouts 2006, QNX Software Systems GmbH & Co. KG.
When thePt ROW WRAP is not set, content is clipped to the size ofthe window. To test this case, you need to clear resize flags forPt RESIZEX BITSon the window:
Initial window without Pt ROW WRAP set.
After shrinking without Pt ROW WRAP set.
WhenPt ROW PACK is not set, all the buttons are the same size:
Initial window without Pt ROW PACK set.
After resizing without Pt ROW PACK set.
WhenPt ROW JUSTIFYis set, extra space is distributed evenlybetween the buttons:
276 Chapter 8 � Geometry Management November 2, 2006

2006, QNX Software Systems GmbH & Co. KG. Using layouts
Initial window with Pt ROW JUSTIFY set.
After resizing with Pt ROW JUSTIFY set.
Now see what happens when we set the layout type toPt LAYOUT VERTICAL:
Initial window with Pt LAYOUT VERTICAL set.
After resizing with Pt LAYOUT VERTICAL set.
November 2, 2006 Chapter 8 � Geometry Management 277
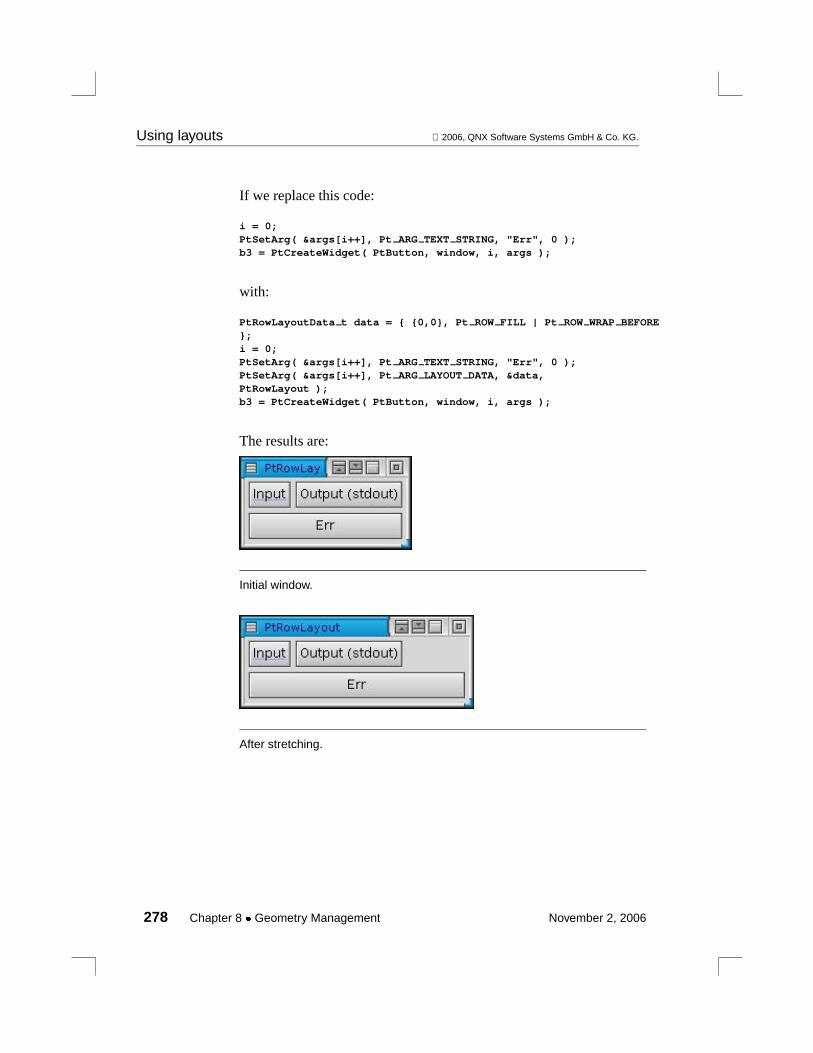
Using layouts 2006, QNX Software Systems GmbH & Co. KG.
If we replace this code:
i = 0;PtSetArg( &args[i++], Pt ARG TEXT STRING, "Err", 0 );b3 = PtCreateWidget( PtButton, window, i, args );
with:
PtRowLayoutData t data = { {0,0}, Pt ROW FILL | Pt ROW WRAP BEFORE};i = 0;PtSetArg( &args[i++], Pt ARG TEXT STRING, "Err", 0 );PtSetArg( &args[i++], Pt ARG LAYOUT DATA, &data,PtRowLayout );b3 = PtCreateWidget( PtButton, window, i, args );
The results are:
Initial window.
After stretching.
278 Chapter 8 � Geometry Management November 2, 2006

2006, QNX Software Systems GmbH & Co. KG. Using layouts
After shrinking.
What happened? TheErr button started its own row because thePt ROW WRAP BEFOREflag was set. Then theErr button wasstretched to fill all the extra space because thePt ROW FILL flag wasset.
PtGridLayoutThe Grid Layout is a very powerful and widely used layout. Thislayout arranges children in a grid, which is why it’s sometimes calleda “table layout.” The layout info structurePtGridLayoutInfo t
contains a number of members that adjust the layout operation.Children of the layout container can have layout data(PtGridLayoutData t) attached to them to fine-tune the layout.
See thePtContainer resourcePt ARG GRID LAYOUTINFO for adescription of thePtGridLayoutInfo t structure. ThePtGridLayoutData t structure is described in thePtWidgetresourcePt ARG GRID LAYOUTDATA.
Let’s look at some examples that use a grid layout:
#include <Pt.h>
intmain( int argc, char *argv[] ){PtWidget t *window;PtArg t args[20];int i = 0;PtGridLayoutInfo t info = PtGridLayoutInfoDflts;PtGridLayoutData t data = PtGridLayoutDataDflts;
November 2, 2006 Chapter 8 � Geometry Management 279

Using layouts 2006, QNX Software Systems GmbH & Co. KG.
info.n cols = 3;info.flags = 0;data.flags = Pt H ALIGN BEGINNING;
/* Create a window */i = 0;PtSetArg( &args[i++], Pt ARG WINDOW TITLE, "PtGridLayout",0 );PtSetArg( &args[i++], Pt ARG LAYOUT, PtGridLayout, &info);if( NULL == ( window = PtAppInit( NULL, &argc, argv, i,args ) ) ) {
perror( "PtAppInit()" );return 1;
}
/* Create buttons */i = 0;PtSetArg( &args[i++], Pt ARG TEXT STRING, "B1", 0 );PtSetArg( &args[i++], Pt ARG LAYOUT DATA, &data, PtGridLayout);PtCreateWidget( PtButton, window, i, args );
i = 0;PtSetArg( &args[i++], Pt ARG TEXT STRING, "Button 2 (two)", 0);PtSetArg( &args[i++], Pt ARG LAYOUT DATA, &data, PtGridLayout);PtCreateWidget( PtButton, window, i, args );
i = 0;PtSetArg( &args[i++], Pt ARG TEXT STRING, "Butt 3", 0 );PtSetArg( &args[i++], Pt ARG LAYOUT DATA, &data, PtGridLayout);PtCreateWidget( PtButton, window, i, args );
i = 0;PtSetArg( &args[i++], Pt ARG TEXT STRING, "B4", 0 );PtSetArg( &args[i++], Pt ARG LAYOUT DATA, &data, PtGridLayout);PtCreateWidget( PtButton, window, i, args );
i = 0;PtSetArg( &args[i++], Pt ARG TEXT STRING, "Butt 5", 0 );PtSetArg( &args[i++], Pt ARG LAYOUT DATA, &data, PtGridLayout);PtCreateWidget( PtButton, window, i, args );
PtRealizeWidget( window );
280 Chapter 8 � Geometry Management November 2, 2006

2006, QNX Software Systems GmbH & Co. KG. Using layouts
PtMainLoop();return 0;}
Build and run the sample, and you’ll see:
One column (n cols=1).
Two columns (n cols=2).
Three columns (n cols=3).
November 2, 2006 Chapter 8 � Geometry Management 281
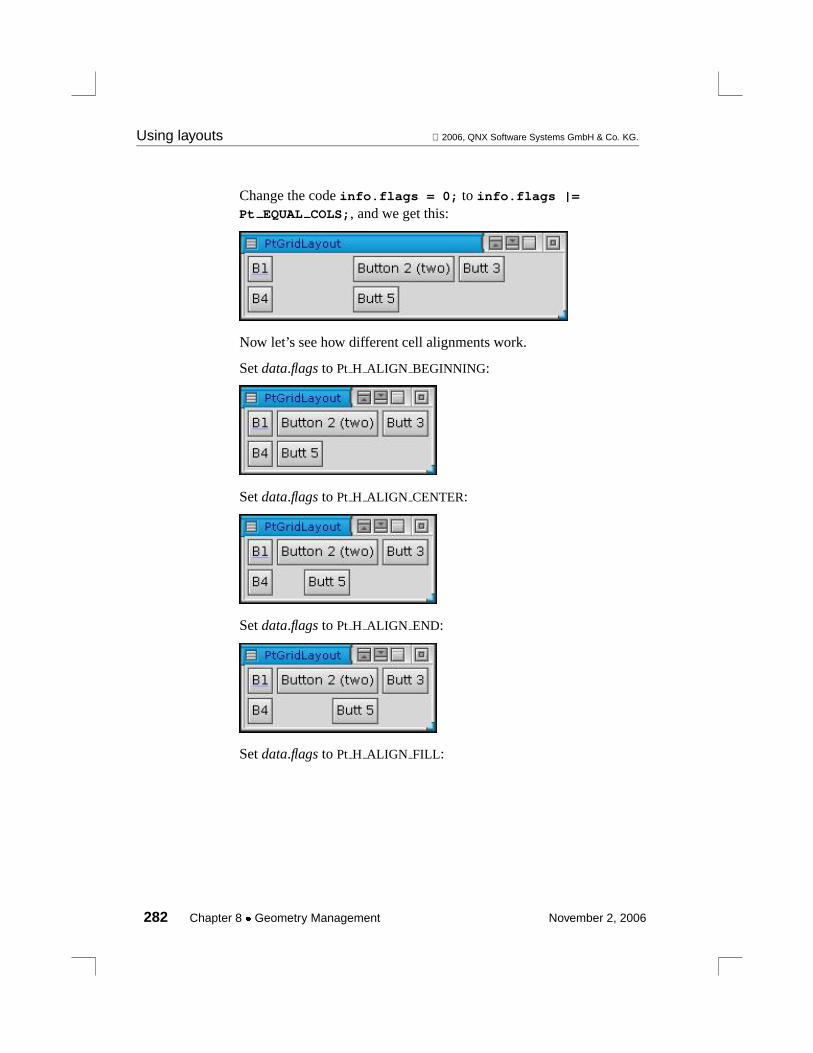
Using layouts 2006, QNX Software Systems GmbH & Co. KG.
Change the codeinfo.flags = 0; to info.flags |=
Pt EQUAL COLS;, and we get this:
Now let’s see how different cell alignments work.
Setdata.flagsto Pt H ALIGN BEGINNING:
Setdata.flagsto Pt H ALIGN CENTER:
Setdata.flagsto Pt H ALIGN END:
Setdata.flagsto Pt H ALIGN FILL:
282 Chapter 8 � Geometry Management November 2, 2006
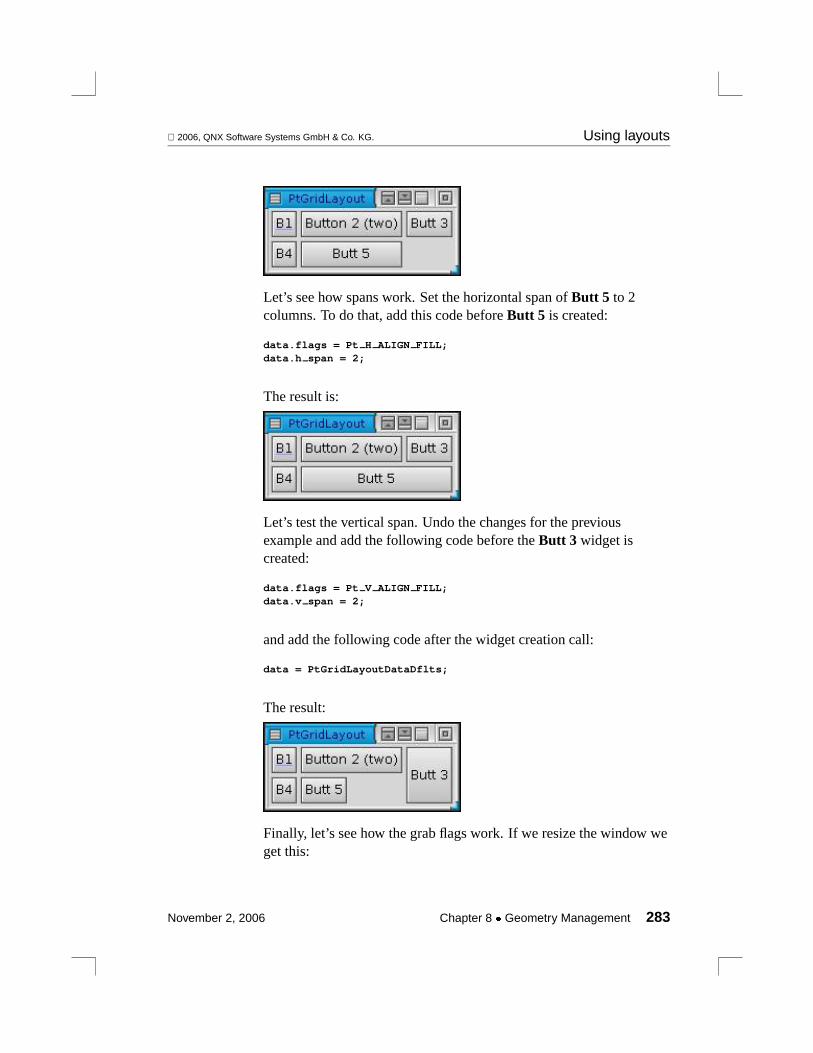
2006, QNX Software Systems GmbH & Co. KG. Using layouts
Let’s see how spans work. Set the horizontal span ofButt 5 to 2columns. To do that, add this code beforeButt 5 is created:
data.flags = Pt H ALIGN FILL;data.h span = 2;
The result is:
Let’s test the vertical span. Undo the changes for the previousexample and add the following code before theButt 3 widget iscreated:
data.flags = Pt V ALIGN FILL;data.v span = 2;
and add the following code after the widget creation call:
data = PtGridLayoutDataDflts;
The result:
Finally, let’s see how the grab flags work. If we resize the window weget this:
November 2, 2006 Chapter 8 � Geometry Management 283
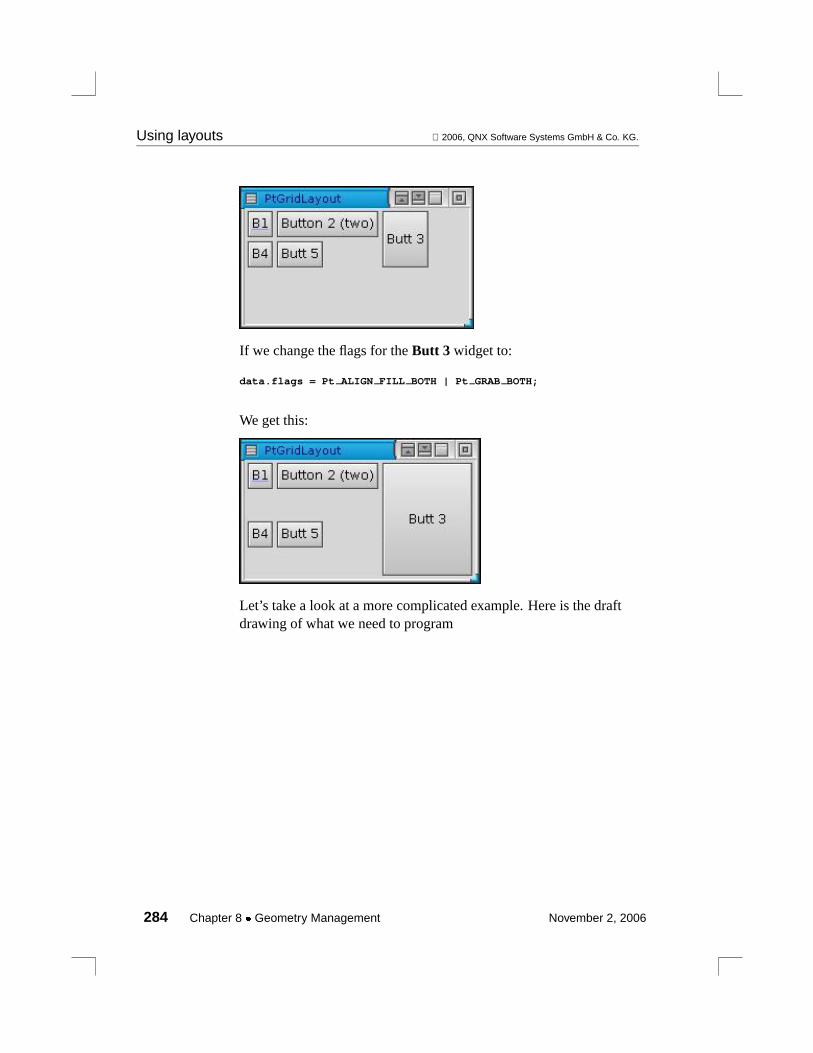
Using layouts 2006, QNX Software Systems GmbH & Co. KG.
If we change the flags for theButt 3 widget to:
data.flags = Pt ALIGN FILL BOTH | Pt GRAB BOTH;
We get this:
Let’s take a look at a more complicated example. Here is the draftdrawing of what we need to program
284 Chapter 8 � Geometry Management November 2, 2006

2006, QNX Software Systems GmbH & Co. KG. Using layouts
Module:
File:
Comment:
Type:
Target:
Icon:
Icon image area
Browse...
CPU
CPUlist
Growsdown
Margin
1 2 3
1
2
3
4
5
6
7
8
9
10
11
Add
Delete
Save
Responsible
Name:
Location:
Grows bothways
Grows tothe right
Right-aligned
Sketch of grid layout.
The code example below implements this grid-layout plan. Pleasenote that this example is for demonstration purposes only and thereare no optimizations in the code.
#include <Pt.h>
intmain( int argc, char *argv[] )
{PtWidget t *window, *w, *ctnr;
PtArg t args[20];
int i = 0;PtGridLayoutInfo t info;
PtGridLayoutData t data;
info = PtGridLayoutInfoDflts;
info.n cols = 3;
November 2, 2006 Chapter 8 � Geometry Management 285

Using layouts 2006, QNX Software Systems GmbH & Co. KG.
info.margin.ul.x = info.margin.ul.y = 5;info.margin.lr.x = info.margin.lr.y = 5;
/* Create a window */i = 0;
PtSetArg( &args[i++], Pt ARG WINDOW TITLE, "Module Config", 0 );
PtSetArg( &args[i++], Pt ARG LAYOUT, PtGridLayout, &info );if( NULL == ( window = PtAppInit( NULL, &argc, argv, i, args ) ) ) {
perror( "PtAppInit()" );return 1;
}
data = PtGridLayoutDataDflts;
data.flags = Pt H ALIGN END | Pt V ALIGN CENTER;
i = 0;PtSetArg( &args[i++], Pt ARG LAYOUT DATA, &data, PtGridLayout );
PtSetArg( &args[i++], Pt ARG TEXT STRING, "Module:", 0 );
PtCreateWidget( PtLabel, window, i, args );
data = PtGridLayoutDataDflts;
data.flags = Pt H ALIGN FILL | Pt H GRAB;data.h span = 2;
i = 0;
PtSetArg( &args[i++], Pt ARG LAYOUT DATA, &data, PtGridLayout );PtSetArg( &args[i++], Pt ARG TEXT STRING, "phlocale", 0 );
PtCreateWidget( PtText, window, i, args );
data = PtGridLayoutDataDflts;
data.flags = Pt H ALIGN END | Pt V ALIGN CENTER;i = 0;
PtSetArg( &args[i++], Pt ARG LAYOUT DATA, &data, PtGridLayout );
PtSetArg( &args[i++], Pt ARG TEXT STRING, "File:", 0 );PtCreateWidget( PtLabel, window, i, args );
data = PtGridLayoutDataDflts;data.flags = Pt H ALIGN FILL | Pt H GRAB;
i = 0;
PtSetArg( &args[i++], Pt ARG LAYOUT DATA, &data, PtGridLayout );PtSetArg( &args[i++], Pt ARG TEXT STRING, "/usr/photon/bin/phlocale", 0 );
PtCreateWidget( PtText, window, i, args );
data = PtGridLayoutDataDflts;
data.flags = Pt H ALIGN FILL | Pt V ALIGN CENTER;i = 0;
PtSetArg( &args[i++], Pt ARG LAYOUT DATA, &data, PtGridLayout );
PtSetArg( &args[i++], Pt ARG TEXT STRING, "Browse...", 0 );PtCreateWidget( PtButton, window, i, args );
data = PtGridLayoutDataDflts;data.flags = Pt H ALIGN END | Pt V ALIGN CENTER;
i = 0;
PtSetArg( &args[i++], Pt ARG LAYOUT DATA, &data, PtGridLayout );PtSetArg( &args[i++], Pt ARG TEXT STRING, "Comment:", 0 );
PtCreateWidget( PtLabel, window, i, args );
data = PtGridLayoutDataDflts;
data.flags = Pt H ALIGN FILL | Pt H GRAB;
data.h span = 2;i = 0;
PtSetArg( &args[i++], Pt ARG LAYOUT DATA, &data, PtGridLayout );
286 Chapter 8 � Geometry Management November 2, 2006

2006, QNX Software Systems GmbH & Co. KG. Using layouts
PtSetArg( &args[i++], Pt ARG TEXT STRING, "Localization utility(timezone, language, keyboard)", 0 );
PtCreateWidget( PtText, window, i, args );
data = PtGridLayoutDataDflts;
data.flags = Pt H ALIGN END | Pt V ALIGN CENTER;
i = 0;PtSetArg( &args[i++], Pt ARG LAYOUT DATA, &data, PtGridLayout );
PtSetArg( &args[i++], Pt ARG TEXT STRING, "Type:", 0 );PtCreateWidget( PtLabel, window, i, args );
data = PtGridLayoutDataDflts;data.flags = Pt H ALIGN FILL | Pt V ALIGN CENTER;
i = 0;
PtSetArg( &args[i++], Pt ARG LAYOUT DATA, &data, PtGridLayout );PtSetArg( &args[i++], Pt ARG TEXT STRING, "<module
type>", 0 );
w = PtCreateWidget( PtComboBox, window, i, args );{
const char *list[] = { "Binary", "Config", "Development", "Support" };
PtListAddItems( w, list, sizeof(list)/sizeof(list[0]), 1);
}
data = PtGridLayoutDataDflts;
data.flags = Pt H ALIGN CENTER | Pt V ALIGN CENTER;i = 0;
PtSetArg( &args[i++], Pt ARG LAYOUT DATA, &data, PtGridLayout );
PtSetArg( &args[i++], Pt ARG TEXT STRING, "CPU", 0 );PtCreateWidget( PtLabel, window, i, args );
data = PtGridLayoutDataDflts;data.flags = Pt H ALIGN END | Pt V ALIGN CENTER;
i = 0;
PtSetArg( &args[i++], Pt ARG LAYOUT DATA, &data, PtGridLayout );PtSetArg( &args[i++], Pt ARG TEXT STRING, "Target:", 0 );
PtCreateWidget( PtLabel, window, i, args );
data = PtGridLayoutDataDflts;
data.flags = Pt H ALIGN FILL | Pt V ALIGN CENTER;
i = 0;PtSetArg( &args[i++], Pt ARG LAYOUT DATA, &data, PtGridLayout );
PtSetArg( &args[i++], Pt ARG TEXT STRING, "<target>",0 );
w = PtCreateWidget( PtComboBox, window, i, args );
{const char *list[] = { "OS targets", "GUI target", "DEV target" };
PtListAddItems( w, list, sizeof(list)/sizeof(list[0]), 1 );
}
data = PtGridLayoutDataDflts;
data.flags = Pt V ALIGN FILL | Pt H ALIGN FILL;data.v span = 5;
data.hint.h = 30; // This is important to keep the list "in bounds"
PtSetArg( &args[i++], Pt ARG LAYOUT DATA, &data, 0 );w = PtCreateWidget( PtList, window, i, args );
{
const char *list[] = { "arm", "mips", "sh", "x86" };PtListAddItems( w, list, sizeof(list)/sizeof(list[0]), 1 );
}
November 2, 2006 Chapter 8 � Geometry Management 287
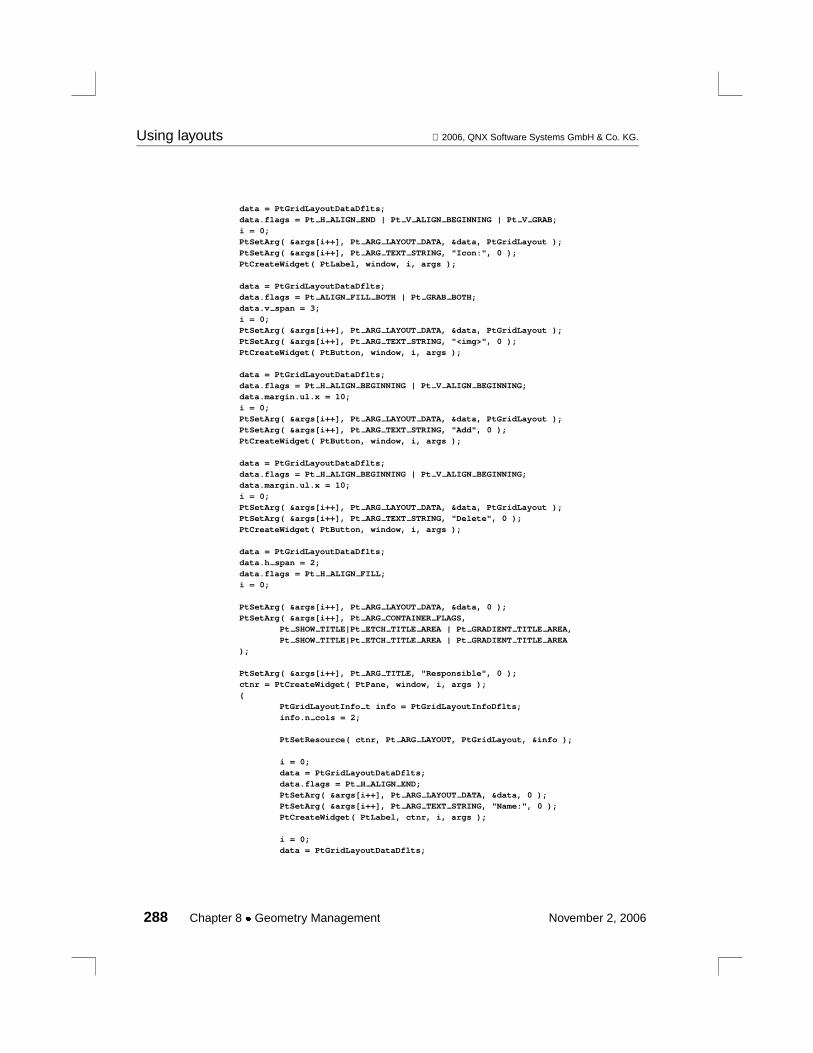
Using layouts 2006, QNX Software Systems GmbH & Co. KG.
data = PtGridLayoutDataDflts;
data.flags = Pt H ALIGN END | Pt V ALIGN BEGINNING | Pt V GRAB;
i = 0;PtSetArg( &args[i++], Pt ARG LAYOUT DATA, &data, PtGridLayout );
PtSetArg( &args[i++], Pt ARG TEXT STRING, "Icon:", 0 );
PtCreateWidget( PtLabel, window, i, args );
data = PtGridLayoutDataDflts;data.flags = Pt ALIGN FILL BOTH | Pt GRAB BOTH;
data.v span = 3;
i = 0;PtSetArg( &args[i++], Pt ARG LAYOUT DATA, &data, PtGridLayout );
PtSetArg( &args[i++], Pt ARG TEXT STRING, "<img>", 0 );
PtCreateWidget( PtButton, window, i, args );
data = PtGridLayoutDataDflts;
data.flags = Pt H ALIGN BEGINNING | Pt V ALIGN BEGINNING;data.margin.ul.x = 10;
i = 0;
PtSetArg( &args[i++], Pt ARG LAYOUT DATA, &data, PtGridLayout );PtSetArg( &args[i++], Pt ARG TEXT STRING, "Add", 0 );
PtCreateWidget( PtButton, window, i, args );
data = PtGridLayoutDataDflts;
data.flags = Pt H ALIGN BEGINNING | Pt V ALIGN BEGINNING;data.margin.ul.x = 10;
i = 0;
PtSetArg( &args[i++], Pt ARG LAYOUT DATA, &data, PtGridLayout );PtSetArg( &args[i++], Pt ARG TEXT STRING, "Delete", 0 );
PtCreateWidget( PtButton, window, i, args );
data = PtGridLayoutDataDflts;
data.h span = 2;
data.flags = Pt H ALIGN FILL;i = 0;
PtSetArg( &args[i++], Pt ARG LAYOUT DATA, &data, 0 );PtSetArg( &args[i++], Pt ARG CONTAINER FLAGS,
Pt SHOW TITLE|Pt ETCH TITLE AREA | Pt GRADIENT TITLE AREA,
Pt SHOW TITLE|Pt ETCH TITLE AREA | Pt GRADIENT TITLE AREA);
PtSetArg( &args[i++], Pt ARG TITLE, "Responsible", 0 );
ctnr = PtCreateWidget( PtPane, window, i, args );
{PtGridLayoutInfo t info = PtGridLayoutInfoDflts;
info.n cols = 2;
PtSetResource( ctnr, Pt ARG LAYOUT, PtGridLayout, &info );
i = 0;data = PtGridLayoutDataDflts;
data.flags = Pt H ALIGN END;
PtSetArg( &args[i++], Pt ARG LAYOUT DATA, &data, 0 );PtSetArg( &args[i++], Pt ARG TEXT STRING, "Name:", 0 );
PtCreateWidget( PtLabel, ctnr, i, args );
i = 0;
data = PtGridLayoutDataDflts;
288 Chapter 8 � Geometry Management November 2, 2006
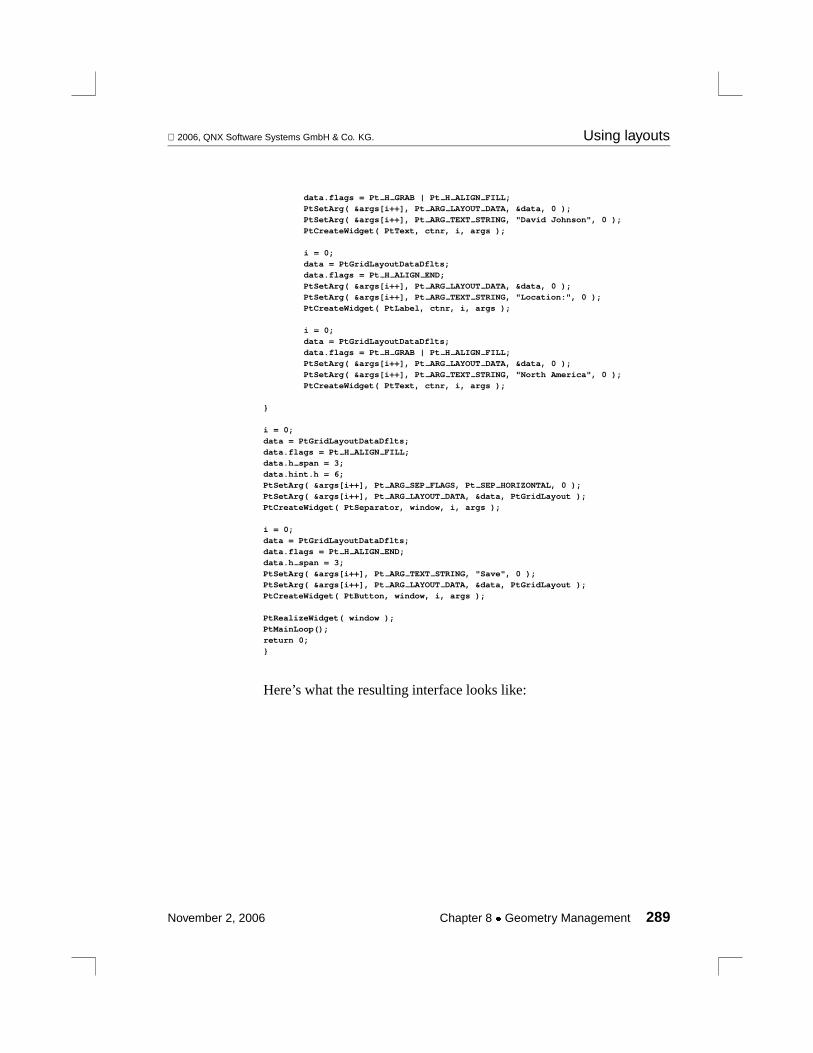
2006, QNX Software Systems GmbH & Co. KG. Using layouts
data.flags = Pt H GRAB | Pt H ALIGN FILL;PtSetArg( &args[i++], Pt ARG LAYOUT DATA, &data, 0 );
PtSetArg( &args[i++], Pt ARG TEXT STRING, "David Johnson", 0 );
PtCreateWidget( PtText, ctnr, i, args );
i = 0;
data = PtGridLayoutDataDflts;data.flags = Pt H ALIGN END;
PtSetArg( &args[i++], Pt ARG LAYOUT DATA, &data, 0 );PtSetArg( &args[i++], Pt ARG TEXT STRING, "Location:", 0 );
PtCreateWidget( PtLabel, ctnr, i, args );
i = 0;
data = PtGridLayoutDataDflts;
data.flags = Pt H GRAB | Pt H ALIGN FILL;PtSetArg( &args[i++], Pt ARG LAYOUT DATA, &data, 0 );
PtSetArg( &args[i++], Pt ARG TEXT STRING, "North America", 0 );
PtCreateWidget( PtText, ctnr, i, args );
}
i = 0;
data = PtGridLayoutDataDflts;
data.flags = Pt H ALIGN FILL;data.h span = 3;
data.hint.h = 6;PtSetArg( &args[i++], Pt ARG SEP FLAGS, Pt SEP HORIZONTAL, 0 );
PtSetArg( &args[i++], Pt ARG LAYOUT DATA, &data, PtGridLayout );
PtCreateWidget( PtSeparator, window, i, args );
i = 0;
data = PtGridLayoutDataDflts;data.flags = Pt H ALIGN END;
data.h span = 3;
PtSetArg( &args[i++], Pt ARG TEXT STRING, "Save", 0 );PtSetArg( &args[i++], Pt ARG LAYOUT DATA, &data, PtGridLayout );
PtCreateWidget( PtButton, window, i, args );
PtRealizeWidget( window );
PtMainLoop();
return 0;}
Here’s what the resulting interface looks like:
November 2, 2006 Chapter 8 � Geometry Management 289

Using layouts 2006, QNX Software Systems GmbH & Co. KG.
Complex grid layout — initial.
290 Chapter 8 � Geometry Management November 2, 2006

2006, QNX Software Systems GmbH & Co. KG. Using layouts
Complex grid layout — resize.
Using hintsLet’s take a look at an interesting way of using hints with the gridlayout. We will use a “draggable” separator to obtain the user’s inputand adjust the width hint of one of the widgets in the layout.
This is what we’ll do:
1 The grid layout contains four columns and one row.
2 Buttons are placed in columns 1, 3, and 4.
3 A separator is placed in column 2.
4 The separator is draggable (thePt SEPDRAGGABLE bit is setin Pt ARGSEPFLAGS.
November 2, 2006 Chapter 8 � Geometry Management 291
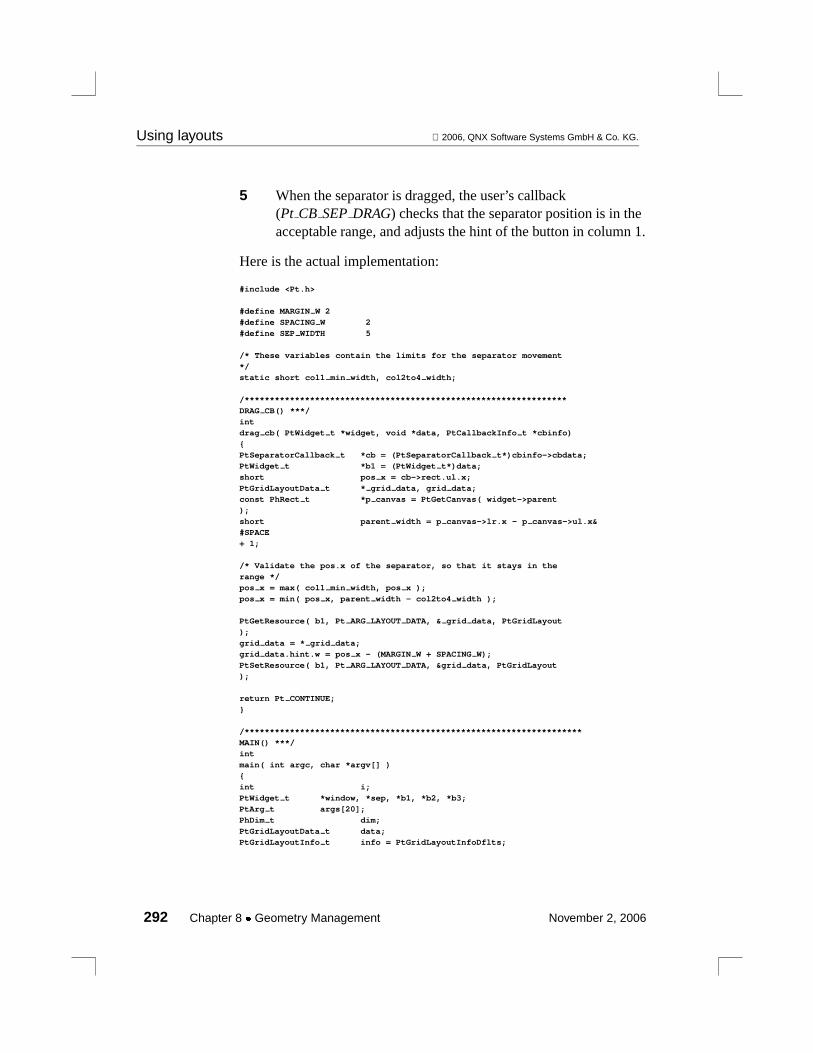
Using layouts 2006, QNX Software Systems GmbH & Co. KG.
5 When the separator is dragged, the user’s callback(Pt CB SEPDRAG) checks that the separator position is in theacceptable range, and adjusts the hint of the button in column 1.
Here is the actual implementation:
#include <Pt.h>
#define MARGIN W 2
#define SPACING W 2
#define SEP WIDTH 5
/* These variables contain the limits for the separator movement
*/static short col1 min width, col2to4 width;
/****************************************************************
DRAG CB() ***/
intdrag cb( PtWidget t *widget, void *data, PtCallbackInfo t *cbinfo)
{
PtSeparatorCallback t *cb = (PtSeparatorCallback t*)cbinfo->cbdata;PtWidget t *b1 = (PtWidget t*)data;
short pos x = cb->rect.ul.x;
PtGridLayoutData t * grid data, grid data;const PhRect t *p canvas = PtGetCanvas( widget->parent
);
short parent width = p canvas->lr.x - p canvas->ul.x&#SPACE
+ 1;
/* Validate the pos.x of the separator, so that it stays in the
range */pos x = max( col1 min width, pos x );
pos x = min( pos x, parent width - col2to4 width );
PtGetResource( b1, Pt ARG LAYOUT DATA, & grid data, PtGridLayout
);
grid data = * grid data;grid data.hint.w = pos x - (MARGIN W + SPACING W);
PtSetResource( b1, Pt ARG LAYOUT DATA, &grid data, PtGridLayout
);
return Pt CONTINUE;
}
/*******************************************************************
MAIN() ***/int
main( int argc, char *argv[] ){
int i;
PtWidget t *window, *sep, *b1, *b2, *b3;PtArg t args[20];
PhDim t dim;
PtGridLayoutData t data;PtGridLayoutInfo t info = PtGridLayoutInfoDflts;
292 Chapter 8 � Geometry Management November 2, 2006

2006, QNX Software Systems GmbH & Co. KG. Using layouts
info.n cols = 4;info.margin.ul.x = info.margin.lr.x = MARGIN W;
info.h spacing = SPACING W;
i = 0;
PtSetArg( &args[i++], Pt ARG WINDOW TITLE, "example: Draggable
Separator", 0 );PtSetArg( &args[i++], Pt ARG HEIGHT, 100, 0 );
PtSetArg( &args[i++], Pt ARG WIDTH, 400, 0 );PtSetArg( &args[i++], Pt ARG CONTAINER FLAGS, Pt AUTO EXTENT,
Pt AUTO EXTENT );
PtSetArg( &args[i++], Pt ARG LAYOUT, PtGridLayout, &info);
if( NULL == ( window = PtAppInit( NULL, &argc, argv, i,args ) ) ) {
perror( "PtAppInit()" );
return 1;}
data = PtGridLayoutDataDflts;data.flags = Pt V ALIGN FILL | Pt H ALIGN FILL;
i = 0;
PtSetArg( &args[i++], Pt ARG TEXT STRING, "B1", 0 );PtSetArg( &args[i++], Pt ARG LAYOUT DATA, &data, PtGridLayout
);b1 = PtCreateWidget( PtButton, NULL, i, args );
data = PtGridLayoutDataDflts;data.hint.w = SEP WIDTH;
data.flags = Pt V ALIGN FILL;
i = 0;PtSetArg( &args[i++], Pt ARG SEP ORIENTATION, Pt VERTICAL,
0 );
PtSetArg( &args[i++], Pt ARG SEP TYPE, Pt DOUBLE LINE,0 );
PtSetArg( &args[i++], Pt ARG SEP FLAGS, Pt SEP DRAGGABLE, Pt SEP DRAGGABLE&
#SPACE);
PtSetArg( &args[i++], Pt ARG CURSOR TYPE, Ph CURSOR DRAG HORIZONTAL,
0 );PtSetArg( &args[i++], Pt ARG LAYOUT DATA, &data, PtGridLayout
);sep = PtCreateWidget( PtSeparator, NULL, i, args );
PtAddCallback( sep, Pt CB SEP DRAG, drag cb, b1 );
i = 0;
data = PtGridLayoutDataDflts;
data.flags = Pt V ALIGN FILL | Pt H ALIGN FILL | Pt GRAB BOTH;PtSetArg( &args[i++], Pt ARG TEXT STRING, "B2", 0 );
PtSetArg( &args[i++], Pt ARG LAYOUT DATA, &data, PtGridLayout
);b2 = PtCreateWidget( PtButton, NULL, i, args );
data = PtGridLayoutDataDflts;data.flags = Pt V ALIGN FILL | Pt H ALIGN FILL | Pt GRAB BOTH;
i = 0;
PtSetArg( &args[i++], Pt ARG TEXT STRING, "B3", 0 );PtSetArg( &args[i++], Pt ARG LAYOUT DATA, &data, PtGridLayout
);
November 2, 2006 Chapter 8 � Geometry Management 293

Using layouts 2006, QNX Software Systems GmbH & Co. KG.
b3 = PtCreateWidget( PtButton, NULL, i, args );
/* Calculate the limits of the dragging */
/* Column 1: width of the b1 + left margin + spacing */
PtGetPreferredDim( b1, 0, 0, &dim );
col1 min width = dim.w + MARGIN W + SPACING W;
/* Column 2 to 4:* separator width + spacing + b2 width + spacing + b3 width
+ right margin
*/col2to4 width = SEP WIDTH + SPACING W;
PtGetPreferredDim( b2, 0, 0, &dim );col2to4 width += dim.w + info.h spacing;
PtGetPreferredDim( b3, 0, 0, &dim );col2to4 width += dim.w + info.margin.lr.x;
PtRealizeWidget( window );
PtMainLoop( );
return 0;
}
This is how the application behaves when resized:
Initial Hints example.
294 Chapter 8 � Geometry Management November 2, 2006
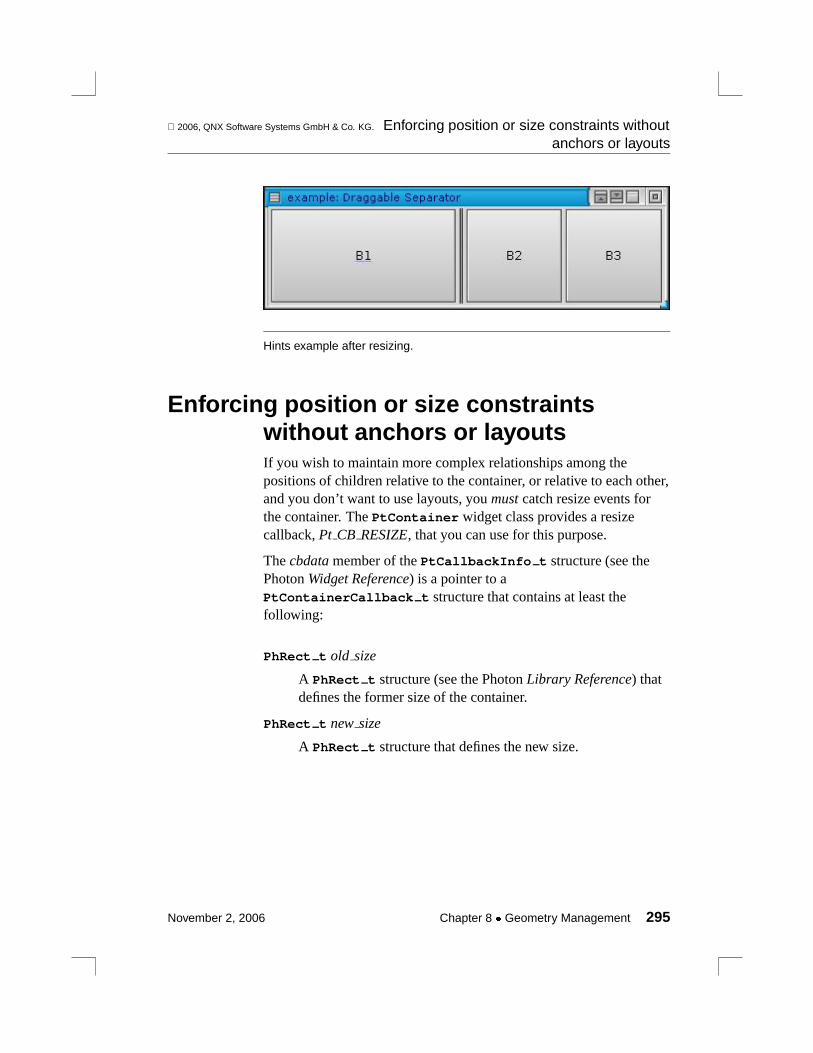
2006, QNX Software Systems GmbH & Co. KG. Enforcing position or size constraints withoutanchors or layouts
Hints example after resizing.
Enforcing position or size constraintswithout anchors or layoutsIf you wish to maintain more complex relationships among thepositions of children relative to the container, or relative to each other,and you don’t want to use layouts, youmustcatch resize events forthe container. ThePtContainer widget class provides a resizecallback,Pt CB RESIZE, that you can use for this purpose.
Thecbdatamember of thePtCallbackInfo t structure (see thePhotonWidget Reference) is a pointer to aPtContainerCallback t structure that contains at least thefollowing:
PhRect t old size
A PhRect t structure (see the PhotonLibrary Reference) thatdefines the former size of the container.
PhRect t newsize
A PhRect t structure that defines the new size.
November 2, 2006 Chapter 8 � Geometry Management 295


Chapter 9
Generating, Compiling, andRunning Code
In this chapter. . .Using the Build menu 299Generating application code 302How application files are organized 309Editing source 312Compiling and linking 315Customizing the build process 317Running the application 318Debugging 319Managing targets 320The Build menu 321Including non-PhAB files in your application 322Making a DLL out of a PhAB application 324
November 2, 2006 Chapter 9 � Generating, Compiling, and Running Code 297


2006, QNX Software Systems GmbH & Co. KG. Using the Build menu
PhAB automatically generates everything that’s required to turn yourapplication into a working executable, including:
� code to handle the UI portion of your application
� stub C and/or C++ files for application-specific callbacks,module-setup functions, application-initialization functions, and soon
� all the files required to compile and link the application—Makefile,global header, main-line file, and prototype file.
By doing all this, PhAB lets you get on with the job of writing thecode that implements your application’s main functionality.
The way you build PhAB projects depends on whether you’re runningPhAB standalone or from the IDE. This chapter describes buildingand generating code using PhAB standalone, and indicates wherethere are differences when using the IDE. For more information onbuilding and generating code in the IDE, see the “Building Projects”section in the Developing Programs chapter of the IDEUser’s Guide.
☞
For most code generation, you can use the Build menu. However, youcan also generate some C and C++ stub files on the spot when usingvarious dialogs to develop your application; use the icons located nextto function or filename fields:
This means you’re free to edit a callback function while still in theprocess of attaching it to the widget. You don’t have to go into theBuild menu, generate code from there, and then come back to writethe function.
Using the Build menuIf you are using PhAB from the IDE, you can use PhAB’s Build menuto generate the application’s user interface code. All other build andrun functions are handled by the IDE.
November 2, 2006 Chapter 9 � Generating, Compiling, and Running Code 299

Using the Build menu 2006, QNX Software Systems GmbH & Co. KG.
In standalone PhAB, the Build menu is the development center forbuilding your applications. From this menu you can:
� generate the application code
� make (compile and link) your application
� debug your application
� run your application
� configure your targets.
Building your applicationTo build your application in standalone PhAB:
� SelectBuild→Build.
When you build your application, PhAB creates an executable thatyou can run on the target system.
If you haven’t already added targets to your application, the SelectNew Platform dialog is displayed:
300 Chapter 9 � Generating, Compiling, and Running Code November 2, 2006

2006, QNX Software Systems GmbH & Co. KG. Using the Build menu
This dialog lets you select a target platform. For example, if youplan to run your application on an SH processor, you should selectSH (Little Endian).
You can add more targets later using the Select New Platform dialog.To open this dialog, selectBuild→Targets, then clickAdd target.See Managing targets below.
☞
Select your target and click Done.
� Generate the application by selectingBuild→Generate UI. PhABsaves your application and then generates the required files. SeeGenerating application code.
� PhAB opens the Make Application dialog and compiles and linksyour application, generating an executable that can be run on yourtarget system. PhAB runsmake in all of the selected targetdirectories. Themake utility links and compiles the source files;PhAB then runs binders to build the widget files into yourexecutable.
November 2, 2006 Chapter 9 � Generating, Compiling, and Running Code 301

Generating application code 2006, QNX Software Systems GmbH & Co. KG.
If any errors or warnings are detected during the make process andit can determine which source file contains errors, PhAB enablestheEdit button.
To edit the first file that contains errors, clickEdit. After fixing theproblems, clickRestart to runmake again.
To stopmake at any time, clickCancel.
Depending on the state of the application, PhAB may skip some ofthe above steps. For instance, if you’ve already built your application,but just changed a resource for one of the widgets, PhAB may onlysave your application to update the changed widget and then rebindthe widget files into your application; it will skip code generation,compilation, and linking.
☞
Generating application codeWhen you make changes to your application, even within your ownsource files, you may need to generate the application code. Doing soensures that the prototype header file,proto.h, is up to date. Youcan safely generate the code at any time — PhAB won’t overwriteany code you’ve added to the stubs it generated earlier.
When you use PhAB from the IDE, PhAB regenerates the applicationcode every time you save the project.
☞
Before generating the code, PhAB saves your application if you’vemodified any modules. To minimize compile time, PhAB compilesonly the files that have changed.
If you plan to use a global header in your application, you should setup the header before generating any code. For more information, see“Setting project properties” in the Working with Applications chapter,and “Global header file” in the Working with Code chapter.
☞
302 Chapter 9 � Generating, Compiling, and Running Code November 2, 2006
2006, QNX Software Systems GmbH & Co. KG. Generating application code
To generate your application code, select Generate UI from the Buildmenu. PhAB generates any required files any time you build yourapplication.
What PhAB generatesPhAB generates various files and stores them in the application’ssrc
directory.
CAUTION: Any filename that starts withab is a PhAB file andshouldn’t be modified at any time. If you try to edit anab file, youcould lose work (when PhAB overwrites the file) or experienceincorrect behavior (when files get out of sync).
!
You can modify any other files that PhAB generates, with fewconditions. These conditions are described in the following sections.
Here are the files that PhAB generates:
appname/Makefile
Used to compile and link the application
appname/common.mk
Contains traditional makefile options, such ascompiler options and link options.
src/Usemsg A usage message for the application
src/abHfiles Contains a list of header files that PhAB knowsabout.
src/abLfiles External PhAB references in theMakefile
src/abSfiles Contains a list of source files that PhAB knowsabout, for example source files with callbacks usedin the PhAB project.
November 2, 2006 Chapter 9 � Generating, Compiling, and Running Code 303
Generating application code 2006, QNX Software Systems GmbH & Co. KG.
src/abWfiles
Contains a list of PhAB modules that are part ofyour application.
src/abdefine.h
Contains all the PhAB-generated manifests. PhABincludes this header in all C files.
src/abevents.h
Contains all the application’s callbacks
src/abimport.h
Theextern reference header that’s included in allC files. See “Function prototypes”, below.
src/ablinks.h
Contains all the application’s module definitions
src/abmain.c The application’s main-line C file. This file startswith ab, so don’t modify it.
src/abmain.cc
If PhAB detects any C++ functions in yourapplication, it generatesabmain.cc instead ofabmain.c. This file also starts withab, so don’tmodify it.
src/abplatform
Contains a list of the platform directories for theapplication
src/abvars.h Contains all the PhAB-generated global variables
src/abwidgets.h
Contains all the PhAB data references
src/indHfiles
Contains additional header files not contained inabHfiles.
304 Chapter 9 � Generating, Compiling, and Running Code November 2, 2006

2006, QNX Software Systems GmbH & Co. KG. Generating application code
src/indLfiles
Contains additional options for the linker.
src/indSfiles
Contains additional source files not contained inabSfiles.
proto.h Contains the application’s prototypes — see“Function prototypes”, below.Don’t rename thisfile.
Version controlHere are the files you need to save if you’re using version-controlsoftware (PhAB can generate some of them, but it’s a good idea tosave them all):
abapp.dfn Callbacks and other information — this is a binaryfile.
abapp.wsp Widget lock status — this is a binary file.
wgt/* Widget resources — these might look like text, butthey’re binary.
src/*.{c,cc,cpp,C,h}
Source files and headers.
src/*files, src/Usemsg
Files that list non-PhAB source files. Be sure to savethe non-PhAB source, too.
Makefile, common.mk
Themake files.
target directory/Makefile, target directory/*/MakefileThe target files and their content.
November 2, 2006 Chapter 9 � Generating, Compiling, and Running Code 305

Generating application code 2006, QNX Software Systems GmbH & Co. KG.
applicationname.ldb
Your application’s language database. Save anytranslation files as well.
You’ll need to keep a matched set of all the files that PhAB generates;save the same version of theabapp.dfn, src/ab*, andwgt/*.wgt? files.
Tips on using CVS
It’s easier to save a PhAB application in CVS than RCS. Here aresome things to keep in mind:
� Flag the*.wgt? andabapp.dfn files as binary (-kb).
� Since binary files can’t be merged, try to prevent multiple peoplefrom modifying the binary files at the same time. CVS doesn’tsupport locking; the closest you can get is to set a “watch” onabapp.dfn (cvs watch on abapp.dfn).
This way, if you just check out an application, your copy ofabapp.dfn is read-only and PhAB doesn’t let you load theapplication. If you do want to modify the application, you have toruncvs edit abapp.dfn, which makes the file writable. Eventhough this doesn’t prevent other people from doing the same, it atleast adds you to a list of “editors” on the CVS server that otherpeople can query.
Function prototypesPhAB generates function prototypes used by the compiler to checkthat your functions are called correctly. These prototypes are placedin abimport.h and optionally inproto.h. Here’s how these filescompare:
306 Chapter 9 � Generating, Compiling, and Running Code November 2, 2006

2006, QNX Software Systems GmbH & Co. KG. Generating application code
proto.h abimport.h
Generated by parsing yoursource code.
Generated by looking at yourapplication’s settings.
Prototypes for all functions aregenerated.
Only prototypes known toPhAB (callbacks, setupfunctions, pointer-to-functionresources) are generated.
You can have problems withpreprocessor directives (see“Potential problems withgeneratingproto.h”), unusualC constructs, syntax errors, andC++ code.
Prototypes don’t depend on thesource code.
Doesn’t work with C++. Contains the appropriate#ifdefs andextern "C"declarations required by C++.
Prototypes match what thefunctions look like.
Prototypes match what thefunctions aresupposedto looklike—if the source code isdifferent, the compiler candetect it.
To suppress the generation of prototypes inproto.h:
1 PressF2 or from the Project menu, choose Properties to openthe Project Properties dialog.
2 Click the Generate Options tab.
3 Disable the Scan Source Files for Prototypes option.
Potential problems with generating proto.h
In the interests of speed, the program that scans your source files forfunction prototypes ignores preprocessor directives. This can causesome problems inproto.h.
November 2, 2006 Chapter 9 � Generating, Compiling, and Running Code 307

Generating application code 2006, QNX Software Systems GmbH & Co. KG.
For example, say we have the following code:
#ifdef DOUBLEfor (i = 0; i < 18; i++, i++) {
#elsefor (i = 0; i < 18; i++) {
#endifx += 2 * (i + x);y += x;
}
Since preprocessor directives are ignored, the prototype generatorsees:
for (i = 0; i < 18; i++, i++) {for (i = 0; i < 18; i++) {
x += 2 * (i + x);y += x;
}
The two opening braces cause it some confusion, and an incorrectprototype is generated. Look for this kind of thing if the prototypegenerator is creating incorrect prototypes.
To fix the example above, we could remove the opening braces andput an opening brace on the line after the#endif. Or we could do thefollowing:
#ifdef DOUBLE#define ADDAMOUNT 2#else#define ADDAMOUNT 1#endif
for (i = 0; i < 18; i += ADDAMOUNT) {x += 2 * (i + x);y += x;
}
308 Chapter 9 � Generating, Compiling, and Running Code November 2, 2006

2006, QNX Software Systems GmbH & Co. KG. How application files are organized
How application files are organizedPhAB stores each application as a directory structure. This structureconsists of a main directory that holds the application-definition file,two subdirectories that store the module files and application sourcecode, and, potentially, directories for different development platforms:
appl
src wgtPlatforms
reports
Directories for a PhAB application.
At the top of the application’s directory structure are thewgt andsrcdirectories. Thewgt directory contains the application’s widget files(files with extension.wgt* that PhAB uses to store informationabout your modules that are part of your application). Thesrc
directory contains header and source files needed to compile yourapplication. At the same level assrc andwgt are the platformdirectories (e.g.x86, mips, andarm). Their structure is the same asthe structure generated by theaddvariant command. Thereportsdirectory contains the files created when you choose the GenerateReport command from the Project menu.
This directory structure is called the “Eclipse PhAB project”structure, because it is allows you to create an application in PhABand then load it in Eclipse as an “Eclipse PhAB project”. Conversely,an application created in Eclipse can be loaded in PhAB.
November 2, 2006 Chapter 9 � Generating, Compiling, and Running Code 309

How application files are organized 2006, QNX Software Systems GmbH & Co. KG.
If you first generated your application with an earlier version ofPhoton, it might have been created as a single-platform application. Inthis case, the placement of files is slightly different, as described inthe sections that follow.
☞
You can choose the target platforms on which to compile yourapplication. You can edit your target configuration by choosingTargets from the Build menu.
Multiplatform applicationsHere’s what each directory contains for a multiplatform application:
appl The name of this directory is the same as yourapplication. It contains the application-definition file,abapp.dfn. Because this file is proprietary to PhAB,you shouldn’t try to modify it.
appl/src Thesrc directory contains the source code, headers,and aMakefile generated by PhAB, as well as anycode you create yourself.
For detailed information on the files stored in thisdirectory, see “What PhAB generates” in this chapter.
appl/src/platforms
These directories contain theMakefile, object files,and executables for the chosen platforms. TheMakefile in thesrc directory runs those in theplatform directories.
appl/wgt Thewgt directory contains your application modules.Because each type of module has a different fileextension, it’s fairly easy to recognize the exactmodules you want when importing modules fromanother application. For more info, see the handytables in the “Module types” section in the Workingwith Modules chapter.
310 Chapter 9 � Generating, Compiling, and Running Code November 2, 2006

2006, QNX Software Systems GmbH & Co. KG. How application files are organized
CAUTION: Always use PhAB to edit the module files in thewgtdirectory. Don’t try to edit these binary files with another editor.
Never modify any files prefixed byab.
!
Single-platform applicationsHere’s what each directory contains for a single-platform application:
appl The name of this directory is the same as yourapplication. It contains the application-definition file,abdefn.app. Because this file is proprietary to PhAB,you shouldn’t try to modify it. After you’ve compiledand linked the application, the executable is also placedin this directory.
appl/src Thesrc directory contains the source code, headers,object files, andMakefile generated by PhAB, aswell as any code you create yourself.
For detailed information on the files stored in thisdirectory, see “What PhAB generates” in this chapter.
appl/wgt Thewgt directory contains your application modules.Because each type of module has a different fileextension, it’s fairly easy to recognize the exactmodules you want when importing modules fromanother application. For more info, see the handytables in the “Module types” section in the Workingwith Modules chapter.
CAUTION: Always use PhAB to edit the module files in thewgtdirectory. Don’t try to edit these binary files with another editor.
Never modify any files prefixed byab.
!
November 2, 2006 Chapter 9 � Generating, Compiling, and Running Code 311
Editing source 2006, QNX Software Systems GmbH & Co. KG.
Converting to EclipseIf you have a single-platform application built with an earlier versionof Photon, it is converted to “Eclipse Project” format when you load itfor the first time. When converting an application, PhAB moves anyexisting Makefile tosrc/default/Makefile.old.
If you have a multiplatform application built with an earlier version ofPhoton, it is loaded by PhAB as is. You can choose to convert it toEclipse Project format by selectingProject→Convert to EclipseProject.
Editing sourceYou can edit source files from an external editor, which you canconfigure in PhAB. If you’re using PhAB from the IDE, you can usean editor in the IDE to work with source files as well.
You can open source files for editing within PhAB from the BrowseFiles palette. If the Browse Files palette isn’t visible, selectWindow→Show Project. The Browse Files palette looks like this:
312 Chapter 9 � Generating, Compiling, and Running Code November 2, 2006

2006, QNX Software Systems GmbH & Co. KG. Editing source
Browse Files palette.
To edit, view, or delete source code from within PhAB:
1 Click the source-code file.
November 2, 2006 Chapter 9 � Generating, Compiling, and Running Code 313

Editing source 2006, QNX Software Systems GmbH & Co. KG.
2 Click the appropriate action button (Edit, View, Delete, ...).
You can also edit a file by double-clicking its name.
Choosing an editor or browserTo choose which external editor or browser the Edit and View buttonsinvoke, see “Customizing your PhAB environment” in the PhAB’sEnvironment chapter.
Creating a source moduleTo create a new source-code module:
1 Click Create to open the Create File dialog, then type the nameof the new file.
2 If you wish to create the file using a template (for a header fileor widget callback), select a format from the Templatecombobox.
3 Click Create. You’ll see a terminal window that displays eitheran empty file or a file that contains the template.
If you create any files, clickRefresh to reread the applicationdirectory and refresh the list of files in the Browse Files palette.
Changing the file displayTo control which files are displayed in the Browse Files palette, usethe following:
� Refresh—forces a reread of the application source directory toensure that your file list is current
� Filter—lets you specify a filename pattern
The Filter line at the bottom of the palette allows you to filter the listof the files the Browse Files palette displays. For instance*.[ch]
displays subdirectories and filenames ending in.c and.h.
314 Chapter 9 � Generating, Compiling, and Running Code November 2, 2006

2006, QNX Software Systems GmbH & Co. KG. Compiling and linking
Compiling and linkingThis section applies to standalone PhAB. For information aboutcompiling and linking applications using the IDE, see the “Buildingprojects” section in the Developing Programs chapter of theIDEUser’s Guide.
After generating the application code, you need to:
� specify additional libraries your application needs
� usemake to compile and link your application.
Specifying additional librariesBy default all PhAB applications link againstlibAp andlibph. Youcan specify addtional libraries libraries for your application in theLink Libraries field of theBuild and Debug Options dialog.
You can also specify how libraries are linked against your application:
� Static Lib—link the Photon and PhAB libraries into theapplication executable. The application is larger than if you usedthe shared library, but runs without the shared libraries. This mightbe useful in an embedded environment.
� Shared Lib—don’t include the libraries in the application. Theapplication is much smaller, but requires the Photon sharedlibraries in order to run.
The default is shared libraries. To specify how libraries are linked, usethe-B option in theLink Libraries field of theBuild and DebugOptions dialog. For example, consider the followingLink Librariesline: -Bstatic -lphexlib -Bdynamic -lmylib -Bstatic.This links againstlibphexlib.a, mylib.so, and since the defaultlibraries are considered being after the end,libAp.a andlibph.a.
You can also specify a list of library callback functions when you startPhAB. For more information, seeappbuilder in theUtilitiesReference.
November 2, 2006 Chapter 9 � Generating, Compiling, and Running Code 315

Compiling and linking 2006, QNX Software Systems GmbH & Co. KG.
Running makeOnce you’ve chosen the library type, you’re ready to compile and link.
The first time you generate your application, PhAB createsMakefile
andcommon.mk files in the project directory (plus aMakefile foreach platform selected for multiplatform development) so you canmake the application. Subsequent generations don’t modify the filedirectly; instead, they update external files referenced in thecommon.mk.
Once thecommon.mk is generated you can modify it, though youshould only do so when there’s no way to set options from withinPhAB.
By default, theMakefile is compatible with the installedmakecommand. You can convert the file to a format that suits themake
command you prefer—just ensure the external file reference methodis still compatible.
For more information, see “Including non-PhAB files in yourapplication,” later in this chapter.
To make your application:
1 SelectBuild→Build to open the Make Application dialog andstart the make process.
2 If any errors or warnings are detected during the make process,PhAB enables theEdit andRestart buttons.
To edit the first file that contains errors, clickEdit. After fixingthe problems, clickRestart to runmake again.
To stopmake at any time, clickCancel.
3 Once the application has been compiled and linked, PhABenables the Make dialog’sDone button. ClickDone to closethe dialog.
TheDone button is also enabled when you clickCancel.
316 Chapter 9 � Generating, Compiling, and Running Code November 2, 2006

2006, QNX Software Systems GmbH & Co. KG. Customizing the build process
Modifying the make command
By default, PhAB uses the installedmake command to make yourapplication. If you need to change this command in any way, clickBuild Preferences.
Any changes you make to Build Preferences settings are saved withthe application itself rather than as a global preference.
☞
Customizing the build processYou can customize the build options on the Build and Debug Optionstab on the Project Properties dialog. Open the Project Propertiesdialog by selectingProject→Properties. For a description of thisdialog, see Build and Debug options in the Working with Applicationschapter.
When you use PhAB from the IDE, PhAB handles the codegeneration for the user interface, while the IDE manages the buildprocess. Therefore, only items in this dialog that affect generation areavailable when you run PhAB from the IDE.
The first time you generate your application, PhAB creates aMakefile and acommon.mk in the top level directory. Subsequentgenerations don’t modify the file directly. You can customize yourbuild process by changing or adding compile and link flags incommon.mk.
Once theMakefile is generated you can modify it, though youshould only do so when there’s no way to set options from withinPhAB.
By default, theMakefile is compatible with the installedmakecommand. You can convert the file to a format that suits themake
command you prefer—just ensure the external file reference methodis still compatible.
For more information, see “Including non-PhAB files in yourapplication,” later in this chapter.
November 2, 2006 Chapter 9 � Generating, Compiling, and Running Code 317

Running the application 2006, QNX Software Systems GmbH & Co. KG.
Running the applicationHow you run an application developed in PhAB depends on whetheryou’re running PhAB standalone or from the IDE. When runningPhAB from the IDE, you set up launch configurations for targetsthrough the IDE. For more information, see the Preparing Your Targetchapter and “Running projects” section of the Developing C/C++Programs chapter in the IDEUser’s Guide.
From standalone PhAB, once your application has been compiled andlinked without errors, it’s ready to run. Just follow these steps:
1 Select Run from the Build menu. The following dialog appears:
2 If you’ve used PhAB to create a multilingual application, youcan choose the language from theLanguage list. For moreinformation, see the International Language Support chapter.
3 If your application needs command-line arguments, type theminto Run Arguments.
4 Click OK.
318 Chapter 9 � Generating, Compiling, and Running Code November 2, 2006

2006, QNX Software Systems GmbH & Co. KG. Debugging
When your application runs, its working directory is the platformdirectory (i.e. the directory containing the executable).
If you checkDo not show this dialog again, the Run Options dialogdoesn’t appear the next time you run the application. To reenable thedialog, check theAsk for run arguments option on the General tabof the AppBuilder Preferences Settings dialog.
If you checkAlways use these settings, then the settings are savedand used any time you run this application. You can change the runarguments or language on the Run Options tab of the ProjectProperties dialog.
☞
If you use functions such asprintf() in your application, the outputgoes to your console if you run your application from PhAB. To seethis output, open apterm and run the application from there insteadof from PhAB.
PhAB is still active while your application is running. To switchbetween the two, use the Window Manager’s taskbar.
If the target you chose to build your application for is not the same asthe one you run PhAB on, you’ll have to transfer your application’sexecutable to your target in order to run it.
☞
DebuggingYou can run your application with a debugger, which can be handy ifyour application crashes or behaves incorrectly.
When running PhAB from the IDE, you use the debug features in theIDE. For more information, see the Debugging Programs chapter inthe IDEUser’s Guide.
➤ To debug your application in standalone PhAB, chooseBuild& Debug from theBuild menu. This launches the applicationin your preferred debugger.
November 2, 2006 Chapter 9 � Generating, Compiling, and Running Code 319

Managing targets 2006, QNX Software Systems GmbH & Co. KG.
In order to debug an application, you have to compile a debug-buildversion. To do this, selectBuild & Debug from theBuild menu.
☞
To switch between the debugger and the application, use the WindowManager’s taskbar.
Managing targetsYou can add or delete target platforms using theManage Targetsdialog. To open this dialog, selectBuild→Targets.
Manage Targets dialog.
To add a target, click Add target. Note that if the target is alreadyadded to your application, theMakefile in the target directory isoverwritten.
320 Chapter 9 � Generating, Compiling, and Running Code November 2, 2006
2006, QNX Software Systems GmbH & Co. KG. The Build menu
To delete a target, select it and clickDelete target.
Only the targets selected in this dialog are built.
The Build menuHere’s a description of all the items in the Build menu:
Build & Run Standalone PhAB only. Builds the currentapplication and then runs it. This command savesany changed files before building the application.
Build & Debug Standalone PhAB only. Builds your application andthen debugs it. This command saves any changedfiles before building the application.
Rebuild All Standalone PhAB only. Rebuilds all files for allselected targets.
Build Standalone PhAB only. Builds the application forselected targets.
Make Clean Standalone PhAB only. Removes the executableand object files from the target directories beforerunningMake.
Generate UI Generates files related to the user interface, butdoesn’t build the application’s executable.
Run Standalone PhAB only. Runs the last builtexecutable.
Targets Standalone PhAB only. Opens the Manage Targetsdialog.
* For these commands, “all your selected targets” means the buildingprocess will take place only for selected targets. To change thecurrently selected targets simply chooseTargets from the Build menuand change the selection in the target list. You can also select targetsfrom the Build and Debug Options tab of the Project Propertiesdialog.
November 2, 2006 Chapter 9 � Generating, Compiling, and Running Code 321

Including non-PhAB files in your application 2006, QNX Software Systems GmbH & Co. KG.
Including non-PhAB files in your applicationYour application can include files that aren’t created with PhAB, butyou need to tell PhAB how to find them.
Eclipse Project applicationsTo add non-PhAB source files to an application, place them in theproject’ssrc directory.
Multiplatform applicationsPhAB generates empty lists in the following files in thesrc directory,and you can edit them:
indHfiles Non-PhAB header files. For example:
MYHDR = ../header1.h ../header2.h
indOfiles Non-PhAB object files. For example:
MYOBJ = file1.o file2.o
indSfiles Non-PhAB source files. For example:
MYSRC = file1.c file2.c
322 Chapter 9 � Generating, Compiling, and Running Code November 2, 2006
2006, QNX Software Systems GmbH & Co. KG. Including non-PhAB files in your application
Remember to specify the filenames relative to where theMakefile sare found. For a multiplatform application, that’s relative to theplatform directory:
� Header files and source files are usually in the parent directory,src, so their names start with../ .
� Object files are usually in the same directories as theMakefiles.
☞
Single-platform applicationsA single-platform application from an earlier version of Photondoesn’t have theindHfiles, indOfiles, andindSfiles files.Instead, you’ll findMYHDR, MYOBJ, andMYSRCin yourMakefile, and you can specify filenames there.
Remember to specify the filenamesrelative to where the Makefile isfound. For a single-platform application, that’s relative to thesrc
directory.
☞
Adding librariesIf your application uses a library that isn’t included by default in theMakefile, you can add it with theLink Libraries line on the Buildand Debug Options tab of the Project Properties dialog. Open thisdialog by selectingProject→Properties.
For instance, if you want to link against the socket library, put thefollowing in theLink Libraries line:
-l socket.
You can also add it by editing theLDFLAGSvariable incommon.mk:
November 2, 2006 Chapter 9 � Generating, Compiling, and Running Code 323
Making a DLL out of a PhAB application 2006, QNX Software Systems GmbH & Co. KG.
Making a DLL out of a PhAB applicationYou can make a PhAB application into a DLL, but there isn’t a PhABoption that will do it for you. PhAB doesn’t know anything aboutbuilding DLLs; it’s the PhABlibrary that lets you turn a PhABapplication into a DLL.
The application that loads your DLL must be a PhAB application sothat the PhAB library is properly initialized.
Even though PhAB lets you set up an initialization function andwindows to open at startup, they’re ignored when your application is aDLL. That’s because this regular PhAB startup is done bymain(), andthemain()function of a DLL isn’t called. (Don’t attempt to call itfrom your own code, either.)
☞
Compiling and linkingIn general, you can turn any application (whether created by PhAB ornot) into a DLL by adding-shared to the compiler and linker flags(and most likely adding adll extension to the filename). You shouldalso give the-Bsymbolic option to the linker to make sure thatlocally defined symbols that your DLL uses aren’t overridden by anysymbols in the executable with the same name.
To make these changes for a PhAB application, run theaddvariant
command at the top level directory for the application. For example:
addvariant x86 dll
For more information, seeaddvariant in theUtilities Referenceandthe Conventions for Makefiles and Directories chapter of the NeutrinoProgrammer’s Guide.
Initializing your DLLTypically, a DLL defines an initialization function that an applicationcalls after it callsdlopen()to load the DLL. Your DLL’s initializationfunction needs the full path to the DLL.
324 Chapter 9 � Generating, Compiling, and Running Code November 2, 2006
2006, QNX Software Systems GmbH & Co. KG. Making a DLL out of a PhAB application
Before calling any PhAB code, the initialization function must callApAddContext(), like this:
ApAddContext( &AbContext, fullpath );
The arguments are:
AbContext A global data structure that PhAB puts inabmain.c.
This structure has the same name in every PhAB application or DLL,so you must link your DLL with the-Bsymbolic option mentionedabove.
☞
fullpath The full path of your DLL, suitable for passing toopen().
You can callApAddContext()more than once, but you need to keeptrack of how many times you called it.
ApAddContext()returns zero on success, or -1 on failure. Don’t callanyAp* functions ifApAddContext()fails.
AbContextholds, among other things, the location of the executable orDLL that it’s contained in, and the language translation files currentlyloaded for that file. At any time, one of the registered contexts may be“current”; a fewlibAp functions implicitly refer to the currentcontext, and some require a current context when you call them. Atprogram startup, the program’s context is made current. You canunset it or change it to a different context by callingApSetContext():
ApContext t *ApSetContext( ApContext t *context );
This makes the givencontextcurrent, and returns the previous currentcontext. Both can beNULL; but if you pass a non-NULL pointer, itmust point to a registered context.
November 2, 2006 Chapter 9 � Generating, Compiling, and Running Code 325

Making a DLL out of a PhAB application 2006, QNX Software Systems GmbH & Co. KG.
Unloading your DLLWhen an application is about to unload a DLL, it typically calls acleanup function in the DLL. In your DLL’s cleanup function, youmust:
� close any widget databases that your DLL opened:
- that was opened usingApOpenDBase()with an argumentpointing to a module defined in the DLL
or
- that was opened usingApOpenDBaseFile()if the DLL’sAbContextwas the current context when it was called
� destroy any PhAB widgets that “belong” to your DLL; this meansyou have to destroy any widgets:
- created by PhAB link callbacks defined in the DLL
- ApCreateModule()using a module in the DLL
- that are using any of the widget databases that must be closed
� if your DLL defined widget classes by callingApAddClass(),remove them by callingApRemoveClass()
� call ApRemoveContext(), like this:ApRemoveContext( &AbContext );
You must callApRemoveContext()the number of times that yousuccessfully calledApAddContext(). After you’ve calledApRemoveContext(), your DLL must not call any PhAB functions.
326 Chapter 9 � Generating, Compiling, and Running Code November 2, 2006

Chapter 10
Working with Code
In this chapter. . .Variables and manifests 329Global header file 333Function names and filenames335Initialization function 336Module setup functions 340Code-callback functions 341Geometry data types 343Timers 344Initializing menus 346Delaying and forcing updates to the display354
November 2, 2006 Chapter 10 � Working with Code 327


2006, QNX Software Systems GmbH & Co. KG. Variables and manifests
PhAB makes it easy to create the user interface for an application.Once PhAB has generated code stubs for your application, you’llneed to write the parts that make the applicationdosomething. Thischapter describes how to work with the code for a PhAB application.
For information about using threads in a Photon program, see theParallel Operations chapter.
☞
Variables and manifestsWidget variables and manifests
PhAB creates global variables and manifests for every module youcreate, and every widget with a unique instance name. This makes iteasier to access the widgets from your application code.
The global variable represents the widget’s name, and is defined in theabvars.h file. Each global variable takes this form:
� ABN widgetname—wherewidgetnameis the widget name ormodule-instance name that you defined in the Resources orCallbacks control panel. The value of this variable is unique in theentire application.
The manifest represents the widget’s instance pointer, and is definedin theabdefine.h file. This file, which is included in all applicationC files, also defines an external reference to the global variables. Eachmanifest takes this form:
� ABW widgetname—wherewidgetnameis the widget name ormodule-instance name that you defined in the Resources orCallbacks control panel.
November 2, 2006 Chapter 10 � Working with Code 329

Variables and manifests 2006, QNX Software Systems GmbH & Co. KG.
PhAB doesn’t createABW ... manifests for menu modules or menuitems. Menus typically don’t exist for very long, so manifests forthem aren’t very useful. If you need to change the resources of thePtMenu, create a setup function for the menu module and do the workthere. See “Module setup functions,” below.
The manifest for a window module refers to the last created instanceof the module. See “Handling multiple instances of a window,” below.
☞
When PhAB detects a unique instance name it generates a globalvariable name and a widget manifest. For example, if you change theinstance name for aPtButton-class widget todone, PhAB willgenerate the following:
� ABN done
� ABW done
A widget’s global variable and manifest are validonlyafter the widgethas been created, and before it has been destroyed.
☞
Using the global variable and widget manifestLet’s now look at some examples of how you can use the global nameand widget manifest within application code. First, here’s an exampleof using theABN doneglobal variable and theApName()function tocheck for a specific widget in a callback:
intmycallback( PtWidget t *widget, ... )
{
/* check for specific widget */if ( ApName( widget ) == ABN done ) {
/* done button processing */}
return( Pt CONTINUE );}
330 Chapter 10 � Working with Code November 2, 2006

2006, QNX Software Systems GmbH & Co. KG. Variables and manifests
The next example usesABW doneto change thedone widget’sbackground color to red (for more information, see the ManipulatingResources in Application Code chapter):
intmycallback( PtWidget t *widget, ... )
{PtSetResource( ABW done, Pt ARG FILL COLOR, Pg RED, 0 );
return( Pt CONTINUE );}
Remember that the global variable and the manifest are validonlyafter the widget has been created and before it has been destroyed.
☞
Handling multiple instances of a windowIf you have more than one instance of a window module displayed ata time, then you’ll have a problem accessing the widgets in thewindow. The problem stems from the fact thatABW instancenamefor any widget in a window module points to the last created instanceof that widget. If you have more than one instance of the window,then you have more than one instance of the widgets within thewindow created.
Let’s say you have the following window module:
November 2, 2006 Chapter 10 � Working with Code 331
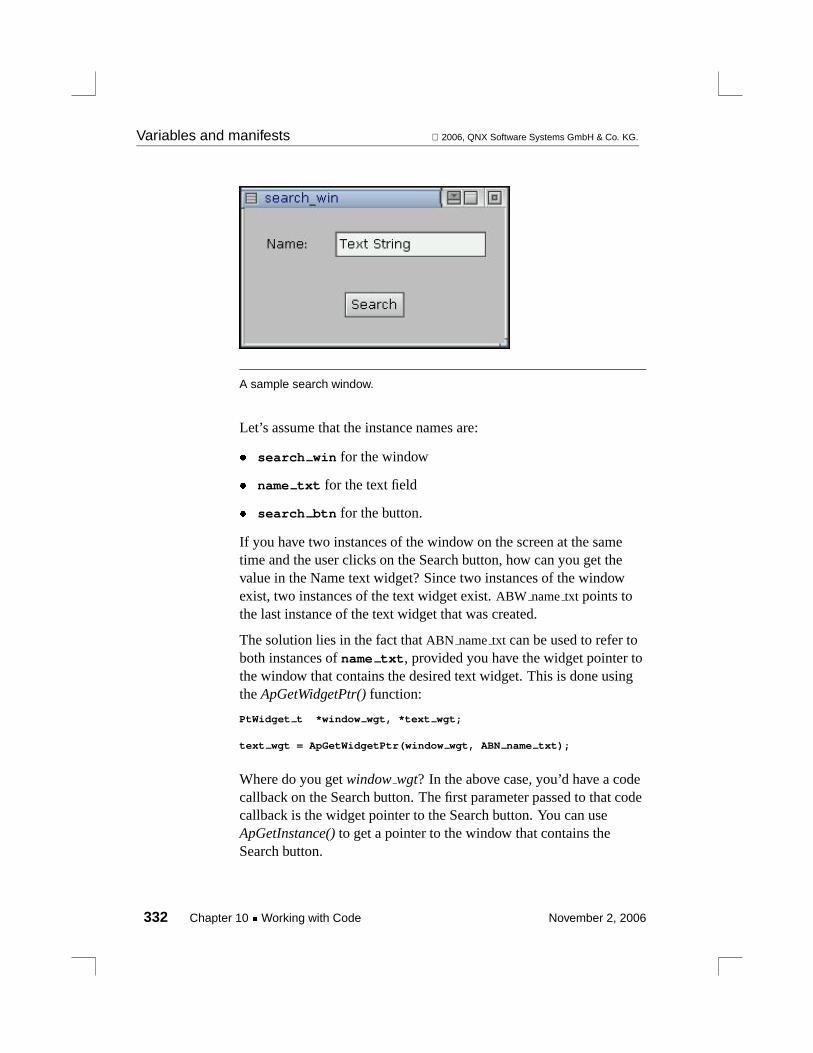
Variables and manifests 2006, QNX Software Systems GmbH & Co. KG.
A sample search window.
Let’s assume that the instance names are:
� search win for the window
� name txt for the text field
� search btn for the button.
If you have two instances of the window on the screen at the sametime and the user clicks on the Search button, how can you get thevalue in the Name text widget? Since two instances of the windowexist, two instances of the text widget exist.ABW nametxt points tothe last instance of the text widget that was created.
The solution lies in the fact thatABN nametxt can be used to refer toboth instances ofname txt, provided you have the widget pointer tothe window that contains the desired text widget. This is done usingtheApGetWidgetPtr()function:
PtWidget t *window wgt, *text wgt;
text wgt = ApGetWidgetPtr(window wgt, ABN name txt);
Where do you getwindowwgt? In the above case, you’d have a codecallback on the Search button. The first parameter passed to that codecallback is the widget pointer to the Search button. You can useApGetInstance()to get a pointer to the window that contains theSearch button.
332 Chapter 10 � Working with Code November 2, 2006

2006, QNX Software Systems GmbH & Co. KG. Global header file
So the callback would become:
int search callback( PtWidget t *widget, ApInfo t *apinfo,PtCallbackInfo t *cbinfo)
{char *name;PtWidget t *window wgt, *text wgt;
/* Get the window that the Search button is in. */
window wgt = ApGetInstance( widget );
/* Given the window, find the text widget. */
text wgt = ApGetWidgetPtr( window wgt, ABN name txt );
/* Now get the text. */
PtGetResource( text wgt, Pt ARG TEXT STRING, &name, 0 );
/* The ’name’ variable now points to the correct name text.Process the text as appropriate. */
...
return( Pt CONTINUE );}
Internal link manifestsPhAB generates a manifest for each internal link defined in yourapplication:
� ABM internal link name—whereinternal link nameis a pointerto the module’s internal definition.
For more information about using internal links, see the AccessingPhAB Modules from Code chapter.
Global header filePhAB lets you define one global header file for each application.PhAB generates this file only once, the first time you generate theapplication’s code.
November 2, 2006 Chapter 10 � Working with Code 333

Global header file 2006, QNX Software Systems GmbH & Co. KG.
Once you’ve defined the header, PhAB automatically includes it inany generated C or C++ stub file. So it’s best to define the headerwhen you first create the application. See “Startup Windows tab” inthe Working with Applications chapter. You can modify the headerwhenever you need to.
☞
Here’s a handy way of using this single header file to simultaneouslydefine all your global variables and theextern references to thosevariables:
/* Header "globals.h" for my appl Application */
#include <Pt.h>
#ifdef DEFINE GLOBALS
#define GLOBAL#define INIT(x) = x
#else
#define GLOBAL extern#define INIT(x)
#endif
/* global variables */GLOBAL int variable1 INIT(1);
If DEFINE GLOBALS is defined, then the last line in the aboveexample looks like:
int variable1 = 1;
If DEFINE GLOBALS isn’t defined, then the last line in the aboveexample looks like:
extern int variable1;
Remember to define all your application’s global variables with theGLOBAL prefix, as shown above. Also make sure to include thefollowing line in one (and only one) of your code files:
334 Chapter 10 � Working with Code November 2, 2006

2006, QNX Software Systems GmbH & Co. KG. Function names and filenames
#define DEFINE GLOBALS
Including this line ensures that the global variables are defined in thiscode file and used asextern declarations in all other code files.
In theMakefile, make the code files dependent on the header file.That way, if you make any changes to the header, all the code will berecompiled when you make your application.
☞
Function names and filenamesPhAB generates a function for every initialization function, modulesetup function, callback, function menu item, and so on you’vespecified in your application. If you don’t need a function, leave itsname blank.
After a function has been generated, you’re free to modify it. There’sjust one condition: if you change the function’s name, you must alsochange the name you specified in the link callback or internal linkdefinition. Otherwise, PhAB will continue to regenerate the old nameevery time it generates the application.
The way you specify the function name in PhAB determines the nameof the file the stub is put into:
functionname
Create a C stub file calledfunctionname.c
Create a stub function and put it infilename.ext. This file willinclude the headers and function structure required to compilein the Photon environment.
PhAB recognizes.cc, .cpp, and.C as C++ extensions.☞
If this file already exists, the stub function is added to it. Youcan use this technique to reduce the number of code files for
November 2, 2006 Chapter 10 � Working with Code 335

Initialization function 2006, QNX Software Systems GmbH & Co. KG.
your application. You can place any number of functions in thesame file. We recommend you put all functions related to amodule in the same file.
functionname.ext
Short form [email protected]
class::[email protected]
Generate a stub C++ static member function, but no prototype.
class::functionname@
Don’t create a stub function or a prototype. Instead, invoke aC++ static class member function. Prototypes aren’t generatedfor class member functions; your application must have thenecessary declarations in its global header file.
functionname@
Generate a prototype for a C function, but not a stub. This isuseful if you’re using a library of C functions.
::functionname@
Generate a prototype for a C++ function, but not a stub. This isuseful if you’re using a library of C++ functions.
You can use C and C++ in the same PhAB application. See “WhatPhAB generates” in the Generating, Compiling, and Running Codechapter.
Initialization functionPhAB lets you define an application-levelinitialization function. ThePhAB API calls this function once at startup, before any windows orother widgets are created. For information on setting up this function,see “Startup Windows tab” in the Working with Applications chapter.
The initialization function includes the standardargcandargvarguments so that your application can parse command-line options ifneeded (see below). You can also use this function to open any widget
336 Chapter 10 � Working with Code November 2, 2006

2006, QNX Software Systems GmbH & Co. KG. Initialization function
databases (see the Accessing PhAB Modules from Code chapter) orother application-specific data files.
Here’s a sample initialization function generated by PhAB:
/* Y o u r D e s c r i p t i o n *//* AppBuilder Photon Code Lib *//* Version 2.01A */
/* Standard headers */#include <stdio.h>#include <stdlib.h>#include <unistd.h>#include <string.h>
/* Toolkit headers */#include <Ph.h>#include <Pt.h>#include <Ap.h>
/* Local headers */#include "abimport.h"#include "proto.h"
/* Application Options string */const char ApOptions[] =
AB OPTIONS ""; /* Add your options in the "" */
intinit( int argc, char *argv[] )
{
/* eliminate ’unreferenced’ warnings */argc = argc, argv = argv;
/* Handle command-line options - if required.Remember to ignore the ones handled by Photon. */
/* Typical spot to open widget databases */
/* Any other application-specific initialization */
return( Pt CONTINUE );
}
November 2, 2006 Chapter 10 � Working with Code 337

Initialization function 2006, QNX Software Systems GmbH & Co. KG.
Processing command-line optionsPhAB applications have several command-line options by default:
-h height[%] The height of the window, in pixels, or as apercentage of the screen height if% is specified.
-s servername
The name of the Photon server:
If server name is: This server is used:
nodenumber //nodenumber/dev/photon
fullpath fullpath
relative path /dev/relative path
-w width[%] The width of the window, in pixels, or as apercentage of the screen width if% is specified.
-x position[%][r]
The x coordinate of the upper-left corner of thewindow, in pixels, or as a percentage of screenwidth if % is specified. Ifr is specified, thecoordinate is relative to the current console.
-y position[%][r]
The y coordinate of the upper-left corner of thewindow, in pixels, or as a percentage of screenheight if% is specified. Ifr is specified, thecoordinate is relative to the current console.
-Si|m|n The initial state of the main window (iconified,maximized, or normal).
You can suppress the options for the application’s size andposition—see “Command-line options” in the Working withApplications chapter. You can also define additional options.
338 Chapter 10 � Working with Code November 2, 2006

2006, QNX Software Systems GmbH & Co. KG. Initialization function
Edit the application’s usage message, which you’ll find in theUsemsg
file in your application’ssrc directory, to include any additionaloptions. For details about the usage message syntax, seeusemsg inthe QNX NeutrinoUtilities Reference.
☞
Use thegetopt()function (described in theC Library Reference) toprocess the command-line options. The following example showshow you could process several options (three of which takearguments):
const char ApOptions[] = AB OPTIONS "a:b:c:pqr";
int init( int argc, char *argv[] ) {int opt;while ( ( opt = getopt( argc, argv, ApOptions ) ) != -1 )
switch ( opt ) {case ’a’ : ...case ’b’ : ......case ’?’ : ...}
...return Pt CONTINUE;}
AB OPTIONSis a macro that defines the default options added byPhAB. It’s generated by PhAB, based on your the settings from theGenerate Options tab of the Project Properties dialog. For example, ifyou disable theEnable Window Position Arguments option, theAB OPTIONSmacro won’t containx: or y:. You can process theoptions inAB OPTIONSin two ways:
� include acase branch for each option, but do nothing in it. Youcould also include adefault that prints a message if an invalidoption is given.
or
� don’t includecase branches for them. If you do this, you won’t beable to have adefault branch.
The PhAB library also looks at theApOptionsarray to take intoaccount the options you’ve added. For example, for the above code
November 2, 2006 Chapter 10 � Working with Code 339
Module setup functions 2006, QNX Software Systems GmbH & Co. KG.
the library recognizes that-px100 specifies the X position (alongwith -p), while-ax100 doesn’t.
Module setup functionsA module setup function is generated if you specify a function namein a module-type link callback, as described in “Module callback” inthe Editing Resources and Callbacks in PhAB chapter.
All PhAB setup functions have three main arguments:
intbase setup( PtWidget t *link instance,
ApInfo t *apinfo,PtCallbackInfo t *cbinfo )
{
/* eliminate unreferenced warnings */link instance = link instance,
apinfo = apinfo,cbinfo = cbinfo;
/* your code here */
return( Pt CONTINUE );}
where:
link instance an instance pointer for the PhAB module beingcreated. You’ll need to save this pointer if it pointsto a window module that supports multipleinstances.
apinfo A pointer to aApInfo t structure that provides:
� A pointer to the widget that caused the setupfunction to be invoked (that is, the widget thatcaused the module to be displayed). For aninternal link, this pointer is a copy of the widgetpointer passed toApCreateModule(); this pointeris useful for positioning the module.
340 Chapter 10 � Working with Code November 2, 2006
2006, QNX Software Systems GmbH & Co. KG. Code-callback functions
You can also determine the widget that causedthe setup function to be invoked by callingApWidget().
� Reason codes related to the type of setupfunction being invoked:
ABR PREREALIZE
This setup function is being called beforethe module is realized.
ABR POSTREALIZE
This setup function is being called after themodule is displayed on the screen.
cbinfo a pointer to a common Photon callback structure.The structure provides information related to thewidget callback being invoked, the Photon event,and some widget-specific callback data. The formatof the data varies with the widget class and callbacktype. For more info, seePtCallbackInfo t intheWidget Reference.
Normally, a setup function returns the valuePt CONTINUE. This tellsthe PhAB API to continue processing and to display the module beinglinked. For window and dialog modules, you can returnPt END toterminate the link callback and destroy the module without displayingit. For window modules, you can returnPt HALT to neither realize nordestroy the window. This is useful if you want to realize the windowlater.
Code-callback functionsA code-callback function is generated if you specify a code-type linkcallback, as described in “Code callbacks” in the Editing Resourcesand Callbacks in PhAB chapter.
All code-type callback functions have three main arguments:
int
November 2, 2006 Chapter 10 � Working with Code 341

Code-callback functions 2006, QNX Software Systems GmbH & Co. KG.
mycallback( PtWidget t *widget,ApInfo t *apinfo,PtCallbackInfo t *cbinfo )
{
/* eliminate unreferenced warnings */widget = widget,apinfo = apinfo,cbinfo = cbinfo;
/* your code here */
return( Pt CONTINUE );}
where:
widget A pointer to the widget instance that invoked the callback.This is a pointer to aPtWidget t structure, but youshould treat it as a widget identifier; don’t manipulate themembers of the structure.
apinfo A pointer to aApInfo t structure that includes reasoncodes related to the type of callback function beinginvoked:
ABR CANCEL This callback function is being called by aCancel link.
ABR CODE This callback function is being called by aCode link.
ABR DONE This callback function is being called by aDone link.
cbinfo a pointer to a common Photon callback structure. Thestructure provides information related to the widgetcallback being invoked, the Photon event, and somewidget-specific callback data. The format of the datavaries with the widget class and callback type. For moreinformation, seePtCallbackInfo t in theWidgetReference.
342 Chapter 10 � Working with Code November 2, 2006
2006, QNX Software Systems GmbH & Co. KG. Geometry data types
Your callback should returnPt CONTINUE unless the description ofthe callback gives you a reason to return some thing else.ABR CANCEL andABR DONE callbacks can returnPt HALT toprevent the module from being closed.
Geometry data typesHere are the data structures that you’ll use a lot when specifyingpositions, sizes, and areas:
PhPoint t Thex andy coordinates of a single point. You’ll useit to specify locations on the screen, in widgetcanvasses, and so on.
PhDim t. A width (w) and a height (h), usually in Photoncoordinates. You’ll use it to specify dimensions.
PhArea t A rectangular area, expressed as aPhPoint t forthe area’s upper left corner, and aPhDim t thatdefines the area’s size.
PhRect t A rectangle, expressed as twoPhPoint t
structures, one for the upper left corner, and one forthe lower right.
PhTile t A list of rectangles. This structure is used mostly indamage liststhat define the areas of the screen or awidget that need to be refreshed.
Photon maintains an internal pool of tiles because they’re frequentlyused, and using a pool reduces the amount of time spent allocatingand freeing the tiles. UsePhGetTile()to get a tile from the pool, andPhFreeTiles()to return a list of tiles to the pool.
☞
You probably won’t use thePhTile t structureunless you’re using aPtRaw widget or creating acustom widget. For more information, see “PtRaw
widget” in the Raw Drawing and Animation chapter,andBuilding Custom Widgets.
November 2, 2006 Chapter 10 � Working with Code 343
Timers 2006, QNX Software Systems GmbH & Co. KG.
The Photon libraries provide various functions that work with thesedata types:
PhAreaToRect()
Convert an area into a rectangle
PhDeTranslateRect()
Detranslate a rectangle (subtract offset)
PhRectIntersect()
Find the intersection of two rectangles
PhRectToArea()
Convert a rectangle into an area
PhRectUnion()
Determine a bounding box for two rectangles
PhTranslateRect()
Translate a rectangle (add offset)
TimersIf you wish to schedule your own operations at particular timeintervals, or if you just want to implement a time-out or trigger anevent at a particular time, you may want to have a timer-basedcallback function. There are several ways to do this, with varyingamounts of difficulty and accuracy:
� PtTimer widget — easy, but not very accurate.
� RtTimer*functions — a bit more work, a bit more accurate.
� Timers in a separate process from the GUI — necessary for hardrealtime. For more information, see “Threads” in the ParallelOperations chapter.
The Photon libraries also include some low-level timer routines, butyou need to be careful using them:
344 Chapter 10 � Working with Code November 2, 2006

2006, QNX Software Systems GmbH & Co. KG. Timers
PhTimerArm() Arm a timer event. Don’t use this function in anapplication that uses widgets.
PtTimerArm() Arm a timer event on a widget. This routine istypically used when building custom widgets.Some widgets (such asPtTerminal) already usethis type of timer, so callingPtTimerArm()mayhave unexpected results.
Using PtTimerThe easiest way to implement a timer is to use aPtTimer widget. Itdefines these resources:
Pt ARG TIMER INITIAL
Initial expiration time.
Pt ARG TIMER REPEAT
Optional repeat interval.
Pt CB TIMER ACTIVATE
Expiration callbacks.
For more information, see theWidget Reference.
When you create aPtTimer widget in PhAB, it appears as a blackbox. The box doesn’t appear when you run the application; it’s just aplaceholder.
☞
PtTimer is easy to use, but doesn’t give accurate timer events. Inparticular, it doesn’t guarantee a constant repeat rate; since therepetition is handled by rearming the timer for each event, any delaysin handling the events accumulate. Kernel timers guarantee anaccurate repeat rate even if your application can’t keep up with them.
November 2, 2006 Chapter 10 � Working with Code 345
Initializing menus 2006, QNX Software Systems GmbH & Co. KG.
RtTimer* functionsTheRtTimer*functions (described in the PhotonLibrary Reference)give more accurate timing thanPtTimer, but still not hard realtime.They’re cover functions for the POSIX functions that manipulate thekernel timers:
RtTimerCreate()
Create a realtime timer
RtTimerDelete()
Delete a realtime timer
RtTimerGetTime()
Get the time remaining on a realtime timer
RtTimerSetTime()
Set the expiration time for a realtime timer
These functions are more accurate thanPtTimer because the timer isrearmed by the kernel, not by Photon. However, if Photon is busyhandling events, there could still be delays in processing theexpiration events.
Initializing menusYou may want to do various things to a menu before it’s displayed.You can use the menu’s setup function to:
� enable, disable, or toggle items
� change the text for an item
You can also use a function menu item to generate new items atruntime.
The methods for doing these things are discussed in the sections thatfollow.
346 Chapter 10 � Working with Code November 2, 2006

2006, QNX Software Systems GmbH & Co. KG. Initializing menus
Enabling, disabling, or toggling menu itemsIf a menu item isn’t currently a valid choice, it’s a good idea todisable it so the user won’t try to select it. Of course, you’ll need toenable it when appropriate, too. If your menu has any toggle items,you’ll also need to set them before the menu is displayed. To do thesethings, use theApModifyItemState()function.
ApModifyItemState()takes a variable number of arguments:
� The first argument is a pointer to the menu module. For example,if the instance name of the menu module isdraw menu, pass&draw menu as the first parameter.
� The second argument is the desired state:
AB ITEM DIM
to disable the itemAB ITEM NORMAL
to enable and unset the itemAB ITEM SET
to set a toggle item
� The rest of the arguments form aNULL-terminated list of the menuitems to be set to the given state. This list consists of theABN ...
global variables of the items.
For example, suppose our application has a menu module whosename isdraw menu, which includes items with the instance namesdraw group anddraw align. We can disable these items with thefollowing call:
ApModifyItemState (&draw menu, AB ITEM DIM,ABN draw group, ABN draw align, NULL);
November 2, 2006 Chapter 10 � Working with Code 347
Initializing menus 2006, QNX Software Systems GmbH & Co. KG.
Changing menu-item textYou can use theApModifyItemText()function to change the text for amenu item, for example, to replace a command by its opposite. Thearguments are as follows:
� a pointer to the menu module. For example, if the instance nameof the menu module isdraw menu, pass&draw menu as the firstparameter.
� theABN ... global variable for the menu item
� the new text
For example, our Draw menu might have an item that’s eitherGroup
or Split, depending on what objects the user chooses. We couldchange the text of thedraw group item in thedraw menu with thefollowing code:
ApModifyItemText (&draw menu, ABN draw group, "Split");
To get the current item text, callApGetItemText().
If you change the item’s text, you probably need to change theshortcut, too, by callingApModifyItemAccel().
Generating menu itemsSometimes you may need to generate the menu items at runtime. Forexample, PhAB’s Window menu includes a list of the modules in yourapplication. To generate menu items, add a function item to yourmenu module (as described in “Creating function items” of theWorking with Modules chapter), and edit the stub function PhABgenerates.
For example, if ourdraw menu module includes a function item thatcallsadd shapes(), PhAB generates the following code:
int add shapes (PtWidget t *widget, ApInfo t *apinfo,PtCallbackInfo t *cbinfo)
{
348 Chapter 10 � Working with Code November 2, 2006
2006, QNX Software Systems GmbH & Co. KG. Initializing menus
/* eliminate ’unreferenced’ warnings */widget=widget, apinfo=apinfo, cbinfo=cbinfo;
return (Pt CONTINUE);}
The parameters passed to this function are of no use.
We use thePtCreateWidget()function to create the menu items,which are usuallyPtMenuButton widgets. As discussed in theManipulating Resources in Application Code chapter, we can use thesame sort of argument list to set initial values for the resources as weuse withPtSetResources(). For example, to add an itemRectanglewith a keyboard shortcut ofR:
PtArg t args[2];PtWidget t *new item;
PtSetArg (&args[0], Pt ARG TEXT STRING, "Rectangle", 0);PtSetArg (&args[1], Pt ARG ACCEL KEY, "R", 0);new item = PtCreateWidget( PtMenuButton, Pt DEFAULT PARENT,
2, args);
The second parameter in the call toPtCreateWidget()is the parent ofthe widget; when you’re generating menu items, this should be set toPt DEFAULT PARENT. This makes the new item a child of the currentmenu or submenu. Don’t callPtSetParentWidget()in this case.
Next, we need a callback function for the new item. We have to createthis manually; PhAB doesn’t create a stub function for it. Forexample, the callback for our new item could be:
int rect callback( PtWidget t *widget,void *client data,PtCallbackInfo t *cbinfo )
{...
}
This callback is similar to a code callback generated by PhAB. Itsarguments are:
widget A pointer to the menu item selected.
November 2, 2006 Chapter 10 � Working with Code 349

Initializing menus 2006, QNX Software Systems GmbH & Co. KG.
client data Arbitrary data passed to the callback.
This is different from a PhAB code callback, which receivesapinfoasits second argument.
☞
cbinfo a pointer to a common Photon callback structure. Thestructure provides information related to the widgetcallback being invoked, the Photon event, and somewidget-specific callback data. The format of the datavaries with the widget class and callback type. Formore info, seePtCallbackInfo t in theWidgetReference.
The last thing we need to do is add the callback to the menu item’sPt CB ACTIVATEcallback list, using thePtAddCallback()function:
PtAddCallback (new item, Pt CB ACTIVATE,rect callback, NULL);
The last argument toPtAddCallback()specifies what’s to be passed astheclient dataargument of the callback. For more information, see“Callbacks” in the Managing Widgets in Application Code chapter.
Let’s put all this together:
int rect callback( PtWidget t *widget,void *client data,PtCallbackInfo t *cbinfo)
{...
}
intadd shapes (PtWidget t *widget, ApInfo t *apinfo,
PtCallbackInfo t *cbinfo){
PtArg t args[2];PtWidget t *new item;
/* eliminate ’unreferenced’ warnings */widget=widget, apinfo-apinfo, cbinfo=cbinfo;
PtSetArg (&args[0], Pt ARG TEXT STRING,
350 Chapter 10 � Working with Code November 2, 2006
2006, QNX Software Systems GmbH & Co. KG. Initializing menus
"Rectangle", 0);PtSetArg (&args[1], Pt ARG ACCEL KEY, "R", 0);new item = PtCreateWidget( PtMenuButton, Pt DEFAULT PARENT,
2, args);PtAddCallback (new item, Pt CB ACTIVATE,
rect callback, NULL);
/* Repeat the above for other shapes... */
return (Pt CONTINUE);}
Creating submenus
You can create submenus in the menu created for a menu functionitem as follows:
1 Create a menu button for the cascade menu, setting thePt ARG BUTTONTYPEto Pt MENU RIGHT orPt MENU DOWN, as required.
2 Save a pointer to the current parent widget by callingPtGetParent():menu = PtGetParentWidget ();
3 Create a newPtMenu widget and setPt MENU CHILD in thenew menu’sPt ARG MENU FLAGSresource.
PtMenu is a container, so this new menu becomes the current defaultparent.
☞
4 Create submenu items, as described above.
5 Reset the default parent from the saved value by callingPtSetParentWidget():PtSetParentWidget( menu );
6 Continue adding items to the top menu, if desired.
November 2, 2006 Chapter 10 � Working with Code 351

Initializing menus 2006, QNX Software Systems GmbH & Co. KG.
This example shows how to generate a submenu, as well as one waytheclient datacan be used in a generic callback to identify the itemchosen from the menu:
/* A menu with a submenu */
/* Standard headers */#include <stdio.h>#include <stdlib.h>#include <unistd.h>#include <string.h>
/* Toolkit headers */#include <Ph.h>#include <Pt.h>#include <Ap.h>
/* Local headers */#include "abimport.h"#include "proto.h"
/* Constants for the shapes in the menu */#define RECTANGLE 1#define CIRCLE 2#define DOT 3#define BLOB 4#define POLYGON 5
intShapeMenuCB( PtWidget t *widget, void *client data,
PtCallbackInfo t *cbinfo ){int shape chosen = (int) client data;
widget=widget, client data=client data, cbinfo=cbinfo;
/* This callback uses the client data to determinewhich shape was chosen. */
switch (shape chosen) {
case RECTANGLE: ...break;
case CIRCLE : ...break;
case DOT : ...break;
case BLOB : ...break;
case POLYGON : ...
352 Chapter 10 � Working with Code November 2, 2006

2006, QNX Software Systems GmbH & Co. KG. Initializing menus
break;default : printf ("Unknown shape: %d\n",
shape chosen);}
return (Pt CONTINUE);}
intadd shapes( PtWidget t *widget, ApInfo t *apinfo,
PtCallbackInfo t *cbinfo ){PtArg t args[3];PtWidget t *menu, *new item;
/* eliminate ’unreferenced’ warnings */widget = widget, apinfo = apinfo, cbinfo = cbinfo;
PtSetArg (&args[0], Pt ARG TEXT STRING, "Rectangle", 0);PtSetArg (&args[1], Pt ARG ACCEL KEY, "R", 0);new item = PtCreateWidget( PtMenuButton, Pt DEFAULT PARENT,
2, args);PtAddCallback ( new item, Pt CB ACTIVATE, ShapeMenuCB,
(void *)RECTANGLE );
PtSetArg (&args[0], Pt ARG TEXT STRING, "Circle", 0);PtSetArg (&args[1], Pt ARG ACCEL KEY, "C", 0);new item = PtCreateWidget( PtMenuButton, Pt DEFAULT PARENT,
2, args);PtAddCallback ( new item, Pt CB ACTIVATE, ShapeMenuCB,
(void *)CIRCLE );
/* Create a menu button for the submenu. */
PtSetArg (&args[0], Pt ARG TEXT STRING, "Miscellaneous", 0);PtSetArg (&args[1], Pt ARG ACCEL KEY, "M", 0);PtSetArg (&args[2], Pt ARG BUTTON TYPE, Pt MENU RIGHT, 0 );new item = PtCreateWidget( PtMenuButton, Pt DEFAULT PARENT,
3, args);
/* Save the current default parent. */
menu = PtGetParentWidget();
/* Create a submenu. It becomes the new default parent. */
PtSetArg (&args[0], Pt ARG MENU FLAGS,Pt MENU CHILD, Pt MENU CHILD);
new item = PtCreateWidget( PtMenu, Pt DEFAULT PARENT, 1, args);
November 2, 2006 Chapter 10 � Working with Code 353

Delaying and forcing updates to the display 2006, QNX Software Systems GmbH & Co. KG.
/* Add items to the submenu. */
PtSetArg (&args[0], Pt ARG TEXT STRING, "Dot", 0);PtSetArg (&args[1], Pt ARG ACCEL KEY, "D", 0);new item = PtCreateWidget( PtMenuButton, Pt DEFAULT PARENT,
2, args);PtAddCallback ( new item, Pt CB ACTIVATE, ShapeMenuCB,
(void *)DOT );
PtSetArg (&args[0], Pt ARG TEXT STRING, "Blob", 0);PtSetArg (&args[1], Pt ARG ACCEL KEY, "B", 0);new item = PtCreateWidget( PtMenuButton, Pt DEFAULT PARENT,
2, args);PtAddCallback ( new item, Pt CB ACTIVATE, ShapeMenuCB,
(void *)BLOB);
/* Restore the current default parent. */
PtSetParentWidget (menu);
/* Continue adding items to the top menu. */
PtSetArg (&args[0], Pt ARG TEXT STRING, "Polygon", 0);PtSetArg (&args[1], Pt ARG ACCEL KEY, "P", 0);new item = PtCreateWidget( PtMenuButton, Pt DEFAULT PARENT,
2, args);PtAddCallback ( new item, Pt CB ACTIVATE, ShapeMenuCB,
(void *)POLYGON);
return( Pt CONTINUE );}
Delaying and forcing updates to the displayIf your application is making changes to a lot of widgets at once, youmight want to delay updating the display until you’re finished makingthe changes. Doing this can reduce flickering, and, in some cases,improve your application’s performance.
You can delay updating:
� all of your application’s widgets — the Photon libraries record anydamage, but don’t redraw the widgets.
354 Chapter 10 � Working with Code November 2, 2006

2006, QNX Software Systems GmbH & Co. KG. Delaying and forcing updates to the display
� a specific container and its children — the libraries don’t evenrecord the damage.
GloballyThe Photon libraries use ahold countto let you delay updating thedisplay for your entire application:
� When the hold count is nonzero, the display isn’t updated. Toincrement the hold count, callPtHold().
� When you modify a widget, the libraries mark it as damaged.
� When the hold count is 0, the libraries repair damaged widgets asnormal. To decrement the hold count, callPtRelease()orPtUpdate()(these two functions are identical).
For more information about these functions, see the PhotonLibraryReference.
For a specific containerThe Photon libraries useflux countsto let you delay updating thedisplay for a specific container. When the flux count is nonzero, andyou modify the container or its children, the widgets aren’t marked asdamaged. What happens when the flux count returns to zero dependson which functions you use:
PtStartFlux()PtEndFlux() When the container’s flux count goes to zero, you
must explicitly damage the areas you want to repair.
PtContainerHold()PtContainerRelease()
When the container’s flux count goes to zero, theentire container is marked as damaged.
PtContainerHold()andPtContainerRelease()are easier to use,because you don’t need to determine which widgets or areas you need
November 2, 2006 Chapter 10 � Working with Code 355
Delaying and forcing updates to the display 2006, QNX Software Systems GmbH & Co. KG.
to damage. However, there might be more flickering than if you usePtStartFlux()andPtEndFlux().
If you need to determine if a container or any of its parents iscurrently in flux, callPtIsFluxing().
For more information about these functions, see the PhotonLibraryReference.
Forcing updatesYou can callPtFlush()at any time to immediately update thedamaged areas of the display.PtFlush()ignores the hold count anddoesn’t change it.
If a container is in flux, and you modify it or its children, the Photonlibraries don’t mark the widgets as damaged, soPtFlush()doesn’trepair them.
Combining holds on the whole application, holds on containers, andcalls toPtFlush()can give you unexpected results. For example, ifyou hold the entire application, damage part of a container, hold thecontainer, modify it, and then callPtFlush(), the libraries repair thedamage — displaying whatever portion of the modifications thataffect the damaged area.
☞
356 Chapter 10 � Working with Code November 2, 2006

Chapter 11
Manipulating Resources inApplication Code
In this chapter. . .Argument lists 359Setting resources 361Getting resources 369Application-level resources 378
November 2, 2006 Chapter 11 � Manipulating Resources in Application Code 357


2006, QNX Software Systems GmbH & Co. KG. Argument lists
This chapter describes how you can set and get the values of awidget’s resources inside your application.
Although you can set the initial values of a widget’s resources inPhAB, you’ll probably need to access them from your code. Forexample:
� when a dialog appears, you may need to initialize some of the datait displays by setting resources beforehand
� when the user types a value in aPtText widget, you may need thevalue in your program, so you’ll have to get resources.
In addition, if you usePtCreateWidget()to instantiate a widget inyour code, you can give an initial value to its resources.
The value for the resource is specified or retrieved using anargumentlist.
There aretwosteps involved in specifying or retrieving more than oneresource value:
� Setting up the argument list, using thePtSetArg()macro.
� Setting the value, usingPtSetResources(), or retrieving the value,usingPtGetResources().
If you’re getting or setting one resource, it’s easier to usePtGetResource()or PtSetResource()— you don’t need to set up theargument list.
☞
Argument listsAn argument list is an array ofPtArg t structures (see the PhotonLibrary Reference). Each of these elements identifies a widgetresource and a new value for the resource (or the address of a variablethat will be set to the resource’s current value).
You can use thePtSetArg()macro to initialize each element of theargument list:
November 2, 2006 Chapter 11 � Manipulating Resources in Application Code 359

Argument lists 2006, QNX Software Systems GmbH & Co. KG.
PtSetArg( PtArg t *arg,long type,long value,long len );
If the values don’t need to be calculated at runtime, you might be ableto usePt ARG()instead to initialize the argument list. For moreinformation, see the PhotonLibrary Reference.
☞
The first two arguments toPtSetArg()are the address of the argumentlist element, and the name of the resource. The third and fourtharguments vary, depending on the type of the resource, and onwhether a set or a get operation is being applied. When setting aresource, the third argument is always used to hold a resource value ora pointer to a resource’s value.
The fourth argument is used as either a size indicator or a mask,depending on the type of the value being specified. The possibleresource types are given in the table below:
Type: Description:
Alloc An arbitrarily sized memory object
Array An array
Boolean A bit that’s either on or off
Color A color
Complex A resource that’s handled in a special way; see below.
Flag A value in which each bit has a different meaning
Function A pointer to a function
Image A pointer to aPhImage t structure
Link A linked list
Pointer A pointer to an address that you specify
continued. . .
360 Chapter 11 � Manipulating Resources in Application Code November 2, 2006

2006, QNX Software Systems GmbH & Co. KG. Setting resources
Type: Description:
Scalar A value that can be represented within a singlelong
String A null-terminated string
Struct A fixed-size data type, usually a structure,float, ordouble
For information about the resources defined for each widget, see thePhotonWidget Reference.
Complex resources are special; see their descriptions in theWidgetReferencefor instructions for setting and getting them. Widgets thathave complex resources usually have convenience functions to makeit easier to work with them.
☞
Setting resourcesRemember that there aretwosteps involved in setting more than oneresource value:
� Setting up the argument list, using thePtSetArg()macro.
� Setting the value, usingPtSetResources().
If you’re setting one resource, it’s easier to usePtSetResource()—you don’t need to set up the argument list. See “Setting one resource,”below.
Argument lists for setting resourcesMany of the sections that follow demonstrate setting some resourcesfor aPtComboBox widget. Note that you can set more than oneresource at a time. To do so, define an argument list of the appropriatelength:
PtArg t args[5];
After initializing the argument list, you’ll actually set the resources.
November 2, 2006 Chapter 11 � Manipulating Resources in Application Code 361
Setting resources 2006, QNX Software Systems GmbH & Co. KG.
Scalar and color resources
When setting a scalar value, you should specify the value as the thirdargument toPtSetArg(). The fourth argument isn’t used and should beset to 0.
For example, to set the bevel width of the combo box, pass the newvalue as the third argument:
PtSetArg(&args[0], Pt ARG BEVEL WIDTH, 5, 0);
When you callPtSetResources(), the widget copies the scalar valueinto its own internal data structure.
String resources
Setting a string value is similar to setting a scalar value; you specifythe string as the third argument to thePtSetArg()macro. The fourthargument is the number of bytes to copy; if it’s 0,strlen() is used todetermine the length of the string.
For example, to set the default text for the combo box, you couldspecify a value for thePt ARG TEXTSTRINGresource in oneelement of the argument list:
PtSetArg(&args[1], Pt ARG TEXT STRING,"Rectangle", 0);
When you callPtSetResources(), the widget copies the string into itsown internal data structure.
If you need to use international (non-ASCII) characters in a string, doone of the following:
� Define the string in a widget database and use the language editorto translate the string. See the International Language Supportchapter.
� Useped or some other UTF-compatible editor to edit theapplication’s C code. You can then use the compose sequencesdescribed in “Photon compose sequences” in the UnicodeMultilingual Support appendix.
362 Chapter 11 � Manipulating Resources in Application Code November 2, 2006
2006, QNX Software Systems GmbH & Co. KG. Setting resources
Mostpterm-based editors, such aselvis andvedit, aren’tUTF-compatible.
☞
For more information onped, see the QNX NeutrinoUtilitiesReference.
� Look up the desired symbol in<photon/PkKeyDef.h>, usewctomb()to convert the character from Unicode to UTF-8, andthen code the hexadecimal digits in your string. For example, theFrench wordresume would be coded as"r\xC3\xA9sum\xC3\xA9" — difficult to read, but it workswith all editors.
For more information on Unicode and UTF-8, see the appendix onUnicode Multilingual Support.
Alloc resources
Some resources are designed to store an allocated block of memory.For example, every widget includes aPt ARGUSERDATAresourcethat you can use to store any data you want in the widget’s internalmemory. To set this resource, pass a pointer to the data as the thirdargument toPtSetArg(). The fourth argument is the size of the blockof memory, in bytes:
my struct user data;
/* Initialize the data */
PtSetArg(&args[2], Pt ARG USER DATA, &user data,sizeof (user data));
The widget copies the number of bytes given into its internal memorywhen you callPtSetResources().
Image resources
Image resources are designed to store aPhImage t structure. Forexample, aPtLabel has aPt ARG LABEL IMAGE resource that youcan use to store an image. To set this resource, create and initialize the
November 2, 2006 Chapter 11 � Manipulating Resources in Application Code 363

Setting resources 2006, QNX Software Systems GmbH & Co. KG.
PhImage t structure, and pass a pointer to it as the third argument toPtSetArg(). The fourth argument is 0:
PhImage t *my image;
/* Create and initialize the image. */
PtSetArg(&args[2], Pt ARG LABEL IMAGE, my image, 0);
The widget copies the image structure (but not any memory pointed toby thePhImage t members) into its internal memory when you callPtSetResources().
Array resources
When setting an array value, the third argument toPtSetArg()is theaddress of the array. The fourth argument is the number of elementsin the array.
For example, the following entry in the argument list can be used toset upPt ARG ITEMS, the list of choices for the combo box:
char *cbox items[3] = {"Circle", "Rectangle", "Polygon"};
PtSetArg(&args[3], Pt ARG ITEMS, cbox items, 3);
The widget copies the contents of the array into its own internal datastructure when you callPtSetResources().
Flag resources
When setting a flag, the third argument toPtSetArg()is a bit fieldspecifying thevalueof the bits to be set. The fourth argument is abitmaskindicating which elements of the bit field should be used.
364 Chapter 11 � Manipulating Resources in Application Code November 2, 2006

2006, QNX Software Systems GmbH & Co. KG. Setting resources
For the value, usePt TRUE, Pt FALSE, or a combination of specificbits and their complements. Don’t use a value of 1, since it containsjust one bit that’s on; that bit might not correspond to the bit you’retrying to set.
☞
For example, the following argument list specification turns on thecombo box widget’sPt COMBOBOX STATIC flag (so that the combobox always displays the list of items):
PtSetArg(&args[4], Pt ARG CBOX FLAGS,Pt TRUE, Pt COMBOBOX STATIC);
When you callPtSetResources(), the widget uses the bit mask todetermine which bits of its internal flag resource representation toalter. It takes the bit values from the value specified.
Function resources
When setting a function resource, pass a pointer to the function as thethird argument toPtSetArg(). The fourth argument is ignored; set it to0.
For example, to specify a drawing function for aPtRaw widget, setthePt ARG RAWDRAWF resource as follows:
PtSetArg( &args[0], Pt ARG RAW DRAW F,&my raw draw fn, 0);
When you callPtSetResources(), the widget copies the pointer intothe resource.
Pointer resources
When setting a pointer resource, the pointer must be given as the thirdargument toPtSetArg(). The fourth argument is ignored and should beset to 0.
When you callPtSetResources(), the widget simply does a shallowcopy of the pointer into the resource.
November 2, 2006 Chapter 11 � Manipulating Resources in Application Code 365
Setting resources 2006, QNX Software Systems GmbH & Co. KG.
The widget doesn’t make a copy of the memory referenced by thepointer; don’t free the memory while the widget is still referencing it.
☞
For example, every widget includes aPt ARGPOINTERresourcethat you can use to store in the widget’s internal memory a pointer toarbitrary data. The widget never refers to this data; it’s just for you touse. To set this resource, allocate the desired memory, and pass apointer to it as the third argument toPtSetArg(). The fourth argumentis set to 0:
my struct *user data;
/* Allocate and initialize the data */
PtSetArg( &args[0], Pt ARG POINTER, user data, 0 );
The widget copies the value of the pointer into its internal memorywhen you callPtSetResources().
Link resources
When setting a Link, pass the address of an array of data as the thirdargument toPtSetArg(). The fourth argument has some specialmeanings:
num appendnumitems (ifnumis 0, one item is appended)
Pt LINK INSERT
insert the first array element at the beginning of the linkedlist
Pt LINK DELETE
remove the first list element that matches the first arrayelement
The widget copies the data into its internal memory when you callPtSetResources().
366 Chapter 11 � Manipulating Resources in Application Code November 2, 2006

2006, QNX Software Systems GmbH & Co. KG. Setting resources
Struct resources
When setting a struct resource, pass the address of the data as thethird argument toPtSetArg(). The fourth argument isn’t used andshould be set to 0.
The widget copies the data into its internal memory when you callPtSetResources().
Boolean resources
When setting a Boolean value, you should specify the value as thethird argument toPtSetArg(), using 0 for false, and a nonzero valuefor true. The fourth argument isn’t used, and should be set to 0.
For example, to set the protocol for aPtTerminal to ANSI, pass anonzero value as the third argument:
PtSetArg(&args[1], Pt ARG TERM ANSI PROTOCOL, 1, 0);
When you callPtSetResources(), the widget clears or sets one bit inits own internal data structure depending on whether or not the valueis zero.
Calling PtSetResources()Once you’ve set up the argument list, you’re ready to set theresources. Remember thatPtSetArg()doesn’t set the resources; it justsets up the argument list.
You can usePtSetResources()to set the new values for resources:
int PtSetResources( PtWidget t *widget,int n args,PtArg t *args );
The arguments to this function are a pointer to the widget, the numberof entries in the argument list, and the argument list itself.
You can also set resources by passing an argument list toPtCreateWidget(). The rules for specifying values in argument listelements are the same. For more information, see “Creating widgets”in the Managing Widgets in Application Code chapter.
November 2, 2006 Chapter 11 � Manipulating Resources in Application Code 367

Setting resources 2006, QNX Software Systems GmbH & Co. KG.
For example, you could set the resources of a combo box, using theargument list created above. CallPtSetResources()as follows:
PtSetResources (ABW shapes cbox, 5, args);
In response to a change to its resources, a widget may have toredisplay itself. ThePtSetResources()call triggers this change. Anychanges to the appearance of the widget, however, don’t take effectuntil control is restored to the Photon event-handling loop. Therefore,if PtSetResources()is called from within a callback function or anevent-handling function, the change to the widget won’t be visibleuntil all the callbacks in the callback list and all event handlers havebeen executed.
Setting one resourceIf you’re setting one resource, it’s easier to usePtSetResource()thanPtSetResources(). With PtSetResource(), you don’t need to set up theargument list.
The arguments toPtSetResource()are a combination of those forPtSetArg()andPtSetResources():
int PtSetResource( PtWidget t *widget,long type,long value,long len );
Thewidgetis a pointer to the widget whose resource you’re setting.The other arguments are set just as they are forPtSetArg()whensetting more than one resource. See “Argument lists for settingresources,” above.
For example, setting one resource withPtSetResources()requirescode like this:
PtArg t args[1];
PtSetArg(&args[0], Pt ARG BEVEL WIDTH, 5, 0);PtSetResources (ABW shapes cbox, 1, args);
Setting the same resource withPtSetResource()is like this:
368 Chapter 11 � Manipulating Resources in Application Code November 2, 2006

2006, QNX Software Systems GmbH & Co. KG. Getting resources
PtSetResource (ABW shapes cbox,Pt ARG BEVEL WIDTH, 5, 0);
It takes just one function call, and there’s no need for anargsarray.
Getting resourcesThere aretwosteps involved in retrieving more than one resourcevalue:
� Setting up the argument list, using thePtSetArg()macro.
� Getting the value, usingPtGetResources().
If you’re getting one resource, it’s easier to usePtGetResource()—you don’t need to set up the argument list. See “Getting oneresource,” below.
There are two methods of getting resources: one that involvespointers, and one that doesn’t. The nonpointer method is usuallyeasier and safer:
� Since you’re getting a copy of the value, the chances ofoverwriting the original by accident are smaller.
� You don’t need to worry about the type of the value (short versuslong).
� You have fewer local variables and don’t use pointers to them,which makes your code easier to read and helps the compilergenerate better code.
The pointer method may be less confusing if you’re getting the valuesof several resources at once; you’ll have named pointers to the valuesinstead of having to remember which element in the argument listcorresponds to which resource.
November 2, 2006 Chapter 11 � Manipulating Resources in Application Code 369

Getting resources 2006, QNX Software Systems GmbH & Co. KG.
Not using pointersIf you set thevalueandlenarguments toPtSetArg()to zero,PtGetResources()returns the resource’s value (converted tolong) asfollows:
Resource type value len
Flags (any C type) Value of theresource
N/A
Scalar (any C type) Value of theresource
N/A
Pointer (any C type) Value of theresource
N/A
String Address of the string N/A
Struct Address of the data N/A
Array Address of the firstarray item
Number of items inthe array
Alloc Address of wherethe resource isstored
N/A
Boolean 0 (false) or 1 (true) N/A
Scalar and flag resources (nonpointer method)
To get a scalar or flag resource (of any C type) with the nonpointermethod:
unsigned long getscalar( PtWidget t *widget, long type ) {/* Get any kind of scalar */PtArg t arg;PtSetArg( &arg, type, 0, 0 );PtGetResources( widget, 1, &arg );return arg.value;}
370 Chapter 11 � Manipulating Resources in Application Code November 2, 2006
2006, QNX Software Systems GmbH & Co. KG. Getting resources
String resources (nonpointer method)
Here’s how to use the nonpointer method to get the value of a stringresource:
const char *getstr2( PtWidget t *widget, long type ) {PtArg t arg;
PtSetArg( &arg, type, 0, 0 );PtGetResources( widget, 1, &arg );return (char*) arg.value;}
Boolean resources (nonpointer method)
In the nonpointer method to get a boolean, the value (0 or 1) isreturned invalueargument toPtSetArg():
int getbool( PtWidget t *widget, long type ) {PtArg t arg;
PtSetArg( &arg, type, 0, 0 );PtGetResources( widget, 1, &arg );return arg.value;}
Using pointersWhen using the pointer method to get a scalar, array, or flag resource,the widget always gives a pointer to an internal widget data structure.In the argument list element you set up usingPtSetArg(), you mustprovide the address of a variable to which the internal data pointer canbe assigned.
The fourth argument isn’t used for most types of resources. Forarrays, it’s the address of a pointer that on return fromPtGetResources()points to the number of entries.
For example, to obtain the contents of thePt ARG FLAGSresource(which is along) for a widget, you must pass theaddress of a pointerto along:
November 2, 2006 Chapter 11 � Manipulating Resources in Application Code 371

Getting resources 2006, QNX Software Systems GmbH & Co. KG.
const long *flags;PtArg t arg[1];
PtSetArg(&arg[0], Pt ARG FLAGS, &flags, 0);PtGetResources(ABW label, 1, arg);
CAUTION: PtGetResources()returns pointers directly into thewidget’s internal memory. Don’t attempt to modify the resourcesdirectly using these pointers. Such a modification won’t have thedesired effect and will likely corrupt the widget’s behavior.Never freethese pointers either— this will certainly result in a memoryviolation or some other fault.
Usingconst pointers will help avoid these problems.
Changes to the widget’s state may invalidate these pointers; use thempromptly.
!
If you wish to retrieve the value of a given resource and then modifythat value:
1 Get the resource.
2 Copy the resource to a temporary variable.
3 Modify the temporary variable.
4 Using the modified copy, set the resource.
You canuse the value obtained to set the value of another resource ofthis or any other widget, as long as you don’t change the originalvalue.
For example, you can use the following code to obtainPt ARG TEXT STRING, the text string displayed in the label widgetnamedlabel:
char *str;PtArg t args[1];
PtSetArg(&args[0], Pt ARG TEXT STRING, &str, 0);PtGetResources(ABW label, 1, args);
372 Chapter 11 � Manipulating Resources in Application Code November 2, 2006

2006, QNX Software Systems GmbH & Co. KG. Getting resources
You can then assign this text string to another label namedlabel2:
PtSetArg(&args[0], Pt ARG TEXT STRING, str, 0);PtSetResources(ABW label2, 1, args);
Scalar and flag resources (pointer method)
If you’re getting scalar or flag resources using the pointer method:
� Thevalueargument toPtSetArg()is the address of a pointer to theappropriate C type.
� len isn’t used.
WhenPtGetResources()is called, the pointer is set to point to thewidget’s internal storage for that resource.
Here are some functions that get a scalar or flag resource, using thepointer method:
unsigned long getlong( PtWidget t *widget, long type ) {/* Get a long or long flags */PtArg t arg; unsigned long const *result;
PtSetArg( &arg, type, &result, 0 );PtGetResources( widget, 1, &arg );return *result;}
unsigned getshort( PtWidget t *widget, long type ) {/* Get a short or short flags */PtArg t arg; unsigned short const *result;
PtSetArg( &arg, type, &result, 0 );PtGetResources( widget, 1, &arg );return *result;}
unsigned getbyte( PtWidget t *widget, long type ) {/* Get a char or char flags */PtArg t arg; unsigned char const *result;
PtSetArg( &arg, type, &result, 0 );PtGetResources( widget, 1, &arg );return *result;}
November 2, 2006 Chapter 11 � Manipulating Resources in Application Code 373
Getting resources 2006, QNX Software Systems GmbH & Co. KG.
String resources (pointer method)
If you’re getting string resources using the pointer method:
� Thevalueargument toPtSetArg()is the address of achar pointer.
� len isn’t used.
WhenPtGetResources()is called, the pointer specified is set to pointto the widget’s internal storage for the string resource. For example:
const char *getstr1( PtWidget t *widget, long type ) {PtArg t arg; const char *str;
PtSetArg( &arg, type, &str, 0 );PtGetResources( widget, 1, &arg );return str;}
Alloc resources (pointer method)
If you’re getting alloc resources using the pointer method:
� Thevalueargument toPtSetArg()is the address of a pointer of theappropriate type (the type is determined by the data given to thewidget when this resource is set).
� The len isn’t used.
WhenPtGetResources()is called, the pointer specified is set to pointto the widget’s internal data.
Image resources (pointer method)
If you’re getting Image resources using the pointer method:
� Thevalueargument toPtSetArg()is the address of a pointer to aPhImage t structure.
� The len isn’t used.
WhenPtGetResources()is called, the pointer specified is set to pointto the widget’s internal data.
374 Chapter 11 � Manipulating Resources in Application Code November 2, 2006

2006, QNX Software Systems GmbH & Co. KG. Getting resources
Array resources (pointer method)
If you’re getting array resources using the pointer method:
� Thevalueargument toPtSetArg()is the address of a pointer of theappropriate C type (the first of the two C types given in the “NewResources” table).
� len is the address of a pointer of the second C type given.
WhenPtGetResources()is called:
� The pointer given byvalueis set to point to the beginning of thearray in the widget’s internal storage.
� The pointer given bylen is set to point to the array-item count inthe widget’s internal storage.
Pointer resources (pointer method)
If you’re getting pointer resources using the pointer method:
� Thevalueargument toPtSetArg()is the address of a pointer of theappropriate C type.
� len isn’t used.
WhenPtGetResources()is called, the pointer specified is set to pointto the same data as the widget’s internal pointer. The data is externalto the widget; you might be able to modify it, depending on theresource.
Link resources (pointer method)
If you’re getting link resources using the pointer method:
� Thevalueargument toPtSetArg()is the address of a pointer to aPtLinkedList t list structure. This structure contains at least:
struct Pt linked list *next
A pointer to the next item in the list.
char data[1] The address of the data stored in the list.
November 2, 2006 Chapter 11 � Manipulating Resources in Application Code 375
Getting resources 2006, QNX Software Systems GmbH & Co. KG.
� len isn’t used.
WhenPtGetResources()is called, The pointer given byvalueis set topoint to the first node of the widget’s internal linked list.
If you get a callback resource, thevalueargument toPtSetArg()is theaddress of a pointer to aPtCallbackList t structure. For moreinformation, see “Examining callbacks” in the Managing Widgets inApplication Code chapter.
☞
Struct resources (pointer method)
If you’re getting struct resources using the pointer method:
� Thevalueargument toPtSetArg()is the address of a pointer of theappropriate C type.
� len isn’t used.
WhenPtGetResources()is called, the pointer specified is set to pointto the widget’s internal storage for the struct resource.
Boolean resources (pointer method)
If you’re getting boolean resources using the pointer method:
� Thevalueargument toPtSetArg()is a pointer to anint.
� len isn’t used.
WhenPtGetResources()is called, theint is set to 1 if the Boolean istrue, or 0 if it’s false.
For example, to get the value of thePt ARG CURSOROVERRIDEresource of aPtContainer:
PtArg t arg;int bool value;
PtSetArg( &arg[0], Pt ARG CURSOR OVERRIDE, &bool value, 0 );PtGetResources (ABW container, 1, arg);
if ( bool value ) {
376 Chapter 11 � Manipulating Resources in Application Code November 2, 2006
2006, QNX Software Systems GmbH & Co. KG. Getting resources
/* The container’s cursor overrides that of its children. */}
Calling PtGetResources()UsePtGetResources()to obtain the values of each of the resourcesidentified in an argument list:
int PtGetResources( PtWidget t *widget,int n args,PtArg t *args );
The arguments to this function are the identifier for the widget, thenumber of entries in the argument list, and the argument list itself.
PtGetResources()returns 0 on success, or -1 if an error occurs. Areturn code of -1 might indicate that you’ve tried to get the value of aresource that isn’t defined for the widget.
Getting one resourceIf you’re getting the value of one resource, it’s easier to usePtGetResource()thanPtGetResources(). With PtGetResource(), youdon’t need to set up the argument list. The arguments toPtGetResource()are:
int PtGetResource( PtWidget t *widget,long type,long value,long len );
Thewidgetis a pointer to the widget whose resource you’re getting.The other arguments are set just as they are forPtSetArg()whengetting more than one resource using the pointer method.
Here’s an example of getting one resource withPtGetResources()andthe pointer method:
unsigned short *width;PtArg t arg;
PtSetArg( &arg, Pt ARG BEVEL WIDTH, &width, 0 );PtGetResources( widget, 1, &arg );
November 2, 2006 Chapter 11 � Manipulating Resources in Application Code 377

Application-level resources 2006, QNX Software Systems GmbH & Co. KG.
With PtGetResource(), the code is like this:
unsigned short *width;
PtGetResource( widget, Pt ARG BEVEL WIDTH, &width, 0 );
CAUTION: PtGetResource()returns a pointer directly into thewidget’s internal memory. Don’t attempt to modify the resourcedirectly using this pointer. Such a modification won’t have the desiredeffect and will likely corrupt the widget’s behavior.Never free thepointer either— this will certainly result in a memory violation orsome other fault.
Using aconst pointer will help avoid these problems.
Changes to the widget’s state may invalidate the pointer; use itpromptly.
!
Application-level resourcesApplications have callback resources that you can set and get, justlike widgets, except the resources apply to the application as a wholeinstead of individual widget instances. These resources apply toapplications:
� Pt CB APP EXIT
� Pt CB APP WCLASS CREATED
� Pt CB FILTER
� Pt CB RAW
� Pt CB HOTKEY
378 Chapter 11 � Manipulating Resources in Application Code November 2, 2006

2006, QNX Software Systems GmbH & Co. KG. Application-level resources
At this time, application-level resources are all callback resources.There may be other resource types in a future version of the Photonlibrary.
☞
To manipulate application-level resources, you can use thesefunctions:
� PtAppAddCallback()
� PtAppGetResource()
� PtAppGetResources()
� PtAppRemoveCallback()
� PtAppSetResource()
� PtAppSetResources()
The application-level resource functions are similar to their widgetcounterparts, except you don’t specify a widget.
Setting resourcesYou can set application-level resources using these functions:
� PtAppAddCallback()
� PtAppSetResource()
� PtAppSetResources()
If you are adding a single callback to an application’s callback list,PtAppAddCallback()is the easiest method. For example, here is anapplication exit callback function that prints a message to the standardoutput when the application exits:
int exit cb(void *data,PtCallbackInfo t *cbinfo)
{printf( "I\’m exiting\n" );return( Pt CONTINUE );
};
November 2, 2006 Chapter 11 � Manipulating Resources in Application Code 379

Application-level resources 2006, QNX Software Systems GmbH & Co. KG.
To add this callback to the application’sPt CB APP EXIT callback listusingPtAppAddCallback(), you would put this in the application’sinitialization code:
PtAppAddCallback(Pt CB APP EXIT, exit cb, NULL);
You can also set a single callback usingPtAppSetResource(), butinstead of passing it a pointer to the callback, you need to pass it theaddress of aPtAppCallback t:
PtAppCallback t exit callback = {exit cb, NULL};PtAppSetResource(Pt CB APP EXIT, &exit callback, 0);
To use thePtAppSetResources()function, you’ll need to create anargument list usingPtSetArg(). For example:
PtAppCallback t exit callbacks[] = {{exit cb, NULL}};PtArg t args[1];
PtSetArg( &args[0], Pt CB APP EXIT, exit callbacks,sizeof(exit callbacks)/sizeof(exit callbacks[0]));
PtAppSetResources( 1, args );
Removing callbacksYou can remove a callback usingPtAppRemoveCallback(). It takesthe same arguments asPtAppAddCallback(). For example, to removethe callback added in the examples above:
PtAppRemoveCallback( Pt CB APP EXIT, exit cb, NULL );
Getting callbacksYou can retrieve a pointer to an application callback to examine it.You can usePtAppGetResource()to get a single callback, orPtAppGetResources()to get one or more.
For example, to retrieve a pointer to the application exit callbackadded in the previous example, you would use:
380 Chapter 11 � Manipulating Resources in Application Code November 2, 2006
2006, QNX Software Systems GmbH & Co. KG. Application-level resources
PtAppCallback t *my exit callback;
PtAppGetResource(Pt CB APP EXIT, &my exit callback, 0 );
See the section on Getting Resources for more information.
November 2, 2006 Chapter 11 � Manipulating Resources in Application Code 381


Chapter 12
Managing Widgets in ApplicationCode
In this chapter. . .Creating widgets 385Ordering widgets 386Callbacks 388Event handlers 393Widget styles 397
November 2, 2006 Chapter 12 � Managing Widgets in Application Code 383

2006, QNX Software Systems GmbH & Co. KG. Creating widgets
We recommend that you create your application’s UI in PhAB — it’seasier than doing it in your code. However, if the interface isdynamic, you’ll probably have to create parts of it “on the fly.”
Creating widgetsCreating a widget in your application code is a bit more work thancreating it in PhAB. That’s because PhAB looks after a lot of thephysical attributes for you, including size, location, and so on. If youcreate the widget in your code, you’ll have to set these resourcesyourself.
To create a widget in your code, callPtCreateWidget(). The syntax isas follows:
PtWidget t *PtCreateWidget(PtWidgetClassRef t *class,PtWidget t *parent,unsigned n args,PtArg t *args );
The arguments are:
class The type of widget to create (e.g.PtButton)
parent The parent of the new widget. If this isPt DEFAULT PARENT, the new widget is made a child ofthe default parent, which is the most recently createdcontainer-class widget. Ifparentis Pt NO PARENT, thewidget has no parent.
n args The number of elements in theargsarray.
args An array ofPtArg t structures (see the PhotonLibraryReference) that store your settings for the widget’sresources. These settings are like the ones used forPtSetResources(); see the Manipulating Resources inApplication Code chapter.
November 2, 2006 Chapter 12 � Managing Widgets in Application Code 385

Ordering widgets 2006, QNX Software Systems GmbH & Co. KG.
You can specify the default parent (used if theparentargument toPtCreateWidget()is Pt DEFAULT PARENT) by callingPtSetParentWidget(). To assign a widget to a different container, callPtReparentWidget().
Here are a few things to note about widgets created in applicationcode:
� The widget isn’t realized until the container widget is realized. Ifthe container is already realized, you can callPtRealizeWidget()torealize the new widget.
� If you create a widget in a PhAB module and then destroy themodule, the widget is destroyed, too. The next time the module iscreated, it will appear as it was specified in PhAB.
� If you save a global pointer to the widget, make sure you reset it toNULL when the widget is destroyed. This can easily be done in thewidget’sPt CB DESTROYEDcallback. Failing to reset the globalpointer (and check it before using it) is a frequent source ofproblems with widgets created in code.
Ordering widgetsThe order in which widgets are given focus depends on the order inwhich they were created or on the widget order specified in PhAB(see “Ordering widgets” in the Creating Widgets in PhAB chapter).The backmost widget is the first in the tab order; the frontmost widgetis the last.
If you’re creating widgets programmatically, you can creating them inthe order in which you want them to get focus, or you can use thesefunctions to change the order:
PtWidgetInsert()
Insert a widget in the widget family hierarchy
PtWidgetToBack()
Move a widget behind all its brothers
386 Chapter 12 � Managing Widgets in Application Code November 2, 2006
2006, QNX Software Systems GmbH & Co. KG. Ordering widgets
PtWidgetToFront()
Move a widget in front of all its brothers
Alternatively, you can use a widget’sPt CB LOSTFOCUScallback(defined byPtBasic) to override the tab order by giving focus toanother widget.
In the lost-focus callback, usePtContainerGiveFocus()to give focusto the desired widget, and returnPt END from the callback to preventfocus from being given to the original target of the focus change.
ThePt CB LOSTFOCUScallback is called a second time as focus isremoved from the widget to go to the new target. To avoid an endlessloop, use a static variable to indicate that this callback has alreadyredirected focus.
☞
Working in the widget familyThe following functions can be used to work with the widget familyhierarchy, and may be useful in setting the focus order:
PtChildType() Determine the relationship between two widgets
PtFindDisjoint() Return the nearest disjoint parent widget
PtFindFocusChild()
Find the closest focusable child widget
PtFindGuardian()
Find the widget responsible for another widget’sactions
PtGetParent() Find the nearest parent widget that matches thespecified class
PtGetParentWidget()
Return the current default widget parent
November 2, 2006 Chapter 12 � Managing Widgets in Application Code 387

Callbacks 2006, QNX Software Systems GmbH & Co. KG.
PtNextTopLevelWidget()
Get a pointer to the next top-level widget
PtValidParent() Identify a valid parent for a widget
PtWidgetBrotherBehind()
Get the brother behind a widget
PtWidgetBrotherInFront()
Get the brother in front of a widget
PtWidgetChildBack()
Get the child that’s farthest back in a container
PtWidgetChildFront()
Get the child at the very front of a container
PtWidgetFamily()
Traverse the widget hierarchy from back to front
PtWidgetParent()
Get a widget’s parent
PtWidgetSkip() Skip to a widget in the next hierarchy
PtWidgetTree() Walk the widget tree from front to back
PtWidgetTreeTraverse()
Walk the widget family hierarchy from front toback
CallbacksYou can add and remove callbacks in your code as well as from PhAB— just watch for differences between the two types!
388 Chapter 12 � Managing Widgets in Application Code November 2, 2006

2006, QNX Software Systems GmbH & Co. KG. Callbacks
Adding callbacksAn application registers callbacks by manipulating the widget’scallback resources. The Photon widget classes employ a namingconvention for these resources — they all begin withPt CB .
Callbacks can be added to the callback list kept by these resourcesusingPtAddCallbacks()to add several callback functions to the list orPtAddCallback()to add just one. In either case, the first twoarguments to the function are the widget and the name of the callbackresource to be augmented. The remaining arguments depend onwhich function is used.
The third argument toPtAddCallbacks()is an array of callbackrecords. Each record contains a pointer to a callback function and theassociated client data pointer that will be passed to the callbackfunction when it’s invoked. Each of these callback records is copiedto the widget’s internal callback list.
For example, we might want to have the application perform someaction when the user selects (i.e. presses) a button. ThePtButton
widget class provides thePt CB ACTIVATEcallback resource fornotifying the application when the button has been pressed. To createthe widget and attach a callback function to this callback resource,we’d have to use code like this:
{PtWidget t *button;int push button cb( PtWidget t *, void *,
PtCallbackInfo t *);PtCallback t callbacks[] = { {push button cb, NULL} };
...
button = PtCreateWidget(PtButton, window, 0, NULL);PtAddCallbacks(button, Pt CB ACTIVATE, callbacks, 1);
}
wherepushbuttoncb is the name of the application function thatwould be called when the user presses the button. ThePtCallback t structure is used to define lists of callbacks; fordetails, see the PhotonWidget Reference.
November 2, 2006 Chapter 12 � Managing Widgets in Application Code 389

Callbacks 2006, QNX Software Systems GmbH & Co. KG.
When adding only one callback function to the callback list (as in thiscase), it’s simpler to usePtAddCallback(). This function takes thepointer to the callback function as the third argument, and the clientdata pointer as the final argument. The above code fragment could bewritten more concisely as:
{PtWidget t *button;int push button cb( PtWidget t *, void *,
PtCallbackInfo t *);button = PtCreateWidget(PtButton, window, 0, NULL);PtAddCallback(button, Pt CB ACTIVATE, push button cb,
NULL);}
You can also give an array of callback records as the value for thecallback resource when using argument lists in conjunction withPtCreateWidget()or PtSetResources(). Since the callback list is anarray, you should specify the array’s base address as the thirdargument toPtSetArg(), and the number of elements as the finalargument. In this case, the callback records are added to the currentcallback list, if there is one. This gives us another way to specify thecallback for the above example:
{PtArg t arg[5];int push button cb( PtWidget t *, void *,
PtCallbackInfo t *);PtCallback t callbacks[] = { {push button cb, NULL} };
...PtSetArg(&args[0], Pt CB ACTIVATE, callbacks, 1);PtCreateWidget(PtButton, window, 1, arg);
}
Each of these methods has its advantages.PtAddCallback()is ofcourse simple.PtAddCallbacks()is more efficient when there areseveral callbacks. UsingPtSetArg()and passing the result toPtCreateWidget()allows the widget creation and callback listattachment to be performed atomically.
390 Chapter 12 � Managing Widgets in Application Code November 2, 2006

2006, QNX Software Systems GmbH & Co. KG. Callbacks
Callback invocationWhen called, the callback function is invoked with the followingparameters:
PtWidget t *widget
The widget that caused the callback function to be called, i.e.the one on which the action took place.
void *client data
Application-specific data that was associated with the callbackwhen it was registered with the widget.
The client data that’s passed to a callback you add from your codeisn’t the same as theapinfodata passed to a PhAB callback.
☞
PtCallbackInfo t *call data
A pointer to aPtCallbackInfo t structure (see the PhotonWidget Reference) that holds data specific to this invocation ofthe callback. It relates to the reason the callback was called andmay have data specific to the callback’s behavior.
ThePtCallbackInfo t structure is defined as:
typedef struct Pt callback info {unsigned long reason;unsigned long reason subtype;PhEvent t *event;void *cbdata;
} PtCallbackInfo t;
The elements ofPtCallbackInfo t have the followingmeaning:
� reason— indicates the reason the callback was called; this isnormally set to the name of the callback resource whosecallback list has been called.
� reasonsubtype— indicates a particular callback typeassociated with the reason; for most callbacks, this value iszero.
November 2, 2006 Chapter 12 � Managing Widgets in Application Code 391

Callbacks 2006, QNX Software Systems GmbH & Co. KG.
� event— a pointer to aPhEvent t structure (see the PhotonLibrary Reference) that describes the Photon event thatcaused the callback to be invoked.
� cbdata— call data that is specific to the callback resourcethat caused the callback function to be called.
For more information, see the descriptions of the callbacksdefined for each widget in theWidget Reference.
Removing callbacksYou can remove one or more callbacks from a callback list associatedwith a widget resource using thePtRemoveCallbacks()andPtRemoveCallback()functions.
CAUTION: Don’t try to remove a callback that was added throughPhAB; unexpected behavior may result.!PtRemoveCallbacks()takes an array of callback records as anargument and removes all the callbacks specified by it from thecallback list.PtRemoveCallback()removes just one callback functionfrom the callback list. Both functions take the widget as the firstargument and the widget resource as the second argument.
To remove the callback from the button we’ve created above, wecould do this:
int push button cb( PtWidget t *, void *,PtCallbackInfo t *);
PtCallback t callbacks[] = { {push button cb, NULL} };PtRemoveCallbacks(button, Pt CB ACTIVATE, callbacks, 1);
or this:
int push button cb( PtWidget t *, void *,PtCallbackInfo t *);
PtRemoveCallback(button, Pt CB ACTIVATE, push button cb,
Both the callback function pointer and the client data pointer areimportant when removing callbacks. Only the first element of thecallback list that has both the same callback functionand the sameclient data pointer will be removed from the callback list.
392 Chapter 12 � Managing Widgets in Application Code November 2, 2006

2006, QNX Software Systems GmbH & Co. KG. Event handlers
Examining callbacksYou can examine the callback list by getting the value of theappropriate callback list resource. The type of value you get from acallback list resource is different from the value used to set theresource. Although this resource is set with an array of callbackrecords, the value obtained by getting the resource is apointer to a listof callback records. The type of the list isPtCallbackList t. Eachelement of the list contains acbmember (i.e. the callback record) andanextpointer (which points to the next element of the list).
The following example shows how you can traverse through thePt CB ACTIVATEcallback list forwidgetto find all instances of aparticular callback function,cb:
...PtCallbackList t *cl;
PtGetResources(widget, Pt CB ACTIVATE, &cl, 0);for ( ; cl; cl = cl->next ){
if ( cl->cb.func == cb )break;
}
Event handlersYou can add and remove event handlers (raw and filter callbacks) inyour application code as well as in PhAB — however, there are somedifferences between the two types.
For a description of raw and filter callbacks and how they’re used, see“Event handlers — raw and filter callbacks” in the Events chapter.
For information on adding event handlers in PhAB, see “Eventhandlers — raw and filter callbacks” in the Editing Resources andCallbacks in PhAB chapter.
☞
November 2, 2006 Chapter 12 � Managing Widgets in Application Code 393

Event handlers 2006, QNX Software Systems GmbH & Co. KG.
Adding event handlersAs with callbacks, you can also set or examine event handlers byperforming a set or get directly on the event handler resource. Thefollowing resources ofPtWidget let you specify handlers for Photonevents:
� Pt CB FILTER
� Pt CB RAW
For more information about these callback resources, see the PhotonWidget Reference.
The set operation requires an array of event handler records of typePtRawCallback t. These are similar to the callback recordsmentioned above, havingeventmask, eventf , anddatafields.
Theevent maskis a mask of Photon event types (seePhEvent t inthe PhotonLibrary Reference) indicating which events will cause thecallback function to be invoked. Theeventf anddatamembers arethe event handler function and client data, respectively.
If you add an event handler to a realized widget and the widget’sregion isn’t sensitive to one or more of the events contained in theevent mask, then the region is made sensitive to them.
If you add the event handlerbeforerealizing the widget, you have toadjust the region’s sensitivity yourself after realizing the widget. SeePhRegionChange()in the PhotonLibrary Reference.
☞
A get operation yields aPtRawCallbackList t * list of eventhandler records. As with callback lists, the list contains two members:nextandcb. Thecbmember is an event handler record.
You can addPt CB RAWevent handlers using either thePtAddEventHandler()or PtAddEventHandlers()function.
You can addPt CB FILTERevent handlers using either thePtAddFilterCallback()or PtAddFilterCallbacks()function.
394 Chapter 12 � Managing Widgets in Application Code November 2, 2006
2006, QNX Software Systems GmbH & Co. KG. Event handlers
The arguments toPtAddEventHandler()andPtAddFilterCallback()are:
widget Widget to which the event handler should be added.
eventmask Event mask specifying which events should cause theevent handler to be called.
eventf Event-handling function.
data A pointer to pass to the event handler as client data.
The arguments toPtAddEventHandlers()andPtAddFilterCallbacks()are:
widget Widget to which the event handlers should be added.
handlers Array of event handler records.
nhandlers Number of event handlers defined in the array.
Removing event handlersYou can removePt CB RAWevent handlers by calling eitherPtRemoveEventHandler()or PtRemoveEventHandlers().
You can removePt CB FILTERevent handlers by calling eitherPtRemoveFilterCallback()or PtRemoveFilterCallbacks()
CAUTION: Don’t remove event handlers that were added throughPhAB; unexpected behavior may result.!The parameters toPtRemoveEventHandler()andPtRemoveFilterCallback()are:
widget Widget from which the event handler should beremoved.
November 2, 2006 Chapter 12 � Managing Widgets in Application Code 395

Event handlers 2006, QNX Software Systems GmbH & Co. KG.
eventmask Event mask specifying the events the handler isresponsible for.
eventf Event-handling function.
data Client data associated with the handler.
This looks for an event handler with the same signature — i.e. thesameeventmask, dataandeventf — in the widget and removes oneif it’s found.
The parameters toPtRemoveEventHandlers()andPtRemoveFilterCallbacks()are:
widget Widget from which the event handlers should beremoved.
handlers Array of event-handler records.
nhandlers Number of event handlers defined in the array.
As with PtRemoveEventHandler()andPtRemoveFilterCallback(), anevent handler is removed only if it has the exact same signature as oneof the event handler specifications in the array of event handlerrecords.
Event handler invocationWhen invoked, event handlers receive the same arguments as callbackfunctions, i.e. the parameters are:
� the widget that received the event (widget)
� the client data associated with the event handler (client data)
The client data passed to this event handler isn’t the same as theapinfodata passed to an event handler added through PhAB.
☞
� the callback information associated with the particular event (info).
396 Chapter 12 � Managing Widgets in Application Code November 2, 2006
2006, QNX Software Systems GmbH & Co. KG. Widget styles
Event handlers return an integer value that the event handler must useto indicate whether or not further processing should be performed onthe event. If the event handler returns the valuePt END, this indicatesthat no further processing is to be performed on the Photon event, andthe event is consumed.
Theeventmember of theinfo parameter contains a pointer to theevent that caused the event handler to be invoked. You should checkthetypemember of this event to determine how to deal with the event.It will be one of the event types specified in theeventmaskgivenwhen the event handler was added to the widget.
To retrieve the data associated with the particular event, call thePhGetData()with the pointer to the event as a parameter. This willreturn a pointer to a structure with the data specific to that particularevent type. This structure’s type depends on the event type.
Widget stylesWidget class styles let you customize or modify a widget’sappearance, size, and behavior at runtime. They also let multiplelooks for a single type of widget exist at the same time. Essentially, awidget class style is a collection of methods and data that define thelook and feel of instances of the widget class.
Each widget class has a default style, but you can add or modify anarbitrary number of additional styles at any time. You can evenmodify the default style for a class, changing the look and feel of anyinstances of that class that are using the default style.
Each instance of a widget can reference a specific style provided byits class. You can change the style that any widget is using wheneveryou want.
Each style has a set ofmembers, including a name for the style andfunctions that replace or augment some of the widget class’smethods.Methods are class-level functions that define how the widgetinitializes itself, draws itself, calculates its extent, and so on. For moreinformation about methods, see theBuilding Custom Widgetsguide.
November 2, 2006 Chapter 12 � Managing Widgets in Application Code 397

Widget styles 2006, QNX Software Systems GmbH & Co. KG.
The members of a style are identified by the following manifests:
Pt STYLE DRAW
The address of a function that’s called whenever any widgetthat’s using this style needs to draw itself.
Pt STYLE EXTENT or Pt STYLE SIZING
The address of a function that whenever a widget that’s usingthis style is moved, resized, or modified in some fashion thatmay require the widget to move or resize (change in widgetdata). This function is responsible for setting the widget’sdimension to the appropriate values.
Pt STYLE ACTIVATE
The address of a function that’s called whenever a widget iscreated that defaults to this style, and whenever a widget’s styleis changed from some other style to this one. This function isthe place to put manipulation of a widget’s control surfaces, theaddition of callbacks, or the setting of resources (to override thewidget’s defaults).
Pt STYLE CALC BORDER
The address of a function that’s responsible for reporting howmuch space is required to render the widget’s edge decorationsand margins.
Pt STYLE CALC OPAQUE
The address of a function that’s responsible for calculating thelist of tiles that represents the opaque areas of a widget. Thislist is used to determine what needs to be damagedbelowthiswidget when it’s modified.
Pt STYLE DEACTIVATE
The address of a function that’s called whenever a widget usingthis style is either being destroyed or is switching to a differentstyle.
398 Chapter 12 � Managing Widgets in Application Code November 2, 2006

2006, QNX Software Systems GmbH & Co. KG. Widget styles
Pt STYLE NAME
The name of the style.
Pt STYLE DATA
A pointer to an arbitrary data block for the style’s use.
For details about the members, seePtSetStyleMember().
The following functions let you create and manipulate the widgetclass styles:
PtAddClassStyle()
Add a style to a widget class
PtCreateClassStyle()
Create a class style
PtDupClassStyle()
Get a copy of a widget class style
PtFindClassStyle()
Find the style with a given name
PtGetStyleMember()
Get a member of a style
PtGetWidgetStyle()
Get the style that a widget is currently using
PtSetClassStyleMethods()
Set multiple members of a style from an array
PtSetStyleMember()
Set a member of a style
PtSetStyleMembers()
Set multiple members of a style from a variable-lengthargument list
November 2, 2006 Chapter 12 � Managing Widgets in Application Code 399

Widget styles 2006, QNX Software Systems GmbH & Co. KG.
PtSetWidgetStyle()
Set the current style for a widget
Some of these functions require or return a pointer to aPtWidgetClassStyle t structure. Don’t access the members ofthis structure directly; callPtGetStyleMember()instead.
You can also set the style for a widget instance by setting itsPt ARG STYLEresource (seePtBasic in theWidget Reference).Setting this resource has the same effect as callingPtSetWidgetStyle().
☞
This example creates a style calledblue and some buttons. Note thatyour widgets can use a style before you’ve added the style to the classor even before you’ve created the style. When you do create the styleand add it to the class, any widgets that use the style are updatedimmediately.
#include <Pt.h>
PtWidget t *win, *but;PtWidgetClassStyle t *b;
void blue draw (PtWidget t *widget, PhTile t *damage){
/* This is the drawing function for the blue style.It draws a blue rectangle (without a label) forthe widget. */
PgSetFillColor( Pg BLUE);PgDrawRect( PtWidgetExtent (widget,NULL),
Pg DRAW FILL);}
int use blue style( PtWidget t *widget, void *data,PtCallbackInfo t *cbinfo)
{/* This callback sets the current style for the given
widget instance. If you haven’t attached the bluestyle to the class, there shouldn’t be any changein the widget’s appearance. */
PtSetWidgetStyle (widget, "blue");
400 Chapter 12 � Managing Widgets in Application Code November 2, 2006

2006, QNX Software Systems GmbH & Co. KG. Widget styles
return Pt CONTINUE;}
int attach blue style( PtWidget t *widget, void *data,PtCallbackInfo t *cbinfo)
{
/* This callback adds the style to the widget class.If you’ve clicked on one of the "Use blue style"buttons, the style of all buttons should change. */
PtAddClassStyle (PtButton, b);return Pt CONTINUE;
}
int main(){
PhArea t area = {{0,50},{100,100}};PtArg t argt[10];PtStyleMethods t meth;PtCallback t cb = {use blue style, NULL};PtCallback t cb2 = {attach blue style, NULL};int unsigned n;
/* Initialize the methods for the style. */meth.method index = Pt STYLE DRAW;meth.func = blue draw;
PtInit(NULL);
/* Create the window. */PtSetArg (&argt[0], Pt ARG DIM, &area.size, 0);win = PtCreateWidget (PtWindow, NULL, 1, argt);
/* Create some buttons. When you click on one of thesebuttons, the callback makes the widget instance usethe blue style. */
n = 0;PtSetArg (&argt[n++], Pt ARG TEXT STRING,
"Use blue style", 0);PtSetArg (&argt[n++], Pt CB ACTIVATE, &cb, 1);but = PtCreateWidget (PtButton, NULL, n, argt);
PtSetArg (&argt[0], Pt ARG TEXT STRING,"Use blue style also", 0);
PtSetArg (&argt[n++], Pt ARG POS, &area.pos, 0);but = PtCreateWidget (PtButton, NULL, n, argt);
/* Create another button. When you click on it, thecallback attaches the blue style to the widget class. */
November 2, 2006 Chapter 12 � Managing Widgets in Application Code 401

Widget styles 2006, QNX Software Systems GmbH & Co. KG.
n = 0;PtSetArg (&argt[n++], Pt ARG TEXT STRING,
"Attach blue style", 0);PtSetArg (&argt[n++], Pt CB ACTIVATE, &cb2, 1);PtSetArg (&argt[n++], Pt ARG POS, &area.pos, 0);area.pos.y = 85;but = PtCreateWidget (PtButton, NULL, n, argt);
/* Copy the default style to make the blue style.Replace the drawing member of the new style. */
b = PtDupClassStyle (PtButton, NULL, "blue");PtSetClassStyleMethods (b,1,&meth);
PtRealizeWidget (win);PtMainLoop();
return EXIT SUCCESS;}
Photon hookPhoton provides a mechanism for you to allow a block of user code tobe pulled in and executed during the initialization of Photonapplications. This functionality is most frequently used to customizewidget styles, allowing you to change the appearance and behavior ofwidgets without having to re-compile, re-link, or otherwisereconstruct executables.
The Photon hook can be used for many other things besides widgetstyles. For example, it can be used to log application usageinformation, or for more complicated situations such as remotecontrol of an application.
☞
PtInit() looks for a DLL,PtHook.so, in the search path, andexecutes the symbol forPtHook()in the DLL.
402 Chapter 12 � Managing Widgets in Application Code November 2, 2006

2006, QNX Software Systems GmbH & Co. KG. Widget styles
Multi-hook
You can use thept multihook.so DLL and rename it asPtHook.so to load one or several DLLs, pointed to by thePHOTON HOOK environment variable. IfPHOTON HOOKpoints to a DLL, that DLL is loaded and itsPtHook()function isexecuted. IfPHOTON HOOK points to a directory, each DLL in itis loaded and itsPtHook()function executed.
ThePtHook.so feature may introduce security holes if the DLLcode is insecure. If you use thept multihook.so, you may wish tomodify its code to add your own security features. See the codelisting below.
☞
ExamplePtHook.so - the ptmultihook:
#include <stdio.h>
#include <stdlib.h>
#include <dlfcn.h>
#include <dirent.h>
#include <photon/PtHook.h>
static int hookit( const char *hookname, PtHookData t *data ) {
void *handle;if ( ( handle = dlopen( hookname, 0 ) ) == NULL )
return -1;
else {PtHookF t *hook;
if ( ( hook = (PtHookF t*) dlsym( handle, "PtHook" ) ) == NULL
|| (*hook)( data ) == 0)
dlclose( handle );
return 0;} }
int PtHook( PtHookData t *data ) {const char *hookname;
DIR *dir;
if ( ( hookname = getenv( "PHOTON HOOK" ) ) != NULL&& hookit( hookname, data ) != 0
&& ( dir = opendir( hookname ) ) != NULL) {
struct dirent *de;
while ( ( de = readdir( dir ) ) != NULL)if ( de->d name[0] != ’.’ ) {
char path[512];
if ( (unsigned) snprintf( path, sizeof(path), "%s/%s",hookname, de->d name ) < sizeof(path) )
hookit( path, data );
November 2, 2006 Chapter 12 � Managing Widgets in Application Code 403
Widget styles 2006, QNX Software Systems GmbH & Co. KG.
}closedir( dir );
}
return Pt CONTINUE;}
The PtHook function, declared inPhoton/PtHook.h, looks like this:
int PtHook( PtHookData t *data );
PtHookData t has at least these members:
int size The size of thePtHookData t structure.
int version The version of the Photon library that loaded theDLL.
The function can returnPt END to ensure the DLL is not unloaded byPtInit(), or returnPt CONTINUE to ensure DLL is unloaded.
Setting widget styles using the Photon Hook
Here is a simple example of changing widget styles using the PhotonHook. The following code changes the fill for all buttons to blue,based on the previous widget style example.
To compile this code, use:
cc -shared button sample.c -o PtHook.so
Place thePtHook.so in the search path to change the button style forall Photon applications. You can get the search path withgetconf
CS LIBPATH.
#include <Pt.h>
static void (*button draw)(PtWidget t *widget, PhTile t const *damage ) = NULL;
void blue draw (PtWidget t *widget, PhTile t *damage)
{
/* This is the drawing function for the blue style.
It draws a blue rectangle (without a label) for
404 Chapter 12 � Managing Widgets in Application Code November 2, 2006

2006, QNX Software Systems GmbH & Co. KG. Widget styles
the widget. */
PgSetFillColor( Pg BLUE);
PgDrawRect( PtWidgetExtent (widget,NULL),Pg DRAW FILL);
}
intPtHook (void *data)
{
PtStyleMethods t button meth = { Pt STYLE DRAW, blue draw };PtWidgetClassStyle t *button style = PtFindClassStyle( PtButton, NULL );
button draw = button style->draw f;PtSetClassStyleMethods( button style, 1, &button meth );
return( Pt END );
}
November 2, 2006 Chapter 12 � Managing Widgets in Application Code 405


Chapter 13
Control Surfaces
In this chapter. . .What’s a control surface? 409Control-surface API 411Example 417
November 2, 2006 Chapter 13 � Control Surfaces 407


2006, QNX Software Systems GmbH & Co. KG. What’s a control surface?
What’s a control surface?Control surfaces are geometrical regions within a widget that canposition, size and draw themselves. Additionally, they can define theirown behavior. They do all this via callbacks and event-handling flagsthat are supplied when the surface is created.
Control surfaces let you redefine the behavior for any area within awidget’s drawable extent. Additionally, they can draw themselves aswell as calculate their own geometry. Conceptually, they can beconsidered as lightweight “widgets within widgets.”
For example, consider a scroll bar. You get different actions,depending on where you click on it: the arrow buttons step up anddown; clicking in the trough pages up and down; dragging on thehandle scrolls as you move.PtScrollbar is implemented as asingle widget with several control surfaces on it.
You could also use control surfaces for:
� keyboard emulations, for example to add aShift-lock to aShift key
� panels of pushbuttons
� and so on.
It’s important to note that control surfaces are a property of a widget;they require a widget in order to exist. However, a widget can possessany number of control surfaces, making it possible to implement awhole user interface using only one widget (say aPtWindow) at afraction of the runtime data size (8% being a reasonable upper bound)as opposed to implementing the same UI using widgets.
LimitationsThere are a few limitations to control surfaces:
� The widget library provides services to widgets that can’t, forreasons of economy, be provided to control surfaces. For instance,widgets have the concept of opacity, which the library uses whendrawing to reduce flicker. Control surfaces are simply drawn fromthe back to the front without any regard to opacity.
November 2, 2006 Chapter 13 � Control Surfaces 409

What’s a control surface? 2006, QNX Software Systems GmbH & Co. KG.
� Control surfaces can’t contain other control surfaces, and don’tinclude the concept of focus.
� Control surfaces are very raw elements and can provide only thebehavior that you implement when you create them. It isn’tdifficult to implement a button as a control surface, but buildingPtMultitext as one would require more effort.
Binding actions to control surfacesYou can bind control surfaces to any of a widget’s predefined actionsor to user-defined actions.
The types of control surfaces are:
Regular surfaces
Let you define an event mask and callback function for thecontrol surface.
Action surfaces
Let you automatically bind a control surface to one of awidget’s predefined actions.
Referring to control surfacesYou can refer to a control surface via:
� a pointer to the control surface structure (PtSurface t *).
� a numerical identifier (16-bitunsigned PtSurfaceId t). ThisID uniquely identifies a control surface within its associatedwidget. Valid values for the surface ID are in the range of 1through 255, inclusive.
While the pointer method is more direct and therefore quicker, it’s notas safe as the ID method. To understand why, consider how controlsurfaces are organized and stored in memory.
Unlike the widget hierarchy, which is implemented as a linked list,control surfaces are stored as an array of surface structures(PtSurface t). The major reasons for storing them this way are:
410 Chapter 13 � Control Surfaces November 2, 2006

2006, QNX Software Systems GmbH & Co. KG. Control-surface API
� The array allows for quick traversal in both directions (which is arequirement, since drawing is handled from back to front andevents are processed from front to back).
� The array reduces the memory requirement per surface. To satisfythe quick-traversal requirement, a doubly linked list would have tobe used, adding significantly to the amount of memory required.
� You aren’t likely to add or remove control surfaces very often, sousing an array doesn’t cause much of a penalty in performance.
As you physically move control surfaces around in the stacking order,their placement in the array changes, affecting their address inmemory. In addition, as you add or remove control surfaces to orfrom a widget, the array needs to be reallocated, which also maycause the array itself to move around in memory. With all thispossibility of memory movement, numerical identifiers are the onlyreliable way of locating a surface.
If you’re pretty certain that a widget’s surface configuration isn’tgoing to change, then the pointer method is safe (and quicker, sincethe ID method needs to do a linear lookup in the surface array).
Control-surface APIThe functions listed below are described in the PhotonLibraryReference.
Creating and destroying control surfacesThe following functions create and destroy control surfaces:
PtCreateActionSurface()
Create a control surface within a widget, bound to a widgetaction
PtCreateSurface()
Create a regular control surface within a widget
November 2, 2006 Chapter 13 � Control Surfaces 411
Control-surface API 2006, QNX Software Systems GmbH & Co. KG.
PtDestroyAllSurfaces()
Destroy all of a widget’s control surfaces
PtDestroySurface()
Destroy a control surface
PtDestroySurfaceById()
Destroy the control surface with a given ID
Finding IDs for control surfacesTo find surface and action IDs, use these functions:
PtSurfaceActionId()
Get the action ID for a surface
PtSurfaceId() Get the ID of a control surface
Calculating geometry for control surfacesYou must provide a function that calculates the control surface’sgeometry. Control surfaces are asked to calculate their geometry twicewhen the widget that owns them is asked to calculate its geometry:
� once before the widget’s geometry calculation (which allows awidget to size itself according to the requirements of its surfaces ifit cares — and some widgets do)
� once after (allowing surfaces to position and size themselvesaccording to the size of the widget).
Thepostargument that’s passed to the geometry function tells youwhich case is in progress.
A surface may also calculate its geometry based on the geometry ofother surfaces. UsingPtCalcSurface()or PtCalcSurfaceById(), youcan ensure that the surface you’re interested in has calculated itsgeometry prior to examining it.
412 Chapter 13 � Control Surfaces November 2, 2006
2006, QNX Software Systems GmbH & Co. KG. Control-surface API
The actual recording of the surface’s geometry is simply a matter ofdirectly modifying the surface’s points array. Be sure you know howthis array is organized before proceeding. This organization isdetailed in the documentation forPtCreateSurface().
These functions deal with a control surface’s geometry:
PtCalcSurface() Force a surface to calculate its geometry
PtCalcSurfaceByAction()
Force all surfaces associated with an action tocalculate their geometry
PtCalcSurfaceById()
Force the control surface with a given ID tocalculate its geometry
PtSurfaceCalcBoundingBox(), PtSurfaceCalcBoundingBoxById()Calculate the bounding box for a control surface
PtSurfaceExtent(), PtSurfaceExtentById()
Calculate the extent of a control surface
PtSurfaceHit() Find the control surface hit by a given point
PtSurfaceRect(), PtSurfaceRectById()
Get the bounding box of a control surface
PtSurfaceTestPoint()
Test whether or not a point is inside a controlsurface
Drawing control surfacesControl surfaces are asked to draw themselves from back to front,after the widget itself has drawn. No clipping is done for you. If youwant clipping, you have to implement the necessary logic to adjust theclipping list as surfaces are traversed, and then reinstate the clipping
November 2, 2006 Chapter 13 � Control Surfaces 413

Control-surface API 2006, QNX Software Systems GmbH & Co. KG.
stack after the last surface is drawn. Otherwise, you’ll get someunexpected results.
The following functions damage control surfaces so they’ll beredrawn:
PtDamageSurface(), PtDamageSurfaceById()
Mark a surface as damaged so that it will be redrawn
PtDamageSurfaceByAction()
Damage all surfaces that are associated with an action
Activating control surfacesThis function activates a control surface:
PtCheckSurfaces()
Match an event with the control surfaces belonging to a widget
Enabling and disabling control surfacesYou can enable and disable control surfaces, like widgets:
PtDisableSurface(), PtDisableSurfaceById()
Disable a control surface
PtDisableSurfaceByAction()
Disable all control surfaces associated with an action
PtEnableSurface(), PtEnableSurfaceById()
Enable a control surface
PtEnableSurfaceByAction()
Enable all control surfaces associated with an action
PtSurfaceIsDisabled()
Determine if a control surface is disabled
PtSurfaceIsEnabled()
Determine if a control surface is enabled
414 Chapter 13 � Control Surfaces November 2, 2006

2006, QNX Software Systems GmbH & Co. KG. Control-surface API
Finding control surfacesTo find a control surface, use these functions:
PtFindSurface()
Find the control surface with a given ID
PtFindSurfaceByAction()
Find the control surface associated with a given action
PtWidgetActiveSurface()
Get a widget’s currently active control surface
Hiding and showing control surfacesYou can hide and show control surfaces, too:
PtHideSurface(), PtHideSurfaceById()
Hide a control surface
PtHideSurfaceByAction()
Hide all control surfaces associated with an action
PtShowSurface(), PtShowSurfaceById()
Show a hidden control surface
PtShowSurfaceByAction()
Show all hidden control surfaces associated with an action
PtSurfaceIsHidden()
Determine if a control surface is hidden
PtSurfaceIsShown()
Determine if a control surface is shown
November 2, 2006 Chapter 13 � Control Surfaces 415

Control-surface API 2006, QNX Software Systems GmbH & Co. KG.
Ordering control surfacesLike widgets, you can stack control surfaces:
PtInsertSurface(), PtInsertSurfaceById()
Insert a control surface in front of or behind another
PtSurfaceBrotherBehind()
Get the control surface behind a given one
PtSurfaceBrotherInFront()
Get the control surface in front of a given one
PtSurfaceInBack()
Get the backmost control surface belonging to a widget
PtSurfaceInFront()
Get the frontmost control surface belonging to a widget
PtSurfaceToBack(), PtSurfaceToBackById()
Move a control surface behind all other control surfacesbelonging to a widget
PtSurfaceToFront(), PtSurfaceToFrontById()
Move a control surface in front of all other control surfacesbelonging to a widget
Storing user data with control surfacesThere’s no callback data in the function associated with controlsurfaces; you can store user data with control surfaces by calling:
PtSurfaceAddData(), PtSurfaceAddDataById()
Add data to a control surface
PtSurfaceGetData(), PtSurfaceGetDataById()
Get data associated with a control surface
PtSurfaceRemoveData(), PtSurfaceRemoveDataById()
Remove data from a control surface
416 Chapter 13 � Control Surfaces November 2, 2006

2006, QNX Software Systems GmbH & Co. KG. Example
ExampleHere’s a program that creates some control surfaces:
#include <Pt.h>
/* This is the function that’s called when an event occursfor our rectangular control surface. When a user clickson this surface, we’ll tally up the clicks and print howmany have occurred. */
static int rect surface callback( PtWidget t *widget,PtSurface t *surface,PhEvent t *event)
{static int rclicks = 1;printf("Rectangle clicks: %d\n", rclicks++);return(Pt END);
}
/* This is the function which draws the contents of ourrectangular control surface. This is a very simpleexample; it draws a red rectangle. */
static void rect surface draw( PtWidget t *widget,PtSurface t *surface,PhTile t *damage)
{PgSetFillColor(Pg RED);PgDrawRect(PtSurfaceRect(surface, NULL), Pg DRAW FILL);
}
/* This is the function keeps the size of the controlsurface in sync with the size of the widget.PtWidgetExtent() returns a rect containing the current sizeof the widget.
PtSurfaceRect() is a macro; this means that you have directaccess to the data within your control surface. You do notneed to call any functions to change its size. Change thedata directly. */
static void rect surface calc( PtWidget t *widget,PtSurface t *surface,uint8 t post)
{/* Do this only after widget has extented. */if(post){/* The rect occupies the top left quadrant of the window. */
November 2, 2006 Chapter 13 � Control Surfaces 417

Example 2006, QNX Software Systems GmbH & Co. KG.
PhRect t *extent;PhRect t *srect;
extent = PtWidgetExtent(widget, NULL);srect = PtSurfaceRect(surface, NULL);
srect->ul = extent->ul;srect->lr.x = (extent->ul.x + extent->lr.x) / 2;srect->lr.y = (extent->ul.y + extent->lr.y) / 2;}
}
/* This is the function that’s called when an event occursfor our elliptical control surface. When a user clicks onthis surface, we’ll tally up the clicks and print howmany have occurred. */
static int ell surface callback( PtWidget t *widget,PtSurface t *surface,PhEvent t *event)
{static int eclicks = 1;printf("Ellipse clicks: %d\n", eclicks++);return(Pt END);
}
/* This is the function that draws the contents of ourelliptical control surface. This is a very simpleexample; it draws a green ellipse. */
static void ell surface draw( PtWidget t *widget,PtSurface t *surface,PhTile t *damage)
{PhRect t *s = PtSurfaceRect(surface, NULL);PgSetFillColor(Pg GREEN);PgDrawEllipse(&(s->ul), &(s->lr),
Pg DRAW FILL | Pg EXTENT BASED);}
/* This is our main function. We create a window, initializeour application with the Photon server and create twocontrol surfaces.
Notice that the second surface doesn’t supply the lastparameter, the extent calculation function. This isn’tneeded because of the fifth parameter, the height andwidth stored in a point structure. This is a pointerto the actual point structure within the window widget.Thus, if the window’s extent changes, changing the
418 Chapter 13 � Control Surfaces November 2, 2006

2006, QNX Software Systems GmbH & Co. KG. Example
extent point structure, the control surface isautomatically updated with the new values! */
int main(int argc, char **argv){PtArg t args[1];PtWidget t *window;const PhDim t dim = { 200, 200 };
PtSetArg(&args[0], Pt ARG DIM, &dim, 0);window = PtAppInit(NULL, &argc, argv, 1, args);
/* Create a rectangular control surface. */PtCreateSurface( window, 0, 0, Pt SURFACE RECT, NULL,
Ph EV BUT PRESS, rect surface callback,rect surface draw, rect surface calc);
/* Create an elliptical control surface to fill the window. */PtCreateSurface( window, 0, 0, Pt SURFACE ELLIPSE,
(PhPoint t*)PtWidgetExtent(window, NULL),Ph EV BUT PRESS, ell surface callback,ell surface draw, NULL);
PtRealizeWidget(window);PtMainLoop();
return(EXIT SUCCESS);}
November 2, 2006 Chapter 13 � Control Surfaces 419

Chapter 14
Accessing PhAB Modules fromCode
In this chapter. . .Creating internal links 424Using internal links in your code 425Using widget databases 428
November 2, 2006 Chapter 14 � Accessing PhAB Modules from Code 421


2006, QNX Software Systems GmbH & Co. KG.
You can access any module directly from your application code bycreating aninternal link to that module.
An internal link is like a link callback—it lets you specify the moduletype, a setup function, and, where appropriate, a location. But unlikea link callback, which is always associated directly with a widgetcallback, an internal link has no association with any widget. Instead,PhAB will generate a manifest that you use in your application codeto specify which internal link you want to use. PhAB provides severalfunctions to help you use internal links (discussed below).
You can use internal links to:
� Create a PhAB module within application code.
Using a link callback, you can directly link a widget to a PhABapplication module. But sometimes you need to create the modulefrom your application code instead. To do that, use an internal link.
Here are some common situations where you should use aninternal link to create a module:
- when your application can display one of two different modulesbased on some condition inside the application
- when you need to control the parentage of a module instead ofusing the PhAB defaults (by default a new module is a child ofthe base window)
- when you want to display a menu when the user presses theright mouse button.
� Access and display picture modules.
You use picture modules primarily to replace the contents ofexisting container widgets, such asPtWindow or PtPanelGroup.
Note that when you create a picture module usingApCreateModule(), you must specify the parent container widget.
� Open widget databases. For more information, see “Using widgetdatabases.”
November 2, 2006 Chapter 14 � Accessing PhAB Modules from Code 423

Creating internal links 2006, QNX Software Systems GmbH & Co. KG.
Creating internal linksTo create an internal link:
1 Choose Internal Links from the Application menu or pressF4.You’ll see the Internal Module Links dialog:
Internal Module Links dialog.
2 Click on the<NEW> option if it isn’t already selected.
3 Choose the type of module you want.
4 Fill in the fields in the Module Link Info section — see below.
5 Click on Apply, then click on Done. If the module youspecified in the Name field doesn’t exist, PhAB will askwhether it should create that module.
424 Chapter 14 � Accessing PhAB Modules from Code November 2, 2006
2006, QNX Software Systems GmbH & Co. KG. Using internal links in your code
You can create only one internal link per module.☞
The fields in the Internal Module Links dialog include:
� Name—Contains the name of the module. To select from a list ofexisting modules, click on the icon next to this field.
� Location—Determines where the module will appear; see“Positioning a module” in the Working with Modules chapter.
� Setup Function—Specifies the function that will be called whenthe module is realized (optional). To edit the function, click on theicon next to this field.
For more information, see “Module setup functions” in theWorking with Code chapter.
� Called—Determines whether the setup function is called beforethe module is realized, after the module is realized, or both.
� Apply—Applies any changes.
� Reset—Restores the internal link information to its original state.
� Remove—Deletes the selected internal link from the ModuleLinks list.
Using internal links in your codeManifests
For every internal link defined in your application, PhAB generates amanifest so you can identify and access the link.
Since PhAB derives the manifest name from the module name, eachmodule can have only one internal link. This may appear limiting, butPhAB provides module-related functions (see below) that let youcustomize a module’s setup function and location from within yourapplication code.
November 2, 2006 Chapter 14 � Accessing PhAB Modules from Code 425

Using internal links in your code 2006, QNX Software Systems GmbH & Co. KG.
To create the manifest name, PhAB takes the module’s name and addsABM as a prefix. So, for example, if you create an internal link to amodule namedmydialog, PhAB creates the manifestABM mydialog.
Internal-link functionsThe manifest is used by the following PhAB API functions:
ApCreateModule()
Lets you manually create modules designed within PhAB.
A module created with this function behaves exactly as if itwere linked directly with a link callback. For example, if youdefine a location and a setup function for the internal link, themodule will appear at that location and the setup function willbe called. Furthermore, widget callbacks, hotkeys, and so onwill become active.
ApModuleFunction()
Lets you change the setup function associated with an internallink.
ApModuleLocation()
Lets you change the display location associated with an internallink.
ApModuleParent()
Lets you change the parent of a window or dialog moduleassociated with an internal link. This function applies only tointernal links for window and dialog modules.
ApOpenDBase()
Lets you open the module associated with an internal link as awidget database.
For more info on the above functions, see the PhotonLibraryReference.
426 Chapter 14 � Accessing PhAB Modules from Code November 2, 2006

2006, QNX Software Systems GmbH & Co. KG. Using internal links in your code
Example — displaying a menuHere’s how you can display a menu module when the user presses theright mouse button while pointing at a widget:
1 In PhAB, create the menu module. Give it a name, such asmy menu.
2 Create an internal link to the menu module, as described above.For a popup menu, you’ll usually want the module to bepositioned relative to the widget or relative to the pointer.
3 Select the widget to be associated with the menu. Make sure ithasPt MENUABLE set andPt ALL BUTTONScleared in itsPt ARG FLAGS.
4 Generate the code for your application. PhAB creates amanifest for the internal link. In this example, it’s calledABM my menu.
5 Every widget that’s a descendant ofPtBasic has aPt CB MENU resource that’s a list of callbacks invoked whenyou press the right mouse button while pointing at the widget.Edit this resource, and create a callback function like this:inttext menu cb( PtWidget t *widget, ApInfo t *apinfo,
PtCallbackInfo t *cbinfo ){
/* eliminate ’unreferenced’ warnings */widget = widget, apinfo = apinfo, cbinfo = cbinfo;
ApCreateModule (ABM my menu, widget, cbinfo);
return( Pt CONTINUE );
}
Thewidgetpassed toApCreateModule()is used if the menu isto be positioned relative to the widget; thecbinfoargument isused if the menu is to be positioned relative to the pointer.
6 Compile, link, and run your application. When you press theright mouse button over the widget, your menu should appear.
November 2, 2006 Chapter 14 � Accessing PhAB Modules from Code 427

Using widget databases 2006, QNX Software Systems GmbH & Co. KG.
Using widget databasesPicture modules have two purposes:
� to let an application replace the contents of any container widget
� to serve as widget databases.
If you plan to use a widget several times within your application, awidget database lets you design the widget just once. It also saves youfrom a lot of coding. All you have to do is preset the widget’sresources and then, using PhAB’s widget-database API functions,create a copy of the widget wherever you’d normally create thewidget within your code.
Here’s an example of a widget database—it’s part of the one thatPhAB uses for its own interface:
Widget database used for PhAB’s interface.
428 Chapter 14 � Accessing PhAB Modules from Code November 2, 2006

2006, QNX Software Systems GmbH & Co. KG. Using widget databases
Creating a databaseTo create a widget database:
1 Create a picture module within your application.
2 Create an internal link to the picture module.
3 Create the widgets that you’ll need to access in your applicationcode.
For example, let’s say you need to create a certain icon manytimes in your application. By creating the icon inside thepicture module, you can create as many copies of the icon asyou need at run time.
Preattaching callbacksBesides being able to preset all of a widget’s resources in the databasemodule, you can also preattach its callbacks. When you create thewidget dynamically, any callbacks you attached will also be created.
By presetting the resources and callbacks of a database widget, youcan easily reduce the code required to dynamically create the widgetto a single line.
Preattached callbacks work only with modules and functions that arepart of your executable. If your application opens an external file as awidget database, the PhAB library won’t be able to find the code toattach to the callback.
☞
Assigning unique instance namesAssign each widget in a widget database an instance name—this letsyou refer to the widgets when using database-related API functions.
Creating a dynamic databaseYou can also create a widget database that you can changedynamically. To do this, open an external widget database—that is,one that isn’t bound into your executable—withApOpenDBaseFile()
November 2, 2006 Chapter 14 � Accessing PhAB Modules from Code 429

Using widget databases 2006, QNX Software Systems GmbH & Co. KG.
instead ofApOpenDBase(). ApOpenDBaseFile()lets you access amodule file directly and open it as a database.
Once you’ve opened the module file, you can copy the widgets fromthat file to your application’s internal database and save the resultingdatabase to a new file that you can reopen later.
Widget-database functionsPhAB provides several support functions to let you open a widgetdatabase and copy its widgets into modules—you can copy thewidgets as often as needed. PhAB also provides conveniencefunctions to let you copy widgets between databases, create widgets,delete widgets, and save widget databases.
ApOpenDBase()ApCloseDBase()
These let you open and close a widget database.
To ensure that the database is always available, youtypically useApOpenDBase()in the application’sinitialization function.
ApOpenDBaseFile()ApSaveDBaseFile()
These let you open and save external module filesas databases within your application.
ApAddClass() This function lets you indicate which widgetclasses you’re likely to encounter when you callApOpenDBaseFile(). When you link yourapplication, only those widgets it needs are linkedinto it. If you access widgets that aren’t in yourapplication because they’re in an external database,you must add them to your internal class table sothat they can be linked in at compile time.
430 Chapter 14 � Accessing PhAB Modules from Code November 2, 2006

2006, QNX Software Systems GmbH & Co. KG. Using widget databases
ApCreateDBWidget()ApCreateDBWidgetFamily()ApCreateWidget()ApCreateWidgetFamily()
These create widgets from the widget database.ApCreateWidget()andApCreateDBWidget()createa single widget only, regardless of the widget’sclass.
For a noncontainer-class widget,ApCreateWidgetFamily()andApCreateDBWidgetFamily()create a single widget;for a container-class widget, they create all thewidgets within the container.
These functions differ in the parent used for thewidgets:
� ApCreateDBWidget()andApCreateDBWidgetFamily()include aparentargument; if this isNULL, the widget has noparent.
� ApCreateWidget()andApCreateWidgetFamily()put the new widget(s) in the current parent. Tomake sure the correct widget is the currentparent, callPtSetParentWidget()before callingeither of these functions.
Don’t use the manifests generated for the widget database’s picturemodule. Instead, use the widget pointers returned byApCreateWidget()or ApCreateDBWidget().
☞
ApCopyDBWidget()
Lets you copy a widget from one widget databaseto another. Typically, you use this only whenyou’re dynamically creating and saving widgetdatabases within your application.
November 2, 2006 Chapter 14 � Accessing PhAB Modules from Code 431

Using widget databases 2006, QNX Software Systems GmbH & Co. KG.
ApDeleteDBWidget()
Deletes a widget from a widget database.
ApGetDBWidgetInfo()
Gets information about a widget in a widgetdatabase, including its name, class, parent, andlevel in the hierarchy.
ApGetImageRes()
Pull out image-resource data from a widget and usethis data to set resources of a widget alreadydisplayed in your application. This function letsyou achieve very basic animation.
If you use a widget database to create widgets that havePhImage t
data attached to them, don’t close the database withApCloseDBase()until after those widgets are destroyed. (Closing the database frees thememory used by the image.) If you must close the database, makesure to copy the image data within your application code and to resetthe image data resource to point to your new copy.
☞
For more information, see the “Animation” sectionin the chapter on Drawing.
ApGetTextRes() This lets you extract text strings from a widgetdatabase. It’s useful for multilingual applications,as the text is automatically translated if thelanguage support is enabled. For more information,see the International Language Support chapter.
ApRemoveClass()
Remove a widget class. If you’ve loaded a DLLthat defines widget classes, you should removethem before unloading the DLL. For moreinformation, see “Making a DLL out of a PhABapplication” in the Generating, Compiling, andRunning Code chapter.
432 Chapter 14 � Accessing PhAB Modules from Code November 2, 2006

2006, QNX Software Systems GmbH & Co. KG. Using widget databases
For more info on widget database functions, see the PhotonLibraryReference.
November 2, 2006 Chapter 14 � Accessing PhAB Modules from Code 433

Chapter 15
International Language Support
In this chapter. . .Application design considerations 437Generating a language database444Message databases445Language editor 446Running your application 452Distributing your application 454
November 2, 2006 Chapter 15 � International Language Support 435


2006, QNX Software Systems GmbH & Co. KG. Application design considerations
PhAB has builtin support for applications that need to be translatedinto other languages.
By keeping a few design considerations in mind, and then following afew simple steps, your application can very easily be translated intoother languages without the need to recompile or rebuild yourapplication:
1 PhAB generates a database of all the text strings used by yourapplication.
2 This text database is used by PhAB’s language editor to allowyou to translate each text string into another language.
3 The translated text strings are saved in a translation file, and areshipped with your application.
4 To run your application in another language, simply set anenvironment variable before starting the application. WhenPhAB’s API builds the application windows, dialogs and othermodules, it replaces the text strings with the new translations.
It’s that simple.
Application design considerationsThis section provides a few design considerations to assist you increating a language-independent application. You should keep theseideas in mind as you are designing and implementing yourapplication, since modifying the application after it’s complete ismore difficult.
Size of text-based widgetsTypically, when you design an application, you lay out the windowusing widgets that have the default application text already preset. Forexample, if you had a Done button at the bottom of a dialog window,the button itself would be only large enough to hold the text string“Done”. You would also place the Done button based on its currentsize. This works well in an application that doesn’t require
November 2, 2006 Chapter 15 � International Language Support 437

Application design considerations 2006, QNX Software Systems GmbH & Co. KG.
translation, but causes many problems for a language-independentapplication. What would happen if the translated text were 12characters instead of the default of 4 characters?
� The translated button could become much larger. In this case, thebutton may be so wide that it writes on top of other widgets in thewindow. This would cause the application to look ugly or poorlydesigned.
or
� The text could be truncated within the default size. In this case, thetranslated text would be unreadable, and the user wouldn’t knowwhat the button does.
For example, these buttons are too small to accommodate translatedtext:
The solution is simple. Make the button larger to accommodatelonger translated text strings. Here’s an example:
JustificationIn addition to making text-based widgets wider to accommodatetranslated text, you should give some thought to the justification oftext, based on the widget’s usage. For example, in a simple text entryfield, it’s quite common to place a label to the left side of the field. Ifyou make the label wider to allow for translation, the label itselfmoves to the far left:
438 Chapter 15 � International Language Support November 2, 2006

2006, QNX Software Systems GmbH & Co. KG. Application design considerations
This problem is easily solved by setting the label’s horizontalalignment to be right-justified. This allows for longer translated textstrings, and still keeps a tight alignment with the text entry field:
Another common labeling method is to place a label centered aboveor within the border of a box. Usually the text is centered by placing itin the desired position based on its current text:
When the text is later translated, it’s either too short or too long, andthe box label looks lopsided. The simple solution is to make the boxtitle much wider than necessary, and set the horizontal alignment to becentered.
November 2, 2006 Chapter 15 � International Language Support 439
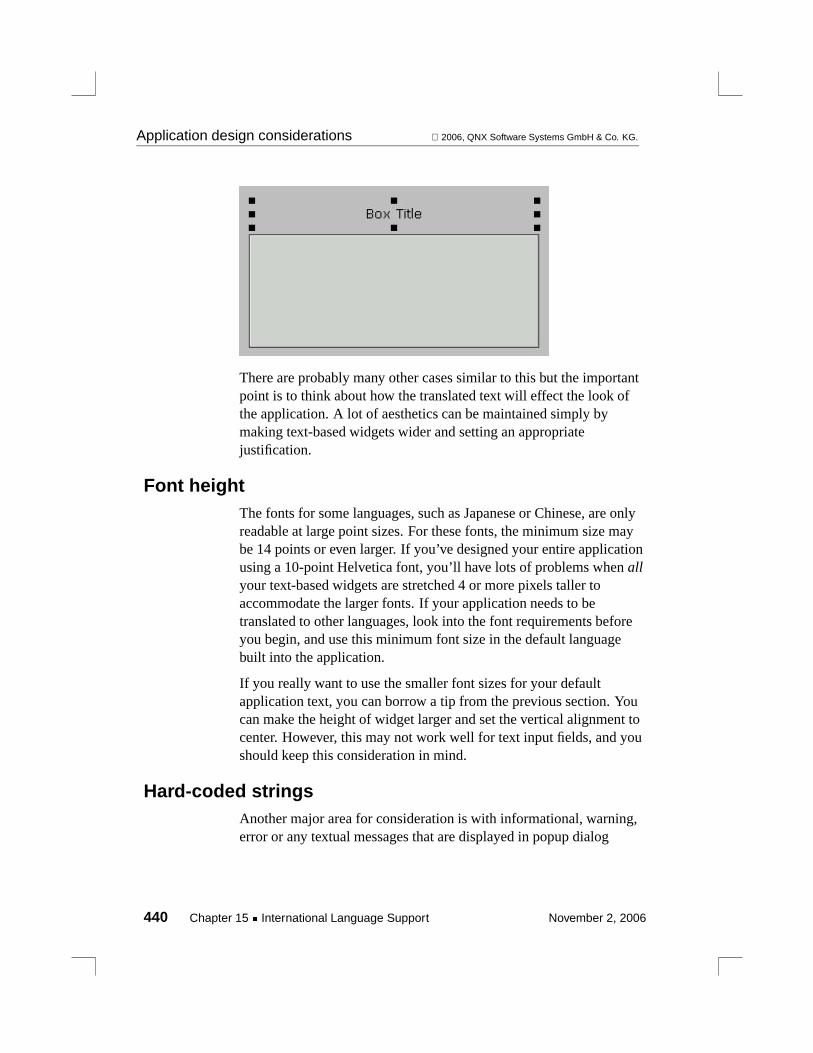
Application design considerations 2006, QNX Software Systems GmbH & Co. KG.
There are probably many other cases similar to this but the importantpoint is to think about how the translated text will effect the look ofthe application. A lot of aesthetics can be maintained simply bymaking text-based widgets wider and setting an appropriatejustification.
Font heightThe fonts for some languages, such as Japanese or Chinese, are onlyreadable at large point sizes. For these fonts, the minimum size maybe 14 points or even larger. If you’ve designed your entire applicationusing a 10-point Helvetica font, you’ll have lots of problems whenallyour text-based widgets are stretched 4 or more pixels taller toaccommodate the larger fonts. If your application needs to betranslated to other languages, look into the font requirements beforeyou begin, and use this minimum font size in the default languagebuilt into the application.
If you really want to use the smaller font sizes for your defaultapplication text, you can borrow a tip from the previous section. Youcan make the height of widget larger and set the vertical alignment tocenter. However, this may not work well for text input fields, and youshould keep this consideration in mind.
Hard-coded stringsAnother major area for consideration is with informational, warning,error or any textual messages that are displayed in popup dialog
440 Chapter 15 � International Language Support November 2, 2006
2006, QNX Software Systems GmbH & Co. KG. Application design considerations
windows or other points within the application. Examples includecalls toPtAlert(), PtNotice(), andPtPrompt(). The most common wayto handle text messages is to embed the text strings in the applicationcode. For example:
char *btns[] = { "&Yes", "&No", "&Cancel" };
answer = PtAlert( base wgt, NULL, NULL, NULL,"File has changed. Save it?",NULL, 3, btns, NULL, 1, 3,Pt MODAL );
While this is quick to code, it’s impossible to translate withoutrewriting the application code, recompiling, and so on. Essentially,you need to create a complete new version of the application for eachlanguage supported.
A much better method is to take advantage of PhAB’s messagedatabases. Using a message database, you can put all your textmessages into a single file and give each message a unique name. Toretrieve the text at runtime, callApGetMessage().
char *btns[3];ApMsgDBase t *textdb;ApLoadMessageDB(textdb, "MyMessageDb");
btns[0] = ApGetMessage( textdb, "msgyes" );btns[1] = ApGetMessage( textdb, "msgno" );btns[2] = ApGetMessage( textdb, "msgcancel" );answer = PtAlert( base wgt, NULL, NULL, NULL,
ApGetMessage( textdb, "file save msg" ),NULL, 3, btns, NULL, 1, 3,Pt MODAL );
ApCloseMessageDB(textdb);
An advantage of message databases is that they can be sharedbetween applications. If several applications use the same types ofstrings, this can make translation easier.
See the section Message Databases below for more information.
Another method of storing strings is to use PhAB’s widget databases.You can put all your text messages in a single (or multiple) widget
November 2, 2006 Chapter 15 � International Language Support 441

Application design considerations 2006, QNX Software Systems GmbH & Co. KG.
database and give each message a unique name. To retrieve the text atruntime, callApGetTextRes()(see the PhotonLibrary Referencefordetails). In thePtAlert()example above, it would become:
char *btns[3];
btns[0] = ApGetTextRes( textdb, "@msgyes" );btns[1] = ApGetTextRes( textdb, "@msgno" );btns[2] = ApGetTextRes( textdb, "@msgcancel" );answer = PtAlert( base wgt, NULL, NULL, NULL,
ApGetTextRes( textdb, "@msg001"),NULL, 3, btns, NULL, 1, 3,Pt MODAL );
This method allows the application to have no predefined text-basedmessages within it, and it can be easily translated. In addition,because the text strings are put into a widget database, PhABautomatically takes care of including the message texts when itgenerates the application’s text string database. This may be moreconvenient than using a separate message database, especially if youonly have a few strings, they’re only used in one application, and theapplication has a widget database anyway.
Use of @ in instance namesBy default, PhAB ignores widgets that have no instance name or havethe instance set to the class name. This means if you place a labelwithin a window and change the text to something appropriate, PhABskips this widget when it generates code for your application. This isbecause PhAB assumes the label is constant and the applicationdoesn’t require access to it. However, when it comes to translatingyour application to another language, this label becomes veryimportant.
To differentiate between widgets that are important for translation butnot for code generation, PhAB recognizes a special character whenplaced in the first position of the instance name. This special characteris the@ character. This means you can give a label the instance nameof @label1, and PhAB will recognize this label when generating thetext language database, but skip over it when generating code.
442 Chapter 15 � International Language Support November 2, 2006

2006, QNX Software Systems GmbH & Co. KG. Application design considerations
This sounds fine, except PhAB also requires that all instance namesbe unique. This rule must be adhered to so that PhAB knows whichtext string to replace at run time. Unfortunately, dreaming uppotentially hundreds of unique instance names that you don’t reallycare about can be a lot of work. To simplify this task, PhAB lets youspecify a single@ character for the instance name, and PhAB appendsan internal sequence number to the end. This eliminates the need tokeep track of all constant text strings that require instance names justfor translation.
If you want to group translation text strings (say, by module), you cangive them all the same instance name, and PhAB will append asequence number to make the name unique. For example, if youassign the name@base to several widgets, PhAB generates@base,@base0, @base1, ... as instance names.
Bilingual applicationsSometimes it’s necessary to design an application to be bilingual.This means two different languages are displayed in every text string.While this can be done, it’s usually difficult for the user to read andunderstand.
PhAB allows you to use another approach. You can create theapplication in one language and provide the ability to flip to the otherlanguage within application control. This is done via a PhAB APIfunction namedApSetTranslation(). This function (which is describedin the PhotonLibrary Reference) changes the current translation filefor the application immediately, such that allfuturedialogs, windows,and so on are drawn using the new translation file.
November 2, 2006 Chapter 15 � International Language Support 443
Generating a language database 2006, QNX Software Systems GmbH & Co. KG.
Any existing modules and widgets aren’t translated, only new ones. Ifyou want immediate feedback, you need to recreate the modules. Thisis easy for dialogs, but more difficult for the base window; rememberthat destroying the base window exits the application. One way totranslate the contents of the base window is to put them in a picturemodule, which can be recreated.
☞
Common stringsIf you have several applications to translate, you can reduce the workby sharing the common text strings and translating them separately.To do this:
1 Create a message database populated with the common textstrings.
2 Use the PhAB Language Editor to translate the strings.
3 Once the database is created and translated, you can open it anduse the strings in other applications usingApLoadMessageDB()andApGetMessage().
Generating a language databaseThis is the easy part. The most important aspect to this step is to knowwhento generate the text string database. Ideally, you want to do thiswhen all application development is complete. This is because therun-time translation mechanism is hinged on the widget’s instancename. If you generate your database mid-way through thedevelopment and do the translations, it’s quite likely that a lot ofwidgets will be changed or deleted, and translations may be deleted orthe time wasted.
One exception to this would be bilingual applications. In this case,you might want to generate and translate the application continuouslyso that the application’s translations can be tested throughout thedevelopment.
444 Chapter 15 � International Language Support November 2, 2006
2006, QNX Software Systems GmbH & Co. KG. Message databases
To generate an application’s language database:
1 Select theProject→Language Editor→Generate LanguageDatabase.
2 A progress dialog appears, and the language database isgenerated.
3 Click Done.
The Languages item in the Application menu is disabled if youhaven’t saved your application for the first time and given it a name.
☞
The database has now been generated and is ready for use with thePhAB Language Editor. The name of the database isapp.ldb, whereapp is the name of the executable file for the application (which istypically the same as the name of the application, unless you’ve usedthe Save As command to rename the application). The languagedatabase is placed in the application’s directory (where theabapp.dfn file is found).
Message databasesA message database is a file that contains textual messages. Eachmessage is identified by a tag name.
To load a message database, callApLoadMessageDB(). This functiondoes the usual file search based on theABLPATH environmentvariable and the current language:
� If no language is defined, the message database is loaded. It musthave a name ofname.mdb.
� If a language is defined, the function looks for a translation filecalledname.language. Translation files can be created using thePhAB translation editor — it can handle message databases.
To retrieve a message, given its tag, callApGetMessage().
To close the message database, callApCloseMessageDB().
November 2, 2006 Chapter 15 � International Language Support 445

Language editor 2006, QNX Software Systems GmbH & Co. KG.
You can create message databases using the PhAB message databaseutility phabmsg, located in the PhAB application directory. Thisutility allows you to create new message databases, and edit existingmessage databases.
Language editorAfter the database has been generated, you can use PhAB’s LanguageEditor to translate the default text strings to another language. TheLanguage Editor is designed to work both as a stand-alone applicationthat you can distribute with your application, or as an integrated partof PhAB itself.
PhAB Language Editor.
446 Chapter 15 � International Language Support November 2, 2006

2006, QNX Software Systems GmbH & Co. KG. Language editor
Starting the Language Editor within PhABWhen you are developing an application within PhAB, you can runthe Language Editor using the current application’s language databasequite easily:
➤ SelectProject→Language Editor→Run Language Editor.
This starts the Language Editor using the current application’slanguage database. At this point, you can proceed to create a newtranslation file or edit an existing one.
Starting the Language Editor as a stand-aloneapplicationIf you plan to allow your application to be translated at a customersite, you’ll need to include the following files with your application:
� /usr/photon/appbuilder/phablang
� /usr/photon/appbuilder/languages.def
Thelanguages.def file must be in the same directory as thephablang editor.
☞
� your application’s language database file,xxx.ldb
To start at the client site, you can:
� type/usr/photon/appbuilder/phablang &
or
� create an entry in the Desktop Manager to run/usr/photon/appbuilder/phablang (assuming the customeris running the full desktop environment).
Oncephablang is started:
1 Click on the Open Folder icon
November 2, 2006 Chapter 15 � International Language Support 447
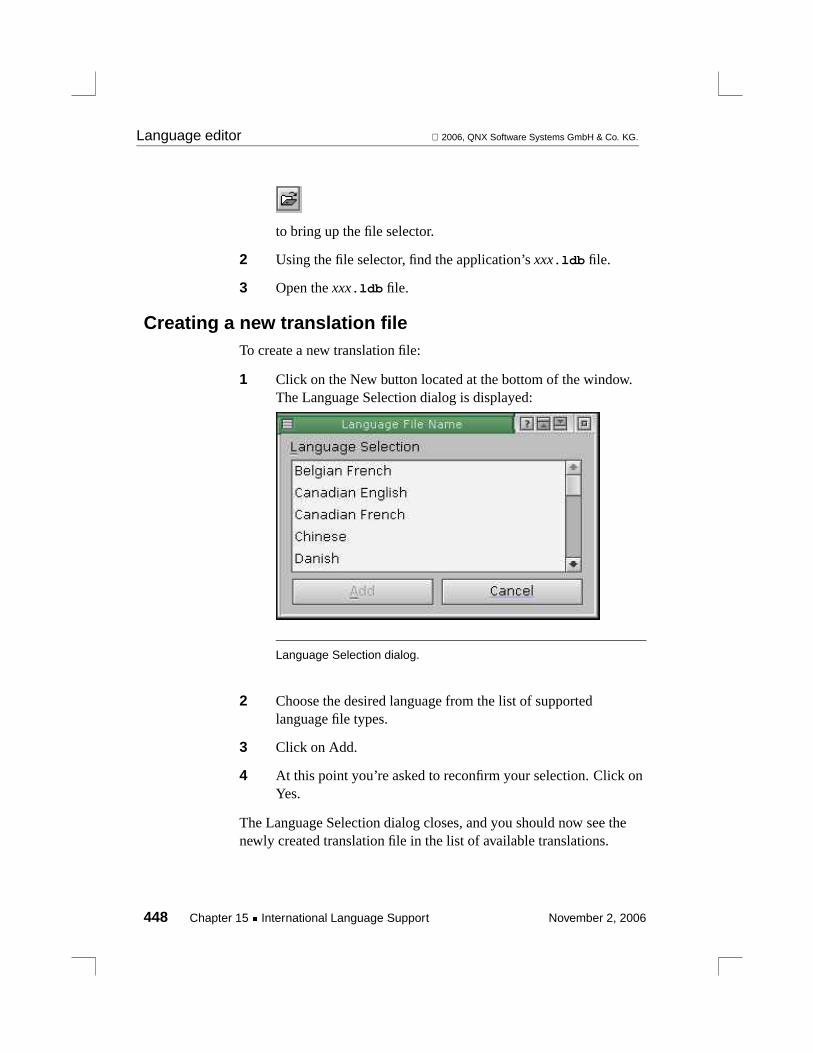
Language editor 2006, QNX Software Systems GmbH & Co. KG.
to bring up the file selector.
2 Using the file selector, find the application’sxxx.ldb file.
3 Open thexxx.ldb file.
Creating a new translation fileTo create a new translation file:
1 Click on the New button located at the bottom of the window.The Language Selection dialog is displayed:
Language Selection dialog.
2 Choose the desired language from the list of supportedlanguage file types.
3 Click on Add.
4 At this point you’re asked to reconfirm your selection. Click onYes.
The Language Selection dialog closes, and you should now see thenewly created translation file in the list of available translations.
448 Chapter 15 � International Language Support November 2, 2006

2006, QNX Software Systems GmbH & Co. KG. Language editor
Editing an existing translation fileTo edit a translation file in the Translations list:
1 Click on the desired language from the list.
2 Click on the Open button.
The Text Translation Editor dialog appears. This editor displays allthe text strings available for translation in the current languagedatabase.
Translating the textTo translate a text string:
1 Click on the text string you want to translate. The selected textstring is displayed in the text areas at the bottom of the window:
Default Text the default text bound into the application
Translation the current translation (if any) for the textstring. This is the area you use to type in thenew translation.
� If you need to type characters that don’t appear on yourkeyboard, you can use the compose sequences listed in“Photon compose sequences” in the Unicode MultilingualSupport appendix.
� You don’t have to translate every string. If a translation isn’tavailable, the default text is used.
☞
You can use the cut, copy, and paste buttons that are above theTranslation area when editing the translations.
November 2, 2006 Chapter 15 � International Language Support 449

Language editor 2006, QNX Software Systems GmbH & Co. KG.
2 Once you change the translated string, a green check mark andred X appear above the Translation area.
3 Click on the green check mark to accept your changes (theshortcut isCtrl – Enter).
4 Click on the red X to cancel your changes.
Repeat the above steps for all the text strings you need to translate.When you’re finished, click on the Save & Close button.
HotkeysOne problem with translating an application is that the hotkeyassignments no longer match up if the translated string doesn’tinclude the accelerator key value. For this reason, PhAB adds theaccelerator key strings to the language database too.
When translating the text string, the translator can also change theaccelerator key. If the key used in the hotkey isn’t a function key (i.e.the key code is less than0xF000), PhAB automatically changes thehotkey to match the accelerator key.
For example, suppose your application has a button labeledCancel.You’d set the button’sPt ARG ACCEL KEY to beC, and arrange forAlt – C to invokePt CB HOTKEY.
When you generate the language database, you’ll find that it includesthe button’s label and its accelerator key. If you translate theapplication into French, the button’s label would becomeAnnuler,so the hotkeyAlt – C is no longer appropriate. Just translate thebutton’sPt ARG ACCEL KEY to beA, and the hotkey automaticallybecomesAlt – A when you run the application in French.
You’ll need to make sure there are no duplicate accelerator keys. If itdoes happen by accident, only the first key defined is accepted.
☞
450 Chapter 15 � International Language Support November 2, 2006
2006, QNX Software Systems GmbH & Co. KG. Language editor
Help resourcesIf you use the Photon Helpviewer for your application help and youplan on providing multiple language help files for your application,the translator can also translate the help topic paths to point to thecorrect positions within the corresponding help files.
Translation functionsYou can build a custom language editor if the default one doesn’tmeet your needs. You’ll find these functions (described in the PhotonLibrary Reference) useful:
AlClearTranslation()
Clear all the translations in a language or messagedatabase
AlCloseDBase()
Close a language or message database
AlGetEntry() Get an entry from a language or message database
AlGetSize() Get the number of records in a language or messagedatabase
AlOpenDBase()
Load a language or message database
AlReadTranslation()
Read a translation file into a database
AlSaveTranslation()
Save translations from a language or messagedatabase
AlSetEntry() Set the translated string for a database entry
You can use these functions to create your own language editor, or toconvert a language database to a different file format (for example, soyou can send the file to a non-Photon or non-QNX system fortranslation).
November 2, 2006 Chapter 15 � International Language Support 451
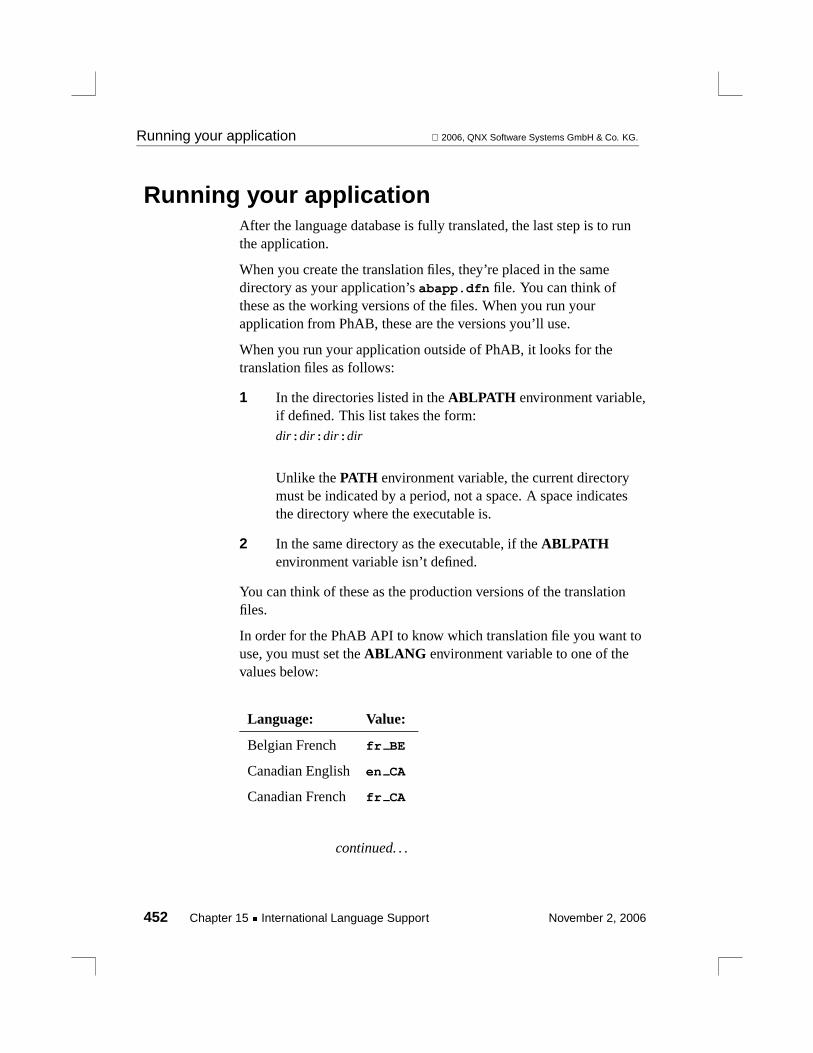
Running your application 2006, QNX Software Systems GmbH & Co. KG.
Running your applicationAfter the language database is fully translated, the last step is to runthe application.
When you create the translation files, they’re placed in the samedirectory as your application’sabapp.dfn file. You can think ofthese as the working versions of the files. When you run yourapplication from PhAB, these are the versions you’ll use.
When you run your application outside of PhAB, it looks for thetranslation files as follows:
1 In the directories listed in theABLPATH environment variable,if defined. This list takes the form:dir:dir:dir:dir
Unlike thePATH environment variable, the current directorymust be indicated by a period, not a space. A space indicatesthe directory where the executable is.
2 In the same directory as the executable, if theABLPATHenvironment variable isn’t defined.
You can think of these as the production versions of the translationfiles.
In order for the PhAB API to know which translation file you want touse, you must set theABLANG environment variable to one of thevalues below:
Language: Value:
Belgian French fr BE
Canadian English en CA
Canadian French fr CA
continued. . .
452 Chapter 15 � International Language Support November 2, 2006

2006, QNX Software Systems GmbH & Co. KG. Running your application
Language: Value:
Danish da DK
Dutch nl NL
French fr FR
German de DE
Italian it IT
Japanese ja JP
Norwegian no NO
Polish pl PL
Portuguese pt PT
Slovak sk SK
Spanish es ES
Swedish se SE
Swiss French fr CH
Swiss German de CH
UK English en GB
USA English en US
This list is current at the time this document was written, but mayhave since been updated. For the latest version, see the file:
/usr/photon/appbuilder/languages.def
☞
For example, to run an application in German (as spoken inGermany), you would do the following:
$ export ABLANG=de DE$ myapplication
November 2, 2006 Chapter 15 � International Language Support 453
Distributing your application 2006, QNX Software Systems GmbH & Co. KG.
The application looks for the best match. For example, if the languageextension specified isfr CA, the search is as follows:
1 Exact match (e.g.fr CA).
2 General match (e.g.fr).
3 Wildcard match (e.g.fr*).
If no translation is found, the original text in the application is used.
☞
Theexport command could be put in the user’s login profile so thatthe application will run in each user’s preferred language.
Distributing your applicationWhen you ship your application to the customer site, you must makesure to include the translation files in your distribution list. Forexample, if your application is namedmyapp, and you havetranslation files for French and German, you would need to includethemyapp.fr FR andmyapp.de DE files with the application.These files must be located:
� in the directories listed in theABLPATH environment variable, ifdefined. This list takes the form:dir:dir:dir:dir
Unlike thePATH environment variable, the current directory mustbe indicated by a period, not a space. A space indicates thedirectory where the executable is.
� in the same directory as the executable, ifABLPATH isn’t defined
If you want each customer to be able to translate the application,you’ll also need to distribute:
� the language editor (phablang), which can be placed in the/usr/bin/photon directory
454 Chapter 15 � International Language Support November 2, 2006
2006, QNX Software Systems GmbH & Co. KG. Distributing your application
� the language definition file (languages.def), which must beinstalled in the same directory as the editor
� the application’s language database (myapp.ldb)
The language database and the translation files that the customercreates should be in:
� one of the directories listed in theABLPATH environmentvariable, if defined
� the same directory as the executable, ifABLPATH isn’t defined
November 2, 2006 Chapter 15 � International Language Support 455

Chapter 16
Context-Sensitive Help
In this chapter. . .Referring to help topics 459Connecting help to widgets 460Accessing help from your code 462
November 2, 2006 Chapter 16 � Context-Sensitive Help 457


2006, QNX Software Systems GmbH & Co. KG. Referring to help topics
For information about creating help files for use with the helpviewer,see “Creating Help Files” in the helpviewer topic in theQNXNeutrino Utilities Reference.
Referring to help topicsThe Helpviewer understands two distinct ways of specifying thelocation of the HTML help text to be displayed:
� Universal Resource Locator (URL)
� topic path
Universal Resource Locator (URL)A URL specifies the filesystem path of the help-text file. It specifiesthis path in the standard HTML way, except that all files must resideon the local network. Here’s a sample URL:
/usr/help/product/photon/prog guide/window mgmt.html
URLs are case-sensitive. These URLs are restricted in scope to thehelp files; they can’t be used to access the web.
☞
Topic pathA topic path is a group of concatenated topic titles that are defined inthe current topic tree. For example, here’s the equivalent topic path tothe above URL:
/Photon microGUI/Programmer’s Guide/Window Management
For the Helpviewer, the topic path is case-insensitive (unlike otherHTML browsers) and may contain the wildcard characters* or ?,where* matches a string and? matches a character. The firstmatching topic is selected.
November 2, 2006 Chapter 16 � Context-Sensitive Help 459

Connecting help to widgets 2006, QNX Software Systems GmbH & Co. KG.
A topic tree used by the Helpviewer must have at least threehierarchical levels: the top level is known as the bookshelf, the secondlevel as the book set, and the third level as the book. A book maycontain further levels of chapters and sections.
Entries in a bookshelf or book set should not contain any HTML, only.toc entries for the next level; help text should only be found inbooks.
Connecting help to widgetsYou can display help information for a widget in the Helpviewer or ina help balloon. You can even use both methods in an application. Forexample, you could use a balloon for short explanations and theHelpviewer for more detailed help.
No matter which method you choose, you need to do the following ineach of your application’s windows:
1 SetPh WM HELP in the Flags: Managed(Pt ARG WINDOWMANAGEDFLAGS) resource.
2 SetPh WM RENDER HELP in the Flags: Render(Pt ARG WINDOWRENDERFLAGS) resource. This will adda ? icon to the window frame. The user can click on it, and thenclick on a widget, and the help information will be displayed.
If using the ? icon isn’t suitable for your application, see “Helpwithout the ? icon” later in this chapter.
For more information, see the Window Management chapter.
Displaying help in the HelpviewerTo use the Helpviewer to display help information for a widget, do thefollowing:
1 Optionally, specify the Help Root(Pt ARG WINDOWHELP ROOT) resource for each windowin your application. This allows you to specify relative topicpaths for widgets inside the window.
460 Chapter 16 � Context-Sensitive Help November 2, 2006

2006, QNX Software Systems GmbH & Co. KG. Connecting help to widgets
Use a topic path, not a URL.☞
The topic root should start with a slash (/), and should be thetop of all topics for the window, usually taken from a TOC filein the/usr/help/product directory. For example:
/Photon microGUI/User’s Guide
2 For each widget in the window, fill in the Help Topic(Pt ARG HELP TOPIC) resource. If you specified a topic rootfor the window, this topic path can be relative to the window’stopic root. For example:
Introduction
When the user clicks on the ? icon and selects the widget, the helpinformation is displayed in the Helpviewer.
If you get an error message about a bad link when you ask for help fora widget, make sure that the topic path is correct.
☞
Displaying help in a balloonTo use a balloon to display help information for a widget:
1 Put the text you want displayed in the balloon into the widget’sHelp Topic (Pt ARG HELP TOPIC) resource.
2 Set thePt INTERNAL HELP flag in the widget’s Extended Flags(Pt ARG EFLAGS) resource.
When the user clicks on the ? icon, and selects the widget, the helpinformation appears in a balloon.
Help without the ? iconIn many applications the ? icon in the window frame isn’t suitable.However, you may still want to use the Photon Helpviewer fordisplaying help. For example:
� For touch screens, the window’s ? icon may be too small.
November 2, 2006 Chapter 16 � Context-Sensitive Help 461

Accessing help from your code 2006, QNX Software Systems GmbH & Co. KG.
� You may want the mouse pointer to change to the Help pointerwhen a key is pressed.
To get the mouse pointer to change to the Help pointer, forward thePh WM HELP event to the window manager. The following codewould be in a callback attached to aPtButton widget labeledHelp:
inthelp cb( PtWidget t *widget, ApInfo t *apinfo,
PtCallbackInfo t *cbinfo ){
PhWindowEvent t winev;
memset( &winev, 0, sizeof(winev) );winev.event f = Ph WM HELP;winev.rid = PtWidgetRid( window );PtForwardWindowEvent( &winev );
return( Pt CONTINUE );}
The window must havePh WM HELP set in the Managed Flags(Pt ARG WINDOWMANAGEDFLAGS) resource. You must also fillin the Help Topic (Pt ARG HELP TOPIC) resource for the widgetsthat have help, as outlined above.
☞
Accessing help from your codeUse the following functions (described in the PhotonLibraryReference) to access help from your application’s code—you don’tneed them if you’re using the method described in “Connecting helpto widgets”:
PtHelpUrl() Display help for the URL.
PtHelpUrlRoot()
Set a URL root.
PtHelpTopic() Display help for a topic path.
462 Chapter 16 � Context-Sensitive Help November 2, 2006

2006, QNX Software Systems GmbH & Co. KG. Accessing help from your code
PtHelpTopicRoot()
Set a topic root.
PtHelpTopicTree()
Display help for the topic tree.
PtHelpSearch() Search for a string.
PtHelpQuit() Exit the Helpviewer.
PtHelpUrlRoot()andPtHelpTopicRoot()don’t save the passed string,so don’t free it until you’re finished using the help root.
☞
November 2, 2006 Chapter 16 � Context-Sensitive Help 463


Chapter 17
Interprocess Communication
In this chapter. . .Connections 468Sending QNX messages 475Receiving QNX messages 477Photon pulses 484Processing signals 490Other I/O mechanisms 492
November 2, 2006 Chapter 17 � Interprocess Communication 465


2006, QNX Software Systems GmbH & Co. KG.
A Photon application can’t always work in isolation — sometimes itneeds to communicate with other processes.
The QNX Neutrino operating system supports various methods ofinterprocess communication (IPC), including:
� messages
� pulses
� signals
These methods can be used in a Photon application, as long as you’recareful. However, it’s best to use Photon connections:
� Connectors let the two communicating processes find each othereasily. Photon connectors are registered with Photon, and thereforethere’s no chance of namespace conflicts between multiple Photonsessions running on the same machine.
� Photon connections know how to direct messages even if you havemultiple connections between the same pair of processes. If youuse raw Neutrino messages and input processes, you might need tohandle that possibility yourself.
On the other hand, here’s why raw Neutrino messages and/or pulsesmight sometimes be better:
� If one of the two communicating processes is not a Photonapplication, it can’t use the Photon library. In this case bothprocesses should use Neutrino messages or pulses.
� If the two processes don’t necessarily belong to the same Photonsession, they will need some other way of finding each other.
� If all you need is pulses, using a Photon connection is overkill.
The Photon main event-handling loop that your application calls isresponsible for handling Photon events so that widgets updatethemselves and your callback functions are called.
This simple event-driven model of programming used with the Photonwidget library presents some challenges for the application developer
November 2, 2006 Chapter 17 � Interprocess Communication 467

Connections 2006, QNX Software Systems GmbH & Co. KG.
because the event-handling loop performs an unconditionalMsgReceive()to obtain events from Photon. This means yourapplication has to be careful if it needs to callMsgReceive(), orPhoton events might go astray and the user interface might not beupdated.
If you need to:
� respond to other messages in your application
� perform I/O using another mechanism (such as reading from apipe)
� process signals
� respond to pulses
you’ll need a way to hook your application code into theevent-handling loop. Similarly, you may want to be able to addtime-outs to your application and associate callback functions withthem.
ConnectionsThe process of establishing a connection uses an object called aconnector. The connector is a name that the server creates and owns,and the client attaches its connection to. The connector is used onlyfor establishing a connection.
The connector has a numeric ID and may also have a name associatedwith it. Both the name and the ID are unique in their Photon session.Here are a few examples of how the name can be used:
� When the server is started, it creates a connector with a wellknown name (such asHelpviewer). Clients connect to it, sendrequests, and then disconnect. If a client fails to find the name, itspawns the server and retries.
� A server creates a nameless connector and somehow sends theconnector’s ID to a potential client (drag-and-drop events use thisscheme). The client then uses the ID to connect to the server.
468 Chapter 17 � Interprocess Communication November 2, 2006

2006, QNX Software Systems GmbH & Co. KG. Connections
� If a client always needs to spawn a new server for itself even if acopy of the server is already running, the client can callPtConnectionTmpName(). to create a “temporary connectorname,” pass the name to the server in a command-line argument oran environment variable, and then connect to the server.
Naming conventionsYou can define unique names for your connectors by following thesenaming conventions:
� Names that don’t contain a slash are reserved for QNX SoftwareSystems.
� Third-party products should register only names that start with aunique string (e.g. an email address or a domain name) followedby a slash. For example,www.acme.com/dbmanager.
Typical scenarioHere’s how you typically use connections:
1 The server callsPtConnectorCreate()to set up a connector,specifying a function to call whenever a client connects to theconnector.
2 If the client needs a connector ID to find the connector, theserver callsPtConnectorGetId()to determine the ID. The serverthen needs to give the ID to the client.
3 The client looks for a connector by callingPtConnectionFindName()or PtConnectionFindId(). If thesefunctions succeed, they return a client connection object of typePtConnectionClient t.
The client can make repeated attempts (within a specified timelimit or until the server terminates) to find the server by callingPtConnectionWaitForName().
4 If the client finds the connector, the library sets up a connectionto it and invokes the callback that the server specified when it
November 2, 2006 Chapter 17 � Interprocess Communication 469

Connections 2006, QNX Software Systems GmbH & Co. KG.
created the connector, passing aPtConnectionServer t
server connection object to the routine.
5 The server’s callback usesPtConnectionAddMsgHandlers()toset up a handler for any messages from the client.
6 The client usesPtConnectionSend()or PtConnectionSendmx()to send a message to the server. The client blocks until theserver replies.
7 The library invokes the server’s message handler, which callsPtConnectionReply()or PtConnectionReplymx()to reply to theclient.
8 The client and server continue to exchange messages.
9 If the client wants to break the connection, it callsPtConnectionClientDestroy(); if the server wants to break theconnection, it callsPtConnectionServerDestroy().
10 When the server no longer needs the connector, it destroys it bycallingPtConnectorDestroy().
You can pass user data with the connection. The server callsPtConnectionServerSetUserData()to specify the data that the clientcan retrieve by callingPtConnectionClientGetUserData(). Similarly,the client callsPtConnectionClientSetUserData()to specify the datathat the server can retrieve by callingPtConnectionServerGetUserData().
You can set up functions to handler errors; the server does this bycallingPtConnectionServerSetError(), and the client by callingPtConnectionClientSetError().
The server can also use events to communicate with the client:
1 The client sets up one or more event handlers by callingPtConnectionAddEventHandlers(). You can set up differenttypes of messages, and handlers for each type.
2 To send an event to the client, the server callsPtConnectionNotify(), which in turn can call
470 Chapter 17 � Interprocess Communication November 2, 2006
2006, QNX Software Systems GmbH & Co. KG. Connections
PtConnectionFlush()if there isn’t enough room for thenotification in the server’s buffer.
3 The server can change the size of the buffer by callingPtConnectionResizeEventBuffer().
Local connectionsIt’s possible for a process to create a connection to itself. The behaviorof such a connection differs a little bit from a normal connection:
� For a normal connection, thePtConnectionSend(),PtConnectionSendmx(), andPtConnectionNotify()functionssimply send a message or a pulse, and never execute any user code(except whenPtConnectionNotify()needs to flush the buffer,which may cause Photon events to be processed in the normalway).
If the connection is local,PtConnectionSend(),PtConnectionSendmx(), andPtConnectionNotify()invoke thehandler directly, and both the calling code and the handler musttake into account any side effect of that.
� Another difference is that the handlers are called from a differentcontext. Normally, an event handler or message handler callback iscalled from within an input function. Since input functions are notinvoked unless you either return to the main loop or callPtBkgdHandlerProcess()or PtProcessEvent(), it’s often safe toassume that a handler won’t be invoked while a callback isrunning. But if the connection is local, the handler is invokeddirectly byPtConnectionSend(), PtConnectionSendmx(), orPtConnectionNotify(), and the assumptions need to be modifiedaccordingly.
� Another side effect of this is that if a message handler callsPtConnectionNotify(), the client gets the notification before thereply. In other words, the client’s event handler is invoked beforethePtConnectionSend()or PtConnectionSendmx()call returns. Ifthe handler callsPtConnectionSend()or PtConnectionSendmx()
November 2, 2006 Chapter 17 � Interprocess Communication 471

Connections 2006, QNX Software Systems GmbH & Co. KG.
again, the call fails witherrnoset toEBUSY (that’s how the libraryprotects itself from infinite recursion).
The simplest way around this is to avoid sending notifications fromwithin a message handler — instead, the notification can be placedin the reply.
ExampleThis application uses a connector to determine if there’s alreadyanother instance of the application running. The program takes twocommand-line options:
-e If another instance of the application is already running,tell it to exit.
-f file If another instance of the application is already running,tell it to open the givenfile; otherwise just open the file.
Here’s the code:
/* Standard headers */#include <stdio.h>#include <stdlib.h>#include <unistd.h>#include <string.h>
/* Toolkit headers */#include <Ph.h>#include <Pt.h>#include <Ap.h>
/* Local headers */#include "abimport.h"#include "proto.h"
enum MyMsgType {MY MSGTYPE EXIT, MY MSGTYPE OPEN DOC, MY MSGTYPE TOFRONT};
enum MyReplyType {MY REPTYPE SUCCESS, MY REPTYPE BADMSG};
struct MyMsg {
472 Chapter 17 � Interprocess Communication November 2, 2006

2006, QNX Software Systems GmbH & Co. KG. Connections
char docname[ PATH MAX ];};
struct MyReply {enum MyReplyType status;};
/* Handle a message from a client: */static PtConnectionMsgFunc t msghandler;
static void const *msghandler(PtConnectionServer t *connection, void *data,unsigned long type, void const *msgptr,unsigned msglen, unsigned *reply len)
{struct MyMsg const *msg = (struct MyMsg const*) msgptr;static struct MyReply reply;
reply.status = MY REPTYPE SUCCESS;switch ( type ) {
case MY MSGTYPE EXIT :PtConnectionReply( connection, sizeof(reply),
&reply );PtExit( EXIT SUCCESS );break;
case MY MSGTYPE OPEN DOC :reply.status = OpenNewDocument( msg->docname );break;
case MY MSGTYPE TOFRONT :break;
default :reply.status = MY REPTYPE BADMSG;
}
PtWindowToFront( ABW base );*reply len = sizeof(reply);return &reply;
}
/* Set up a new connection: */static PtConnectorCallbackFunc t connector callback;
static void connector callback(PtConnector t *connector,PtConnectionServer t *connection,void *data )
November 2, 2006 Chapter 17 � Interprocess Communication 473
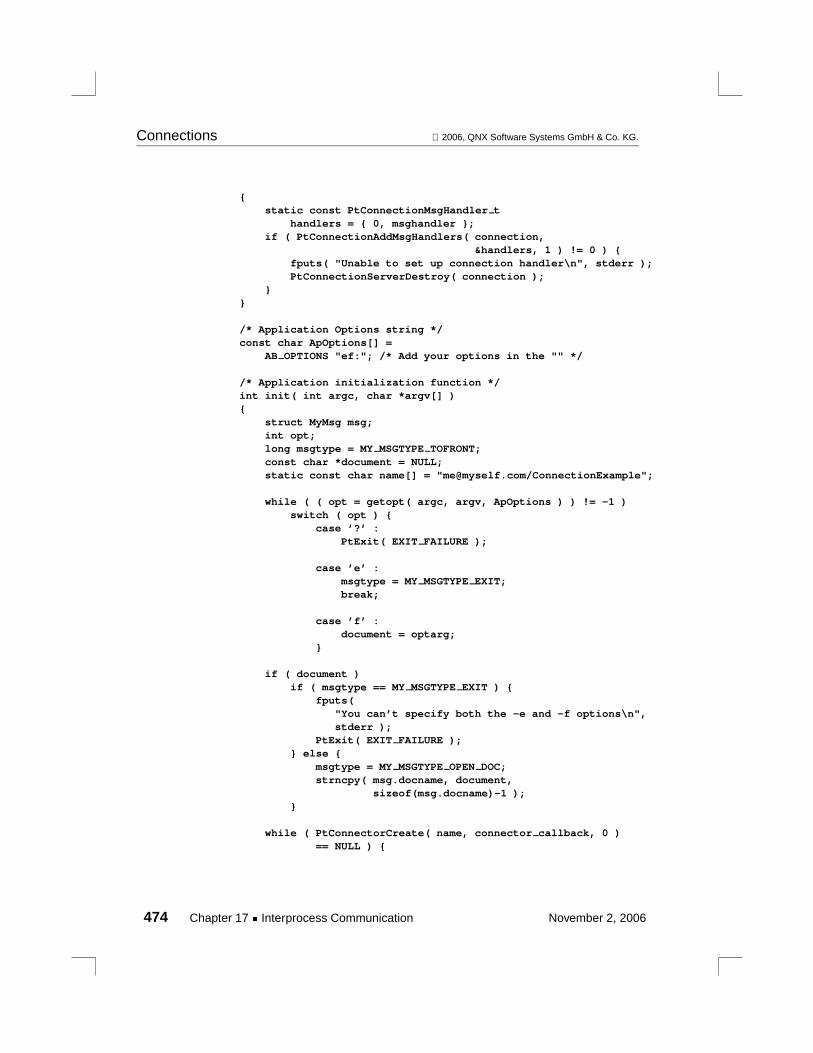
Connections 2006, QNX Software Systems GmbH & Co. KG.
{static const PtConnectionMsgHandler t
handlers = { 0, msghandler };if ( PtConnectionAddMsgHandlers( connection,
&handlers, 1 ) != 0 ) {fputs( "Unable to set up connection handler\n", stderr );PtConnectionServerDestroy( connection );
}}
/* Application Options string */const char ApOptions[] =
AB OPTIONS "ef:"; /* Add your options in the "" */
/* Application initialization function */int init( int argc, char *argv[] ){
struct MyMsg msg;int opt;long msgtype = MY MSGTYPE TOFRONT;const char *document = NULL;static const char name[] = "[email protected]/ConnectionExample";
while ( ( opt = getopt( argc, argv, ApOptions ) ) != -1 )switch ( opt ) {
case ’?’ :PtExit( EXIT FAILURE );
case ’e’ :msgtype = MY MSGTYPE EXIT;break;
case ’f’ :document = optarg;
}
if ( document )if ( msgtype == MY MSGTYPE EXIT ) {
fputs("You can’t specify both the -e and -f options\n",stderr );
PtExit( EXIT FAILURE );} else {
msgtype = MY MSGTYPE OPEN DOC;strncpy( msg.docname, document,
sizeof(msg.docname)-1 );}
while ( PtConnectorCreate( name, connector callback, 0 )== NULL ) {
474 Chapter 17 � Interprocess Communication November 2, 2006

2006, QNX Software Systems GmbH & Co. KG. Sending QNX messages
/* If this failed, another instance of the app mustbe already running */
PtConnectionClient t *clnt;if ( ( clnt = PtConnectionFindName( name, 0, 0 ) )
!= 0 ) {struct MyReply reply;int result = PtConnectionSend( clnt, msgtype,
&msg, &reply, sizeof(msg),sizeof(reply) );
PtConnectionClientDestroy( clnt );if ( result == 0 )
PtExit( reply.status );}
}
/* Since PtConnectorCreate() has succeeded, we’re the onlyinstance of the app running */
if ( msgtype == MY MSGTYPE EXIT ) {fputs( "Can’t tell it to exit; it’s not running\n",
stderr );PtExit( EXIT FAILURE );}
if ( document )OpenNewDocument( document );
return Pt CONTINUE;}
Sending QNX messagesA Photon application can useMsgSend()to pass messages to anotherprocess, but the other process needs toMsgReply()promptly, asPhoton events aren’t processed while the application is blocked.(Promptness isn’t an issue if your application has multiple threads thatprocess events, and you callPtLeave()beforeMsgSend(), andPtEnter()after. For a discussion of writing applications that usemultiple threads, see the Parallel Operations chapter.)
November 2, 2006 Chapter 17 � Interprocess Communication 475

Sending QNX messages 2006, QNX Software Systems GmbH & Co. KG.
As an example, here’s a callback that extracts a string from a textwidget, sends it to another process, and displays the reply in the sametext widget:
/* Callback that sends a message to another process */
/* Standard headers */#include <stdio.h>#include <stdlib.h>#include <unistd.h>#include <string.h>#include <sys/neutrino.h> /* Needed for MsgSend() */
/* Toolkit headers */#include <Ph.h>#include <Pt.h>#include <Ap.h>
/* Local headers */#include "globals.h"#include "abimport.h"#include "proto.h"
extern int coid;
intsend msg to b( PtWidget t *widget,
ApInfo t *apinfo,PtCallbackInfo t *cbinfo )
{char *a message;
/* eliminate ’unreferenced’ warnings */widget = widget, apinfo = apinfo, cbinfo = cbinfo;
/* Get the string from the text widget. */
PtGetResource (ABW msg text, Pt ARG TEXT STRING, 0, 0);
/* Send the string to another process. */
a message = (char *)args[0].value;if ( MsgSend (coid, a message, msg size,
rcv msg, msg size) == -1){
perror ("Send to B failed");PtExit (-1);
}
476 Chapter 17 � Interprocess Communication November 2, 2006

2006, QNX Software Systems GmbH & Co. KG. Receiving QNX messages
/* Remember the UI is "hung" until the otherprocess replies! */
/* Display the reply in the same text widget. */
PtSetResource (ABW msg text, Pt ARG TEXT STRING,rcv msg, 0);
return( Pt CONTINUE );
}
For more information on messages, see the QNX NeutrinoSystemArchitectureguide.
Receiving QNX messagesTo handle non-Photon events in a Photon application, you need toregister aninput handling procedure(or input handler), otherwise theevents are lost. This is because the unconditionalMsgReceive()performed by the Photon event handling loop ignores non-Photonevents.
You can create your own channel and callMsgReceive()on it, butremember that your application and its interface will be blocked untilthat process sends a message. It’s better to use an input handler asdescribed in this section.
☞
An input handler is responsible for handling messages received by theapplication from a particular process. When you register the handlerwith the widget library, you identify the pid the input handler isassociated with.
You can define more than one input handler in your application for apid, but only the last one registered is called by the widget librarywhen a message is received from that process.
You can register a nonspecific input handler by specifying a value ofzero for the pid. This handler is called when the application receives:
November 2, 2006 Chapter 17 � Interprocess Communication 477
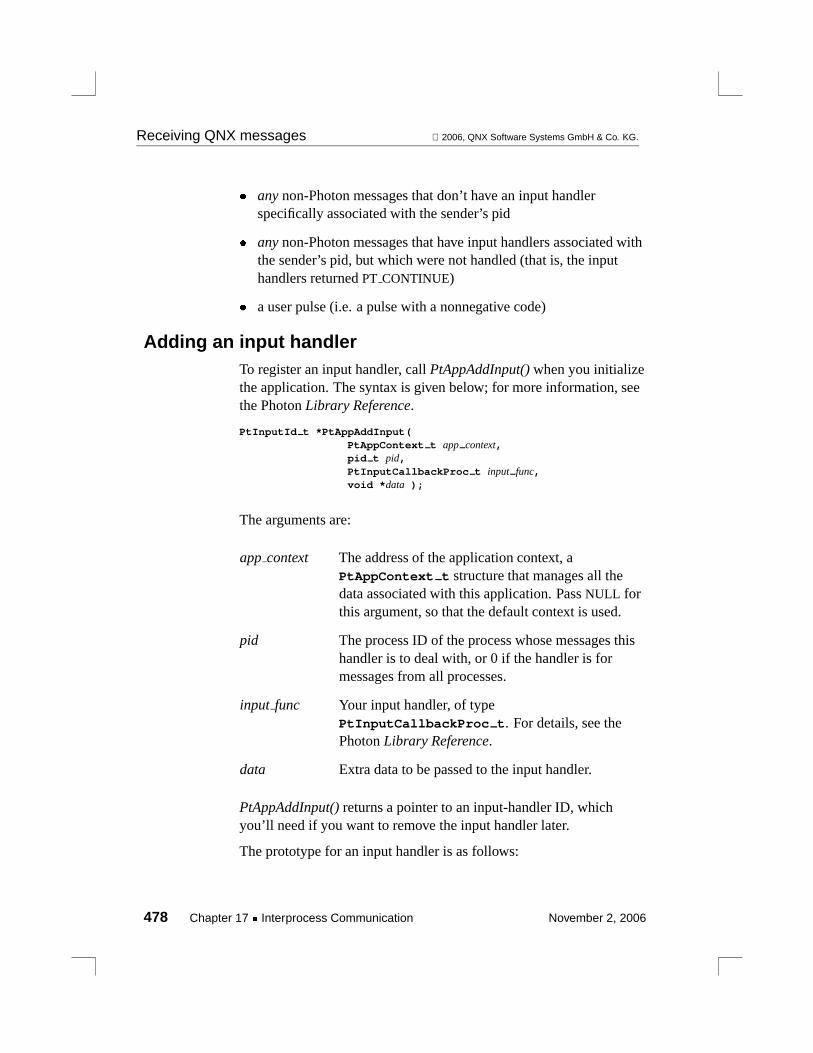
Receiving QNX messages 2006, QNX Software Systems GmbH & Co. KG.
� anynon-Photon messages that don’t have an input handlerspecifically associated with the sender’s pid
� anynon-Photon messages that have input handlers associated withthe sender’s pid, but which were not handled (that is, the inputhandlers returnedPT CONTINUE)
� a user pulse (i.e. a pulse with a nonnegative code)
Adding an input handlerTo register an input handler, callPtAppAddInput()when you initializethe application. The syntax is given below; for more information, seethe PhotonLibrary Reference.
PtInputId t *PtAppAddInput(PtAppContext t app context,pid t pid,PtInputCallbackProc t input func,void *data );
The arguments are:
app context The address of the application context, aPtAppContext t structure that manages all thedata associated with this application. PassNULL forthis argument, so that the default context is used.
pid The process ID of the process whose messages thishandler is to deal with, or 0 if the handler is formessages from all processes.
input func Your input handler, of typePtInputCallbackProc t. For details, see thePhotonLibrary Reference.
data Extra data to be passed to the input handler.
PtAppAddInput()returns a pointer to an input-handler ID, whichyou’ll need if you want to remove the input handler later.
The prototype for an input handler is as follows:
478 Chapter 17 � Interprocess Communication November 2, 2006
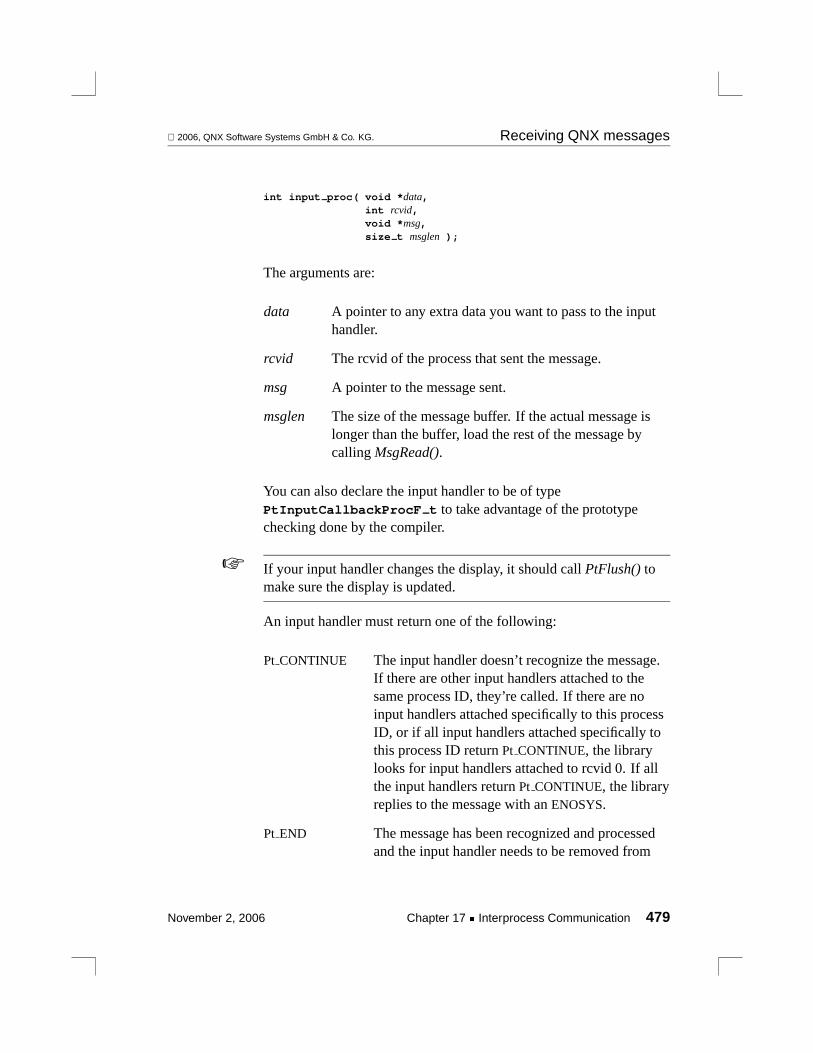
2006, QNX Software Systems GmbH & Co. KG. Receiving QNX messages
int input proc( void *data,int rcvid,void *msg,size t msglen );
The arguments are:
data A pointer to any extra data you want to pass to the inputhandler.
rcvid The rcvid of the process that sent the message.
msg A pointer to the message sent.
msglen The size of the message buffer. If the actual message islonger than the buffer, load the rest of the message bycallingMsgRead().
You can also declare the input handler to be of typePtInputCallbackProcF t to take advantage of the prototypechecking done by the compiler.
If your input handler changes the display, it should callPtFlush()tomake sure the display is updated.
☞
An input handler must return one of the following:
Pt CONTINUE The input handler doesn’t recognize the message.If there are other input handlers attached to thesame process ID, they’re called. If there are noinput handlers attached specifically to this processID, or if all input handlers attached specifically tothis process ID returnPt CONTINUE, the librarylooks for input handlers attached to rcvid 0. If allthe input handlers returnPt CONTINUE, the libraryreplies to the message with anENOSYS.
Pt END The message has been recognized and processedand the input handler needs to be removed from
November 2, 2006 Chapter 17 � Interprocess Communication 479

Receiving QNX messages 2006, QNX Software Systems GmbH & Co. KG.
the list. No other input handlers are called for thismessage.
Pt HALT The message has been recognized and processedbut the input handler needs to stay on the list. Noother input handlers are called for this message.
name attach() and PtAppAddInput()
If possible, you should use a Photon connection instead ofnameattach()to establish a connection with another process.However, you can’t use a Photon connection in these cases:
� The connecting client isn’t a Photon application.
� The connecting processes belong to a different Photon session.This applies even if you’re running multiple Photon sessions onone machine, or if your Photon session consists of applicationsrunning on several machines and the two connecting processeshappen to be on different machines.
PtAppAddInput()andnameattach()both try to create a channel withNTO CHF COID DISCONNECTand NTO CHF DISCONNECTset(see the QNX NeutrinoLibrary Reference). If your application callsboth functions, you need to let Photon use the same channel asnameattach(), by callingPhChannelAttach()first, like this:
PhChannelAttach( chid, -1, NULL );
before callingnameattach()or PtAppAddInput().
If you want to create a separate channel for Photon, it doesn’t matterwhether you create it and give it toPhChannelAttach()before or aftercallingnameattach(). But keep in mind that since certainmechanisms in Photon library expect the Photon channel to have thetwo DISCONNECT flags, they might not work properly if it doesn’t.One such mechanism is the detection of broken connections (seePtConnectionClientSetError()andPtConnectionServerSetError())and anything that relies on it.
480 Chapter 17 � Interprocess Communication November 2, 2006

2006, QNX Software Systems GmbH & Co. KG. Receiving QNX messages
Removing an input handlerTo remove an input handler:
� Have it returnPt END.
Or:
� Call PtAppRemoveInput(), passing it the ID returned byPtAppAddInput().
Message buffer sizeAs described above, arguments to your input function include:
msg A pointer to an event buffer that was used to receive themessage.
msglen The size of the buffer.
This buffer might not be large enough to hold the entire message. Oneway of handling this is to have the first few bytes of the messageindicate the message type and from that determine how big themessage should be. Once you know the message size, you can:
� Reread the entire message by callingMsgReadv().
Or:
� Copy the part you’ve already received into a new buffer. Get therest of the message by callingMsgReadv(). Add the rest of themessage to the first part.
Alternatively, you can set the event buffer to be the size of the largestmessage your application will receive (if known). This can be done bycallingPtResizeEventMsg(). You’d typically call this before youexpect to receive any messages.
November 2, 2006 Chapter 17 � Interprocess Communication 481
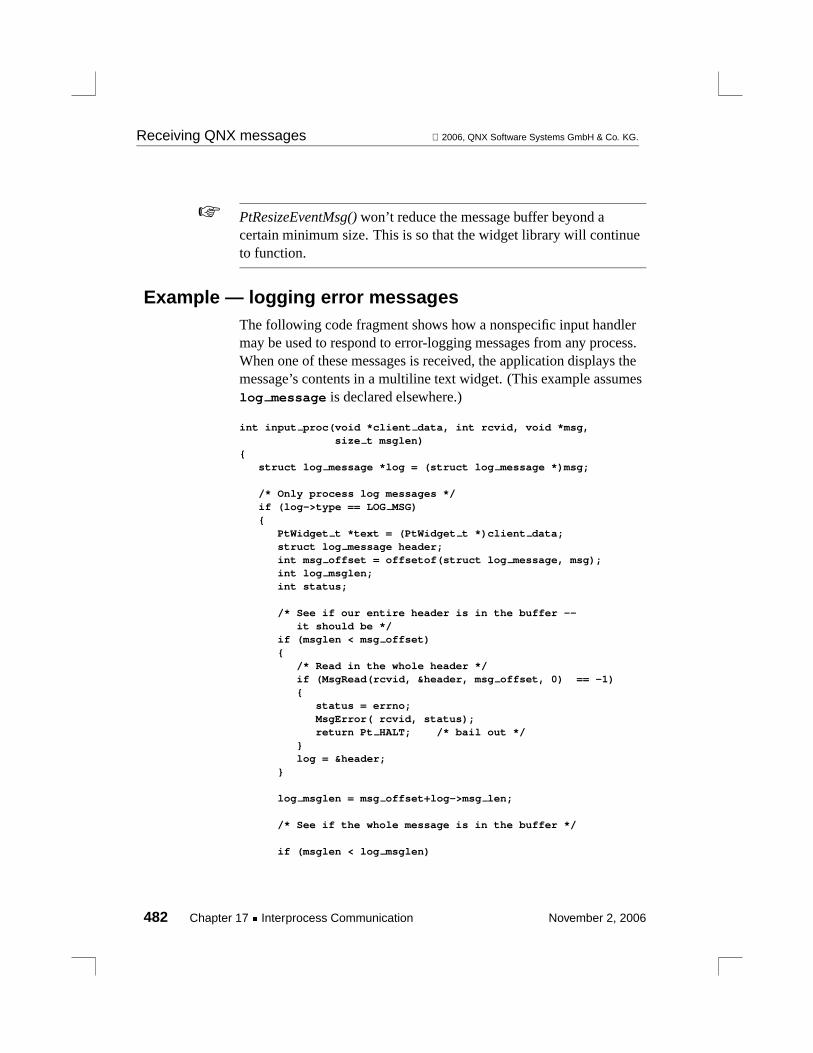
Receiving QNX messages 2006, QNX Software Systems GmbH & Co. KG.
PtResizeEventMsg()won’t reduce the message buffer beyond acertain minimum size. This is so that the widget library will continueto function.
☞
Example — logging error messagesThe following code fragment shows how a nonspecific input handlermay be used to respond to error-logging messages from any process.When one of these messages is received, the application displays themessage’s contents in a multiline text widget. (This example assumeslog message is declared elsewhere.)
int input proc(void *client data, int rcvid, void *msg,size t msglen)
{struct log message *log = (struct log message *)msg;
/* Only process log messages */if (log->type == LOG MSG){
PtWidget t *text = (PtWidget t *)client data;struct log message header;int msg offset = offsetof(struct log message, msg);int log msglen;int status;
/* See if our entire header is in the buffer --it should be */
if (msglen < msg offset){
/* Read in the whole header */if (MsgRead(rcvid, &header, msg offset, 0) == -1){
status = errno;MsgError( rcvid, status);return Pt HALT; /* bail out */
}log = &header;
}
log msglen = msg offset+log->msg len;
/* See if the whole message is in the buffer */
if (msglen < log msglen)
482 Chapter 17 � Interprocess Communication November 2, 2006

2006, QNX Software Systems GmbH & Co. KG. Receiving QNX messages
{struct log message *log msg =
(struct log message *)alloca(log msglen);
/* Read the remainder of the message intospace on the stack */
if (log msg == NULL ||MsgRead( rcvid, log msg, log msglen, 0) == -1)
{status = errno;MsgError( rcvid, status);return Pt HALT; /* bail out */
}log = log msg;
}
add msg(text, log);status = 0;MspReply( rcvid, 0, 0, 0);
}
return Pt HALT;}
This application registers theinput proc() function as an input handlerfor handling non-Photon messages from any other process.
The input proc() function first checks the message type of theincoming message. If the input handler isn’t responsible for this typeof message, it returns immediately. This is important because anyother nonspecific input handlers that were registered will be called aswell, and only one of them should respond to a given message.
If the type of message received is a log message, the function makessure that Photon has read the entire message into the Photon eventbuffer. This can be determined by looking at the message lengthprovided as themsglento the input handler. If part of the messageisn’t in the event buffer, a message buffer is allocated andMsgRead()is called to get the whole message. Theinput proc() function thencallsadd msg()to add the message to the text widget and replies tothe message.
Wheninput proc() is complete, it returns the valuePt HALT. Thisinstructs the Photon widget library not to remove the input handler.
November 2, 2006 Chapter 17 � Interprocess Communication 483

Photon pulses 2006, QNX Software Systems GmbH & Co. KG.
Photon pulsesIn addition to synchronous message-passing, Photon supports pulses.A process that wants to notify another process but doesn’t want towait for a reply can use a Photon pulse. For example, a server can usea pulse to contact a client process in a situation where sending amessage would leave both SEND-blocked (and hence deadlocked).
A Photon pulse is identified by a negative PID that can be used as thepid argument toPtAppAddInput(). This PID is local to yourapplication. If you want another process to send pulses to you, youmust “arm” the pulse usingPtPulseArm(). This creates aPtPulseMsg t object that can be sent to the other process in amessage. The other process will then be able to send pulses by callingMsgDeliverEvent()function.
Under the QNX Neutrino OS version 6,PtPulseMsg t is asigevent structure. The bits inmsg.sigevvalue.sivalint thatcorrespond toNOTIFY COND MASK are clear, but can be set by theapplication that sends the pulse. For more information, seeionotify()in the QNX NeutrinoLibrary Reference.
PtPulseArm()(described in the PhotonLibrary Reference) simplytakes asigevent structure.PtPulseArmFd()andPtPulseArmPid()are for compatibility with earlier version of the QNX Neutrino OSand the Photon microGUI.
☞
Let’s look at the code you’ll need to write to support pulses in a:
� Photon application that receives pulses
� Photon application that delivers pulses
Photon application that receives a pulseIt’s the recipient of a Photon pulse that has to do the most preparation.It has to:
1 Create the pulse.
484 Chapter 17 � Interprocess Communication November 2, 2006
2006, QNX Software Systems GmbH & Co. KG. Photon pulses
2 Arm the pulse.
3 Send the pulse message to the process that will deliver it.
4 Register an input handler for the pulse message.
5 Deliver the pulse to itself, if necessary.
6 Destroy the pulse when it’s no longer needed.
The sections below discuss each step, followed by an example.
Before exiting, the recipient process should tell the delivering processto stop sending pulses.
☞
Creating a pulse
To create a Photon pulse, callPtAppCreatePulse():
pid t PtAppCreatePulse( PtAppContext t app,int priority );
The arguments are:
app The address of the application context, aPtAppContext t structure that manages all the dataassociated with this application. You should passNULLfor this argument, so that the default context is used.
priority The priority of the pulse. If this is -1, the priority of thecalling program is used.
PtAppCreatePulse()returns a pulse process ID, which is negative butnever -1. This is the receiver’s end of the pulse.
Arming a pulse
Arming the pulse fills in thesigevent structure, which can be usedfor most of the QNX Neutrino calls that take this type of argument.
November 2, 2006 Chapter 17 � Interprocess Communication 485
Photon pulses 2006, QNX Software Systems GmbH & Co. KG.
There’s nothing wrong with having more than one process deliver thesame pulse, although the recipient won’t be able to tell which processsent it.
☞
To arm a pulse, callPtPulseArm(). The prototype is:
int PtPulseArm( PtAppContext t app,pid t pulse,struct sigevent *msg );
The arguments are:
app A pointer to thePtAppContext t structure that definesthe current application context (typicallyNULL).
pulse The pulse created byPtAppCreatePulse().
msg A pointer to a pulse message that this function creates.This is the deliverer’s end of the pulse, and we’ll need tosend it to that process, as described below.
This function returns a pointer to a pulse message ID, which you’llneed later.
Sending the pulse message to the deliverer
The method you use to send the pulse message depends on theprocess that will deliver the pulse. For example,
� For a resource manager, useionotify():ionotify (fd, NOTIFY ACTION POLLARM, NOTIFY COND INPUT,
&pulsemsg);
� For other process types, you could useMsgSendv():/* Create your own message format: */msg.pulsemsg = pulsemsg;MsgSendv (connection id, &msg, msg parts, &rmsg, rmsg parts);
486 Chapter 17 � Interprocess Communication November 2, 2006
2006, QNX Software Systems GmbH & Co. KG. Photon pulses
Registering an input handler
Registering an input handler for the pulse is similar to registering onefor a message; see “Adding an input handler” earlier in this chapter.Pass the pulse ID returned byPtAppCreatePulse()as thepidparameter toPtAppAddInput().
Thercvid argument for the input handler won’t necessarily have thesame value as the pulse ID: it matches the pulse ID on the bits definedby NOTIFY DATA MASK (seeionotify() in the QNX NeutrinoLibrary Reference), but the other bits are taken from the Neutrinopulse that was received.
Delivering a pulse to yourself
If the application needs to send a pulse to itself, it can callPtAppPulseTrigger():
int PtAppPulseTrigger( PtAppContext t app,pid t pulse );
The parameters for this function are thePtAppContext t structurethat defines the application context (typicallyNULL) and the pulse IDreturned byPtAppCreatePulse().
Destroying a pulse
When your application no longer needs the pulse, it can be destroyedby callingPtAppDeletePulse():
int PtAppDeletePulse( PtAppContext t app,pid t pulse pid );
The parameters are thePtAppContext t structure that defines theapplication context (typicallyNULL) and the pulse ID returned byPtAppCreatePulse().
November 2, 2006 Chapter 17 � Interprocess Communication 487

Photon pulses 2006, QNX Software Systems GmbH & Co. KG.
Example — message queues
Here’s an application that receives Photon pulses. It opens a messagequeue (/dev/mqueue/testqueue by default), sets up a pulse, andusesmq notify() to give itself a pulse when there’s something to readfrom the message queue:
/* Standard headers */#include <stdio.h>#include <stdlib.h>#include <unistd.h>#include <string.h>#include <mqueue.h>#include <fcntl.h>#include <errno.h>#include <sys/stat.h>
/* Toolkit headers */#include <Ph.h>#include <Pt.h>#include <Ap.h>
/* Local headers */#include "abimport.h"#include "proto.h"
mqd t mqd = -1;struct sigevent sigev;
static void readqueue( void ) {static unsigned counter;unsigned mprio;ssize t msize;char mbuf[ 4096 ];while ( ( msize = mq receive( mqd, mbuf, sizeof(mbuf),
&mprio ) ) >= 0 ) {char hbuf[ 40 ];PtTextModifyText( ABW mtext, 0, 0, -1, hbuf,
sprintf( hbuf, "Msg #%u (prio %d):\n", ++counter,mprio )
);PtTextModifyText( ABW mtext, 0, 0, -1, mbuf, msize );}
if ( errno != EAGAIN )perror( "mq receive" );
}
static int input fun( void *data, int rcvid, void *message,size t mbsize ) {
488 Chapter 17 � Interprocess Communication November 2, 2006

2006, QNX Software Systems GmbH & Co. KG. Photon pulses
readqueue();if ( mq notify( mqd, &sigev ) == -1 )
perror( "mq notify" );return Pt HALT;}
pid t pulse;
/* Application Options string */const char ApOptions[] =
AB OPTIONS ""; /* Add your options in the "" */
int init( int argc, char *argv[] ) {if ( ( pulse = PtAppCreatePulse( NULL, -1 ) ) == 0
|| PtAppAddInput( NULL, pulse, input fun, NULL ) ==NULL ) {
fputs( "Initialization failed\n", stderr );exit( EXIT FAILURE );}
PtPulseArm( NULL, pulse, &sigev );/* eliminate ’unreferenced’ warnings */argc = argc, argv = argv;return( Pt CONTINUE );}
int open queue( PtWidget t *link instance, ApInfo t *apinfo,PtCallbackInfo t *cbinfo ) {
const char *name;PtArg t arg;
if ( mqd >= 0 )mq close( mqd );
PtSetArg( &arg, Pt ARG TEXT STRING, &name, 0 );PtGetResources( ABW qname, 1, &arg );if ( ( mqd = mq open( name, O RDONLY | O CREAT | O NONBLOCK,
S IRUSR | S IWUSR, NULL ) ) < 0 )perror( name );
elseif ( mq notify( mqd, &sigev ) == -1 ) {
perror( "mq notify" );mq close( mqd );mqd = -1;}
elsereadqueue();
/* eliminate ’unreferenced’ warnings */link instance = link instance, apinfo = apinfo;
November 2, 2006 Chapter 17 � Interprocess Communication 489

Processing signals 2006, QNX Software Systems GmbH & Co. KG.
cbinfo = cbinfo;
return( Pt CONTINUE );}
Photon application that delivers a pulseA Photon application that’s going to deliver a pulse must:
� Have an input handler for messages from the application that’sgoing to receive the pulses. This input handler is created asdescribed in “Receiving QNX messages” earlier in this chapter. Itwill need to handle messages that contain the pulse message, andtell the deliverer to stop sending pulses.
Save thercvid from the message that contains the pulse message— you’ll need it to deliver the pulse.
� Deliver the pulse by callingMsgDeliverEvent().
Processing signalsIf your application needs to process signals, you’ll need to set up asignal handler. The problem is that you can’t call Photon functionsfrom a signal handler because the widget library isn’t signal-safe orreentrant.
To get around this problem, the Photon library includes a signalhandler. You register a signal-processing function, and Photon calls itafter
� Photon’s signal handler returns
AND
� all processing for the current widget is complete
490 Chapter 17 � Interprocess Communication November 2, 2006

2006, QNX Software Systems GmbH & Co. KG. Processing signals
CAUTION: By handling signals in this way, you’re not getting strictrealtime performance, since your signal-processing function isn’tcalled right away.
!
Adding a signal-processing functionTo add a signal-processing function, use thePtAppAddSignalProc()function. You typically call this in
� your application’s initialization function
Or
� the setup function for a window
You’ll need to include<signal.h>.
The syntax forPtAppAddSignalProc()is as follows:
int PtAppAddSignalProc( PtAppContext t app,sigset t const *set,PtSignalProc t func,void *data);
The arguments are as follows:
app The address of the application context, aPtAppContext t
structure that manages all the data associated with thisapplication. SpecifyNULL for this argument, so that thedefault context is used.
set A pointer to the set of signals that should cause thesignal-processing function to be called. Use thesigemptyset()andsigaddset()functions to build this set. Seethe QNX NeutrinoLibrary Referencefor more information.
func The signal-processing function. SeePtSignalProc t inthe PhotonLibrary Reference.
data Any data to be passed to the function.
November 2, 2006 Chapter 17 � Interprocess Communication 491
Other I/O mechanisms 2006, QNX Software Systems GmbH & Co. KG.
PtAppAddSignalProc()returns 0 on success, or -1 if an error occurs.
Your signal-processing function has the following prototype:
int signalProcFunctions (int signumvoid *data);
The arguments are:
signum The number of the signal to be processed.
data Thedataparameter specified in the call toPtAppAddSignalProc().
If you want the signal handler to remain installed, returnPt CONTINUE. To remove it for the current signal, returnPt END (ifthe function was registered for other signals, it’s still called if they’reraised).
Removing a signal-processing functionTo remove a signal-processing function:
� Call PtAppRemoveSignal()to remove one or all occurrences of a(signal-processing function, data) pair.
� ReturnPt END from the signal-processing function. If the functionwas registered for more than one signal, it remains installed forsignals other than the one just processed.
Other I/O mechanismsIf your application needs to perform I/O such as reading from orwriting to a pipe, you should add anfd handler. An fd handler is afunction that’s called by the main event loop when a given filedescriptor (fd) is ready for input or output:
� To add an fd handler to your application, callPtAppAddFd()orPtAppAddFdPri().
492 Chapter 17 � Interprocess Communication November 2, 2006
2006, QNX Software Systems GmbH & Co. KG. Other I/O mechanisms
� For details about the prototype of the fd handler, seePtFdProc t.
� To change the mode that’s of interest to the fd handler, callPtAppSetFdMode()
� To remove an fd handler, returnPt END from it or callPtAppRemoveFd().
These functions are described in the PhotonLibrary Reference.
If your fd handler changes the display, it should callPtFlush()tomake sure the display is updated.
☞
November 2, 2006 Chapter 17 � Interprocess Communication 493


Chapter 18
Parallel Operations
In this chapter. . .Overview 497Background processing 498Work procedures 499Threads 505
November 2, 2006 Chapter 18 � Parallel Operations 495

2006, QNX Software Systems GmbH & Co. KG. Overview
OverviewWhen you have to perform an operation that takes a long time toexecute, it’s not a good idea to implement it as a simple callback.During the time the callback is executing, the widgets in yourapplication can’t repair damage and they won’t respond to user inputat all. You should develop a strategy for handling lengthy operationswithin your application that involves returning from your callback asquickly as possible.
Returning from your callback allows the widgets to continue toupdate themselves visually. It also gives some visual feedback if theuser attempts to do anything. If you don’t want the user to be able toperform any UI operations during this time, you should deactivate themenu and command buttons. You can do this by setting thePt BLOCKED flag in the application window widget’sPt ARG FLAGSresource.
You might consider one of several different mechanisms for dealingwith parallel operations:
� If you can’t break the operation into pieces, process Photon eventswhile the operation continues; see “Background processing,”below.
� If you can break the operation into small chunks, you may wish tohave a function that keeps track of the current state and executesone small chunk of the operation at a time. You can then set up atimer widget and attach it to a callback that invokes the functionwhenever the timer goes off. Or you may call the function fromwithin a work procedure. These methods are especially effectivefor iterative operations where the function may be executed onceper iteration. See “Work procedures,” below.
� Use multiple threads. This requires some special handling, becausethe Photon libraries aren’t thread-safe; see “Threads,” below.
� Spawn another process in the callback, and have the other processreturn its results to the application by sending it messages. In this
November 2, 2006 Chapter 18 � Parallel Operations 497
Background processing 2006, QNX Software Systems GmbH & Co. KG.
case, it’s very important to be able to monitor the operation’sprogress and give the user visual feedback.
Background processingIf a lengthy operation can’t be easily decomposed, and you don’t wantto use multiple threads, you should at least callPtBkgdHandlerProcess()to process Photon events so that the GUIdoesn’t appear to be frozen.
If the operation is very lengthy, you can callPtBkgdHandlerProcess()within a loop. How often you need to callPtBkgdHandlerProcess()depends on what your application is doing. You should also find away to let the user know what progress the operation is making.
For example, if you’re reading a large directory, you could call thebackground handler after reading a few files. If you’re opening andprocessing every file in a directory, you could callPtBkgdHandlerProcess()after each file.
It’s safe to callPtBkgdHandlerProcess()in callbacks, workprocedures, and input procedures, butnot in a widget’s Draw method(seeBuilding Custom Widgets) or aPtRaw widget’s drawing function.
If a callback callsPtBkgdHandlerProcess(), be careful if theapplication can invoke the callback more than once simultaneously. Ifyou don’t want to handle this recursion, you should block thewidget(s) associated with the callback.
☞
The following functions process Photon events:
� PtBkgdHandlerProcess()
� PtFileSelection()
� PtProcessEvent()
� PtSpawnWait()
498 Chapter 18 � Parallel Operations November 2, 2006

2006, QNX Software Systems GmbH & Co. KG. Work procedures
Work proceduresA work procedure is run whenever there are no messages for yourapplication to respond to. In every iteration of the Photonevent-handling loop, this procedure is called if no messages havearrived (rather than block on aMsgReceive()waiting for moremessages). This procedure will be run very frequently, so keep it asshort as possible.
If your work procedure changes the display, callPtFlush()to makesure that it’s updated.
See “Threads and work procedures,” below, if you’re writing a workprocedure for a multithreaded program.
☞
Work procedures are stacked; when you register a work procedure,it’s placed on the top of the stack. Only the work procedure at the topof the stack is called. When you remove the work procedure that’s atthe top of the stack, the one below it is called.
There is one exception to this rule. If the work procedure that’s at thetop of the stack is running already, the next one is called. This is onlypossible if the already running procedure allows the Photon library tostart another one, perhaps by calling a modal function likePtModalBlock(), PtFileSelection()or PtAlert(), or callingPtLeave()while you have other threads ready to process events.
☞
The work procedure itself is a callback function that takes a singlevoid * parameter,client data. Thisclient data is data that youassociate with the work procedure when you register it with thewidget library. You should create a data structure for the workprocedure that contains all its state information and provide this as theclient data.
To register, or add, a work procedure, callPtAppAddWorkProc():
PtWorkProcId t *PtAppAddWorkProc(PtAppContext t app context,PtWorkProc t work func,void *data );
November 2, 2006 Chapter 18 � Parallel Operations 499

Work procedures 2006, QNX Software Systems GmbH & Co. KG.
The parameters are:
� app context—the address of the application context, aPtAppContext t structure that manages all the data associatedwith this application. This must be specified asNULL, so that thedefault context is used.
� work func—the work procedure callback function. SeePtWorkProc t in the PhotonLibrary Reference.
� client data—the data to be passed to the function when it’sinvoked.
PtAppAddWorkProc()returns a pointer to aPtWorkProcId t
structure that identifies the work procedure.
To remove a a work procedure when it’s no longer needed, callPtAppRemoveWorkProc():
void PtAppRemoveWorkProc(PtAppContext t app context,PtWorkProcId t *WorkProc id );
passing it the same application context and the pointer returned byPtAppAddWorkProc().
A practical example of the use of work procedures would be too longto cover here, so here’s a simple iterative example. The workprocedure counts to a large number, updating a label to reflect itsprogress on a periodic basis.
#include <Pt.h>#include <stdlib.h>
typedef struct workDialog {PtWidget t *widget;PtWidget t *label;PtWidget t *ok button;
} WorkDialog t;
typedef struct countdownClosure {WorkDialog t *dialog;int value;
500 Chapter 18 � Parallel Operations November 2, 2006

2006, QNX Software Systems GmbH & Co. KG. Work procedures
int maxvalue;int done;PtWorkProcId t *work id;
} CountdownClosure t;
WorkDialog t *create working dialog(PtWidget t *parent){
PhDim t dim;PtArg t args[3];int nargs;PtWidget t *window, *group;WorkDialog t *dialog =
(WorkDialog t *)malloc(sizeof(WorkDialog t));
if (dialog){
dialog->widget = window =PtCreateWidget(PtWindow, parent, 0, NULL);
nargs = 0;PtSetArg(&args[nargs], Pt ARG GROUP ORIENTATION,
Pt GROUP VERTICAL, 0); nargs++;PtSetArg(&args[nargs], Pt ARG GROUP VERT ALIGN,
Pt GROUP VERT CENTER, 0); nargs++;group = PtCreateWidget(PtGroup, window, nargs, args);
nargs = 0;dim.w = 200;dim.h = 100;PtSetArg(&args[nargs], Pt ARG DIM, &dim, 0); nargs++;PtSetArg(&args[nargs], Pt ARG TEXT STRING,
"Counter: ", 0); nargs++;dialog->label = PtCreateWidget(PtLabel, group,
nargs, args);
PtCreateWidget(PtSeparator, group, 0, NULL);
nargs = 0;PtSetArg(&args[nargs], Pt ARG TEXT STRING, "Stop", 0);
nargs++;dialog->ok button = PtCreateWidget(PtButton, group,
1, args);}return dialog;
}
int done(PtWidget t *w, void *client,PtCallbackInfo t *call)
{CountdownClosure t *closure =
November 2, 2006 Chapter 18 � Parallel Operations 501

Work procedures 2006, QNX Software Systems GmbH & Co. KG.
(CountdownClosure t *)client;
call = call;
if (!closure->done) {PtAppRemoveWorkProc(NULL, closure->work id);
}PtDestroyWidget(closure->dialog->widget);free(closure->dialog);free(closure);return (Pt CONTINUE);
}
intcount cb(void *data){
CountdownClosure t *closure =(CountdownClosure t *)data;
char buf[64];int finished = 0;
if ( closure->value++ == 0 || closure->value %1000 == 0 )
{sprintf(buf, "Counter: %d", closure->value);PtSetResource( closure->dialog->label,
Pt ARG TEXT STRING, buf, 0);}
if ( closure->value == closure->maxvalue ){
closure->done = finished = 1;PtSetResource( closure->dialog->ok button,
Pt ARG TEXT STRING, "Done", 0);}
return finished ? Pt END : Pt CONTINUE;}
int push button cb(PtWidget t *w, void *client,PtCallbackInfo t *call)
{PtWidget t *parent = (PtWidget t *)client;WorkDialog t *dialog;
w = w; call = call;
dialog = create working dialog(parent);
if (dialog)
502 Chapter 18 � Parallel Operations November 2, 2006

2006, QNX Software Systems GmbH & Co. KG. Work procedures
{CountdownClosure t *closure =
(CountdownClosure t *)malloc(sizeof(CountdownClosure t));
if (closure){
PtWorkProcId t *id;
closure->dialog = dialog;closure->value = 0;closure->maxvalue = 200000;closure->done = 0;closure->work id = id =
PtAppAddWorkProc(NULL, count cb, closure);
PtAddCallback(dialog->ok button, Pt CB ACTIVATE,done, closure);
PtRealizeWidget(dialog->widget);}
}return (Pt CONTINUE);
}
int main(int argc, char *argv[]){
PhDim t dim;PtArg t args[3];int n;PtWidget t *window;PtCallback t callbacks[] = {{push button cb, NULL}};char Helvetica14b[MAX FONT TAG];
if (PtInit(NULL) == -1)exit(EXIT FAILURE);
dim.w = 200;dim.h = 100;PtSetArg(&args[0], Pt ARG DIM, &dim, 0);if ((window = PtCreateWidget(PtWindow, Pt NO PARENT,
1, args)) == NULL)PtExit(EXIT FAILURE);
callbacks[0].data = window;n = 0;PtSetArg(&args[n++], Pt ARG TEXT STRING, "Count Down...", 0);
/* Use 14-point, bold Helvetica if it’s available. */
if(PfGenerateFontName("Helvetica", PF STYLE BOLD, 14,
November 2, 2006 Chapter 18 � Parallel Operations 503

Work procedures 2006, QNX Software Systems GmbH & Co. KG.
Helvetica14b) == NULL) {perror("Unable to generate font name");
} else {PtSetArg(&args[n++], Pt ARG TEXT FONT, Helvetica14b, 0);
}PtSetArg(&args[n++], Pt CB ACTIVATE, callbacks,
sizeof(callbacks)/sizeof(PtCallback t));PtCreateWidget(PtButton, window, n, args);
PtRealizeWidget(window);
PtMainLoop();return (EXIT SUCCESS);
}
When the pushbutton is pressed, the callback attached to it creates aworking dialog and adds a work procedure, passing a closurecontaining all the information needed to perform the countdown andto clean up when it’s done.
The closure contains a pointer to the dialog, the current counter, andthe value to count to. When the value is reached, the work procedurechanges the label on the dialog’s button and attaches a callback thatwill tear down the entire dialog when the button is pressed. Uponsuch completion, the work procedure returnsPt END in order to getremoved.
Thedone()function is called if the user stops the work procedure, orif it has completed. This function destroys the dialog associated withthe work procedure and removes the work procedure if it was stoppedby the user (i.e. it didn’t run to completion).
If you run this example, you may discover one of the other features ofwork procedures — they preempt one another. When you add a newwork procedure, it preempts all others. The new work procedure willbe the only one run until it has completed or is removed. After that,the work procedure that was previously running resumes. This isillustrated in the above example if the user presses theCount Down...button before a countdown is finished. A new countdown dialog iscreated, and that countdown runs to the exclusion of the first until it’sdone.
504 Chapter 18 � Parallel Operations November 2, 2006

2006, QNX Software Systems GmbH & Co. KG. Threads
The granularity for this preemption is at the function call level. Whenthe callback function for a work procedure returns, that workprocedure may be preempted by another work procedure.
ThreadsPhoton applications are event-driven and callback-based; whenever anevent arrives, the appropriate callback is invoked to handle it, and thenthe control returns to the event loop to wait for the next event.Because of this structure, most Photon applications aresingle-threaded.
The Photon library lets you use threads, but in a way that minimizesthe overhead for single-threaded applications. The Photon library is“thread-friendly,” rather than completely thread-safe the wayprintf()andmalloc()are thread-safe.
Don’t cancel a thread that might be executing a Photon libraryfunction or a callback (because the library might need to do somecleanup when the callback returns).
☞
Locking the Photon libraryYou can use multiple threads by arranging your program so that onlythe thread that calledPtInit() calls Photon functions, but you mightfind this approach restrictive.
The Photon library is mostly single-threaded, but has a mechanismthat lets multiple threads use it in a safe way. This mechanism is alibrary lock, implemented by thePtEnter()andPtLeave()functions.
This lock is like a big mutex protecting the Photon library: only onethread can own the lock at a time, and only that thread is allowed tomake Photon calls. Any other thread that wants to call a Photonfunction must callPtEnter()first, which blocks until the lock isavailable. When a thread no longer needs the lock, it callsPtLeave()to let other threads use the Photon library.
To write your non-Photon threads:
November 2, 2006 Chapter 18 � Parallel Operations 505

Threads 2006, QNX Software Systems GmbH & Co. KG.
� Put calls toPtEnter()andPtLeave()around any Photon calls inthem.
� Group as much Photon code together as you can and wrap it in asingle enter-leave pair, because this minimizes the number ofpotentially blocking calls toPtEnter()in your code.
� Try to leave any non-Photon code that can take a while to completeoutside of the enter-leave section — otherwise it mayunnecessarily prevent other threads from doing their job.
Don’t call PtLeave()if your thread hasn’t calledPtEnter(), becauseyour application could crash or misbehave.
Remember that if you’re in a callback function, something must havecalledPtEnter()to let you get there.
☞
PtLeave()doesn’t atomically give the library lock to another threadblocked insidePtEnter(); the other thread gets unblocked, but then itmust compete with any other threads as if it just calledPtEnter().
You should usePtEnter()andPtLeave()instead of using your ownmutex because whenPtProcessEvent()(whichPtMainLoop()calls) isabout to wait for an event, it unlocks the library. OncePtProcessEvent()has an event that it can process, it locks the libraryagain. This way, your non-Photon threads can freely access Photonfunctions when you don’t have any events to process.
If you use your own mutex thatPtProcessEvent()doesn’t know about,it’s unlocked only when your code unlocks it. This means that theonly time that your non-Photon threads can lock the mutex is whenyour application is processing an event that invokes one of yourcallbacks. The non-Photon threads can’t lock the mutex when theapplication is idle.
Multiple event-processing threadsIf you need to have a lengthy callback in your application, you canhave your callback invokePtBkgdHandlerProcess()as described
506 Chapter 18 � Parallel Operations November 2, 2006

2006, QNX Software Systems GmbH & Co. KG. Threads
earlier in this chapter. You can also spawn a new thread to do the jobinstead of doing it in the callback.
Another choice is to have more than one Photon thread that processesPhoton events in your application. Here’s how:
� Spawn one or more extra threads that callPtEnter()followed byPtMainLoop(). If one of your Photon threads receives an event thatinvokes your lengthy callback, the remaining threads can take overprocessing Photon events.
� Call PtLeave()from the callback to give the other threads access tothe Photon library.
� Don’t forget to callPtEnter()before returning from the callback;the code that invokes your callback expects to own the Photon lockwhen the callback returns.
Unlocking the library lets other threads modify your widgets andglobal variables while you’re not looking, so be careful.
☞
If your callback allows other threads to process events while it’s doingits lengthy operation, there’s a chance that the person holding themouse may press the same button again, invoking your callbackbefore its first invocation is complete.
You have to make sure that your application either handles thissituation properly, or prevents it from happening. Here are severalways to do this:
� Block your button before the callback callsPtLeave(), and unblockthe button after callingPtEnter().
Or:
� Use a flag to tell the second invocation of the callback that it’salready running.
Or:
� Use a counter if you want to count rather than just ignore any extrabutton presses.
November 2, 2006 Chapter 18 � Parallel Operations 507
Threads 2006, QNX Software Systems GmbH & Co. KG.
Or:
� Use your own mutex or another synchronization mechanism tomake sure that you’re not stepping on your own toes (but watchout for potential deadlocks).
Realtime threadsDon’t make Photon calls from threads that must have deterministicrealtime behavior. It’s hard to predict how longPtEnter()will blockfor; it can take a while for the thread that owns the lock to finishprocessing the current event or callPtLeave(), especially if it involvessending to other processes (like the window manager).
It’s better to have a “worker thread” that accepts requests from yourrealtime threads and executes them in its own enter-leave section. Acondition variable — and possibly a queue of requests — is a goodway of sending these requests between threads.
If you’re using worker threads, and you need to use a conditionvariable, callPtCondWait()instead ofpthreadcondwait() and aseparate mutex.PtCondWait()uses the Photon library lock as themutex and makes an implicit call toPtLeave()when you block, and toPtEnter()when you unblock.
The threads block until:
� They get access to the library.
� They get hit by a signal.
� Another thread raises a signal or broadcasts on the conditionvariable.
� Another thread callsPtExit(), exit(), or exit().
PtCondTimedWait()is similar toPtCondWait(), but the blocking islimited by a timeout.
508 Chapter 18 � Parallel Operations November 2, 2006
2006, QNX Software Systems GmbH & Co. KG. Threads
Non-Photon and Photon threadsThe library keeps track of which of your threads are Photon threads(event readers) and which are non-Photon threads (nonreaders). Thisway, the library always knows how many of your threads are availableto receive and process events. This information is currently used onlyby thePtModalBlock()function (see “Modal operations and threads,”below).
By default, the thread that calledPtInit() is an event reader, and anyother thread isn’t. But if a nonreader thread callsPtProcessEvent()orPtMainLoop(), it automatically becomes an event reader.
Photon doesn’t start new threads for you if you run out of Photonthreads.
☞
You can also turn a nonreader into a reader and back by passing a flagto PtEnter()or PtLeave():
Pt EVENT PROCESSALLOW
Turn the calling thread into an event reader.
Pt EVENT PROCESSPREVENT
Turn the calling thread into a nonreader.
If you don’t need to change the thread’s status (e.g. for a non-Photonthread that never processes any events), don’t set either of these bits inthe flags.
If you’re callingPtLeave()in a callback because you’re about to dosomething lengthy, passPt EVENT PROCESSPREVENTto PtLeave().This tells the library that this thread isn’t going to process events for asignificant amount of time. Make sure to passPt EVENT PROCESSALLOW to PtEnter()before returning from thecallback.
November 2, 2006 Chapter 18 � Parallel Operations 509
Threads 2006, QNX Software Systems GmbH & Co. KG.
Modal operations and threadsA modal operation is one where you need to wait until a particularevent happens before you can proceed — for example, when you wantthe user to make a decision and push a Yes or a No button. Sinceother events usually arrive before the one you’re waiting for, you needto make sure that they’re processed.
In a single-threaded application, attach a callback to the Yes and Nobuttons. In this callback, callPtModalUnblock(). When you displaythe dialog, callPtModalBlock(). This function runs anevent-processing loop similar toPtMainLoop(), except thatPtModalBlock()returns when something (e.g. the callback attached tothe Yes and No buttons) callsPtModalUnblock().
In a multithreaded application,PtModalBlock()may either:
� Do the same as in a single-threaded application.
Or:
� Block on a condition variable and let other Photon threads processevents.
By default,PtModalBlock()uses a condition variable if you have anyother Photon threads. This removes the thread from the pool ofevent-processing threads, but prevents a situation where starting asecond modal operation in a thread that’s running the event loop inPtModalBlock()makes it impossible for the firstPtModalBlock()toreturn until after the second modal operation has completed.
In most applications, there’s no chance of this happening; usually, youeither don’t want to allow another modal operation until the currentone has completed, or you actually want the stacking behavior wherethe second modal operation prevents completion of the first one. Forexample, if the first modal operation is a file selector and the secondone is an “Are you sure you want to overwrite this file?” question, youdon’t want to let the user dismiss the file selector before answeringthe question.
If you know that your application doesn’t have two unrelated modaloperations that may happen at the same time but can be completed in
510 Chapter 18 � Parallel Operations November 2, 2006
2006, QNX Software Systems GmbH & Co. KG. Threads
any order, you can passPt EVENT PROCESSALLOW toPtModalBlock(). This tellsPtModalBlock()to run an event loop evenif you have other Photon threads available, and may reduce the totalnumber of Photon threads that your application needs.
Exiting a multithreaded programTerminating a multithreaded application can be tricky; callingexit()makes all your threads just disappear, so you have to make sure thatyou don’t exit while another thread is doing something that shouldn’tbe interrupted, such as saving a file.
Don’t call pthreadexit() in any kind of callback (such as a widgetcallback, an input function, a work procedure, and so on). It is likelythat the library code that invoked your callback needs to do somecleanup when the callback returns. If it doesn’t return, yourapplication may leak memory.
Remember that all callbacks are run by a thread that has locked thelibraries.
☞
In a Photon application, the library may callPtExit()when yourapplication’s last window is closed. If you don’t want that to happenwhile a thread is doing something important, turn offPh WM CLOSEin your base window’sPt ARG WINDOWMANAGEDFLAGSresource and handle the close message yourself. You also need to findall the calls toexit()or PtExit() in your code and make sure that youdon’t exit until it’s safe to exit. If a widget in your base window has aDone or Cancel type callback, you have to handle that, too.
The Photon library provides some mechanisms to make handling thistype of situation easier and safer:
� There’s a simple counter that tellsPtExit() to block until thecounter goes to zero.
The functions that implement this counter,PtPreventExit()andPtAllowExit(), are not only thread-safe, but also realtime-friendly:
November 2, 2006 Chapter 18 � Parallel Operations 511

Threads 2006, QNX Software Systems GmbH & Co. KG.
they’re guaranteed to run a bound amount of code and nevergenerate priority inversion.
This mechanism is considered relatively low-level and meantprimarily for threads that don’t have anything to do with Photon(perhaps temporarily — i.e. while in aPtLeave()- PtEnter()section of a Photon callback).
The reason is that certain Photon calls that normally are blockingcause the the calling thread to go to sleep (blocked indefinitely) ifPtExit() is pending (otherwisePtExit()would potentially block fora long time). This also happens when a thread blocksbeforeanother thread callsPtExit(); the blocked thread is terminatedwithout returning from the blocking call. The sleeping threadsbehave as if the scheduler didn’t give them any CPU cycles untilthe entire process terminates. This allows the thread(s) that calledPtPreventExit()to finish their job as quickly as possible.
The list of Photon calls that make their calling threads sleep afteranother thread has calledPtExit() includes attempts to processevents, do anything modal, block on a condvar usingPtCondWait()or PtCondTimedWait(), callingPtEnter()or PtLeave(), and callingPtExit().
� It may sometimes be difficult to make sure that your thread doesn’tcall any of those after callingPtPreventExit()— and if it does andgets killed without having a chance to callPtAllowExit(), yourprocess will lock up and you’ll have to kill it manually.
To prevent such situations, there’s aPt DELAY EXIT flag that youcan pass toPtEnter()andPtLeave(). Doing it not only preventsPtEnter()andPtLeave()from blocking if another thread has calledPtExit(), but also implicitly callsPtPreventExit(). If your threaddies for any reason, the library knows to callPtAllowExit()foryou. ThePt DELAY EXIT flag makes your “save file” callback assimple as this:my callback( ... ){
PtLeave( Pt DELAY EXIT );save file(); /* You’re safe here... */PtEnter( 0 ); /* But this may cause you to never return
-- and that’s OK! */
512 Chapter 18 � Parallel Operations November 2, 2006
2006, QNX Software Systems GmbH & Co. KG. Threads
}
You still have to make sure thatsavefile() doesn’t attempt any ofthe “sleep inducing” calls. In particular, you can’t pop up a dialogwith an error message if something goes wrong. If you want to popup a dialog that will potentially sit on the screen for minutes orhours, you have to do it before callingPtExit(), for example, byusing thePt ARG WINDOWMANAGEDFLAGStrick mentionedabove.
The protection thatPt DELAY EXIT gives your thread is disabled notonly when the thread exits, but also when one of the “sleep inducing”calls puts it to sleep. The only way to keepPt DELAY EXIT turned onis by making sure that you don’t call any of the “sleep inducing” callsand passPt DELAY EXIT to PtEnter()andPtLeave()each time youcall them.
☞
To terminate a thread that’s runningPtMainLoop()withoutterminating the entire application, callPtQuitMainLoop().
Don’t call PtQuitMainLoop()from a thread that hasn’t locked thePhoton libraries.
☞
If you call PtQuitMainLoop()from your application’s main thread,your application terminates. To determine whether or not you’re inthe main thread:
� Call pthreadself()from your application’s initialization functionand save the thread ID in a global variable.
� Before callingPtQuitMainLoop(), call pthreadself()again andcompare the returned thread ID and the global variable. If thethread IDs are different, callingPtQuitMainLoop()will terminatethe thread, not the application.
November 2, 2006 Chapter 18 � Parallel Operations 513

Threads 2006, QNX Software Systems GmbH & Co. KG.
Threads and work proceduresNote the following concerning threads and work procedures:
� If you attach a work procedure and you have more than one readerthread, there’s a very narrow window where the work procedurecan be invoked right away instead of after you run out of events.
� Mixing threads and work procedures might cause a minorproblem; if one of the other threads adds a workproc while anotherthread is already waiting for an event, the workproc might not beinvoked until you receive an event.
514 Chapter 18 � Parallel Operations November 2, 2006

Chapter 19
Raw Drawing and Animation
In this chapter. . .PtRaw widget 517Color 526Drawing attributes 527Arcs, ellipses, polygons, and rectangles531Lines, pixels, and pixel arrays 541Text 542Bitmaps 545Images 546Animation 554Direct mode 559Video memory offscreen 563Alpha blending support 569Chroma key support 570Extended raster operations571Video modes 573Gradients 575Video overlay 576Layers 580OpenGL 588
November 2, 2006 Chapter 19 � Raw Drawing and Animation 515

2006, QNX Software Systems GmbH & Co. KG. PtRaw widget
PtRaw widgetThePg routines in the Photon library are the lowest-level drawingfunctions. They’re used by the widget library to draw the widgets.You can use the Pg functions in a Photon application, but yourapplication has to:
� handle any interaction with the user
� determine when the drawing is damaged (for example, when it’suncovered, or when the user moves the window)
� repair the drawing whenever it’s damaged.
You should use widgets whenever possible because they do all of theabove themselves.
☞
If your application must do its own drawing, you should use thePtRaw widget. It does the following:
1 Tells the application what has been damaged.
2 Flushes the draw buffer almost whenever necessary. (Youshould flush the buffer explicitly; for example, before a blittingoperation. Blitting shifts a rectangular area of your drawing bysome distance; you want your drawing to be up-to-date beforethis happens.)
To create aPtRaw widget in PhAB, click on its icon in the widgetpalette:
Position it where you want your drawing to appear.
You can provide various functions for thePtRaw widget; they’recalled in the order given below when the widget is realized, and arethen called as necessary:
November 2, 2006 Chapter 19 � Raw Drawing and Animation 517

PtRaw widget 2006, QNX Software Systems GmbH & Co. KG.
Pt ARG RAWINIT F
An initialization function that’s called before the widget’sextent is calculated.
Pt ARG RAWEXTENTF
If provided, calculates the widget’s extent when the widget ismoved or resized.
Pt ARG RAWCALC OPAQUEF
Calculates the raw widget’s opacity tile list.
Pt ARG RAWCONNECTF
Called as the last stage in realizing the widget, just before anyrequired regions are created.
Pt ARG RAWDRAWF
Does the drawing.
Most of the time you’ll need to specify only the drawing function (seebelow). You can use PhAB’s function editor (described in the EditingResources and Callbacks in PhAB chapter) to edit these resources —but you must give the raw widget a unique instance name first. Youcan also set these resources in your application’s code; for moreinformation, see “Function resources” in the Manipulating Resourcesin Application Code chapter.
For information onPtRaw’s resources, see the PhotonWidgetReference.
Raw drawing functionWhen you create aPtRaw widget in PhAB and edit itsPt ARG RAWDRAWF function, you’ll see default code like this:
void my raw draw fn( PtWidget t *widget,PhTile t *damage )
{PtSuperClassDraw( PtBasic, widget, damage );
}
518 Chapter 19 � Raw Drawing and Animation November 2, 2006

2006, QNX Software Systems GmbH & Co. KG. PtRaw widget
The call toPtSuperClassDraw()(described in theBuilding CustomWidgetsguide) invokesPtBasic’s draw function, which draws theraw widget’s borders, fills the widget, and so on, as specified by itsresources. The raw widget can do all this by itself, but usingPtSuperClassDraw()reduces the complexity of the raw drawingfunction.
There are several things to consider in the raw drawing function:
� You’ll need to know the raw widget’s canvas.
� The origin for the drawing primitives is the top left corner of thecanvas of the raw widget’sparent, not the raw widget itself. You’llneed to translate the coordinates.
� The raw widget can draw beyond its canvas, but it’s not a goodidea. You should set up clipping in the drawing function.
� The drawing function is passed a list of damaged areas that can beused to speed up repairs.
� For raw widgets whose contents change dynamically, you candefine a model that describes what to draw.
These are described below, followed by some examples of simpledrawing functions.
Don’t call PtBkgdHandlerProcess()in aPtRaw widget’s drawingfunction.
Don’t change any other widget in any way (creating, destroying,setting resources, and so on) in a raw widget’s drawing function. It’ssafe to get resources from other widgets.
Don’t call the drawing function directly from your program. Instead,damage the widget by callingPtDamageWidget(), and let the librarycall the drawing function.
☞
November 2, 2006 Chapter 19 � Raw Drawing and Animation 519

PtRaw widget 2006, QNX Software Systems GmbH & Co. KG.
Determining the raw widget canvas
You can determine the raw widget’s canvas by callingPtCalcCanvas()as follows:
PhRect t raw canvas;
PtCalcCanvas (widget, &raw canvas);
You’ll need this canvas to perform any required translations andclipping.
Translating coordinates
The origin for the drawing primitives is the upper left corner of theraw widget’s parent’s canvas. You’ll probably find it easier to use theupper left corner of the raw widget’s canvas as the origin.
Once you’ve determined the raw widget’s canvas, you can do one ofthe following:
� Add the coordinates of the upper left corner of the raw widget’scanvas to any coordinates passed to the drawing primitives. Forexample, to draw an ellipse centered at (80, 60) relative to the rawwidget’s canvas:PhPoint t c1 = { 80, 60 };PhPoint t r = { 72, 52 };
c1.x += raw canvas.ul.x;c1.y += raw canvas.ul.y;PgSetFillColor(Pg YELLOW);PgDrawEllipse ( &c1, &r, Pg DRAW FILL );
This is the preferred method.
� You can set the translation by callingPgSetTranslation(), passingto it the upper left corner of the raw widget’s canvas:PhPoint t c1 = { 80, 60 };PhPoint t r = { 72, 52 };
PgSetTranslation (&raw canvas.ul, Pg RELATIVE);
PgSetFillColor(Pg YELLOW);PgDrawEllipse ( &c1, &r, Pg DRAW FILL );
520 Chapter 19 � Raw Drawing and Animation November 2, 2006
2006, QNX Software Systems GmbH & Co. KG. PtRaw widget
Be sure to restore the old translation before leaving the raw widget’sdrawing function. Here’s one way to do it:
/* Restore the translation by subtracting thecoordinates of the raw widget’s canvas. */
raw canvas.ul.x *= -1;raw canvas.ul.y *= -1;PgSetTranslation (&raw canvas.ul, Pg RELATIVE);
☞
Clipping
As mentioned above, it’s possible to draw beyond the raw widget’sextent in its drawing function, but it’s not a good thing to do:
� It can mess up the rest of your application’s interface.
� If the raw drawing beyond the raw widget’s extent is damaged butthe raw widget itself isn’t, the raw widget’s drawing function isn’tcalled, so the damage won’t be repaired.
It’s possible to write the drawing function so that clipping isn’tneeded, but it can make your code more complicated. For example, ifyou try to write text that extends beyond the raw widget’s canvas, youmight need to draw partial letters. You’ll also have to consider whathappens if the user changes the size of the raw widget.
It’s much easier to usePtClipAdd()to set the clipping area to be theraw widget’s canvas and let the graphics driver restrict the drawing:
PtClipAdd ( widget, &raw canvas);
Before leaving the drawing function, callPtClipRemove()to reset theclipping area:
PtClipRemove ();
November 2, 2006 Chapter 19 � Raw Drawing and Animation 521

PtRaw widget 2006, QNX Software Systems GmbH & Co. KG.
Using damage tiles
If your raw widget’s drawing function takes a lot of time, you mightnot want to redraw the entire canvas when a small portion of it hasbeen damaged. You can speed up the repairs by using the drawingfunction’sdamageargument.
Thedamageargument is a pointer to a linked list ofPhTile t
structures (see the PhotonLibrary Reference), each of which includesthese members:
rect A PhRect t structure that defines the damaged area.
next A pointer to the next tile in the list.
The damaged areas are relative to the raw widget’s parent. At leastone of them intersects the raw widget, but some of them might not.
If there’s more than one tile in the linked list, the first one covers theentire area covered by the rest. Either use the first tile and ignore therest, or ignore the first and use the rest:
void rawDrawFunction (PtWidget t *widget,PhTile t *damage)
{if (damage->next != NULL) {
/* If there’s more than one tile, skip the first. */
damage = damage->next;}
while (damage != NULL) {
/* Examine ’damage’ to see if any drawingneeds doing:damage->rect.ul.x, damage->rect.ul.y,damage->rect.lr.x, damage->rect.lr.y */
...damage = damage->next; /* Go on to the next tile. */
}}
522 Chapter 19 � Raw Drawing and Animation November 2, 2006

2006, QNX Software Systems GmbH & Co. KG. PtRaw widget
The following functions (described in the PhotonLibrary Reference)work with tiles:
PhAddMergeTiles()
Merge two list tiles, eliminating overlap
PhClipTilings() Clip one list of tiles from another
PhCoalesceTiles()
Combine a list of tiles
PhCopyTiles() Copy a list of tiles
PhDeTranslateTiles()
Subtract x and y offsets from the vertices of a listof tiles
PhFreeTiles() Return a list of tiles to the internal tile pool
PhGetTile() Retrieve a tile from the internal tile pool
PhIntersectTilings()
Determine the intersection of two lists of tiles
PhMergeTiles() Remove all overlap from a list of tiles
PhRectsToTiles()Create a list of tiles from an array of rectangles
PhSortTiles() Sort a list of tiles
PhTilesToRects()Create an array of rectangles from a list of tiles
PhTranslateTiles()
Add x and y offsets to the vertices of a list of tiles
November 2, 2006 Chapter 19 � Raw Drawing and Animation 523
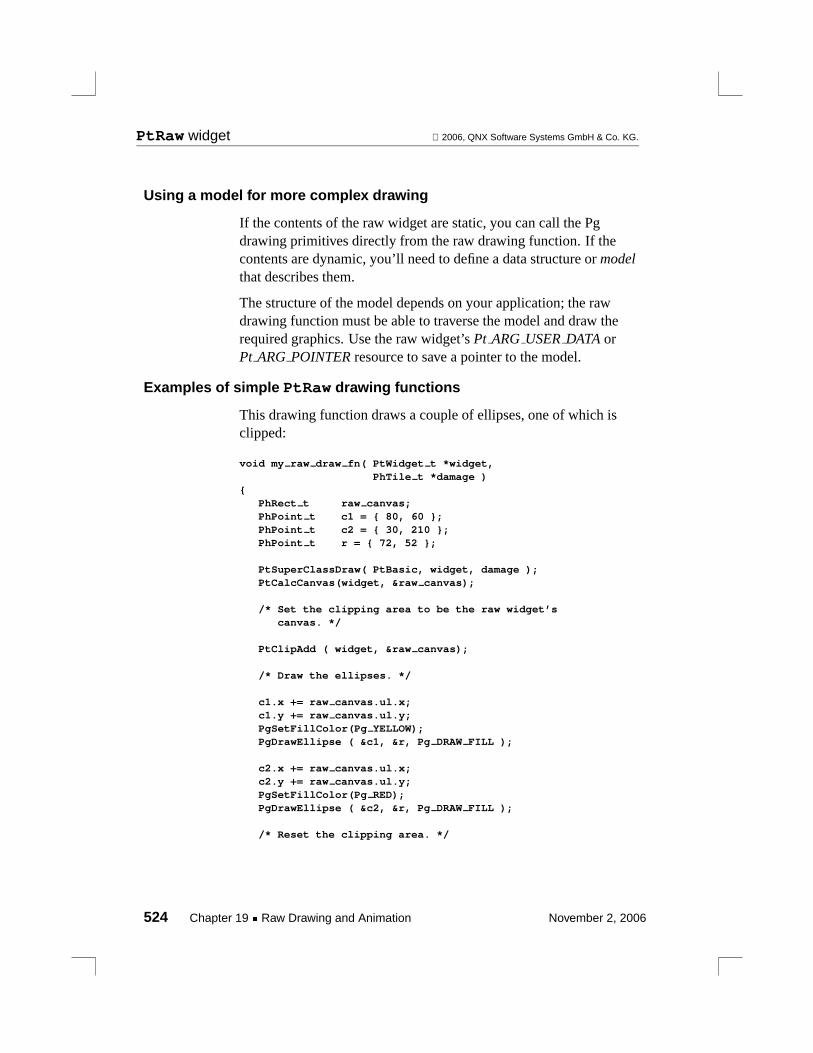
PtRaw widget 2006, QNX Software Systems GmbH & Co. KG.
Using a model for more complex drawing
If the contents of the raw widget are static, you can call the Pgdrawing primitives directly from the raw drawing function. If thecontents are dynamic, you’ll need to define a data structure ormodelthat describes them.
The structure of the model depends on your application; the rawdrawing function must be able to traverse the model and draw therequired graphics. Use the raw widget’sPt ARG USERDATAorPt ARG POINTERresource to save a pointer to the model.
Examples of simple PtRaw drawing functions
This drawing function draws a couple of ellipses, one of which isclipped:
void my raw draw fn( PtWidget t *widget,PhTile t *damage )
{PhRect t raw canvas;PhPoint t c1 = { 80, 60 };PhPoint t c2 = { 30, 210 };PhPoint t r = { 72, 52 };
PtSuperClassDraw( PtBasic, widget, damage );PtCalcCanvas(widget, &raw canvas);
/* Set the clipping area to be the raw widget’scanvas. */
PtClipAdd ( widget, &raw canvas);
/* Draw the ellipses. */
c1.x += raw canvas.ul.x;c1.y += raw canvas.ul.y;PgSetFillColor(Pg YELLOW);PgDrawEllipse ( &c1, &r, Pg DRAW FILL );
c2.x += raw canvas.ul.x;c2.y += raw canvas.ul.y;PgSetFillColor(Pg RED);PgDrawEllipse ( &c2, &r, Pg DRAW FILL );
/* Reset the clipping area. */
524 Chapter 19 � Raw Drawing and Animation November 2, 2006

2006, QNX Software Systems GmbH & Co. KG. PtRaw widget
PtClipRemove ();}
This function is the same, but it sets the translation:
void my raw draw fn( PtWidget t *widget,PhTile t *damage )
{PhRect t raw canvas;PhPoint t c1 = { 80, 60 };PhPoint t c2 = { 30, 210 };PhPoint t r = { 72, 52 };
PtSuperClassDraw( PtBasic, widget, damage );PtCalcCanvas(widget, &raw canvas);
/* Set the clipping area to be the raw widget’scanvas. */
PtClipAdd ( widget, &raw canvas);
/* Set the translation so that drawing operationsare relative to the raw widget’s canvas. */
PgSetTranslation (&raw canvas.ul, Pg RELATIVE);
/* Draw the ellipses. */
PgSetFillColor(Pg YELLOW);PgDrawEllipse ( &c1, &r, Pg DRAW FILL );
PgSetFillColor(Pg RED);PgDrawEllipse ( &c2, &r, Pg DRAW FILL );
/* Restore the translation by subtracting thecoordinates of the raw widget’s canvas. */
raw canvas.ul.x *= -1;raw canvas.ul.y *= -1;PgSetTranslation (&raw canvas.ul, Pg RELATIVE);
/* Reset the clipping area. */
PtClipRemove ();}
November 2, 2006 Chapter 19 � Raw Drawing and Animation 525
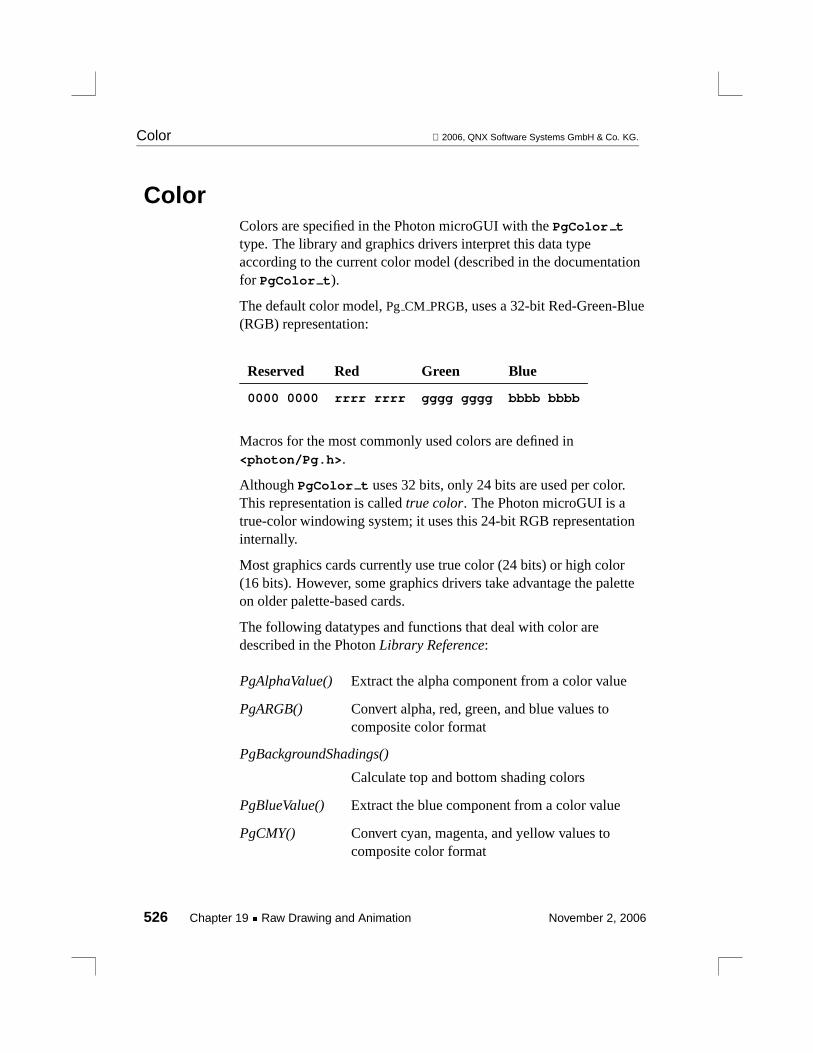
Color 2006, QNX Software Systems GmbH & Co. KG.
ColorColors are specified in the Photon microGUI with thePgColor t
type. The library and graphics drivers interpret this data typeaccording to the current color model (described in the documentationfor PgColor t).
The default color model,Pg CM PRGB, uses a 32-bit Red-Green-Blue(RGB) representation:
Reserved Red Green Blue
0000 0000 rrrr rrrr gggg gggg bbbb bbbb
Macros for the most commonly used colors are defined in<photon/Pg.h>.
AlthoughPgColor t uses 32 bits, only 24 bits are used per color.This representation is calledtrue color. The Photon microGUI is atrue-color windowing system; it uses this 24-bit RGB representationinternally.
Most graphics cards currently use true color (24 bits) or high color(16 bits). However, some graphics drivers take advantage the paletteon older palette-based cards.
The following datatypes and functions that deal with color aredescribed in the PhotonLibrary Reference:
PgAlphaValue() Extract the alpha component from a color value
PgARGB() Convert alpha, red, green, and blue values tocomposite color format
PgBackgroundShadings()
Calculate top and bottom shading colors
PgBlueValue() Extract the blue component from a color value
PgCMY() Convert cyan, magenta, and yellow values tocomposite color format
526 Chapter 19 � Raw Drawing and Animation November 2, 2006

2006, QNX Software Systems GmbH & Co. KG. Drawing attributes
PgColorHSV t Hue-Saturation-Value color value
PgColorMatch() Query for best color matches
PgGetColorModel()
Get the current color model
PgGetPalette() Query for current color palette
PgGray() Generate a shade of gray
PgGrayValue() Extract color brightness
PgGreenValue() Extract the green component from a color value
PgHSV() Convert hue, saturation, and value to compositecolor format
PgHSV2RGB() Convert HSV colors to RGB
PgRedValue() Extract the red component from a color
PgRGB() Convert red, green, and blue values to compositecolor format
PgRGB2HSV() Convert RGB colors to HSV
PgSetColorModel()
Set the current color model
PgSetPalette() Set the color palette
Drawing attributesWhen doing raw drawing, you can set various attributes, includingfonts, palettes, fill colors, line colors and styles, and text colors. Theattributes that you set affect all raw drawing operations until you setthem again. For example, the line color affects all lines, pixels, andbitmaps that you draw using the drawing primitives.
November 2, 2006 Chapter 19 � Raw Drawing and Animation 527
Drawing attributes 2006, QNX Software Systems GmbH & Co. KG.
You don’t need to set these attributes if you’re using widgets; thedrawing attributes are set based on the widgets’ definitions andresources.
However, in all other cases you should set these attributes before youbegin drawing. The defaults are undefined and drawing before settingthe relevant attributes may produce unexpected results.
☞
General attributesThe functions that set general drawing attributes are:
PgDefaultMode()
Reset draw mode and plane mask to their default values
PgSetDrawMode()
Set draw mode
PgSetPlaneMask()
Protect video memory from being modified
Text attributesThe text attributes affect all the text that you draw by calling thedrawing primitives described in “Text,” below. The functions that settext attributes are:
PgDefaultText()
Reset the text attribute to its system default
PgSetFont() Set text font
PgSetTextColor()
Set text color
PgSetTextDither()
Set text dither pattern
528 Chapter 19 � Raw Drawing and Animation November 2, 2006

2006, QNX Software Systems GmbH & Co. KG. Drawing attributes
PgSetTextTransPat()
Set draw transparency
PgSetTextXORColor()
Set a color for XOR drawing
PgSetUnderline()
Set colors for underlining text
Fill attributesThe fill attributes affect all the drawing that you do by calling theprimitive functions described in
� Arcs, ellipses, polygons, and rectangles
� Text
� Bitmaps
The functions that set fill attributes are:
PgDefaultFill()
Reset the fill attribute to its default value
PgSetFillColor()
Set exact fill color
PgSetFillDither()
Set specific dither pattern and colors
PgSetFillTransPat()
Set draw transparency
PgSetFillXORColor()
Set a color for XOR drawing
November 2, 2006 Chapter 19 � Raw Drawing and Animation 529

Drawing attributes 2006, QNX Software Systems GmbH & Co. KG.
Stroke (line) attributesThe stroke attributes affect all the drawing that you do by calling theprimitive functions described in
� Arcs, ellipses, polygons, and rectangles
� Lines, pixels, and pixel arrays
� Text
� Bitmaps
The functions that set stroke attributes are:
PgDefaultStroke()
Reset the stroke attribute to its system default
PgSetStrokeCap()
Set what the ends of lines look like
PgSetStrokeColor()
Set the color of subsequent outlines
PgSetStrokeDither()
Apply a color pattern to outlines
PgSetStrokeTransPat()
Use a masking pattern to set draw transparency on outlines
PgSetStrokeXORColor()
Use the XOR of a color to draw outlines
PgSetStrokeDash()
Set dashed lines
PgSetStrokeJoin()
Set how lines are joined
PgSetStrokeWidth()
Set line thickness
530 Chapter 19 � Raw Drawing and Animation November 2, 2006

2006, QNX Software Systems GmbH & Co. KG. Arcs, ellipses, polygons, and rectangles
PgSetStrokeFWidth()
Set line thickness
Arcs, ellipses, polygons, and rectanglesThe Photon libraries include a number of primitive functions that youcan use to draw shapes, including:
� rectangles
� rounded rectangles
� beveled boxes, rectangles, and arrows
� polygons
� arcs, circles, chords, and pies
� spans — complex shapes
Don’t use these drawing primitives in an interface that uses widgets;widgets redisplay themselves when damaged, so anything drawn ontop of them disappears. To display arcs, lines, etc. in an interface:
� Create aPtRaw widget and call the primitives in its draw function.See the section on thePtRaw widget earlier in this chapter.
Or:
� Use the corresponding graphical widget. For more information,seePtGraphic in the PhotonWidget Reference.
☞
By using each primitive’sflags, you can easily draw an outline(stroke), draw the filled “inside” (fill), or draw both as a filled outline.
The current fill and stroke attributes are used. For more information,see “Drawing attributes,” earlier in this chapter.
November 2, 2006 Chapter 19 � Raw Drawing and Animation 531
Arcs, ellipses, polygons, and rectangles 2006, QNX Software Systems GmbH & Co. KG.
To: Set flags to:
Fill the primitive, using the current fillattributes
Pg DRAW FILL
Outline the primitive, using the currentstroke attributes
Pg DRAW STROKE
Fill the primitive and outline it, usingthe current fill and stroke attributes
Pg DRAW FILL STROKE
Themx versions of these functions place the address of the primitiveinto the draw buffer in your application’s data space. When the drawbuffer is flushed, the primitive is copied to the graphics driver. Thenon-mx versions copy the primitive itself into the draw buffer.
RectanglesYou can draw rectangles, using the current drawing attributes, bycallingPgDrawIRect()or PgDrawRect().
PgDrawRect()uses aPhRect t structure (see the PhotonLibraryReference) for the rectangle coordinates, whilePgDrawIRect()letsyou specify the coordinates individually. Use whichever method youwant.
The following example draws a rectangle that’s filled, but not stroked(i.e. it has no border):
void DrawFillRect( void ){
PgSetFillColor( Pg CYAN );PgDrawIRect( 8, 8, 152, 112, Pg DRAW FILL );
}
If you wish, you can callPgDrawRect()instead:
void DrawFillRect( void ){
PhRect t rect = { {8, 8}, {152, 112} };
PgSetFillColor( Pg CYAN );PgDrawRect( &rect, Pg DRAW FILL );
}
532 Chapter 19 � Raw Drawing and Animation November 2, 2006
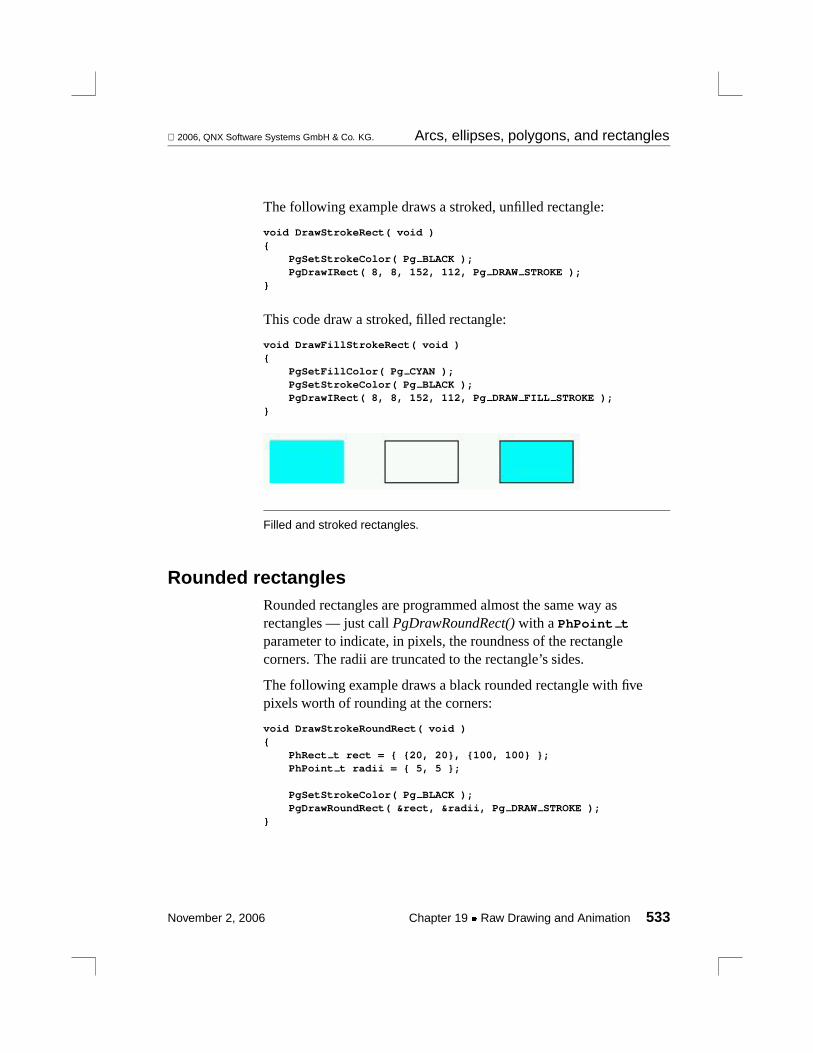
2006, QNX Software Systems GmbH & Co. KG. Arcs, ellipses, polygons, and rectangles
The following example draws a stroked, unfilled rectangle:
void DrawStrokeRect( void ){
PgSetStrokeColor( Pg BLACK );PgDrawIRect( 8, 8, 152, 112, Pg DRAW STROKE );
}
This code draw a stroked, filled rectangle:
void DrawFillStrokeRect( void ){
PgSetFillColor( Pg CYAN );PgSetStrokeColor( Pg BLACK );PgDrawIRect( 8, 8, 152, 112, Pg DRAW FILL STROKE );
}
Filled and stroked rectangles.
Rounded rectanglesRounded rectangles are programmed almost the same way asrectangles — just callPgDrawRoundRect()with aPhPoint t
parameter to indicate, in pixels, the roundness of the rectanglecorners. The radii are truncated to the rectangle’s sides.
The following example draws a black rounded rectangle with fivepixels worth of rounding at the corners:
void DrawStrokeRoundRect( void ){
PhRect t rect = { {20, 20}, {100, 100} };PhPoint t radii = { 5, 5 };
PgSetStrokeColor( Pg BLACK );PgDrawRoundRect( &rect, &radii, Pg DRAW STROKE );
}
November 2, 2006 Chapter 19 � Raw Drawing and Animation 533

Arcs, ellipses, polygons, and rectangles 2006, QNX Software Systems GmbH & Co. KG.
Beveled boxes, rectangles, and arrowsPgDrawBevelBox()draws a beveled box, which is a special type ofrectangle:
� If you setPg DRAW FILL or Pg DRAW FILL STROKEin theflagsargument, the area of the beveled box is filled according to thecurrent fill attributes.
� If you setPg DRAW STROKEOR Pg DRAW FILL STROKEin theflags, the top and left edges are drawn according to the currentstroke attributes, and the bottom and left edges are drawn with anextra color that’s passed as one of the parameters.
� There’s also a parameter to let you set the with or “depth” of thebevel.
This code draws a dark grey beveled box with a green and red bevelthat’s four pixels wide:
void DrawBevelBox( void ){
PhRect t r = { 8, 8, 152, 112 };PgSetFillColor( Pg DGREY );PgSetStrokeColor( Pg RED );PgDrawBevelBox( &r, Pg GREEN, 4, Pg DRAW FILL STROKE );
}
A beveled box.
You can callPgDrawBeveled()to draw a beveled rectangle(optionally with clipped or rounded corners) or a beveled arrow. Ifyou draw a rectangle with square corners, the results are the same as
534 Chapter 19 � Raw Drawing and Animation November 2, 2006
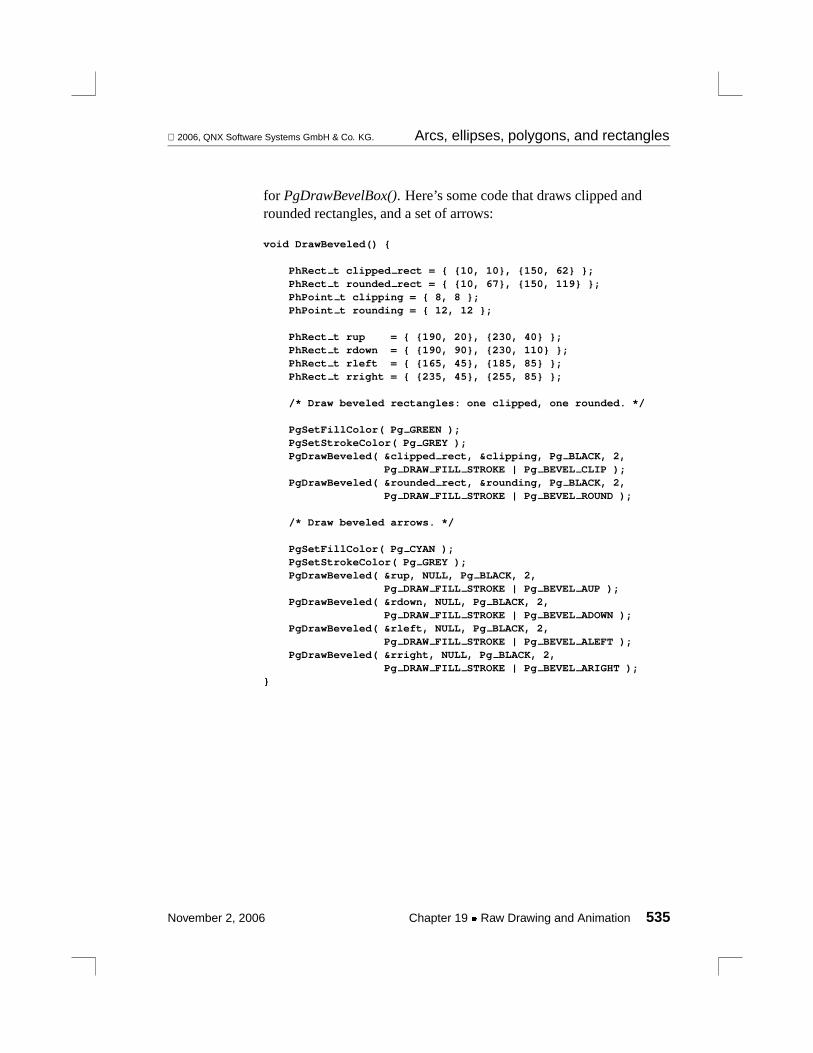
2006, QNX Software Systems GmbH & Co. KG. Arcs, ellipses, polygons, and rectangles
for PgDrawBevelBox(). Here’s some code that draws clipped androunded rectangles, and a set of arrows:
void DrawBeveled() {
PhRect t clipped rect = { {10, 10}, {150, 62} };PhRect t rounded rect = { {10, 67}, {150, 119} };PhPoint t clipping = { 8, 8 };PhPoint t rounding = { 12, 12 };
PhRect t rup = { {190, 20}, {230, 40} };PhRect t rdown = { {190, 90}, {230, 110} };PhRect t rleft = { {165, 45}, {185, 85} };PhRect t rright = { {235, 45}, {255, 85} };
/* Draw beveled rectangles: one clipped, one rounded. */
PgSetFillColor( Pg GREEN );PgSetStrokeColor( Pg GREY );PgDrawBeveled( &clipped rect, &clipping, Pg BLACK, 2,
Pg DRAW FILL STROKE | Pg BEVEL CLIP );PgDrawBeveled( &rounded rect, &rounding, Pg BLACK, 2,
Pg DRAW FILL STROKE | Pg BEVEL ROUND );
/* Draw beveled arrows. */
PgSetFillColor( Pg CYAN );PgSetStrokeColor( Pg GREY );PgDrawBeveled( &rup, NULL, Pg BLACK, 2,
Pg DRAW FILL STROKE | Pg BEVEL AUP );PgDrawBeveled( &rdown, NULL, Pg BLACK, 2,
Pg DRAW FILL STROKE | Pg BEVEL ADOWN );PgDrawBeveled( &rleft, NULL, Pg BLACK, 2,
Pg DRAW FILL STROKE | Pg BEVEL ALEFT );PgDrawBeveled( &rright, NULL, Pg BLACK, 2,
Pg DRAW FILL STROKE | Pg BEVEL ARIGHT );}
November 2, 2006 Chapter 19 � Raw Drawing and Animation 535
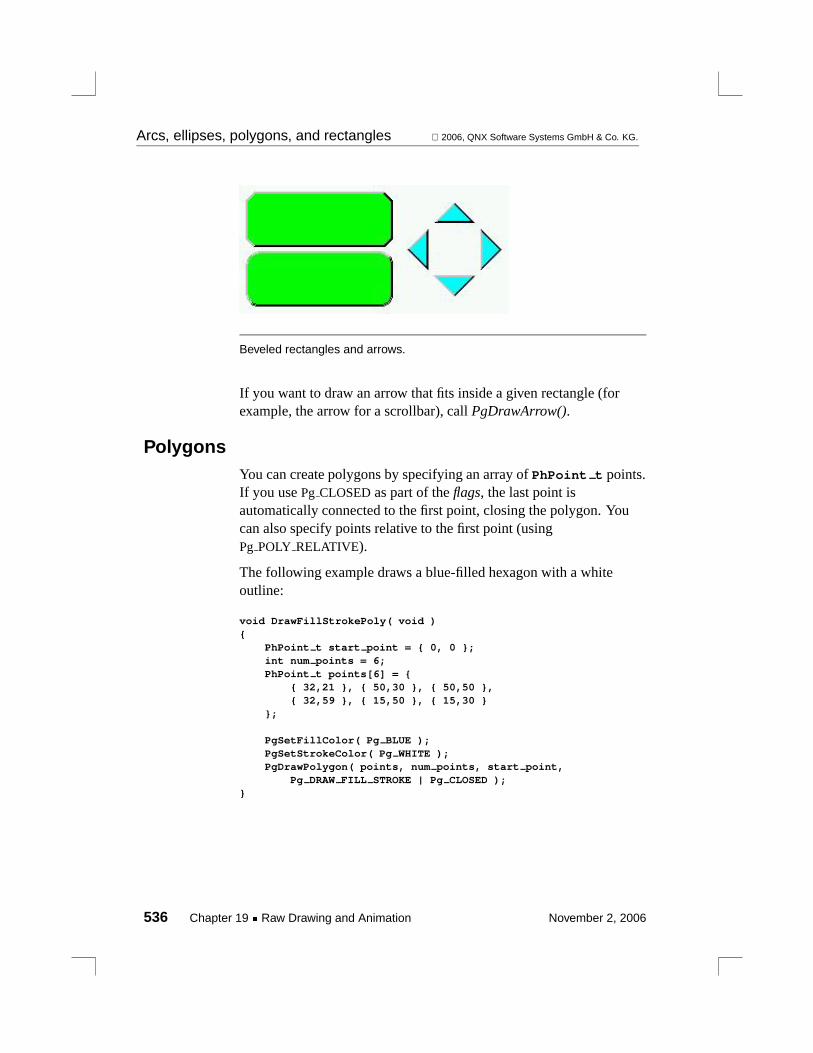
Arcs, ellipses, polygons, and rectangles 2006, QNX Software Systems GmbH & Co. KG.
Beveled rectangles and arrows.
If you want to draw an arrow that fits inside a given rectangle (forexample, the arrow for a scrollbar), callPgDrawArrow().
PolygonsYou can create polygons by specifying an array ofPhPoint t points.If you usePg CLOSEDas part of theflags, the last point isautomatically connected to the first point, closing the polygon. Youcan also specify points relative to the first point (usingPg POLY RELATIVE).
The following example draws a blue-filled hexagon with a whiteoutline:
void DrawFillStrokePoly( void ){
PhPoint t start point = { 0, 0 };int num points = 6;PhPoint t points[6] = {
{ 32,21 }, { 50,30 }, { 50,50 },{ 32,59 }, { 15,50 }, { 15,30 }
};
PgSetFillColor( Pg BLUE );PgSetStrokeColor( Pg WHITE );PgDrawPolygon( points, num points, start point,
Pg DRAW FILL STROKE | Pg CLOSED );}
536 Chapter 19 � Raw Drawing and Animation November 2, 2006
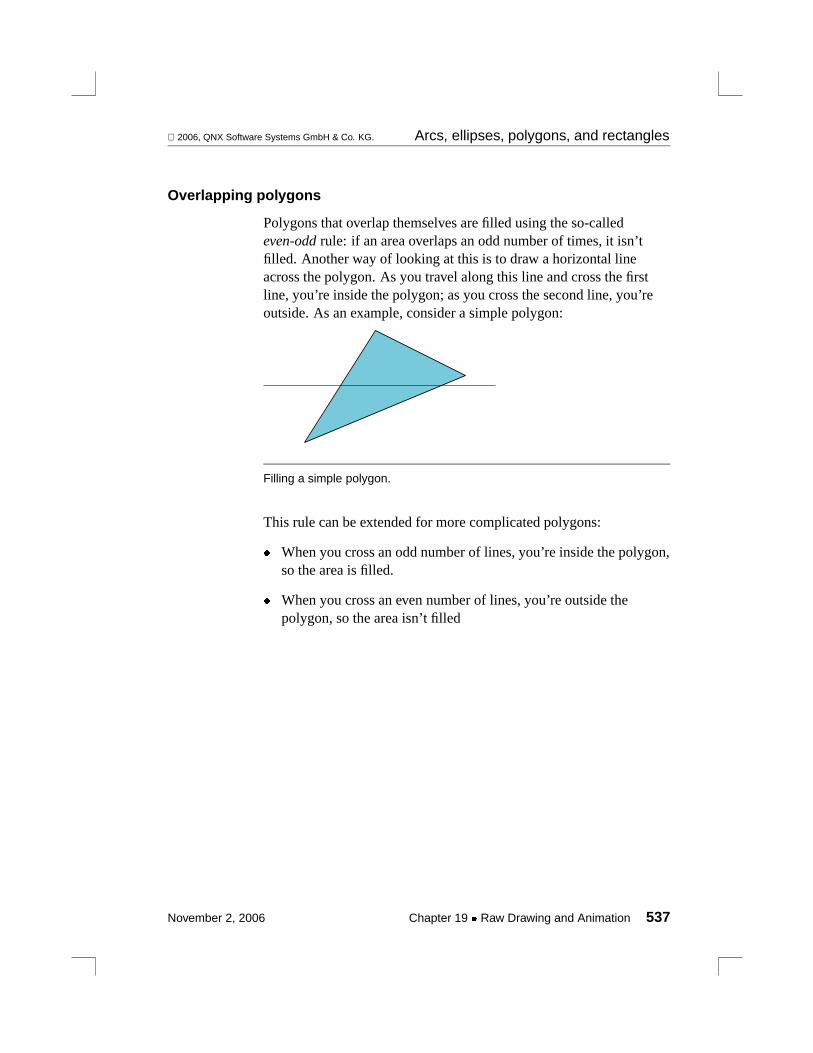
2006, QNX Software Systems GmbH & Co. KG. Arcs, ellipses, polygons, and rectangles
Overlapping polygons
Polygons that overlap themselves are filled using the so-calledeven-oddrule: if an area overlaps an odd number of times, it isn’tfilled. Another way of looking at this is to draw a horizontal lineacross the polygon. As you travel along this line and cross the firstline, you’re inside the polygon; as you cross the second line, you’reoutside. As an example, consider a simple polygon:
Filling a simple polygon.
This rule can be extended for more complicated polygons:
� When you cross an odd number of lines, you’re inside the polygon,so the area is filled.
� When you cross an even number of lines, you’re outside thepolygon, so the area isn’t filled
November 2, 2006 Chapter 19 � Raw Drawing and Animation 537
Arcs, ellipses, polygons, and rectangles 2006, QNX Software Systems GmbH & Co. KG.
Filling an overlapping polygon.
The even-odd rule applies to both thePgDrawPolygon()andPgDrawPolygonmx()functions.
☞
Arcs, circles, chords, and piesThePgDrawArc()function can be used for drawing:
� arcs
� circles
� ellipses
� elliptical arcs
� chords
� pie slices
You can also callPgDrawEllipse()to draw an ellipse.
The start and end angles of arc segments are specified in binarygradations (bi-grads), with 65536 bi-grads in a complete circle.
538 Chapter 19 � Raw Drawing and Animation November 2, 2006
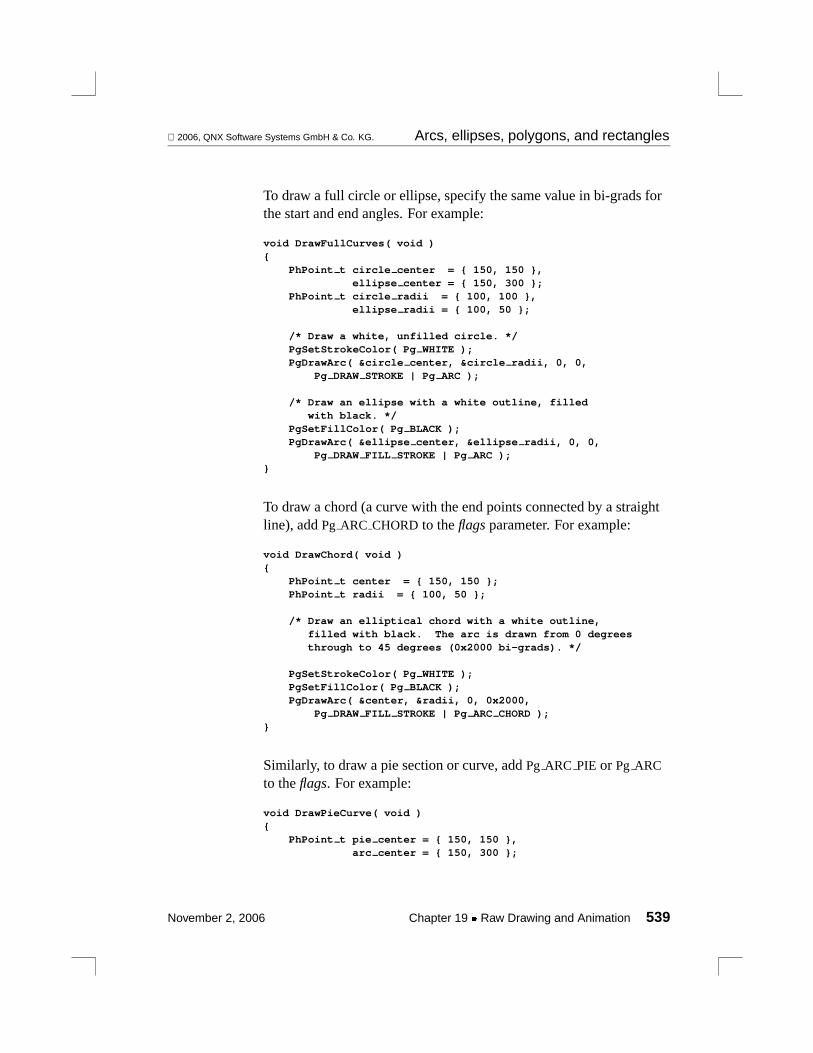
2006, QNX Software Systems GmbH & Co. KG. Arcs, ellipses, polygons, and rectangles
To draw a full circle or ellipse, specify the same value in bi-grads forthe start and end angles. For example:
void DrawFullCurves( void ){
PhPoint t circle center = { 150, 150 },ellipse center = { 150, 300 };
PhPoint t circle radii = { 100, 100 },ellipse radii = { 100, 50 };
/* Draw a white, unfilled circle. */PgSetStrokeColor( Pg WHITE );PgDrawArc( &circle center, &circle radii, 0, 0,
Pg DRAW STROKE | Pg ARC );
/* Draw an ellipse with a white outline, filledwith black. */
PgSetFillColor( Pg BLACK );PgDrawArc( &ellipse center, &ellipse radii, 0, 0,
Pg DRAW FILL STROKE | Pg ARC );}
To draw a chord (a curve with the end points connected by a straightline), addPg ARC CHORDto theflagsparameter. For example:
void DrawChord( void ){
PhPoint t center = { 150, 150 };PhPoint t radii = { 100, 50 };
/* Draw an elliptical chord with a white outline,filled with black. The arc is drawn from 0 degreesthrough to 45 degrees (0x2000 bi-grads). */
PgSetStrokeColor( Pg WHITE );PgSetFillColor( Pg BLACK );PgDrawArc( ¢er, &radii, 0, 0x2000,
Pg DRAW FILL STROKE | Pg ARC CHORD );}
Similarly, to draw a pie section or curve, addPg ARC PIE or Pg ARCto theflags. For example:
void DrawPieCurve( void ){
PhPoint t pie center = { 150, 150 },arc center = { 150, 300 };
November 2, 2006 Chapter 19 � Raw Drawing and Animation 539

Arcs, ellipses, polygons, and rectangles 2006, QNX Software Systems GmbH & Co. KG.
PhPoint t pie radii = { 100, 50 },arc radii = { 50, 100 };
/* Draw an elliptical pie with a white outline,filled with black. */
PgSetStrokeColor( Pg WHITE );PgSetFillColor( Pg BLACK );PgDrawArc( &pie center, &pie radii, 0, 0x2000,
Pg DRAW FILL STROKE | Pg ARC PIE );
/* Draw a black arc. */PgSetStrokeColor( Pg BLACK );PgDrawArc( &arc center, &arc radii, 0, 0x2000,
Pg DRAW STROKE | Pg ARC );}
Filled and stroked arcs.
Spans — complex shapesIf the shape you want to draw can’t be expressed as any of the othershapes that the Photon microGUI supports, you can draw it as a seriesof spansby callingPgDrawSpan().
This function takes as one of its arguments an array ofPgSpan t
records. The members are:
short x1 Starting x position.
short x2 Last x position.
short y Y position.
540 Chapter 19 � Raw Drawing and Animation November 2, 2006

2006, QNX Software Systems GmbH & Co. KG. Lines, pixels, and pixel arrays
Lines, pixels, and pixel arraysLines and pixels are drawn using the current stroke state (color,thickness, etc.). The drawing primitives are:
PgDrawBezier(), PgDrawBeziermx()
Draw a stroked and/or filled Bezier curve
PgDrawGrid()
Draw a grid
PgDrawLine(), PgDrawILine()
Draw a single line
PgDrawPixel(), PgDrawIPixel()
Draw a single point
PgDrawPixelArray(), PgDrawPixelArraymx()
Draw multiple points
PgDrawTrend(), PgDrawTrendmx()
Draw a trend graph
The following example draws red, green, and blue lines:
void DrawLines( void ){
PgSetStrokeColor( Pg RED );PgDrawILine( 8, 8, 152, 8 );PgSetStrokeColor( Pg GREEN );PgDrawILine( 8, 8, 152, 60 );PgSetStrokeColor( Pg BLUE );PgDrawILine( 8, 8, 152, 112 );
}
November 2, 2006 Chapter 19 � Raw Drawing and Animation 541

Text 2006, QNX Software Systems GmbH & Co. KG.
Lines created by the drawing primitives.
TextThere are various routines that draw text, depending on yourrequirements:
PgDrawMultiTextArea()
Draw multiline text in an area
PgDrawString(), PgDrawStringmx()
Draw a string of characters
PgDrawText(), PgDrawTextmx()
Draw text
PgDrawTextArea()
Draw text within an area
PgDrawTextChars()
Draw the specified number of text characters
PgExtentMultiText()
Calculate the extent of a multiline text string
PgExtentText()
Calculate the extent of a string of text
542 Chapter 19 � Raw Drawing and Animation November 2, 2006

2006, QNX Software Systems GmbH & Co. KG. Text
Text is drawn using the current text attributes; for more information,see “Text attributes,” above. If you setflagsto Pg BACK FILL, thetext’s extent is filled according to the current fill attributes (see “Fillattributes”). If you define an underline withPgSetUnderline(), theunderline is drawn under the text and on top of the backfill.
For example, to print black text in 18-point Helvetica:
void DrawSimpleText( void ){
char *s = "Hello World!";PhPoint t p = { 8, 30 };char Helvetica18[MAX FONT TAG];
if(PfGenerateFontName("Helvetica", 0, 18,Helvetica18) == NULL) {
perror("Unable to generate font name");} else {
PgSetFont( Helvetica18 );}PgSetTextColor( Pg BLACK );PgDrawText( s, strlen( s ), &p, 0 );
}
To print black text on a cyan background:
void DrawBackFillText( void ){
char *s = "Hello World!";PhPoint t p = { 8, 30 };char Helvetica18[MAX FONT TAG];
if(PfGenerateFontName("Helvetica", 0, 18,Helvetica18) == NULL) {
perror("Unable to generate font name");} else {
PgSetFont( Helvetica18 );}PgSetTextColor( Pg BLACK );PgSetFillColor( Pg CYAN );PgDrawText( s, strlen( s ), &p, Pg BACK FILL );
}
To print black text with a red underline:
void DrawUnderlineText( void ){
November 2, 2006 Chapter 19 � Raw Drawing and Animation 543

Text 2006, QNX Software Systems GmbH & Co. KG.
char *s = "Hello World!";PhPoint t p = { 8, 30 };char Helvetica18[MAX FONT TAG];
if(PfGenerateFontName("Helvetica", 0, 18,Helvetica18) == NULL) {
perror("Unable to generate font name");} else {
PgSetFont( Helvetica18 );}PgSetTextColor( Pg BLACK );PgSetUnderline( Pg RED, Pg TRANSPARENT, 0 );PgDrawText( s, strlen( s ), &p, 0 );PgSetUnderline( Pg TRANSPARENT, Pg TRANSPARENT, 0 );
}
To print black text with a red underline on a cyan background:
void DrawBackFillUnderlineText( void ){
char *s = "Hello World!";PhPoint t p = { 8, 30 };char Helvetica18[MAX FONT TAG];
if(PfGenerateFontName("Helvetica", 0, 18,Helvetica18) == NULL) {
perror("Unable to generate font name");} else {
PgSetFont( Helvetica18 );}PgSetTextColor( Pg BLACK );PgSetFillColor( Pg CYAN );PgSetUnderline( Pg RED, Pg TRANSPARENT, 0 );PgDrawText( s, strlen( s ), &p, Pg BACK FILL );PgSetUnderline( Pg TRANSPARENT, Pg TRANSPARENT, 0 );
}
544 Chapter 19 � Raw Drawing and Animation November 2, 2006

2006, QNX Software Systems GmbH & Co. KG. Bitmaps
Text created by the drawing primitives.
BitmapsBitmaps are drawn using the current text state. If you setflagstoPg BACK FILL, the blank pixels in the image are drawn using thecurrent fill state. The drawing primitives for bitmaps are:
PgDrawBitmap(), PgDrawBitmapmx()
Draw a bitmap
PgDrawRepBitmap(), PgDrawRepBitmapmx()
Draw a bitmap several times
This example draws the bitmap with a transparent background:
void DrawSimpleBitmap( void ){
PhPoint t p = { 8, 8 };
PgSetTextColor( Pg CELIDON );PgDrawBitmap( TestBitmap, 0, &p, &TestBitmapSize,
TestBitmapBPL, 0 );}
November 2, 2006 Chapter 19 � Raw Drawing and Animation 545

Images 2006, QNX Software Systems GmbH & Co. KG.
A bitmap with a transparent background.
This example draws the bitmap against a yellow background:
void DrawBackFillBitmap( void ){
PhPoint t p = { 8, 8 };
PgSetTextColor( Pg CELIDON );PgSetFillColor( Pg YELLOW );PgDrawBitmap( TestBitmap, Pg BACK FILL, &p,
&TestBitmapSize, TestBitmapBPL, 0 );}
A backfilled bitmap.
ImagesThe Photon microGUI supports these main types of images:
direct color Consisting of:
� image data — a matrix of colors (but notnecessarily of typePgColor t). Each elementin the matrix is the color of a single pixel.
Direct-color images have a type that starts withPg IMAGE DIRECT .
palette-based Consisting of:
546 Chapter 19 � Raw Drawing and Animation November 2, 2006

2006, QNX Software Systems GmbH & Co. KG. Images
� a palette — an array of typePgColor t
� image data — a matrix whose elements areoffsets into the palette.
Palette-based images have a type that starts withPg IMAGE PALETTE .
gradient color Colors are algorithmically generated as a gradientbetween two given colors.
You can define any image by its pixel size, bytes per line, image data,and format. Images can be stored in structures of typePhImage t
(described in the PhotonLibrary Reference). Thetypefield of thisdata structure identifies the type of image.
Palette-based imagesPalette-based images provide a fast, compact method for drawingimages. Before drawing a palette-based image, you must set either ahard paletteor soft paletteto define the colors for the image.
Setting a hard palette changes the physical palette. All colors set withaPgSetFillColor()function are chosen from this palette. Otherprocesses continue to choose colors from the Photon microGUI’sglobal paletteand may appear incorrect. When you release the hardpalette, the other processes return to normal without being redrawn.You should always release the hard palette when your window losesfocus.
Setting a soft palette lets you redefine how colors are interpreted forthe given draw contextwithoutchanging the physical palette. Allcolors in the soft palette are mapped to the physical palette.
If your physical palette uses more colors than your graphics cardsupports, some colors are dropped, and the image won’t look as nice.
☞
The image data (either bytes or nibbles) is an index into the currentpalette. For example:
November 2, 2006 Chapter 19 � Raw Drawing and Animation 547

Images 2006, QNX Software Systems GmbH & Co. KG.
PgColor t ImagePalette[256];char *ImageData;PhPoint t ImageSize;int ImageBPL;
void DrawYourImage( PhPoint t pos ){
PgSetPalette( ImagePalette, 0, 0, 256,Pg PALSET SOFT );
PgDrawImage( ImageData, Pg IMAGE PALETTE BYTE, pos,ImageSize, ImageBPL, 0 );
}
Direct-color imagesWith direct-color images, every pixel can be any color. But comparedto palette-based images, the image data is larger and the image maytake longer to draw. You can choose from several types of direct-colorimages, listed in the description ofPhImage t in the PhotonLibraryReference; each has a different image-pixel size and color accuracy.
Gradient-color imagesWith gradient-color images, colors are algorithmically generated as agradient between two given colors.
Creating imagesTo create aPhImage t structure:
� Call PhCreateImage()
Or:
� Call PxLoadImage()to load an image from disk.
Or:
� Call ApGetImageRes()to load an image from a PhAB widgetdatabase.
Or:
548 Chapter 19 � Raw Drawing and Animation November 2, 2006

2006, QNX Software Systems GmbH & Co. KG. Images
� Get the value of thePt ARG LABEL IMAGE resource of aPtLabel or PtButton widget (provided the widget’sPt ARG LABEL TYPEis Pt IMAGE or Pt TEXT IMAGE).
Or:
� Allocate it and fill in the members by hand.
It’s better to callPhCreateImage()than to allocate the structure andfill it in by hand. Not only doesPhCreateImage()provide theconvenience of setting up a blank image, but it also observes therestrictions that the graphics drivers impose on image alignment, andso on.
☞
Caching imagesThe imagetagandpalettetagmembers of thePhImage t structureare used for caching images when dealing with remote processes viaphrelay (see the QNX NeutrinoUtilities Reference) for example,when usingphindows.
These tags are cyclic-redundancy checks (CRCs) for the image dataand the palette, and can be computed byPtCRC()or PtCRCValue()Ifthese tags are nonzero,phindows andphditto cache the images.Before sending an image,phrelay sends its tag. Ifphindows findsthe same tag in its cache, it uses the image in the cache. This schemereduces the amount of data transmitted.
You don’t need to fill in the tags if the images don’t need to be savedin the cache. For example, set the tags to 0 if you’re displayinganimation by displaying images, and the images never repeat.
☞
PxLoadImage()andApGetImageRes()set the tags automatically.PhAB generates the tags for any images generated through it (forexample, in the pixmap editor).
November 2, 2006 Chapter 19 � Raw Drawing and Animation 549
Images 2006, QNX Software Systems GmbH & Co. KG.
Transparency in imagesIf you want parts of an image to be transparent, you can:
� Use a chroma key.
Or:
� Create atransparency maskfor the image.
Chroma is accelerated by most hardware, whereas transparencybitmaps are always implemented in software.
Using chroma
To make a given color transparent in an image, using chroma ifpossible, callPhMakeTransparent(), passing it the image and theRGB color that you want to be made transparent.
Using a transparency mask
The transparency mask is stored in themaskbmmember of thePhImage t structure. It’s a bitmap that corresponds to the imagedata; each bit represents a pixel:
If the bit is: The corresponding pixel is:
0 Transparent
1 Whatever color is specified in the image data
Themaskbpl member of thePhImage t structure specifies thenumber of bytes per line for the transparency mask.
You can build a transparency mask by callingPhMakeTransBitmap().
550 Chapter 19 � Raw Drawing and Animation November 2, 2006

2006, QNX Software Systems GmbH & Co. KG. Images
If you usePxLoadImage()to load a transparent image, setPX TRANSPARENTin theflagsmember of thePxMethods t
structure. If you do this, the function automatically makes the imagetransparent; you don’t need to create a transparency mask.
☞
Displaying imagesThere are various ways to display an image:
� If the image is stored in aPhImage t structure, callPgDrawPhImage()or PgDrawPhImagemx(). These functionsautomatically handle chroma key, alpha operations, ghosting,transparency, and so on.
To draw the image repeatedly, callPgDrawRepPhImage()orPgDrawRepPhImagemx().
To draw a rectangular portion of the image, callPgDrawPhImageRectmx().
� If the image isn’t stored in aPhImage t data structure, callPgDrawImage()or PgDrawImagemx().
To draw the image repeatedly, callPgDrawRepImage()orPgDrawRepImagemx()
� If the image isn’t stored in aPhImage t structure and has atransparency mask, callPgDrawTImage()or PgDrawTImagemx().
� Set thePt ARG LABEL IMAGE resource for aPtLabel orPtButton widget (which usePgDrawPhImagemx()internally).The widget’sPt ARG LABEL TYPEmust bePt IMAGE orPt TEXT IMAGE.
Themx versions of these functions place the address of the image intothe draw buffer in your application’s data space. When the drawbuffer is flushed, the entire image is copied to the graphics driver. Thenon-mx versions copy the image itself into the draw buffer.
You can speed up the drawing by using shared memory. CallPgShmemCreate()to allocate the image data buffer:
November 2, 2006 Chapter 19 � Raw Drawing and Animation 551
Images 2006, QNX Software Systems GmbH & Co. KG.
my image->image = PgShmemCreate( size, NULL );
If you do this, the image data isn’t copied to the graphics driver.
The images created and returned byApGetImageRes()andPxLoadImage()aren’t in shared memory.
☞
Manipulating imagesThe following functions let you manipulate images:
PiCropImage() Crop an image to the specified boundary
PiDuplicateImage()
Duplicate an image
PiFlipImage() Flip all or part of an image
PiGetPixel() Retrieve the value of a pixel within an image
PiGetPixelFromData()
Retrieve a value from a run of pixels
PiGetPixelRGB()
Retrieve the RGB value of a pixel within an image
PiSetPixel() Alter the value of a pixel within an image
PiSetPixelInData()
Set the value of a pixel in a run of pixels
Releasing imagesThePhImage t structure includes aflagsmember that can make iteasier to release the memory used by an image. These flags indicatewhich members you would like to release:
� Ph RELEASEIMAGE
552 Chapter 19 � Raw Drawing and Animation November 2, 2006
2006, QNX Software Systems GmbH & Co. KG. Images
� Ph RELEASEPALETTE
� Ph RELEASETRANSPARENCYMASK
� Ph RELEASEGHOST BITMAP
CallingPhReleaseImage()with an image frees any resources thathave the corresponding bit set in the image flags.
� PhReleaseImage()doesn’t free thePhImage t structure itself,just the allocated members of it.
� PhReleaseImage()correctly frees memory allocated withPgShmemCreate().
☞
Theflagsfor images created byApGetImageRes(), PiCropImage(),PiDuplicateImage(), PiFlipImage(), andPxLoadImage()aren’t set. Ifyou wantPhReleaseImage()to free the allocated members, you’llhave to set the flags yourself:
my image->flags = Ph RELEASE IMAGE |Ph RELEASE PALETTE |Ph RELEASE TRANSPARENCY MASK |Ph RELEASE GHOST BITMAP;
When should you set the release flags? When you know that theimage is referred to only by one entity. For example, if one widgetwill be using an image, then it should free the image once it’s donewith it. If you set the release flags appropriately, prior to setting theimage resource, then this will happen automatically — that is, thewidget will free the image and data when it’s destroyed, or you applya new setting for the resource.
If multiple widgets use the same image (they have their own copies ofthe image structure but share the data to conserve memory), then youneed to be a little more clever and make sure the image is freed onlywhen all the widgets are done with it, and never before. There are anumber of ways to accomplish this. For example, you could:
� Release the image in aPt CB DESTROYED, but you would needto be sure that no other widgets are using it. If you know that one
November 2, 2006 Chapter 19 � Raw Drawing and Animation 553

Animation 2006, QNX Software Systems GmbH & Co. KG.
widget will survive the rest, then release the image in itsPt CB DESTROYED. Otherwise you need a more sophisticatedapproach, like your own reference count.
� Alternatively, if you know one widget will outlast all the othersusing the image, then set the release flags in the structure prior tosetting the image resource of that widget. All the rest should havethe flags clear. Note that if you change the image resource on thatwidget, however, the image will be freed, thus invalidating all theother widgets’ references to it!
The approach you take will depend on your situation andrequirements.
If the image is stored in a widget, the allocated members of imagesare automatically freed when an new image is specified or the widgetis destroyed, provided that the appropriate bits in theflagsmember ofthePhImage t structure are set before the image is added to thewidget.
AnimationThis section describes how you can create simple animation. Thereare two basic steps:
� creating a series of “snapshots” of the object in motion
� cycling through the snapshots
It’s better to use images for animation than bitmaps, as images aren’ttransparent (provided you haven’t created a transparency mask). Thismeans that the background doesn’t need to be redrawn whenreplacing one image with another. As a result, there’s no flicker whenyou use images. For other methods of eliminating flicker, see“Flickerless animation”, below.
☞
It’s also possible to create animation by using aPtRaw widget and thePhoton drawing primitives. See “PtRaw widget”, earlier in thischapter.
554 Chapter 19 � Raw Drawing and Animation November 2, 2006

2006, QNX Software Systems GmbH & Co. KG. Animation
Creating a series of snapshotsTo animate an image you’ll need a series of snapshots of it in motion.For example, you can use aPtLabel widget (with aPt ARG LABEL TYPEof Pt IMAGE or Pt TEXT IMAGE) foranimation. Create onePtLabel widget where you want theanimation to appear, and create anotherPtLabel widget for eachsnapshot. You can store these snapshots in a widget database or a file.
Using a widget database
As described in “Widget databases” in the Accessing PhAB Modulesfrom Code chapter, you can use a picture module as a widgetdatabase. To use one for animation, do the following in PhAB:
1 Create a picture module to use as widget database.
2 Create an internal link to the picture module.
3 Create the snapshots of the object in motion. Use the samewidget type as you use where the animation is to appear. Giveeach snapshot a unique instance name.
In your application’s initialization function, open the database bycallingApOpenDBase()or ApOpenDBaseFile(). Then, load theimages with theApGetImageRes()function. For example:
/* global data */PhImage t *images[4];ApDBase t *database;int cur image = -1,
num images = 4;
intapp init( int argc, char *argv[])
{int i;char image name[15];
/* eliminate ’unreferenced’ warnings */argc = argc, argv = argv;
database = ApOpenDBase (ABM image db);
November 2, 2006 Chapter 19 � Raw Drawing and Animation 555

Animation 2006, QNX Software Systems GmbH & Co. KG.
for (i = 0; i < num images; i++){
sprintf (image name, "image%d", i);images[i] = ApGetImageRes (database, image name);
}
return (PT CONTINUE);}
ApGetImageRes()returns a pointer into the widget database. Don’tclose the database while you’re still using the images in it.
☞
Using a file
You can also load the snapshots from a file into aPhImage t
structure, by using thePxLoadImage()function. This functionsupports a number of formats, including GIF, PCX, JPG, BMP, andPNG. For a complete list, see/usr/photon/dll/pi io *.
Cycling through the snapshotsNo matter where you get the images, the animation is the same:
1 Create aPtTimer widget in your application. PhAB displays itas a black box; it won’t appear when you run your application.
2 Specify the initial (Pt ARGTIMER INITIAL) and repeat(Pt ARG TIMER REPEAT) timer intervals.
3 Create an activate (Pt CB TIMER ACTIVATE) callback for thetimer. In the callback, determine the next image to bedisplayed, and copy it into the destination widget.
For example, the callback for the timer could be as follows:
/* Display the next image for our animation example. */
/* Standard headers */#include <stdio.h>#include <stdlib.h>#include <unistd.h>#include <string.h>
556 Chapter 19 � Raw Drawing and Animation November 2, 2006

2006, QNX Software Systems GmbH & Co. KG. Animation
/* Toolkit headers */#include <Ph.h>#include <Pt.h>#include <Ap.h>
/* Local headers */#include "globals.h"#include "abimport.h"#include "proto.h"
intdisplay image( PtWidget t *widget,
ApInfo t *apinfo,PtCallbackInfo t *cbinfo )
{
/* eliminate ’unreferenced’ warnings */widget = widget, apinfo = apinfo, cbinfo = cbinfo;
cur image++;if (cur image >= num images){
cur image=0;}
PtSetResource (ABW base image, Pt ARG LABEL IMAGE,images[cur image], 0 );
PtFlush ();
return( Pt CONTINUE );
}
ABW baseimageis the widget name of thePtLabel widget in whichthe animation appears.
Flickerless animationThere are two ways to eliminate flicker in animation:
� Create aPtOSContainer (an offscreen-context container) andmake it the parent of all the widgets in the area being animated.
Or:
November 2, 2006 Chapter 19 � Raw Drawing and Animation 557

Animation 2006, QNX Software Systems GmbH & Co. KG.
� Use thePmMem...()memory-context functions to build the imagein memory, and display it when complete.
PtOSContainer
When you do animation in a child of an offscreen-context container,thePtOSContainer renders the draw stream into offscreen videomemory, taking advantage of any hardware-acceleration features thatthe graphics driver supports. The graphics hardware can then blit theimage directly onto the screen, resulting in flicker-free widgets and/oranimation.
PtRaw (like any other widget) can be a child ofPtOSContainer.This means that you can have flicker-free animation even when usingthe Photon drawing primitives.
☞
Memory-context functions
You can call these functions to use a memory context to reduceflickering:
PmMemCreateMC()
Create a memory context
PmMemFlush()
Flush a memory context to its bitmap
PmMemReleaseMC()
Release a memory context
PmMemSetChunkSize()
Set the increment for growing a memory context’s draw buffer
PmMemSetMaxBufSize()
Set the maximum size of a memory context’s draw buffer
PmMemSetType()
Set the type of a memory context
558 Chapter 19 � Raw Drawing and Animation November 2, 2006

2006, QNX Software Systems GmbH & Co. KG. Direct mode
PmMemStart()
Make a memory context active
PmMemStop()
Deactivate a memory context
Start by creating a memory context:
PmMemoryContext t * PmMemCreateMC(PhImage t *image,PhDim t *dim,PhPoint t *translation );
The imagestructure must at least specify thetypeandsizemembers.The image data buffer is optional, but if you want it in sharedmemory, you must provide it. The imagetypemust be eitherPg IMAGE DIRECT 888or Pg IMAGE PALETTE BYTE.
Once you’ve created the memory context:
� Call PmMemStart()to set the current draw context to the memorycontext.
� Call PmMemStop()when finished your drawing, to return to thedefault draw context.
� Call PmMemFlush()to get the resulting image.
When you no longer need the memory context, callPmMemReleaseMC().
Direct modeIn normal (nondirect) mode, an application sends drawing requests tothe Photon manager. The graphics driver blocks on the Photonmanager.
November 2, 2006 Chapter 19 � Raw Drawing and Animation 559
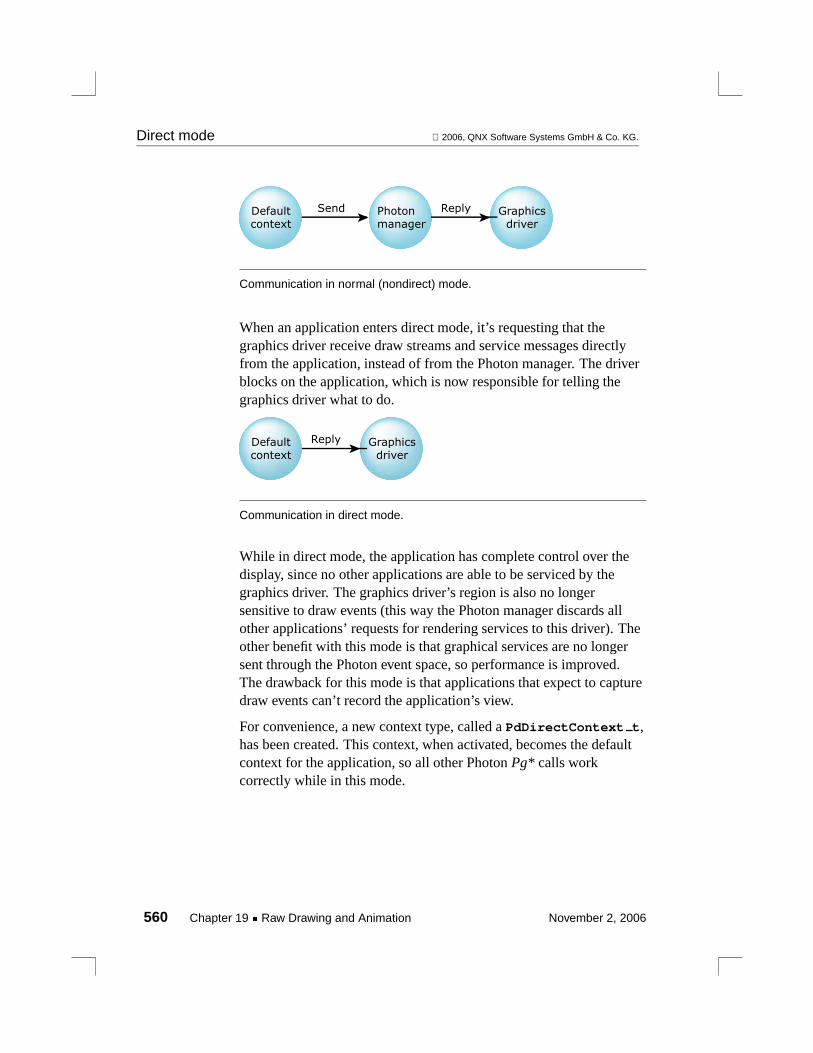
Direct mode 2006, QNX Software Systems GmbH & Co. KG.
Defaultcontext
Photonmanager
Graphicsdriver
Send Reply
Communication in normal (nondirect) mode.
When an application enters direct mode, it’s requesting that thegraphics driver receive draw streams and service messages directlyfrom the application, instead of from the Photon manager. The driverblocks on the application, which is now responsible for telling thegraphics driver what to do.
Defaultcontext
Graphicsdriver
Reply
Communication in direct mode.
While in direct mode, the application has complete control over thedisplay, since no other applications are able to be serviced by thegraphics driver. The graphics driver’s region is also no longersensitive to draw events (this way the Photon manager discards allother applications’ requests for rendering services to this driver). Theother benefit with this mode is that graphical services are no longersent through the Photon event space, so performance is improved.The drawback for this mode is that applications that expect to capturedraw events can’t record the application’s view.
For convenience, a new context type, called aPdDirectContext t,has been created. This context, when activated, becomes the defaultcontext for the application, so all other PhotonPg* calls workcorrectly while in this mode.
560 Chapter 19 � Raw Drawing and Animation November 2, 2006

2006, QNX Software Systems GmbH & Co. KG. Direct mode
While in this mode, the origin of all drawing operations is the upperleft corner of the display, since the requests are no longer clipped ortranslated by the Photon event space. Your application can stilltranslate and clip the events by callingPgSetTranslation()andPgSetClipping()if necessary.
☞
The following functions deal with direct mode:
PdCreateDirectContext()
Create a direct-mode context
PdDirectStart()
Enter direct mode
PdDirectStop()
Leave direct mode
PdGetDevices()
Get region IDs for the currently available draw devices
PdReleaseDirectContext()
Leave direct mode and release the direct-mode context
PdSetTargetDevice()
Set the target device
PgWaitVSync()
Wait for vertical synchronization
Here are some things to keep in mind:
� When you enter or leave direct mode, all video RAM contexts(except the display), are destroyed on the driver side (an OSINFOevent is shot out by the driver so applications are notified and canreinitialize any video memory contexts). This includes video RAMused byPdOffscreenContext t structures and anything usedby the video overlay API.
November 2, 2006 Chapter 19 � Raw Drawing and Animation 561

Direct mode 2006, QNX Software Systems GmbH & Co. KG.
� When you leave direct mode, an expose event is also sent out bythe driver, so all other applications redraw themselves.
� When you’re in direct mode, the graphics driver region is nolonger sensitive to draw events (so the Photon manager doesn’tbuild up a massive list of draw events to be processed from otherapplications).
� If you have automatic double buffering turned on (e.g.devg-banshee -B ...), it’s turned off while you’re in directmode (to let applications control the double buffering themselves).
ExampleHere’s how to get the address of any video memory context (includingthe display, which is considered to be one).
If you create a direct context by callingPdCreateDirectContext(), andthen enter direct mode by callingPdDirectStart(), your application“owns” the graphics driver (PgFlush()goes to the video driverdirectly, instead of to the Photon server). You don’t need to be indirect mode to get a pointer to offscreen RAM, but you do need to beto get a pointer to the primary display.
Here’s some pseudo-code:
/* Create the direct context. */direct context = PdCreateDirectContext();
/* Start Direct Mode. */PdDirectStart(direct context);
/* Get the primary display. */primary display = PdCreateOffscreenContext( 0, 0, 0,
Pg OSC MAIN DISPLAY);
/* Get a pointer to the display. */vidptr = PdGetOffscreenContextPtr(primary display);
/* Make sure the Photon driver isn’t doing anything(it shouldn’t be at this point but this is just tobe sure that we haven’t gotten ahead of the videocard’s draw engine). */
PgWaitHWIdle();
562 Chapter 19 � Raw Drawing and Animation November 2, 2006

2006, QNX Software Systems GmbH & Co. KG. Video memory offscreen
/* Do what ever you do to the memory. */Do something(vidptr);
/* Leave direct mode, and destroy the direct context(an alternative would be PdDirectStop if you don’twant to destroy the context). */
PdReleaseDirectContext(direct context);
Video memory offscreenThese API calls allow you to use the leftover memory on a video card.When a video card is in a video mode, there’s usually video RAMleftover that isn’t being used by the display area. These areas of RAMcan be used to do a variety of graphical operations while still using theaccelerator on the video card. They’re treated in the Photon microGUIbasically the same way that a memory context is used, but should bemuch faster because there’s hardware acceleration for these areas.
The functions and data structures include:
PdCreateOffscreenContext()
Create an offscreen context in video RAM
PdDupOffscreenContext()
Duplicate an offscreen context
PdGetOffscreenContextPtr()
Create a shared memory object reference to an offscreencontext
PdOffscreenContext t
Data structure that describes an offscreen context
PdSetOffscreenTranslation()
Set the translation for an offscreen context
PdSetTargetDevice()
Set the target device
November 2, 2006 Chapter 19 � Raw Drawing and Animation 563
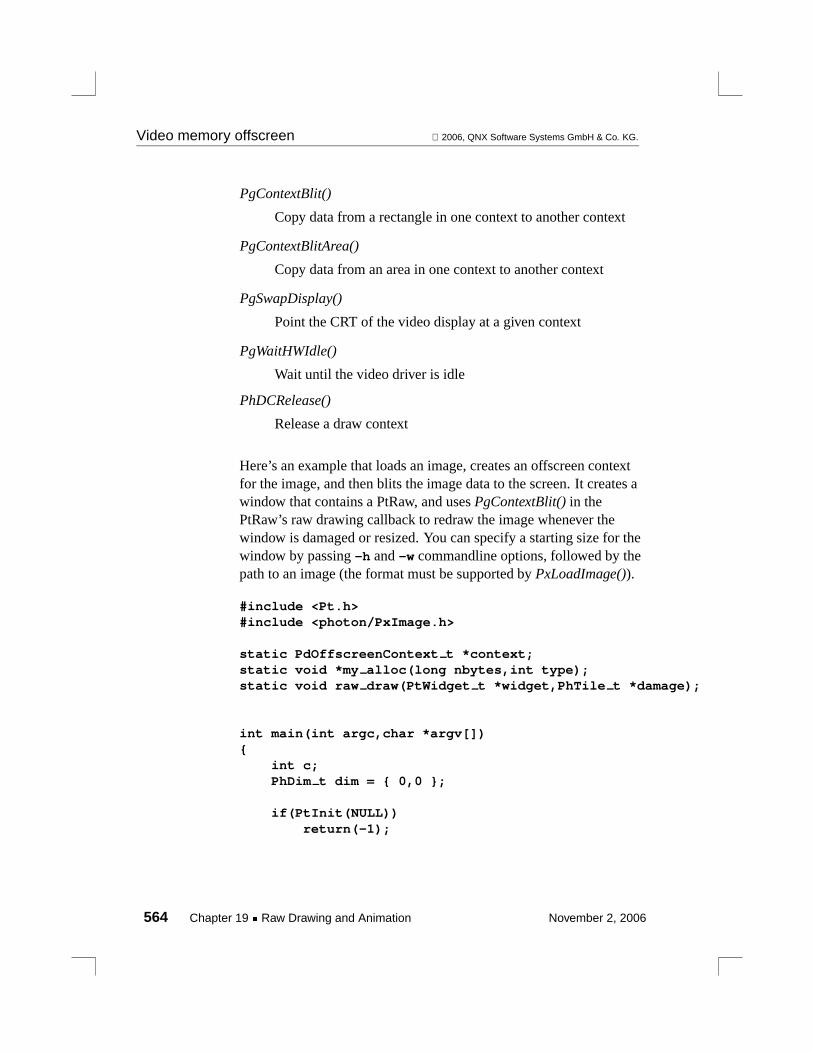
Video memory offscreen 2006, QNX Software Systems GmbH & Co. KG.
PgContextBlit()
Copy data from a rectangle in one context to another context
PgContextBlitArea()
Copy data from an area in one context to another context
PgSwapDisplay()
Point the CRT of the video display at a given context
PgWaitHWIdle()
Wait until the video driver is idle
PhDCRelease()
Release a draw context
Here’s an example that loads an image, creates an offscreen contextfor the image, and then blits the image data to the screen. It creates awindow that contains a PtRaw, and usesPgContextBlit()in thePtRaw’s raw drawing callback to redraw the image whenever thewindow is damaged or resized. You can specify a starting size for thewindow by passing-h and-w commandline options, followed by thepath to an image (the format must be supported byPxLoadImage()).
#include <Pt.h>#include <photon/PxImage.h>
static PdOffscreenContext t *context;static void *my alloc(long nbytes,int type);static void raw draw(PtWidget t *widget,PhTile t *damage);
int main(int argc,char *argv[]){
int c;PhDim t dim = { 0,0 };
if(PtInit(NULL))return(-1);
564 Chapter 19 � Raw Drawing and Animation November 2, 2006
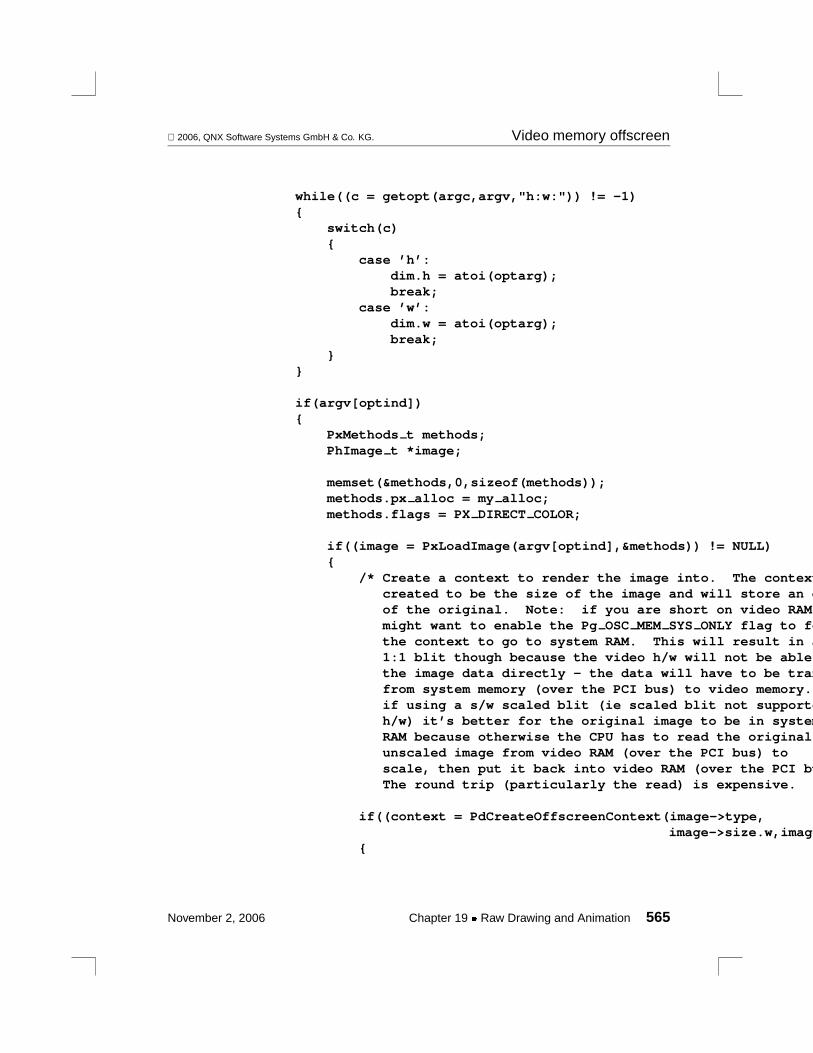
2006, QNX Software Systems GmbH & Co. KG. Video memory offscreen
while((c = getopt(argc,argv,"h:w:")) != -1){
switch(c){
case ’h’:dim.h = atoi(optarg);break;
case ’w’:dim.w = atoi(optarg);break;
}}
if(argv[optind]){
PxMethods t methods;PhImage t *image;
memset(&methods,0,sizeof(methods));methods.px alloc = my alloc;methods.flags = PX DIRECT COLOR;
if((image = PxLoadImage(argv[optind],&methods)) != NULL){
/* Create a context to render the image into. The contextcreated to be the size of the image and will store an eof the original. Note: if you are short on video RAMmight want to enable the Pg OSC MEM SYS ONLY flag to fothe context to go to system RAM. This will result in a1:1 blit though because the video h/w will not be ablethe image data directly - the data will have to be tranfrom system memory (over the PCI bus) to video memory.if using a s/w scaled blit (ie scaled blit not supporteh/w) it’s better for the original image to be in systemRAM because otherwise the CPU has to read the originalunscaled image from video RAM (over the PCI bus) toscale, then put it back into video RAM (over the PCI buThe round trip (particularly the read) is expensive. *
if((context = PdCreateOffscreenContext(image->type,image->size.w,image
{
November 2, 2006 Chapter 19 � Raw Drawing and Animation 565
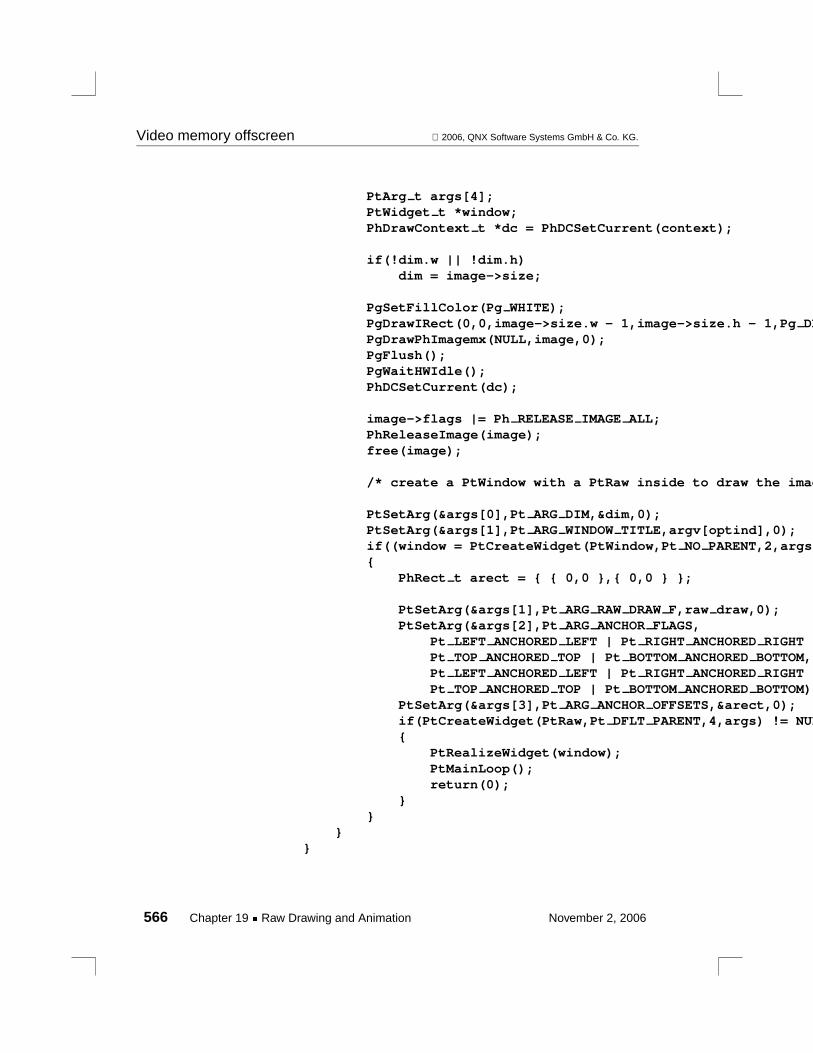
Video memory offscreen 2006, QNX Software Systems GmbH & Co. KG.
PtArg t args[4];PtWidget t *window;PhDrawContext t *dc = PhDCSetCurrent(context);
if(!dim.w || !dim.h)dim = image->size;
PgSetFillColor(Pg WHITE);PgDrawIRect(0,0,image->size.w - 1,image->size.h - 1,Pg DRPgDrawPhImagemx(NULL,image,0);PgFlush();PgWaitHWIdle();PhDCSetCurrent(dc);
image->flags |= Ph RELEASE IMAGE ALL;PhReleaseImage(image);free(image);
/* create a PtWindow with a PtRaw inside to draw the imag
PtSetArg(&args[0],Pt ARG DIM,&dim,0);PtSetArg(&args[1],Pt ARG WINDOW TITLE,argv[optind],0);if((window = PtCreateWidget(PtWindow,Pt NO PARENT,2,args){
PhRect t arect = { { 0,0 },{ 0,0 } };
PtSetArg(&args[1],Pt ARG RAW DRAW F,raw draw,0);PtSetArg(&args[2],Pt ARG ANCHOR FLAGS,
Pt LEFT ANCHORED LEFT | Pt RIGHT ANCHORED RIGHTPt TOP ANCHORED TOP | Pt BOTTOM ANCHORED BOTTOM,Pt LEFT ANCHORED LEFT | Pt RIGHT ANCHORED RIGHTPt TOP ANCHORED TOP | Pt BOTTOM ANCHORED BOTTOM)
PtSetArg(&args[3],Pt ARG ANCHOR OFFSETS,&arect,0);if(PtCreateWidget(PtRaw,Pt DFLT PARENT,4,args) != NUL{
PtRealizeWidget(window);PtMainLoop();return(0);
}}
}}
566 Chapter 19 � Raw Drawing and Animation November 2, 2006
2006, QNX Software Systems GmbH & Co. KG. Video memory offscreen
}
return(-1);}
static void *my alloc(long nbytes,int type){
return(type == PX IMAGE ? PgShmemCreate(nbytes,NULL) : malloc(nbyt}
static void raw draw(PtWidget t *widget,PhTile t *damage){
/* raw widget draw function; simply blit the context onto the screPgContextBlit() will take care of scaling */
PhRect t src;
src.ul.x = src.ul.y = 0;src.lr.x = context->dim.w - 1;src.lr.y = context->dim.h - 1;
PgContextBlit(context,&src,PhDCGetCurrent(),PtCalcCanvas(widget,NU}
Offscreen contexts can be invalidated by the graphics driver for anumber of reasons. When this happens, the graphics driver sends tothe Photon manager aPh EV INFO event with a subtype ofPh OFFSCREENINVALID . The event data is a singlelong describingwhy the offscreen areas have been invalidated. The possible reasonsare as follows:
Pg VIDEO MODE SWITCHED
The graphics driver has changed video modes.
Pg ENTERED DIRECT
An application has entered direct mode.
November 2, 2006 Chapter 19 � Raw Drawing and Animation 567
Video memory offscreen 2006, QNX Software Systems GmbH & Co. KG.
Pg EXITED DIRECT
An application has left direct mode.
Pg DRIVER STARTED
The video driver has just started execution.
Applications planning on using offscreen contexts should be sensitiveto this event and reinitialize their off screen contexts accordingly.
Offscreen locksYou generally use offscreen locks with pointers that you gained viaPdGetOffscreenContextPtr(). The locks ensure that:
� Draw stream commands don’t draw while the offscreen context islocked.
� The memory is valid while the application is using it.
Your application should lock offscreen memory for as little time aspossible. If the graphics driver needs to do something with theoffscreen memory, it tries to gain a lock itself, potentially blockingio-graphics for a long period of time (the result being that thedisplay may not get updated, and the user thinks that the computer haslocked up).
☞
The locks are implemented as semaphores in shared memory betweenio-graphics and the application.
The basic steps for using offscreen locks are:
1 Create a lock for an offscreen context by callingPdCreateOffscreenLock(). You can arrange for a signal to bedropped on the application if a request is made to remove theoffscreen context while it’s locked.
2 Lock the offscreen context, when required, by callingPdLockOffscreen(). You can optionally specify a timeout forthe blocking.
568 Chapter 19 � Raw Drawing and Animation November 2, 2006
2006, QNX Software Systems GmbH & Co. KG. Alpha blending support
3 Unlock the offscreen context by callingPdUnlockOffscreen().
4 When you no longer need to lock the offscreen context, destroythe lock by callingPdDestroyOffscreenLock().
When you’re debugging, you can callPdIsOffscreenLocked()todetermine whether or not the offscreen context is currently locked.
If you’ve locked the context, callPdUnlockLockOffscreen()to unlockit before destroying the lock or releasing the offscreen context.
☞
Alpha blending supportAlpha blending is a technique of portraying transparency whendrawing an object. It combines the color of an object to be drawn (thesource) and the color of whatever the object is to be drawn on top of(the destination). The higher the portion of source color, the moreopaque the object looks.
Alpha blending can be applied in three ways:
� As a global factor that applies to every pixel of the source
� With a map that indicates the alpha blending to be applied to eachindividual pixel. Alpha maps are “pinned” to the origin of yourdraw command and are tiled if the dimensions of the map aresmaller than the dimension of the drawing operation.
� On a per-pixel basis
A 32-bit color is made up of four 8-bitchannels: alpha, red, green,and blue. These channels are represented as (A, R, G, B). Whenreferring to the source, the channels are denoted as As, Rs, Gs, andBs; for the destination, they’re Ad, Rd, Gd, and Bd.
The basic formula for alpha blending is:
Sm = source pixel * source multiplierDm = destination pixel * destination multiplierdestination pixel = Sm + Dm
November 2, 2006 Chapter 19 � Raw Drawing and Animation 569

Chroma key support 2006, QNX Software Systems GmbH & Co. KG.
There are several options for multipliers to achieve different blendingeffects. Flags are defined for source and destination multipliers inPgSetAlpha().
You can also perform an “alpha test”, which tests for certainconditions in the alpha channel before writing the source pixel to thedestination. In an alpha test, pixels aren’t blended — the source pixelis either written to the destination or it’s not. For example, you can setthe operation to only write the source pixel to the destination if thesource alpha is less than the destination alpha.
The functions include:
PgAlphaOff() Turn alpha blending operations off
PgAlphaOn() Turn alpha blending operations on
PgAlphaValue() Extract the alpha component from a color value
PgARGB() Convert alpha, red, green, and blue values tocomposite color format
PgSetAlpha() Set the parameters for alpha blending in detail
PgSetAlphaBlend()
Set the parameters for alpha blending simply
Chroma key supportChroma-key operations are a method of masking out pixel data duringa rendering operation (copies, image rendering, rectangles, etc.) basedon a chroma color value. The basic modes of operation are:
� Masking on the source key color
� Masking on the destination key color
� Masking on everything but the source key color
� Masking on everything but the destination key color.
570 Chapter 19 � Raw Drawing and Animation November 2, 2006
2006, QNX Software Systems GmbH & Co. KG. Extended raster operations
The functions include:
PgChromaOff()
Turn chroma key operations off
PgChromaOn()
Turn chroma operations on
PgSetChroma()
Set the chroma color and operation
Extended raster operationsThe Photon microGUI supports 256 raster operations. Operations canbe done using a combination of source pixel data, destination pixeldata, and color expanded monochrome pattern pixel data. Extendedraster operations are set the same way the normal raster operations areset, usingPgSetDrawMode().
The extended raster operations are pervasive, meaning that they affectall subsequent drawing operations, including bit-blit operations andimages. The old style raster operations still exist and behave the sameway they did in earlier versions of the Photon microGUI.
The extended raster operations are defined asPg DrawModecharacters, in reverse notation, where thecharactersare chosen from the following:
Character Meaning
P Pattern
S Source
D Destination
o OR
continued. . .
November 2, 2006 Chapter 19 � Raw Drawing and Animation 571
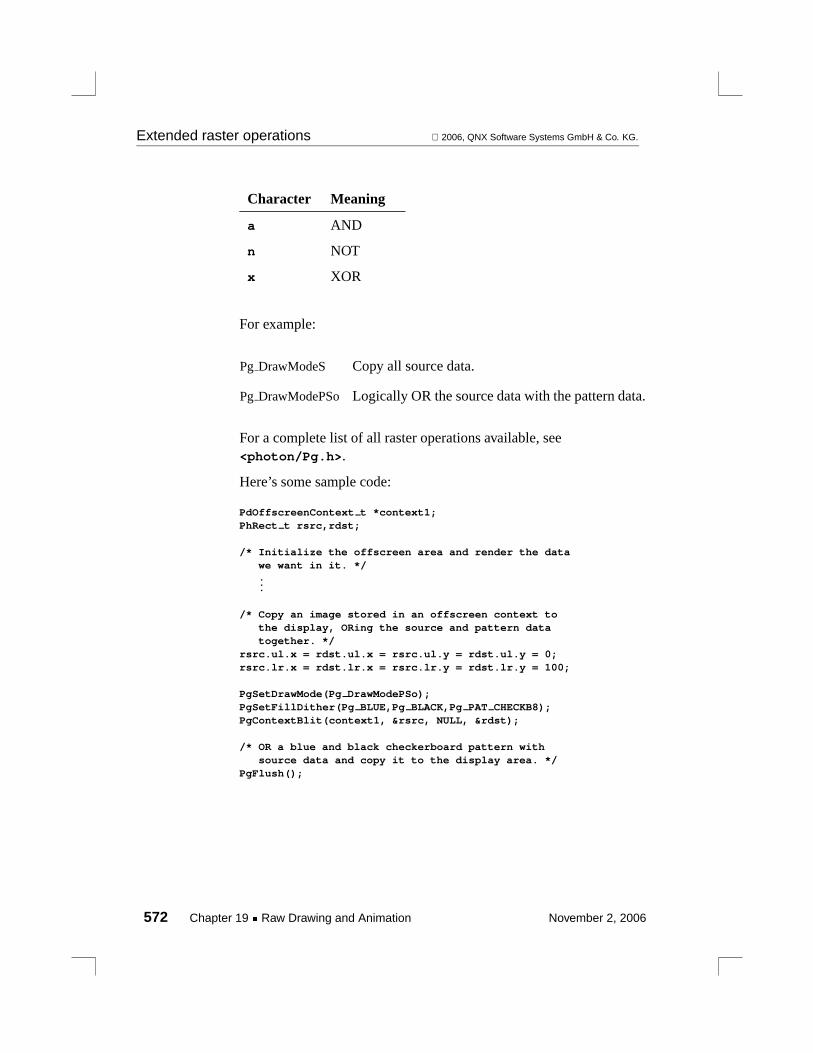
Extended raster operations 2006, QNX Software Systems GmbH & Co. KG.
Character Meaning
a AND
n NOT
x XOR
For example:
Pg DrawModeS Copy all source data.
Pg DrawModePSo Logically OR the source data with the pattern data.
For a complete list of all raster operations available, see<photon/Pg.h>.
Here’s some sample code:
PdOffscreenContext t *context1;PhRect t rsrc,rdst;
/* Initialize the offscreen area and render the datawe want in it. */...
/* Copy an image stored in an offscreen context tothe display, ORing the source and pattern datatogether. */
rsrc.ul.x = rdst.ul.x = rsrc.ul.y = rdst.ul.y = 0;rsrc.lr.x = rdst.lr.x = rsrc.lr.y = rdst.lr.y = 100;
PgSetDrawMode(Pg DrawModePSo);PgSetFillDither(Pg BLUE,Pg BLACK,Pg PAT CHECKB8);PgContextBlit(context1, &rsrc, NULL, &rdst);
/* OR a blue and black checkerboard pattern withsource data and copy it to the display area. */
PgFlush();
572 Chapter 19 � Raw Drawing and Animation November 2, 2006
2006, QNX Software Systems GmbH & Co. KG. Video modes
Video modesA video modedescribes what the display (what you see on yourmonitor) looks like. The description includes:
Width The width of the display, in pixels.
Height The height of the display, in pixels.
Pixel depth The number of bits used to represent a pixel. Thisaffects how many unique colors you can see on thescreen at one time.
Refresh rate How many times per second the phosphor on theCRT of your monitor is updated (represented in Hz).
The Photon microGUI’s method of video mode enumeration is similarto the VESA spec, where there are “mode numbers”, numericalrepresentations of the width, height, and pixel depth of a video mode.The refresh rate is independent of the mode numbers (it’s a differentmember ofPgDisplaySettings t).
The driver determines the mode numbers, so for one video card640x480x8 might be mode 2, while on another card it might be mode3022. UsePgGetVideoModeInfo()to determine the properties of anygiven mode number. UsePgGetVideoModeList()to get a list of themode numbers supported by a particular graphics driver.
The functions for working with video modes are:
PdSetTargetDevice()
Set the target device
PgGetGraphicsHWCaps()
Determine the hardware capabilities
PgGetVideoMode()
Get the current video mode
November 2, 2006 Chapter 19 � Raw Drawing and Animation 573
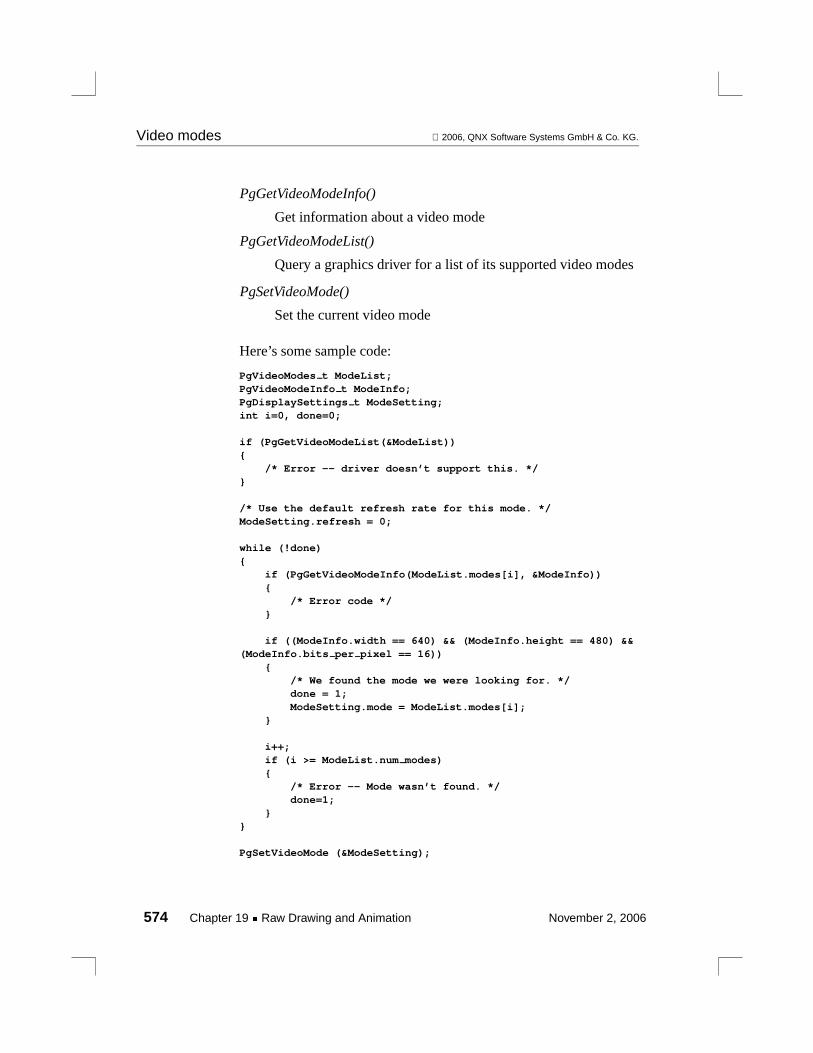
Video modes 2006, QNX Software Systems GmbH & Co. KG.
PgGetVideoModeInfo()
Get information about a video mode
PgGetVideoModeList()
Query a graphics driver for a list of its supported video modes
PgSetVideoMode()
Set the current video mode
Here’s some sample code:
PgVideoModes t ModeList;PgVideoModeInfo t ModeInfo;PgDisplaySettings t ModeSetting;int i=0, done=0;
if (PgGetVideoModeList(&ModeList)){
/* Error -- driver doesn’t support this. */}
/* Use the default refresh rate for this mode. */ModeSetting.refresh = 0;
while (!done){
if (PgGetVideoModeInfo(ModeList.modes[i], &ModeInfo)){
/* Error code */}
if ((ModeInfo.width == 640) && (ModeInfo.height == 480) &&(ModeInfo.bits per pixel == 16))
{/* We found the mode we were looking for. */done = 1;ModeSetting.mode = ModeList.modes[i];
}
i++;if (i >= ModeList.num modes){
/* Error -- Mode wasn’t found. */done=1;
}}
PgSetVideoMode (&ModeSetting);
574 Chapter 19 � Raw Drawing and Animation November 2, 2006
2006, QNX Software Systems GmbH & Co. KG. Gradients
GradientsA gradient is a gradual blend of two colors. The Photon librarysupports:
� Driver-level gradients — quick, but not sophisticated. Accuracy issacrificed for speed.
� Application-level gradients — slower, but more accurate.
Driver-level gradientsAlthough the Photon library supports a large variety of gradients (seePhImage t), there are times when you would just want a simplegradient to be rendered without having to store it in aPhImage t. Asa result, some basic gradient rendering operations have been added tothe graphics driver:
PgDrawGradient()
Ask the graphics driver to render a gradient
Application-level gradientsThese functions let you create your own gradients:
PgBevelBox() Draw a beveled box with gradients
PgCalcColorContrast()
Compute light and dark colors to use for a gradient
PgContrastBevelBox()
Draw a beveled box with gradients and a givenlevel of contrast
PgDrawGradientBevelBox()
Draw a beveled box with gradients and two flatcolors
November 2, 2006 Chapter 19 � Raw Drawing and Animation 575
Video overlay 2006, QNX Software Systems GmbH & Co. KG.
Video overlayA video overlay scaler is a hardware feature that allows a rectangulararea of the visible screen to be replaced by a scaled version of adifferent image. The prescaled video frames are typically stored inoffscreen memory, and are fetched from memory and overlaid on topof the desktop display image in real time, by the overlay scaler.
Chroma keying is used to control what parts of the video frame arevisible. Typically, the application picks a color to be the chroma-keycolor and draws a rectangle of this color where video content is toappear. When another application’s window is placed on top of thevideo playback application, the chroma-colored rectangle is obscured.Since the video hardware is programmed to display video contentonly where the chroma-key color is drawn, video doesn’t showthrough where the chroma-colored rectangle is obscured.
The following functions and data types deal with video overlay:
PgConfigScalerChannel()
Configure a video overlay scaler channel
PgCreateVideoChannel()
Create a channel for video streaming
PgDestroyVideoChannel()
Destroy resources associated with a video channel
PgGetOverlayChromaColor()
Return the color used for video overlay chroma-key operations
PgGetScalerCapabilities()
Get the capabilities of a video overlay scaler
PgNextVideoFrame()
Get the index of the next video buffer to fill
PgScalerCaps t
Data structure that describes video overlay scaler capabilities
576 Chapter 19 � Raw Drawing and Animation November 2, 2006

2006, QNX Software Systems GmbH & Co. KG. Video overlay
PgScalerProps t
Data structure that describes video overlay scaler properties
PgVideoChannel t
Data structure that describes a video overlay channel
Example#include <stdio.h>
#include <Ph.h>
#define SRC WIDTH 100#define SRC HEIGHT 100
#define DATA FORMAT Pg VIDEO FORMAT YV12
unsigned char *ybuf0, *ybuf1;unsigned char *ubuf0, *ubuf1;unsigned char *vbuf0, *vbuf1;
voidgrab ptrs(PgVideoChannel t *channel){
/* Buffers have moved; get the pointers again. */ybuf0 = PdGetOffscreenContextPtr(channel->yplane1);ybuf1 = PdGetOffscreenContextPtr(channel->yplane2);ubuf0 = PdGetOffscreenContextPtr(channel->uplane1);ubuf1 = PdGetOffscreenContextPtr(channel->uplane2);vbuf0 = PdGetOffscreenContextPtr(channel->vplane1);vbuf1 = PdGetOffscreenContextPtr(channel->vplane2);
if (channel->yplane1)fprintf(stderr, "ybuf0: %x, stride %d\n", ybuf0,
channel->yplane1->pitch);if (channel->uplane1)
fprintf(stderr, "ubuf0: %x, stride %d\n", ubuf0,channel->uplane1->pitch);
if (channel->vplane1)fprintf(stderr, "vbuf0: %x, stride %d\n", vbuf0,
channel->vplane1->pitch);
if (channel->yplane2)fprintf(stderr, "ybuf1: %x, stride %d\n", ybuf1,
channel->yplane2->pitch);if (channel->uplane2)
fprintf(stderr, "ubuf1: %x, stride %d\n", ubuf1,
November 2, 2006 Chapter 19 � Raw Drawing and Animation 577

Video overlay 2006, QNX Software Systems GmbH & Co. KG.
channel->uplane2->pitch);if (channel->vplane2)
fprintf(stderr, "vbuf1: %x, stride %d\n", vbuf1,channel->vplane2->pitch);
}
voidoverlay example(){
PgVideoChannel t *channel;PgScalerCaps t vcaps;PgScalerProps t props;unsigned char *ptr;unsigned short *ptr16;int i = 0, j, k, index;int color;PhDrawContext t *old;int rc;
if ((channel = PgCreateVideoChannel(Pg VIDEO CHANNEL SCALER, 0)) == NULL) {
perror("PgCreateVideoChannel");exit(1);
}
/** Cycle through the available formats looking for the one* we’re interested in.*/
vcaps.size = sizeof (vcaps);while (PgGetScalerCapabilities(channel, i++, &vcaps) == 0) {
if (vcaps.format == DATA FORMAT)break;
vcaps.size = sizeof (vcaps);}if (vcaps.format != DATA FORMAT) {
fprintf(stderr, "Format not supported?\n");exit(1);
}
props.size = sizeof (props);props.format = DATA FORMAT;props.viewport.ul.x = 20;props.viewport.ul.y = 20;props.viewport.lr.x = 600;props.viewport.lr.y = 440;props.src dim.w = SRC WIDTH;props.src dim.h = SRC HEIGHT;props.flags =
Pg SCALER PROP SCALER ENABLE |
578 Chapter 19 � Raw Drawing and Animation November 2, 2006
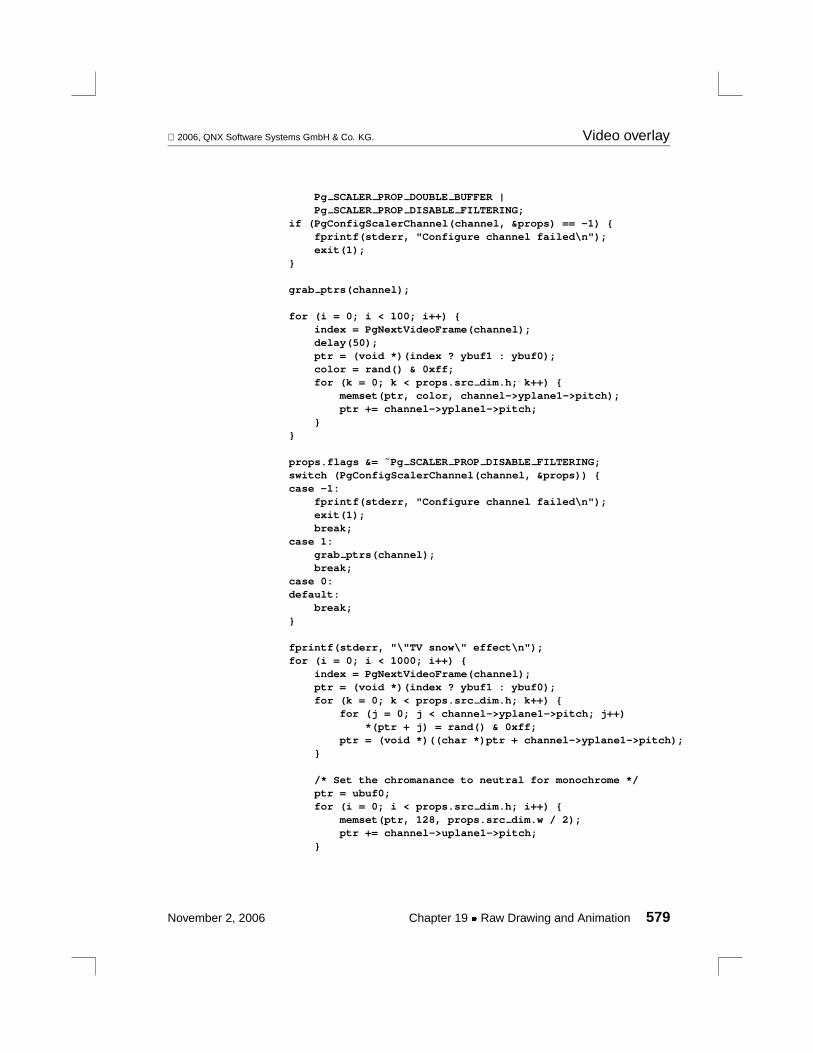
2006, QNX Software Systems GmbH & Co. KG. Video overlay
Pg SCALER PROP DOUBLE BUFFER |Pg SCALER PROP DISABLE FILTERING;
if (PgConfigScalerChannel(channel, &props) == -1) {fprintf(stderr, "Configure channel failed\n");exit(1);
}
grab ptrs(channel);
for (i = 0; i < 100; i++) {index = PgNextVideoFrame(channel);delay(50);ptr = (void *)(index ? ybuf1 : ybuf0);color = rand() & 0xff;for (k = 0; k < props.src dim.h; k++) {
memset(ptr, color, channel->yplane1->pitch);ptr += channel->yplane1->pitch;
}}
props.flags &= ˜Pg SCALER PROP DISABLE FILTERING;switch (PgConfigScalerChannel(channel, &props)) {case -1:
fprintf(stderr, "Configure channel failed\n");exit(1);break;
case 1:grab ptrs(channel);break;
case 0:default:
break;}
fprintf(stderr, "\"TV snow\" effect\n");for (i = 0; i < 1000; i++) {
index = PgNextVideoFrame(channel);ptr = (void *)(index ? ybuf1 : ybuf0);for (k = 0; k < props.src dim.h; k++) {
for (j = 0; j < channel->yplane1->pitch; j++)*(ptr + j) = rand() & 0xff;
ptr = (void *)((char *)ptr + channel->yplane1->pitch);}
/* Set the chromanance to neutral for monochrome */ptr = ubuf0;for (i = 0; i < props.src dim.h; i++) {
memset(ptr, 128, props.src dim.w / 2);ptr += channel->uplane1->pitch;
}
November 2, 2006 Chapter 19 � Raw Drawing and Animation 579

Layers 2006, QNX Software Systems GmbH & Co. KG.
ptr = vbuf0;for (i = 0; i < props.src dim.h; i++) {
memset(ptr, 128, props.src dim.w / 2);ptr += channel->vplane1->pitch;
}
if (rand() % 200 == 23) {props.viewport.ul.x = rand() % 400;props.viewport.ul.y = rand() % 300;props.viewport.lr.x =
props.viewport.ul.x + SRC WIDTH + rand() % 200;props.viewport.lr.y =
props.viewport.ul.y + SRC HEIGHT + rand() % 200;if (PgConfigScalerChannel(channel, &props) == 1)
grab ptrs(channel);}
}
/** This isn’t really necessary, since the video resources* should automatically be released when the app exits*/
PgDestroyVideoChannel(channel);}
intmain(int argc, char *argv[]){
PhAttach(NULL, NULL);
overlay example();
fprintf(stderr, "Exiting normally\n");}
LayersSome display controllers allow you to transparently overlay multiple"screens" on a single display. Each overlay is called alayer.
Layers can be used to combine independent display elements.Because overlaying is performed by the graphics hardware, it can bemore efficient than rendering all of the display elements onto a singlelayer. For example, a fast navigational display can be implemented
580 Chapter 19 � Raw Drawing and Animation November 2, 2006
2006, QNX Software Systems GmbH & Co. KG. Layers
with a scrolling navigational map on a background layer, and pop-upGUI elements, such as menus or a web browser, on a foreground layer.
Layer capabilities vary depending on the display controller and thedriver. Some display controllers don’t support layers. Different layerson the same display may have different capabilities. You should usePgGetLayerCaps()to determine whether a layer exists and whichfeatures are supported by the layer.
Layers are indexed per-display, starting from 0, from back to front inthe default overlay order.
A layer is eitheractive(shown) orinactive(hidden). It may not bepossible to activate a layer if its configuration is incomplete (if, forexample, the layer format is unspecified, or there aren’t enoughsurfaces assigned to it). A layer’s configuration persists when it’sinactive. After a video mode switch, all layers revert to their defaultconfiguration.
The images on all the active layers of a display are combined, usingalpha blending, chroma keying, or both, to produce the final image onthe display.
SurfacesThe image on a layer is fetched from one or more offscreen contexts,also calledsurfaces. The number of surfaces needed by a layer isdetermined by the layer format. For example, a layer whose format isPg LAYER FORMAT ARGB888requires one surface, while a layerwhose format isPg LAYER FORMAT YUV420 requires three surfacesfor a complete image. The format of a layer is set usingPgSetLayerArg().
November 2, 2006 Chapter 19 � Raw Drawing and Animation 581

Layers 2006, QNX Software Systems GmbH & Co. KG.
ViewportsDisplay
Surface data
Destination viewport
Source viewport
Source and destination viewports.
The"source viewport" defines a rectangular window into the surfacedata. This window is used to extract a portion of the surface data fordisplay by the layer.
The"destination viewport" defines a rectangular window on thedisplay. This window defines where the layer will display its image.
Scrolling and scaling, if supported by the layer, can be implementedby adjusting the source and destination viewports. To scroll or pan animage, move the position of the source viewport. To scale an image,increase or decrease the size of the destination viewport.
582 Chapter 19 � Raw Drawing and Animation November 2, 2006

2006, QNX Software Systems GmbH & Co. KG. Layers
You must target these functions at a device by callingPdSetTargetDevice().
☞
Layer APIThe layer API includes:
PgGetLayerCaps()
Query the capabilities of a layer
PgCreateLayerSurface()
Create an offscreen context displayable by a layer
PgSetLayerSurface()
Display an offscreen context on a layer
PgSetLayerArg()
Configure a layer parameter
PgLockLayer()
Lock a layer for exclusive use by an application
PgUnlockLayer()
Release a locked layer
PgLayerCaps t
Data structure that describes the capabilities for a layer
WARNING: The layer API is incompatible with the existing videooverlay API (PgCreateVideoChannel(), PgConfigScalerChannel(),PgNextVideoFrame(), and so on). Don’t run two applications thatuse different APIs simultaneously.
Note the following:
November 2, 2006 Chapter 19 � Raw Drawing and Animation 583

Layers 2006, QNX Software Systems GmbH & Co. KG.
� Photon cannot render in offscreen contexts that are in a differentformat from the current video mode. Thus, it may not be possibleto use Photon draw functions in an offscreen context allocated byPgCreateLayerSurface(). Instead, the application should usePdGetOffscreenContextPtr()to get a pointer to the video memoryand write data directly into the video memory.
� If an application changes the main display’s surface by callingPgSetLayerSurface(), Photon will continue to render on the oldsurface. The application should keep a pointer to the old maindisplay surface and restore it when it releases the layer. See thecode below for an example.
Using layersTo use layers, you typically do the following:
1 Call PgGetLayerCaps()with successively incremented indexesto enumerate your hardware capabilities (unless you alreadyknow them). IfPgGetLayerCaps()fails for all values, the driverdoesn’t support layers.
2 If you want to prevent other applications from accessing alayer, callPgLockLayer().
3 Allocate surfaces for the layer, and offscreen contexts for thesurfaces, by callingPgCreateLayerSurface().
4 Call PgSetLayerArg()with anarg argument ofPg LAYER ARG LIST BEGIN.
5 Call PgSetLayerArg()to set other arguments as required.
6 Call PgSetLayerSurface()to display a surface’s offscreencontext on a layer.
7 Call PgSetLayerArg()to set other arguments as required. Youcan specifyPg LAYER ARG ACTIVE to display the layer.
8 Call PgSetLayerArg()with anarg argument ofPg LAYER ARG LIST END.
584 Chapter 19 � Raw Drawing and Animation November 2, 2006

2006, QNX Software Systems GmbH & Co. KG. Layers
9 If the layer format is one of the RGB or PAL8 formats, set thecurrent draw context to render into a surface’s associated drawcontext(s), and then use thePg* functions to draw into theoffscreen context.
10 If the layer format is YUV, and so on, you typically dump datadirectly to the buffer (like the video channel buffers).
11 If you locked a layer, you must usePgUnlockLayer()to unlockit before your application exits.
See the code below for an example of using the layers API.
Example#include <errno.h>#include <stdio.h>#include <Ph.h>
intFindFormatIndex(int layer, unsigned int format){
PgLayerCaps t caps;int format idx = 0;
while (PgGetLayerCaps(layer, format idx, &caps) != -1) {if (caps.format == format)
return format idx;
format idx++;}return -1;
}
intmain(int argc, char **argv){/** For best results, these values should match your video mode.*/
#define LAYER FORMAT Pg LAYER FORMAT ARGB8888#define SURFACE WIDTH 1024#define SURFACE HEIGHT 768
struct Ph ctrl *ph;PgLayerCaps t caps;PdOffscreenContext t *surf;
November 2, 2006 Chapter 19 � Raw Drawing and Animation 585

Layers 2006, QNX Software Systems GmbH & Co. KG.
PdOffscreenContext t *scr = NULL;PhDrawContext t *olddc;PhRid t driver rid = -1;int layer idx = -1;int format idx = -1;int active = 1;int i;
PhArea t sarea, darea;
/** Arguments:* -d <driver region>* -l <layer index>*/
while ((i = getopt(argc, argv, "d:l:")) != -1) {switch(i) {case ’d’: /* driver region */
driver rid = atol(optarg);break;
case ’l’: /* layer index */layer idx = atoi(optarg);break;
default:break;
}}
if (layer idx == -1) {printf("Specify layer index.\n");exit(-1);
}
if (driver rid == -1) {printf("Specify graphics driver region.\n");exit(-1);
}
ph = PhAttach(NULL, NULL);if (ph == NULL) {
perror("PhAttach");exit(-1);
}
if (-1 == PdSetTargetDevice(PhDCGetCurrent(), driver rid)) {perror("PdSetTargetDevice");exit(-1);
}
586 Chapter 19 � Raw Drawing and Animation November 2, 2006
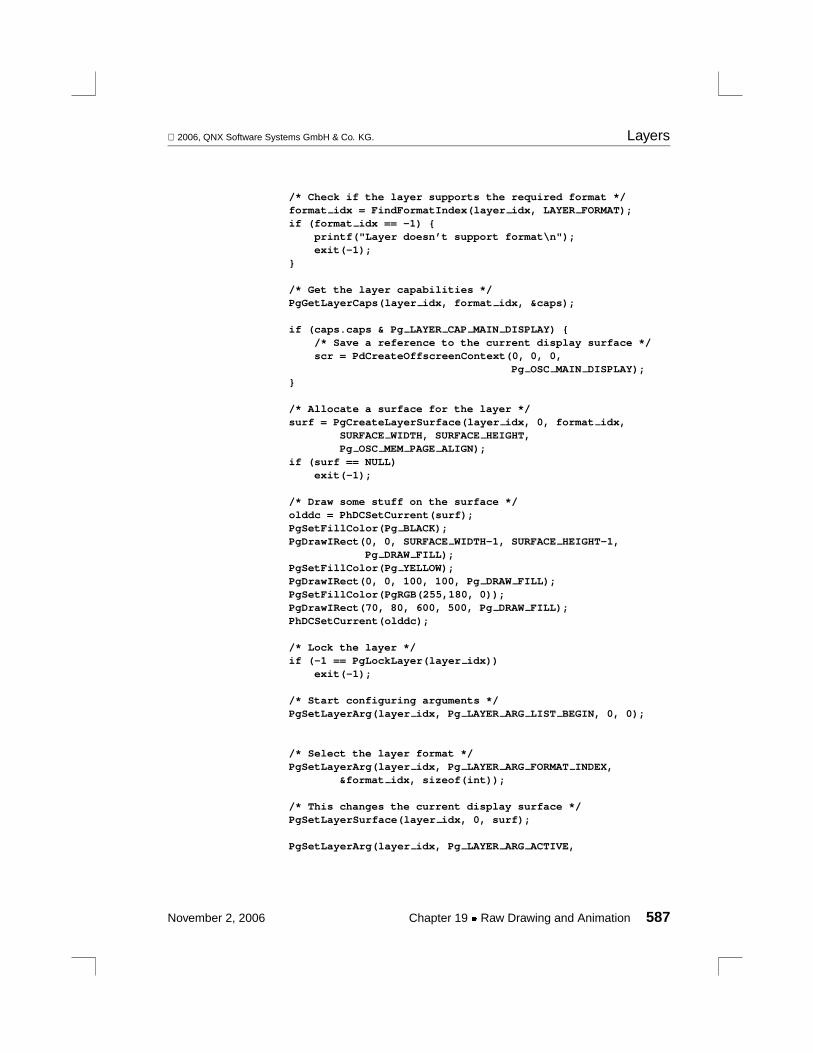
2006, QNX Software Systems GmbH & Co. KG. Layers
/* Check if the layer supports the required format */format idx = FindFormatIndex(layer idx, LAYER FORMAT);if (format idx == -1) {
printf("Layer doesn’t support format\n");exit(-1);
}
/* Get the layer capabilities */PgGetLayerCaps(layer idx, format idx, &caps);
if (caps.caps & Pg LAYER CAP MAIN DISPLAY) {/* Save a reference to the current display surface */scr = PdCreateOffscreenContext(0, 0, 0,
Pg OSC MAIN DISPLAY);}
/* Allocate a surface for the layer */surf = PgCreateLayerSurface(layer idx, 0, format idx,
SURFACE WIDTH, SURFACE HEIGHT,Pg OSC MEM PAGE ALIGN);
if (surf == NULL)exit(-1);
/* Draw some stuff on the surface */olddc = PhDCSetCurrent(surf);PgSetFillColor(Pg BLACK);PgDrawIRect(0, 0, SURFACE WIDTH-1, SURFACE HEIGHT-1,
Pg DRAW FILL);PgSetFillColor(Pg YELLOW);PgDrawIRect(0, 0, 100, 100, Pg DRAW FILL);PgSetFillColor(PgRGB(255,180, 0));PgDrawIRect(70, 80, 600, 500, Pg DRAW FILL);PhDCSetCurrent(olddc);
/* Lock the layer */if (-1 == PgLockLayer(layer idx))
exit(-1);
/* Start configuring arguments */PgSetLayerArg(layer idx, Pg LAYER ARG LIST BEGIN, 0, 0);
/* Select the layer format */PgSetLayerArg(layer idx, Pg LAYER ARG FORMAT INDEX,
&format idx, sizeof(int));
/* This changes the current display surface */PgSetLayerSurface(layer idx, 0, surf);
PgSetLayerArg(layer idx, Pg LAYER ARG ACTIVE,
November 2, 2006 Chapter 19 � Raw Drawing and Animation 587
OpenGL 2006, QNX Software Systems GmbH & Co. KG.
&active, sizeof(int));
/* Configure other arguments ... */
if (!(caps.caps & Pg LAYER CAP MAIN DISPLAY)) {sarea.pos.x = 0; sarea.pos.y = 0;sarea.size.w = SURFACE WIDTH; sarea.size.h = SURFACE HEIGHT;PgSetLayerArg(layer idx, Pg LAYER ARG SRC VIEWPORT, &sarea, sizeof(sarea));
darea.pos.x =0; darea.pos.y =0;darea.size.w =SURFACE WIDTH/2 ; darea.size.h =SURFACE HEIGHT/2 ;PgSetLayerArg(layer idx, Pg LAYER ARG DST VIEWPORT, &darea, sizeof(darea));
}
/* End configuration */PgSetLayerArg(layer idx, Pg LAYER ARG LIST END, 0, 0);
/* Application continues ... */sleep(3);
/* Finished using layer; Restore the current displaysurface */
active = 0;
PgSetLayerArg(layer idx, Pg LAYER ARG LIST BEGIN, 0, 0);PgSetLayerArg(layer idx, Pg LAYER ARG ACTIVE, &active, sizeof(int));PgSetLayerSurface(layer idx, 0, scr);PgSetLayerArg(layer idx, Pg LAYER ARG LIST END, 0, 0);
PgUnlockLayer(layer idx);
if (scr) PhDCRelease(scr);PhDCRelease(surf);
PhDetach(ph);exit(0);
}
OpenGLOpenGL is an open standard API that provides services for renderinggraphics in 2D and 3D. It’s used in many different applications,ranging from video games to medical programs to desktop interfaces.
588 Chapter 19 � Raw Drawing and Animation November 2, 2006

2006, QNX Software Systems GmbH & Co. KG. OpenGL
QNXGL is a framework that allows applications written for QNXNeutrino to use the OpenGL API.
The QNXGL framework is based on the published OpenGL API, butisn’t an implementation that’s certified or licensed by SiliconGraphics, Inc. under the OpenGL API.
☞
QNXGL isn’t Photon-specific. You can use it in non-Photonapplications.
OpenGL itself isn’t covered in this documentation. You can find a lotof information on OpenGL on the Internet as well as in the numerousbooks published on the subject. A good place to start ishttp://www.opengl.org.
The QNXGL FrameworkThe QNXGL Framework consists of the GL library (libGL) andstacks based on the OpenGL standard. A stack is a DLL that managesOpenGL rendering. There can be any number of stacks based on theOpenGL API present on a system. Some can work without theassistance of an existing GUI such as Photon or X Windows, otherscan be designed to work within existing GUIs, and others can behighly specialized and specific to a particular piece of hardware.
The QNXGL library is responsible for finding the appropriate stackthat best meets the needs of the application using it, and for sendingOpenGL commands to that stack. It provides entry points for theOpenGL API, functions for creating, destroying and manipulatingOpenGL buffers and contexts, and functions for dealing with specificstacks that may be on the system. It discovers the stacks via theAddOn Interface library (libaoi) and queries for QNXGLInterfaces.
For information about the QNXGL functions, see the qnxgl librarysection of thePhoton Library Reference.
Two QNXGL-compatible stacks are shipped with QNX Neutrino:
November 2, 2006 Chapter 19 � Raw Drawing and Animation 589

OpenGL 2006, QNX Software Systems GmbH & Co. KG.
GLPh (gl-ph.so)
A plugin that allows Photon microGUI applications to use theQNXGL API. It encodes OpenGL commands into messagesand sends them toio-graphics, much like other Photonapplications do, andio-graphics then interprets them,providing it can find a plugin capable of interpreting a GLPhstream. It also provides some extension functions. See UsingGLPh extension functions below.
Mesa (gl-mesa.so)
A stack based on the open source project of the same namefound athttp://www.mesa3d.org. This is a complete stackbased on the OpenGL standard that supports many functions. Ithas been ported to QNX Neutrino to make use of Neutrinovideo drivers (devg-*.so files), and is capable of functioningstandalone. This stack can also be used byio-graphics toservice rendering requests made by GLPh.
When you use Mesa standalone (that is, without Photon), it requiresthe /etc/system/config/graphics-modes configuration file for displaysettings (screen resolution, refresh rate, etc). This file contains theio-graphics command lines needed to start various drivers, and isusually generated by crttrap. For more information, see crttrap.
☞
These stacks are typically found in/lib/dll/gl.
Using the QNXGL libraryThese are the steps you should follow to use QNXGL and theOpenGL API:
1 Include the<GL/qnxgl.h> header.
2 Initialize the QNXGL library by callingqnxgl init().
3 Create the buffers your QNXGL context will use, withqnxgl bufferscreate(). You can set attributes for the buffersusing an attribute array, which is an array ofuint64 t entries.
590 Chapter 19 � Raw Drawing and Animation November 2, 2006

2006, QNX Software Systems GmbH & Co. KG. OpenGL
4 Create a QNXGL context for the buffers, usingqnxgl contextcreate().
5 Set the context to the current context, usingqnxgl set current().
6 Render your scene, using OpenGL commands. If you need touse OpenGL extensions, useqnxgl get func()to get the addressof extension functions.
7 When you’re finished, release the context and buffers, usingqnxgl contextdestroy()andqnxgl buffersdestroy(). Make sureyour application calls these functions whenever it might exitunexpectedly.
8 Finally, release the QNXGL library, usingqnxgl finish().
ExampleHere is an example of setting up the QNXGL library to render anOpenGL scene:
#include <GL/qnxgl.h>
/* stub functions so we can check that the example compiles */static int init my gl stuff(void){return 0;}
static int check done(void){return 1;}static void check input(void){}
static void do logic(void){}
static void render scene(void){}
int main (int argc, char *argv[]) {
qnxgl buf attrib t qnxgl attribs[10], *p attrib = qnxgl attribs;int num interfaces = 0;
qnxgl bufs t * qnxgl bufs = NULL;
qnxglc t * qnxgl gc = NULL;
num interfaces = qnxgl init(NULL, NULL, 0);
if (num interfaces < 0) {printf("Error: qnxgl init failed\n");
exit(0);
}if (num interfaces == 0) {
printf("Error: no GL interfaces found\n");exit(0);
}
/* When we exit the program we should call qnxgl finish so that the OpenGL
* renderers can shutdown what ever they may need to properly (ones that are
* talking to hardware directly may need to properly shut it down). */atexit(&qnxgl finish);
November 2, 2006 Chapter 19 � Raw Drawing and Animation 591

OpenGL 2006, QNX Software Systems GmbH & Co. KG.
/* Create a 16 bit depth buffer */p attrib = qnxgl attrib set depth(p attrib, 16);
/* Only create hardware capable buffers */p attrib = qnxgl attrib set force hw(p attrib);
/* End of the array */p attrib = qnxgl attrib set end(p attrib);
/* Create a QNXGL buffer that has 2 color buffers in the best RGB format that
* fits this request, a 16 bit depth buffer, is hardware accelerated, and it’s
* dimensions are 640 x 480 */qnxgl bufs = qnxgl buffers create (QNXGL FORMAT BEST RGB, 2, 640, 480,
qnxgl attribs, -1);
/* Check to see if the buffer was created */
if (qnxgl bufs == NULL) {
/* The buffer wasn’t created */printf("Error: Couldn’t create QNXGL Buffers\n");
exit(0);
}
/* Create a QNXGL context for the previously created buffer */
qnxgl gc = qnxgl context create (qnxgl bufs, NULL);
/* Check to see if the context was properly created */if (qnxgl gc == NULL) {
/* The context didn’t get created, destroy the buffer and exit */
qnxgl buffers destroy (qnxgl bufs);printf("Error: Couldn’t create the QNXGL Context\n");
exit(0);
}
/* Attempt to make the context current so we can use OpenGL commands */
if (qnxgl set current (qnxgl gc) == -1) {/* The context couldn’t be made current, destroy the context and
* buffers and exit */
qnxgl context destroy(qnxgl gc);qnxgl buffers destroy(qnxgl bufs);
printf("Error: Couldn’t make the context current\n");
exit(0);}
/* Do what ever initialization I need for my OpenGL program (load models,
* setup viewports, etc.) */
init my gl stuff();while (!check done()) {
/* Check for user input */
check input();
/* Do any logic we need to do prior to rendering the scene */
do logic();
/* Render an OpenGL scene */
render scene();
/* We’ve rendered a complete scene at this point; make sure
it’s visible */qnxgl swap buffers(qnxgl bufs);
}
592 Chapter 19 � Raw Drawing and Animation November 2, 2006

2006, QNX Software Systems GmbH & Co. KG. OpenGL
/* Exiting the program, clean up */
qnxgl context destroy(qnxgl gc);
qnxgl buffers destroy(qnxgl bufs);printf("Done!\n");
exit(0);
}
Using the GLPh extension functionsGLPh provides some Photon-specific extensions to the OpenGL API.By default, GLPh is designed to be transparent to QNXGLapplications, which means that it assumes that the application has noknowledge of Photon. This means that it will create any connectionsto Photon that it requires, as well as a window to render in for eachQNXGL buffer it creates.
However, if you use the GLPh buffer creation extensions (one of theglph attrib set*()convenience functions for setting attributes forqnxgl bufferscreate()), or if there is a valid Photon connection atbuffer creation time, GLPh assumes that the application knows aboutPhoton, and won’t create windows. It is up to the application toprovide the proper regions and layers for GLPh to use. These can beset via the GLPh OpenGL extension functions (glSetPhoton*()) or theGLPh QNXGL buffer creation extensions (glph attrib set*()).
To use the GLPh extensions, follow the guidelines in Using theQNXGL library above, but in addition:
1 Include the<GL/GLPh.h> header.
2 Declare the GLPh extension functions withGLPH DECLARE FUNCS(orGLPH DECLARE EXTERN FUNCSif the functions are extern).
3 Attach to Photon and initialize the widget toolkit withPtInit().
4 Create your Photon application’s window.
5 Set the QNXGL buffer attributes, and set the Photon region,surface, or layer to track the QNXGL buffer using one of the
November 2, 2006 Chapter 19 � Raw Drawing and Animation 593

OpenGL 2006, QNX Software Systems GmbH & Co. KG.
glph attrib set*()convenience functions forqnxgl bufferscreate().
Alternatively, you can use one of theglSetPhoton*()extensionfunctions to accomplish the same thing.
6 Make sure that the GLPh extensions exist by checking that thestring returned byglGetString(GL EXTENSIONS) containsGL QNX glph.
7 Load the GLPh extension functions using eitherGLPH LOAD FUNCSGC()or GLPH LOAD FUNCSIDX().
Here is an example of setting up the QNXGL library to render anOpenGL scene in a Photon application. This is the same example asabove, with the addition of the GLPh extensions:
#include <Ph.h>#include <Pt.h>
#include <Ap.h>
#include <GL/qnxgl.h>#include <GL/GLPh.h>
/* stub functions so we can check that the example compiles */
static int init my gl stuff(void){return 0;}
static int check done(void){return 1;}static void check input(void){}
static void do logic(void){}
static void render scene(void){}
/* Declare the GLPh extension functions */
GLPH DECLARE FUNCS;
int main (int argc, char *argv[]) {
qnxgl buf attrib t qnxgl attribs[10], *p attrib = qnxgl attribs;int num interfaces = 0;
qnxgl bufs t *qnxgl bufs = NULL;
qnxglc t *qnxgl gc = NULL;PtWidget t *win;
PhDim t dim = {640,480};PtArg t arg[15];
int cur arg = 0;
PhRid t rid = -1;char * exten = NULL;
/* Attach to photon and initialize widget toolkit */if (PtInit(NULL) == -1) {
printf("Error: PtInit failed\n");
exit(0);}
/* Create a window */PtSetArg(&arg[cur arg++], Pt ARG WINDOW TITLE, "My GLPh App", 0);
594 Chapter 19 � Raw Drawing and Animation November 2, 2006
2006, QNX Software Systems GmbH & Co. KG. OpenGL
PtSetArg(&arg[cur arg++], Pt ARG DIM, &dim,0);PtSetArg(&arg[cur arg++], Pt ARG RESIZE FLAGS, Pt TRUE,
Pt RESIZE XY AS REQUIRED);
PtSetArg(&arg[cur arg++], Pt ARG FILL COLOR, Pg BLACK, 0);PtSetParentWidget(NULL);
if ((win=PtCreateWidget(PtWindow,NULL,cur arg-1,arg)) == NULL) {
printf("Error: Creating window failed\n");PtExit(0);
}PtRealizeWidget(win);
PtFlush();
/* Get the Region ID of the window we just realized */
rid = PtWidgetRid(win);
/* Initialize QNXGL */
num interfaces = qnxgl init(NULL, NULL, 0);
if (num interfaces < 0) {printf("Error: qnxgl init failed\n");
PtExit(0);
}if (num interfaces == 0) {
printf("Error: no GL interfaces found\n");
PtExit(0);}
/* When we exit the program we should call qnxgl finish so that the OpenGL
* renderers can shutdown what ever they may need to properly (ones that are
* talking to hardware directly may need to properly shut it down). */atexit(&qnxgl finish);
/* Set the buffers region to be that of our window’s region */p attrib = glph attrib set region(p attrib, rid);
/* Create a 16 bit depth buffer */p attrib = qnxgl attrib set depth(p attrib, 16);
/* Only create hardware capable buffers */p attrib = qnxgl attrib set force hw(p attrib);
/* End of the array */p attrib = qnxgl attrib set end(p attrib);
/* Create a QNXGL buffer that has 2 color buffers in the best RGB format that
* fits this request, a 16 bit depth buffer, is hardware accelerated, and
* it’s dimensions are 640 x 480 */qnxgl bufs = qnxgl buffers create (QNXGL FORMAT BEST RGB, 2, 640, 480,
qnxgl attribs, -1);
/* Check to see if the buffer was created */
if (qnxgl bufs == NULL) {
/* The buffer wasn’t created */printf("Error: Couldn’t create QNXGL Buffers\n");
PtExit(0);
}
/* Create a QNXGL context for the previously created buffer */
qnxgl gc = qnxgl context create (qnxgl bufs, NULL);
/* Check to see if the context was properly created */
November 2, 2006 Chapter 19 � Raw Drawing and Animation 595

OpenGL 2006, QNX Software Systems GmbH & Co. KG.
if (qnxgl gc == NULL) {/* The context didn’t get created, destroy the buffer and exit */
qnxgl buffers destroy (qnxgl bufs);
printf("Error: Couldn’t create the QNXGL Context\n");PtExit(0);
}
/* Attempt to make the context current so we can use OpenGL commands */
if (qnxgl set current (qnxgl gc) == -1) {/* The context couldn’t be made current, destroy the context and buffers
* and exit */
qnxgl context destroy(qnxgl gc);qnxgl buffers destroy(qnxgl bufs);
printf("Error: Couldn’t make the context current\n");
PtExit(0);}
/* check to make sure that we have GLPh extensions */exten = (const char *) glGetString(GL EXTENSIONS);
if (!strstr(exten, "GL QNX glph")) {
printf("Sorry, GL QNX glph not supported by this renderer.\n");PtExit(0);
}
/* We have the extensions; use macro to load the function pointers
* so we can use the extensions at a later point in this program */GLPH LOAD FUNCS GC(qnxgl gc);
/* Do what ever initialization I need for my OpenGL program (load models,* setup viewports, etc.) */
init my gl stuff();
while (!check done()) {/* Check for user input */
check input();
/* Do any logic we need to do prior to rendering the scene */
do logic();
/* Render an OpenGL scene */
render scene();
/* We’ve rendered a complete scene at this point; make sure it’s
* visible */qnxgl swap buffers(qnxgl bufs);
}
/* Exiting the program, clean up */
qnxgl context destroy(qnxgl gc);
qnxgl buffers destroy(qnxgl bufs);printf("Done!\n");
exit(0);
}
596 Chapter 19 � Raw Drawing and Animation November 2, 2006

Chapter 20
Fonts
In this chapter. . .Symbol metrics 599Font function libraries 600Font names 604Writing text in a rectangular area 611Repairing damage to proportional text615
November 2, 2006 Chapter 20 � Fonts 597

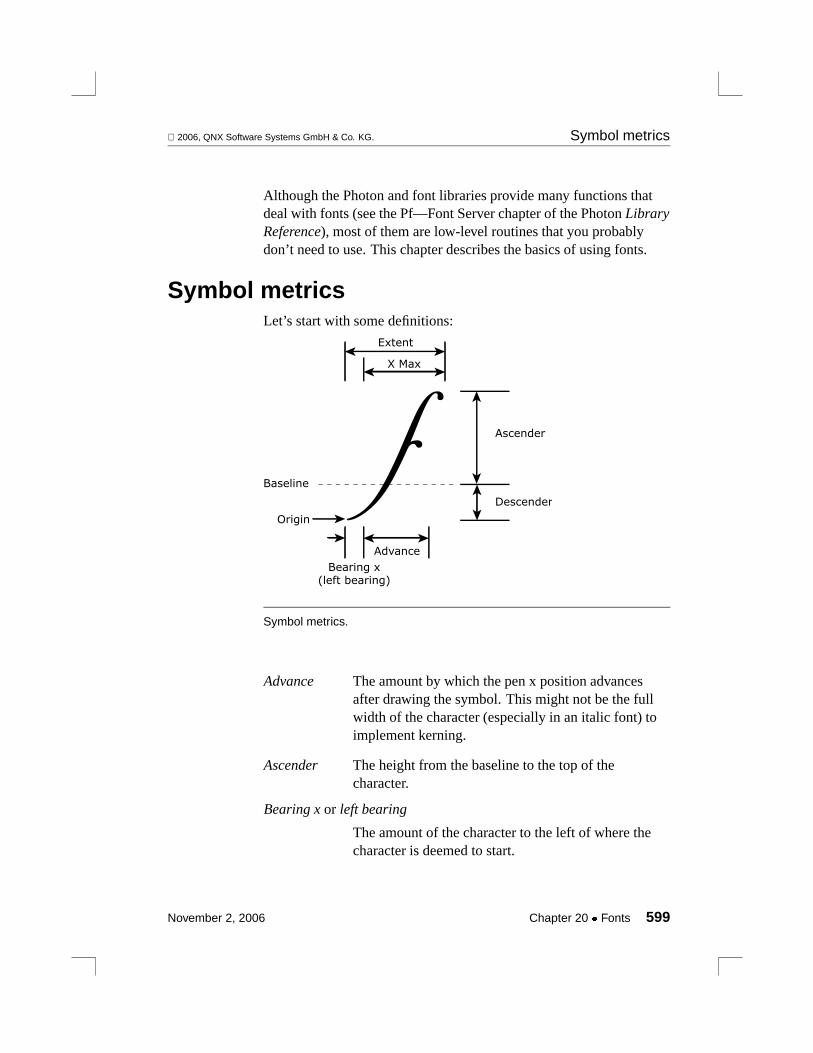
2006, QNX Software Systems GmbH & Co. KG. Symbol metrics
Although the Photon and font libraries provide many functions thatdeal with fonts (see the Pf—Font Server chapter of the PhotonLibraryReference), most of them are low-level routines that you probablydon’t need to use. This chapter describes the basics of using fonts.
Symbol metricsLet’s start with some definitions:
Extent
Advance
Origin
X Max
Baseline
Ascender
Descender
Bearing x(left bearing)
Symbol metrics.
Advance The amount by which the pen x position advancesafter drawing the symbol. This might not be the fullwidth of the character (especially in an italic font) toimplement kerning.
Ascender The height from the baseline to the top of thecharacter.
Bearing xor left bearing
The amount of the character to the left of where thecharacter is deemed to start.
November 2, 2006 Chapter 20 � Fonts 599

Font function libraries 2006, QNX Software Systems GmbH & Co. KG.
Descender The height from the bottom of the character to thebaseline.
Extent The width of the symbol. Depending on the font, thismight include some white space.
Origin The lower left corner of the character
X Max The width of the symbol, not including the bearing x.
To save time and memory, kerning isn’t supported.☞
Font function librariesThere are two libraries of font-related functions shipped withNeutrino:
� the functions that come with the Photon libraryph
� the separatelibfont library. All libfont functions have aCx orDll suffix.
The Photon library font functions referencelibfont functions usingglobal contexts.
600 Chapter 20 � Fonts November 2, 2006

2006, QNX Software Systems GmbH & Co. KG. Font function libraries
io-graphics
phfont.so
App. 1 App. 2 App. 3...
Font architecture using io-graphics with a resource manager font
instance
The font library,libfont, offers three different methods forobtaining font services:
� The first method uses message passing to communicate to anexternal font server process. This is the default behavior.
� The second method allows an application to create a private fontserver instance, eliminating message passing for font processing.
� The third method creates a resource manager font server instanceusing a separate thread within the application. The resourcemanager thread will attach a device (e.g./dev/phfont), whichother applications may connect to viaPfAttachCx(), if theapplications are aware of the device name. Note that to run aresource manager font server private instance, the application mustbe root-privileged. The application which invokes the font serverinstance does not require message passing for font processing.
These methods are made possible through the font server plugin,phfont.so, which contains all common font server code. Thisallows the memory footprint of the font server to be potentially muchsmaller than it was before. The font library also allows you to
November 2, 2006 Chapter 20 � Fonts 601

Font function libraries 2006, QNX Software Systems GmbH & Co. KG.
fine-tune your system’s memory requirements for your particularembedded environment.
For example, if your system had maximum resources, you could run aprivate font server instance for every application. Each applicationwould usePfAttachLocalDLL(), passing either your own schema orNULL.
App. 1
phfont.so
App. 2 App. 3...
phfont.sophfont.so
Every application with its own private font server.
Now say you had only minimal resources. Your applications woulduse the external font serverphfont, with each application performinga message pass to process fonts, which would require minimalmemory but maximum CPU usage.
602 Chapter 20 � Fonts November 2, 2006

2006, QNX Software Systems GmbH & Co. KG. Font function libraries
phfont
App. 1
phfont.so
App. 2 App. 3...
Applications sharing a common font server.
Finally, you might determine that you need some applications to runprivate font server instances to improve font rendering speed, whileothers use the external font server,phfont.
This configuration is the Photon default, withio-graphics runningits own private font server instance, and other Photon applicationssharing another public instance.
☞
November 2, 2006 Chapter 20 � Fonts 603

Font names 2006, QNX Software Systems GmbH & Co. KG.
io-graphics
phfont.so
App. 1
phfont.so
App. 2 App. 3...
phfont
Shared and private font servers.
Thelibfont library DLL functions introduce the concept of aschema, which is a configuration file you can use to override thedefault settings for private font server instances. You can create aschema using thefontdamin utility.
Font namesA font is identified by its name, which can be in one of these forms:
foundry name The name assigned by the font foundry to identifythe font family, such as Helvetica, Comic Sans MS,and PrimaSans BT. Note the use of capitals.
The foundry name doesn’t include informationabout the style (e.g. bold, italic) or the size. Thisname is universal across operating environments(e.g. X, Photon).
stem name A unique identifier that includes an abbreviation ofthe foundry name, as well as the style (e.g.b, i)and the size. For example,helv12 is the stemname for 12-point Helvetica, andhelv12b is thestem name for 12-point bold Helvetica.
604 Chapter 20 � Fonts November 2, 2006
2006, QNX Software Systems GmbH & Co. KG. Font names
To specify a font in the Photon API, you always use a stem name. Youshould consider stem names to be constant identifiers, not modifiablestrings.
You can hard-code all references to fonts in a Photon application. Butyour application can be more flexible if it uses the foundry name tochoose the best match from whatever fonts are available. That way,there isn’t a problem if a particular font is eventually renamed,removed, or replaced.
For example, the following call toPtAlert()uses the hard-coded stemnamehelv14 to specify 14-point Helvetica:
answer = PtAlert(base wgt, NULL, "File Not Saved", NULL,"File has not been saved.\nSave it?","helv14", 3, btns, NULL, 1, 3, Pt MODAL );
You can get the available stem names from the names of the files in${PHOTON PATH}/font repository — just remove any fileextension (e.g..phf).
Alternately, if you have a$HOME/.ph directory, check in$HOME/.ph/font/. The Photon microGUI creates this local fileonly when needed, such as when you run thefontadmin utility (seethe QNX NeutrinoUtilities Reference) to create your own personalfont configuration. Until the local file is created, the microGUI usesthe global file.
Querying available fontsThe above example takes a shortcut by using a hard-coded stem name( helv14). And, like any shortcut, this approach has trade-offs. First,stem names are subject to change. More importantly, all versions ofthe Photon microGUI up to and including 1.13 have only 16characters available for the stem name. This isn’t always enough togive each font a unique stem. The current version of the PhotonmicroGUI allows 80 characters.
November 2, 2006 Chapter 20 � Fonts 605

Font names 2006, QNX Software Systems GmbH & Co. KG.
We’ve defined theFontName data type for you to use for the bufferyou pass toPfGenerateFontName(). It’s an array of sizeMAX FONT TAG. For successful font programming, don’t use a fontidentifier storage buffer that’s smaller thanFontName.
☞
To get around hard-coded stem name issues, you can usePfQueryFonts()to determine which fonts are available and providethe information needed to build a stem name. This function queriesthe font server, and protects you from future changes.
FontDetails structureOnce you’ve got the list of fonts, you need to examine eachFontDetails structure in it to find the font you need and determinethe string to use as the stem name.
TheFontDetails structure is defined in<photon/Pf.h>, andcontains at least these elements:
FontDescription desc
The foundry name or full descriptive name of the font, such asHelvetica or Charter.
FontName stem
The short form. This provides a part of the stem name used bythe Photon API calls. For example,helv andchar correspondto Helvetica and Charter.
Generating font namesAs described earlier, the Photon API requires a stem name to identifya font, but if you want to be flexible, you should use a font foundryname.
The easiest way to get a stem name, given the font foundry name,desired point size, and style, is to callPfGenerateFontName(). Itcreates, in a buffer that you supply, a unique stem name for the font.
606 Chapter 20 � Fonts November 2, 2006
2006, QNX Software Systems GmbH & Co. KG. Font names
(You can use this approach even if you don’t usePfQueryFonts()tofind all the available fonts.)
Here’s the same call toPtAlert()as shown earlier, but this time it callsPfGenerateFontName():
char Helvetica14[MAX FONT TAG];
if ( PfGenerateFontName("Helvetica", 0, 14,Helvetica14) == NULL )
{/* Couldn’t find the font! */...
}
answer = PtAlert(base wgt, NULL, "File Not Saved", NULL,"File has not been saved.\nSave it?",Helvetica14, 3, btns, NULL, 1, 3,Pt MODAL );
ExampleNow that we’ve looked at the pieces involved, it’s fairly simple tofollow the steps needed to build up the correct stem name for a givenfont.
Keep these things in mind:
� Use aFontName buffer to store the stem name.
� Search for a font based on the foundry name (i.e. thedescmemberof its FontDetails entry), not on thestem.
You’ll probably want to do this work in the initialization function foryour application, or perhaps in the base window setup function.Define theFontName buffer as a global variable; you can then use itas needed throughout your application.
Here’s a sample application-initialization function:
/****************************** global variables ******************************/
November 2, 2006 Chapter 20 � Fonts 607
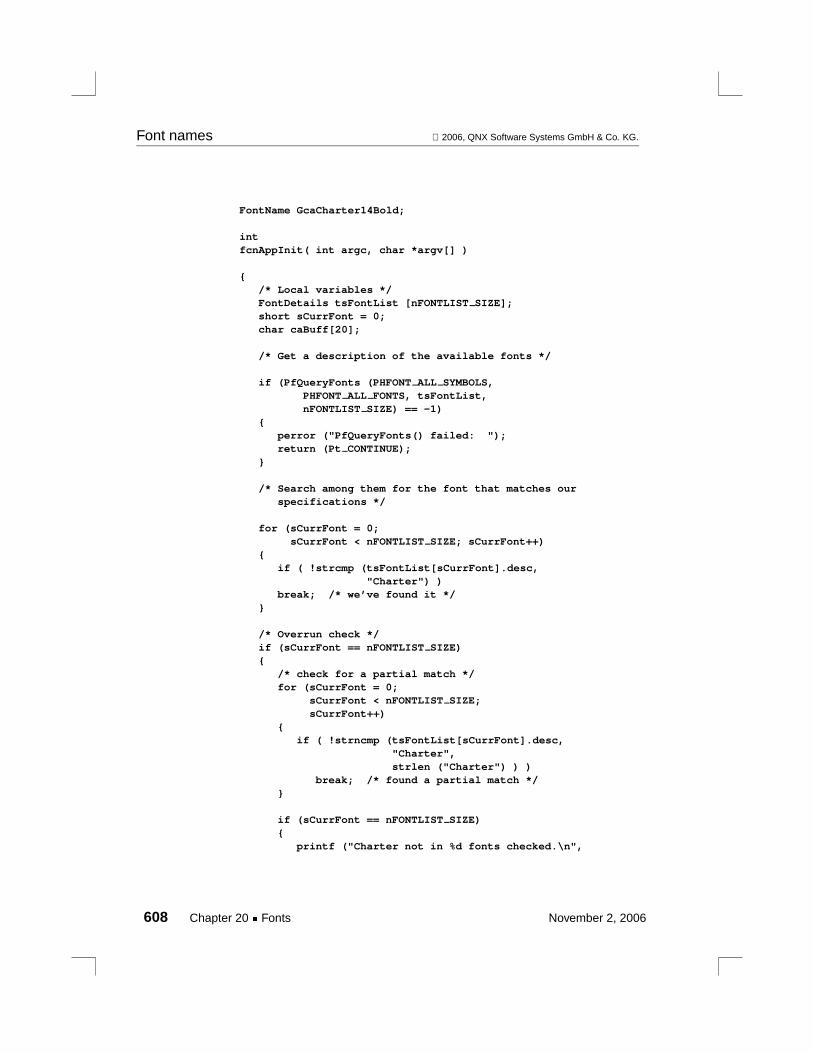
Font names 2006, QNX Software Systems GmbH & Co. KG.
FontName GcaCharter14Bold;
intfcnAppInit( int argc, char *argv[] )
{/* Local variables */FontDetails tsFontList [nFONTLIST SIZE];short sCurrFont = 0;char caBuff[20];
/* Get a description of the available fonts */
if (PfQueryFonts (PHFONT ALL SYMBOLS,PHFONT ALL FONTS, tsFontList,nFONTLIST SIZE) == -1)
{perror ("PfQueryFonts() failed: ");return (Pt CONTINUE);
}
/* Search among them for the font that matches ourspecifications */
for (sCurrFont = 0;sCurrFont < nFONTLIST SIZE; sCurrFont++)
{if ( !strcmp (tsFontList[sCurrFont].desc,
"Charter") )break; /* we’ve found it */
}
/* Overrun check */if (sCurrFont == nFONTLIST SIZE){
/* check for a partial match */for (sCurrFont = 0;
sCurrFont < nFONTLIST SIZE;sCurrFont++)
{if ( !strncmp (tsFontList[sCurrFont].desc,
"Charter",strlen ("Charter") ) )
break; /* found a partial match */}
if (sCurrFont == nFONTLIST SIZE){
printf ("Charter not in %d fonts checked.\n",
608 Chapter 20 � Fonts November 2, 2006

2006, QNX Software Systems GmbH & Co. KG. Font names
sCurrFont);return (Pt CONTINUE);
}else
printf ("Using partial match -- ’Charter’.\n");}
/* Does it have bold? */if (!(tsFontList[sCurrFont].flags & PHFONT INFO BOLD)){
printf ("Charter not available in bold font.\n");return (Pt CONTINUE);
}
/* Is 14-point available? */if ( !( (tsFontList[sCurrFont].losize ==
tsFontList[sCurrFont].hisize == 0)/* proportional font -- it can be shown in14-point*/
||
( (tsFontList[sCurrFont].losize <= 14 )&&(tsFontList[sCurrFont].hisize >= 14 ) ) ) )/* 14-point fits between smallest and
largest available size */
{printf ("Charter not available in 14-point.\n");return (Pt CONTINUE);
}
/* Generate the stem name */if (PfGenerateFontName( tsFontList[sCurrFont].desc,
PF STYLE BOLD, 14,GcaCharter14Bol) == NULL)
{perror ("PfGenerateFontName() failed: ");return (Pt CONTINUE);
}
/* You can now use GcaCharter14Bold as an argument toPtAlert(), etc. */
/* Eliminate ’unreferenced’ warnings */argc = argc, argv = argv;
November 2, 2006 Chapter 20 � Fonts 609

Font names 2006, QNX Software Systems GmbH & Co. KG.
return( Pt CONTINUE );
}
For the above code to work, you must declare the followinginformation in the application’s global header file. To do this, usePhAB’s Startup Info/Modules dialog (accessed from the Applicationmenu).
/************************************ user-defined constants ************************************/#define nFONTLIST SIZE 100 /* an arbitrary choice of size */
/****************************** global variables ******************************/
extern FontName GcaCharter14Bold;
You can avoid using a specific size for the list by callingPfQueryFonts()with n set to 0 andlist set toNULL. If you do this,PfQueryFonts()returns the number of matching fonts but doesn’t tryto fill in the list. You can use this feature to determine the number ofitems to allocate.
Remember to define this header before you start adding callbacks andsetup functions — that way, it’s automatically included as a#define.If you forget, you’ll have to go back and add the statement manually.For more information, see “Specifying a global header file” in theWorking with Applications chapter.
And last of all, here’s a sample callback that uses our stem namestring:
intfcnbase btn showdlg ActivateCB( PtWidget t *widget,
ApInfo t *apinfo,PtCallbackInfo t *cbinfo )
/* This callback is used to launch a dialog box with theintent of exercising the global variable GcaCharter14Bold */
610 Chapter 20 � Fonts November 2, 2006

2006, QNX Software Systems GmbH & Co. KG. Writing text in a rectangular area
{PtNotice (ABW base, NULL, "Font Demonstration", NULL,
"This sentence is in 14-pt. Charter bold",GcaCharter14Bold, "OK", NULL, 0);
/* Eliminate ’unreferenced’ warnings */widget = widget, apinfo = apinfo, cbinfo = cbinfo;
return( Pt CONTINUE );}
Writing text in a rectangular areaWriting text in a rectangle of a specific size can be tricky if the stringsize is unknown.
Consider a rectangle of fixed dimensions, for example a cell in aspreadsheet. How do you determine how many characters cansuccessfully be displayed in this cell without clipping? CallPfExtentTextToRect(). Give it a clipping rectangle, a font identifier, astring, and the maximum number of bytes within the string, and ittells you the number and extent of the characters that fit within theclipping rectangle.
This is useful for placing an ellipsis (...) after a truncated string andavoiding partially clipped characters. Currently this routine supportsclipping only along the horizontal axis.
Here’s an example:
/* PfExtentTextToRect */
#include <stdlib.h>#include <stdio.h>#include <string.h>#include <Ap.h>#include <Ph.h>#include <Pt.h>#include <errno.h>
PtWidget t * pwndMain = NULL, * pbtn = NULL, * pobjRaw = NULL;char * pcText = "pAfaBfbfffffffffffffffCfcXfxYfyZfzf";char * pcGB = "\323\316\317\267";char ** ppcData = NULL;
November 2, 2006 Chapter 20 � Fonts 611

Writing text in a rectangular area 2006, QNX Software Systems GmbH & Co. KG.
int fnDrawCanvas( PtWidget t * ptsWidget, PhTile t * ptsDamage );
#define FALSE 0
FontName szFont;
char * pmbGB = NULL;struct PxTransCtrl * ptsTrans = NULL;int iTemp1 = 0, iTemp2 = 0;
#define BUFFER SIZE 256
int main (int argc, char *argv[]){ PtArg t args[4];
PhPoint t win size, pntPOS, pntDIM;short nArgs = 0;
if((pmbGB = calloc(BUFFER SIZE, sizeof(char))) == NULL)return(EXIT FAILURE);
PtInit (NULL);
if(argc > 1){ if(PfGenerateFontName(argv[1], 0, 9, szFont) == NULL)
PfGenerateFontName("TextFont", 0, 9, szFont);}elsePfGenerateFontName("TextFont", 0, 9, szFont);
if((ptsTrans = PxTranslateSet(NULL, "GB2312-80")) == NULL)return(EXIT FAILURE);
if(PxTranslateToUTF(ptsTrans, pcGB, 4, &iTemp1, pmbGB,BUFFER SIZE, &iTemp2) == -1)
printf("Could not translate from GB to UTF.\n");
if(argc > 2)pcText = pmbGB;
/* Set the base pwndMain parameters. */win size.x = 450;win size.y = 450;
PtSetArg(&args[0],Pt ARG DIM, &win size, 0);PtSetArg(&args[1],Pt ARG WINDOW TITLE,
"PfExtentTextToRect", 0);
pwndMain = PtCreateWidget (PtWindow, Pt NO PARENT, 2, args);
612 Chapter 20 � Fonts November 2, 2006
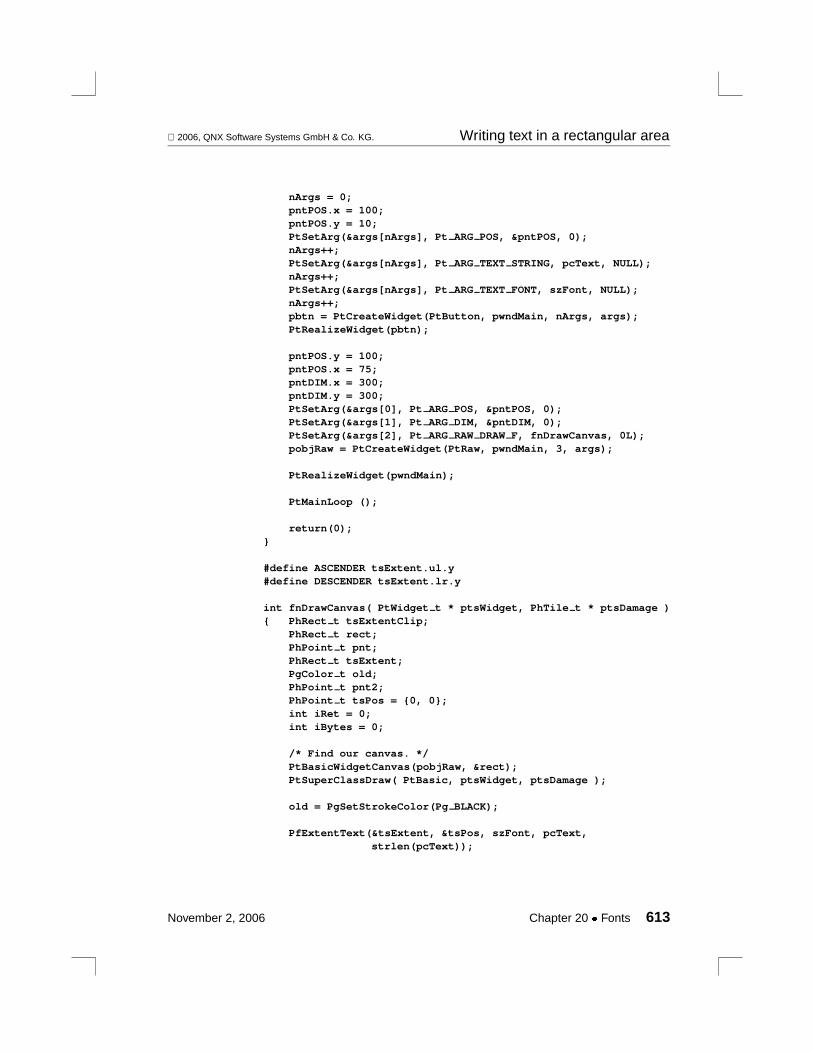
2006, QNX Software Systems GmbH & Co. KG. Writing text in a rectangular area
nArgs = 0;pntPOS.x = 100;pntPOS.y = 10;PtSetArg(&args[nArgs], Pt ARG POS, &pntPOS, 0);nArgs++;PtSetArg(&args[nArgs], Pt ARG TEXT STRING, pcText, NULL);nArgs++;PtSetArg(&args[nArgs], Pt ARG TEXT FONT, szFont, NULL);nArgs++;pbtn = PtCreateWidget(PtButton, pwndMain, nArgs, args);PtRealizeWidget(pbtn);
pntPOS.y = 100;pntPOS.x = 75;pntDIM.x = 300;pntDIM.y = 300;PtSetArg(&args[0], Pt ARG POS, &pntPOS, 0);PtSetArg(&args[1], Pt ARG DIM, &pntDIM, 0);PtSetArg(&args[2], Pt ARG RAW DRAW F, fnDrawCanvas, 0L);pobjRaw = PtCreateWidget(PtRaw, pwndMain, 3, args);
PtRealizeWidget(pwndMain);
PtMainLoop ();
return(0);}
#define ASCENDER tsExtent.ul.y#define DESCENDER tsExtent.lr.y
int fnDrawCanvas( PtWidget t * ptsWidget, PhTile t * ptsDamage ){ PhRect t tsExtentClip;
PhRect t rect;PhPoint t pnt;PhRect t tsExtent;PgColor t old;PhPoint t pnt2;PhPoint t tsPos = {0, 0};int iRet = 0;int iBytes = 0;
/* Find our canvas. */PtBasicWidgetCanvas(pobjRaw, &rect);PtSuperClassDraw( PtBasic, ptsWidget, ptsDamage );
old = PgSetStrokeColor(Pg BLACK);
PfExtentText(&tsExtent, &tsPos, szFont, pcText,strlen(pcText));
November 2, 2006 Chapter 20 � Fonts 613
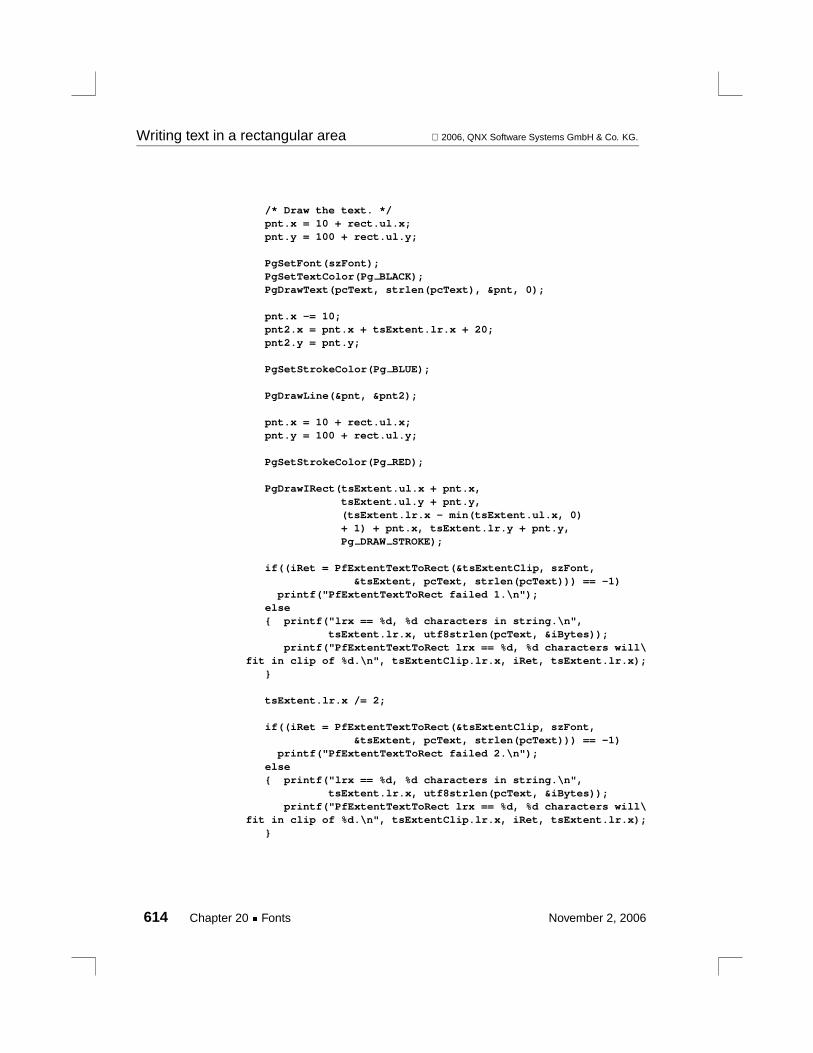
Writing text in a rectangular area 2006, QNX Software Systems GmbH & Co. KG.
/* Draw the text. */pnt.x = 10 + rect.ul.x;pnt.y = 100 + rect.ul.y;
PgSetFont(szFont);PgSetTextColor(Pg BLACK);PgDrawText(pcText, strlen(pcText), &pnt, 0);
pnt.x -= 10;pnt2.x = pnt.x + tsExtent.lr.x + 20;pnt2.y = pnt.y;
PgSetStrokeColor(Pg BLUE);
PgDrawLine(&pnt, &pnt2);
pnt.x = 10 + rect.ul.x;pnt.y = 100 + rect.ul.y;
PgSetStrokeColor(Pg RED);
PgDrawIRect(tsExtent.ul.x + pnt.x,tsExtent.ul.y + pnt.y,(tsExtent.lr.x - min(tsExtent.ul.x, 0)+ 1) + pnt.x, tsExtent.lr.y + pnt.y,Pg DRAW STROKE);
if((iRet = PfExtentTextToRect(&tsExtentClip, szFont,&tsExtent, pcText, strlen(pcText))) == -1)
printf("PfExtentTextToRect failed 1.\n");else{ printf("lrx == %d, %d characters in string.\n",
tsExtent.lr.x, utf8strlen(pcText, &iBytes));printf("PfExtentTextToRect lrx == %d, %d characters will\
fit in clip of %d.\n", tsExtentClip.lr.x, iRet, tsExtent.lr.x);}
tsExtent.lr.x /= 2;
if((iRet = PfExtentTextToRect(&tsExtentClip, szFont,&tsExtent, pcText, strlen(pcText))) == -1)
printf("PfExtentTextToRect failed 2.\n");else{ printf("lrx == %d, %d characters in string.\n",
tsExtent.lr.x, utf8strlen(pcText, &iBytes));printf("PfExtentTextToRect lrx == %d, %d characters will\
fit in clip of %d.\n", tsExtentClip.lr.x, iRet, tsExtent.lr.x);}
614 Chapter 20 � Fonts November 2, 2006

2006, QNX Software Systems GmbH & Co. KG. Repairing damage to proportional text
pnt.x = 10 + rect.ul.x;pnt.y = 150 + rect.ul.y;
PgDrawText(pcText, iRet, &pnt, 0);PgDrawIRect(tsExtentClip.ul.x + pnt.x,
tsExtentClip.ul.y + pnt.y,(tsExtentClip.lr.x - min(tsExtentClip.ul.x, 0)+ 1) + pnt.x, tsExtentClip.lr.y + pnt.y,Pg DRAW STROKE);
tsExtent.lr.x /= 2;
if((iRet = PfExtentTextToRect(&tsExtentClip, szFont,&tsExtent, pcText, strlen(pcText))) == -1)
printf("PfExtentTextToRect failed 3.\n");else{ printf("lrx == %d, %d characters in string.\n",
tsExtent.lr.x, utf8strlen(pcText, &iBytes));printf("PfExtentTextToRect lrx == %d, %d characters will\
fit in clip of %d.\n", tsExtentClip.lr.x, iRet, tsExtent.lr.x);}
pnt.x = 10 + rect.ul.x;pnt.y = 200 + rect.ul.y;
PgDrawText(pcText, iRet, &pnt, 0);PgDrawIRect(tsExtentClip.ul.x + pnt.x,
tsExtentClip.ul.y + pnt.y,(tsExtentClip.lr.x - min(tsExtentClip.ul.x, 0)+ 1) + pnt.x, tsExtentClip.lr.y + pnt.y,Pg DRAW STROKE);
PgSetStrokeColor(old);
return( Pt CONTINUE );}
Repairing damage to proportional textWhen dealing with proportional fonts, sometimes the vectors of oneglyph run into the vectors of another. This is especially evident whenusing a font such as Nuptial BT. You need to take special care whenrepairing damage to such fonts.
PfExtentTextCharPositions()addresses this issue. You can use thisroutine to obtain the position after each character, incorporating the
November 2, 2006 Chapter 20 � Fonts 615

Repairing damage to proportional text 2006, QNX Software Systems GmbH & Co. KG.
bearing x of the following character. This position is where youshould draw the next character.
If you use thePF CHAR DRAW POSITIONSflag, the bearing x of thefollowing character isn’t applied to the position, which is useful whenyou’re placing cursors.
For example:
#include <stdlib.h>#include <stdio.h>#include <string.h>#include <Ap.h>#include <Ph.h>#include <Pt.h>#include <errno.h>
PtWidget t * pwndMain = NULL,* pbtn = NULL,* pobjRaw = NULL,* pobjLabel = NULL;
char ** ppcData = NULL;
int fnDrawCanvas( PtWidget t * ptsWidget,PhTile t * ptsDamage );
#define FALSE 0
#define WIN SIZE X 1000
FontName szFont;
int main (int argc, char *argv[]){ PtArg t args[8];
PhPoint t win size, pntPOS, pntDIM;short nArgs = 0;char caTitle[50];
if(argc < 2){ printf("Usage: pen text string\n");
exit(EXIT FAILURE);}
PtInit (NULL);
ppcData = argv;
PfGenerateFontName("TextFont", 0, 9, szFont);
616 Chapter 20 � Fonts November 2, 2006

2006, QNX Software Systems GmbH & Co. KG. Repairing damage to proportional text
/* Set the base pwndMain parms. */win size.x = 800;win size.y = 600;
sprintf(caTitle, "Get the pen position");PtSetArg(&args[0],Pt ARG DIM, &win size, 0);PtSetArg(&args[1],Pt ARG WINDOW TITLE, caTitle, 0);
pwndMain = PtCreateWidget (PtWindow, Pt NO PARENT, 2, args);
nArgs = 0;pntDIM.x = 80;pntDIM.y = 20;PtSetArg(&args[nArgs], Pt ARG DIM, &pntDIM, 0);nArgs++;pntPOS.x = 100;pntPOS.y = 10;PtSetArg(&args[nArgs], Pt ARG POS, &pntPOS, 0);nArgs++;PtSetArg(&args[nArgs], Pt ARG TEXT STRING, argv[1], NULL);nArgs++;pbtn = PtCreateWidget(PtButton, pwndMain, nArgs, args);PtRealizeWidget(pbtn);
nArgs = 0;pntDIM.x = 80;pntDIM.y = 20;PtSetArg(&args[nArgs], Pt ARG DIM, &pntDIM, 0);nArgs++;pntPOS.x = 100;pntPOS.y = 600;PtSetArg(&args[nArgs], Pt ARG POS, &pntPOS, 0);nArgs++;PtSetArg(&args[nArgs], Pt ARG TEXT STRING, argv[1], NULL);nArgs++;PtSetArg(&args[nArgs], Pt ARG RESIZE FLAGS,
Pt RESIZE XY ALWAYS, Pt RESIZE XY ALWAYS);nArgs++;PtSetArg(&args[nArgs], Pt ARG BORDER WIDTH, 0L, 0L);nArgs++;PtSetArg(&args[nArgs], Pt ARG MARGIN LEFT, 0L, 0L);nArgs++;PtSetArg(&args[nArgs], Pt ARG MARGIN RIGHT, 0L, 0L);nArgs++;pobjLabel = PtCreateWidget(PtLabel, pwndMain, nArgs, args);PtRealizeWidget(pobjLabel);
pntPOS.y = 100;pntPOS.x = 75;pntDIM.x = WIN SIZE X - 75 - 10;
November 2, 2006 Chapter 20 � Fonts 617

Repairing damage to proportional text 2006, QNX Software Systems GmbH & Co. KG.
pntDIM.y = 300;PtSetArg(&args[0], Pt ARG POS, &pntPOS, 0);PtSetArg(&args[1], Pt ARG DIM, &pntDIM, 0);PtSetArg(&args[2], Pt ARG RAW DRAW F, fnDrawCanvas, 0L);pobjRaw = PtCreateWidget(PtRaw, pwndMain, 3, args);
(void) PtRealizeWidget(pwndMain);
PtMainLoop ();
return(0);}
int fnDrawCanvas( PtWidget t * ptsWidget, PhTile t * ptsDamage ){ unsigned char const * pucFont = NULL;
int * piIndx = NULL;int * piPos = NULL;char ** argv = (char **)ppcData;PhRect t rect;PhPoint t pnt;PhPoint t tsPos = {0, 0};PhRect t tsExtent;short n = 0;char * pc = NULL;PgColor t old;
pucFont = szFont;pc = argv[1];piIndx = (int *)calloc(50, sizeof(int));piPos = (int *)calloc(50, sizeof(int));
if(strlen(pc) < 4){ printf("Pick a longer string, must be at least\
4 characters.\n");exit(EXIT SUCCESS);
}
for(n = 0; n < strlen(pc); n++)piIndx[n] = n + 1;
/* Find our canvas. */PtBasicWidgetCanvas(pobjRaw, &rect);
old = PgSetStrokeColor(Pg BLACK);
PfExtentText(&tsExtent, &tsPos, pucFont, pc, strlen(pc));
PgSetFont(pucFont);PgSetTextColor(Pg BLACK);
618 Chapter 20 � Fonts November 2, 2006
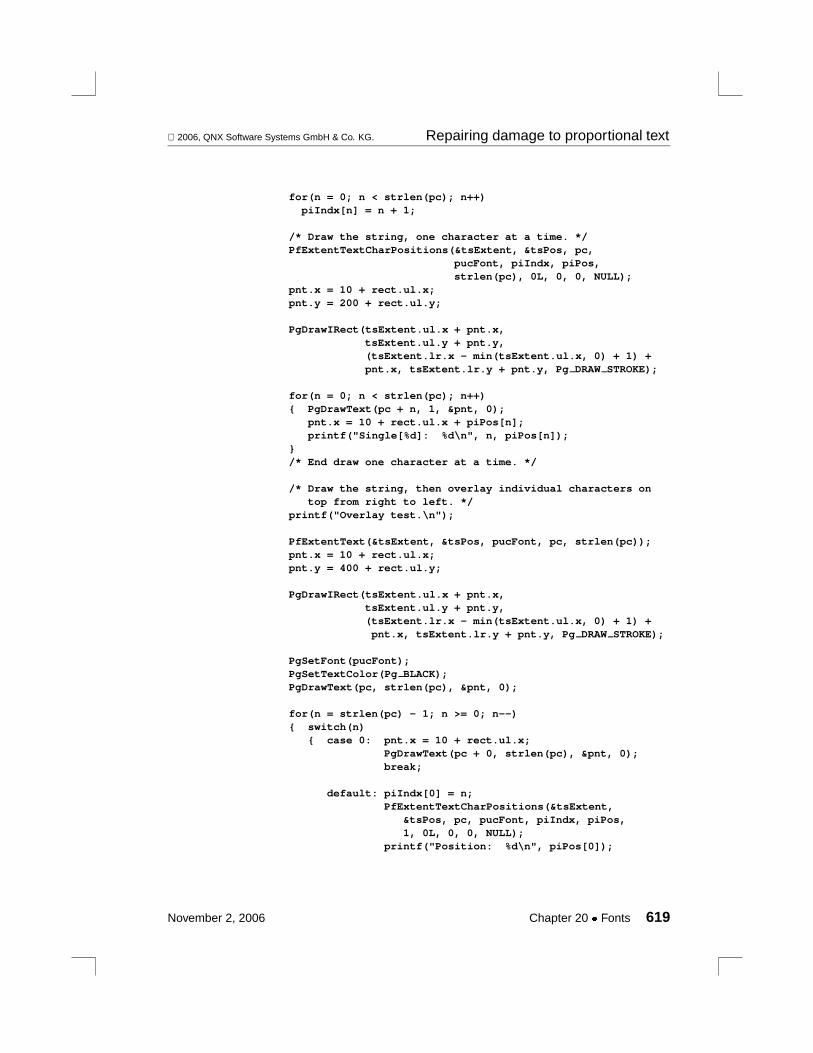
2006, QNX Software Systems GmbH & Co. KG. Repairing damage to proportional text
for(n = 0; n < strlen(pc); n++)piIndx[n] = n + 1;
/* Draw the string, one character at a time. */PfExtentTextCharPositions(&tsExtent, &tsPos, pc,
pucFont, piIndx, piPos,strlen(pc), 0L, 0, 0, NULL);
pnt.x = 10 + rect.ul.x;pnt.y = 200 + rect.ul.y;
PgDrawIRect(tsExtent.ul.x + pnt.x,tsExtent.ul.y + pnt.y,(tsExtent.lr.x - min(tsExtent.ul.x, 0) + 1) +pnt.x, tsExtent.lr.y + pnt.y, Pg DRAW STROKE);
for(n = 0; n < strlen(pc); n++){ PgDrawText(pc + n, 1, &pnt, 0);
pnt.x = 10 + rect.ul.x + piPos[n];printf("Single[%d]: %d\n", n, piPos[n]);
}/* End draw one character at a time. */
/* Draw the string, then overlay individual characters ontop from right to left. */
printf("Overlay test.\n");
PfExtentText(&tsExtent, &tsPos, pucFont, pc, strlen(pc));pnt.x = 10 + rect.ul.x;pnt.y = 400 + rect.ul.y;
PgDrawIRect(tsExtent.ul.x + pnt.x,tsExtent.ul.y + pnt.y,(tsExtent.lr.x - min(tsExtent.ul.x, 0) + 1) +pnt.x, tsExtent.lr.y + pnt.y, Pg DRAW STROKE);
PgSetFont(pucFont);PgSetTextColor(Pg BLACK);PgDrawText(pc, strlen(pc), &pnt, 0);
for(n = strlen(pc) - 1; n >= 0; n--){ switch(n)
{ case 0: pnt.x = 10 + rect.ul.x;PgDrawText(pc + 0, strlen(pc), &pnt, 0);break;
default: piIndx[0] = n;PfExtentTextCharPositions(&tsExtent,
&tsPos, pc, pucFont, piIndx, piPos,1, 0L, 0, 0, NULL);
printf("Position: %d\n", piPos[0]);
November 2, 2006 Chapter 20 � Fonts 619
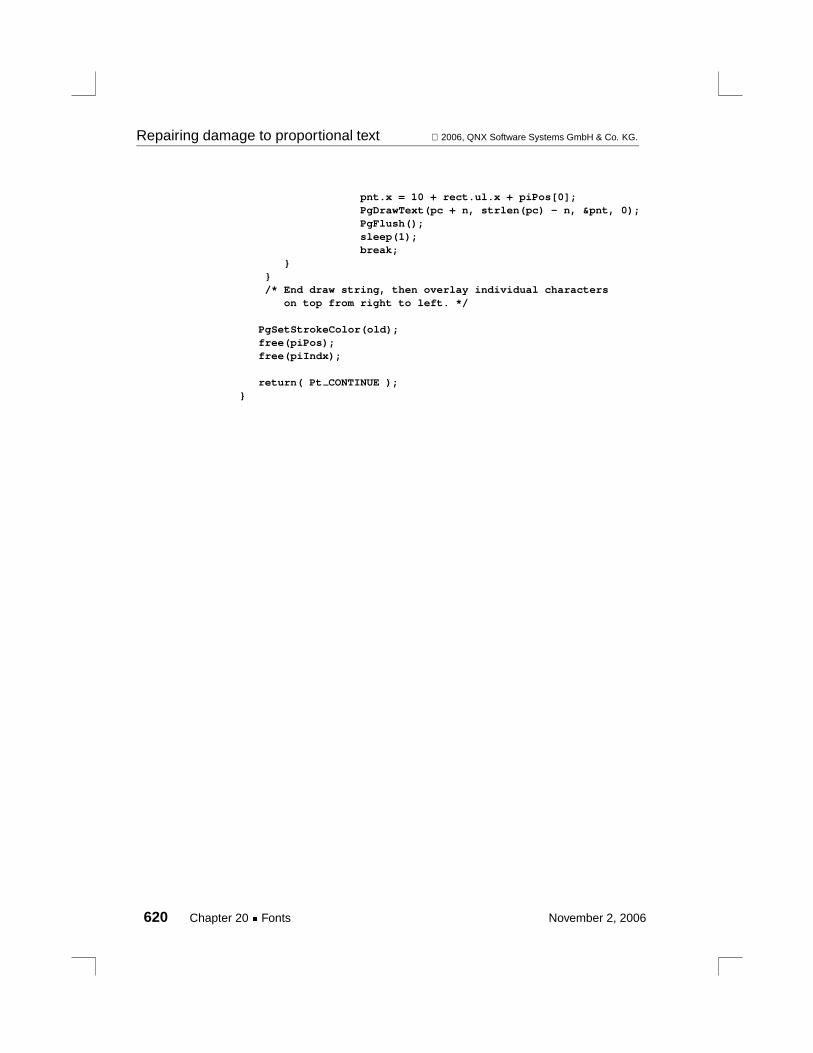
Repairing damage to proportional text 2006, QNX Software Systems GmbH & Co. KG.
pnt.x = 10 + rect.ul.x + piPos[0];PgDrawText(pc + n, strlen(pc) - n, &pnt, 0);PgFlush();sleep(1);break;
}}/* End draw string, then overlay individual characters
on top from right to left. */
PgSetStrokeColor(old);free(piPos);free(piIndx);
return( Pt CONTINUE );}
620 Chapter 20 � Fonts November 2, 2006
Chapter 21
Printing
In this chapter. . .Print contexts 624Starting a print job 625Printing the desired widgets 628Suspending and resuming a print job631Ending a print job 632Freeing the print context 632Example 632
November 2, 2006 Chapter 21 � Printing 621

2006, QNX Software Systems GmbH & Co. KG.
Printing and drawing are the same in Photon—the difference dependson thedraw context, a data structure that defines where the drawstream (i.e. the draw events) flows:
� by default, to the graphics driver for drawing on the screen
Or:
� to amemory context(or MC) for storing images in memory forlater use
Or:
� to aprint context(or PC) for printing. See “Print Contexts,” below.
To print in Photon:
1 Create a print context by callingPpCreatePC().
2 Set up the print context automatically via thePtPrintSelwidget, or programmatically viaPpSetPC().
3 Initialize the print job by callingPpStartJob().
4 Any time afterPpStartJob()is called, make the print context“active” by callingPpContinueJob(). When a print context isactive, anything that’s drawn viaPpPrintWidget()or Pg* calls,including widgets, is directed to the file opened by the printcontext during thePpStartJob()call.
5 Insert page breaks, as required, by callingPpPrintNewPage().
6 The print context can be made inactive without terminating thecurrent print job by callingPpSuspendJob(), or by callingPpContinueJob()with a different print context. To resume theprint job from where you left off, callPpContinueJob().
7 Complete the print job by callingPpEndJob().
8 When your application doesn’t need to print anything else, callPpReleasePC()to free the print context.
November 2, 2006 Chapter 21 � Printing 623

Print contexts 2006, QNX Software Systems GmbH & Co. KG.
Print contextsA print context is aPpPrintContext t structure whose memberscontrol how printing is to be done. For information about what’s in aprint context, see the PhotonLibrary Reference.
Never directly access the members of aPpPrintContext t
structure; usePpGetPC()to extract members, andPpSetPC()tochange them.
☞
Creating a print contextThe first step to printing in Photon is to create a print context bycallingPpCreatePC():
PpPrintContext t *pc;
pc = PpCreatePC();
Modifying a print contextOnce the print context is created, you must set it up properly for yourprinter and the options (orientation, paper size, etc.) you want to use.You can do this by calling:
� PpLoadDefaultPrinter()
� PpLoadPrinter()
� PpSetPC()
� PtPrintPropSelect()
� PtPrintSelect()
� PtPrintSelection()
These functions are described in the PhotonLibrary Reference.
You can also usePtPrintSel (see the PhotonWidget Reference).
624 Chapter 21 � Printing November 2, 2006

2006, QNX Software Systems GmbH & Co. KG. Starting a print job
You can get a list of available printers by callingPpLoadPrinterList().When you’re finished with the list, callPpFreePrinterList().
Starting a print jobIf you’re using an application that needs to know anything about theprint context, you can usePpGetPC()to get the appropriateinformation. For example, you might need to know the selectedorientation (in order to orient your widgets properly). If you need toknow the size of the margins, you can callPpGetCanvas().
Before printing, you must set the source size or resolution. Forexample:
� If you want a widget to fill the page, set the source size to equal thewidget’s dimensions. You can callPpSetCanvas()to do this.
� by default, the source resolution is 100 pixels per inch so that fontsare printed at an appealing size. You can get the size of the interiorcanvas by callingPpGetCanvas(), which gives dimensions thattake into account the marginal, nonprintable area.
When setting the source size, take the nonprintable area of the printerinto account. All printers have a margin around the page that theywon’t print on, even if the page margins are set to 0. Therefore, thesize set above is actually a bit larger than the size of a page, and thefont will be scaled down to fit on the printable part of the page.
In the following example, the page size and nonprintable area aretaken into account to give the proper source size and text height. Trythis, and measure the output to prove the font is 1″ high from ascenderto descender:
#include <stdio.h>#include <stdlib.h>#include <Pt.h>
PtWidget t *label, *window;PpPrintContext t *pc;
int quit cb (PtWidget t *widget, void *data,PtCallbackInfo t *cbinfo )
November 2, 2006 Chapter 21 � Printing 625
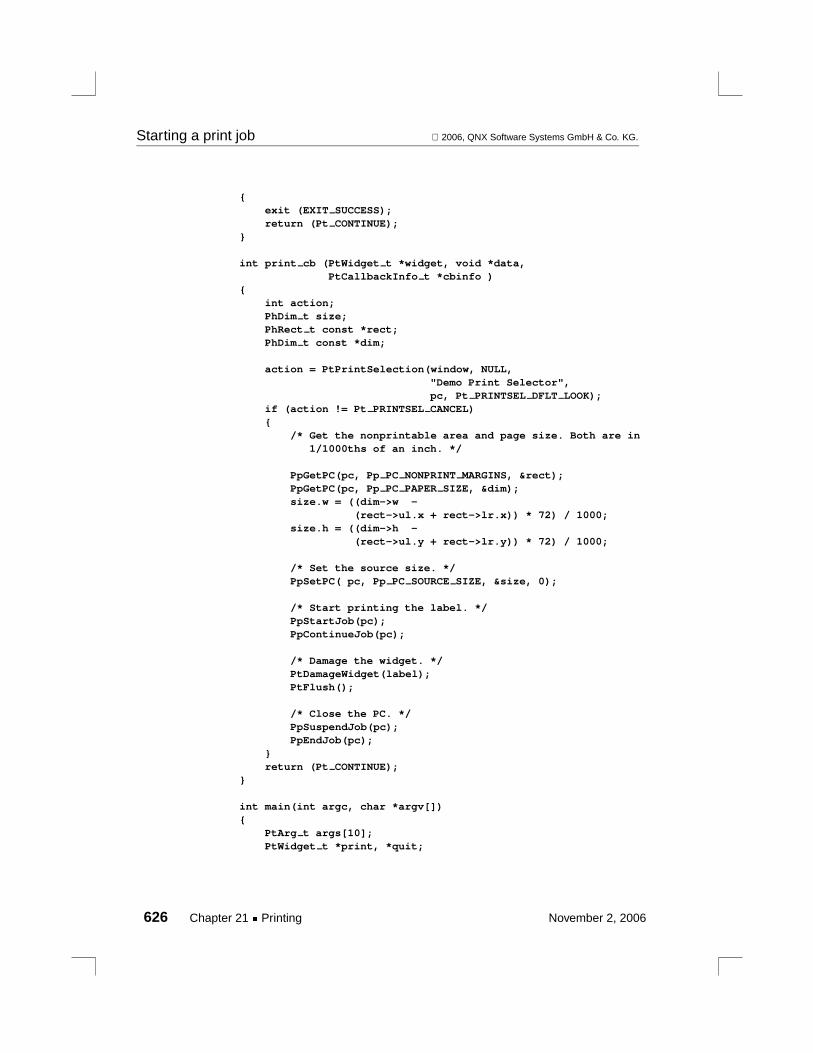
Starting a print job 2006, QNX Software Systems GmbH & Co. KG.
{exit (EXIT SUCCESS);return (Pt CONTINUE);
}
int print cb (PtWidget t *widget, void *data,PtCallbackInfo t *cbinfo )
{int action;PhDim t size;PhRect t const *rect;PhDim t const *dim;
action = PtPrintSelection(window, NULL,"Demo Print Selector",pc, Pt PRINTSEL DFLT LOOK);
if (action != Pt PRINTSEL CANCEL){
/* Get the nonprintable area and page size. Both are in1/1000ths of an inch. */
PpGetPC(pc, Pp PC NONPRINT MARGINS, &rect);PpGetPC(pc, Pp PC PAPER SIZE, &dim);size.w = ((dim->w -
(rect->ul.x + rect->lr.x)) * 72) / 1000;size.h = ((dim->h -
(rect->ul.y + rect->lr.y)) * 72) / 1000;
/* Set the source size. */PpSetPC( pc, Pp PC SOURCE SIZE, &size, 0);
/* Start printing the label. */PpStartJob(pc);PpContinueJob(pc);
/* Damage the widget. */PtDamageWidget(label);PtFlush();
/* Close the PC. */PpSuspendJob(pc);PpEndJob(pc);
}return (Pt CONTINUE);
}
int main(int argc, char *argv[]){
PtArg t args[10];PtWidget t *print, *quit;
626 Chapter 21 � Printing November 2, 2006

2006, QNX Software Systems GmbH & Co. KG. Starting a print job
PhDim t win dim = { 400, 200 };PhPoint t lbl pos = {0, 0};PhArea t print area = { {130, 170}, {60, 20} };PhArea t quit area = { {210, 170}, {60, 20} };PtCallback t callbacks[2] = { {print cb, NULL},
{quit cb, NULL} };
if (PtInit(NULL) == -1)PtExit(EXIT FAILURE);
/* Create the main window. */PtSetArg (&args[0], Pt ARG DIM, &win dim, 0);PtSetArg (&args[1], Pt ARG WINDOW TITLE,
"Print Example", 0);
if ((window = PtCreateWidget(PtWindow, Pt NO PARENT,1, args)) == NULL)
PtExit (EXIT FAILURE);
/* Create a print context. */pc = PpCreatePC();
/* Create a label to be printed. */PtSetArg (&args[0], Pt ARG POS, &lbl pos, 0);PtSetArg (&args[1], Pt ARG TEXT STRING,
"I am 1 inch high", 0);PtSetArg (&args[2], Pt ARG TEXT FONT, "swiss72", 0);PtSetArg (&args[3], Pt ARG MARGIN HEIGHT, 0, 0);PtSetArg (&args[4], Pt ARG MARGIN WIDTH, 0, 0);PtSetArg (&args[5], Pt ARG BEVEL WIDTH, 0, 0);label = PtCreateWidget (PtLabel, window, 6, args);
/* Create the print button. */PtSetArg(&args[0], Pt ARG AREA, &print area, 0);PtSetArg(&args[1], Pt ARG TEXT STRING, "Print", 0);PtSetArg(&args[2], Pt CB ACTIVATE, &callbacks[0], 0);print = PtCreateWidget (PtButton, window, 3, args);
/* Create the quit button. */PtSetArg(&args[0], Pt ARG AREA, &quit area, 0);PtSetArg(&args[1], Pt ARG TEXT STRING, "Quit", 0);PtSetArg(&args[2], Pt CB ACTIVATE, &callbacks[1], 0);quit = PtCreateWidget (PtButton, window, 3, args);
PtRealizeWidget(window);PtMainLoop();return (EXIT SUCCESS);
}
November 2, 2006 Chapter 21 � Printing 627
Printing the desired widgets 2006, QNX Software Systems GmbH & Co. KG.
You should also set the source offset, the upper left corner of what’sto be printed. For example, if you have a button drawn at (20, 20)from the top left of a pane and you want it to be drawn at (0, 0) on thepage, set the source offset to (20, 20). Any other widgets are drawnrelative to their position from this widget’s origin. A widget at (40,40) will be drawn at (20, 20) on the page. The code is as follows:
PhPoint t offset = {20, 20};...PpSetPC( pc, Pp PC SOURCE OFFSET, &offset, 0 );
Once the source size and offset have been set, you can start printing:
PpStartJob(pc);PpContinueJob(pc);
PpStartJob()sets up the print context for printing andPpContinueJob()makes the print context active, causing all Photondraw commands to be redirected to the destination specified in theprint context.
Printing the desired widgetsAfter you’ve made the print context active, you can start printingwidgets and so on. This can be done by calling any combination ofthe following:
� Pg* functions
� PpPrintWidget()— you can even print a widget that hasn’t beenunrealized.
If you want to print all the contents of a widget that scrolls, you’llneed to do some special preparations. See “Printing scrollingwidgets” below.
☞
628 Chapter 21 � Printing November 2, 2006
2006, QNX Software Systems GmbH & Co. KG. Printing the desired widgets
Printing a new pageYou can force a page break at any point by callingPpPrintNewPage():
PpPrintNewPage(pc);
Note that once you callPpStartJob(), any changes to the print contexttake effect after the next call toPpPrintNewPage().
Photon assumes that the page numbers increase by one. If this isn’tthe case, manually set thePp PC PAGE NUM member of the printcontext to the correct page number. Don’t make the page numberdecrease because the print drivers might not work properly.
Printing widgets that scrollIf you want to print all the contents of a widget that scrolls, you needsome special processing:
PtList
The only way to make aPtList print (or draw) all the items is byresizing it to be the total height of all the items. The easiest way isprobably by using the resize policy:
This will work only if the total height is smaller than 65K pixels.☞
1 Open and start the print context.
2 Get the current resize flags (Pt ARGRESIZEFLAGS) for thePtList widget.
3 Change the resize flags toPt RESIZEXY ALWAYS, to make thelist resize to fit all of its text.
4 Call PpPrintWidget()for the widget or parent widget.
5 Reset the resize flags for thePtList widget.
6 Stop and close the print context.
November 2, 2006 Chapter 21 � Printing 629
Printing the desired widgets 2006, QNX Software Systems GmbH & Co. KG.
PtMultiText
To print aPtMultiText widget’s entire text, breaking the output intopages:
1 Create another multitext widget — let’s call it the print widget— that isn’t visible to the user (i.e. hide it behind the user’smultitext widget).
2 Get the printer settings for printing: the orientation, page size,and the margins.
3 Adjust the printer settings for what you want and then usePpSetPC()to set them.
4 Set the print multitext widget’s margins to match those of theprinter that you just set.
5 UsePpStartJob()to start your print job.
6 Get the user’s multitext widget resources (i.e. text, fonts,number of lines) and set the print multitext widget’s resourcesto match them.
7 Go through the user’s multitext and get the attributes for eachline (color, font, tabs, etc) and set the print multitext widget’sattributes accordingly.
8 Once you’ve set all of the attributes to match, specify the topline of the print multitext widget. This positions the widget tostart printing.
9 Get the number of lines that are completely visible in the printmultitext widget, as well as the total number of lines.
10 UsePpContinueJob(), PpPrintWidget(), andPpSuspendJob()toprint the current page.
11 Delete the lines that you just printed from the print multitextwidget. Doing this causes the next group of lines that you wantto print to become the visible lines of the widget.
630 Chapter 21 � Printing November 2, 2006
2006, QNX Software Systems GmbH & Co. KG. Suspending and resuming a print job
12 Call PpPrintNewPage()to insert a page break.
13 Continue printing pages and deleting the visible lines untilyou’ve reached the end of the text in the print multitext widget.
PtScrollArea
For aPtScrollArea, you need to print itsvirtual canvas, which iswhere all widgets created within or moved to a scroll area are placed:
1 Get a pointer to the virtual canvas by calling:PtValidParent( ABW Scroll area, PtWidget );
2 Get the area (Pt ARG AREA) of the virtual canvas, and use itssizemember as the source size in the print context.
3 Set the print context’s source offset to:PtWidgetOffset( PtValidParent( ABW Scroll area,
PtWidget ));
4 Print the scroll area’s virtual canvas by calling:PpPrintWidget( pc, PtValidParent( ABW Scroll area,
PtWidget ),NULL, NULL, 0);
Suspending and resuming a print jobTo suspend a print job and direct all draw events back to the graphicsdriver at any point after callingPpStartJob(), call:
PpSuspendJob( pc );
To resume a print job, reactivating the print context, causing drawevents to be directed towards the destination specified in the printcontext, call:
PpContinueJob( pc );
November 2, 2006 Chapter 21 � Printing 631

Ending a print job 2006, QNX Software Systems GmbH & Co. KG.
Ending a print jobWhen you’re finished printing your widgets, the print context must bedeactivated and closed. This is done by calling:
PpSuspendJob(pc);PpEndJob(pc);
All draw events will be directed to the graphics driver.
You can reuse the print context for new print jobs, eliminating theneed to create and initialize it again.
☞
Freeing the print contextWhen printing is complete and you no longer need the print context,you can free it, which in turn frees any resources used by it.
If you want to remember any information from the print context forfuture use, save it by callingPpGetPC()before freeing the printcontext. For example:
short const *orientation;...PpGetPC( pc, Pp PC ORIENTATION, &orientation );
To free a print context, call:
PpReleasePC( pc );
ExampleThis example creates an application with a main window, and a panewith a few widgets on it. When you press the Print button, a PrintSelection Dialog appears. When you select this dialog’s Print orPreview button, the pane is “drawn” on the printer.
632 Chapter 21 � Printing November 2, 2006

2006, QNX Software Systems GmbH & Co. KG. Example
#include <stdio.h>#include <stdlib.h>#include <Pt.h>
PtWidget t *pane, *window;PpPrintContext t *pc;
int quit cb ( PtWidget t *widget, void *data,PtCallbackInfo t *cbinfo)
{PpReleasePC (pc);exit (EXIT SUCCESS);return (Pt CONTINUE);
}
int print cb ( PtWidget t *widget, void *data,PtCallbackInfo t *cbinfo)
{int action;
/* You could make these calls to PpSetPC() rightafter creating the print context. Having it herelets you reuse the print context. */
PhDim t size = { 850, 1100 };PhDim t size2 = { 200, 150 };
/* Set the source resolution to be proportional tothe size of a page. */
PpSetPC(pc, Pp PC SOURCE SIZE, &size, 0);
/* Uncomment this to set the source size to be the sizeof the widget. The widget will be scaled when printed. */
/* PpSetPC(pc, Pp PC SOURCE SIZE, &size2, 0); */
action = PtPrintSelection(window, NULL,"Demo Print Selector", pc,Pt PRINTSEL DFLT LOOK);
if (action != Pt PRINTSEL CANCEL){
/* Start printing the pane. Note that we’re usingthe same print context for all print jobs. */
PpStartJob(pc);PpContinueJob(pc);
/* Print the widget. */PpPrintWidget(pc, pane, NULL, NULL, 0);
/* Close the print context. */PpSuspendJob(pc);PpEndJob(pc);
November 2, 2006 Chapter 21 � Printing 633
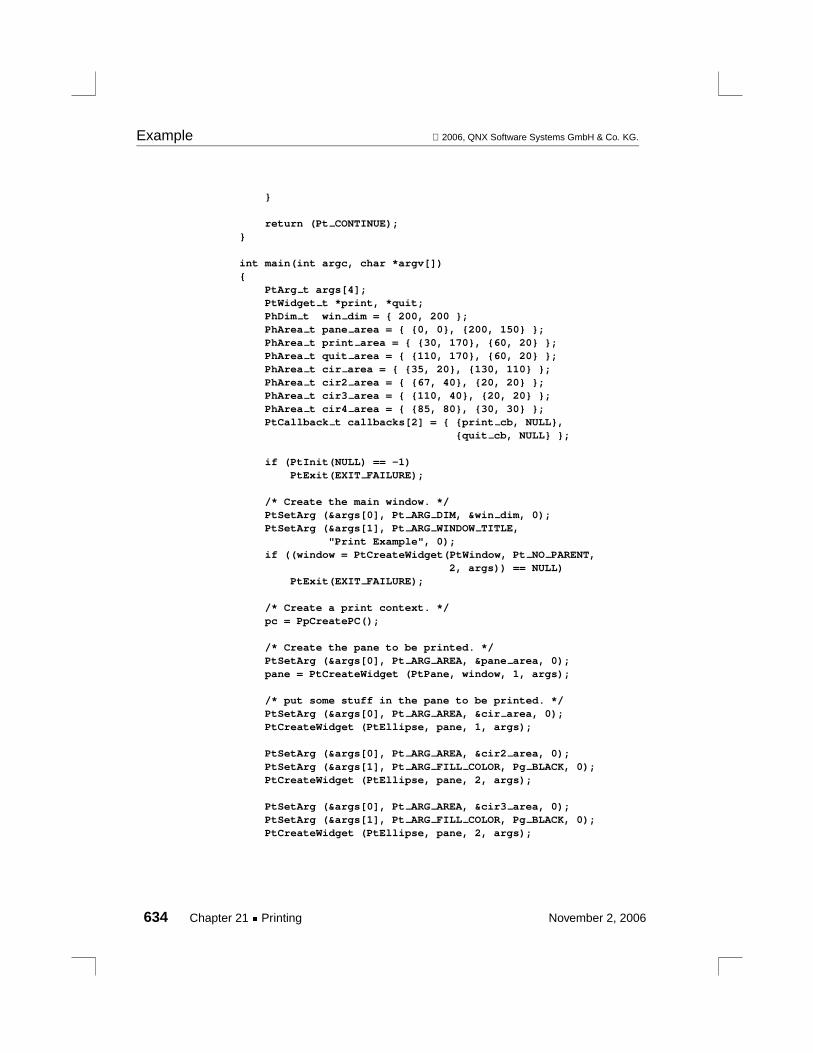
Example 2006, QNX Software Systems GmbH & Co. KG.
}
return (Pt CONTINUE);}
int main(int argc, char *argv[]){
PtArg t args[4];PtWidget t *print, *quit;PhDim t win dim = { 200, 200 };PhArea t pane area = { {0, 0}, {200, 150} };PhArea t print area = { {30, 170}, {60, 20} };PhArea t quit area = { {110, 170}, {60, 20} };PhArea t cir area = { {35, 20}, {130, 110} };PhArea t cir2 area = { {67, 40}, {20, 20} };PhArea t cir3 area = { {110, 40}, {20, 20} };PhArea t cir4 area = { {85, 80}, {30, 30} };PtCallback t callbacks[2] = { {print cb, NULL},
{quit cb, NULL} };
if (PtInit(NULL) == -1)PtExit(EXIT FAILURE);
/* Create the main window. */PtSetArg (&args[0], Pt ARG DIM, &win dim, 0);PtSetArg (&args[1], Pt ARG WINDOW TITLE,
"Print Example", 0);if ((window = PtCreateWidget(PtWindow, Pt NO PARENT,
2, args)) == NULL)PtExit(EXIT FAILURE);
/* Create a print context. */pc = PpCreatePC();
/* Create the pane to be printed. */PtSetArg (&args[0], Pt ARG AREA, &pane area, 0);pane = PtCreateWidget (PtPane, window, 1, args);
/* put some stuff in the pane to be printed. */PtSetArg (&args[0], Pt ARG AREA, &cir area, 0);PtCreateWidget (PtEllipse, pane, 1, args);
PtSetArg (&args[0], Pt ARG AREA, &cir2 area, 0);PtSetArg (&args[1], Pt ARG FILL COLOR, Pg BLACK, 0);PtCreateWidget (PtEllipse, pane, 2, args);
PtSetArg (&args[0], Pt ARG AREA, &cir3 area, 0);PtSetArg (&args[1], Pt ARG FILL COLOR, Pg BLACK, 0);PtCreateWidget (PtEllipse, pane, 2, args);
634 Chapter 21 � Printing November 2, 2006
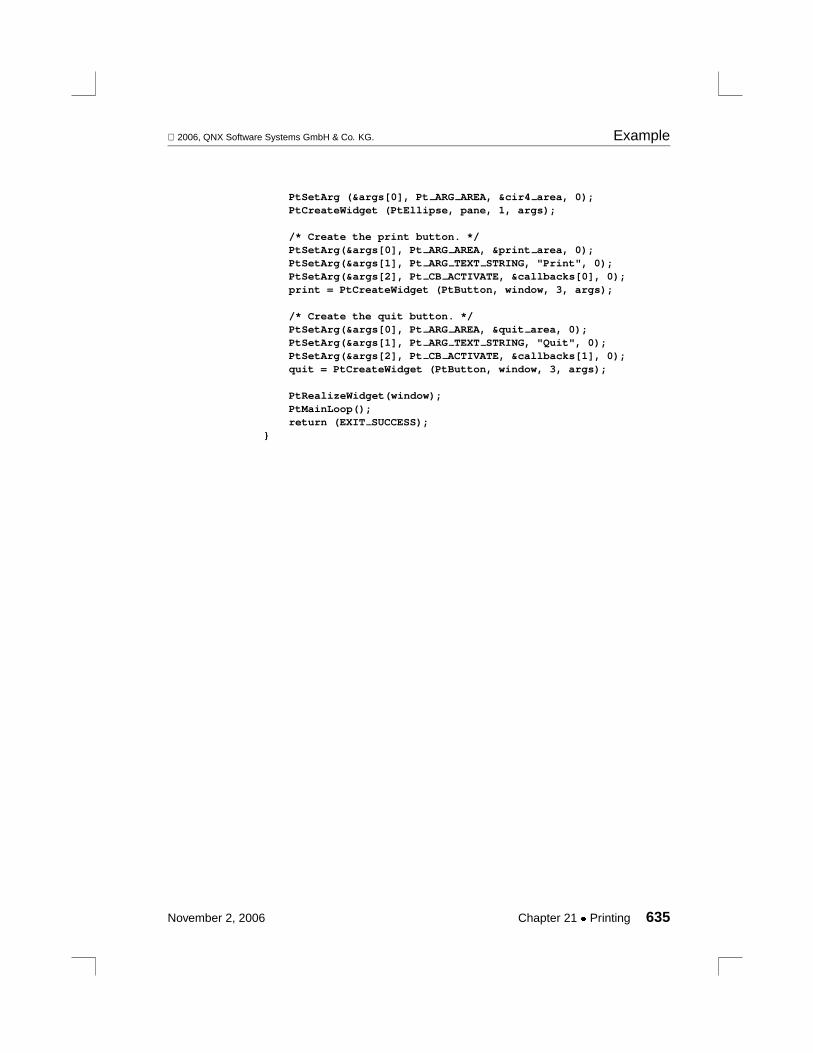
2006, QNX Software Systems GmbH & Co. KG. Example
PtSetArg (&args[0], Pt ARG AREA, &cir4 area, 0);PtCreateWidget (PtEllipse, pane, 1, args);
/* Create the print button. */PtSetArg(&args[0], Pt ARG AREA, &print area, 0);PtSetArg(&args[1], Pt ARG TEXT STRING, "Print", 0);PtSetArg(&args[2], Pt CB ACTIVATE, &callbacks[0], 0);print = PtCreateWidget (PtButton, window, 3, args);
/* Create the quit button. */PtSetArg(&args[0], Pt ARG AREA, &quit area, 0);PtSetArg(&args[1], Pt ARG TEXT STRING, "Quit", 0);PtSetArg(&args[2], Pt CB ACTIVATE, &callbacks[1], 0);quit = PtCreateWidget (PtButton, window, 3, args);
PtRealizeWidget(window);PtMainLoop();return (EXIT SUCCESS);
}
November 2, 2006 Chapter 21 � Printing 635

Chapter 22
Drag and Drop
In this chapter. . .Transport mechanism 639Using drag and drop 640Registering new transport types650
November 2, 2006 Chapter 22 � Drag and Drop 637

2006, QNX Software Systems GmbH & Co. KG. Transport mechanism
Drag and drop lets you drag arbitrary data within an application orbetween applications.
If you simply need to drag graphical objects around, see “Dragging”in the Events chapter.
☞
Transport mechanismPhoton’s transport mechanism lets you transfer arbitrary data fromone application to another, even if the applications are on differentplatforms with different endian-ness. This mechanism is used as thebasis for drag and drop, but could be used for other purposes such asconfiguration files.
There are two ways to transport data:
Inline The data is packed into a stream and sent to thedestination.
By request Descriptions of the data are packed into a stream andsent. The destination decides which type(s) of data itwants and sends the request back to the source, whichthen packs only the data required.
In order to transport data, the transport mechanism must pack data atthe source application or widget and unpack it at the destination. Ithas to have a means of recognizing the type of data to determine whatpacking and unpacking must be done. This is accomplished via thetransport registry.
There are a number of system-registered types that exist afterPtInit()or PtAppInit() initializes the Photon library — this is doneautomatically for PhAB applications. The system-registered types are:
� string
� raw
� PhDim
November 2, 2006 Chapter 22 � Drag and Drop 639

Using drag and drop 2006, QNX Software Systems GmbH & Co. KG.
� PhArea
� PhPoint
� PhImage
You can add other data types to the registry, as described in“Registering new transport types,” later in this chapter.
The transport mechanism works by building a linked list of data to betransported, packing up the data into a stream, with each blockpreceded by a header that describes the data.
Headers
Data
Header forentire blockof packed data
Packed data and headers.
When the data arrives at the destination, the headers are extracted toget the unpacking instructions for the data. The transport mechanismautomatically unpacks the data; the application gets the data in itsoriginal form.
Using drag and dropYou can use drag and drop to move data from one widget to another,using Photon’s transport mechanism. You can transport several typesof data at once, giving the destination the choice of which ones toreceive. All of the communication between the source and destinationis nonblocking.
640 Chapter 22 � Drag and Drop November 2, 2006

2006, QNX Software Systems GmbH & Co. KG. Using drag and drop
The basic steps (described in more detail in the sections that follow)are:
1 The user holds down the pointer button on the widget that’s tobe the source of the drag-and-drop operation.
2 In its Pt CB OUTBOUNDcallback, the source widget packs upthe data to be dragged, and starts a drag-and-drop operation.
3 The user drags the data and decides to drop it on a widget.
4 In its Pt CB DND callback, the destination widget decideswhich pieces of dragged data (if any) it will accept. Any datathat’s accepted is unpacked automatically. The data is stored inallocated memory; the destination should free the memorywhen it doesn’t need the data any more.
The source widget can also cancel the operation if it wishes.
Starting drag and dropTo start a drag-and-drop operation, the source widget must pack upthe data to be dragged, and then initiate drag-and-drop. This istypically done in one of the widget’sPt CB OUTBOUNDcallbacks.
Pt CB OUTBOUNDcallbacks are invoked only if the widget hasPt SELECTABLEset in itsPt ARG FLAGS.
☞
The steps to follow are:
1 If the data isn’t of one of the system-defined types of transportdata, create a transport registry entry for it. For moreinformation, see “Registering new transport types,” below.
2 Create a transport control structure (of typePtTransportCtrl t) for use with drag and drop, by callingPtCreateTransportCtrl(). The transport control structure isfreed automatically when the drag-and-drop operation is done.
3 The data to be dragged can be packedinline (i.e. includeddirectly in the structure passed to the destination) or it can be
November 2, 2006 Chapter 22 � Drag and Drop 641

Using drag and drop 2006, QNX Software Systems GmbH & Co. KG.
requestable(i.e. the data isn’t packed up until the destinationasks for it).
� For each piece of data to be packed inline, callPtTransportType().
� For each piece of requestable data, callPtTransportRequestable().
ThePtTransportCtrl t structure has a list ofresponsedata, which is automatically sent if the destination requestsit. The source widget can add data to this queue by callingPtAddResponseType().
If the source widget doesn’t want to pack the requestabledata at this point, it must provide a callback when callingPtTransportRequestable().
4 When all the data is packed, callPtInitDnd() to initiate thedrag-and-drop operation.
Example
Here’s an example of a callback that initiates a drag-and-dropoperation for aPtLabel widget. You can use this callback for thelabel widget’sPt CB OUTBOUNDcallback.
Be sure to setPt SELECTABLEin the label’sPt ARGFLAGS.☞
This callback sets up a drag-and-drop operation involving these piecesof data:
� The label’s text, if any, packed as inline data.
� The label’s image, if any, packed as requestable data. The imageisn’t transported until the destination asks for it, but the callbackprepares the data in advance so we don’t need a request callback.
� Alternate text to use if there’s no image. This string is alsorequestable data, but we provide a request callback to pack it up ifthe destination requests it.
642 Chapter 22 � Drag and Drop November 2, 2006
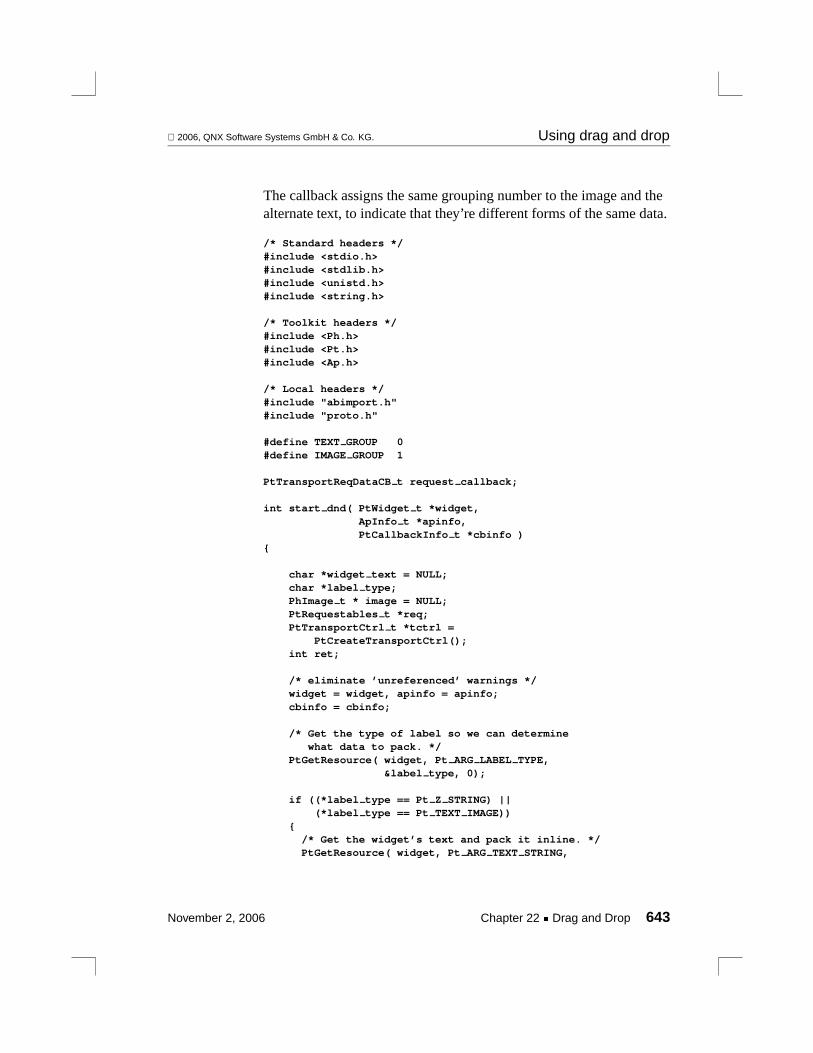
2006, QNX Software Systems GmbH & Co. KG. Using drag and drop
The callback assigns the same grouping number to the image and thealternate text, to indicate that they’re different forms of the same data.
/* Standard headers */#include <stdio.h>#include <stdlib.h>#include <unistd.h>#include <string.h>
/* Toolkit headers */#include <Ph.h>#include <Pt.h>#include <Ap.h>
/* Local headers */#include "abimport.h"#include "proto.h"
#define TEXT GROUP 0#define IMAGE GROUP 1
PtTransportReqDataCB t request callback;
int start dnd( PtWidget t *widget,ApInfo t *apinfo,PtCallbackInfo t *cbinfo )
{
char *widget text = NULL;char *label type;PhImage t * image = NULL;PtRequestables t *req;PtTransportCtrl t *tctrl =
PtCreateTransportCtrl();int ret;
/* eliminate ’unreferenced’ warnings */widget = widget, apinfo = apinfo;cbinfo = cbinfo;
/* Get the type of label so we can determinewhat data to pack. */
PtGetResource( widget, Pt ARG LABEL TYPE,&label type, 0);
if ((*label type == Pt Z STRING) ||(*label type == Pt TEXT IMAGE))
{/* Get the widget’s text and pack it inline. */PtGetResource( widget, Pt ARG TEXT STRING,
November 2, 2006 Chapter 22 � Drag and Drop 643

Using drag and drop 2006, QNX Software Systems GmbH & Co. KG.
&widget text, 0);PtTransportType( tctrl, "text", "plain",
TEXT GROUP, Ph TRANSPORT INLINE, "string",widget text, 0, 0);
}
/* If there’s an image, add it as requestabledata. Prepare the response data (to allow anautomatic response). */
if ((*label type == Pt IMAGE) ||(*label type == Pt TEXT IMAGE))
{PtGetResource( widget, Pt ARG LABEL IMAGE,
&image, 0);if (image){
req = PtTransportRequestable ( tctrl,"image", "an image", IMAGE GROUP,Ph TRANSPORT INLINE, "PhImage",NULL, NULL );
PtAddResponseType( tctrl, req, "image","an image", Ph TRANSPORT INLINE,"PhImage", image, 0, 0);
}}
/* Add a requestable string that will beprovided by a callback. */
PtTransportRequestable( tctrl, "text","image description", IMAGE GROUP,Ph TRANSPORT INLINE, "string",(PtTransportReqDataCB t *) &request callback,"This was requested");
/* Initiate the drag and drop. */
ret = PtInitDnd( tctrl, widget, cbinfo->event,NULL, 0);
return( Pt CONTINUE );}
int unsigned request callback( int unsigned type,PtReqResponseHdr t *req hdr,PtRequestables t *req)
{if (type == Pt DND REQUEST DATA){
/* Respond to the request with the string in
644 Chapter 22 � Drag and Drop November 2, 2006

2006, QNX Software Systems GmbH & Co. KG. Using drag and drop
req->rq callback data, the last argumentto PtTransportRequestable(). */
PtAddResponseType( req->ctrl, req, "text","request", Ph TRANSPORT INLINE, "string",req->rq callback data, 0, 0);
return Pt CONTINUE;}
/* Deny the request. */return Pt END;
}
Receiving drag-and-drop eventsTo make a widget able to receive drag-and-drop events, attach aPt CB DND callback to the widget (seePtWidget in the PhotonWidget Reference).
A widget doesn’t have to havePt SELECTABLEset in itsPt ARG FLAGSfor its Pt CB DND callbacks to be invoked.
☞
Whenever the widget is involved in a drag-and-drop event in somefashion, itsPt CB DND callback is invoked. In the callback, thecbinfo->reasonsubtypeindicates the type of drag-and-drop actionthat’s occurring.
The sections below describe the drag-and-drop events that are ofinterest to the source and destination widgets. Of course, if a widgetcan be the source and destination of (separate) drag-and-dropoperations, itsPt CB DND callbacks need to have both sets of events.
For more information about events, seePhEvent t in the PhotonLibrary Reference.
Source widget
The source widget of a drag-and-drop operation can receive eventsthat describe the status of the operation. If you don’t want theseevents, setPt DND SILENT in theflagsargument toPtInitDnd().
November 2, 2006 Chapter 22 � Drag and Drop 645

Using drag and drop 2006, QNX Software Systems GmbH & Co. KG.
Don’t setPt DND SILENT if you’ve included requestable data in thecontrol structure.
☞
The subtypes of a drag-and-drop event that are of interest to thesource of the operation are:
Ph EV DND INIT
The operation has started successfully.
Ph EV DND CANCEL
The operation was canceled (for example, if the drop occurredwhen not over a drop zone, or the destination terminated theoperation before receiving the drop or before it finished fetchingrequestable data).
If the operation is canceled in this way, the library cleans up thedata structures automatically.
Ph EV DND COMPLETE
The drag-and-drop event is enqueued at the destination (thedestination hasn’t seen it yet).
Ph EV DND DELIVERED
The destination has dequeued the drag-and-drop event.
Destination widget
The subtypes of a drag-and-drop event that are of interest to thedestination of the operation are:
Ph EV DND ENTER
Someone has dragged some data into the widget’s region buthasn’t yet released it. This is thereasonsubtypethe first timethat the drag-and-drop callback is called.
At this time, your application decides if it will accept the data tobe dropped. It must build an array ofPtDndFetch t structures
646 Chapter 22 � Drag and Drop November 2, 2006

2006, QNX Software Systems GmbH & Co. KG. Using drag and drop
and pass it toPtDndSelect(). This array describes theacceptable types, descriptions, and transport methods fordrag-and-drop data to be accepted by a widget.PtDndSelect()returned the number of selected items from the array. If theevent contains data, or references to data, in an acceptableformat, those pieces of the event are selected.
If none of the data is acceptable, this widget isn’t notified of anyother events for the current drag-and-drop operation.
Ph EV DND MOTION
The pointer is moving inside the widget’s region. This type ofevent is emitted only if thePt DND SELECTMOTION bit is setin theselectflagsmember of thePtDndFetch t structure fora piece of selected data.
Ph EV DND DROP
The user has dropped the data.
For thisreasonsubtype, the callback should retrieve theselected data from the event. This might involve someautomatic, nonblocking communication with the source of thedata — to prevent any communication with the source, specifyPh TRANSPORTINLINE as the only acceptable transportprotocol.
If the drop is successful, the memory used by the transportmechanism is automatically freed.
Ph EV DND LEAVE
The pointer has moved out of the widget’s region, but the userdidn’t drop the data.
Here’s an example that works with the callback given above for aPtLabel widget. This callback accepts the following from thedrag-and-drop data:
� text
� an image
November 2, 2006 Chapter 22 � Drag and Drop 647
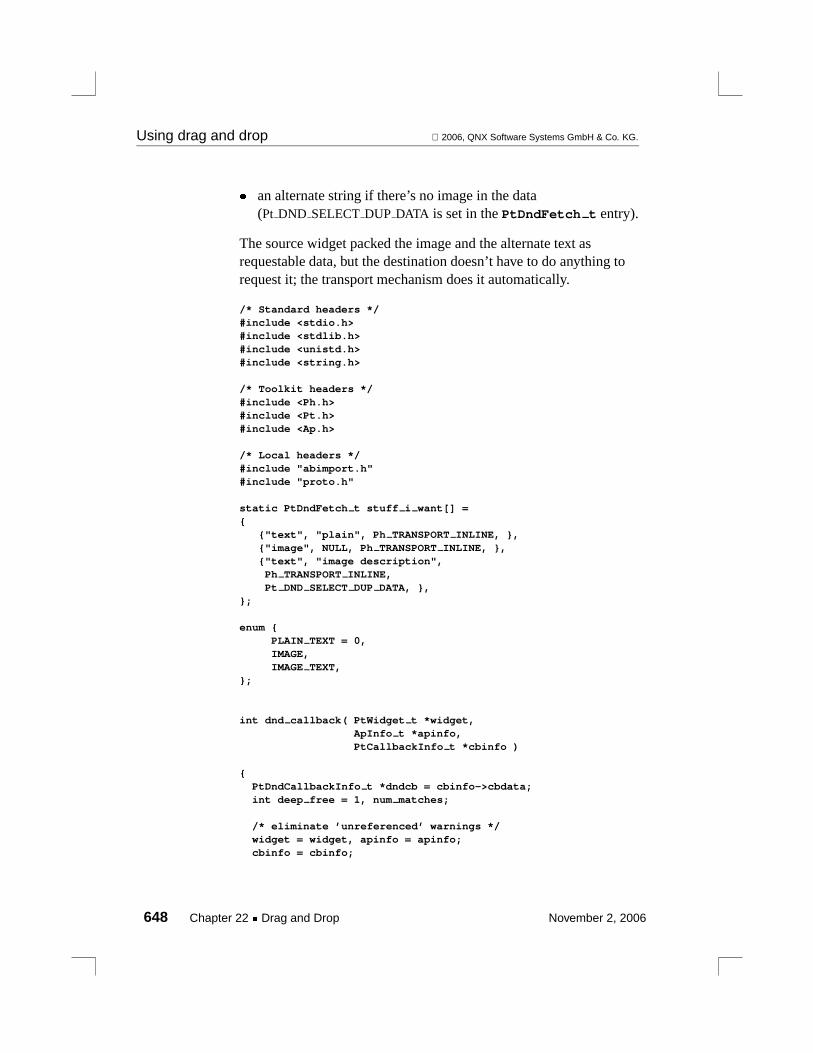
Using drag and drop 2006, QNX Software Systems GmbH & Co. KG.
� an alternate string if there’s no image in the data(Pt DND SELECT DUP DATA is set in thePtDndFetch t entry).
The source widget packed the image and the alternate text asrequestable data, but the destination doesn’t have to do anything torequest it; the transport mechanism does it automatically.
/* Standard headers */#include <stdio.h>#include <stdlib.h>#include <unistd.h>#include <string.h>
/* Toolkit headers */#include <Ph.h>#include <Pt.h>#include <Ap.h>
/* Local headers */#include "abimport.h"#include "proto.h"
static PtDndFetch t stuff i want[] ={
{"text", "plain", Ph TRANSPORT INLINE, },{"image", NULL, Ph TRANSPORT INLINE, },{"text", "image description",Ph TRANSPORT INLINE,Pt DND SELECT DUP DATA, },
};
enum {PLAIN TEXT = 0,IMAGE,IMAGE TEXT,
};
int dnd callback( PtWidget t *widget,ApInfo t *apinfo,PtCallbackInfo t *cbinfo )
{PtDndCallbackInfo t *dndcb = cbinfo->cbdata;int deep free = 1, num matches;
/* eliminate ’unreferenced’ warnings */widget = widget, apinfo = apinfo;cbinfo = cbinfo;
648 Chapter 22 � Drag and Drop November 2, 2006

2006, QNX Software Systems GmbH & Co. KG. Using drag and drop
switch (cbinfo->reason subtype){
case Ph EV DND ENTER:num matches = PtDndSelect (widget,
stuff i want,sizeof( stuff i want ) / sizeof( stuff i want[0] ),NULL, NULL, cbinfo );
break;
case Ph EV DND DROP:switch (dndcb->fetch index){
case PLAIN TEXT:PtSetResource (widget, Pt ARG TEXT STRING,dndcb->data, strlen(dndcb->data));
break;
case IMAGE:PtSetResource (widget, Pt ARG LABEL IMAGE,dndcb->data, 0);free (dndcb->data);
deep free = 0;break;
case IMAGE TEXT:printf (
"No image; the alternate text is: %s\n",(char *)dndcb->data);
break;}
if (deep free) {PhFreeTransportType (dndcb->data,
dndcb->trans hdr->packing type);}break;
}
return( Pt CONTINUE );}
November 2, 2006 Chapter 22 � Drag and Drop 649

Registering new transport types 2006, QNX Software Systems GmbH & Co. KG.
Canceling drag and dropThe source widget can cancel the drag-and-drop operation by callingPtCancelDnd().
The widget must then clean up the transport-control structures and thepacked data by callingPtReleaseTransportCtrl(). (If the drop issuccessfully done, the control structures are cleaned up automatically.The destination decides when to free the dropped data.)
Registering new transport typesTo transport data other than the types automatically defined byPhoton, you must define the type and register it with thetransportregistry, a collection of type descriptions, each of which includes:
� a type name in the form of a string, e.g.PhImage
� the packing method to be used (one ofPh PACK RAW,Ph PACK STRING, or Ph PACK STRUCT)
� a list of members within the type that reference data outside thebase size of the type in question (reference or pointer-typemembers)
� a list of members that are endian-sensitive (these members areendian corrected if ever unpacked on a machine whose endian-nessdiffers from that on the machine where the data was packed)
� a list of members that should be cleared when the type is unpacked(for example, a pointer to data — such as a password — that youdon’t want to be transported).
The source and destination applications must both define the data typein their transport registries before the data can be successfullytransported.
☞
650 Chapter 22 � Drag and Drop November 2, 2006

2006, QNX Software Systems GmbH & Co. KG. Registering new transport types
A simple data structureLet’s consider a simple data structure:
typedef struct simp1 {int num;int nums 10[10];char name[10];short vals 5[5];
} Simp1 t;
This structure could easily be packed using theraw type because itdoesn’t make any external references (i.e. it has no pointer members).But that doesn’t protect the transported data from endian differencesbetween the source and destination. So even for this simple structure,a type description detailing its endian sensitivity is beneficial.
The type definition starts with an array ofint unsigned entries thatdescribed the endian-sensitivity for each member:
static const int unsigned Simp1Endians[] = {Tr ENDIAN( Simp1 t, num ),Tr ENDIAN ARRAY( Simp1 t, nums 10 ),Tr ENDIAN ARRAY( Simp1 t, vals 5 ),0 /* End of the endian list */
};
Note that this list must end with an entry of 0. Thenamemember isn’tendian-sensitive, so it isn’t included in the list.
All types or references to types correct the endian-ness of theirmembers based on the endian array defined for the type. Theclassifications of endian-sensitive members are:
Tr ENDIAN( typedefname, member)
int, long, short, (signed or unsigned). For example,unsigned int my scalar.
Tr ENDIAN ARRAY( typedefname, member)
Array of short or int entries. For example,shortshort nums[10].
November 2, 2006 Chapter 22 � Drag and Drop 651

Registering new transport types 2006, QNX Software Systems GmbH & Co. KG.
Tr ENDIAN REF( typedefname, member, num)
A reference to endian scalars. For example,int *nums.
Having defined the endian list for our simple data type, let’s create thedefinition to go into the transport registry:
static const PhTransportRegEntry t Simp1TransDef = {"simp1",Ph PACK STRUCT,sizeof( Simp1 t ),0,NULL,&Simp1Endians,NULL
};
ThePhTransportRegEntry t structure includes the followingmembers:
char *type The name of the type being registered.
int unsigned packing
The packing method to be used (one ofPh PACK RAW, Ph PACK STRING, orPh PACK STRUCT).
int unsigned size
The size, in bytes, of the data type.
int unsigned num fixups
The number of entries in thefixupsarrays.
PhTransportFixupRec t const *fixups
A list of instructions for dealing with references todata outside the type being defined. We’ll discussthis later.
int unsigned const *endians
The zero-terminated array of endian informationdescribed above.
652 Chapter 22 � Drag and Drop November 2, 2006
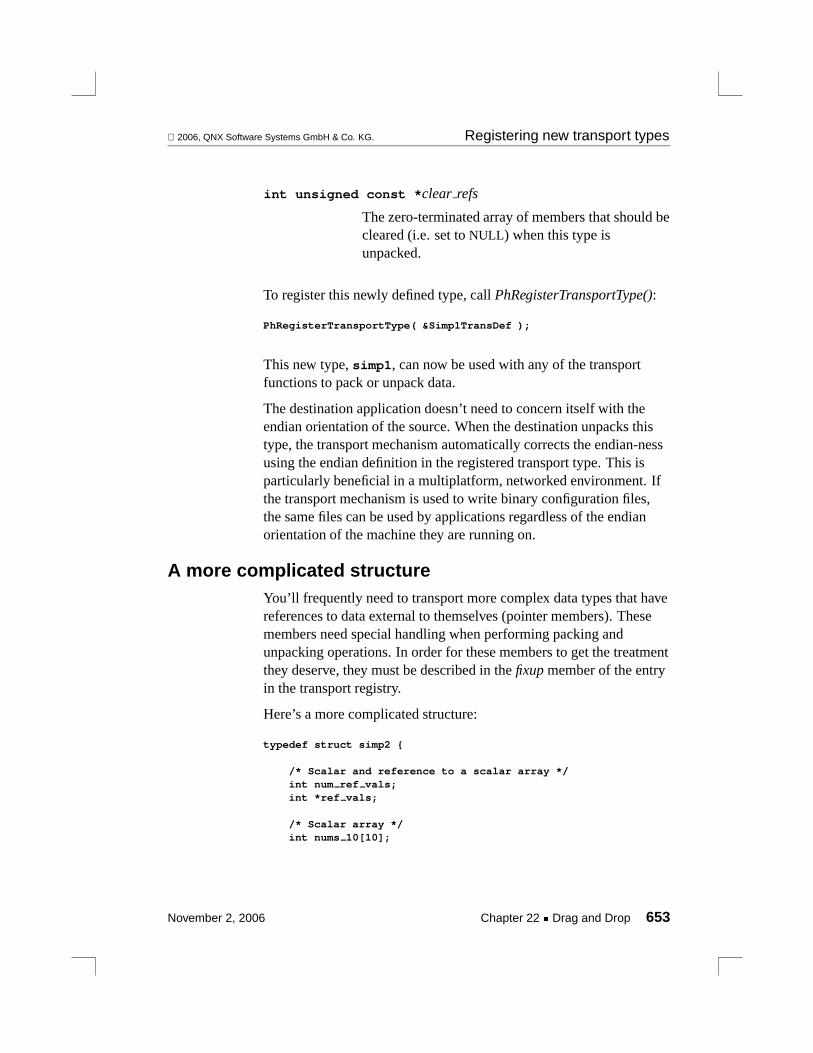
2006, QNX Software Systems GmbH & Co. KG. Registering new transport types
int unsigned const *clear refs
The zero-terminated array of members that should becleared (i.e. set toNULL) when this type isunpacked.
To register this newly defined type, callPhRegisterTransportType():
PhRegisterTransportType( &Simp1TransDef );
This new type,simp1, can now be used with any of the transportfunctions to pack or unpack data.
The destination application doesn’t need to concern itself with theendian orientation of the source. When the destination unpacks thistype, the transport mechanism automatically corrects the endian-nessusing the endian definition in the registered transport type. This isparticularly beneficial in a multiplatform, networked environment. Ifthe transport mechanism is used to write binary configuration files,the same files can be used by applications regardless of the endianorientation of the machine they are running on.
A more complicated structureYou’ll frequently need to transport more complex data types that havereferences to data external to themselves (pointer members). Thesemembers need special handling when performing packing andunpacking operations. In order for these members to get the treatmentthey deserve, they must be described in thefixupmember of the entryin the transport registry.
Here’s a more complicated structure:
typedef struct simp2 {
/* Scalar and reference to a scalar array */int num ref vals;int *ref vals;
/* Scalar array */int nums 10[10];
November 2, 2006 Chapter 22 � Drag and Drop 653

Registering new transport types 2006, QNX Software Systems GmbH & Co. KG.
/* Scalar array (not endian sensitive) */char first name[10];
/* Reference to a string */char *last name2;
/* Scalar array */short vals 5[5];
/* Registered type member */Simp1 t simp1 instance;
/* Registered type member array */Simp1 t simp1 array[4];
/* Reference to a registered type */Simp1 t *simp1 reference;
/* Scalar and reference to a registeredtype array */
int num simps;Simp1 t *ref simp1 array;
/* Scalar and reference to a registeredtype reference array */
int num simp refs;Simp1 t **ref simp1 ref array;
/* Two scalars and a reference to arbitrarilysized data */
short bm height;int bm bpl;char *bitmap;
/* Something we don’t want packed, but wantcleared when unpacking */
char *dont pack this;
} Simp2 t;
Clear-references list
Here’s theclear refs list for this structure:
static const int unsigned Simp2ClearRefs[] = {offsetof( Simp2 t, dont pack this ),0 /* End of the clear-refs list */};
654 Chapter 22 � Drag and Drop November 2, 2006

2006, QNX Software Systems GmbH & Co. KG. Registering new transport types
Endian list
Here’s the endian list for this structure:
static const int unsigned Simp2Endians[] = {Tr ENDIAN( Simp2 t, num ref vals ),Tr ENDIAN REF( Simp2 t, ref vals ),Tr ENDIAN ARRAY( Simp2 t, nums 10 ),Tr ENDIAN ARRAY( Simp2 t, vals 5 ),0 /* End of the endian list */};
Here’s the full list of endian manifests for each type of member:
Scalar (char) None
Scalar (short) Tr ENDIAN( type, member)
Scalar (int) Tr ENDIAN( type, member)
Scalar Array (char)
NoneScalar Array (short)
Tr ENDIAN ARRAY( type, member)
Scalar Array (int)
Tr ENDIAN ARRAY( type, member)
Reference (char)
NoneReference (short)
Tr ENDIAN REF( type, member)
Reference (int) Tr ENDIAN REF( type, member)
November 2, 2006 Chapter 22 � Drag and Drop 655

Registering new transport types 2006, QNX Software Systems GmbH & Co. KG.
Reference (char array)
NoneReference (short array)
Tr ENDIAN REF( type, member)
Reference (int array)
Tr ENDIAN REF( type, member)
Simple structure List each endian-sensitive member of the memberstructure
Registered type None
Reference to registered type
None
For example, for aSample t structure:
int i; Tr ENDIAN( Sample t, i )
int array[7]; Tr ENDIAN ARRAY( Sample t, array )
short *short nums;
Tr ENDIAN REF( Sample t, short nums )
int *long nums;
Tr ENDIAN REF( Sample t, long nums )
struct my simp ms;
Tr ENDIAN( Sample t, ms.width ),Tr ENDIAN( Sample t, ms.height )
656 Chapter 22 � Drag and Drop November 2, 2006
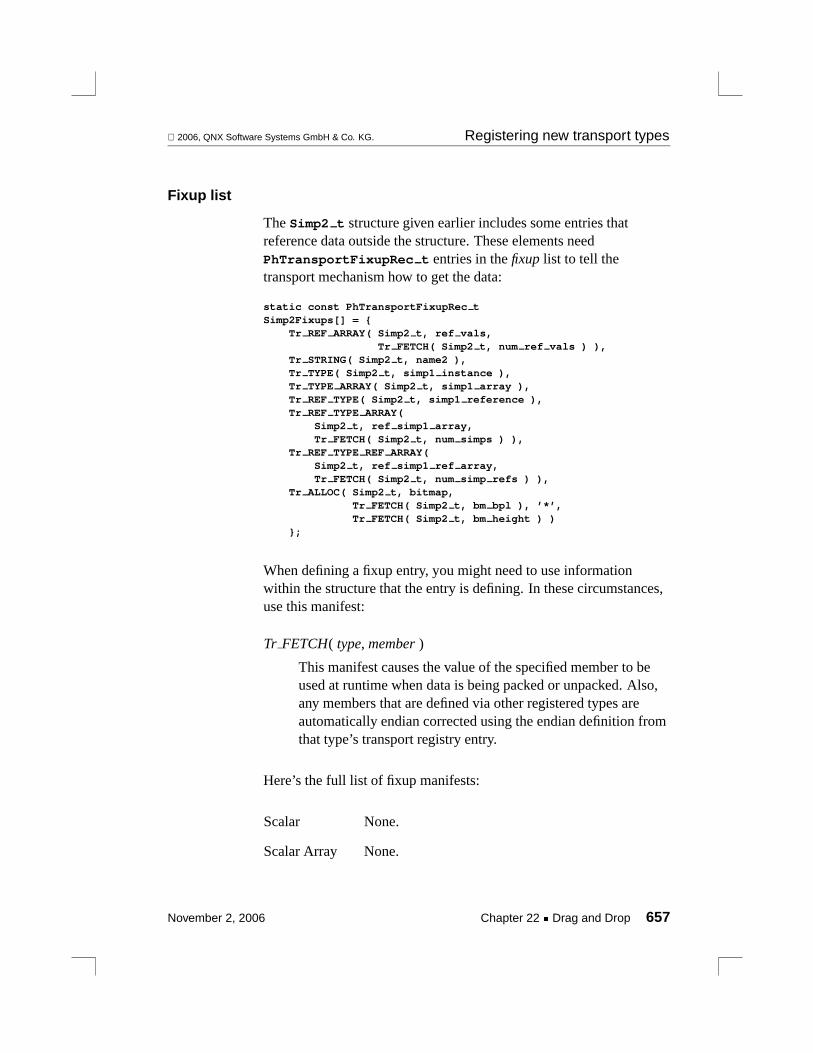
2006, QNX Software Systems GmbH & Co. KG. Registering new transport types
Fixup list
TheSimp2 t structure given earlier includes some entries thatreference data outside the structure. These elements needPhTransportFixupRec t entries in thefixup list to tell thetransport mechanism how to get the data:
static const PhTransportFixupRec tSimp2Fixups[] = {
Tr REF ARRAY( Simp2 t, ref vals,Tr FETCH( Simp2 t, num ref vals ) ),
Tr STRING( Simp2 t, name2 ),Tr TYPE( Simp2 t, simp1 instance ),Tr TYPE ARRAY( Simp2 t, simp1 array ),Tr REF TYPE( Simp2 t, simp1 reference ),Tr REF TYPE ARRAY(
Simp2 t, ref simp1 array,Tr FETCH( Simp2 t, num simps ) ),
Tr REF TYPE REF ARRAY(Simp2 t, ref simp1 ref array,Tr FETCH( Simp2 t, num simp refs ) ),
Tr ALLOC( Simp2 t, bitmap,Tr FETCH( Simp2 t, bm bpl ), ’*’,Tr FETCH( Simp2 t, bm height ) )
};
When defining a fixup entry, you might need to use informationwithin the structure that the entry is defining. In these circumstances,use this manifest:
Tr FETCH( type, member)
This manifest causes the value of the specified member to beused at runtime when data is being packed or unpacked. Also,any members that are defined via other registered types areautomatically endian corrected using the endian definition fromthat type’s transport registry entry.
Here’s the full list of fixup manifests:
Scalar None.
Scalar Array None.
November 2, 2006 Chapter 22 � Drag and Drop 657

Registering new transport types 2006, QNX Software Systems GmbH & Co. KG.
Reference (string)
Tr STRING( type, member)
Reference (scalar array)
Tr REF ARRAY( type, member, number of elements)
Registered type
Tr TYPE( type, member, type name )
Registered type array
Tr TYPE ARRAY( type, member, type name )
Reference (registered type)
Tr REF TYPE( type, member, type name )
Reference (registered type array)
Tr REF TYPE ARRAY( type, member, num elements, \type name )
Reference( registered type reference array )
Tr REF TYPE REF ARRAY( type, member, \num elements, type name )
Here are some sample members and their fixup manifests:
char *name; Tr STRING( Sample t, name )
int num nums;int *int array; Tr REF ARRAY( Sample t, int array, \
Tr FETCH( Sample t, num nums) )
or if the number is known:
Tr REF ARRAY( Sample t, int array, 7 )
658 Chapter 22 � Drag and Drop November 2, 2006

2006, QNX Software Systems GmbH & Co. KG. Registering new transport types
Simp1 t simpleinstance
Tr TYPE( Sample t, simple instance, "simp1" )
or, as a single instance if it’s just an array of one:
Tr TYPE ARRAY( Sample t, simple instance, \"simp1" )
Simp1 t simplearray[5]
Tr TYPE ARRAY( Sample t, simple array, "simp1" )
Simp1 t *simp1ref
Tr REF TYPE( Sample t, simp1 ref, "simp1" )
short num simp1s;Simp1 t *simp1ref
Tr REF TYPE ARRAY( Sample t, simp1 ref, \Tr FETCH( Sample t, num simp1s ), "simp1" )
short num simp1s;Simp1 t **simp1ref ;
Tr REF TYPE REF ARRAY( Sample t, simp1 ref, \Tr FETCH( Sample t, num simp1s ), "simp1" )
Registry entry
Finally, here’s the registry entry forSimp2 t:
static const PhTransportRegEntry tSimp2TransDef = {
"simp2",Ph PACK STRUCT,sizeof( Simp2 t ),sizeof(Simp2Fixups)/sizeof(Simp2Fixups[0]),&Simp2Fixups,
November 2, 2006 Chapter 22 � Drag and Drop 659

Registering new transport types 2006, QNX Software Systems GmbH & Co. KG.
&Simp2Endians,&Simp2ClearRefs};
Transport functionsThis section describes the low-level functions and data types that dealwith the transport mechanism. Some functions are called by theapplication that’s the source of the data, some are called by thedestination, and some are called by both.
Both applications
Both applications use these:
PhTransportRegEntry t
Data structure that describes data to be transported
PhRegisterTransportType()
Add a new transport type to the transport registry
PhFindTransportType()
Find a transport type in the transport registry
Source application
The source application uses these, in roughly this order:
PhTransportCtrl t
Control structure for the Photon transport mechanism
PhCreateTransportCtrl()
Allocate aPhCreateTransportCtrl()structure
PhTransportType()
Pack data into aPhTransportCtrl t structure
660 Chapter 22 � Drag and Drop November 2, 2006
2006, QNX Software Systems GmbH & Co. KG. Registering new transport types
PhTransportFindLink()
Search a linked list of transport data for some specific data
PhTransportLink t
Entry in a linked list of transport data
PhLinkTransportData()
Add transport data to a linked list
PhGetNextInlineData()
Get the data for the next entry in a linked list of transport data
PhGetTransportVectors()
Build an I/O vector of data to be transported
PhFreeTransportType()
Free data associated with a transport registry entry
PhReleaseTransportCtrl()
Free aPhTransportCtrl t structure
These are low-level functions that you’ll probably never need to calldirectly:
PhAllocPackType()
Allocate a buffer and pack transport data into it
PhPackEntry() Pack transport data, given a transport registryentry
PhPackType() Pack transport data, given the type of data
Destination application
The destination application uses these, in roughly this order:
PhGetAllTransportHdrs()
Extract all the headers from a buffer of packedtransport data
November 2, 2006 Chapter 22 � Drag and Drop 661
Registering new transport types 2006, QNX Software Systems GmbH & Co. KG.
PhGetTransportHdr()
Extract the header from a buffer of packed transportdata
PhGetNextTransportHdr()
Get the next header from a buffer of packed transportdata
PhLocateTransHdr()
Look for specific data in a linked list of transportheaders
PhMallocUnpack()
Unpack transport data, using a custommemory-allocation function
PhUnpack() Unpack transport data
PhUnlinkTransportHdr()
Remove an entry from a linked list of transportheaders
PhReleaseTransportHdrs()
Free a linked list of headers for packed transport data
662 Chapter 22 � Drag and Drop November 2, 2006

Chapter 23
Regions
In this chapter. . .Photon coordinate space 665Region coordinates 666Regions and event clipping 669Placement and hierarchy 670Using regions 676System information 678
November 2, 2006 Chapter 23 � Regions 663


2006, QNX Software Systems GmbH & Co. KG. Photon coordinate space
In Photon, all applications consist of one or more rectangles calledregions, which reside in an abstract, three-dimensionalevent space.Regions are assigned an identification number of typePhRid t.
You can usephview to see what regions exist on your machine. Formore information, see theUtilities Reference.
☞
Photon coordinate spaceThe Photon coordinate space looks like this:
(-32K, -32K) (+32K, -32K)
(+32K, +32K)(-32K, +32K)
Upper-left
quadrant
Upper-right
quadrant
Lower-left
quadrant
Lower-right
quadrant
VGA
display
(640, 480)
(0, 0)
Photon coordinate space.
Unlike the typical Cartesian layout, the lower-right quadrant is the(+,+) quadrant.
☞
The root region has the same dimensions as the entire coordinatespace. As a rule, graphics drivers map the display screen to thelocation shown in the above diagram and place the Photon origin at
November 2, 2006 Chapter 23 � Regions 665
Region coordinates 2006, QNX Software Systems GmbH & Co. KG.
the upper-left corner of the display screen. (Graphics drivers equate asingle Photon coordinate to a single pixel value on your displayscreen).
Region coordinatesRegion origins
When an application specifies coordinates within a given region, theseare relative to the region’sorigin. The application specifies this originwhen it opens the region.
Initial dimensions and locationThe initial dimensions of a region (i.e.rect argument inPhRegionOpen()) are relative to its origin. These dimensions controlthe range of the coordinates that the application can use within theregion.
Let’s look at some examples to get an idea of the relationship betweena region’s origin and its initial rectangle coordinates. These examplesillustrate how opened regions are placed in relation to the root region,which has its origin in the center of the Photon coordinate space.
Origin at (0,0) and initial rectangle at (0,0)
By default, applications use the following approach for regions.(These kinds of regions are described in “Photon window manager” inthe Photon Architecture appendix.)
Coordinates: Origin = (0,0)
Upper left of initial rectangle = (0,0)
Lower right of initial rectangle = (100,100)
666 Chapter 23 � Regions November 2, 2006

2006, QNX Software Systems GmbH & Co. KG. Region coordinates
Root region
Parent's origin
Child's origin
(0, 0)
(100, 100)
Origin at (0,0) and initial rectangle not at (0,0)
The following example shows an approach typically used for regionsthat fill the entire coordinate space. For example, for the device regionand the workspace region, the upper left is (-32768,-32768) and thelower right is (32767,32767).
Coordinates: Origin = (0,0)
Upper left of initial rectangle = (-50,-50)
Lower right of initial rectangle = (50,50)
November 2, 2006 Chapter 23 � Regions 667
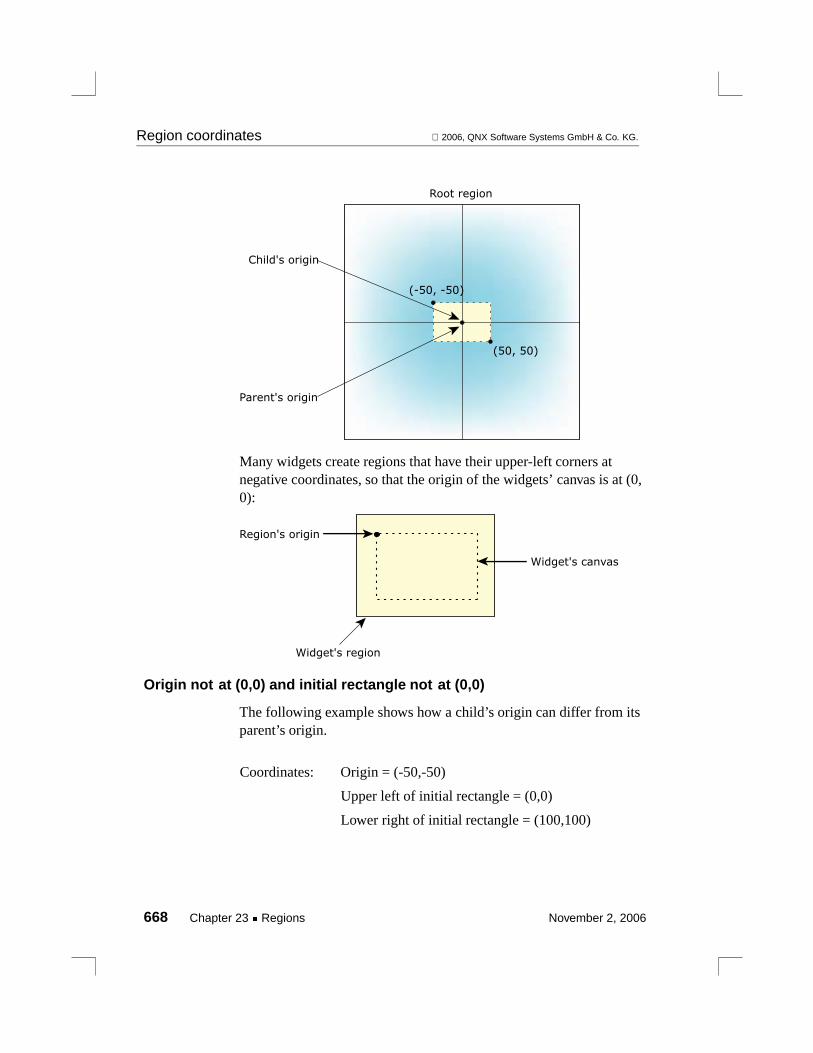
Region coordinates 2006, QNX Software Systems GmbH & Co. KG.
Root region
Parent's origin
Child's origin
(-50, -50)
(50, 50)
Many widgets create regions that have their upper-left corners atnegative coordinates, so that the origin of the widgets’ canvas is at (0,0):
Region's origin
Widget's region
Widget's canvas
Origin not at (0,0) and initial rectangle not at (0,0)
The following example shows how a child’s origin can differ from itsparent’s origin.
Coordinates: Origin = (-50,-50)
Upper left of initial rectangle = (0,0)
Lower right of initial rectangle = (100,100)
668 Chapter 23 � Regions November 2, 2006
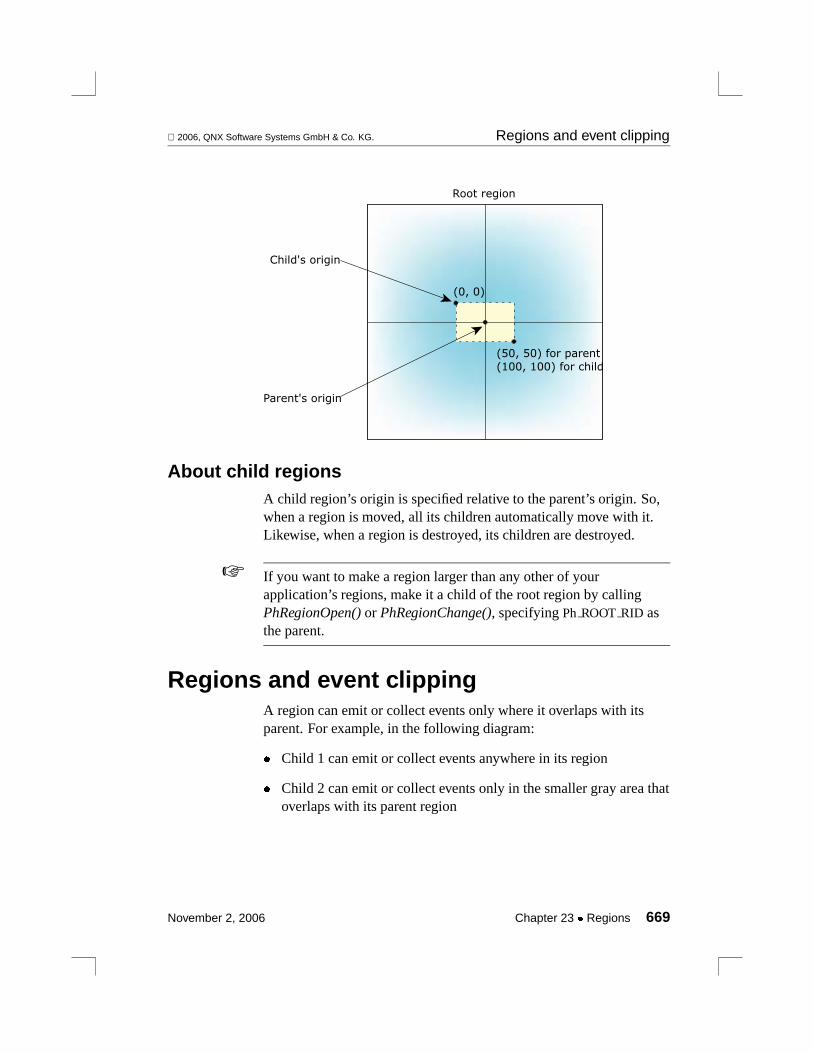
2006, QNX Software Systems GmbH & Co. KG. Regions and event clipping
Root region
Parent's origin
Child's origin
(0, 0)
(50, 50) for parent
(100, 100) for child
About child regionsA child region’s origin is specified relative to the parent’s origin. So,when a region is moved, all its children automatically move with it.Likewise, when a region is destroyed, its children are destroyed.
If you want to make a region larger than any other of yourapplication’s regions, make it a child of the root region by callingPhRegionOpen()or PhRegionChange(), specifyingPh ROOT RID asthe parent.
☞
Regions and event clippingA region can emit or collect events only where it overlaps with itsparent. For example, in the following diagram:
� Child 1 can emit or collect events anywhere in its region
� Child 2 can emit or collect events only in the smaller gray area thatoverlaps with its parent region
November 2, 2006 Chapter 23 � Regions 669
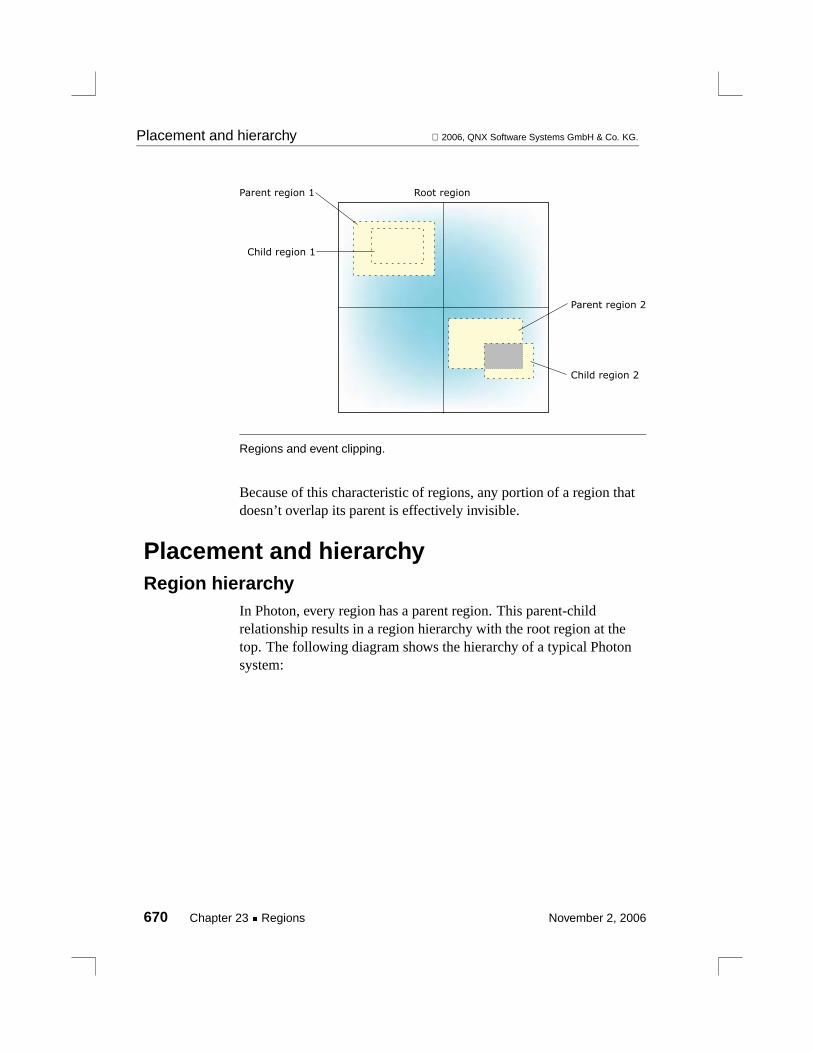
Placement and hierarchy 2006, QNX Software Systems GmbH & Co. KG.
Root regionParent region 1
Child region 1
Parent region 2
Child region 2
Regions and event clipping.
Because of this characteristic of regions, any portion of a region thatdoesn’t overlap its parent is effectively invisible.
Placement and hierarchyRegion hierarchy
In Photon, every region has a parent region. This parent-childrelationship results in a region hierarchy with the root region at thetop. The following diagram shows the hierarchy of a typical Photonsystem:
670 Chapter 23 � Regions November 2, 2006
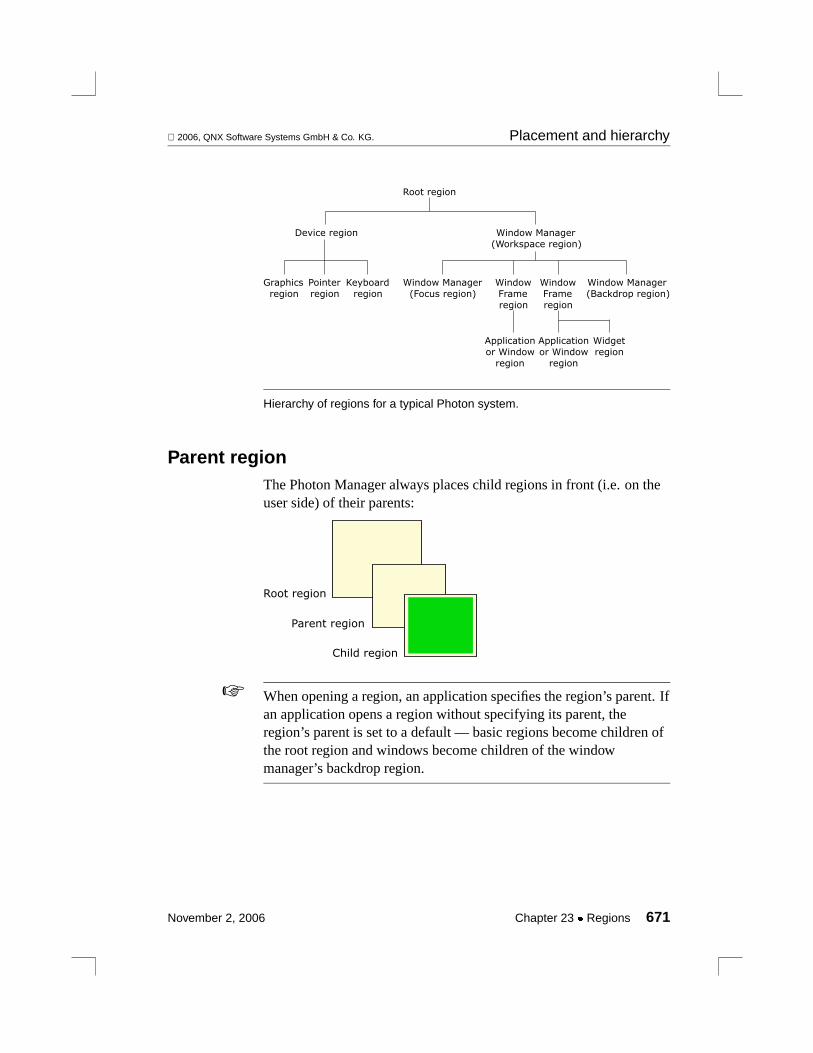
2006, QNX Software Systems GmbH & Co. KG. Placement and hierarchy
Root region
Device region Window Manager
(Workspace region)
Graphics
region
Keyboard
region
Pointer
region
Window Manager
(Focus region)
Window Manager
(Backdrop region)
Window
Frame
region
Application
or Window
region
Window
Frame
region
Application
or Window
region
Widget
region
Hierarchy of regions for a typical Photon system.
Parent regionThe Photon Manager always places child regions in front (i.e. on theuser side) of their parents:
Root region
Parent region
Child region
When opening a region, an application specifies the region’s parent. Ifan application opens a region without specifying its parent, theregion’s parent is set to a default — basic regions become children ofthe root region and windows become children of the windowmanager’s backdrop region.
☞
November 2, 2006 Chapter 23 � Regions 671

Placement and hierarchy 2006, QNX Software Systems GmbH & Co. KG.
Brother regionsBesides having a parent, a region may have “brothers,” i.e. otherregions who have the same parent. A region knows about only two ofits brothers — the one immediately in front and the one immediatelybehind.
The following diagram shows a parent with three children, and therelationship that child region 2 has with its brothers:
Root region
Parent region
Child regionsBrother behind
Brother in front
Child region 2
When the application opens a region (e.g. child region 2 in the abovediagram), it can specify neither, one, or both immediate brothers.Depending on how the application specifies these brothers, the newregion may be placed according to default rules (see below) or at aspecific location.
If an application opens a region, specifying both brothers, and thisaction results in an ambiguous placement request, the request fails.
☞
Default placementIf an application opens a region without specifying brothers, thePhoton Manager places that region using default placement rules. Inmost cases, these rules cause a newly opened region to be placed infront of its frontmost brother, which then becomes “brother behind”of the new region. (To use different placement rules, you can specifythePh FORCEFRONTflag.)
672 Chapter 23 � Regions November 2, 2006

2006, QNX Software Systems GmbH & Co. KG. Placement and hierarchy
For example, in the following diagram, child region 1 is the frontmostregion:
Root region
Parent region
Child region 1
When the application opens child region 2 with default placement(next diagram), region 2 is placed in front of region 1. Region 1becomes region 2’s brother “behind.” Region 2 becomes region 1’sbrother “in front.”
Root region
Parent region
Child region 1
Child region 2
Ph FORCE FRONT flag
An application uses thePh FORCEFRONTflag when it wants a regionto remain in front of any subsequent brothers that rely on the PhotonManager’s default placement.
As mentioned earlier, when a region is opened with default placement,it’s placed ahead of its frontmost brother. But if any brother has thePh FORCEFRONTflag set, then the new region is placedbehindthefarthest brother that has thePh FORCEFRONTflag set.
For example, let’s see what would happen in the following example ifchild region 1 had thePh FORCEFRONTflag set:
November 2, 2006 Chapter 23 � Regions 673
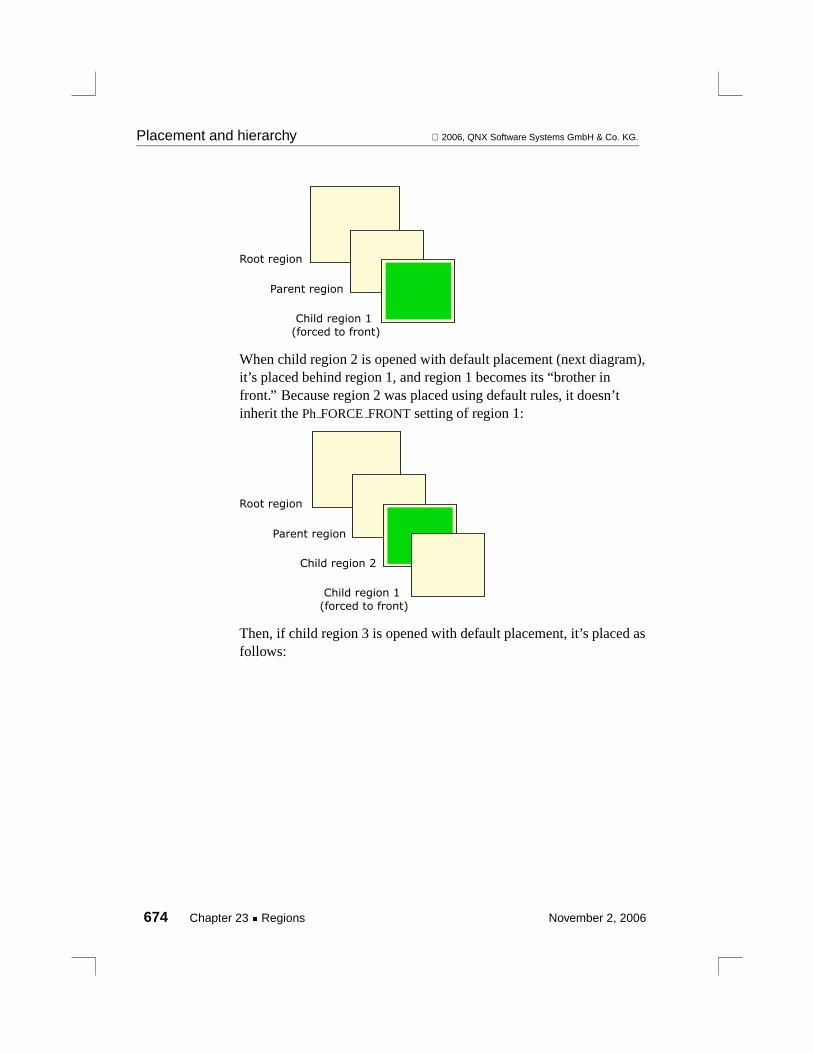
Placement and hierarchy 2006, QNX Software Systems GmbH & Co. KG.
Root region
Parent region
Child region 1
(forced to front)
When child region 2 is opened with default placement (next diagram),it’s placed behind region 1, and region 1 becomes its “brother infront.” Because region 2 was placed using default rules, it doesn’tinherit thePh FORCEFRONTsetting of region 1:
Root region
Parent region
Child region 2
Child region 1
(forced to front)
Then, if child region 3 is opened with default placement, it’s placed asfollows:
674 Chapter 23 � Regions November 2, 2006

2006, QNX Software Systems GmbH & Co. KG. Placement and hierarchy
Root region
Parent region
Child region 2
Child region 3
Child region 1
(forced to front)
The application can set thePh FORCEFRONTflag when it opens aregion (or later) by changing the region’s flags. The state of this flagdoesn’t affect how the region itself is placed, but rather howsubsequent brothers are placed if those brothers are opened usingdefault placement rules. That is, thePh FORCEFRONTstate ofexisting brothers doesn’t affect the placement of a new region if it’sopened with specified brother relations. See the next section, Specificplacement.
☞
Remember that thePh FORCEFRONTflag affects placement onlyamong brother regions — a child region always goes in front of itsparent.
Specific placementIn contrast to default placement, if any brother is specified when aregion is opened, then that specification controls the placement of thenew region. We refer to this asspecific placement.
If a “behind” brother is specified, then the newly opened regionautomatically is placed in front of that brother.
If an “in front” brother is specified, then the newly opened region isautomatically placed behind that brother.
November 2, 2006 Chapter 23 � Regions 675
Using regions 2006, QNX Software Systems GmbH & Co. KG.
ThePh FORCEFRONTsetting of the specified brother is inherited bythe new region. If an application opens a region, specifying bothbrothers, and this results in an ambiguous placement request, then theopen fails.
☞
Using regionsOpening a region
To open a region, create aPtRegion widget. ThePtRegion widgetisn’t included in PhAB’s widget palette; to instantiate it:
� Call PtCreateWidget()in your application.
Or:
� Create a window module, select it, and use the Change Class itemin PhAB’s Edit menu to turn the window into aPtRegion. Formore information, see “Changing a widget’s class” in the chapteron Creating Widgets in PhAB.
For more information on thePtRegion widget, see theWidgetReference.
Placing regionsWhile a region is always in front of its parent, the region’s placementrelative to its brothers is flexible. See “Placement and hierarchy” formore information about “default” and “specific” placement.
ThePhRegion t structure (see theLibrary Reference) contains thefollowing members. These indicate the relationship of a region withits siblings:
� bro in front — indicates the sibling immediately in front
� bro behind— indicates the sibling immediately behind
To retrieve this information, you can usePhRegionQuery().
676 Chapter 23 � Regions November 2, 2006

2006, QNX Software Systems GmbH & Co. KG. Using regions
Changing region placement
An application can specify a region’s placement when it opens theregion, or it can change the placement later on. To change a region’splacement, the application must change the relationship between theregion and the region’s family.
The application does this by doing any or all of the following:
� setting theparent, bro front, andbro behindmembers of thePhRegion t structure
� setting the correspondingfieldsbits to indicate which members arevalid (only those fields marked as valid will be acted on)
� calling thePhRegionChange()function
Since an application can be sure of the position of only the regions itowns, it shouldn’t change the position of any other regions.Otherwise, by the time the application makes a request to change theposition of a region it doesn’t own, the information retrieved byPhRegionQuery()may not reflect that region’s current position. Thatis, a request to change a region’s placement may not have the resultsthe application intended.
☞
Changing the parent
You can change a region’s parent in these ways:
� If the region has a parent widget, callPtReparentWidget()to makethe region the child of another widget. Don’t reparent the regiondirectly.
� Specify the parent in theparentmember of the child’sPhRegion t structure. The child region becomes the frontmost ofthe parent region’s children.
� Specify a child of another parent as the region’s brother. Thismakes the region a child of that parent, but lets you specify wherethe child region fits in the parent region’s hierarchy.
November 2, 2006 Chapter 23 � Regions 677
System information 2006, QNX Software Systems GmbH & Co. KG.
The following constants are defined in<photon/PhT.h>:
� Ph DEV RID — the ID of the device region.
� Ph ROOT RID — the ID of the root region.
Specifying brothers
If you set: Then:
bro behind The region indicated in therid member ofPhRegion t moves in front of thebro behindregion
bro in front The region indicated in therid member ofPhRegion t moves behind thebro in front region
As discussed in “Changing the parent,” a region inherits the parent ofany specified brothers that are children of another parent.
System informationYou can get the following information about your system:
� the version of your Photon server
� an estimate of the bandwidth of communication between yourwindow and the Photon server
� information about regions that intersect your window:
- graphics regions
- keyboard regions
- pointer regions
- input group regions
678 Chapter 23 � Regions November 2, 2006

2006, QNX Software Systems GmbH & Co. KG. System information
You don’t get information about each region. Instead, you get theminimum value of each type of information.
For example, if several graphics-driver regions overlapping yourwindow have different bandwidths, the bandwidth given is theminimum of them.
☞
There are two functions that you can use to get system information:
PhQuerySystemInfo()
Get the information for a given region.
PtQuerySystemInfo()
Get the information for a widget (usually a window).
PhQuerySystemInfo()sends a message to the server each time thatyou call it.
PtQuerySystemInfo()callsPhQuerySystemInfo(), but buffers theinformation. When a region that intersects your widget changes (forexample, it’s moved), the buffer is marked as invalid. The next timeyou callPtQuerySystemInfo(), it callsPhQuerySystemInfo()again. Byusing the buffer whenever possible,PtQuerySystemInfo()keeps thenumber of messages to a minimum.
BothPtQuerySystemInfo()andPhQuerySystemInfo()fill in a structureof typePhSysInfo t that your application has allocated. For moreinformation, see the PhotonLibrary Reference.
One field that’s of particular interest is the graphics bandwidth, ingfx.bandwidth. This value can be used to modify the behavior of aninterface based on the connection speed. For example, a simple statechange could be substituted for an elaborate animation if thebandwidth isPh BAUD SLOW or less. It’s also a good idea to see ifshared memory can be used for drawing; thePh GCAP SHMEM flag isset ingfx.capabilitiesif all the graphics drivers support the...mx()functions and they’re all running on your node.
November 2, 2006 Chapter 23 � Regions 679


Chapter 24
Events
In this chapter. . .Pointer events 683Emitting events 686Event coordinates 690Event handlers — raw and filter callbacks691Collecting events 694Event compression 694Dragging 694
November 2, 2006 Chapter 24 � Events 681


2006, QNX Software Systems GmbH & Co. KG. Pointer events
The interactions between applications, users and the Photon server arerepresented by data structures calledevents.
Event information is stored in structures of typePhEvent t; see thePhotonLibrary Reference.
Pointer eventsMost of the time, you can use a widget’s callbacks to handle what theuser does while pointing to it. If you’re working with event handlers,you’ll need to know what events Photon emits.
Pressing a button
When you press the pointer button, Photon emits aPh EV BUT PRESSevent to the widget that currently has focus.
Releasing a button
When you release the button, Photon emitstwo Ph EV BUT RELEASEevents:
� One with subtypePh EV RELEASEREAL
� One with subtypePh EV RELEASEPHANTOM.
The real release hits whatever the mouse points to when you releasethe button. The phantom releasealwaysgoes to the same region (andposition) that received the press.
In other words, if your widget saw the press, it also sees the phantomrelease. And depending on where the mouse was pointing to, you mayor may not get the real release. If your widget gets both the real andphantom releases, the real one always comes first.
Multiple clicks
Whenever you press or release the mouse button, the event includesthe click count. How can your application determine that you clicked,instead of double clicked?
There’s a click counter in the event data that’s associated withPh EV BUT PRESSandPh EV BUT RELEASEevents; to get this data,
November 2, 2006 Chapter 24 � Events 683

Pointer events 2006, QNX Software Systems GmbH & Co. KG.
call PhGetData(). The data for these events is a structure of typePhPointerEvent t (see the PhotonLibrary Referencefor details);its click countmember gives the number of times that you clicked themouse button.
If you keep clicking quickly enough without moving the mouse, thecounter keeps incrementing. If you move the mouse or stop clickingfor a while, the counter resets and Photon emits aPh EV BUT RELEASEevent with a subtype ofPh EV RELEASEENDCLICK.
In other words, the first click generates aPh EV BUT PRESSeventand a pair ofPh EV BUT RELEASEevents (one REAL and onePHANTOM) with click countset to 1. Then, depending on whetherthe user clicks again soon enough or not, you get either:
� A Ph EV BUT PRESSevent and a pair ofPh EV BUT RELEASEevents withclick countset to 2
Or:
� A Ph EV BUT RELEASEevent with a subtype ofPh EV RELEASEENDCLICK.
After the second click, you either get a third one or an ENDCLICK,and so on. But eventually you get an ENDCLICK — and the nexttime the person clicks, the click count is 1 again.
Modifier keys
If you need to determine what keys were pressed in a pointer event,call PhGetData()to get the event data that’s included forPh EV BUT PRESSandPh EV BUT RELEASEevents. The data forthese events is a structure of typePhPointerEvent t (described inthe PhotonLibrary Reference); check itskeymodsmember todetermine the modifier keys that were pressed.
For example, thisPt CB ACTIVATEcallback lists the modifier keysthat were pressed when the pointer button was released:
/* Standard headers */#include <stdio.h>
684 Chapter 24 � Events November 2, 2006

2006, QNX Software Systems GmbH & Co. KG. Pointer events
#include <stdlib.h>#include <unistd.h>#include <string.h>
/* Toolkit headers */#include <Ph.h>#include <Pt.h>#include <Ap.h>
/* Local headers */#include "abimport.h"#include "proto.h"
intcheck keys( PtWidget t *widget, ApInfo t *apinfo,
PtCallbackInfo t *cbinfo )
{
PhPointerEvent t *event data;
/* eliminate ’unreferenced’ warnings */widget = widget, apinfo = apinfo, cbinfo = cbinfo;
if (cbinfo->event->type != Ph EV BUT RELEASE) {printf ("Not a Ph EV BUT RELEASE event\n");
} else {printf ("It’s a Ph EV BUT RELEASE event\n");
event data = (PhPointerEvent t *)PhGetData (cbinfo->event);
if (event data->key mods & Pk KM Shift )printf (" Shift\n");
if (event data->key mods & Pk KM Ctrl )printf (" Ctrl\n");
if (event data->key mods & Pk KM Alt )printf (" Alt\n");
}return( Pt CONTINUE );
}
November 2, 2006 Chapter 24 � Events 685
Emitting events 2006, QNX Software Systems GmbH & Co. KG.
Emitting eventsThe most general way for your application to emit an event is to callPhEmit():
int PhEmit( PhEvent t *event,PhRect t *rects,void *data );
The arguments are:
event A pointer to aPhEvent t structure. The applicationemitting the event needs to set the following members:
� type— the type of event.
� subtype— the event subtype (if necessary).
� flags— event modifiers (e.g. direction).
� emitter— aPhEventRegion t structure; you need toset at least the ID of the region that’s emitting the event.
� translation— typically set to (0,0) when emitting anevent.
� num rects— the number of rectangles in the function’srectsargument. If you setnum rectsto 0, you must alsopassrectsasNULL.
� event->collector.rid— if you set the collector ID tozero, the event is enqueued to every appropriatelysensitive region that intersects with the event.
If you setcollector.rid to a region ID, only that regionnotices the event.
The Photon Manager sets the following members of theevent structure after it has enqueued a copy of the event toan application:
� timestamp— the time when this event was emitted (inmilliseconds).
� collector— aPhEventRegion t structure thatincludes the ID of the collecting region.
686 Chapter 24 � Events November 2, 2006
2006, QNX Software Systems GmbH & Co. KG. Emitting events
rects An array ofPhRect t structures (see the PhotonLibraryReference) indicating the event’s initial rectangle set. If thisargument isNULL, the set consists of a single rectanglecorresponding to the emitting region.
data Valid data for the type of event being emitted. Each type ofevent has its own type of data, as described for thePhEvent t structure in the PhotonLibrary Reference.
If the event-specific data isn’t in contiguous memory, youmay findPhEmitmx()more useful thanPhEmit():
int PhEmitmx( PhEvent t *event,PhRect t *rects,int mxparts,struct mxfer entry *mx );
The return codes forPhEmit()andPhEmitmx()are:
A nonnegative value
Successful completion.
-1 An error occurred; check the value oferrno.
Targeting specific regionsSometimes an application needs to target an event directly at aspecific region, without making the event travel through the eventspace before arriving at that region. You can use an inclusive event ora direct event to ensure that the targeted region sees the event.
Inclusive event
For an inclusive event, do the following:
� Set the emitter’s region ID (i.e.event->emitter.rid) to the ID of thetarget region — this causes the event to be emitted automaticallyfrom that region.
November 2, 2006 Chapter 24 � Events 687

Emitting events 2006, QNX Software Systems GmbH & Co. KG.
� SetPh EVENT INCLUSIVE on in theflagmember of the event —this causes the Photon Manager to emit the event to the emittingregion before emitting it into the event space.
If you don’t want an inclusive targeted event to continue through theevent space, you must make the emitting regionopaqueto that type ofevent, or use a direct event instead.
Direct event
For a direct event, do the following:
� Set the emitter’s region ID (i.e.event->emitter.rid) to the ID ofyour application’s region.
� Set the collector’s region ID (i.e.event->collector.rid) to the ID ofthe target region.
� SetPh EVENT DIRECT on in theflagmember of the event — thiscauses the Photon Manager to emit the event directly fromemitterto collector.
Targeting specific widgetsIf you want to send an event to a specific widget, you could callPhEmit()as described above, but you’ll need to look after a lot ofdetails, including making sure:
� The event is delivered to the right window.
� The widget still has focus — there might be other events enqueuedbefore yours.
It’s easier to callPtSendEventToWidget(). This function gives theevent to the specified widget directly and without delay. It’s muchmore deterministic and efficient thanPhEmit().
The prototype is:
int PtSendEventToWidget( PtWidget t *widget,PhEvent t *event );
688 Chapter 24 � Events November 2, 2006
2006, QNX Software Systems GmbH & Co. KG. Emitting events
Emitting key eventsSometimes you might need to simulate a key press in yourapplication. Depending on what exactly you want to achieve, you canchoose from several ways of generating key events:
� Emit aPh EV KEY event from the device region:event->emitter.rid = Ph DEV RID;
The rectangle set should consist of a single pixel — if you’re notusing the window manager, or if PWM is set to use cursor focus,the position of that pixel determines which window the event willhit.
� If you know which region you want to send the event to, emit aPh EV KEY event directly to that region:event->collector.rid = rid;event->flags |= Ph EVENT DIRECT;
In both of these cases, use aPhKeyEvent t structure as the eventdata. For more information, see the PhotonLibrary Reference.
Here’s an example:
static void send key( long key ){
struct{PhEvent t event;PhRect t rect;PhKeyEvent t pevent;} new event;
PhEvent t event;PhKeyEvent t key event;
PhRect t rect;
rect.ul.x = rect.ul.y = 0;rect.lr.x = rect.lr.y = 0;
memset( &event , 0, sizeof(event) );memset( &key event, 0, sizeof(key event) );
November 2, 2006 Chapter 24 � Events 689
Event coordinates 2006, QNX Software Systems GmbH & Co. KG.
event.type = Ph EV KEY;event.emitter.rid = Ph DEV RID;event.num rects = 1;event.data len = sizeof(key event);event.input group = 1;
key event.key cap = key;key event.key sym = key;
if ( isascii( key ) && isupper( key ) ){
key event.key mods = Pk KM Shift;}
/* Emit the key press. */
key event.key flags = Pk KF Sym Valid | Pk KF Cap Valid |Pk KF Key Down;
PhEmit( &event, &rect, &key event );
/* Emit the key release. */
key event.key flags &= ˜(Pk KF Key Down | Pk KF Sym Valid) ;PhEmit( &event ,&rect, &key event );
return;}
Event coordinatesWhen an event is emitted, the coordinates of its rectangle set arerelative to the emitting region’s origin. But when the event iscollected, its coordinates become relative to the collecting region’sorigin.
The Photon Manager ensures this happens by translating coordinatesaccordingly. Thetranslationmember of thePhEvent t specifies thetranslation between the emitting region’s origin and the collectingregion’s origin.
690 Chapter 24 � Events November 2, 2006
2006, QNX Software Systems GmbH & Co. KG. Event handlers — raw and filter callbacks
Event handlers — raw and filter callbacksThePtWidget widget class provides these callbacks for processingevents:
Pt CB FILTER
Invokedbeforethe event is processed by the widget.They let you perform actions based on the eventbefore the widget sees it. They also give you theopportunity to decide if the event should be ignored,discarded, or allowed to be processed by the widget.
Pt CB RAW These callbacks are invokedafter the widget hasprocessed the event, even if the widget’s classmethods consume it.
These callbacks are called every time a Photon event that matches anevent mask (provided by the application) is received. Since all thewidget classes in the Photon widget library are descended from thePtWidget, these callbacks can be used withanywidget from thePhoton widget library.
When you attach a raw or filter callback to a widget, the widgetlibrary creates a region, if necessary, that will pick up specific eventsfor the widget. This increases the number of regions the PhotonManager must manage and, as a result, may reduce performance.
For this reason, use event handlers only when you have to dosomething that can’t be done using standard widget callbacks. If youdo use event handlers, consider using them only on window widgets,which already have regions.
☞
Whenever a Photon event is received, it’s passed down the widgetfamily hierarchy until a widget consumes it. (When a widget hasprocessed an event and prevents another widget from interacting withthe event, the first widget is said to haveconsumedthe event.)
November 2, 2006 Chapter 24 � Events 691

Event handlers — raw and filter callbacks 2006, QNX Software Systems GmbH & Co. KG.
In general, thePt CB FILTERcallbacks are invoked on the way downthe hierarchy, and thePt CB RAWcallbacks are invoked on the wayback up. Each widget processes the event like this:
1 The widget’sPt CB FILTERcallbacks are invoked if the eventtype matches the callback’s mask. The callback’s return codeindicates what’s to be done with the event:
Pt CONSUME The event is consumed, without beingprocessed by the widget’s class methods.
Pt PROCESS The widget’s class methods are allowed toprocess the event.
Pt IGNORE The event bypasses the widget and all itsdescendants, as if they didn’t exist.
2 If the widget is sensitive to the event, and thePt CB FILTERcallback permits, the widget’s class method processes the event.The class method might consume the event.
3 If the widget consumes the event, the widget’sPt CB RAWcallbacks are invoked if the event type matches the callback’smask. The raw callbacks of the widget’s parents aren’t called.
4 If the widget doesn’t consume the event, the event is passed tothe widget’s children, if any.
5 If no widget consumes the event, the event is passed back upthe family hierarchy, and each widget’sPt CB RAWcallbacksare invoked if the event type matches the callback’s mask.
The value returned by a widget’sPt CB RAWcallbackindicates what’s to be done with the event:
Pt CONSUME The event is consumed and no other rawcallbacks are invoked as the event is passedup to the widget’s parent.
Pt CONTINUE The event is passed up to the widget’sparent.
692 Chapter 24 � Events November 2, 2006

2006, QNX Software Systems GmbH & Co. KG. Event handlers — raw and filter callbacks
If a widget is disabled (i.e.Pt BLOCKED is set in itsPt ARG FLAGS), the raw and filter callbacks aren’t invoked. Instead,the widget’sPt CB BLOCKEDcallbacks (if any) are invoked.
☞
Let’s look at a simple widget family to see how this works. Let’ssuppose you have a window that contains a pane that contains abutton. Here’s what normally happens when you click on the button:
1 The window’sPt CB FILTERcallbacks are invoked, but don’tconsume the event. The window’s class methods don’t consumethe event either.
2 The event is passed to the pane. Neither itsPt CB FILTERcallbacks nor its class methods consume the event.
3 The event is passed to the button. ItsPt CB FILTERcallbacksdon’t consume the event, but the class methods do; theappropriate callback (e.g.Pt CB ACTIVATE) is invoked.
4 The button’sPt CB RAWcallbacks are invoked for the event.
5 The pane’s and window’sPt CB RAWcallbacks aren’t invokedbecause the button consumed the event.
If the pane’sPt CB FILTERcallback says to ignore the event:
1 The window processes the event as before.
2 The pane’sPt CB FILTERcallbacks say to ignore the event, sothe pane and all its descendants are skipped.
3 There are no more widgets in the family, so the window’sPt CB RAWcallbacks are invoked.
For information on adding event handlers, see:
� “Event handlers — raw and filter callbacks” in the EditingResources and Callbacks in PhAB chapter
� “Event handlers” in the Managing Widgets in Application Codechapter.
November 2, 2006 Chapter 24 � Events 693
Collecting events 2006, QNX Software Systems GmbH & Co. KG.
Collecting eventsMost applications collect events by callingPtMainLoop(). Thisroutine processes Photon events and supports work procedures andinput handling.
If your application doesn’t use widgets, you can collect events:
� asynchronouslyby callingPhEventRead(). You must callPhEventArm()before you callPhEventRead()for the first time.
� synchronouslyby callingPhEventNext(). You can check for eventswithout blocking by callingPhEventPeek().
However, writing your own mainloop function isn’t a trivial matter;it’s easier to create at least a disjoint widget (such asPtRegion orPtWindow) and then usePtMainLoop().
PhGetRects()extracts the rectangle set, andPhGetData()extracts theevent’s data portion.
A region can collect a given event only if portions of the regionintersect the event, and the region is sensitive to that type of event.
☞
Event compressionThe Photon Manager compresses drag, boundary, and pointer events.That is, if an event of that type is pending when another event arrives,the new event will be merged with the unprocessed events. As aresult, an application sees only the latest values for these events and issaved from collecting too many unnecessary events.
DraggingIf you need to capture mouse coordinates, for example to draggraphical objects in your application, you’ll need to work with events.
694 Chapter 24 � Events November 2, 2006

2006, QNX Software Systems GmbH & Co. KG. Dragging
If you want to transfer arbitrary data within your application orbetween applications, see the Drag and Drop chapter.
☞
There are two types of dragging:
outline dragging
The user sees an outline while dragging. When the dragging iscomplete, the application repositions the widget.
opaque dragging
The application moves the widget as the dragging progresses.
Dragging is done in two steps:
1 Initiating the dragging, usually when the user clicks onsomething.
2 Handling drag (Ph EV DRAG) events.
These steps are discussed in the sections that follow.
Initiating draggingWhere you initiate the dragging depends on how the user is meant todrag widgets. For example, if the user holds down the left mousebutton on a widget to drag it, initiate dragging in the widget’s Arm(Pt CB ARM) or Outbound (Pt CB OUTBOUND) callback. Makesure thatPt SELECTABLEis set in the widget’sPt ARGFLAGSresource.
Dragging is started by calling thePhInitDrag() function:
int PhInitDrag( PhRid t rid,unsigned flags,PhRect t *rect,PhRect t *boundary,unsigned int input group,PhDim t *min,PhDim t *max,const PhDim t *step,
November 2, 2006 Chapter 24 � Events 695
Dragging 2006, QNX Software Systems GmbH & Co. KG.
const PhPoint t *ptrpos,const PhCursorDescription t *cursor );
The arguments are used as follows:
rid The ID of the region thatrect andboundaryarerelative to. You can get this by callingPtWidgetRid().
flags Indicate whether outline or opaque dragging is to beused, and which edge(s) of the dragging rectangletrack the pointer, as described below.
rect A PhRect t structure (see the PhotonLibraryReference) that defines the area to drag.
boundary Rectangular area that limits the dragging
input group Get this from the event in the callback’scbinfoparameter by callingPhInputGroup().
min, max Pointers toPhDim t structures (see the PhotonLibrary Reference) that define the minimum andmaximum sizes of the drag rectangle.
step Dragging granularity.
ptrpos If not NULL, it’s a pointer to aPhPoint t structure(see the PhotonLibrary Reference) that defines theinitial cursor position for the drag. Applicationsshould take it from the event that makes them decideto start a drag. If the cursor moves from that positionby the time yourPhInitDrag() reaches Photon, yourdrag is updated accordingly. In other words, Photonmakes the drag behave as if it started from whereyou thought the cursor was rather than from where itactually was a few moments later.
cursor If not NULL, defines how the cursor should lookwhile dragging.
696 Chapter 24 � Events November 2, 2006

2006, QNX Software Systems GmbH & Co. KG. Dragging
If Ph DRAG TRACK is included inflags, then opaque dragging isused; ifPh DRAG TRACK isn’t included, outline dragging is used.
The following flags indicate which edge(s) of the dragging rectangletrack the pointer:
� Ph TRACK LEFT
� Ph TRACK RIGHT
� Ph TRACK TOP
� Ph TRACK BOTTOM
� Ph TRACK DRAG—all the above
Outline dragging
The following example shows an Arm (Pt CB ARM) callback thatinitiates outline dragging:
/* Start dragging a widget */
/* Standard headers */#include <stdio.h>#include <stdlib.h>#include <unistd.h>#include <string.h>
/* Toolkit headers */#include <Ph.h>#include <Pt.h>#include <Ap.h>
/* Local headers */#include "globals.h"#include "abimport.h"#include "proto.h"
intstart dragging( PtWidget t *widget,
ApInfo t *apinfo,PtCallbackInfo t *cbinfo )
{PhDim t *dimension;PhRect t rect;
November 2, 2006 Chapter 24 � Events 697

Dragging 2006, QNX Software Systems GmbH & Co. KG.
PhRect t boundary;
/* eliminate ’unreferenced’ warnings */widget = widget, apinfo = apinfo, cbinfo = cbinfo;
/* Set the dragging rectangle to the position and size ofthe widget being dragged. */
PtWidgetExtent (widget, &rect);
/* Set the boundary for dragging to the boundary of thewindow. */
PtGetResource (ABW base, Pt ARG DIM, &dimension, 0);boundary.ul.x = 0;boundary.ul.y = 0;boundary.lr.x = dimension->w - 1;boundary.lr.y = dimension->h - 1;
/* Initiate outline dragging (Ph DRAG TRACK isn’tspecified). */
PhInitDrag (PtWidgetRid (ABW base),Ph TRACK DRAG,&rect, &boundary,PhInputGroup( cbinfo->event ),NULL, NULL, NULL, NULL, NULL );
/* Save a pointer to the widget being dragged. */
dragged widget = widget;
return( Pt CONTINUE );}
The above callback is added to the Arm (Pt CB ARM) callback of thewidget to be dragged. It can be used for dragging any widget, so apointer to the widget is saved in the global variabledraggedwidget.
Opaque dragging
If you want to use opaque dragging, add thePh DRAG TRACK flag tothe call toPhInitDrag():
PhInitDrag( PtWidgetRid (ABW base),Ph TRACK DRAG | Ph DRAG TRACK,&rect, &boundary,PhInputGroup( cbinfo->event ),
698 Chapter 24 � Events November 2, 2006

2006, QNX Software Systems GmbH & Co. KG. Dragging
NULL, NULL, NULL, NULL, NULL );
Handling drag eventsTo handle drag (Ph EV DRAG) events, you need to define a Raw(Pt CB RAW) or Filter (Pt CB FILTER) callback.
The raw or filter callback must be defined for the widget whose regionwas passed toPhInitDrag(), not for the widget being dragged. For theexample given, the Raw callback is defined for the base window.
☞
As described in “Event handlers — raw and filter callbacks” in theEditing Resources and Callbacks in PhAB chapter, you use an eventmask to indicate which events your callback is to be called for. Fordragging, the event isPh EV DRAG. The most commonly usedsubtypes for this event are:
Ph EV DRAG START
The user has started to drag.
Ph EV DRAG MOVE
The dragging is in progress (opaque dragging only).
Ph EV DRAG COMPLETE
The user has released the mouse button.
Outline dragging
If you’re doing outline dragging, the event subtype you’re interestedin is Ph EV DRAG COMPLETE. When this event occurs, yourcallback should:
1 Get the data associated with the event. This is aPhDragEvent t structure that includes the location of thedragging rectangle, in absolute coordinates. For moreinformation, see the PhotonLibrary Reference.
November 2, 2006 Chapter 24 � Events 699

Dragging 2006, QNX Software Systems GmbH & Co. KG.
2 Calculate the new position of the widget, relative to thedragging region. This is the position of the upper left corner ofthe dragging rectangle, translated by the amount given in theevent’stranslationfield.
3 Set the widget’sPt ARG POSresource to the new position.
Remember, the callback’swidgetparameter is a pointer to thecontainer (the base window in the example), not to the widget beingdragged. Make sure you pass the correct widget toPtSetResources()or PtSetResource()when setting thePt ARG POSresource.
☞
For example, here’s the Raw callback for the outline dragginginitiated above:
/* Raw callback to handle drag events; define thisfor the base window. */
/* Standard headers */#include <stdio.h>#include <stdlib.h>#include <unistd.h>#include <string.h>
/* Toolkit headers */#include <Ph.h>#include <Pt.h>#include <Ap.h>
/* Local headers */#include "globals.h"#include "abimport.h"#include "proto.h"
intend dragging( PtWidget t *widget,
ApInfo t *apinfo,PtCallbackInfo t *cbinfo )
{PhDragEvent t *dragData;PhPoint t new pos;
/* eliminate ’unreferenced’ warnings */widget = widget, apinfo = apinfo, cbinfo = cbinfo;
700 Chapter 24 � Events November 2, 2006

2006, QNX Software Systems GmbH & Co. KG. Dragging
/* Ignore all events until dragging is done. */
if (cbinfo->event->subtype != Ph EV DRAG COMPLETE){return (Pt CONTINUE);
}
/* Get the data associated with the event. */
dragData = PhGetData (cbinfo->event);
/* The rectangle in this data is the absolutecoordinates of the dragging rectangle. We want tocalculate the new position of the widget, relative tothe dragging region. */
new pos.x = dragData->rect.ul.x+ cbinfo->event->translation.x;
new pos.y = dragData->rect.ul.y+ cbinfo->event->translation.y;
printf ("New position: (%d, %d)\n", new pos.x, new pos.y);
/* Move the widget. */
PtSetResource (dragged widget, Pt ARG POS, &new pos, 0);
return( Pt CONTINUE );
}
Opaque dragging
The callback for opaque dragging is similar to that for outlinedragging—the only difference is the subtype of event handled:
if (cbinfo->event->subtype != Ph EV DRAG MOVE){return (Pt CONTINUE);
}
November 2, 2006 Chapter 24 � Events 701

Chapter 25
Window Management
In this chapter. . .Window-management flags 705Notification callback 710Getting and setting the window state712Managing multiple windows 715Window-manager functions 715Running a standalone application716Modal dialogs 716
November 2, 2006 Chapter 25 � Window Management 703

2006, QNX Software Systems GmbH & Co. KG. Window-management flags
Sometimes you’ll need to interact with the Photon Window Managerto make your windows and dialogs behave the way you’d like.
Remember that PhAB’s window and dialog modules are implementedasPtWindow widgets.PtWindow has many resources that are used tointeract with the Window Manager.
☞
For information about the Window Manager’s regions, see theappendix on Photon architecture. For a list of related functions, see“Window Manager” in the Summary of Functions chapter of thePhotonLibrary Reference.
Window-management flagsThePtWindow widget defines various types of flags:
Pt ARG WINDOWRENDERFLAGS
Which window decorations appear in the window frame.
Pt ARG WINDOWMANAGEDFLAGS
How the Window Manager operates on the window.
Pt ARG WINDOWNOTIFY FLAGS
Which Window Manager events your application would like tobe notified of.
Pt ARG WINDOWSTATE
The current state of the window.
If you change the state of the window after it’s realized, you’ll need tolet the Window Manager know. See “Getting and setting the windowstate” later in this chapter.
☞
November 2, 2006 Chapter 25 � Window Management 705

Window-management flags 2006, QNX Software Systems GmbH & Co. KG.
Window-rendering flagsThePt ARG WINDOWRENDERFLAGSresource specifies whatappears in the window’s frame.
In PhAB, if you turn these flags off, PhAB provides a border, title,and buttons that allow you to re-size, move, minimize, and close thewindow in design mode. The flags still affect how the windowappears when the application is running.
☞
To display: Set this bit: Default:
Border Ph WM RENDER BORDER Yes
Resize handles Ph WM RENDER RESIZE Yes
Title bar Ph WM RENDER TITLE Yes
Menu button Ph WM RENDER MENU Yes
Close button Ph WM RENDER CLOSE
Help button (questionmark)
Ph WM RENDER HELP
Minimize button Ph WM RENDER MIN Yes
Maximize button Ph WM RENDER MAX Yes
Collapse button Ph WM RENDER COLLAPSE Yes
An extra line inside thestandard borders
Ph WM RENDER INLINE
Using these flags to display a decoration doesn’t cause the WindowManager to do anything with it. You may need to set the windowmanaged flags and/or notify flags.
☞
706 Chapter 25 � Window Management November 2, 2006

2006, QNX Software Systems GmbH & Co. KG. Window-management flags
Window-managed flagsThePt ARG WINDOWMANAGEDFLAGSresource specifies whatoperations you want the window manager to handle:
To let the windowmanager:
Set this bit: Default:
Close the window Ph WM CLOSE Yes
Give focus Ph WM FOCUS Yes
Build and control thewindow menu
Ph WM MENU Yes
Move the window to thefront
Ph WM TOFRONT Yes
Move the window to theback
Ph WM TOBACK Yes
Move the window to a newconsole as the userswitches consoles
Ph WM CONSWITCH
Resize the window Ph WM RESIZE Yes
Move the window Ph WM MOVE Yes
Hide (i.e. minimize) thewindow
Ph WM HIDE Yes
Maximize the window Ph WM MAX Yes
Display the window as abackdrop
Ph WM BACKDROP
Restore the window Ph WM RESTORE Yes
Provide context-sensitivehelp
Ph WM HELP
continued. . .
November 2, 2006 Chapter 25 � Window Management 707

Window-management flags 2006, QNX Software Systems GmbH & Co. KG.
To let the windowmanager:
Set this bit: Default:
Make the windowforce-front
Ph WM FFRONT
Collapse the window to justthe title bar
Ph WM COLLAPSE
Prevent you from cyclingfocus to the window bypressingAlt – Esc, Alt –Shift – Esc, or Alt – Tab
Ph WM NO FOCUSLIST
By default, a selection of these flags are set, as defined byPh WM APP DEF MANAGED in <PhWm.h>. You’d turn themanagement flags off if:
� You don’t want the operation to happen.
� You want the application to handle the operation. In this case,you’ll need to set the appropriate notify flag as well.
Window-notify flagsThePt ARG WINDOWNOTIFYFLAGSresource specifies whichwindow-manager operations your application should be notified of.This resource uses the same bits asPt ARG WINDOWMANAGEDFLAGS:
To be notified when: Set this bit: Default:
The window is to be closed(see below)
Ph WM CLOSE Yes
The window is to gain/losefocus
Ph WM FOCUS
continued. . .
708 Chapter 25 � Window Management November 2, 2006

2006, QNX Software Systems GmbH & Co. KG. Window-management flags
To be notified when: Set this bit: Default:
The window menu is requestedor dismissed
Ph WM MENU
The window is to be moved tothe front
Ph WM TOFRONT
The window is to be moved tothe back
Ph WM TOBACK
The window is to switchconsoles
Ph WM CONSWITCH
The window is to be resized Ph WM RESIZE Yes
The window is to be moved Ph WM MOVE
The window is to be hidden orunhidden
Ph WM HIDE
The window is to bemaximized
Ph WM MAX
The window is to be made intoa backdrop
Ph WM BACKDROP
The window is to be restored Ph WM RESTORE
The help button is pressed Ph WM HELP Yes
The window is to be madeforce-front or not force-front
Ph WM FFRONT
The default setting isPh WM RESIZE|Ph WM CLOSE|Ph WM HELP.
When the requested operations occur, the window’sPt CB WINDOWcallback is invoked. See “Notification callback” below.
If you set thePh WM CLOSEnotify flag, your application’sPt CB WINDOWcallback is invoked when someone wants thewindow to close. Your application doesn’t have to close the window— it could decide to leave it open.
November 2, 2006 Chapter 25 � Window Management 709

Notification callback 2006, QNX Software Systems GmbH & Co. KG.
In contrast, thePt CB WINDOWCLOSINGcallback is called when awindow is being unrealized, but before its region is removed. At thispoint, the application can’t stop the window from being closed.
If you’ve set thePh WM CLOSEmanaged flag, the window manageris told to handle the window’s closing. In this case, thePt CB WINDOWCLOSINGcallback is invoked, but thePt CB WINDOWcallback isn’t.
☞
Notification callbackWhen a window manager operation occurs that’s listed in thewindow’s notify flags (Pt ARG WINDOWNOTIFYFLAGS), thewindow’sPt CB WINDOWcallback is invoked.
Each callback function listed in this resource is passed aPtCallbackInfo t structure (see the PhotonWidget Reference)that contains at least the following members:
reason Pt CB WINDOW
reasonsubtype
0 (not used).
event A pointer to the event that caused the callback to beinvoked.
cbdata A pointer to aPhWindowEvent t (described in thePhotonLibrary Reference).
These callback functions should returnPt CONTINUE.
Example: verifying window closureSuppose you want to verify that the user really wants to exit theapplication when the window is closed. Here’s what you need to do:
710 Chapter 25 � Window Management November 2, 2006
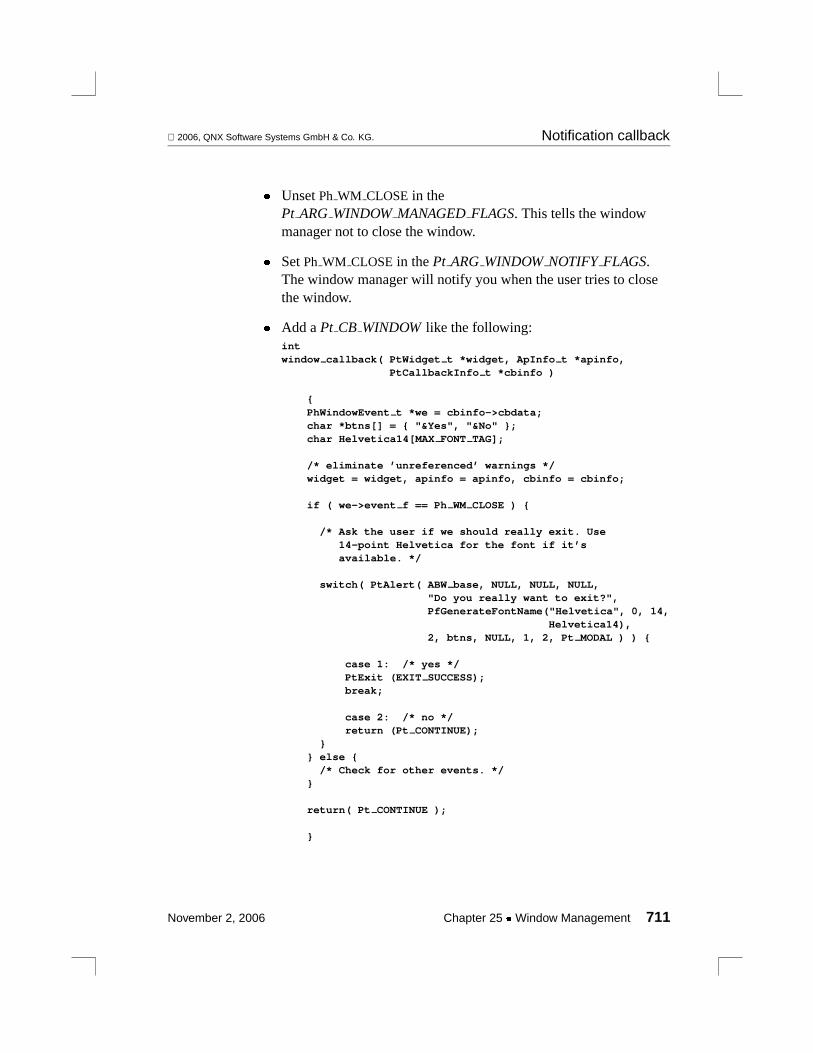
2006, QNX Software Systems GmbH & Co. KG. Notification callback
� UnsetPh WM CLOSEin thePt ARG WINDOWMANAGEDFLAGS. This tells the windowmanager not to close the window.
� SetPh WM CLOSEin thePt ARG WINDOWNOTIFY FLAGS.The window manager will notify you when the user tries to closethe window.
� Add aPt CB WINDOWlike the following:intwindow callback( PtWidget t *widget, ApInfo t *apinfo,
PtCallbackInfo t *cbinfo )
{PhWindowEvent t *we = cbinfo->cbdata;char *btns[] = { "&Yes", "&No" };char Helvetica14[MAX FONT TAG];
/* eliminate ’unreferenced’ warnings */widget = widget, apinfo = apinfo, cbinfo = cbinfo;
if ( we->event f == Ph WM CLOSE ) {
/* Ask the user if we should really exit. Use14-point Helvetica for the font if it’savailable. */
switch( PtAlert( ABW base, NULL, NULL, NULL,"Do you really want to exit?",PfGenerateFontName("Helvetica", 0, 14,
Helvetica14),2, btns, NULL, 1, 2, Pt MODAL ) ) {
case 1: /* yes */PtExit (EXIT SUCCESS);break;
case 2: /* no */return (Pt CONTINUE);
}} else {/* Check for other events. */
}
return( Pt CONTINUE );
}
November 2, 2006 Chapter 25 � Window Management 711
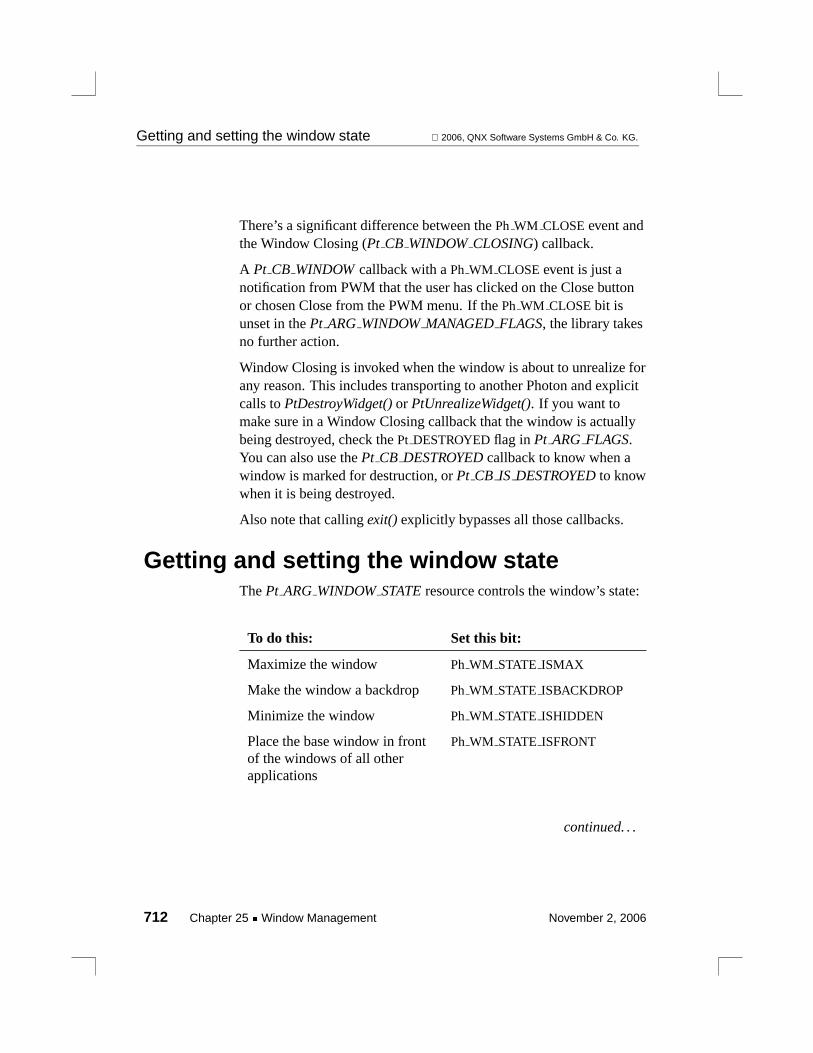
Getting and setting the window state 2006, QNX Software Systems GmbH & Co. KG.
There’s a significant difference between thePh WM CLOSEevent andthe Window Closing (Pt CB WINDOWCLOSING) callback.
A Pt CB WINDOWcallback with aPh WM CLOSEevent is just anotification from PWM that the user has clicked on the Close buttonor chosen Close from the PWM menu. If thePh WM CLOSEbit isunset in thePt ARG WINDOWMANAGEDFLAGS, the library takesno further action.
Window Closing is invoked when the window is about to unrealize forany reason. This includes transporting to another Photon and explicitcalls toPtDestroyWidget()or PtUnrealizeWidget(). If you want tomake sure in a Window Closing callback that the window is actuallybeing destroyed, check thePt DESTROYEDflag inPt ARGFLAGS.You can also use thePt CB DESTROYEDcallback to know when awindow is marked for destruction, orPt CB IS DESTROYEDto knowwhen it is being destroyed.
Also note that callingexit()explicitly bypasses all those callbacks.
Getting and setting the window stateThePt ARG WINDOWSTATEresource controls the window’s state:
To do this: Set this bit:
Maximize the window Ph WM STATE ISMAX
Make the window a backdrop Ph WM STATE ISBACKDROP
Minimize the window Ph WM STATE ISHIDDEN
Place the base window in frontof the windows of all otherapplications
Ph WM STATE ISFRONT
continued. . .
712 Chapter 25 � Window Management November 2, 2006
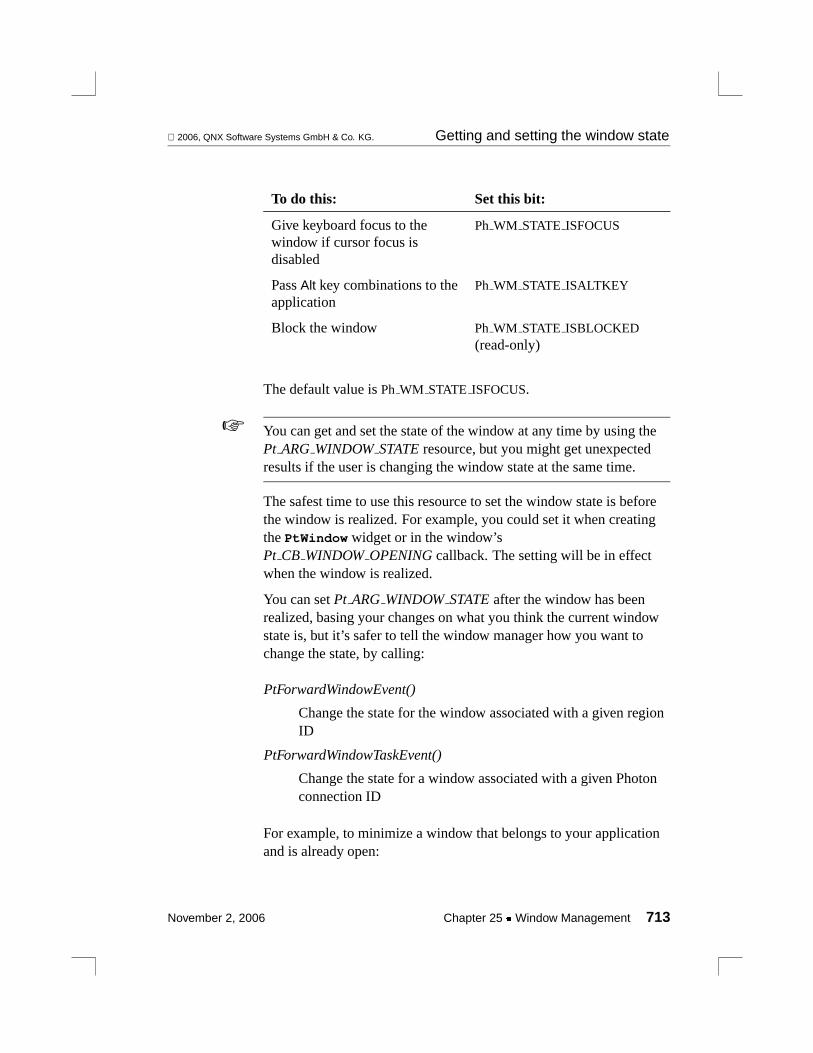
2006, QNX Software Systems GmbH & Co. KG. Getting and setting the window state
To do this: Set this bit:
Give keyboard focus to thewindow if cursor focus isdisabled
Ph WM STATE ISFOCUS
PassAlt key combinations to theapplication
Ph WM STATE ISALTKEY
Block the window Ph WM STATE ISBLOCKED(read-only)
The default value isPh WM STATE ISFOCUS.
You can get and set the state of the window at any time by using thePt ARG WINDOWSTATEresource, but you might get unexpectedresults if the user is changing the window state at the same time.
☞
The safest time to use this resource to set the window state is beforethe window is realized. For example, you could set it when creatingthePtWindow widget or in the window’sPt CB WINDOWOPENINGcallback. The setting will be in effectwhen the window is realized.
You can setPt ARG WINDOWSTATEafter the window has beenrealized, basing your changes on what you think the current windowstate is, but it’s safer to tell the window manager how you want tochange the state, by calling:
PtForwardWindowEvent()
Change the state for the window associated with a given regionID
PtForwardWindowTaskEvent()
Change the state for a window associated with a given Photonconnection ID
For example, to minimize a window that belongs to your applicationand is already open:
November 2, 2006 Chapter 25 � Window Management 713
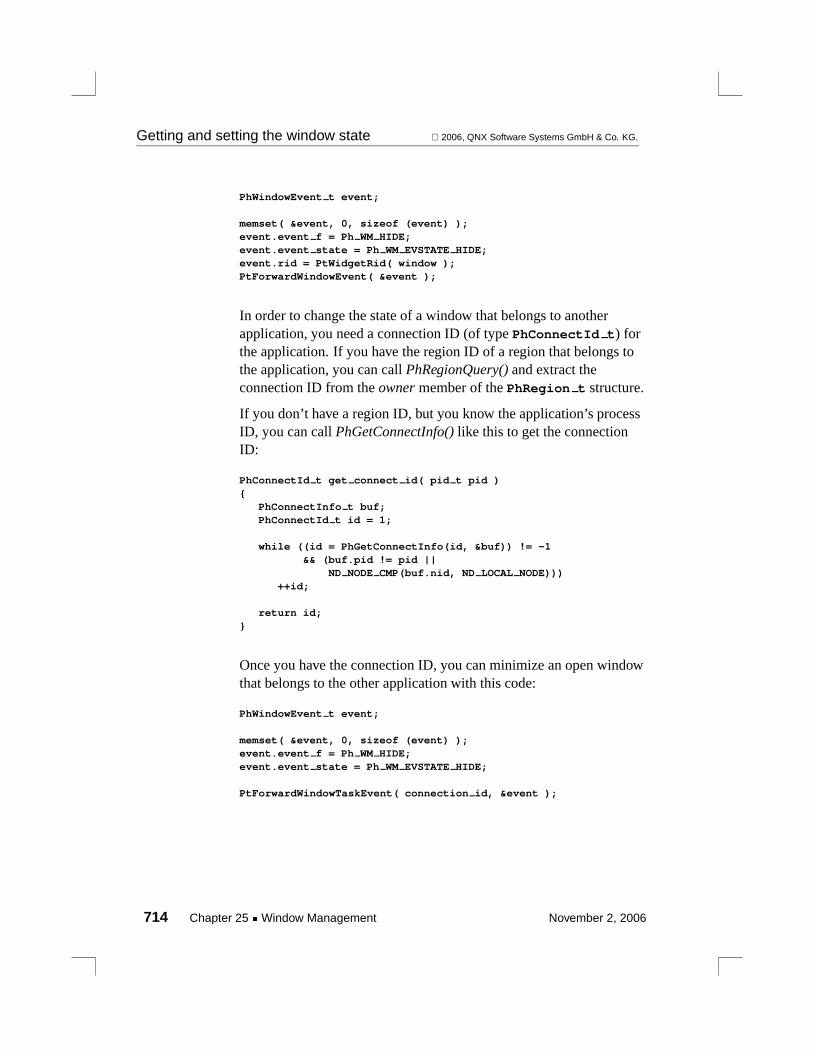
Getting and setting the window state 2006, QNX Software Systems GmbH & Co. KG.
PhWindowEvent t event;
memset( &event, 0, sizeof (event) );event.event f = Ph WM HIDE;event.event state = Ph WM EVSTATE HIDE;event.rid = PtWidgetRid( window );PtForwardWindowEvent( &event );
In order to change the state of a window that belongs to anotherapplication, you need a connection ID (of typePhConnectId t) forthe application. If you have the region ID of a region that belongs tothe application, you can callPhRegionQuery()and extract theconnection ID from theownermember of thePhRegion t structure.
If you don’t have a region ID, but you know the application’s processID, you can callPhGetConnectInfo()like this to get the connectionID:
PhConnectId t get connect id( pid t pid ){
PhConnectInfo t buf;PhConnectId t id = 1;
while ((id = PhGetConnectInfo(id, &buf)) != -1&& (buf.pid != pid ||
ND NODE CMP(buf.nid, ND LOCAL NODE)))++id;
return id;}
Once you have the connection ID, you can minimize an open windowthat belongs to the other application with this code:
PhWindowEvent t event;
memset( &event, 0, sizeof (event) );event.event f = Ph WM HIDE;event.event state = Ph WM EVSTATE HIDE;
PtForwardWindowTaskEvent( connection id, &event );
714 Chapter 25 � Window Management November 2, 2006

2006, QNX Software Systems GmbH & Co. KG. Managing multiple windows
When you call these functions, you’re asking the window manager todo the specified action. If the action isn’t set in the managed flags(Pt ARG WINDOWMANAGEDFLAGS) for the given window, thewindow manager doesn’t do it.
☞
Managing multiple windowsIf your application has more than one window, you’ll need to take therelationships between them into account.
By definition, a child window isalwaysin front of its parent. Thechild windows can move above and below siblings. For windows tobe able to go behind other windows, they must be siblings. So for awindow to be able to move behind the base window, that windowwould have to have no parent.
Window-manager functionsThe following low-level functions are associated with the windowmanager, but you shouldn’t use them in an application that useswidgets:
PhWindowChange()
Modify the attributes of a window’s region
PhWindowClose()
Close a window
PhWindowOpen()
Create a window region
These functions can be called in an application that uses widgets:
PhWindowQueryVisible()
Query a visible extent
November 2, 2006 Chapter 25 � Window Management 715
Running a standalone application 2006, QNX Software Systems GmbH & Co. KG.
PtConsoleSwitch()
Switch to another virtual console
PtForwardWindowEvent()
Forward a window event
PtForwardWindowTaskEvent()
Forward a window event to a task
PtWindowConsoleSwitch()
Switch to the console a given window’s displayed on
PtWindowGetFrameSize()
Determine the size of a window’s frame
Running a standalone applicationIf your application is intended to run by itself, you might want to:
� Make your application fill the screen. SetPh WM STATE ISMAXin the base window’sPt ARG WINDOWSTATEresource.
� Turn off all the flags in the base window’sPt ARG WINDOWRENDERFLAGSso that the window won’tget a title bar, borders, menu buttons, and so on — there’s no usehaving them if there aren’t any other applications running.
Modal dialogsSometimes, you want your program to prompt the user forinformation before continuing. You usually do this by popping up adialog; if you don’t want the user to be able to select any otheroperations before providing the information, you should use amodaldialog.
A modal dialog doesn’t allow user input to go to any of the otherwidgets in the application. To use a modal dialog to prompt forinformation, you have to make sure that events are processed withinthe callback function.
716 Chapter 25 � Window Management November 2, 2006
2006, QNX Software Systems GmbH & Co. KG. Modal dialogs
To create a modal dialog, you have to create a newPtWindow widget,normally as a child of the main application window.
To activate the modal dialog, you have to realize the dialog widgetand block all the other window widgets in the application. To blockthe window or windows, call one of:
PtBlockAllWindows()
Block all windows except the one with a given widget
PtBlockWindow()
Block a given window
Both of these routines return a list of blocked widgets, which you’llneed when you unblock them. Instead of blocking the windows, youcan make the dialog modal by callingPtMakeModal().
After the modal dialog has been activated, callPtModalBlock()tostart a modal loop to process Photon events until a terminationcondition is met.
When the operation associated with the modal dialog is completed oraborted, you have to dismiss the dialog. To do so:
1 Call PtModalUnblock()to stop the modal loop. You can specifythe value to be returned byPtModalBlock().
2 Destroy or unrealize the dialog itself.
3 Call PtUnblockWindows()to unblock any window widgets thatyou blocked when you created the dialog. You don’t need to dothis if you calledPtMakeModal()instead ofPtBlockAllWindows()or PtBlockWindow().
We can easily change our previous example of work procedures sothat its progress dialog behaves as a modal dialog. We’ll add aPtModalCtrl t structure to the callback closure, forPtModalBlock()andPtModalUnblock()to use.
Thedone()callback is altered to callPtModalUnblock()rather thanfree the closure:
November 2, 2006 Chapter 25 � Window Management 717

Modal dialogs 2006, QNX Software Systems GmbH & Co. KG.
int done(PtWidget t *w, void *client,PtCallbackInfo t *call)
{CountdownClosure *closure =
(CountdownClosure *)client;
call = call;
if (!closure->done) {PtAppRemoveWorkProc(NULL, closure->work id);
}PtDestroyWidget(closure->dialog->widget);free(closure->dialog);
/* New: end the modal loop, return the counter’svalue as the response. */
PtModalUnblock(&(closure->modal control),(void *) &(closure->value));
return (Pt CONTINUE);}
All that remains at this point is to change thepushbuttoncb()callback function so that it blocks the window after realizing theprogress dialog, starts the modal loop, and unblocks the windows andfrees the closure after the dialog is dismissed.
Here’s the new version of thepushbuttoncb()callback function:
int push button cb(PtWidget t *w, void *client,PtCallbackInfo t *call)
{PtWidget t *parent = (PtWidget t *)client;WorkDialog *dialog;PtBlockedList t * blocked list;void * response;
w = w; call = call;
dialog = create working dialog(parent);
if (dialog){CountdownClosure *closure =
(CountdownClosure *)malloc(sizeof(CountdownClosure));
if (closure)
718 Chapter 25 � Window Management November 2, 2006

2006, QNX Software Systems GmbH & Co. KG. Modal dialogs
{PtWorkProcId t *id;
closure->dialog = dialog;closure->value = 0;closure->maxvalue = 200000;closure->done = 0;closure->work id = id =
PtAppAddWorkProc(NULL, count cb, closure);
PtAddCallback(dialog->ok button, Pt CB ACTIVATE,done, closure);
PtRealizeWidget(dialog->widget);
/* New: Block all the windows except the dialog,process events until the dialog is closed,and then unblock all the windows. */
blocked list = PtBlockAllWindows (dialog->widget,Ph CURSOR NOINPUT, Pg TRANSPARENT);
response = PtModalBlock( &(closure->modal control), 0 );printf ("Value reached was %d\n", *(int *)response );free (closure);
PtUnblockWindows (blocked list);
}}return (Pt CONTINUE);
}
Here’s the new version of the whole program:
#include <stdlib.h>#include <Pt.h>
typedef struct workDialog {PtWidget t *widget;PtWidget t *label;PtWidget t *ok button;
} WorkDialog;
typedef struct countdownClosure {WorkDialog *dialog;int value;int maxvalue;int done;PtWorkProcId t *work id;
November 2, 2006 Chapter 25 � Window Management 719

Modal dialogs 2006, QNX Software Systems GmbH & Co. KG.
/* New member: */PtModalCtrl t modal control;
} CountdownClosure;
WorkDialog *create working dialog(PtWidget t *parent){
PhDim t dim;PtArg t args[3];int nargs;PtWidget t *window, *group;WorkDialog *dialog =
(WorkDialog *)malloc(sizeof(WorkDialog));
if (dialog){nargs = 0;PtSetArg(&args[nargs], Pt ARG WIN PARENT, parent, 0);
nargs++;PtSetParentWidget(NULL);dialog->widget = window =
PtCreateWidget(PtWindow, parent, nargs, args);
nargs = 0;PtSetArg(&args[nargs], Pt ARG GROUP ORIENTATION,
Pt GROUP VERTICAL, 0); nargs++;PtSetArg(&args[nargs], Pt ARG GROUP VERT ALIGN,
Pt GROUP VERT CENTER, 0); nargs++;group = PtCreateWidget(PtGroup, window, nargs, args);
nargs = 0;dim.w = 200;dim.h = 100;PtSetArg(&args[nargs], Pt ARG DIM, &dim, 0); nargs++;PtSetArg(&args[nargs], Pt ARG TEXT STRING,
"Counter: ", 0); nargs++;dialog->label = PtCreateWidget(PtLabel, group,
nargs, args);
PtCreateWidget(PtSeparator, group, 0, NULL);
nargs = 0;PtSetArg(&args[nargs], Pt ARG TEXT STRING, "Stop", 0);
nargs++;dialog->ok button = PtCreateWidget(PtButton, group,
1, args);}
return dialog;}
720 Chapter 25 � Window Management November 2, 2006

2006, QNX Software Systems GmbH & Co. KG. Modal dialogs
int done(PtWidget t *w, void *client,PtCallbackInfo t *call)
{CountdownClosure *closure =
(CountdownClosure *)client;
call = call;
if (!closure->done) {PtAppRemoveWorkProc(NULL, closure->work id);
}PtDestroyWidget(closure->dialog->widget);free(closure->dialog);
/* New: end the modal loop, return the counter’svalue as the response. */
PtModalUnblock(&(closure->modal control),(void *) &(closure->value));
return (Pt CONTINUE);}
intcount cb(void *data){
CountdownClosure *closure =(CountdownClosure *)data;
char buf[64];int finished = 0;
if ( closure->value++ == 0 || closure->value %1000 == 0 )
{sprintf(buf, "Counter: %d", closure->value);PtSetResource( closure->dialog->label,
Pt ARG TEXT STRING, buf, 0);}
if ( closure->value == closure->maxvalue ){closure->done = finished = 1;PtSetResource( closure->dialog->ok button,
Pt ARG TEXT STRING, "Done", 0);}
return finished ? Pt END : Pt CONTINUE;}
int push button cb(PtWidget t *w, void *client,
November 2, 2006 Chapter 25 � Window Management 721

Modal dialogs 2006, QNX Software Systems GmbH & Co. KG.
PtCallbackInfo t *call){
PtWidget t *parent = (PtWidget t *)client;WorkDialog *dialog;PtBlockedList t * blocked list;void * response;
w = w; call = call;
dialog = create working dialog(parent);
if (dialog){CountdownClosure *closure =
(CountdownClosure *)malloc(sizeof(CountdownClosure));
if (closure){PtWorkProcId t *id;
closure->dialog = dialog;closure->value = 0;closure->maxvalue = 200000;closure->done = 0;closure->work id = id =
PtAppAddWorkProc(NULL, count cb, closure);
PtAddCallback(dialog->ok button, Pt CB ACTIVATE,done, closure);
PtRealizeWidget(dialog->widget);
/* New: Block all the windows except the dialog,process events until the dialog is closed,and then unblock all the windows. */
blocked list = PtBlockAllWindows (dialog->widget,Ph CURSOR NOINPUT, Pg TRANSPARENT);
response = PtModalBlock( &(closure->modal control), 0 );printf ("Value reached was %d\n", *(int *)response );free (closure);
PtUnblockWindows (blocked list);
}}return (Pt CONTINUE);
}
722 Chapter 25 � Window Management November 2, 2006

2006, QNX Software Systems GmbH & Co. KG. Modal dialogs
int main(int argc, char *argv[]){
PhDim t dim;PtArg t args[3];int n;PtWidget t *window;PtCallback t callbacks[] = {{push button cb, NULL}};char Helvetica14b[MAX FONT TAG];
if (PtInit(NULL) == -1)exit(EXIT FAILURE);
dim.w = 200;dim.h = 100;PtSetArg(&args[0], Pt ARG DIM, &dim, 0);if ((window = PtCreateWidget(PtWindow, Pt NO PARENT,
1, args)) == NULL)PtExit(EXIT FAILURE);
callbacks[0].data = window;n = 0;PtSetArg(&args[n++], Pt ARG TEXT STRING, "Count Down...", 0);
/* Use 14-point, bold Helvetica if it’s available. */
if(PfGenerateFontName("Helvetica", PF STYLE BOLD, 14,Helvetica14b) == NULL) {
perror("Unable to generate font name");} else {
PtSetArg(&args[n++], Pt ARG TEXT FONT, Helvetica14b, 0);}PtSetArg(&args[n++], Pt CB ACTIVATE, callbacks,
sizeof(callbacks)/sizeof(PtCallback t));PtCreateWidget(PtButton, window, n, args);
PtRealizeWidget(window);
PtMainLoop();return (EXIT SUCCESS);
}
If your modal dialog is self-contained and you just need to wait for it,you might find this function useful:
ApModalWait()
Process Photon events until a given widget is destroyed
November 2, 2006 Chapter 25 � Window Management 723


Chapter 26
Programming Photon without PhAB
In this chapter. . .Basic steps 727Compiling and linking a non-PhAB application 728Sample application 729Connecting application code to widgets732Complete sample application 733
November 2, 2006 Chapter 26 � Programming Photon without PhAB 725

2006, QNX Software Systems GmbH & Co. KG. Basic steps
We strongly recommend that you use PhAB to develop Photonapplications—this chapter is for those who insist on not using PhAB.
Basic stepsAll applications using the Photon widget library follow the same basicsequence:
1 Include<Pt.h>, the standard header file for the widget library.
2 Initialize the Photon widget toolkit by callingPtInit() (orPtAppInit(), which also creates the main window).
3 Create the widgets that make up the UI by callingPtCreateWidget(). This function can make the new widgetsinto children of a given widget or the current container, or withno parent.
4 Register any callback functions in the application with theappropriate widgets usingPtAddCallback()orPtAddCallbacks().
5 Realize the widgets by callingPtRealizeWidget(). This functionneeds to be called only once by the application.
Therealizestep actually creates any Photon regions that arerequired and maps them to the screen. Until this step isperformed, no regions exist, and nothing is displayed on thescreen.
6 Begin processing photon events by callingPtMainLoop().
At this point, the Photon widget toolkit takes control over theapplication and manages the widgets. If any widgets are to callfunctions in your application, they must have been registered ascallbacks before this.
November 2, 2006 Chapter 26 � Programming Photon without PhAB 727

Compiling and linking a non-PhAB application 2006, QNX Software Systems GmbH & Co. KG.
Compiling and linking a non-PhABapplicationTo compile and run an application that uses the Photon widget library,you must link against the main Photon library,ph. There are bothstatic and shared versions of this library.
CAUTION:
Thelibphoton.so.1 library is for applications created with version1.14 of the Photon microGUI only. Don’t combine this library withthe current libraries or header files, or your application won’t runproperly.
!
We recommend that you always link against thesharedlibrary. Thislets you keep your applications smaller and allows them to inheritnew features that are added to the widget library when new releases ofthe shared library are installed.
The Photon library includes most of the function and widgetdefinitions. If your application usesAl (translation) orPx (extended)functions, you’ll also need to link with thephexlib library. If yourapplication usesAp (PhAB) functions, you’ll also need to link withtheAp library.
The names of the shared and static libraries are the same. By default,qcc links against the shared library; to link against the static library,specify the-Bstatic option forqcc.
For example, if we have an application calledhello.c, the commandto compile and link against the shared libraries is:
qcc -o hello hello.c -lph
To link against the static libraries, the command is:
qcc -o hello hello.c -Bstatic -lph -lfont
728 Chapter 26 � Programming Photon without PhAB November 2, 2006
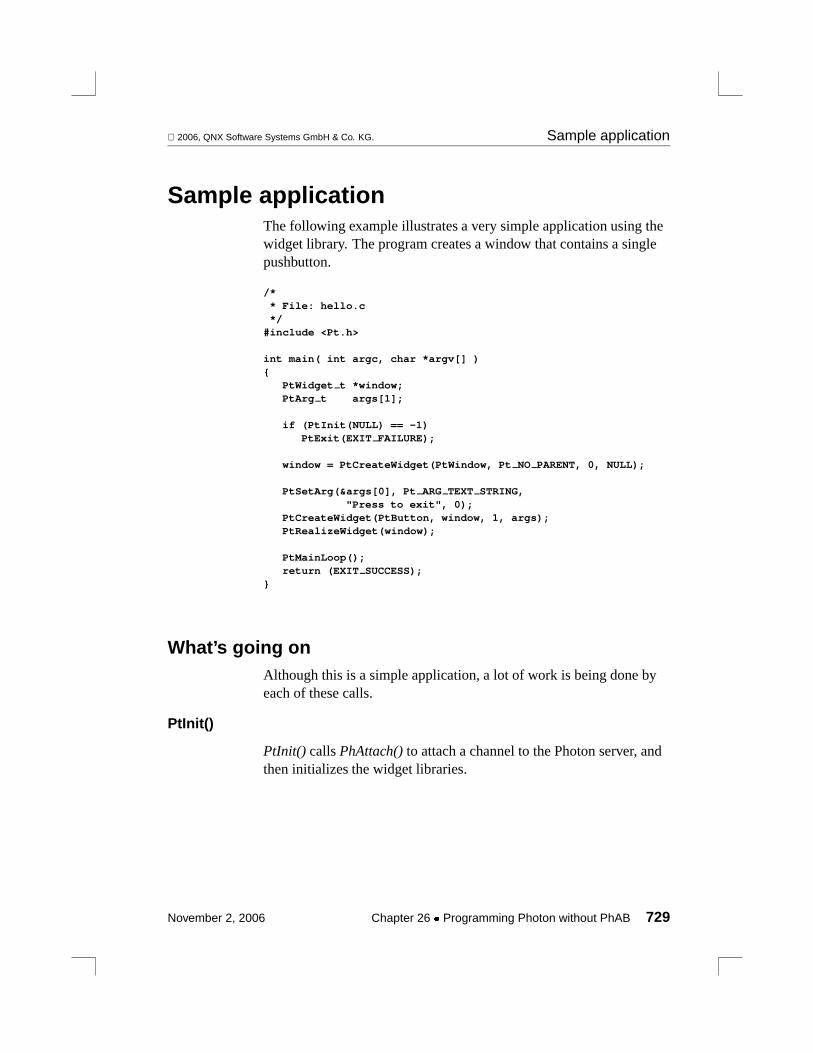
2006, QNX Software Systems GmbH & Co. KG. Sample application
Sample applicationThe following example illustrates a very simple application using thewidget library. The program creates a window that contains a singlepushbutton.
/** File: hello.c*/
#include <Pt.h>
int main( int argc, char *argv[] ){
PtWidget t *window;PtArg t args[1];
if (PtInit(NULL) == -1)PtExit(EXIT FAILURE);
window = PtCreateWidget(PtWindow, Pt NO PARENT, 0, NULL);
PtSetArg(&args[0], Pt ARG TEXT STRING,"Press to exit", 0);
PtCreateWidget(PtButton, window, 1, args);PtRealizeWidget(window);
PtMainLoop();return (EXIT SUCCESS);
}
What’s going onAlthough this is a simple application, a lot of work is being done byeach of these calls.
PtInit()
PtInit() callsPhAttach()to attach a channel to the Photon server, andthen initializes the widget libraries.
November 2, 2006 Chapter 26 � Programming Photon without PhAB 729

Sample application 2006, QNX Software Systems GmbH & Co. KG.
PtCreateWidget() — first call
The first call toPtCreateWidget()creates a window widget thatinteracts with the window manager and serves as the parent for otherwidgets created in the application. The arguments are:
� the class of widget to create (PtWindow in this case)
� the window’s parent (Pt NO PARENTbecause the window doesn’thave one)
� the number of elements in the argument list
� an argument list of initial values for the widget’s resources.
PtCreateWidget()returns a pointer to the widget created.
For more information, see “Creating widgets” in the ManagingWidgets in Application Code chapter. For more information aboutwidgets and their resources, see the PhotonWidget Reference.
PtSetArg()
ThePtSetArg()macro sets up an argument list that’s used to initializethe button’s resources when it’s created. For more information, seethe Manipulating Resources in Application Code chapter.
PtCreateWidget() — second call
All the widgets in the application — except the top-level window —have a container widget as a parent. Container widgets may haveother containers within them. Creating the widgets in the applicationproduces a hierarchy called thewidget family.
The second call toPtCreateWidget()creates a pushbutton widget as achild of the window widget, using the argument list to initialize thebutton’s resources. You can passPt DEFAULT PARENTas the parentto make the widget the child of the most recently created containerwidget; in this case, the results are the same.
730 Chapter 26 � Programming Photon without PhAB November 2, 2006

2006, QNX Software Systems GmbH & Co. KG. Sample application
PtRealizeWidget()
PtRealizeWidget()displays the widget and all its descendants in thewidget family. Our sample application callsPtRealizeWidget()for thetop-level window, so all the widgets in the application are displayed.
When a widget is realized, it uses the values of its resources todetermine how big it must be to display its contents. Before realizinga widget, you should set any of the resources that may affect its size.You may change some of the resources after the widget has beenrealized, but it’s up to the widget to determine if it can or will resize toaccommodate the change in the resource’s value.
You can setresize flagsthat the widget uses to determine whether ornot to adjust its size in response to such changes, but note that if thewidget exceeds the dimensions allocated to it by its parent, it’sclipped to the parent’s size. There’s no mechanism for the widget tonegotiate with its parent to obtain more space. See the GeometryManagement chapter for more information.
If a Photonregion is required to display the widget correctly, it’screated each time the widget is realized. A region is required underanyof the following conditions:
� The widget sets a cursor.
� The widget needs to get events that aren’t redirected to it by itsparent container (e.g. boundary, pointer-motion events)
� ThePt REGIONflag is set in the widget’sPt ARG FLAGSresource (seePtWidget in theWidget Reference).
You can unrealize a widget by callingPtUnrealizeWidget(). Thisaffects the visibility of the widget and its descendants, but not the restof the widget family hierarchy. You can redisplay the widget later bycallingPtRealizeWidget().
You can prevent a widget and its descendants from being realizedwhen the widget’s ancestor is realized. To do this, setPt DELAY REALIZE in the widget’sPt ARG FLAGSresource. If you
November 2, 2006 Chapter 26 � Programming Photon without PhAB 731

Connecting application code to widgets 2006, QNX Software Systems GmbH & Co. KG.
set this flag, it’s your responsibility to callPtRealizeWidget()on thewidget when you want it to appear.
PtMainLoop()
CallingPtMainLoop()transfers control of the application to thePhoton widget library.
The widget library waits for Photon events and passes them on to thewidgets to handle them. Application code is executed only whencallback functions that the application has registered with a widget areinvoked as a result of some event.
Connecting application code to widgetsIf you compile, link, and run the sample application, you’ll see that awindow appears with a button in it. If you push the button, nothinghappens because no application code has been associated with it.
The Photon widget library is designed so that the UI code can be keptdistinctly separate from the application code. The UI is composed ofthe code to create and manipulate the widget family hierarchy, andmust call the application code in response to particular events or useractions. The connection between the application code and the UI thatallows it to use the application code is the single point where thesetwo parts have intimate knowledge of each other.
Connections are made between the UI and the application code usingcallbacksandevent handlers.
A callback is a special type of widget resource that allows theapplication to take advantage of existing widget features. Using acallback, the application can register a function to be called by thewidget library later in response to a particular occurrence within thewidget.
Event handlers (raw and filter callbacks) are normally used to addcapabilities to a widget. For example, you could add behavior to abutton press inside a widget that has no callbacks associated withbutton-press events.
732 Chapter 26 � Programming Photon without PhAB November 2, 2006

2006, QNX Software Systems GmbH & Co. KG. Complete sample application
CallbacksA callback resource is used to notify the application that a specificaction has occurred for a widget (e.g. you’ve selected a button). Everycallback resource represents some user action that we thought yourapplication might be interested in.
As with all resources, a widget has its callback resources defined byits widget class, and it inherits the callback resources defined by allthe ancestors of its class. This means that a widget may have severaluser actions that it can notify the application about.
The value of a callback resource is a callback list. Each element of thelist is an application function to be called in response to the behaviorandclient dataassociated with the callback. Client data is a pointer toany arbitrary data that your application may need to provide to thecallback function for it to work correctly.
For information about callbacks, see “Callbacks” in the ManagingWidgets in Application Code chapter.
Event handlingWhen we create a widget class, we can’t possibly anticipate all ofyour application’s needs. Your application may want to be notified ofsome occurrence on a widget that doesn’t have an associated callbackresource. In such cases, your application can define event-handlingfunctions.
For information about event handlers, see “Event handlers” in theManaging Widgets in Application Code chapter.
Complete sample applicationWe can now use our newly acquired knowledge of resources andcallbacks to create a more functional version of the sampleapplication given earlier.
Using resources, we can give the pushbutton widget the samedimensions as the window, and specify which font to use for thelabel’s text. We can also define the callback to be executed when the
November 2, 2006 Chapter 26 � Programming Photon without PhAB 733

Complete sample application 2006, QNX Software Systems GmbH & Co. KG.
pushbutton is pressed. We’ll make the callback function display asimple message and exit.
Here’s the complete source code for our sample program with thesechanges:
#include <stdio.h>#include <stdlib.h>#include <Pt.h>
int main( int argc, char *argv[] ){
PtArg t args[3];int n;PtWidget t *window;int push button cb( PtWidget t *, void *,
PtCallbackInfo t *);PtCallback t callbacks[] = {{push button cb, NULL}};char Helvetica14[MAX FONT TAG];
if (PtInit(NULL) == -1)PtExit(EXIT FAILURE);
window = PtCreateWidget(PtWindow, Pt NO PARENT, 0, NULL);
n = 0;PtSetArg(&args[n++], Pt ARG TEXT STRING,
"Press to exit", 0);
/* Use 14-point, bold Helvetica if it’s available. */
if(PfGenerateFontName("Helvetica", 0, 14,Helvetica14) == NULL) {
perror("Unable to generate font name");} else {
PtSetArg(&args[n++], Pt ARG TEXT FONT, Helvetica14, 0);}PtSetArg(&args[n++], Pt CB ACTIVATE, callbacks,
sizeof(callbacks)/sizeof(callbacks[0]));PtCreateWidget(PtButton, window, n, args);
PtRealizeWidget(window);PtMainLoop();return (EXIT SUCCESS);
}
intpush button cb(PtWidget t *w, void *data,
PtCallbackInfo t *cbinfo){
734 Chapter 26 � Programming Photon without PhAB November 2, 2006

2006, QNX Software Systems GmbH & Co. KG. Complete sample application
printf( "I was pushed\n " );PtExit( EXIT SUCCESS );
/* This line won’t be reached, but it keepsthe compiler happy. */
return( Pt CONTINUE );}
November 2, 2006 Chapter 26 � Programming Photon without PhAB 735


Appendix A
Photon Architecture
In this appendix. . .Event space 739Events 740Regions 741Event types 746How region owners are notified of events746Device region 747Photon drivers 749Photon window manager 752
November 2, 2006 Appendix: A � Photon Architecture 737


2006, QNX Software Systems GmbH & Co. KG. Event space
This appendix provides a technical overview of Photon’s architecture.
Event spaceThe essential characteristic of Photon is the way in which graphicalapplications are represented. All Photon applications consist of one ormore rectangles calledregions. These regions reside in an abstract,three-dimensionalevent space; the user is outside this space lookingin.
Event space
Root region
Application region
Child application region
Regions can emit and collect objects calledevents. These events cantravel in either direction through the event space (i.e. either toward oraway from the user). As events move through the event space, theyinteract with other regions — this is how applications interact witheach other. The process maintaining this simple architecture is thePhoton Manager.
November 2, 2006 Appendix: A � Photon Architecture 739

Events 2006, QNX Software Systems GmbH & Co. KG.
All the services required for a windowing system — windowmanagers, drivers, and applications — can easily be created usingregions and events. And because processes whose regions aremanaged by the Photon Manager needn’t reside on the same computeras the Photon Manager, it’s also easy to implementnetwork-distributed applications.
Regions and eventsPhoton programs use two basic objects: regions and events. Regionsare stationary, while events move through the event space.
A region is asingle, fixed rectangular area that a program places inthe event space. A region possesses attributes that define how itinteracts with events.
An event is asetof nonoverlapping rectangles that can be emitted andcollected by regions in either direction in the event space. All eventshave an associatedtype. Some event types also possess correspondingdata.
EventsAs an event flows through the event space, its rectangle set intersectswith regions placed in the event space by other applications. As thisoccurs, the Photon Manager adjusts the event’s rectangle set accordingto the attributes of the regions with which the event intersected.
Initial rectangle setAn emitted event’s default initial rectangle set contains a singlerectangle whose dimensions are usually the size of the emittingregion. As the event moves through the event space, its interactionswith other regions may cause some portions of this rectangle to beremoved. If this happens, the rectangle will be divided into a set ofsmaller rectangles that represent the remaining portions:
740 Appendix: A � Photon Architecture November 2, 2006
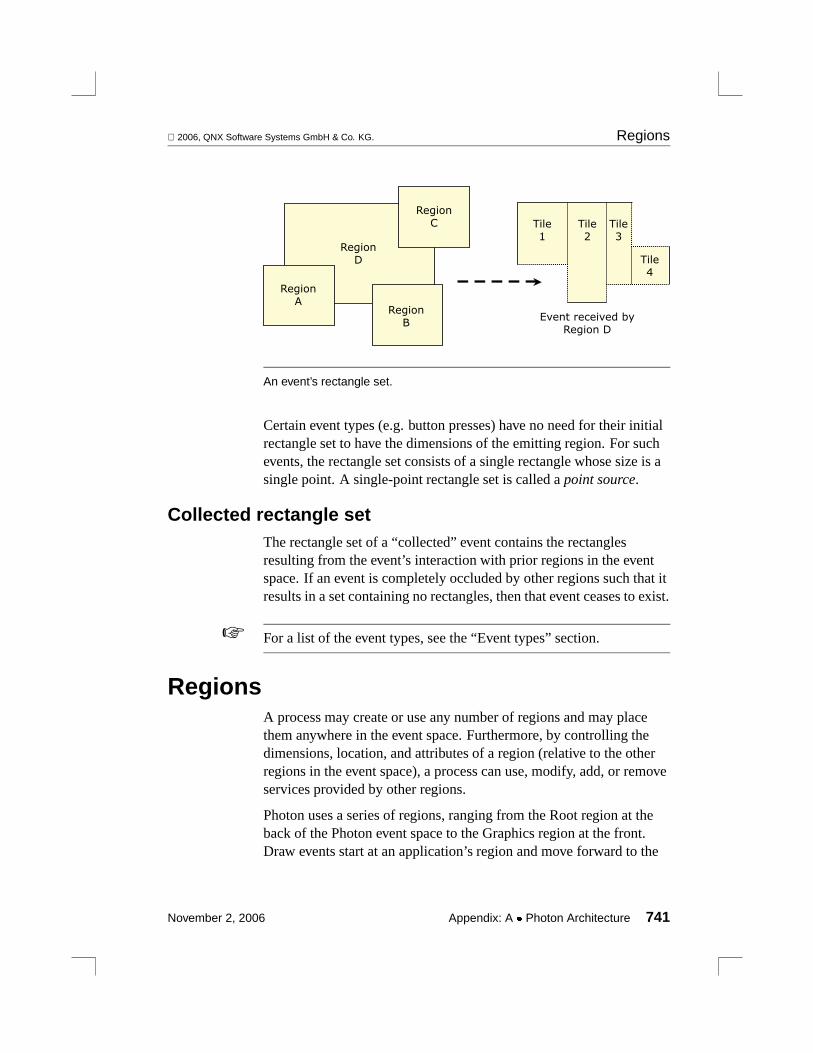
2006, QNX Software Systems GmbH & Co. KG. Regions
RegionA
RegionB
RegionC
RegionD
Tile1
Tile2
Tile3
Tile4
Event received byRegion D
An event’s rectangle set.
Certain event types (e.g. button presses) have no need for their initialrectangle set to have the dimensions of the emitting region. For suchevents, the rectangle set consists of a single rectangle whose size is asingle point. A single-point rectangle set is called apoint source.
Collected rectangle setThe rectangle set of a “collected” event contains the rectanglesresulting from the event’s interaction with prior regions in the eventspace. If an event is completely occluded by other regions such that itresults in a set containing no rectangles, then that event ceases to exist.
For a list of the event types, see the “Event types” section.☞
RegionsA process may create or use any number of regions and may placethem anywhere in the event space. Furthermore, by controlling thedimensions, location, and attributes of a region (relative to the otherregions in the event space), a process can use, modify, add, or removeservices provided by other regions.
Photon uses a series of regions, ranging from the Root region at theback of the Photon event space to the Graphics region at the front.Draw events start at an application’s region and move forward to the
November 2, 2006 Appendix: A � Photon Architecture 741
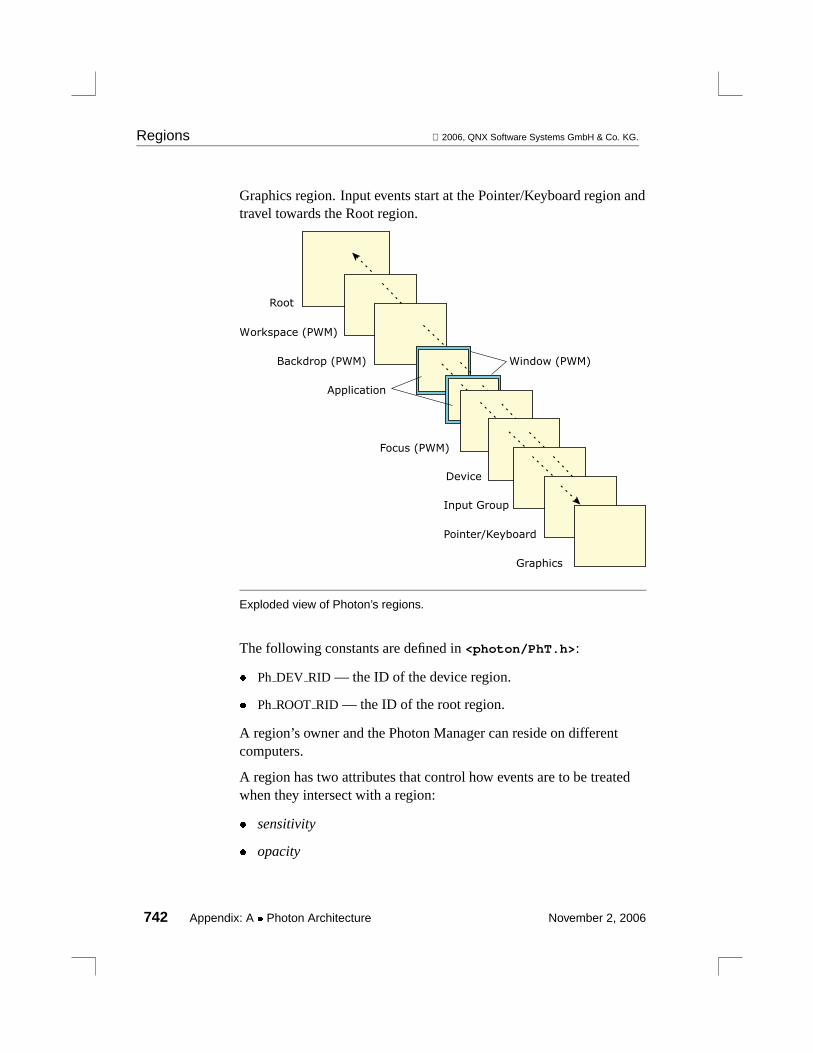
Regions 2006, QNX Software Systems GmbH & Co. KG.
Graphics region. Input events start at the Pointer/Keyboard region andtravel towards the Root region.
Root
Device
Graphics
Workspace (PWM)
Backdrop (PWM)
Focus (PWM)
Input Group
Pointer/Keyboard
Application
Window (PWM)
Exploded view of Photon’s regions.
The following constants are defined in<photon/PhT.h>:
� Ph DEV RID — the ID of the device region.
� Ph ROOT RID — the ID of the root region.
A region’s owner and the Photon Manager can reside on differentcomputers.
A region has two attributes that control how events are to be treatedwhen they intersect with a region:
� sensitivity
� opacity
742 Appendix: A � Photon Architecture November 2, 2006

2006, QNX Software Systems GmbH & Co. KG. Regions
You can set these independently for each different type of event.
SensitivityIf a region is sensitive to a particular type of event, then the region’sowner collects a copy of any event of that type that intersects with theregion. If other regions are sensitive to this same event type and theevent intersects with them, they’ll also collect a copy of the event —but with a potentially different rectangle set.
Although many regions can collect a copy of the same event, therectangle set for the event may be adjusted and will therefore beunique for each region that collects the event. The rectangle setreflects the event’s interaction with other regions in the event spacebefore arriving at the collecting region.
If a region isn’t sensitive to an event type, the region’s owner nevercollects that type of event.
The sensitivity attribute doesn’t modify the rectangle set of an event,nor does it affect the event’s ability to continue flowing through theevent space.
OpacityOpaque regions block portions of an event’s rectangle set fromtraveling further in the event space. The opacity attribute controlswhether or not an event’s rectangle set is adjusted as a result ofintersecting with a region.
If a region is opaque to an event type, any event of that type thatintersects with the region has its rectangle set adjusted in order to“clip out” the intersecting area. This changes the rectangle set suchthat it includes smaller rectangles. These new rectangles describe theportions of the event that remain visible to regions beyond this regionin the event space.
If a regionisn’t opaque to an event type, then events of that type neverhave their rectangle set adjusted as a result of intersecting with thatregion.
November 2, 2006 Appendix: A � Photon Architecture 743
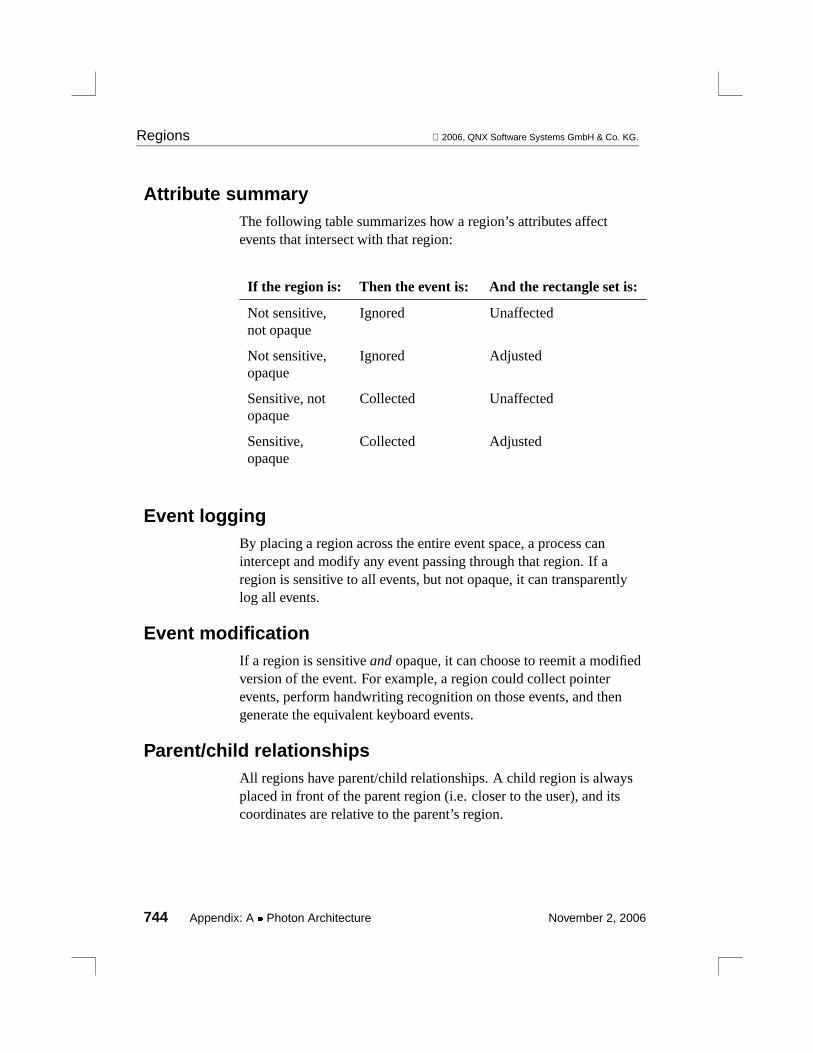
Regions 2006, QNX Software Systems GmbH & Co. KG.
Attribute summaryThe following table summarizes how a region’s attributes affectevents that intersect with that region:
If the region is: Then the event is: And the rectangle set is:
Not sensitive,not opaque
Ignored Unaffected
Not sensitive,opaque
Ignored Adjusted
Sensitive, notopaque
Collected Unaffected
Sensitive,opaque
Collected Adjusted
Event loggingBy placing a region across the entire event space, a process canintercept and modify any event passing through that region. If aregion is sensitive to all events, but not opaque, it can transparentlylog all events.
Event modificationIf a region is sensitiveandopaque, it can choose to reemit a modifiedversion of the event. For example, a region could collect pointerevents, perform handwriting recognition on those events, and thengenerate the equivalent keyboard events.
Parent/child relationshipsAll regions have parent/child relationships. A child region is alwaysplaced in front of the parent region (i.e. closer to the user), and itscoordinates are relative to the parent’s region.
744 Appendix: A � Photon Architecture November 2, 2006

2006, QNX Software Systems GmbH & Co. KG. Regions
Photon coordinate spaceAll regions reside within the Photon coordinate space, whosedimensions are as follows:
(-32K, -32K) (+32K, -32K)
(+32K, +32K)(-32K, +32K)
Upper-left
quadrant
Upper-right
quadrant
Lower-left
quadrant
Lower-right
quadrant
VGA
display
(640, 480)
(0, 0)
Root regionA special region called theroot regionis always the region furthestaway from the user. All other regions descend in some way from theroot region. Once an event traveling away from the user reaches theroot region, it ceases to exist.
The root region’s dimensions are the width of the entire Photoncoordinate space. As a result of the parent/child relationship of allregions, any region’s location is ultimately related to the root region’sdimensions.
A region can be located anywhere in the event space and still have theroot region as its parent.
☞
November 2, 2006 Appendix: A � Photon Architecture 745

Event types 2006, QNX Software Systems GmbH & Co. KG.
Event typesEvents are emitted for the following reasons:
� key presses, keyboard state information
� button presses and releases
� pointer motions (with or without button pressed)
� boundary crossings
� regions exposed or covered
� drag operations
� drag-and-drop operations
� drawing functions
For more information on event types, seePhEvent t in the PhotonLibrary Reference.
How region owners are notified of eventsRegion owners can be notified of events by the Photon Manager inthree different ways:
� polling
� synchronous notification
� asynchronous notification
PollingTo poll, the application calls a function that asks the Photon Managerto reply immediately with either an event or a status indicating noevent is available.
746 Appendix: A � Photon Architecture November 2, 2006
2006, QNX Software Systems GmbH & Co. KG. Device region
Normally you should avoid polling, but you may find it beneficial onoccasion. For example, an application rapidly animating a screen canpoll for events as part of its stream of draw events. An application canalso use polling to retrieve an event after asynchronous notification.
☞
Synchronous notificationFor synchronous notification, the application calls a function that asksthe Photon Manager to reply immediately if an event is pending, or towait until one becomes available before replying.
With synchronous notification, an application can’t block on othersources while it’s waiting for the Photon Manager to reply. Youshould find this behavior acceptable in most cases since it causes theapplication to execute only when the desired events become available.But if for some reason the possibility of blocking on the PhotonManager isn’t acceptable, you may consider asynchronousnotification.
Asynchronous notificationFor asynchronous notification, the application calls a function thatsets up a notification method (e.g. a signal or a pulse) that the PhotonManager activates when an event of the desired type is available. Theapplication can then retrieve the event by polling.
With asynchronous notification, an application can block on multiplesources, including processes that aren’t Photon applications.
Device regionThe device region is owned by the Photon Manager, which divides theevent space into two sections:
� driver regions, which reside on the user’s side of the device region
� application regions, which reside on the other side of the deviceregion
November 2, 2006 Appendix: A � Photon Architecture 747
Device region 2006, QNX Software Systems GmbH & Co. KG.
The Photon Manager uses the device region to focus pointer andkeyboard events as well as to manage drag events.
Pointer focusAs with other windowing systems, Photon has the concept of apointer(i.e. screen cursor). This pointer is graphically represented onthe screen and tracks the movements of the pointing device (e.g. amouse or touchscreen). Drivers for pointing devices emit pointerevents toward the root region.
A pointer event emitted from a driver isunfocused, or raw, until itarrives at the device region, where the Photon Manager intercepts itand then assigns it a location in the Photon coordinate space.
Assigning this location — which is known asfocusingthe event —controls which regions will collect the event. The Photon Managerthen reemits the event with the focused location.
Because Photon emitsfocused, or cooked, pointer motion events inboth directions from the device region, application programs as wellas driver programs can be informed of pointer actions. For example,when the graphics driver collects focused pointer events, it updatesthe location of the pointer’s graphical image on the screen.
Keyboard focusThe keyboard driver is similar to pointing device drivers, except itemits keyboard events. As with pointer events, keyboard events areunfocused until they arrive at the device region, where the PhotonManager assigns them a location (i.e. focuses them) in the Photoncoordinate space.
By default, the device region sets the same focus location for bothkeyboard events and pointer events. Therefore, regions directlybehind the screen pointer will collect focused keyboard events.
The window manager supplements the keyboard focus methods. Formore information, see the section on the Photon window manager.
748 Appendix: A � Photon Architecture November 2, 2006

2006, QNX Software Systems GmbH & Co. KG. Photon drivers
Drag eventsAn application initiates dragging by emitting a drag event to thedevice region. Once this event is collected at the device region, thePhoton Manager takes care of the interaction with the pointer (i.e.drag rectangle) until the drag operation is complete. Once completed,the device region emits a drag event to the application.
Drag-and-drop eventsDuring a drag-and-drop operation, a series of events is emitted toadvise the widgets involved of the operation’s status. Some of theseevents are emitted to the source of the operation, and others to thedestination. For more information, see the Drag and Drop chapter.
Photon driversIn Photon, drivers aren’t inherently different from other applications.They’re simply programs that use regions and events in a particularway to provide their services. Depending on its function, a driver iseither aninput driveror anoutput driver.
For example, the mouse and keyboard drivers are input driversbecause they emit, and are the source of, hardware actions. Graphicsdrivers, on the other hand, are output drivers because they collectevents that cause them to take action with hardware devices.
Input driversMouse driver
The mouse driver places a region on the user’s side of the deviceregion. It gets information from the mouse hardware and buildsPhoton raw pointer events that it then emits toward the root region.
When the device region collects a raw pointer event, the PhotonManager focuses it and then emits cooked events in both directions inthe event space.
November 2, 2006 Appendix: A � Photon Architecture 749
Photon drivers 2006, QNX Software Systems GmbH & Co. KG.
Keyboard driver
The keyboard driver also places a region on the user’s side of thedevice region. The driver gets information from the keyboardhardware and builds Photon keyboard events that it then emits towardthe root region.
When the device region collects keyboard events, the Photon Managerfocuses those events and then reemits them toward the root region.
The window manager supplements the default focus method providedby the device region.
☞
Since Photon makes no assumptions as to what type of keyboard isbeing used, the keyboard driver could acquire its event data on anyhardware or even from another process.
Photon allows multiple input drivers and multiple output drivers to beassociated with each other as aninput group. This group of deviceswill be treated distinctly from other input groups by Photon.
To determine the current input group, callPhInputGroup(), passing toit the current event, if any.
Output driversGraphics driver
A graphics driver places a region sensitive to draw events onto theuser’s side of the device region. As the driver collects draw events, itrenders the graphical information on the screen. Because the collectedevent’s rectangle set contains only those areas that need to be updated,the driver can optimize its update. (This is especially efficient if thegraphics hardware can handle clipping lists directly.)
The Photon drawing API accumulates draw requests into batches thatare emitted as single draw events.
☞
750 Appendix: A � Photon Architecture November 2, 2006

2006, QNX Software Systems GmbH & Co. KG. Photon drivers
Multiple graphic drivers
The region a graphics driver uses can have dimensions that representan area smaller than the entire Photon coordinate space. As a result,multiple graphics drivers can share the coordinate space by eachhandling different portions of it and displaying their events ondifferent screens. And since region owners don’t have to be on thesame node as the Photon Manager, those graphics drivers can displaytheir portion of the coordinate space on screens located on othercomputers in the network.
Drivers using separate regions
From an application’s perspective, the Photon coordinate spacealways looks like a single, unified graphical space, yet it allows usersto drag windows from one physical screen to another.
For example, let’s say an operator in a factory control environmenthas a small handheld computer. If this computer were connected tonetwork via a wireless link, the operator could walk up to a computerwith a large-screen control application and drag a window from thatscreen onto the screen of the handheld unit. Taking the handheldcomputer, the operator could then walk out onto the plant floor andcontinue to interact with the control application to monitor and adjustequipment.
Drivers using overlapping regions
In another type of example, instead of having driver regions withexclusive portions of the coordinate space, you could have driversusingoverlappingregions. This approach would let you replicate thesame draw events on multiple screens, which would be ideal forsupport or training environments.
Encapsulation drivers
Since graphics drivers for Photon are really just applications, they candisplay the graphical output of Photon inside another windowingsystem (for example, the X Window System). A Photon driver couldalso take the keyboard and mouse events it collects from the X system
November 2, 2006 Appendix: A � Photon Architecture 751

Photon window manager 2006, QNX Software Systems GmbH & Co. KG.
and regenerate them within Photon, allowing the Photon window inthe X system to be fully functional, both for graphical display and forkeyboard/mouse input.
Photon window managerThe window manager is an optional Photon application that managesthe appearance and operation of menus, buttons, scrollbars, and so on.It provides the windowing system with a certain “look and feel” (e.g.Motif).
The window manager also manages theworkspace, supplements themethods for focusing keyboard events, and lets you display abackdrop. To provide all these services, the window manager placesseveral regions in the event space:
� Window-frame regions
� Focus region
� Workspace region
� Backdrop region
Window-frame regionsMost applications rely on the windowing system to provide the userwith the means to manipulate their size, position, and state (i.e.open/iconified). In order for the user to perform these actions, thewindow manager puts a frame around the application’s region andthen places controls in that frame (e.g. resize corners, title bars,buttons). We refer to these controls aswindow services.
To indicate it can provide window services, the window managerregisters with the Photon Manager. When an application opens awindow, the window manager sets up two regions on its behalf: awindow frame region and an application region (or window region).The window frame region is slightly larger than the application regionand is placed just behind it.
752 Appendix: A � Photon Architecture November 2, 2006
2006, QNX Software Systems GmbH & Co. KG. Photon window manager
The window manager uses the window frame region for its controls,while the application uses its own region. But the application isn’taware of the controls. If the user uses the controls to move theapplication, the application notices only that its location has changed.The same goes for resizing, iconifying, and so on.
Focus regionAs mentioned earlier, the device region focuses keyboard events toregions directly behind the screen pointer. But by placing a region ofits own (i.e. thefocus region) just behind the device region, thewindow manager intercepts these keyboard events as they’re emittedfrom the device region and implements an alternate focus method.
The window manager can redirect keyboard events to regions notdirectly beneath the screen pointer. For example, it can focus eventstoward the last window the user “clicked” on (i.e. theactive window).The window manager can direct keyboard events to that active regioneven if the region gets covered by another region.
Workspace regionFrom the user’s perspective, the workspace is the empty spacesurrounding the windows on the screen. The window manager placesaworkspace regionjust in front of the root region to capture pointerevents before they get to the root region and thus disappear. When theuser presses a pointer button and no region collects the event, thewindow manager brings up aworkspace menuthat lets the user selecta program to run.
Backdrop regionUsers often like to have an ornamental backdrop image displayedbehind the windows on the screen. To display such a bitmap, thewindow manager places abackdrop regionin the event space.
November 2, 2006 Appendix: A � Photon Architecture 753

Appendix B
Widgets at a Glance
November 2, 2006 Appendix: B � Widgets at a Glance 755


2006, QNX Software Systems GmbH & Co. KG.
The following table lists the Photon widget classes and the icons usedin PhAB’s widget palette. For more information on specific widgetclasses, see the PhotonWidget Reference.
PhAB Icon Class Description
PtArc An elliptical arc
PtBarGraph Bar graph
PtBasic A superclass of basicresources for mostwidgets
PtBezier Bezier curve
PtBkgd Background of tiledimages, gradients, orbitmaps
PtButton A button for initiatingan action
PtCalendar Calendar
N/A PtClient Superclass for clientwidgets — not normallyinstantiated
PtClock Analog, digital, or LEDclock
PtColorPanel A color panel
PtColorPatch A widget for selecting ahue and shading or tint
continued. . .
November 2, 2006 Appendix: B � Widgets at a Glance 757

2006, QNX Software Systems GmbH & Co. KG.
PhAB Icon Class Description
N/A PtColorSel Superclass forcolor-selectorwidgets—not normallyinstantiated
PtColorSelGroup A group of colorselectors
PtColorWell A rectangle thatdisplays a color and letsyou change it
PtComboBox Text-entry field with alist of choices
N/A PtCompound Superclass forcompoundwidgets—not normallyinstantiated
PtContainer Superclass for containerwidgets
N/A PtDisjoint Superclass for disjointwidgets—not normallyinstantiated
PtDivider Widget that divides agiven space among itschild widgets andallows resizing
PtEllipse Ellipse
PtFileSel A tree widget forselecting files anddirectories
continued. . .
758 Appendix: B � Widgets at a Glance November 2, 2006

2006, QNX Software Systems GmbH & Co. KG.
PhAB Icon Class Description
PtFontSel A widget for selectingfont attributes
N/A PtGauge Superclass forgauge-likewidgets—not normallyinstantiated
N/A PtGenList Superclass for listwidgets—not normallyinstantiated
N/A PtGenTree Superclass for treewidgets—not normallyinstantiated
N/A PtGraphic Superclass for graphicalwidgets—not normallyinstantiated
PtGrid Grid pattern
N/A PtGroup Group—use PhAB’sGroup Together buttonto create this
PtImageArea An area for viewing animage
PtLabel A text, bitmap, or imagelabel
PtLine Straight line (singlesegment)
PtList List of text items
continued. . .
November 2, 2006 Appendix: B � Widgets at a Glance 759

2006, QNX Software Systems GmbH & Co. KG.
PhAB Icon Class Description
N/A PtMenu Menu—use a Menumodule instead
PtMenuBar Menubar that’s placedat the top of a window
PtMenuButton Button that pops up amenu, or an item in amenu
PtMeter Meter widget
PtMTrend Medical trend widget
PtMultitext Multiple-line stylizedtext field
N/A PtNumeric Numeric fieldsuperclass—notnormally instantiated
PtNumericFloat Floating-point numericfield
PtNumericInteger Integer field
PtOnOffButton Button that’s either onor off
PtOSContainer Offscreen-contextcontainer, useful fordrawing flicker-freeimages and animations
PtPane Container that managesits children
continued. . .
760 Appendix: B � Widgets at a Glance November 2, 2006

2006, QNX Software Systems GmbH & Co. KG.
PhAB Icon Class Description
PtPanelGroup Container that managespanels
PtPixel Set of points
PtPolygon Set of connected linesegments
PtPrintSel Compound widget forchoosing printingoptions
PtProgress Progress bar
PtRaw Widget in which youcan use low-level Pgdrawing functions
PtRawList Raw list
PtRawTree raw tree
PtRect Rectangle
N/A PtRegion Photon region—must becreated withPtCreateWidget()
N/A PtScrollArea Superclass for scrollingwidgets—not normallyinstantiated
PtScrollBar Scrollbar
PtScrollContainer A viewport for viewinga large virtual area
continued. . .
November 2, 2006 Appendix: B � Widgets at a Glance 761

2006, QNX Software Systems GmbH & Co. KG.
PhAB Icon Class Description
PtSeparator Separator
N/A PtServer Server widget — mustbe created withPtCreateWidget()
PtSlider Numerical inputmechanism with a range
PtTab Terminal emulator
PtTerminal Terminal emulator
PtText Single-line text field
PtTimer Timer
PtToggleButton Toggle button
PtToolbar Superclass for toolbarwidgets
PtToolbarGroup A group of toolbars
PtTree Hierarchy tree
PtTrend Display of connectedpoints that shift in aspecified direction at therate in which data is fed
PtTty Terminal device
PtUpDown Increment/decrementbutton
continued. . .
762 Appendix: B � Widgets at a Glance November 2, 2006

2006, QNX Software Systems GmbH & Co. KG.
PhAB Icon Class Description
PtWebClient Widget for displayingweb pages
N/A PtWidget Widget superclass—notnormally instantiated
N/A PtWindow Window—use aWindow module instead
November 2, 2006 Appendix: B � Widgets at a Glance 763

Appendix C
Unicode Multilingual Support
In this appendix. . .Wide and multibyte characters 767Unicode 768UTF-8 encoding 768Conversion functions 770Other encodings 772Keyboard drivers 773Photon compose sequences774
November 2, 2006 Appendix: C � Unicode Multilingual Support 765

2006, QNX Software Systems GmbH & Co. KG. Wide and multibyte characters
Photon is designed to handle international characters. Following theUnicode standard, Photon provides developers with the ability tocreate applications that can easily support the world’s majorlanguages and scripts.
Unicode is modeled on the ASCII character set, but uses a 32-bitencoding to support full multilingual text. There’s no need for escapesequences or control codes when specifying any character in anylanguage. Note that Unicode encoding conveniently treats allcharacters — whether alphabetic, ideographs, or symbols — inexactly the same way.
In designing the keyboard driver and the character handlingmechanisms, we referred to the X11 keyboard extensions and ISOstandards 9995 and 10646-1.
Wide and multibyte charactersANSI C includes the following concepts:
wide character
A character represented as a value of typewchar t, whichtypically is larger than achar.
multibyte character
A sequence of one or more bytes that represents a character,stored in achar array. The number of bytes depends on thecharacter.
wide-character string
An array ofwchar t.
multibyte string
A sequence of multibyte characters stored in achar array.
November 2, 2006 Appendix: C � Unicode Multilingual Support 767
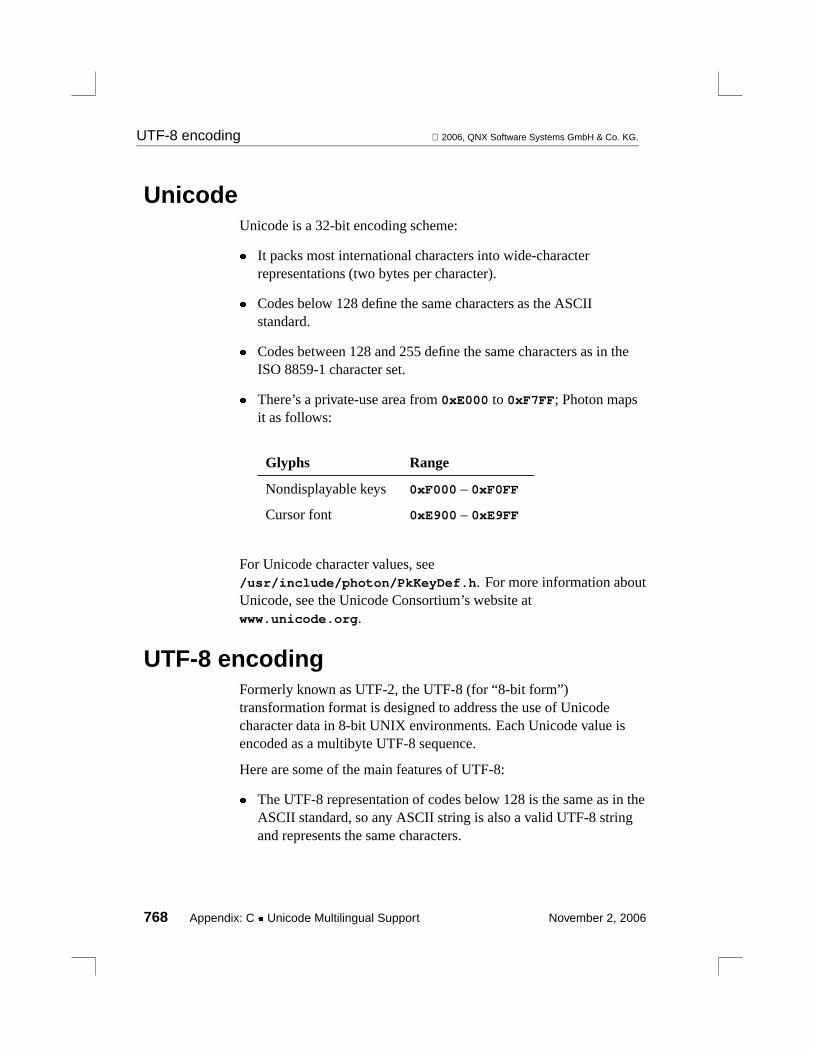
UTF-8 encoding 2006, QNX Software Systems GmbH & Co. KG.
UnicodeUnicode is a 32-bit encoding scheme:
� It packs most international characters into wide-characterrepresentations (two bytes per character).
� Codes below 128 define the same characters as the ASCIIstandard.
� Codes between 128 and 255 define the same characters as in theISO 8859-1 character set.
� There’s a private-use area from0xE000 to 0xF7FF; Photon mapsit as follows:
Glyphs Range
Nondisplayable keys 0xF000 – 0xF0FF
Cursor font 0xE900 – 0xE9FF
For Unicode character values, see/usr/include/photon/PkKeyDef.h. For more information aboutUnicode, see the Unicode Consortium’s website atwww.unicode.org.
UTF-8 encodingFormerly known as UTF-2, the UTF-8 (for “8-bit form”)transformation format is designed to address the use of Unicodecharacter data in 8-bit UNIX environments. Each Unicode value isencoded as a multibyte UTF-8 sequence.
Here are some of the main features of UTF-8:
� The UTF-8 representation of codes below 128 is the same as in theASCII standard, so any ASCII string is also a valid UTF-8 stringand represents the same characters.
768 Appendix: C � Unicode Multilingual Support November 2, 2006

2006, QNX Software Systems GmbH & Co. KG. UTF-8 encoding
� ASCII values don’t otherwise occur in a UTF-8 transformation,giving complete compatibility with historical filesystems that parsefor ASCII bytes.
� UTF-8 encodes the ISO 8859-1 character set as double-bytesequences.
� UTF-8 simplifies conversions to and from Unicode text.
� The first byte indicates the number of bytes to follow in amultibyte sequence, allowing for efficient forward parsing.
� Finding the start of a character from an arbitrary location in a bytestream is efficient, because you need to search at most four bytesbackwards to find an easily recognizable initial byte. For example:isInitialByte = ((byte & 0xC0) != 0x80);
� UTF-8 is reasonably compact in terms of the number of bytes usedfor encoding.
The actual encoding is this:
� For multibyte encodings, the first byte sets1 in a number ofhigh-order bits equal to the number of bytes used in the encoding;the bit after that is set to0. For example, a 2-byte sequence alwaysstarts with110 in the first byte.
� For all subsequent bytes in a multibyte encoding, the first two bitsare10. The value of a trailing byte in a multibyte encoding isalways greater than or equal to0x80.
The following table shows the binary form of each byte of theencoding and the minimum and maximum values for thecharacters represented by 1-, 2-, 3-, and 4-byte encodings:
November 2, 2006 Appendix: C � Unicode Multilingual Support 769

Conversion functions 2006, QNX Software Systems GmbH & Co. KG.
Length First byte Following bytes Min. value Max. value
Single byte 0XXXXXXX N/A 0x0000 0x007F
Two bytes 110XXXXX 10XXXXXX 0x0080 0x07FF
Three bytes 1110XXXX 10XXXXXX 0x0800 0xFFFF
Four bytes 11110XXX 10XXXXXX 0x10000 0x10FFFF
� The actual content of the multibyte encoding (i.e. thewide-character encoding) is the catenation of theXX bits in theencoding. A 2-byte encoding of11011111 10000000 encodesthe wide character11111000000.
� Where there’s more than one way to encode a value (such as 0),the shortest is the only legal value. The null character is always asingle byte.
Conversion functionsIn our C libraries, “wide characters” are assumed to be Unicode, and“multibyte” is UTF-8 in the default locale. Thewchar t type isdefined as an unsigned 32-bit type, andwctomb()andmbtowc()implement the UTF-8 encoding in the default locale.
Multibyte characters in the C library are UTF-8 in the default locale;in different locales, multibyte characters might use a differentencoding.
☞
You can use the following functions (described in the QNX NeutrinoLibrary Reference) for converting between wide-character andmultibyte encodings:
mblen() Compute the length of a multibyte string incharacters
mbtowc() Convert a multibyte character to a wide character
770 Appendix: C � Unicode Multilingual Support November 2, 2006

2006, QNX Software Systems GmbH & Co. KG. Conversion functions
mbstowcs() Convert a multibyte string to a wide-character string
wctomb() Convert a wide character to its multibyterepresentation
wcstombs() Convert a wide-character string to a multibyte string
Photon libraries use multibyte UTF-8 character strings: any functionthat handles strings should be able to handle a valid UTF-8 string, andfunctions that return a string can return a multibyte-character string.This also applies to widget resources. The graphics drivers and fontserver assume that all strings use UTF-8.
The main Photon library,ph, provides the following non-ANSIfunctions (described in the PhotonLibrary Reference) for workingwith multibyte UTF-8 and wide characters:
utf8len() Count the bytes in a UTF-8 character
utf8strblen() Find the number of UTF-8 characters in part of astring
utf8strchr() Search for a UTF-8 character in a string
utf8strichr() Search for a UTF-8 character in a string, ignoringcase
utf8strirchr() Search backwards for a UTF-8 character in a string,ignoring case
utf8strlen() Find the length of a UTF-8-character string
utf8strnchr() Search for a UTF-8 character in part of a string
utf8strncmp() Compare part of a UTF-8-character string
utf8strndup() Create a copy of part of a UTF-8-character string
utf8strnichr() Search for a UTF-8 character in part of a string,ignoring case
November 2, 2006 Appendix: C � Unicode Multilingual Support 771

Other encodings 2006, QNX Software Systems GmbH & Co. KG.
utf8strnlen() Find the number of bytes used by aUTF-8-character string
utf8strrchr() Search backwards for a UTF-8 character in a string
utf8towc() Convert a UTF-8 character to a wide-character code
wctolower() Return the lowercase equivalent of a wide character
wctoutf8() Convert a wide-character code into a UTF-8character
These functions are defined in<utf8.h> (notice it isn’t<photon/utf8.h>), and use UTF-8 encodings no matter what thecurrent locale is.UTF8 LEN MAX is defined to be the maximumnumber of bytes in a UTF-8 character.
Other encodingsIf your application needs to work with other character encodings,you’ll need to convert to and from UTF-8. Character sets are definedin the file/usr/photon/translations/charsets, and include:
� Big5 (Chinese)
� Cyrillic (KOI8-R)
� Japanese (EUC)
� Japanese (Shift-JIS)
� Korean (EUC)
� Western (ISO 8859-1)
The following translation functions are provided, and are described inthe PhotonLibrary Reference:
772 Appendix: C � Unicode Multilingual Support November 2, 2006

2006, QNX Software Systems GmbH & Co. KG. Keyboard drivers
PxTranslateFromUTF()
Translate characters from UTF-8
PxTranslateList()
Create a list of all supported character translations
PxTranslateSet()
Install a new character-set translation
PxTranslateStateFromUTF()
Translate characters from UTF-8, using an internal state buffer
PxTranslateStateToUTF()
Translate characters to UTF-8, using an internal state buffer
PxTranslateToUTF()
Translate characters to UTF-8
PxTranslateUnknown()
Control how unknown encodings are handled
These functions are supplied only in static form in the Photon libraryphexlib. The prototypes are in<photon/PxProto.h>.
☞
Keyboard driversThe keyboard driver is table-driven; it handles any keyboard with 127or fewer physical keys.
A keypress is stored in a structure of typePhKeyEvent t (describedin the PhotonLibrary Reference).
Example: text widgetsThe text widgets use thekeysymfield for displayable characters.These widgets also check it to detect cursor movement. For example,if the content of the field isPk Left, the cursor is moved left. Thekeysymis Pk Left for both the left cursor key and the numeric keypadleft cursor key (assumingNumLock is off).
November 2, 2006 Appendix: C � Unicode Multilingual Support 773

Photon compose sequences 2006, QNX Software Systems GmbH & Co. KG.
Dead keys and compose sequencesQNX Neutrino supports “dead” keys and “compose” key sequences togeneratekeysyms that aren’t on the keyboard. Thekeysymfield isvalid only on a keypress— not on a key release — to ensure that youget only one symbol, not two.
For example, if the keyboard has a dead accent key (for example,‘)and the user presses it followed bye, thekeysymis an “e” with agrave accent (e). If thee key isn’t released, and then another group ofkeys (or more compose or dead key sequences) are pressed, thekeysyms would have to be stacked for the final releases.
If an invalid key is pressed during a compose sequence, the keyboarddrivers generatekeysyms for all the intermediate keys, but not anactual press or release.
For a list of compose sequences, see below.
Photon compose sequencesPhoton comes equipped with standard compose sequences. If yourkeyboard doesn’t include a character from the standard ASCII table,you can generate the character using a compose sequence. Forexample,o can be generated by pressing theAlt key, followed by the’ key, followed by theo key.
These aren’t keychords; press and release each key one after the other.☞
The following keys can be used for generating accented letters:
Key Accent Example sequence Result
’ acute Alt ’ o o
, cedilla Alt , c c
continued. . .
774 Appendix: C � Unicode Multilingual Support November 2, 2006
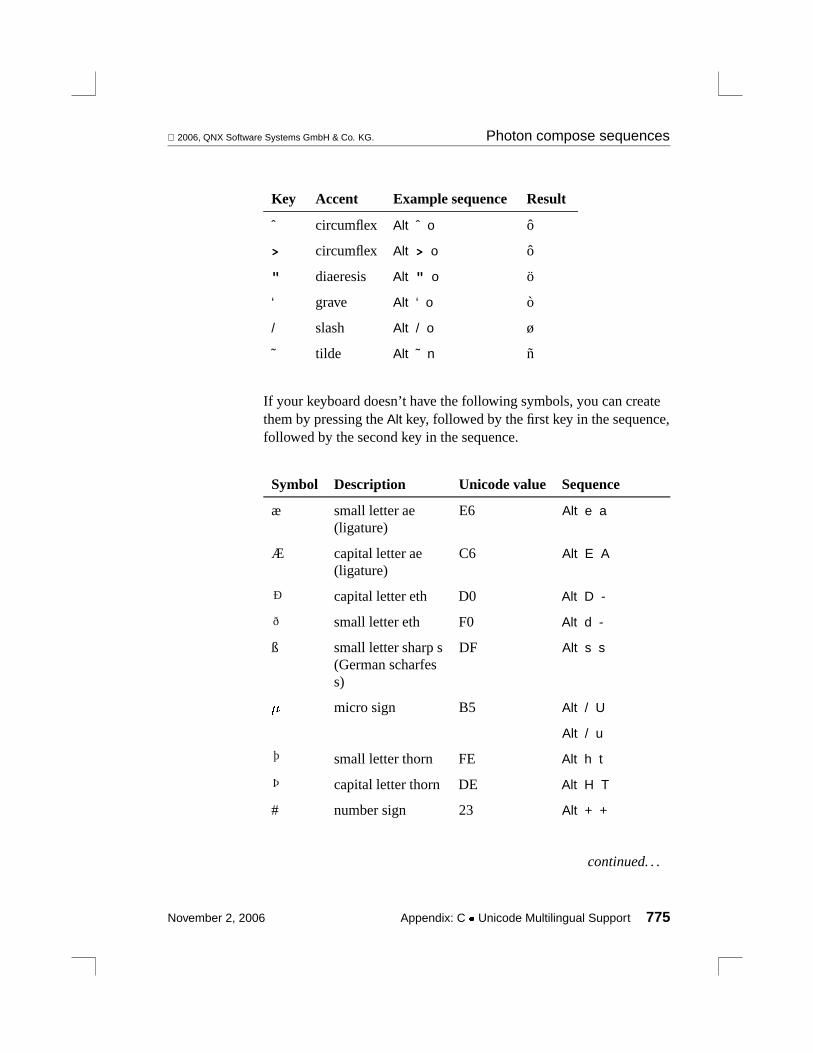
2006, QNX Software Systems GmbH & Co. KG. Photon compose sequences
Key Accent Example sequence Result
ˆ circumflex Alt ˆ o o
> circumflex Alt > o o
" diaeresis Alt " o o
‘ grave Alt ‘ o o
/ slash Alt / o ø
˜ tilde Alt ˜ n n
If your keyboard doesn’t have the following symbols, you can createthem by pressing theAlt key, followed by the first key in the sequence,followed by the second key in the sequence.
Symbol Description Unicode value Sequence
æ small letter ae(ligature)
E6 Alt e a
Æ capital letter ae(ligature)
C6 Alt E A
Ð capital letter eth D0 Alt D -
ð small letter eth F0 Alt d -
ß small letter sharp s(German scharfess)
DF Alt s s
� micro sign B5 Alt / U
Alt / u
þ small letter thorn FE Alt h t
Þ capital letter thorn DE Alt H T
# number sign 23 Alt + +
continued. . .
November 2, 2006 Appendix: C � Unicode Multilingual Support 775
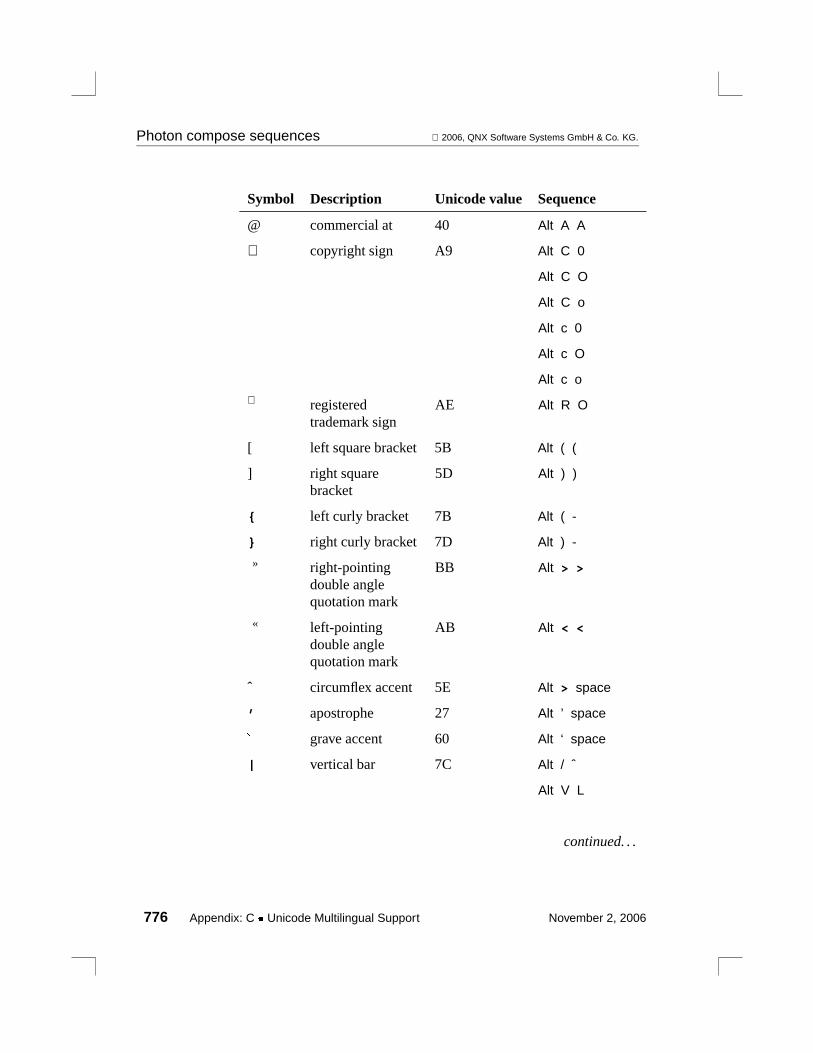
Photon compose sequences 2006, QNX Software Systems GmbH & Co. KG.
Symbol Description Unicode value Sequence
@ commercial at 40 Alt A A
copyright sign A9 Alt C 0
Alt C O
Alt C o
Alt c 0
Alt c O
Alt c o
registeredtrademark sign
AE Alt R O
[ left square bracket 5B Alt ( (
] right squarebracket
5D Alt ) )
{ left curly bracket 7B Alt ( -
} right curly bracket 7D Alt ) -
» right-pointingdouble anglequotation mark
BB Alt > >
« left-pointingdouble anglequotation mark
AB Alt < <
ˆ circumflex accent 5E Alt > space
’ apostrophe 27 Alt ’ space
� grave accent 60 Alt ‘ space
| vertical bar 7C Alt / ˆ
Alt V L
continued. . .
776 Appendix: C � Unicode Multilingual Support November 2, 2006

2006, QNX Software Systems GmbH & Co. KG. Photon compose sequences
Symbol Description Unicode value Sequence
Alt v l
� reverse solidus(backslash)
5C Alt / /
Alt / <
˜ tilde 7E Alt - space
no-break space A0 Alt space space
° degree sign B0 Alt 0 ˆ
¡ invertedexclamation mark
A1 Alt ! !
¿ inverted questionmark
BF Alt ? ?
¢ cent sign A2 Alt C /
Alt C |
Alt c /
Alt c |
£ pound sign A3 Alt L -
Alt L =
Alt l -
Alt l =
¤ currency sign A4 Alt X 0
Alt X O
Alt X o
Alt x 0
Alt x O
continued. . .
November 2, 2006 Appendix: C � Unicode Multilingual Support 777
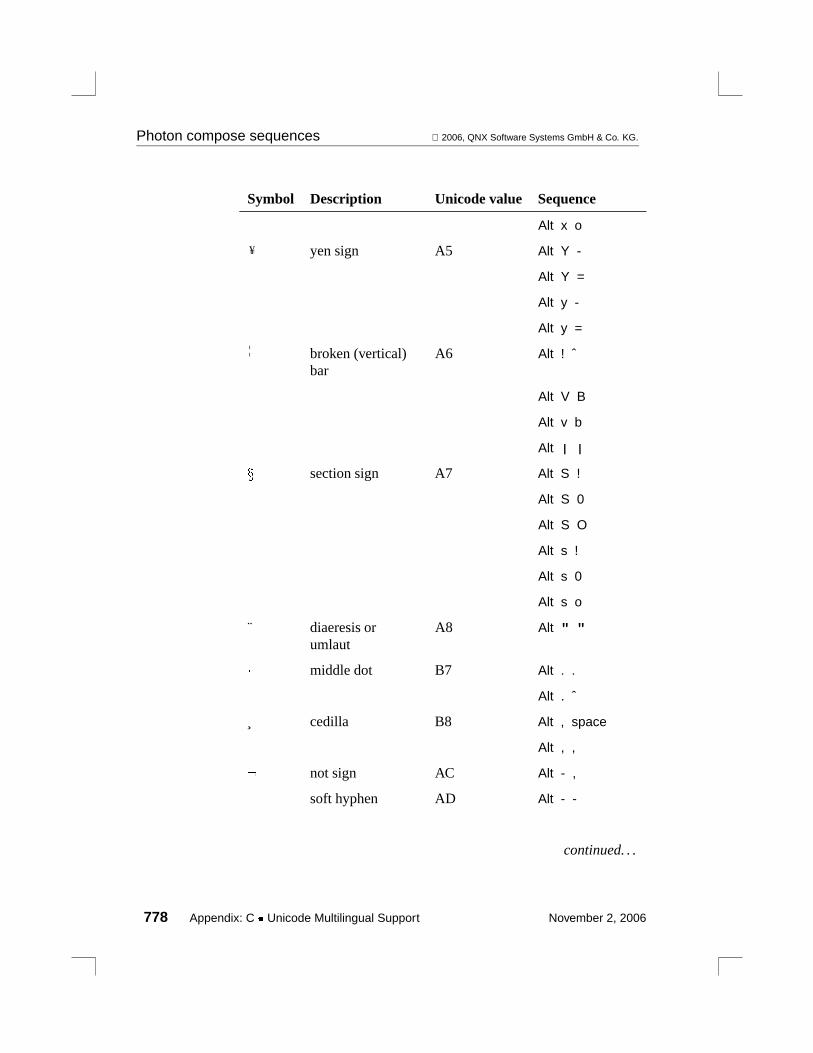
Photon compose sequences 2006, QNX Software Systems GmbH & Co. KG.
Symbol Description Unicode value Sequence
Alt x o
¥ yen sign A5 Alt Y -
Alt Y =
Alt y -
Alt y =
¦ broken (vertical)bar
A6 Alt ! ˆ
Alt V B
Alt v b
Alt | |
� section sign A7 Alt S !
Alt S 0
Alt S O
Alt s !
Alt s 0
Alt s o
¨ diaeresis orumlaut
A8 Alt " "
� middle dot B7 Alt . .
Alt . ˆ
¸ cedilla B8 Alt , space
Alt , ,
� not sign AC Alt - ,
soft hyphen AD Alt - -
continued. . .
778 Appendix: C � Unicode Multilingual Support November 2, 2006
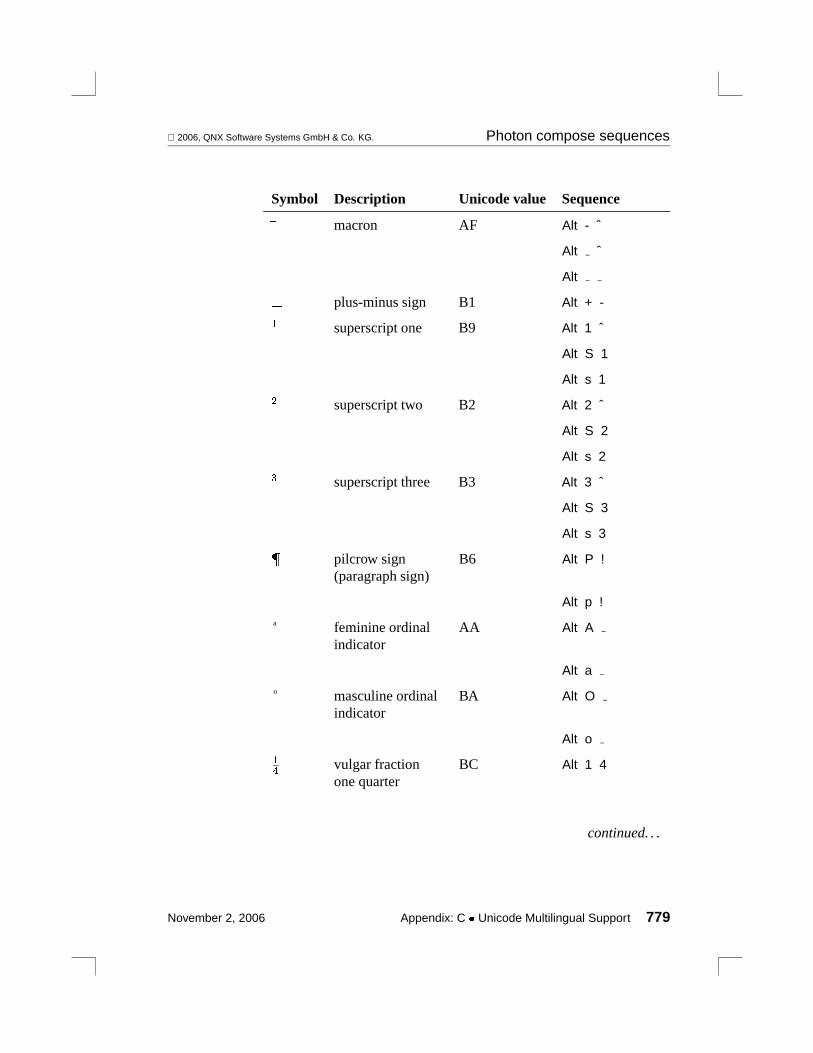
2006, QNX Software Systems GmbH & Co. KG. Photon compose sequences
Symbol Description Unicode value Sequence
� macron AF Alt - ˆ
Alt ˆ
Alt
� plus-minus sign B1 Alt + -
� superscript one B9 Alt 1 ˆ
Alt S 1
Alt s 1
� superscript two B2 Alt 2 ˆ
Alt S 2
Alt s 2
� superscript three B3 Alt 3 ˆ
Alt S 3
Alt s 3
� pilcrow sign(paragraph sign)
B6 Alt P !
Alt p !
ª feminine ordinalindicator
AA Alt A
Alt a
º masculine ordinalindicator
BA Alt O
Alt o
�
�vulgar fractionone quarter
BC Alt 1 4
continued. . .
November 2, 2006 Appendix: C � Unicode Multilingual Support 779

Photon compose sequences 2006, QNX Software Systems GmbH & Co. KG.
Symbol Description Unicode value Sequence�
�vulgar fractionone half
BD Alt 1 2
�
�vulgar fractionthree quarters
BE Alt 3 4
� division sign F7 Alt - :
� multiplication sign D7 Alt x x
780 Appendix: C � Unicode Multilingual Support November 2, 2006

Appendix D
Photon in Embedded Systems
In this appendix. . .Assumptions 783Introduction 783The basics 786Caveats 793Example 796Example: Using the IDE’s System Builder 804Advanced Topics 806
November 2, 2006 Appendix: D � Photon in Embedded Systems 781

2006, QNX Software Systems GmbH & Co. KG. Assumptions
AssumptionsThis appendix makes the following assumptions:
� You understand the process of building an embedded system forQNX Neutrino. For more information, seeBuilding EmbeddedSystems.
� You have your target hardware booting into Neutrino, and can runa shell and commands such aspidin.
� You know what graphics hardware you will be using, and itsparameters (such as the Vendor and Device IDs for a PCI graphicscard).
� You’ll be using a QNX Neutrino development system to build yourembedded Photon target from the command line, or using theSystem Builder in the IDE.
IntroductionThe Photon microGUI is an embedded Graphical User Interface(GUI). This GUI is made up of numerous processes that use Neutrinomessage passing in order to create a highly responsive userexperience. Photon is made up of these main components:
� Photon server (the graphical kernelphoton)
� graphics subsystem manager and hardware driver (io-graphics
and associated graphics driver)
� font support (phfont.so and plugin DLLs)
� input support (adev-i* input driver)
� user applications.
November 2, 2006 Appendix: D � Photon in Embedded Systems 783

Introduction 2006, QNX Software Systems GmbH & Co. KG.
Photon ServerThePhoton server is the core server process for the GUI. Thisprocess must be the first graphical process run in the system. It isresponsible for handling region creation and destruction, clipping, andmanaging the Photon event space.
Graphics subsystemThis process,io-graphics, handles the Photon draw stream andloads the hardware driver. This process runs before any userapplication processes. You must specify the following when runningthis process:
� the graphics driver (adevg-* driver)
� the graphics resolution and color depth (for example: 640�480, 24bit)
� specific hardware parameters for a LCD panel or PCI video card
Font supportThis process (phfont) and associated libraries are used to render andgather metrics about fonts. Photon can render the following types offonts:
� Adobe Type 1 (.pfa)
� Adobe Type 2 (.cff)
� Bitstream Speedo — public encryption only (.spd)
� Bitstream Stroke (.ffs)
� Bitstream T2K (.t2k)
� Bitstream TrueDoc (.pfr)
� Photon bitmap (.phf)
� TrueType (.ttf)
� TrueType collections (.ttc)
784 Appendix: D � Photon in Embedded Systems November 2, 2006

2006, QNX Software Systems GmbH & Co. KG. Introduction
Input supportThis process is responsible for handling user input from a mouse,keyboard, or touchscreen. This process communicates with your inputhardware and then emits Photon events, which are collected anddelivered to graphical processes in the system.
User applicationsOnce all of the other processes are running you can start userapplications.
Steps to boot into PhotonHere’s an outline of the steps required to start Photon yourself, in thecontext of an embedded, closed system:
1 Export (at a minimum) thePHOTON PATH environmentvariable.
2 Start the Photon server.
3 Configure your fonts.
4 Start the graphics driver.
5 Start the input driver.
6 Start the window manager, if required.
7 Start your application(s).
Each of these steps requires certain files be installed in your targetsystem. By predetermining exactly what graphics hardware you haveand what fonts your application needs, you can keep the number offiles (and size of the image) to an absolute minimum. This reductionin size may in turn have a positive impact on your system’s startuptime.
We’ll go through all the steps in detail and discuss the files needed foreach step. At the end of this process, you should know exactly whatPhoton files you’ll need to run your embedded application.
November 2, 2006 Appendix: D � Photon in Embedded Systems 785

The basics 2006, QNX Software Systems GmbH & Co. KG.
The basicsStep 1. Export environment variables
ThePHOTON PATH environment variable points to the basedirectory of the Photon installation. By default, this directory is/usr/photon. This location is expected to hold at least thefollowing subdirectories:
font repository
Photon font files and configuration files used by thefont server (platform-independent).
palette graphics palettes (platform-independent). Thesepalettes are required only when you’re running yourgraphics driver(s) with a color depth of 8 bits.
translations
Photon language translations (platform-independent)These files are required only if your application(s)handles non-UTF8 character encodings via thePxTranslate*()API.
You should set thePHOTON PATH environment variable in thebuildfile where you set other environment variables such asPATH:
PHOTON PATH=/usr/photon
TheLD LIBRARY PATH points the default system search path forlibraries. Theprocnto process uses its setting ofLD LIBRARY PATH to initialize the privileged configuration stringCS LIBPATH, which limits the paths that programs running asroot can load libraries from.
ThePATH environment variable points to the default system searchpath for binaries. You should set it to include the directories in yourbuild image that contain binaries. These settings apply to any bootimage.
786 Appendix: D � Photon in Embedded Systems November 2, 2006
2006, QNX Software Systems GmbH & Co. KG. The basics
Step 2. Start the Photon server
If you don’t need to pass any command-line arguments to the Photonserver, you can start it as follows:
Photon
If you start Photon as a background process (that is, with theampersand& after the command) you can tell that Photon startedcorrectly by checking that/dev/photon appears in the filesystem.Usewaitfor /dev/photon in your buildfile to check that thedirectory exists.
☞
If your boot image is too large because you’ve included Photon orother executables, you can place them in another filesystem that youcan mount at boot-time. For more information, seemkifs in theQNX NeutrinoUtilities Reference.
If you do include any of the Photon executables in your boot image,you should also include/usr/photon/bin in MKIFS PATH somkifs can find them.
Files needed/usr/photon/bin/Photon
Step 3. Configure fonts
If you’re working on a board that has network access and can mount anetwork filesystem on your host machine, we recommend that youmount${QNX TARGET}/usr/photon/font repository as/usr/photon/font repository via NFS or CIFS. Although thisapproach uses the full Photon font system, it simplifies developmentsignificantly, and you can customize the embedded fonts later usingthe information in"Configuring Fonts" in the"Advanced topics"section.
For information about using NFS and CIFS to mount a networkfilesystem, see"CIFS filesystem" and"NFS filesystem" in theWorking with Filesystems chapter of the NeutrinoUser’s Guide.
November 2, 2006 Appendix: D � Photon in Embedded Systems 787
The basics 2006, QNX Software Systems GmbH & Co. KG.
Include the following libraries in your build file;io-graphics willload the font libraries for you when it starts:
/lib/dll/font/ttfFFcore.so, /lib/dll/font/FCcore.so,and/lib/dll/font/PHFcore.so
Rendering plugins. Use theuse utility to view specific supportinformation for these plugins.
/lib/libfontharnessutils.so
Common code used byphfont.so, fontview, andmkfontdir.
/lib/libfontutils.so
Helper routines forPHFcore.so.
/lib/libblkcache.so
Disk block cache library, used byttfFFcore.so,FCcore.so, andPHFcore.so.
/lib/libFF-T2K.so
Bitstream FontFusion rendering library, used byttfFFcore.so andFCcore.so.
/lib/libFF-T2K-fm.so
Bitstream FontFusion font management library for fontcollections (.pfr andttc), used byFCcore.so.
/lib/libFF-T2K-cache.so
Bitstream FontFusion font cache management library, used byFCcore.so andttfFFcore.so.
Step 4. Start the graphics driver
The graphics subsystem consists ofio-graphics, ahardware-specific driver DLL, and a collection of helper libraries.You need the following components to run the graphics subsystem onthe target:
788 Appendix: D � Photon in Embedded Systems November 2, 2006

2006, QNX Software Systems GmbH & Co. KG. The basics
/usr/photon/bin/io-graphics
Graphics subsystem executable.
/lib/dll/gri-photon.so
Photon draw event handler.
/usr/lib/libgri.so
Utilities library for Photon event handling
/usr/lib/libphrender.so
Photon rendering routines (required bygri-photon.so).
/lib/libfont.so
Font manipulation library (also required by Photonapplications).
/lib/dll/phfont.so
Font server plugin.
/usr/photon/palette/file
A Photon palette file for the target display.
Additionally, you need a hardware-specific library (or graphicsdriver). By convention, graphics driver names begin withdevg-, forexample,devg-rage.so. If you need to rotate the display, you alsorequire one of the rotate pseudo-drivers,devg-rotate90.so ordevg-rotate270.so.
Most graphics drivers depend on the following shared libraries:
/usr/lib/libffb.so.2
Software fallback routines for graphics drivers.
/usr/lib/libdisputil.so.2
Miscellaneous utilities for graphics drivers.
Make sure that all required libraries are accessible by the dynamicloader before you startio-graphics. Use the
November 2, 2006 Appendix: D � Photon in Embedded Systems 789

The basics 2006, QNX Software Systems GmbH & Co. KG.
LD LIBRARY PATH environment variable orCS LIBPATHconfiguration string to point to the location of the shared libraries.
In an embedded environment, you should predetermine graphicshardware and mode information such as PCI vendor and device IDs,and resolution. You should switch into graphics mode and start thegraphics driver by specifying the commands directly, without the useof convenience tools such as trappers and display-configurationapplications.
The command-line arguments that you need to give toio-graphics
depend on the kind of display device you’re using. If there’s a BSPfor the board you’re working with, see the BSP documentation forinformation about relevant command-line arguments. Here’s a typicalinvocation for a PCI device:
io-graphics -dati rage128 xres=1024,yres=768,bitpp=32,vid=0x1022,did=0x544
Here’s an example for a non-PCI device:
io-graphics -dsa1110 xres=640,yres=480,bitpp=16,mode opts=/usr/photon/conf/sa1110.conf
For more information seeio-graphics in the NeutrinoUtilitiesReference. For a richer set of features, use the configuration fileoption forio-graphics. See"Theio-graphics configurationfile" section.
Some examples you’ll see use the legacy command-line options. Youcan’t mix legacy options with regular options.
☞
Whenio-graphics starts, it checks to see if a font server is running(i.e. it checks for the existence of/dev/phfont). If there isn’t onerunning,io-graphics starts its own internal font server.
The graphics driver then initializes the display device. At this point,Photon applications can render to the screen.
790 Appendix: D � Photon in Embedded Systems November 2, 2006
2006, QNX Software Systems GmbH & Co. KG. The basics
Step 5. Start the input driver
Normally in a desktop environment, you use theinputtrap utility toautomatically generate the correct command line and to invoke theappropriatedevi-* driver. For example, it might invokedevi-hirun like this:
devi-hirun kbd fd -d/dev/kbd msoft fd &
Seedevi-hirun in the NeutrinoUtilities Referencefor moreexamples.
You typically runinputtrap because you don’t know in advancewhat the appropriate command line should be.
In an embedded system, however, you typically specify the commandline to thedevi-* driver manually. This is because the input devicesare often found at unusual locations, are incapable of PnPidentification, or are simply not supported by an existingdevi-*
driver. In addition, theinputtrap utility tends to be quite large andcould waste precious storage and memory in a constrainedenvironment. If figuring out the appropriate command to run provesdifficult, you can temporarily installinputtrap in your image (ormount a networked filesystem that contains the binary) and use it togenerate the correct command line. Seeinputtrap and itsqueryoption in the NeutrinoUtilities Reference.
If none of the shipped input drivers are able to work with your inputhardware, you can customize the input drivers by using the InputDriver Development Kit (Input DDK). For example, you can changethe size of the memory footprint, or you can create a custom moduleto support new devices.
Files neededThe appropriatedevi-* driver in/usr/photon/bin
The appropriate.kbd keyboard mapping file in/usr/photon/keyboard
November 2, 2006 Appendix: D � Photon in Embedded Systems 791

The basics 2006, QNX Software Systems GmbH & Co. KG.
Step 6. Start the window manager
The Photon window manager (pwm) is an optional component thatprovides your system with windowing functionality you may notneed. If your application user interface consists of one (or more thanone) program that always fills the screen, uses a “card” or “slide”paradigm (that is, a UI composed of a series of stacked cards or slidesthat the program flips through), or uses dialogs that your applicationcontrols itself, then you probably don’t require the window manager.On the other hand, if your UI is built using one (or more than one)program that relies on windowing behavior (such as windows ordialogs that you don’t want to manage yourself), thenpwm is probablya good fit for your system.
Files needed/usr/photon/bin/pwm
Step 7. Start your application
If your application is a single executable and doesn’t require thewindow manager, you may link statically against the Photon-relatedlibraries (such aslibAp.a, libph.a, andlibphexlib.a). Linkingstatically avoids the need to include the corresponding sharedcomponents in your image, and will pull in only the symbols neededby your program, making the overall image smaller. Also, linkingstatically has an added benefit of slightly reducing runtime overhead.If you have multiple applications in your image (includingpwm), youshould always link against the shared libraries and include them inyour image.
You can use thepidin utility on a host system to view the librariesthat an application or OS component requires. For example, if youwanted to see the libraries required byphcalc, run it on a hostsystem, and then runpidin -p phcalc mem.
The QNX IDE includes a tool called the Dietician that shrinks sharedlibraries by analyzing the executables in your system and removingthe symbols that aren’t needed. This realizes most of the benefits oflinking statically while still allowing the libraries to be shared.
792 Appendix: D � Photon in Embedded Systems November 2, 2006

2006, QNX Software Systems GmbH & Co. KG. Caveats
However, if your system only consists of one application (and nowindow manager), linking statically is probably the better way to go.
Files needed� Your application files
� If linking shared, you require/usr/lib/libph.so
� If you’re using executables created in PhAB, you need/usr/lib/libAp.so.
� You also may need/libphexlib.so if you load images or dolanguage translation.
The libraries in/usr/photon/lib (*.so.1) are provided forruntime compatibility with Photon for QNX Neutrino 6.0 (x86 only).The libraries for QNX Neutrino 6.1 and later are located in/usr/lib.
☞
CaveatsThe following are observations that some customers have encounteredwhen moving Photon to an embedded system.
mkifsBy default,mkifs strips PhAB resource names from executable files.To prevent this, specify the+raw attribute for all Photon ApplicationBuilder applications. For example:
[+raw]/usr/photon/bin/phcalc
You can runstrip yourself on Photon Application Builderapplications first.
November 2, 2006 Appendix: D � Photon in Embedded Systems 793
Caveats 2006, QNX Software Systems GmbH & Co. KG.
Flash filesystemsThe following flash filesystem properties affect how you configurePhoton:
Compression and Speed
PhAB executables, by default, have their resources bound intothe executable file at the end of the binary data. Since the flashfilesystem is slower when it’s seeking in a compressed file,you’ll probably want to keep the resource records in a separatefile, instead of including them at the end of the binary. To dothis, change themakefile so that the resources are bound to aseparate file. For example, change the following dependency:
$(ABOBJ) $(MYOBJ)$(LD) $(LDFLAGS) $(ABOBJ) $(MYOBJ) -M -o mineusemsg mine ../Usemsgphabbind mine $(ABMOD)
to:
$(ABOBJ) $(MYOBJ)$(LD) $(LDFLAGS) $(ABOBJ) $(MYOBJ) -M -o mineusemsg mine ../Usemsgphabbind mine.res $(ABMOD)
When your executable is launched, the PhAB library(libAp.so) automatically finds the resource file, provided thefollowing criteria are met:
1 The resource file has the same basename as the binary,with the extension.res
2 The resource file is in the same directory as the binary.
If you want to group your resource files in a separate directory,you can. Place them in the directory specified by the exportedAB RESOVRD environment variable, and the PhAB librarywill look for them there. The naming of the resource files mustmeet the first criterion, listed above.
794 Appendix: D � Photon in Embedded Systems November 2, 2006

2006, QNX Software Systems GmbH & Co. KG. Caveats
GraphicsMany embedded systems lack components that are typical on an x86desktop machine, such as BIOS ROMs. Because many of themodeswitchers that Photon supports require a video BIOS to allowthem to switch graphics modes, you might need a BIOS on the board.Check with us to see if a non-BIOS version is available.
MiscellaneousHere are some other considerations:
CPU Speed For some embedded systems, the CPU performancewill be slower than the desktop. You’ll want toconsider this when you design your Photonapplications for the embedded environment.
Scrolling If the scrolling area pages down more than one pageat a time when you click in the trough, try increasingthe value of the mouse repeat delay in Photon. Forexample:
Photon -D1000 &
Input You can set the throttling parameters on both theInput and the Photon Server. By reducing the speed atwhich mouse events are emitted, you can reduce thetraffic through the Photon system. On slower 386 and486 platforms, it’s common practice to lower thethrottling on input to 10 or 20 ms.
Phindows and Phditto
If your target application needs to support remotediagnostics from either Phindows orphditto, you’llalso need to installphrelay, a render library, and theservices configuration file.
November 2, 2006 Appendix: D � Photon in Embedded Systems 795
Example 2006, QNX Software Systems GmbH & Co. KG.
ExampleLet’s look at the steps involved in embedding Photon for use in anembedded system by creating a simple buildfile that contains a fewsimple Photon applications.
Our goal is to build a Photon system with the following minimalcapabilities that satisfies our system’s requirements:
� scalable TrueType fonts — the smallest set available required foryour applications
� the minimum files needed to run the graphics driver
� input support for a mouse and keyboard
� a window manager to handle multiple Photon applications.
Note that a window manager isn’t strictly required for an embeddedsystem, but we’ll include one to make our example easier to use.
We’ll follow these steps:
� Analyzing required binaries
� Analyzing required libraries (.so)
� Analyzing required fonts
� Putting it all together
� Troubleshooting
Required binariesThe first step involves figuring out all the binaries required to runPhoton. You can see everything that’s running on a full system. RunPhoton on your PC, and look at the output of thepidin arg
command.
From that list, you need only a few of the programs:
� Photon — the process that implements the windowing kernel
796 Appendix: D � Photon in Embedded Systems November 2, 2006

2006, QNX Software Systems GmbH & Co. KG. Example
� phfont — font server
� io-graphics — graphics rendering subsystem
� pwm — provides window management
� devi-hirun — mouse/touchscreen and keyboard driver; see“Input drivers (devi-*)” in the summary of the QNX NeutrinoUtilities Reference.
Save the argument list for your system in a file. We’ll need that outputlater.
Required librariesOn this embedded system you want only the components listed above,plus you’ll run a couple of simple applications:
� phcalc sm — the small calculator
� pterm — a terminal application
Run the applications, then look at the output of thepidin mem
command. The resulting listing tells you every library that you needto make available to the embedded system. For a graphics driver,you’ll use the generic SVGA driver (devg-svga.so).
So you need the following libraries (at least):
� ldqnx.so.2 — an alias forlibc.so
� libph.so.3
� libphexlib.so.3
� libphrender.so.2
� libffb.so.2
� libdisputil.so.2
� libgri.so.2
� libAp.so.3
November 2, 2006 Appendix: D � Photon in Embedded Systems 797

Example 2006, QNX Software Systems GmbH & Co. KG.
� libm.so.2
� devg-svga.so
Required fontsNow let’s look at fonts. Sometimes an application expects a specificfont, and codes directly to that font. If this is the case, you need toexplicitly include every font that your application needs. If youstandardize on a certain family/style of fonts or if you don’t care whatexact font you have (as long as the size is okay), then you can cutdown on the number of fonts and use one font to replace several otherfamilies of fonts. For example, you can use Times as a replacementfor Helvetica and Courier.
In this example, because you’re using a few simple applications, andbecause you’re trying to create the smallest image possible, you needonly two fonts: a monospace and regular TrueType version of PrimaSans.
Now’s a good time to create a play area on your system to begintesting the embedded system, and collecting required files.
Create a subdirectory calledphembed in your home directory (orwhichever directory you wish to keep your source files). Within thatdirectory, create these subdirectories:
� phembed/bin
� phembed/lib
� phembed/font repository
Now back to the fonts. In this example, you want to use theprimasansmonobts TrueType font for everything. You’ll also wantto use a mouse, so you’ll include thephcursor.phf file.
Here are the files you need:
� fontdir
� fontext
798 Appendix: D � Photon in Embedded Systems November 2, 2006

2006, QNX Software Systems GmbH & Co. KG. Example
� fontkey
� fontmap
� fontopts
� mappings
� phcursor.phf
� tt2009m .ttf
Copy these files from/usr/photon/font repository to/phembed/font repository, then change directories to/phembed/font repository.
You need to modify thefontdir, fontmap, andfontopts files toreflect the fonts, options and mappings you want for your embeddedsystem. You can edit these files by hand (seephfont for moreinformation on the structure of these files), or usefontadmin andmkfontdir. To editfontdir, use themkfontdir like this:
mkfontdir -d /phembed/font repository
To invokefontadmin for fontmap, andfontopts, type:
fontadmin -c /phembed/font repository -d /phembed/font repository
We’ve included examples of the modified files in-line in the build filebelow.
Putting it all togetherNow let’s put all the pieces you need in place and create a buildfile foryour embedded Photon system. Runmkifs to create an image.
November 2, 2006 Appendix: D � Photon in Embedded Systems 799

Example 2006, QNX Software Systems GmbH & Co. KG.
� For a sample buildfile that includes more Photon components, suchas the background managerbkgmgr, see Getting Photon on yourboard in the Working with a BSP chapter of theBuildingEmbedded Systemsguide.
� In a real buildfile, you can’t use a backslash (�) to break a long lineinto shorter pieces, but we’ve done that here, just to make thebuildfile easier to read.
☞
[virtual=x86,bios +compress] .bootstrap = {
startup-bios -vPATH=:/proc/boot:/usr/bin:/bin:/usr/photon/bin
LD LIBRARY PATH=:/proc/boot:/usr/lib:/lib:/lib/dll \
PHOTON PATH=/usr/photon procnto -v}
[+script] .script = {
procmgr symlink ../../proc/boot/libc.so.2 /usr/lib/ldqnx.so.2
display msg Welcome to QNX Neutrino 6.3 on an x86 platform with Photon
slogger &
SYSNAME=ntoTERM=qansi
PHOTON=/dev/photon
PATH=:/proc/boot:/usr/bin:/bin:/usr/photon/binLD LIBRARY PATH=:/proc/boot:/usr/lib:/lib:/lib/dll
PHOTON PATH=/usr/photonPHOTON=/dev/photon
PHFONT=/dev/phfont
HOME=/
display msg Starting Photon
Photonwaitfor /dev/photon 10
display msg Starting Inputdevi-hirun kbd kbddev ps2 mousedev &
display msg Starting Graphicsio-graphics -dsvga photon,xres=1024,yres=768,bitpp=16,refresh=60 -pphoton
waitfor /dev/phfont 10
display msg Starting Window Manager
pwm &devc-pty &
display msg Starting Terminalpterm /proc/boot/ksh &
}
[type=link] /bin/sh = /proc/boot/ksh
800 Appendix: D � Photon in Embedded Systems November 2, 2006
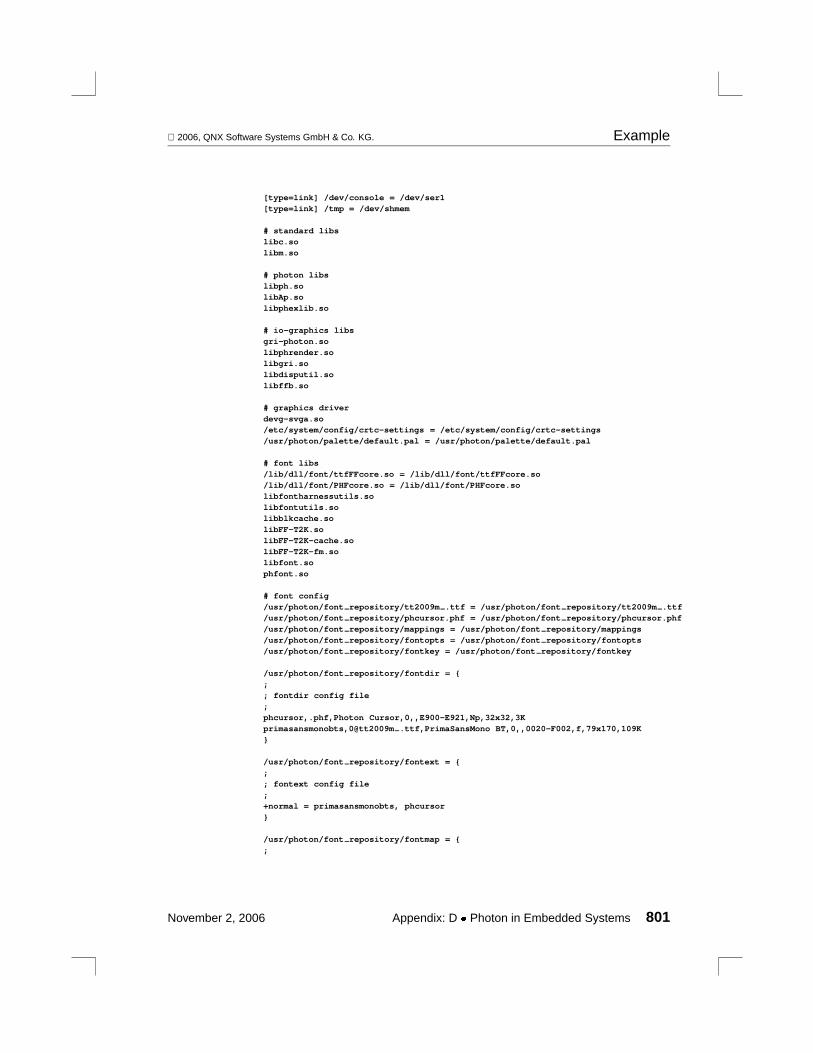
2006, QNX Software Systems GmbH & Co. KG. Example
[type=link] /dev/console = /dev/ser1[type=link] /tmp = /dev/shmem
# standard libslibc.so
libm.so
# photon libs
libph.solibAp.so
libphexlib.so
# io-graphics libs
gri-photon.so
libphrender.solibgri.so
libdisputil.so
libffb.so
# graphics driver
devg-svga.so/etc/system/config/crtc-settings = /etc/system/config/crtc-settings
/usr/photon/palette/default.pal = /usr/photon/palette/default.pal
# font libs
/lib/dll/font/ttfFFcore.so = /lib/dll/font/ttfFFcore.so/lib/dll/font/PHFcore.so = /lib/dll/font/PHFcore.so
libfontharnessutils.so
libfontutils.solibblkcache.so
libFF-T2K.so
libFF-T2K-cache.solibFF-T2K-fm.so
libfont.so
phfont.so
# font config
/usr/photon/font repository/tt2009m .ttf = /usr/photon/font repository/tt2009m .ttf/usr/photon/font repository/phcursor.phf = /usr/photon/font repository/phcursor.phf
/usr/photon/font repository/mappings = /usr/photon/font repository/mappings
/usr/photon/font repository/fontopts = /usr/photon/font repository/fontopts/usr/photon/font repository/fontkey = /usr/photon/font repository/fontkey
/usr/photon/font repository/fontdir = {
;
; fontdir config file;
phcursor,.phf,Photon Cursor,0,,E900-E921,Np,32x32,3K
primasansmonobts,0@tt2009m .ttf,PrimaSansMono BT,0,,0020-F002,f,79x170,109K}
/usr/photon/font repository/fontext = {;
; fontext config file
;+normal = primasansmonobts, phcursor
}
/usr/photon/font repository/fontmap = {
;
November 2, 2006 Appendix: D � Photon in Embedded Systems 801

Example 2006, QNX Software Systems GmbH & Co. KG.
; fontmap config file;
? = primasansmonobts
}
# input config
/usr/photon/keyboard/en US 101.kbd = /usr/photon/keyboard/en US 101.kbd
[data=c]devc-pty
ksh
sloggersloginfo
Photon
io-graphicsdevi-hirun
pwm
[+raw] /usr/photon/bin/pterm = pterm[+raw] /usr/photon/bin/phcalc sm = phcalc sm
# allow pterm to save its configuration to RAM, if the user changes it.[type=link] /.ph/pterm = /dev/shmem
Note the following about the buildfile:
� You set up the environment variablesPATH,LD LIBRARY PATH, andPHOTON PATH. PassingLD LIBRARY PATH to procnto sets the privilegedconfiguration stringCS LIBPATH.
� You link libc.so.2 andldqnx.so.2, because they’re the samelibrary.
� You invoke Photon, then wait for/dev/photon to indicate thatthe Photon server is running.
� You useinputtrap to detect input devices and configuredevi-hirun. This makes the buildfile compatible with most inputdevices. For a smaller boot image, determine the correctarguments for the input driver, and start it directly.
� After the system startsio-graphics, you check that the fontserver is running correctly (waitfor /dev/phfont).
� You specify where libraries and binaries should be put on thetarget (by default they’re put in/proc/boot).
802 Appendix: D � Photon in Embedded Systems November 2, 2006
2006, QNX Software Systems GmbH & Co. KG. Example
� Some libraries are from the customized library directory in thephembed directory (./lib), while others are from the host system(such as/usr/lib/libdisputil.so.2).
� You use the[+raw] directive for the PhAB applications so thatmkifs doesn’t remove necessary resource information from thesefiles.
Once you’ve built your image usingmkifs, you can transfer it to atest machine to see how it works. See"Transferring an OS imageonto your board" in the Working with a BSP chapter ofBuildingEmbedded Systemsfor more information.
Troubleshooting1 When I startio-graphics, it seems to be running, but nothing
appears on the screen.
Check the system log;io-graphics may have sent errormessages to the system logger,slogger. In order to debug theproblem, make sureslogger is running before starting thegraphics driver. Usesloginfo to display the system logmessages.
2 When I start an application, it exits with the messageAp:
Unable to locate Photon.
Make sure both the Photon server and the font manager arerunning. You can determine if they’re running by making surethat/dev/photon and/dev/phfont exist.
3 When I start an application, it exits with the messageAp:
Unable to open resource file.
If you include an application that was built by PhAB in animage created bymkifs, some information will be stripped out,sincemkifs does a very aggressive binary strip. You can avoidthis by using the+raw attribute; see themkifs documentationfor more information. Since setting the attribute will cause theapplication not to be stripped, you may want to use thestrip
utility to manually strip the binary before building the image, toreduce the image size.
November 2, 2006 Appendix: D � Photon in Embedded Systems 803

Example: Using the IDE’s System Builder 2006, QNX Software Systems GmbH & Co. KG.
Example: Using the IDE’s System BuilderBuilding an embedded OS image that includes Photon using the IDEis similar to writing a buildfile and using the command line. You needto perform the same analysis (described in the example above) of therequired binaries, libraries and fonts. The difference is that you don’twrite a buildfile; instead you create a project in the IDE’s SystemBuilder.
This example assumes that you’re familiar with the IDE’s SystemBuilder. See the Building OS and Flash Images chapter in the IDEUser’s Guidefor more information.
Instead of building a new System Builder project from scratch, youcan import the buildfile from the command-line example above. Youcan then modify the resulting System Builder project to suit yourneeds.
☞
Here are the general steps required to make a System Builder projectthat’s identical to the previous buildfile example:
1 Create a new System Builder project. You’ll need to select thetarget platform. Note that the project containslibc.so and thelink to ldqnx.so.2 already.
2 Add these binaries:
� devc-pty
� ksh
� slogger
� sloginfo
� Photon
� io-graphics
� devi-hirun
� pwm
� /usr/photon/bin/pterm
� /usr/photon/bin/phcalc sm
804 Appendix: D � Photon in Embedded Systems November 2, 2006

2006, QNX Software Systems GmbH & Co. KG. Example: Using the IDE’s System Builder
You need to use the equivalent of[+raw] onpterm andphcalc sm by selecting them, and setting the Strip Fileproperty to No.
3 Next, add the required libraries. You’ll find that some of themare already in the project, as the System Builder identifieslibraries required by binaries, and adds them automatically.
Standard libraries:
� libm.so
Photon libraries:
� libph.so
� libAp.so
� libphexlib.so
Graphics libraries:
� libphrender.so
� libgri.so
� libdisputil.so
� libffb.so
Font libraries:
� libfontharnessutils.so
� libfontutils.so
� libblkcache.so
� libFF-T2K.so
� libFF-T2K-cache.so
� libFF-T2K-fm.so
� libfont.so
� phfont.so
4 Now add the DLLs:
� devg-svga.so
November 2, 2006 Appendix: D � Photon in Embedded Systems 805
Advanced Topics 2006, QNX Software Systems GmbH & Co. KG.
� /lib/dll/font/ttfFFcore.so
� /lib/dll/font/PHFcore.so
5 Add these required files.
Fonts and the font configuration files:
� /usr/photon/font repository/tt2009m .ttf
� /usr/photon/font repository/phcursor.phf
� /usr/photon/font repository/mappings
� /usr/photon/font repository/fontopts
� /usr/photon/font repository/fontkey
Other required configuration files:
� /etc/system/config/crtc-settings
� /usr/photon/palette/default.pal
� /usr/photon/keyboard/en US 101.kbd
6 Finally set up these symbolic links:
� /bin/sh = /proc/boot/ksh
� /dev/console = /dev/ser1
� /tmp = /dev/shmem
You can now build the image, transfer it to your target, and run it.
Advanced TopicsThis section covers some of the more advanced topics in embeddingPhoton. It covers:
� Configuring fonts
� Adding a splash screen
806 Appendix: D � Photon in Embedded Systems November 2, 2006

2006, QNX Software Systems GmbH & Co. KG. Advanced Topics
Configuring fontsConfiguring fonts and installing the font server components in thecorrect location is the most difficult part of embedding Photon.
To configure the font system, you need to:
1 decide whether to run an internal or external font server
2 determine which fonts your system requires
3 determine the font binaries required
4 set up the font configuration files.
Internal or external?
The first decision you must make about the font service is how theserver is started. It can run as a stand alone process (we refer to this asanexternalserver) or as a plugin toio-graphics (which we call aninternalserver). While each method has its own distinct advantages,in general we recommend running the font server as a separateprocess (as an external server), since testing has shown this methodhas the best overall performance. By default, the font server runs inthe more memory-conservative internal configuration.
November 2, 2006 Appendix: D � Photon in Embedded Systems 807

Advanced Topics 2006, QNX Software Systems GmbH & Co. KG.
For optimum performance, it’s best to run an external fontserver.Because the graphics driver still invokes a font library instance,there’s no negative performance effect in using the externalfontserver. Since the graphics driver runs at a priority higher thanother applications, it processes the draw stream without beinginterrupted by outside applications requesting font services.
However, if you are more concerned about memory footprint, don’trun an external font server, although the graphic processing might beslower. Any increased memory footprint is mostly data, since bothinstances share common code libraries.
Startio-graphics with the-f option to run an external fontserver.For more information seeio-graphics in the NeutrinoUtilitiesReference.
☞
To run an external font server, startphfont beforeio-graphics.To run an internal font server, simply startio-graphics.
Required fonts
When building an embedded system, you also need to make carefuldecisions about the level of font support, including which fonts youneed, and whether or not you need scalable fonts, since extra fontsmake for a larger image size and potentially longer startup time.
The first step is to decide which fonts you need:
� You’re very likely to need the cursor font,phcursor.phf, as thegraphics driver requires it to render the standard Photon cursors.
� If your embedded system includespterm, you need the terminalsupport fonts, PC Terminal (pcterm*.phf), PC Serif(pcs*.phf), and PC Sanserif (pcss*.phf) font families. Youprobably also need a$HOME/.photon/pterm.rc file, or a$PHOTON PATH/config/pterm.rc file to configure theterminal font.
� Most widget-based applications expect these aliases to be definedby being appropriately mapped in thefontmap file (see below):
808 Appendix: D � Photon in Embedded Systems November 2, 2006
2006, QNX Software Systems GmbH & Co. KG. Advanced Topics
- TextFont
- MenuFont
- FixedFont
- BalloonFont
- TitleFont
� A web browser requires these types of fonts:
- body font (e.g. PrimaSans BT, Dutch 801 Rm BT)
- heading font (e.g. Swis721 BT)
- nonproportional font (e.g. Courier10 BT, PrimaSansMono BT)
Check the browser’s configuration to see which fonts are expected,and use those fonts, modifying the configuration to reflect whatyou’ve installed, or use thefontmap file to map them at runtime.
You can map, or substitute, font names by using thefontmap file, orthe Mappings section of thefontadmin utility. For more informationon the format offontmap and other font configuration files, seephfont in the QNX NeutrinoUtilities Reference.
Required fonts binaries
You may be able to reduce the number of binaries required by thePhoton font system, depending on the types of fonts you need torender on your target. Each font type has an associated plugin thatsupports that type, and each plugin in turn requires additionallibraries. Each plugin requireslibblkcache.so andlibc.so. Thefollowing table summarizes additional, plugin-specific, requirements:
November 2, 2006 Appendix: D � Photon in Embedded Systems 809

Advanced Topics 2006, QNX Software Systems GmbH & Co. KG.
Fonts supported Plugin Required libs
Bitstream TrueDoc (.pfr)TrueType collections (.ttc)
FCcore.so libFF-T2K-fm.solibFF-T2K-cache.solibFF-T2K.so
Photon bitmap (.phf) PHFcore.so libfontutils.so
TrueType (.ttf), AdobeType1 (.pfa), Adobe Type2(.cff), Bitstream Stroke(.ffs), Bitstream Speedo(.spd, public encryptiononly), Bitstream T2K (.t2k)
ttfFFcore.so libFF-T2K-cache.solibFF-T2K.so
Configure the font server
The font system is configured with various files. The minimumconfiguration files required by an embedded system are:
� fontdesc — font classifications
� fontdir — a directory of known fonts. This file should list everyfont in your embedded system.
� fontext — extension rules to handle missing characters
� fontkey — keys for font names
� fontmap — a set of font-mapping rules
You also require thefontopts file if you’re using international fontsupport (for example,cpim, jpim, orkpim).
☞
For more information about the format of each of these files, seephfont.
You can configure the fonts on the embedded system itself, but it’seasier to use your development system to configure the fonts to mimic
810 Appendix: D � Photon in Embedded Systems November 2, 2006

2006, QNX Software Systems GmbH & Co. KG. Advanced Topics
the desired configuration for the embedded system, then assemble thefont data and configuration files in the appropriate Embedded FileSystem (EFS) build image directory.
If you’re using a self-hosted development system to mimic yourtarget, then the font server can aid in determining which fonts youneed by logging failed requests for fonts that aren’t mapped(explicitly or otherwise). Seephfont for more information.
☞
In an embedded system with only a few applications, chances areyou’ll need far fewer fonts than a desktop system requires. In thissituation, you can provide minimal configuration files (all located in/usr/photon/font repository):
fontdir This file needs to list only the fonts you’re installingin /usr/photon/font repository. You can editthis file in one of two ways:
� Edit the default existing fontdir file by hand,removing all the lines that refer to fonts you’re notincluding in your image.Or:
� Generate this file using themkfontdir utility (onall hosts).
fontdesc You’ll need to edit this file by hand. Start with a copyof the defaultfontdesc file, and remove the fontfamilies you’re not including in your image.
fontkey Use the default file.
fontext Make a copy of the default file and edit it.
fontmap Make a copy of the default file and edit it, or usefontadmin (self-hosted only)
This file can consist of a single line:
?=primasansbts
November 2, 2006 Appendix: D � Photon in Embedded Systems 811

Advanced Topics 2006, QNX Software Systems GmbH & Co. KG.
(If you aren’t including PrimaSans BT in your image,change this to the name of the font you want to use asa default).
Adding a splash screenNormally, the graphics driver switches into graphics mode when thegraphics subsystem (io-graphics) is started. However, you maysometimes wish to switch into graphics mode earlier in the bootprocess in order to display a splash screen. In this case, you canmodify the IPL code or startup to perform a switch into graphicsmode, and to display the splash screen image. For more information,see the Writing an IPL Program and Customizing Image StartupPrograms chapters inBuilding Embedded Systems.
Startup sets aside the area of memory used for the frame buffer, andthen later passes the physical address of this memory to the graphicsdriver.
Whenio-graphics starts, it calls into the graphics driver to resetthe video mode, and clear the display. This can cause an undesirable“glitch” on the display between the time the graphics subsystem startsand the application starts. In order to achieve a smooth transition fromthe splash screen to the running Photon application, the graphicsdriver requires special support. Some graphics drivers, including thegeneric “flat” driver, already have this support.
The flat driver is a simple case, since it always assumes the device isalready in graphics mode. On the command line, you specify thephysical address of the frame buffer (which is the same frame bufferthat startup draws the splash screen in). As well, you need to specifythe-N option toio-graphics in order to prevent the display frombeing cleared. Here’s an example:
io-graphics -dldevg-flat.so -g800x600x16 -amem=0x1f000000,2048 -N
812 Appendix: D � Photon in Embedded Systems November 2, 2006
2006, QNX Software Systems GmbH & Co. KG. Advanced Topics
If your embedded environment has a touchscreen or pen input device,you can adjust the input values for pointer events by specifying the-D, -R, and-U options. For example, to prevent random changes inposition because the size of a finger press is larger than a pixel,specify the-U option.
For more information, seePhoton in the QNX NeutrinoUtilitiesReference.
☞
November 2, 2006 Appendix: D � Photon in Embedded Systems 813


Appendix E
Using PhAB under MicrosoftWindows
In this appendix. . .Photon in a single window 817Exiting PhAB 817Advanced options 818PHINDOWSOPTS 818Transferring PhAB projects 819Debugger launch line 819Custom widget development and PhAB820Using custom TrueType fonts and PhAB822Photon Hook DLLs 822
November 2, 2006 Appendix: E � Using PhAB under Microsoft Windows 815


2006, QNX Software Systems GmbH & Co. KG. Photon in a single window
This appendix describes the main differences between the Windowsand native QNX Neutrino versions of PhAB.
Photon in a single windowLike the native QNX Neutrino version of PhAB, the Windows versionuses Photon and the Photon Window Manager (pwm) to manage itswindows and dialogs. The main difference is that under Windows,Photon runswithin a single window.
When you launch PhAB, it first starts a console window that it usesonly for status messages. Next, the main Photon window is created.All PhAB windows and dialogs appear within this main window, andany sub-applications launched by PhAB stay within this window.Note that you can run multiple PhAB sessions within this singlePhoton window.
You can minimize application windows within the Photon window,but since there’s noshelf application running, the right mousebutton has been set up to list all running applications and to let youbring them to the foreground. To do this, simply click the right mousebutton on a blank area of the main Photon window, then select theapplication you wish to bring to the foreground.
Exiting PhABWhen you exit PhAB, it attempts to shut down all Photon componentsas well, unless there are other applications still running within thePhoton window (such as a second PhAB session or the languageeditor).
If all Photon components don’t shut down automatically, or if you justwant to force everything to exit in the event that the system is havingproblems, you should manually close theConsole for PhAB window.If this does not work, type:
ph -kill
from a Windows command prompt.
November 2, 2006 Appendix: E � Using PhAB under Microsoft Windows 817
Advanced options 2006, QNX Software Systems GmbH & Co. KG.
Advanced optionsIf you wish to specify command-line options topwm or to thephotonserver, you can use these environment variables:
� PWMOPTS
� PHOTONOPTS
You set these environment variables using the Environment tab (in theSystem program of the Windows Control Panel).
For details on the command-line options for any QNX Neutrinoutility, see theUtilities Reference.
PHINDOWSOPTSYou can use thePHINDOWSOPTS environment variable to passextra options to the special version of Phindows that’s used as thedisplay driver for PhAB for Windows. For example, if your Neutrinotarget is using an 8-bit 256 color mode with a nondefault palette, thento allow the PhAB display on the Windows host to show the colors asthey’ll appear on the target, you can do the following:
1 Set the Windows display mode to 256 colors.
In Windows XP, unlike Windows NT/2000, you do this on aper-application basis, by using the Compatibility tab on theproperties for the application’s shortcut or executable.
2 Set thePHINDOWSOPTS environment variable to specify thesame palette file as will be used on the target. For example, ifthe palette file is calledgrey.pal, you might set this variableto -P%QNX TARGET%/usr/photon/palette/grey.pal. Inthis case, the direction of the slashes doesn’t matter.
To set environment variables globally, you can use the EnvironmentVariables button in the Advanced tab of the System program in theWindows Control Panel. To set a variable temporarily, useset
variable= in a Command Prompt window, and then typephab to runthe Photon Application Builder with that environment variable set.
818 Appendix: E � Using PhAB under Microsoft Windows November 2, 2006

2006, QNX Software Systems GmbH & Co. KG. Transferring PhAB projects
Transferring PhAB projectsWhen transferring PhAB projects between QNX Neutrino andWindows it is important to preserve the exact contents of all files. Inother words, each file should be treated as binary, not ASCII, and thecase of all filenames should be preserved. The easiest way to ensurethis is to create a zip archive at the source, transferring the singlebinary zip file, and then extracting the contents of the archive at thedestination.
Note thattar files can be used to transfer PhAB projects, but if youuseWinzip to extract the contents of a tar archive on Windows it willby default treat files as ASCII and change their line endings. Toprevent this you must deselect theTAR file smart CR/LF conversionoption inWinzip.
Debugger launch lineYou can launch theGDB debugger from within PhAB. Edit the projectproperties to specify the debug command that PhAB should use (formore information, see the Generating, Compiling, and Running Codechapter). The default debug command and arguments used by PhABon Windows is:
gdb phab.bat -debugger nto$TPR-gdb --symbols
This runs the commands in thegdb phab.bat batch file.
PhAB automatically sets theTPR environment variable beforeissuing the debug command. It contains the name of the current targetprocessor, as determined by the last build performed. Possible valuesare currentlyx86, ppc, mips, sh andarm. Having this variable in thedebug command automatically selects the correct debuggerexecutable to use.
Finally, since the Windows version of PhAB is never used forself-hosting, PhAB passes the--symbols option to GDB by default.This is like thesymbol GDB command, and makesgdb load symbolsfrom the PhAB executable without making it the program executed
November 2, 2006 Appendix: E � Using PhAB under Microsoft Windows 819
Custom widget development and PhAB 2006, QNX Software Systems GmbH & Co. KG.
when you use therun command. This lets you run the executable onthe remote target. Here are the initial commands from a typical debugsession after you start GDB using the default launch line:
(gdb) target qnx com1(gdb) upload myprog(gdb) run myprog(gdb) break main(gdb) continue
For the above, we assume that we’re connected to the target machinevia serial port com1 and that thepdebug remote debug agent isalready running on the target.
If you want to use a graphical debugger, use the IDE that’s part of theQNX Momentics Professional Edition. Create a Photon Appbuilderproject within the IDE and launch PhAB from there.
☞
Custom widget development and PhABPhoton lets you create applications using widgets that you’ve builtyourself or obtained from a third party. You can build these customwidget libraries into your application and run it on your intendedtarget.
For documentation on writing source code for custom widgets,getting them to run within your application on the target, and gettingPhAB to recognize your custom widgets, seeBuilding CustomWidgets. The process for doing these things is essentially the same onall host platforms.
PhAB can dynamically load custom widgets and display themproperly as you develop your application on the host machine.
To make PhAB display custom widgets correctly on the host as youdevelop your application, you need to take some extra steps torecompile and link the custom widget source code for the hostplatform and processor. This means building shared libraries thatPhAB dynamically loads at runtime. If you do not do this, you can set
820 Appendix: E � Using PhAB under Microsoft Windows November 2, 2006
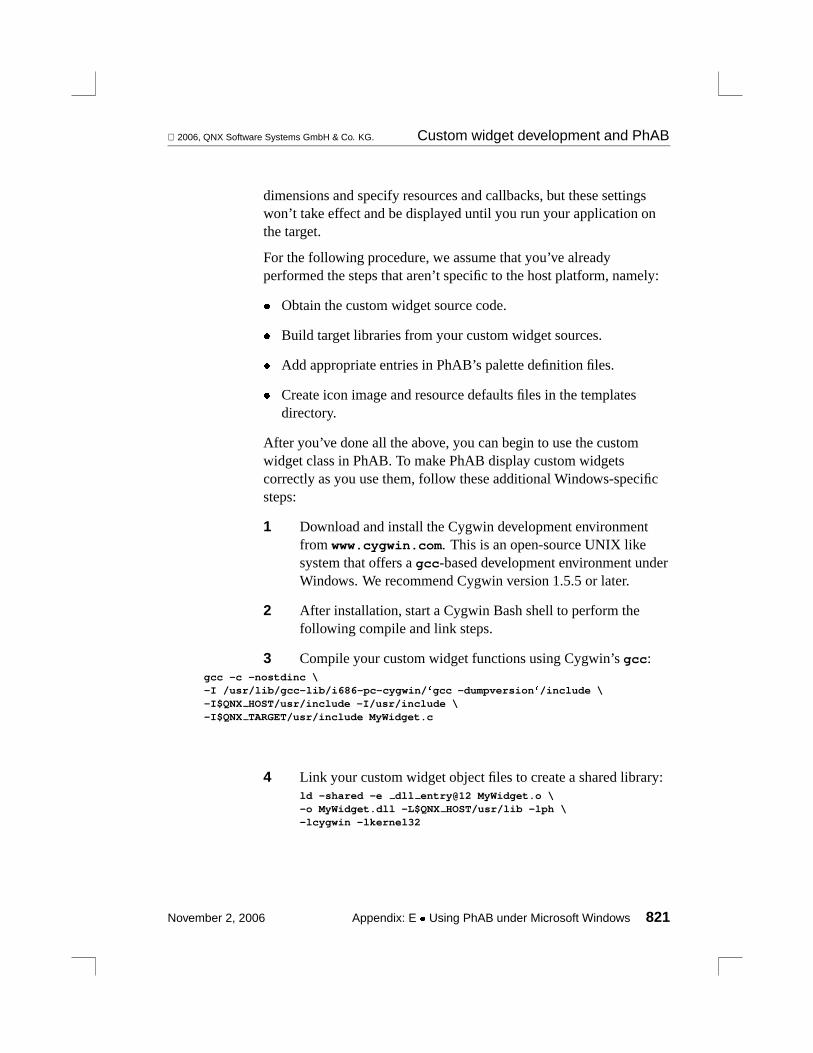
2006, QNX Software Systems GmbH & Co. KG. Custom widget development and PhAB
dimensions and specify resources and callbacks, but these settingswon’t take effect and be displayed until you run your application onthe target.
For the following procedure, we assume that you’ve alreadyperformed the steps that aren’t specific to the host platform, namely:
� Obtain the custom widget source code.
� Build target libraries from your custom widget sources.
� Add appropriate entries in PhAB’s palette definition files.
� Create icon image and resource defaults files in the templatesdirectory.
After you’ve done all the above, you can begin to use the customwidget class in PhAB. To make PhAB display custom widgetscorrectly as you use them, follow these additional Windows-specificsteps:
1 Download and install the Cygwin development environmentfrom www.cygwin.com. This is an open-source UNIX likesystem that offers agcc-based development environment underWindows. We recommend Cygwin version 1.5.5 or later.
2 After installation, start a Cygwin Bash shell to perform thefollowing compile and link steps.
3 Compile your custom widget functions using Cygwin’sgcc:gcc -c -nostdinc \-I /usr/lib/gcc-lib/i686-pc-cygwin/�gcc -dumpversion�/include \-I$QNX HOST/usr/include -I/usr/include \-I$QNX TARGET/usr/include MyWidget.c
4 Link your custom widget object files to create a shared library:ld -shared -e dll entry@12 MyWidget.o \-o MyWidget.dll -L$QNX HOST/usr/lib -lph \-lcygwin -lkernel32
November 2, 2006 Appendix: E � Using PhAB under Microsoft Windows 821

Using custom TrueType fonts and PhAB 2006, QNX Software Systems GmbH & Co. KG.
5 Place your shared object (in this exampleMyWidget.dll) in adirectory specified by thePATH environment variable. NotethatLD LIBRARY PATH is not recognized by Windows.
The next time you start PhAB after completing these steps, you shouldbe able to see custom widgets displayed correctly as you work withthem. If not, consult the PhAB console window for error messages.
Using custom TrueType fonts and PhABYou can configure PhAB for Windows to use TrueType fonts that yousupply, in addition to the standard font set installed with QNXMomentics. To do this:
1 Install the font in Windows using the control panel. See theWindows help for more information on this step.
2 Copy the font’s.ttf file to the Photon font repositorydirectory,%QNX TARGET%\usr\photon\font repository.
3 Runmkfontdir on the directory to register the new TrueTypefont in thefontdir file.
For example:mkfontdir.exe -d
%QNX TARGET%\usr\photon\font repository
The font is now available when you run PhAB standalone or in theIDE.
Photon Hook DLLsPhoton supports a special method to change the look and feel ofwidgets at runtime called “Photon hook DLLs”. This method can beused to “skin” an application without recompiling it. For moreinformation about Photon hook DLLs, see the Widget styles sectionof the Managing Widgets in Application Code chapter.
To make PhAB display widgets correctly on a Windows host as youdevelop your application, the Photon hook DLL needs to be builtunder Windows using the following steps:
822 Appendix: E � Using PhAB under Microsoft Windows November 2, 2006

2006, QNX Software Systems GmbH & Co. KG. Photon Hook DLLs
1 Download and install the Cygwin development environmentfrom www.cygwin.com. This is an open-source UNIX likesystem that offers a gcc-based development environment underWindows. We recommend Cygwin version 1.5.5 or later.
2 After installation, start a Cygwin Bash shell to perform thefollowing compile and link steps.
3 Compile your Photon hook DLL source code using Cygwin’sgcc, for example:
gcc -c -nostdinc \-I /usr/lib/gcc-lib/i686-pc-cygwin/�gcc -dumpversion�/include \-I$QNX HOST/usr/include -I/usr/include \-I$QNX TARGET/usr/include hook.c
4 Link the actual shared library, for example:ld -shared -e dll entry@12 hook.o -o PtHook.dll \-L$QNX HOST/usr/lib -lph -lcygwin -lkernel32
The above steps create a Photon hook DLL calledPtHook.dll. Touse this DLL, place it in the search path (specified by$PATH) beforerunning PhAB.
Alternatively, you can use a version of the PtMultiHook sample codeas thePtHook.dll (see the Widget styles section of the ManagingWidgets in Application Code chapter). This DLL can be found at$QNX HOST/usr/photon/bin/pt multihook.dll, and shouldbe renamed toPtHook.dll before use. This code looks for thePHOTON HOOK environment variable, and loads the DLL it pointsto. If it points to a directory, it loads all the DLLs in the directory. Itthen executes thePtHook()function in any loaded DLLs.
For example, if your hook DLL is placed inC:\my photon hooks\, you can type the following two commandsfrom a Windows command prompt:
set PHOTON HOOK=c:/my photon hooksappbuilder
November 2, 2006 Appendix: E � Using PhAB under Microsoft Windows 823

Photon Hook DLLs 2006, QNX Software Systems GmbH & Co. KG.
Or you can type the following frombash:
export PHOTON HOOK=c:/my photon hooksappbuilder
To set the environment variable permanently, use the System optionon the Windows Control Panel.
824 Appendix: E � Using PhAB under Microsoft Windows November 2, 2006
Appendix F
PhAB Keyboard Shortcuts
November 2, 2006 Appendix: F � PhAB Keyboard Shortcuts 825


2006, QNX Software Systems GmbH & Co. KG.
Quick Reference
This Appendix contains a quick reference guide to PhotonApplication Builder’s keyboard shortcuts. The following types ofshortcuts are available:
� Project management
� Editing
� Adding items
� Building
� Widget management
� Other shortcuts
Project management shortcutsCommand Shortcut
New project Ctrl – N*
Open project Ctrl – O*
Save project Ctrl – S*
Save project as Ctrl – Shift – S*
Print Ctrl – P
Exit Ctrl – X
* These commands aren’t available in the IDE-hosted version ofPhAB.
Editing shortcutsCommand Shortcut
Undo last action Ctrl – Z
continued. . .
November 2, 2006 Appendix: F � PhAB Keyboard Shortcuts 827
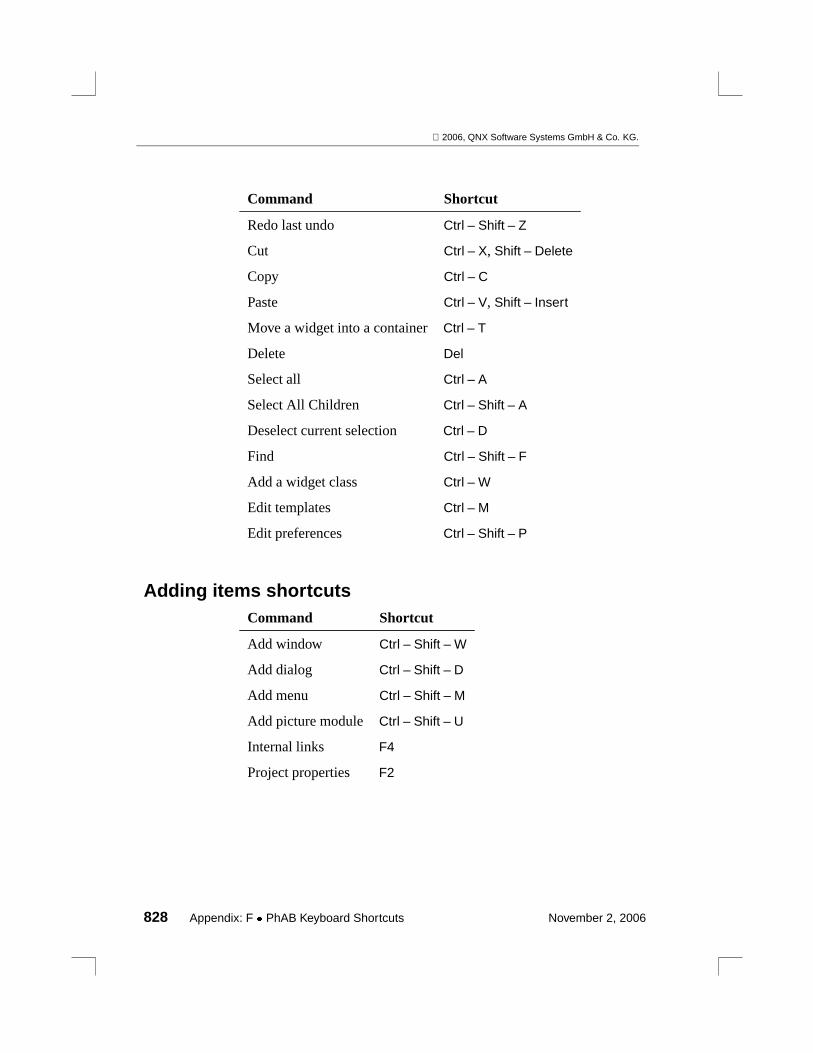
2006, QNX Software Systems GmbH & Co. KG.
Command Shortcut
Redo last undo Ctrl – Shift – Z
Cut Ctrl – X, Shift – Delete
Copy Ctrl – C
Paste Ctrl – V, Shift – Insert
Move a widget into a containerCtrl – T
Delete Del
Select all Ctrl – A
Select All Children Ctrl – Shift – A
Deselect current selection Ctrl – D
Find Ctrl – Shift – F
Add a widget class Ctrl – W
Edit templates Ctrl – M
Edit preferences Ctrl – Shift – P
Adding items shortcutsCommand Shortcut
Add window Ctrl – Shift – W
Add dialog Ctrl – Shift – D
Add menu Ctrl – Shift – M
Add picture module Ctrl – Shift – U
Internal links F4
Project properties F2
828 Appendix: F � PhAB Keyboard Shortcuts November 2, 2006

2006, QNX Software Systems GmbH & Co. KG.
Building shortcutsCommand Shortcut
Build and run F6*
Build and debug F5*
Rebuild all F3*
Build F7*
Make clean Shift – F3*
Generate UI Shift – F7
Run arguments Shift – F6*
Manage targets F11*
* These commands aren’t available in the IDE-hosted version ofPhAB.
Widget management shortcutsCommand Shortcut
Move to front Ctrl – F
Move to back Ctrl – B
Group Ctrl – G
Ungroup Ctrl – Shift – G
Change class Ctrl – H
Define template Ctrl – L
Select next widget in moduletree
F10
Multiple-select the current andnext widget in the module tree
Shift – F10
continued. . .
November 2, 2006 Appendix: F � PhAB Keyboard Shortcuts 829

2006, QNX Software Systems GmbH & Co. KG.
Command Shortcut
Select previous widget inmodule tree
F9
Multiple-select the current andprevious widget in the moduletree
Shift – F9
Toggle the nudge mode throughmove, shrink, and expand
Ctrl – 5*
Move, shrink or expand theselected widget by one pixel
Ctrl – 1 to Ctrl – 9* (excludingCtrl – 5) andCtrl – arrow
* These shortcuts are on the numeric keyboard only.
View and window shortcutsCommand Shortcut
Zoom in Ctrl – +
Zoom out Ctrl – -
Close current window Ctrl – Alt – L
Close all windows Ctrl – Alt – A
Show/hide the resources tabF12
Show/hide the callbacks tabShift – F12
Other shortcutsCommand Shortcut
Help F1
830 Appendix: F � PhAB Keyboard Shortcuts November 2, 2006

Glossary
November 2, 2006 Glossary 831


2006, QNX Software Systems GmbH & Co. KG.
accelerator
Seehotkey.
activate
A widget is usuallyactivatedwhen you release a mouse button whilepointing at anarmed widget.
active window
The window that currently hasfocus.
anchor offset
The distance between the edges of a widget and the parent widget it’sanchored to.
anchor
A constraint mechanism used to manage what happens to a widgetwhen its parent is expanded or contracted. For example, a pane that’sanchored to the sides of a window expands or contracts as thewindow’s size is changed.
application region
A region that belongs to a Photon application (as opposed to a Photonsystem process, such as the window manager, graphics drivers, etc.).An application region is usually placed behind thedevice region.Also called awindow region.
argument list
An array of typePtArg t used when setting and getting widgetresources.
arm
A widget is usuallyarmedwhen you press a mouse button whilepointing at it.
November 2, 2006 Glossary 833
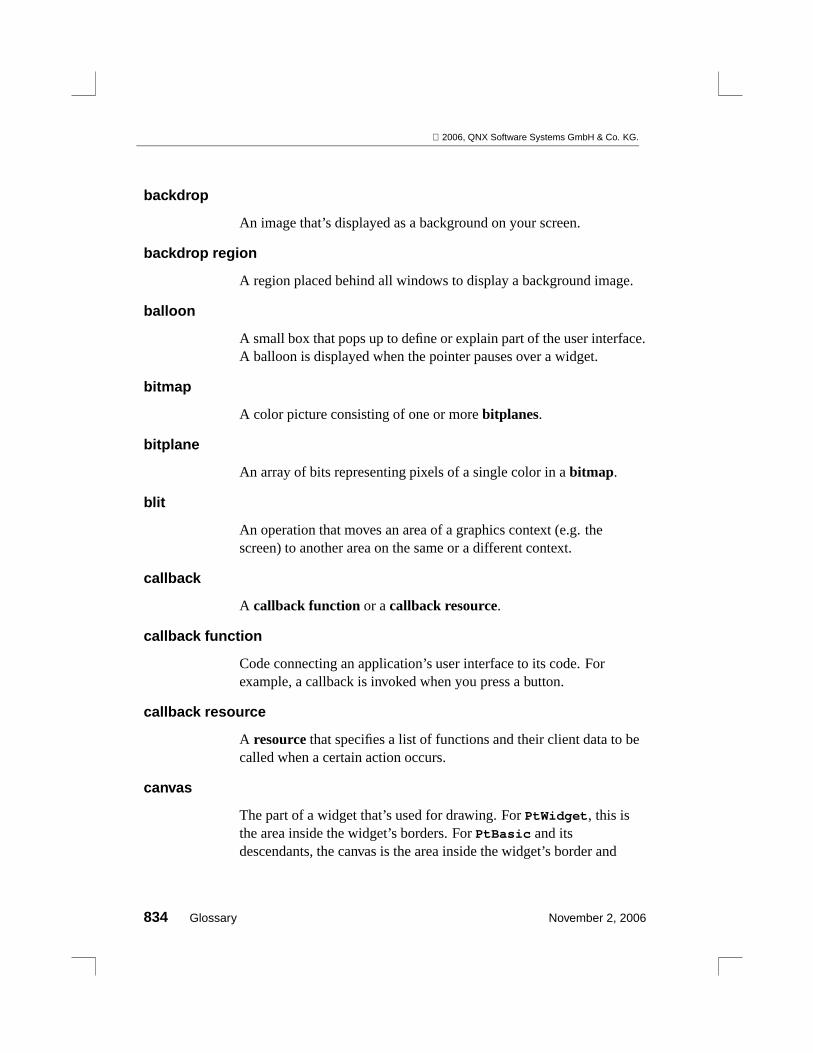
2006, QNX Software Systems GmbH & Co. KG.
backdrop
An image that’s displayed as a background on your screen.
backdrop region
A region placed behind all windows to display a background image.
balloon
A small box that pops up to define or explain part of the user interface.A balloon is displayed when the pointer pauses over a widget.
bitmap
A color picture consisting of one or morebitplanes.
bitplane
An array of bits representing pixels of a single color in abitmap.
blit
An operation that moves an area of a graphics context (e.g. thescreen) to another area on the same or a different context.
callback
A callback function or acallback resource.
callback function
Code connecting an application’s user interface to its code. Forexample, a callback is invoked when you press a button.
callback resource
A resource that specifies a list of functions and their client data to becalled when a certain action occurs.
canvas
The part of a widget that’s used for drawing. ForPtWidget, this isthe area inside the widget’s borders. ForPtBasic and itsdescendants, the canvas is the area inside the widget’s border and
834 Glossary November 2, 2006

2006, QNX Software Systems GmbH & Co. KG.
margins. Other widgets, such asPtLabel, may define additionalmargins.
class
Seewidget class.
class hierarchy
The relationships between all of the widget classes.
client data
Any arbitrary data the application may need to provide to a callbackfunction.
clipping list
An array of rectangles used to restrict output to a particular area.
clipping rectangle
A rectangle used to restrict output to a particular area.
CMY value
A color expressed as levels of cyan, magenta, and yellow.
CMYK value
A color expressed as levels of cyan, magenta, yellow, and black.
code-type link callback
In a PhAB application, an application function that’s called when awidget’s callback list is invoked.
color depth
The number of bits per pixel for a screen or pixmap.
November 2, 2006 Glossary 835
2006, QNX Software Systems GmbH & Co. KG.
Common User Access
SeeCUA.
compose sequence
A sequence of key presses that can be used to type a character thatmight not appear on the keyboard.
console
One of nine virtual screens on thedesktop. Also called aworkspace.
consume
When a widget has processed an event and prevents another widgetfrom interacting with the event, the first widget is said to haveconsumed the event.
container
A widget that can have other widgets as children. For example,PtWindow, PtGroup, andPtOSContainer.
cooked event
A key or pointer event that has been assigned a location in the Photonevent space. Also called afocused event.
CUA
Common User Access — a standard that defines how you can changefocus by using the keyboard.
current item
The item in a list or tree widget that will be selected (or perhapsunselected) when you pressEnter or Space. It’s typically drawn witha blue dotted line around it when its widget has focus.
836 Glossary November 2, 2006

2006, QNX Software Systems GmbH & Co. KG.
cursor
An indicator of a position on a screen, such as apointer or aninsertion point in a text field.
damaged
Whenever a widget needs to be redisplayed due to a change in thewindow (e.g. the widget is changed, moved, orrealized), it’s said tobedamaged.
dead key
A key that, when pressed, doesn’t produce a symbol, but initiates acompose sequence.
default placement
The placement of a region when no siblings are specified. Theopposite ofspecific placement.
desktop
The virtual screen, consisting of nineconsoles or workspaces.
device region
Theregion located in the middle of theevent space, with applicationregions behind it anddriver regions in front of it (from the user’spoint of view).
dialog module
A PhAB module similar to awindow module, except that a dialogmodule can have only one instance per process.
direct-color
A color scheme in which each pixel is represented by an RGB value.Contrastpalette-based.
November 2, 2006 Glossary 837
2006, QNX Software Systems GmbH & Co. KG.
disjoint parent
A disjoint widget that’s the ancestor of another widget.
disjoint widget
A widget that can exist without a parent. If a disjoint widget has aparent, it can exist outside its parent’s canvas. For example,PtWindow, PtMenu, andPtRegion are disjoint widgets, butPtButton, PtBkgd, andPtRect aren’t.
A disjoint widget owns regions that aren’t children of its parent’sregions. Any clipping set by the parent of a disjoint widget isn’tapplied to the disjoint widget. The regions of disjoint widgets aresensitive and opaque to expose events.
dithering
A process whereby pixels of two colors are combined to create atexture or a blended color.
draw context
A structure that defines the flow of the draw stream. The default drawcontext emits draw events to graphics drivers.Print contexts andmemory contexts are types of draw contexts.
draw stream
A series of tokens that are dispatched via draw events and can becollected by a rendering engine such as a graphics driver.
driver region
A region created by a driver, usually placed in front of thedeviceregion.
encapsulation driver
A program that displays Photon graphical output inside anotherwindowing system such as the X Window System.
838 Glossary November 2, 2006

2006, QNX Software Systems GmbH & Co. KG.
event
A data structure that represents an interaction between you and anapplication or between applications. Events travel through the eventspace either toward you or away (i.e. toward theroot region).
event compression
The merging of events such that the application sees only their latestvalues. The application doesn’t have to process many unnecessaryevents.
event handler
A callback function that lets an application respond directly to Photonevents, such as dragging events.
event mask
A set of event types that are of interest to anevent handler. Whenone of these events occurs, the event handler is invoked.
event space
An abstract, three-dimensional space that contains regions — fromthe root region at the back to the graphics region at the front. You sitoutside the event space, looking in from the front. Events travelthrough the event space either toward the root region or toward you.
exported subordinate child
A widget created by a container widget (as opposed to an application)whose resources you can access only through the parent.
exposure
Typically occurs when aregion is destroyed, resized, or moved.Expose events are sent to applications to inform them when thecontents of their regions need to be redisplayed.
November 2, 2006 Glossary 839
2006, QNX Software Systems GmbH & Co. KG.
extent
A rectangle that describes the outermost edges of a widget.
File Manager
The Photon File Manager (PFM), an application used to maintain andorganize files and directories.
focus
A widget that hasfocuswill receive any key events collected by itswindow.
focus region
A region placed just behind thedevice region by thePhotonWindow Manager that lets it intercept key events and direct them totheactive window.
focused event
A key or pointer event that has been assigned a location in the Photonevent space. Also called acooked event.
folder
In the Photon File Manager, a metaphor for a directory.
GC
Seegraphics context.
geometry negotiation
The process of determining the layout for a widget and itsdescendants, which depends on the widget’s layout policy, any sizeset for the widget, and the dimensions and desired positions of each ofthe widget’s children.
840 Glossary November 2, 2006

2006, QNX Software Systems GmbH & Co. KG.
global header file
A header file that’s included in all code generated by PhAB for anapplication. The global header file is specified in PhAB’s ApplicationStartup Information dialog.
graphics driver
A program that places a region that’s sensitive to draw events on theuser’s side of the device region, collects draw events, and renders thegraphical information on the screen.
graphics context (GC)
A data structure that defines the characteristics of primitives,including foreground color, background color, line width, clipping,etc.
Helpviewer
A Photon application for viewing online documentation.
hotkey
A special key or keychord that invokes an action (such as a menuitem) without actually selecting a widget. Also called anaccelerator.Contrastkeyboard shortcut.
hotspot
The part of the pointer that corresponds to the coordinates reportedfor the pointer (e.g. the intersection of crosshairs, or the tip of thearrow of the basic pointer).
HSB
Hue-Saturation-Brightness color model.
HSV
Hue-Saturation-Value color model.
November 2, 2006 Glossary 841

2006, QNX Software Systems GmbH & Co. KG.
icon module
A PhAB module that associates icons with an application.
image
A rectangular array of color values, where each element represents asingle pixel. See alsodirect-color andpalette-based.
initialization function
In a PhAB application, a function that’s called before any widgets arecreated.
input driver
A program that emits, and is the source of, key and/or pointer events.
input group
A set of input and output devices. There’s typically one input groupper user.
input handler (or input-handling function)
A function that’s hooked into Photon’s main event-processing loop tohandle messages andpulses sent to the application by other processes.
instance
A concrete example of an abstract class; for example, “Lassie” is aninstance of the class “dog.” In Photon, an instance is usually a widgetinstance; for example, a pushbutton is an instance of thePtButton
widget class. When an instance of a widget is created, the initialvalues of itsresources are assigned.
instance name
In PhAB, a string that identifies a particular instance of a widget sothat you can access the instance in your application’s code.
842 Glossary November 2, 2006

2006, QNX Software Systems GmbH & Co. KG.
instantiation
The action of creating aninstance of a widget class in an application.
internal link
A PhAB mechanism that lets a developer access a PhAB moduledirectly from an application’s code.
Image Viewer
A Photon application (pv) that displays images.
key modifier
A flag in a key event that indicates the state of the correspondingmodifier key when another key was pressed.
keyboard driver
A program that gets information from the keyboard hardware, buildsPhoton key events, and emits them towards the root region.
keyboard shortcut
A key that selects a menu item. The shortcut works only if the menuis displayed. Contrasthotkey.
language database
A file that contains the text strings used in a PhAB application; alanguage database makes it easier to create multilingual applicationswith PhAB’s language editor.
link callback
A mechanism that connects different parts of a PhAB application. Forexample, a link callback can be invoked to display a dialog when abutton is pressed.
November 2, 2006 Glossary 843

2006, QNX Software Systems GmbH & Co. KG.
margin
The area between a widget’s border andcanvas.
memory context
A draw context in which Photon draw events are directed to memoryfor future displaying on the screen, as opposed to a printer (printcontext) or to the screen directly (the default draw context).
menu module
A PhAB module used to create a menu.
method
A function that’s internal to a widget class and invoked under specificconditions (e.g. to draw the widget). Methods are provided aspointers to functions in widget class records.
modifier key
A key (such asShift, Alt, or Ctrl) used to change the meaning ofanother key.
module
An object in PhAB that holds an application’s widgets. PhABmodules include windows, menus, icons, pictures, and dialogs.
module-type link callback
A link callback that displays a PhAB module.
mouse driver
A program that gets information from the pointer hardware, buildsPhoton raw pointer events, and emits them towards the root region.
opaque
The state of a region with regard to events. If a region isopaqueto anevent type, any event of that type that intersects with the region has its
844 Glossary November 2, 2006
2006, QNX Software Systems GmbH & Co. KG.
rectangle set adjusted to clip out the intersecting area. The regionprevents the event from passing through.
palette
An array of colors. Ahard palette is in hardware; asoft palette is insoftware.
palette-based
A color scheme in which each pixel is represented by an index into apalette. Contrastdirect-color.
PDR
SeePress-drag-release.
PFM
SeePhoton File Manager.
PhAB
Photon Application Builder. Visual design tool that generates thecode required to implement a user interface.
phditto
A utility that accesses the Photon workspace on a remote node. Seealsoditto.
Phindows
Photon in Windows. An application that accesses a Photon sessionfrom a Microsoft Windows environment.
Photon File Manager (PFM)
An application used to maintain and organize files and directories.
November 2, 2006 Glossary 845

2006, QNX Software Systems GmbH & Co. KG.
Photon Manager or server
The program that maintains the Photon event space by managingregions and events.
Photon Terminal
An application (pterm) that emulates a character-mode terminal in aPhoton window.
Photon Window Manager (PWM)
An application that manages the appearance of window frames andother objects on the screen. For example, the window manager addsthe resize bars, title bar, and various buttons to an application’swindow. The window manager also provides a method of focusingkeyboard events.
picture module
A PhAB module that contains an arrangement of widgets that can bedisplayed in another widget or used as a widget database.
pixmap
A bitmap or image.
plane mask
A mask used to restrict graphics operations to affect only a subset ofcolor bits.
point source
A single-pointrectangle set used as the source of an event.
pointer
An object on the screen that tracks the position of a pointing device(e.g. a mouse, tablet, track-ball, or joystick). Photon has severalpointers indicating various states: Basic, Busy, Help, Move, Resize,I-beam, No-input.
846 Glossary November 2, 2006

2006, QNX Software Systems GmbH & Co. KG.
Press-drag-release (PDR)
A method of selecting a menu item by pressing down a mouse buttonwhile pointing to a menu button, dragging until the desired item ishighlighted, and releasing the mouse button.
print context
A draw context in which Photon draw events are directed to a file, asopposed to the screen (the default draw context) or to memory(memory context).
printer driver
A program that converts Photon draw stream format into a formatsuitable for a printer, including PostScript, Hewlett-Packard PCL, andCanon.
procreated widget
A widget created by another widget (as opposed to an application),such as thePtList andPtText created by aPtComboBox. Alsoknown as asubordinate child.
pterm
A Photon Terminal; an application that emulates a character-modeterminal in a Photon window.
pulse
A small message that doesn’t require a reply; used for asynchronouscommunication with a Photon application.
pv
SeeImage Viewer.
PWM
SeePhoton Window Manager.
November 2, 2006 Glossary 847
2006, QNX Software Systems GmbH & Co. KG.
raw event
An input event that hasn’t been assigned a location in the Photonevent space. Also called anunfocused event.
raw callback
A function that lets an application respond directly to Photon eventssuch as dragging events. Also called anevent handler.
realize
To display a widget and its descendants, possibly making theminteractive.
rectangle set
An array of nonoverlapping rectangles associated with an event.
region
A rectangular area within the Photon event space that’s used by anapplication for collecting and emitting events.
resize policy
A rule that governs how a widget resizes itself when its contentschange.
resource
An attribute of a widget, such as fill color, dimensions, or a callbacklist.
root region
The region at the very back of the Photon event space.
sensitive
The state of a region with regard to events. If a region issensitiveto aparticular type of event, the region’s owner collects a copy of anysuch event that intersects with the region.
848 Glossary November 2, 2006
2006, QNX Software Systems GmbH & Co. KG.
setup function
A function that’s called after a PhAB module is created.
shelf
An application that attaches areas to the outside edge of the screen.You can add plugins to customize these areas, such as a taskbar,launcher, clock, and magnifier.
Snapshot
A Photon application for capturing images of the screen.
specific placement
The placement of a region when one or more siblings are specified.The opposite ofdefault placement.
subordinate child
A widget created by another widget (as opposed to an application),such as thePtList andPtText created by aPtComboBox. Alsoknown as aprocreated widget.
table-of-contents (TOC) file
In the PhotonHelpviewer, a file that describes a hierarchy of helptopics.
taskbar
A shelf plugin that displays icons representing the applications thatare currently running.
tile
A data structure used to build linked lists of rectangles, such as a listof the damaged parts of an interface.
November 2, 2006 Glossary 849

2006, QNX Software Systems GmbH & Co. KG.
topic path
Help information identified by a string oftitles that are separated byslashes.
topic root
A topic path that’s used as a starting point for locating help topics.
topic tree
A hierarchy of help information.
translation file
A file containing translated strings for a PhAB application. There’sone translation file per language supported by the application.
unfocused event
Seeraw event.
Unicode
The ISO/IEC 10646 16-bit encoding scheme for representing thecharacters used in most languages.
UTF-8
The encoding forUnicode characters, where each character isrepresented by one, two, or three bytes.
widget
A component (e.g. a pushbutton) in a graphical user interface.
widget class
A template for widgets that perform similar functions and provide thesame public interface. For example,PtButton is a widget class.
850 Glossary November 2, 2006
2006, QNX Software Systems GmbH & Co. KG.
widget database
In PhAB, a module containing widgets that can be copied at any timeinto a window, dialog, or other container.
widget family
A hierarchy of widgetinstances. For example, a window and thewidgets it contains.
widget instance
Seeinstance.
window frame region
A region that PWM adds to a window. It lets you move, resize,iconify, and close the window.
Window Manager
SeePhoton Window Manager.
window module
A PhAB module that’s instantiated as aPtWindow widget.
window region
A region that belongs to an application window.
work procedure
A function that’s invoked when there are no Photon events pendingfor an application.
workspace
Seeconsole.
workspace menu
A configurable menu that’s displayed when you press or click theright mouse button while pointing at the background of the desktop.
November 2, 2006 Glossary 851

Index
!
.ldb extension 445
.wgtd extension 145, 153
.wgtm extension 145, 155
.wgtp extension 145, 165
.wgtw extension 145, 152/usr/bin/photon 455/usr/photon/lib 24:: in function names 336@ in function names 336@ in instance names 171, 442<PhWm.h> 708<PkKeyDef.h> 363<Pt.h> 727<utf8.h> 772
A
abapp.dfn 310abdefine.h 329abdefine.h 304abevents.h 304abimport.h 304, 306
AB ITEM DIM 347AB ITEM NORMAL 347AB ITEM SET 347ABLANG 452abLfiles 303ablinks.h 304ABLPATH 445, 452, 454, 455ABM ... manifests 333, 425abmain.c, abmain.cc 304ABN ... manifests 158, 329, 330,
347, 348AB OPTIONS 339About PhAB (Help menu) 94abplatform 304ABR CANCEL 342ABR CODE 342ABR DONE 342ABR POSTREALIZE 341ABR PRE REALIZE 341abSfiles 303abvars.h 329abvars.h 304ABW ... manifests 329–331abWfiles 304abwidgets.h 304accelerators Seehotkeys
November 2, 2006 Index 853
Index 2006, QNX Software Systems GmbH & Co. KG.
Activate callbacks 164, 230, 350,389
modifier keys 684active region 753Actual Size (View menu) 92Add Dialog (Project menu) 88Add Menu (Project menu) 88Add Picture Module (Project
menu) 88Add Window (Project menu) 88adding widgets 199AlClearTranslation() 451AlCloseDBase() 451AlGetEntry() 451AlGetSize() 451Align (Widget menu) 91, 179Alignment (Widget menu) 97AlOpenDBase() 451alpha blending
map 569AlReadTranslation() 451AlSaveTranslation() 451AlSetEntry() 451anchoring 262–267
and resize flags 251, 264flags 265offset 262, 267
anchoring widgets 96animation 554
cycling through snapshots 556eliminating flicker 557graphics bandwidth 679loading images from a file 556widget database 555
Ap library 22, 23, 728ApAddClass() 326, 430ApAddContext() 324
ApCloseDBase() 430ApCloseMessageDB()445ApCopyDBWidget() 431ApCreateDBWidget() 431ApCreateDBWidgetFamily() 431ApCreateModule() 340, 423, 426ApCreateWidget() 431ApCreateWidgetFamily() 431ApDeleteDBWidget() 432ApError() 155ApGetDBWidgetInfo() 432ApGetImageRes()432, 548, 552,
553, 555ApGetInstance() 332ApGetItemText() 348ApGetMessage() 445ApGetTextRes() 441ApGetWidgetPtr() 332apinfo 340, 342ApInfo t 340, 342ApInstanceName() 136ApLoadMessageDB()445ApModalWait() 723ApModifyItemAccel() 348ApModifyItemState() 243, 347ApModifyItemText() 348ApModuleFunction() 426ApModuleLocation() 426ApModuleParent() 426ApName() 330ApOpenDBase() 426, 429, 430,
555ApOpenDBaseFile() 429, 430, 555Appbuilder SeePhABapplication
resources 378Application menu
854 Index November 2, 2006

2006, QNX Software Systems GmbH & Co. KG. Index
Convert to Eclipse Project 89Internal Links 88, 424Language editor 89Properties 89
applicationsaccessing help
information 462Alt combinations, passing to
712bilingual 443blocking 747closing 128command-line options 318
processing 338compiling 316, 324, 728context (PtAppContext t)
478, 485–487, 491, 500creating 121
tutorial 34debugging 319directory 310, 311DLL, turning into 324drawing 517exiting, verifying 710files 309
non-PhAB, including 322,323
Generate optionsdefaults for PhAB
applications 134initialization function 133,
335, 336languages
@ in instance names 171,442
choosing 452databases 444
design considerations 437distributing 454font size 440help resources 451hotkeys 450justification 438message databases 440running 452text widgets 437translating text 449translation files 448, 449,
452lengthy operations 497
modal dialogs 716visual feedback 497work procedures 497, 499,
500, 504linking 316, 324, 728mainloop function 304, 727,
732making 316, 324multilingual Seeapplication
languagesnon-PhAB 727opening 123overwriting 127parallel operations 497performance, improving 173,
213, 354region 747, 752renaming 126running 318
tutorial 36saving 125–127standalone 716startup windows 129, 131, 132timers 344
November 2, 2006 Index 855
Index 2006, QNX Software Systems GmbH & Co. KG.
version control 305ApRemoveClass()326, 432ApRemoveContext()326ApSaveDBaseFile() 430ApWidget() 341arcs 538areas
PhArea t 343PhRect t 343PhTile t 343, 522
argument lists (PtArg t) 359Arm callbacks 164, 230, 695, 697ARM, support for 23Arrange (Widget menu) 91Arrange Icons (Window menu) 93,
152Arrange Modules (Window
menu) 152ASCII 768
B
backdrop region 677, 753backdrops 712background processing 498beveled boxes 534bitmaps 545Blocked callbacks 693border, widget 14, 17Browse Files palette 312, 314Build (Build menu) 90Build & Run dialog 28Build Debug (Build menu) 89Build menu 27, 89, 299, 300
Build 90
Build Debug 89Build Run 89Generate UI 90, 303Make Clean 90Rebuild All 90
Build Run (Build menu) 89
C
C++class member functions 336main program 304prototypes 306
callbacks See alsowork proceduresActivate 164, 230, 350, 389
modifier keys 684adding 233, 389Arm 164, 230, 695, 697Blocked 693Cancel 232, 237, 342client data 389, 391, 392, 733code-type link 232, 237, 238,
341defined 12, 230, 732, 733Disarm 230Done 232, 237, 342editing 232examining in your code 393filenames 335Filter 231, 244, 691, 699, 732hotkeys 231, 238, 240
disabling 242keycap 241label 239menu items 159, 239
856 Index November 2, 2006

2006, QNX Software Systems GmbH & Co. KG. Index
modifier keys 238multilingual
applications 241, 450PkKeyDef.h 241processing 242
informationApInfo t 340, 342PtCallbackInfo t 341,
342, 350, 391PtContainerCallback t
295link 231
tutorial 54listsPtCallback t 389PtCallbackList t 393traversing 393
Lost Focus 387Menu 230menu item 349module-type link 231, 234Outbound 695parameters 341, 391preattaching 429Raw 231, 244, 691, 699, 732rawPtRawCallback t 394PtRawCallbackList t
394reason 391removing 234, 392Repeat 230Resize 295return value 343time-consuming work 497,
506Callbacks (View menu) 105
Callbacks panel 104canvas 14, 255Cascade (Window menu) 93cbinfo 341, 342, 350Change Class (Widget menu) 92,
196characters
conversion functions 770, 772encodings other than
Unicode 772international 224, 362, 767multibyte 767–769Unicode encodings 768wide 767, 768
child region 669, 670chords 538chroma key 550, 570, 576circles 538client data 396clipboard 189, 191clipping area SeecanvasClose (File menu) 85, 128Close (Window menu) 93Close All (Window menu) 94code
accessing helpinformation 462
callbacks 341filename 335
compiling 316, 728tutorial 36
creating 314deleting 313editing 299, 312, 316, 335filename 335files 303, 309
November 2, 2006 Index 857
Index 2006, QNX Software Systems GmbH & Co. KG.
non-PhAB, including 322,323
generating 299, 302, 303tutorial 36
initialization function 133,335, 336
filenames 335lengthy operations 497
modal dialogs 716visual feedback 497work procedures 497, 499,
500, 504linking 316, 728mainloop function 304, 727,
732making 316menu setup 347, 348
creating submenus 351parallel operations 497setup functions 237, 340timers 344version control 305viewing 313
code-type link callbacks 232, 237colors
editor 212models 526palette
global 547hard 547physical 547soft 547
PgColor t, PgColorHSV t
526resize handles 115
command-line options
defaults for PhABapplications 134
processing 338specifying 318
Common User Access (CUA) 181,182, 184
common.mk 303compose key sequences 774condvars 508configuration strings
CS LIBPATH 786connection IDs, finding 714connections 468
local 471connectors 468
naming conventions 469container widgets See also
PtGroup
absolute positioning 255aligning children 180damaging 354defined 169, 249duplicating 192, 193flux 354focus 181–183geometry management 249manipulating in PhAB 169moving children between
containers 187PhAB modules 145picture modules 165, 423positioning children 17, 179,
186, 250Pt CB RESIZE 295Resize callbacks 295resize flags 254resize policy 251
858 Index November 2, 2006

2006, QNX Software Systems GmbH & Co. KG. Index
selecting children 169widget databases 428
contextsapplication
(PtAppContext t) 478,485–487, 491, 500
direct (PdDirectContext t)560
offscreen(PdOffscreenContext t)563
print (PpPrintContext t)624
control panels 98about 34Callbacks 104, 178, 232, 244displaying 98editing callback resources 233editing menu items 156editing raw callbacks 244finding 98instance name 104, 170Module Links 108Module Tree 106, 173, 175,
178, 179, 185next and previous buttons 104,
178, 186positioning 98Resources 102, 178, 205, 256resources
colors 212displayed 148, 205fonts 216lists 218names 104, 114not displayed 104pixmaps 206
text 221resources displayed 176selecting widgets 104, 174,
175, 177–179, 186, 257control surfaces 409conventions, typographical xxxiiiConvert to Eclipse Project
(Application menu) 89coordinate space 665–667, 745,
751Copy (Edit menu) 87, 96, 190create mode 101, 102, 173CS LIBPATH configuration string
786CUA (Common User Access) 181,
182, 184custom widgets
on Microsoft Windows 820Cut (Edit menu) 87, 96, 190CVS 306
D
damage 9, 343, 522damping factor 116data types
ApInfo t 340, 342FontDetails 606PdDirectContext t 560PdOffscreenContext t
563PgColor t, PgColorHSV t
526PgDisplaySettings t 573PgLayerCaps t 583
November 2, 2006 Index 859

Index 2006, QNX Software Systems GmbH & Co. KG.
PgScalerCaps t 576PgScalerProps t 577PgSpan t 540PgVideoChannel t 577PhArea t 343PhDim t 343PhEvent t 683, 686PhEventRegion t 686PhImage t 547, 548, 556PhKeyEvent t 689, 773PhPoint t 343PhPointerEvent t 683,
684PhRect t 343PhRegion t 676, 714PhRid t 665PhSysInfo t 679PhTile t 343, 522PhTransportFixupRec t
652, 657PhTransportLink t 661PhTransportRegEntry t
652, 660PhWindowEvent t 710PpPrintContext t 624PtAppContext t 478,
485–487, 491, 500PtArg t 359PtCallback t 389PtCallbackInfo t 341,
342, 350, 391PtCallbackList t 393PtContainerCallback t
295PtDndFetch t 646PtFdProc t 493
PtInputCallbackProc t
478PtInputCallbackProcF t
479PtLinkedList t 375PtPulseMsg t 484PtRawCallback t 394PtRawCallbackList t 394PtSignalProc t 491PtTransportCtrl t 641,
660PtWidget t 342PtWorkProc t 500PtWorkProcId t 500PxMethods t 551sigevent 484
databases, languageSeelanguagedatabases
databases, message 445databases, widgetSeewidget
databasedead keys 774debugging 319Define Template (Widget
menu) 92, 197Delete (Edit menu) 87, 191, 193Deselect (Edit menu) 87development platforms
multiple 310, 322single 311, 323
device regions 667, 747–750, 753dialogs
modal 716example 717
module 153, 705predefined 154Project Properties 307
860 Index November 2, 2006
2006, QNX Software Systems GmbH & Co. KG. Index
resizing 154Search 111, 179Select New Platform 300tutorial 63
dimensions (PhDim t) 343direct context
(PdDirectContext t)560
direct mode 6, 559direct-color image SeeimagesDisarm callbacks 230display settings
(PgDisplaySettings t)573
Distribute (Widget menu) 91distributing widgets 181DLLs, turning applications
into 324drag and drop
acceptance list(PtDndFetch t) 646
canceling 650events 749
receiving 645packing data 641
dragging 694–701events 244, 694, 699, 701,
748, 749initiating 695opaque
defined 695handling events 701initiating 698specifying 697
outlinedefined 695handling events 699
initiating 697specifying 697
preferences 115draw buffer 5
PtRaw 517draw context 559, 623draw events 741
accumulating 750direct mode 560graphics driver 750multiple displays 751printing 623, 631
draw primitives 22, 531arc 538attributes 527beveled box 534bitmap 545chord 538circle 538ellipse 538flags 531flickerless animation 558image 546
caching 549creating 548direct color 546, 548displaying 551format 547gradient color 547, 548palette-based 546, 547releasing 552remote processes 549shared memory 551, 553transparency 550
line 541overlapping polygon 537pie 538
November 2, 2006 Index 861

Index 2006, QNX Software Systems GmbH & Co. KG.
pixel 541polygon 536rectangle 532rounded rectangle 533span 540text 542
draw stream 5, 623drivers
encapsulation 751graphics 22, 665, 748–751
multiple 751input 749keyboard 748–750, 767, 773mouse 748, 749output 749regions 747
overlapping 751separate 751
E
Eclipse Project applications 322Eclipse project format 312edit command, specifying 114Edit menu 86
Copy 87, 96, 190Cut 87, 96, 190Delete 87, 191, 193Deselect 87Edit Templates 201Find 87, 111Move Into 87, 96, 188Paste 87, 96, 191Preferences 112Redo 86
Select All 87Select All Children 87Split Apart 261Templates 201To Back 185To Front 185Undo 86
Edit Mode (Project menu) 88, 96Edit Templates (Edit menu) 201ellipses 538encapsulation drivers 751environment variables
ABLANG 452ABLPATH 445, 452, 454, 455LD LIBRARY PATH 786PATH 786PHOTONOPTS 818PHOTON PATH 786PWMOPTS 818TPR 819
even-odd rule 537events
boundary 694callbacks 392, 691click count 683clipping 669collecting 694compression 694consuming 397, 691coordinates 690data 397, 683, 684, 740defined 4, 739, 740drag 244, 694, 699, 701, 748,
749drag-and-drop 749
receiving 645draw 741
862 Index November 2, 2006

2006, QNX Software Systems GmbH & Co. KG. Index
accumulating 750direct mode 560graphics driver 750multiple displays 751printing 623, 631
emitting 686key 689to a specific widget 688
filter callbacks 231, 244focusing 748handlers 231, 244, 691, 699,
732adding 394invoking 396removing 395
handling 727, 732, 733information 567intersection with regions 740key (PhKeyEvent t) 689,
773keyboard 744, 748, 750–753logging 744mask 244, 394–396, 691, 699modifier keys 684modifying 744notification 746
asynchronous 747polling 746synchronous 747
PhEvent t 683, 686PhEventRegion t 686point source 741pointer 694, 731, 744, 748,
749, 753buttons 683cooked (focused) 748
PhPointerEvent t 683,684
raw (unfocused) 748raw callbacks 231, 244rectangle set 694, 740, 741,
743, 744collected 741
regions 691, 694, 731nonopaque 743opaque 742–744root 745sensitive 394, 742–744
resize 295space 3, 665, 739, 741targeting regions 687translation 690types 746window (PhWindowEvent t)
710Exit (File menu) 86exit() 511, 712Export Files (File menu) 86extended library 728
F
fd handler 492file extension
.ldb 445
.wgtd 145, 153
.wgti 145
.wgtm 145, 155
.wgtp 145, 165
.wgtw 145, 152File menu 85
November 2, 2006 Index 863

Index 2006, QNX Software Systems GmbH & Co. KG.
Close 85, 128Exit 86Export Files 86Import Files 86, 139–141New 85, 121Open 85, 95, 123Revert 85Save 85, 96, 127Save As 85, 126, 127
filesmixed-case names under
Microsoft Windows 819non-PhAB, including in your
application 322, 323fill attributes 529, 530Filter callbacks 244, 691, 699, 732Find (Edit menu) 87, 111Fit in Window (View menu) 92flag editor 214flickering, reducing 213, 354, 554,
557flux count 355focus 181–183, 386, 748
functions 183region 753
FontDetails 606FontName 606fonts
available, determining 605names 604, 606proportional, repairing 615symbol metrics 599widget resources, editing 216
foundry names 604frame, window 752functions
editor 224
prototypes 306potential problems 307
G
Generate Language Database(Project menu, LanguageEditor submenu) 445
Generate Report (Project menu) 89Generate UI (Build menu) 90, 303geometry
data types 343negotiation 249widget 14
getopt() 339global header file 132, 302, 333gradients 575
application-level 575driver-level 575image 547
graphics drivers 22, 665, 748–751multiple 751
graphics files, importing 140, 141,195
Grid (Preferences) 116grid, PhAB’s 116grids, drawing 541Group (Widget menu) 92, 97, 257groups
creating 92, 97, 256realizing 258splitting 92, 97, 261
864 Index November 2, 2006

2006, QNX Software Systems GmbH & Co. KG. Index
H
header file, global 132, 302, 333help
accessing from code 462displaying
in a balloon 461in the Helpviewer 460
topic path 459–462topic root 460, 461, 463Universal Resource Locator
(URL) 459, 461, 462restriction on scope 459root 462, 463
Help menu 94About PhAB 94PhAB Concepts 94PhAB Library API 94Tools + Techniques 94Tutorials 94Welcome to PhAB 94
high color 526Hints 291hold count 355hooks
Photon 402hotkeys
callbacks 231, 238, 240disabling 242keycap 241label 239menu items 159, 239modifier keys 238, 241multilingual applications 241,
450PkKeyDef.h 241processing 242
I
I/O 492image-loading methods
(PxMethods t) 551images 546
caching 549creating 548direct color 546, 548displaying 551gradient color 547, 548importing 141palette-based 546, 547PhImage t 547, 548, 556releasing 552remote processes 549shared memory 551, 553transparency 550
Import Files (File menu) 86,139–141
indHfiles 322indLfiles 304, 305indOfiles 322indSfiles 305, 322initialization function 133, 335,
336filename 335
input groupsdefined 750determining 750
input handlers 477adding 478removing 481typesPtInputCallbackProc t
478
November 2, 2006 Index 865
Index 2006, QNX Software Systems GmbH & Co. KG.
PtInputCallbackProcF t
479instance names 104, 158, 170, 192,
193generated by PhAB 171, 443in widget databases 429including in widgets 136language databases 171, 442starting with @ 171, 442
internal links 333, 423, 429accessing picture modules 423creating 424creating a module 423manifests 425opening widget databases 423setup functions 425
Internal Links (Applicationmenu) 88, 424
international characters 224, 362,767
interprocess communication (IPC)asynchronous 484messages 475pulses 484signals 490synchronous 475
ionotify() 486
K
key presses, simulating 689keyboard
compose sequences 774drivers 748–750, 767, 773events 744, 748, 750–753
emitting 689focus 181, 748shortcuts 158, 161, 348
keycaps 241keys, modifier 238, 684
L
Language editor (Applicationmenu) 89
Language Editor (Projectmenu) 445, 447
languages@ in instance names 171, 442bilingual applications 443changing 318choosing 452common strings 444databases 171, 437, 442,
444–447, 449, 450, 452,455
design considerations 437distributing an application 454editor 446
in PhAB 447standalone 447, 454
font size 440help resources 451hotkeys 450international characters 449justification 438message databases 440running a multilingual
application 452text widgets 437
866 Index November 2, 2006
2006, QNX Software Systems GmbH & Co. KG. Index
translating text 449translation files 448, 449, 452
languages.def 447, 453, 455Launcher plugin 145layers 580
capabilities (PgLayerCaps t)583
surfaces 581viewports 582
Layouts 267types 268
layoutseditor 225
LD LIBRARY PATH environmentvariable 786
lengthy operations 497modal dialogs 716visual feedback 497work procedures 497, 499
adding 499example 500preemption 504removing 500, 504
libraries 21, 315adding 323Ap 22, 23, 728extended 728locking 505multithreading 505of user functions 336ph 23, 728, 771phexlib 22, 23, 728, 773photon 24, 728phrender 23platforms 23shared 23, 315, 728static 23, 315, 728
version numbers 24lines 541linked lists (PtLinkedList t)
375link instance 340list editor 218Location dialog 150, 235lock 97, 186Lock (Widget menu) 92Lost Focus callbacks 387
M
mainloop function 304, 727, 732Make Clean (Build menu) 90make command 316, 317Makefile
dependency on headerfiles 335
Makefileadding libraries 323DLL, generating 324generated by PhAB 303multiplatform applications 310
including non-PhABfiles 323
renaming the application 127restrictions on modifying 316,
317runningmake 316, 317single-platform
applications 311including non-PhAB
files 323manifests
November 2, 2006 Index 867
Index 2006, QNX Software Systems GmbH & Co. KG.
ABM ... 333, 425ABN ... 158, 329, 330, 347,
348ABW ... 329–331widget database 431window, multiple instances
of 331margins, widget 14Match (Widget menu) 91Match Advanced (Widget
menu) 91MAX FONT TAG 606mblen() 770mbstowcs() 771mbtowc() 770MC Seememory contextsmemory contexts 558, 623Menu callbacks 230menubar
creating 55PhAB 33, 85tutorial 54widget 55, 164
menusdisplaying 163editing 156hotkeys 158, 239, 240items 156
commands 159disabling and enabling 347functions 162, 348, 351generating at runtime 162,
348instance names 158moving 163separators 161submenus 161
submenus, creating atruntime 351
text, changing 348text, getting 348toggles 162, 347
module 155resizing 159shortcuts 158, 349tutorial 54
message databases 445message queues 488messages 468
receiving 477sending 475
Microsoft Windows, running PhABon 817
MIPS, support for 24modal dialogs 716
example 717modal operations
threads 510modifier keys 238, 684Module Links (View menu) 108Module Links panel 108module selector 148, 149Module Tree (View menu) 106Module Tree panel 106, 173module types 148module-type link callbacks 231,
234modules
accessing with an internallink 423
as container 145creating 148creating within application
code 423
868 Index November 2, 2006
2006, QNX Software Systems GmbH & Co. KG. Index
deleting 149, 193Dialog 153, 705file extensions 145finding 152iconifying 149icons
moving 150importing 140instance name 147, 329Menu 155, 156minimizing 149parentage 234, 423, 426Picture 165selecting 147setup functions 235, 340, 425
filenames 335return value 341
specifying a location 150, 235Test mode 185types 145usage 145Window 152, 705Window menu 147Work menu 146, 149
mouse capture 694mouse drivers 748, 749Move Into (Edit menu) 87, 96, 188mqueues 488MsgDeliverEvent() 490MsgRead() 483MsgReceive() 477, 499MsgReply() 475MsgSend() 475MsgSendv() 486multibyte characters 767–769
conversion functions 770multiline text editor 222
multilingual applications Seelanguages
multiplatform development 310,322
multithreaded programs 505MYHDR 322, 323MYOBJ 322, 323MYSRC 322, 323
N
nameattach() 480New (File menu) 85, 121NFS and PhAB 125non-PhAB code, including in your
application 322, 323normal mode 5, 559NTO CHF COID DISCONNECT 480NTO CHF DISCONNECT 480
number editor 220
O
offscreen context(PdOffscreenContext t)563
offscreen locks 568offscreen-context container 558Open (File menu) 85, 95, 123Options menu
Preferences 88, 104options, command-line See
command-line optionsOutbound callbacks 695
November 2, 2006 Index 869
Index 2006, QNX Software Systems GmbH & Co. KG.
overlapping polygons 537
P
palette-based imageSeeimagespalettes (View menu) 198parallel operations 497parent region 669–671Paste (Edit menu) 87, 96, 191PATH environment variable 786pathname delimiter in QNX
Momentics documentationxxxiv
PC Seeprint contextsPdCreateDirectContext() 561PdCreateOffscreenContext()563,
564PdCreateOffscreenLock()568PdDestroyOffscreenLock()569PdDirectContext t 560PdDirectStart() 561PdDirectStop() 561PdDupOffscreenContext()563PdGetDevices() 561PdGetOffscreenContextPtr()563,
568PdIsOffscreenLocked()569PdLockOffscreen() 568PdOffscreenContext t 563PDR (press-drag-release)
method 164PdReleaseDirectContext()561PdSetOffscreenTranslation()563PdSetTargetDevice()561, 563, 573PdUnlockOffscreen() 569
PfExtentTextCharPositions()615PfGenerateFontName()606PgAlphaOff() 570PgAlphaOn() 570PgAlphaValue() 526, 570Pg ARC 539Pg ARC CHORD 539Pg ARC PIE 539PgARGB() 526, 570Pg BACK FILL 543, 545PgBackgroundShadings()526PgBevelBox() 575PgBlueValue() 526PgCalcColorContrast() 575PgChromaOff() 571PgChromaOn() 571Pg CLOSED 536Pg CM PRGB 526PgCMY() 526PgColor t 526PgColorHSV t 527PgColorMatch() 527PgConfigScalerChannel()576PgContextBlit() 564PgContextBlitArea() 564PgContrastBevelBox() 575PgCreateLayerSurface()583PgCreateVideoChannel()576PgDefaultFill() 529PgDefaultMode() 528PgDefaultStroke() 530PgDefaultText() 528PgDestroyVideoChannel()576PgDisplaySettings t 573PgDrawArc() 538PgDrawArrow() 536PgDrawBevelBox() 534
870 Index November 2, 2006

2006, QNX Software Systems GmbH & Co. KG. Index
PgDrawBeveled() 534PgDrawBezier() 541PgDrawBeziermx() 541PgDrawBitmap() 545PgDrawBitmapmx() 545PgDrawEllipse() 538Pg DRAW FILL 531, 534Pg DRAW FILL STROKE 531, 534PgDrawGradient() 575PgDrawGradientBevelBox() 575PgDrawGrid() 541PgDrawILine() 541PgDrawImage() 551PgDrawImagemx() 551PgDrawIPixel() 541PgDrawIRect() 532PgDrawLine() 541PgDrawMultiTextArea() 542PgDrawPhImage() 551PgDrawPhImagemx() 551PgDrawPhImageRectmx()551PgDrawPixel() 541PgDrawPixelArray() 541PgDrawPixelArraymx() 541PgDrawPolygon() 538PgDrawPolygonmx() 538PgDrawRect() 532PgDrawRepBitmap() 545PgDrawRepBitmapmx() 545PgDrawRepImage() 551PgDrawRepImagemx()551PgDrawRepPhImage() 551PgDrawRepPhImagemx()551PgDrawRoundRect() 533PgDrawString() 542PgDrawStringmx() 542Pg DRAW STROKE 531, 534
PgDrawText() 542PgDrawTextArea() 542PgDrawTextChars() 542PgDrawTextmx() 542PgDrawTImage() 551PgDrawTImagemx() 551PgDrawTrend() 541PgDrawTrendmx() 541Pg DRIVER STARTED 568Pg ENTERED DIRECT 567Pg EXITED DIRECT 568PgExtentMultiText() 542PgExtentText() 542PgGetColorModel() 527PgGetGraphicsHWCaps()573PgGetLayerCaps() 583PgGetOverlayChromaColor() 576PgGetPalette() 527PgGetScalerCapabilities()576PgGetVideoMode() 573PgGetVideoModeInfo() 573, 574PgGetVideoModeList() 573, 574PgGray() 527PgGrayValue() 527PgGreenValue() 527PgHSV() 527PgHSV2RGB() 527Pg IMAGE DIRECT 888 559Pg IMAGE PALETTE BYTE 559Pg LAYER ARG LIST BEGIN 584Pg LAYER ARG LIST END 584PgLayerCaps t 583PgLockLayer() 583PgNextVideoFrame() 576Pg POLY RELATIVE 536PgRedValue() 527PgRGB() 527
November 2, 2006 Index 871

Index 2006, QNX Software Systems GmbH & Co. KG.
PgRGB2HSV() 527PgScalerCaps t 576PgScalerProps t 577PgSetAlpha() 570PgSetAlphaBlend() 570PgSetChroma() 571PgSetClipping() 561PgSetColorModel() 527PgSetDrawMode() 528, 571PgSetFillColor() 529, 547PgSetFillDither() 529PgSetFillTransPat() 529PgSetFillXORColor() 529PgSetFont() 528PgSetLayerArg() 583PgSetLayerSurface()583PgSetPalette() 527PgSetPlaneMask() 528PgSetStrokeCap()530PgSetStrokeColor() 530PgSetStrokeDash()530PgSetStrokeDither() 530PgSetStrokeFWidth()531PgSetStrokeJoin() 530PgSetStrokeTransPat()530PgSetStrokeWidth()530PgSetStrokeXORColor()530PgSetTextColor() 528PgSetTextDither() 528PgSetTextTransPat()529PgSetTextXORColor()529PgSetTranslation() 520, 561PgSetUnderline() 529, 543PgSetVideoMode() 574PgShmemCreate()551, 553PgSpan t 540PgSwapDisplay() 564
PgUnlockLayer() 583PgVideoChannel t 577Pg VIDEO MODE SWITCHED 567PgWaitHWIdle() 564ph library 23, 728, 771PhAB
balloon help 95clipboard 189, 191context-sensitive help 94control panels 98
about 34Callbacks 104, 178, 232,
244color resources 212displaying 98editing callback
resources 233editing menu items 156editing raw callbacks 244finding 98font resources 216instance name 104, 170list resources 218Module Links 108Module Tree 106, 173, 175,
178, 179, 185next and previous
buttons 104, 178, 186pixmap resources 206positioning 98resource names 104, 114Resources 102, 178, 205,
256resources displayed 148,
176, 205resources not displayed 104
872 Index November 2, 2006

2006, QNX Software Systems GmbH & Co. KG. Index
selecting widgets 104, 174,175, 177–179, 186, 257
text resources 221copyright information 94customizing 112dialogs
Search 179exiting 86, 817grid 116help 94menubar 33, 85Microsoft Windows, running
on 817NFS, use with 125Search dialog 111SMB, use with 125starting 31toolbars 33, 95version number 94widget palette 34, 99work area 33, 149
PhAB Concepts (Help menu) 94PhAB Library API (Help menu) 94phablang 447, 454PhabMsg 445PhAddMergeTiles() 523PhAllocPackType() 661PhArea t 343PhAreaToRect() 344PhAttach() 729PhChannelAttach() 480PhClipTilings() 523PhCoalesceTiles() 523PhConnectId t 714PhCopyTiles() 523PhCreateImage() 548PhCreateTransportCtrl() 660
PhDCRelease() 564PhDeTranslateRect() 344PhDeTranslateTiles() 523Ph DEV RID 678, 689, 742PhDim t 343phditto 549PhDragEvent t 699Ph DRAG TRACK 697, 698PhEmit() 686PhEmitmx() 687Ph EV BUT PRESS 683
click count 683modifier keys 684
Ph EV BUT RELEASE 683click count 683modifier keys 684
Ph EV DND CANCEL 646Ph EV DND COMPLETE 646Ph EV DND DELIVERED 646Ph EV DND DROP 647Ph EV DND ENTER 646Ph EV DND INIT 646Ph EV DND LEAVE 647Ph EV DND MOTION 647Ph EV DRAG 244, 699Ph EV DRAG COMPLETE 699Ph EV DRAG MOVE 699, 701Ph EV DRAG START 699PhEvent t 683, 686PhEventArm() 694Ph EVENT DIRECT 688Ph EVENT INCLUSIVE 688PhEventNext() 694PhEventPeek() 694PhEventRead() 694PhEventRegion t 686Ph EV INFO 567
November 2, 2006 Index 873
Index 2006, QNX Software Systems GmbH & Co. KG.
Ph EV KEY 689Ph EV RELEASEENDCLICK 684Ph EV RELEASEPHANTOM 683Ph EV RELEASEREAL 683phexlib library 22, 23, 728, 773PhFindTransportType() 660Ph FORCEFRONT 672, 673, 676PhFreeTiles() 523PhFreeTransportType() 661PhGetAllTransportHdrs() 661PhGetConnectInfo() 714PhGetData() 397, 683, 684, 694PhGetNextInlineData() 661PhGetNextTransportHdr() 662PhGetRects() 694PhGetTile() 523PhGetTransportHdr() 662PhGetTransportVectors()661PhImage t 556
creating 548image types 547
phindows 549PHINDOWSOPTS 818PhInitDrag() 695PhInputGroup() 750PhIntersectTilings() 523PhKeyEvent t 689, 773Ph LIB VERSION 24PhLibVersion() 24PhLinkTransportData() 661PhLocateTransHdr() 662PhMakeTransBitmap() 550PhMakeTransparent() 550PhMallocUnpack() 662PhMergeTiles() 523Ph OFFSCREENINVALID 567
Photon coordinate space 665–667,745, 751
Photon hook 402photon library 24, 728Photon Manager 671–673, 686,
688, 690, 691, 694, 739,742, 746–752
Photon pulses SeepulsesPhoton Window Manager 151, 235,
671, 730, 748, 750, 752,753
taskbar 319, 320workspace menu 753
PHOTONOPTS 818PHOTON PATH environment
variable 786PhPackEntry() 661Ph PACK RAW 650, 652Ph PACK STRING 650, 652Ph PACK STRUCT 650, 652PhPackType() 661PhPoint t 343PhPointerEvent t 683, 684PhQuerySystemInfo()679PhRect t 343PhRectIntersect() 344PhRectsToTiles() 523PhRectToArea() 344PhRectUnion() 344PhRegion t 676, 714PhRegionChange() 669, 677PhRegionOpen() 666, 669PhRegionQuery() 676, 677, 714PhRegisterTransportType()653,
660phrelay 549Ph RELEASEGHOST BITMAP 553
874 Index November 2, 2006
2006, QNX Software Systems GmbH & Co. KG. Index
Ph RELEASEIMAGE 552PhReleaseImage()553Ph RELEASEPALETTE 553Ph RELEASETRANSPARENCYMASK
553PhReleaseTransportCtrl()661PhReleaseTransportHdrs()662phrender library 23PhRid t 665Ph ROOT RID 669, 678, 742PhSortTiles() 523PhSysInfo t 679PhTile t 343, 522PhTilesToRects() 523PhTimerArm() 345Ph TRACK BOTTOM 697Ph TRACK DRAG 697Ph TRACK LEFT 697Ph TRACK RIGHT 697Ph TRACK TOP 697PhTranslateRect() 344PhTranslateTiles() 523PhTransportCtrl t 660PhTransportFindLink() 661PhTransportFixupRec t 652,
657Ph TRANSPORTINLINE 647PhTransportLink t 661PhTransportRegEntry t 652,
660PhTransportType() 660PhUnlinkTransportHdr() 662PhUnpack() 662PhWindowChange() 715PhWindowClose() 715PhWindowEvent t 710PhWindowOpen() 715
PhWindowQueryVisible() 715Ph WM APP DEF MANAGED 708Ph WM BACKDROP 707, 708Ph WM CLOSE 511, 707–709, 711Ph WM COLLAPSE 707Ph WM CONSWITCH 707, 708Ph WM FFRONT 707, 708Ph WM FOCUS 707, 708Ph WM HELP 460, 462, 707–709Ph WM HIDE 707, 708Ph WM MAX 707, 708Ph WM MENU 707, 708Ph WM MOVE 707, 708Ph WM NO FOCUSLIST 707Ph WM RENDER BORDER 706Ph WM RENDER CLOSE 706Ph WM RENDER COLLAPSE 706Ph WM RENDER HELP 460, 706Ph WM RENDER INLINE 706Ph WM RENDER MAX 706Ph WM RENDER MENU 706Ph WM RENDER MIN 706Ph WM RENDER RESIZE 706Ph WM RENDER TITLE 706Ph WM RESIZE 707–709Ph WM RESTORE 707, 708Ph WM STATE ISALTKEY 712Ph WM STATE ISBACKDROP 712Ph WM STATE ISBLOCKED 712Ph WM STATE ISFOCUS 712Ph WM STATE ISFRONT 712Ph WM STATE ISHIDDEN 712Ph WM STATE ISMAX 712, 716Ph WM TOBACK 707, 708Ph WM TOFRONT 707, 708PiCropImage() 552, 553pictures
November 2, 2006 Index 875
Index 2006, QNX Software Systems GmbH & Co. KG.
as widget database 166, 555displaying 165modules 165, 428, 429, 444
accessing anddisplaying 423
resizing 166PiDuplicateImage() 552, 553pies 538PiFlipImage() 552, 553PiGetPixel() 552PiGetPixelFromData() 552PiGetPixelRGB() 552pipes 492PiSetPixel() 552PiSetPixelInData() 552pixels 541pixmap editor 206PkKeyDef.h 768PkKeyDef.h 241platforms supported 23plugins
Launcher 145Shelf 145
PmMemCreateMC() 558, 559PmMemFlush() 558, 559PmMemReleaseMC()558, 559PmMemSetChunkSize()558PmMemSetMaxBufSize()558PmMemSetType()558PmMemStart() 559PmMemStop() 559point (PhPoint t) 343point-and-click selection
method 174pointer
buttons, multiple clicks 683events 731, 744, 748, 749, 753
buttons 683cooked (focused) 748raw (unfocused) 748
focus 748polygons 536
overlapping 537PowerPC, support for 24PpContinueJob() 628, 631PpCreatePC() 624PpEndJob() 632PpFreePrinterList() 624PpGetCanvas() 625PpGetPC() 624, 625PpLoadDefaultPrinter() 624PpLoadPrinter() 624PpLoadPrinterList() 624PpPrintContext t 624PpPrintNewPage() 629PpPrintWidget() 628PpReleasePC() 632PpSetCanvas() 625PpSetPC() 624PpStartJob() 628PpSuspendJob()631, 632Preferences
Grid 116Preferences (Edit menu) 112Preferences (Options menu) 88,
104press-drag-release (PDR)
method 164print command, specifying 114print contexts
creating 624example 632freeing 632modifying 624
876 Index November 2, 2006

2006, QNX Software Systems GmbH & Co. KG. Index
PpPrintContext t 624printing 625
printingabout 623available printers 624closing 632example 632new page 629nonprintable margins 625print context
freeing 632print contexts 623
creating 624data type 624modifying 624
resuming 631source
offset 628size 625
starting 625suspending 631widgets 628
PpPrintWidget() 628PtList 629PtMultiText 630PtScrollArea 631scrolling widgets 629
Project menu 88Add Dialog 88Add Menu 88Add Picture Module 88Add Window 88Edit Mode 88, 96Generate Report 89Language Editor
Generate LanguageDatabase 445
Run Language Editor 447Project Properties 128, 136Properties 307Test Mode 88, 96Zoom Mode 88, 97
Project Properties (Projectmenu) 128, 136
Project Properties dialog 128, 307Properties (Application menu) 89Properties (Project menu) 307proto.h 302, 305, 306
potential problems 307prototypes 306
potential problems 307PtAddCallback() 350, 389, 390,
727PtAddCallbacks() 389, 390, 727PtAddClassStyle() 399PtAddEventHandler(),
PtAddEventHandlers()394
PtAddFilterCallback(),PtAddFilterCallbacks()394
PtAddHotkeyHandler() 243PtAddResponseType()642PtAlert() 155
multilingual applications 440PtAllowExit() 511, 512PtAppAddFd() 492PtAppAddFdPri() 492PtAppAddInput() 478PtAppAddSignalProc() 491PtAppAddWorkProc() 499PtAppContext t 478, 485–487,
491, 500PtAppCreatePulse() 485
November 2, 2006 Index 877

Index 2006, QNX Software Systems GmbH & Co. KG.
PtAppDeletePulse() 487PtAppInit() 639, 727PtAppPulseTrigger() 487PtAppRemoveInput()481PtAppRemoveSignal()492PtAppRemoveWorkProc()500PtAppSetFdMode() 493PtArg t 359Pt ARG() 360Pt ARG ACCEL KEY 239
multilingual applications 450Pt ARG ANCHORFLAGS 265Pt ARG ANCHOROFFSETS 267Pt ARG AREA 17, 104Pt ARG BASICFLAGS 15Pt ARG BEVELWIDTH 15, 362Pt ARG BUTTONTYPE 351Pt ARG CBOX FLAGS 365Pt ARG CONTAINERFLAGS
182, 239, 242Pt ARG CURSOROVERRIDE
376Pt ARG DIM 15, 104, 188, 255Pt ARG EFLAGS 461Pt ARG EXTENT 17, 104PT ARG FILL LAYOUTINFO
editing 225Pt ARG FLAGS 15, 182, 239, 243,
371, 497, 641, 645, 693,695, 712, 731
PT ARG GRID LAYOUTDATAediting 229
PT ARG GRID LAYOUTINFOediting 227
Pt ARG GROUPFLAGS 259Pt ARG GROUPORIENTATION
257
Pt ARG GROUPROWSCOLS258
Pt ARG GROUPSPACING 257,259
Pt ARG HELP TOPIC 461Pt ARG ITEMS 364Pt ARG LABEL IMAGE 363, 549,
551, 555Pt ARG LABEL TYPE 141, 549,
551, 555Pt ARG MARGIN HEIGHT 16Pt ARG MARGIN WIDTH 16Pt ARG MENU FLAGS 351Pt ARG POINTER 366, 524Pt ARG POS 17, 104, 255, 700Pt ARG RAWCALC OPAQUEF
518Pt ARG RAWCONNECTF 518Pt ARG RAWDRAWF 518Pt ARG RAWEXTENTF 518Pt ARG RAWINIT F 518Pt ARG RESIZEFLAGS 250,
251, 254PT ARG ROWLAYOUTDATA
editing 228PT ARG ROWLAYOUTINFO
editing 226Pt ARG STYLE 400Pt ARG TERM ANSI PROTOCOL
367Pt ARG TEXT STRING 362, 372Pt ARG TIMER INITIAL 345, 556Pt ARG TIMER REPEAT 345, 556Pt ARG USERDATA 363, 524Pt ARG WINDOWHELP ROOT
460
878 Index November 2, 2006

2006, QNX Software Systems GmbH & Co. KG. Index
Pt ARG WINDOWMANAGEDFLAGS460, 511, 705, 707, 708,711, 712, 715
Pt ARG WINDOWNOTIFYFLAGS705, 708, 710, 711
Pt ARG WINDOWRENDERFLAGS460, 705, 706, 716
Pt ARG WINDOWSTATE 705,712, 716
Pt AS REQUIRED 256PtBasic 16, 230PtBezier 172PtBkgdHandlerProcess()498, 519PtBlockAllWindows() 717Pt BLOCK CUA FOCUS 182Pt BLOCKED 497, 693PtBlockWindow() 717Pt BOTTOM ANCHORED BOTTOM 266Pt BOTTOM ANCHORED TOP 266Pt BOTTOM IS ANCHORED 267PtButton 389, 549, 551, 555PtCalcCanvas() 520PtCalcSurface() 413PtCalcSurfaceByAction()413PtCalcSurfaceById() 413PtCallback t 389PtCallbackInfo t 341, 342,
350, 391PtCallbackList t 393PtCancelDnd() 650Pt CB ACTIVATE 164, 230, 350,
389modifier keys 684
Pt CB ARM 164, 230, 695, 697Pt CB BLOCKED 693Pt CB DESTROYED 14, 386, 712Pt CB DISARM 230
Pt CB DND 645Pt CB FILTER 244, 691, 699
adding 244, 394removing 395
Pt CB GOT FOCUS 183Pt CB HOTKEY 159, 240
multilingual applications 450Pt CB IS DESTROYED 14, 712Pt CB LOSTFOCUS 183, 387Pt CB MENU 230Pt CB OUTBOUND 641, 695Pt CB RAW 244, 691, 699
adding 244, 394removing 395
Pt CB REALIZED 14Pt CB REPEAT 230Pt CB RESIZE 295Pt CB TIMER ACTIVATE 345,
556Pt CB UNREALIZED 14Pt CB WINDOW 709–711Pt CB WINDOWCLOSING 709,
712PtCheckSurfaces()414PtChildType() 387PtClipAdd() 521PtClipRemove() 521PtComboBox 361Pt COMBOBOX STATIC 365PtCondTimedWait() 508, 512PtCondWait() 508, 512PtConnectionAddEventHandlers()470PtConnectionAddMsgHandlers()470PtConnectionClient t 469PtConnectionClientDestroy()470PtConnectionClientGetUserData()470
November 2, 2006 Index 879

Index 2006, QNX Software Systems GmbH & Co. KG.
PtConnectionClientSetError()470,480
PtConnectionClientSetUserData()470PtConnectionFindId() 469PtConnectionFindName()469PtConnectionFlush() 471PtConnectionNotify() 471PtConnectionReply(),
PtConnectionReplymx()470
PtConnectionResizeEventBuffer()471PtConnectionSend(),
PtConnectionSendmx()470, 471
PtConnectionServer t 470PtConnectionServerDestroy()470PtConnectionServerGetUserData()470PtConnectionServerSetError()470,
480PtConnectionServerSetUserData()470PtConnectionTmpName()469PtConnectionWaitForName()469PtConnectorCreate() 469PtConnectorDestroy() 470PtConnectorGetId() 469PtConsoleSwitch() 716Pt CONSUME 692PtContainer 249, 256PtContainerCallback t 295PtContainerGiveFocus() 387PtContainerHold() 355PtContainerRelease()355Pt CONTINUE 236, 341, 343, 479,
692PtCRC() 549PtCRCValue() 549PtCreateActionSurface()411
PtCreateClassStyle()399PtCreateSurface() 411PtCreateTransportCtrl() 641PtCreateWidget() 349, 359, 385,
390, 727, 730PtDamageSurface() 414PtDamageSurfaceByAction()414PtDamageSurfaceById()414PtDamageWidget() 519Pt DEFAULT PARENT 349, 385,
730Pt DELAY EXIT 512Pt DELAY REALIZE 731PtDestroyAllSurfaces() 412Pt DESTROYED 712PtDestroySurface() 412PtDestroyWidget() 14, 712PtDisableSurface() 414PtDisableSurfaceByAction()414PtDisableSurfaceById() 414PtDndFetch t 646PtDndSelect() 646Pt DND SELECTDUP DATA 648Pt DND SELECTMOTION 647Pt DND SILENT 645PtDupClassStyle() 399Pt ENABLE CUA 182Pt ENABLE CUA ARROWS 182PtEnableSurface() 414PtEnableSurfaceByAction()414PtEnableSurfaceById()414Pt END 341, 397, 480, 481, 492,
504PtEndFlux() 355PtEnter() 505, 512Pt EVENT PROCESSALLOW 509,
510
880 Index November 2, 2006
2006, QNX Software Systems GmbH & Co. KG. Index
Pt EVENT PROCESSPREVENT 509PtExit() 62, 511PtExtentWidget(),
PtExtentWidgetFamily()17
PtFdProc t 493PtFileSelection() 155, 498PtFillLayout 271
example 271PtFindClassStyle() 399PtFindDisjoint() 387PtFindFocusChild() 387PtFindGuardian() 387PtFindSurface() 415PtFindSurfaceByAction() 415PtFlush() 356, 479, 493, 499Pt FOCUSRENDER 182PtFontSelection() 155PtForwardWindowEvent() 713, 716PtForwardWindowTaskEvent()713,
716PtGetParent() 351, 387PtGetParentWidget() 387PtGetResource() 377PtGetResources()359, 370, 371,
373–377, 393Pt GETS FOCUS 182, 239, 243PtGetStyleMember() 399, 400PtGetWidgetStyle() 399Pt GHOST 243PtGridLayout 279
example 279PtGroup 256, 257, 261
flags 259Pt GROUPEQUAL SIZE 259Pt GROUPEQUAL SIZE HORIZONTAL
260
Pt GROUPEQUAL SIZE VERTICAL260
Pt GROUPEXCLUSIVE 259Pt GROUPHORIZONTAL 257Pt GROUPNO KEYS 260Pt GROUPNO KEY WRAP HORIZONTAL
260Pt GROUPNO KEY WRAP VERTICAL
260Pt GROUPNO SELECT ALLOWED 260Pt GROUPSTRETCHFILL 261Pt GROUPSTRETCHHORIZONTAL 260Pt GROUPSTRETCHVERTICAL 260Pt GROUPVERTICAL 257Pt HALT 343, 480PtHelpQuit() 463PtHelpSearch() 463PtHelpTopic() 462PtHelpTopicRoot() 463PtHelpTopicTree() 463PtHelpUrl() 462PtHelpUrlRoot() 462PtHideSurface() 415PtHideSurfaceByAction()415PtHideSurfaceById() 415Pt HIGHLIGHTED 15PtHold() 355PtHook() 402PtHook.so 402Pt HOTKEYS FIRST 242Pt HOTKEYS FIRST 239Pt HOTKEY TERMINATOR 242pthreadcondwait() 508pthreadexit() 511pthreadself() 513Pt IGNORE 692Pt IMAGE 141, 549, 551, 555
November 2, 2006 Index 881
Index 2006, QNX Software Systems GmbH & Co. KG.
PtInit() 505, 639, 727, 729PtInitDnd() 642, 645Pt INITIAL 256PtInputCallbackProc t 478PtInputCallbackProcF t 479PtInsertSurface() 416PtInsertSurfaceById() 416Pt INTERNAL HELP 461PtIsFluxing() 356PtLabel 141, 222, 549, 551, 555PtLeave() 505, 512Pt LEFT ANCHORED LEFT 265Pt LEFT ANCHORED RIGHT 266Pt LEFT IS ANCHORED 267Pt LINK DELETE 366PtLinkedList t 375Pt LINK INSERT 366PtList 218
printing 629PtMainLoop() 507, 509, 694, 727,
732PtMakeModal() 717PtMenu 351PtMenuBar 55, 164PtMenuButton 164, 349
hotkeys 240Pt MENU CHILD 351Pt MENU DOWN 351Pt MENU RIGHT 351PtMessageBox() 155PtModalBlock() 509, 510, 717PtModalCtrl t 717PtModalUnblock() 510, 717PtMultiText 222
printing 630PtNextTopLevelWidget()388Pt NO PARENT 385, 730
PtNotice() 155multilingual applications 440
PtOSContainer 558PtPanelGroup 99PtPassword() 155PtPolygon 172PtPreventExit() 511, 512PtPrintPropSelect() 155, 624PtPrintSel 624PtPrintSelect() 155, 624PtPrintSelection() 155, 624Pt PROCESS 692PtProcessEvent() 498, 506, 509PtPrompt() 155
multilingual applications 440PtPulseArm() 486PtPulseMsg t 484PtQuerySystemInfo()679PtQuitMainLoop() 513PtRaw 22, 224, 517, 558
canvas 520clipping 521damage tiles 522drawing function 518
examples 524dynamic contents 524translating coordinates 520
PtRawCallback t 394PtRawCallbackList t 394PtRealizeWidget() 13, 386, 727,
731Pt REGION 731PtRelease() 355PtReleaseTransportCtrl()650PtRemoveCallback(),
PtRemoveCallbacks()392
882 Index November 2, 2006

2006, QNX Software Systems GmbH & Co. KG. Index
PtRemoveEventHandler(),PtRemoveEventHandlers()395
PtRemoveFilterCallback(),PtRemoveFilterCallbacks()395
PtRemoveHotkeyHandler()243PtReparentWidget() 385Pt RESIZE X ALWAYS 251Pt RESIZE X AS REQUIRED 252Pt RESIZE X BITS 254Pt RESIZE X INITIAL 253Pt RESIZE XY ALWAYS 252Pt RESIZE XY AS REQUIRED 252Pt RESIZE XY BITS 255Pt RESIZE XY INITIAL 253Pt RESIZE Y ALWAYS 252Pt RESIZE Y AS REQUIRED 252Pt RESIZE Y BITS 254Pt RESIZE Y INITIAL 253Pt RIGHT ANCHORED LEFT 266Pt RIGHT ANCHORED RIGHT 266Pt RIGHT IS ANCHORED 267PtRowLayout 274
example 274PtScrollArea
printing 631PtScrollbar
control surfaces 409Pt SELECTABLE 239, 243, 641,
645, 695Pt SELECT NOREDRAW 239PtSendEventToWidget()688PtSetArg() 267, 349, 359, 362–367,
370, 371, 373–376, 390,393, 730
PtSetClassStyleMethods()399
PtSetParentWidget() 349, 351, 385,431
PtSetResource()12, 255, 368PtSetResources()12, 349, 359,
362–368, 390PtSetStyleMember()399PtSetStyleMembers()399PtSetWidgetStyle()400PtShowSurface() 415PtShowSurfaceByAction()415PtShowSurfaceById()415PtSignalProc t 491PtSpawnWait() 498PtStartFlux() 355Pt STYLE ACTIVATE 398Pt STYLE CALC BORDER 398Pt STYLE CALC OPAQUE 398Pt STYLE DATA 399Pt STYLE DEACTIVATE 398Pt STYLE DRAW 398Pt STYLE EXTENT 398Pt STYLE NAME 399Pt STYLE SIZING 398PtSuperClassDraw() 519PtSurfaceActionId() 412PtSurfaceAddData() 416PtSurfaceAddDataById()416PtSurfaceBrotherBehind()416PtSurfaceBrotherInFront() 416PtSurfaceCalcBoundingBox()413PtSurfaceCalcBoundingBoxById()413PtSurfaceExtent() 413PtSurfaceExtentById()413PtSurfaceGetData() 416PtSurfaceGetDataById()416PtSurfaceHit() 413PtSurfaceId() 412
November 2, 2006 Index 883
Index 2006, QNX Software Systems GmbH & Co. KG.
PtSurfaceInBack() 416PtSurfaceInFront() 416PtSurfaceIsDisabled() 414PtSurfaceIsEnabled()414PtSurfaceIsHidden() 415PtSurfaceIsShown()415PtSurfaceRect() 413PtSurfaceRectById()413PtSurfaceRemoveData()416PtSurfaceRemoveDataById()416PtSurfaceTestPoint() 413PtSurfaceToBack() 416PtSurfaceToBackById()416PtSurfaceToFront() 416PtSurfaceToFrontById() 416PtText 221Pt TEXT IMAGE 549, 551, 555PtTimer 345, 556PtTimerArm() 345Pt TOP ANCHORED BOTTOM 266Pt TOP ANCHORED TOP 266Pt TOP IS ANCHORED 267PtTransportCtrl t 641PtTransportRequestable()642PtTransportType() 642PtUnblockWindows() 717PtUnrealizeWidget() 14, 712, 731PtUpdate() 355PtValidParent() 388, 631PtWidget 691PtWidget t 342PtWidget.h 255PtWidgetActiveSurface()415PtWidgetBrotherBehind() 388PtWidgetBrotherInFront() 388PtWidgetChildBack() 388PtWidgetChildFront() 388
PtWidgetClassStyle t 400PtWidgetExtent() 17PtWidgetFamily() 388PtWidgetInsert() 386PtWidgetParent() 388PtWidgetRid() 696PtWidgetSkip() 388PtWidgetToBack() 386PtWidgetToFront() 387PtWidgetTree() 388PtWidgetTreeTraverse()388PtWindow 256, 705
managed flags 460, 706, 707,715
notify flags 706, 708, 710render flags 460, 706, 716state 712, 716
PtWindowConsoleSwitch()716PtWindowGetFrameSize()716PtWorkProc t 500PtWorkProcId t 500pulses 484
arming 486creating 485delivering
from a Photonapplication 490
to yourself 487destroying 487PtPulseMsg t 484receiving 484
example 488registering an input
handler 487sending to the deliverer 486sigevent 484
884 Index November 2, 2006
2006, QNX Software Systems GmbH & Co. KG. Index
PWM 151, 235, 671, 705, 730,748, 750, 752, 753
Microsoft Windows 817options 818taskbar 319, 320workspace menu 753
PWMOPTS 818PxLoadImage() 548, 551–553, 556PxMethods t 551PxTranslateFromUTF() 773PxTranslateList() 773PxTranslateSet() 773PxTranslateStateFromUTF()773PxTranslateStateToUTF()773PxTranslateToUTF() 773PxTranslateUnknown() 773PX TRANSPARENT 551
Q
qcc 728
R
radio buttons 259Raw callbacks 244, 691, 699, 732realizing 13, 19, 21, 26, 131, 249,
251, 253, 255, 256, 258,265, 341, 425, 727, 731
delaying 731realtime 508Rebuild All (Build menu) 90rectangles
data types
PhArea t 343PhRect t 343PhTile t 343, 522
draw primitivesbeveled 534rounded 533simple 532
Red-Green-Blue (RGB)representation 526
Redo (Edit menu) 86regions 3, 739, 741
active 753application 747, 752backdrop 677, 753brother 672
behind 673, 675in front 673, 675specifying 678
child 669, 670, 744coordinates 666creating 727, 731defined 665, 740destroying 669device 667, 747–750, 753driver 747event clipping 669event notification 746
asynchronous 747polling 746synchronous 747
events 394, 691, 694focus 753hierarchy 670ID (PhRid t) 665initial dimensions 666initial locations 666keyboard events 748
November 2, 2006 Index 885

Index 2006, QNX Software Systems GmbH & Co. KG.
location 745moving 669notification of events 746
asynchronous 747polling 746synchronous 747
opacity 688, 742–744opening 676origin 666–668, 690parent 669–671, 744
changing 677PhRegion t 676, 714placement 672, 676
changing 677default 672specific 675
querying 676, 714root 665, 666, 669–671, 677,
745, 748–750, 753defined 745
sensitivity 742–744system information 678–679PhSysInfo t 679
targeting events 687window 752window frame 677, 752workspace 667, 753
Repeat callbacks 230Resize callbacks 295resize events 295resize handles, changing color 115resize policy 250, 251
and anchor flags 251, 264resources
application 378editing 205
colors 44, 212
editor buttons 205flags 42, 43, 214fonts 40, 216functions 224layouts 225lists 48, 218numbers 39, 220pixmaps 45, 206text, multiline 46, 222text, single line 221
getting 369argument list 359one 377
manifests 114modifying values 372names 114not displayed in PhAB 104setting 361, 730
argument list 359one 368
types 360, 371Resources (View menu) 103Resources panel 102Revert (File menu) 85RGB representation 526root region 665, 666, 669–671,
677, 745, 748–750, 753defined 745
rounded rectangles 533RtTimerCreate() 346RtTimerDelete() 346RtTimerGetTime() 346RtTimerSetTime() 346Run Language Editor (Project menu,
Language Editor submenu)447
886 Index November 2, 2006

2006, QNX Software Systems GmbH & Co. KG. Index
S
Save (File menu) 85, 96, 127Save As (File menu) 85, 126, 127scaling 582scrolling 582Search dialog 111Select All (Edit menu) 87Select All Children (Edit menu) 87select mode 101, 102, 173, 174Select New Platform dialog 300Send To Back (Window menu) 93setup functions Seemodules, setup
functionSH-4, support for 24shapes, complex (PgSpan t) 540shared libraries 23, 315, 728shared memory 551, 553Shelf plugin 145shortcuts, keyboard 158, 161, 348Show Grid (View menu) 93Show Selection (View menu) 93Show* (Window menu) 94sigaddset() 491sigemptyset() 491sigevent 484signals 490
Photon’s signal handler 490processing function 490
adding 491prototype 492PtSignalProc t 491removing 492
single-platform development 311,323
size (PhDim t) 343SMB and PhAB 125
Snap to Grid (View menu) 93spans (PgSpan t) 540Split Apart (Edit menu) 261src directory 310, 311startup windows 129, 131, 132static libraries 23, 315, 728stem names 604stroke (line) attributes 530structures Seedata typesstyles 397submenus 161surfaces 581symbol metrics 599system information 678–679
PhSysInfo t 679
T
taskbar 319, 320templates
about 196creating 197deleting 201editing 201tutorial 50
Templates (Edit menu) 201Test mode 185Test Mode (Project menu) 88, 96text
attributes 528draw primitive 542international characters 224,
362, 767multiline editor 222single-line editor 221
November 2, 2006 Index 887

Index 2006, QNX Software Systems GmbH & Co. KG.
threads 505condvars 508event readers 509exiting 511modal operations 510realtime 508work procedures and 514
timers 344, 556To Back (Edit menu) 185To Back (Widget menu) 97To Front (Edit menu) 185To Front (Widget menu) 97toolbars 33, 95Tools + Techniques (Help
menu) 94TPR 819transferring
PhAB projects 819transport mechanism 639
control structure(PtTransportCtrl t)641, 660
data (PhTransportLink t)661
PhTransportFixupRec t
652, 657registry 639
entry(PhTransportRegEntry t)652, 660
system-registered types 639transport types, creating 650
Tr ENDIAN() 651, 655Tr ENDIAN ARRAY() 651, 655Tr ENDIAN REF() 652, 655Tr FETCH() 657Tr REF ARRAY() 658
Tr REF TYPE() 658Tr REF TYPEARRAY() 658Tr REF TYPEREF ARRAY() 658Tr STRING() 658Tr TYPE() 658Tr TYPEARRAY() 658true color 526tutorials
applications, creating 34callbacks 54code, generating, compiling and
running 36dialogs 63link callbacks 54menus and menubars 54PhAB overview 31resources, editing
colors 44flags 42, 43fonts 40lists 48numerical 39pixmaps 45text 46
templates 50windows 72
Tutorials (Help menu) 94typographical conventions xxxiii
U
Undo (Edit menu) 86Ungroup (Widget menu) 92, 97Unicode 767, 768, 770
character values 768
888 Index November 2, 2006
2006, QNX Software Systems GmbH & Co. KG. Index
Universal Resource Locator(URL) 459, 461, 462
restriction on scope 459root 462, 463
unlock 97, 186unrealizing 14, 21, 731updates, delaying 354Usemsg 303Using hints 291/usr/photon 786UTF-8 768–770, 772utf8len() 771UTF8 LEN MAX 772utf8strblen() 771utf8strchr() 771utf8strichr() 771utf8strirchr() 771utf8strlen() 771utf8strnchr() 771utf8strncmp() 771utf8strndup() 771utf8strnichr() 771utf8strnlen() 772utf8strrchr() 772utf8towc() 772
V
version control 305video memory offscreen 563video modes 573video overlay 576
channels(PgVideoChannel t)577
scaler capabilities(PgScalerCaps t) 576
scaler properties(PgScalerProps t)577
view command, specifying 114View menu 92
Actual Size 92Callbacks 105control panels 98Fit in Window 92Module Links 108Module Tree 106palettes 198Resources 103Show Grid 93Show Selection 93Snap to Grid 93Widgets 100Zoom 92
viewports 582
W
wcstombs() 771wctolower() 772wctomb() 771wctoutf8() 772Welcome to PhAB (Help menu) 94wgt directory 148wgt directory 310, 311wgtd extension 145, 153wgtm extension 145, 155wgtp extension 145, 165wgtw extension 145, 152
November 2, 2006 Index 889

Index 2006, QNX Software Systems GmbH & Co. KG.
wide characters 767, 768conversion functions 770
Widget menuAlign 91, 179Alignment 97Arrange 91Change Class 92, 196Define Template 92, 197Distribute 91Group 92, 97, 257Lock 92Match 91Match Advanced 91To Back 97To Front 97Ungroup 92, 97
widgetsabsolute positioning 255aligning
horizontally 257, 439in rows and columns 258to a parent widget 180to another widget 179using groups 256, 257vertically 257, 440
anchoring 96, 262–267flags 265
blocked 693border 14canvas 14, 255class 199class methods 10
processing events 692classes 10
changing 196containers See alsoPtGroup
absolute positioning 255
aligning children 180defined 169, 249duplicating 192, 193focus 181–183geometry management 249manipulating in PhAB 169moving children between
containers 187PhAB modules 145picture modules 165, 423positioning children 17, 179,
186, 250Pt CB RESIZE 295Resize callbacks 295resize flags 254resize policy 251selecting children 169widget databases 428
copying 189creating 13, 172
from code 385custom
on Microsoft Windows 820cutting 189damaging 9, 354databases 8, 25, 165, 166, 337,
423, 428, 440animation 555creating 429dynamic 429functions 430instance names 429preattaching callbacks 429
defined 8deleting 193destroying 14, 21, 386distributing 181
890 Index November 2, 2006

2006, QNX Software Systems GmbH & Co. KG. Index
dragging 186duplicating 192events
handler 691sending to 688
extent 17family
container-class widgets 169defined 11functions dealing with 387geometry negotiation 249PtCreateWidget() 385, 727,
730finding hidden 178focus 181–183, 386focus callbacks 183geometry 14, 731grouping 256, 261hierarchy 10icon in PhAB 757image 363images 551
releasing 554instance names 104, 140, 170,
192, 193, 329generated by PhAB 171, 443language databases 171, 442starting with @ 171, 442
instances 12instantiating 13, 19, 21, 730
from code 385life cycle 13locking 97, 186margins 14methods 397moving 98, 186
moving betweencontainers 187
nudging 98ordering 184, 386origin 16palette 34, 99, 198parent
default 385reparenting 385
pasting 191position 17, 187
constraints 295positioning with a grid 116printing 628
PpPrintWidget() 628PtList 629PtMultiText 630PtScrollArea 631scrolling widgets 629
PtWidget t 342realizing 13, 19, 21, 249, 251,
253, 255, 256, 258, 386,727, 731
delaying 731resize policy 250, 251resizing 98, 188resources 12
editing 205manifests 114names 114
selecting 174bounding-box method 175,
176extended selection
method 177in control panels 175, 177Module Tree 175
November 2, 2006 Index 891
Index 2006, QNX Software Systems GmbH & Co. KG.
multiple 175parent container 174point-and-click method 174Shift–click method 175, 177within a group 178
size constraints 295styles 397templates
about 196creating 197deleting 201editing 201tutorial 50
unlocking 97, 186unrealizing 14, 21, 731updates, delaying 354user data 363, 366
Widgets (View menu) 100window manager 151, 235, 671,
705, 730, 748, 750, 752,753
Microsoft Windows 817options 818standalone application 716taskbar 319, 320workspace menu 753
Window menu 93Arrange Icons 93, 152Arrange Modules 152Cascade 93Close 93Close All 94module names 147Send To Back 93Show* 94
windows
Alt combinations, passing toapplication 712
backdrop 712blocking 712, 717closing, verifying 710focus, giving 712frame
buttons 706region 677, 752
manifest 331maximizing 712minimizing 712module 152, 705placing in front 712region 752resizing 153services 752startup 129, 131, 132tutorial 72
Windows (Microsoft), running PhABon 817
Winzip 819work area 33, 149work procedures 497, 499
function type(PtWorkProc t) 500
ID (PtWorkProcId t) 500threads and 514
workspacemenu 753region 667, 753
X
x86, support for 24
892 Index November 2, 2006

2006, QNX Software Systems GmbH & Co. KG. Index
XBM imagesimporting 140
Z
zip 819Zoom (View menu) 92Zoom Mode (Project menu) 88, 97
November 2, 2006 Index 893