PLEASE READ ALL DIRECTIONS BEFORE STARTING...
4
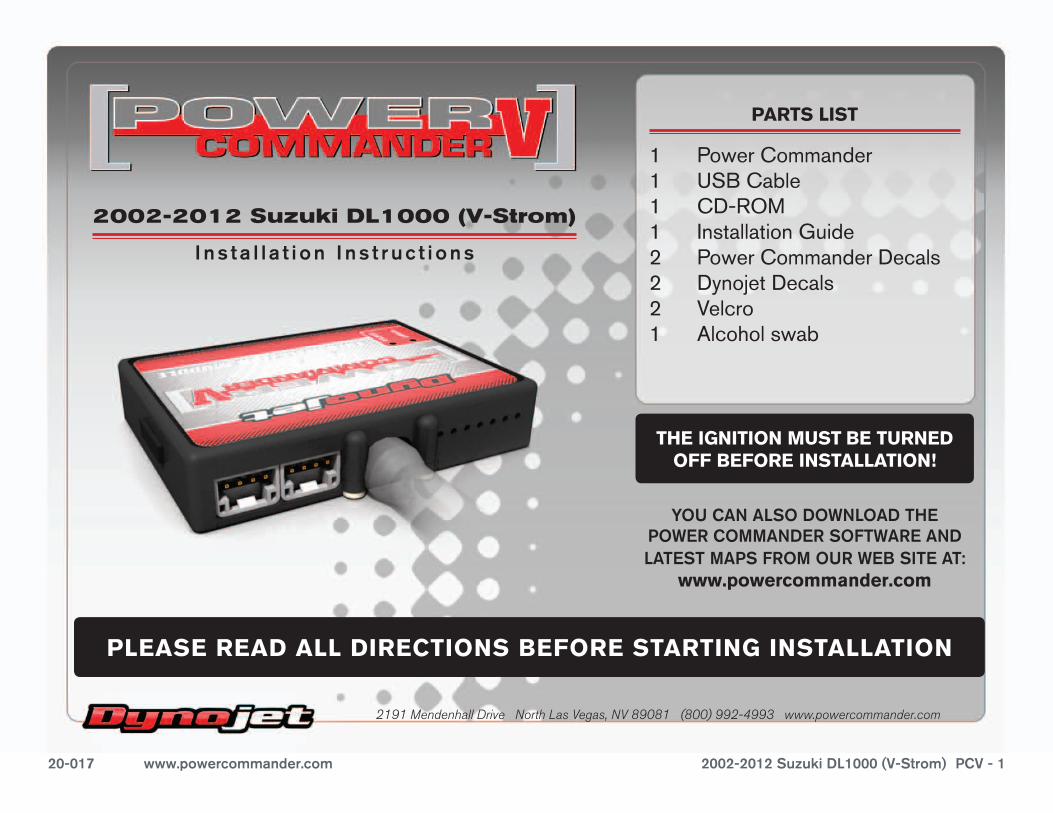
20-017 www.powercommander.com 2002-2012 Suzuki DL1000 (V-Strom) PCV - 1 PARTS LIST 1 Power Commander 1 USB Cable 1 CD-ROM 1 Installation Guide 2 Power Commander Decals 2 Dynojet Decals 2 Velcro 1 Alcohol swab YOU CAN ALSO DOWNLOAD THE POWER COMMANDER SOFTWARE AND LATEST MAPS FROM OUR WEB SITE AT: www.powercommander.com 2002-2012 Suzuki DL1000 (V-Strom) Installation Instructions PLEASE READ ALL DIRECTIONS BEFORE STARTING INSTALLATION THE IGNITION MUST BE TURNED OFF BEFORE INSTALLATION! 2191 Mendenhall Drive North Las Vegas, NV 89081 (800) 992-4993 www.powercommander.com
Transcript of PLEASE READ ALL DIRECTIONS BEFORE STARTING...
20-017 www.powercommander.com 2002-2012 Suzuki DL1000 (V-Strom) PCV - 1
PARTS LIST
1 PowerCommander1 USBCable1 CD-ROM1 InstallationGuide2 PowerCommanderDecals2 DynojetDecals2 Velcro1 Alcoholswab
YOU CAN ALSO DOWNLOAD THE POWER COMMANDER SOFTWARE AND LATEST MAPS FROM OUR WEB SITE AT:
www.powercommander.com
2002-2012 Suzuki DL1000 (V-Strom)
I ns ta l l a t i on I ns t ruc t i ons
PLEASE READ ALL DIRECTIONS BEFORE STARTING INSTALLATION
THE IGNITION MUST BE TURNED OFF BEFORE INSTALLATION!
2191 Mendenhall Drive North Las Vegas, NV 89081 (800) 992-4993 www.powercommander.com
20-017 www.powercommander.com 2002-2012 Suzuki DL1000 (V-Strom) PCV - 2
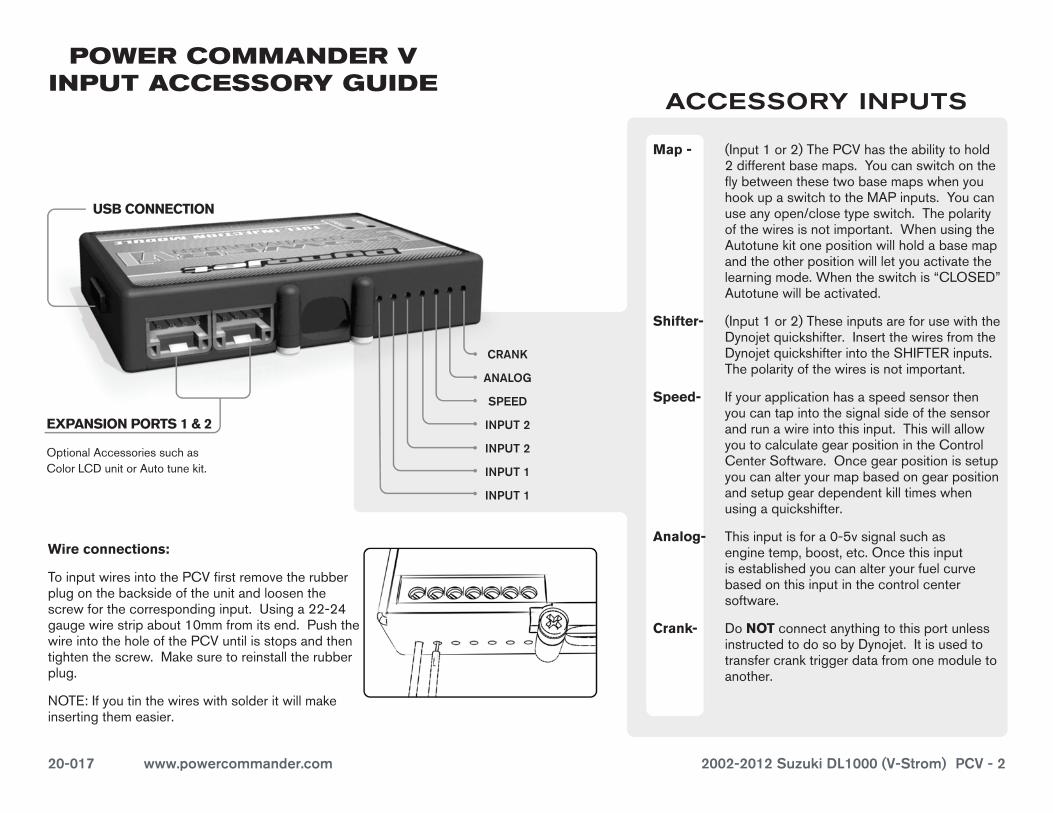
EXPANSION PORTS 1 & 2
OptionalAccessoriessuchasColorLCDunitorAutotunekit.
POWER COMMANDER V INPUT ACCESSORY GUIDE
Map - (Input1or2)ThePCVhastheabilitytohold2differentbasemaps.YoucanswitchontheflybetweenthesetwobasemapswhenyouhookupaswitchtotheMAPinputs.Youcanuseanyopen/closetypeswitch.Thepolarityofthewiresisnotimportant.WhenusingtheAutotunekitonepositionwillholdabasemapandtheotherpositionwillletyouactivatethelearningmode.Whentheswitchis“CLOSED”Autotunewillbeactivated.
Shifter- (Input1or2)TheseinputsareforusewiththeDynojetquickshifter.InsertthewiresfromtheDynojetquickshifterintotheSHIFTERinputs.Thepolarityofthewiresisnotimportant.
Speed- Ifyourapplicationhasaspeedsensorthenyoucantapintothesignalsideofthesensorandrunawireintothisinput.ThiswillallowyoutocalculategearpositionintheControlCenterSoftware.Oncegearpositionissetupyoucanalteryourmapbasedongearpositionandsetupgeardependentkilltimeswhenusingaquickshifter.
Analog- Thisinputisfora0-5vsignalsuchasenginetemp,boost,etc.Oncethisinputisestablishedyoucanalteryourfuelcurvebasedonthisinputinthecontrolcentersoftware.
Crank- DoNOTconnectanythingtothisportunlessinstructedtodosobyDynojet.Itisusedtotransfercranktriggerdatafromonemoduletoanother.
ACCESSORY INPUTS
Wire connections:
ToinputwiresintothePCVfirstremovetherubberplugonthebacksideoftheunitandloosenthescrewforthecorrespondinginput.Usinga22-24gaugewirestripabout10mmfromitsend.PushthewireintotheholeofthePCVuntilisstopsandthentightenthescrew.Makesuretoreinstalltherubberplug.
NOTE:Ifyoutinthewireswithsolderitwillmakeinsertingthemeasier.
CRANK
ANALOG
SPEED
INPUT 1
INPUT 1
INPUT 2
INPUT 2
USB CONNECTION
20-017 www.powercommander.com 2002-2012 Suzuki DL1000 (V-Strom) PCV - 3
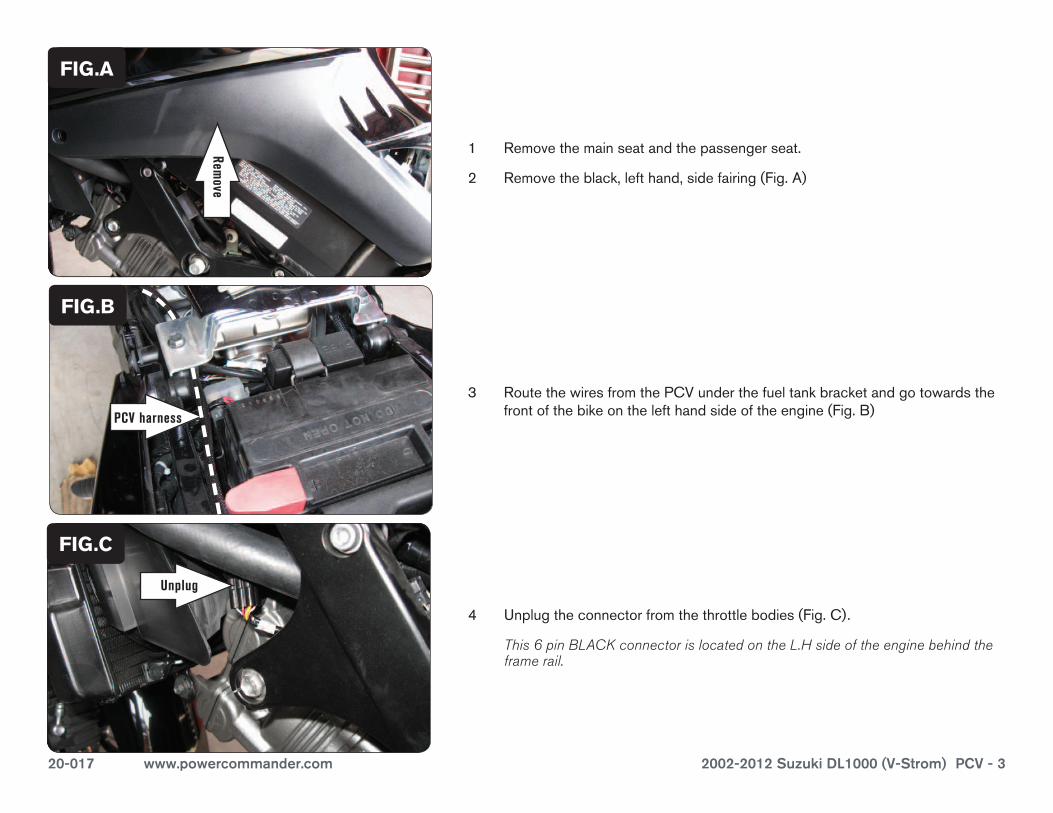
1 Removethemainseatandthepassengerseat.
2 Removetheblack,lefthand,sidefairing(Fig.A)
3 RoutethewiresfromthePCVunderthefueltankbracketandgotowardsthefrontofthebikeonthelefthandsideoftheengine(Fig.B)
4 Unplugtheconnectorfromthethrottlebodies(Fig.C).
This 6 pin BLACK connector is located on the L.H side of the engine behind the frame rail.
FIG.A
FIG.B
Remove
PCV harness
Unplug
FIG.C
20-017 www.powercommander.com 2002-2012 Suzuki DL1000 (V-Strom) PCV - 4
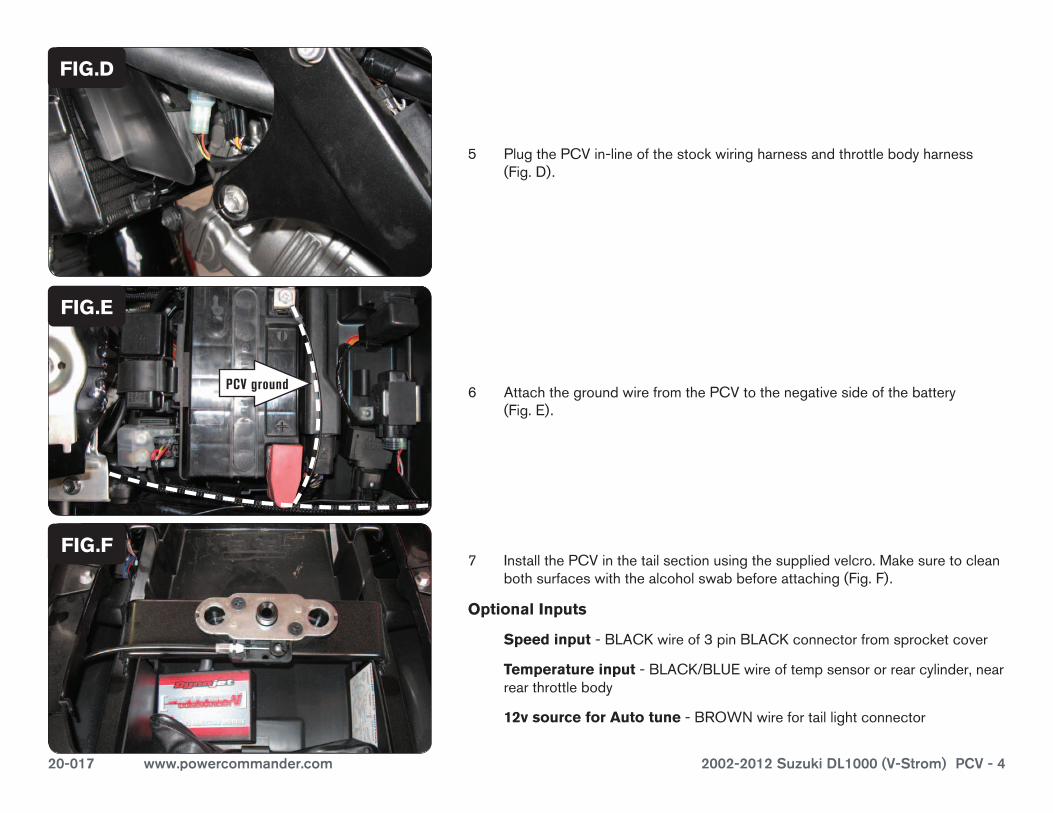
5 PlugthePCVin-lineofthestockwiringharnessandthrottlebodyharness(Fig.D).
FIG.D
6 AttachthegroundwirefromthePCVtothenegativesideofthebattery(Fig.E).
FIG.E
7 InstallthePCVinthetailsectionusingthesuppliedvelcro.Makesuretocleanbothsurfaceswiththealcoholswabbeforeattaching(Fig.F).
Optional Inputs
Speed input -BLACKwireof3pinBLACKconnectorfromsprocketcover
Temperature input-BLACK/BLUEwireoftempsensororrearcylinder,nearrearthrottlebody
12v source for Auto tune-BROWNwirefortaillightconnector
FIG.F
PCV ground