Making Laminated Turning Blanks Ð by Bill...
10
Page 1 of 10 Making Laminated Turning Blanks – by Bill Kloepping March, 2008 When turned, the laminated blanks described here will display unusual, randomly shaped multi-colored patterns and designs. Although the process is most easily implemented in pen blanks, it works the same, and just as well, with larger blanks and billets. The limiting factor is how thick a piece of wood can be cut with a band saw or scroll saw. The blanks can also be cut up to create segmented bowls or make/decorate jewelry. PATIENCE… PATIENCE… PATIENCE… PATIENCE… PATIENCE… PATIENCE… The key to laminating blanks is PATIENCE. It can take 2-4 days to complete the lamination process before the blanks will be ready to turn. Rushing through one or more of the steps can result in ruining the blank(s)! Materials needed: Wood blanks (typically 1, 2, or 4 pieces) Thin veneer (typically 1, 2, or 4 strips for each blank to be laminated) Wood glue and glue brush (Titebond III wood glue is suggested) Masking tape (1” wide is good – blue painters tape works well) Tools needed: Band saw or scroll saw with a narrow, thin kerf, large number of teeth per inch blade Wood clamps (I recommend 3 – 4 screw type clamps per blank, not “quick clamps”) Wood chisel or utility knife First, determine how many kinds of wood you want in the final blanks. I typically use 1, 2 or 4 woods. You will need 1 blank of each type of wood you wish to use. For multiple wood laminations I prefer that the woods have distinctive, contrasting colors. To make the process easier when using multiple woods, all pieces should be identical in size to each other (height, width, and length) and be square (height = width and sides at 90 degrees). Second, determine what laminate you want to use. I typically try to choose a veneer with a color that contrasts with all of the other woods being used so the veneer stands out separately from the other woods. Cut the laminate into strips (along the grain of the wood, not cross grain) so the strips are about the same width (or height) of the blanks and somewhat longer than the length of the blanks. For 3/4” x 3/4” x 5” blanks I’ll cut the strips to approximately 3/4” wide and 6” long (individual strips can vary in size). Helpful hint: An old flat bed paper cutter with a scissor type blade is an excellent tool to use for cutting most thin wood veneers. The band saw or scroll saw blade kerf being used should be approximately the same thickness as the veneer being used. If the blade is a bit thicker or thinner than the veneer, the veneer lines may not be smooth curves (they may be shifted off a bit at intersections). This is a visual effect only and won’t affect the quality of the laminations. Most of the veneers I use are in the 0.020”- 0.040” thickness range. For pen blanks, I use a #12 scroll saw blade, which has a 0.024” kerf. For larger blanks, I use a 3/16” or 1/4” band saw blade with a 0.025” thick kerf. The more teeth per inch on the blade, the smoother the cut will be. Using a blade with few TPI will result in a ragged cut which will be visible on the final turned piece. If the blade is A LOT thinner or A LOT thicker than the veneer you are using, the blank will not glue back together into a square blank. This will complicate subsequent cuts but shouldn’t affect the overall quality of the laminations as long as you clamp the pieces tight enough to remove all gaps between the wood and veneer. Pictures illustrating a number of the steps and intermediate results described below are provided at the end of the descriptions and are referenced by the various steps.
Transcript of Making Laminated Turning Blanks Ð by Bill...

Page 1 of 10
Making Laminated Turning Blanks – by Bill Kloepping March, 2008
When turned, the laminated blanks described here will display unusual, randomly shaped multi-colored
patterns and designs. Although the process is most easily implemented in pen blanks, it works the same, and
just as well, with larger blanks and billets. The limiting factor is how thick a piece of wood can be cut with a
band saw or scroll saw. The blanks can also be cut up to create segmented bowls or make/decorate jewelry.
PATIENCE… PATIENCE… PATIENCE… PATIENCE… PATIENCE… PATIENCE…
The key to laminating blanks is PATIENCE. It can take 2-4 days to complete the lamination process before the
blanks will be ready to turn. Rushing through one or more of the steps can result in ruining the blank(s)!
Materials needed:
Wood blanks (typically 1, 2, or 4 pieces)
Thin veneer (typically 1, 2, or 4 strips for each blank to be laminated)
Wood glue and glue brush (Titebond III wood glue is suggested)
Masking tape (1” wide is good – blue painters tape works well)
Tools needed:
Band saw or scroll saw with a narrow, thin kerf, large number of teeth per inch blade
Wood clamps (I recommend 3 – 4 screw type clamps per blank, not “quick clamps”)
Wood chisel or utility knife
First, determine how many kinds of wood you want in the final blanks. I typically use 1, 2 or 4 woods. You
will need 1 blank of each type of wood you wish to use. For multiple wood laminations I prefer that the woods
have distinctive, contrasting colors.
To make the process easier when using multiple woods, all pieces should be identical in size to each other
(height, width, and length) and be square (height = width and sides at 90 degrees).
Second, determine what laminate you want to use. I typically try to choose a veneer with a color that contrasts
with all of the other woods being used so the veneer stands out separately from the other woods. Cut the
laminate into strips (along the grain of the wood, not cross grain) so the strips are about the same width (or
height) of the blanks and somewhat longer than the length of the blanks. For 3/4” x 3/4” x 5” blanks I’ll cut
the strips to approximately 3/4” wide and 6” long (individual strips can vary in size).
Helpful hint: An old flat bed paper cutter with a scissor type blade is an excellent tool to use for
cutting most thin wood veneers.
The band saw or scroll saw blade kerf being used should be approximately the same thickness as the veneer
being used. If the blade is a bit thicker or thinner than the veneer, the veneer lines may not be smooth curves
(they may be shifted off a bit at intersections). This is a visual effect only and won’t affect the quality of the
laminations. Most of the veneers I use are in the 0.020”- 0.040” thickness range. For pen blanks, I use a #12
scroll saw blade, which has a 0.024” kerf. For larger blanks, I use a 3/16” or 1/4” band saw blade with a 0.025”
thick kerf. The more teeth per inch on the blade, the smoother the cut will be. Using a blade with few TPI will
result in a ragged cut which will be visible on the final turned piece.
If the blade is A LOT thinner or A LOT thicker than the veneer you are using, the blank will not glue back
together into a square blank. This will complicate subsequent cuts but shouldn’t affect the overall quality of the
laminations as long as you clamp the pieces tight enough to remove all gaps between the wood and veneer.
Pictures illustrating a number of the steps and intermediate results described below are provided at the end of
the descriptions and are referenced by the various steps.
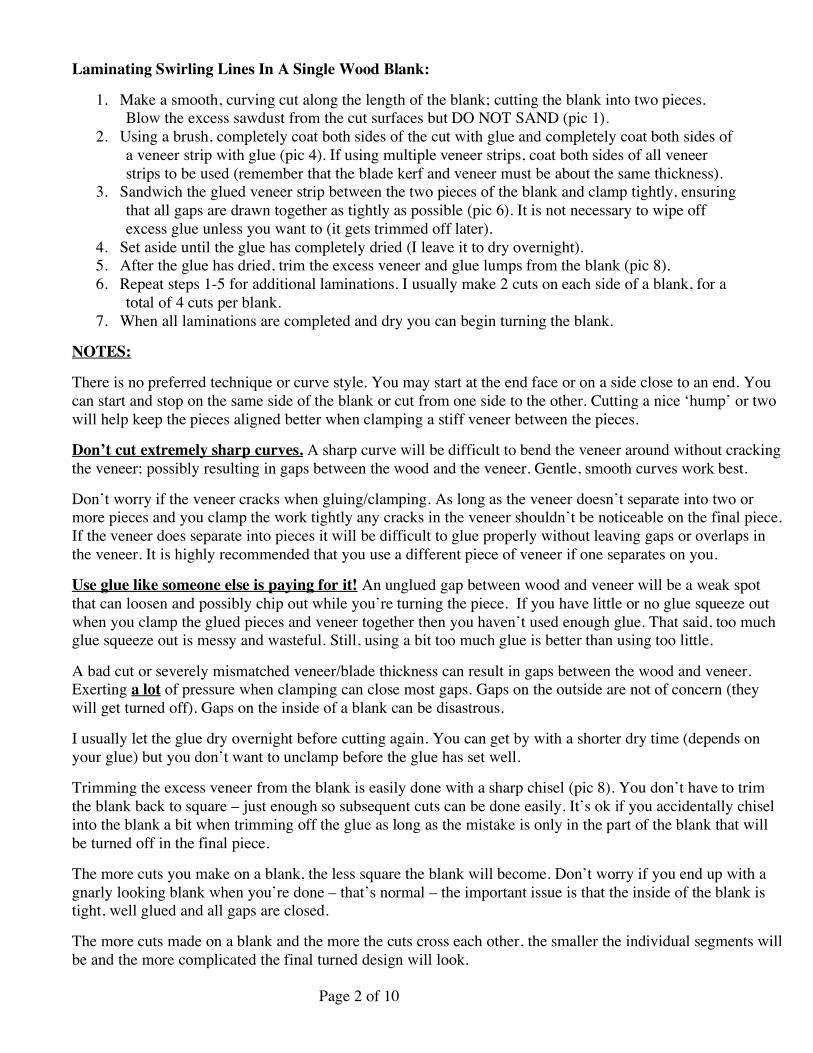
Page 2 of 10
Laminating Swirling Lines In A Single Wood Blank:
1. Make a smooth, curving cut along the length of the blank; cutting the blank into two pieces.
Blow the excess sawdust from the cut surfaces but DO NOT SAND (pic 1).
2. Using a brush, completely coat both sides of the cut with glue and completely coat both sides of
a veneer strip with glue (pic 4). If using multiple veneer strips, coat both sides of all veneer
strips to be used (remember that the blade kerf and veneer must be about the same thickness).
3. Sandwich the glued veneer strip between the two pieces of the blank and clamp tightly, ensuring
that all gaps are drawn together as tightly as possible (pic 6). It is not necessary to wipe off
excess glue unless you want to (it gets trimmed off later).
4. Set aside until the glue has completely dried (I leave it to dry overnight).
5. After the glue has dried, trim the excess veneer and glue lumps from the blank (pic 8).
6. Repeat steps 1-5 for additional laminations. I usually make 2 cuts on each side of a blank, for a
total of 4 cuts per blank.
7. When all laminations are completed and dry you can begin turning the blank.
NOTES:
There is no preferred technique or curve style. You may start at the end face or on a side close to an end. You
can start and stop on the same side of the blank or cut from one side to the other. Cutting a nice ‘hump’ or two
will help keep the pieces aligned better when clamping a stiff veneer between the pieces.
Don’t cut extremely sharp curves. A sharp curve will be difficult to bend the veneer around without cracking
the veneer; possibly resulting in gaps between the wood and the veneer. Gentle, smooth curves work best.
Don’t worry if the veneer cracks when gluing/clamping. As long as the veneer doesn’t separate into two or
more pieces and you clamp the work tightly any cracks in the veneer shouldn’t be noticeable on the final piece.
If the veneer does separate into pieces it will be difficult to glue properly without leaving gaps or overlaps in
the veneer. It is highly recommended that you use a different piece of veneer if one separates on you.
Use glue like someone else is paying for it! An unglued gap between wood and veneer will be a weak spot
that can loosen and possibly chip out while you’re turning the piece. If you have little or no glue squeeze out
when you clamp the glued pieces and veneer together then you haven’t used enough glue. That said, too much
glue squeeze out is messy and wasteful. Still, using a bit too much glue is better than using too little.
A bad cut or severely mismatched veneer/blade thickness can result in gaps between the wood and veneer.
Exerting a lot of pressure when clamping can close most gaps. Gaps on the outside are not of concern (they
will get turned off). Gaps on the inside of a blank can be disastrous.
I usually let the glue dry overnight before cutting again. You can get by with a shorter dry time (depends on
your glue) but you don’t want to unclamp before the glue has set well.
Trimming the excess veneer from the blank is easily done with a sharp chisel (pic 8). You don’t have to trim
the blank back to square – just enough so subsequent cuts can be done easily. It’s ok if you accidentally chisel
into the blank a bit when trimming off the glue as long as the mistake is only in the part of the blank that will
be turned off in the final piece.
The more cuts you make on a blank, the less square the blank will become. Don’t worry if you end up with a
gnarly looking blank when you’re done – that’s normal – the important issue is that the inside of the blank is
tight, well glued and all gaps are closed.
The more cuts made on a blank and the more the cuts cross each other, the smaller the individual segments will
be and the more complicated the final turned design will look.

Page 3 of 10
Use sharp tools while turning to avoid tearing the veneer or small pieces from the blank.
I have had problems with glue joints failing when using friction finishes. High heat can adversely affect glue
bonds especially with a cheaper glue. I had this problem with Elmers and Titebond II glue. I have not had a
problem with this since switching to Titebond III (perhaps I’ve learned to control the heating/cooling better?).
Delamination (glue failure) often shows up during finishing as an area of the piece that was smooth suddenly
begins to feel rough. This is typically where a small laminated segment starts to work out of the piece (glue
failure). If not fixed immediately, the segment may continue to work out and possibly fly off. To fix a minor
delamination, try prying the segment out a bit from the piece, squeeze CA glue underneath and around the
segment, press it back in place and let it dry completely before continuing. If you can’t pry it up, try soaking
the area with thin CA glue and press the segment back down and let it dry completely before continuing.
Laminating Two Different Wood Blanks Together:
The same basic lamination steps listed above are used for laminating two different wood blanks together,
however, there are a few additional steps added in.
1. Stack the blanks with the ends aligned evenly and tape both ends together tightly (like pic 10).
2. With the blanks stacked one on top of the other, make a smooth cut along the length of the
stacked blanks. It is EXTREMELY IMPORTANT that the blanks are kept vertical and the
blade isn’t bent or deformed (e.g. pushed sideways) during the cutting process. (This is
where patience comes in ! ! !) Clamping the stacked blanks between L-shaped push blocks can
help keep the blanks vertical and keep your fingers away from the blade during cutting (pic 1).
3. When the cut is complete, blow off excess sawdust from all pieces but do not sand.
4. Peel off the tape from both blanks, then swap the pieces between the blanks by taking a piece
from one blank and matching it to the mating piece on the other blank (pic 3). If you made a
good cut the pieces should mate well (small gaps are ok).
5. Take one of the mixed blanks and completely coat both sides of the cut faces with glue and
completely coat both sides of a veneer strip with glue.
6. Sandwich the glued veneer strip between the two pieces of the blank and clamp tightly, ensuring
all gaps are closed as tightly as possible (pic 6). Set aside to dry.
7. Repeat steps 5-6 to glue up the remaining (mixed) blank.
8. When both blanks are completely dried, trim the excess veneer and glue from them (pic 8). It is
not necessary to trim them square but you should remove large glue bumps so the blanks can be
stacked and taped tight again without them being able to wobble around much.
9. Restack the blanks, matching up the cuts made in step 2 (pic 9), so the blanks are on top of each
other in the same orientation as they were when they were first cut, then tape both ends together
tightly (pic 10).
10. Repeat steps 2 through 8 for the second lamination cut (the second cut should be different than
the first cut and should intersect the first cut at multiple spots).
11. For the third cut, restack and align the blanks so the uncut faces are now on top of each other
and tape both ends together tightly.
12. Repeat steps 2 through 10 to make the third and fourth lamination cuts.
13. When all laminations are completed and dry, you can begin turning the blanks.
NOTES:
All the notes for single blank laminations apply to laminating two different wood blanks together. In addition:
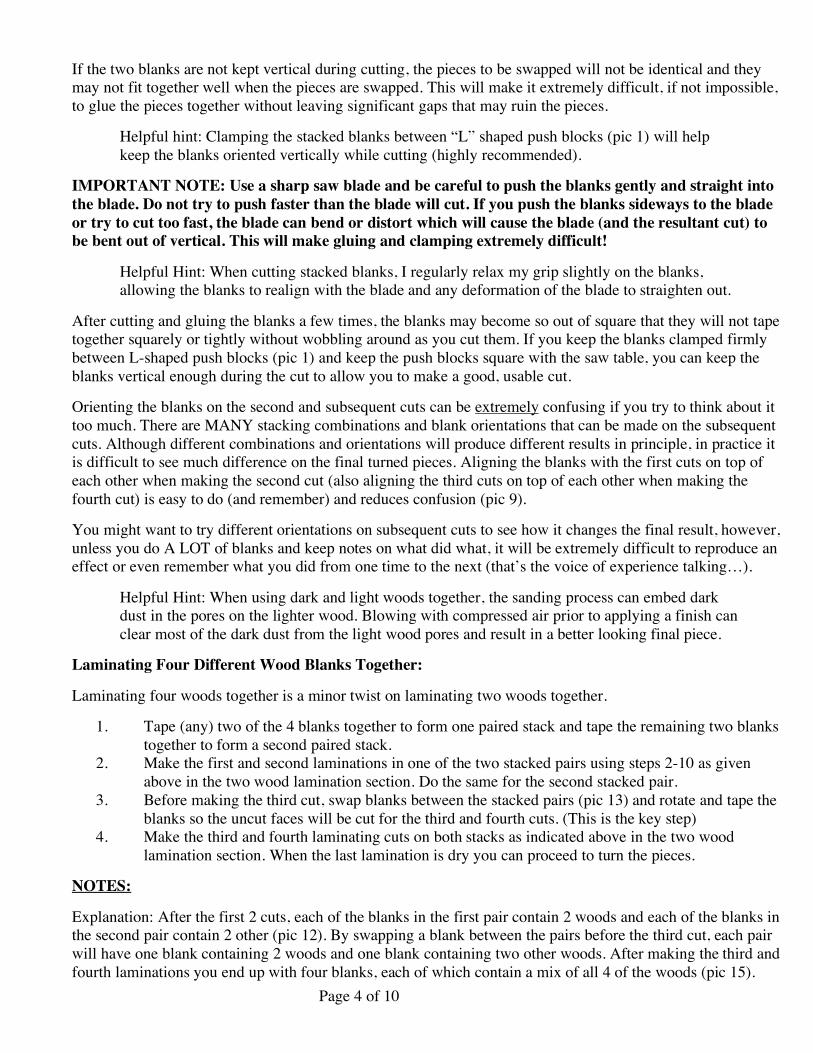
Page 4 of 10
If the two blanks are not kept vertical during cutting, the pieces to be swapped will not be identical and they
may not fit together well when the pieces are swapped. This will make it extremely difficult, if not impossible,
to glue the pieces together without leaving significant gaps that may ruin the pieces.
Helpful hint: Clamping the stacked blanks between “L” shaped push blocks (pic 1) will help
keep the blanks oriented vertically while cutting (highly recommended).
IMPORTANT NOTE: Use a sharp saw blade and be careful to push the blanks gently and straight into
the blade. Do not try to push faster than the blade will cut. If you push the blanks sideways to the blade
or try to cut too fast, the blade can bend or distort which will cause the blade (and the resultant cut) to
be bent out of vertical. This will make gluing and clamping extremely difficult!
Helpful Hint: When cutting stacked blanks, I regularly relax my grip slightly on the blanks,
allowing the blanks to realign with the blade and any deformation of the blade to straighten out.
After cutting and gluing the blanks a few times, the blanks may become so out of square that they will not tape
together squarely or tightly without wobbling around as you cut them. If you keep the blanks clamped firmly
between L-shaped push blocks (pic 1) and keep the push blocks square with the saw table, you can keep the
blanks vertical enough during the cut to allow you to make a good, usable cut.
Orienting the blanks on the second and subsequent cuts can be extremely confusing if you try to think about it
too much. There are MANY stacking combinations and blank orientations that can be made on the subsequent
cuts. Although different combinations and orientations will produce different results in principle, in practice it
is difficult to see much difference on the final turned pieces. Aligning the blanks with the first cuts on top of
each other when making the second cut (also aligning the third cuts on top of each other when making the
fourth cut) is easy to do (and remember) and reduces confusion (pic 9).
You might want to try different orientations on subsequent cuts to see how it changes the final result, however,
unless you do A LOT of blanks and keep notes on what did what, it will be extremely difficult to reproduce an
effect or even remember what you did from one time to the next (that’s the voice of experience talking…).
Helpful Hint: When using dark and light woods together, the sanding process can embed dark
dust in the pores on the lighter wood. Blowing with compressed air prior to applying a finish can
clear most of the dark dust from the light wood pores and result in a better looking final piece.
Laminating Four Different Wood Blanks Together:
Laminating four woods together is a minor twist on laminating two woods together.
1. Tape (any) two of the 4 blanks together to form one paired stack and tape the remaining two blanks
together to form a second paired stack.
2. Make the first and second laminations in one of the two stacked pairs using steps 2-10 as given
above in the two wood lamination section. Do the same for the second stacked pair.
3. Before making the third cut, swap blanks between the stacked pairs (pic 13) and rotate and tape the
blanks so the uncut faces will be cut for the third and fourth cuts. (This is the key step)
4. Make the third and fourth laminating cuts on both stacks as indicated above in the two wood
lamination section. When the last lamination is dry you can proceed to turn the pieces.
NOTES:
Explanation: After the first 2 cuts, each of the blanks in the first pair contain 2 woods and each of the blanks in
the second pair contain 2 other (pic 12). By swapping a blank between the pairs before the third cut, each pair
will have one blank containing 2 woods and one blank containing two other woods. After making the third and
fourth laminations you end up with four blanks, each of which contain a mix of all 4 of the woods (pic 15).

Page 5 of 10
All of the previous notes above for one and two wood lamination apply to laminating 4 woods. Additionally:
Intersecting cuts will “mix” the woods better than non-intersecting cuts. Intersecting the cuts a lot will give you
smaller segments in the final piece. I make 2 cuts on each face, for a total of 4 cuts per blank, and usually cut
the curves to make 3-6 intersections between cuts 1 and 2 and a similar number between cuts 3 and 4.
If you follow the above procedure using 4 woods (in particular, aligning the first and third cuts when making
the second and fourth cuts), you will see that the final 4 blanks will look very different from each other (pic
15). All 4 long edges on a blank should be the same color wood and all 4 blanks will have different colors on
the long edges. Additionally, the intersecting areas on the faces will show different color combinations as well.
Also, if you start and stop the cuts on the side of the blanks instead of the end of the blanks, the ends of each of
the 4 blanks will be different colors (one each for the original 4 colors of the blanks). Once turned, the final
pieces will all look similar, however, you may be able to distinguish differences in how the colors are mixed
between the 4 pieces (especially if the ends are different colors due to starting/stopping the cuts on the sides
instead of ends). If you plan to turn paired items (e.g. pen/pencil sets), you might want to laminate 8 blanks (2
sets of 4 woods laminated together) so you can pair the blanks with similar final color combinations together.
To keep from getting the blanks confused during the laminating process and to help you in aligning the blanks
for the 2nd and 4th cuts, you should label the individual blanks and also the orientation of the blanks.
In general, the above procedures will result in blanks with a good, reasonably uniform mixing of all 4 woods.
Swapping and/or rotating the blanks differently will produce similar results but can be confusing when trying
to determine how to align the blanks for each cut and/or result in an unbalanced mixing of the woods (e.g.
more of one color on one side than on the other side of the final piece, etc. – which isn’t wrong, just different).
There is no “one way”… but as indicated above, PATIENCE is extremely important!
Some Notes About Laminating Without Using Veneer:
The purpose of using veneer between the cuts is two-fold. In addition to providing a contrasting color as a part
of the overall design, functionally the veneer replaces the wood that is removed by the blade so the two pieces
can be glued back together without leaving large gaps.
Consider if you cut a circular disk from the center of a board and then try to glue the disk back into the hole –
you will have a gap between the board and the disk that needs to be filled – by glue or wood (veneer). The
thicker the kerf of the blade, the larger the resulting gap will be.
Glue can fill small gaps where the pieces don’t fit together well but glue cannot fully replace veneer when you
are using a thick kerf blade.
By using an extremely thin blade (e.g. a # 0 scroll saw blade) you can reduce the gaps to a point where glue
alone can be sufficient to fill the gaps, making the veneer unnecessary.
This can be useful if you are cutting extremely radical curves where bending veneer around the curves would
be problematic (e.g. cammo design, small polka dots, etc.). This can also be useful if you wish to try dying the
cuts and gluing them back together to give you extremely thin, delicate looking color lines in the final piece.
Caution: Cutting two stacked blanks with a # 0 scroll saw blade is extremely difficult as the blade can bend and
distort very easily, making mating the swapped parts back together without noticeable gaps extremely
problematic. Extreme patience is required when cutting with a thin blade but it can be done.
All of the above procedures can be done using no veneer if you carefully make the cuts with a # 0 scroll saw
blade. Also, using colored glues can help mask or even be used to highlight the cut lines.

Page 6 of 10
Multiple Wood Lamination Pictures:
Pic 1: Cutting a curve using L-shaped push
blocks
Pic 2: A cut stacked pair
Pic 3: Swapping parts from a cut pair
Pic 4: Glued veneer between swapped parts
Pic 5: Temporary clamp keep parts aligned
Pic 6: Glued and fully clamped blank
Pic 7: Dried blank ready to trim and cut
Pic 8: Trim off excess glue and veneer with
a sharp chisel

Page 7 of 10
Pic 9: Restacking blanks, aligning the
previous cut line
Pic 10: Blanks restacked and taped for the
2nd cut
Pic 11: Inside of blanks after 2nd cut
Pic 12: Two pairs (4 woods) after 2nd cut
Pic 13: Swapping blanks between pairs gets
2 blanks containing all 4 woods
Pic 14: Inside blanks after the 4th cut
Pic 15: Final set of 4 blanks, each containing
a mix of all 4 woods
Pic 16: A variety of planned design
laminations

Page 8 of 10
Design Control – Beyond Random Shapes:
The procedures outlined above result in random looking designs from blank to blank. A large amount of
control can be achieved over the size and shape of the individual segments and the overall amount of chaos
displayed in the final piece by planning in advance each of the cuts to be made.
Additionally, very precise designs can be laminated into blanks to achieve calculated results in the final turned
piece. To effectively control the design, an understanding is needed of what is happening when you make
laminated cuts in a blank to be turned.
The following comments are not a detailed discussion of the process; they outline the basic principles of the
process which can help you control the final results and/or enable you to come up with other designs.
• When you make a cut in a blank you are creating a curving surface within the blank. The veneer
follows along the curved surface of the cut.
• When you spindle turn a (long, rectangular) blank you are turning a shaped cylindrical object,
symmetric around the central axis of the blank.
• The swirling lines of veneer that are seen on the surface of the final turned piece are the intersection of
where the curved surfaces of the cuts intersect the shaped cylinder of the final turned piece.
• By knowing where the outside surface of the final turned piece will be located inside the blank, you can
predict what the effect of any particular cut will be on the surface of the turned piece.
• Alternately, if you know what effect you want to create on the surface of the final turned piece, and can
figure out how to make curved surfaces (the cuts) intersect the intended final turned surface of the piece
to result in the effect you are after, then this tells you how to make your cuts.
• Though more difficult to visualize than simple veneer lines, color mixing of different woods on the
final turned piece can be similarly predicted and controlled.
By carefully planning the dimensions of the final turned piece and the cuts you intend to make in advance, you
can successfully laminate smiley (or frowny) faces, figure eights, circles and polka dots, ovals, line segments
(including X’s and triangular shapes), as well as other odd shapes (e.g. cow/cammo look) onto pens and other
turned pieces. Picture 16 shows a number of designs that are reasonably easy to create.
Useful tools for creating planned designs:
Ruler/straightedge
Protractor or other angle setting tool
Rounded radius corner templates (e.g. Quick corners templates)
French curves
Other purchased or shop-made jigs for drawing consistent shapes
Planned Design Considerations:
It’s extremely helpful, often crucial, in knowing exactly where the outline of the final piece will be on a blank
for proper alignment and placement of the intended cut lines.
Drawing the centerline of the blank (the turning axis) and the planned outline of the final turned piece on one
or more faces of the blank will help you in laying out and drawing in what cuts need to be made on the blank to
achieve the final desired effects.
A number of design cuts are described below. Figures illustrating the cuts are provided after the descriptions.
Fig 1 shows a horizontal slot cut perpendicular to the turning axis. This type of cut will make a horizontal arc
around the piece. The arc is a segment of a circle (around the piece). The depth of the cut will define the
amount of the arc that will show up on the final piece. If the cut goes to the centerline, the arc will span

Page 9 of 10
halfway around the final piece. If the cut stops short of the centerline, the arc will span less than halfway
around. If the cut is made deeper than the centerline, the arc will wrap around to the back of the piece.
In general:
• Portions of cuts that are outside the planned outline of a piece will get turned off and will not show on
the final piece. Extremely shallow cuts will get turned off and will not be seen on the final piece.
• Cuts that extend below the planned outline but above the centerline will result in features that are
visible on the “front” side of the final piece.
• Cuts that extend below the centerline of a blank will result in design features that wrap around to the
“back” side of the final turned piece.
• Cuts that extend below the centerline and also below the lower planned outline of the turned piece will
result in curves that wrap completely around the turned piece.
• If the piece is not turned with the turning axis coincident with the blank centerline that the design
element is drawn around, the final shape of the design may be significantly altered from the envisioned
design. For best results, care must be taken to ensure that the centerline and turning axis are the same.
Gluing veneer into a slot cut requires that the veneer be thinner than the kerf of the blade. If the veneer is
thicker than the cut it won’t be able to be inserted into the slot. Make sure the veneer is cut square so when
inserted into the slot it will seat completely at the bottom of the slot. Any gap at the bottom of the slot will
result in a feature that doesn’t show veneer in some spots.
To glue veneer into a slot, coat both sides of the veneer with glue and put some glue over the entrance to the
cut. Push the veneer into the slot entrance all the way to the bottom of the slot. If you used enough glue, a
small amount of glue will be pushed in front of the veneer and will squeeze out at the bottom of the cut. If no
glue squeezes out you didn’t use enough glue (which could result in the veneer tearing out during turning).
Simply pull the veneer out of the slot and repeat the process, ensuring you have squeeze out at the bottom.
Note that it is a good idea to clamp the blank after veneer is glued in to ensure all glue joints are tight.
Fig 2 shows an angled cut into the blank. This cut will result in a curved “smile” arc in the final piece that will
be symmetric around the turning axis. The angle and depth of the cut will affect the final shape.
Fig 3 is a combination of the smile and horizontal arc that will result in a half moon shape. The veneer is glued
in two pieces, one running down each slot. Alternately, two blanks can be stacked and both slots cut at the
same time to cut away the triangular piece and the pieces swapped between the blanks to give a two-color
wood design. Cutting 2 blanks and swapping the parts can be done with or without using veneer.
In general, if a cut separates a piece from a blank, the design cut can be done on two stacked blanks with the
pieces swapped to result in a 2 wood lamination. This can usually be done with or without using veneer.
Fig 4 uses 2 slots at different angles to create a chevron or open mouth design.
Figs 5 and 6 are variations on “Eye” shapes. Curving the slot cuts can produce interesting effects.
Fig 7 will produce a circle if properly shaped, an oval if not. Use of a “quick corner” jig with a radius about the
same as the width of the blank will yield an acceptable circle if the corner radius is aligned perpendicular to
and almost touching the centerline. If the corner radius is angled to the centerline, an oval will result.
Fig 8 results in concentric circles. You can also offset/overlap the circles to produce interlocking circles. Fig 9
results in concentric circles with lines between the circles. To do this, the larger circle is cut and glued and
when dry, the smaller circle is cut and before gluing in the small circle, the slot cuts are made to the larger
circle with veneer glued into the slots. After cleaning up the slot cuts the smaller circle is glued in. Fig 10 is a
similar combination of a circle with slot cuts – the circle is cut and glued first, followed by the slot cuts.

Page 10 of 10
Fig 11 results in a Figure “8” design if the middle hump is at the edge of the final turned piece. If the piece is
not turned down far enough a peanut shape will result. If turned down too far two circles will result.
Fig 12 results in a cammo or cow type design. Due to the radical curve shapes, this design is best suited for 2
(or more) woods cut and glued without veneer. There is no one set way to do this design. Different variations
on this design will work and produce good-looking cammo or cow designs.
All of these designs can be mixed, matched and modified to create even more complicated designs. Your only
limitation is your imagination and your patience.
The Happy Face Design:
The following shows the layout of a happy face design. Note that the eyes are drilled into the side adjacent
from the circle and smile cuts. The eye holes are packed with veneer splinters coated with glue, or sawdust
mixed with glue, and packed firmly into the holes to completely fill the holes with wood/glue. Veneer is used
for the smile. Veneer does not have to be used for the circle cut if using a different color wood for the face. To
make a frowny face, simply change the angle of the smile to point away from the eyes.
Cent er
Outline
Planned Design Cut Illustration Figures:
Cent er
Outline
Fig 1: Horizontal Line Segment
Cent er
Outline
Fig 2: Curved Line Segment
Center
Outline
Fig 3: Half Moon Shape
Cent er
Outline
Fig 4: Chevron Shape
Cent er
Outline
Fig 5: “Eye” Shape
Cent er
Outline
Fig 6: Pinched “Eye” Shape
Cent er
Outline
Fig 7: Circle or Oval Shape
Cent er
Outline
Fig 8: Concentric Circles (or
Ovals)
Cent er
Outline
Fig 9: Concentric Circles with
lines/arcs between the circles
Cent er
Outline
Fig 10: Circle with curves
inscribed within the circle
Center
Outline
Fig 11: Figure “8” (or peanut or
two circles if not turned exact)
Cent er
Outline
Fig 12: Cammo or Cow pattern
All designs created and descriptions written are by Bill Kloepping – Greenville TX, March 2008