Steps in Cleaning Floors Using Vinegar and White Vinegar for Laminate Floors

1NACECARE SOLUTIONS Toll Free: 1-800-387-3210
MACHINES FOR CLEANING FLOORSAND CARPETS
INSTRUCTIONS FOR USEAND MAINTENANCE
®
Floor & carpet washer
2
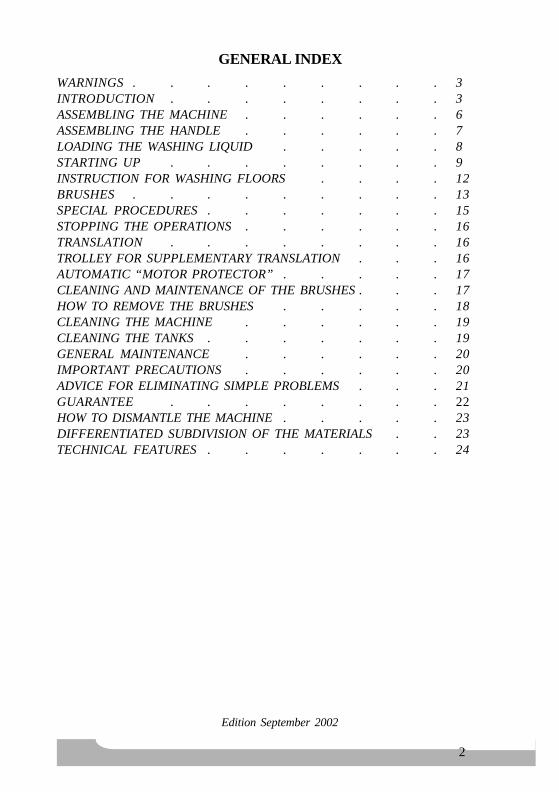
GENERAL INDEX
Edition September 2002
WARNINGS . . . . . . . . .INTRODUCTION . . . . . . . .ASSEMBLING THE MACHINE . . . . . .ASSEMBLING THE HANDLE . . . . . .LOADING THE WASHING LIQUID . . . . .STARTING UP . . . . . . . .INSTRUCTION FOR WASHING FLOORS . . . .BRUSHES . . . . . . . . .SPECIAL PROCEDURES . . . . . . .STOPPING THE OPERATIONS . . . . . .TRANSLATION . . . . . . . .TROLLEY FOR SUPPLEMENTARY TRANSLATION . . .AUTOMATIC “MOTOR PROTECTOR” . . . . .CLEANING AND MAINTENANCE OF THE BRUSHES . . .HOW TO REMOVE THE BRUSHES . . . . .CLEANING THE MACHINE . . . . . .CLEANING THE TANKS . . . . . . .GENERAL MAINTENANCE . . . . . .IMPORTANT PRECAUTIONS . . . . . .ADVICE FOR ELIMINATING SIMPLE PROBLEMS . . .GUARANTEE . . . . . . . .HOW TO DISMANTLE THE MACHINE . . . . .DIFFERENTIATED SUBDIVISION OF THE MATERIALS . .TECHNICAL FEATURES . . . . . . .
336789121315161616171718191920202122232324

3
WARNINGS
BEFORE USING THE MACHINE IT IS RECOMMENDED CAREFULLYREADING ALL THE INSTRUCTIONS IN THIS MANUAL
INTRODUCTION
DUPLEX is a machine for washing floors equipped with an original automaticsystem for recovering the dirty water. Its special manufacturing characteristicsendow it with advantages and performances which make it stand out from allother types of floor washer.
DUPLEX possesses two robust cylindrical brushes which thanks to theirdecentred position, are capable of thoroughly washing any surface right up tothe edge of the skirting boards of every wall or piece of furniture, collectingevery drop of dirty liquid
This is the only machine with double action that allows for reversing themovement, simply by inverting the position of the handle, without having toshift it from its original position, and working with full force both backwardsand forwards.
It is also equipped with two counterbalanced tanks which contain and supplythe water. Their position guarantees a perfect balance as well as a double anduniform distribution of the liquid onto the floor.
The tank for recovering the dirt is located in the centre of the machine and isperfectly balanced which makes the machine user-friendly, practical, and verylight to use without tiring the operator.
DUPLEX designs and builds from the best Italian technical tradition exploitingknow-how of an extremely high technological level.
The safety guards which bear the weight of the entire structure are in die-castaluminium, the accessory fairways are in shockproof material and the brush-holder panel is in stainless steel. All are top-of-the-range components.

4
DUPLEX, covered by international patents, is always ready for use, and ex-tremely user-friendly due to moving about on four sliding castors which dropdown automatically.
We invite you to follow the use and maintenance instructions with care.
This device is suitable for commercial use, for example in hotels, hospitals,factories, shops, offices and hire services, as well as for normal use in thehome.
Warning: this device is destined for use exclusively with the brushesspecified by the manufacturer.
The use of any other brushes could compromise the safety of the device.
THE ORIGINALITY OF THE HANDLETHAT INVERTS ITS OPERATINGPOSITION, ALLOWS FOR CLEANINGAND WASHING FLOORS ANDCARPETS IN A THOROUGH MANNER,BOTH FORWARDS AND BACKWARDSAND FROM RIGHT TO LEFT.

5
1
3
2
4
45
It washes and dries floors in the following materials:Ceramics - rubber - tapisum - cotto - carpet - klinker - cement - wood - plastic- PVC – epoxy resin - brick - porphyry - marble - granite – relief ceramics -bullonato - pietra serena - linoleum - porcelain - glass – artistic mosaics -rugs - quartz - graniglia - grès.
1 Rest Translation2 Mop Up3 Motor Protector4 Tank for water with detergent5 Recovery tank

6
1
2
43
ASSEMBLING THE MACHINE
The machine is shipped in a cardboard box.
After receiving the package the user must carry out the assembly of all theparts that for space reasons have been disassembled before being shipped.
The package contains the following:
1 Floor washing / carpet washing machine2 Elbow for handle3 Handle4 Connecting casing
Use and maintenance manualCertificate of Compliance

7
Fig. 1
Fig. 2
à
Fig. 3
ASSEMBLING THE HANDLE
Insert the elbow of the handle intothe housing of the jointed elbow.Tighten the two screws with thescrewdriver supplied and tightenwell. (fig. 1)
Assemble the handgrip if the handle bypushing it through the connecting casingand make sure to point the screws inwardswith the cable-holder facing towards thebottom.
Screw up the three screws with the samescrewdriver supplied. (fig. 2).
The assembled handle must be as illustrated in the drawingto the right.
Adjust the screw of the register located underneath the lever of the handgrip,at the same time observing the positioning of the feelers that allow the liquidto exit from the tanks. (fig. 3)

8
Fig. 5
à
+
Fig. 4
Make sure that the same feelers remain flush with the side panel when thelever is not pulled down. (fig. 4)
If the feelers protrude it may be impossible to insert or extract the tankscontaining the liquid from their housings.
LOADING THE WASHING LIQUID
Two tanks contain the solution for washing, both of these must always be atthe same level.
The tanks can be filled either bypouring water in from a jug, (fig. 5)or by placing the tanks themselvesunder a tap as they are easy toremove.
For ensuring the best use of your DUPLEX ask for the special detergents forevery type of floor from the manufacturer or authorised dealers (For thedoses please follow the instructions on the outside of the bottles).
The manufacturer declines all responsibility for damagecaused by incorrect use of the machine or detergents notsuitable for the type of floor.

9
RT
M U
Fig. 6
STARTING UP
Before inserting the plug of the connecting cable into a power point equippedwith earthing, make sure that the handle is in the Rest position (perfectlyvertical) and that the RT register is in the Rest Translation position. (fig. 6)
This register can be shifted to anyone of the four preselectedpositions, which will establish thedifferent positions the brusheswill adopt on the floor. (fig. 7)
During machine operation it is recommended keeping the cable well clearof the brushes in order to prevent it from being damaged.
“For washing carpets use the yellow brushes exclusively.”
Heavy duty wash for very dirty floors
delicate wash for all types of floors
normal carpets and wooden floors
long-pile rugs
transporting position(REST TRASLATION)
Fig.7

10
+
Fig. 8
Fig. 9
Take hold of the handle and lower it slowlyto one of the two sides, the machine will startup and the revolving brushes will startrevolving on the floor. (fig. 8)
Move the machine slowly forwards, goingover the same washing path with the recoverydevice MU (MOP UP) inserted (lever pulleddownwards). (fig. 6)
Let the liquid move downwards by activatingthe lever underneath the handle at briefintervals and only when the machine ismoving forwards, taking care not to flood thefloor.
The dirty water will instantly be collectedinside the easy-to-remove recovery tankwhich must be emptied as soon as it fillsup. (fig. 9)
The disposal of the dirty water must be carried out incompliance with the regulations in force.

11
Fig. 10
Fig. 11 Fig. 12
Figures 10, 11 and 12 illustrate how DUPLEX works as far as the edges ofthe skirting boards of the walls or the furniture and how it enters into restrictedspaces.
DUPLEX works in two directions (backwards and forwards) without havingto shift it from its original position as it is sufficient to move the handle fromright to left or from left to right in order to reach the opposite sides of everyroom.

12
INSTRUCTION FOR WASHING FLOORS
1. For the first phase move forwards from the Start position towards thecorner as indicated in fig. 13.
2. Make the machine move backwards and continue to clean the same“lane”, thus returning to the starting off point.
3. From the starting-off point shift onto the second washing path, slightlyoverlapping the path that has been cleaned previously.Repeat the operation until finishing the washing operation of the entirearea of phase 1.
4. In order to clean the edge on the side of the room facing the cleaningarea, reverse the machine. (fig. 13)
Phase 2, Repeat the entire operation, as per phase 1.
Fig. 13
Pos
ition
sta
rt1
pha
se
st
Pos
ition
sta
rt2
ph
ase
nd

13
BRUSHES
“Use original DUPLEX brushes exclusively ”
The original DUPLEX brushes are tested and balanced individually withspecial electronic instruments and guarantee the absence of vibrations thatcould generate damaging mechanical stress for the machine and the floors.
The use characteristics of the brushes can be recognised via the colour:Light grey; Black; Black/hard; Yellow; Brown; Scotch-brite (compact); Darkgrey (Tynex).
Light grey brushes:Universal use for light dirt on all types of floors (standard supply).
Soft black brushes:Universal use for heavy dirt and less delicate floors.
Hard black brushes:For scraping off resistant dirt (for this use it is sufficient to assemble one“hard” brush only together with the other “soft” black brush.
Yellow brushes:For cleaning carpets, rugs, parquet and particularly delicate floors.
How to clean carpetsSet the register to the working position, choosing the correct operating position(normal carpets / long-pile carpets). It is recommended crossing over thewashing tracks in order to thoroughly wash all the fibres while taking carenot to wet the carpet too much. (Make several trial runs before proceedingwith the full washing operation).
How to clean ParquetDo not wet the floor too much, especially the non-varnished types whichabsorb a greater quantity of humidity. It is recommended always taking greatcare when cleaning these floors, making several trial runs before proceedingwith the full washing operation.

14
Brown horsehair brushes:The polishing of smooth surfaces is carried out after having evenly distributeda thin layer of liquid wax over the floor. Wait for the wax to dry completelybefore polishing.
Set the register to the MU (Mop-Up) position towards the top. The RT registermust be set to the “Heavy Wash” or “Delicate Wash” positions, then movethe machine forwards and backwards in order to polish the floor.
Do not use the machine for spreading the wax.(The horsehair brushes must not be used with water or detergents).
Compact “scotch-brite” brushes :Only for fine polishing and endowing waxed and very smooth floors with amirror finish.
Tinex brushes:Extremely abrasive for removing paint, plaster, incrustations of cement andother products, even when dried hard on resistant industrial floors: gres,porphyry, klinker, cotto, etc. (These brushes can normally be used with waterand detergents; due to their abrasive power they may damage the floor).
SPECIAL PROCEDURES
Waxing the floor with the “Lavaincera” systemSome floors are extremely suitable for being washed and treated with the“Lavaincera” thanks to their specific characteristics, like those in cotto,smooth tiles, klinker, marble, granite, industrial floors, roun raised rubberfloors, rubber, old pre-treated wax floors and many others.Excellent results and a good “polished look” can be obtained with this solution,as well as a thorough washing of the entire floor and an instantaneous recoveryof the dirt in a simple, fast and economical manner.For this procedure it is possible to use the machine with the two normal greybrushes that come with the machine.

15
The two tanks must be filled with the special product mixed with water in theproportions and according to the instructions on the outside of the bottles,after which the same system is followed as for the normal washing operation.(The special product can be ordered for home delivery). It is possible toobtain a greater brilliance by passing the Duplex over the floor fitted with thehorsehair or Scotch-brite brushes.
Very dirty floors:Whenever it is necessary to give a heavy wash to floors which have collecteddirt over a long period of time with all sorts of stains and the build-up ofsolvents from normal detergents it is recommended proceeding in thefollowing manner:
After moving the MOP-UP lever to the top position, use the lever of thehandle to allow abundant liquid product/water solution - preferably heated toa temperature of 35/40°C – to flow onto the floor.
Under these conditions the recovery device will be disabled and the liquidpoured onto the floor will serve for turning the solution into an emulsion,thus allowing the detergent to exert a greater efficacy.
Move the machine forwards over the entire wet surface of the floor eithermoving in all directions or following a precise pattern.
Once this washing operation is over, the MOP-UP lever must be moved downto the bottom in order to reactivate the automatic system for recovering thedirty water.
(The MOP-UP lever must only ever be activatedwhen the machine is stopped)

16
This procedure can be carried out with every type of brush supplied exceptthe brown horsehair brushes.
After washing particularly dirty floors and before carrying out any othertype of process on delicate floors, clean the brushes and the machine well(see pages 17 and 19).
STOPPING THE OPERATIONS
Every time the handle is moved into the vertical REST position the machinewill immediately come to a halt. Each time the machine stops, it will benecessary to move the register (fig. 6) to the “rest translation” position.
TRANSLATION
In order to be transported from one room to another, or put it away, theDUPLEX moves on four sliding castors that raise it up automatically. Inorder to ensure that the castors remain firmly fixed in this position, move thehandle of the machine into the “vertical” rest position, and the register (fig.6) to the “rest translation” position; then lower the handle to either of the twosides, and then push the machine which will roll along on its castors.
TROLLEY FOR SUPPLEMENTARY TRANSLATION
(Option for going up or down steps andfor transporting the machine from oneroom to another with different level floors)

17
Fig. 14
à
AUTOMATIC “MOTOR PROTECTOR”
In the event of certain conditions existing which could overload the electricmotor (foreign bodies in the brushes that could block their rotation, powersupply fluctuations, overheating etc.), the “Motor Protector” will interveneand stop the machine.
Important: Disconnect the machine fromthe power point before removing anyforeign bodies caught up in the brushes.
After waiting for approximately 60 seconds,restore the machine operation by pressingthe same “Motor Protector” button.
CLEANING AND MAINTENANCE OF THE BRUSHES
Remove the plug from the power point before proceeding with the cleaningor maintenance operations or replacement of the brushes.
The DUPLEX brushes do not require anything more than periodicmaintenance seeing that their high speed rotation is capable of centrifugingthe dirt and always keep them efficient.
Every now and then it will be necessary to remove the brushes and soak themfor several hours in a basin filled with cold or warm (never hot) water, inwhich the same detergent used for cleaning the floors must be added.
After having washed and rinsed the brushes well, their bristles will regain invigour and elasticity.
At the moment of reassembling the brushes it is important to remember toinvert them. This precaution is necessary due to the fact that if they alwaysrotate in the same direction the bristles may tend to bend.

18
Fig. 16
Fig. 15
HOW TO REMOVE THE BRUSHES
Use the screwdriver supplied to remove the two screws located on the stainlessside panel. (fig. 15)
Extract the two brushes together with the side panel. fig. 16)
Separate the two brushes from the side panel itself.
In the case of the brushes being deformed (due to wear and tear of thesame), they may generate jumps and vibrations.
In this case contact the assistance centre.

19
Fig. 18
Fig. 19
à
à
Fig. 17
CLEANING THE MACHINE
Remove the three tanks (fig. 17). Use adamp sponge to carefully clean therubber conveyor belts and every part ofthe machine itself.
Use a brush to remove every residue ofdirt from all the corners.
Dry well.
Do not use high pressure water jet machines to wash the machine.
CLEANING THE TANKS
The three thanks (the dirty water recovery one and the two containing theclean water and the detergent) can be washed in running water under the tap.
Make sure that no foreign bodies remain inside the rubber valves located inthe two tanks which make the washing liquid exit. Any dirt could preventthem from closing meaning that the liquid will continue to exit.
After having extracted the screws (fig. 18) remove the nozzles from the tanks.Hold then in the middle and pull upwards (fig. 19), extracting them fromtheir side housings.

20
Fig. 20
Clean the holes of the nozzles with aneedle (fig. 20).
Always keep the two scrapers of therecovery tank clean.
This procedure should be carriedout after every machine operation.
GENERAL MAINTENANCE
The mechanical parts of the DUPLEX do not require periodic maintenanceas their gearings all run on bearings.
IMPORTANT PRECAUTIONS
At times it may happen that the electric cord gets tangled up underneath thebrushes of the machine. Do not under any circumstances attempt to extractthe cord while the machine is in operation. First take the handle up to thevertical position.
Disconnect the plug from the power point and before reinserting it check thecord to make sure that it has not been damaged.
In the event of the cord being damaged after being caught up underneath themachine, do not simply repair it with tape but have it checked and repaired bya qualified technician.
Whenever in the rest position the DUPLEX must never rest on the brushes asthe weight of the machine itself could deform them. It must always be raisedup from the brushes and supported by the four castors that come downautomatically when the register is in the “RT” position (see Translation page16)
Do not pour water or other liquids on top of the machine.
For all maintenance operations unplug the power supply cord from the powerpoint.

21
As with all electrical products, the machine must be stored in a dry environ-ment after use.
The machine is designed exclusively for washing floors and must not be usedfor other purposes.
When the machine is no longer capable of functioning correctly after manyyears of service, follow the instructions on page 23 for rendering itunserviceable.
During the cleaning and maintenance operations,it is compulsory for the machine to be disconnectedfrom the electric power supply.
ADVICE FOR ELIMINATING SIMPLE PROBLEMS
The machine leaves a wet strip along the sides- Too much liquid has been pumped out.- An irregular pattern has been carried out without observing the
instructions on page 12- The scrapers of the recovery tank are dirty.
It fails to collect the dirt.- The MOP-UP device is not activated.- The brushes are worn down.- The scrapers of the recovery tank are dirty or worn.- The washing liquid does not exit.- The recovery tank has not been fitted correctly into its housing.
It fails to start- Defective power point.- Power supply cord cut-off.- The MOTOR PROTECTOR device has intervened. Wait for
approximately 60 seconds and press the “MP” button (fig. 14).- The register (fig. 7) has been left in the “rest translation” position.- The handle has been lowered too quickly.- The voltage is too low.
22
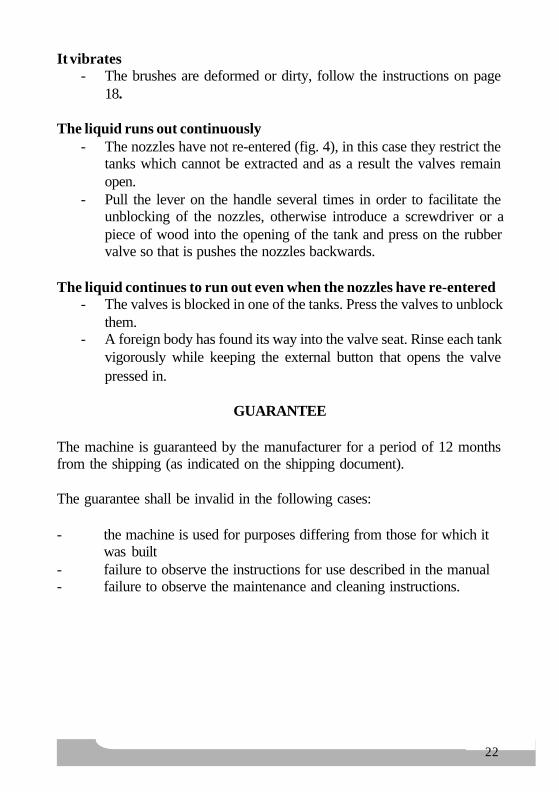
It vibrates- The brushes are deformed or dirty, follow the instructions on page
18.
The liquid runs out continuously- The nozzles have not re-entered (fig. 4), in this case they restrict the
tanks which cannot be extracted and as a result the valves remainopen.
- Pull the lever on the handle several times in order to facilitate theunblocking of the nozzles, otherwise introduce a screwdriver or apiece of wood into the opening of the tank and press on the rubbervalve so that is pushes the nozzles backwards.
The liquid continues to run out even when the nozzles have re-entered- The valves is blocked in one of the tanks. Press the valves to unblock
them.- A foreign body has found its way into the valve seat. Rinse each tank
vigorously while keeping the external button that opens the valvepressed in.
GUARANTEE
The machine is guaranteed by the manufacturer for a period of 12 monthsfrom the shipping (as indicated on the shipping document).
The guarantee shall be invalid in the following cases:
- the machine is used for purposes differing from those for which itwas built
- failure to observe the instructions for use described in the manual- failure to observe the maintenance and cleaning instructions.

23
HOW TO DISMANTLE THE MACHINE
At the time of demolishing the machine it is sufficient to observe the followinginstructions :
· disconnect the electrical connections and entrust the dismantling operationsto qualified and authorised personnel.
DIFFERENTIATED SUBDIVISION OF THE MATERIALS
Electric components :Material that can be disposed of with the urban waste collection, in compliancewith the legal provisions in the country of use.
Mechanical components :The machine is built with aluminium, steel and plastic materials.
Steel and aluminium will not damage the environment if recycled by qualifiedand authorised companies.
The plastic materials may cause environmental damage therefore they shouldbe handed over to specialised companies authorised for disposal.
The disposal of the packaging must be carried out in accordance with theregulations in force.