Line detector robot / Robot garisan123userdocs.s3-website-eu-west-1.amazonaws.com/d/8a/d8/... ·...
12
Line detector robot / Robot garisan Line Robot car uses the Infrared patrol module and Motor Drive module to automatize the vehicle. It uses the infrared light sensor to convert the black and white line draw on the driving surface into digital signals. The digital signal is then transmitted to the Motor Drive module to control the motor rotation. The car will follow the black line as it runs. Menggunakan modul cahaya infra merah, kita boleh mencipta sebuah kenderaan yang akan berfungsi secara automatik. Sensor infra merah akan memproses warna hitam dan putih pada permukaan dan mengubahnya kepada isyarat digital. Isyarat digital ini akan dihantar ke “motor drive module” untuk mengawal pergerakan motor. Kenderaan ini akan bergerak mengikut landasan berwarna hitam.
Transcript of Line detector robot / Robot garisan123userdocs.s3-website-eu-west-1.amazonaws.com/d/8a/d8/... ·...
Line detector robot / Robot garisan
Line Robot car uses the Infrared patrol module and Motor Drive module to automatize the vehicle. It uses the infrared light sensor to convert the black and white line draw on the driving surface into digital signals. The digital signal is then transmitted to the Motor Drive module to control the motor rotation. The car will follow the black line as it runs. Menggunakan modul cahaya infra merah, kita boleh mencipta sebuah kenderaan yang akan berfungsi secara automatik. Sensor infra merah akan memproses warna hitam dan putih pada permukaan dan mengubahnya kepada isyarat digital. Isyarat digital ini akan dihantar ke “motor drive module” untuk mengawal pergerakan motor. Kenderaan ini akan bergerak mengikut landasan berwarna hitam.
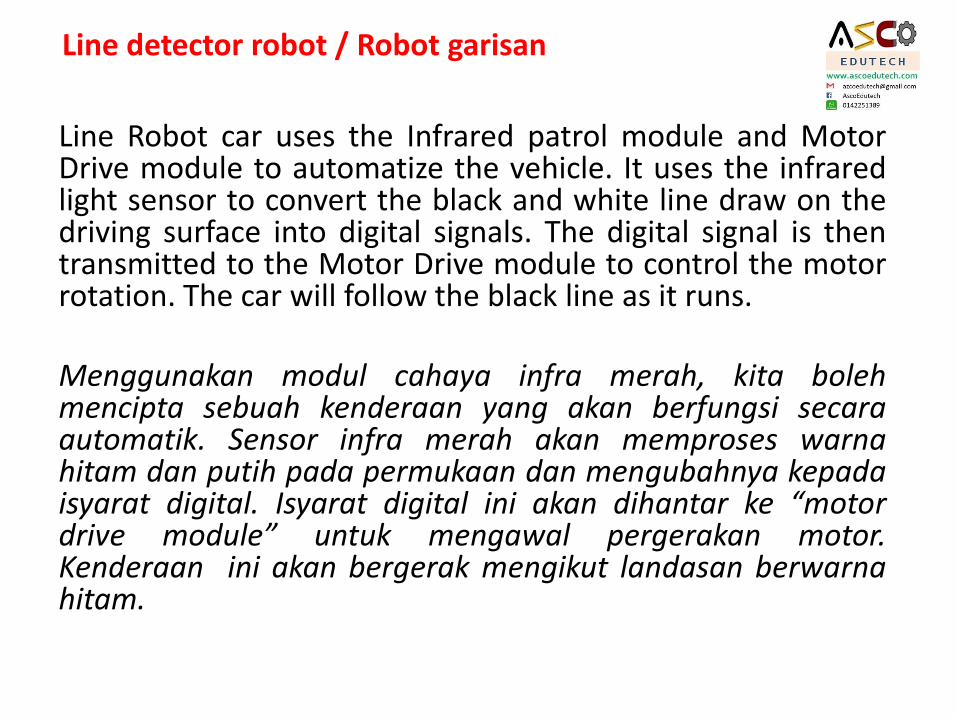
THE FINISHED PRODUCT IMAGE / IMEJ PRODUK
STEM
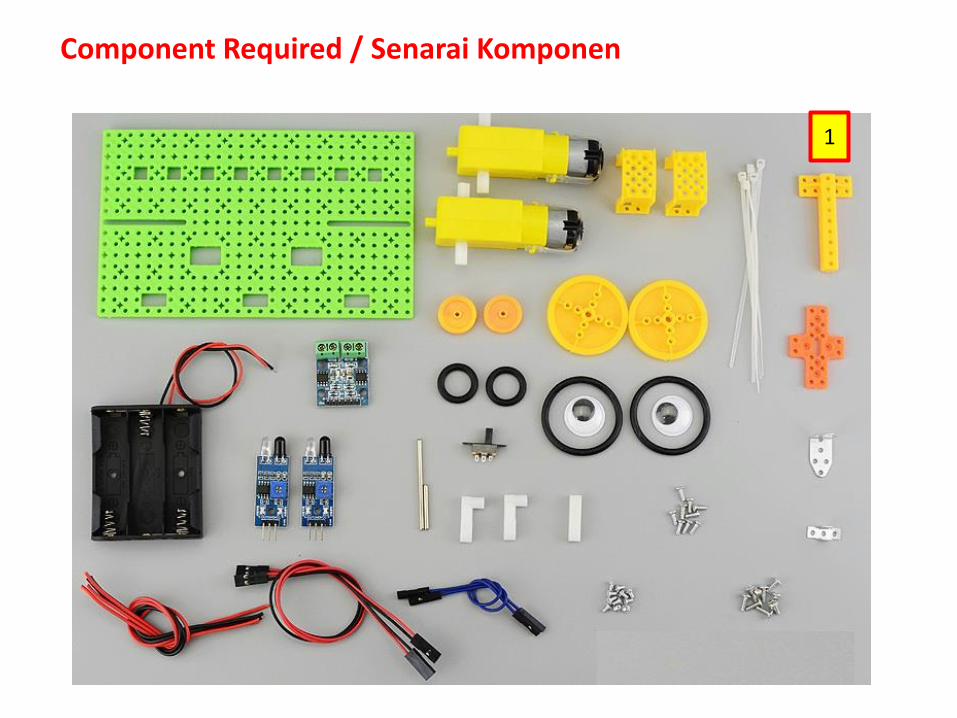
Component Required / Senarai Komponen
1

Infrared module: The white line output means low level signal (motor rotation) detected (motor will run); If black line detected means no signal output (motor will stop). Modul Infra Merah: Apabila mengesan warna putih/cerah, isyarat untuk mengerakkan motor akan dihantar ke “Motor Drive Module”. Apabila mengesan warna hitam, isyarat untuk menghentikan motor akan dihantar.
Power Indicator
Power Indicator Output
Output
Sen
sor
Sen
siti
vity
Co
ntr
ol
Sen
sor
Sen
siti
vity
Co
ntr
ol
Switch
Motor A
Motor B
MOTOR DRIVE
MODULE
DC MOTOR
Motor B Motor A
Power Line A Signal Line B Signal
2
Circuit Simulation / Litar simulasi

Step 1: Install the black and red wires to the motor as the photo below. Step 2: Cut the red and black wires (with connectors) into two. Twist/connect 3 black wires and 3 red wires as indicated below. Langkah 1: Sambungkan wayar hitam dan merah seperti di dalam gambar. Langkah 2: Potong separuh wayar merah dan hitam (yang ada penyambung di hujung wayar). Sambungkan 3 wayar merah dan 3 wayar hitam seperti gambar di bawah.
Wayar merah di sebelah kiri motor
Wayar hitam di sebelah kanan motor
3 wayar merah di sambungkan
3 wayar hitam di sambungkan
Fold the black and red wires and cut into half / Lipat kepada dua wayar hitam dan merah sebelum potong

On the green board, install the DC Motor using the 6mm screw as the photo indicated. Install the Wheel using the 7mm screw. Pada papan hijau, sambungkan motor menggunakan skru 6mm seperti gambar di bawah. Kemudian, masukkan roda dan gunakan skru 7mm untuk lekatkan tayar pada motor.
Make sure the correct side of the wheel is used / Pastikan tayar dimasukkan mengikut sisi yang betul

Install the robot eyes and small wheels as indicated. Pasang mata robot dan tayar kecil seperti gambar.
2 cm Axle / Gandar 2cm
Leave some space / Pastikan ada sedikit jarak
4 cm Axle / Gandar 4cm
Rubber Stopper / Getah Gandar
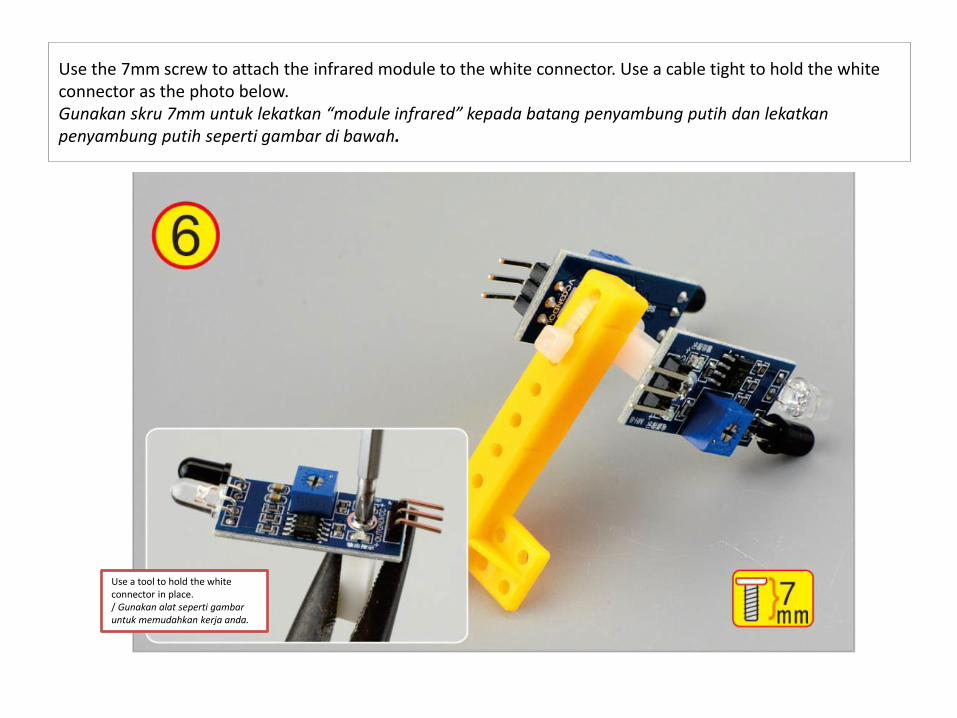
Use the 7mm screw to attach the infrared module to the white connector. Use a cable tight to hold the white connector as the photo below. Gunakan skru 7mm untuk lekatkan “module infrared” kepada batang penyambung putih dan lekatkan penyambung putih seperti gambar di bawah.
Use a tool to hold the white connector in place. / Gunakan alat seperti gambar untuk memudahkan kerja anda.

Use 6mm screw as the photo to put the “T” shape stand in place. Insert the wheel and the robot face as indicated below. Make sure the wheel can rotate easily. Gunakan skru 6mm letakkan pemegang “T” seperti gambar. Masukkan roda dan pastikan roda boleh berpusing dengan mudah.
Make sure there’s 1 mm space below the rubber stopper / Pastikan ada ruang 1 mm di bawah pemegang gandar
Hole No. 5 / Lubang ke 5
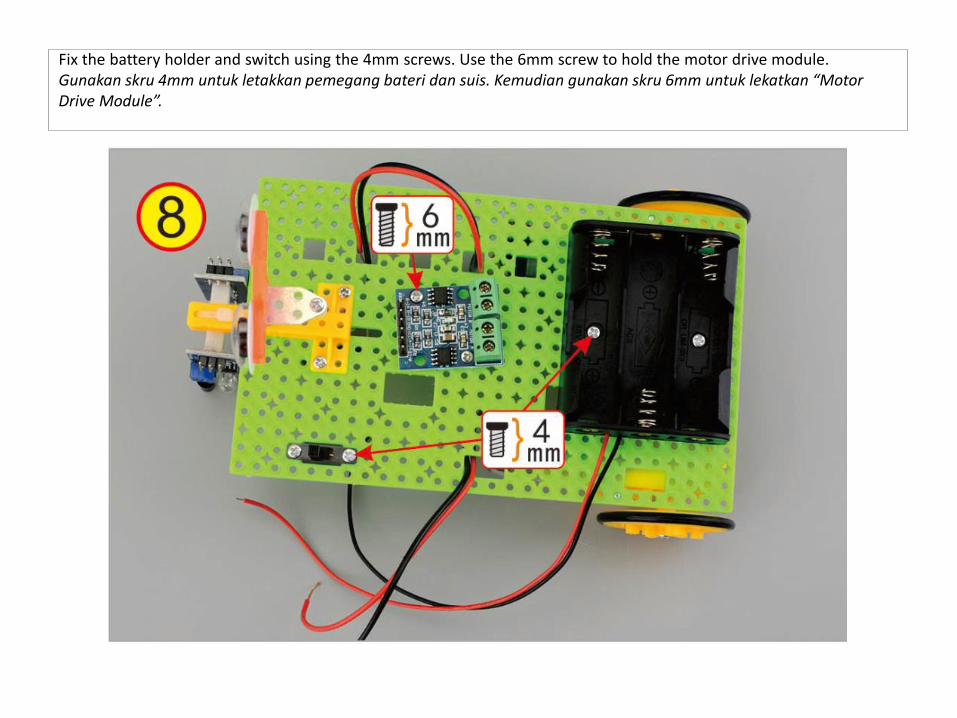
Fix the battery holder and switch using the 4mm screws. Use the 6mm screw to hold the motor drive module. Gunakan skru 4mm untuk letakkan pemegang bateri dan suis. Kemudian gunakan skru 6mm untuk lekatkan “Motor Drive Module”.
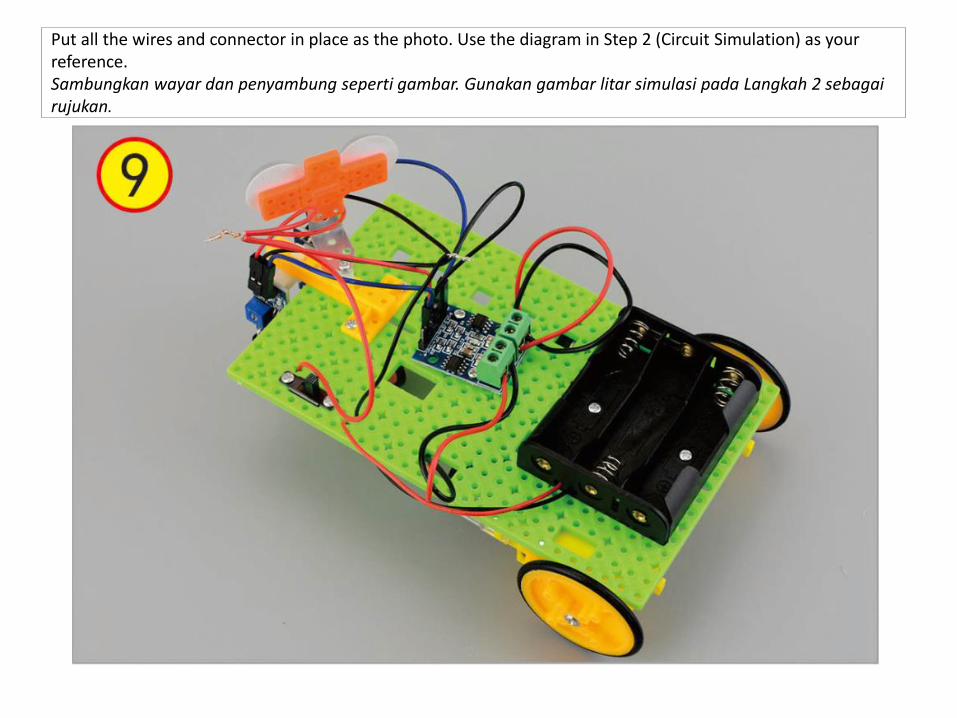
Put all the wires and connector in place as the photo. Use the diagram in Step 2 (Circuit Simulation) as your reference. Sambungkan wayar dan penyambung seperti gambar. Gunakan gambar litar simulasi pada Langkah 2 sebagai rujukan.
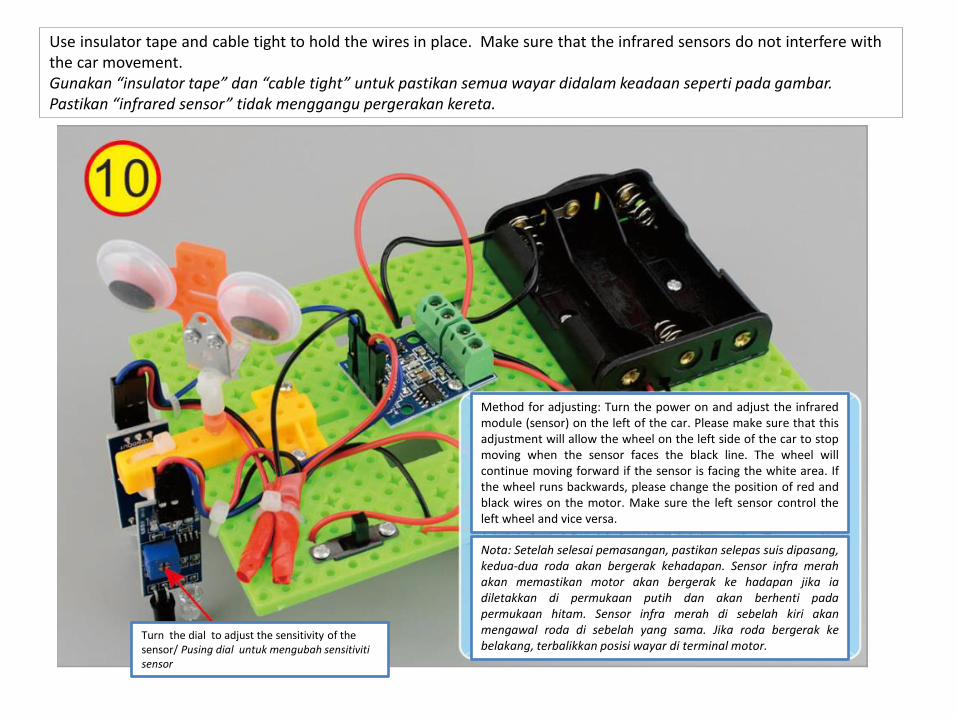
Use insulator tape and cable tight to hold the wires in place. Make sure that the infrared sensors do not interfere with the car movement. Gunakan “insulator tape” dan “cable tight” untuk pastikan semua wayar didalam keadaan seperti pada gambar. Pastikan “infrared sensor” tidak menggangu pergerakan kereta.
Method for adjusting: Turn the power on and adjust the infrared module (sensor) on the left of the car. Please make sure that this adjustment will allow the wheel on the left side of the car to stop moving when the sensor faces the black line. The wheel will continue moving forward if the sensor is facing the white area. If the wheel runs backwards, please change the position of red and black wires on the motor. Make sure the left sensor control the left wheel and vice versa.
Nota: Setelah selesai pemasangan, pastikan selepas suis dipasang, kedua-dua roda akan bergerak kehadapan. Sensor infra merah akan memastikan motor akan bergerak ke hadapan jika ia diletakkan di permukaan putih dan akan berhenti pada permukaan hitam. Sensor infra merah di sebelah kiri akan mengawal roda di sebelah yang sama. Jika roda bergerak ke belakang, terbalikkan posisi wayar di terminal motor.
Turn the dial to adjust the sensitivity of the sensor/ Pusing dial untuk mengubah sensitiviti sensor