JD Edwards EnterpriseOne HTML Web Server WebSphere ... · HTML Server on WebSphere Reference ... JD...
190
JD Edwards EnterpriseOne HTML Server on WebSphere Reference Guide Release 9.1 for Microsoft Windows E18841-09 January 2014
Transcript of JD Edwards EnterpriseOne HTML Web Server WebSphere ... · HTML Server on WebSphere Reference ... JD...

JD Edwards EnterpriseOneHTML Server on WebSphere Reference Guide
Release 9.1 for Microsoft Windows
E18841-09
January 2014
JD Edwards EnterpriseOne HTML Server on WebSphere Reference Guide, Release 9.1 for Microsoft Windows
E18841-09
Copyright © 2011, 2014, Oracle and/or its affiliates. All rights reserved.
This software and related documentation are provided under a license agreement containing restrictions on use and disclosure and are protected by intellectual property laws. Except as expressly permitted in your license agreement or allowed by law, you may not use, copy, reproduce, translate, broadcast, modify, license, transmit, distribute, exhibit, perform, publish, or display any part, in any form, or by any means. Reverse engineering, disassembly, or decompilation of this software, unless required by law for interoperability, is prohibited.
The information contained herein is subject to change without notice and is not warranted to be error-free. If you find any errors, please report them to us in writing.
If this is software or related documentation that is delivered to the U.S. Government or anyone licensing it on behalf of the U.S. Government, the following notice is applicable:
U.S. GOVERNMENT END USERS: Oracle programs, including any operating system, integrated software, any programs installed on the hardware, and/or documentation, delivered to U.S. Government end users are "commercial computer software" pursuant to the applicable Federal Acquisition Regulation and agency-specific supplemental regulations. As such, use, duplication, disclosure, modification, and adaptation of the programs, including any operating system, integrated software, any programs installed on the hardware, and/or documentation, shall be subject to license terms and license restrictions applicable to the programs. No other rights are granted to the U.S. Government.
This software or hardware is developed for general use in a variety of information management applications. It is not developed or intended for use in any inherently dangerous applications, including applications that may create a risk of personal injury. If you use this software or hardware in dangerous applications, then you shall be responsible to take all appropriate fail-safe, backup, redundancy, and other measures to ensure its safe use. Oracle Corporation and its affiliates disclaim any liability for any damages caused by use of this software or hardware in dangerous applications.
Oracle and Java are registered trademarks of Oracle and/or its affiliates. Other names may be trademarks of their respective owners.
Intel and Intel Xeon are trademarks or registered trademarks of Intel Corporation. All SPARC trademarks are used under license and are trademarks or registered trademarks of SPARC International, Inc. AMD, Opteron, the AMD logo, and the AMD Opteron logo are trademarks or registered trademarks of Advanced Micro Devices. UNIX is a registered trademark of The Open Group.
This software or hardware and documentation may provide access to or information on content, products, and services from third parties. Oracle Corporation and its affiliates are not responsible for and expressly disclaim all warranties of any kind with respect to third-party content, products, and services. Oracle Corporation and its affiliates will not be responsible for any loss, costs, or damages incurred due to your access to or use of third-party content, products, or services.

iii
Contents
Preface ................................................................................................................................................................ vii
Audience...................................................................................................................................................... viiDocumentation Accessibility .................................................................................................................... viiRelated Documents .................................................................................................................................... viiConventions ............................................................................................................................................... viii
1 Accessing Certifications (formerly Minimum Technical Requirements)
2 Understanding Server Manager and This Guide
3 Installing, Updating, and Configuring WebSphere 8.5 and 8.5.5
3.1 Before You Begin ....................................................................................................................... 3-23.2 Installing the IBM Installation Manager .............................................................................. 3-23.3 Installing an IBM WebSphere Application Server 8.5 or 8.5.5 ......................................... 3-73.4 Creating a New Profile for WebSphere Application Server 8.5 .................................... 3-163.5 Installing the IBM HTTP Server 8.5 .................................................................................... 3-213.6 Installing Web Server Plug-ins for IBM WebSphere Application Server................... 3-273.7 Enabling SDK 7.0 on WebSphere Application Server 8.5 .................................................. 3-313.8 Switching to SDK 7.0 on WebSphere Application Server 8.5 ............................................ 3-333.8.1 Working with the managesdk Command..................................................................... 3-333.8.2 Modify the JD Edwards EnterpriseOne Server Manager Agent with JRE 1.7.0...... 3-343.9 Installing the WebSphere Customization Toolbox.......................................................... 3-343.10 Installing or Updating to WebSphere 8.5 Fix Pack .......................................................... 3-403.10.1 Updating the IBM Installation Manager to WebSphere 8.5 or Greater .................... 3-403.10.2 Updating WebSphere Application Server 8.5 or Greater ........................................... 3-413.10.3 Working with the HTTP Server Component................................................................ 3-443.10.4 Working with the Plug-ins Component ........................................................................ 3-453.10.5 Working with the Customization Toolbox Component ............................................. 3-453.11 Configuring the IBM Web Server Plug-in ......................................................................... 3-463.12 Setting the HTTP Server Properties .................................................................................... 3-533.13 Manually Generating a Plug-in ........................................................................................... 3-543.14 Manually Editing the HTTP Configuration File.................................................................. 3-55
4 Installing and Configuring WebSphere 7.0
4.1 Performing the Pre-installation Procedure ............................................................................. 4-1

iv
4.2 Installing WebSphere Application Server 7.0 (Using Network Deployment CD or Downloaded Image) 4-2
4.3 Installing the IBM HTTP Server 7.0....................................................................................... 4-124.4 Installing IBM HTTP Server Plug-ins for WebSphere Application Server...................... 4-184.5 Installing the WebSphere Update Installer .......................................................................... 4-284.6 Installing WebSphere 7.0 Fix Pack 29.................................................................................... 4-324.7 Installing the IBM HTTP Server Fix Pack ............................................................................ 4-374.8 Installing the WebSphere 7.0 Plug-ins Fix Pack .................................................................. 4-404.9 Verifying the Versions of Installed WebSphere Products.................................................. 4-444.9.1 WebSphere Application Server....................................................................................... 4-444.9.2 IBM HTTP Server.............................................................................................................. 4-454.9.3 WebSphere Plugins for IBM WebSphere Application Server .................................... 4-454.10 Starting the WebSphere Application Server ........................................................................ 4-464.11 Stopping the WebSphere Application Server ...................................................................... 4-464.12 Determining the Name and Status of the WebSphere Application Server ..................... 4-474.13 Starting the IBM HTTP Server ............................................................................................... 4-484.14 Stopping the IBM HTTP Server ............................................................................................. 4-484.15 Accessing the WebSphere Administration Console ........................................................... 4-484.16 Testing the WebSphere and IBM HTTP Server Installation .............................................. 4-504.17 Generating and Propagating WebSphere Plug-ins (optional)........................................... 4-514.17.1 Generating WebSphere Plug-ins .................................................................................... 4-514.17.2 Propagating WebSphere Plug-ins .................................................................................. 4-534.18 Creating a New Application Server Profile (optional) ....................................................... 4-554.19 Deleting a Profile (optional) ................................................................................................... 4-624.20 Adding a New Web Server for a New Profile (optional) ................................................... 4-62
5 Running the HTML Server
5.1 Starting the HTML Server.......................................................................................................... 5-15.2 Stopping the HTML Server ....................................................................................................... 5-25.3 Accessing the HTML Server...................................................................................................... 5-25.4 Generating Serialized Objects for the HTML Server ............................................................. 5-25.5 Configuring the HTML Server for Non-Western European Languages ............................ 5-25.6 Enabling the Browser Side Debugging Feature on the Web Client..................................... 5-35.7 Customizing the Disclaimer for the Sign-In Page .................................................................. 5-35.8 Setting Up Quick Links for Pervasive Device Support ......................................................... 5-45.9 Clearing File Attachments from the Browser Cache ............................................................. 5-65.9.1 Securing Internet Explorer ................................................................................................. 5-65.9.2 Securing Safari...................................................................................................................... 5-65.9.3 Securing Mozilla Firefox..................................................................................................... 5-7
6 Understanding EnterpriseOne HTML Server Package Discovery
6.1 Overview of EnterpriseOne HTML Server Package Discovery........................................... 6-16.2 Impacts to End Users.................................................................................................................. 6-26.3 Understanding the Manifest...................................................................................................... 6-2

v
A Generating JD Edwards EnterpriseOne Serialized Objects
A.1 Generating JD Edwards EnterpriseOne Serialized Objects Overview............................... A-1A.2 Installing eGenerator ................................................................................................................. A-2A.2.1 Prerequisites ........................................................................................................................ A-2A.2.2 Setting the Default Storage Parameter (SQL Server only) ............................................ A-3A.2.3 Preparing JD Edwards EnterpriseOne for Serialized Objects ...................................... A-3A.3 Working with the eGenerator .................................................................................................. A-3A.3.1 Running the eGenerator Diagnostic Tool........................................................................ A-4A.3.2 Generate Using the Web Server........................................................................................ A-4A.3.3 Bypass the Web Server and Generate Serialized Objects Directly to the Serialized
Object Tables A-7A.4 Configuring eGenerator ............................................................................................................ A-9A.4.1 Setting eGenerator Options ............................................................................................... A-9A.4.1.1 Generation Modes .................................................................................................... A-10A.4.2 Choosing Languages ........................................................................................................ A-10A.4.3 Configuring the genapp.ini File...................................................................................... A-11A.5 Generating the Serialized Object Manifest........................................................................... A-11A.6 Generating All Standard Serialized Objects......................................................................... A-13A.7 Generating a List of Objects (Bulk Generation)................................................................... A-15A.8 Verifying the Generation Process .......................................................................................... A-16A.8.1 Checking Log Files ........................................................................................................... A-16A.8.2 Checking Database Acknowledgements....................................................................... A-16A.9 Generating Other Selected Objects........................................................................................ A-16A.9.1 Generating Core Objects .................................................................................................. A-17A.9.2 Generating Applications.................................................................................................. A-17A.9.3 Generating Forms ............................................................................................................. A-20A.9.4 Generating Reports........................................................................................................... A-21A.9.5 Generating NERs .............................................................................................................. A-23A.9.6 Generating Data Dictionary Items ................................................................................. A-24A.9.7 Generating Tables ............................................................................................................. A-25A.9.8 Generating Business Views ............................................................................................. A-26A.9.9 Generating Data Structures ............................................................................................. A-27
B Configuring Secure Socket Layer with the HTML Server
B.1 Configuring SSL on the IBM HTTP Server ............................................................................ B-1B.2 Configuring SSL on IBM WebSphere...................................................................................... B-5
C Uninstalling WebSphere Fix Packs
C.1 Uninstalling a WebSphere 8.5 Fix Pack .................................................................................. C-1C.2 Uninstalling a WebSphere 7.0 Fix Pack .................................................................................. C-1
D Enabling Compression on IBM HTTP Server
D.1 Understanding Compression ................................................................................................... D-1D.2 Configuring the mod_deflate directive .................................................................................. D-1D.2.1 Logging Compression Results .......................................................................................... D-2

vi
D.2.2 Example: Configuring mod_deflate for EnterpriseOne................................................ D-2
E Understanding Media Objects on the Web Server
E.1 Required jas.ini Settings............................................................................................................ E-1E.2 How Media Objects are Displayed by the HTML Server .................................................... E-2
vii
Preface
Welcome to the JD Edwards EnterpriseOne Tools HTML Server on WebSphere Reference Guide for Microsoft Windows.
AudienceThis guide is intended for system administrators and technical consultants who are responsible for installing and configuring IBM WebSphere and JD Edwards EnterpriseOne.
Documentation AccessibilityFor information about Oracle's commitment to accessibility, visit the Oracle Accessibility Program website at http://www.oracle.com/pls/topic/lookup?ctx=acc&id=docacc.
Access to Oracle SupportOracle customers have access to electronic support through My Oracle Support. For information, visit http://www.oracle.com/pls/topic/lookup?ctx=acc&id=info or visit http://www.oracle.com/pls/topic/lookup?ctx=acc&id=trs if you are hearing impaired.
Related DocumentsYou can access related documents from the JD Edwards EnterpriseOne Release Documentation Overview pages on My Oracle Support. Access the main documentation overview page by searching for the document ID, which is 876932.1, or by using this link:
https://support.oracle.com/CSP/main/article?cmd=show&type=NOT&id=876932.1
To navigate to this page from the My Oracle Support home page, click the Knowledge tab, and then click the Tools and Training menu, JD Edwards EnterpriseOne, Welcome Center, Release Information Overview.
This guide contains references to server configuration settings that JD Edwards EnterpriseOne stores in configuration files (such as jde.ini, jas.ini, jdbj.ini, jdelog.properties, and so on). Beginning with the JD Edwards EnterpriseOne Tools Release 8.97, it is highly recommended that you only access and manage these settings for the supported server types using the Server Manager program. See the JD Edwards EnterpriseOne Server Manager Guide.

viii
ConventionsThe following text conventions are used in this document:
Convention Meaning
Bold Indicates field values.
Italics Indicates emphasis and JD Edwards EnterpriseOne or other book-length publication titles.
Monospace Indicates a JD Edwards EnterpriseOne program, other code example, or URL.

1
Accessing Certifications (formerly Minimum Technical Requirements) 1-1
1Accessing Certifications (formerly Minimum Technical Requirements)
Customers must conform to the supported platforms for the release as detailed in the Certifications for JD Edwards EnterpriseOne. In addition, JD Edwards EnterpriseOne may integrate, interface, or work in conjunction with other Oracle products. Refer to the following link for cross-reference material in the Program Documentation for Program prerequisites and version cross-reference documents to assure compatibility of various Oracle products.
http://www.oracle.com/corporate/contracts/index.html
Access the Certifications from My Oracle Support (https://support.oracle.com) by searching for this product from the Certifications tab:
■ JD Edwards EnterpriseOne HTML Server

1-2 HTML Server on WebSphere Reference Guide

2
Understanding Server Manager and This Guide 2-1
2Understanding Server Manager and This Guide
Beginning with JD Edwards EnterpriseOne Tools Release 8.97, a new tool called Server Manager is provided. This tool is a complete replacement for the JD Edwards EnterpriseOne legacy management and installation tools including internal components known as Server Administration Workbench (SAW), Server Management Console (SMC), and the InstallShield based installers previously used to install or upgrade JD Edwards EnterpriseOne servers. As a result, you should refer to the JD Edwards EnterpriseOne Server Manager Guide for details on installing and configuring all JD Edwards EnterpriseOne server products, with the exception of the JD Edwards EnterpriseOne Deployment Server, whose installation is described in this guide. This guide only contains reference information for functionality outside the Server Manager tool.
Note: Management of JD Edwards EnterpriseOne Tools Release 8.96 or earlier must be done using the existing tools. Server Manager cannot be used to manage any JD Edwards EnterpriseOne Tools Release prior to 8.97.
The Server Manager tool provides:
■ Web Based System Management
You can securely access and manage your JD Edwards EnterpriseOne installation from anywhere using a standard web browser.
■ Remote Deployment and Upgrades
You can install, uninstall, and update your JD Edwards EnterpriseOne servers regardless of their physical location or platform.
■ Remote Operational Control
You can start and stop any of your JD Edwards EnterpriseOne servers, Oracle J2EE application servers, or supported third party J2EE application servers directly from the Management Console.
■ Secure Administrative Tasks
Server Manager permits you to specify which existing JD Edwards EnterpriseOne users have access to the Management Console control which JD Edwards EnterpriseOne servers the user may view, and specify which administrative tasks the user may perform on those servers.
■ Configuration Management

2-2 HTML Server on WebSphere Reference Guide
Server Manager provides a web-based interface for managing the configuration of all managed servers. The application presents each configuration item along with integrated help describing the configuration setting.
Note: Beginning with the availability of Server Manager, it is strongly advised that all changes to configuration files (such as jde.ini, jas.ini, jdbj.ini, jdelog.properties, etc.) for any JD Edwards EnterpriseOne server managed by Server Manager be accomplished using only the Management Console interface of Server Manager. In addition to providing usability improvements, using Server Manager reduces the risk of introducing configuration errors by providing dropdowns that contain only valid values where applicable. Further, the tool provides a useful audit history for any modifications made to configurations using Server Manager.
■ Configuration Comparison
Use Server Manager to compare the configuration of two or more servers to identify configuration differences. You can compare configurations through the Management Console application regardless of the platform or location of the actual JD Edwards EnterpriseOne server. You can also compare individual servers with the default configuration of the corresponding server groups to which the servers belong.
■ Audit History
Server Manager maintains a history of changes made to the managed servers. This includes a history of each configuration change, each server start and stop, and each tools release update, including the user that performed the change or operation. The Management Console application provides mechanisms to query and view the audit history that is maintained.
■ Integrated EnterpriseOne Software Management
Use Server Manager to centrally maintain all your JD Edwards EnterpriseOne server tools releases, including the ability to copy the software to the remote server machines.
■ Logical Server Grouping
Server Manager allows you to group servers with a similar purpose. These groups can include any of the server types such as Enterprise Server, HTML Server, and so on. A default, or template, configuration is maintained for each server group.
■ Application Release Independence
Server Manager is delivered with JD Edwards EnterpriseOne Tools Release 8.97 and is compatible with any supported JD Edwards EnterpriseOne application release beginning with Application Release 8.9 through the currently supported release. No electronic software updates (ESUs) are required to support Server Manager.
■ Self-Contained Installation
The installation of Server Manager delivers all components that are required by the Management Console application. There are no third party requirements regardless of your existing or intended middleware topology (for example, WebLogic Server, Oracle Application Server, WebSphere Application Server, or no application server).

Understanding Server Manager and This Guide 2-3
■ Tools Release Independence
Newer versions of the Server Manager application will continue to support the management of earlier tools releases back to JD Edwards EnterpriseOne Tools Release 8.97.

2-4 HTML Server on WebSphere Reference Guide

3
Installing, Updating, and Configuring WebSphere 8.5 and 8.5.5 3-1
3Installing, Updating, and Configuring WebSphere 8.5 and 8.5.5
Note: Unless otherwise noted, all references to WebSphere version 8.5 are also applicable to WebSphere version 8.5.5.
Beginning with JD Edwards EnterpriseOne Tools Release 9.1 Update 2.3, the IBM WebSphere Application Server Release 8.5 is supported.
Beginning with JD Edwards EnterpriseOne Tools Release 9.1 Update 3.3, the IBM WebSphere Application Server Release 8.5.5 is supported. This fix pack can be installed as a new installation or an update.
Relative to WebSphere 7.0, with IBM WebSphere 8.5 the installation procedure has changed dramatically. You will now use the IBM Installation Manager as a central hub to manage the installation process. The IBM Installation Manager is designed to make the installation procedure much simpler and easier than in prior releases.
Additionally IBM WebSphere Application Server 8.5 supports SDK 1.6 as the basic configuration but with SDK 1.7 as an optional configuration. For JD Edwards EnterpriseOne, the implementation requires SDK 1.7 as the default run-time configuration for WebSphere Application Server 8.5. Therefore, after WebSphere Application Server is installed with the basic configuration, you MUST change the default SDK to 1.7.
This chapter describes these tasks:
■ Section 3.1, "Before You Begin"
■ Section 3.2, "Installing the IBM Installation Manager"
■ Section 3.3, "Installing an IBM WebSphere Application Server 8.5 or 8.5.5"
■ Section 3.4, "Creating a New Profile for WebSphere Application Server 8.5"
■ Section 3.5, "Installing the IBM HTTP Server 8.5"
■ Section 3.6, "Installing Web Server Plug-ins for IBM WebSphere Application Server"
■ Section 3.7, "Enabling SDK 7.0 on WebSphere Application Server 8.5"
■ Section 3.8, "Switching to SDK 7.0 on WebSphere Application Server 8.5"
■ Section 3.9, "Installing the WebSphere Customization Toolbox"
■ Section 3.10, "Installing or Updating to WebSphere 8.5 Fix Pack"
■ Section 3.11, "Configuring the IBM Web Server Plug-in"

Before You Begin
3-2 HTML Server on WebSphere Reference Guide
■ Section 3.12, "Setting the HTTP Server Properties"
■ Section 3.13, "Manually Generating a Plug-in"
■ Section 3.14, "Manually Editing the HTTP Configuration File"
3.1 Before You BeginBefore you install WebSphere, you must first set up a local user account that is in the Administrative group and has these advanced user rights:
■ Act as part of operating system
■ Create a token object
■ Log on as a service
■ Replace a process level token
To set up a local user account with the above user rights, navigate to:
Control Panel > Administrative Tools > Local Security Policy > Local Policies > Users Rights Assignment
On User Rights Assignment, double-click one of the user rights, click Add, select a local user account from the list, and click OK. Repeat this process for the remaining user rights.
You should also download all the required software from the JD Edwards Update Center.
3.2 Installing the IBM Installation ManagerFor all supported platforms, you must install the IBM Installation Manager before an IBM WebSphere Application Server can be installed. Follow the steps below to install the Installation Manager.
1. After you have downloaded and unzipped the IBM Installation Manager software, locate the install executable.
On Microsoft Windows 2008R2, you must right-click and select the Run as administrator option.

Installing the IBM Installation Manager
Installing, Updating, and Configuring WebSphere 8.5 and 8.5.5 3-3
2. On Install Packages, package selection, select the check box for the latest version of the IBM Installation Manager.
3. Click the Next button.

Installing the IBM Installation Manager
3-4 HTML Server on WebSphere Reference Guide
4. On Install Packages, review the International Program License Agreement and click the radio button to accept the terms if you want to continue with the installation.
5. Click the Next button.

Installing the IBM Installation Manager
Installing, Updating, and Configuring WebSphere 8.5 and 8.5.5 3-5
6. On Install Packages, select a location for Installation Manager, enter an installation directory.
For example:
Z:\IBM\Installation Manager\eclipse

Installing the IBM Installation Manager
3-6 HTML Server on WebSphere Reference Guide
7. On Install Packages, summary information, review the summary information and click the Install button to begin the installation.

Installing an IBM WebSphere Application Server 8.5 or 8.5.5
Installing, Updating, and Configuring WebSphere 8.5 and 8.5.5 3-7
8. On Install Packages, if you are ready to install using the IBM Installation Manager, click the Restart Installation Manager button.
9. After the Installation Manager is restarted, continue to the next section in this chapter entitled: Section 3.3, "Installing an IBM WebSphere Application Server 8.5 or 8.5.5".
3.3 Installing an IBM WebSphere Application Server 8.5 or 8.5.5IBM WebSphere Application Server (WAS) 8.5 is installed through the IBM Installation Manager. Fix Pack 8.5.5 can be installed as a new installation or an update. For purposes of this procedure, all references are to release 8.5, but you can substitute 8.5.5 where applicable.
To install an IBM WebSphere Application Server 8.5:
1. Start the IBM Installation Manager, which you must have previously installed as described in the preceding chapter of this guide entitled: Section 3.2, "Installing the IBM Installation Manager".
The IBM Installation Manager screen displays.

Installing an IBM WebSphere Application Server 8.5 or 8.5.5
3-8 HTML Server on WebSphere Reference Guide
2. You must configure the software repository in the Installation Manager before you can start the product installation. On the initial screen of the IBM Installation Manager, navigate File > Preferences.
Installing an IBM WebSphere Application Server 8.5 or 8.5.5
Installing, Updating, and Configuring WebSphere 8.5 and 8.5.5 3-9
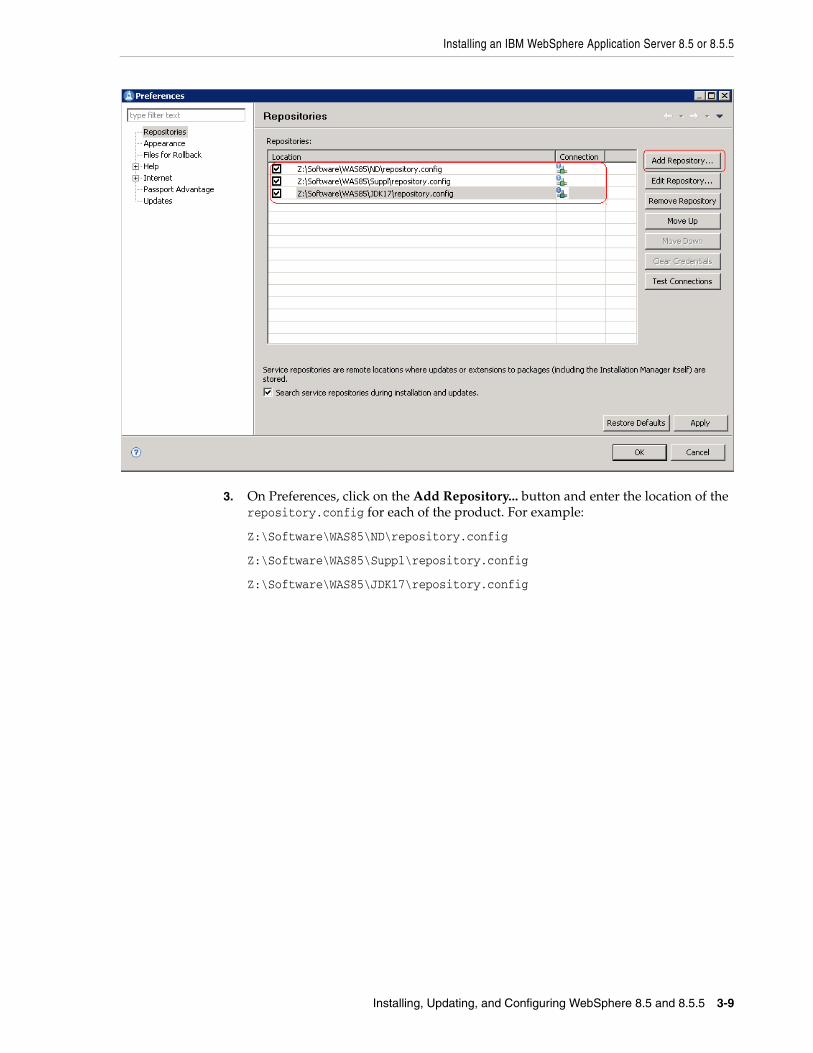
3. On Preferences, click on the Add Repository... button and enter the location of the repository.config for each of the product. For example:
Z:\Software\WAS85\ND\repository.config
Z:\Software\WAS85\Suppl\repository.config
Z:\Software\WAS85\JDK17\repository.config

Installing an IBM WebSphere Application Server 8.5 or 8.5.5
3-10 HTML Server on WebSphere Reference Guide
4. Optionally, if needed for your installation, you should enable a proxy server and enter proxy information.
5. After all repositories are added, click the Install option from the Installation Manager.
IBM Installation Manager displays a list of available products, as shown in the following example:

Installing an IBM WebSphere Application Server 8.5 or 8.5.5
Installing, Updating, and Configuring WebSphere 8.5 and 8.5.5 3-11
6. The IBM Install Manager displays a list of available products (packages) to install.

Installing an IBM WebSphere Application Server 8.5 or 8.5.5
3-12 HTML Server on WebSphere Reference Guide
7. On Install Packages, select packages, select the products you want to install such as:
■ WebSphere Network Deployment
■ SDK 1.7
8. Click the Next button.
Note: Once the installation begins, the installer may prompt to inform you that updates are available.
If Updates are available, the installer will display a list as shown in this example:

Installing an IBM WebSphere Application Server 8.5 or 8.5.5
Installing, Updating, and Configuring WebSphere 8.5 and 8.5.5 3-13
9. If the IBM Install Manager displays a list of updates, it is recommended that you click the Select Recommended button to accept and install the updates.
10. On Install Packages, review the International Program License Agreement and click the radio button to accept the terms if you want to continue with the installation.
11. On Install Packages, select location for the shared resources directory, enter an appropriate location for IMShared. These files will be used by all IBM products installed through the Installation Manager (such as HTTP Server and Customization Toolbox).
For example:
z:\IBM\IMShared
12. Click the Next button.

Installing an IBM WebSphere Application Server 8.5 or 8.5.5
3-14 HTML Server on WebSphere Reference Guide
13. On Install Packages, package group, click the radio button entitled: Create a new package group.
In the Installation Directory field, enter an appropriate location to install the IBM WebSphere Application Server 8.5 software. It does not have to be the same location as the shared location.
For example:
z:\IBM\WebSphere\AppServer
14. Click the Next button.
15. On Install Packages, translations, select your desired language.
16. Click the Next button.

Installing an IBM WebSphere Application Server 8.5 or 8.5.5
Installing, Updating, and Configuring WebSphere 8.5 and 8.5.5 3-15
17. On Install Packages, select features, verify that the package for Java JDK 1.7 is selected.
Caution: Although JDK 1.6 is the default installation, you must choose to install JDK 1.7 in order to be compatible with JD Edwards EnterpriseOne.
18. Click the Next button.
19. Click the Install button.

Creating a New Profile for WebSphere Application Server 8.5
3-16 HTML Server on WebSphere Reference Guide
20. On Install Packages, the packages are installed, click the Finish button.
21. To create a profile, ensure this radio button in the right pane is selected:
Profile Management Tool to create a profile.
Continue to the next section of this chapter entitled: Section 3.4, "Creating a New Profile for WebSphere Application Server 8.5".
3.4 Creating a New Profile for WebSphere Application Server 8.5The section describes how to create a new profile. This profile will be used later in the installation process to create a web server and configure the plugin.
Note: This document describes how to create a "standalone" application server. For information on how to create a cell and managed node, refer to IBM's Infocenter:
http://www-01.ibm.com/software/webservers/appserv/was/library/
You can choose to create your first profile now or after the remaining software packages have been installed. If you create your profile now, you will need to manually define the web server before configuring the plug-in later in this chapter. As an alternative, you can use the advanced profile creation option to automatically create a web server, but this must be done after all of the other software components described in this guide are installed and updated to the correct level.
This procedure assumes you are creating a new profile at this time so that you can verify your installation.

Creating a New Profile for WebSphere Application Server 8.5
Installing, Updating, and Configuring WebSphere 8.5 and 8.5.5 3-17
1. If you followed the last step in the preceding chapter entitled: Section 3.3, "Installing an IBM WebSphere Application Server 8.5 or 8.5.5", the Profile Management Tool was launched.
Alternately, you can use this navigation:
IBM WebSphere > IBM WebSphere Application Server > Tools > Profile Management Tool
2. On WebSphere Customization Toobox, Profile Management Tool, with the Profiles tab selected, click the Create button.
3. On Profile Management Tools, Environment Selection, highlight the Application server environment type.
4. Click the Next button.

Creating a New Profile for WebSphere Application Server 8.5
3-18 HTML Server on WebSphere Reference Guide
5. On Profile Creation Options, select the Typical profile creation radio button.
Note: Choosing Typical profile creation uses the default configuration settings. It assigns unique names to the profile, node, and host. The tool also assigns unique port values.
Alternatively, you can choose Advanced profile creation to specify your own values for settings such as the location of the profile and names of the profile, node, and host.
6. Click the Next button.
7. On Administrative Security, clear the Enable administrative security checkbox.
8. Click the Next button.

Creating a New Profile for WebSphere Application Server 8.5
Installing, Updating, and Configuring WebSphere 8.5 and 8.5.5 3-19
9. On Profile Creation Summary, review the information for accuracy and click the Create button.
The progress screen is displayed. Wait for the progress to complete 100%, which may take several minutes.

Creating a New Profile for WebSphere Application Server 8.5
3-20 HTML Server on WebSphere Reference Guide
10. Optionally, on Profile Creation Complete, you can select the check box for Launch the First steps console.
11. Click the Finish button.

Installing the IBM HTTP Server 8.5
Installing, Updating, and Configuring WebSphere 8.5 and 8.5.5 3-21
12. If you chose to run First Steps, on WebSphere Application Server, First steps, select the first option, which is entitled: Installation verification.
13. Verify that the installation verification completed successfully. You should get the message entitled: The installation verification is complete.
14. Close the screen for the First steps output.
15. Verify that you can sign on to the Administration Console. For example:
http://host:9060/ibm/console
3.5 Installing the IBM HTTP Server 8.5The IBM HTTP Server 8.5 must be installed through the IBM Installation Manager.
In order to install the IBM HTTP server, you must have the Supplemental images in the repository, as shown in the second line item in the following screen sample.

Installing the IBM HTTP Server 8.5
3-22 HTML Server on WebSphere Reference Guide
To install an IBM HTTP Server 8.5:
1. Start the IBM Installation Manager, which you must have previously installed as described in the preceding chapter of this guide entitled: Section 3.2, "Installing the IBM Installation Manager".
2. Click the Install option.

Installing the IBM HTTP Server 8.5
Installing, Updating, and Configuring WebSphere 8.5 and 8.5.5 3-23
3. On Install Packages, select packages, click the checkboxes for the HTTP Server for WebSphere Application Server and the HTTP Server Version (8.5.x).
4. Click the Next button.
5. Review the International Program License Agreement and click the radio button to accept the terms if you want to continue with the installation.
6. Click the Next button.
7. On Install Packages, package group, click the radio button entitled: Create a new package group. In the Installation Directory field, enter an appropriate location to install the IBM HTTP Server 8.5 software. It does not have to be the same location as the shared location.
For example:
z:\IBM\HTTPServer
This document refers to a local IBM HTTP server installed on the same machine as the IBM WebSphere Application Server. For instructions on how to install a remote HTTP server, refer to the IBM info center:
http://www-01.ibm.com/software/webservers/appserv/was/library/
Also note that the shared location that you defined when you installed the IBM WebSphere Application Server in the previous section cannot be changed.
8. Click the Next button.

Installing the IBM HTTP Server 8.5
3-24 HTML Server on WebSphere Reference Guide
9. On Install Packages, select the features to install, verify the package you chose is selected.
10. Click the Next button.

Installing the IBM HTTP Server 8.5
Installing, Updating, and Configuring WebSphere 8.5 and 8.5.5 3-25
11. On Install Packages, configuration, complete these fields:
■ HTTP Port
Specify a port for IBM HTTP Server to communicate. The default port is 80. If the default port is already in use, then change to another port that is available. Running IBM HTTP Server without root or Administrative privilege might restrict use of ports below 1024.
■ Run IBM HTTP Server as a Windows Service
Ensure this check box is checked.
■ Log on as a local system account
Normally this check box should be selected. However your network configuration may require you to specify a user with specific authority across domains or network segments. Contact your System Administrator for more information.
■ Startup type
Use the pulldown to choose a startup type for the Windows service. The default value is Automatic.
12. Click the Next button.

Installing the IBM HTTP Server 8.5
3-26 HTML Server on WebSphere Reference Guide
13. On Install Packages, review summary information, verify the accuracy of the selections.
14. Click the Install button to begin the installation of the IBM HTTP Server.

Installing Web Server Plug-ins for IBM WebSphere Application Server
Installing, Updating, and Configuring WebSphere 8.5 and 8.5.5 3-27
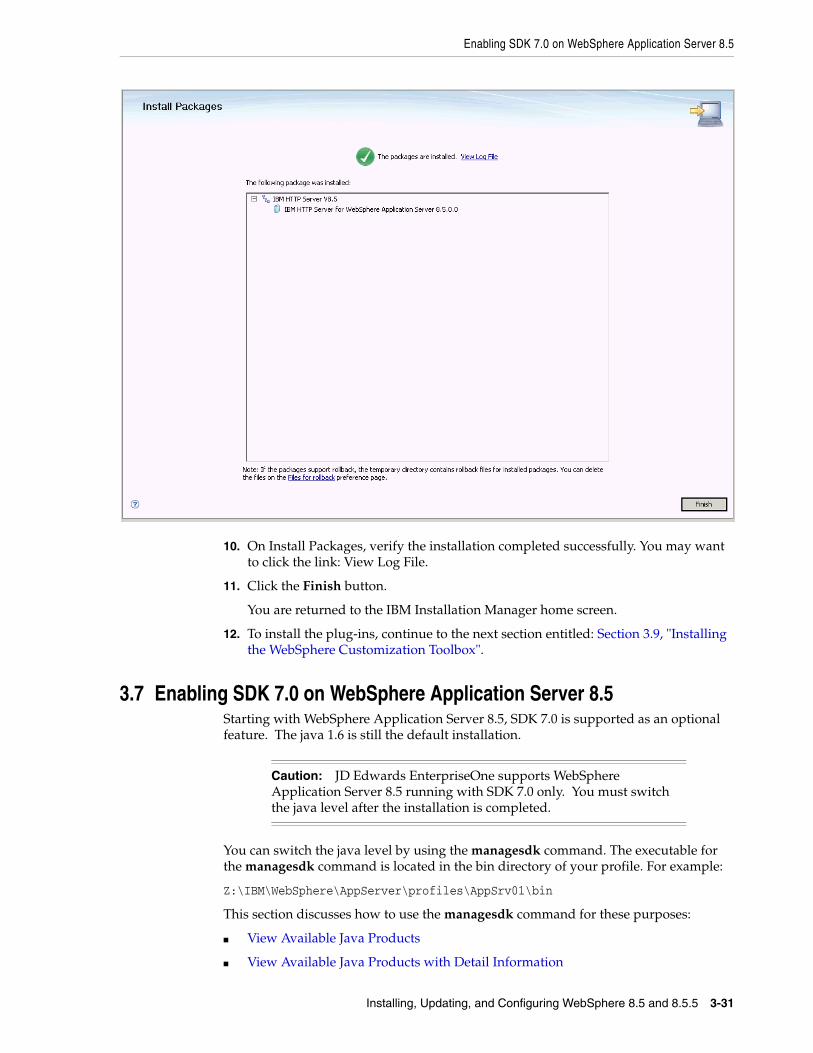
15. On Install Packages, verify the installation completed successfully. You may want to click the link: View Log File.
16. Click the Finish button.
You are returned to the IBM Installation Manager home screen.
17. To install the plug-ins, continue to the next section entitled: Section 3.6, "Installing Web Server Plug-ins for IBM WebSphere Application Server".
3.6 Installing Web Server Plug-ins for IBM WebSphere Application ServerAs with the previous software packages described in this guide, the plug-ins for IBM WebSphere Application Server 8.5 must be installed using the IBM Installation Manager.
In order to install the IBM HTTP server, you must have the Supplemental images in the repository, as shown in the second line item in the following screen sample.
To install Web Server Plug-ins for IBM WebSphere Applications Server:
1. Start the IBM Installation Manager, which you must have previously installed as described in the preceding chapter of this guide entitled: Section 3.2, "Installing the

Installing Web Server Plug-ins for IBM WebSphere Application Server
3-28 HTML Server on WebSphere Reference Guide
IBM Installation Manager".
2. On IBM Installation Manager, click the Install option.

Installing Web Server Plug-ins for IBM WebSphere Application Server
Installing, Updating, and Configuring WebSphere 8.5 and 8.5.5 3-29
3. On Install Packages, select packages, click the checkboxes for the Web Server Plug-ins for WebSphere Application Server and the HTTP Server Version (8.5.x).
4. Click the Next button.
5. On Install Packages, review the International Program License Agreement and click the radio button to accept the terms if you want to continue with the installation.
6. Click the Next button.

Installing Web Server Plug-ins for IBM WebSphere Application Server
3-30 HTML Server on WebSphere Reference Guide
7. On Install Packages, package group, click the radio button entitled: Create a new package group.
In the Installation Directory field, enter an appropriate location to install the Web Server Plugins for IBM WebSphere Application Server 8.5.
For example:
z:\IBM\WebSphere\Plugins
Note: New functionality for IBM WebSphere 8.5 for the plug-in installs provides this default location:
\IBM\WebSphere\Plugins
The remainder of this guide assumes you chose to accept the default location.
8. On Install Packages, review summary information, verify the accuracy of the selections.
9. Click the Install button to begin the installation of the JDK.
The progress screen is displayed. Wait for the progress to complete 100%, which may take several minutes.
Enabling SDK 7.0 on WebSphere Application Server 8.5
Installing, Updating, and Configuring WebSphere 8.5 and 8.5.5 3-31
10. On Install Packages, verify the installation completed successfully. You may want to click the link: View Log File.
11. Click the Finish button.
You are returned to the IBM Installation Manager home screen.
12. To install the plug-ins, continue to the next section entitled: Section 3.9, "Installing the WebSphere Customization Toolbox".
3.7 Enabling SDK 7.0 on WebSphere Application Server 8.5Starting with WebSphere Application Server 8.5, SDK 7.0 is supported as an optional feature. The java 1.6 is still the default installation.
Caution: JD Edwards EnterpriseOne supports WebSphere Application Server 8.5 running with SDK 7.0 only. You must switch the java level after the installation is completed.
You can switch the java level by using the managesdk command. The executable for the managesdk command is located in the bin directory of your profile. For example:
Z:\IBM\WebSphere\AppServer\profiles\AppSrv01\bin
This section discusses how to use the managesdk command for these purposes:
■ View Available Java Products
■ View Available Java Products with Detail Information

Enabling SDK 7.0 on WebSphere Application Server 8.5
3-32 HTML Server on WebSphere Reference Guide
■ Syntax Examples using the managesdk Command
View Available Java ProductsUse this command to view the available Java products:
managesdk.bat -listAvailable
The following shows a sample of returned information.
View Available Java Products with Detail InformationUse this command to view the available Java products with detail information:
managesdk.bat -listAvailable -verbose
The following shows sample returned information.
Syntax Examples using the managesdk CommandThe following examples demonstrate correct syntax when you run the managesdk command:
managesdk.bat -listAvailable [-verbose] managesdk.bat -listEnabledProfile -profileName AppSrv01 [-verbose] managesdk.bat -listEnabledProfileAll [-verbose] managesdk.bat -enableProfile -profileName AppSrv01 -sdkname 1.7_64 -enableServers managesdk.bat -enableProfileAll -sdkname 1.7_64 -enableServers managesdk.bat -getNewProfileDefault [-verbose] managesdk.bat -setNewProfileDefault -sdkname 1.7_64 managesdk.bat -getCommandDefault [-verbose] managesdk.bat -setCommandDefault -sdkname 1.7_64

Switching to SDK 7.0 on WebSphere Application Server 8.5
Installing, Updating, and Configuring WebSphere 8.5 and 8.5.5 3-33
3.8 Switching to SDK 7.0 on WebSphere Application Server 8.5
Caution: JD Edwards EnterpriseOne supports WebSphere Application Server 8.5 running with SDK 7.0 only. You must switch the java level after the installation is completed.
This section describes these topics:
■ Section 3.8.1, "Working with the managesdk Command"
■ Section 3.8.2, "Modify the JD Edwards EnterpriseOne Server Manager Agent with JRE 1.7.0"
3.8.1 Working with the managesdk CommandThis section discusses how to use the managesdk command for these purposes:
■ View List of Available SDK Names
■ Set the command default to the version 7.0 SDK
■ Set the New Profile Default to the Version 7.0 SDK
■ If Profiles Already Exist, Enable the Profiles to use the Version 7.0 SDK
View List of Available SDK NamesUse this command to view a list of available SDK names for the product installation:
managesdk.bat -listAvailable
The following shows sample returned information.
Set the command default to the version 7.0 SDKUse this command to set the command default to the version 7.0 SDK:
managesdk.bat -setCommandDefault -sdkname 1.7_64
The following shows sample returned information.
Set the New Profile Default to the Version 7.0 SDKUse this command to set the new profile default to version 7.0 SDK:
managesdk.bat -setNewProfileDefault -sdkname 1.7_64
The following shows sample returned information.
Installing the WebSphere Customization Toolbox
3-34 HTML Server on WebSphere Reference Guide
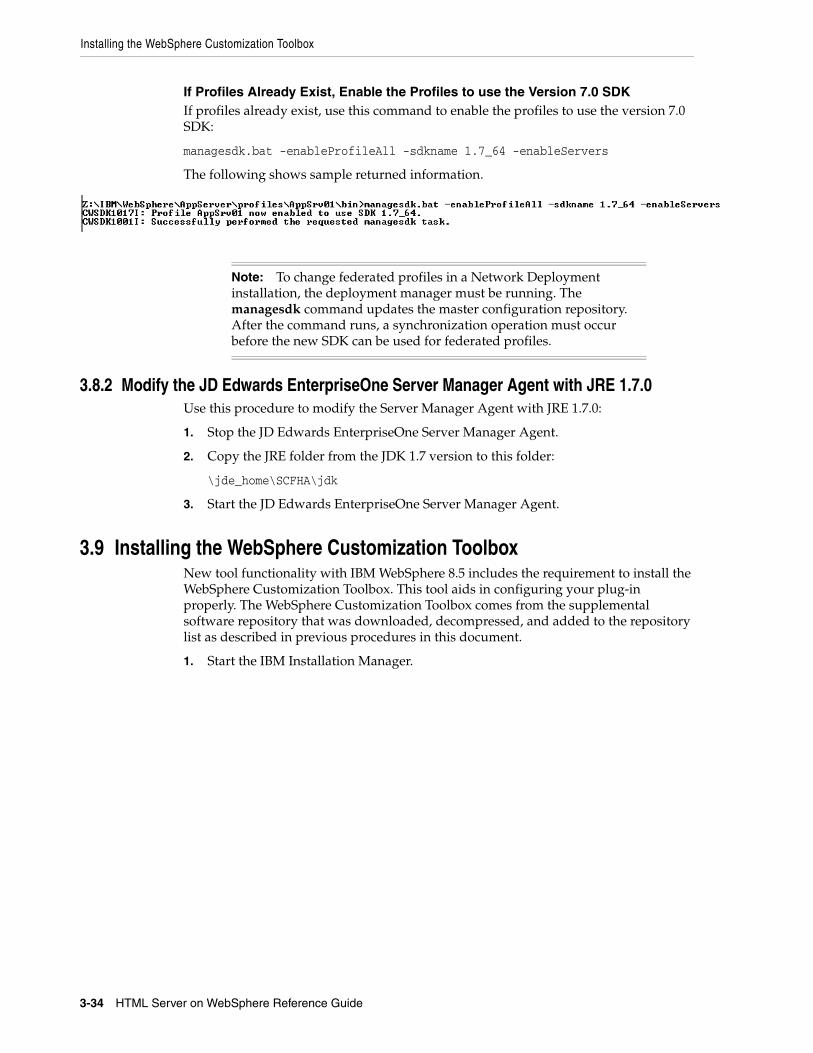
If Profiles Already Exist, Enable the Profiles to use the Version 7.0 SDKIf profiles already exist, use this command to enable the profiles to use the version 7.0 SDK:
managesdk.bat -enableProfileAll -sdkname 1.7_64 -enableServers
The following shows sample returned information.
Note: To change federated profiles in a Network Deployment installation, the deployment manager must be running. The managesdk command updates the master configuration repository. After the command runs, a synchronization operation must occur before the new SDK can be used for federated profiles.
3.8.2 Modify the JD Edwards EnterpriseOne Server Manager Agent with JRE 1.7.0Use this procedure to modify the Server Manager Agent with JRE 1.7.0:
1. Stop the JD Edwards EnterpriseOne Server Manager Agent.
2. Copy the JRE folder from the JDK 1.7 version to this folder:
\jde_home\SCFHA\jdk
3. Start the JD Edwards EnterpriseOne Server Manager Agent.
3.9 Installing the WebSphere Customization ToolboxNew tool functionality with IBM WebSphere 8.5 includes the requirement to install the WebSphere Customization Toolbox. This tool aids in configuring your plug-in properly. The WebSphere Customization Toolbox comes from the supplemental software repository that was downloaded, decompressed, and added to the repository list as described in previous procedures in this document.
1. Start the IBM Installation Manager.

Installing the WebSphere Customization Toolbox
Installing, Updating, and Configuring WebSphere 8.5 and 8.5.5 3-35
2. On IBM Installation Manager, click the Install option.
3. On Install Packages, select packages, select the two check boxes for WebSphere Customization Toolbox and his package and version Version 8.5.x.
4. Click the Next button.
5. On Install Packages, review the International Program License Agreement and click the radio button to accept the terms if you want to continue with the installation.

Installing the WebSphere Customization Toolbox
3-36 HTML Server on WebSphere Reference Guide
6. Click the Next button.
7. On Install Packages, package group, click the radio button entitled: Create a new package group.
In the Installation Directory field, enter an appropriate location to install the WebSphere Customization Toolbox 8.5.
For example:
z:\IBM\WebSphere\Toolbox
8. Click the Next button.

Installing the WebSphere Customization Toolbox
Installing, Updating, and Configuring WebSphere 8.5 and 8.5.5 3-37
9. On Install Packages, select features, select Web Server Plug-ins Configuration Tool.
10. Click the Next button.

Installing the WebSphere Customization Toolbox
3-38 HTML Server on WebSphere Reference Guide
11. On Install Packages, review summary information, verify the accuracy of the selections.
12. Click the Install button to begin the installation of the WebSphere Customization Toolbox.

Installing the WebSphere Customization Toolbox
Installing, Updating, and Configuring WebSphere 8.5 and 8.5.5 3-39
The progress screen is displayed. Wait for the progress to complete 100%, which may take several minutes.

Installing or Updating to WebSphere 8.5 Fix Pack
3-40 HTML Server on WebSphere Reference Guide
13. On Install Packages, verify the installation completed successfully. You may want to click the link: View Log File.
14. Click the Finish button.
You are returned to the IBM Installation Manager home screen.
3.10 Installing or Updating to WebSphere 8.5 Fix PackUse these procedures to install or update your existing WebSphere components to WebSphere 8.5.0 Fix Pack:
■ Section 3.10.1, "Updating the IBM Installation Manager to WebSphere 8.5 or Greater"
■ Section 3.10.2, "Updating WebSphere Application Server 8.5 or Greater"
■ Section 3.10.3, "Working with the HTTP Server Component"
■ Section 3.10.4, "Working with the Plug-ins Component"
■ Section 3.10.5, "Working with the Customization Toolbox Component"
3.10.1 Updating the IBM Installation Manager to WebSphere 8.5 or GreaterUse this procedure to update the IBM Installation Manager.

Note: For instructions on installing the Update Installer itself, refer to the section of this guide entitled: Section 4.5, "Installing the WebSphere Update Installer".
Installing or Updating to WebSphere 8.5 Fix Pack
Installing, Updating, and Configuring WebSphere 8.5 and 8.5.5 3-41
1. Start the IBM Installation Manager using the IBMIM executable..
2. Open the Preferences of the IBM Installation Manager.
3. Highlight the Updates node and select this checkbox:
Search for Installation Manager Updates
4. Log out of IBM Installation Manager.
5. Log in to the Installation Manager and you will be prompted if a new version of Installation Manager is available.
6. On IBM Installation Manager, click the Yes button and follow the installation wizard to complete the upgrade.
3.10.2 Updating WebSphere Application Server 8.5 or GreaterUse this procedure to update WebSphere 8.5 or greater.
1. Stop all the WebSphere Processes including the HTTP Server and Web Server.
2. Launch the IBM Installation Manager using the IBMIM executable.
3. Select the Update option.

Installing or Updating to WebSphere 8.5 Fix Pack
3-42 HTML Server on WebSphere Reference Guide
4. On Package Group Name, select the IBM WebSphere Application Server product to which you wish to upgrade. For example:
IBM WebSphere Application Server V8.5
5. On Password Required, enter valid credentials for your IBM ID to connect to the IBM download site by completing these fields:
■ User name
■ Password
Note: You can uncheck the Show Recommended only option to list all available fix packs.
6. Review the license agreement and accept the terms in order to continue.
7. You can accept the recommended fix packs that are automatically checked.
Note: The recommended fix packs may vary depends on the platform.

Installing or Updating to WebSphere 8.5 Fix Pack
Installing, Updating, and Configuring WebSphere 8.5 and 8.5.5 3-43
8. On Features, use the checkboxes to select the components you want to install.
9. On Features to Install, review the summary of components that you have selected and click the Update button.
The update process downloads the fix pack from the IBM web site. The download speed depends on the network connections.

Installing or Updating to WebSphere 8.5 Fix Pack
3-44 HTML Server on WebSphere Reference Guide
10. Click the Finish button when the update is completed as indicated by this message:
The packages are updated.
3.10.3 Working with the HTTP Server ComponentUse this procedure to install or update the IBM HTTP Server Component for WebSphere 8.5 or greater.
1. Launch the IBM Installation Manager using the IBMIM executable.
2. Select the Update option.
3. On Update, select this component for the version you want to install or update:
IBM HTTP Server
4. On Features to Install, review the summary of selected features and click Update.

Installing or Updating to WebSphere 8.5 Fix Pack
Installing, Updating, and Configuring WebSphere 8.5 and 8.5.5 3-45
5. Click the Finish button when the update is completed as indicated by this message:
The packages are updated.
3.10.4 Working with the Plug-ins ComponentUse this procedure to install or update the Plug-ins Component for WebSphere 8.5 or greater.
1. Launch the IBM Installation Manager using the IBMIM executable.
2. Select the Update option.
3. On Update, select this component for the version you want to install or update:
Web Server Plug-ins for IBM WebSphere Application Server
4. On Features, review the summary of selected features and click Update.
5. Click the Finish button when the update is completed as indicated by this message:
The packages are updated.
3.10.5 Working with the Customization Toolbox ComponentUse this procedure to install or update the Customization Toolbox Component to WebSphere 8.5 or greater.
1. Launch the IBM Installation Manager using the IBMIM executable.
2. Select the Update option.

Configuring the IBM Web Server Plug-in
3-46 HTML Server on WebSphere Reference Guide
3. On Update, select this component for the version you want to install or update:
WebSphere Customization Toolbox
4. On Features, verify the component you want to installed is selected..
5. On Update, review the summary of selected features and click Update.
6. Click the Finish button when the update is completed as indicated by this message:
The packages are updated.
7. Restart all HTTP Services.
8. Restart all Web Server instances.
3.11 Configuring the IBM Web Server Plug-inAfter you have updated all software packages as described in the preceding section of this document entitled: Section 3.10, "Installing or Updating to WebSphere 8.5 Fix Pack", you must configure the plug-in. This process is performed through the IBM WebSphere Customization Toolbox. You must complete this configuration before you install the JD Edwards EnterpriseOne HTML Web Server.
1. Start the WebSphere Customization Toolbox using this navigation:
Start > Programs > IBM WebSphere > WebSphere Customization Toolbox V8.5 > WebSphere Customization Toolbox

Configuring the IBM Web Server Plug-in
Installing, Updating, and Configuring WebSphere 8.5 and 8.5.5 3-47
2. On WebSphere Customization Toolbox, Welcome, in the list of provided tools, highlight the Web Server Plug-ins Configuration Tool.
3. Click the Launch Selected Tool button.
4. In the Web Server Plug-in Runtime Location section, click the Add button.
5. On Add Web Server Plug-in Location, complete these fields:
■ Name
Enter a name for the plug-in location. For example:
IHS_webserver1
■ Location
Enter the location of your plug-in. The default plug-in directory is:
Z:\IBM\WebSphere\Plugins

Configuring the IBM Web Server Plug-in
3-48 HTML Server on WebSphere Reference Guide
6. Click the Finish button.
7. In the upper half of the form (shown above), verify the plug-in location that you just defined is displayed in the Web Server Plug-in Runtime Locations section in the upper half of the form.
8. In the lower half of the screen (shown above), click the Create button.
9. On Web Server Selection, choose this radio button:
IBM HTTP Server V8.5.

Configuring the IBM Web Server Plug-in
Installing, Updating, and Configuring WebSphere 8.5 and 8.5.5 3-49
10. On Web Server Configuration File Selection, complete these fields:
■ Select the existing IBM HTTP Server httpd.conf file
Enter in the location of your httpd.conf file. For example:
z:\IBM\HTTPServer\conf\httpd.conf
■ Specify the Web server port
Specify a web server port that matches the port used by your HTTP server.
11. Click the Next button.
You will receive the Non-Administrative user configuration limitation screen if you are not logged on as an administrative user.
12. Click the Next button.

Configuring the IBM Web Server Plug-in
3-50 HTML Server on WebSphere Reference Guide
13. If you are signed on as an Administrative User, you will see the above screen. You can choose to create a user ID for IBM HTTP Server.
14. Click the Next button.
15. You can choose whether to use a Windows service to run IBM HTTP Server administration server. It is recommended that you select to run the Server as a Windows Service. Optionally you can change the startup type to Manual if you are not going to use the HTTP Administration server often.

Configuring the IBM Web Server Plug-in
Installing, Updating, and Configuring WebSphere 8.5 and 8.5.5 3-51
16. On Web Server Definition name, specify a web server name. If you already have a web server defined (for example, webserver1), then you should use the same name here.
For the purposes of this guide, it is assumed that the HTTP Server and WebSphere Application Server are located on the same machine. Therefore, on Configuration Scenario Selection, the radio button for (Local) Installation location of WebSphere Application Server is selected.
17. Use the Browse button to locate the installation location of the WebSphere Application Server. For example:
Z:\IBM\WebSphere\AppServer
18. Click the Next button.
19. On WebSphere Application Server Profile Selection, use the drop-down menu in Available Profiles to select the WebSphere Application Server profile to configure

Configuring the IBM Web Server Plug-in
3-52 HTML Server on WebSphere Reference Guide
with the current Web server plug-in and create the Web server definition. For example, an available profile might be named AppSvr01.
Note: If the Available Profiles field is blank and no options show on the drop down, you must Cancel from this procedure. Create a profile and either use the advanced option to automatically create a web server definition or manually create the web server in the IBM WebSphere Application Server Administrative Console. For more information on either option, refer to the IBM info center:
http://www-01.ibm.com/software/webservers/appserv/was/library/
20. Click the Next button.
21. On Plug-in Configuration Summary, review the information for accuracy.
22. Click the Configure > button.

Setting the HTTP Server Properties
Installing, Updating, and Configuring WebSphere 8.5 and 8.5.5 3-53
23. On Plug-in Configuration Result, verify that the configuration completed successfully. If necessary, follow the instructions to correct any errors.
24. Click the Finish button.
25. On WebSphere Customization Toolbox, with the Web Server Plug-in Configurations tab selected, verify that the server definition exists.
3.12 Setting the HTTP Server PropertiesTo use IBM WebSphere Application Server 8.5 properly with Oracle JD Edwards EnterpriseOne, you must set the HTTP server to automatically generate and propagate the plug-in. These steps briefly describe this process.
1. Log into the admin console for IBM WebSphere Application Server
2. Select Servers > Server Types > Web Servers.
3. Select your web server.
4. On the right hand side of the screen, select Additional Properties > Plug-in properties.
5. Make any necessary changes and ensure the checkboxes are selected next to these two properties:
Manually Generating a Plug-in
3-54 HTML Server on WebSphere Reference Guide
■ Automatically generate the plug-in configuration file
■ Automatically propagate plug-in configuration file
6. Click Apply.
7. Click the Save button to save all changes.
3.13 Manually Generating a Plug-inOccasionally, you may to manually generate the web server plug-in. The most common error that requires manual plug-in generation is the "HTTP 404" when trying to access the software. This section briefly explains how to manually generate the plug-in.
1. Log in to the WebSphere Application Server Administration Console for your profile.
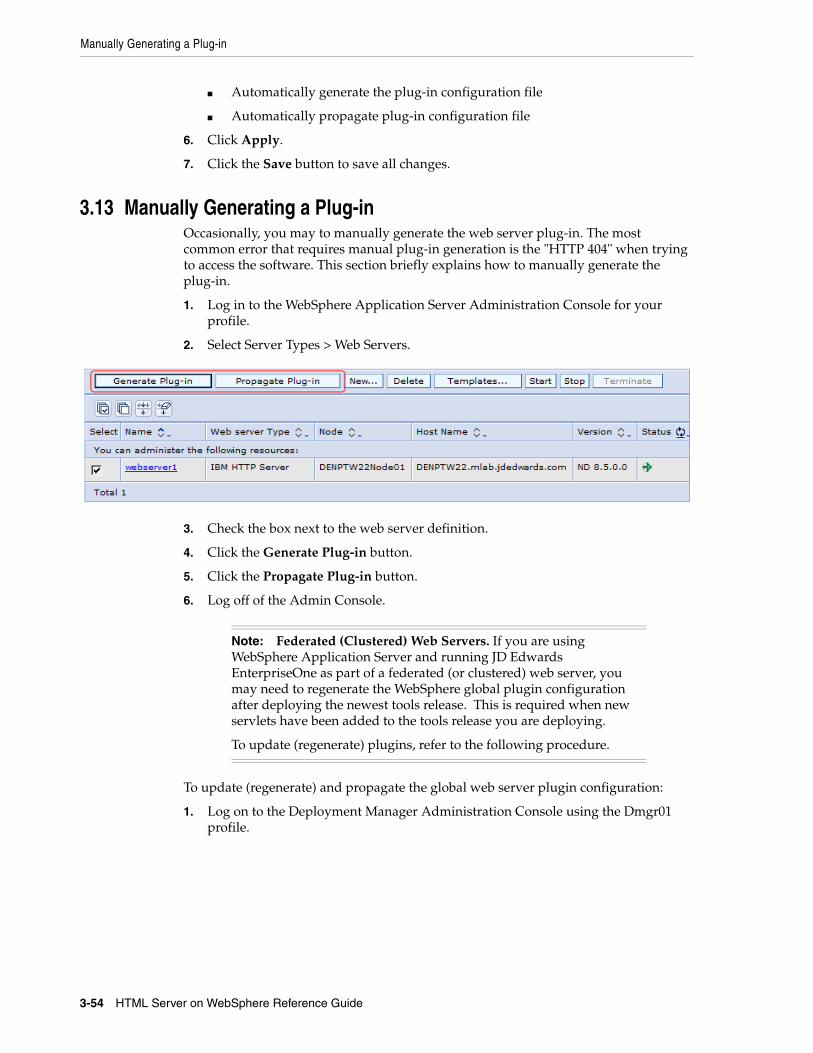
2. Select Server Types > Web Servers.
3. Check the box next to the web server definition.
4. Click the Generate Plug-in button.
5. Click the Propagate Plug-in button.
6. Log off of the Admin Console.
Note: Federated (Clustered) Web Servers. If you are using WebSphere Application Server and running JD Edwards EnterpriseOne as part of a federated (or clustered) web server, you may need to regenerate the WebSphere global plugin configuration after deploying the newest tools release. This is required when new servlets have been added to the tools release you are deploying.
To update (regenerate) plugins, refer to the following procedure.
To update (regenerate) and propagate the global web server plugin configuration:
1. Log on to the Deployment Manager Administration Console using the Dmgr01 profile.
Manually Editing the HTTP Configuration File
Installing, Updating, and Configuring WebSphere 8.5 and 8.5.5 3-55
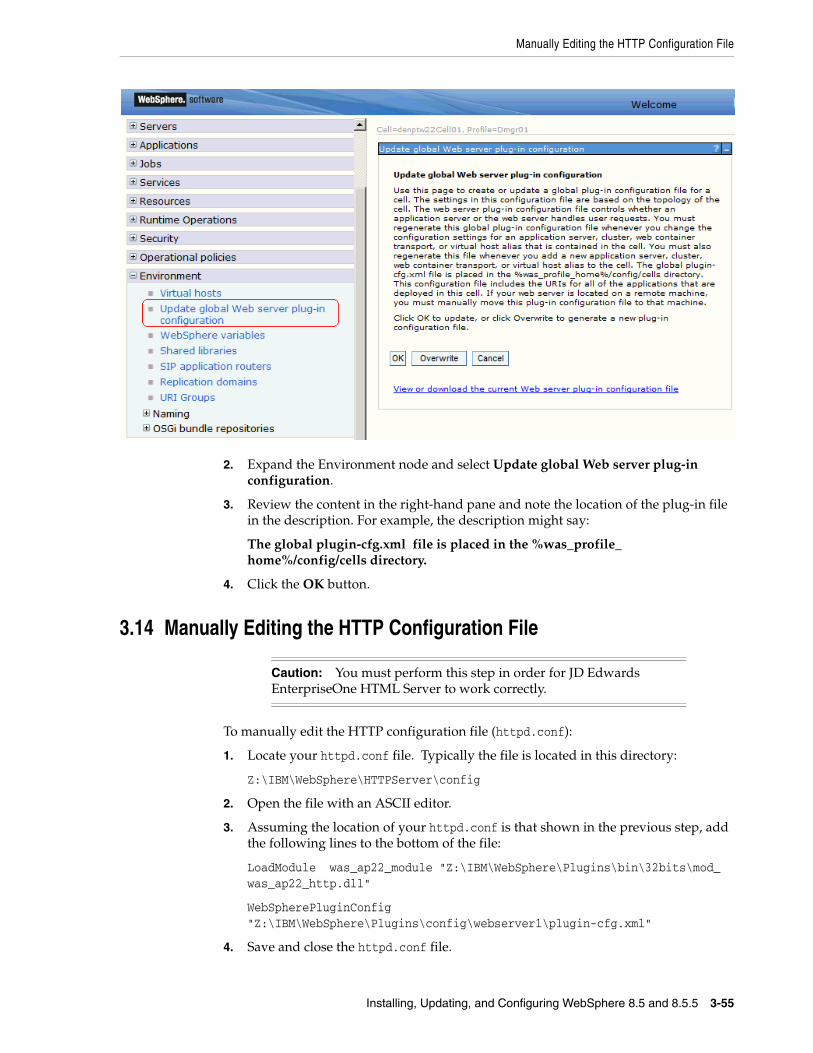
2. Expand the Environment node and select Update global Web server plug-in configuration.
3. Review the content in the right-hand pane and note the location of the plug-in file in the description. For example, the description might say:
The global plugin-cfg.xml file is placed in the %was_profile_home%/config/cells directory.
4. Click the OK button.
3.14 Manually Editing the HTTP Configuration File
Caution: You must perform this step in order for JD Edwards EnterpriseOne HTML Server to work correctly.
To manually edit the HTTP configuration file (httpd.conf):
1. Locate your httpd.conf file. Typically the file is located in this directory:
Z:\IBM\WebSphere\HTTPServer\config
2. Open the file with an ASCII editor.
3. Assuming the location of your httpd.conf is that shown in the previous step, add the following lines to the bottom of the file:
LoadModule was_ap22_module "Z:\IBM\WebSphere\Plugins\bin\32bits\mod_was_ap22_http.dll"
WebSpherePluginConfig "Z:\IBM\WebSphere\Plugins\config\webserver1\plugin-cfg.xml"
4. Save and close the httpd.conf file.

Manually Editing the HTTP Configuration File
3-56 HTML Server on WebSphere Reference Guide
5. Stop and restart HTTP Server from the Windows Services panel.

4
Installing and Configuring WebSphere 7.0 4-1
4Installing and Configuring WebSphere 7.0
This chapter describes how to install and configure WebSphere 7.0. It contains the following topics:
■ Section 4.1, "Performing the Pre-installation Procedure"
■ Section 4.2, "Installing WebSphere Application Server 7.0 (Using Network Deployment CD or Downloaded Image)"
■ Section 4.3, "Installing the IBM HTTP Server 7.0"
■ Section 4.4, "Installing IBM HTTP Server Plug-ins for WebSphere Application Server"
■ Section 4.5, "Installing the WebSphere Update Installer"
■ Section 4.6, "Installing WebSphere 7.0 Fix Pack 29"
■ Section 4.7, "Installing the IBM HTTP Server Fix Pack"
■ Section 4.8, "Installing the WebSphere 7.0 Plug-ins Fix Pack"
■ Section 4.9, "Verifying the Versions of Installed WebSphere Products"
■ Section 4.10, "Starting the WebSphere Application Server"
■ Section 4.11, "Stopping the WebSphere Application Server"
■ Section 4.12, "Determining the Name and Status of the WebSphere Application Server"
■ Section 4.13, "Starting the IBM HTTP Server"
■ Section 4.14, "Stopping the IBM HTTP Server"
■ Section 4.15, "Accessing the WebSphere Administration Console"
■ Section 4.16, "Testing the WebSphere and IBM HTTP Server Installation"
■ Section 4.17, "Generating and Propagating WebSphere Plug-ins (optional)"
■ Section 4.18, "Creating a New Application Server Profile (optional)"
■ Section 4.19, "Deleting a Profile (optional)"
■ Section 4.20, "Adding a New Web Server for a New Profile (optional)"
4.1 Performing the Pre-installation ProcedureBefore you install WebSphere, you must first set up a local user account that is in the Administrative group and has these advanced user rights:
■ Act as part of operating system

Installing WebSphere Application Server 7.0 (Using Network Deployment CD or Downloaded Image)
4-2 HTML Server on WebSphere Reference Guide
■ Create a token object.
■ Log on as a service
■ Replace a process level token
To set up a local user account with the above user rights, navigate to:
Control Panel > Administrative Tools > Local Security Policy > Local Policies > Users Rights Assignment
On User Rights Assignment, double-click one of the user rights, click Add, select a local user account from the list, and click OK. Repeat this process for the remaining user rights.
4.2 Installing WebSphere Application Server 7.0 (Using Network Deployment CD or Downloaded Image)
Note: It is important to follow the exact sequence of steps in this procedure.
Complete these steps to install the WebSphere Application Server version 7.0, and then install the EnterpriseOne Web Server to that installation. The WebSphere 7.0 Network Deployment CD may be used to install WebSphere Application Server for a base or standalone configuration.
Note: The typical IBM WebSphere installation includes the Application Server itself, HTTP Server, and the Plug-in components. You must install all these components to ensure WebSphere Application Server 7.0 is functioning correctly. For any additional requirements and Fix Packs once the basic install is completed, review the minimum technical requirements (MTRs) as described in Accessing Certifications (formerly Minimum Technical Requirements) in this document.
1. Insert the WebSphere Application Server Network Deployment CD, Version 7.0 (32-bit) or extract the downloaded image into a temporary location.
2. Run the launchpad executable from the extracted directory:
cd x:\dump\was7_windows\cd1
x:\dump\was7_windows\cd1 > launchpad.exe
where x: is the drive on which you downloaded the WebSphere 7.0 image.
Installing WebSphere Application Server 7.0 (Using Network Deployment CD or Downloaded Image)
Installing and Configuring WebSphere 7.0 4-3
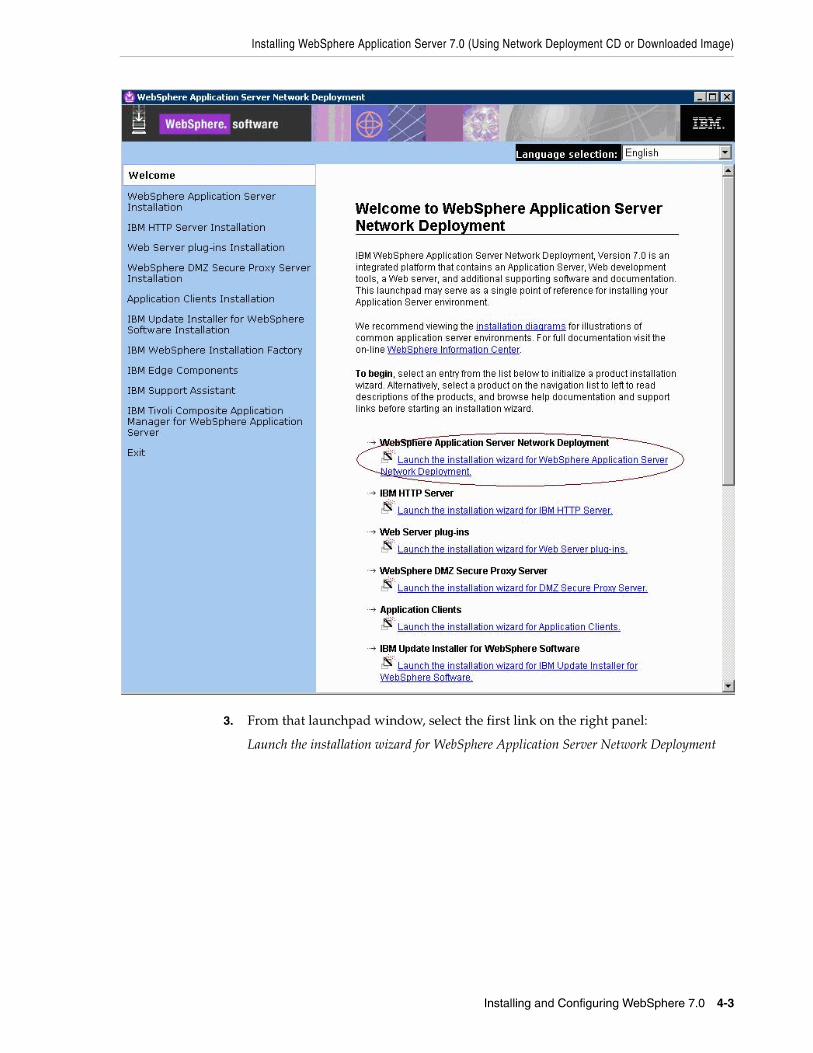
3. From that launchpad window, select the first link on the right panel:
Launch the installation wizard for WebSphere Application Server Network Deployment

Installing WebSphere Application Server 7.0 (Using Network Deployment CD or Downloaded Image)
4-4 HTML Server on WebSphere Reference Guide
4. On the Welcome panel, click the Next button to continue.

Installing WebSphere Application Server 7.0 (Using Network Deployment CD or Downloaded Image)
Installing and Configuring WebSphere 7.0 4-5
5. On Software License Agreement, review the License Agreement and select a radio button to accept or decline.
If you chose to accept, click the Next button to continue.
If you do not accept the terms of the license agreement, you cannot continue with the installation.
6. On System Prerequisites Check, the installer performs a quick system requirements check on the server. Once the check is complete and successful, click the Next button to continue.

Installing WebSphere Application Server 7.0 (Using Network Deployment CD or Downloaded Image)
4-6 HTML Server on WebSphere Reference Guide
7. On the Optional Features Installation screen, click the Next button to continue.
Tip: For production environments, it is recommended that you not enable the Install the Sample application check box.
You should enable the check box for non-English support for the WebSphere Administrative Console if applicable to your installation.

Installing WebSphere Application Server 7.0 (Using Network Deployment CD or Downloaded Image)
Installing and Configuring WebSphere 7.0 4-7
8. On Installation Directory, enter or browse to a valid location where you want to install WebSphere Application Server Network Deployment. For example:
z:\IBM\WebSphere\AppServer
9. Click the Next button to continue.
10. On WebSphere Application Server Environments, select Application Server to create a standalone application server profile and then click the Next button to continue.
Note: The Application Server environment will create a default stand-alone application server called AppSrv01 during the installation. To use federated nodes configuration, select Cell environment to create a deployment manger (such as Dmgr01) and a managed node (for example, AppSrv01) during the installation.

Installing WebSphere Application Server 7.0 (Using Network Deployment CD or Downloaded Image)
4-8 HTML Server on WebSphere Reference Guide
11. On Enable Administrative Security, the check box for the application server profile is checked by default. You can choose either to:
■ Clear the check box for Enable administrative security to disable server administrative security, or
■ If the check box is enabled for Enable administrative security, server administration security will be enabled and you must enter the User ID and Password
When you enable the check box the fields on this screen are enabled and you must enter valid credentials for the WebSphere administrator for this installation.
Tip: JD Edwards EnterpriseOne Business Services Server. If you are using these instructions to install a JD Edwards EnterpriseOne Business Services Server into this WebSphere instance, you must enable administrative security.
12. Click the Next button to continue.

Installing WebSphere Application Server 7.0 (Using Network Deployment CD or Downloaded Image)
Installing and Configuring WebSphere 7.0 4-9
13. On Installation Summary, review the information and click the Next button to begin the installation of WebSphere Application Server Network Deployment.
Note: You should enable the check box for Verify my permissions to perform the installation in order for the installer to validate the permissions required for installation of the product.

Note: On Installation Results, you can click on the AboutThisProfile.txt link to see the port assignment for this profile. Note the Administrative console port on which AppSrv01 will be running (for example, 9060). You can use Profile Management Tool to create as many profiles as you like. Each profile is a separate instance of the WebSphere running on a different set of ports.
A sample of the contents of the AboutThisProfile.txt file is shown below:
Installing WebSphere Application Server 7.0 (Using Network Deployment CD or Downloaded Image)
4-10 HTML Server on WebSphere Reference Guide
14. On Installation Results, click Finish.

Installing WebSphere Application Server 7.0 (Using Network Deployment CD or Downloaded Image)
Installing and Configuring WebSphere 7.0 4-11
The First steps menu is launched.
15. On the First steps menu, click Installation verification to verify the installation.
After you click Installation verification, you can verify the success of the installation by reviewing the contents of the resulting display. For example:
16. Ensure that the Installation Verification utility completes with a success message.

Installing the IBM HTTP Server 7.0
4-12 HTML Server on WebSphere Reference Guide
17. Close the First steps output and click Exit on the First steps screen.
This completes the profile creation activity.
4.3 Installing the IBM HTTP Server 7.0
Note: If you are planning to use Microsoft Internet Information Services (IIS), you can skip this section and continue to Installing IBM HTTP Server Plug-ins for WebSphere Application Server.
Note: Although the IBM HTTP Server is integrated into the WebSphere Application Server, the installation is a separate process.
To install the IBM HTTP Server:
1. Insert the WebSphere Application Server Supplement CD, Version 7.0 (32-bit) or extract the downloaded image (if you haven't done so already).
2. Run the install executable that is located in the IHS directory from the extracted location by typically using these commands:
cd x:\dump\was7_windows\sup1\IHS
x:\dump\was7_windows\sup1\IHS > install.exe
where x: is the drive on which you downloaded the WebSphere 7.0 image.
3. On Welcome, click the Next button to continue.

Installing the IBM HTTP Server 7.0
Installing and Configuring WebSphere 7.0 4-13
4. On Software License Agreement, review the License Agreement and choose an option to accept or decline.
5. Click the Next button to continue.
6. On System Prerequisites Check, the installer performs a quick system requirements check on the server. Once the check is complete and successful, click the Next button to continue.

Installing the IBM HTTP Server 7.0
4-14 HTML Server on WebSphere Reference Guide
7. For the install location, enter a valid value for your IBM HTTP Server installation directory. Use a value such as:
z:\IBM\HTTPServer
8. Click the Next button to continue.
9. On Port Values Assignment, use the default port or enter different ports.
10. Click the Next button to continue.

Installing the IBM HTTP Server 7.0
Installing and Configuring WebSphere 7.0 4-15
11. On Windows Service, complete these fields:
Field Value
Run IBM HTTP Server as a Windows Service
Checked
Run the Application Server process as a Windows Service
Checked
Log on as a local system account Selected
Startup Type Use the pull-down to choose either manual or automatic.
12. Click the Next button to continue.

Installing the IBM HTTP Server 7.0
4-16 HTML Server on WebSphere Reference Guide
13. On HTTP Administration Server Authentication, the check box enabling HTTP server administration security is checked by default. You can choose either to:
■ Clear the check box for Create a user ID for IBM HTTP administration server authentication to disable HTTP server administration security, or
■ If the check box is enabled for Create a user ID for IBM HTTP administration server authentication, HTTP server administration security will be enabled and you must enter the User ID and Password
14. Click the Next button to continue.

Installing the IBM HTTP Server 7.0
Installing and Configuring WebSphere 7.0 4-17
15. On IBM HTTP Administration Server Plug-in For IBM WebSphere Application Server, clear the check box for Install the IBM HTTP Server Plug-in for IBM WebSphere Application Server to disable the silent install of the plug-in at this time. The installation of IBM HTTP Server Plug-in for IBM WebSphere Application Server will be described in the section Installing IBM HTTP Server Plug-ins for WebSphere Application Server.
16. Click the Next button to continue.
17. On the summary screen, click the Next button to begin the installation.

Installing IBM HTTP Server Plug-ins for WebSphere Application Server
4-18 HTML Server on WebSphere Reference Guide
18. On the successfully installed screen, click Finish.
4.4 Installing IBM HTTP Server Plug-ins for WebSphere Application Server
With the IBM HTTP Server or Microsoft Internet Information Services (IIS) successfully installed, the final portion of the WebSphere Application Server installation is to install WebSphere Plug-ins.
Prior to installing WebSphere Plug-ins, it is recommended to ensure the IBM HTTP Server services (Apache) or Microsoft IIS services are not already running.
To install WebSphere Plug-ins:
1. Insert the WebSphere Application Server Supplement CD, Version 7.0 (32-bit) or extract the downloaded image (if you haven't done so already).
2. Run the install executable in the plugin directory. For example:
cd Z:\dump\was7_windows\sup1\pluginZ:\dump\was7_windows\sup1\plugin > install.exe
Note: The syntax of the mount command can vary by platform, and is not required for Sun platforms.
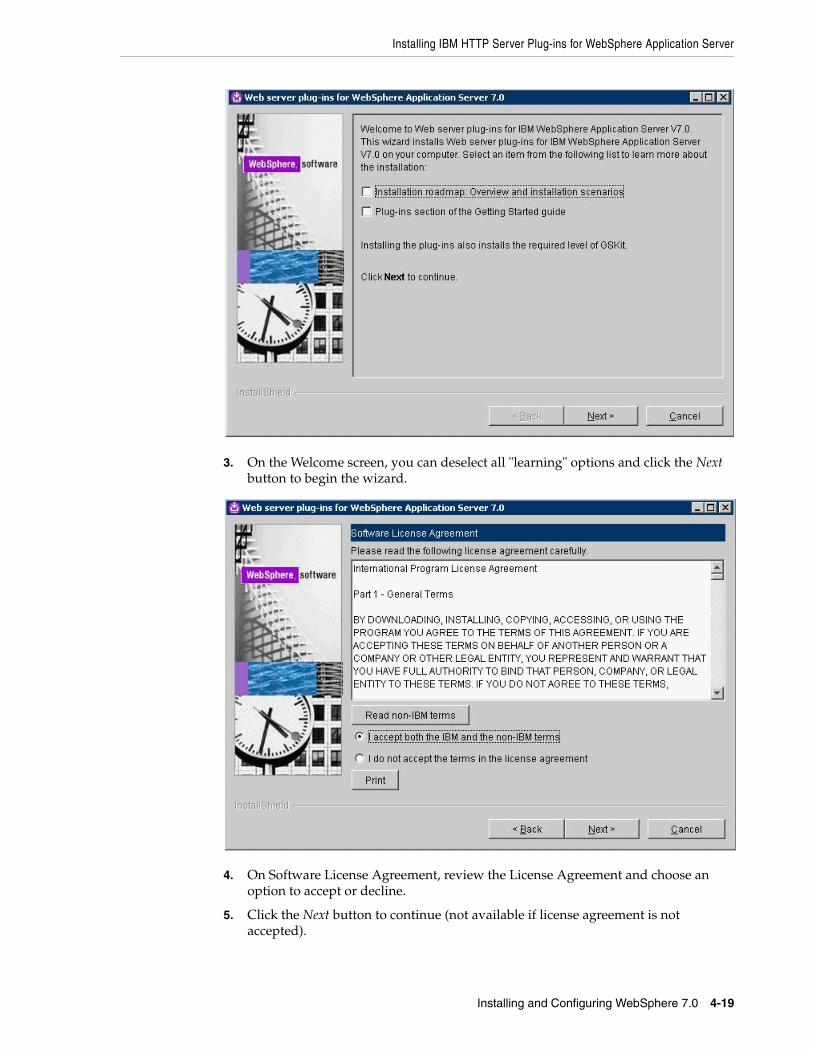
Installing IBM HTTP Server Plug-ins for WebSphere Application Server
Installing and Configuring WebSphere 7.0 4-19
3. On the Welcome screen, you can deselect all "learning" options and click the Next button to begin the wizard.
4. On Software License Agreement, review the License Agreement and choose an option to accept or decline.
5. Click the Next button to continue (not available if license agreement is not accepted).

Installing IBM HTTP Server Plug-ins for WebSphere Application Server
4-20 HTML Server on WebSphere Reference Guide
6. On System Prerequisites Check, the installer performs a verification of system requirements.
After the installer indicates the check was successful, click the Next button to continue.

Installing IBM HTTP Server Plug-ins for WebSphere Application Server
Installing and Configuring WebSphere 7.0 4-21
7. On Select the Web server to configure, select only one of the following radio buttons:
IBM HTTP Server V7
Miscrosoft Internet Information Service V7
Miscrosoft Internet Information Service V6
Note: All plug-in binaries are installed, but only the selected Web server will be configured.
8. Click the Next button to continue.

Installing IBM HTTP Server Plug-ins for WebSphere Application Server
4-22 HTML Server on WebSphere Reference Guide
9. On Select installation scenario, if your WAS server is located on the same machine on which you are installing, select this radio button:
WebSphere Application Server machine (local)
If your WAS server is located on a different machine than the one on which you are running the installer, select this radio button:
Web server machine (remote)
10. Click the Next button to continue.

Installing IBM HTTP Server Plug-ins for WebSphere Application Server
Installing and Configuring WebSphere 7.0 4-23
11. On Web server plug-ins installation location, enter a directory. The default directory is:
z:\IBM\HTTPServer\Plugins
12. Click the Next button to continue.
13. On Installation location of WebSphere Application Server V7.0, enter a directory. For example:
z:\IBM\WebSphere\AppServer
14. Click the Next button to continue.

Installing IBM HTTP Server Plug-ins for WebSphere Application Server
4-24 HTML Server on WebSphere Reference Guide
15. On Select the existing IBM HTTP Server httpd.conf file, enter a directory path. For example:
z:\IBM\HTTPServer\conf\httpd.conf
Note: This field is not available for IIS.
You must also specify the Web Server port. Typically you can accept the default value of 80 for the both the IBM HTTP and Microsoft IIS servers.
Note: The plug-ins installer directly modifies the IBM HTTP Server configuration file with the information you specify on this screen.
16. Click the Next button to continue.

Installing IBM HTTP Server Plug-ins for WebSphere Application Server
Installing and Configuring WebSphere 7.0 4-25
17. On Specify a unique Web Server definition name, enter the name of your IBM HTTP or Microsoft IIS Server to allow the WebSphere Administration Console to administer the IBM HTTP or Microsoft IIS Server configuration and status.
Tip: In order to avoid confusion in installations with multiple web servers on multiple ports, it is good practice to use the following naming convention:
webserver<port_number>
For example, the name webserver80 indicates the webserver is on port 80.
18. Click the Next button to continue.

Installing IBM HTTP Server Plug-ins for WebSphere Application Server
4-26 HTML Server on WebSphere Reference Guide
19. On Web Server plugin-cfg.xml file, you can accept the default location for the plugin-cfg.xml file.
20. Click the Next button to continue.
21. The installation wizard detects the default profile (such as AppSrv01) that does not have a Web server defined. Click the Next button to continue.

Installing IBM HTTP Server Plug-ins for WebSphere Application Server
Installing and Configuring WebSphere 7.0 4-27
22. On the Summary screen, click the Next button to begin the installation.
23. The installation wizard shows that a Web server definition is created for the default Application server profile (such as AppSrv01).
24. Click the Next button to proceed.
The installation wizard launches a web browser with more detailed information about the Plug-ins road map. You can close the browser at any time or return to the installation wizard.

Installing the WebSphere Update Installer
4-28 HTML Server on WebSphere Reference Guide
25. On the completion screen, click Finish to exit the WebSphere Plug-ins installation wizard.
4.5 Installing the WebSphere Update InstallerThe Update Installer for WebSphere Software includes a new installation program for IBM WebSphere Version 7.0, Installation Wizard starting with Fix Pack 7. The Update Installer is backwards compatible. You should download the Update Installer that match with your WebSphere product. You can use a single installation of the Update Installer to install maintenance packs on all the WebSphere software products such as WebSphere Application Server, Java SDK, IBM HTTP Server, and Web server plug-ins.
Before you can install Refresh or Fix pack for WebSphere software, you need to install the Update Installer engine as described in this procedure.
Note: Make sure all WebSphere processes including IBM HTTP Server V7 are not running before starting Update Installer installation.
This document uses Fix Pack 29 (7.0.0.29) to describe the process of installing WebSphere Fix Pack. Check the Certification for the latest supported WebSphere Fix Pack for the JD Edwards EnterpriseOne HTML Web Server (refer to Chapter 1, "Accessing Certifications (formerly Minimum Technical Requirements)").
To install the WebSphere update installer:
1. Download the Update Installer software from IBM web site.
2. Extract the downloaded image.
3. From the downloaded image run the install executable using these commands:
cd x:\dump\was7_windows\sup1\UpdateInstaller
x:\dump\was7_windows\sup1\UpdateInstaller > install.exe

Installing the WebSphere Update Installer
Installing and Configuring WebSphere 7.0 4-29
where x: is the drive where you downloaded the Update Installer.
4. On the Welcome screen, click the Next button to begin the wizard.
5. On Software License Agreement, review the License Agreement and choose an option to accept or decline.
6. Click the Next button to continue.
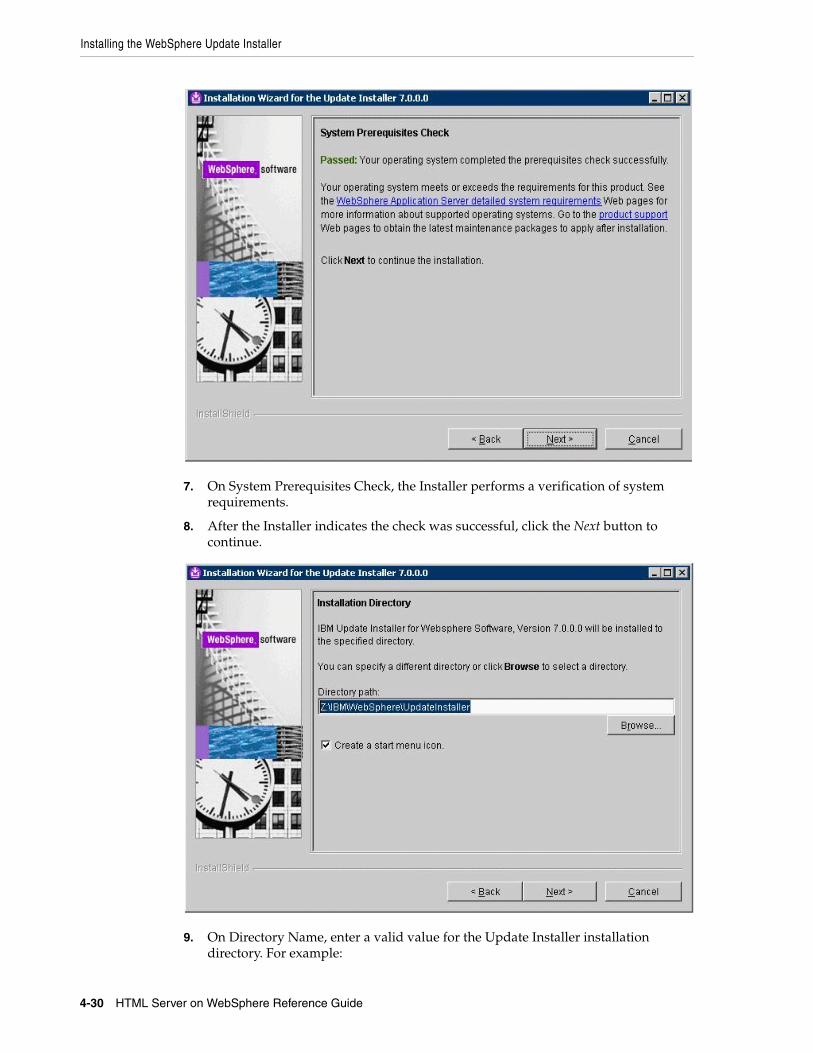
Installing the WebSphere Update Installer
4-30 HTML Server on WebSphere Reference Guide
7. On System Prerequisites Check, the Installer performs a verification of system requirements.
8. After the Installer indicates the check was successful, click the Next button to continue.
9. On Directory Name, enter a valid value for the Update Installer installation directory. For example:

Installing the WebSphere Update Installer
Installing and Configuring WebSphere 7.0 4-31
z:\IBM\WebSphere\UpdateInstaller
Note: To facilitate maintenance, it is recommended that you install the Update Installer under the WebSphere root directory. For example:
z:\IBM\WebSphere\UpdateInstaller
10. Click the Next button to continue.
11. On Installation Summary, click the Next button to begin the installation.

Installing WebSphere 7.0 Fix Pack 29
4-32 HTML Server on WebSphere Reference Guide
12. On Installation Complete, deselect the check box for Launch IBM Update Installer for WebSphere software on exit.
13. Click the Finish button.
4.6 Installing WebSphere 7.0 Fix Pack 29
Note: This document uses Fix Pack 29 (7.0.0.29) to describe the process of installing WebSphere Fix Pack. Check the Certification for the latest supported WebSphere Fix Pack for the JD Edwards EnterpriseOne HTML Web Server (refer to Chapter 1, "Accessing Certifications (formerly Minimum Technical Requirements)").
To install the WebSphere 7.0 Fix Pack:
1. Ensure that all WebSphere and HTTP Services are stopped prior to updating the software.
2. Download all the fix pack files to the "maintenance" directory under the installation directory of the Update Installer, such as: Z:\IBM\WebSphere\UpdateInstaller\maintenance
The complete list of WebSphere 7.0 Fix Pack 29 (7.0.0.29) files is shown in the screen sample below:

Note: You do not need to uncompress these files, just put them in the "maintenance" directory.
Installing WebSphere 7.0 Fix Pack 29
Installing and Configuring WebSphere 7.0 4-33
3. Run the update executable from the UpdateInstaller directory using these commands:
cd x:\IBM\WebSphere\UpdateInstaller
x:\IBM\WebSphere\UpdateInstaller > update.exe
where x: is the drive on which you downloaded the Update Installer.
4. Click the Next button to continue.

Installing WebSphere 7.0 Fix Pack 29
4-34 HTML Server on WebSphere Reference Guide
5. On the Product selection screen, use the drop down to select the installation location of the WebSphere Application Server. For example:
Z:\IBM\WebSphere\AppServer
6. Click the Next button to continue.
7. On Maintenance Operation Selection, select the following radio button:
Install maintenance package
8. Click the Next button to continue.
The installer inspects the UpdateInstaller directory for maintenance packages (.pak files); specifically in the maintenance sub-directory.

Installing WebSphere 7.0 Fix Pack 29
Installing and Configuring WebSphere 7.0 4-35
9. On Maintenance Package Selection, validate the directory name that was located by the Installer wizard.
10. On Available Maintenance Package to Install, check the WAS and WASSDK fix pack files since the WebSphere Application Server components are being updated.
11. Click the Next button to continue.

Installing WebSphere 7.0 Fix Pack 29
4-36 HTML Server on WebSphere Reference Guide
12. On Installation Summary, review the information and click the Next button to begin the installation.
13. Click the Next button to continue.
14. On Installation Complete, Success, click the Relaunch button to relaunch the wizard and install the HTTP server components.

Installing the IBM HTTP Server Fix Pack
Installing and Configuring WebSphere 7.0 4-37
4.7 Installing the IBM HTTP Server Fix Pack
Note: If you are planning to use Microsoft Internet Information Services (IIS), you can skip this section and continue to Installing the WebSphere 7.0 Plug-ins Fix Pack.
To install the IBM HTTP Server Fix Pack:
1. Ensure that all WebSphere and HTTP Services are stopped prior to updating the software.
2. Download and uncompress the fix pack file for the IBM HTTP Server to the \UpdateInstaller\maintenance directory.
For example:
7.0.0-WS-IHS-WinX32-FP00000029.pak
3. Once the wizard has restarted, select the HTTP server components.
4. On the Welcome screen, click the Next button to begin the Update Installer wizard.

Installing the IBM HTTP Server Fix Pack
4-38 HTML Server on WebSphere Reference Guide
5. On Product Selection, use the drop down to select the installation location of the IBM HTTP Server. For example:
Z:\IBM\HTTPServer
6. Click the Next button to continue.
7. On Maintenance Operation Selection, select this radio button:
Install maintenance package
8. Click the Next button to continue.
9. On Maintenance Package Directory Selection, validate the directory path that was located by the Installer wizard.
10. Click the Next button to continue.

Installing the IBM HTTP Server Fix Pack
Installing and Configuring WebSphere 7.0 4-39
11. On Available Maintenance Package to Install, ensure that the available IHS and WASSDK fix pack files are checked since the IBM HTTP Server components are being updated.
12. Click the Next button to continue.
13. On Installation Summary, click the Next button to begin the installation.

Installing the WebSphere 7.0 Plug-ins Fix Pack
4-40 HTML Server on WebSphere Reference Guide
14. On Installation Complete, verify that the proper maintenance packages for the IBM HTTP Server were successfully installed.
15. Click the Relaunch button and continue to the next section to install WebSphere Plug-ins Fix Pack.
4.8 Installing the WebSphere 7.0 Plug-ins Fix Pack
Note: It is very important to following the exact sequence of steps in this procedure.
To install the WebSphere 7.0 Plug-ins Fix Pack:
1. Ensure that all WebSphere and IBM HTTP or Microsoft IIS Services are stopped prior to updating the software.
2. Download and copy the fix pack file for the WebSphere Plug-ins to the \UpdateInstaller\maintenance directory.
For example:
7.0.0-WS-PLG-WinX32-FP00000029.pak
3. Run the update executable from the copied UpdateInstaller directory using these commands:
cd Z:\IBM\WebSphere\UpdateInstaller
Z:\IBM\WebSphere\UpdateInstaller > update.exe
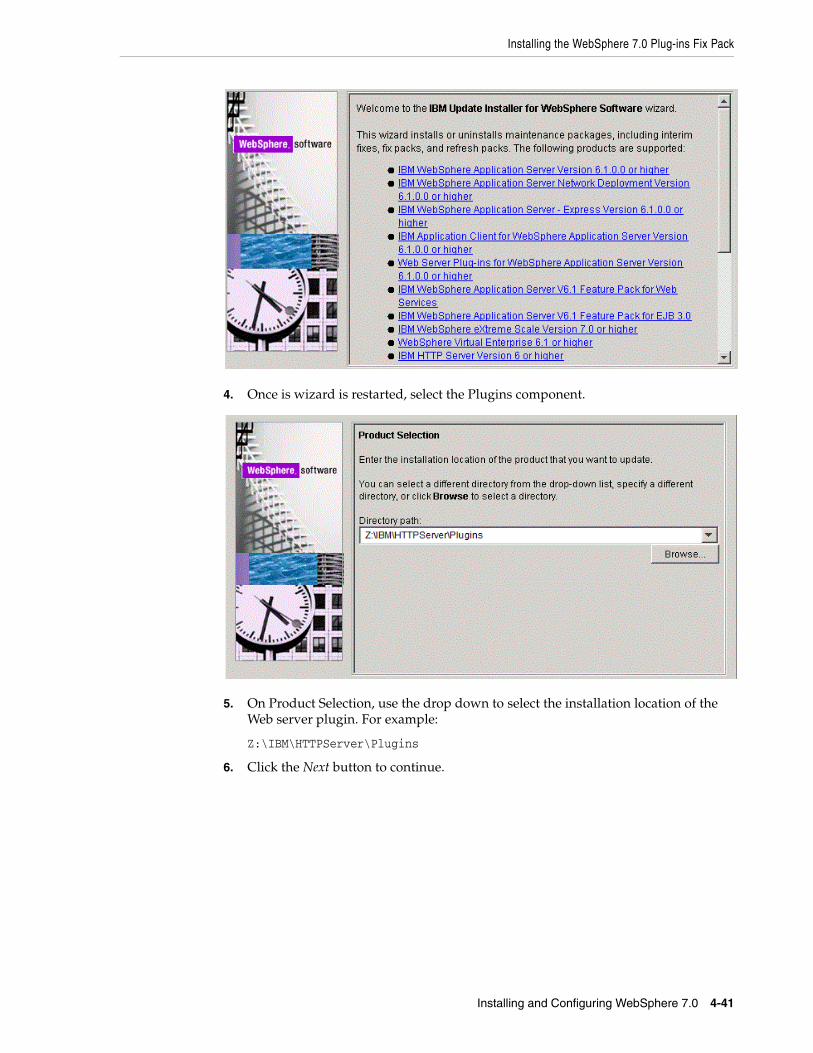
Installing the WebSphere 7.0 Plug-ins Fix Pack
Installing and Configuring WebSphere 7.0 4-41
4. Once is wizard is restarted, select the Plugins component.
5. On Product Selection, use the drop down to select the installation location of the Web server plugin. For example:
Z:\IBM\HTTPServer\Plugins
6. Click the Next button to continue.

Installing the WebSphere 7.0 Plug-ins Fix Pack
4-42 HTML Server on WebSphere Reference Guide
7. On Maintenance Operation Selection, select the following radio button:
Install maintenance package
8. Click the Next button to continue.
9. On Maintenance Package Directory Selection, validate the directory path that was located by the Installer wizard.
Note: The installer inspects the \UpdateInstaller\maintenance directory for maintenance packages (.pak files).
10. Click the Next button to continue.

Installing the WebSphere 7.0 Plug-ins Fix Pack
Installing and Configuring WebSphere 7.0 4-43
11. On Available Maintenance Package to Install, ensure that the PLG and WASSDK fix pack files are checked since the WebSphere Plugin components are being updated.
12. Click the Next button to continue the update for the WebSphere Plug-ins.
13. On the Installation Summary screen, review the information and click the Next button to begin the installation.

Verifying the Versions of Installed WebSphere Products
4-44 HTML Server on WebSphere Reference Guide
14. After the Plug-ins update is complete, the Success screen indicates the status of the maintenance package installation.
15. Click the Finish button to exit the Update Installer wizard.
4.9 Verifying the Versions of Installed WebSphere ProductsThis section describes how to verify the versions of these installed WebSphere products:
■ WebSphere Application Server
■ IBM HTTP Server
■ WebSphere Plugins for IBM WebSphere Application Server
4.9.1 WebSphere Application ServerUse this procedure to verify the version of the IBM WebSphere Application Server.
1. Open a Windows Command window
2. Navigate to this folder:
Z:\IBM\WebSphere\AppServer\bin
3. From the above folder, execute this batch file:
versionInfo.bat
Verify the installed version of the IBM WebSphere Application Server is 7.0.0.29 as shown in the example below:

Verifying the Versions of Installed WebSphere Products
Installing and Configuring WebSphere 7.0 4-45
4.9.2 IBM HTTP ServerUse this procedure to verify the version of the IBM HTTP Server.
1. Open a Windows Command window
2. Navigate to this folder:
Z:\IBM\WebSphere\AppServer\bin
3. From the above folder, execute this batch file:
versionInfo.bat
Verify the installed version of the IBM HTTP Server is 7.0.0.29 as shown in the example below:
4.9.3 WebSphere Plugins for IBM WebSphere Application ServerUse this procedure to verify the version of the IBM HTTP Server.
1. Open a Windows Command window
2. To verify the Web server plugins for IBM WebSphere Application Server, navigate to this folder:
Z:\IBM\HTTPServer\Plugins\bin
3. From the above folder, execute this batch file:
versionInfo.bat
Verify the installed version of the Web server plugins for IBM WebSphere Application Server is 7.0.0.29 as shown in the example below:

Starting the WebSphere Application Server
4-46 HTML Server on WebSphere Reference Guide
4.10 Starting the WebSphere Application Server
Note: By default, WebSphere Application Server 7.0 creates and configures a default server named server1 during installation. If you named your server something other than the default value, then substitute that name for server1 in the following steps.
To start the WebSphere Application Server:
1. Start a command prompt.
2. Navigate to the <websphere_install_dir>\AppServer\profiles\profile_name\bin directory. For example:
cd Z:\IBM\WebSphere\AppServer\profiles\AppSrv01\bin
3. Issue the command startServer followed by the Application Server name. For example:
Z:\IBM\WebSphere\AppServer\profiles\AppSrv01\bin > startServer server1
This command is case sensitive.
Tip: The Application Server can also be started through the Windows Services Applet. Each profile that you configured will have a corresponding service that is automatically created when you created the profile.
Note: Starting with Tools Release 8.97, you can use the Server Manager to start the WebSphere process.
4.11 Stopping the WebSphere Application Server
Note: By default, WebSphere Application Server 7.0 creates and configures a default server named server1 during installation. If you named your server something other than the default value, then substitute that name for server1 in the following steps.
To stop the WebSphere Application Server:
1. Start a command prompt.

Determining the Name and Status of the WebSphere Application Server
Installing and Configuring WebSphere 7.0 4-47
2. Navigate to the <websphere_install_dir>\AppServer\profiles\profile_name\bin directory. For example:
cd Z:\IBM\WebSphere\AppServer\profiles\AppSrv01\bin
3. Issue the command stopServer followed by the Application Server name. For example:
stopServer server1
This command is case sensitive.
Note: If administrative security has been enabled for the WebSphere Application Server profile then use the following command to stop the servers:
Z:\IBM\WebSphere\AppServer\profiles\AppSrv01\bin > stopServer server1 user <admin_user_name> -password <admin_user_password>
Tip: The Application Server can also be stopped through the Windows Services Applet. Each profile that you configured will have a corresponding service that is automatically created when you created the profile.
Note: Starting with Tools Release 8.97, you can use the Server Manager to stop the WebSphere process.
4.12 Determining the Name and Status of the WebSphere Application Server
To determine the name and status of any or all WebSphere Application servers:
1. Start a command prompt.
2. Navigate to the <websphere_install_dir>\AppServer\profiles\profile_name\bin directory. For example:
cd Z:\IBM\WebSphere\AppServer\profiles\AppSrv01\bin
3. Issue the command serverStatus followed by the Application Server name (or with the all option to view the status of all the servers in the profile). For example, to view the status of all Application Servers:
Z:\IBM\WebSphere\AppServer\profiles\AppSrv01\bin > serverStatus -all
Note: If administrative security has been enabled for the WebSphere Application Server profile, you must use the following command to check the status of the servers:
Z:\IBM\WebSphere\AppServer\profiles\AppSrv01\bin > serverStatus all user <admin_user_name> -password <admin_user_password>

Starting the IBM HTTP Server
4-48 HTML Server on WebSphere Reference Guide
4.13 Starting the IBM HTTP ServerTo start the IBM HTTP Server:
1. Start a command prompt.
2. Navigate to the <ibm_http_server_location>\bin directory and issue the start command with the -k option. For example:
cd Z:\IBM\HTTPServer\bin
apache.exe -k start
This command is case sensitive.
Tip: The IBM HTTP Server can also be started through the Windows Services Applet.
Note: Starting with Tools Release 8.97, you can use the Server Manager to start the IBM HTTP Server process.
4.14 Stopping the IBM HTTP ServerTo stop the IBM HTTP Server:
1. Start a command prompt.
2. Navigate to the <ibm_http_server_location>\bin directory and issue the stop command with the -k option. For example:
cd Z:\IBM\HTTPServer\bin
apache -k stop
This command is case sensitive.
Tip: The IBM HTTP Server can also be stopped through the Windows Services Applet.
Note: Starting with Tools Release 8.97, you can use the Server Manager to stop the IBM HTTP Server process.
Note: Below is an example of the console indicating that the IBM HTTP Server is successfully stopped:
4.15 Accessing the WebSphere Administration ConsoleThe WebSphere Administration Console is completely web-based and can be accessed from any supported web browser. The default URL is:
http://<machinename>:<profile_port>/admin

Accessing the WebSphere Administration Console
Installing and Configuring WebSphere 7.0 4-49
where machine_name is the name of the machine on which WebSphere Application Server has been installed, and
where profile_port was defined during the profile creation in the profile creation wizard. For the first profile created, the default value is usually 9060.
To access the WebSphere Administration Console on the installed machine:
1. Ensure that the WebSphere Application Server (default name is server1) is started.
2. Start a web browser.
3. Enter this URL to access the WebSphere Administration Console:
http://localhost:9060/admin
Tip: If the port number is unknown and the default port is not working, the AboutThisProfile.txt file contains the key Administrative console port, which typically lists the assigned admin port number. Typically this file is located in this directory:
<websphere_installation_root>\AppServer\profiles\<profile_name>\logs\ AboutThisProfile.txt
4. On the Log in to the console screen, enter a valid or new user.

Testing the WebSphere and IBM HTTP Server Installation
4-50 HTML Server on WebSphere Reference Guide
Upon successful logon, the WebSphere Application Server welcome screen is displayed. You can use this application to manage your WebSphere servers and related machines.
4.16 Testing the WebSphere and IBM HTTP Server InstallationTo test the WebSphere Administration Console:
1. Ensure that the WebSphere Application Server (default name is server1) is started.
2. Ensure that the IBM HTTP Server is started.
3. Start a web browser.
4. Enter this URL to test the WebSphere Administration Console:
http://<machine_name>:<http_port>/snoop
where machine_name is your server, and
where http_port is the port of your IBM HTTP Server. The default value is 80.
For example:
http://localhost:80/snoop

Generating and Propagating WebSphere Plug-ins (optional)
Installing and Configuring WebSphere 7.0 4-51
Upon successful execution, the resulting page should display information similar to the above. This indicates that your WebSphere Application Server is successfully installed and functioning.
4.17 Generating and Propagating WebSphere Plug-ins (optional)
Note: This section is informational only and is not required before you install the Oracle JD Edwards EnterpriseOne HTML Web server.
Whenever you install new enterprise applications, or create new virtual hosts, you must regenerate Web Server plug-ins. If your WebSphere installation is on a single machine, you can generate plug-ins from the WebSphere Administrative console. However, your configuration is across multiple machines, you might need to manually generate plug-ins.
This section describes these topics:
■ Generating WebSphere Plug-ins
■ Propagating WebSphere Plug-ins
4.17.1 Generating WebSphere Plug-insTo generate WebSphere plug-ins:
1. Log on to the WebSphere Administrative console as described in Accessing the WebSphere Administration Console.
2. On the left hand navigation pane, select Servers > Server Types > Web servers

Generating and Propagating WebSphere Plug-ins (optional)
4-52 HTML Server on WebSphere Reference Guide
3. Click the check box next to the webserver definition for which you want to regenerate plug-ins.
4. To generate plug-ins, click the Generate Plug-in button, which is located above the webserver definition.
The Plug-in file plugin-cfg.xml is regenerated in place, typically at this location:
Z:\IBM\WebSphere\AppServer\profiles\AppSrv01\config\cells\denicint2Node01Cell\nodes\ denicint2Node01\servers\webserver80
A status message will display under the Web servers section.

Generating and Propagating WebSphere Plug-ins (optional)
Installing and Configuring WebSphere 7.0 4-53
5. You must restart the IBM HTTP or Microsoft IIS Server for any plug-in changes to take effect.
4.17.2 Propagating WebSphere Plug-insTo propagate the generated WebSphere plug-ins:
1. Log on to the WebSphere Administrative console as described in Accessing the WebSphere Administration Console.
2. On the left hand navigation pane, select Servers > Server Types > WebServers.
3. Click the check box next to the webserver definition for which you want to propagate plug-ins.
4. To generate plug-ins, click the Propagate Plug-in button, which is located above the webserver definition.
The Plug-in file plugin-cfg.xml is propagated in place, typically at this location:
x:\IBM\HTTPServer\Plugins\config\webserver80\plugin-cfg.xml
where x: is the drive on which the IBM HTTP Server is installed.
A status message displays under the Web servers section as indicated in this screenshot sample:

Note: Federated (Clustered) Web Servers. If you are using WebSphere Application Server and running JD Edwards EnterpriseOne as part of a federated (or clustered) web server, you may need to regenerate the WebSphere global plugin configuration after deploying the newest tools release. This is required when new servlets have been added to the tools release you are deploying.
To update (regenerate) plugins, refer to the following procedure.
Generating and Propagating WebSphere Plug-ins (optional)
4-54 HTML Server on WebSphere Reference Guide
To update (regenerate) and propagate the global web server plugin configuration:
1. Log on to the Deployment Manager Administration Console using the Dmgr01 profile.

Creating a New Application Server Profile (optional)
Installing and Configuring WebSphere 7.0 4-55
2. Expand the Environment node and select Update global Web server plug-in configuration.
3. Review the content in the right-hand pane and note the location of the plug-in file in the description. For example, the description might say:
The global plugin-cfg.xml file is placed in the %was_profile_home%/config/cells directory.
4. Click the OK button.
4.18 Creating a New Application Server Profile (optional)
Note: This section is informational only and is not required before you install Oracle JD Edwards EnterpriseOne HTML Web server.
To create a new application server profile:
1. Launch the profile creation wizard. For example:
cd Z:\IBM\WebSphere\AppServer\bin\ProfileManagement
Z:\IBM\WebSphere\AppServer\bin\ProfileManagement > pmt.bat
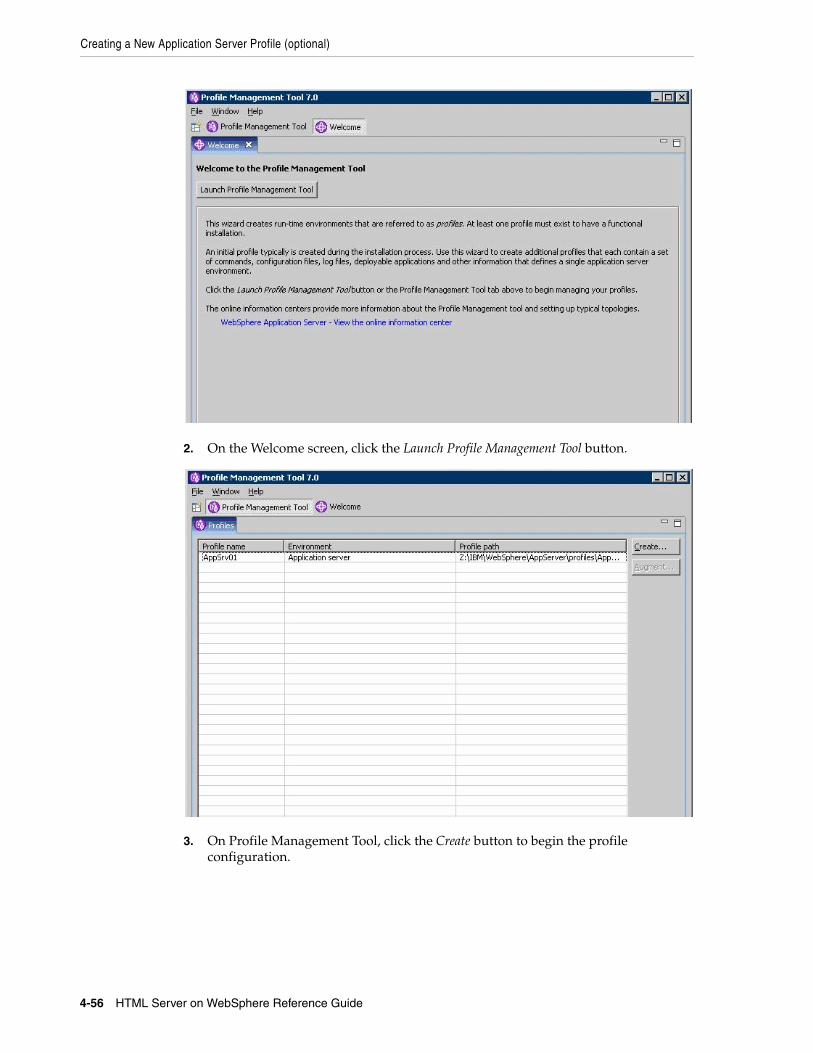
Creating a New Application Server Profile (optional)
4-56 HTML Server on WebSphere Reference Guide
2. On the Welcome screen, click the Launch Profile Management Tool button.
3. On Profile Management Tool, click the Create button to begin the profile configuration.

Creating a New Application Server Profile (optional)
Installing and Configuring WebSphere 7.0 4-57
4. On Environment Selection, select Application Server as the type of environment to create.
5. Click the Next button to continue.

Creating a New Application Server Profile (optional)
4-58 HTML Server on WebSphere Reference Guide
6. On Profile Creation Options, select the Typical profile creation radio button.
7. Click the Next button to continue.

Creating a New Application Server Profile (optional)
Installing and Configuring WebSphere 7.0 4-59
8. Administrative security is enabled for the profile by default. Clear the check box to disable administrative security or enter the user name and password.
On Enable Administrative Security, the check box for the application server profile is checked by default. You can choose either to:
■ Clear the check box for Enable administrative security to disable server administrative security, or
■ If the check box is enabled for Enable administrative security, server administration security will be enabled and you must enter the User ID and Password
9. Click the Next button to continue.

Creating a New Application Server Profile (optional)
4-60 HTML Server on WebSphere Reference Guide
10. On Profile summary, review your selections.
11. Click the Create button to start the profile creation.

Creating a New Application Server Profile (optional)
Installing and Configuring WebSphere 7.0 4-61
When complete, the installer displays the message: The Profile Management Tool created the profile successfully. It is not necessary to Launch the First Steps console at this time; you can clear the check box, which is checked by default.
12. Click the Finish button to complete the wizard and the profile configuration and proceed to the final Profiles screen.

Deleting a Profile (optional)
4-62 HTML Server on WebSphere Reference Guide
13. Exit the Profile Management Tool by choosing File > Exit.
4.19 Deleting a Profile (optional)This section is provided as reference in case you need to delete a WebSphere base or Network Deployment profile.
1. From a command prompt, change to this directory:
cd Z:\IBM\WebSphere\AppServer\bin
2. To delete a profile, issue this command:
manageprofiles delete profileName <profile_name>
where profile_name is the name of the profile to be deleted.
If the profile_name is valid, and the command successfully executed, the system returns this message:
INSTCONFSUCCESS: Success: The profile no longer exists.
When you delete a profile, the profile and its directory are deleted, except for the logs directory. You must manually delete the logs directory and then delete the profile directory.
4.20 Adding a New Web Server for a New Profile (optional)Each profile should be associated with a Web Server. The EnterpriseOne HTML Web Server install fails if it does not find a webserver associated with the profile specified during the install. If the newly created profile is an ND profile, you can create the Web Server by using the button Create a New Web Server from the Web Servers page on the WebSphere Administrator Console. However, if the newly created profile is not an ND profile, the option to Create a New Web Server is not available. Instead, you must create a new web server must be created from the command line.

Adding a New Web Server for a New Profile (optional)
Installing and Configuring WebSphere 7.0 4-63
To add a new web server for a new profile from the command line:
1. Locate a copy of this Web Server configuration file which is typically located in this directory with this name:
x:\IBM\HTTPServer\Plugins\bin\configurewebserver<webserver_port>.bat
where x: is the drive on which you installed the IBM HTTP Server, and
where <webserver_port> is the port on which the IBM HTTP Server is installed.
2. Make a copy of the configurewebserver<webserver_port>.bat file assigning a new port value to the copy. For example, assuming you have changed directory to x:\IBM\HTTPServer\Plugins\bin:
copy configurewebserver80.bat configurewebserver81.bat
Do not manually copy the configurewebserver1.bat file to the specific profile directory.
3. Edit the new configuration file (configurewebserver81.bat) file that resides in the x:\IBM\HTTPServer\Plugins\bin directory to change the settings to be unique to and specific to your newly created profile.
Change the settings to be unique to and specific to your newly created profile.
A sample file is provided below where:
the newly created profile is called AppSrv02, and
the new webserver will be called webserver81, and
the name of the node that we specified for our new profile is SERVERNode02, and
the name of the server itself is SERVER.domain.com.
The above is illustrated by the bolded settings in this sample file:
"Z:/IBM/WebSphere/AppServer/profiles/AppSrv02/bin/wsadmin.bat" %PROFILE_NAME_PARAMETER% %WSADMIN_USERID_PARAMETER% %WSADMIN_PASSWORD_PARAMETER% -conntype NONE -f "Z:\IBM\WebSphere\AppServer\bin\configureWebserverDefinition.jacl"webserver81 IHS "Z:\\IBM\\HTTPServer" "Z:\\IBM\\HTTPServer\\conf\\httpd.conf" 81 MAP_ALL "Z:\\IBM\\HTTPServer\\Plugins" managed denicint2Node02 denicint2.mlab.jdedwards.com windows
Note: Where the original settings for these bolded entries were probably something similar to these:
■ AppSrv01
■ webserver80
■ 80
■ SERVERNode01
4. Save the file.
5. From the directory where the batch file exists, execute it using this command:
configurewebserver81.bat
where x: is the drive on which your plugins are installed.
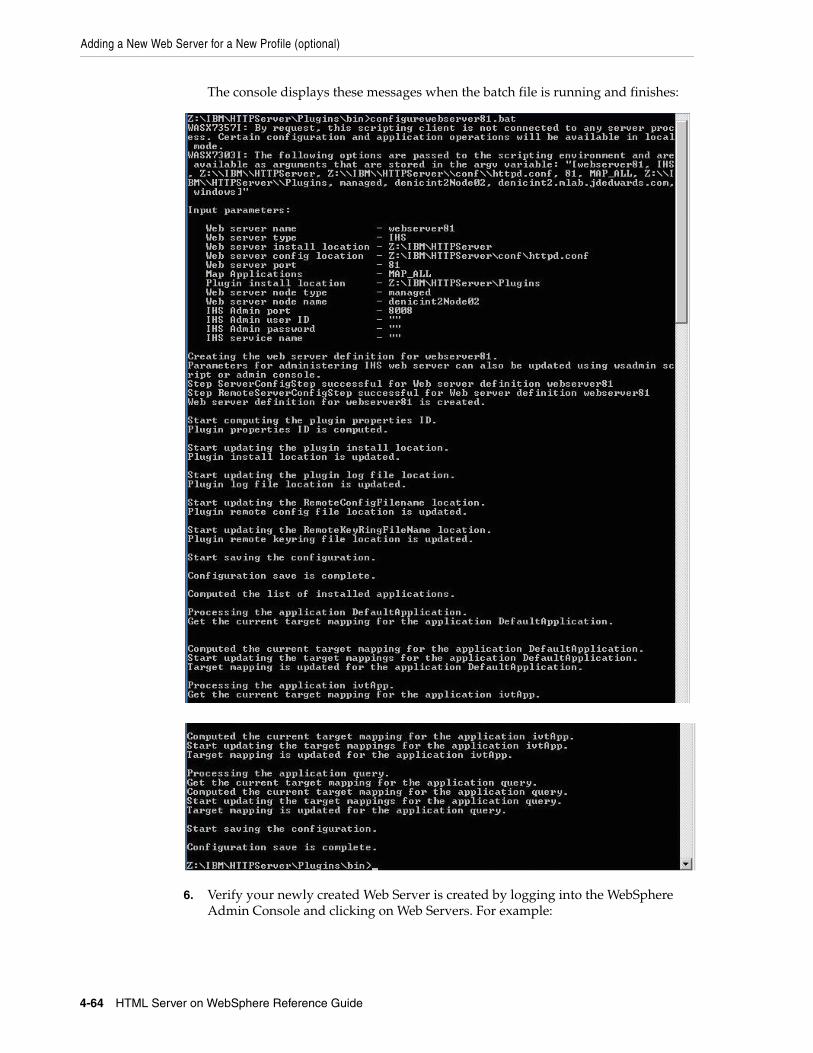
Adding a New Web Server for a New Profile (optional)
4-64 HTML Server on WebSphere Reference Guide
The console displays these messages when the batch file is running and finishes:
6. Verify your newly created Web Server is created by logging into the WebSphere Admin Console and clicking on Web Servers. For example:

Adding a New Web Server for a New Profile (optional)
Installing and Configuring WebSphere 7.0 4-65

Adding a New Web Server for a New Profile (optional)
4-66 HTML Server on WebSphere Reference Guide

5
Running the HTML Server 5-1
5Running the HTML Server
This chapter contains the following topics:
■ Section 5.1, "Starting the HTML Server"
■ Section 5.2, "Stopping the HTML Server"
■ Section 5.3, "Accessing the HTML Server"
■ Section 5.4, "Generating Serialized Objects for the HTML Server"
■ Section 5.5, "Configuring the HTML Server for Non-Western European Languages"
■ Section 5.6, "Enabling the Browser Side Debugging Feature on the Web Client"
■ Section 5.7, "Customizing the Disclaimer for the Sign-In Page"
■ Section 5.8, "Setting Up Quick Links for Pervasive Device Support"
■ Section 5.9, "Clearing File Attachments from the Browser Cache"
Tip: In order to enable any modifications, you should always stop and restart the Application Server any time you modify the configuration.
Note: Beginning with Tools Release 8.97, many administrative tasks (such as starting and stopping services) for both the HTTP server and the JD Edwards EnterpriseOne HTML Web server can be performed through the Server Manager Console.
5.1 Starting the HTML ServerThe JD Edwards EnterpriseOne HTML Server is installed in the instance of the application server that you defined when you installed the Web Server (for example, AS_JS_81). Complete this task to start the server.
To start the HTML Server:
1. Start the Server Manager console.
2. Select the Server and Instance you want to start.
3. Select the Start button.

Stopping the HTML Server
5-2 HTML Server on WebSphere Reference Guide
5.2 Stopping the HTML ServerThe JD Edwards EnterpriseOne HTML Server is installed in an instance of the application server that you defined when you installed the Web Server (for example, AS_JS_81). Complete this task to stop the server.
To Stop the HTML Server:
1. Start the Server Manager console.
2. Select the Server and Instance you want to stop.
3. Select the Stop button.
5.3 Accessing the HTML ServerYou can access the HTML Server from any web browser connected to your network.
To access the HTML Server:
1. Open the JD Edwards HTML client by opening a browser and entering this URL:
http://<web_server_name>:<port_number>/jde/owhtml or
http://<web_server_name>:<port_number>/jde/E1Menu.maf
For example:
http://jdewebs1.myserver.com:81/jde/owhtml or
http://jdewebs1.myserver.com:81/jde/E1Menu.maf
5.4 Generating Serialized Objects for the HTML ServerStarting with application release 8.12, JD Edwards EnterpriseOne specs are delivered in XML format, which allows for on-demand generation of serialized Java objects from these XML specs. Objects are now automatically generated when the first user accesses an application, and the only objects not automatically generated are FDA-created portlets.
eGenerator can still be used to manually generate serialized objects. eGenerator is the only method for generating FDA-created portlets, so it is required if you installed a Portal and created portlets in the FDA application.
To install the eGenerator and manually generate serialized objects, refer to Appendix A, "Generating JD Edwards EnterpriseOne Serialized Objects".
5.5 Configuring the HTML Server for Non-Western European LanguagesIf you are setting up the HTML Server to run Non-Western European Languages, complete this task to ensure that the Application Server is properly configured for Unicode.
To configure the HTML Server for Non-Western European Languages:
1. Open the WebSphere Administrative Console, and select the Application Server for the JD Edwards HTML Server.
2. Using Server Manager, verify this code page parameter and setting:
codePage=1252

Customizing the Disclaimer for the Sign-In Page
Running the HTML Server 5-3
5.6 Enabling the Browser Side Debugging Feature on the Web ClientIn past releases, a user working on a form in the web client could press the Ctrl+D keys to display GUI elements at the bottom of the page that are used for browser side debugging. Starting with release 8.96, this feature is disabled in the default mode, and the web client no longer displays this debugging feature when Ctrl+D is pressed. To enable this feature for developers and support personnel, the system administrator must modify the JDEDTA.js file as described in this task.
To enable the browser side debugging feature:
1. On the HTML Server, navigate to the webclient.war/js/ directory, and open the JDEDTA.js file in a text editor.
2. Search for the following line:
var allowDebug=false;
and change the value to true.
3. Save the file.
You do not need to restart the server to activate the change.
4. Open Internet Explorer, and press the Refresh button to reload the page.
This action refreshes the .js files cached in the browser to activate the Ctrl-D feature.
5.7 Customizing the Disclaimer for the Sign-In PageWhen web-based clients log on to JD Edwards EnterpriseOne, the sign-in page includes a default disclaimer that is included in a file shipped with the HTML Server software. This task describes how to modify this file to include your own disclaimer.
To specify an additional disclaimer for the sign-in page:
1. Open this file in a text editor:
<JAS_HOME>\webcontent\share\html4login.jsp
where <JAS_HOME> is the installation directory of the HTML Server.
2. Make a backup of this file.
3. Locate the following line and specify your disclaimer with the following element:
String companyDisclaimerHTML = "";
For example:
String companyDisclaimerHTML = "By signing in, you agree to the <a href=\"http://server/path-to/privacypolicy.html\">privacy policy</a>.";
Tip: This element is Java code. Therefore, quotation marks must be preceded by a back-slash character, as shown above.
4. Save the file.
Your changes should take effect immediately. If not, restart the portal.
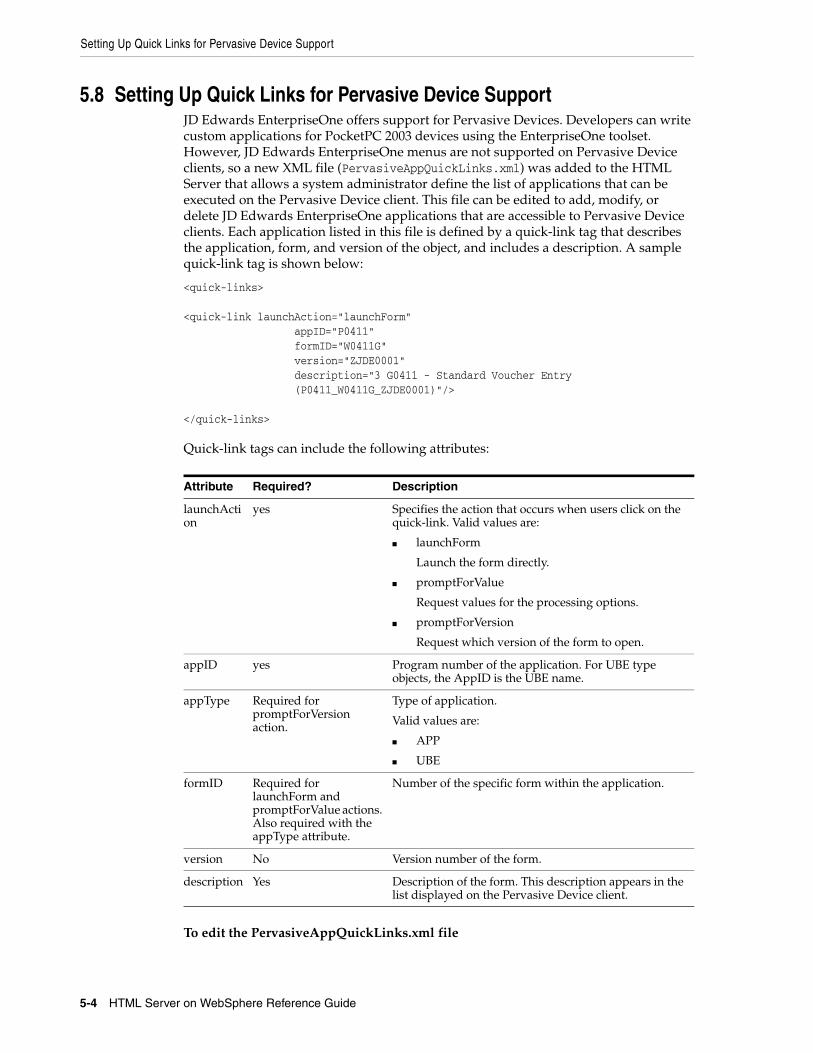
Setting Up Quick Links for Pervasive Device Support
5-4 HTML Server on WebSphere Reference Guide
5.8 Setting Up Quick Links for Pervasive Device SupportJD Edwards EnterpriseOne offers support for Pervasive Devices. Developers can write custom applications for PocketPC 2003 devices using the EnterpriseOne toolset. However, JD Edwards EnterpriseOne menus are not supported on Pervasive Device clients, so a new XML file (PervasiveAppQuickLinks.xml) was added to the HTML Server that allows a system administrator define the list of applications that can be executed on the Pervasive Device client. This file can be edited to add, modify, or delete JD Edwards EnterpriseOne applications that are accessible to Pervasive Device clients. Each application listed in this file is defined by a quick-link tag that describes the application, form, and version of the object, and includes a description. A sample quick-link tag is shown below:
<quick-links>
<quick-link launchAction="launchForm" appID="P0411" formID="W0411G" version="ZJDE0001" description="3 G0411 - Standard Voucher Entry (P0411_W0411G_ZJDE0001)"/>
</quick-links>
Quick-link tags can include the following attributes:
Attribute Required? Description
launchAction
yes Specifies the action that occurs when users click on the quick-link. Valid values are:
■ launchForm
Launch the form directly.
■ promptForValue
Request values for the processing options.
■ promptForVersion
Request which version of the form to open.
appID yes Program number of the application. For UBE type objects, the AppID is the UBE name.
appType Required for promptForVersion action.
Type of application.
Valid values are:
■ APP
■ UBE
formID Required for launchForm and promptForValue actions. Also required with the appType attribute.
Number of the specific form within the application.
version No Version number of the form.
description Yes Description of the form. This description appears in the list displayed on the Pervasive Device client.
To edit the PervasiveAppQuickLinks.xml file

Setting Up Quick Links for Pervasive Device Support
Running the HTML Server 5-5
1. On the HTML Server, navigate to this directory: <JAS_Home>/installedApps/<node_name>/EA_JS_81.ear/webclient.war/classes.
Open the PervasiveAppQuickLinks.xml file in a text editor.
2. Add quick-link tags for each of the JD Edwards EnterpriseOne applications you want to make accessible to Pervasive Devices.
You can also delete or modify existing tags to remove or change the forms that Pervasive Device clients can access. When clients access JD Edwards EnterpriseOne from a Pervasive Device, the forms are listed as links in the same order they appear in the PervasiveAppQuickLinks.xml file.
Save and exit the file.
Below is an example of the PervasiveAppQuickLinks.xml file:
<?xml version="1.0" encoding="UTF-8" ?> <quick-links> <quick-link launchAction="launchForm" appID="P0411" formID="W0411G" version="ZJDE0001" description="3 G0411 - Standard Voucher Entry (P0411_W0411G_ZJDE0001)" /> <quick-link launchAction="launchForm" appID="P01012" formID="W01012B" version="ZJDE0001" description="P01012_W01012B" /> <quick-link launchAction="promptForValue" appID="P01012" formID="W01012B" version="ZJDE0001" mode="1" appType="APP" description="Prompt for Values(P01012_W01012B,ZJDE0001,1,APP)" /> <quick-link launchAction="promptForValue" appID="P4210" formID="W4210E" description="Prompt for Values(P4210_W4210E)" /> <quick-link launchAction="promptForVersion" appID="P01012" formID="W01012A" appType="APP" description="Prompt for Version(P01012_W01012A)" /> <quick-link launchAction="promptForVersion" appID="R0006P" appType="UBE" description="Prompt for Version(R0006P)" /> <quick-link launchAction="launchForm" appID="P98TREE" formID="W98TREEA" description="P98TREE_W98TREEA" /> <quick-link launchAction="launchForm" appID="P98SYSGR" formID="W98SYSGRB" description="P98SYSGR_W98SYSGRB" /> <quick-link launchAction="launchForm" appID="P98CTRL" formID="W98CTRLA" description="P98CTRL_W98CTRLA" /> <quick-link launchAction="launchForm" appID="P98RUNPC" formID="W98RUNPCM" description="P98RUNPC_W98RUNPCM" /> <quick-link launchAction="launchForm" appID="P98SYSFM" formID="W98SYSFMA" description="P98SYSFM_W98SYSFMA" /> <quick-link launchAction="launchForm" appID="P98SYSFM" formID="W98SYSFMB" description="P98SYSFM_W98SYSFMB" /> <quick-link launchAction="launchForm" appID="P98FRMFL" formID="W98FRMFLA" description="P98FRMFL_W98FRMFLA" /> <quick-link launchAction="launchForm" appID="P98MEDIA" formID="W98MEDIAA" description="P98MEDIA_W98MEDIAA" /> <quick-link launchAction="launchForm" appID="P90CB050" formID="W90CB050A" description="P90CB050_W90CB050A" /> <quick-link launchAction="launchForm" appID="P55SFRU1" formID="W55SFRU1A" description="P55SFRU1_W55SFRU1A" /> <quick-link launchAction="launchForm" appID="P99WIZ01" formID="W99WIZ01B" description="P99WIZ01_W99WIZ01B" /> <quick-link launchAction="launchForm" appID="P99WIZ03" formID="W99WIZ03A" description="P99WIZ03_W99WIZ03A" /> <quick-link launchAction="launchForm" appID="PMODAL" formID="WMODALA" description="PMODAL_WMODALA" /> <quick-link launchAction="launchForm" appID="P42101" formID="W42101C" description="New Sales Order Application" />

Clearing File Attachments from the Browser Cache
5-6 HTML Server on WebSphere Reference Guide
</quick-links>
5.9 Clearing File Attachments from the Browser CacheIn a typical environment, file attachments (such as Media Object attachments and JD Edwards EnterpriseOne reports) are automatically cached into the \Temporary Internet Files directory on web-based client machines when these attachments are opened from a browser. This situation allows copies of confidential documents, such as Media Objects, images, and web pages, to proliferate across workstations on which these objects are opened.
To prevent these objects from persisting in the internet cache, administrators should configure the browsers to automatically clear the cache when the client closes the browser. This protection is particularly important in a kiosk environment. The procedure for clearing the cache depends on the type of browser. Refer to the relevant task below to secure the browser used in your system.
In addition to securing the browser cache, Media Object Security was added in 8.96 to ensure that media objects can be secured within the application. For more information on this topic, see "Managing Media Object Security" in the JD Edwards EnterpriseOne Tools Security Administration Guide.
This section describes these tasks:
■ Securing Internet Explorer
■ Securing Safari
■ Securing Mozilla Firefox
5.9.1 Securing Internet ExplorerComplete this task to automatically clear the cache in Internet Explorer.
1. In Internet Explorer, select Tools, Internet Options from the drop down menu.
2. Click the Advanced tab.
3. In the "Settings" box, scroll down to the section labeled "Security," and select the check box next to Empty Temporary Internet Files folder when browser is closed."
4. Click OK to save the change.
This option does not delete cookies, but will clear your cache of other files when you close the browser.
Tip: Access the following web page for more details:
http://www.microsoft.com/windows/ie/using/howto/customizing/clearcache.mspx
5.9.2 Securing SafariActivate the Private Browsing feature of Safaris to secure the browser. When activated, no web addresses, personal information, or pages are saved or cached on the browser, and no trace of any activity is recorded.

Clearing File Attachments from the Browser Cache
Running the HTML Server 5-7
5.9.3 Securing Mozilla FirefoxActivate the Clear Private Data tool to secure Firefox. This tool allows you to delete all personal data, including browsing history, cookies, Web form entries and passwords with a single click. Mozilla Firefox can also be configured to automatically clear this information when you close the browser.

Clearing File Attachments from the Browser Cache
5-8 HTML Server on WebSphere Reference Guide
6
Understanding EnterpriseOne HTML Server Package Discovery 6-1
6Understanding EnterpriseOne HTML Server Package Discovery
This chapter contains the following topics:
■ Section 6.1, "Overview of EnterpriseOne HTML Server Package Discovery"
■ Section 6.2, "Impacts to End Users"
■ Section 6.3, "Understanding the Manifest"
6.1 Overview of EnterpriseOne HTML Server Package DiscoveryStarting with JD Edwards EnterpriseOne release 8.12, EnterpriseOne specs are delivered in XML format. The new format enables the specs to be stored in database tables instead of the TAM files, and is called Shared Object Configuration. In this configuration, both Enterprise Servers and HTML Servers access the same database for the same set of specs.
Before release 8.12, whenever a new package was deployed to the Enterprise Server, you had to install the package on a development client and manually generate serialized objects for the HTML Server. With release 8.12, however, manual generation is now optional. Instead, the JD Edwards EnterpriseOne now automatically generates objects on the fly if they do not exist in the serialized object tables.
When you deploy a package to the Enterprise Server, the HTML Server automatically discovers the new package and purges all serialized records impacted by the package. If a full package is deployed, the HTML Server deletes all serialized object records. If an update package is deployed, the HTML Server deletes only those records that are included in the update package. It also removes the impacted objects from in-memory cache. After the package deployment is complete, when a user accesses an EnterpriseOne object, this object is generated on the fly using the new specs delivered in the package.
To ensure the integrity of the specs, the HTML Server must be configured so that:
■ Each EnterpriseOne JAS instance includes only one path code and one package within the path code.
■ All users accessing a JD Edwards EnterpriseOne HTML Server instance access only one package.
■ Serialized object databases are not shared among multiple EnterpriseOne JAS instances, unless all these instances run on the same path code and same package.

Impacts to End Users
6-2 HTML Server on WebSphere Reference Guide
6.2 Impacts to End UsersDuring package deployment, the HTML Server stops responding to user requests until the package is deployed and serialized objects are purged. During this process, user will not able to log in. Users that are already logged in prior to the package deployment will not be able to launch new forms until the package deployment is complete.
6.3 Understanding the ManifestEach package now contains a package manifest. The manifest is a record in a new table that is created every time a package is built. The package manifest contains a date/time stamp for the package build and information about the package content. For update packages, it also contains a list of objects included in the package.
Each serialized object table now contains a serialized object manifest. This manifest indicates what specs are used to generate the serialized objects. For example, the manifest includes the name of the package used to generate the serialized objects. To ensure the integrity of the system, all serialized objects are generated from the same package.
When the HTML Server detects a package deployment, it compares the package manifest with the serialized object manifest. If a new package is deployed, the package manifest will be different than the serialized object manifest. The HTML Server purges the serialized objects table of objects listed in the package manifest. The HTML Server then updates the serialized object manifest so it is consistent with the package manifest. This entire process is automatic and does not need administrator involvement.
If you decide to generate objects manually using the eGenerator, you must generate the manifest manually for the discovery process to work. For instructions on how to generate the manifest, see Generating the Serialized Object Manifest in Generating JD Edwards EnterpriseOne Serialized Objects.

A
Generating JD Edwards EnterpriseOne Serialized Objects A-1
AGenerating JD Edwards EnterpriseOne Serialized Objects
This appendix describes the tasks to install eGenerator and generate JD Edwards EnterpriseOne JAS objects from a set of JD Edwards EnterpriseOne objects. It contains the following topics:
■ Section A.1, "Generating JD Edwards EnterpriseOne Serialized Objects Overview"
■ Section A.2, "Installing eGenerator"
■ Section A.3, "Working with the eGenerator"
■ Section A.4, "Configuring eGenerator"
■ Section A.5, "Generating the Serialized Object Manifest"
■ Section A.6, "Generating All Standard Serialized Objects"
■ Section A.7, "Generating a List of Objects (Bulk Generation)"
■ Section A.8, "Verifying the Generation Process"
■ Section A.9, "Generating Other Selected Objects"
A.1 Generating JD Edwards EnterpriseOne Serialized Objects OverviewThe first step is determine which JDK to use:
■ HTML Server with WebSphere Application Server 7.0
You must use JDK version 1.6 on your eGenerator script.
■ HTML Server with WebSphere Application Server 8.5.x
You must use JDK version 1.7 on your eGenerator script.
Note: If you are running eGenerator on your Development Client for WebSphere 8.5.x, you will need JDK 1.6 32-bit for your Development Client and JDK 1.7 for the eGenerator.
Starting with application release 8.12, JD Edwards EnterpriseOne specs are delivered in XML format, which allows for on-demand generation of serialized objects from these XML specs. Objects are now automatically generated when the first user accesses an application.
eGenerator can still be used to manually generate serialized objects. It is the only method for generating FDA-created portlets, so is required if you installed a JD

Installing eGenerator
A-2 HTML Server on WebSphere Reference Guide
Edwards EnterpriseOne Portal. eGenerator is also an optional path for generating any set of objects, including a complete set of objects.
The eGenerator allows manual control over the process that turns JD Edwards EnterpriseOne specifications into Java code, which enables you to access JD Edwards EnterpriseOne applications in HTML. The JD Edwards EnterpriseOne forms and applications that you generate, either manually from eGenerator, or automatically using on-demand generation, are serialized Java objects. JD Edwards EnterpriseOne stores these objects in a database (in serialized object tables F989998 & F989999), and retrieves them at runtime.
eGenerator requires a specific machine configuration. While it is possible to configure a web server as the generation machine for release 8.12, you should dedicate a separate generation machine for this process. The configuration of this machine depends on the release of JD Edwards EnterpriseOne you installed.
If you upgraded to JD Edwards EnterpriseOne from a previous release and customized your JD Edwards EnterpriseOne objects, you should first test your custom modifications, then generate serialized JAS objects from the upgraded path code.
A.2 Installing eGeneratorThis topic discusses the tasks you follow to install the eGenerator:
■ Section A.2.1, "Prerequisites"
■ Section A.2.2, "Setting the Default Storage Parameter (SQL Server only)"
■ Section A.2.3, "Preparing JD Edwards EnterpriseOne for Serialized Objects"
■ Section A.3.3, "Bypass the Web Server and Generate Serialized Objects Directly to the Serialized Object Tables"
A.2.1 PrerequisitesBefore you install the eGenerator, verify that the tasks below are completed for your version of JD Edwards EnterpriseOne:
■ Complete the task: "Copying the JDBC Drivers and the tnsnames.ora file to the Deployment Server" in the JD Edwards EnterpriseOne Development Client Installation Guide.
Caution: This task must be completed by a JD Edwards EnterpriseOne system administrator before you complete any of the tasks below.
■ Install the Web Development Client to set up eGenerator.
If the Web Development Client installs successfully, eGenerator is automatically configured to run without modifying any of the files used in the generation process.
Refer to the JD Edwards EnterpriseOne Development Client Installation Guide.
■ Complete this task if you are using IBM DB2 on the Enterprise Server.
On the Generation machine, open the db2cli.ini file and comment out or remove the LobCachSize parameters under database aliases associated with JD Edwards EnterpriseOne. This file is typically located under DB_HOME\SQLLIB\.

Working with the eGenerator
Generating JD Edwards EnterpriseOne Serialized Objects A-3
A.2.2 Setting the Default Storage Parameter (SQL Server only)For SQL Servers databases, the default storage parameter on your JD Edwards EnterpriseOne database might not enable enough space to transfer all the standard JD Edwards EnterpriseOne Java objects. To avoid this problem, complete the task below:
To set the default storage parameter:
1. Open the SQL Server database and set your database Maximum File Size parameter to "Unrestricted filegrowth."
Complete this step for each database (for example, PY900) to which you are installing the Java objects.
A.2.3 Preparing JD Edwards EnterpriseOne for Serialized ObjectsBefore you generate serialized Java objects in JD Edwards EnterpriseOne, complete this task to link to the JD Edwards EnterpriseOne serialized object tables on the Java generation machine.
Complete this task only if you want to generate serialized objects on a different location other than the datasouce listed in the Object Configuration Manager (OCM). If you choose this option, you can use this procedure to edit the JD Edwards EnterpriseOne Spec database.
1. Sign on to Server Manager Console.
2. Open the database configuration of the HTML instance.
3. On JDBj Spec Datasource, enter the Spec Datasource information.
4. Save the configuration and restart the HTML instance.
A.3 Working with the eGeneratorThis section describes these topics:
■ Section A.3.1, "Running the eGenerator Diagnostic Tool"
■ Section A.3.2, "Generate Using the Web Server"
■ Section A.3.3, "Bypass the Web Server and Generate Serialized Objects Directly to the Serialized Object Tables"
Each method of generation has a specific way to log into eGenerator. Select the task that corresponds to the way you want to generate objects.

Working with the eGenerator
A-4 HTML Server on WebSphere Reference Guide
A.3.1 Running the eGenerator Diagnostic TooleGenerator now includes an application that is automatically launched every time eGenerator is started. This application is a diagnostic tool that checks the configuration of eGenerator and reports incorrect settings. The diagnostic tool categorizes errors into two types: fatal and non-fatal. If a fatal error is detected, the application displays an error message and does not enable eGenerator to launch. If a non-fatal error is detected, the application displays an error message but enables you to continue with the Generation process.
Note: The auto diagnostic tool can be suppressed by launching gen.bat with the -nodiag parameter.
The auto diagnostic tool performs these operations for general use:
The auto diagnostic tool performs these operations for general use for Direct Generation:
Operation Fatal Error
Generates a Web Code Level Object, which is used by JAS at startup to determine if its code matches the generated objects.
X
Checks the location of the jas.ini file and validates these key parameters in the file.
Checks the location of the location of the jas logs.
For JAS Generation only
Operation Fatal Error
Verifies that the Tools Release of the JAS code on the generation machine matches the Tools Release of the JAS code on the HTML Server (fatal error).
X
A.3.2 Generate Using the Web ServerComplete this task to generate objects using the web server.
1. On your generation machine, select your configuration below, navigate to this directory:
x:\<release>\JAS
Note: If you do not want to run the diagnostic program, include the parameter -nodiag in the command statement when you run launchGen.bat. See the section, Running the eGenerator Diagnostic Tool, for more information about the autodiagnostic tool.
2. From the above directory, run the launchGen.bat file.

Working with the eGenerator
Generating JD Edwards EnterpriseOne Serialized Objects A-5
3. On Generator, complete this field:
■ JAS Server Name
Enter machine name:port, where machine name is the name of your web server and port is the port number for the EnterpriseOne instance.
4. Click the Connect button.
5. Enter the login information for JD Edwards EnterpriseOne. After the connection is successful, the eGenerator is properly configured to generate the objects through the Web Server you specified.
6. Select where the specs exist for generation. You can generate specs from a specific set of Central Objects or a particular path code. By default, Default Spec Files will be used. Default Spec Files reside on the local machine.
Choose one of the following options:
■ To generate specs from a particular set of Central Objects:
Click the Central Objects radio button, and enter the Path Code where the specs are stored.

Working with the eGenerator
A-6 HTML Server on WebSphere Reference Guide
■ To generate specs from a specific package:
Click the Package radio button, and enter the name of the Package and the DataSource where the specs are stored.

Working with the eGenerator
Generating JD Edwards EnterpriseOne Serialized Objects A-7
7. Click Connect.
The system connects to the Web server that you indicated. A message appears on the status bar when login is complete.
Once you have logged in to a Web server, skip the following task and refer to the sections below it for information on how to generate objects.
A.3.3 Bypass the Web Server and Generate Serialized Objects Directly to the Serialized Object Tables
Select direct generation by clicking the Direct Generation radio button in the Connection section on the eGenerator application.
In this mode, the generator initializes a "mini" HTML Web Server instance on the generation machine. During generation, the generator will by-pass the actual HTMl Web Server and store the objects directly to the serialized object tables. After you complete this task, you can set up the HTML Server to read from the pre-populated serialized object tables.
Advantages:
■ Can generate objects before setting up the HTML Server.
■ Faster for all forms of generation.
■ Easier to maintain.

Working with the eGenerator
A-8 HTML Server on WebSphere Reference Guide
Disadvantages: You must configure the generation machine.
Complete this task to generate objects directly to a database.
1. Run the launchGen.bat file.
Note: If you do not want to run the diagnostic program, include the parameter -nodiag in the command statement when you run launchGen.bat. See the section, Section A.3.1, "Running the eGenerator Diagnostic Tool", for more information about the autodiagnostic tool.
2. On Generator, click the Direct Generation radio button.
In Direct Generation Mode the eGenerator locates the serialized object database by looking for the database server in the server= setting of the JDBj-SPEC DATA SOURCE section of the jdbj.ini file located on the generation machine.
3. Click the Connect button and enter the login information for JD Edwards EnterpriseOne.
The system bypasses the Web server and connects directly to the database specified in the jdbj.ini file.

Configuring eGenerator
Generating JD Edwards EnterpriseOne Serialized Objects A-9
A.4 Configuring eGeneratoreGenerator includes a number of options you can set up for your particular environment. The configuration process consists of these tasks:
■ Setting eGenerator Options
■ Choosing Languages
■ Configuring the genapp.ini File
A.4.1 Setting eGenerator OptionsBefore generating objects, you can define a variety of parameters that affect how the eGenerator functions.
1. From the pull-down menu, select OptionsAdvanced Settings.
2. On Advanced Settings, select the options appropriate for your generation requirements
■ Logging
Specify whether to log the generation process by clicking the check boxes next to the Status and Error logs. You can also enter the location of the log files. Logging is crucial for troubleshooting problems with the generation process.
■ Generation Modes
Specify if the generation of All Objects will be done in parallel mode or sequential mode by checking the appropriate radio button.
For more information on Generation Modes, see Generation Modes.

Configuring eGenerator
A-10 HTML Server on WebSphere Reference Guide
■ User Option
You can generate a public version of the applications or a personal version by choosing the relevant option. Personal versions are only available to the person who created the versions, and are only intended for developers.
■ Protocol Option
Starting with Tool Release 9.1.4, you can choose the HTTPS Protocol connection to the Web Server. You must include the HTML server certificate location in the gen.bat file. The location is set by the -Djavax.net.ssl.trustStore= parameter (bolded) as shown in this example:
%JAVA_PGM% -Xss1m -Xms128m -Xmx512m -Ddefault_path=%INI_DIR% -Djavax.net.ssl.trustStore=Z:/E910/e1keystore -classpath %GEN_CLASSPATH% com.jdedwards.runtime.generator.Generator %1%JAVA_PGM% -Xss1m -Xms128m -Xmx512m -Ddefault_path=%INI_DIR% -Djavax.net.ssl.trustStore=Z:/E910/e1keystore -classpath %GEN_CLASSPATH% com.jdedwards.runtime.generator.Generator %1
A.4.1.1 Generation Modes The eGenerator has these modes for generating web objects:
■ Sequential Generation
■ Parallel Generation
A.4.1.1.1 Sequential Generation In this mode the web objects are generated one after the other when you select the Generate-All Objects option. You can set this mode by clicking OptionsAdvanced Settings, then clicking Sequential Generation.
Advantages:
■ Most stable mode of generation.
■ Requires the least system resources, e.g. memory.
■ Safe to use during a JITI (Just in Time Install) process.
Disadvantage: The generation process can take longer.
A.4.1.1.2 Parallel Generation This is the default mode of generation. You can turn off this mode of generation by clicking Advanced Settings, then clicking Sequential Generation.
In this mode of generation the web objects are generated concurrently when you select the Generate-All Objects option
Advantage: Faster than Sequential Generation, especially with multi-processor workstations and fast database connections.
Disadvantages:
■ Cannot be used when the user doesn't have the full set of spec files, because JITI might occur.
■ If a JITI occurs during parallel generation, the spec files can get corrupted.
A.4.2 Choosing LanguagesYou can generate applications and reports in the language you desire by selecting any of the supported languages on the eGenerator application.

Note: You must install the Language CD for each language you want to use.
Generating the Serialized Object Manifest
Generating JD Edwards EnterpriseOne Serialized Objects A-11
To select languages
1. On eGenerator, select OptionsLanguages from the pull-down menu.
2. Click the check box next to each of the languages you want to use.
3. Click OK.
A.4.3 Configuring the genapp.ini FileThe genapp.ini file contains the list of applications that you want generated in a mode other than the default mode, which is mode 1. In the genapp.ini file, you can list applications you want generated in one of the other modes: Mode 2 or Mode 3.
Do not modify this file unless you created custom applications using Mode 2 or Mode 3.
A.5 Generating the Serialized Object ManifestThe section describes how to generate the manifest for the set of objects in the serialized object tables. For an overview of the serialized object manifest and a description of the package discovery process, refer to Understanding EnterpriseOne HTML Server Package Discovery.
To generate serialized object manifests
1. From the pull-down menu, select GenerateManifest.

Generating the Serialized Object Manifest
A-12 HTML Server on WebSphere Reference Guide
2. Click Create Manifest.
3. Click Yes.
The program creates the manifest and closes the window.
4. To view the manifest that was created, from the pull down menu, select GenerateManifest.

Generating All Standard Serialized Objects
Generating JD Edwards EnterpriseOne Serialized Objects A-13
The Manifest Info section displays the name of the package, the build date, and the deployment date. This manifest shows that no update packages were deployed.
The Manifest Audit Info field contains information about the user and the machine that created the manifest.
A.6 Generating All Standard Serialized ObjectseGenerator can generate a complete set of Java Serialized Objects from JD Edwards EnterpriseOne objects. These serialized objects enable you access to all JD Edwards EnterpriseOne objects when you run your web server. If, however, you only want to generate a partial set of objects, skip this task and complete the relevant task in the section: Section A.9, "Generating Other Selected Objects".
Complete this task to generate a complete set of JD Edwards EnterpriseOne objects.
1. From the pull-down menu, select File > Core Objects.
For more information on generating core objects, see Section A.9.1, "Generating Core Objects".
2. If the core objects generate successfully, from the pull-down menu, select Generate > All Objects.

Generating All Standard Serialized Objects
A-14 HTML Server on WebSphere Reference Guide
3. On Generate All Objects, check all the objects listed.
4. Click the Start button.
eGenerator checks the database connection before it attempts to generate objects.
If it cannot connect to the database, eGenerator displays this screen:
5. If this screen displays, click the Stop button and verify the connection to the database.
6. If the last Generate-All session did not conclude successfully, eGenerator displays a screen with the details of the failed generation.
Select one of these options:
■ To resume the previous generation process, click RESUME OLD SESSION. You should select this option, which restarts the previous process from the
Generating a List of Objects (Bulk Generation)
Generating JD Edwards EnterpriseOne Serialized Objects A-15
point of failure. Once the previous process completes, you can repeat this task to generate the new set of objects.
■ To cancel the previous generation process and generate the new objects, click CREATE NEW SESSION.
Select this option if you are currently generating a complete new set of all object types.
In either case, an object set starts generating. The progress of object generation is displayed on the screen: the blue progress bar indicates the progress of the generation process, and the green progress bar indicates the progress of objects inserted into the database.
If the database insertion of objects is not complete when the generation is done, the eGenerator displays the number of objects remaining in the queue.
Once all the objects are inserted into the database, the program displays a message that the "Generation completed successfully."
A.7 Generating a List of Objects (Bulk Generation)If you are running EnterpriseOne release 812, the JAS servers generates objects on demand. To reduce the performance impact of on-demand generation, you can manually generate a list of the most frequently used applications from a list defined in a text file, and let other applications or reports to be generated on demand.
A sample text file named BulkGen.txt is included with the HTML Server or Web Development Client under the WEB-INF directory. This file contains sample entries in the format that can be read by the eGenerator. Modify this file to include just the large, frequently used applications.
To run the bulk generation file
1. Run launchGen.bat.
2. On eGenerator, complete this field:
■ Bulk Generation File: Enter the name of the file, or click Select File, and select the Bulk Generation File.
It may take some time for the system to connect to the file.
3. Select a Connection option (either Direct Generation or JAS Server).
4. Select Default Spec Files.
5. Click Connect.
6. Log on to JD Edwards EnterpriseOne and click OK.
7. From the pull-down menu at the top of the screen, select FileBulk Generation.
8. Click Start.
eGenerator will generate all the objects listed in the file you selected. When the process is complete, eGenerator displays a message: Generation Completed Successfully.
Tip: The update package build generates a GeneratorList.txt file in the work directory of the package. The GeneratorList.txt file is a well formed bulk generation file that lists the objects included in the update package. You can use this file for Bulk Generation after deploying the update package.

Verifying the Generation Process
A-16 HTML Server on WebSphere Reference Guide
A.8 Verifying the Generation ProcessComplete these tasks to verify the generation is successful:
■ Checking Log Files
■ Checking Database Acknowledgements
A.8.1 Checking Log FileseGenerator enables you to automatically display the Status Log and Error Log files by selecting these options from a menu.
To display the Status Log
1. On eGenerator, select LogsStatus Log from the pull-down menu.
To display the Error Log
1. On Generator, select LogsError Log from the pull-down menu.
A.8.2 Checking Database AcknowledgementsThe status log records whether an object is successfully inserted in the database. This enables the user to monitor the generation process and verify that objects are successfully generated.
These acknowledgments will not be printed for data dictionary Items or Data Structures, however, because they are too numerous to be printed on the command line screen.
Below is an example of the output:
Generating application P01012 ...-->Database Ack:ER_P01012_W01012D successfully inserted into database-->Database Ack:P01012_HTML_W01012D successfully inserted into database-->Database Ack:ER_P01012_W01012B successfully inserted into database-->Database Ack:P01012_HTML_W01012B successfully inserted into database-->Database Ack:ER_P01012_W01012A successfully inserted into database-->Database Ack:P01012_HTML_W01012A successfully inserted into database Appgeneration finished Generating 2 NERs -->Database Ack: ER_P01012_W01012Csuccessfully inserted into database -->Database Ack: P01012_HTML_W01012Csuccessfully inserted into database -->Database Ack: NER_PlugAndPlay_P0101successfully inserted into database NER generation finished Generating 1 POData Structure Items PO Data Structure generation finished Generating 2Business Views Business View generation finished Generating 5 Tables Tablegeneration finished Generating 294 Data Dictionary Items Data Dictionarygeneration finished Generating 30 Data Structure Items Data Structuregeneration finished -->Database Ack:NER_UpdateChangedGeoCode successfullyinserted into database -->Database Ack: PODATAP01012 successfully insertedinto database -->Database Ack:VIEW_V0101E successfully inserted intodatabase -->Database Ack: TABLE_F0101 successfully inserted into database-->Database Ack: TABLE_F0111 successfully inserted into database-->Database Ack: TABLE_F0116 successfully inserted into database-->Database Ack: TABLE_F03012successfully inserted into database-->Database Ack: TABLE_F0401 successfully inserted into database
A.9 Generating Other Selected ObjectsWhen you deploy an update package of JD Edwards EnterpriseOne objects, you can either depend on the on-demand feature of the HTML Server to generate serialized

Generating Other Selected Objects
Generating JD Edwards EnterpriseOne Serialized Objects A-17
objects, or you can manually generate selected objects using eGenerator. eGenerator includes several methods of generating a partial set of serialized objects. All but one method, "Generating objects using the Bulk Generation File," are performed by selecting options from the eGenerator screen. The Bulk Generation file enables you to type selected objects directly into a text file and run this file in eGenerator.
Complete one of these tasks to generate a partial set of serialized objects.
■ Generating Core Objects.
■ Generating Applications.
■ Generating Forms.
■ Generating Reports.
■ Generating NERs.
■ Generating Data Dictionary Items.
■ Generating Tables.
■ Generating Business Views.
■ Generating Data Structures.
A.9.1 Generating Core ObjectsThe core objects are the foundation objects required by other JD Edwards EnterpriseOne components. Generating these objects enables the Java server to run Task Explorer and the Portal without installing specific applications.
To generate core objects, on eGenerator, select FileCoreObjects from the pull-down menu.
eGenerator begins generating the core objects and their dependent Data Dictionary Items.
The eGenerator displays the status of the generation once the process is complete.
A.9.2 Generating ApplicationsComplete one of these tasks to generate one or more applications:
■ From the pull-down menu, select Generate -> Applications.
■ From the pull-down menu, select Generate ->Application.
■ From the pull-down menu, select Generate -> Application.
To generate an application:
1. From the pull-down menu, select Generate -> Applications.

Generating Other Selected Objects
A-18 HTML Server on WebSphere Reference Guide
2. Select Application Name, and enter the program number of the application (for example, P01012).
3. Click Start.
The Generator generates all forms contained in the application and all dependent objects used by the application.
4. Check the Status Log for status of generation.
To generate applications by system code
1. From the pull-down menu, select Generate ->Application.
2. Select Generate by System Code, and type the number of the System Code in the field to the right.

Generating Other Selected Objects
Generating JD Edwards EnterpriseOne Serialized Objects A-19
3. Click Start.
eGenerator fetches all the applications under that system code.
4. Confirm the applications were generated by checking the status and error logs.
5. Use this SQL command to verify the applications reside in the database:
SQL> select wboid from f989999 where wboid like P%W%;
You can generate applications by modes 1, 2 or 3. These modes determine the look and feel of the applications. For more information on Generation Modes, see the section "Generating Options" in Designing JD Edwards EnterpriseOne Web Applications.
To Generate applications by mode
1. From the pull-down menu, select Generate -> Application.
2. Select a mode.

Generating Other Selected Objects
A-20 HTML Server on WebSphere Reference Guide
3. Click Application Name, and enter the name of an application (for example, P01012).
4. Click Start.
A.9.3 Generating FormsTo generate a form
1. From the pull-down menu, select GenerateApplications.
2. Enter the form name in the Form Name field, for example, P01012_W01012A.
3. Click Start.
If the form name is invalid, this error message appears:
If the application name is invalid, this error message appears:

Generating Other Selected Objects
Generating JD Edwards EnterpriseOne Serialized Objects A-21
4. Check the status log for the generation status.
A.9.4 Generating ReportsComplete one of these tasks to generate one or more reports:
■ From the pull-down menu, select Generate -> Reports.
■ From the pull-down menu, select Generate -> Reports.
■ From the pull-down menu, select Generate ->Reports.
To generate a report
1. From the pull-down menu, select Generate -> Reports.
2. Enter the name of a report, (for example, R0006P).
3. Click Start.
4. Check the status log for the generation status.
The Generator generates all versions of the report and their corresponding data selection, data sequencing, and Print Information Objects.
5. Confirm the presence of the objects by checking the Status logs, or use this query to check the database:
SQL> select wboid from f989999 where wboid like %<report_name>%;
To generate a report version
1. From the pull-down menu, select Generate -> Reports.
2. Enter a Report Name and Report Version, for example, R0006P, and XJDE0001.

Generating Other Selected Objects
A-22 HTML Server on WebSphere Reference Guide
3. Click Start.
The Generator generates the version and any dependent objects.
4. Check the status log for the generation status.
To generate reports by system code
1. From the pull-down menu, select Generate ->Reports.
2. Select Generate by System Code, and enter a number for the code.
3. Click Start.

Generating Other Selected Objects
Generating JD Edwards EnterpriseOne Serialized Objects A-23
eGenerator fetches all the reports under that system code.
4. Check the status and error logs to confirm that all the reports for that system code were generated.
A.9.5 Generating NERsTo generate NERs
1. From the pull-down menu, select GenerateNERs.
2. Enter the name of an NER, for example, GetObjectDesc.
Note: NERs are case sensitive.

Generating Other Selected Objects
A-24 HTML Server on WebSphere Reference Guide
3. Click Start.
4. Check the status log for the generation status.
5. Use this SQL command to verify that the objects reside in the database.
SQL> select wboid from f989999 where wboid like <NER_ name>
A.9.6 Generating Data Dictionary ItemsTo generate Data Dictionary items
1. From the pull-down menu, select Generate -> Data Dictionary.
2. Generate any data dictionary item, for example, OBNM.

Generating Other Selected Objects
Generating JD Edwards EnterpriseOne Serialized Objects A-25
3. Check the status log for the generation status.
4. Use this SQL command to verify that the objects reside in the database.
SQL> select wboid from f989999 where wboid like 'DICT_<dd_name>';
A.9.7 Generating TablesTo generate tables
1. From the pull-down menu, select Generate -> Tables.
2. Enter a table number, for example, F9860.

Generating Other Selected Objects
A-26 HTML Server on WebSphere Reference Guide
3. Click Start.
eGenerator generates the table and all data dictionary items used by the table.
4. Check the status log for the generation status.
A.9.8 Generating Business ViewsTo generate business views
1. From the pull-down menu, select Generate -> Business Views.
2. Enter the name of a business view, for example, e.g. V9001B.
3. Click Start.
eGenerator generates the View and all associated tables and data dictionary items.
4. Check the status log for the generation status.

Generating Other Selected Objects
Generating JD Edwards EnterpriseOne Serialized Objects A-27
A.9.9 Generating Data StructuresTo generate data structures
1. From the pull-down menu, select Generate -> Data Structures.
2. Enter the name of a data structure, for example, D9800150C.

Generating Other Selected Objects
A-28 HTML Server on WebSphere Reference Guide
3. Click Start.
eGenerator generates the data structure.
4. Check the status log for the generation status.
5. Use this SQL command to verify that the objects reside in the database:
SQL> select wboid from f989999 where wboid like 'DSTR_ <datastructure_name>'

B
Configuring Secure Socket Layer with the HTML Server B-1
BConfiguring Secure Socket Layer with the HTML Server
The chapter describes how to configure Secure Socket Layer (SSL) with the HTML Server, and includes the following tasks:
■ Configuring SSL on the IBM HTTP Server
■ Configuring SSL on IBM WebSphere
B.1 Configuring SSL on the IBM HTTP ServerSSL requires a Signed Personal Certificate. You can either request a CA-Signed Personal Certificate directly from IBM, or you can generate a Self-Signed Certificate yourself. This task describes how to generate and use a Self-Signed Certificate. For production environments, we recommend you request one from CA. For instructions to request a CA-Signed Personal Certificate, refer to the IBM Info Center.
1. Create a folder named keys in the HTTP Server installation directory.
2. Start the Key Management Utility by navigating the following path:
Start > Programs > IBM HTTP Server > Start Key Management Utility
Alternately you can use a script found in this directory
Z:\IBM\HTTPServer\bin
3. In the IBM Key Management utility, create a Key Database File by navigating Key Database File > New.

Configuring SSL on the IBM HTTP Server
B-2 HTML Server on WebSphere Reference Guide
4. At the prompt, enter the following information:
■ Key Database Type = CMS
Only CMS is supported with the IBM HTTP Server.
■ File Name = serverkey.kdb
■ Location = x:\IBM\HTTPServer\keys
where x: is the drive on which you installed the IBM HTTP Server.
5. Enter the password (for example, "serverkey") and select the option stash the password file.
6. Click the OK button.
7. From the drop down box, select Personal Certificates.
8. Click New Self-Signed.
9. Enter following information on the screen that appears:
■ Key Label= Enter any label (for example, server_cert)
■ Version= X509V3
■ Key Size = 1024
■ Common Name = Fully Qualified Server Name (for example, denicint2.mlab.jdedwards.com)
■ Organization = your organization name (for example, Oracle).
■ Country or region = US
■ Validity Period = 365 days

Configuring SSL on the IBM HTTP Server
Configuring Secure Socket Layer with the HTML Server B-3
A sample screen shot is provided below:
10. On Create New Self-Signed Certificate, after the fields are complete click the OK button.
The program displays your certificate in the list.
11. Delete all the other certificates.
12. Open the httpd.conf file in a text editor, and add the following virtual host definition.
Note: The text in the httpd.conf is case sensitive; type the host definition exactly as shown.
If you have already configured a port on the HTTP Server (for example, port 91), the file will include an Alias. Use the same alias under your Virtual Host definition as described here.
# Example SSL configuration which supports SSLv3 and TLSv1# To enable this support:# 1) Create a key database with ikeyman# 2) Update the KeyFile directive below to point to that key database# 3) Uncomment the directives up through the end of the example# Note: The IPv6 Listen directive must only be uncommented if# IPv6 networking is enabled.## uncomment below line to enable sslLoadModule ibm_ssl_module modules/mod_ibm_ssl.so<IfModule mod_ibm_ssl.c>Listen 0.0.0.0:443
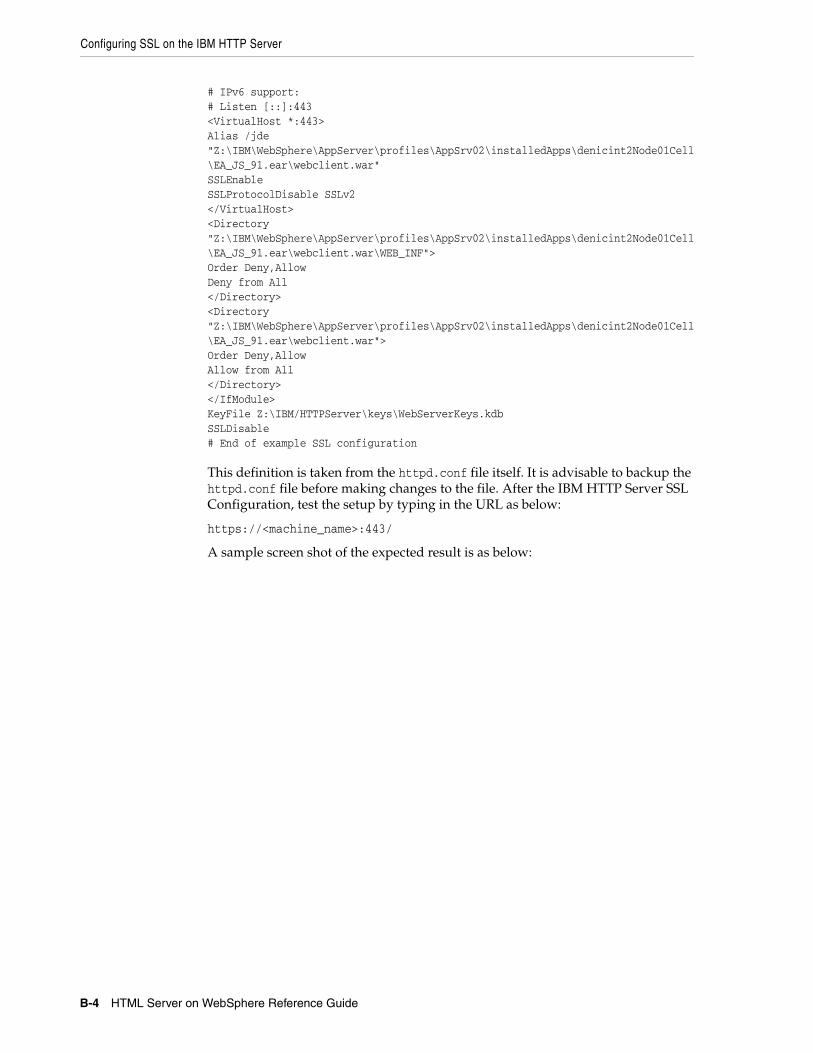
Configuring SSL on the IBM HTTP Server
B-4 HTML Server on WebSphere Reference Guide
# IPv6 support:# Listen [::]:443<VirtualHost *:443>Alias /jde "Z:\IBM\WebSphere\AppServer\profiles\AppSrv02\installedApps\denicint2Node01Cell\EA_JS_91.ear\webclient.war"SSLEnableSSLProtocolDisable SSLv2</VirtualHost><Directory "Z:\IBM\WebSphere\AppServer\profiles\AppSrv02\installedApps\denicint2Node01Cell\EA_JS_91.ear\webclient.war\WEB_INF">Order Deny,AllowDeny from All</Directory><Directory "Z:\IBM\WebSphere\AppServer\profiles\AppSrv02\installedApps\denicint2Node01Cell\EA_JS_91.ear\webclient.war">Order Deny,AllowAllow from All</Directory></IfModule>KeyFile Z:\IBM/HTTPServer\keys\WebServerKeys.kdbSSLDisable# End of example SSL configuration
This definition is taken from the httpd.conf file itself. It is advisable to backup the httpd.conf file before making changes to the file. After the IBM HTTP Server SSL Configuration, test the setup by typing in the URL as below:
https://<machine_name>:443/
A sample screen shot of the expected result is as below:

Configuring SSL on IBM WebSphere
Configuring Secure Socket Layer with the HTML Server B-5
B.2 Configuring SSL on IBM WebSphere1. Log on to your WebSphere Admin Console.
2. Navigate to EnvironmentVirtual Hosts.
3. Select your virtual host.
For example, if you initially installed your application on port 91, then the virtual host should be VH_EA_JS_91.
4. Under the virtual host, select Additional PropertiesHostAliases.
5. Under Host Aliases, click New.
A sample screen shot is provided below:

Configuring SSL on IBM WebSphere
B-6 HTML Server on WebSphere Reference Guide
6. Create a new host alias using the fully qualified name of the server and a port number of 443.
■ Host: *
■ port: 443 (Default SSL Port)
7. Regenerate and propogate the HTTP Server plug-in file and restart your HTTP Server.
8. Restart the Application Server.
You should be able to login to the following URL:
https://fully_qualified_server_name/jde/E1Menu.maf
Note: If SSL is activated, the system uses https instead of the http protocol.

C
Uninstalling WebSphere Fix Packs C-1
CUninstalling WebSphere Fix Packs
These appendix describes these tasks:
■ Section C.1, "Uninstalling a WebSphere 8.5 Fix Pack"
■ Section C.2, "Uninstalling a WebSphere 7.0 Fix Pack"
C.1 Uninstalling a WebSphere 8.5 Fix PackTo uninstall a WebSphere 7.0 fix pack:
1. Launch the Update Installer wizard.
2. Select the Uninstall option.
3. On Uninstall Packages, use the checkboxes to select the Installation Package that you want to uninstall
4. Click the Uninstall button.
C.2 Uninstalling a WebSphere 7.0 Fix PackTo uninstall a WebSphere 7.0 fix pack:
1. Launch the Update Installer wizard.

Uninstalling a WebSphere 7.0 Fix Pack
C-2 HTML Server on WebSphere Reference Guide
2. On Product Selection, use the pulldown to select the directory path for the component that you wish to uninstall.
3. On Maintenance Operation Selection, choose the radio button for Uninstall maintenance package.

Uninstalling a WebSphere 7.0 Fix Pack
Uninstalling WebSphere Fix Packs C-3
4. On the maintenance package to uninstall screen, select the radio button associated with an available package to uninstall and click Next.
Repeat the same process for other packages as necessary.

Uninstalling a WebSphere 7.0 Fix Pack
C-4 HTML Server on WebSphere Reference Guide

D
Enabling Compression on IBM HTTP Server D-1
DEnabling Compression on IBM HTTP Server
You can set the mod_deflate directive within the httpd.conf file to enable the IBM HTTP Server to compress output files and log the compression ratios. mod_deflate is an Apache module in the httpd.conf file that compresses content sent from the web server to the client browser.
This appendix contains the following topics:
■ Section D.1, "Understanding Compression"
■ Section D.2, "Configuring the mod_deflate directive"
D.1 Understanding CompressionRegular text and most non-image content are well suited for compression. Text files can typically be compressed by 70% or more. Compression can save significant bandwidth and enable faster browser response times. The effect is negligible in most high speed LAN environments, but is quite noticeable for users on slow WAN connections.
Compression is not recommended for files that are already compressed. A partial list includes these types of files:
■ zip
■ exe
■ image files
Compressing these file types using mod_deflate can actually increase their size or corrupt the files.
There are 9 levels of compression available when using mod_deflate. The difference between the default level (6) and the maximum compression level (9) is minimal, and the cost in extra CPU time necessary to process the higher compression level is significant and ultimately not beneficial. For this reason, you should use the default compression level.
D.2 Configuring the mod_deflate directiveFor specific instructions to configure the mod_deflate directive, access the Apache documentation on this web page, http://httpd.apache.org/docs/2.0/, and click on the link for http://httpd.apache.org/docs/2.0/mod/directives.html. Refer to this web page for instructions to configure each of the parameters discussed below. Also refer to the sample mod_deflate module at the end of this appendix.

Configuring the mod_deflate directive
D-2 HTML Server on WebSphere Reference Guide
To enable compression, open the httpd.conf file, and verify that the LoadModule deflate_module is uncommented (see the example below). You can configure mod_deflate to compress documents in one of two ways (both of which are specified in the httpd.conf file):
■ Explicit exclusion of files by extension
This method lists the file types that should NOT be compressed by the http server.
■ Explicit inclusion of files by MIME type.
This method lists file types that should always be compressed by the http server.
D.2.1 Logging Compression ResultsThe following three directives can be added to the httpd.conf file to enable the writing of compression statistics to a log file. These directives will record the bytes before compression (Input), the bytes after compression (Output), and calculate the compression ratio:
DeflateFilterNote Input instreamDeflateFilterNote Output outstreamDeflateFilterNote Ratio ratio
The following line defines a new logging format to be used for the compression log. The format is named "deflate." The second line below specifies the path and file name of the log file (deflate.log) where the output is written.
LogFormat '"%r" %{outstream}n/%{instream}n (%{ratio}n%%)' deflateCustomLog Z:\IBM\HTTPServer\logs\deflate.log
D.2.2 Example: Configuring mod_deflate for EnterpriseOneThe following load module line enables compression for EnterpriseOne. Verify that the line is uncommented in the httpd.conf file.
LoadModule deflate_module modules/mod_deflate.so
In the httpd.conf file, add the following lines under the existing <IfModule mod_deflate.c> section. Note that the compression method used in this example is explicit exclusion.
For specific instructions to configure the mod_deflate directive, access the Apache documentation on this web page, http://httpd.apache.org/docs/2.0/, and click on the link for http://httpd.apache.org/docs/2.0/mod/directives.html.
<IfModule mod_deflate.c>DeflateFilterNote Input instreamDeflateFilterNote Output outstreamDeflateFilterNote Ratio ratioLogFormat '"%r" %{outstream}n/%{instream}n (%{ratio}n%%)' deflateCustomLog Z:\IBM\HTTPServer\logs\deflate.log<Location / ># Insert filterSetOutputFilter DEFLATE# Don't compress images or binariesSetEnvIfNoCase Request_URI \\.(?:gif|[jm]pe?g|png|t?gz|bz2*|zip|exe|iso|avi)$ no-gzip dont-vary</Location></IfModule>

E
Understanding Media Objects on the Web Server E-1
EUnderstanding Media Objects on the Web Server
This section provides an overview of jas.ini settings required to access Media Objects on the HTML Server, and the process by which the web server accesses these objects from the network. The last section describes how to secure Media Objects on web-based client machines.
This appendix contains the following topics:
■ Section E.1, "Required jas.ini Settings"
■ Section E.2, "How Media Objects are Displayed by the HTML Server"
E.1 Required jas.ini SettingsEnsure that these parameters are set in the [OWWEB] section of the jas.ini file.
[OWWEB]
ParameterRecommended Setting Description
MO QUEUE= Site-dependent path
Identifies the media object directory location on your HTML Server. This path must translate into virtual path /jde/moqueue/ for the web browser.
FtpPort= 21 Specifies the default port to be used for FTP.
FtpUsr= anonymous Specifies the user id to be used for FTP access to the media Object File Server.

How Media Objects are Displayed by the HTML Server
E-2 HTML Server on WebSphere Reference Guide
E.2 How Media Objects are Displayed by the HTML ServerThis section explains how Media Objects are sent to the HTML client by the HTML Server.
1. A user selects attachments on an application which has support for media objects.
2. The Media Object window displays the image, file, or OLE objects, and the user selects one of these objects.
3. The request goes to the web server.
4. The web server reads the location of the object from the Media Object queue table (F98MOQUE), finds the file, and caches it in the location specified by the MO QUEUE path.
If UseMOWinNTShare is TRUE, files are transferred using Microsoft Windows file sharing mechanism, otherwise files are transferred using FTP protocol.
This diagram illustrates the process:
UseMOWinNTShare= TRUE Specifies that the web server use the Microsoft Windows file sharing mechanism for fetching Media Object files from their location into the cached location of the web server.
Note: If this setting is TRUE, media object queue paths set in P98MOQUE must be accessible by the owner of the application server from the application server machine (the application server is the server program hosting web servlets). To test the accessibility of a media object queue path, log in as the owner of the application server, open Windows Explorer, and paste the path to the media object queue into the address field. The path should be accessible without entering a user ID and password.
If this path is not accessible, you can change the media object queue setting to a path accessible by the owner of the application server. For example, you can specify a path on the application server machine as the media object queues directory.
ParameterRecommended Setting Description

How Media Objects are Displayed by the HTML Server
Understanding Media Objects on the Web Server E-3

How Media Objects are Displayed by the HTML Server
E-4 HTML Server on WebSphere Reference Guide