IT CICS Getting Started
167
InterTest GSG.doc, printed on 1/29/2002, at 6:06 PM A dvantage CA-InterTest for CICS Getting Started 00-00-000-00000
-
Upload
lucia-mello -
Category
Documents
-
view
80 -
download
3
Transcript of IT CICS Getting Started

InterTest GSG.doc, printed on 1/29/2002, at 6:06 PM
Advantage
CA-InterTest for CICS
Getting Started
00-00-000-00000

InterTest GSG.doc, printed on 1/29/2002, at 6:06 PM
This documentation and related computer software program (hereinafter referred to as the “Documentation”) is for the end user’s informational purposes only and is subject to change or withdrawal by Computer Associates International, Inc. (“CA”) at any time.
This documentation may not be copied, transferred, reproduced, disclosed or duplicated, in whole or in part, without the prior written consent of CA. This documentation is proprietary information of CA and protected by the copyright laws of the United States and international treaties.
Notwithstanding the foregoing, licensed users may print a reasonable number of copies of this documentation for their own internal use, provided that all CA copyright notices and legends are affixed to each reproduced copy. Only authorized employees, consultants, or agents of the user who are bound by the confidentiality provisions of the license for the software are permitted to have access to such copies.
This right to print copies is limited to the period during which the license for the product remains in full force and effect. Should the license terminate for any reason, it shall be the user’s responsibility to return to CA the reproduced copies or to certify to CA that same have been destroyed.
To the extent permitted by applicable law, CA provides this documentation “as is” without warranty of any kind, including without limitation, any implied warranties of merchantability, fitness for a particular purpose or noninfringement. In no event will CA be liable to the end user or any third party for any loss or damage, direct or indirect, from the use of this documentation, including without limitation, lost profits, business interruption, goodwill, or lost data, even if CA is expressly advised of such loss or damage.
The use of any product referenced in this documentation and this documentation is governed by the end user’s applicable license agreement.
The manufacturer of this documentation is Computer Associates International, Inc.
Provided with “Restricted Rights” as set forth in 48 C.F.R. Section 12.212, 48 C.F.R. Sections 52.227-19(c)(1) and (2) or DFARS Section 252.227-7013(c)(1)(ii) or applicable successor provisions.
2002 Computer Associates International, Inc. (CA)
All trademarks, trade names, service marks, and logos referenced herein belong to their respective companies.
Contents
InterTest GSG.doc, printed on 1/29/2002, at 6:06 PM
Chapter 1: Introduction Overview 1–1
ISPF-Like Menu Interface 1–1 Test and Debug Directly from Your Source Listing 1–1 Prevent Abends by Trapping All Application Errors Online 1–2 Set Breakpoints to Interrupt Program Execution 1–2 Control Program Execution to Test All Program Paths 1–3 CICSPlex Exploitation 1–3 Ease-of-Use Features 1–3 Symbolic Support Facilitates Problem Solving 1–4 Display and Update Data Values from Your Source Listing Display 1–4 View and Modify Storage/Files without Interrupting the Test Session 1–4 Structured File Display Makes Data Easy on the Eyes 1–4 Trace Program Execution 1–5 Code Coverage 1–5 Dynamically Change Program Execution 1–5 Monitoring by CICS User ID 1–5 Interactively Debug Applications That Access DB2 1–5 Helpful Diagnostic Information 1–6 Synchronized Processing 1–6 Immediate Support for CICS Releases 1–6 Debug Production Applications Symbolically from Any CICS Region 1–6
Chapter 2: Getting Started with Advantage CA-InterTest for CICS Overview 2–1 What You Need to Get Started 2–2 Summary of Changes for This Release 2–2
Starting a Test Session 2–3 Source Listing Facility Features 2–3 New Monitoring Menus and Status Display 2–4 CNTL Menus 2–4 New Breakpoint Menu (PF 6 Menu) 2–4
Major SMP Operations 2–5
Chapter 3: Systemem Requirements Operating Environments 3–1 Unicenter TNG Framework for OS/390 Common Services Requirements 3–1
CAIRIM 3–2 CA LMP 3–2 CAICCI 3–3
CA-Hardware Requirements 3–3 Distribution Libraries 3–3 Target Libraries 3–4
Special Considerations 3–4 PL/I Programs 3–4

InterTest GSG.doc, printed on 1/29/2002, at 6:06 PM
Global User Exits 3–5 TIOA Compression Routine Users 3–5 CICSPlex Support 3–6 CA-ACF2 and RACF Users 3–7 CA-Realia II Workbench For OS/390 CICS Users 3–7 Database Support 3–7 HOGAN Users 3–8 MRO Users 3–8 Omegamon Users 3–8 TMON Users 3–8 User CORE Commands 3–8 User Macros and Software Calls Support 3–8
Advantage CA-InterTest 6.1 Migration Considerations 3–9 Advantage CA-InterTest 6.0 to 6.1 Migration Considerations 3–9
Chapter 4: Base Product Installation Steps Summary of Installation Steps 4–2
Step 1. Review System Requirements 4–3 Step 2. Enter LMP Product Key Certificate Information 4–3 Step 3. Complete the Installation Worksheet 4–6 Step 4. Load Installation Sample JCL Library 4–7 Step 5. Allocate Target and Distribution Libraries 4–8 Step 6. Allocate Private SMP/E Libraries and Define SMP Zones 4–8 Step 7. Customize the SMP Procedure 4–9 Step 8. Receive the Advantage CA-InterTest for CICS Product 4–9 Step 9. Apply the Advantage CA-InterTest for CICS Product 4–10 Step 10. Accept the Advantage CA-InterTest for CICS Product 4–10 Step 11. Install the Advantage CA-InterTest for CICS Help Facility 4–11 Step 11a. Create the User-Defined Abend Description File 4–12 Step 13. Create the Advantage CA-InterTest for CICS Checkpoint File 4–13 Step 14. Add the Required CICS Resource Definitions 4–13 Step 15. Adjust the CICS JCL 4–14 Step 16. Install DB2 Support 4–14 Step 17. Restart CICS and Run Check-out Program 4–15 Step 18. Install Support for the PL/I Option (Optional) 4–16 Step 19. Unload Documentation Set 4–16 Activating Advantage CA-InterTest for CICS 4–19 Deactivating Advantage CA-InterTest for CICS 4–19
Option Installation Steps 4–20 Step 1. Receive the Advantage CA-InterTest PL/I Option 4–21 Step 2. Apply the Advantage CA-InterTest PL/I Option 4–21 Step 3. Accept the Advantage CA-InterTest PL/I Option 4–21
Automatically Starting Advantage CA-InterTest for CICS 4–22 Using the PROMMAC Macro 4–22 Entering CNTL Commands from a CRLP-type Terminal 4–23 Activating Advantage CA-InterTest for CICS from a Program 4–24 Starting Advantage CA-InterTest for CICS from a PLT 4–25

InterTest GSG.doc, printed on 1/29/2002, at 6:06 PM
Automatic Startup in CICSPlex Regions 4–25
Chapter 5: PL/I Option Installation Steps Overview 5–1 Step 1. Receive the CA-InterTest PL/I Option 5–1 Step 2. Apply the CA-InterTest PL/I Option 5–2 Step 3. Accept the CA-InterTest PL/I Option 5–2
Chapter 6: Symbolic Support About Symbolic Support 6–1
COBOL Compilers 6–1 IBM COBOL Compiler Options 6–2 CA-Optimizer and CA-Optimizer/II Option 6–3 Using the Post-Processors with Multiple Advantage CA-InterTest Releases 6–3 Advantage CA-InterTest Post-Processor Program Options 6–4 Controlling Printed Output with the CUTPRINT Option 6–4 Saving Your Listing for Online Display with the LISTER Option 6–4 Setting Data as Nonpurgable 6–5 COBOL JCL Examples 6–6 COBOL II, CA-Optimizer/II, COBOL/370, IBM COBOL for MVS, or IBM
COBOL for OS/390 Example 6–8 Assembler Programs 6–10 Assembler Options 6–11 IN25SYMA Options 6–11 Controlling Printed Output with the CUTPRINT Option 6–12 Saving Your Listing for Online Display with the LISTER Option 6–12 Setting Data as Nonpurgable 6–12 Assembler JCL Example 6–14 PL/I Programs 6–15 Compiler Options 6–16 Installation Options 6–16 IN25SYMP Options 6–16 Controlling Printed Output with the CUTPRINT Option 6–16 Saving Your Listing for Online Display with the LISTER Option 6–17 Setting Data as Nonpurgable 6–17 PL/I JCL Example 6–18
Chapter 7: Advantage CA-InterTest for CICS Modifying Advantage CA-InterTest for CICS Options 7–1 Procedure for Modifying Options 7–1
Sample JCL to Assemble the Options Program 7–4 IN25OPTS Keywords 7–5
Additional Advantage CA-InterTest for CICS Customization Procedures 7–23 Implementing Composite Support 7–23 IN25LINK Program 7–24 Identifying the Composite Module 7–24 Identifying the Main Program and Subroutines 7–25 Excluding Subroutines 7–26
InterTest GSG.doc, printed on 1/29/2002, at 6:06 PM
Example 7–26
Declaring User-Defined CORE Commands 7–30 The CORUCOM Macro 7–30 Coding the CORUCOM Macros 7–30 Sample JCL for Assembling IN25UCOM 7–32
Adding Assembler DSECTs to the Symbolic File 7–32 Sample JCL for Adding Members to the Symbolic File 7–33 Sample JCL for Defining CORE Keywords 7–34
Unprotecting Main Storage with the User Exit IN25LETX 7–34 The IN25LETX COMMAREA 7–35 The LETX Table 7–35 Sample IN25LETX Program 7–36 Disabling IN25LETX 7–37
Adding COBOL File Structures to the Symbolic File 7–38 Specifying Abend Codes That Should Not Be Intercepted 7–39 Customizing Help for Abend Codes 7–41
Chapter 8: Handling Special Situations Overview 8–1 Special Considerations for MRO Support 8–1
Monitoring Considerations for DFLTUSER 8–2 Additional Monitoring Considerations 8–3 Remote FILE Support 8–4
Using Advantage CA-InterTest for CICS with DB2 Application Programs 8–5 Calls to Software and User Macro Support 8–7
How Support Is Provided 8–7 Coding IN25UEX Macros for Called Software 8–8 Supporting Your Site's Global Routines 8–9 Coding the ROUT= Routine 8–10 Sample JCL for Generating the IN25UEXI Programs 8–12 IN25UEXI Instructions for Additional Vendor Products 8–13
Handling Wild Branches 8–15 Monitoring a Wild Branch 8–15 Using the FOL=ON Option 8–16
Using Advantage CA-InterTest for CICS with IBM's EXEC Debugging Facility (EDF) 8–16 Advantages of Advantage CA-InterTest for CICS Over EDF 8–16 Using Advantage CA-InterTest for CICS with EDF 8–17
Using Advantage CA-InterTest for CICS and HOGAN Software 8–17 Use Considerations 8–17 Installation Procedure 8–18
Chapter 9: Password Protection with Advantage CA-InterTest for CICS Required Parameters 9–2 Specifying Passwords for the CORE Facility 9–2 Specifying Passwords for Files and DL/I Databases 9–3 Specifying Passwords for CNTL Commands and Options 9–4
Password Protected CNTL Commands 9–5

InterTest GSG.doc, printed on 1/29/2002, at 6:06 PM
Password Protected CNTL Options 9–6
Sample IN25SEC2 Assembly JCL 9–8
Chapter 10: Automatically Starting Advantage CA-InterTest for CICS Using the PROMMAC Macro 10–1 Entering CNTL Commands from a CRLP-type Terminal 10–2 Activating Advantage CA-InterTest for CICS from a Program 10–3 Starting Advantage CA-InterTest for CICS from a PLT 10–4 Automatic Startup in CICSPlex Regions 10–4
Chapter 11: Symbolic File Maintenance Control Cards 11–1 Examples 11–2
Initializing the CA-InterTest for CICS Symbolic Files 11–2 Purging Programs 11–2 Deleting Symbolic Data 11–3 Generating Reports and Purging Programs 11–3 Unloading Programs 11–4 Reloading Programs 11–4 Printing a Program Listing 11–4 Reorganizing the Symbolic File 11–5
Chapter 12: Troubleshooting Overview 12–1
Diagnostic Procedures 12–1 Collecting Diagnostic Data 12–3 Interpreting Diagnostic Data 12–3 Accessing the Online Client Support System 12–3 Requirements for Using StarTCC 12–4 StarTCC Security 12–4 Access StarTCC 12–4 CA-TLC: Total License Care 12–6 Calling Technical Support 12–6 Generating a Problem Report 12–7 Product Releases and Maintenance 12–7 Requesting Enhancements 12–8
Chapter 13: Maintenance Overview 13–1
PL/I Option Maintenance 13–1 Advantage CA-InterTest Maintenance 13–1 SMP/E Libraries 13–2 APPLY and ACCEPT Commands 13–2 The RESTORE Command 13–3 Maintenance Delivery 13–3 PTF Maintenance Tape Installation 13–3 Overview of Maintenance Steps 13–4 Step 1. Review and Follow the Cover Letter Instructions 13–4 Step 2. Load the Sample JCL from the Tape 13–5

InterTest GSG.doc, printed on 1/29/2002, at 6:06 PM
Step 3. Customize the SMP Procedure 13–5
Step 4. Edit Maintenance JCL to Exclude Previously Applied SYSMODs 13–5 Step 5. Receive Advantage CA-InterTest Maintenance 13–7 Step 6. Apply Check Advantage CA-InterTest Maintenance 13–7 Step 7. Restore Any Applicable SYSMODs 13–7 Step 8. Apply Advantage CA-InterTest Maintenance 13–8 Step 9. Reapply Any Applicable SYSMODs 13–8 Step 10. Execute Advantage CA-InterTest to Validate Maintenance 13–8 Step 11. Accept Advantage CA-InterTest Maintenance 13–9 Step 12. Unload the Documentation Set 13–9 Step 13. Save All Materials and Output 13–9
InterTest GSG.doc, printed on 1/29/2002, at 6:06 PM
Chapter 1
Introduction Overview
Advantage CA-InterTest for CICS is a powerful interactive tool for testing and debugging CICS COBOL, PL/I, and Assembler programs. Testing and debugging is one of the most time-consuming and important phases of application development. The interactive testing facilities of Advantage CA-
InterTest dramatically improve testing efficiency and application quality. Advantage CA-InterTest works online to trap all application errors known to
CICS. It lets you resolve multiple errors interactively as they occur, without having to recompile or end the test session.
ISPF-Like Menu Interface A high-level ISPF-like menu interface makes it easy for both experienced and novice users to take advantage of the power of Advantage CA-InterTest and navigate among its many functions. For example, you can:
• Select the program you want to debug • Display the monitoring options in effect for a program • Set and remove breakpoints • Display and modify main storage • Display and modify files and databases • Invoke the optional Advantage CA-SymDump fo CICS dump analysis facility
Test and Debug Directly from Your Source Listing You can also work directly from the comfort of your familiar source code to: • Initiate program monitoring • Set and remove breakpoints • Correct problems and continue testing from any program location • Single-step through the executed code path • Change program execution with pseudocode • Display and modify main storage • Display and modify files and databases
1–1

Overview
InterTest GSG.doc, printed on 1/29/2002, at 6:06 PM
You never have to wait for printouts because Advantage CA-InterTest provides immediate, online access to your program's source listing and compiler information such as maps, cross-reference tables, and messages—information your online editor cannot provide.
Prevent Abends by Trapping All Application Errors Online As your program executes, the Advantage CA-InterTest monitor works online to check all statements before they are executed. This allows Advantage CA-InterTest to detect any application error that could cause a program to fail or damage CICS. When an error is detected, Advantage CA-InterTest automatically suspends program execution before the program fails or the CICS region is corrupted. This halt in execution is called an automatic breakpoint. When an automatic breakpoint occurs, your system is protected and your interactive debugging can begin immediately.
Set Breakpoints to Interrupt Program Execution You can set breakpoints to interrupt program execution at any point. At each breakpoint, the source listing positioned at the breakpoint is displayed. You can then change program variables or data areas in main storage, set or remove other breakpoints, dynamically change the program's execution path, retrace the program's execution path, inspect and modify files and databases, abend the program, and perform many other debugging tasks.
Advantage CA-InterTest provides several types of breakpoint to give you maximum flexibility in designing test scenarios:
• Unconditional The program stops whenever execution reaches a specified location.
• Variable-Change The program stops whenever the value of a variable changes.
• Request The program stops when it reaches specified CICS commands or macros, calls to DL/I and DB2, or calls to subroutines, such as database software.
• Single-Step The program stops each time it executes a specified number of COBOL verbs, PL/I statements, or Assembler instructions.
1–2

Overview
InterTest GSG.doc, printed on 1/29/2002, at 6:06 PM
Control Program Execution to Test All Program Paths Advantage CA-InterTest lets you completely control program execution. Not only can you stop execution at any point, you can also resume execution from any point. Such flexibility makes it easy to test particular program sections or circumvent an error. You can also write and execute pseudocode to dynamically change your program's execution path during testing—without recompiling. By using one or more of these methods to control program execution, you can be sure that all program paths have been tested.
CICSPlex Exploitation Advantage CA-InterTest exploits the CICSPlex environment by monitoring a program wherever it executes in the CICSPlex. Breakpoint and other debugging information is sent to you, regardless of the region in which the program actually executes. Advantage CA-InterTest also supports non-CICSPlex MRO/ISC configurations.
Ease-of-Use Features CICS programmers can quickly benefit from the many features of Advantage CA-InterTest because it so easy to learn and use. Here are some of the reasons
• High-level, ISPF-like menu interface. • Online access to source listings and compiler output • The ability to perform most tasks directly from source listing displays • A "fast path" for experienced users • No need to worry about displacement or address changes after recompiling
because all locations can be referenced by program-defined names (symbolic reference).
• A comprehensive Help facility that is available from every Advantage CA-InterTest screen and directly from CICS, which includes detailed information about all CICS abend codes and Advantage CA-InterTest error messages.
• Demo sessions for COBOL, COBOL II, COBOL/370, PL/I, and Assembler users that demonstrate key Advantage CA-InterTest features and help train new users.
Symbolic Support Facilitates Problem Solving To speed error resolution, Advantage CA-InterTest lets you identify program locations symbolically without computing addresses or displacements, and without worrying about address changes after recompilation. Full symbolic support is provided, even for modules that consist of separately compiled programs link-edited together. These statically-called programs can be written in different languages, and each subprogram can be debugged as a separate program. Advantage CA-InterTest can also debug dynamically-called programs.
1–3

Overview
InterTest GSG.doc, printed on 1/29/2002, at 6:06 PM
Display and Update Data Values from Your Source Listing Display You can display and update any data values from the convenience of the Advantage CA-InterTest source code display without having to interrupt or leave your test session. Advantage CA-InterTest lets you invoke Keep windows from the Source Listing. These specialized windows display user-specified data values, registers, or storage area contents at breakpoints. You can also use the Keep window to automatically display the contents of all data items on the current program statement. From within the Keep window you can easily change any of the displayed items by simply overtyping their contents.
View and Modify Storage/Files without Interrupting the Test Session Advantage CA-InterTest main storage and file access facilities save time and effort during testing. You can access these facilities, which can be secured, directly from any Advantage CA-InterTest screen. The storage facility allows you to easily display and modify data in main storage by simply overtyping the displayed data, or you can use the Advantage CA-InterTest COBOL-like MOVE statement to change the value of a variable when you do not know the type of data (binary, packed, and others) or its length. Advantage CA-InterTest takes care of all of the details for you.
The Advantage CA-InterTest FILE facility lets you update files or create test data without writing one-time programs or leaving the test session.
Authorized users can perform any I/O function provided by CICS or DL/I for accessing and updating VSAM, BDAM, and DL/I database data. The DB2 facility lets you display and update DB2 tables using SQL.
Structured File Display Makes Data Easy on the Eyes Structured File Display makes it easy to view and modify data accessed through the Advantage CA-InterTest FILE facility. It presents the records of a file, transient data queue, temporary storage queue, or DL/I segment. The information is presented in a field-by-field manner, mapped to the data structure you are accustomed to, providing an immediate frame of reference. Structured fields are shown in hexadecimal or character format, and you can change data by overtyping the contents right on the screen.
Trace Program Execution The Backtrace facility lets you retrace a program's path of execution and understand its logic. With both statement-by-statement and block-by-block tracing capabilities, Advantage CA-InterTest helps you answer the question, "How did I get to this point?"
1–4
Overview
InterTest GSG.doc, printed on 1/29/2002, at 6:06 PM
Code Coverage The Code Coverage (or COUNTS) feature lets you view the number of times each program statement was executed during your program testing. This feature makes it easy to identify program statements that were or were not executed—quickly identifying untested code. You can accumulate program statement counts across multiple executions of the same program.
Dynamically Change Program Execution The Indirect Commands facility lets you dynamically correct errors for all users during a debug session. Using this facility, you can write and execute pseudocode to change the flow of COBOL and PL/I programs without recompiling. Indirect commands are executed automatically at a predetermined location in a monitored program.
Monitoring by CICS User ID You can restrict monitoring and breakpoints to a specific CICS user ID—a capability that allows a user to switch terminals or terminal sessions and retain established monitoring options. In addition, user ID monitoring makes it possible to isolate a test session from sessions of other users of the same program. This function is ideally suited to testing and debugging CICS Web applications, or isolating and debugging a rogue production application without affecting other users.
Interactively Debug Applications That Access DB2 In addition to performing SQL functions, Advantage CA-InterTest provides facilities for testing and debugging CICS applications that access DB2. When you are testing DB2 applications, you can even set breakpoints based upon SQL return codes. At each breakpoint, you can symbolically display DB2 areas and perform other CICS and DB2-related debugging functions. Moreover, the DB2 return code and its related message are available online at any breakpoint. You can also use the CORE=LASTSQL command to view the last SQL statement that was executed while sitting at a breakpoint.
Helpful Diagnostic Information Whenever Advantage CA-InterTest detects an error, it provides diagnostic information to help you find the error and determine why it occurred. In addition, the Help facility provides context-sensitive explanations of each abend and suggestions on how to use Advantage CA-InterTest to correct the error. Sites can define their own user abend codes with associated problem descriptions to identify the cause of a preprogrammed abend. An abend code can be associated with a particular program or it can override the Advantage CA-InterTest default description.
1–5

Overview
InterTest GSG.doc, printed on 1/29/2002, at 6:06 PM
Synchronized Processing To ensure that the correct version of your source code is used, Advantage CA-InterTest provides symbolic file and load module synchronization. When a program is selected for testing, Advantage CA-InterTest compares the date and time in the source listing to the date and time in the load module. If no matching files are found, Advantage CA-InterTest displays a File Selection List from which you can select the correct file.
Immediate Support for CICS Releases Advantage CA-InterTest supports all current CICS releases, including OS/390, CICS/ESA releases, and CICS/VSE releases. Immediate support helps MIS managers implement successful migration projects.
Debug Production Applications Symbolically from Any CICS Region Even the most thoroughly tested program can abend in production. Advantage CA-SymDump, an optional component of Advantage CA-InterTest for OS/390 users, lets you debug transaction abends symbolically without having to analyze dumps.
By using Advantage CA-InterTest breakpoint facilities, CA-SymDump/System automatically pinpoints the source listing statement responsible for the abend. Its powerful trace and program call facilities make it easy to determine the execution path. The full power of Advantage CA-InterTest is available to help you quickly solve each problem interactively.
In addition, Advantage CA-SymDump gives you all of the control of a complete dump management package. You can manage the Advantage CA-SymDump data set online by listing all dumps, selecting dumps to view, deleting dumps, and holding dumps for later use.
1–6
InterTest GSG.doc, printed on 1/29/2002, at 6:06 PM
Chapter 2
Getting Started with Advantage CA-InterTest for CICS
Overview
This guide is for OS/390 systems running under CICS Releases 4.1 and above. It explains how to:
• Install:
- Advantage CA-InterTest
- The Advantage CA-InterTest PL/I option • Implement symbolic support for these programs:
- COBOL
- Assembler
- PL/I • Customize Advantage CA-InterTest • Use Advantage CA-InterTest in special situations • Apply maintenance and get support Do not use this guide to install Advantage CA-InterTest on: • VSE systems • OS/390 systems running CICS releases below 4.1 Separate installation tapes and guides are available for these systems. For
additional information, contact Computer Associates. Contact information is in the “Customer Support” chapter.
2–1

What You Need to Get Started
InterTest GSG.doc, printed on 1/29/2002, at 6:06 PM
What You Need to Get Started Computer Associates provides the following materials for installing and using Advantage CA-InterTest.
• A standard label magnetic cartridge or standard label magnetic tape recorded at 6250 BPI (DCB=DEN=4) containing the Advantage CA-InterTest product. The Volume Serial number is BAyymm. The tape contents are:
1. DSN=CAI.SAMPJCL (File number 9): This is an unloaded PDS containing all of the sample JCL referred to in this document that pertains to the installation and execution of Advantage CA-InterTest. Load using IEBCOPY.
2. DSN=SMPMCS (File number 32): This file contains the SMP modification control statements (MCS) used by SMP to install Advantage CA-InterTest.
3. Files beyond 32 are the SMP RELFILES, which SMP downloads to disk during RECEIVE processing. • Comprehensive documentation that explains how to use, install,
customize, and maintain Advantage CA-InterTest. • Tape Contents and Format – The machine-readable program materials
required for installation are distributed as a multifile installation tape in SMP format. This tape contains all of the necessary data to install and execute Advantage CA-InterTest.
Distribution tapes contain pregenerated versions of Advantage CA-InterTest. The pregenerated versions use all of the default installation options. If you think you need to customize the product for a particular need, see the chapters on “Advantage CA-InterTetst for CICS” and “Additional Advantage CA-InterTest.”
Use the IBM-supplied System Modification Program/Extended (SMP/E) to install, customize, and maintain Advantage CA-InterTest. This program lets you control these activities in a consistent manner.
Summary of Changes for This Release Advantage CA-InterTest Release 6.1 includes the following new features. • CICS TS 2.2 Support - Support for CICS Transaction Server 2.2 is available in
this release. • Composite Module Enhancements - A new 'COMPOSITE' command is now
supported by the Source Listing Display facility which will allow you to dynamically select which composite sub-programs to monitor/debug. The IN25LINK program, which is run at post-link edit time, to support debugging of separately compiled/linked sub-programs is now optional.
• Visual/Age PL/1 Compiler Support - Support for the IBM Visual Age/PL1 compiler is provided in this release.
2–2
Summary of Changes for This Release
InterTest GSG.doc, printed on 1/29/2002, at 6:06 PM
• Usability Enhancements - The CORE transaction now supports a new 'DUMP' pfkey which provides 'point and shoot' capability on address pointers which are displayed in the CORE menu. The Source/Load module date/time mismatch screen has been enhanced to show the load library name and volume of the mismatching load module for faster resolutiion of module date/time mismatches. Cursor Position scrolling is supported by the Source Listing Display transaction.
Starting a Test Session From CICS, enter ITST to use the new Primary Option menu or enter LIST=progname to display your Source Listing and begin a test session. Both access methods let you perform any Advantage CA-InterTest function.
NOTE: Do not start a session from the CNTL menu, CORE, or FILE facility for accessing your Source listing. Instead, type LIST=progname or use ITST option 1 (Source selection from menus).
Source Listing Facility Features The Source Listing facility provides new, user-friendly features to take advantage of the new menu interface and a new monitoring option: • A new USER ID field has been added to the PROFILE screen to limit
monitoring to a specific user ID.
Buddy Tip—For details on monitoring by user ID, see ITST Option 8: What’s New for This Release, or the “Monitoring Menu Options” chapter in the Advantage CA-InterTest User Guide. The default for monitoring by user ID is set using an installation option.
• A command line is always available for navigating to another facility by entering
the transaction ID (ITST, FILE, CORE, or CNTL). You can also use the command line to jump directly to an ITST or breakpoint menu option (=n.n.n) or to enter a long form CORE or CNTL command.
• To abend a task, enter the ABEND command. • New commands are supported from the Source Listing facility. The supported
commands vary by breakpoint status. To access this list from online help, do the following:
1. Display a program using ITST Option 1 or LIST=progname
2. Press PF1 Help
3. Select 32 Line Commands from the Help menu
2–3

Summary of Changes for This Release
InterTest GSG.doc, printed on 1/29/2002, at 6:06 PM
New Monitoring Menus and Status Display Option 2 of the ITST Primary Option menu displays a new Monitoring menu designed to replace the use of the CNTL Monitoring Command Builder menu. Try it.
The new Monitoring Status display—available from ITST option 2.4 or by typing STATUS or STATUS ALL on a Source Listing command line—allows you to easily view and remove monitoring options. Simply type an R next to the option to be removed.
CNTL Menus The CNTL menus are integrated with the new ITST Option 2 monitoring menus. However, the CNTL transaction is still available for existing users and accesses the CNTL Monitoring Command Builder menu. Regardless of access path, the CNTL menus remain essentially unchanged, with the following exceptions:
• A new USER ID field to limit monitoring to a specific user ID • Removal of many PF key assignments, which affects your test session
navigation Because many PF keys were removed, the CNTL menus cannot be used as the
access path to other Advantage CA-InterTest functions. Use either the ITST menu options or the new Source Listing commands to access other Advantage CA-InterTest facilities.
New Breakpoint Menu (PF 6 Menu) A new PF key assignment, PF6 menu, provides immediate access to a new Breakpoint menu from any Advantage CA-InterTest breakpoint. The breakpoint menu lets you access the Primary Option menu (Option 1) and perform any of the following breakpoint functions: 1. View and remove monitoring options of breakpointed program (Status Display) 2. Abend the task 3. Resume task execution (several options) 4. Override an error 5. Produce a dump and resume execution 6. Disconnect from the breakpoint
You can select breakpoint menu options directly from any breakpoint display by entering the fast path notation (=n.n) in the command line and pressing Enter. For example, users who frequently select the Override PF key from the Detailed Breakpoint display can now override from the Source Listing Breakpoint using command entry =5 and pressing Enter.
2–4

Major SMP Operations
InterTest GSG.doc, printed on 1/29/2002, at 6:06 PM
Major SMP Operations SMP performs three major operations when installing a product or performing maintenance. These operations manage a structure where a product is present in two places: distribution libraries and target system libraries. The distribution libraries are used for maintenance operations only. The product executes from the target system libraries.
The operations performed are: • RECEIVE Processing - SMP loads the installation tape into temporary
data sets. If any error is detected or you want to stop the process at this point, you can run a REJECT operation, which undoes anything done during RECEIVE processing.
• APPLY Processing - During APPLY processing, SMP performs the operations dictated by the modification control statements (MCS) and updates the target system libraries. You can then test the modification. If the installation is to be terminated at this point, you can run a RESTORE operation, which restores the system libraries from the distribution libraries.
• ACCEPT Processing - Running the ACCEPT operation permanently places the modification in the distribution libraries. There is no direct way to undo the modification once the ACCEPT process has been run.
2–5

InterTest GSG.doc, printed on 1/29/2002, at 6:06 PM
Chapter 3
Systemem Requirements
This chapter helps you prepare for installation by listing the hardware and software components needed to install and operate Advantage CA-InterTest for CICS and by discussing cross-product considerations.
Topics discussed include:
• Operating environments • Unicenter TNG Framework for OS/390 Common Services • Hardware requirements for distribution and target libraries • Special considerations • Migration considerations
Operating Environments The pregenerated versions provided on this tape support any MVS/ESA operating system running on any hardware with CICS Release 4.1 or above. This tape includes pregenerated versions of Advantage CA-InterTest for:
■ CICS 4.1 ■ CICS TS 1.2, 1.3, 2.1, and 2.2 Database management systems DL/I, DB2, and ADABAS are fully supported by
the pregenerated versions without modification. If you need to support other systems (such as TOTAL, CA-IDMS or CA-Datacom) or calls to software that should not be monitored by Advantage CA-InterTest, see the chapter “Handling Special Situations”.
Unicenter TNG Framework for OS/390 Common Services Requirements Advantage CA-InterTest requires the following Unicenter TNG Framework for OS/390 Common Services:
• CAIRIM • CA LMP
Advantage CA-InterTest support for CICSPlex requires the following additional Unicenter TNG Framework for OS/390 Common Service: CAICCI for MVS.
Unicenter TNG Framework for OS/390 Common Services Requirements
InterTest GSG.doc, printed on 1/29/2002, at 6:06 PM
The Unicenter TNG Framework for OS/390 Common Services must be installed or maintained at the genlevel indicated on the cover letter for the product. If you have other CA products installed at your site, some of these services may already be installed. If the Unicenter TNG Framework for OS/390 Common Services have not been installed already on your system, you must do so before proceeding with this installation.
Refer to the Unicenter TNG Framework for OS/390 Getting Started guide for more information about Unicenter TNG Framework for OS/390 Common Services and for detailed installation instructions.
CAIRIM
CAIRIM, CAI Resource Initialization Manager, is the common driver for a collection of dynamic initialization routines that eliminate the need for user SVCs, SMF exits, subsystems, and other installation requirements commonly encountered when installing systems software. Some of the features of CAIRIM are:
• Obtaining SMF data • Verification of proper software installation • Installation of MVS interfaces • Automatic startup of Computer Associates and other vendor products • Proper timing and order of initialization
CAIRIM is required to run CA LMP.
CA LMP The CA License Management Program provides a standardized and automated approach to the tracking of licensed software. It uses common realtime enforcement software to validate the user‘s configuration. CA LMP reports on activities related to the license, usage, and financials of program solutions. CA LMP features include:
• A common Key Data Set that can be shared among many CPUs • Using check digits to detect errors in transcribing key information • Execution Keys can be entered without affecting any CA software
solution already running • No special maintenance requirements
CA LMP is required to run Advantage CA-InterTest.
3–2

CA-Hardware Requirements
InterTest GSG.doc, printed on 1/29/2002, at 6:06 PM
CAICCI Advantage CA-InterTest installations that do not require CICSPlex support do not need to install CAICCI. However, if you plan to use Advantage CA-InterTest support for CICSPlex environments, CAICCI for MVS is required. For CICSPlex support, CAICCI must be installed in each MVS/CICS region that is a CICSPlex family member.
CAICCI (CAI Common Communications Interface) enables Computer Associates products to communicate with one another. This facility provides a layer that isolates application software from the specifics of the communications environment.
CAICCI is a started task used for sending messages between Computer Associates products. It usually runs continuously whenever the operating system is active.
Advantage CA-InterTest uses CAICCI to facilitate testing and debugging in CICSPlex environments. In particular, it uses CAICCI to send and receive the monitoring commands to and from the CICSPlex family member CICS regions. This automatically propagates monitoring activity to all regions participating in the CICSPlex environment.
CA-Hardware Requirements Estimates for the amount of disk space needed to install Advantage CA-InterTest follow.
Distribution Libraries The following table estimates disk space for the distribution libraries required to install Advantage CA-InterTest.
Name Blksize Blocks Dir. Blks. Description
CAI.CBA6141D 6144 600 50 Load modules CICS 4.1
CAI.CBA6152D 6144 600 50 Load modules CICS TS 1.2
CAI.CBA6153D 6144 600 50 Load modules CICS TS 1.3
CAI.CBA6161D 6144 600 50 Load modules CICS TS 2.1
CAI.CBA6162D 6144 600 50 Load modules CICS TS 2.2
CAI.CBA60SLD 3120 250 30 Sample source and JCL
3–3

Special Considerations
InterTest GSG.doc, printed on 1/29/2002, at 6:06 PM
Target Libraries The following table estimates disk space for the target libraries required to install Advantage CA-InterTest. These libraries must be allocated if they do not already exist for some other Computer Associates product at your site.
Name Blksize Blocks Dir. Blks. Description
CAI.SAMPLIB 3120 250 30 Sample source library
CAI.CACICS41 6144 600 50 CICS 4.1 load library
CAI.CACICS52 6144 600 50 CICS TS 1.2 load library
CAI.CACICS53 6144 600 50 CICS TS 1.3 load library
CAI.CACICS61 6144 600 50 CICS TS 2.1 load library
CAI.CACICS62 6144 600 50 CICS TS 2.2 load library
CAI.PROTHLF 4096(CI) 1000 N/A Help file (VSAM)
CAI.PROTUHF 4096(CI) 1000 N/A User-defined help file for abend codes (VSAM)
CAI.PROTSYM 2048(CI) 4500 N/A Symbolic file (VSAM)
CAI.PROTCPF 4096(CI) 5 N/A Checkpoint file (VSAM)
Special Considerations Additional considerations apply under the circumstances described next.
PL/I Programs PL/I programs that contain arrays must be recompiled with the IN25SYMP post-processor provided with version 6.1, or above, if the support for complex arrays is to be available.
3–4
Special Considerations
InterTest GSG.doc, printed on 1/29/2002, at 6:06 PM
Global User Exits This Advantage CA-InterTest release requires the use of the following global user exits:
• XPCFTCH and XPCTA
Required for the CNTL=START and CNTL=END commands to operate Advantage CA-InterTest and control monitoring. • XDUREQ
Required for dump suppression. • XMEOUT
Required for suppression of abend messages. When monitoring programs observe the following rules:
• You must not disable the above global user exits in any way or Advantage CA-InterTest will stop functioning.
• The Advantage CA-InterTest global user exits will honor the return codes set by previous exits, which may have an impact on whether Advantage CA-InterTest successfully monitors a program. If you are having problems caused by other CICS global user exits setting a return code before Advantage CA-InterTest exits receive control, you can guarantee that the Advantage CA-InterTest exits are first to receive control by adding the program entry IN25PLTX to the CICS startup PLT. IN25PLTX is required as the first program entry in Phase 1 (prior to the DFHDELIM entry) of the PLT.
• If other exits receive control after Advantage CA-InterTest, they must not change the return code or entry point fields in the user exit parameter list.
• To disable Advantage CA-InterTest you must use the CNTL=END command.
Failure to observe the above rules will disable monitoring. For example, Advantage CA-InterTest monitoring is not performed if another exit receives control before Advantage CA-InterTest and passes on a modified return code or entry point.
TIOA Compression Routine Users Advantage CA-InterTest transactions and programs must be excluded from any TIOA compression packages or routines, such as 3270 Super Optimizer/CICS and CTOP. Failure to do so will produce unpredictable results because Advantage CA-InterTest uses saved TIOAs. In addition, the Advantage CA-InterTest FILE facility may not work properly with data files that have been put through data compression routines.
3–5

Special Considerations
InterTest GSG.doc, printed on 1/29/2002, at 6:06 PM
CICSPlex Support Advantage CA-InterTest provides special, optional support for CICS regions participating in a CICSPlex environment. If Advantage CA-InterTest is installed with CICSPlex support, participating CICS regions have Advantage CA-InterTest commands and breakpoints automatically propagated to all regions in the CICSPlex. This allows for easier debugging of dynamically routed transactions and programs. For details on which commands are propagated across a CICSPlex, refer to the Advantage CA-InterTest for CICS User Guide.
Installation Requirements for CICSPlex Support CICSPlex command propagation is accomplished mainly through the services of CAICCI for MVS, a Unicenter TNG Framework for OS/390 Common Service. Other than installing CAICCI for MVS and setting a few customization options, as listed below, there is nothing else needed to obtain CICSPlex support.
To install Advantage CA-InterTest with CICSPlex support, you need to perform these steps:
1. Install CAICCI in all participating CICSPlex regions as discussed in the section Unicenter TNG Framework for OS/390 Common Services Requirements.
2. Follow normal installation instructions for the product, as discussed in the chapter “Base Product Installation Steps.”
3. Use the following IN25OPTS customization options in each participating CICSPlex region:
• CICSPLEX=YES
• CPLXFMID=a-CICSPlex-family-name
• CPLXCKPI=hhmm (a checkpoint interval) For details on setting these options, see the chapter “Modifying CA-InterTest
for CICS Options”.
NOTE: Support for multiple CICSPlex families within or across multiple MVS regions can be obtained by changing the CPLXFMID family name associated with each region.
3–6
Special Considerations
InterTest GSG.doc, printed on 1/29/2002, at 6:06 PM
Startup and Termination with CICSPlex Support Advantage CA-InterTest regions installed with CICSPLEX=YES are affected during startup and termination in the following ways:
• The CNTL=START and CNTL=RESTART commands automatically have Advantage CA-InterTest resynchronize monitoring with any active regions in the CICSPlex upon startup
• The CNTL=END, SCOPE=GLOBAL command can be issued to concurrently terminate all Advantage CA-InterTest processing in all connected regions in the CICSPlex
CA-ACF2 and RACF Users For CA-ACF2 Users To use Advantage CA-InterTest with CA-ACF2, add the
transactions IPLX, VTAT, LIST, and VIRC to your ACF2 SAFELIST. For additional information on these Advantage CA-InterTest transactions, see the
chapter “Modifying Advantage CA-InterTest Options.” For instructions on adding transactions to the SAFELIST, see the CA-ACF2 for OS/390 CICS Support Guide.
For RACF Users To use Advantage CA-InterTest with RACF, the Advantage CA-InterTest transactions IPLX, ISER, VIRC, LIST, and VTAT must be defined to CICS with CMDSEC(NO) and RESSEC(NO). All Advantage CA-InterTest transactions and programs require UACC(READ) for EXEC CICS INQUIRE commands to give all users RACF READ access. Without these settings, the symbolics for a source listing breakpoint display may not be available to users.
If RACF file level security is in use, you must also add the following statements to the xCICSFCT resource class: PROTSYM, PROTHLF ...UACC(READ) PROTCPF, PROTUHF ...UACC(UPDATE)
CA-Realia II Workbench For OS/390 CICS Users This version provides full support for the CA-Realia II Workbench For OS/390 CICS. Refer to the CA-Realia II Workbench For OS/390 CICS User Guide for instructions on using the WH= parameter with the appropriate COBOL post-processor.
Database Support Database management systems DL/I, DB2, and ADABAS are fully supported by the pregenerated versions without modification. If you need to support other systems (such as CA-IDMS, CA-Datacom, or TOTAL) or calls to software that should not be monitored by Advantage CA-InterTest, see the chapter “Handling Special Situations”
HOGAN Users If you want Advantage CA-InterTest to support HOGAN, see the chapter “Handling Special Situations” for detailed instructions.
3–7

Advantage CA-InterTest 6.1 Migration Considerations
InterTest GSG.doc, printed on 1/29/2002, at 6:06 PM
MRO Users If you want Advantage CA-InterTest to support MRO, see the chapter “Handling Special Situations” for detailed instructions.
Omegamon Users To use Advantage CA-InterTest with Omegamon Version 450 or subsequent versions: • You must start Omegamon before you start Advantage CA-InterTest. • If you are starting Omegamon with the PLT, you must add the Omegamon
program EISET to the list of PLT program To use Advantage CA-InterTest with Omegamon, Advantage CA-InterTest
transactions must be excluded from the Omegamon Resource Limit (Time Out) Specification.
TMON Users To use Advantage CA-InterTest with TMON, Advantage CA-InterTest transactions must be excluded from the TMON Resource Limit (Time Out) Specification.
User CORE Commands To generate your own CORE commands, see the chapter “Handling Special Situations”.
User Macros and Software Calls Support If you need to support user macros and software calls, see the chapter “Handling Special Situations”.
Advantage CA-InterTest 6.1 Migration Considerations Pre-existing Advantage CA-InterTest Customization If you have customized Advantage CA-InterTest (IN25OPTS, IN25LETX, IN25UCOM, IN25UEXI) make sure you redo the modifications after Advantage CA-InterTest is installed. Symbolic File Considerations The Symbolic Files from this release are downward compatible with Version 6.0 providing the release 6.0 compatibily PTF ‘s are applied. Check your cover letter shipped with the product for the correct 6.0 PTF numbers needed for upward compatibility with the 6.1 symbolic file. Additionally, the Symbolic File format for 6.1 is compatible with InterTest/Batch 3.0. CICS Program Definition Requirements This release requires new Advantage CA-InterTest programs. The resource definitions from previous releases will not work properly with this release. CICS/COMET Support Support is provided for both mixed- and macro-level programs controlled by Technologic Software's CICS/COMET.
3–8

Advantage CA-InterTest 6.0 to 6.1 Migration Considerations
InterTest GSG.doc, printed on 1/29/2002, at 6:06 PM
IN25UEXI Pregenerated IN25UEXI is provided for CA-IDMS, CA-Datacom, CA-Telon, CA-Sort, CA-Masterpiece, CA-InfoPoint, DB2, and MQSERIES, CICSPlex/SM, and TCP/IP Sockets Interface. CA-ACF2 and RACF Additional transactions must be granted unrestricted security. See CA-ACF2 and RACF Users for details.
Advantage CA-InterTest 6.0 to 6.1 Migration Considerations If you are migrating from an Advantage CA-InterTest 6.0 version to Advantage CA-InterTest Version 6.1, you may have some additional considerations, which are discussed next.
IN25OPTS Macro Changes The IN25OPTS macro differs from the IN25OPTS macro in Versions 6.0. New parameters have been added to support various new features of Advantage CA-InterTest. See the chapter “Modifying CA-InterTest for CICS Options” for more information.
3–9

InterTest GSG.doc, printed on 1/29/2002, at 6:06 PM
Chapter 4
Base Product Installation Steps
Advantage CA-InterTest for CICS is installed using SMP/E. The installation process consists of:
• Installing required Unicenter TNG Framework for OS/390 Common Services
• Entering Advantage CA-InterTest product keys for CA LMP check • Loading and modifying the supplied sample JCL library • Allocating libraries • Executing an SMP/E RECEIVE function • Executing an SMP/E APPLY function • Executing an SMP/E ACCEPT function • Defining and loading the Help data set • Creating the user-defined help file for abend descriptions (optional) • Defining and loading the Symbolic File • Creating the Checkpoint File • Adding entries to the CICS tables • Updating the CICS JCL and Startup parameters • Installing DB2 support (optional) • Executing the Check-out Program • Installing PL/I support (optional)
NOTE: you MUST install the required Unicenter TNG Framework for OS/390 Common Services components before proceeding with an SMP/E installation of Advantage CA-InterTest.
4–1

Summary of Installation Steps
InterTest GSG.doc, printed on 1/29/2002, at 6:06 PM
Summary of Installation Steps NOTE: Advantage CA-InterTest for CICS and Advantage CA-SymDump
share common components. The release and maintenance level of the two products must be equivalent. If your site has previously installed Advantage CA-SymDump as a separate product, the following procedures must install Advantage CA-InterTest to the same set of libraries. In this case, skip Steps 5, 6, and 11; Steps 11a and 12 are optional. The creation of the User Help File and any new Symbolic Files is left completely up to you.
The following list summarizes the steps involved in the Advantage CA-InterTest installation process. Review this list before installing Advantage CA-InterTest, and then use it as a checklist during the actual installation.
1. Review Advantage CA-InterTest system requirements. Be sure all of the requirements are met before installing Advantage CA-InterTest.
2. Enter the LMP codes for the Advantage CA-InterTest product. 3. Complete the Advantage CA-InterTest Installation Worksheet. Modify the
default values that do not meet your data center‘s standards. Use the worksheet as a guide when modifying the installation JCL.
4. Load the sample installation JCL from the tape. 5. Allocate target and distribution libraries using member BA61ALC JCL. 6. If this is your first or only Computer Associates product, define the CA SMP
data sets using sample JCL member BAINITE for SMP/E Release 1.4 or member BAINITE5 for SMP/E Release 1.5 or higher. Also, define SMP zones using BA61INIT.
7. Customize the SMP JCL procedures using the BA61SMPE member. 8. Execute an SMP RECEIVE function using the BA61REC JCL member. 9. Execute an SMP APPLY function using the BA61APP JCL member. 10. Execute an SMP ACCEPT function using JCL member BA61ACC. 11. Install the Help facility.
a. Create the help file for user-defined abend descriptions (optional). 12. Create the Symbolic File. 13. Create the Checkpoint File. 14. Add the CICS table entries. 15. Update the CICS startup JCL and Startup parameters. 16. Install DB2 support (optional). 17. Restart CICS and run the check-out program.
4–2

Summary of Installation Steps
InterTest GSG.doc, printed on 1/29/2002, at 6:06 PM
18. Install PL/I support, if licensed for this option. See the chapter “PL/I Option Installation Steps” for details.
19. Unload the documentation set. After installing Advantage CA-InterTest (and the PL/I option if you are licensed
for it), adjust the compile and assemble procedures for COBOL, COBOL II and higher, Assembler, and PL/I programs so that Advantage CA-InterTest can obtain symbolic information.
Existing users should begin by reviewing ITST Option 8 “What’s New.” New users should begin by using the demo programs before using Advantage CA-InterTest on their own programs.
Step 1. Review System Requirements Be sure that your system meets all of the requirements given in the “System Requirements” chapter before installing Advantage CA-InterTest.
Step 2. Enter LMP Product Key Certificate Information You must enter the LMP Key Information for Advantage CA-InterTest. If you purchased the PL/I Symbolic Facility and Advantage CA-SymDump for CICS options, you also need to enter the LMP Key Information for these options.
Using CA LMP Advantage CA-InterTest requires CA LMP (License Management Program), one of the Unicenter TNG Framework for OS/390 Common Services, to initialize correctly. CA LMP also provides a standardized and automated approach to the tracking of licensed software.
Examine the CA LMP Key Certificate you received with your Advantage CA-InterTest installation or maintenance tape. The certificate provides an LMP key for the Advantage CA-InterTest base product and, if you have purchased the PL/I Symbolic Option or Advantage CA-SymDump, an additional key for each option purchased.
4–3

Summary of Installation Steps
InterTest GSG.doc, printed on 1/29/2002, at 6:06 PM
The certificate contains the fields shown in the following table.
Fields Descriptions
Product Name The trademarked or registered name of the Advantage CA-InterTest licensed for the designated site and CPUs.
Supplement The reference number of your license for Advantage CA-InterTest in the format nnnnnn nnn. This format differs slightly inside and outside North America and may not be provided in some cases.
Expiration Date The date your license expires in the format MONTH dd, yyyy (as in OCTOBER 21, 2001).
Technical Contact The name of the technical contact at your site who is responsible for the installation and maintenance of Advantage CA-InterTest. This is the person to whom CA addresses all CA LMP correspondence.
MIS Director The name of the Director of MIS or the person who performs that function. If the title, but not the individual‘s name, is indicated on the Certificate, supply the actual name when correcting and verifying the Certificate.
CPU Location The address of the building where the CPU is installed.
Execution Key An encrypted code required by CA LMP for Advantage CA-InterTest initialization. During installation, it is referred to as the LMP Code.
Product Code A two-character code that corresponds to Advantage CA-InterTest.
CPU ID The code that identifies the specific CPU on which this installation of Advantage CA-InterTest is valid.
CA LMP is provided as an integral part of CAIRIM (Resource Initialization
Manager), one of the Unicenter TNG Framework for OS/390 Common Services. Once CAIRIM has been installed or maintained as specified in the cover letter for this product release, CA LMP support is available for all CA LMP-supported software solutions.
4–4

Summary of Installation Steps
InterTest GSG.doc, printed on 1/29/2002, at 6:06 PM
The CA LMP execution key, provided on the Key Certificate, must be added to the CAIRIM parameters to ensure proper initialization of the Computer Associates software solution. To define a CA LMP execution key to the CAIRIM parameters, modify member KEYS in OPTLIB data set. The parameter structure for member KEYS is shown next.
PROD(pp) DATE(ddmmmyy) CPU(tttt-mmmm/ssssss) LMPCODE(kkkkkkkkkkkkkkkk)
pp Required. The two-character product code. For any given CA LMP software solution, this code agrees with the product code already in use by the CAIRIM initialization parameters for earlier genlevels of Advantage CA-InterTest.
ddmmmyy The CA LMP licensing agreement expiration date.
tttt-mmmm Required. The CPU type and model (for example: 3090-600) on which the CA LMP software solution is to run.
If the CPU type or model requires less than four characters, blank spaces are inserted for the unused characters.
ssssss Required. The serial number of the CPU on which the CA LMP software solution is to run.
kkkkkkkkkkkkk Required. The execution key needed to run the CA LMP software solution. This CA LMP execution key is provided on the Key Certificate shipped with each CA LMP software solution.
An example of a control card for the CA LMP execution software parameter is shown next. In this example, the CA LMP execution key value is invalid and provided as an example only.
PROD(BA) DATE(01JAN94) CPU(3090-600 /370623) LMPCODE(52H2K06130Z7RZD6) For a full description of the procedure for defining the CA LMP execution key to
the CAIRIM parameters, see the Unicenter TNG Framework for OS/390 Common Services Getting Started
4–5

Summary of Installation Steps
InterTest GSG.doc, printed on 1/29/2002, at 6:06 PM
Enter CA LMP Key Information for the PL/I Symbolic and Advantage CA-SymDump Options If you purchased the PL/I Symbolic Facility or the Advantage CA-SymDump option, you received an additional Execution Key for each option you purchased. To define these CA LMP execution keys to the CAIRIM parameters, modify member KEYS in the OPTLIB data set (see the section, Using CA LMP, for instructions).
Step 3. Complete the Installation Worksheet
The installation worksheet, shown next, simplifies the task of tailoring the supplied JCL. Answer each question on the worksheet, filling in the blanks with the appropriate information. Default values are noted, so if the default value is acceptable, leave the item blank on the worksheet. However, you must supply appropriate volume serial numbers. The worksheet items are listed in the approximate order in which you encounter them during the installation.
1. What is your installation generic unit name for temporary work DASD?
Default: WORK=SYSDA WORK=_____________
2. What is your installation’s generic unit name for the shipped installation tape?
Default: TAPE=TAPE TAPE=______________
3. What is your installation standard SYSOUT class for Computer Associate product installationss and SMP output?
Default: SYSOUT=* SYSOUT=___________
4. What is the dsname high-level qualifier for the Advantage CA-InterTest installation libraries (both target and distribution libraries)?
Default: CAI=CAI. CAI=_______________
a. What VOL=SER do you want to use for the target libraries?
Default: TARGET= TARGET=___________
b. What VOL=SER do you want to use for the distribution libraries?
Default: DLIB= DLIB=______________
c. What is your installation generic unit name for the above library volumes?
Default: PUNIT=SYSDA PUNIT=____________
4–6
Summary of Installation Steps
InterTest GSG.doc, printed on 1/29/2002, at 6:06 PM
5. What is the dsname high-level qualifier for the SMP libraries to be used for the installation of Computer Associate products?
Default: CAISMP=CAI. CAISMP=___________
a. What VOL=SER do you want for the SMP libraries, if these libraries do not already exist?
Default: VOLSER= VOLSER=___________
b. What is your installation generic unit name for the permanent DASD SMP volumes?
Default: PERMDA=SYSDA PERMDA=__________
6. What VOL=SER do you want for the SMP temporary libraries?
TLIB=______________
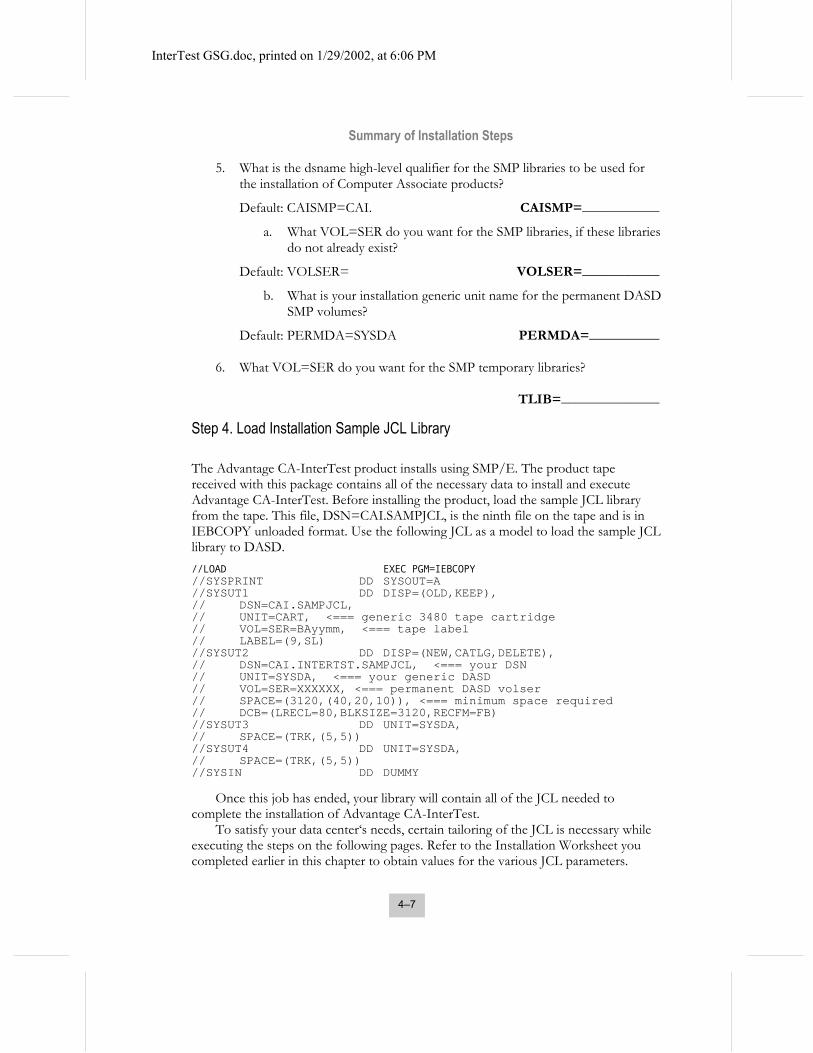
Step 4. Load Installation Sample JCL Library
The Advantage CA-InterTest product installs using SMP/E. The product tape received with this package contains all of the necessary data to install and execute Advantage CA-InterTest. Before installing the product, load the sample JCL library from the tape. This file, DSN=CAI.SAMPJCL, is the ninth file on the tape and is in IEBCOPY unloaded format. Use the following JCL as a model to load the sample JCL library to DASD. //LOAD EXEC PGM=IEBCOPY //SYSPRINT DD SYSOUT=A //SYSUT1 DD DISP=(OLD,KEEP), // DSN=CAI.SAMPJCL, // UNIT=CART, <=== generic 3480 tape cartridge // VOL=SER=BAyymm, <=== tape label // LABEL=(9,SL) //SYSUT2 DD DISP=(NEW,CATLG,DELETE), // DSN=CAI.INTERTST.SAMPJCL, <=== your DSN // UNIT=SYSDA, <=== your generic DASD // VOL=SER=XXXXXX, <=== permanent DASD volser // SPACE=(3120,(40,20,10)), <=== minimum space required // DCB=(LRECL=80,BLKSIZE=3120,RECFM=FB) //SYSUT3 DD UNIT=SYSDA, // SPACE=(TRK,(5,5)) //SYSUT4 DD UNIT=SYSDA, // SPACE=(TRK,(5,5)) //SYSIN DD DUMMY
Once this job has ended, your library will contain all of the JCL needed to complete the installation of Advantage CA-InterTest.
To satisfy your data center‘s needs, certain tailoring of the JCL is necessary while executing the steps on the following pages. Refer to the Installation Worksheet you completed earlier in this chapter to obtain values for the various JCL parameters.
4–7

Summary of Installation Steps
InterTest GSG.doc, printed on 1/29/2002, at 6:06 PM
Step 5. Allocate Target and Distribution Libraries
NOTE: If your site has previously installed Advantage CA-SymDump as a separate product, skip this step.
Member BA61ALC allocates all of the target and distribution libraries required by Advantage CA-InterTest during installation and maintenance. However, many Computer Associates products have common components and libraries that may already have been installed. Therefore, carefully analyze the installation steps to ensure that completed steps are not repeated.
Edit the JCL to conform to your installation standards and the previously completed worksheet. However, never change any of the ddnames or the last qualifier of the data set names.
All space allocations supplied in this member are in blocks to allow for compatibility between DASD types. The allocations given are the minimum required for installing Advantage CA-InterTest. You may want to adjust these for your installation device types, and to allow enough free space for maintenance (the more free space you allocate, the less often the libraries will be compressed during maintenance). For common libraries that are already present, be sure there is sufficient space for Advantage CA-InterTest.
Submit member BA61ALC and review the output.
Step 6. Allocate Private SMP/E Libraries and Define SMP Zones Important! If you have already created SMP data sets during the installation of another Computer Associates product, skip this task and go to Task 2, Define Additional Product Target and Distribution Zones. Even if you skip Task 1, you must still perform Task 2.
This step allocates and initializes the Computer Associates base SMP libraries and
defines additional product target and distribution zones.
Task 1. Allocate and Initialize Computer Associates Base SMP Libraries This step is not required if SMP data sets have been created already during the installation of another Computer Associates product.
Use member BAINITE or BAINITE5 to allocate and initialize a set of private SMP data sets for all Computer Associates products.
• Use member BAINITE if you are using SMP/E Release 1.4 or lower • Use BAINITE5 if you are using SMP/E Release 1.5 or higher
We recommend that you keep Computer Associates products as distinct entities from other SMP data sets. These members also set up CAI global, target, and distribution zones for Computer Associates products.
To find out which release of SMP/E you are running, execute the following JCL. //jobname JOB acnt,pgmr
4–8

Summary of Installation Steps
InterTest GSG.doc, printed on 1/29/2002, at 6:06 PM
//SMP EXEC PGM=GIMSMP,REGION=4M //SMPOUT DD SYSOUT=*
This JOB produces condition code 16 and a short status report. The report shows
the SMP level in both the title line and the termination message. The release is the second digit of the level (for example, LVL 15.11 indicates Version 1, Release 5, Modification level 11).
Task 2. Define Additional Product Target and Distribution Zones Next, use member BA61INIT to define additional SMP zones for a set of target and distribution libraries for CICS 4.1, CTS 1.2, CTS 1.3, CTS 2.1, or CTS 2.2.
Step 7. Customize the SMP Procedure Edit the procedure to conform to the installation standards and specifications you entered on the installation worksheet. This procedure can be placed into a system or user procedure library or executed instream. The procedure is used in the following SMP RECEIVE, APPLY, and ACCEPT steps.
Buddy Tip—There is a model JCL procedure called BA61SMPE in the sample JCL library.
Step 8. Receive the Advantage CA-InterTest for CICS Product Member BA61REC receives all of the components (functional SYSMODs) of Advantage CA-InterTest and executes the procedure edited in Step 7, Customize the SMP Procedure.
If your site has previously installed Advantage CA-SymDump as a separate product, use member BA61RECS. This member will receive only the necessary components for the addition of Advantage CA-InterTest to your Advantage CA-SymDump software.
Edit the JCL to conform to your installation standards and the previously completed worksheet.
If you require the uppercase version of Advantage CA-InterTest for CICS because you cannot use the mixed case English character set for your terminals, you no longer have to specify a different FMID during the SMP RECEIVE, APPLY, and ACCEPT processes. Support for the uppercase version is now controlled by the IN25OPTS UCONLY=YES parameter.
Submit the job and review the output to verify that the RECIEVE process ran successfully. If the RECEIVE process completed with an SMP return code greater than 4, review the output, correct the problem, and resubmit.
If other Computer Associates products have been installed, some of these functions may have been received already. If this is the case, SMP can receive the SYSMODs again. Therefore, you should be aware that not all SYSMODs received will later apply and accept. Failing SYSMODs should be removed and the job resubmitted.
4–9

Summary of Installation Steps
InterTest GSG.doc, printed on 1/29/2002, at 6:06 PM
WARNING! To ensure proper installation and maintenance of this product, all SYSMODs
specified in the SMP control statements for this job must be selected. During the APPLY and ACCEPT steps, SMP propagates all zones that are appropriate for the product. Eliminatiing any SYSMOD from the installation process may cause failures in customization or future maintenance of the product.
Step 9. Apply the Advantage CA-InterTest for CICS Product Member BA61APP applies all of the components (functional SYSMODs) of Advantage CA-InterTest to the target libraries. SMP does not require the distribution libraries to be allocated during APPLY processing.
If your site has previously installed Advantage CA-SymDump as a separate product, use member BA61APPS. This member will apply only the necessary components for the addition of Advantage CA-InterTest to your Advantage CA-SymDump software.
Edit the JCL to conform to your installation standards and the previously completed worksheet.
Review and edit the SMP SELECT control statement as described in the sample JCL. If other Computer Associates products have been installed, some of these
functions may have been applied already. If this is the case, a return code of 12 will occur. Remove any failing SYSMODs and resubmit the job. Optionally, you can specify REDO on the APPLY command statement to reapply the SYSMOD.
Submit the job and review the output to verify that the APPLY process ran successfully.
If the APPLY process completed with an SMP return code greater than 4, review the output, correct the problem, and resubmit.
WARNING! To ensure proper installation and maintenance of this product, all SYSMODs
specified in the SMP control statements for this job must be selected. During the APPLY and ACCEPT steps, SMP propagates all zones that are appropriate for the product. Eliminating any SYSMOD from the installation process may cause failures in customization or future maintenance of the product.
Step 10. Accept the Advantage CA-InterTest for CICS Product Member BA61ACC accepts all the components (functional SYSMODs) of Advantage CA-InterTest to the distribution libraries.
If your site has previously installed Advantage CA-SymDump as a separate product, use member BA61ACCS. This member will accept only the necessary components for the addition of Advantage CA-InterTest to your Advantage CA-SymDump software.
4–10

Summary of Installation Steps
InterTest GSG.doc, printed on 1/29/2002, at 6:06 PM
WARNING! If your site has previously installed Advantage CA-SymDump as a separate product and you are installing Advantage CA-InterTest only on a trial basis, skip this step. If you perform this step, you will not be able to restore your libraries back to the original Advantage CA-SymDump installation. Once the product has been purchased and licensed, you must perform this step before any additional maintenance can be applied.
Edit the JCL to conform to your installation standards and the previously
completed worksheet. Review and edit the SMP SELECT control statement as described in the sample JCL. If other Computer Associates products have been installed some of these functions
may have been accepted already. If this is the case, a return code of 12 will occur. Remove the failing SYSMODs and resubmit the job. SMP/E users have the option of specifying the operand REDO on the ACCEPT command statement and should expect an SMP return code of 8, which is permissible in this case.
Submit the job and review the output to verify that the ACCEPT process ran successfully. If the ACCEPT process completed with an SMP return code greater than 4, view the output, correct the problem, and resubmit the job.
We strongly recommend that you accept the Advantage CA-InterTest product immediately after you have successfully run the APPLY process. This ACCEPT step provides a backup of the base product on the distribution libraries. This backup is necessary for future SMP restores.
Buddy Tip—To ensure proper installation and maintenance of this product, all SYSMODs specified in the SMP control statements for this job must be selected. During the APPLY and ACCEPT steps, SMP propagates all zones that are appropriate for the product. Eliminating any SYSMOD from the installation process may cause failures in customization or future maintenance of the product.
Step 11. Install the Advantage CA-InterTest for CICS Help Facility
NOTE: If your site has previously installed Advantage CA-SymDump as a separate product, skip this step.
The member DEFHELP creates and loads the VSAM file that contains the Advantage CA-InterTest online help information. Edit the JCL to conform to your installation standards and the previously completed worksheet. This member and other referenced members are found in the CAI.SAMPLIB library after the APPLY step.
Step 11a. Create the User-Defined Abend Description File
NOTE: If your site has previously installed Advantage CA-SymDump as a separate product and this step was optionally performed during that installation, skip this step.
4–11
Summary of Installation Steps
InterTest GSG.doc, printed on 1/29/2002, at 6:06 PM
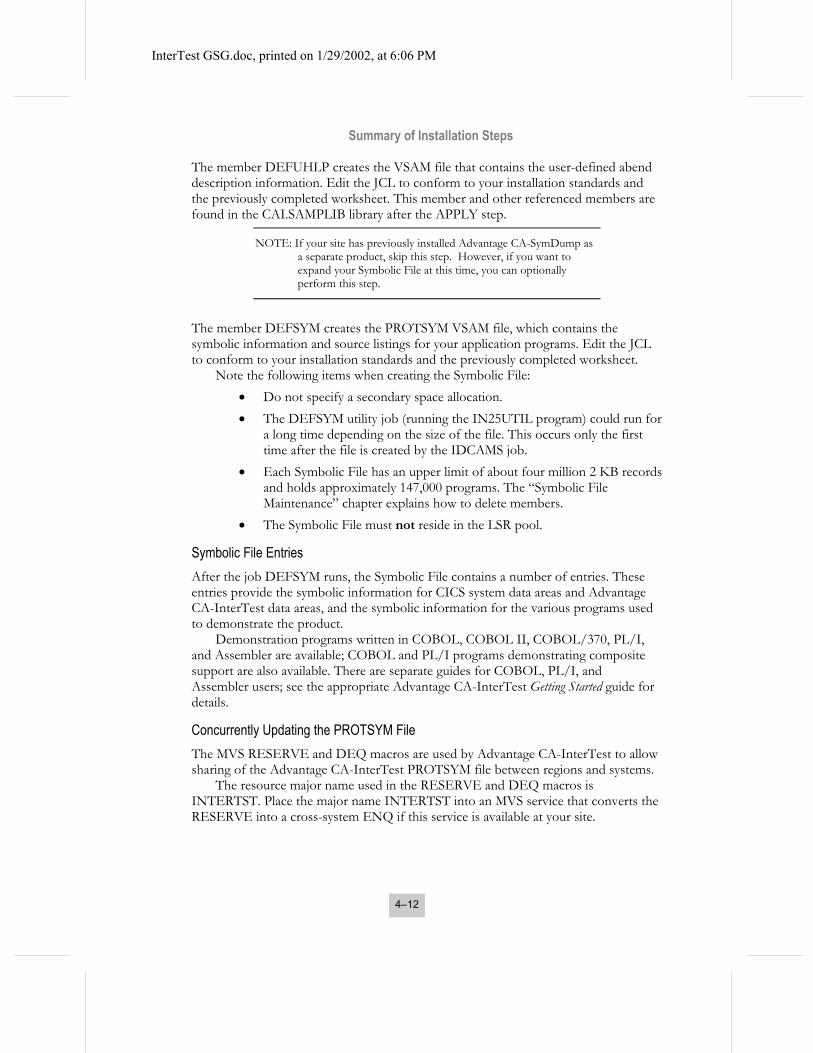
The member DEFUHLP creates the VSAM file that contains the user-defined abend description information. Edit the JCL to conform to your installation standards and the previously completed worksheet. This member and other referenced members are found in the CAI.SAMPLIB library after the APPLY step.
NOTE: If your site has previously installed Advantage CA-SymDump as a separate product, skip this step. However, if you want to expand your Symbolic File at this time, you can optionally perform this step.
The member DEFSYM creates the PROTSYM VSAM file, which contains the symbolic information and source listings for your application programs. Edit the JCL to conform to your installation standards and the previously completed worksheet.
Note the following items when creating the Symbolic File: • Do not specify a secondary space allocation. • The DEFSYM utility job (running the IN25UTIL program) could run for
a long time depending on the size of the file. This occurs only the first time after the file is created by the IDCAMS job.
• Each Symbolic File has an upper limit of about four million 2 KB records and holds approximately 147,000 programs. The “Symbolic File Maintenance” chapter explains how to delete members.
• The Symbolic File must not reside in the LSR pool.
Symbolic File Entries After the job DEFSYM runs, the Symbolic File contains a number of entries. These entries provide the symbolic information for CICS system data areas and Advantage CA-InterTest data areas, and the symbolic information for the various programs used to demonstrate the product.
Demonstration programs written in COBOL, COBOL II, COBOL/370, PL/I, and Assembler are available; COBOL and PL/I programs demonstrating composite support are also available. There are separate guides for COBOL, PL/I, and Assembler users; see the appropriate Advantage CA-InterTest Getting Started guide for details.
Concurrently Updating the PROTSYM File The MVS RESERVE and DEQ macros are used by Advantage CA-InterTest to allow sharing of the Advantage CA-InterTest PROTSYM file between regions and systems.
The resource major name used in the RESERVE and DEQ macros is INTERTST. Place the major name INTERTST into an MVS service that converts the RESERVE into a cross-system ENQ if this service is available at your site.
4–12

Summary of Installation Steps
InterTest GSG.doc, printed on 1/29/2002, at 6:06 PM
Step 13. Create the Advantage CA-InterTest for CICS Checkpoint File The member DEFCKPT creates the Checkpoint File that is used to periodically record the status of Advantage CA-InterTest for a possible restart. Edit the JCL to conform to your installation standards and the entries on the previously completed worksheet.
See the chapter “Monitoring Menu Options” in the Advantage CA-InterTest User Guide for information on the checkpoint recording facility.
Step 14. Add the Required CICS Resource Definitions The CSDINT member in CAI.SAMPLIB adds the CICS resource definitions for the Advantage CA-InterTest programs, files, and transactions. Modify the JCL according to the instructions in this member.
Add the corresponding RDO group to your CICS startup list (the SIT parameter GRPLIST=) as listed in the following table.
CICS Level RDO Group for CICS Startup List
4.1 INT61041
CTS 1.2 INT61052
CTS 1.3 INT61053
CTS 2.1 INT61061
CTS 2.2 INT61062
The use of the Advantage CA-InterTest transactions ISER, VIRC, and VTAT
must not be protected to a specific signon, and for CA-ACF2 and RACF users must meet the special considerations given in the chapter “System Requirements.”
Do not change any of the options specified for the Advantage CA-InterTest entries. If you believe there is an error in any of the entries, contact Computer Associates Technical Support.
Step 15. Adjust the CICS JCL
NOTE: If your site has previously installed Advantage CA-SymDump as a separate product, some DD statements may already exist.
If you use DD statements in your CICS startup JCL then your Advantage CA-InterTest files, as defined in the CSD, require DD statements in the JCL for CICS. DISP=SHR must be specified for PROTSYM to allow batch compiles to run concurrently with CICS.
Sample DD statements are shown next:
4–13

Summary of Installation Steps
InterTest GSG.doc, printed on 1/29/2002, at 6:06 PM
//PROTCPF DD DSN=CAI.PROTCPF,DISP=OLD //PROTSYM DD DSN=CAI.PROTSYM,DISP=SHR //PROTHLF DD DSN=CAI.PROTHLF,DISP=SHR //PROTUHF DD DSN=CAI.PROTUHF,DISP=SHR
Refer to the SYMFIL option in the chapter “ Modifying Advantage CA-InterTest for CICs Options” if you need more than one Symbolic File.
Also, add the Advantage CA-InterTest load library to the DFHRPL in the CICS startup JCL for your release of CICS: // DD DSN=CAI.CACICS41,DISP=SHR CICS 4.1 // DD DSN=CAI.CACICS52,DISP=SHR CTS 1.2 // DD DSN=CAI.CACICS53,DISP=SHR CTS 1.3 // DD DSN=CAI.CACICS61.DISP=SHR CTS 2.1 // DD DSN=CAI.CACICS62.DISP=SHR CTS 2.2
• CICS Startup DSA Limit parameter - Advantage CA-InterTest for CICS makes calls to IEWBIND when using the new online COMPOSITE module command and IEWBIND requires about 750k of below the line storage. To ensure there is sufficient storage available (below the line for IEWBIND calls), you must insure that your DSALIM is at least 750k less than your below the line private area size. Failure to do this could result in S0F4 and U900 abends in your CICS region during dump capture.
Step 16. Install DB2 Support Instructions for installing DB2 support are provided next. Note that additional considerations apply if you have programs that issue calls or require special handling.
Supporting DB2 Calls in the FILE and CORE Facilities The FILE facility supports dynamic SQL calls to DB2. This feature lets users view, alter, add, or delete data in DB2 tables without leaving CICS. The CORE facility lets you view the last SQL statement executed (CORE=LASTSQL).
The pregenerated versions of IN25DB2 and IN25AI## are preassembled with DB2 Release 3.1.
Perform the following steps to install DB2 support: 1. CICS 4.1 sites must add the FILE, VTAT, CNTL, LIST, HELP, CORE,
and ITST transactions to the RCT (Resource Control Table). See the IBM Database2 Installation Manual for a description of the DSNCRCT macro. CTS 1.2 and 1.3 sites are provided with the RDO entries in the CSDDB2 member on the CAI.SAMPLIB.
2. Bind the DBRM members IN61FIDB and IN61AIDB provided on the CAI.SAMPLIB into an InterTest DB2 plan (the recommended name is IN61PLAN).
4–14

Summary of Installation Steps
InterTest GSG.doc, printed on 1/29/2002, at 6:06 PM
3. The DBA must grant Bind and Execute authority to the plan created in Step 2.
Monitoring DB2 Applications A pregenerated version of IN25UEXI, assembled for DB2 Releases 3.1 and above, is provided in your Advantage CA-InterTest load library.
If you do not have any other special software situations that will be handled by the IN25UEXI program, you need not perform any additional installation steps for DB2 support. However, if you have programs that issue calls or require special handling, see the “Calls to Software and User Macro Support” section.
For additional information on using Advantage CA-InterTest with DB2, see the section “Using Advantage CA-InterTest for CICS with DB2 Application Programs”.
Step 17. Restart CICS and Run Check-out Program After Advantage CA-InterTest has been installed, restart CICS and run the Advantage CA-InterTest check-out program IN25VRPT. This program checks for common mistakes that may have been made during the installation of Advantage CA-InterTest.
Important! You are strongly advised to perform this step so errors can be detected quickly. To check out the installation of Advantage CA-InterTest: 1. Enter the transaction code VRPT. Advantage CA-InterTest displays the
selection menu. 2. Enter 1 in the Option field and press Enter. Advantage CA-InterTest displays
the first screen of programs. 3. Continue to press Enter to display the next screen. 4. The Advantage CA-InterTest check-out procedure is completed when the
selection menu is displayed with the option field set to 4 or beyond. Important! If you are upgrading from a previous release, urge your users to use ITST Option
8 to review “What’s New” in this release.
Step 18. Install Support for the PL/I Option (Optional) If you need support for PL/I programs, you must perform the SMP/E RECEIVE, APPLY and ACCEPT procedures in addition to the base product installation. The PL/I option installation uses the same target and distribution libraries as the Advantage CA-InterTest base product. See the chapter “PL/I Opyion Installation Steps” for details.
Step 19. Unload Documentation Set The Advantage CA-InterTest for CICS documentation set is provided in Adobe Acrobat PDF format and in IBM BookManager format. In addition, two quick references are provided in PDF format for you to print. Procedures for unloading the documentation and for printing the quick references follow.
4–15

Summary of Installation Steps
InterTest GSG.doc, printed on 1/29/2002, at 6:06 PM
Unloading BookManager Files from the Distribution Tape In addition to the PDF files provided for printing, updates to the Advantage CA-InterTest for CICS documentation are provided in IBM BookManager format on the Advantage CA-InterTest for CICS installation and maintenance cartridge in file 14. Unload the BookManager READ files using the JCL in SAMPJCL member BA61BOOK. Edit the JCL to conform to your installation standards and submit the job.
The Advantage CA-InterTest for CICS documentation set consists of six sequential data sets that contain the following:
• The bookshelf definition • A search index • The Advantage CA-InterTest for CICS User Guide • The Advantage CA-InterTest for CICS and Advantage CA-SymDump for
CICSMessage Guide • The Advantage CA-InterTest for CICS Getting Started • The Advantage CA-InterTest for CICS Assembler Primer • The Advantage CA-InterTest for CICS COBOL Primer • The Advantage CA-InterTest for CICS PL/I Primer
Changing the Prefix in the Bookshelf Definition The bookshelf definition (prefix BKSHELF) contains the MVS data set names BookManager uses to reference the other books. The original bookshelf definition uses CAI as the prefix in those data set names. To use BookManager Read on MVS, you must change the references to those data sets by replacing CAI with the prefix used to unload the files.
Downloading OS/390 Files for Use on a PC Perform the actions in this section only if you want to download the OS/390 files to a PC. To use the PC versions of BookManager READ, be sure that the book files have been downloaded with a file extension of .BOO. The bookshelf must have an extension of .BKS and the index should have an extension of .BKI.
4–16

Summary of Installation Steps
InterTest GSG.doc, printed on 1/29/2002, at 6:06 PM
The following table describes the sequential files that are provided on the product tape and lists the commands you can issue to transfer them to a PC.
OS/390 Name/Description
OS/390 Format File Transfer Command on PC
prefix.CAINT61.BKSHELF Bookshelf definition
Variable block ASCII CRLF
RECEIVE <dir>\CAINT61.BKS ‘prefix.CAINT61.BKSHELF’
prefix.CAINT61.BKINDEX Search index
Fixed block LRECL 4096 Binary
RECEIVE <dir>\CAINT61.BKI ‘prefix.CAINT61.BKINDEX’
prefix.CAINT61.INT61OG1Getting Started
Fixed block LRECL 4096 Binary
RECEIVE <dir>\INT61OG1.BOO ‘prefix.CAINT61.INT61OG1’
prefix.CAINT61.INT61OM1Message Guide
Fixed block LRECL 4096 Binary
RECEIVE <dir>\INT61OM1.BOO ‘prefix.CAINT61.INT61OM1’
prefix.CAINT61.INT61OU1 User Guide
Fixed block LRECL 4096 Binary
RECEIVE <dir>\INT61OU1.BOO ‘prefix.CAINT61.INT61OU1’
prefix.CAINT61.INT61OA1 Assembler Primer
Fixed block LRECL 4096 Binary
RECEIVE <dir>\INT61OA1.BOO ‘prefix.CAINT61.INT61OA1’
prefix.CAINT61.INT61OC1 COBOL Primer
Fixed block LRECL 4096 Binary
RECEIVE <dir>\INT61OC1.BOO ‘prefix.CAINT61.INT61OC1’
prefix.CAINT61.INT61OP1 PL/I Primer
Fixed block LRECL 4096 Binary
RECEIVE <dir>\INT61OP1.BOO ‘prefix.CAINT61.INT61OP1’
4–17
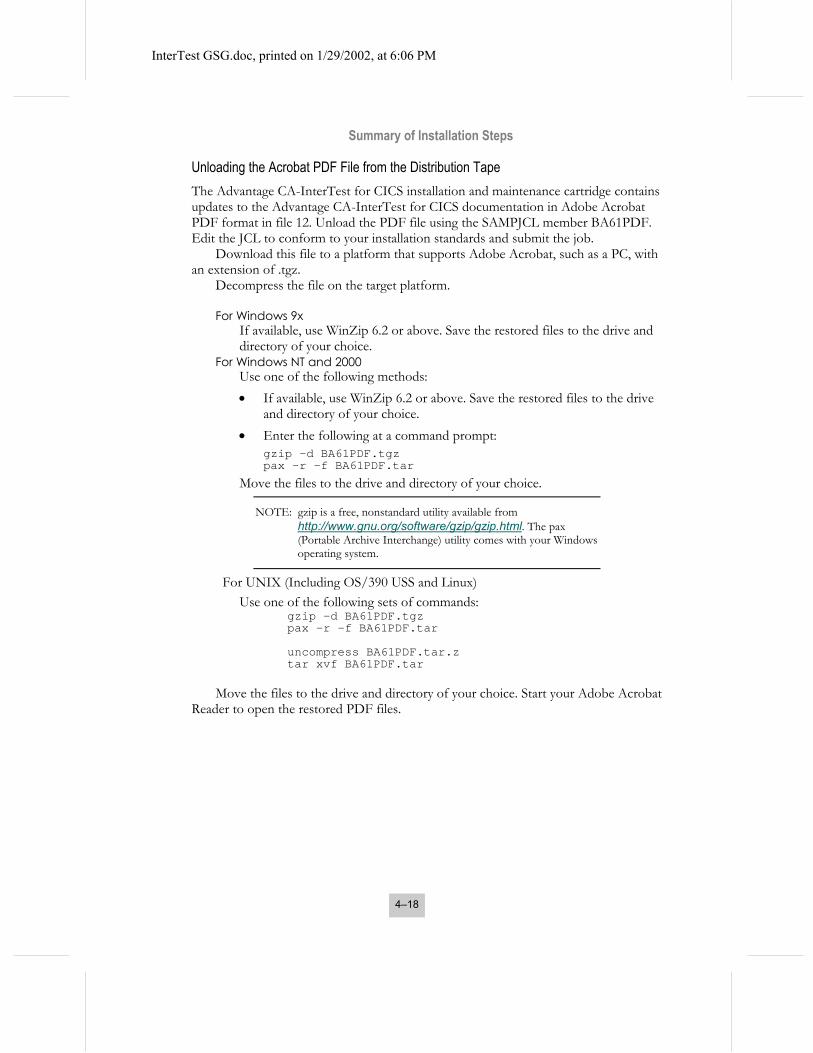
Summary of Installation Steps
InterTest GSG.doc, printed on 1/29/2002, at 6:06 PM
Unloading the Acrobat PDF File from the Distribution Tape The Advantage CA-InterTest for CICS installation and maintenance cartridge contains updates to the Advantage CA-InterTest for CICS documentation in Adobe Acrobat PDF format in file 12. Unload the PDF file using the SAMPJCL member BA61PDF. Edit the JCL to conform to your installation standards and submit the job.
Download this file to a platform that supports Adobe Acrobat, such as a PC, with an extension of .tgz.
Decompress the file on the target platform. For Windows 9x
If available, use WinZip 6.2 or above. Save the restored files to the drive and directory of your choice.
For Windows NT and 2000 Use one of the following methods: • If available, use WinZip 6.2 or above. Save the restored files to the drive
and directory of your choice. • Enter the following at a command prompt:
gzip –d BA61PDF.tgz pax –r –f BA61PDF.tar
Move the files to the drive and directory of your choice.
NOTE: gzip is a free, nonstandard utility available from http://www.gnu.org/software/gzip/gzip.html. The pax (Portable Archive Interchange) utility comes with your Windows operating system.
For UNIX (Including OS/390 USS and Linux) Use one of the following sets of commands:
gzip –d BA61PDF.tgz pax –r –f BA61PDF.tar uncompress BA61PDF.tar.z tar xvf BA61PDF.tar
Move the files to the drive and directory of your choice. Start your Adobe Acrobat
Reader to open the restored PDF files.
4–18
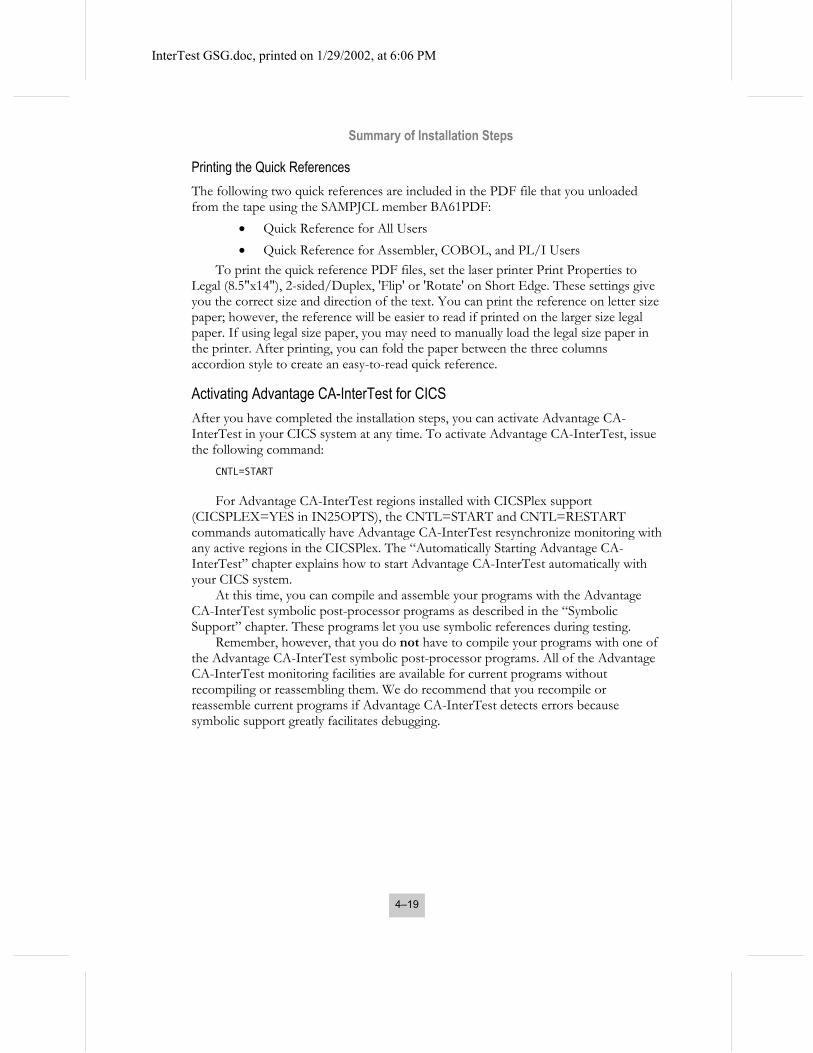
Summary of Installation Steps
InterTest GSG.doc, printed on 1/29/2002, at 6:06 PM
Printing the Quick References The following two quick references are included in the PDF file that you unloaded from the tape using the SAMPJCL member BA61PDF:
• Quick Reference for All Users • Quick Reference for Assembler, COBOL, and PL/I Users
To print the quick reference PDF files, set the laser printer Print Properties to Legal (8.5"x14"), 2-sided/Duplex, 'Flip' or 'Rotate' on Short Edge. These settings give you the correct size and direction of the text. You can print the reference on letter size paper; however, the reference will be easier to read if printed on the larger size legal paper. If using legal size paper, you may need to manually load the legal size paper in the printer. After printing, you can fold the paper between the three columns accordion style to create an easy-to-read quick reference.
Activating Advantage CA-InterTest for CICS After you have completed the installation steps, you can activate Advantage CA-InterTest in your CICS system at any time. To activate Advantage CA-InterTest, issue the following command:
CNTL=START For Advantage CA-InterTest regions installed with CICSPlex support
(CICSPLEX=YES in IN25OPTS), the CNTL=START and CNTL=RESTART commands automatically have Advantage CA-InterTest resynchronize monitoring with any active regions in the CICSPlex. The “Automatically Starting Advantage CA-InterTest” chapter explains how to start Advantage CA-InterTest automatically with your CICS system.
At this time, you can compile and assemble your programs with the Advantage CA-InterTest symbolic post-processor programs as described in the “Symbolic Support” chapter. These programs let you use symbolic references during testing.
Remember, however, that you do not have to compile your programs with one of the Advantage CA-InterTest symbolic post-processor programs. All of the Advantage CA-InterTest monitoring facilities are available for current programs without recompiling or reassembling them. We do recommend that you recompile or reassemble current programs if Advantage CA-InterTest detects errors because symbolic support greatly facilitates debugging.
4–19

Option Installation Steps
InterTest GSG.doc, printed on 1/29/2002, at 6:06 PM
To activate Advantage CA-InterTest at CICS startup, you can: • Manually activate Advantage CA-InterTest by issuing the
CNTL=START command. • Automatically activate Advantage CA-InterTest using the PROMMAC
macro or the IN25PLT PLTPI program. For details, see the section “Automatically Starting Advantage CA-InterTest for CICS.”
Deactivating Advantage CA-InterTest for CICS Advantage CA-InterTest can be deactivated at any time by issuing the following command:
CNTL=END For regions using the CICSPlex support option, you can issue the following
command to concurrently deactivate Advantage CA-InterTest in all connected CICSPlex regions:
CNTL=END,SCOPE=GLOBAL Advantage CA-InterTest maintains a permanent service task that runs under the
transaction ID ISER. The program is IN25SERV. CICS cannot complete a normal shutdown until this task ends. It is important that you deactivate Advantage CA-InterTest before CICS shutdown to terminate this task.
To deactivate Advantage CA-InterTest at CICS shutdown, you can do one of the following:
• Manually deactivate Advantage CA-InterTest by issuing the CNTL=END command.
• Automatically deactivate Advantage CA-InterTest using the IN25PLTE program. If you add this Advantage CA-InterTest-supplied shutdown PLT program to your shutdown program list, Advantage CA-InterTest will be deactivated automatically at normal CICS termination.
• Add the following Advantage CA-InterTest PLTSD entry before DFHDELIM so that it is part of Stage 1 processing: DFHPLT TYPE=ENTRY,PROGRAM=IN25PLTE
Option Installation Steps If you are licensed to install and use the Advantage CA-InterTest PL/I option, you must perform the following SMP/E RECEIVE, APPLY, and ACCEPT procedures in addition to the base product installation. The PL/I option installation procedure uses the same target and distribution libraries as Advantage CA-InterTest.
NOTE: If you did not modify member KEYS in the OPTLIB data set to include the PL/I option LMP key, you must do this to successfully run the PL/I option. See the section “Step 2. Enter LMP Product Key Certificate Information” for instructions.
4–20
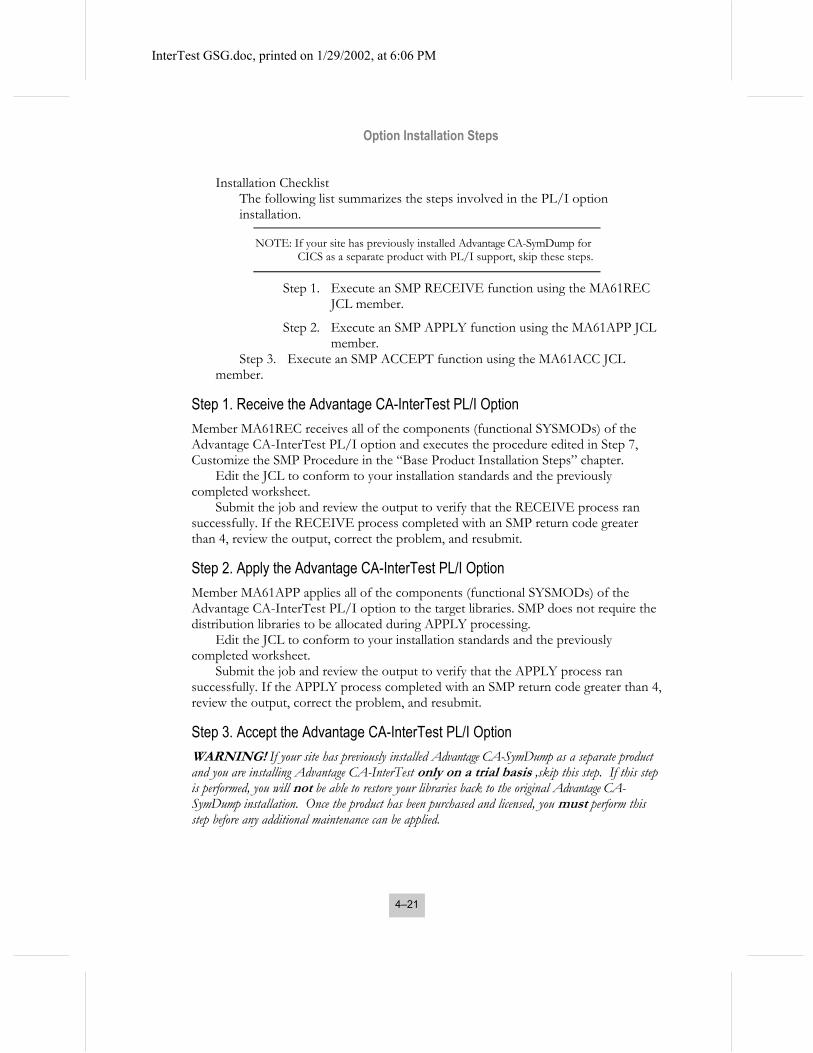
Option Installation Steps
InterTest GSG.doc, printed on 1/29/2002, at 6:06 PM
Installation Checklist
The following list summarizes the steps involved in the PL/I option installation.
NOTE: If your site has previously installed Advantage CA-SymDump for CICS as a separate product with PL/I support, skip these steps.
Step 1. Execute an SMP RECEIVE function using the MA61REC JCL member.
Step 2. Execute an SMP APPLY function using the MA61APP JCL member.
Step 3. Execute an SMP ACCEPT function using the MA61ACC JCL member.
Step 1. Receive the Advantage CA-InterTest PL/I Option Member MA61REC receives all of the components (functional SYSMODs) of the Advantage CA-InterTest PL/I option and executes the procedure edited in Step 7, Customize the SMP Procedure in the “Base Product Installation Steps” chapter.
Edit the JCL to conform to your installation standards and the previously completed worksheet.
Submit the job and review the output to verify that the RECEIVE process ran successfully. If the RECEIVE process completed with an SMP return code greater than 4, review the output, correct the problem, and resubmit.
Step 2. Apply the Advantage CA-InterTest PL/I Option Member MA61APP applies all of the components (functional SYSMODs) of the Advantage CA-InterTest PL/I option to the target libraries. SMP does not require the distribution libraries to be allocated during APPLY processing.
Edit the JCL to conform to your installation standards and the previously completed worksheet.
Submit the job and review the output to verify that the APPLY process ran successfully. If the APPLY process completed with an SMP return code greater than 4, review the output, correct the problem, and resubmit.
Step 3. Accept the Advantage CA-InterTest PL/I Option WARNING! If your site has previously installed Advantage CA-SymDump as a separate product and you are installing Advantage CA-InterTest only on a trial basis ,skip this step. If this step is performed, you will not be able to restore your libraries back to the original Advantage CA-SymDump installation. Once the product has been purchased and licensed, you must perform this step before any additional maintenance can be applied.
4–21

Automatically Starting Advantage CA-InterTest for CICS
InterTest GSG.doc, printed on 1/29/2002, at 6:06 PM
Member MA61ACC accepts all of the components (functional SYSMODs) of the Advantage CA-InterTest PL/I option to the distribution libraries.
Edit the JCL to conform to your installation standards and the previously completed worksheet.
Submit the job and review the output to verify that the ACCEPT process ran successfully. If the ACCEPT process completed with an SMP return code greater than 4, view the output, correct the problem, and resubmit the job.
We strongly recommend that you accept the Advantage CA-InterTest PL/I option product immediately after you have successfully run the APPLY process. This ACCEPT step provides a backup of the base product on the distribution libraries. This backup is necessary for future SMP restores.
Automatically Starting Advantage CA-InterTest for CICS
After Advantage CA-InterTest for CICS has been installed, you can start it automatically with your CICS system. There are four ways to do this:
• Use the PROMMAC macro • Enter CNTL commands from a CRLP-type terminal • Activate Advantage CA-InterTest from a program • Start Advantage CA-InterTest from a PLT
Using the PROMMAC Macro You can use PROMMAC macros in an assembly to create a load module defined in the CICS program definition that contains a number of CNTL commands. These commands are executed consecutively in the order of their appearance in the macros when either of these commands is submitted:
CNTL=START,PROM=tablname
or CNTL=EXEC,MODULE=tablname
Where tablname is the name of the load module generated by the assembly of the PROMMAC macros.
You can generate several alternate modules with different names, each with a CICS program definition, if you want alternate ways to start Advantage CA-InterTest or execute CNTL commands.
If the PROMD=tablname option is specified in the IN25OPTS macro, you can achieve the same result by specifying:
CNTL=START
4–22

Automatically Starting Advantage CA-InterTest for CICS
InterTest GSG.doc, printed on 1/29/2002, at 6:06 PM
If the CNTL=START command is issued from a CRT terminal or CRLP-type terminal (a terminal whose input and output are two sequential files; see the IBM CICS System Programmer's Guide), the commands from the load module are displayed back. For a CRT terminal, there is a small time delay before each command is executed so the user can see what is being done.
The first positional parameter of the PROMMAC macro contains the CNTL command to be executed. The command must be enclosed in apostrophes.
If the table is to be used by the CNTL=START command, the first PROMMAC macro must contain this command:
'CNTL=START,PROM=nn,PROX=nn' Where nn sets the sizes of the internal Advantage CA-InterTest tables. The second positional parameter of the PROMMAC macro must contain END. It
must be coded in the last PROMMAC macro before the END statement. Any CNTL command can be specified except CNTL=LIST and CNTL=INQ.
• Sample PROMMAC Macros - The following JCL is suitable for OS/390 installations. These examples are shown for illustration purposes only. See the “Advantage CA-InterTest for CICS User Guide” for more information.
//PROMAC JOB (NTSM,473),'JOHN BROWN',CLASS=D,MSGCLASS=A //ASSEM EXEC PGM=IEV90,REGION=512K, // PARM='XREF(SHORT),DECK,NUM,LIST,ALIGN,NOOBJ' //* //SYSLIB DD DSN=CAI.SAMPLIB,DISP=SHR //SYSUT1 DD SPACE=(CYL,(1,1)),UNIT=SYSDA //SYSUT2 DD SPACE=(CYL,(1,1)),UNIT=SYSDA //SYSUT3 DD SPACE=(CYL,(1,1)),UNIT=SYSDA //SYSPUNCH DD DSN=&OBJ,SPACE=(TRK,(1,1)),UNIT=SYSDA, // DCB=(BLKSIZE=800,LRECL=80,RECFM=FB),DISP=(,PASS) //SYSPRINT DD SYSOUT=A //SYSIN DD * PROMMAC 'CNTL=START,PROM=20,PROX=5' PROMMAC 'CNTL=ABP,ON,T321' PROMMAC 'CNTL=ON,PROG=(CFIL,TERMIO,FILEIO,ERRORS,SCAN,LLASRCH), USR=.ANY' PROMMAC 'CNTL=EXCL,PROG=(TERMIO,FILEIO)' PROMMAC 'CNTL=ON,PROG=PBMASTER,FOL=ON,USR=.ANY' PROMMAC 'CNTL=PURGE,INTRVAL=0100',END END /* //LINK EXEC PGM=IEWL,PARM='LIST,XREF,MAP',REGION=512K //SYSLMOD DD DSN=CAI.CACICSxx(PROMAC),DISP=SHR //SYSUT1 DD UNIT=SYSDA,SPACE=(TRK,(10,10)) //SYSPRINT DD SYSOUT=A //SYSLIN DD DSN=&&OBJ,DISP=(OLD,DELETE) //
NOTE: A CICS program definition named PROMAC is required for the generated table. In the SYSLMOD DD statement, replace xx with your two-digit CICS release number (for example, 41 for CICS 4.1, 52 for CTS 1.2, or 53 for CTS 1.3).
4–23

Automatically Starting Advantage CA-InterTest for CICS
InterTest GSG.doc, printed on 1/29/2002, at 6:06 PM
Entering CNTL Commands from a CRLP-type Terminal If you have at least one CRLP-type terminal defined in your TCT, its input sequential file can contain CNTL commands. These commands are executed in sequence just as if they were entered manually from a terminal. Responses to them are written in the terminal's output sequential file.
To reduce the amount of time required to process large numbers of CNTL commands, perform the following steps:
1. Create a load module that contains the CNTL commands to be processed using the PROMMAC macro (see the section “ Using the PROMMAC Macro).
NOTE: You can add the USR= option to any embedded CNTL=ON commands to assign the entries to a specific user ID. See the chapter “CNTL Commands and Menus” in the Advantage CA-InterTest for CICS User Guide.
2. Add a PPT entry for the load module. 3. Set the following Advantage CA-InterTest options (see the “Modifying
Advantage CA-InterTest for CICS section Advantage CA-InterTest for CICS” chapter):
RECNTMU=NO RECNTNW=NO
4. Replace the CNTL commands in the sequential input with the following command:
CNTL=START,PROM=name Where name is the name of the module that was created in Step 1.
Activating Advantage CA-InterTest for CICS from a Program In one of your programs you can code a routine to activate Advantage CA-InterTest for CICS by the CICS command:
EXEC CICS START TRANSID('CNTL') FROM(data-area)... The data-area must contain the command: CNTL=START,PROM=tablname
Where tablname is the name of the load module assembled through PROMMAC macros (see the section Using the PROMMAC Macro). The table name must be followed by a space.
If the CNTL task to be automatically initiated is to own a terminal, be sure that the terminal is in service and has the ATI (automatic task initiation) capability when the CNTL task is started.
• Issuing CNTL Commands from a Program - You can issue any CNTL command using the EXEC CICS START command. However, for the CNTL=START command, the only permitted format is:
4–24

Automatically Starting Advantage CA-InterTest for CICS
InterTest GSG.doc, printed on 1/29/2002, at 6:06 PM
CNTL=START,PROM=tablname If the CNTL task is activated at a terminal, response messages are displayed there
and the command is executed as if someone had entered it from that terminal. For example, if the CNTL command sets a breakpoint, the from and to terminals are the terminal at which the task was activated.
After Advantage CA-InterTest is started, a program can issue an EXEC CICS START command with the data record containing:
CNTL=EXEC,MODULE=tablname
This command executes the table of commands contained in tablname.
Starting Advantage CA-InterTest for CICS from a PLT If the program IN25PLT is included in the PLT, it starts Advantage CA-InterTest for CICS as specified in the IN25OPTS member. IN25PLT is delivered in the distribution load library.
The following Advantage CA-InterTest PLTPI entry must be added after DFHDELIM so that it is part of stage 2 processing:
DFHPLT TYPE=ENTRY,PROGRAM=IN25PLT
The IN25PLT program can be called by another user-written PLT program that passes a valid Advantage CA-InterTest start command in a COMMAREA to IN25PLT. An example is given below: INTSTART DC C'CNTL=START,PROM=PROMTABL ...' . . . EXEC CICS LINK PROGRAM('IN25PLT') COMMAREA(INTSTART) LENGTH(=Y(L'INSTART))
• The transient data destination specified in the GLOG= Advantage CA-InterTest option must be defined to CICS and must be opened. See the section Modifying Advantage CA-InterTest for CICS Options in the “Avantage CA-InterTest for CICS”chapter for details.
• The group DFHINQUI must be defined in the CICS startup list for IN25PLT to execute.
• The Advantage CA-InterTest Help file, PROTHLF, must be defined and available.
Automatic Startup in CICSPlex Regions If Advantage CA-InterTest is automatically started in a CICSPlex-participating region (that is, CICSPLEX=YES in IN25OPTS), it will resynchronize its monitoring options with any active CICSPlex members upon startup.
4–25

Automatically Starting Advantage CA-InterTest for CICS
InterTest GSG.doc, printed on 1/29/2002, at 6:06 PM
NOTE: Resynchronization occurs whenever the CNTL=START or CNTL=RESTART command is issued in a CICSPlex-participating region.
4–26

InterTest GSG.doc, printed on 1/29/2002, at 6:06 PM
Chapter 5
PL/I Option Installation Steps Overview
I f you are licensed to install and use the CA-InterTest PL/I option, you must perform the following SMP/E RECEIVE, APPLY, and ACCEPT procedures in addition to the base product installation. The PL/I option installation procedure uses the same target and distribution libraries as CA-InterTest. If you did not modify member KEYS in the OPTLIB data set to include the PL/I
option LMP key, you must do this to successfully run the PL/I option.. • Installation Checklist - The following list summarizes the steps
involved in the PL/I option installation.
NOTE: If your site has previously installed CA-SymDump for CICS as a separate product with PL/I support, skip these steps.
1. Execute an SMP RECEIVE function using the MA61REC JCL member.
2. Execute an SMP APPLY function using the MA61APP JCL member.
3. Execute an SMP ACCEPT function using the MA61ACC JCL member.
Step 1. Receive the CA-InterTest PL/I Option Member MA61REC receives all of the components (functional SYSMODs) of the CA-InterTest PL/I option and executes the procedure edited in Step 7, Customize the SMP Procedure in the “Base Product Installation Steps” chapter.
Edit the JCL to conform to your installation standards and the previously completed worksheet.
Submit the job and review the output to verify that the RECEIVE process ran successfully. If the RECEIVE process completed with an SMP return code greater than 4, review the output, correct the problem, and resubmit.
5–1
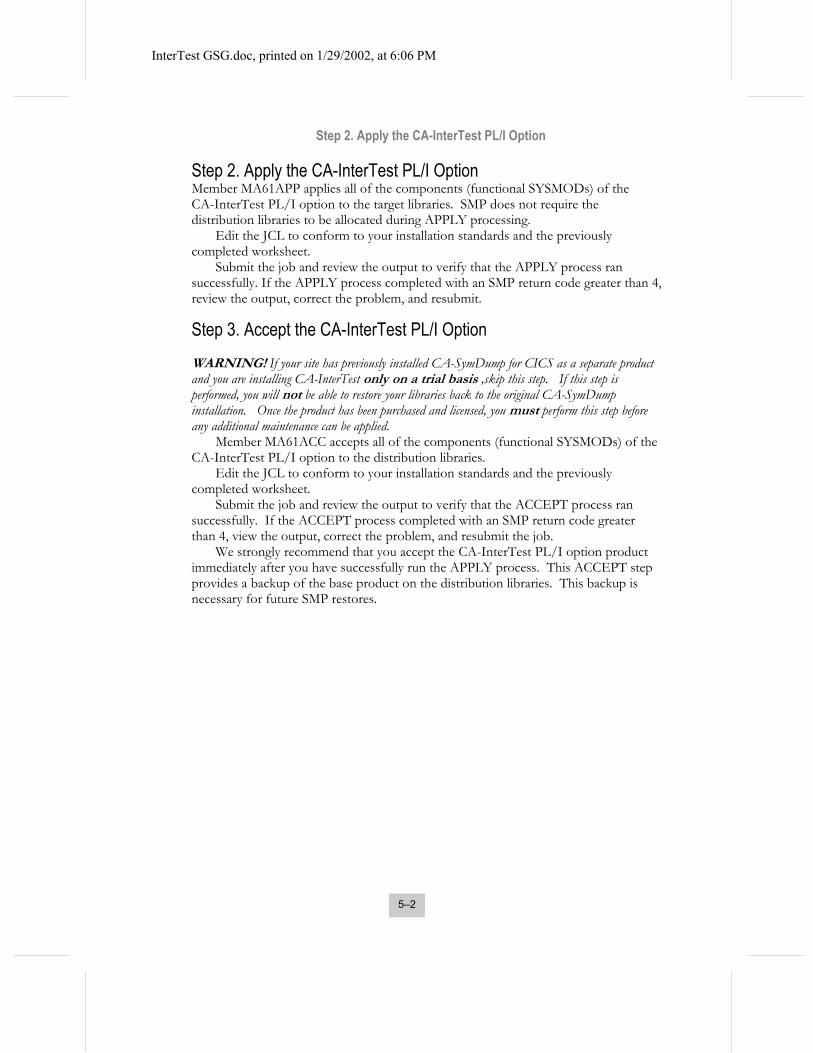
Step 2. Apply the CA-InterTest PL/I Option
InterTest GSG.doc, printed on 1/29/2002, at 6:06 PM
Step 2. Apply the CA-InterTest PL/I Option Member MA61APP applies all of the components (functional SYSMODs) of the CA-InterTest PL/I option to the target libraries. SMP does not require the distribution libraries to be allocated during APPLY processing.
Edit the JCL to conform to your installation standards and the previously completed worksheet.
Submit the job and review the output to verify that the APPLY process ran successfully. If the APPLY process completed with an SMP return code greater than 4, review the output, correct the problem, and resubmit.
Step 3. Accept the CA-InterTest PL/I Option
WARNING! If your site has previously installed CA-SymDump for CICS as a separate product and you are installing CA-InterTest only on a trial basis ,skip this step. If this step is performed, you will not be able to restore your libraries back to the original CA-SymDump installation. Once the product has been purchased and licensed, you must perform this step before any additional maintenance can be applied.
Member MA61ACC accepts all of the components (functional SYSMODs) of the CA-InterTest PL/I option to the distribution libraries.
Edit the JCL to conform to your installation standards and the previously completed worksheet.
Submit the job and review the output to verify that the ACCEPT process ran successfully. If the ACCEPT process completed with an SMP return code greater than 4, view the output, correct the problem, and resubmit the job.
We strongly recommend that you accept the CA-InterTest PL/I option product immediately after you have successfully run the APPLY process. This ACCEPT step provides a backup of the base product on the distribution libraries. This backup is necessary for future SMP restores.
5–2
InterTest GSG.doc, printed on 1/29/2002, at 6:06 PM
Chapter 6
Symbolic Support About Symbolic Support
To be able to use symbolic references in COBOL, Assembler, and PL/I programs, you must make a one-time change to your compile and assemble procedures. This new procedure will not change your program or load module in any way. It simply runs a Advantage CA-InterTest program to save
information for online use. The new procedure can be executed by as many concurrent jobs as necessary.
Concurrent compiles or assemblies do not interfere with each other in updating the Symbolic File.
After you change your compile and assemble procedure, you should compile and assemble a few CICS programs to test the new procedure.
COBOL Compilers The post-processor program that you use to change your compile procedure depends on your COBOL compiler. The sample JCL described later in this section explains which post-processor to use.
Here is how the Advantage CA-InterTest post-processor works: 1. The Advantage CA-InterTest post-processor operates after your compiler
step and collects information from the compiler's //SYSPRINT DD statement.
2. This temporary data set is passed to the Advantage CA-InterTest job step through the //INPUT DD statement.
3. The original input from your compiler's //SYSPRINT is written to the //OUTPUT DD data set declared in the Advantage CA-InterTest job step. This data set is specified in the same way as the //SYSPRINT DD was specified for the compile without Advantage CA-InterTest.
4. Messages from the Advantage CA-InterTest program are written to the ...//MESSAGE DD SYSOUT=... statement to be printed.
5. The Advantage CA-InterTest Symbolic VSAM File is referenced through the //PROTSYM DD statement with DISP=SHR.
6. Old records in the PROTSYM file are replaced by new ones during each run of the Advantage CA-InterTest program.
See the “Symbolic File Maintenance” chapter for instructions on removing old program data from the file.
6–1

About Symbolic Support
InterTest GSG.doc, printed on 1/29/2002, at 6:06 PM
Notes for COBOL Programs To use symbolic references in COBOL, you should also be aware of the following considerations:
• For CICS MVS, the following options must not be used in a COBOL program that is a CICS application: COUNT, ENDJOB, FLOW, DYNAM, STATE, SYMDMP, SYST, and TEST.
• At least one data item must be declared in Working Storage. • If compiling a program using the COBOL for MVS and VM compiler, the
program must be defined to CICS as LE/370 and not COBOL or COBOL II. Failure to do so can cause unpredictable results.
IBM COBOL Compiler Options The following options must be used with the IBM COBOL compiler.
COBOL COBOL II, COBOL/370, IBM COBOL for MVS, IBM COBOL for OS/390
Produces
NONUM NONUMBER Suppress Compiler Generated Line Numbers
DMAP MAP Data Division Map
VERB no option Verb Names
SXREF XREF Cross-Reference of Data Names & Cross-Reference of Paragraph Names
CLIST or PMAP
OFFSET or LIST
Condensed Procedure Division Map ASSEMBLER-like Procedure Division Map
See the section Additional Notes for COBOL Programs in this chapter for other
compiler considerations.
CA-Optimizer and CA-Optimizer/II Option The options listed in the following table must be used with CA-Optimizer and CA-Optimizer/II if you are not using the NOCOPT option. (The NOCOPT option specifies that the program will not be optimized by CA-Optimizer even if CA-Optimizer is active.)
6–2

About Symbolic Support
InterTest GSG.doc, printed on 1/29/2002, at 6:06 PM
If you are using the NOCOPT option, use the options for IBM COBOL compilers specified in the previous section. See the CA-Optimizer User Guide or CA-Optimizer/II User Guide for more information.
CA-Optimizer CA-Optimizer/II Produces
MLIST MLIST or MOFFSET Integrated Procedure Division Map
NONUM NONUMBER Suppress Compiler-Generated Line Numbers
DMAP MAP or MMAP Data Division Map INTERTST Advantage CA-InterTest
requirement. Indicates that the program is being optimized for use with Advantage CA-InterTest.
XREF XREF Cross-Reference of Data Names and Cross-Reference of Paragraph Names
Using the Post-Processors with Multiple Advantage CA-InterTest Releases Important: The symbolics produced by this release's version of the post-processor are not downward compatible with earlier Advantage CA-InterTest releases.
Symbolics produced by earlier Advantage CA-InterTest releases are upward compatible with all Advantage CA-InterTest releases.
• If you need programs to run under multiple Advantage CA-InterTest releases, compile or assemble these programs with the lowest Advantage CA-InterTest release you are using.
• If you require support for both CA-Realia Host Test Option and a release level of Advantage CA-InterTest that requires a separate version of the post-processors, you can either create and maintain separate Symbolic Files or mix the output of the different post-processors in the same Symbolic File.
Advantage CA-InterTest Post-Processor Program Options Options are passed to the Advantage CA-InterTest post-processor using a parameter statement. The parameter statement can be specified in a control card or created in a PARM= parameter of a preceding job step. The "//GENPARM" step (indicated by 2->) in the JCL example at the end of this section illustrates how to specify the statement.
6–3

About Symbolic Support
InterTest GSG.doc, printed on 1/29/2002, at 6:06 PM
• The only required field on the parameter statement is a program name. The program name is the name in the CICS program definition or, for composite support, the monitor-name.
• If you pass options using a control card, the program name must start in column 1.
The following example saves symbolic references for the program named ORDEDIT using a control card:
COL = 1...5....0 ORDEDIT
Controlling Printed Output with the CUTPRINT Option Since all COBOL source code and compiler information can be available online, you can request that the Advantage CA-InterTest program not print all or part of the listing produced by the compiler. To make this request, add one of the following keywords immediately after the program name on the parameter statement:
,CUTPRINT=ALL produces no COBOL listing ,CUTPRINT=MAP prints only the part that precedes the Data Division
map ,CUTPRINT=REF prints only the parts that precede the data names Cross-Reference list
The following sample parameter statement saves symbolic information for the program ORDEDIT and prints only the source code portion of the compiler output.
ORDEDIT,CUTPRINT=MAP
NOTE: Specify the CUTPRINT parameter only when you do not want all or part of your listing printed. The entire listing will be printed if this parameter is missing from the parameter statement.
Saving Your Listing for Online Display with the LISTER Option You can also request that all or a portion of your source code be saved for online viewing. If saved, Advantage CA-InterTest automatically displays the relevant part of the listing when a breakpoint occurs.
To make this request you must add one of the following keywords to the parameter statement:
,LISTER=ALL saves the entire COBOL listing ,LISTER=MAP saves only the parts that precede the Data Division map (recommended for COBOL) ,LISTER=REF saves only the parts that precede the data names Cross-Reference list (recommended for COBOL II)
6–4
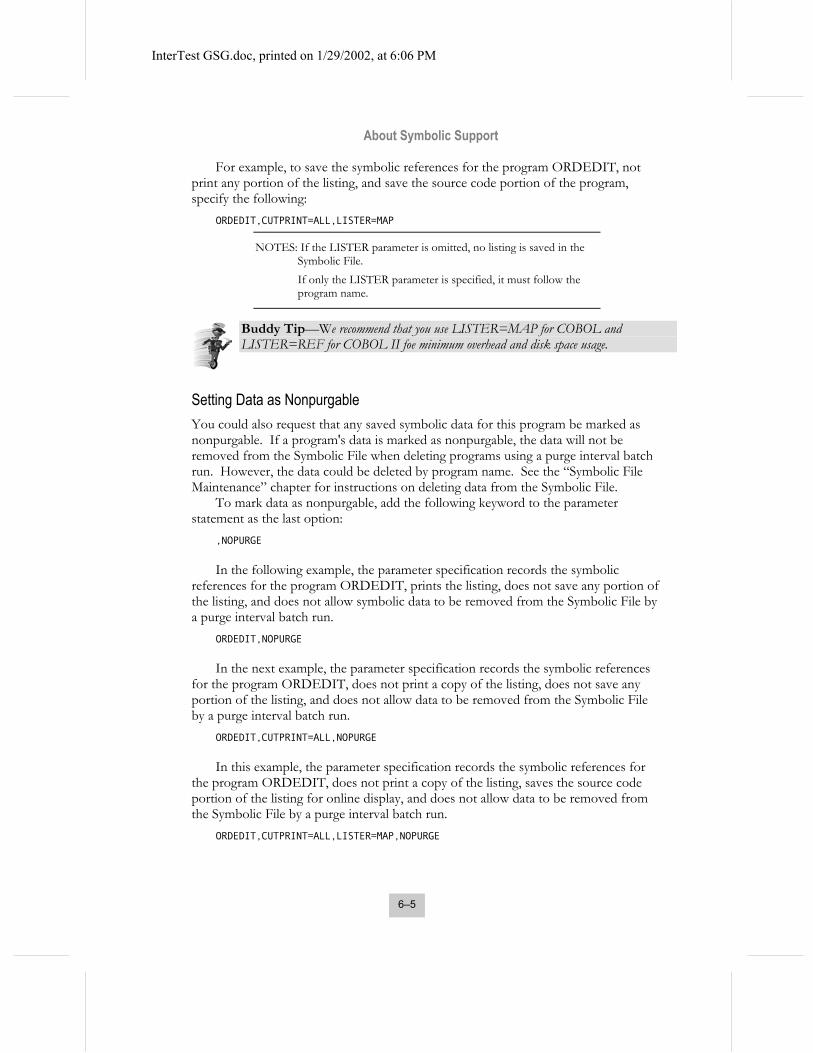
About Symbolic Support
InterTest GSG.doc, printed on 1/29/2002, at 6:06 PM
For example, to save the symbolic references for the program ORDEDIT, not print any portion of the listing, and save the source code portion of the program, specify the following:
ORDEDIT,CUTPRINT=ALL,LISTER=MAP
NOTES: If the LISTER parameter is omitted, no listing is saved in the Symbolic File.
If only the LISTER parameter is specified, it must follow the program name.
Buddy Tip—We recommend that you use LISTER=MAP for COBOL and LISTER=REF for COBOL II foe minimum overhead and disk space usage.
Setting Data as Nonpurgable You could also request that any saved symbolic data for this program be marked as nonpurgable. If a program's data is marked as nonpurgable, the data will not be removed from the Symbolic File when deleting programs using a purge interval batch run. However, the data could be deleted by program name. See the “Symbolic File Maintenance” chapter for instructions on deleting data from the Symbolic File.
To mark data as nonpurgable, add the following keyword to the parameter statement as the last option:
,NOPURGE In the following example, the parameter specification records the symbolic
references for the program ORDEDIT, prints the listing, does not save any portion of the listing, and does not allow symbolic data to be removed from the Symbolic File by a purge interval batch run.
ORDEDIT,NOPURGE In the next example, the parameter specification records the symbolic references
for the program ORDEDIT, does not print a copy of the listing, does not save any portion of the listing, and does not allow data to be removed from the Symbolic File by a purge interval batch run.
ORDEDIT,CUTPRINT=ALL,NOPURGE In this example, the parameter specification records the symbolic references for
the program ORDEDIT, does not print a copy of the listing, saves the source code portion of the listing for online display, and does not allow data to be removed from the Symbolic File by a purge interval batch run.
ORDEDIT,CUTPRINT=ALL,LISTER=MAP,NOPURGE
6–5

About Symbolic Support
InterTest GSG.doc, printed on 1/29/2002, at 6:06 PM
COBOL JCL Examples The following sections show JCL examples.
COBOL/VS or CA-Optimizer Example All changes to the normal procedure are specified by ->. //* //* YOUR EXISTING CICS PREPROCESSOR JCL GOES HERE //* (IF DOING A COMMAND LEVEL COMPILE) // // //* YOUR EXISTING COBOL OR CA-OPTIMIZER JCL GOES HERE WITH //* THE FOLLOWING MODIFICATIONS: //*
For COBOL/VS only:
1-> //SYSPRINT DD DSN=&&INPUT,DISP=(,PASS),UNIT=SYSDA, 1-> // SPACE=(TRK,(15,5)), 1-> // DCB=(DSORG=PS,LRECL=121,BLKSIZE=2420,RECFM=FBA) //*
For CA-Optimizer only: 1-> //SYSPRINT DD DSN=&&INPUT,DISP=(MOD,PASS),UNIT=SYSDA, 1-> // SPACE=(TRK,(15,5)), 1-> // DCB=(DSORG=PS,LRECL=121,BLKSIZE=2420,RECFM=FBA) //*
For all symbolic users:
//* //* IF THE COMPILER GIVES A RETURN CODE NOT HIGHER THAN 4 - //* //* RUN THE ADVANTAGE CA-INTERTEST POST-PROCESSOR - //* //* BELOW, THE //STEPLIB AND THE //STEPCAT MAY BE UNNECESSARY. //*
2-> //GENPARM EXEC PGM=IN25PARM,PARM='PARAMETER STATEMENT' 2-> //STEPLIB DD DSN=CAI.CACICSxx,DISP=SHR 2-> //CARDS DD DSN=&&CARDS,DISP=(,PASS),UNIT=SYSDA, SPACE=(TRK,(1,1))
//* //POSTCOB EXEC PGM=IN25SYMC,COND=(4,LT,COBOL),REGION=512K //SYSUDUMP DD SYSOUT=A //STEPLIB DD DSN=CAI.CACICSxx,DISP=SHR //INPUT DD DSN=&&INPUT,DISP=(OLD,DELETE) //OUTPUT DD SYSOUT=A,DCB=(RECFM=FBA,LRECL=121,BLKSIZE=2420) //MESSAGE DD SYSOUT=A //PROTSYM DD DSN=INTRTST.PROTSYM,DISP=SHR
3-> //CARDS DD DSN=&&CARDS,DISP=(OLD,DELETE) //* //* IF THE COMPILER GIVES A RETURN CODE HIGHER THAN 4 - //* THEN RUN AN IEBGENER TO PRINT THE COBOL LISTING - //* //PRINT EXEC PGM=IEBGENER,COND=(5,GT,COBOL) //SYSPRINT DD DUMMY //SYSIN DD DUMMY
6–6

About Symbolic Support
InterTest GSG.doc, printed on 1/29/2002, at 6:06 PM
//SYSUT1 DD DSN=&&INPUT,DISP=(OLD,DELETE) //SYSUT2 DD SYSOUT=A //* //* YOUR EXISTING LINKAGE-EDITOR JCL GOES HERE In the STEPLIB DD statements, replace xx with your two-digit CICS release
number (for example: 41 for CICS 4.1, 52 for CTS 1.2, or 53 for CTS 1.3). The following JCL modifications must be made to your existing compile procedure:
1. Specify the //SYSPRINT data set in the COBOL/VS compiler or CA-Optimizer step.
2. Insert a new job step to execute the Advantage CA-InterTest program after the compiler or CA-Optimizer step.
This JCL example assumes that you will pass the parameter statement in the PARM parameter of the EXEC statement. If you prefer to pass the parameter statement using a control card:
1. Remove all of the statements in the example that are marked by a 2->. 2. Change the following JCL statement:
3->//CARDS DD DSN=&&CARDS,DISP=(OLD,DELETE)
to 3->//CARDS DD *
3. Add the parameter statement after this JCL statement.
NOTE: The Advantage CA-InterTest post-processor is shown with a region size of 512 KB. Processing larger programs may require a larger region size.
COBOL II, CA-Optimizer/II, COBOL/370, IBM COBOL for MVS, or IBM COBOL for OS/390 Example All changes to the normal procedure are specified by ->. //* //* YOUR EXISTING CICS PREPROCESSOR JCL GOES HERE //* (IF DOING A COMMAND LEVEL COMPILE) // // //* YOUR EXISTING COBOL II OR CA-OPTIMIZER/II JCL GOES HERE WITH //* THE FOLLOWING MODIFICATIONS: //*
For COBOL II, COBOL/370, IBM COBOL for MVS, or IBM COBOL for OS/390 only:
1-> //SYSPRINT DD DSN=&&INPUT,DISP=(,PASS),UNIT=SYSDA, 1-> // SPACE=(TRK,(15,5)), 1-> // DCB=(DSORG=PS,LRECL=133,BLKSIZE=2660,RECFM=FBA)
For CA-Optimizer/II only: 1-> //SYSPRINT DD DSN=&&INPUT,DISP=(MOD,PASS),UNIT=SYSDA,
6–7

About Symbolic Support
InterTest GSG.doc, printed on 1/29/2002, at 6:06 PM
1-> // SPACE=(TRK,(15,5)), 1-> // DCB=(DSORG=PS,LRECL=133,BLKSIZE=3990,RECFM=FBA)
//*
For all symbolic users:
//* //* IF THE COMPILER GIVES A RETURN CODE NOT HIGHER THAN 4 - //* RUN THE ADVANTAGE CA-INTERTEST POST-PROCESSOR - //* //* BELOW, THE //STEPLIB AND THE //STEPCAT MAY BE UNNECESSARY. //*
2-> //GENPARM EXEC PGM=IN25PARM,PARM='PARAMETER STATEMENT' 2-> //STEPLIB DD DSN=CAI.CACICSxx,DISP=SHR 2-> //CARDS DD
DSN=&&CARDS,DISP=(,PASS),UNIT=SYSDA,SPACE=(TRK,(1,1)) //* //POSTCOB EXEC PGM=IN25COB2,COND=(4,LT,COBOL),REGION=512K //SYSUDUMP DD SYSOUT=A //STEPLIB DD DSN=CAI.CACICSxx,DISP=SHR //INPUT DD DSN=&&INPUT,DISP=(OLD,DELETE) //OUTPUT DD SYSOUT=A,DCB=(RECFM=FBA,LRECL=133,BLKSIZE=2660) //* //MESSAGE DD SYSOUT=A //PROTSYM DD DSN=INTRTST.PROTSYM,DISP=SHR
3-> //CARDS DD DSN=&&CARDS,DISP=(OLD,DELETE) //* //* IF THE COMPILER GIVES A RETURN CODE HIGHER THAN 4 - //* THEN RUN AN IEBGENER TO PRINT THE COBOL LISTING - //* //PRINT EXEC PGM=IEBGENER,COND=(5,GT,COBOL) //SYSPRINT DD DUMMY //SYSIN DD DUMMY //SYSUT1 DD DSN=&&INPUT,DISP=(OLD,DELETE) //SYSUT2 DD SYSOUT=A //* //* YOUR EXISTING LINKAGE-EDITOR JCL GOES HERE In the STEPLIB DD statements, replace xx with your two-digit CICS release
number (for example: 41 for CICS 4.1, 52 for CTS 1.2, or 53 for CTS 1.3). The following JCL modifications must be made to your existing compile
procedure: 1. Specify the //SYSPRINT data set in the COBOL II compiler or
CA-Optimizer/II step. 2. Insert a new job step to execute the Advantage CA-InterTest program after
the compiler or CA-Optimizer/II step.
6–8

About Symbolic Support
InterTest GSG.doc, printed on 1/29/2002, at 6:06 PM
This JCL example assumes that you will pass the parameter statement in the PARM parameter of the EXEC statement. If you prefer to pass the parameter statement using a control card:
1. Remove all of the statements in the example that are marked by a 2->. 2. Change the following JCL statement:
3->//CARDS DD DSN=&&CARDS,DISP=(OLD,DELETE)
to 3->//CARDS DD *
3. Add the parameter statement after this JCL statement.
NOTE: The Advantage CA-InterTest post-processor is shown with a region size of 512 KB. Processing larger programs may require a larger region size.
Assembler Programs The change to your Assembler procedure requires only one job step—to execute the IN25SYMA program. IN25SYMA supports Assembler F, Assembler H, and High Level Assembler.
Here is how the Advantage CA-InterTest procedure works: 1. IN25SYMA operates between your Assembler and link-editor, collecting
information from the Assembler's //SYSPRINT DD statement, which should be declared a temporary sequential data set in the Assembler job step with: DCB=(RECFM=FBA,LRECL=121,BLKSIZE=(a multiple of 121))
NOTE: When using Assembler H, specify RECFM=FBM unless your Assembler H is generated to produce listings in the RECFM=FBA format.
2. That temporary data set is passed to the IN25SYMA job step through the //INPUT DD statement.
3. The original input from your Assembler's //SYSPRINT is written to the //OUTPUT DD data set declared in the IN25SYMA job step.
4. Messages from the IN25SYMA program are written to the //MESSAGE DD statement to be printed.
5. The Advantage CA-InterTest Symbolic VSAM file is referenced by IN25SYMA through the //PROTSYM DD statement with DISP=SHR.
6. Old records in the PROTSYM file are replaced by new ones with each run of the IN25SYMA program.
See the “Symbolic File Maintenance” chapter for instructions on removing old program data from the Symbolic File.
6–9
About Symbolic Support
InterTest GSG.doc, printed on 1/29/2002, at 6:06 PM
NOTE: For Advantage CA-InterTest Source Listing support to work properly, all CSECTs must appear in the listing and each CSECT statement must have a label.
Assembler Options The entire listing produced by the Assembler is required. The following options must be specified:
Option Produces
ESD External Symbol Dictionary
XREF(FULL) or Full Cross-Reference XREF(SHORT) Short Cross-Reference
Important! You must ensure that all statements that define the start of DSECTs are
printed. This ensures that the CORE structured display facility shows the correct data in DSECT format.
NOTE: High Level Assembler Release 2.0 users must also specify the option LIST(121).
IN25SYMA Options Options are passed to the Advantage CA-InterTest post-processor using a parameter statement. The parameter statement can be specified in a control card or created in a PARM= parameter of a preceding job step. The //GENPARM step (indicated by 2->) in the JCL example at the end of this section shows how to specify the statement.
NOTE: If you specify the parameter statement as a control card, the program name must start in column 1.
The only required field on this parameter card is the program name. The program name is the name in the CICS program definition or, for composite support, the monitor-name.
The following example saves the symbolic references for the program named ORDEDIT in control card format:
COL = 1...5....0 ORDEDIT
6–10

About Symbolic Support
InterTest GSG.doc, printed on 1/29/2002, at 6:06 PM
Controlling Printed Output with the CUTPRINT Option Since all Assembler output can be made available online, you can request that the IN25SYMA program not print all or any part of the listing produced by the Assembler. To make this request, you must add one of the following keywords immediately after the program name on the parameter card: ,CUTPRINT=ALL produces no Assembler listing ,CUTPRINT=REF prints only the parts that precede the Cross-Reference list
The following example saves symbolic information for the program ORDEDIT but will not produce a hardcopy listing.
ORDEDIT,CUTPRINT=ALL
NOTE: Specify the ,CUTPRINT= parameter only when you do not want all or part of your listing printed. The entire listing prints if this parameter is omitted from the parameter statement.
Saving Your Listing for Online Display with the LISTER Option You can also request that all or a portion of your source code be saved for online viewing. If saved, Advantage CA-InterTest automatically displays the relevant part of the listing when a breakpoint occurs.
To save the listing you must add one of these keywords to the parameter statement:
,LISTER=ALL saves the entire Assembler listing ,LISTER=REF saves only the parts that precede the Cross-Reference list
The parameter specification in the following example saves symbolic references for program ORDEDIT, does not print the listing, and saves the entire Assembler output for online display.
ORDEDIT,CUTPRINT=ALL,LISTER=ALL
NOTES: If the LISTER parameter is omitted, no listing is saved in the Symbolic File.
If only the LISTER parameter is specified, it must follow the program name.
Setting Data as Nonpurgable You can also request that any saved symbolic data for this program be marked as nonpurgable. If a program's data is marked as nonpurgable, the data will not be removed from the Symbolic File when deleting programs using a purge interval batch run. However, the data can be deleted by program name. See the “Symbolic Files Maintenance” chapter for instructions on deleting data from the Symbolic File.
6–11
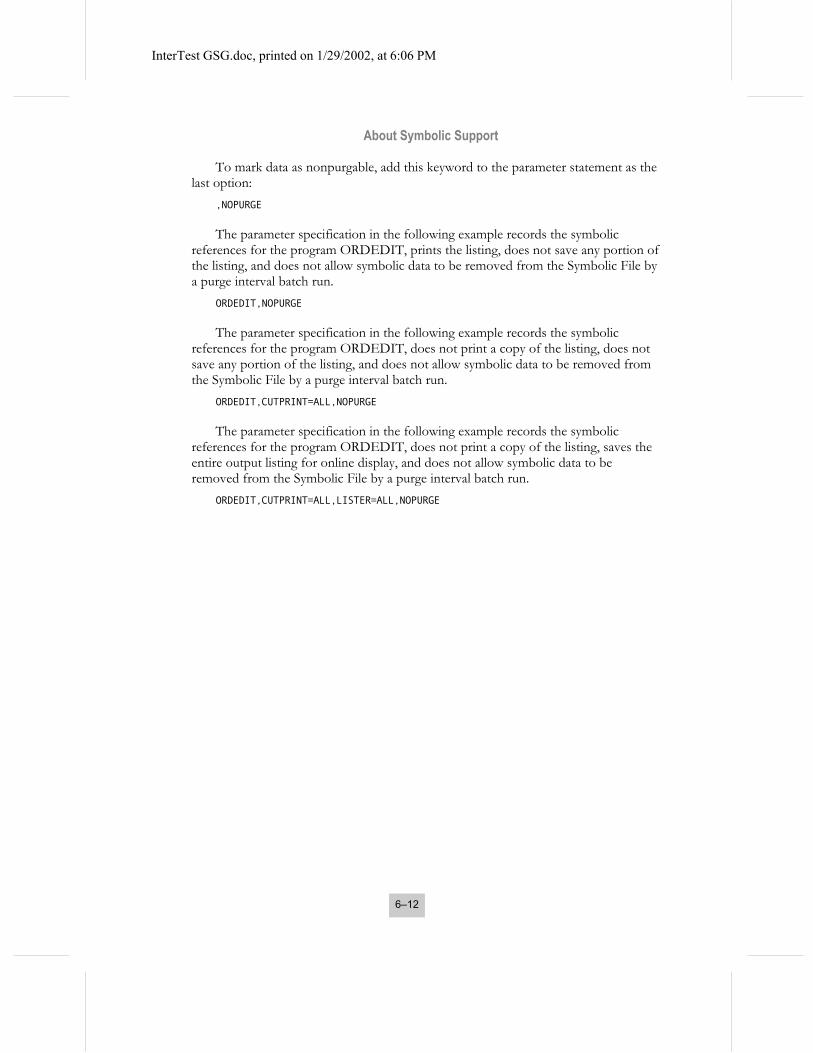
About Symbolic Support
InterTest GSG.doc, printed on 1/29/2002, at 6:06 PM
To mark data as nonpurgable, add this keyword to the parameter statement as the last option:
,NOPURGE The parameter specification in the following example records the symbolic
references for the program ORDEDIT, prints the listing, does not save any portion of the listing, and does not allow symbolic data to be removed from the Symbolic File by a purge interval batch run.
ORDEDIT,NOPURGE The parameter specification in the following example records the symbolic
references for the program ORDEDIT, does not print a copy of the listing, does not save any portion of the listing, and does not allow symbolic data to be removed from the Symbolic File by a purge interval batch run.
ORDEDIT,CUTPRINT=ALL,NOPURGE The parameter specification in the following example records the symbolic
references for the program ORDEDIT, does not print a copy of the listing, saves the entire output listing for online display, and does not allow symbolic data to be removed from the Symbolic File by a purge interval batch run.
ORDEDIT,CUTPRINT=ALL,LISTER=ALL,NOPURGE
6–12
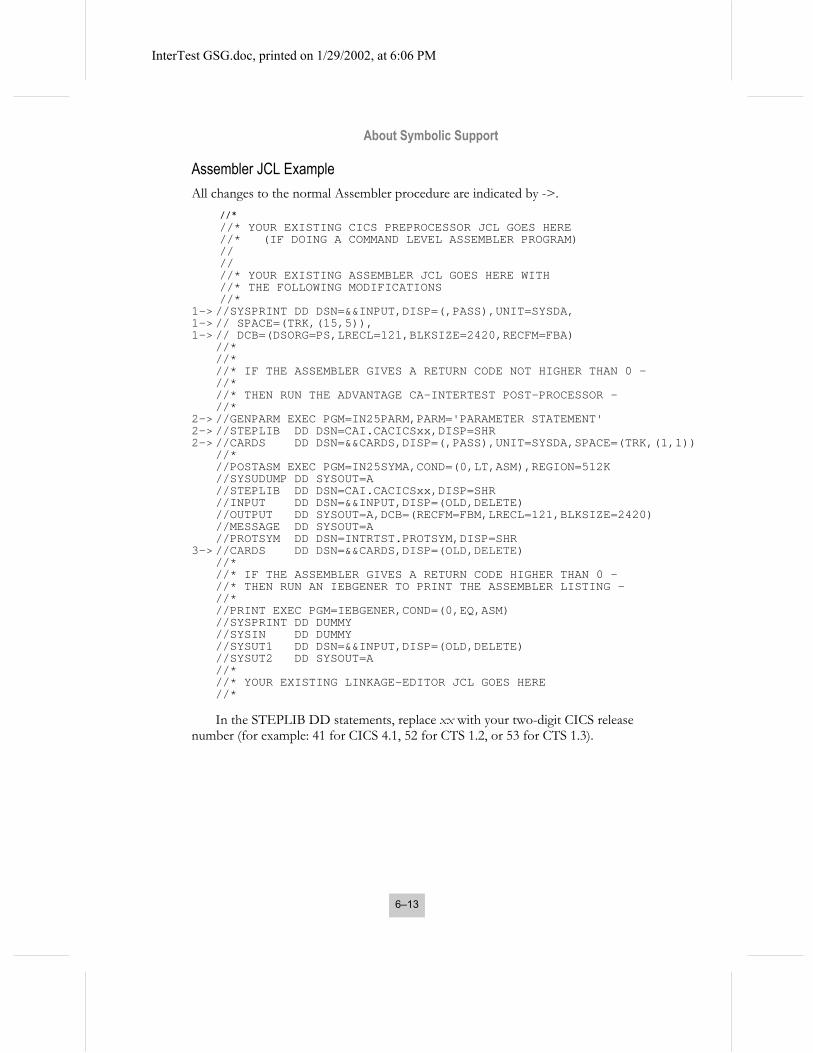
About Symbolic Support
InterTest GSG.doc, printed on 1/29/2002, at 6:06 PM
Assembler JCL Example All changes to the normal Assembler procedure are indicated by ->. //*
//* YOUR EXISTING CICS PREPROCESSOR JCL GOES HERE //* (IF DOING A COMMAND LEVEL ASSEMBLER PROGRAM) // // //* YOUR EXISTING ASSEMBLER JCL GOES HERE WITH //* THE FOLLOWING MODIFICATIONS
//* 1-> //SYSPRINT DD DSN=&&INPUT,DISP=(,PASS),UNIT=SYSDA, 1-> // SPACE=(TRK,(15,5)), 1-> // DCB=(DSORG=PS,LRECL=121,BLKSIZE=2420,RECFM=FBA)
//* //* //* IF THE ASSEMBLER GIVES A RETURN CODE NOT HIGHER THAN 0 - //* //* THEN RUN THE ADVANTAGE CA-INTERTEST POST-PROCESSOR - //*
2-> //GENPARM EXEC PGM=IN25PARM,PARM='PARAMETER STATEMENT' 2-> //STEPLIB DD DSN=CAI.CACICSxx,DISP=SHR 2-> //CARDS DD DSN=&&CARDS,DISP=(,PASS),UNIT=SYSDA,SPACE=(TRK,(1,1))
//* //POSTASM EXEC PGM=IN25SYMA,COND=(0,LT,ASM),REGION=512K
//SYSUDUMP DD SYSOUT=A //STEPLIB DD DSN=CAI.CACICSxx,DISP=SHR //INPUT DD DSN=&&INPUT,DISP=(OLD,DELETE) //OUTPUT DD SYSOUT=A,DCB=(RECFM=FBM,LRECL=121,BLKSIZE=2420) //MESSAGE DD SYSOUT=A //PROTSYM DD DSN=INTRTST.PROTSYM,DISP=SHR 3-> //CARDS DD DSN=&&CARDS,DISP=(OLD,DELETE)
//* //* IF THE ASSEMBLER GIVES A RETURN CODE HIGHER THAN 0 - //* THEN RUN AN IEBGENER TO PRINT THE ASSEMBLER LISTING - //* //PRINT EXEC PGM=IEBGENER,COND=(0,EQ,ASM) //SYSPRINT DD DUMMY //SYSIN DD DUMMY //SYSUT1 DD DSN=&&INPUT,DISP=(OLD,DELETE) //SYSUT2 DD SYSOUT=A //* //* YOUR EXISTING LINKAGE-EDITOR JCL GOES HERE //* In the STEPLIB DD statements, replace xx with your two-digit CICS release
number (for example: 41 for CICS 4.1, 52 for CTS 1.2, or 53 for CTS 1.3).
6–13

About Symbolic Support
InterTest GSG.doc, printed on 1/29/2002, at 6:06 PM
The following JCL modifications must be made to your existing Assembler procedure to use the IN25SYMA program:
1. The //SYSPRINT data set in the Assembler step must be modified. 2. A new job step to execute the IN25SYMA program must be inserted after the
Assembler step. In the previous example, the parameter statement is specified in the PARM
parameter of the EXEC statement. If you want to pass the parameter statement using a control card:
1. Remove all of the statements marked with a 2->. 2. Change the following JCL statement:
3->//CARDS DD DSN=&&CARDS,DISP=(OLD,DELETE)
to 3->//CARDS DD *
3. Add the parameter statement after this JCL statement.
PL/I Programs To be able to set breakpoints at PL/I statement numbers and label names online, a one-time change to your PL/I compile procedure is required. This new procedure runs a Advantage CA-InterTest program, IN25SYMP, to save information for online use.
Here is how the Advantage CA-InterTest program IN25SYMP works: 1. IN25SYMP operates between your compiler and link-editor and collects
information from the compiler's //SYSPRINT DD statement. Declare this data set a temporary, sequential data set in the compiler job step with: DCB=BLKSIZE=a number larger than 129
2. This temporary data set is passed to the IN25SYMP job step through the //INPUT DD statement.
3. The original input from your compiler's //SYSPRINT is written to the //SYSPRINT DD data set declared in the IN25SYMP job step.
4. Messages from the IN25SYMP program are written to both the //MSGS DD and the //MESSAGES DD statements.
5. The Advantage CA-InterTest Symbolic VSAM File is updated by IN25SYMP through the //PROTSYM DD statement with DISP=SHR.
6. Old records in the PROTSYM file are replaced by new ones during each run of the Advantage CA-InterTest program.
See the “Symbolic File Maintenance” chapter for instructions on removing old program data from the file.
6–14

About Symbolic Support
InterTest GSG.doc, printed on 1/29/2002, at 6:06 PM
Compiler Options Suggested parameters for the PL/I optimizing compiler provide enough information for successful symbolic debugging. The LIST option (Assembler-like listing of the generated code) is optional, but the tables of offsets must be provided.
The following options must be used with the IBM PL/I compiler: AGGREGATE, ATTRIBUTES(FULL), MAP, NEST, NOGONUM, NOMARGINI, NONUMBER, OPTIONS, SOURCE, STMT or GOSTMT, STORAGE, and XREF(FULL).
NOTE: Because of special considerations, if you must use the %NOPRINT compiler option contact Advantage CA-InterTest technical support.
Installation Options For Symbolic File compile date-time to load module checking on PL/I programs to function, your PL/I compiler must have been installed with the TSTAMP=YES option (the default).
IN25SYMP Options Options are passed to the Advantage CA-InterTest post-processor using a parameter statement. This statement can be specified in a control card or created in a PARM= parameter of a preceding job step. The //GENPARM step (indicated by 2->) in the JCL example at the end of this section shows how to specify the statement.
NOTE: If you specify the options in a control card, the program name must start in column 1.
The only required field on the parameter statement is a program name. The program name is the name in the CICS program definition or, for composite support, the monitor-name.
The following example saves symbolic references for the program named ORDEDIT in control card format:
COL = 1...5....0 ORDEDIT
Controlling Printed Output with the CUTPRINT Option Since all PL/I source code and compiler information can be available online, you can request that the IN25SYMP program not print all or part of the listing produced by the compiler. To make this request, add one of the following keywords immediately after the program name: ,CUTPRINT=ALL produces no PL/I listing ,CUTPRINT=REF terminates printing after the XREF table ,CUTPRINT=OFFSET terminates printing after the table of offsets
6–15
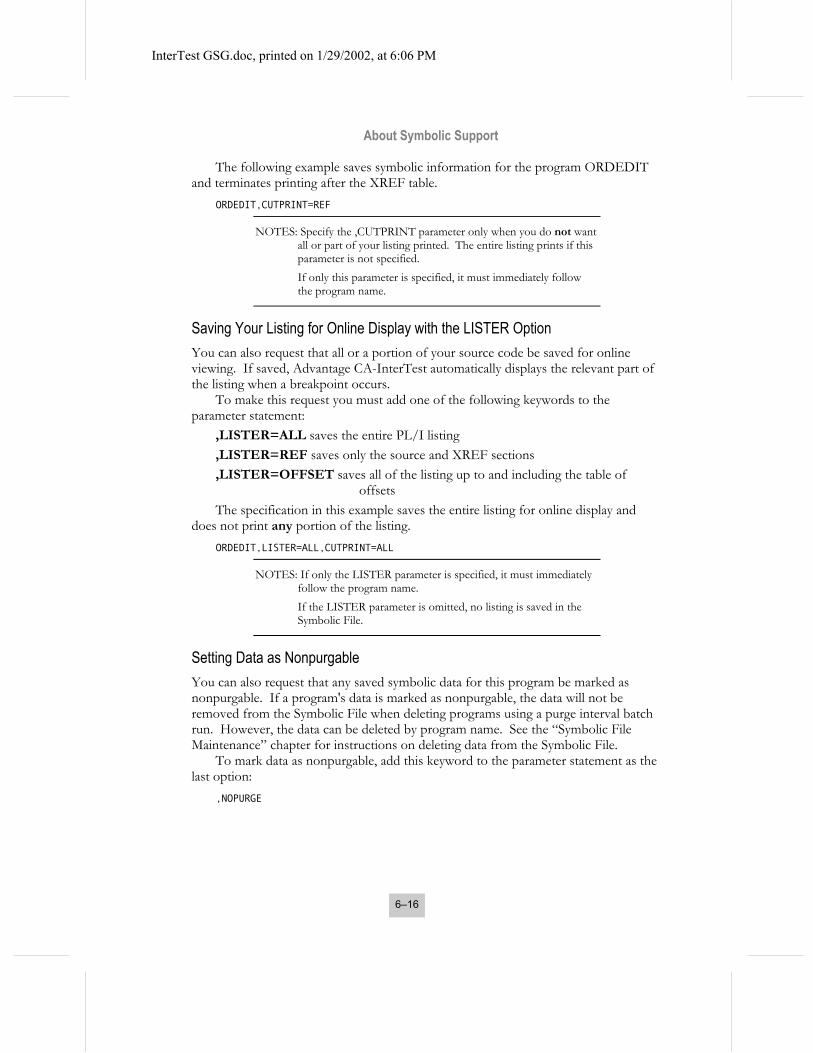
About Symbolic Support
InterTest GSG.doc, printed on 1/29/2002, at 6:06 PM
The following example saves symbolic information for the program ORDEDIT and terminates printing after the XREF table.
ORDEDIT,CUTPRINT=REF
NOTES: Specify the ,CUTPRINT parameter only when you do not want all or part of your listing printed. The entire listing prints if this parameter is not specified.
If only this parameter is specified, it must immediately follow the program name.
Saving Your Listing for Online Display with the LISTER Option You can also request that all or a portion of your source code be saved for online viewing. If saved, Advantage CA-InterTest automatically displays the relevant part of the listing when a breakpoint occurs.
To make this request you must add one of the following keywords to the parameter statement:
,LISTER=ALL saves the entire PL/I listing ,LISTER=REF saves only the source and XREF sections ,LISTER=OFFSET saves all of the listing up to and including the table of
offsets The specification in this example saves the entire listing for online display and
does not print any portion of the listing. ORDEDIT,LISTER=ALL,CUTPRINT=ALL
NOTES: If only the LISTER parameter is specified, it must immediately follow the program name.
If the LISTER parameter is omitted, no listing is saved in the Symbolic File.
Setting Data as Nonpurgable You can also request that any saved symbolic data for this program be marked as nonpurgable. If a program's data is marked as nonpurgable, the data will not be removed from the Symbolic File when deleting programs using a purge interval batch run. However, the data can be deleted by program name. See the “Symbolic File Maintenance” chapter for instructions on deleting data from the Symbolic File.
To mark data as nonpurgable, add this keyword to the parameter statement as the last option:
,NOPURGE
6–16

About Symbolic Support
InterTest GSG.doc, printed on 1/29/2002, at 6:06 PM
The parameter specification in the following example records the symbolic references for the program ORDEDIT, prints the listing, does not save any portion of the listing, and does not allow symbolic data to be removed from the Symbolic File by a purge interval batch run.
ORDEDIT,NOPURGE The parameter specification in the following example records the symbolic
references for the program ORDEDIT, does not print a copy of the listing, does not save any portion of the listing, and does not allow symbolic data to be removed from the Symbolic File by a purge interval batch run.
ORDEDIT,CUTPRINT=ALL,NOPURGE The parameter specification in the following example records the symbolic
references for the program ORDEDIT, does not print a copy of the listing, saves the entire output listing for online display, and does not allow symbolic data to be removed from the Symbolic File by a purge interval batch run.
ORDEDIT,CUTPRINT=ALL,LISTER=ALL,NOPURGE
PL/I JCL Example All changes to the normal compile procedure are indicated by ->.
//INTRSYMP JOB ... //* //* YOUR EXISTING CICS PREPROCESSOR JCL GOES HERE //* WHEN DOING A COMMAND LEVEL COMPILE // //* YOUR EXISTING PL/I COMPILER JCL GOES HERE //* WITH THE FOLLOWING MODIFICATIONS //*
1-> //SYSPRINT DD DSN=&&INPUT,DISP=(MOD,PASS),UNIT=SYSDA,
1-> // SPACE=(CYL,(1,1)),DCB=BLKSIZE=5000 //* //* IF THE COMPILER GIVES A RETURN CODE LESS THAN 9, //* //* THEN RUN THE ADVANTAGE CA-INTERTEST POST-PROCESSOR STEP //*
2-> //GENPARM EXEC PGM=IN25PARM,PARM='PARAMETER STATEMENT'
2-> //STEPLIB DD DSN=CAI.CACICSxx,DISP=SHR
2-> //CARDS DD
DSN=&&CARDS,DISP=(,PASS),UNIT=SYSDA,SPACE=(TRK,(1,1)) //*
//POSTPLI EXEC PGM=IN25SYMP,REGION=2048K,COND=(9,LT,PLI), // PARM='NOREPORT' //STEPLIB DD DSN=CAI.CACICSxx,DISP=SHR //PROTSYM DD DSN=INTRTST.PROTSYM,DISP=SHR //INPUTT DD DSN=&&INPUT,DISP=(OLD,PASS) //MSGS DD SYSOUT=* //MESSAGE DD SYSOUT=* //SYSPRINT DD SYSOUT=*
6–17

About Symbolic Support
InterTest GSG.doc, printed on 1/29/2002, at 6:06 PM
//PLIDUMP DD SYSOUT=* 3-> //CARDS DD DSN=&&CARDS,DISP=(OLD,DELETE)
//* //* //* YOUR EXISTING LINKAGE-EDITOR JCL GOES HERE //*
//* IF THE COMPILER GIVES A RETURN CODE HIGHER THAN 9 //* THEN RUN AN IEBGENER TO PRINT THE PL/I LISTING //* //GENP EXEC PGM=IEBGENER,COND=(9,GT,PLI) //SYSPRINT DD SYSOUT=* //SYSIN DD DUMMY //SYSUT1 DD DSN=&&INPUT,DISP=(OLD,DELETE) //SYSUT2 DD SYSOUT=* //*
In the STEPLIB DD statements, replace xx with your two-digit CICS release number (for example: 41 for CICS 4.1, 52 for CTS 1.2, or 53 for CTS 1.3).
The following are the JCL modifications that must be made to your existing compile procedure:
1. Specify the //SYSPRINT data set in the PL/I compiler step. 2. Insert a new job step to execute the Advantage CA-InterTest program after
the compiler step.
This JCL example assumes that you will pass the parameter statement in the PARM parameter of the EXEC statement. If you prefer to pass the parameter statement using a control card:
1. Remove all of the statements in the previous example that are marked with a 2->.
2. Change the following JCL statement: 3-> //CARDS DD DSN=&&CARDS,DISP=(OLD,DELETE)
to: 3-> //CARDS DD *
3. Add the parameter statement after this JCL statement.
6–18

InterTest GSG.doc, printed on 1/29/2002, at 6:06 PM
Chapter 7
Advantage CA-InterTest for CICS Modifying Advantage CA-InterTest for CICS Options
The various option settings are described in this chapter, along with their defaults and how to change them. This chapter also explains how to further customize Advantage CA-InterTest for CICS to meet your site's needs. The following topics are discussed:
• Implementing composite support • Declaring user-defined CORE commands • Adding Assembler DSECTs to the symbolic file • Unprotecting main storage with the user exit IN25LETX • Adding COBOL file structures to the Symbolic File • Specifying abend codes that should not be intercepted—IN25ABEN • Customizing help for abend codes
Procedure for Modifying Options Advantage CA-InterTest installation options are contained in the IN25OPTS load module. You can change option settings easily by changing the load module without recompiling Advantage CA-InterTest programs. To change a Advantage CA-InterTest option, follow these steps:
• Create an IN25OPTS load module that contains the modified options with a batch assemble-and-linkedit job (sample JCL follows).
• Activate the changes by performing these steps:
1. Turn off CA-InterTest
2. Issue this command: CEMT SET PROG(IN25*) NEWCOPY
7–1

Procedure for Modifying Options
InterTest GSG.doc, printed on 1/29/2002, at 6:06 PM
Ignore any failures of IN25HOOK to newcopy.
3. Restart CA-InterTest
• Option Defaults - The option defaults used in the pregenerated version of Advantage CA-InterTest Version 6.1 are listed in the following table:
Option=Default Value Option=Default Value
AUDIT=NO IPLXT=IPLX*
AUTMON=YES IRCTT=VIRC*
BREAK=YES ISERT=ISER*
CICSPLEX=NO ITSTT=ITST*
CKPTFIL=PROTCPF LETSVC=YES
CNTLSEC=YES LISTT=LIST*
CNTLT=CNTL* MONOM=NO
CNTOSEC=YES MONOMSEC=YES
CNTSQLG=YES OSGETM=YES
CORET=CORE* PROMD=00000020
CORSEC=YES READBUF=YES
CPF11=7B REALIA2=NO
CPLXCKPI=0020 RECNTMU=NO
CPLXFMID=INTERTST RECNTNW=YES
CWALET= no value SLB=YES
DFLTUSER=.ANY SLBAKEEP=YES
DL1SIZE=8192 SLBMARG=1
EXTSEC=N SLBSCRL=PAGE
FDISP=FC STBTIT=YES
FFORM=D STBTRN=STB4*
FILET=FILE STUAR=NO
7–2

Procedure for Modifying Options
InterTest GSG.doc, printed on 1/29/2002, at 6:06 PM
Option=Default Value Option=Default Value
FILSEC=YES SYMDFIL=PROTDMP
FSYMP=PROTFILE SYMDINT=YES
GLOG=CSSL SYMDT=SYMD*
HELPFIL=PROTHLF SYMFIL=PROTSYM
HELPT=HELP* SYMPSWD=12345678
ICMDBUF=1024 UCONLY=YES
ICMDEXE=50 USERHELP=PROTUHF
ICMDMAX=50 VERCOR=NO
IGLUT=IGLU* VRPTT=VRPT*
VTATT=VTAT*
TRCFFMID=SYMDTRCF TRCFMCLAS=
TRCFSCLS= TRCFDCLS=
TRCFVOL= TRCFUNIT=
TRCFTRHD=50 TRCFMEGM=1000
TRCFMEGT=15 TRCFTOUT=240 *If you change a transaction ID, also change the CICS transaction definition.
7–3

Procedure for Modifying Options
InterTest GSG.doc, printed on 1/29/2002, at 6:06 PM
Sample JCL to Assemble the Options Program The following example shows the JCL needed to assemble the Advantage CA-InterTest Options Program (IN25OPTS). //IN25OPTS JOB //************************************************************ //* IN25OPTS SAMPLE JCL * //************************************************************ //ASM EXEC PGM=IEV90,REGION=1M, // PARM='LIST,XREF(SHORT),DECK,NOOBJ' //SYSPRINT DD SYSOUT=* //SYSPUNCH DD DSN=&&OBJECT,UNIT=SYSDA,DISP=(NEW,PASS), // DCB=BLKSIZE=3200,SPACE=(TRK,(1,1)) //SYSLIB DD DSN=CAI.SAMPLIB,DISP=SHR // DD DSN=CICS.MACLIB,DISP=SHR //SYSUT1 DD UNIT=SYSDA,SPACE=(CYL,(1,1)) //SYSUT2 DD UNIT=SYSDA,SPACE=(CYL,(1,1)) //SYSUT3 DD UNIT=SYSDA,SPACE=(CYL,(1,1)) //SYSIN DD * *** CWA USER DSECT REQUIRED HERE IF USING THE CWALET OPTION *** USING CWADS,0 ADVANTAGE CA-INTERTEST REQUIREMENT CWADS DSECT USER CWA CWAFLD1 DS CL20 CWAFLD2 DS CL15 CWAFLD3 DS CL100 ******** ADVANTAGE CA-INTERTEST OPTION SPECIFICATIONS********************** IN25OPTS TYPE=CSECT, X FILSEC=YES, X LETSVC=NO IN25OPTS TYPE=CSECT, X CWALET=(CWAFLD1,CWAFLD2+15) IN25OPTS TYPE=FINAL END /* //LKED EXEC PGM=IEWL,PARM=(XREF,LIST,MAP), // REGION=1M,COND=(4,LT,ASM) //SYSPRINT DD SYSOUT=* //SYSLIN DD DSN=&&OBJECT,DISP=(OLD,DELETE) //SYSLMOD DD DSN=CAI.CACICSxx(IN25OPTS),DISP=SHR //SYSUT1 DD UNIT=SYSDA,SPACE=(CYL,(1,1)) //
In this example, the options FILSEC, LETSVC, and CWALET have been generated. All other options use the default settings. In the SYSLMOD DD statement, replace xx with your two-digit CICS release number (for example: 41 for CICS 4.1, 52 for CTS 1.2, or 53 for CTS 1.3).
NOTE: The CWALET option requires you to place your user CWA DSECT before the first IN25OPTS specification in the assembly. The USING statement for this DSECT is required. The register value for the USING statement can be any value from 0 to 15.
7–4
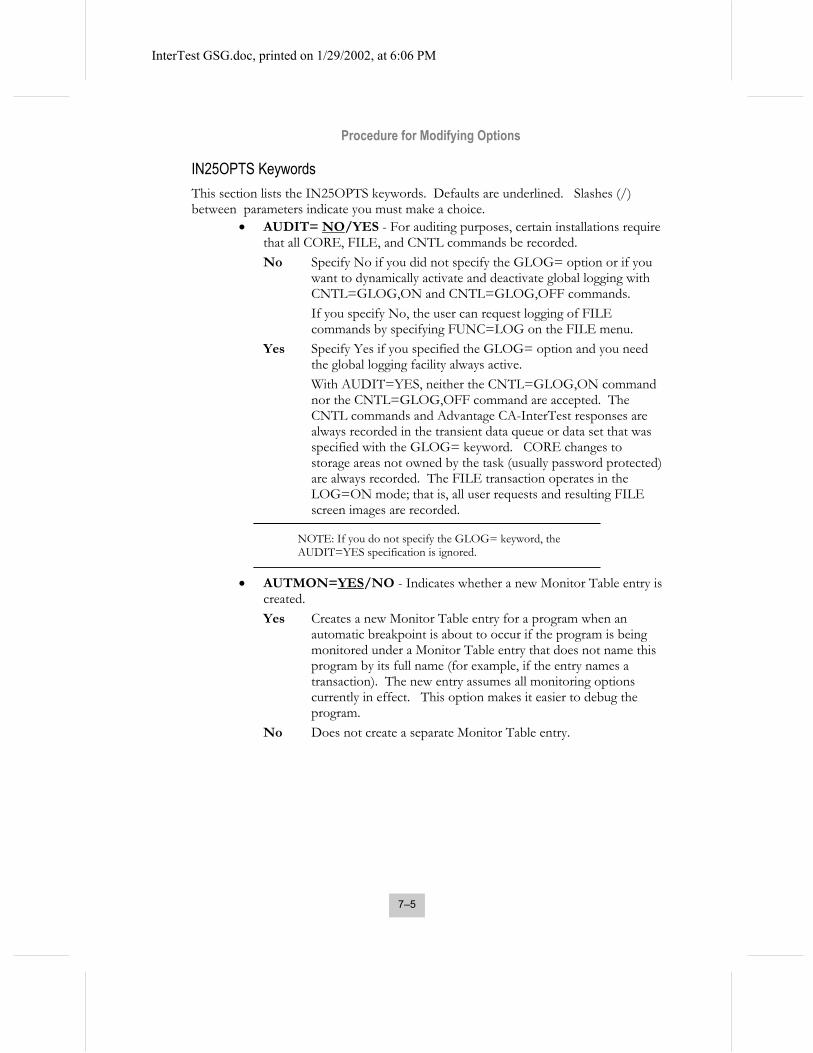
Procedure for Modifying Options
InterTest GSG.doc, printed on 1/29/2002, at 6:06 PM
IN25OPTS Keywords This section lists the IN25OPTS keywords. Defaults are underlined. Slashes (/) between parameters indicate you must make a choice.
• AUDIT= NO/YES - For auditing purposes, certain installations require that all CORE, FILE, and CNTL commands be recorded. No Specify No if you did not specify the GLOG= option or if you
want to dynamically activate and deactivate global logging with CNTL=GLOG,ON and CNTL=GLOG,OFF commands.
If you specify No, the user can request logging of FILE commands by specifying FUNC=LOG on the FILE menu.
Yes Specify Yes if you specified the GLOG= option and you need the global logging facility always active.
With AUDIT=YES, neither the CNTL=GLOG,ON command nor the CNTL=GLOG,OFF command are accepted. The CNTL commands and Advantage CA-InterTest responses are always recorded in the transient data queue or data set that was specified with the GLOG= keyword. CORE changes to storage areas not owned by the task (usually password protected) are always recorded. The FILE transaction operates in the LOG=ON mode; that is, all user requests and resulting FILE screen images are recorded.
NOTE: If you do not specify the GLOG= keyword, the AUDIT=YES specification is ignored.
• AUTMON=YES/NO - Indicates whether a new Monitor Table entry is created. Yes Creates a new Monitor Table entry for a program when an
automatic breakpoint is about to occur if the program is being monitored under a Monitor Table entry that does not name this program by its full name (for example, if the entry names a transaction). The new entry assumes all monitoring options currently in effect. This option makes it easier to debug the program.
No Does not create a separate Monitor Table entry.
7–5

Procedure for Modifying Options
InterTest GSG.doc, printed on 1/29/2002, at 6:06 PM
• BREAK=YES/NO - Indicates whether Advantage CA-InterTest is allowed to execute breakpoints. Yes Allows Advantage CA-InterTest to execute breakpoints; that is,
to stop execution of the application program at certain points. Select this option if you intend to use Advantage CA-InterTest as an interactive debugging tool.
No Does not allow Advantage CA-InterTest to execute breakpoints. This option might be desirable in a separate version of Advantage CA-InterTest used solely for monitoring production applications. Advantage CA-InterTest generated with BREAK=NO monitors with less overhead, which is important in production.
Instead of causing automatic breakpoints, Advantage CA-InterTest abnormally terminates transactions with a transaction dump when it detects a standards violation. The abend/dump code is INTE. The dump contains all of the usual diagnostic information.
• CICSPLEX=YES/NO - Advantage CA-InterTest provides special support for CICS regions participating in a CICSPlex environment. Participating CICSPlex regions have Advantage CA-InterTest commands propagated across all regions in the CICSPlex. Yes Indicates that this CICS region is participating in at least one
CICSPlex family of regions, as named in the CPLXFMID keyword. Invokes Advantage CA-InterTest CICSPlex processing by using CAICCI.
If CICSPLEX=YES, CAICCI processing must be installed on the OS/390 operating system and available to CICS.
No Indicates that this CICS region is not participating in a CICSPlex family.
• CKPTFIL=PROTCPF/ filename - Specify the file name for the Advantage CA-InterTest checkpoint file. The name must not exceed seven characters. If you do not use the default, be sure to adjust the CICS file definition.
7–6

Procedure for Modifying Options
InterTest GSG.doc, printed on 1/29/2002, at 6:06 PM
• CNTLSEC=YES/NO - Indicates whether certain CNTL commands can be protected with a password. Yes Protects certain CNTL commands with a password and allows for
password protection of certain CNTL options. Specify CNTLSEC=YES if the CNTL command functions should be available only to authorized personnel. With CNTLSEC=YES, the keyword CNTOSEC further specifies whether the subset of CNTL options should also be password protected.
The passwords are defined in the IN25SEC2 macros. See the Password Protection with Advantage CA-InterTest chapter in System Programmer Guide for the list of CNTL commands and options subject to password protection and details on specifying passwords using IN25SEC2.
With CNTLSEC=YES, you must use the IN25SEC2 macro to generate the Advantage CA-InterTest program IN25SEC2 or use the IN25SEC2 delivered with CA-InterTest.
No Does not protect certain CNTL commands with passwords and does not allow for password protection of certain CNTL options.
• CNTLT= CNTL/transaction-id - Specify a four-character transaction ID for the Advantage CA-InterTest CNTL transaction. Be sure to adjust the CICS transaction definition if you do not use the default.
NOTE: The CICS restriction that no user transaction ID begin with the character C is not strict. IDs such as CNTL and CORE can be used if the CICS system does not use them.
• CNTOSEC=YES/NO - When the value for the keyword CNTLSEC is YES, specify this keyword to include or exclude certain CNTL options from password protection. When CNTLSEC=NO, this keyword is ignored. Yes Protects certain CNTL options with a password. The password is
defined in an IN25SEC2 macro, as discussed in the chapter “Password Protection with Advantage CA-InterTest for CICS.”
No Does not protect any CNTL options with passwords. • CNTSQLG=YES/NO - Indicates whether CNTL commands are logged.
Yes Logs CNTL commands executed from a sequential terminal and responses to them into the transient data destination defined in the GLOG option.
No Does not log CNTL commands.
7–7

Procedure for Modifying Options
InterTest GSG.doc, printed on 1/29/2002, at 6:06 PM
• CORET=CORE/transaction-id - Specify a four-character transaction ID for the Advantage CA-InterTest CORE transaction. Be sure to adjust the CICS transaction definition if you do not use the default.
Buddy Tip—The CICS restriction that no user transaction ID begin with the character C is not strict. You can use IDs such as CNTL and CORE if the CICS system does not use them.
• CORSEC=YES/NO - Indicates whether a password is required to modify a
main storage area protected by CA-InterTest. Yes Requires a password when a user of the CORE facility is about to modify
a main storage area that is protected by CA-InterTest, but does not require the password during normal debugging. Specify CORSEC=YES if you will use the Advantage CA-InterTest IN25SEC2 macro to generate a password that would prevent the CORE facility from being used by unauthorized personnel.
The IN25SEC2 macro must be used to generate the Advantage CA-InterTest program IN25SEC2 or use the IN25SEC2 delivered with CA-InterTest. The use of the IN25SEC2 macro is described in the “Password Protection with Advantage CA-InterTest for CICS” chapter.
Without the password, the CORE transaction lets you modify only those storage areas that belong to a task that is waiting in a breakpoint and are not protected by Advantage CA-InterTest from being modified by the monitored program.
No Does not require a password before allowing modification of any field within the CICS region in main storage.
See the description of the CORE transaction in the Advantage CA-InterTest for CICS User Guide. The CORSEC specification also applies to data modification in the LIST Keep window.
NOTE: Regardless of the CORSEC= specification, the following main storage areas are not available for modification by the CORE transaction:
- CICS/VS Sign-on Table (DFHSNT) - Main storage outside of the CICS region
7–8

Procedure for Modifying Options
InterTest GSG.doc, printed on 1/29/2002, at 6:06 PM
• CPF11=7B/BF - Activates the PF11 key on the Detailed Breakpoint screen. 7B Allows application programmers to use the PF11 key on the Detailed
Breakpoint screen to tell Advantage CA-InterTest to force the execution of any error condition that Advantage CA-InterTest has detected even though the error condition that caused the automatic breakpoint still exists. In effect, the user tells Advantage CA-InterTest that this is really not a violation and to execute regardless of the consequences.
Before enabling this facility, be aware of the following considerations:
• As a result of this execution, not only the tested transaction's data could be damaged but other concurrent transactions could also be affected and the entire CICS system may crash.
• Using PF11 ignores not only the immediate error condition, but also all subsequent error conditions until the next breakpoint or CICS Service Request (whichever comes first).
BF Specify CPF11=BF if you do not want to provide this facility. • CPLXFMID=INTERTST/CICSPlex-familyname - Defines a CICSPlex
family name to be associated with the CICS region. Yes Defines an eight-character CICSPlex family name associated with the
CICS region. The same family name must be given to all CICS regions participating in that family to obtain CICSPlex support throughout the family.
Advantage CA-InterTest supports multiple CICSPlex families within or across multiple OS/390 regions. For example, all regions associated with CPLXFMID=REGIONA participate in one CICSPlex family, while all regions associated with CPLXFMID=REGIONB participate in another.
No Disregards this keyword; the default. • CPLXCKPI=0020/hhmm - If CICSPLEX=YES and the checkpoint facility is
started by a CICSPLEX resynchronization request, defines the time interval in hours (HH) and minutes (MM) between checkpoints.
7–9

Procedure for Modifying Options
InterTest GSG.doc, printed on 1/29/2002, at 6:06 PM
• CWALET=( )/(label,label) - Specify the CWALET keyword only if you want to remove Advantage CA-InterTest storage protection from certain CWA fields.
Important! The storage fields specified with this keyword are unprotected for all programs that run under Advantage CA-InterTest monitoring; all programs are permitted to modify these fields. If you choose to specify one or more CWALET areas, you must code a separate IN25OPTS TYPE=CSECT macro for each CWALET area (one area per macro). IN25OPTS macros with CWALET must follow other IN25OPTS macros except for the TYPE=FINAL macro, which must be the last one. no value Advantage CA-InterTest protection will not be removed. Use the
CSA= and LET= online options to let specific monitored programs modify additional areas of main storage. See the Advantage CA-InterTest for CICS User Guide for details about online options.
(label,label) Specify two Assembler labels, separated by a comma and enclosed in parentheses; for example, CWALET=(CSAUTA1,CSAUTA4). The first label defines the first byte of the area to be unprotected; the second label defines the first byte past the area.
When using labels, they must be defined in the DSECT for the CWA and inserted in the IN25OPTS compile; see the section “Sample JCL to Assemble the Options Program for details. If your CWA has an existing DSECT, use existing labels and offsets from the labels to define the unprotected area. If you do not have an existing DSECT in your CWA, add the following two statements to the IN25OPTS module to create one:
*********** CWA USER DSECT REQUIRED HERE ************ USING CWADS,0 ADVANTAGE CA-INTERTEST REQUIREMENT CWADS DSECT USER CWA ************** ADVANTAGE CA-INTERTEST SPECIFICATIONS *********
You can then specify offsets from the beginning of the CWA. For example, the following macro unprotects a 20-byte area starting at the beginning of the CWA: IN25OPTS TYPE=CSECT,CWALET=(CWADS,CWADS+20) • DL1SIZE=8192/nnnnn - Specifies the number of bytes in the largest DL/I
segment to be retrieved using the Advantage CA-InterTest FILE facility. Storage corruption may occur if the size specified here is smaller than a DL/I segment that is retrieved using FILE.
• DFLTUSER=.ANY/SPECIFIC/BACKGROUND - DFLTUSER stands for default user and controls how Advantage CA-InterTest monitoring functions by default. A user can override the default settings established by this parameter at any time.
7–10

Procedure for Modifying Options
InterTest GSG.doc, printed on 1/29/2002, at 6:06 PM
.ANY When this setting is used, Advantage CA-InterTest monitoring pays no attention to the CICS user ID of the session, even if the user is signed on to CICS. Monitoring is set for all users, and breakpoints, by default, are directed to the same terminal used to set them. DFLTUSER=.ANY keeps Advantage CA-InterTest monitoring the same as it was in Versions 5.3 and below.
SPECIFIC This setting is only valid in a secure Advantage CA-InterTest region where the users log on to CICS. When DFLTUSER=SPECIFIC is used, Advantage CA-InterTest qualifies each monitoring entry with the user’s CICS user ID. In addition, Advantage CA-InterTest directs all options to monitoring to .ANY terminal. This setting allows many users to test the same program or transaction independently. This also allows users to move from terminal to terminal and have their monitoring entries and monitoring options follow them.
Important! When DFLTUSER=SPECIFIC is used and a user does not sign on to the CICS region, Advantage CA-InterTest uses the value of the CICS DFLTUSER for the monitoring entry. The CICS default user ID is optionally specified in the SIT parameters. If not specified in the SIT, its value is CICSUSER.
BACKGROUND This setting is only valid in a secure Advantage CA-InterTest region where the users log on to CICS. Code this if your CICS system is used predominantly as an Application Server, where most transactions are not attached to terminals (that is, web interface transactions). This setting sets the FROM terminal to .ANY, and the breakpoint (TO) terminal to the current terminal that is setting the breakpoints.
• EXTSEC=YES/NO - Indicates whether the External Security Manager is to be used. Yes Advantage CA-InterTest and CA-SymDump for CICS call the External
Security Manager to verify access to secured functions.
NOTE: For details regarding CA-SymDump for CICS calls to external security, see the CA-SymDump for CICS Getting Started.
No Advantage CA-InterTest and CA-SymDump for CICS bypass the calls to the External Security Manager. When first installing Advantage CA-InterTest and CA-SymDumpfor CICS, this setting is useful until the product is tested and the security rules are written.
7–11

Procedure for Modifying Options
InterTest GSG.doc, printed on 1/29/2002, at 6:06 PM
• FDISP=FC/DL/TD/TS/DB - Determines the default menu for the FILE transaction. The various menu types are described in the Advantage CA-InterTest for CICS User Guide. The user can change the menu of the FILE facility online at any time. FC The FILE transaction shows its first display in the DATATYPE=FC
format; that is, ready to process CICS files defined in the CICS file definition (File Control Table).
DL The FILE transaction shows its first display in the DATATYPE=DL format; that is, ready to process DL/I segments.
TD The FILE transaction shows its first display in the DATATYPE=TD format; that is, ready to process CICS transient data queues.
TS The FILE transaction shows its first display in the DATATYPE=TS format; that is, ready to process CICS temporary storage.
DB The FILE transaction shows its first display in the DATATYPE=DB format; that is, ready to process DB2 data.
• FFORM=D/C/V/S - Determines the default format in which the FILE transaction displays the data. The user can change the format of the FILE display online at any time. For illustrations of FILE displays, see the Advantage CA-InterTest for CICS User Guide. D The FILE transaction shows its first display in dump format, similar to
the nonstructured display of the CORE transaction. Shows both character and hexadecimal images.
C The FILE transaction shows its first display in character format. This format displays the largest amount of data, but is useless for noncharacter data records.
V The FILE transaction shows its first display in vertical format, similar to the DITTO utility. This format displays the least amount of data.
S The FILE transaction shows its first display in structured format if symbolic information for the program containing the structures is stored in the Advantage CA-InterTest Symbolic File. COBOL and PL/I structures use 01 level names; Assembler structures use DSECT names. Shows both character and hexadecimal images. See the FSYMP option.
7–12

Procedure for Modifying Options
InterTest GSG.doc, printed on 1/29/2002, at 6:06 PM
• FILET=FILE/transaction-id - Specify a four-character transaction ID for the Advantage CA-InterTest FILE transaction. Be sure to adjust the CICS transaction definition if you do not use the default. Yes The Advantage CA-InterTest IN25SEC2 macro generates passwords to
prevent the FILE transaction from being used by unauthorized personnel. More comprehensive security enforcement has to be implemented on the CICS level or on the operating system level.
With FILSEC=YES the IN25SEC2 macro must be used to generate the Advantage CA-InterTest IN25SEC2 program, or use the IN25SEC2 delivered with CA-InterTest. Failure to do so will make the FILE transaction useless. Using the IN25SEC2 macro is described in the “Password Protection with Advantage CA-InterTest for CICS” chapter.
No Permits users of the FILE transaction to access any CICS file or DL/I data without a CA-InterTest-enforced password.
• FSYMP=PROTFILE/symbolic-programname - Specify the name of the default dummy COBOL or PL/I program that contains all of the 01 level structures used at the site or the Assembler program that contains all the DSECTs. Symbolic information for this program must be stored in the Advantage CA-InterTest Symbolic File. Users of the FILE transaction requesting records or DL/I segments in structured
format must specify the symbolic name of the program that contains the structure. However, if a default program containing all of the structures has been compiled or assembled, users can omit the symbolic program name.
See the “Additional Advantage CA-InterTest for CICS Customization Procedures” section for a sample default COBOL program. The Adding Assembler DESCTs to the Symbolic File section in that chapter describes how to add Assembler file structures. • GLOG=CSSL/DCT-destination-id - Specify a four-character name of a
transient data destination in the CICS Destination Control Table (DCT). The default, GLOG=CSSL, provides the statistics destination that is always present in the CICS system and is usually printed when the CICS system is terminated. The destination must specify a direct or indirect extrapartition transient data set
that has a record size of at least 84 bytes (variable-length format, including the length field).
Advantage CA-InterTest writes records to the specified transient data queue (destination) after the command CNTL=GLOG,ON is entered. See the description of the AUDIT keyword; also see the description of the Advantage CA-InterTest global logging facility in the Advantage CA-InterTest for CICS User Guide. • HELPFIL=PROTHLF/filename - Specify the file name for the Advantage
CA-InterTest Help file. The name cannot exceed seven characters. Be sure to adjust the CICS file definition if you do not use the default If CICSPLEX=NO, the default, this task does not run.
7–13

Procedure for Modifying Options
InterTest GSG.doc, printed on 1/29/2002, at 6:06 PM
• IRCTT=VIRC/transaction-id - Specify a four-character transaction ID for the Advantage CA-InterTest VIRC transaction. This is an internal Advantage CA-InterTest transaction used only for handling breakpoints. Its use must not be protected by a specific signon. If started by mistake from a terminal, the transaction program does nothing. In an MRO or ISC environment, the VIRC transaction must be installed as local
in all Terminal Owning Regions and Application Owning Regions that use CA-InterTest.
In a CICS environment that does not use MRO or ISC, the VIRC transaction must be installed to support automatic single-stepping.
NOTE: If you change the transaction ID, also change the CICS transaction definition.
• ISERT=ISER/transaction-id - Specify a four-character transaction ID for the
internal Advantage CA-InterTest ISER transaction. Do not assign protection to a specific user.
NOTE: If you change the transaction ID, also change the CICS transaction definition.
• ITSTT=ITST/transaction-id - Specify a four-character transaction ID for the
Advantage CA-InterTest ITST transaction. This transaction displays the Advantage CA-InterTest Primary Option menu from a CICS prompt. Do not assign protection to a specific user.
NOTE: If you change the transaction ID, also change the CICS transaction definition.
• LETSVC=YES/NO - Indicates whether SVCs are permitted.
Yes Permits any SVCs in application programs except: SVC 13 (hex 0D) - ABEND macro
No Indicates that application programs do not use any SVCs except: SVC 11 (hex 0B) - TIME macro
These are the SVCs often used implicitly in applications, but any other SVCs
should not be used in CICS programming. Regardless of this keyword, you can use BYP= options during a Advantage CA-
InterTest test session to permit the monitored program to use SVCs.
7–14
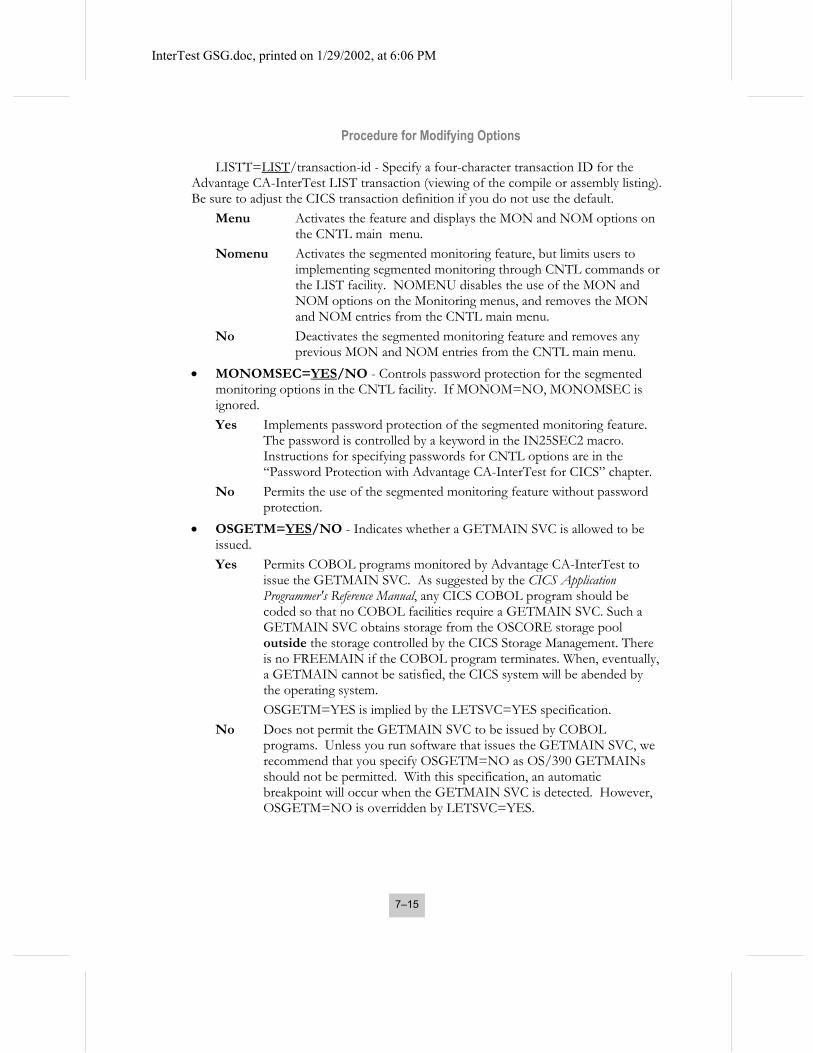
Procedure for Modifying Options
InterTest GSG.doc, printed on 1/29/2002, at 6:06 PM
LISTT=LIST/transaction-id - Specify a four-character transaction ID for the Advantage CA-InterTest LIST transaction (viewing of the compile or assembly listing). Be sure to adjust the CICS transaction definition if you do not use the default.
Menu Activates the feature and displays the MON and NOM options on the CNTL main menu.
Nomenu Activates the segmented monitoring feature, but limits users to implementing segmented monitoring through CNTL commands or the LIST facility. NOMENU disables the use of the MON and NOM options on the Monitoring menus, and removes the MON and NOM entries from the CNTL main menu.
No Deactivates the segmented monitoring feature and removes any previous MON and NOM entries from the CNTL main menu.
• MONOMSEC=YES/NO - Controls password protection for the segmented monitoring options in the CNTL facility. If MONOM=NO, MONOMSEC is ignored. Yes Implements password protection of the segmented monitoring feature.
The password is controlled by a keyword in the IN25SEC2 macro. Instructions for specifying passwords for CNTL options are in the “Password Protection with Advantage CA-InterTest for CICS” chapter.
No Permits the use of the segmented monitoring feature without password protection.
• OSGETM=YES/NO - Indicates whether a GETMAIN SVC is allowed to be issued. Yes Permits COBOL programs monitored by Advantage CA-InterTest to
issue the GETMAIN SVC. As suggested by the CICS Application Programmer's Reference Manual, any CICS COBOL program should be coded so that no COBOL facilities require a GETMAIN SVC. Such a GETMAIN SVC obtains storage from the OSCORE storage pool outside the storage controlled by the CICS Storage Management. There is no FREEMAIN if the COBOL program terminates. When, eventually, a GETMAIN cannot be satisfied, the CICS system will be abended by the operating system.
OSGETM=YES is implied by the LETSVC=YES specification. No Does not permit the GETMAIN SVC to be issued by COBOL
programs. Unless you run software that issues the GETMAIN SVC, we recommend that you specify OSGETM=NO as OS/390 GETMAINs should not be permitted. With this specification, an automatic breakpoint will occur when the GETMAIN SVC is detected. However, OSGETM=NO is overridden by LETSVC=YES.
7–15

Procedure for Modifying Options
InterTest GSG.doc, printed on 1/29/2002, at 6:06 PM
• PROMD=00000020/name/number - The name or the number in this keyword is used for the default value of the PROM= parameter of the CNTL=START command. name Specify the name (up to eight characters) of the Advantage CA-
InterTest Startup Table that has to be generated with the PROMMAC macro. The use of the macro is described in the chapter “Automatically Starting Advantage CA-InterTest for CICS.”
number Specify the number to be used as the default value of the PROM= parameter of the CNTL=START command, which specifies the initial number of entries in the Monitoring Table. This number must be eight characters long. For the initial period of use, the default value should suffice.
The number of entries in the table should be no less than the number of names to be declared for monitoring. However, for efficiency, allow enough entries at the beginning by specifying the PROM= parameter here or in the CNTL=START command. A large number of unoccupied entries use more storage but do not increase the overhead because only occupied table entries are examined when the table is scanned.
• READBUF=YES/NO - Indicates whether the read buffer function is suported.
Yes Before sending a breakpoint to a terminal, Advantage CA-InterTest issues a read buffer to save the last user screen from that terminal. If your Advantage CA-InterTest demonstration session runs successfully, specify Yes.
No You must specify No if all terminals that would be used by Advantage CA-InterTest users run under TCAM or do not support the read buffer function. If you do not specify No, you must declare the NRB=ON online option whenever monitoring is declared.
• REALIA2=YES/NO/ONLY - Indicates whether CA-Realia II Workbench for OS/390 CICS is active in the CICS region. Yes Indicates that both CA-Realia II Workbench for OS/390 CICS and
Advantage CA-InterTest are active in the CICS region. No Indicates that CA-Realia II Workbench for OS/390 CICS is not active in
the CICS region. Only Indicates that only CA-Realia II Workbench for OS/390 CICS is active
in the CICS region. • RECNTMU=YES/NO - Indicates whether CNTL commands are displayed
before execution. Yes Displays the CNTL commands generated by the Advantage CA-
InterTest menus just before the commands are executed. The user can learn these commands from the screen and, for efficiency, use them instead of menus.
7–16

Procedure for Modifying Options
InterTest GSG.doc, printed on 1/29/2002, at 6:06 PM
No Suppresses display of CNTL commands. • RECNTNW=YES/NO - Indicates whether CNTL commands are displayed
before execution. Yes Displays the CNTL commands that are automatically generated by
CNTL=RESTART or CNTL=NEW,PROG= commands. These appear just before they are executed so that the user can see what is being done.
No Suppresses display of CNTL commands. Specify No if users are not interested in these details.
• SLB=YES/NO - Indicates whether Source Listing Breakpoint displays are available. Yes Uses Source Listing Breakpoint displays for the terminal from which the
program was declared for monitoring if the compile (assembly) listing is available in the Advantage CA-InterTest Symbolic File.
No Uses Detailed Breakpoint displays when a program is declared for monitoring.
In either case, Source Listing Breakpoint displays can be turned on or off during the online test session.
NOTE: The Advantage CA-InterTest LIST facility (the online viewing of compile and assembly listings prior to program execution) is not affected by this setting.
• SLBAKEEP=YES/NO - Specifies the default value for the LIST facility of the AutoKeep display feature. Regardless of this setting, the value can be adjusted online at any time. Yes Displays items in the Keep window concerning the currently highlighted
line and any data items you have requested to be displayed in the Keep Window.
No Displays only the data items you have requested to be displayed in the Keep Window.
• SLBMARG=1/nn - Specifies a decimal number, from 1 to 41, of the default margin value on the LIST facility screens for Assembler programs. Regardless of this setting, the Location field of each source listing line is shown. The margin value can be adjusted online at any time. 1 Presents the left-most portion of each source listing line. 41 Presents the right-most portion. 28 Suppresses the machine code. 34 Suppresses the machine code and statement numbers.
7–17

Procedure for Modifying Options
InterTest GSG.doc, printed on 1/29/2002, at 6:06 PM
• SLBSCRL=PAGE/HALF/STOP/nnnn - Specifies the default scroll value for the LIST facility (online viewing of compile and assembly listings) when the user presses the PF7 or PF8 keys. Regardless of this setting, the value can be adjusted online at any time. Page Scrolls the display one page. Half Scrolls the display half a page. Stop Scrolls the display to the next declared breakpoint. nnnn Scrolls the display the specified number of lines (1 to 9999).
• SLBTIT=YES/NO/REGS - Specifies the default top portion of the display of the LIST facility (online viewing of compile and assembly listings); that is, whether the titles for the options and PF keys should be presented or not. Regardless of this setting, the value can be adjusted online at any time. Yes Displays the entire top portion of the display, leaving less space for the
source listing. No Displays only the entry fields and a command line, leaving more space for
the source listing. Pressing the PF4 or PF16 key displays the entire top portion so a user can review the options or PF key assignments.
Regs Displays the same fields as SLBTIT=NO, but also displays the general registers and the condition code at a breakpoint.
• STBTRN=STB4/transaction-id - For CA-Stabilize/CICS users, specify a four-character transaction ID for the CA-Stabilize/CICS STB4 initialization transaction. Be sure to adjust the CICS transaction definition if you do not use the default.
• STUAR= NO/YES - Affects breakpoint processing in regard to the TCTTE user area (an area embedded in the TCTTE, whose address is in the field labeled TCTTECIA). No The contents of the area are not saved for the duration of the breakpoint
or restored when the task continues execution from the breakpoint. There is no need to preserve the data in the area if the breakpoint display is to be sent to another terminal, or if the area is to be modified (during the breakpoint) only by the person performing the test. Because command level (EXEC CICS) applications rarely use this area, STUAR=NO should be appropriate.
Also specify STUAR=NO if the area may be affected during the breakpoint by a facility other than the tested application.
Yes The contents of the area are preserved for the duration of the breakpoint. Specify STUAR=YES if the logic of the tested application depends on saving this area while your task waits at a breakpoint, and then restoring it to its previous value, possibly with your modifications.
STUAR=YES is desirable if the area can be used during the breakpoint and use of the area must not affect the tested program.
7–18

Procedure for Modifying Options
InterTest GSG.doc, printed on 1/29/2002, at 6:06 PM
• SYMDFIL=PROTDMP/filename - For CA-SymDump for CICS users, specify the file name for the CA-SymDump for CICS (the Symbolic Dump option) file. This is the name of the file from which dumps can be viewed; CA-SymDump for CICS always writes to the file PROTDMP. The name cannot exceed seven characters. Be sure to adjust the CICS file definition if you do not use the default.
• SYMDINT=YES/NO - For CA-SymDump for CICS users viewing a Source Listing, this option specifies whether the user can invoke Advantage CA-InterTest functions for the abended program. Yes CA-SymDump for CICS users can invoke Advantage CA-InterTest
functions when viewing a Source Listing for an abended program. For example, users can set monitoring, invoke the FILE facility, and perform other Advantage CA-InterTest functions directly from CA-SymDump for CICS.
No CA-SymDump for CICS users cannot invoke Advantage CA-InterTest functions when viewing a Source Listing for an abended program. To invoke Advantage CA-InterTest functions, users must access Advantage CA-InterTest directly.
• SYMDT=SYMD/transaction-id - For CA-SymDump for CICS users, specify a four-character transaction ID for the CA-SymDump for CICS transaction that allows dumps to be viewed online. Be sure to adjust the CICS transaction definition if you do not use the default.
• SYMFIL=PROTSYM/file/(file1,file2,....) - Specify the CICS file definition names for the Advantage CA-InterTest Symbolic Files. The names cannot exceed seven characters. If more than one name is specified, the names must be separated by commas and the entire list enclosed in parentheses. Be sure to adjust the CICS file definition if you do not use the default. This option tells Advantage CA-InterTest the CICS file definitions of the
Advantage CA-InterTest Symbolic Files and their search order for program data. When monitoring is turned on for a program, Advantage CA-InterTest searches the Symbolic Files in the sequence specified and for COBOL and PL/1 programs finds the Symbolic File member which matches the corresponding load module compile date/time. If a matching date/time cannot be found or a symbolic file member has a more recent date than the date in the load module, a symbolic file mismatch screen will appear and the customer must chose which symbolic file member to use for debugging. For assembler programs, the symbolic file mismatch screen will always appear if a program is found on more than one symbolic file.
Once a matching date/time member is found or a member is selected from a mismatch screen, Advantage CA-InterTest will continue to use the selected symbolic file member until all breakpoints and monitoring has been turned off for the program.
7–19

Procedure for Modifying Options
InterTest GSG.doc, printed on 1/29/2002, at 6:06 PM
There is no upper limit to the number of Symbolic Files that you can specify. However, limit the number of files to reduce the overhead and the storage required for the VSAM buffers because each CICS file definition must be defined with LSRPOOL=NONE. • SYMPSWD=12345678/character-string - Specify an eight-character
password used by the Symbolic File utility program IN25UTIL to guard against an inadvertent change to the Symbolic File. The password generated here will be required when doing the following utility functions: INITIALIZE, RELOAD, DELETE, or PURGE.
To change the default password, specify any character string up to eight characters long. • TRCFMID=SYMDTRCF/8 character unique id - For CA-SymDump for
CICS users, specify the unique TRACE FAMILY ID that a CICS region will use to locate and form an affinity with a TRACE FORMAT REGION that has an IN25OPTS with the same TRCFFMID. This parameter is used by both the CICS region and the TRACE FORMAT REGION.
• TRCFMCLS= - For CA-SymDump for CICS users, specify an allocation MANAGEMENT CLASS that the TRACE FORMAT REGION will use to allocate storage for trace formatting. This parameter is used only by the TRACE FORMAT REGION and is ignored by a CICS region.
• TRCFSCLS= - For CA-SymDump for CICS users, specify an allocation STORAGE CLASS that the TRACE FORMAT REGION will use to allocate storage for trace formatting. This parameter is used only by the TRACE FORMAT REGION and is ignored by a CICS region.
• TRCFDCLS= - For CA-SymDump for CICS users, specify an allocation DATA CLASS that the TRACE FORMAT REGION will use to allocate storage for trace formatting. This parameter is used only by the TRACE FORMAT REGION and is ignored by a CICS region.
• TRCFUNIT= - For CA-SymDump for CICS users, specify an allocation UNIT that the TRACE FORMAT REGION will use to allocate storage for trace formatting. This parameter is used only by the TRACE FORMAT REGION and is ignored by a CICS region.
• TRCFVOL= - For CA-SymDump for CICS users, specify an allocation VOLUME that the TRACE FORMAT REGION will use to allocate storage for trace formatting. This parameter is used only by the TRACE FORMAT REGION and is ignored by a CICS region.
• TRCFTHRD=50/ number of threads - For CA-SymDump for CICS users, specify the number of simultaneous threads that will be supported for trace format requests. This parameter should be used as a rudimentary throttle to allow performance tuning of the formatted trace facility. This parameter is used only by the TRACE FORMAT REGION and is ignored by a CICS region.
7–20
Procedure for Modifying Options
InterTest GSG.doc, printed on 1/29/2002, at 6:06 PM
• TRCFMEGM=1000/ total number of megs - For CA-SymDump for CICS users, specify the maximum size of extended private area storage in megabytes that the TRACE FORMAT REGION will allocate for use by all threads. This amount of extended private must be available to the TRACE FORMAT REGION when it starts, or the job will terminate. If this number is exceeded when a trace is selected for formatting, the user is invited to try again later This will allow performance tuning of the formatted trace facility. This parameter is used only by the TRACE FORMAT REGION and is ignored by a CICS region.
• TRCFMEGT=15/megs per thread - For CA-SymDump for CICS users, specify the maximum size of extended private area storage in megabytes that the TRACE FORMAT REGION will allocate for use by one thread. If this is not available when a trace is selected for formatting, the user is invited to try again later. This will allow performance tuning of the formatted trace facility. This parameter is used only by the TRACE FORMAT REGION and is ignored by a CICS region.
• TRCFTOUT=240/ trace timeout in seconds - For CA-SymDump for CICS users, specify trace timeout value in seconds that both the TRACE FORMAT REGION and the CICS task will wait on CCI calls used to communicate between the CICS task and the TRACE FORMAT REGION. When this value is exceeded, the CCI session is terminated, and the formatted trace resources are freed. The operator remains within the reloaded dump, and is given the option of reformatting the trace. This will allow performance tuning of the formatted trace facility. This parameter is used by both the CICS region and the TRACE FORMAT REGION.
• UCONLY=NO/YES - Determines whether certain terminal output will be dynamically translated from lowercase to uppercase. . No Terminal output is not dynamically translated. Yes Terminal output is dynamically translated to uppercase characters. If you
previously installed the uppercase version of the Advantage CA-InterTest load libraries because your terminals did not support the mixed case English character set, you should specify YES.
• USERHELP=PROTUHF/ filename - Specify the file name for the optional help file of user-defined abend descriptions. The name cannot exceed seven characters. Be sure to adjust the CICS file definition if you do not use the default.
7–21
Additional Advantage CA-InterTest for CICS Customization Procedures
InterTest GSG.doc, printed on 1/29/2002, at 6:06 PM
• VERCOR=NO/YES - Determines whether changes to main storage must be verified. No Changes to main storage requested in a CORE transaction command can,
but need not be, verified in the same command. If CORSEC=YES is specified, the user cannot modify any foreign piece
of storage by mistake because the CORE transaction will ask for the password. As a result, you can specify VERCOR=NO because a careless user can harm only the tested program's data.
Yes Any change to main storage requested in a CORE transaction command must be verified in the same command regardless of password protection (see the CORSEC= keyword). This compulsory verification could make a debugging session unnecessarily tedious, thus decreasing productivity. The system programmer will find this specification a hindrance, especially in situations when a certain value must be forced upon an area whose content continually changes.
See the “Accessing Main Storage: CORE” chapter in the Advantage CA-InterTest for CICS User Guide for more information.
• VRPTT=VRPT/transaction-id - Specify a four-character transaction ID for the
Advantage CA-InterTest VRPT transaction used to verify the installation and display the installation options. Be sure to adjust the CICS transaction definition if you do not use the default.
• VTATT=VTAT/transaction-id - Specify a four-character transaction ID for the Advantage CA-InterTest VTAT transaction. This is an internal Advantage CA-InterTest transaction used only for handling breakpoints. Since it is not used by any operator, its use must not be protected by a specific user. If started by mistake from a terminal, the program does nothing. Be sure to adjust the CICS transaction definition if you do not use the default.
Additional Advantage CA-InterTest for CICS Customization Procedures Implementing Composite Support This section describes the set-up procedure required to use composite support. Composite support lets users test composite modules—load modules named in a CICS program definition that consist of separately compiled or assembled parts brought together when the module is link-edited. The main program and called subroutines can be written in the same or different languages. With composite support, users can test and debug a subroutine as if it were a separate program. See the Advantage CA-InterTest for CICS User Guide for a detailed description of the composite support feature.
Complete the following steps for composite support:
7–22

Additional Advantage CA-InterTest for CICS Customization Procedures
InterTest GSG.doc, printed on 1/29/2002, at 6:06 PM
1. For symbolic support, compile the main program and each subroutine you want to test with the Advantage CA-InterTest post-processor. Follow the directions in the “Symbolic Support” chapter.
2. Link-edit the programs and execute the Advantage CA-InterTest batch program IN25LINK to read the link-edit map and store the necessary information in the Symbolic File.
NOTE: Skip Step 1 if you do not want symbolic support.
The IN25LINK program does not change the load module in any way and can be executed by as many concurrent jobs as necessary. Concurrent jobs do not interfere with each other when updating the Advantage CA-InterTest Symbolic File. It is more efficient to use the IN25LINK program to obtain necessary link-edit information; however, you can provide the link-edit information online on the CNTL Composite Support menu.
IN25LINK Program The IN25LINK program processes the link-editor map after the link-editor step. Here is how it works:
1. IN25LINK collects information from the link-editor's //SYSPRINT DD statement, which should be declared a temporary sequential data set in the link-editor job step with: DCB=(RECFM=FBA,LRECL=121,BLKSIZE=2420))
IN25LINK either appends the collected data to an existing symbolic program entry or creates a new entry.
2. The temporary data set is passed to the IN25LINK job step through the INPUT DD statement.
3. The original input from the link-editor's //SYSPRINT is written to the //OUTPUT DD data set declared in the IN25LINK job step.
4. Messages from the IN25LINK program are written to the //MESSAGE DD statement to be printed.
5. The Advantage CA-InterTest Symbolic VSAM File is referenced by IN25LINK through the //PROTSYM DD statement with DISP=SHR.
Specify one or more parameter cards to identify the composite module, main program, and any subroutines you want to test. The IN25LINK parameters are passed to the IN25LINK program using one or more parameter cards.
Identifying the Composite Module The first parameter card is required. It specifies the CICS program definition name of the composite module beginning in column 1. The first parameter card has this format:
7–23
Additional Advantage CA-InterTest for CICS Customization Procedures
InterTest GSG.doc, printed on 1/29/2002, at 6:06 PM
composite-name[,NOPURGE] The program name specified in the parameter statement for the post-processor
step must also be the CICS program definition name of the composite module. See the chapter “Symbolic Support” for details.
You can also optionally specify the NOPURGE parameter. This parameter specifies that symbolic information for the composite module not be purged from the Symbolic File during a purge interval batch job.
Identifying the Main Program and Subroutines Subsequent parameter cards identify the main program and each subroutine you want to test separately. These cards can be in any order and must specify two parameters, separated by commas, in this format:
link-name,monitor-name
link-name identifies the name of the COBOL program, Assembler CSECT, or PL/I Control Section as listed in the link-edit map. This parameter must begin in column 1.
For a PL/I program, specify the name of the Control Section, generated by the compiler, that ends with '1'.
monitor-name specifies the name under which the program is to be monitored. Follow these rules in selecting a monitor-name:
• Each monitor-name must be unique.
• The monitor-name of the main program must be the CICS program definition name of the composite module. However, the monitor-name of a subroutine cannot be a CICS program definition name.
• The monitor-name can be identical to the link-name.
• If you compiled the main program or subroutine with the Advantage CA-InterTest post-processor, the monitor-name must be identical to the program name specified in that job step.
7–24
Additional Advantage CA-InterTest for CICS Customization Procedures
InterTest GSG.doc, printed on 1/29/2002, at 6:06 PM
You can omit all but the first parameter card, which identifies the composite module.
Excluding Subroutines By default, Advantage CA-InterTest excludes subroutines with CEE, DFH, DLZ, ILB, IGZ, and IBM prefixes when it reads the link-edit map. Usually, you will not want to test such programs. However, you can specify a parameter card to change the default exclusion rules. This parameter card can be positioned anywhere in the card deck except as the first card, and has this format:
.EXCLUDE=
or .EXCLUDE=xxxxxxxx[,xxxxxxxx,...,xxxxxxxx]
• The .EXCLUDE= specification must begin in column 1. • .EXCLUDE= instructs Advantage CA-InterTest not to exclude any
subroutines. • .EXCLUDE=xxxxxxxx instructs Advantage CA-InterTest to exclude
subroutines whose link-names are represented by xxxxxxxx. Specify the entire link-name to exclude a specific subroutine; specify the beginning portion of the link-name to exclude a group of subroutines. For example, to exclude all subroutines with the prefix ACA1, specify .EXCLUDE=ACA1.
Example A composite module with the CICS program definition name BIGMOD consists of several separately compiled programs and library modules. Its main program is named MAINMOD and is written in COBOL. BIGMOD also has three Assembler subroutines that you want to test separately: SUBMOD-A, SUBMOD-B, and SUBMOD-C. None of the subroutines has its own CICS program definition entry.
You have already assembled SUBMOD-A, SUBMOD-B, and SUBMOD-C with the Advantage CA-InterTest Assembler post-processor program. You specified ASMMOD-A, ASMMOD-B, and ASMMOD-C, respectively, as the program names in that job step.
Compile MAINMOD with the Advantage CA-InterTest COBOL post-processor program and specify BIGMOD as the program name. Next, link-edit MAINMOD, SUBMOD-A, SUBMOD-B, and SUBMOD-C and execute the Advantage CA-InterTest batch program IN25LINK.
7–25

Additional Advantage CA-InterTest for CICS Customization Procedures
InterTest GSG.doc, printed on 1/29/2002, at 6:06 PM
The link-edit map output for BIGMOD indicates an entry address of 160 and that BIGMOD now is replaced in the data set, and contains the following:
Control Section Name Origin Length Description
DFHECI 00 160 Command level COBOL stub
MAINMOD 160 78A8 Main program—COBOL
ILBOATB 7A08 11A COBOL library module
ILBOCOM0 7B28 73 COBOL library module
SUBMOD-A 7CA0 1200 Subprogram—Assembler
SUBMOD-B 8EA0 100 Subprogram—Assembler
SUBMOD-C 9EA1 93 Subprogram—Assembler
Sample JCL for the link-edit step and Advantage CA-InterTest job step follows.
NOTE: The link-names specified on the parameter cards for the Advantage CA-InterTest job step are the program names as listed in the link-edit output.
7–26

Additional Advantage CA-InterTest for CICS Customization Procedures
InterTest GSG.doc, printed on 1/29/2002, at 6:06 PM
The following specifications let users set breakpoints and options for any of the four programs using the monitor-names specified: BIGMOD, ASMMOD-A, ASMMOD-B, and ASMMOD-C.
Buddy Tip—If you are using the link editor DFSM S1.1, you must add PARM (MAP,...) to your execute card.
//*
//* LINK-EDIT STEP //* //LKED EXEC PGM=IEWL,...... //SYSLIB DD..... //SYSLMOD DD..... //SYSUT1 DD..... //SYSLIN DD..... 1-> //SYSPRINT DD DSN=&&INPUT,DISP=(,PASS),UNIT=SYSDA, 1-> // SPACE=(TRK,(2,5)), 1-> // DCB=(DSORG=PS,LRECL=121,BLKSIZE=2420,RECFM=FB) //* //* RUN THE ADVANTAGE CA-INTERTEST POST-PROCESSOR STEP - //* 3-> //* ADD IN25PARM JCL HERE IF NEEDED //* //* BELOW, THE //STEPCAT MAY BE UNNECESSARY. //* 2-> //POSTASM EXEC PGM=IN25LINK,REGION=512K 2-> //SYSUDUMP DD SYSOUT=A 2-> //STEPLIB DD DSN=CAI.CACICSxx,DISP=SHR 2-> //INPUT DD DSN=&&INPUT,DISP=(OLD,DELETE) 2-> //OUTPUT DD SYSOUT=A,DCB=(RECFM=FBA,LRECL=121,BLKSIZE=2420) 2-> //MESSAGE DD SYSOUT=A 2-> //PROTSYM DD DSN=INTRTST.PROTSYM,DISP=SHR 2-> //CARDS DD * 2-> BIGMOD CICS program definition name of composite module 2-> MAINMOD,BIGMOD link-name and monitor-name of main program 2-> SUBMOD-A,ASMMOD-A link-name and monitor-name of subprogram 2-> SUBMOD-B,ASMMOD-B link-name and monitor-name of subprogram 2-> SUBMOD-C,ASMMOD-C link-name and monitor-name of subprogram 2-> /*
7–27

Additional Advantage CA-InterTest for CICS Customization Procedures
InterTest GSG.doc, printed on 1/29/2002, at 6:06 PM
In the STEPLIB DD statement, replace xx with your two-digit CICS release number (for example, 41 for CICS 4.1, 52 for CTS 1.2, or 53 for CTS 1.3).
Observe the following rules: • The parameter statement for the post-processor step must specify the CICS
program definition name of the composite module as the program name. In this example this is BIGMOD, so an appropriate parameter statement would be: BIGMOD,LISTER=ALL
See the chapter “Symbolic Support” for details on specifying this parameter statement. • The first parameter card for the IN25LINK job step must identify the
composite module; for example, BIGMOD. • The monitor-name of the main program must be the CICS program
definition name of the composite module; for example, BIGMOD, as illustrated in the second parameter card.
The following JCL modifications are required to use the IN25LINK program: • The //SYSPRINT data set in the link-edit step must be modified. • A new job step to execute the IN25LINK program is inserted after the
link-editor step. If you are processing only the first parameter control card, you can pass it using a
PARM= statement. To use a PARM= statement, add the following JCL at the location marked by 3->: 3-> //GENPARM EXEC PGM=IN25PARM,PARM='PARAMETER STATEMENT' 3-> //STEPLIB DD DSN=CAI.CACICSxx,DISP=SHR 3-> //CARDS DD DSN=&&CARDS,DISP=(,PASS),UNIT=SYSDA,
// SPACE=(TRK,(1,1)) In the STEPLIB DD statement, replace xx with your two-digit CICS release
number (for example, 41 for CICS 4.1, 52 for CTS 1.2, or 53 for CTS 1.3).
Change the following JCL statement: 2-> //CARDS DD * 2-> .... 2-> .... YOUR PARAMETER CARDS GO HERE 2-> .... 2-> /*
to read: //CARDS DD DSN=&&CARDS,DISP=(OLD,DELETE)
and add the parameter statement after this JCL statement.
7–28

Declaring User-Defined CORE Commands
InterTest GSG.doc, printed on 1/29/2002, at 6:06 PM
Declaring User-Defined CORE Commands This section explains how to define your own CORE keywords. User-defined CORE keywords provide a shorthand method for entering a complex CORE command by specifying a simple command that contains one or more of your own keywords. The new keyword is automatically replaced with a string of command elements that could otherwise be difficult to remember.
Among the new commands can be some to display your own areas in main storage, such as crucial control tables for running an application system. If your replacement command includes the USE= element, the storage areas can be displayed as COBOL or Assembler structures, with names and offsets attached to each data field.
For details, see the Advantage CA-InterTest Help facility. Select the CORE Facility, then Structured Data Displays, and then Additional Features.
The CORUCOM Macro The CORUCOM macro lets you define any number of new CORE command keywords, each an abbreviation for a series of CORE command elements. For instance, there is a user table that is pointed to by an address located eight bytes into the CWA. There is a counter 12 bytes into this table that contains the number of times a service request transaction was issued. Add the following CORUCOM entry and assemble the CORUCOM table:
CORUCOM CODE=SERVCNT,COMND=CWA@8+C To display the service request count online, issue: CORE=SERVCNT Code one CORUCOM macro for each new CORE keyword. Submit the resulting
source code to assemble a new Advantage CA-InterTest load module named IN25UCOM. The module is used by the CORE facility as a table to convert your own keywords into strings of CORE keywords.
Since the CORUCOM macro generates a separate CICS load module, you can add new or modified commands at any time. To do this, code the commands, assemble the module, and then do a NEWCOPY for the load module IN25UCOM by issuing:
CEMT SET PROG(IN25UCOM) NEWCOPY
Coding the CORUCOM Macros The CORUCOM macro is delivered in the Advantage CA-InterTest source library. The first CORUCOM statement must be coded as follows:
1 1 COL= 1...5....0....5 CORUCOM TYPE=INITIAL
7–29

Declaring User-Defined CORE Commands
InterTest GSG.doc, printed on 1/29/2002, at 6:06 PM
The last CORUCOM statement must be coded as follows: 1 1
COL= 1...5....0....5 CORUCOM TYPE=FINAL
Each user-defined CORUCOM statement specifies one user-defined element of the CORE command and one string of CORE commands that will replace that user-defined element.
The user-defined element is specified by the CODE= keyword. Each element keyword must be less that eight characters long, must consist only of alphanumeric characters and, to prevent confusion with a hexadecimal number, must contain at least one of these characters: GHIJKLMNOPQRSTUVWXYZ. When two or more keywords have the same prefix (for example, ICE2, ICE), the longer keyword must be specified first, as illustrated in the following example.
The string of CORE command elements is specified by the COMND= keyword. The string must be enclosed in apostrophes and, within the string, any apostrophe must be coded as two apostrophes. All elements of the CORE command are permitted, including other user-defined elements.
Example - In the next example: • The new keyword ICE2 (second macro) uses another new keyword ICE (in
the third macro). Notice that the longer keyword is specified first. • The fourth macro defines the keyword MYTABLE, which displays a storage
area pointed to by the address in the CWA, and produces a display formatted as a structure named MYTABLE in the Advantage CA-InterTest Symbolic File records identified by the name MYSYMDEF. For more details, see the section “Adding Assembler DSECTs to the Symbolic File.
• The * in column 72 means continuation. 1 1 7
COL=
1...5....0.....6............................................2
CORUCOM TYPE=INITIAL (required)
CORUCOM CODE=ICE2,COMND='ICE@4'
CORUCOM CODE=ICE,COMND='=CSA@54'
CORUCOM
CODE=MYTABLE,COMND='=CWA@8,USE=MYSYMDEF.MYT*
ABLE'
CORUCOM TYPE=FINAL (required)
7–30

Adding Assembler DSECTs to the Symbolic File
InterTest GSG.doc, printed on 1/29/2002, at 6:06 PM
Sample JCL for Assembling IN25UCOM The following IN25UCOM JCL example uses the standard IBM procedure to assemble and link-edit macro level programs. //UCOM JOB ... //* (COMMENT: A STANDARD IBM PROC FOR ASSEMBLER MACRO LEVEL) //STEP EXEC ASMFCL //ASM.SYSLIB DD DSN=CAI.SAMPLIB,DISP=SHR //ASM.SYSIN DD * CORUCOM TYPE=INITIAL * YOUR FIRST CORUCOM STATEMENT GOES HERE .. ..... CORUCOM TYPE=FINAL END /* //LKED.SYSLMOD DD DSN=CAI.CACICSxx,DISP=SHR //LKED.SYSIN DD * NAME IN25UCOM(R) /* //
In the LKED.SYSLMOD DD statement, replace xx with your two-digit CICS release number (for example, 41 for CICS 4.1, 52 for CTS 1.2, or 53 for CTS 1.3).
NOTE: The IN25UCOM member of the Advantage CA-InterTest source library contains sample source for assembling the IN25UCOM load module.
Adding Assembler DSECTs to the Symbolic File Advantage CA-InterTest lets you display the major CICS areas in Assembler DSECT format. You can also display your own user areas in DSECT format. One way to do this is to add your DSECTs to the ones supplied by CA-InterTest. However, if you do this, your entries will disappear when you install a new release of Advantage CA-InterTest or CICS. A better way is to create one or more Symbolic File members to contain your DSECTs.
Saving all of the DSECTs used at your site in one Symbolic File member allows users of the FILE transaction to omit the symbolic program name when requesting records or DL/I segments in structured format. The name of this member must be referenced in the FSYMP installation option. The default name is PROTFILE.
Complete the following steps to create your own Symbolic File members: 1. Run a job to add the members containing the DSECTs to the Symbolic File. 2. Run a job to define the CORE keywords needed to display the DSECTs.
7–31

Adding Assembler DSECTs to the Symbolic File
InterTest GSG.doc, printed on 1/29/2002, at 6:06 PM
Sample JCL for Adding Members to the Symbolic File This sample JCL adds member USERDSEC to the Symbolic File. This member contains the DSECT USERTWAF. //USERDSEC JOB **your JOB card goes here** //ASM EXEC PGM=IEV90,REGION=1024K //SYSLIB DD DSN=USER.SOURCE,DISP=SHR //SYSUT1 DD DSN=&SYSUT1,SPACE=(1024,(120,120),,,ROUND), UNIT=VIO, // DCB=BUFNO=1 //SYSPUNCH DD SYSOUT=B //SYSTERM DD SYSOUT=* //SYSPRINT DD DSN=&&TEMP,DISP=(,PASS),UNIT=SYSDA, SPACE=(CYL,(3,2)), // DCB=(RECFM=FBM,LRECL=121,BLKSIZE=2420) //SYSIN DD * USERTWAF DSECT COPY USERTWAF USERDSEC CSECT END //* //PARM EXEC PGM=IN25PARM,REGION=512K, // PARM='USERDSEC,LISTER=REF,NOPURGE' //STEPLIB DD DSN=CAI.CACICSxx,DISP=SHR //CARDS DD DSN=&&CARDS,DISP=(,PASS),UNIT=SYSDA, SPACE=(80,1) //* //SA EXEC PGM=IN25SYMA,REGION=512K //STEPLIB DD DSN=CAI.CACICSxx,DISP=SHR //INPUT DD DSN=&&TEMP,DISP=(OLD,DELETE) //OUTPUT DD SYSOUT=*, DCB=(RECFM=FBM,LRECL=121,BLKSIZE=2420) //MESSAGE DD SYSOUT=* //PROTSYM DD DSN=INTRTST.PROTSYM,DISP=SHR //CARDS DD DSN=&&CARDS,DISP=(OLD,DELETE) /*
In the STEPLIB DD statements, replace xx with your two-digit CICS release number (for example, 41 for CICS 4.1, 52 for CTS 1.2, or 53 for CTS 1.3).
See the Assembler section of the “Symbolic Support “ chapter for an explanation of the IN25PARM and IN25SYMA programs.
NOTE: This job does not require a link-edit step because it only updates the Symbolic File. No load module is produced.
7–32

Unprotecting Main Storage with the User Exit IN25LETX
InterTest GSG.doc, printed on 1/29/2002, at 6:06 PM
Sample JCL for Defining CORE Keywords After you have added the necessary members to the Symbolic File, run a job to define the commands needed to access your DSECTs. The sample job below uses CORUCOM macros to define the user CORE keyword TWAF. See the section Declaring User-Defined CORE Commands for a detailed explanation. //UCOM JOB ... //* (COMMENT: A STANDARD IBM PROC FOR ASSEMBLER MACRO LEVEL) //STEP EXEC ASMFCL //ASM.SYSLIB DD DSN=CAI.SAMPLIB,DISP=SHR //ASM.SYSIN DD * COPY CORUCOM CORUCOM TYPE=INITIAL CORUCOM CODE=TWAF,COMND='TWA,USE=USERDSEC.USERTWAF' CORUCOM TYPE=FINAL END /* //LKED.SYSLMOD DD DSN=CAI.CACICSxx,DISP=SHR //LKED.SYSIN DD * NAME IN25UCOM(R) /* //
In the LKED.SYSLMOD DD statement, replace xx with your two-digit CICS release number (for example, 41 for CICS 4.1, 52 for CTS 1.2, or 53 for CTS 1.3).
Unprotecting Main Storage with the User Exit IN25LETX IN25LETX is an optional exit program coded by the user that specifies areas in main storage that should not be protected by Advantage CA-InterTest. The areas to be unprotected are indicated by beginning and ending storage addresses.
This exit program provides a programmable function equivalent to the Advantage CA-InterTest interactive LET option. This is a particularly useful option, because frequently an application program is designed to modify a storage area that is protected by Advantage CA-InterTest. Ordinarily when that happens, Advantage CA-InterTest initiates an automatic breakpoint and halts the program's execution.
IN25LETX must follow the rules for command-level programs. It executes within the task of the monitored application program, and must not do anything that would affect normal execution of the application. IN25LETX is invoked each time Advantage CA-InterTest begins monitoring and also when it resumes monitoring, such as after a CICS command or after any kind of breakpoint.
For CICS 4.1 and above, the interface to IN25LETX is a CICS command level LINK with a COMMAREA. This allows a user's IN25LETX module to issue CICS SPI or API commands to locate key module addresses.
NOTE: The interface permits IN25LETX to return a variable-length table of pairs to Advantage CA-InterTest in a single pass. Previous non-ESA versions of IN25LETX branched to Advantage CA-InterTest for each address pair until all address pairs were passed.
7–33

Unprotecting Main Storage with the User Exit IN25LETX
InterTest GSG.doc, printed on 1/29/2002, at 6:06 PM
The IN25LETX COMMAREA The IN25LETX COMMAREA contains the fields discussed next. See the section Sample IN25LETX Program for the COMMAREA layout.
COMMAREA Field Length Primed By
Table Address Fullword User
Monitored Program 8 bytes Advantage CA-InterTest
Application Registers Fullword Advantage CA-InterTest
Table Address –This field is set to zeros upon entry to the exit. Advantage CA-InterTest assumes it was passed a valid table address if this field is modified. Leaving this field set to zeros causes Advantage CA-InterTest to remove any address pairs previously set by this exit for this task. Monitored Program—Contains the name of the program being monitored by Advantage CA-InterTest at the time this exit was invoked. Application Registers—The fullword address of the 16-fullword area containing the application's registers (0 to 15) that were saved just prior to the entry to this exit.
The LETX Table For each area of main storage that is to be unprotected, IN25LETX stores a pair of addresses in a table (the LETX table). Each pair of addresses represents a from and a to area of storage that will not be protected by Advantage CA-InterTest if those areas are modified by the application. For example, if the area to be unprotected resides at address X'11AA2E0' and is X'2000' bytes long, the address pair is 11AA2E0 and 11AC2E0.
The last entry in the table must contain two fullwords of X'FFFFFFFF'. In many cases, the declared addresses may only need to be unprotected for a
particular CICS task or program execution. Thus the logic of IN25LETX may need to consider the varying circumstances of execution, including:
• Transaction identification • Terminal identification • Logical level of execution • Program identification
7–34

Unprotecting Main Storage with the User Exit IN25LETX
InterTest GSG.doc, printed on 1/29/2002, at 6:06 PM
IN25LETX must deliver a full table of address pairs each time it is invoked. IN25LETX does not have to be reentrant, meaning it can contain save areas and tables in which permanent addresses can be stored. There is no need to rebuild the LETX table if the addresses do not change. In this case, a one-time routine can find the areas, build the LETX table, and save the table in the IN25LETX module for the next time. IN25LETX can make itself resident by loading itself again (see the section Sample IN25LETX Program).
IN25LETX can reside above or below the 16 MB line and execute in either addressing mode. All table addresses, however, must have the X'80000000' bit turned off; that is, the address X'01234567' must not be passed as X'81234567'.
Sample IN25LETX Program The sample IN25LETX program that follows locates two areas, both permanently resident in storage, which are to be unprotected for all monitored programs running under transaction code ABCD. The first area is a table pointed to by an address in the user's TWA. The second area is a table loaded as a member of the CICS program definition named ATABLE. Both areas are established before Advantage CA-InterTest becomes active and remain resident in main storage. * TITLE 'IN25LETX - ADVANTAGE CA-INTERTEST LET EXIT - USER CODED' DFHREGS REGISTER EQUATES * DFHEISTG DSECT WORKING STORAGE DSECT XPROGLEN DS F PROGRAM LENGTH **************************************************************** * I N 2 5 L E T X C O M M A R E A * **************************************************************** COMMAREA DSECT COMMAREA CTBLADDR DS F ADDRESS OF USER LET TABLE INTPROG DS CL8 NAME OF MONITORED PROGRAM INTREGS DS F ADDR OF APPL REGISTERS (0-15) * USERTWA DSECT DSECT FOR USER TWA UTBLADDR DS F ADDRESS OF USER TABLE UTBLLEN DS H LENGTH OF USER TABLE * ***************************************************************** IN25LETX DFHEIENT EIBREG=R11,CODEREG=R12,DATAREG=R13 * L R10,DFHEICAP POINT TO COMMAREA USING COMMAREA,R10 * CLC EIBTRNID,=C'ABCD' IS THIS THE TRANSACTION? BNE RETURN NO, RETURN, DO NOT SET ANY * ADDRESSES FOR THIS TASK * PROCESS CLC LTWATBL,=D'0' HAVE THEY BEEN ALREADY SAVED? BE GETAREAS NO, GO GET THEM LA R1,LTABLE THEN, THE LET TABLE IS BUILT... ST R1,CTBLADDR PUT LET TABLE ADDR IN THE COMMAREA * RETURN EXEC CICS RETURN *
7–35

Unprotecting Main Storage with the User Exit IN25LETX
InterTest GSG.doc, printed on 1/29/2002, at 6:06 PM
GETAREAS DS 0H * EXEC CICS ADDRESS TWA(R5) USING USERTWA,R5 * L R1,UTBLADDR GET THE START OF THE TWA AREA N R1,=X'7FFFFFFF' ENSURE HIGH-ORDER BIT IS TURNED * OFF IN USER'S ADDRESS ST R1,LTWATBL STORE THE AREA'S START ADDRESS AH R1,UTBLLEN ADD THE TABLE LENGTH ST R1,LTWATBL+4 STORE THE AREA'S END ADDRESS * EXEC CICS INQUIRE PROGRAM('ATABLE') LOADPOINT(R0) X LENGTH(XPROGLEN) * ST R0,LPROGTBL STORE THE AREA'S START ADDRESS A R0,XPROGLEN ADD THE PROGRAM'S LENGTH ST R0,LPROGTBL+4 STORE THE AREA'S END ADDRESS * ********************************************************************** * LOAD THIS EXIT AGAIN SO IT WILL NOT HAVE TO REOBTAIN THE ADDRESSES * * ON THE NEXT CALL TO THIS EXIT. * ********************************************************************** EXEC CICS LOAD PROGRAM('IN25LETX') HOLD * LA R1,LTABLE ST R1,CTBLADDR PUT ADDR OF LET TABLE IN COMMAREA B RETURN * LTABLE DS 0H LET TABLE LTWATBL DC 2F'0' ADDRESSES OF TWA TABLE LPROGTBL DC 2F'0' ADDRESSES OF PROGRAM TABLE LEND DC X'FFFFFFFF' END OF TABLE INDICATOR LTORG END
Disabling IN25LETX Advantage CA-InterTest uses IN25LETX during all monitoring; that is, for all entries of the Advantage CA-InterTest monitoring table. To prevent Advantage CA-InterTest from executing IN25LETX, you must disable it or remove it from the program library.
Once a link to IN25LETX fails (because the program is disabled), Advantage CA-InterTest will not try the link again, thus avoiding much overhead. In such a case, the execution of IN25LETX will not resume until the next Advantage CA-InterTest start.
7–36
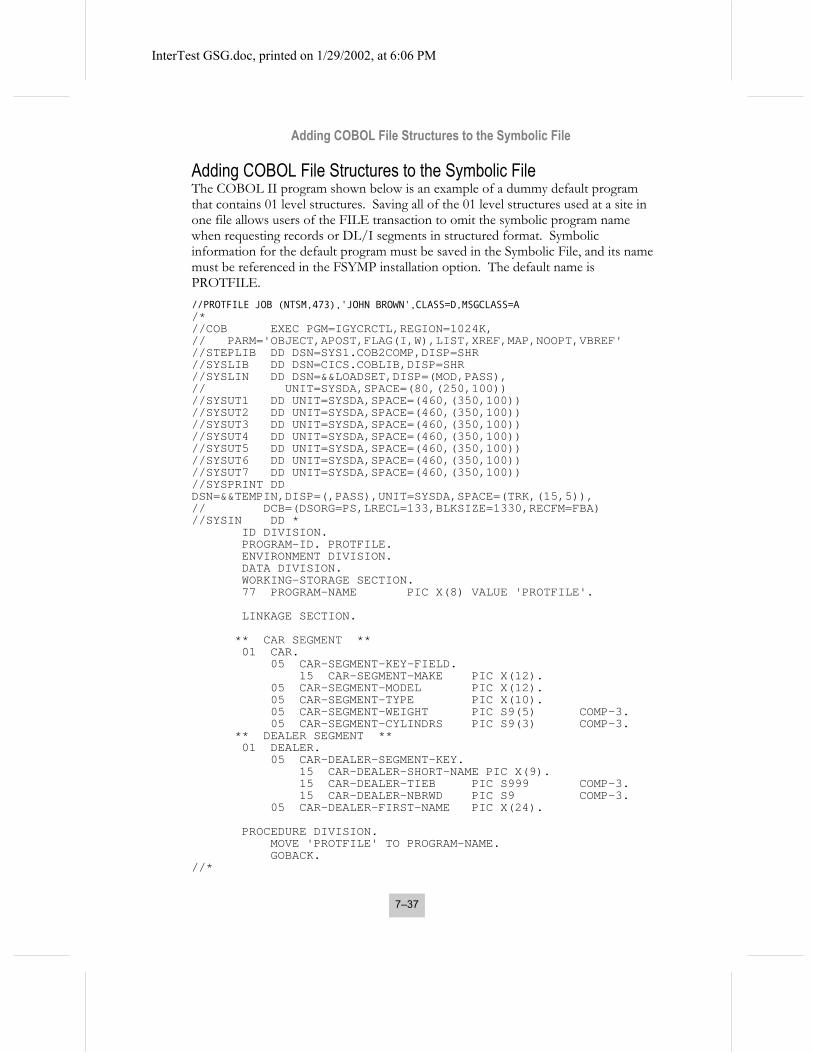
Adding COBOL File Structures to the Symbolic File
InterTest GSG.doc, printed on 1/29/2002, at 6:06 PM
Adding COBOL File Structures to the Symbolic File The COBOL II program shown below is an example of a dummy default program that contains 01 level structures. Saving all of the 01 level structures used at a site in one file allows users of the FILE transaction to omit the symbolic program name when requesting records or DL/I segments in structured format. Symbolic information for the default program must be saved in the Symbolic File, and its name must be referenced in the FSYMP installation option. The default name is PROTFILE. //PROTFILE JOB (NTSM,473),'JOHN BROWN',CLASS=D,MSGCLASS=A /* //COB EXEC PGM=IGYCRCTL,REGION=1024K, // PARM='OBJECT,APOST,FLAG(I,W),LIST,XREF,MAP,NOOPT,VBREF' //STEPLIB DD DSN=SYS1.COB2COMP,DISP=SHR //SYSLIB DD DSN=CICS.COBLIB,DISP=SHR //SYSLIN DD DSN=&&LOADSET,DISP=(MOD,PASS), // UNIT=SYSDA,SPACE=(80,(250,100)) //SYSUT1 DD UNIT=SYSDA,SPACE=(460,(350,100)) //SYSUT2 DD UNIT=SYSDA,SPACE=(460,(350,100)) //SYSUT3 DD UNIT=SYSDA,SPACE=(460,(350,100)) //SYSUT4 DD UNIT=SYSDA,SPACE=(460,(350,100)) //SYSUT5 DD UNIT=SYSDA,SPACE=(460,(350,100)) //SYSUT6 DD UNIT=SYSDA,SPACE=(460,(350,100)) //SYSUT7 DD UNIT=SYSDA,SPACE=(460,(350,100)) //SYSPRINT DD DSN=&&TEMPIN,DISP=(,PASS),UNIT=SYSDA,SPACE=(TRK,(15,5)), // DCB=(DSORG=PS,LRECL=133,BLKSIZE=1330,RECFM=FBA) //SYSIN DD * ID DIVISION. PROGRAM-ID. PROTFILE. ENVIRONMENT DIVISION. DATA DIVISION. WORKING-STORAGE SECTION. 77 PROGRAM-NAME PIC X(8) VALUE 'PROTFILE'. LINKAGE SECTION. ** CAR SEGMENT ** 01 CAR. 05 CAR-SEGMENT-KEY-FIELD. 15 CAR-SEGMENT-MAKE PIC X(12). 05 CAR-SEGMENT-MODEL PIC X(12). 05 CAR-SEGMENT-TYPE PIC X(10). 05 CAR-SEGMENT-WEIGHT PIC S9(5) COMP-3. 05 CAR-SEGMENT-CYLINDRS PIC S9(3) COMP-3. ** DEALER SEGMENT ** 01 DEALER. 05 CAR-DEALER-SEGMENT-KEY. 15 CAR-DEALER-SHORT-NAME PIC X(9). 15 CAR-DEALER-TIEB PIC S999 COMP-3. 15 CAR-DEALER-NBRWD PIC S9 COMP-3. 05 CAR-DEALER-FIRST-NAME PIC X(24). PROCEDURE DIVISION. MOVE 'PROTFILE' TO PROGRAM-NAME. GOBACK. //*
7–37

Specifying Abend Codes That Should Not Be Intercepted
InterTest GSG.doc, printed on 1/29/2002, at 6:06 PM
//SYMSTEP EXEC PGM=IN25COB2,REGION=1024K //STEPLIB DD DSN=CAI.CACICSxx,DISP=SHR //INPUT DD DSN=&&TEMPIN,DISP=(OLD,DELETE) //OUTPUT DD SYSOUT=A,DCB=(RECFM=FBA,LRECL=133,BLKSIZE=1330) //MESSAGE DD SYSOUT=A //PROTSYM DD DSN=** your protsym file **,DISP=SHR //CARDS DD * PROTFILE,LISTER=ALL,NOPURGE //*
In the STEPLIB DD statement, replace xx with your two-digit CICS release number (for example, 41 for CICS 4.1, 52 for CTS 1.2, or 53 for CTS 1.3).
NOTE: A similar job can be used for COBOL/VS.
Specifying Abend Codes That Should Not Be Intercepted If certain abend codes should not be intercepted regardless of the Advantage CA-InterTest Automatic Breakpoint (ABI) setting, use the IN25ABEN macro to specify the codes. Advantage CA-InterTest provides a default IN25ABEN that includes the abend codes AKC3, ATNI, ATCV, and AEXY.
NOTE: AKC3 is needed to run Advantage CA-InterTest with CA-Verify.
To specify your own codes in the IN25ABEN macro, code the macro as described in the following sample IN25ABEN source code assembly: //ASSEMBLE.SYSIN DD * IN25ABEN TYPE=INITIAL IN25ABEN ABCODE=(ATNI,ATCV,AEXY) IN25ABEN ABCODE=AKC3 IN25ABEN ABCODE=(AKCT,APLE) IN25ABEN ABCODE=(1234,'# Q$',1UMF) IN25ABEN TYPE=FINAL END /*
IN25ABEN Coding Rules - Follow these rules when coding IN25ABEN: • IN25ABEN TYPE=INITIAL must be coded first. • The ABCODE= parameters must specify four-character abend codes. The
abend codes ATNI, ATCV, and AEXY must be included. Include the code AKC3 if you are running Advantage CA-InterTest with CA-Verify.
• If ABCODE specifies a list of abend codes, then separate the codes with commas and enclose the list in parentheses.
• Codes that include spaces or special characters must be enclosed in single quotes.
• IN25ABEN TYPE=FINAL terminates the table. • END terminates the assembly source.
7–38

Specifying Abend Codes That Should Not Be Intercepted
InterTest GSG.doc, printed on 1/29/2002, at 6:06 PM
After coding the macro, assemble the source code according to the following sample JCL. The following JCL example assembles the IN25ABEN source code. Modify this example to meet your system requirements.
//IN25ABEN JOB ... //ASM EXEC PGM=IEV90,REGION=1024K, // PARM='DECK,LIST,XREF(SHORT),ALIGN' //SYSPRINT DD SYSOUT=A //SYSPUNCH DD DSN=&&LOADSET,DISP=(NEW,PASS),UNIT=SYSDA, // DCB=(RECFM=FB,LRECL=80,BLKSIZE=400),SPACE=(400,(100,100,1)) //SYSLIB DD DSN=CAI.SAMPLIB,DISP=SHR //SYSUT1 DD UNIT=SYSDA,SPACE=(CYL,(5,1)) //SYSUT2 DD UNIT=SYSDA,SPACE=(CYL,(5,1)) //SYSUT3 DD UNIT=SYSDA,SPACE=(CYL,(5,1)) //SYSIN DD * IN25ABEN TYPE=INITIAL IN25ABEN ABCODE=(ATNI,ATCV,AEXY) IN25ABEN ABCODE=AKC3 IN25ABEN ABCODE=(AKCT,APLE) IN25ABEN ABCODE=(1234,'# Q$',1UMF) IN25ABEN TYPE=FINAL END /* //LKED EXEC PGM=IEWL,REGION=512K,PARM=(XREF,LIST,MAP) //SYSLMOD DD DSN=CAI.CACICSxx(IN25ABEN),DISP=SHR //SYSUT1 DD UNIT=SYSDA,DCB=BLKSIZE=1024,SPACE=(1024,(200,200)) //SYSPRINT DD SYSOUT=A //SYSLIN DD DSN=&&LOADSET,DISP=(OLD,DELETE)
In the SYSLMOD DD statement, replace xx with your two-digit CICS release
number (for example, 41 for CICS 4.1, 52 for CTS 1.2, or 53 for CTS 1.3).
7–39

Customizing Help for Abend Codes
InterTest GSG.doc, printed on 1/29/2002, at 6:06 PM
Customizing Help for Abend Codes You can customize the help text displayed at an automatic breakpoint for abend codes. A separate help file, PROTUHF, is available to hold your user-defined abend code descriptions. This file must be created as explained in the section Step 11a. Create the User Help File (Optional) in the “Base Product Installation Steps” chapter.
After installation, the online Abend Code Maintenance menu (ITST Option 7.2) lets you add, inquire, update, and delete entries in the user-defined help file. Press PF1 from this menu to obtain help on using the facility.
--------------- Advantage CA-InterTest 5.4 ABEND CODE MAINTENANCE MENU ---------------- OPTION ===> Enter Option, Abend code, and Program name; then press enter. 1 Add - Add an Abend code/Program name 2 Inquire - Inquire on an Abend code/Program name 3 Update - Update an Abend code/Program name 4 Delete - Delete an Abend code/Program name Abend code . . __Program name . . ________ PF1 Help 2 3 End 4 Return 5 6 PF7 8 9 10 11 12
You can tie an abend code to a specific program by entering both the abend code
and program name fields. You can create a generic abend code for all program names by entering the abend code only, with no program name.
During a user session when Advantage CA-InterTest intercepts an abend, it first searches for a matching abend code entry on the user-defined help file. If a description for the abend code is found on the user-help file, Advantage CA-InterTest displays its contents at the breakpoint and on related CA-SymDump analysis displays.
If there is no user-defined description or if the user file does not exist, then the abend code description from the Advantage CA-InterTest help file is used. If there is no abend code description in the Advantage CA-InterTest help file, then a default NOTFABCODE is displayed.
7–40

InterTest GSG.doc, printed on 1/29/2002, at 6:06 PM
Chapter 8
Handling Special Situations Overview
This chapter discusses how to use Advantage CA-InterTest for CICS with:
• MRO • DB2 • Software invoked by CALLs from your application programs or macros • Wild branches • EDF • HOGAN Software
Special Considerations for MRO Support To use Advantage CA-InterTest in an MRO environment, you must have:
• All Advantage CA-InterTest-required CICS definitions in any CICS application-owning region (AOR) that will use Advantage CA-InterTest for testing.
• A local program definition for IN25VIRC in the terminal-owning region (TOR).
• A local transaction definition for VIRC in the TOR; this transaction ID must be identical in the TOR and all AORs.
• One remote transaction definition for VTAT in the TOR for each AOR that will use Advantage CA-InterTest. Of course, the TOR's local VTAT transaction IDs must be unique (for example, VTA1, VTA2, VTA3, and so on). However, the remote transaction IDs can be the same for all AORs (for example, VTAT), so you do not need to maintain a unique IN25OPTS for each AOR. If you choose to specify an alternate VTAT transaction ID in one or more AORs, you must be sure to specify the same alternate transaction ID in the TOR's remote VTAT transaction definition.
In addition, for all CICS regions that will use Advantage CA-InterTest—both AOR and TOR—the transaction definition for VIRC must specify the same transaction code.
8–1
Special Considerations for MRO Support
InterTest GSG.doc, printed on 1/29/2002, at 6:06 PM
A sample set of definitions is supplied in member CSDINTTO on the CAI.SAMPLIB. This sample set contains all of the RDO definitions required for the CICS TOR region. All Advantage CA-InterTest transaction names are the same as those specified in the AOR and can be modified by your site.
NOTE: We recommend that the Advantage CA-InterTest CORE transaction be installed in the TOR as local to help system support staff resolve problems in that region.
Remote transaction definitions can be defined for all transactions except VIRC, which can be started from the TOR to run in the AOR. Using these transaction definitions is usually preferable to starting routing sessions with the CRTE SYSID= transaction.
You can add a transaction definition in each TOR. DEFINE TRANSACTION(LNTL)
Where LNTL— is a four-character transaction name for the Advantage CA-InterTest CNTL transaction in the TOR
REMOTENAME(RNTL) Where RNTL—is a four-character transaction name for the Advantage CA-InterTest CNTL transaction in the AOR
REMOTESYSTEM(TROW) Where TROW—the name under which the AOR is known to the TOR
Buddy Tip—NOTE: RNTL and LNTL can be the same name.
Monitoring Considerations for DFLTUSER Advantage CA-InterTest qualifies all monitoring entries with a CICS user ID. All
monitoring entries use the form: promid.userid
8–2

Special Considerations for MRO Support
InterTest GSG.doc, printed on 1/29/2002, at 6:06 PM
The ATTACHSEC option of the CONNECTION entry in the CSD is used with the DFLTUSER= option setting in IN25OPTS to provide the granularity of monitoring required. Only the combinations of DFLTUSER and ATTACHSEC given in the following table are supported:
IN25OPTS DFLTUSER=
CSD CONNECTION, ATTACHSEC=
Typical Use Additional Consideration
ANY LOCAL Nonsecure MRO environment
AOR and TOR need the same default CICS user ID (set in the SIT)
SPECIFIC IDENTIFY Secure MRO environment
TOR’s SIT uses SEC=YES or MIGRATE option
The following sections discuss each combination in detail.
Monitoring in a Nonsecure MRO Environment The following combination says that monitoring and monitoring options should be set by terminal ID and not by CICS user ID. DFLTUSER=.ANY ATTACHSEC=LOCAL
This setting is typically used in a nonsecure MRO environment where the TOR’s SIT uses the SEC=NO option. The user ID passed from the TOR is the TOR’s default user ID as set in the SIT (typically CICSUSER).
Advantage CA-InterTest compares this user ID to the AOR’s default user ID and, if they match, sets the user ID to be monitored by .ANY user. This entry causes all users of the program to be monitored (as in earlier Advantage CA-InterTest releases).
Important! Should the default user IDs of the AOR and TOR not match, the results are
unpredictable. Thereforet, you should check that the default user IDs in the AOR and TOR are the same.
Monitoring in a Secure MRO Environment The following combination is allowed in a secure MRO environment where the TOR’s SIT uses the SEC=YES or MIGRATE option. DFLTUSER=SPECIFIC ATTACHSEC=IDENTIFY
8–3
Special Considerations for MRO Support
InterTest GSG.doc, printed on 1/29/2002, at 6:06 PM
In this case, the application’s unique user ID is passed from the TOR to the AOR only if the ATTACHSEC option of the CONNECTION entry is IDENTIFY. This requirement and specifying DFLTUSER=SPECIFIC in IN25OPTS allows Advantage CA-InterTest to assign the user ID to each monitoring command as a default. This saves the user from having to type it in or specify it, and allows Advantage CA-InterTest to properly monitor user activity in the TOR.
Additional Monitoring Considerations The CRT terminal that is to receive the Advantage CA-InterTest breakpoint display is called the receiving terminal. After receiving the display, the terminal remains ready to execute any Advantage CA-InterTest command. However, until the user disconnects from Advantage CA-InterTest, it will accept only Advantage CA-InterTest commands.
The receiving terminal must meet these specifications: • IBM 3270-type CRT or compatible:
– The terminal must have ATI (automatic task initiation) capability.
– If its screen is larger than model 2, its default screen size (as defined in the TCT) must be 24 lines x 80 characters (the model 2 size)
• For two-terminal testing:
– The receiving terminal must be logged on to the TOR at the time the breakpoint is about to be displayed.
– At the time the first breakpoint display is about to appear, the receiving terminal must not be occupied by any task (transaction). This restriction also applies to CRTE.
– The next transaction ID must not be primed in the TCTTE of the receiving terminal. If this occurs, Advantage CA-InterTest cannot write the breakpoint screen because CICS prevents automatic task initiation.
– The receiving terminal must not be occupied by an explicit routing session. (Explicit routing sessions are started by entering CRTE SYSID= and are normally ended by entering Cancel.) When necessary, the receiving terminal will have a routing session started for it by Advantage CA-InterTest so the terminal can receive a breakpoint display.
– The terminal from which the tested transaction is entered or the terminal that the tested transaction owns is called the sending terminal. Since a user typically sets breakpoints without naming the receiving or sending terminal, the receiving and sending terminal will be the terminal from which the CNTL command was entered when the user ID monitoring option=.ANY.
8–4

Using Advantage CA-InterTest for CICS with DB2 Application Programs
InterTest GSG.doc, printed on 1/29/2002, at 6:06 PM
– If the sending terminal is not the same as the receiving terminal, the sending terminal will be unavailable and tied to the tested transaction during the breakpoint. This restriction does not apply if the receiving terminal is the same as the sending one because the user can disconnect from Advantage CA-InterTest.
Remote FILE Support All CICS regions participating in a remote FILE transaction session must be at Advantage CA-InterTest Version 4.2 or above. Also, the FILE transaction and its associated program entry IN25FLE must be defined to the file-owning region. The transaction name assigned to the FILE transaction must be the same in all regions.
Using Advantage CA-InterTest for CICS with DB2 Application Programs The installation procedure is explained next. For an information on how to test and debug DB2 application programs with Advantage CA-InterTest, see the Advantage CA-InterTest for CICS User Guide.
• Using the Pregenerated Version - A pregenerated IN25UEXI with DB2 support is provided. If you have no other special software situations that the IN25UEXI program will handle, there are no further installation steps you have to perform for DB2 support.
• Creating the IN25UEXI Module for DB2 - To monitor application programs that issue SQL calls, a special program named IN25UEXI must exist in your Advantage CA-InterTest load library. A pregenerated version of IN25UEXI, assembled for DB2 Release 3.1 and above, is provided. This release includes support for DB2 6.1.
You can also use the IN25UEXI program to support calls to programs that are
not to be monitored by Advantage CA-InterTest. If you have programs that issue calls or require special handling, review the section Calls to Software and User Macro Support. In this case, you must combine the two uses in one IN25UEXI.
The source code for the preassembled version of IN25UEXI with DB2 support is provided in the Advantage CA-InterTest source (CAI.SAMPLIB) library in member UEXIDB2.
8–5
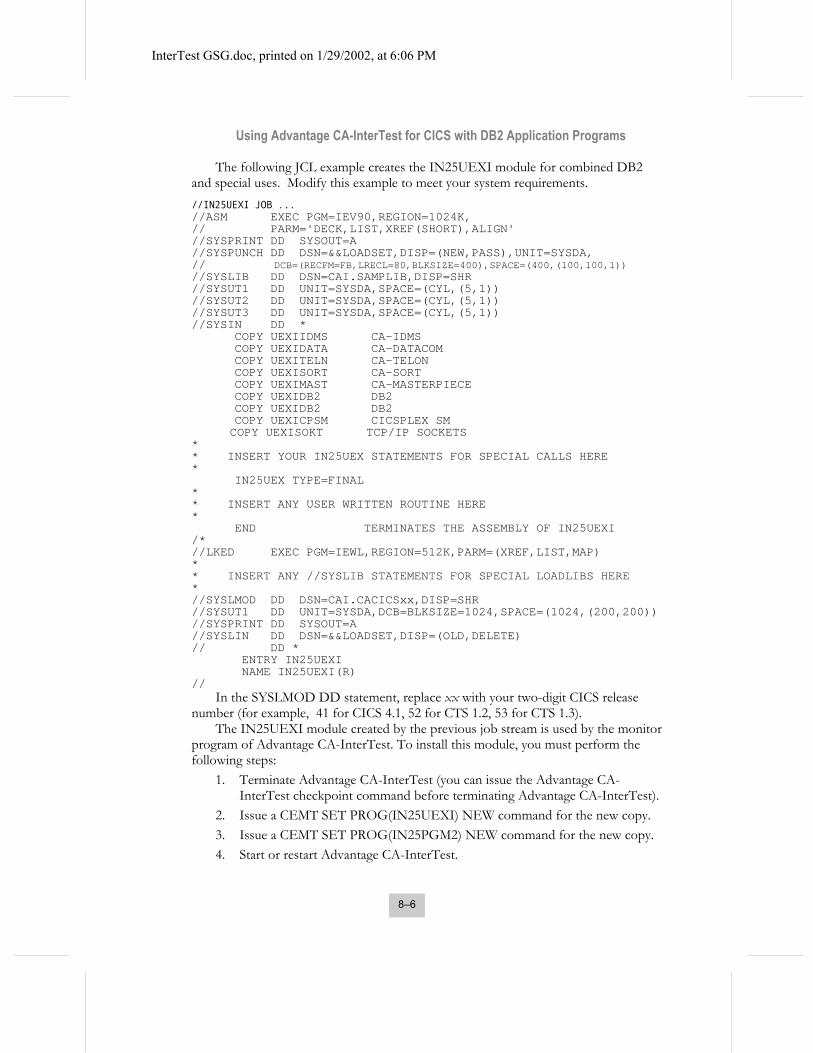
Using Advantage CA-InterTest for CICS with DB2 Application Programs
InterTest GSG.doc, printed on 1/29/2002, at 6:06 PM
The following JCL example creates the IN25UEXI module for combined DB2 and special uses. Modify this example to meet your system requirements. //IN25UEXI JOB ... //ASM EXEC PGM=IEV90,REGION=1024K, // PARM='DECK,LIST,XREF(SHORT),ALIGN' //SYSPRINT DD SYSOUT=A //SYSPUNCH DD DSN=&&LOADSET,DISP=(NEW,PASS),UNIT=SYSDA, // DCB=(RECFM=FB,LRECL=80,BLKSIZE=400),SPACE=(400,(100,100,1)) //SYSLIB DD DSN=CAI.SAMPLIB,DISP=SHR //SYSUT1 DD UNIT=SYSDA,SPACE=(CYL,(5,1)) //SYSUT2 DD UNIT=SYSDA,SPACE=(CYL,(5,1)) //SYSUT3 DD UNIT=SYSDA,SPACE=(CYL,(5,1)) //SYSIN DD * COPY UEXIIDMS CA-IDMS COPY UEXIDATA CA-DATACOM COPY UEXITELN CA-TELON COPY UEXISORT CA-SORT COPY UEXIMAST CA-MASTERPIECE COPY UEXIDB2 DB2 COPY UEXIDB2 DB2 COPY UEXICPSM CICSPLEX SM COPY UEXISOKT TCP/IP SOCKETS * * INSERT YOUR IN25UEX STATEMENTS FOR SPECIAL CALLS HERE * IN25UEX TYPE=FINAL * * INSERT ANY USER WRITTEN ROUTINE HERE * END TERMINATES THE ASSEMBLY OF IN25UEXI /* //LKED EXEC PGM=IEWL,REGION=512K,PARM=(XREF,LIST,MAP) * * INSERT ANY //SYSLIB STATEMENTS FOR SPECIAL LOADLIBS HERE * //SYSLMOD DD DSN=CAI.CACICSxx,DISP=SHR //SYSUT1 DD UNIT=SYSDA,DCB=BLKSIZE=1024,SPACE=(1024,(200,200)) //SYSPRINT DD SYSOUT=A //SYSLIN DD DSN=&&LOADSET,DISP=(OLD,DELETE) // DD * ENTRY IN25UEXI NAME IN25UEXI(R) //
In the SYSLMOD DD statement, replace xx with your two-digit CICS release number (for example, 41 for CICS 4.1, 52 for CTS 1.2, 53 for CTS 1.3).
The IN25UEXI module created by the previous job stream is used by the monitor program of Advantage CA-InterTest. To install this module, you must perform the following steps:
1. Terminate Advantage CA-InterTest (you can issue the Advantage CA-InterTest checkpoint command before terminating Advantage CA-InterTest).
2. Issue a CEMT SET PROG(IN25UEXI) NEW command for the new copy. 3. Issue a CEMT SET PROG(IN25PGM2) NEW command for the new copy. 4. Start or restart Advantage CA-InterTest.
8–6

Calls to Software and User Macro Support
InterTest GSG.doc, printed on 1/29/2002, at 6:06 PM
Calls to Software and User Macro Support This section explains how to support software (which must not be monitored by Advantage CA-InterTest) that is invoked by CALLs from your application programs or your own macros. For example:
• To support global routines whose addresses are found in the CWA and that are given control from monitored programs by a BALR 14,14 or BALR 14,15 instruction. When such routines are given control, they are not monitored by Advantage CA-InterTest until they return to the next byte after the BALR in the calling program.
• To make Advantage CA-InterTest recognize a call (a COBOL or PL/I CALL verb or the Assembler CALL macro) to specific interfaces (such as database systems) and execute the call without monitoring the interface code.
In both cases, optional routines can be coded to: • Check the parameters before the global routine is given control • Display Advantage CA-InterTest automatic breakpoints with error codes
defined by you WARNING! Advantage CA-InterTest assumes that the global routine of the CALL
interface always returns control to the point of the CALL. If it does not, the user-written routine is mandatory.
How Support Is Provided To provide support, code a few lines of Assembler source code using the IN25UEX macros delivered in the Advantage CA-InterTest source library. (The next section explains how to code these macros.) Then run assembly and link-edit steps to create the IN25UEXI module.
The macros create a table that, in addition to identification names and other information, contains references to the same routines that get link-edited with application programs because of CALLs issued by application programs. These references are resolved at link-edit time.
The IN25UEXI module consists of the table and the same modules that are usually link-edited with application programs. In the IN25UEXI, however, these modules are never executed. They are there only to compare a piece of their code with the code in the application load module.
Advantage CA-InterTest uses the IN25UEXI module to compare the two pieces of code: the one link-edited with the IN25UEXI and the one that is about to receive control from the application program. The compared pieces of code are at the offset (from the entry point) and the length specified in the IN25UEX macros. If a large piece of code is involved, there is no need to include all of it with the IN25UEXI; include just enough to make the comparison. The comparison is made when a BALR 14,15 or BALR 14,14 instruction (for XA, BASSM or BASR instruction) is about to be executed.
8–7

Calls to Software and User Macro Support
InterTest GSG.doc, printed on 1/29/2002, at 6:06 PM
If the code matches and there is no associated routine (defined in the IN25UEXI), Advantage CA-InterTest drops monitoring and produces a standard Advantage CA-InterTest entry in the CICS Trace Table (USER 144 code) with the identifier found in the corresponding entry in the IN25UEXI module. Monitoring resumes only upon return from the called module to the CALL statement.
If there is a user-defined routine, the routine is performed first. The routine can check the CALL's parameters and decide whether a particular interface should be given control or an automatic breakpoint should occur (if the CALL is incorrect), and whether monitoring should continue when the interface returns to the calling program.
IN25UEXI routines receive control in: ■ AMODE31 (CICS 3.2 and above) ■ EXECKEY (CICS) (CICS 3.3 and above) ■ BASESPACE MODE (CICS 4.1 and above)
Coding IN25UEX Macros for Called Software The entry points are specified by using one of the following formats: IN25UEX CALL=entry1,ROUT=routine,LENGTH=xx,DISP=xx,ID=xx
" " " " " "
or IN25UEX CALL=(entry1,......,entryn)
" " " " " " IN25UEX TYPE=FINAL (REQUIRED) place optional routines here
CALL=entry1 This required parameter specifies the name of an entry point. Specify the same name used in your COBOL or PL/I CALL statement or Assembler CALL macro, or specify an arbitrary name.
A name specified in this CALL parameter is displayed on the Advantage CA-InterTest Request Breakpoint menus and on the CNTL=INQ reports.
Multiple entry point names can be specified, as shown in the second format; however, the optional parameters listed next cannot be used. WARNING! Do not specify entry points used in a CALL that is the result of an EXEC CICS.
ROUT=routine This optional parameter specifies the name of your special routine. Omit this parameter if there is no routine.
LENGTH=xx This optional parameter specifies the length (in decimal) of the comparison. The maximum length is 64 and the default length is 16. The default is sufficient in most cases.
8–8

Calls to Software and User Macro Support
InterTest GSG.doc, printed on 1/29/2002, at 6:06 PM
DISP=xx This optional parameter specifies the offset (in decimal) from the entry point of the code to be compared. The maximum offset (displacement) is 512; the default offset is 0.
ID=xx This optional parameter specifies the identification value for the Advantage CA-InterTest entry in the CICS Trace Table. Like all such entries produced by Advantage CA-InterTest, the first byte contains the character C (USER 144), field A contains the displacement, and field B contains the characters US followed by the two characters specified in this parameter. If the ID= parameter is not specified, Advantage CA-InterTest generates a value.
After IN25UEXI is link-edited, verify the total size of the result as shown in the link-edit listing. There is no need to include entire interface modules in the IN25UEXI, as the comparison occurs only for the specified (or default) length at the specified (or default) offset. If the IN25UEXI module is too large, you can code little Assembler CSECTs that identically replace the ones used by applications in IN25UEXI. This technique has been used in the pregenerated version of IN25UEXI. Its source code is provided in the CAI.SAMPLIB source library in member DB2UEXI. This technique has reduced the size of IN25UEXI from approximately 30 KB to just 192 bytes.
Supporting Your Site's Global Routines This section does not apply to most Advantage CA-InterTest sites. It applies to global routines that are given control by the following two machine instructions: L 14,CWALABEL BALR 14,14
Where CWALABEL is the label of a field in the CWA that contains the address of the global routine.
The entry points are specified by using one of the following formats: ********** CWA USER DSECT REQUIRED HERE ********** USING CWADS,0 ADVANTAGE CA-INTERTEST REQUIREMENT CWADS DSECT USER CWA CWAFLD1 DS CL20 CWAENT1 DS F USER ROUTINE CWAFLD3 DS CL100 ************ ADVANTAGE CA-INTERTEST SPECIFICATIONS ************* IN25UEX CWAD=label1,ROUT=routine,ID=xx " " " " " " IN25UEX CWAD=labeln IN25UEX TYPE=FINAL (REQUIRED) place optional routines here
8–9

Calls to Software and User Macro Support
InterTest GSG.doc, printed on 1/29/2002, at 6:06 PM
or IN25UEX CWAD=(label1,.....,labeln) IN25UEX TYPE=FINAL (REQUIRED) place optional routines here
CWAD=cwadadr This required parameter specifies a label that is defined in the CWA and contains the address of the entry point of a piece of commonly used code, such as a date conversion routine. For example, if the routine address is 20 bytes from the beginning of the CWA, you can code:
IN25UEX CWAD=(CWADS+20)
Multiple entry point names can be specified as in the second format; however, if specified in this manner, the optional parameters listed next cannot be used.
ROUT=routine This optional parameter is used as in the CALL= form. ID=xx This optional parameter is used as in the CALL= form.
Coding the ROUT= Routine The ROUT= parameter coded in the IN25UEX macro specifies the name of a routine that is performed by Advantage CA-InterTest prior to the execution of the IN25UEXI-supported CWA routine or CALL. The routines are coded in Assembler after the IN25UEX TYPE=FINAL control card. CICS commands are not allowed.
Each routine must be a CSECT whose name is specified by the ROUT= keyword. When Advantage CA-InterTest passes control to the routine, the registers are set as follows:
R0 = 0 R1 = address of the BALR instruction R2 = address of the called routine that is about to receive control by the
BALR (or, for XA, by BASSM or BASR) R3 = address of the Advantage CA-InterTest work area R4 = undetermined R5 = undetermined R6 = undetermined R7 = undetermined R8 = undetermined R9 = address of an eight-byte field that contains the name specified in the
CALL= or CWAD= parameter R10 = undetermined R11 = undetermined R12 = user's TWA address
8–10

Calls to Software and User Macro Support
InterTest GSG.doc, printed on 1/29/2002, at 6:06 PM
R13 = EIB address R14 = return address for this routine R15 = entry point address for this routine
NOTES: In XA or ESA systems, this routine receives control in the same AMODE (addressing mode 24 or 31) that the branch instruction had prior to its execution.
Registers 3 and 14 must not be changed by the routine. If these registers are used, they must be saved and restored by the routine.
The application program registers 0 to 15 (prior to the execution of the branch instruction) are at 96 (X'60') bytes past the address in register 3.
In addition to checking application-related parameters, the routine must determine
if Advantage CA-InterTest should continue monitoring. Monitoring must not continue if the code that is called by the monitored program does not return control to the next byte after the BALR instruction.
Before the routine returns to the address in register 14, it must set register 0 to one of the following values:
0 Execute the CALL without monitoring X'D0' - X'FF' Advantage CA-InterTest should issue an automatic
breakpoint with this error code -1 The routine does not return control to the next byte
after the BALR; therefore monitoring must be dropped
any other negative value Advantage CA-InterTest should monitor the called piece of code
8–11

Calls to Software and User Macro Support
InterTest GSG.doc, printed on 1/29/2002, at 6:06 PM
Sample JCL for Generating the IN25UEXI Programs This example shows a call to the global routine CWAENT1, which has an
associated routine called MYCHECK. //IN25UEXI JOB (123,45),USERID,MSGCLASS=A,TIME=(,09) //ASM EXEC PGM=IEV90,REGION=1024K, // PARM='DECK,LIST,XREF(SHORT),ALIGN' //SYSPRINT DD SYSOUT=A //SYSPUNCH DD DSN=&&LOADSET,DISP=(NEW,PASS),UNIT=SYSDA, // DCB=(RECFM=FB,LRECL=80,BLKSIZE=400),SPACE=(400,(100,100,1)) //SYSLIB DD DSN=CAI.SAMPLIB,DISP=SHR //SYSUT1 DD UNIT=SYSDA,SPACE=(CYL,(5,1)) //SYSUT2 DD UNIT=SYSDA,SPACE=(CYL,(5,1)) //SYSUT3 DD UNIT=SYSDA,SPACE=(CYL,(5,1)) //SYSIN DD * ********** CWA USER DSECT REQUIRED HERE ********** USING CWADS,0 ADVANTAGE CA-INTERTEST REQUIREMENT CWADS DSECT USER CWA CWAFLD1 DS CL20 CWAENT1 DS F USER ROUTINE CWAFLD3 DS CL100 ************ ADVANTAGE CA-INTERTEST SPECIFICATIONS ************* * * INSERT YOUR IN25UEX STATEMENTS HERE * IN25UEX CWAD=CWAENT1,ROUT=MYCHECK IN25UEX TYPE=FINAL * * INSERT USER WRITTEN ROUTINES HERE * TITLE 'ROUTINE TO CHECK CWAENT1' MYCHECK CSECT USING MYCHECK,15 ESTABLISH ADDRESSABILITY L 4,X'60'+4(,3) OBTAIN APPLICATION'S REGISTER 1 LTR 4,4 IS REGISTER 1 ZERO ? BZ RETOKAY YES, NOTHING MORE TO CHECK. L 4,0(,4) PICK UP 1ST ADDR FROM PARM LIST LTR 4,4 IS THE HIGH ORDER BIT ON ? BM ONLYONE YES, ONLY ONE PARAMETER. CLC =C'FINAL',0(4) 1ST PARAMETER SAYS 'FINAL' ? BNE NOFINAL NO, TREAT SEPARATELY. LH 0,=H'-1' YES, INDICATE 'DROP MONITORING' BR 14 AND RETURN TO ADVANTAGE CA-INTERTEST. NOFINAL CLI 0(4),C'0' 1ST CHARACTER NUMERIC ? BNL RETOKAY YES, GO CONTINUE NORMALLY. LH 0,=H'-2' NO, KEEP MONITORING THE CALLED- BR 14 - ROUTINE. ONLYONE CLI 0(4),C'X' 1ST CHARACTER EQUAL TO "X"
8–12

Calls to Software and User Macro Support
InterTest GSG.doc, printed on 1/29/2002, at 6:06 PM
BE RETOKAY YES, GO CONTINUE NORMALLY. LA 0,X'E5' NO,DO A BREAKPOINT WITH CODE E5 BR 14 AND RETURN TO ADVANTAGE CA-INTERTEST. RETOKAY SR 0,0 INDICATE 'CONTINUE NORMALLY' * (DO NOT MONITOR THE CALL) BR 14 AND RETURN TO ADVANTAGE CA-INTERTEST. LTORG TERMINATES THE ROUTINE. * * CODE ANY ADDITIONAL ROUTINES HERE * END TERMINATES THE ASSEMBLY OF IN25UEXI /* //LKED EXEC PGM=IEWL,REGION=512K,PARM=(XREF,LIST,MAP) //SYSLMOD DD DSN=CAI.CACICSxx,DISP=SHR //SYSUT1 DD UNIT=SYSDA,DCB=BLKSIZE=1024,SPACE=(1024,(200,200)) //SYSPRINT DD SYSOUT=A //SYSLIN DD DSN=&&LOADSET,DISP=(OLD,DELETE) // DD * ENTRY IN25UEXI NAME IN25UEXI(R) //
In the SYSLMOD DD statement, replace xx with your two-digit CICS release number (for example, 41 for CICS 4.1).
The IN25UEXI module created by the previous job stream is used by the monitor program of Advantage CA-InterTest. To install this module, perform the following steps:
1. Terminate Advantage CA-InterTest (you can issue the Advantage CA-InterTest checkpoint command before terminating Advantage CA-InterTest).
2. Issue a CEMT SET PROG(IN25UEXI) NEWCOPY command for the new copy.
3. Issue a CEMT SET PROG(IN25PGM2) NEWCOPY command for the new copy.
4. Start or restart Advantage CA-InterTest.
IN25UEXI Instructions for Additional Vendor Products You need intro text here
Calls for COMPUTATIONS Users To handle a call to the COMPUTATIONS package, code the IN25UEX control statement as follows: IN25UEX CALL=MGCALL,DISP=12,LENGTH=8
8–13

Calls to Software and User Macro Support
InterTest GSG.doc, printed on 1/29/2002, at 6:06 PM
In addition, add an INCLUDE MSSECALL in your link-edit step. You should exclude the COMPUTATIONS program from monitoring. To do
this, issue the CNTL=EXCL,PROG=PS* and CNTL=EXCL,PROG=PE* commands.
Calls for SHRINK Users To handle calls to SHRINK, code the IN25UEX control statements as follows:
IN25UEX CALL=SHRINK IN25UEX CALL=EXPAND IN25UEX CALL=PUFFUP IN25UEX CALL=PUFFDOWN IN25UEX CALL=CLOSE
Where SHRINK, EXPAND, PUFFUP, PUFFDOWN, and CLOSE are the entry points.
Calls for Patient Care System (PCS) Users To handle calls to PCS, uncomment the COPY statement provided in the IN25UEXI member in CAI.SAMPLIB: *** COPY PCSUEXI
Calls for HOGAN Users To handle calls to HOGAN, add this COPY statement to the IN25UEXI member in CAI.SAMPLIB: COPY UEXIHOGN
Add the HOGAN.LOADLIB to the LKED step’s SYSLIB.
Calls for CICS/COMET Users To handle calls to CICS/COMET, you must assemble the IN25UEXI module that is supplied with the COMET software.
8–14
Handling Wild Branches
InterTest GSG.doc, printed on 1/29/2002, at 6:06 PM
Handling Wild Branches When a monitored program passes control to another program directly by a branch instruction, bypassing the CICS services of an XCTL or a LINK macro or command, Advantage CA-InterTest treats this as a wild branch (branching outside a module) and causes an automatic breakpoint. Such direct passing of control, although not advised by CICS coding standards, is used frequently in some applications.
You cannot monitor just the program receiving control by a direct branch from another program. To monitor a receiving program, you must also monitor the program passing control to it. Monitoring can begin only with the program that originally received control from CICS.
Most often, the program receives control by a direct branch caused either by a CALL statement or by a special macro. Usually, such code should not be monitored by Advantage CA-InterTest. See the section Calls to Software and User Macro Support for an explanation of how to make Advantage CA-InterTest drop monitoring in such cases.
Monitoring a Wild Branch If the program that receives control should be monitored and you want to debug it with Advantage CA-InterTest, there are three possible situations:
• The receiving program resides in the same load module as the program that passes control. In this situation, use the composite support facility of Advantage CA-InterTest. This facility lets you debug a subprogram as if it were a separate program and supports all language combinations.
• The receiving program resides in another load module that has a CICS program definition. In this situation, use the FOL=CICS-program-definition-name online option and, if needed, composite support. This approach makes all Advantage CA-InterTest debugging features available for the branched-to program.
NOTE: For COBOL II dynamically called programs, the FOL= option is not needed. Simply set breakpoints in the dynamically called program as you would for any other CICS program.
• The receiving program resides elsewhere and has no CICS program definition. In this situation, use the FOL=ON online option. In this case, breakpoints can be set for addresses, not offsets, and symbolic Advantage CA-InterTest support is not available.
8–15

Using Advantage CA-InterTest for CICS with IBM's EXEC Debugging Facility (EDF)
InterTest GSG.doc, printed on 1/29/2002, at 6:06 PM
Using the FOL=ON Option We strongly advise that the FOL=ON online option be applied only at the program level; that is, monitorg declared with a CNTL=ON,PROG= command as opposed to CNTL=ON,TRAN= or CNTL=ON,TERM= commands. This allows online options to be used in the most convenient way, with different options such as breakpoints declared for different programs. If necessary, the FOL=ON online option can also be specified at the terminal or transaction level.
Using Advantage CA-InterTest for CICS with IBM's EXEC Debugging Facility (EDF) The EDF facility, which is activated by the CEDF transaction and described in the IBM CICS/VS Application Programmer's Guide Command Level, does not interfere with the Advantage CA-InterTest monitoring and interactive testing. Advantage CA-InterTest also does not interfere with EDF, except when EDF presents the EDF breakpoint display of the program that is being monitored by Advantage CA-InterTest, EDF incorrectly indicates the location of the command since commands are issued by Advantage CA-InterTest, not by the program. Additionally, CEDF will not be supported on transactions that contain programs that use COMET.
Advantages of Advantage CA-InterTest for CICS Over EDF Advantage CA-InterTest offers many advantages over the EDF facility, including:
• The ability to set breakpoints anywhere in the program (not just at EXEC CICS commands).
• Data display and modification by symbolic names. This means the programmer does not need the most recent listing of the tested program, if the data names or paragraph names (labels in Assembler) remain the same.
• Monitoring, such as the ability to detect any illegal action of the program between CICS commands. CICS abends are intercepted by EDF, but damage may have occurred on the way to the abend and EDF may not give any specifics on the problem.
• The ability to declare an unconditional or conditional breakpoint at a specific location—the EXEC CICS call at the point when the EXEC CICS call parameters have already been formatted. At that time you can change the parameters (for example, by issuing the CORE=ARGnn command) before you let the command execute.
• The ability to set request breakpoints for a particular type of CICS command regardless of where in the program it occurs, for all EXEC CICS commands, or for all except some EXEC CICS commands. For example, with one specification you can set breakpoints at all File Control commands or at all READ or WRITE commands.
8–16

Using Advantage CA-InterTest for CICS and HOGAN Software
InterTest GSG.doc, printed on 1/29/2002, at 6:06 PM
Using Advantage CA-InterTest for CICS with EDF If you want to use Advantage CA-InterTest with EDF, you can turn on EDF before you begin monitoring a program with Advantage CA-InterTest. Moreover, when a monitored program is stopped at a request breakpoint for an EXEC CICS command, you can activate EDF by entering any character in the field marked EDF in the lower-right corner of the Detailed Breakpoint display.
When Advantage CA-InterTest and EDF are being used on the same task, be aware of the following: • If a Advantage CA-InterTest breakpoint is set at an EXEC CICS command, the
Advantage CA-InterTest breakpoint occurs before the command is passed to CICS.
• At the breakpoint, the programmer can review and change any parameters of the command before telling Advantage CA-InterTest to continue with the task.
• Advantage CA-InterTest checks the parameters and, if necessary, halts the task at an automatic breakpoint.
• If that does not happen, the command is passed by Advantage CA-InterTest to CICS for execution; that is, to the EXEC interface.
• Subsequently, EDF presents the EDF breakpoint display of the program that is being monitored by Advantage CA-InterTest, before a command breakpoint. The EDF facility, however, is in control at that time and any changes by the user during the EDF breakpoint cannot be checked by Advantage CA-InterTest.
• Only after the command is executed and a command EDF breakpoint display appears and EDF is told to continue with the task can Advantage CA-InterTest resume control and continue monitoring.
Using Advantage CA-InterTest for CICS and HOGAN Software
For users with CICS 3.2 or above, all Advantage CA-InterTest features are available for debugging HOGAN applications, including symbolic support if the Advantage CA-InterTest post-compile step was executed.
Use Considerations • Monitoring the PEM Module - The PEM module does not need to be
debugged and should not be monitored by Advantage CA-InterTest in a CICS 3.2 or above environment. Monitor only your HOGAN application programs using the segmented monitoring option, as discussed next.
8–17

Using Advantage CA-InterTest for CICS and HOGAN Software
InterTest GSG.doc, printed on 1/29/2002, at 6:06 PM
• Monitoring Application Programs That Use HOGAN - Application programs that use HOGAN should be monitored only by using the Advantage CA-InterTest segmented monitoring options. Do not monitor such programs by transaction or terminal name, or by global monitoring. The Advantage CA-InterTest for CICS User Guide explains how to use segmented monitoring.
The USH=ON monitoring option must also be used to prevent unnecessary automatic breakpoints from occurring.
All of the Advantage CA-InterTest online options are available. However, the FOL= option should not be used. It is advisable to learn how to use the BYP= option and the PF11 override option.
Installation Procedure To install Advantage CA-InterTest for HOGAN support, first complete all of the required steps given in the chapter “Base Product Installation Steps.” Then complete your installation by performing the steps below.
1. Create the IN25UEXI module for HOGAN. Instructions are given in the section IN25UEXI Instructions for Additional Vendor Products.
2. Enable the Advantage CA-InterTest segmented monitoring options. To do this, you must set the MONOM installation option in the IN25OPTS module to either MENU or NOMENU. Optionally, you can enable password security for segmented monitoring by setting the MONOMSEC installation option to YES. Refer to the chapter “Advantage CA-InterTest for CICS” for details.
This completes the installation for HOGAN support in a CICS 3.2 or above environment.
8–18

InterTest GSG.doc, printed on 1/29/2002, at 6:06 PM
Chapter 9
Password Protection with Advantage CA-InterTest for CICS
O
nline password protection is an optional Advantage CA-InterTest for CICS feature. You can disable it selectively by redefining the password installation options CNTLSEC, CNTOSEC, CORSEC, and FILSEC. See the chapter “Modifying Advantage CA-InterTest for CICS Options” for instructions.
The IN25SEC2 macro is used to assemble a CICS Advantage CA-InterTest load module that contains the passwords for the CORE facility, FILE facility, and CNTL facility. If you take no action, the default passwords are:
MAIN CORE $FUN CNTL functions (commands) $OPT CNTL options $MNO CNTL options for segmented monitoring on and off (MON and
NOM) There is no default password for the FILE facility.
NOTES: The IN25SEC2 passwords are not stored anywhere in their unscrambled form. For secrecy, you can code PRINT OFF in your IN25SEC2 assembly.
Passwords can be changed at any time, even if someone is using the CORE or FILE facilities. Just run an IN25SEC2 assembly with the new passwords. If the CICS system is active, enter the following command to put the new passwords into effect:
CEMT SET PROG(IN25SEC2) NEW
Required Parameters The IN25SEC2 macro is delivered in the Advantage CA-InterTest source code file and must be unloaded from the distribution tape before the assembly job.
IN25SEC2 TYPE=INITIAL,SCRNUM=(x,x,x,x) The TYPE=INITIAL macro initiates the assembly and specifies the four numbers
in the SCRNUM keyword that are to be used in your version of the scrambling algorithm. These numbers must be a value from 1 to 16, separated by commas, and enclosed in parentheses.
The TYPE=FINAL macro must be the last macro before the END statement. This macro must not contain any other parameters.
9–1

Specifying Passwords for the CORE Facility
InterTest GSG.doc, printed on 1/29/2002, at 6:06 PM
Between the TYPE=INITIAL and TYPE=FINAL macros, specify the IN25SEC2 macros to assign passwords to protected resources as follows:
• NAME= keyword specifies the name of the resource • PASS= keyword specifies the four-character password for the resource. Only
the characters A-Z, 0-9, $, @, and # are allowed. The following sections explain how to specify IN25SEC2 macros to assign
passwords for CORE, FILE, and CNTL.
Specifying Passwords for the CORE Facility The macro for the CORE password is:
IN25SEC2 NAME=PROTCORE,PASS=xxxx
• NAME=PROTCORE must be specified. • xxxx specifies the password.
When a user of the CORE facility receives the message ENTER SECURITY PASSWORD, the user must enter the four-character password. This password is then scrambled and compared with the scrambled password specified in the PASS= parameter. If the codes are equal, the CORE change is made and the password does not have to be entered again during the same session. If the password is entered incorrectly, the CORE facility asks for it again.
NOTE: Even if the password is entered correctly, areas outside CICS storage cannot be modified.
The following IN25SEC2 macro, delivered with the pregenerated version of Advantage CA-InterTest, protects all storage not owned by a user's task:
IN25SEC2 NAME=PROTCORE,PASS=MAIN
PROTCORE—Specifies that this entry is for the CORE transaction. MAIN—The default password:
• To change this password, reassemble the IN25SEC2 program with the new password specified in the above macro.
• To remove this password, reassemble the IN25SEC2 program with the above macro removed.
Specifying Passwords for Files and DL/I Databases The macros for the FILE facility are: IN25SEC2 NAME=yyyyyyyy,PASS=xxxx WRITE only IN25SEC2 NAME=yyyyyyyy,PASS=xxxx,FPROT=YES READ and WRITE
9–2

Specifying Passwords for CNTL Commands and Options
InterTest GSG.doc, printed on 1/29/2002, at 6:06 PM
yyyyyyyy Specifies the name of the file ID (from the CICS file definition) or the DBD identification.
xxxx Specifies the password. FPROT=YES Indicates that the file or DBD name should also be fetch-
protected; that is, data cannot be viewed or changed unless the password is correctly entered.
You must code one IN25SEC2 macro for every file or DBD name you want to protect; files or DBDs not named in a macro are not password protected against unauthorized use. These passwords apply only to access through the Advantage CA-InterTest FILE facility.
When a user of the FILE facility receives the message ENTER SECURITY PASSWORD, the user must enter the four-character password. This password is then scrambled and compared with the scrambled password specified in the PASS= parameter. If the codes are equal, the specified FILE or DBD is accessed. If the password is entered incorrectly, the FILE facility terminates.
Protecting All Files with a Password You can code an IN25SEC2 macro to protect all files and DBD names that are not specifically protected in individual IN25SEC2 macros.
The following example password protects FILEA against both reads and writes with the password ASEC, password protects FILEB against writes only with the password BSEC, and password protects all other files against both reads and writes with the password FSEC. IN25SEC2 NAME=PROTFILE,PASS=FSEC,FPROT=YES IN25SEC2 NAME=FILEA,PASS=ASEC,FPROT=YES IN25SEC2 NAME=FILEB,PASS=BSEC
NOTE: Any security measures of your CICS installation are applied by CICS or the operating system after Advantage CA-InterTest password protection is satisfied. The FILE facility functions as an application within CICS.
Specifying Passwords for CNTL Commands and Options Password protection is available for certain CNTL commands and monitoring options as described next.
To use Advantage CA-InterTest to protect other commands and options or not protect the ones listed here, contact Computer Associates for assistance.
CNTL password protection does not apply to the following situations: • Automatic startup of Advantage CA-InterTest from the table assembled
from Advantage CA-InterTest PROMMAC macros • CNTL=RESTART command • CNTL=NEW command
9–3
Specifying Passwords for CNTL Commands and Options
InterTest GSG.doc, printed on 1/29/2002, at 6:06 PM
• CNTL=EXEC command • Startup of Advantage CA-InterTest by the IN25PLT program in the PLT
table • Execution of a CNTL command from a CRLP terminal; that is, a
simulated terminal consisting of input and output sequential files • Execution of a CNTL command from the system console
Passwords are not needed in these situations because they either automatically start Advantage CA-InterTest, which is controlled by the system programming staff, or reestablish functions that were password protected when they were originally requested.
9–4

Specifying Passwords for CNTL Commands and Options
InterTest GSG.doc, printed on 1/29/2002, at 6:06 PM
Password Protected CNTL Commands The following commands are password protected by default; that is, if you use the pregenerated version of Advantage CA-InterTest.
CNTL=CKPT Start and end checkpoint
CNTL=END Remove Advantage CA-InterTest from CICS
CNTL=EXCL Enter a program, transaction, or terminal in the Exclusion Table to prevent monitoring
CNTL=INCL Remove a program, transaction, or terminal from the Exclusion Table
CNTL=ABP Activate and deactivate the global automatic breakpoint facility
CNTL=PURGE Start and end the purging of tasks that remained at a breakpoint longer than the specified time
CNTL=GLOG Start and end logging of CNTL commands and CORE changes
CNTL=ON,PROG=.ALL Declare monitoring for all application programs not specifically declared for monitoring
CNTL=OFF,PROG=.ALL Remove monitoring of all application programs not specifically declared for monitoring
CNTL=ON,PROG=.ALL, Add monitoring options for all applications not specifically declared for monitoring
CNTL=ALL Declare and remove monitoring for all applications not specifically declared for monitoring
The CNTL=OFF command that removes monitoring options is password protected only to the extent that the option to be removed is password protected.
9–5

Specifying Passwords for CNTL Commands and Options
InterTest GSG.doc, printed on 1/29/2002, at 6:06 PM
The following IN25SEC2 macro, delivered with the pregenerated version of Advantage CA-InterTest, protects all of the previously listed CNTL commands:
IN25SEC2 NAME=PROT$FUN,PASS=$FUN
PROT$FUN—Identifies the CNTL commands listed previously. $FUN—The default password. • To change this password, reassemble the IN25SEC2 program with the
new password specified in the above macro. • To remove this password, reassemble the IN25SEC2 program with the
above macro removed.
Password Protected CNTL Options The following monitoring options are password protected by default; that is, if you use the pregenerated version of Advantage CA-InterTest. You can disable password protection for these CNTL options by redefining the Advantage CA-InterTest installation option CNTOSEC.
CNTL Option Definition
,BYP Bypass storage protection or monitoring of BALR 14,15 and BALR 14,14 routines (for XA, BASSM, and BASR)
,CSA=(offset,length) Do not protect specified areas of the CSA or CWA
,LET=name Do not protect storage occupied by a specified program module
,LET=(address,length) Do not protect a specified storage area
,MON=location Set segmented monitoring on
,NOM=location Set segmented monitoring off
,OVR=errcode Disregard an error condition that would typically cause a breakpoint
,STR=ON Preserve a copy of the CICS Trace Table for the duration of a breakpoint
,TON=* or ,TON=terminal
Limit monitoring to a specific terminal
,USH=ON Remove storage protection from storage areas in the shared subpool
9–6

Specifying Passwords for CNTL Commands and Options
InterTest GSG.doc, printed on 1/29/2002, at 6:06 PM
The PROT$OPT Name Option The following IN25SEC2 macro, delivered with the pregenerated version of Advantage CA-InterTest, protects all of the previously listed CNTL options except MON and NOM:
IN25SEC2 NAME=PROT$OPT,PASS=$OPT
PROT$OPT —Identifies the password protected CNTL options. $OPT—The default password.
• To change this password, reassemble the IN25SEC2 program with the new password specified in the above macro.
• To remove this password, reassemble the IN25SEC2 program with the above macro removed.
The PROT$MNO Name Option The following IN25SEC2 macro, delivered with the pregenerated version of Advantage CA-InterTest, protects the segmented monitoring functions (MON and NOM) when MONOM=MENU or NOMENU, and MONOMSEC=YES:
IN25SEC2 NAME=PROT$MNO,PASS=$MNO
PROT$MNO—Identifies the CNTL options MON and NOM. $MNO—The default password. • To change this password, reassemble the IN25SEC2 program with the
new password specified in the above macro. • To remove this password, reassemble the IN25SEC2 program with the
above macro removed.
9–7

Sample IN25SEC2 Assembly JCL
InterTest GSG.doc, printed on 1/29/2002, at 6:06 PM
Sample IN25SEC2 Assembly JCL The following is sample JCL for the assembly of IN25SEC2.
//IN25SEC2 JOB (NTSM,473),'JOHN BROWN',CLASS=D,MSGCLASS=A //ASSEM EXEC PGM=IEV90,REGION=512K, // PARM='XREF(SHORT),DECK,NUM,LIST,ALIGN,NOOBJ' //* //SYSLIB DD DSN=CAI.SAMPLIB,DISP=SHR // DD DSN=CICS.MACLIB,DISP=SHR //SYSUT1 DD SPACE=(CYL,(1,1)),UNIT=SYSDA //SYSUT2 DD SPACE=(CYL,(1,1)),UNIT=SYSDA //SYSUT3 DD SPACE=(CYL,(1,1)),UNIT=SYSDA //SYSPUNCH DD DSN=&OBJ,SPACE=(TRK,(1,1)),UNIT=SYSDA, // DCB=(BLKSIZE=800,LRECL=80,RECFM=FB),DISP=(,PASS) //SYSPRINT DD SYSOUT=A //SYSIN DD * IN25SEC2 TYPE=INITIAL,SCRNUM=(1,1,1,1) IN25SEC2 NAME=PROTCORE,PASS=CORE IN25SEC2 NAME=PROTFILE,PASS=FSEC IN25SEC2 NAME=FILE1,PASS=WXYZ,FPROT=YES IN25SEC2 NAME=FILE2,PASS=ABCD IN25SEC2 NAME=PROT$FUN,PASS=CNTL IN25SEC2 NAME=PROT$OPT,PASS=CNTL IN25SEC2 TYPE=FINAL END /* //LINK EXEC PGM=IEWL,PARM='LIST,XREF,MAP',REGION=512K //SYSLMOD DD DSN=CAI.CACICSxx(IN25SEC2),DISP=SHR //SYSUT1 DD UNIT=SYSDA,SPACE=(TRK,(10,10)) //SYSPRINT DD SYSOUT=A //SYSLIN DD DSN=&&OBJ,DISP=(OLD,DELETE) //
In the SYSLMOD DD statement, replace xx with your two-digit CICS release number (for example, 41 for CICS 4.1, 52 for CTS 1.2, or 53 for CTS 1.3).
In this example: • The CORE password has been changed to CORE. • All files except FILE1 and FILE2 will be WRITE protected with the
password FSEC. • FILE1 will be READ and WRITE protected with password WXYZ. • FILE2 will be WRITE protected with password ABCD. • CNTL commands and monitoring options are protected with the
password CNTL
9–8

InterTest GSG.doc, printed on 1/29/2002, at 6:06 PM
Chapter 10
Automatically Starting Advantage CA-InterTest for CICS
A
fter Advantage CA-InterTest for CICS has been installed, you can start it automatically with your CICS system. There are four ways to do this: • Use the PROMMAC macro • Enter CNTL commands from a CRLP-type terminal • Activate Advantage CA-InterTest from a program • Start Advantage CA-InterTest from a PLT
Using the PROMMAC Macro You can use PROMMAC macros in an assembly to create a load module defined in the CICS program definition that contains a number of CNTL commands. These commands are executed consecutively in the order of their appearance in the macros when either of these commands is submitted:
CNTL=START,PROM=tablname
or CNTL=EXEC,MODULE=tablname
Where tablname is the name of the load module generated by the assembly of the PROMMAC macros.
You can generate several alternate modules with different names, each with a CICS program definition, if you want alternate ways to start Advantage CA-InterTest or execute CNTL commands.
If the PROMD=tablname option is specified in the IN25OPTS macro, you can achieve the same result by specifying:
CNTL=START If the CNTL=START command is issued from a CRT terminal or CRLP-type
terminal (a terminal whose input and output are two sequential files; see the IBM CICS System Programmer's Guide), the commands from the load module are displayed back. For a CRT terminal, there is a small time delay before each command is executed so the user can see what is being done.
The first positional parameter of the PROMMAC macro contains the CNTL command to be executed. The command must be enclosed in apostrophes.
10–1

Using the PROMMAC Macro
InterTest GSG.doc, printed on 1/29/2002, at 6:06 PM
If the table is to be used by the CNTL=START command, the first PROMMAC macro must contain this command:
'CNTL=START,PROM=nn,PROX=nn' Where nn sets the sizes of the internal Advantage CA-InterTest tables. The second positional parameter of the PROMMAC macro must contain END.
It must be coded in the last PROMMAC macro before the END statement. Any CNTL command can be specified except CNTL=LIST and CNTL=INQ.
Sample PROMMAC Macros The following JCL is suitable for OS/390 installations. These examples are shown for illustration purposes only. See the Advantage CA-InterTest for CICS User Guide for more information. //PROMAC JOB (NTSM,473),'JOHN BROWN',CLASS=D,MSGCLASS=A //ASSEM EXEC PGM=IEV90,REGION=512K, // PARM='XREF(SHORT),DECK,NUM,LIST,ALIGN,NOOBJ' //* //SYSLIB DD DSN=CAI.SAMPLIB,DISP=SHR //SYSUT1 DD SPACE=(CYL,(1,1)),UNIT=SYSDA //SYSUT2 DD SPACE=(CYL,(1,1)),UNIT=SYSDA //SYSUT3 DD SPACE=(CYL,(1,1)),UNIT=SYSDA //SYSPUNCH DD DSN=&OBJ,SPACE=(TRK,(1,1)),UNIT=SYSDA, // DCB=(BLKSIZE=800,LRECL=80,RECFM=FB),DISP=(,PASS) //SYSPRINT DD SYSOUT=A //SYSIN DD * PROMMAC 'CNTL=START,PROM=20,PROX=5' PROMMAC 'CNTL=ABP,ON,T321' PROMMAC 'CNTL=ON,PROG=(CFIL,TERMIO,FILEIO,ERRORS,SCAN,LLASRCH), USR=.ANY' PROMMAC 'CNTL=EXCL,PROG=(TERMIO,FILEIO)' PROMMAC 'CNTL=ON,PROG=PBMASTER,FOL=ON,USR=.ANY' PROMMAC 'CNTL=PURGE,INTRVAL=0100',END END /* //LINK EXEC PGM=IEWL,PARM='LIST,XREF,MAP',REGION=512K //SYSLMOD DD DSN=CAI.CACICSxx(PROMAC),DISP=SHR //SYSUT1 DD UNIT=SYSDA,SPACE=(TRK,(10,10)) //SYSPRINT DD SYSOUT=A //SYSLIN DD DSN=&&OBJ,DISP=(OLD,DELETE) //
NOTE: A CICS program definition named PROMAC is required for the generated table.
In the SYSLMOD DD statement, replace xx with your two-digit CICS release number (for example, 41 for CICS 4.1, 52 for CTS 1.2, or 53 for CTS 1.3).
10–2
Entering CNTL Commands from a CRLP-type Terminal
InterTest GSG.doc, printed on 1/29/2002, at 6:06 PM
Entering CNTL Commands from a CRLP-type Terminal If you have at least one CRLP-type terminal defined in your TCT, its input sequential file can contain CNTL commands. These commands are executed in sequence just as if they were entered manually from a terminal. Responses to them are written in the terminal's output sequential file.
To reduce the amount of time required to process large numbers of CNTL commands, perform the following steps:
1. Create a load module that contains the CNTL commands to be processed using the PROMMAC macro.
NOTE: You can add the USR= option to any embedded CNTL=ON commands to assign the entries to a specific user ID. See “CNTL Commands and Menus” in the Advantage CA-InterTest for CICS User Guide.
2. Add a PPT entry for the load module. 3. Set the following Advantage CA-InterTest options (see the chapter
“Advantage CA-InterTest fo CICS”): RECNTMU=NO RECNTNW=NO
4. Replace the CNTL commands in the sequential input with the following command: CNTL=START,PROM=name
Where name is the name of the module that was created in Step 1.
Activating Advantage CA-InterTest for CICS from a Program In one of your programs you can code a routine to activate Advantage CA-InterTest for CICS by the CICS command:
EXEC CICS START TRANSID('CNTL') FROM(data-area)... The data-area must contain the command:
CNTL=START,PROM=tablname
Where tablname is the name of the load module assembled through PROMMAC macros. The table name must be followed by a space.
If the CNTL task to be automatically initiated is to own a terminal, be sure that the terminal is in service and has the ATI (automatic task initiation) capability when the CNTL task is started.
10–3
Starting Advantage CA-InterTest for CICS from a PLT
InterTest GSG.doc, printed on 1/29/2002, at 6:06 PM
Issuing CNTL Commands from a Program You can issue any CNTL command using the EXEC CICS START command. However, for the CNTL=START command, the only permitted format is: CNTL=START,PROM=tablname
If the CNTL task is activated at a terminal, response messages are displayed there and the command is executed as if someone had entered it from that terminal. For example, if the CNTL command sets a breakpoint, the from and to terminals are the terminal at which the task was activated.
After Advantage CA-InterTest is started, a program can issue an EXEC CICS START command with the data record containing: CNTL=EXEC,MODULE=tablname
This command executes the table of commands contained in tablname.
Starting Advantage CA-InterTest for CICS from a PLT If the program IN25PLT is included in the PLT, it starts Advantage CA-InterTest for CICS as specified in the IN25OPTS member. IN25PLT is delivered in the distribution load library.
The following Advantage CA-InterTest PLTPI entry must be added after DFHDELIM so that it is part of stage 2 processing:
DFHPLT TYPE=ENTRY,PROGRAM=IN25PLT
The IN25PLT program can be called by another user-written PLT program that passes a valid Advantage CA-InterTest start command in a COMMAREA to IN25PLT. An example is given below: INTSTART DC C'CNTL=START,PROM=PROMTABL ...' . . . EXEC CICS LINK PROGRAM('IN25PLT') COMMAREA(INTSTART) LENGTH(=Y(L'INSTART))
NOTES: The transient data destination specified in the GLOG= Advantage CA-InterTest option must be defined to CICS and must be opened. See the chapter “Advantage CA-InterTest for CICS” for details.
The group DFHINQUI must be defined in the CICS startup list for IN25PLT to execute.
The Advantage CA-InterTest Help file, PROTHLF, must be defined and available.
10–4

Automatic Startup in CICSPlex Regions
InterTest GSG.doc, printed on 1/29/2002, at 6:06 PM
Automatic Startup in CICSPlex Regions If Advantage CA-InterTest is automatically started in a CICSPlex-participating region (that is, CICSPLEX=YES in IN25OPTS), it will resynchronize its monitoring options with any active CICSPlex members upon startup.
NOTE: Resynchronization occurs whenever the CNTL=START or CNTL=RESTART command is issued in a CICSPlex-participating region.
10–5
InterTest GSG.doc, printed on 1/29/2002, at 6:06 PM
Chapter 11
Symbolic File Maintenance
The IN25UTIL batch utility program maintains and reports on the Symbolic File .This program runs as a separate job .Its functions are specified using control cards.
Control Cards All control cards must begin in column 1.
PASSWORD=12345678/xxxxxxxx Specifies a password that is required when maintaining the Symbolic File .You only need to specify the password once, but it must precede the first update request. The xxxxxxxx specification must match the value of the SYMPSWD= keyword in the IN25OPTS macro.
INITIALIZE Initializes the Symbolic File. This function must always be run after the Symbolic File is created using VSAM Access Method Services. For a newly defined file, the IN25UTIL program preformats all records .If you perform this function for an existing file, all symbolic data is removed. The PASSWORD control card must precede the INITIALIZE control card.
PURGE=nnn Removes symbolic data for any program that has not been compiled or assembled within the number of days specified by nnn, a decimal number from 1 to 365. The PASSWORD control card must precede the PURGE control card.
NOTE: The PURGE function does not remove data for programs compiled or assembled with the post-processor NOPURGE option.
DELETE=xxxxxxxx Deletes all symbolic data for the program specified by xxxxxxxx. The PASSWORD control card must precede the DELETE control card.
REPORT Produces a Symbolic File report that contains statistics and a detailed report on each program. You can obtain a similar report online by entering one of these commands:
CNTL=INQ,SYM=ALL for all programs C NTL=INQ,SYM=xxxxxxxx for program xxxxxxxx
Buddy Tip—Either of the above commands reports on all Symbolic Files.
11–1
Examples
InterTest GSG.doc, printed on 1/29/2002, at 6:06 PM
PRINT=xxxxxxxx Prints the saved source listing for program xxxxxxxx. The PASSWORD control card must precede the RELOAD control card.
Examples The following examples contain sample JCL for performing common Symbolic File maintenance tasks.
Initializing the CA-InterTest for CICS Symbolic Files The following example initializes the CA-InterTest Symbolic Files. //UTILITY JOB ........ //STEP1 EXEC PGM=IN25UTIL //STEPLIB DD DSN=CAI.CACICSxx,DISP=SHR //SYSUDUMP DD SYSOUT=* //MESSAGE DD SYSOUT=* //PROTSYM DD DSN=INTRTST.PROTSYM,DISP=SHR //CARDS DD * PASSWORD=12345678 INITIALIZE /* //
In the STEPLIB DD statement, replace xx with your two-digit CICS release number (for example, 41 for CICS 4.1, 52 for CTS 1.2, or 53 for CTS 1.3).
Purging Programs The following example purges all programs that have not been compiled or assembled within the last 20 days. //UTILITY JOB ........ //STEP1 EXEC PGM=IN25UTIL //STEPLIB DD DSN=CAI.CACICSxx,DISP=SHR //SYSUDUMP DD SYSOUT=* //MESSAGE DD SYSOUT=* //PROTSYM DD DSN=INTRTST.PROTSYM,DISP=SHR //CARDS DD * PASSWORD=12345678 PURGE=20 /* //
In the STEPLIB DD statement, replace xx with your two-digit CICS release number (for example, 41 for CICS 4.1, 52 for CTS 1.2, or 53 for CTS 1.3).
11–2

Examples
InterTest GSG.doc, printed on 1/29/2002, at 6:06 PM
Deleting Symbolic Data The following example deletes all symbolic data for programs ORDEDIT and TEST1. //UTILITY JOB ........ //STEP1 EXEC PGM=IN25UTIL //STEPLIB DD DSN=CAI.CACICSxx,DISP=SHR //SYSUDUMP DD SYSOUT=* //MESSAGE DD SYSOUT=* //PROTSYM DD DSN=INTRTST.PROTSYM,DISP=SHR //CARDS DD * PASSWORD=12345678 DELETE=ORDEDIT DELETE=TEST1 /* //
In the STEPLIB DD statement, replace xx with your two-digit CICS release number (for example, 41 for CICS 4.1, 52 for CTS 1.2, or 53 for CTS 1.3).
Generating Reports and Purging Programs The following example generates a system report, purges all programs that have not been compiled or assembled within 90 days, and generates another system report. //UTILITY JOB ........ //STEP1 EXEC PGM=IN25UTIL //SYSUDUMP DD SYSOUT=* //STEPLIB DD DSN=CAI.CACICSxx,DISP=SHR //MESSAGE DD SYSOUT=* //PROTSYM DD DSN=INTRTST.PROTSYM,DISP=SHR //CARDS DD * REPORT PASSWORD=12345678 PURGE=90 REPORT /* //
In the STEPLIB DD statement, replace xx with your two-digit CICS release number (for example, 41 for CICS 4.1, 52 for CTS 1.2, or 53 for CTS 1.3).
Unloading Programs The following example unloads all programs on the Symbolic File to tape. //UTILITY JOB ........ //STEP1 EXEC PGM=IN25UTIL //STEPLIB DD DSN=CAI.CACICSxx,DISP=SHR //SYSUDUMP DD SYSOUT=* //MESSAGE DD SYSOUT=* //UNLOAD DD UNIT=TAPE,VOL=SER=UNLDTAP,LABEL=(,NL),DISP=(OLD,KEEP), // DCB=(RECFM=FB,LRECL=2042,BLKSIZE=20420) //PROTSYM DD DSN=INTRTST.PROTSYM,DISP=SHR //CARDS DD * UNLOAD=ALL /* //
11–3

Examples
InterTest GSG.doc, printed on 1/29/2002, at 6:06 PM
In the STEPLIB DD statement, replace xx with your two-digit CICS release number (for example, 41 for CICS 4.1, 52 for CTS 1.2, or 53 for CTS 1.3).
Reloading Programs The following example reloads all programs on tape to the CA-InterTest Symbolic File. //UTILITY JOB ........ //STEP1 EXEC PGM=IN25UTIL //STEPLIB DD DSN=CAI.CACICSxx,DISP=SHR //SYSUDUMP DD SYSOUT=* //MESSAGE DD SYSOUT=* //RELOAD DD UNIT=TAPE,VOL=SER=RELDTAP,LABEL=(,NL),DISP=(OLD,KEEP), // DCB=(RECFM=FB,LRECL=2042,BLKSIZE=20420) //PROTSYM DD DSN=INTRTST.PROTSYM,DISP=SHR //CARDS DD * PASSWORD=12345678 RELOAD=ALL /* //
In the STEPLIB DD statement, replace xx with your two-digit CICS release number (for example, 41 for CICS 4.1, 52 for CTS 1.2, or 53 for CTS 1.3).
Printing a Program Listing The following example prints the saved listing for program ORDEDIT.
//UTILITY JOB ........ //STEP1 EXEC PGM=IN25UTIL //STEPLIB DD DSN=CAI.CACICSxx,DISP=SHR //SYSUDUMP DD SYSOUT=* //MESSAGE DD SYSOUT=* //OUTPUT DD SYSOUT=*,DCB=(RECFM=FBA,LRECL=121,BLKSIZE=2420) //PROTSYM DD DSN=INTRTST.PROTSYM,DISP=SHR //CARDS DD * PRINT=ORDEDIT /* //
In the STEPLIB DD statement, replace xx with your two-digit CICS release number (for example, 41 for CICS 4.1, 52 for CTS 1.2, or 53 for CTS 1.3).
Reorganizing the Symbolic File The following example reorganizes or changes the size of the Symbolic File .This job unloads all programs, deletes and defines the Symbolic File, initializes the Symbolic File, reloads all programs, and generates a system report.
11–4

Examples
InterTest GSG.doc, printed on 1/29/2002, at 6:06 PM
//UTILITY JOB ........ //UNLOAD EXEC PGM=IN25UTIL //STEPLIB DD DSN=CAI.CACICSxx,DISP=SHR //SYSUDUMP DD SYSOUT=* //MESSAGE DD SYSOUT=* //UNLOAD DD UNIT=TAPE,VOL=SER=RELDTAP,LABEL=(,NL),DISP=(,PASS), // DCB=(RECFM=FB,LRECL=2042,BLKSIZE=20420) //PROTSYM DD DSN=INTRTST.PROTSYM,DISP=SHR //CARDS DD * UNLOAD=ALL /* //IDCAMS EXEC PGM=IDCAMS,COND=(0,NE,UNLOAD) Insert an IDCAMS step to delete the existing Symbolic File and define a new one .We recommend that this step and the next one run only if the first step has a condition code of 0. /* //RELOAD EXEC PGM=IN25UTIL,COND=(0,NE,UNLOAD) //STEPLIB DD DSN=CAI.CACICSxx,DISP=SHR //SYSUDUMP DD SYSOUT=* //MESSAGE DD SYSOUT=* //RELOAD DD UNIT=TAPE,VOL=SER=RELDTAP,LABEL=(,NL),DISP=(OLD,KEEP), // DCB=(RECFM=FB,LRECL=2042,BLKSIZE=20420) //PROTSYM DD DSN=INTRTST.PROTSYM,DISP=SHR //CARDS DD * PASSWORD=12345678 INITIALIZE RELOAD=ALL REPORT /* //
In the STEPLIB DD statements, replace xx with your two-digit CICS release number (for example, 41 for CICS 4.1, 52 for CTS 1.2, or 53 for CTS 1.3).
11–5
InterTest GSG.doc, printed on 1/29/2002, at 6:06 PM
Chapter 12
Troubleshooting Overview
This chapter explains how to troubleshoot problems and obtain customer support. The following topics are discussed:
• Identifying and resolving problems • Contacting Computer Associates Technical Support • Receiving ongoing product releases and maintenance • Requesting product enhancements
Diagnostic Procedures See the following flowchart for a summary of the procedures you should follow if you have a problem with a Computer Associates software product. Each of these procedures is detailed on the following pages.
Troubleshoo
ting 12 1

Overview
InterTest GSG.doc, printed on 1/29/2002, at 6:06 PM
Overview
InterTest GSG.doc, printed on 1/29/2002, at 6:06 PM
Troubleshoo
ting 12 2
Troubleshoo
ting 12 2

Overview
InterTest GSG.doc, printed on 1/29/2002, at 6:06 PM
Collecting Diagnostic Data In the following table, use the left column to categorize the problem your site has encountered. Then, follow the instructions in the corresponding right column to generate useful diagnostic data.
Type of Problem Procedure
User-initiated functions Check the user and service machine console logs. Try to reproduce the problem with [CNTL=ITTRACE, ON]
System or Operator functions Collect the dump or screen print, if appropriate.
Interpreting Diagnostic Data When you have collected the specified diagnostic data, write down your answers to the following questions:
• What was the sequence of events prior to the error condition? • What circumstances existed when the problem occurred and what action did
you take? • Has this situation occurred before? What was different then? • Did the problem occur after a particular PTF was applied or after a new
release of the software was installed? • Have you recently installed a new release of the operating system? • Has the hardware configuration (tape drives, disk drives, and so forth)
changed? From your response to these questions and the diagnostic data, try to identify the
cause and resolve the problem.
Accessing the Online Client Support System Computer Associates is making extensive use of the Internet for your benefit. CA encourages you to surf the net to the CA home page at http://www.ca.com. The CA Internet site provides a great variety of information about CA products and services, including:
• Service and support • Product information and sales • CA-World conference information • Press releases • CA user groups
Troubleshoo
ting 12 3
Overview
InterTest GSG.doc, printed on 1/29/2002, at 6:06 PM
StarTCC, the web-based portion of CA-TCC (CA-Total Client Care), gives you real-time, interactive access to CA product support information through the Internet. Using StarTCC, you can:
• Open new issues • Browse or update your existing issues • Perform keyword searches • Download solutions, PTFs, and important notices regarding Computer
Associates products, maintenance, and documentation
Requirements for Using StarTCC The following requirements are necessary to use StarTCC:
• You must be a Computer Associates client with a current maintenance agreement.
• You must register through the Computer Associates Internet site. • You must access the Internet with a browser that supports the HTML
specification 2.0 or higher, such as Netscape Navigator 4.0 or higher or Microsoft Internet Explorer 4.0 or higher. (You can download browsers from the Computer Associates Technical Support page.)
Browsers that meet the HTML requirement support the following functions, which are required for StarTCC:
− Secure sockets layer (SSL) to encrypt your transaction traffic
− Encrypted data records (known as cookies)
− HTML tables
StarTCC Security StarTCC runs as a secured server (SSL). You may need to configure your browser to enable SSL. Guidelines for doing this are provided on the Computer Associates Technical Support page.
Access StarTCC To access StarTCC, click Support on the Computer Associates home page and follow the links for StarTCC. The StarTCC options are:
• StarTCC introduction • StarTCC registration • Access StarTCC These options are described next:
Troubleshoo
ting 12 4

Overview
InterTest GSG.doc, printed on 1/29/2002, at 6:06 PM
StarTCC Introduction Click Introducing StarTCC to view background information for StarTCC, details about the prerequisites, and instructions for configuring your browser. Be sure to review this section for updates or information not included here.
StarTCC Registration Click Register to identify yourself to StarTCC. You must register before you can access StarTCC online. There are prompts for all required information, including your name, site ID, CA-StarTrak PIN, company name, e-mail address, postal address, and desired password for accessing StarTCC.
NOTE: If you do not have a CA-StarTrak PIN, StarTCC provides one for you when you register.
Accessing StarTCC Click Login and select an access option to begin using StarTCC. When prompted, enter your user ID and password. Once your sign on is validated, you can select one of the following options:
• Open a New Issue—Open an issue for, or request an enhancement to, one of your Computer Associates products.
• Browse Your Issues—Display all issues for your site. The issues are grouped into three categories: Open, Closed, and Enhancement Requests (DARs).
• Browse/Download Solutions—Specify criteria for selecting solutions, which you can then view or download.
• Search CA Knowledge Base—Specify criteria for searching the Computer Associates database for solutions, problems, and keywords that can provide you with immediate answers to your product support questions and concerns.
• Update Your StarTCC Profile—Make changes to your default e-mail address, phone number, and password whenever necessary.
• Display Your Site’s Licenses—View a list of all of the Computer Associates products for which your company site is currently licensed.
• Display News Items—View and download recently published solutions for Computer Associates products, instructions for downloading from StarTCC, and helpful information for using CA-StarTrak, StarTCC, or other Computer Associates products.
Troubleshoo
ting 12 5
Overview
InterTest GSG.doc, printed on 1/29/2002, at 6:06 PM
Accessing the Technical Support Phone Services Directory The Computer Associates Technical Support Phone Services Directory lists each Computer Associates product and the telephone number to call for primary support for that product. To access the Technical Support Phone Services Directory online, click Support on the Computer Associates home page. Follow the links, first to Calling CA for Support, and then Telephone Numbers.
StarTCC Hotline If you experience any problems using StarTCC, call the StarTCC Technical Support hotline.
CA-TLC: Total License Care Many Computer Associates software solutions use license keys or authorization codes to validate your hardware configuration. If you need assistance obtaining a license key or authorization code, contact the CA-TLC: Total License Care group at http://esupport.ca.com/.
Calling Technical Support Computer Associates provides telephone support for all its products.
If you are in North America, see the Technical Support Phone Services Directory for the CA-InterTest for CICS Technical Support phone number. Outside North America, call your local Computer Associates Support Center during normal business hours.
NOTE: Only your local Computer Associates Support Center can provide native language assistance. Use English when contacting any North American center.
Emergency phone numbers are available for after-hours technical support. You can find the emergency phone numbers for the United States and Canada, and for international calls at http://esupport.ca.com/. All after-hours calls should be limited to severity 1 problems.
If you are unable to resolve the problem, have the following information ready before contacting Computer Associates Technical Support:
• All of the diagnostic information described in the section “Collecting Diagnostic Data”
• Product name, release number, operating system, and genlevel
Buddy Tip—This information is available online from the Advantage CA-InterTest Product Status Menu. To access the menu from CICS, enter ITST to display the Primary Option Menu, and then select Option 7.1.
• Your CICS release number
Troubleshoo
ting 12 6
Overview
InterTest GSG.doc, printed on 1/29/2002, at 6:06 PM
• Product name and release number of any other software you suspect is involved
• Release level and PUTLEVEL of the operating system • Your name, telephone number, and extension (if any) • Your company name • Your site ID • A severity code. This is a number from 1 to 4 that you assign to the problem.
Use the following definitions to determine the severity of the problem:
1 = a system down or inoperative condition
2 = a suspected high-impact condition associated with the product
3 = a question concerning product performance or an intermittent low-impact condition associated with the product
4 = a question concerning general product use or implementation
Generating a Problem Report Once a Computer Associates Technical Support representative has determined that your problem requires further investigation, use CA-ACTIVATOR to generate the problem report required by Computer Associates.
CA-ACTIVATOR Problem Reporting Facility The CA-ACTIVATOR problem reporting facility lets you provide a description of the problem. It automatically produces a report on:
• Your current system environment • Computer Associates product installation and maintenance information • The product runtime options in effect
Product Releases and Maintenance New users of CA-InterTest receive a distribution tape containing the current version of the system. Clients are requested to operate only under currently supported releases of CA-InterTest.
Standard user documentation is also provided to CA-InterTest users. Updates to this documentation are provided automatically to all clients having current maintenance agreements.
Clients with current maintenance agreements also receive ongoing CA-InterTest maintenance. When a new release of the system is available, a notice is sent to all current CA-InterTest clients.
Troubleshoo
ting 12 7

Overview
InterTest GSG.doc, printed on 1/29/2002, at 6:06 PM
Requesting Enhancements Computer Associates welcomes your suggestions for product enhancements. All suggestions are considered and acknowledged. You can use any of the following methods to request enhancements: • Access StarTCC, the Computer Associates web-based, interactive support system,
from the Computer Associates Internet site to open an issue for the enhancement request. For details, see the section Accessing the Online Client Support System.
• Contact your Account Manager or a Technical Support Representative, who will initiate a Demand Analysis Request (DAR) for you. The DAR system serves as a central receiving point for all enhancement requests.
Troubleshoo
ting 12 8

InterTest GSG.doc, printed on 1/29/2002, at 6:06 PM
Chapter 13
Maintenance Overview
This chapter describes the maintenance process for Advantage CA-InterTest for CICS. Topics include:
• Overview of the SMP/E maintenance process • Advantage CA-InterTest maintenance delivery • PTF maintenance installation • Overview of maintenance steps • Detailed maintenance steps New users of Advantage CA-InterTest receive a distribution tape containing the
current version of the system. Clients are requested to operate only under currently supported releases of Advantage CA-InterTest.
Standard user documentation is also provided to Advantage CA-InterTest users. Updates to this documentation are provided automatically to all clients having current maintenance agreements.
Clients with current maintenance agreements also receive ongoing Advantage CA-InterTest maintenance. When a new release of the system is available, a notice is sent to all current Advantage CA-InterTest clients.
PL/I Option Maintenance The following maintenance procedure applies to the Advantage CA-InterTest PL/I option and the Advantage CA-InterTest base product. PL/I option maintenance members substitute MA60 for BA60 in the maintenance JCL member names.
Advantage CA-InterTest Maintenance Advantage CA-InterTest maintenance is delivered in SMP/E format. You should use SMP/E to apply all maintenance modifications.
Important: If you attempt to apply maintenance without using SMP/E, the integrity of your Advantage CA-InterTest libraries is at risk and the maintenance tracking capabilities of SMP/E are lost.
13–1

Overview
InterTest GSG.doc, printed on 1/29/2002, at 6:06 PM
SMP/E Libraries SMP/E uses two sets of libraries:
• Target libraries are the product execution or runtime libraries.
- CAI.CACICSnn—contains the load modules.
- CAI.SAMPLIB —contains the sample source and JCL. • Distribution libraries are the product backup libraries.
- CAI.CBA60nnD—contains the load modules.
- CAI.CBA60SLD—contains the sample source and JCL.
NOTE: nn is the two-digit CICS release number
When a product is installed by SMP/E, the target and distribution libraries are populated. The target libraries are populated during the SMP/E APPLY process, and the distribution libraries are populated during the SMP/E ACCEPT process. At this point, the target and the distribution libraries contain identical versions of the product modules.
Maintenance through SMP/E is applied to the runtime system (the target libraries) first. After the maintenance has been running on the system for a period of time or when it appears that there are no problems with the maintenance, it is applied to the backup libraries (the distribution libraries).
NOTE: When maintenance is installed on the running libraries, it is said to be applied. When installed on the backup libraries, it is said to be accepted.
APPLY and ACCEPT Commands APPLY and ACCEPT are the names of two SMP/E commands. The APPLY process updates the target libraries and the ACCEPT process updates the distribution libraries.
The cycle of a product under SMP/E generally follows this schedule: 1. Apply and accept the base product installation material, creating target and
distribution libraries. 2. At this point, the target and distribution libraries are at the same maintenance
level. Later, you apply maintenance in the form of an APAR or a PTF, bringing the target libraries to a new maintenance level.
3. The target and distribution libraries are now at different maintenance levels. If there is a problem with the maintenance applied to your target libraries, the maintenance can be removed by the SMP/E RESTORE command.
13–2

Overview
InterTest GSG.doc, printed on 1/29/2002, at 6:06 PM
The RESTORE Command The RESTORE process replaces the modules in the target library that were affected by the maintenance with backup modules from the distribution libraries.
After verifying that the maintenance will not cause any new problems on your runtime system, install the maintenance into your distribution libraries with the SMP/E ACCEPT process. This step synchronizes your target and distribution libraries at the same maintenance level.
Once you accept the maintenance into your distribution libraries, there is no SMP/E process to remove it.
Maintenance Delivery Maintenance to your Advantage CA-InterTest system is packaged and delivered as SMP/E USERMODs, APARs, and PTFs. The various types of maintenance delivery are discussed next.
Informational APAR or PML The informational APAR or Product Maintenance Letter (PML) is official information relative to a product. PMLs are delivered by hardcopy, CA-TCC, and on maintenance tapes.
The naming convention for PMLs (at the time of the release of this manual) is LInnnnn, where:
• LI identifies an informational APAR • nnnnn is an identification number
Program Temporary Fixes A Program Temporary Fix (PTF) is an official replacement module or modules that fixes one or more problems. A PTF is usually an accumulation of APARs.
• PTFs are installed as PTF SYSMODs, which you must accept prior to installing subsequent maintenance
• PTFs are always delivered on a periodic maintenance tape • PTFs are named (at the time of the release of this manual) LAnnnnn-LZnnnnn
PTF Maintenance Tape Installation A combined installation and maintenance tape is distributed periodically on a standard IBM cartridge, which can be processed by SMP. It contains the newly published official PTF SYSMODs for Advantage CA-InterTest. This cartridge is to be used only where SMP controls installation and maintenance of Computer Associates solutions. This tape is in the new combined format, which means that it can be used either to install Advantage CA-InterTest at the genlevel specified on the external label or to apply maintenance to bring an existing Advantage CA-InterTest solution up to the genlevel specified on the external label.
13–3

Overview
InterTest GSG.doc, printed on 1/29/2002, at 6:06 PM
A partitioned data set containing all necessary sample JCL is provided in the Load Sample JCL Library step. The sample JCL data set contains all JCL necessary for installation and maintenance. The maintenance-specific members are prefixed with an M.
Refer to the external label of the tape for the current volume serial number.
Overview of Maintenance Steps Important: Before applying any new maintenance, the base product and all prior maintenance
to Advantage CA-InterTest must be accepted. The following list summarizes the steps involved in the Advantage CA-InterTest
maintenance process. Review this list before performing maintenance on Advantage CA-InterTest.
Step Description Step 1. Review and follow the cover letter instructions. Step 2. Load the sample JCL from the tape Step 3. Customize the SMP procedure. Step 4. Edit the JCL to exclude previously applied SYSMODs. Step 5. Receive Advantage CA-InterTest maintenance. Step 6. Apply check Advantage CA-InterTest maintenance. Step 7. Restore any applicable SYSMODs. Step 8. Apply Advantage CA-InterTest maintenance. Step 9. Reapply any applicable SYSMODs. Step 10. Execute Advantage CA-InterTest to verify successful maintenance. Step 11. Accept Advantage CA-InterTest maintenance. Step 12. Unload the documentation set. Step 13. Save all materials and output.
Step 1. Review and Follow the Cover Letter Instructions Before starting the maintenance steps, you must first review and follow the cover letter instructions. This letter details any additional steps that may be required by your site.
13–4

Step 4. Edit Maintenance JCL to Exclude Previously Applied SYSMODs
InterTest GSG.doc, printed on 1/29/2002, at 6:06 PM
Additionally, before starting this maintenance procedure you should: • Check the packing list for Advantage CA-InterTest against the package
contents. • Review all PTFs (Program Temporary Fixes) and PMLs (Product
Maintenance Letters) provided. Important! If any items are missing or if you have any questions, call your local Computer
Associates Technical Support center before performing the maintenance procedure.
Step 2. Load the Sample JCL from the Tape Use the following JCL as a model to load the sample JCL library to DASD: //LOAD EXEC PGM=IEBCOPY //SYSPRINT DD SYSOUT=A //SYSUT1 DD DISP=(OLD,KEEP), // DSN=CAI.SAMPJCL, // UNIT=CART, <===generic 3480 tape cartridge // VOL=SER=BAyymm, <===VOLSER from tape label // LABEL=(9,SL) //SYSUT2 DD DISP=(NEW,CATLG,DELETE), // DSN=CAIM.INTERTST.SAMPJCL, <===your DSN // UNIT=SYSDA, <===your generic DASD // VOL=SER=XXXXXX, <===permanent DASD volser // SPACE=(3120,(50,10,10)), <===minimum space required // DCB=(LRECL=80,BLKSIZE=3120,RECFM=FB) //SYSUT3 DD UNIT=SYSDA, // SPACE=(TRK,(5,5)) //SYSUT4 DD UNIT=SYSDA, // SPACE=(TRK,(5,5)) //SYSIN DD DUMMY
Once this job has ended, your library will contain all of the JCL needed to complete the maintenance for Advantage CA-InterTest.
Step 3. Customize the SMP Procedure During the installation of Advantage CA-InterTest, an SMP/E procedure was selected and customized. If the SMP procedure used during the installation of Advantage CA-InterTest is available, this step is not required.
If that procedure is not available, a JCL procedure can be found in the sample JCL library. Member BA60SMPE is the model JCL procedure using SMP/E. Select and modify this member to conform to your site standards.
NOTE: This procedure is used in subsequent steps.
Step 4. Edit Maintenance JCL to Exclude Previously Applied SYSMODs In this step you exclude those PTFs (SMP element replacements) already processed from previous Advantage CA-InterTest maintenance cycles.
13–5

Step 4. Edit Maintenance JCL to Exclude Previously Applied SYSMODs
InterTest GSG.doc, printed on 1/29/2002, at 6:06 PM
The sample JCL data set contains the members listed in the following table.
NOTE: xx is the two-digit CICS release number.
Member Name For Product
CBA60xx (xx = 41, 52, or 53) Advantage CA-InterTest
CLQ60xx CA-Realia II Workbench for CICS
CSA60xx Breakpoint
CMA60xx PL/I option
To be cumulative, these members contain a list of all PTFs for each component
since the base level of this release. You must edit these members by either commenting out or deleting the PTF IDs belonging to maintenance levels equal to or lower than your current genlevel. These members drive all subsequent SMP steps.
For example, to edit the PTF list for the Advantage CA-InterTest member CBA60xx, locate the member in the sample JCL file. The example below shows sample SYSMOD entries for genlevels 9904, 9912, and 0009.
LA14345 /*LVL9904*/ LA19222 /*LVL9904*/ LA26333 /*LVL9904*/ LA29234 /*LVL9912*/ LA33123 /*LVL9912*/ LA33567 /*LVL9912*/ LA33555 /*LVL0009*/ LA33735 /*LVL0009*/
Assuming you are at the fictitious genlevel 9805 and going to genlevel 9808, you should edit the list as follows:
/* LA14345 LVL9904*/ /* LA19222 LVL9904*/ /* LA26333 LVL9904*/ /* LA29234 LVL9912*/ /* LA33123 LVL9912*/ /* LA33567 LVL9912*/ LA33555 /*LVL0009*/ LA33735 /*LVL0009*/
NOTE: SMP requires that all comments begin with “/*“ and complete with “*/“.
After you edit this member, remember to update the data set so the changes are not lost.
13–6

Step 4. Edit Maintenance JCL to Exclude Previously Applied SYSMODs
InterTest GSG.doc, printed on 1/29/2002, at 6:06 PM
NOTE: Advantage CA-InterTest and CA-SymDump for CICS share common components. The release and maintenance level of the two products must be equivalent. If your site also has CA-SymDump for CICS as a separate product and you have already applied this maintenance level to CA-SymDump for CICS, pay particular attention to the instructions within the SAMPJCL members specified in the following steps.
Step 5. Receive Advantage CA-InterTest Maintenance Maintenance JCL member MBA60REC receives all of the PTFs corresponding to Advantage CA-InterTest maintenance. Edit member MBA60REC to conform to your site standards.
Submit the job and verify that the RECEIVE process was successful. If the SMP RECEIVE completed with a return code greater than 4, review the output, correct the problem, and resubmit.
Step 6. Apply Check Advantage CA-InterTest Maintenance Maintenance JCL member MBA60APC apply checks all PTFs corresponding to the components specified within the SMPCNTL DD statement. This step identifies any USERMODs and APARs that prevent PTF application and any PTFs already applied.
Edit member MBA60APC to conform to your site standards. Delete any DD statements within the SMPCNTL DD statement that correspond to Advantage CA-InterTest components not currently installed.
Submit the job and verify that APPLY CHECK processing was successful. If the SMP APPLY CHECK completed with a return code greater than 4, review the output, correct the problem, and resubmit.
NOTE: SMP APPLY CHECK processing performs preliminary validation on SYSMODs individually. Carefully review the SMP generated reports, noting any possible regression of SYSMODs.
Computer Associates requires the removal of any SYSMOD preventing PTF application. To allow PTF application, perform SMP RESTORE processing on the SYSMODs identified during the SMP APPLY CHECK. The instructions to accomplish this are in Step 7.
Step 7. Restore Any Applicable SYSMODs Maintenance JCL member MBA60RES contains the control statements for an SMP RESTORE. This step restores SMP USERMODs and APARs identified by APPLY CHECK processing to allow for PTF application. If you do not have any SYSMODs to restore, skip this step and continue to the next step.
13–7
Step 4. Edit Maintenance JCL to Exclude Previously Applied SYSMODs
InterTest GSG.doc, printed on 1/29/2002, at 6:06 PM
Edit member MBA60RES to conform to your site standards. Only the SYSMODs identified by APPLY CHECK processing need to be restored. Type these SYSMODs within the SMPCNTL DD statement.
After you complete editing, submit the job and verify that RESTORE processing ran successfully. If SMP RESTORE completed with a return code greater than 4, review the output, correct the problem, and resubmit.
We suggest you execute the SMP APPLY CHECK again to verify that there are no additional SYSMODs inhibiting the application of maintenance.
Step 8. Apply Advantage CA-InterTest Maintenance Maintenance JCL member MBA60APP applies all PTFs corresponding to the components specified within the SMPCNTL DD statement.
Edit member MBA60APP to conform to your site standards. Submit the job and verify that APPLY processing was successful. If the SMP APPLY completed with a return code greater than 4, review the output, correct the problem, and resubmit.
Step 9. Reapply Any Applicable SYSMODs Review the USERMODs and APARs restored by Step 7. If no SYSMODs were restored, skip this step and continue to the next step.
SYSMODs identified by APPLY CHECK processing may be at a higher level than the PTFs contained on the Advantage CA-InterTest maintenance tape.
Edit maintenance JCL member MBA60RAP to conform to your site standards. Submit the job and verify that APPLY processing ran successfully. If the SMP APPLY completed with a return code greater than 4, review the output, correct the problem, and resubmit the job.
NOTE: SMP can handle only one update per element per APPLY select statement. In reapplying SYSMODs, it may be necessary to use multiple APPLY select statements.
Step 10. Execute Advantage CA-InterTest to Validate Maintenance Important: If Advantage CA-InterTest is currently running, stop it with the command: CNTL=END Then, activate the maintenance and restart Advantage CA-InterTest with the commands: CEMT SET PROG(IN25*) NEW CNTL=START To validate the successful application of maintenance, run the appropriate
demonstration program.
13–8

InterTest GSG.doc, printed on 1/29/2002, at 6:06 PM
Step 11. Accept Advantage CA-InterTest Maintenance After a reasonable period of testing the features of Advantage CA-InterTest with the new maintenance level applied, we recommend that you perform an SMP ACCEPT. This will give you a solid baseline to proceed from and make it easier to apply or restore any test USERMODs that you may be given by the Advantage CA-InterTest support staff.
Maintenance JCL member MBA60ACC accepts all PTFs corresponding to the components specified within the SMPCNTL DD statement.
Edit member MBA60ACC to conform to your site standards. Submit the job and verify ACCEPT processing was successful. If the SMP ACCEPT completed with a return code greater than 4, review the output, correct the problem, and resubmit.
Step 12. Unload the Documentation Set See Step 19. Unload Documentation Set in the chapter "Base Product Installation Steps," for an explanation of how to unload the Advantage CA-InterTest documentation.
Step 13. Save All Materials and Output Be sure to save all of your maintenance materials and all output from the
maintenance process. This material is essential for future problem determination.
13–9


![Skaffold - storage.googleapis.com · [getting-started getting-started] Hello world! [getting-started getting-started] Hello world! [getting-started getting-started] Hello world! 5.](https://static.fdocuments.net/doc/165x107/5ec939f2a76a033f091c5ac7/skaffold-getting-started-getting-started-hello-world-getting-started-getting-started.jpg)