Guardi final report
127
Design of a Bluetooth Enabled Android Application for a Microcontroller Driven Robot by Vito M. Guardi An Engineering Project Submitted to the Graduate Faculty of Rensselaer Polytechnic Institute in Partial Fulfillment of the Requirements for the degree of MASTER OF ENGINEERING Major Subject: Mechanical Engineering Approved: _________________________________________ Ernesto Gutierrez-Miravete, Project Adviser Rensselaer Polytechnic Institute Hartford, CT May, 2014
-
Upload
steph-cliche -
Category
Documents
-
view
50 -
download
0
Transcript of Guardi final report

Design of a Bluetooth Enabled Android Application for a Microcontroller Driven Robot
by
Vito M. Guardi
An Engineering Project Submitted to the Graduate
Faculty of Rensselaer Polytechnic Institute
in Partial Fulfillment of the
Requirements for the degree of
MASTER OF ENGINEERING
Major Subject: Mechanical Engineering
Approved:
_________________________________________ Ernesto Gutierrez-Miravete, Project Adviser
Rensselaer Polytechnic Institute Hartford, CT
May, 2014

© Copyright 2014
by
Vito M. Guardi
All Rights Reserved

i
CONTENTS
Design of a Bluetooth Enabled Android Application for a Microcontroller Driven Robot i
LIST OF TABLES ............................................................................................................ iii
LIST OF ACCRONYMS ................................................................................................. iv
LIST OF FIGURES ........................................................................................................... v
ACKNOWLEDGMENT ................................................................................................. vii
ABSTRACT ................................................................................................................... viii
1. INTRODUCTION/BACKGROUND .......................................................................... 1
1.1 Background ........................................................................................................ 1
1.2 Prior Work .......................................................................................................... 1
1.3 Objective ............................................................................................................ 4
2. METHODOLOGY/IMPLEMENTATION ................................................................. 5
2.1 Component and Software Selection ................................................................... 5
2.1.1 Selecting a Mobile Operating System and a Mobile Device ................. 5
2.1.2 Selecting a Microcontroller and Robotic Platform ................................ 9
2.1.3 Setting up the Development Environment, Android & Propeller ........ 13
2.2 Communication Protocol and Control Logic Design ....................................... 15
2.2.1 Development of a Communication Protocol ........................................ 15
2.2.2 Implementing and Demonstrating the Communication Protocol......... 17
3. RESULTS AND DISCUSSION ................................................................................ 26
4. CONCLUSIONS ....................................................................................................... 28
5. REFERENCES .......................................................................................................... 29
6. APPENDICES ........................................................................................................... 31
6.1 Table of the first 128 Characters of the ASCII Code ....................................... 31
6.2 Android Device User Interface Screen Captures ............................................. 33
6.3 XML Code for Android User Interface and Context Menus ........................... 37
6.3.1 Main User Interface XML Code .......................................................... 37

ii
6.3.2 Discovered and Connected Bluetooth Device List .............................. 38
6.3.3 Display Format of Device Names ........................................................ 39
6.3.4 XML Code for Options Menu .............................................................. 39
6.3.5 String Constants Referenced in the User Interface .............................. 40
6.3.6 Android Manifest File .......................................................................... 40
6.4 Java Source Code for Android Device ............................................................. 41
6.4.1 Main Activity Java Code ...................................................................... 41
6.4.2 Bluetooth Data Transfer Service .......................................................... 47
6.4.3 Device List Activity ............................................................................. 52
6.4.4 Data Resolver Service .......................................................................... 56
6.5 ActivityBot Propeller .Spin Source Code ........................................................ 56
6.5.1 RN-42 Bluetooth Module Configuration .Spin Source Code .............. 56
6.5.2 RN-42 Bluetooth Module Verification .Spin Source Code ................. 60
6.5.3 ActivityBot .Spin Source Code Implemented on the Propeller Microcontroller .................................................................................... 64
6.5.4 FullDuplexSerial4port.Spin Library .................................................... 71
6.5.5 DataIO4port.Spin Library .................................................................. 108

iii
LIST OF TABLES
Table 1 - List of Android API Levels and Corresponding Code Names [6] ..................... 7
Table 2 - Correlation between Index, its Meaning on the Android Device and the Robot
......................................................................................................................................... 17
Table 3 - Correlation between Numerical Value, its Physical Implementation on the
Android Application and the Robotic Platform for Parameters A & B ........................... 18
Table 4 - First 128 Characters of the ASCII code ........................................................... 31

iv
LIST OF ACCRONYMS
CTS – Clear to send
RTS – Request to send
API – Application programming interface
RC – Radio controlled
SDK – Software development kit
IDE – Integrated development environment
MAC – Media Access Control

v
LIST OF FIGURES
Figure 1 - Rover Revolution Available from Brookstone [2] ............................................ 2
Figure 2 - Parallax RN-42 Bluetooth Demo [3] ................................................................ 3
Figure 3 - MicroTronics Technologies Mobile Control Robot [4] .................................... 3
Figure 4 – World Wide Mobile OS Market Share [5] ....................................................... 6
Figure 5 - Relative Number of Devices by Platform Number / API level / Code Name [8]
........................................................................................................................................... 8
Figure 6 – Mobile Platform, Samsung Galaxy Note II Running Android 4.3 Ice Cream
Sandwich ............................................................................................................................ 9
Figure 7 - ActivityBot Robot Kit [9] ............................................................................... 10
Figure 8 - Propeller Activity Board [10] ......................................................................... 11
Figure 9 - RN-42 Bluetooth Adapter [11] ....................................................................... 12
Figure 10 - Assembled Robotic Platform with Bluetooth Adapter ................................. 12
Figure 11 - System Wiring Diagram for the Robotic Platform and Bluetooth Adapter .. 13
Figure 12 - Android Environment and Eclipse IDE with Code Snippet from BlueTest3
Application ...................................................................................................................... 14
Figure 13 - Spin IDE with Code Snippet from the PBAA_v0.7.spin Program ............... 15
Figure 14 - Example Message per the Communication Protocol .................................... 16
Figure 15 - Level 0 System Block Diagram .................................................................... 19
Figure 16 - Android User Interface for Controlling the Robotic Platform ...................... 20
Figure 17 - Android User Interface Code Snippet ........................................................... 21
Figure 18 - Level 1 Block Diagram Android Process for Connecting to a Remote
Bluetooth Device ............................................................................................................. 22
Figure 19 - Level 1 Block Diagram for Reading User Input and Transmitting to a
Remote Device ................................................................................................................. 23
Figure 20 - Level 1 Block Diagram of the Propeller Microcontroller and the Interaction
between Cogs ................................................................................................................... 24
Figure 21 - BlueTest 3 Application Launched from the Application Menu .................... 33
Figure 22 - User Menu within the Application ................................................................ 33
Figure 23 - List of Bluetooth Devices Found for Pairing ................................................ 34
Figure 24 - Screen Prior to Selecting Start, Slider Bars Disabled ................................... 34

vi
Figure 25 - Screen after Selecting Start, Slider Bars Enabled ......................................... 35
Figure 26 - Screen Requesting the User to Enable Bluetooth on the Device .................. 35
Figure 27 - Alerting the User of Successfully Enabling Bluetooth ................................. 36
Figure 28 - Alerting the User, Bluetooth Failed to Initialize ........................................... 36
Figure 29 - Example of User Input .................................................................................. 37

vii
ACKNOWLEDGMENT
To my parents who have taught me the importance and value of education and to my
loving wife whose support has kept me going when I might have otherwise quit.

viii
ABSTRACT
The objective of this paper is to show that it is possible to create a single Android
application capable of working with a number of electronic devices typically used within
the hobby and armature robotics field, without the devices creator having to know
anything about developing an Android application. To do this, a standard
communication protocol must be established between Android powered devices and
other electronic devices. To limit the scope of this task, this paper considers
communication between an electronic device powered by a typical microcontroller and
an Android 4.0 (Jelly Bean) or later powered device. Additionally communication
between the two devices takes place over Bluetooth communication channels V2.1 or
later.

1
1. INTRODUCTION/BACKGROUND
1.1 Background
All communications between devices require that the devices agree on the format of the
data. The set of rules defining said format is called a protocol [1]. Communication
protocols are almost everywhere we look from computers to televisions to basic mp3
players. They can even be compared to social mannerisms in today’s culture. Take the
activity of answering a phone, when someone answers the phone they say “Hello” or
some other equivalent greeting. This first phrase lets the person on the other end of the
phone know that its their turn to speak and that the person they have called is ready to
receive information. This can be equated to flow control within a communication
protocol which is used to let one device know that another device is ready for some
communication or data transfer to occur.
If a product developer wishes to make an electronic device that allows the end user
to control said electronic device from their smart phone or tablet, since there is currently
no industry standard open source communication protocol applicable to this scenario,
they would be forced to develop their own basic protocol. They would not only have to
develop the software on the electronic device side but they would also have to design a
custom application for the end users cell phone or tablet. As a basic example consider, a
company which designs keyboards for computers. There is a standard communication
protocol and standard human interface driver for all modern USB keyboards. This allows
the keyboard manufacture to develop and produce a keyboard without requiring them to
write custom software for the computer
1.2 Prior Work
Much work has been done amongst the amateur robotic community to develop platforms
that are controlled by mobile devices as shown in [3] and [4]. Additionally several
companies offer small robotic devices that can be controlled by mobile devices typically
from the Android of Apple operating systems. These systems come with proprietary
software for both the robot and the mobile device that is specifically designed to control
only the device sold by the manufacture. Figure 1, the Rover Revolution available from

2
Brookstone, is one such example which allows the end user to remotely operate the
device from an application on an Apple or Android device. This device also has
advanced capabilities that allow the user to remotely control the vehicle while also
streaming video from an onboard camera. Due to the high bandwidth requirements to
support streaming video the device utilizes WIFI instead of Bluetooth or other lower
frequency RF communication protocols. [2] Note that this software nor the
communication protocol is distributed as open source software for others to modify, or
implement in their own projects and applications.
Figure 1 - Rover Revolution Available from Brookstone [2]
Parallax a popular supplier of microcontrollers and other components commonly
used by armature robotic developers, offers tutorials and educational material for many
of their products. In one such tutorial, shown in Figure 2, Parallax demonstrates the
ability to send commands to a Propeller microcontroller remotely from a PC via a
Bluetooth Serial Port Profile. [3] Additionally the example provides open source
software for the microcontroller, mainly programs that were already available as
published open source library’s tied together with a single custom application. The
example utilizes an RN-42 Bluetooth adapter and the user sends commands to the
microcontroller via a serial terminal like HyperTerminal or in the case of the example
the Parallax Serial Terminal. This example will be used a starting point for my work on
the microcontroller side of the task. While this application demonstrates the ability to
send data over a Bluetooth connection it has essentially used the Bluetooth connection to
replace the wired connection with the computer. User input is no different than if the

3
computer was directly wired to the computer and no generic communication protocol is
established.
Figure 2 - Parallax RN-42 Bluetooth Demo [3]
An alternative approach to controlling a robot via a cell phone was demonstrated by
MicroTronics Technologies [4] the device is shown in Figure 3. In this application a call
is placed from a user’s cell phone to a cell phone mounted on the remote platform. The
platform mounted cell is connected to the microcontroller through a decoding module
which interprets the tones of the numeric keys being pressed through the headphone
jack. Commands are sent by pressing one of the numeric key on the operator’s cell
phone, frequencies are transmitted over the cell network / towers, received on the
platform mounted cell and interpreted by the microcontroller as commands. The benefits
of this set up is that it requires no additional software to be installed on the cellphone, as
it utilizes existing functionality built in to make phone calls.
Figure 3 - MicroTronics Technologies Mobile Control Robot [4]

4
The downside is that the system is limited to only 12 unique codes correlating to the 12
keys on / frequencies created by a phone (10 Numeric keys 0 through 9, the pound key
and the asterisk key) and only one command can be sent at a time. Another difference is
that the signals are sent over a cellphone network, so the range is only limited by the size
of the cell network, however the devices will only work where cell service exists and are
dependent on a network outside the users control. The Bluetooth connection I have
proposed does have a limited range which is many times smaller than that of a modern
cell network. However, it is not subject to the infrastructure requirements of a cell
network, i.e. it will operate where cell coverage is not provided. Additionally the
Bluetooth network is completely in the users control and can be optimized to meet the
requirements of the application.
1.3 Objective
I have developed a communication protocol that meets the prescribe definition of a
communication protocol as discussed earlier. Additionally I have implemented said
communication protocol and demonstrate its use in the communication between an
Android powered mobile device and a robotic platform over a Bluetooth connection.
Finally I have shown that the communication protocol and its application /
implementation produce a responsive user experience that is on par with existing radio
controlled robotic platforms.

5
2. METHODOLOGY/IMPLEMENTATION
Developing a communication protocol for use between typical electronic devices and
mobile devices such as tablets and cell phones requires that the foundation and principles
/ rules i.e. the protocol, should be transferable across any platform. However due to the
number of mobile platforms available (Windows, iOS, Blackberry, Android), the
number of data transfer methods (Bluetooth, Peer to Peer Wi-Fi, Internet, Cell Network)
and the number or electronic devices it would be an extensive task to
demonstrate/implement the communication protocol across all of the available
platforms. It would also be a trivial task in that, relatively no unique work would be
required. For the most part it would be a task of translating the code from one language
to another. Instead I plan to demonstrate a communication protocol and the
communication between an android device and a microcontroller over Bluetooth using
only open source hardware and software. This will allow me to develop the
communication protocol in a cost effective manner while still remaining flexible so that
it can be expanded to other operating systems and devices as need dictates.
2.1 Component and Software Selection
To develop and implement a communication protocol between a mobile device and
another electronic device several pieces of both software and hardware are required. On
the mobile device side both an IDE (Integrated Development Environment) and SDK
(Software Development Kit) are required for programming the electronic device.
Additionally a physical device will be required for implementation / testing. On the
Electronic device side an IDE and SDK are required for programming the
microcontroller as well a physical microcontroller and robotic platform for
implementation/testing. Additionally since Bluetooth will be used for data transfer
between the devices, a Bluetooth module that is compatible with the selected
microcontroller is required.
2.1.1 Selecting a Mobile Operating System and a Mobile Device
There are many choices to pick from when it comes to selecting a mobile platform /
operating system to demonstrate communication via Bluetooth with a microcontroller.

6
The leading operating systems include Google’s Android, Apple’s IOS, Windows
Mobile, and Blackberry all of which offer products of similar technological
implementations. That is all of these devices are available with similar processing
power, memory (RAM and ROM), screen size, screen resolution, touch screen
capability, battery life, Bluetooth, Wi-Fi, GPS and cell network capabilities. With no
limiting factors on the selection of an OS from an available / required hardware
standpoint, the decision came down to two factors, the market share or number of
devices in service for the operating system and the ability to provide an open source
solution. Googles Android OS is known for its open source developer friendly
environment and as of May 2012 it has surpassed Apple IOS in terms of market share in
mobile devices, Figure 4. As of the end of 2013 Android represents over 43% of the
market compared to Apple its closest competitor which has just over 20% of the market.
Figure 4 – World Wide Mobile OS Market Share [5]
With the Android OS selected as the operating system of choice for development,
the next question that arises is which variant or platform version will be targeted for the
application development. Platform versions in Android are tracked by API level, and to
most they are known by their clever nick-names like Gingerbread, Ice-Cream Sandwich

7
or Kit-Kat. Google has made a pattern out of naming their new platform versions after
desserts or snacks in alphabetical order. Table 1 contains a list of the current API levels,
Android version numbers and platform code names from version 1.0 or “Base” to their
latest version Android 4.4 / API 19 or “Kit Kat”. API levels are analogous to the
different versions of Windows operating system like XP, Vista, Windows 7 or Windows
8. Each new API brings in various software and hardware support updates like the ability
to support a GPS module or the ability to support multi-point touch screen displays.
Table 1 - List of Android API Levels and Corresponding Code Names [6]
Android applications designed for and that utilize features available only in later
versions of Android will not be capable of running on earlier version or API levels of the
operating system. Therefore the selection of a platform will mean that all devices
running an older version of Android will be incompatible, reducing the number of

8
devices capable of running the application. Since our application will require Bluetooth
functionality we can eliminate any platform versions that did not support Bluetooth. The
Bluetooth Adapter Class [7] was first incorporated into Android 2.0, API level 5 AKA
Eclair, which sets the minimum API level that will be able to support our needs.
Additionally Android publishes statistics on a monthly basis that tells us the relative
number of devices that run a given platform version [8].
Figure 5 - Relative Number of Devices by Platform Number / API level / Code Name [8]
Based on Figure 5 as of April 2014 approximately 81% of Android devices run Android
4.0 (API 15) or later. Since we want to maintain a similar user experience and style to
what the majority of users are currently used to experiencing, and selecting an older
android version as the target version may make the application appear older and outdated
compared to newer applications Android 4.0 (API15) “Ice Cream Sandwich” will be
selected as the target Android platform. Ultimately this means that the application
developed will not be capable of running on 19% of Android devices currently in use,
however this number will continue to decrease as these devices older are phased out and
users upgrade to newer devices.
With a target mobile operating system selected the next choice is selecting a
mobile device that utilizes the selected operating system. Fortunately I currently own
two mobile device that uses the Android operating system, a cellphone and a tablet. Both
devices run Android Ice Cream Sandwich or later operating systems, and while the tablet
may boast higher performance / processing power I have selected the cell phone Figure 6

9
as the test platform. The reason for this selection was due to the form factor of the
device, the 10” tablet was difficult to hold with two hands and still use my thumbs to
control the device, however the smaller 5” cell phone fit nicely within my hands similar
to a game controller or an R/C car controller. Additionally a 7” or 8” tablet would also
likely work just as well, and ultimately it’s a matter of personal taste.
Figure 6 – Mobile Platform, Samsung Galaxy Note II Running Android 4.3 Ice Cream Sandwich
2.1.2 Selecting a Microcontroller and Robotic Platform
The robotic platform could take many forms for one to demonstrate control of it. It could
be as simple as just a microcontroller with an output to a monitor / terminal showing the
change in variables being controlled. However this method of implementation would not
provide a good feel for the speed and responsiveness of the control of the robot. To
better perceive / judge these qualities I decided it would be best to implement a robotic
platform capable of movement. This would provide a platform that could be compared to
the responsiveness found and expected by users of existing “Radio” controlled robotic
platforms. I selected the ActivityBot Robot Kit, Figure 7 (as shown with optional
Propeller Activity Board Attached) manufactured by Parallax. The ActivityBot Kit
provides a platform that is capable of movement as provided by the two wheels
connected directly to continuous rotation servos. Since it only has two wheels a third
sliding post is provided for stability. It also changes direction using skid steering, that is
to turn left the right wheel must be rotating faster than the left wheel. It is also capable of
turning in place by rotating the wheels in opposite directions. Additionally the

10
ActivityBot is compatible with a number of microcontroller boards produced by
Parallax.
Figure 7 - ActivityBot Robot Kit [9]
When selecting a microcontroller for this project I considered a number of factors to
help make my decision. Factors considered included startup cost, open source IDE,
compatibility with existing add-ons / robotic platforms, the availability of documentation
and the architecture / processing power of the microcontroller. I found that there were
two microcontroller platforms at the forefront of the hobby / armature robotics
community, the Arduino platform and the Parallax Propeller platform. Both platforms
compared equally across many aspects as both offered products with a 32-bit processor,
both offer free open source IDE’s, both are in the same price range, both offer a large
number of add-ons / compatible robotic platforms and both have a large online support
community. I did however find two differences that for my application were the deciding
factor in selecting the Propeller Activity Board from Parallax Figure 8 over a similar
board from Arduino. The Propeller microcontroller has a unique architecture unlike
many others including the Arduino, while most contain a single processor or cog the
Propeller contains 8 independent 32-bit processors.
11
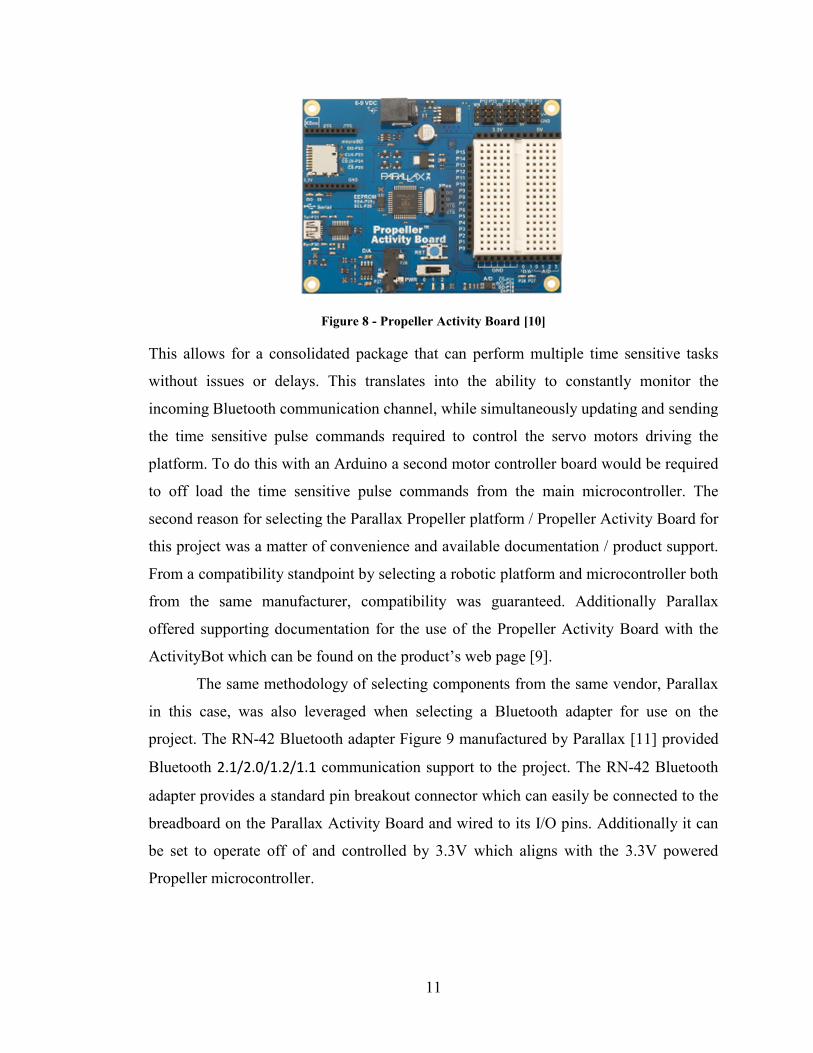
Figure 8 - Propeller Activity Board [10]
This allows for a consolidated package that can perform multiple time sensitive tasks
without issues or delays. This translates into the ability to constantly monitor the
incoming Bluetooth communication channel, while simultaneously updating and sending
the time sensitive pulse commands required to control the servo motors driving the
platform. To do this with an Arduino a second motor controller board would be required
to off load the time sensitive pulse commands from the main microcontroller. The
second reason for selecting the Parallax Propeller platform / Propeller Activity Board for
this project was a matter of convenience and available documentation / product support.
From a compatibility standpoint by selecting a robotic platform and microcontroller both
from the same manufacturer, compatibility was guaranteed. Additionally Parallax
offered supporting documentation for the use of the Propeller Activity Board with the
ActivityBot which can be found on the product’s web page [9].
The same methodology of selecting components from the same vendor, Parallax
in this case, was also leveraged when selecting a Bluetooth adapter for use on the
project. The RN-42 Bluetooth adapter Figure 9 manufactured by Parallax [11] provided
Bluetooth 2.1/2.0/1.2/1.1 communication support to the project. The RN-42 Bluetooth
adapter provides a standard pin breakout connector which can easily be connected to the
breadboard on the Parallax Activity Board and wired to its I/O pins. Additionally it can
be set to operate off of and controlled by 3.3V which aligns with the 3.3V powered
Propeller microcontroller.

12
Figure 9 - RN-42 Bluetooth Adapter [11]
The RN-42 module communicates with the Propeller microcontroller via asynchronous
serial interface with RTS/CTS flow control at a user programmed baud rate which was
set to 9600 bps for compatibility with the microcontroller. Further support information
and examples of use with the Propeller microcontroller can be found on the product’s
web page [11].
The fully assembled Robotic Platform is shown in Figure 10,
Figure 10 - Assembled Robotic Platform with Bluetooth Adapter
while the system wiring schematic is shown in Figure 11.

13
Figure 11 - System Wiring Diagram for the Robotic Platform and Bluetooth Adapter
2.1.3 Setting up the Development Environment, Android & Propeller
Providing a full description of how to download, install, and configure the Android and
Propeller development environments is outside the scope of this project. However below
is a brief description of the software required as well as links to web pages that will go
into full detail on the subject.
Google has a website [12] completely devoted to Android Developers, this site
provides developers with free training modules, full library support of the Android APIs
(Application Programming Interfaces) and instructions on how to download and install
the latest Android development environment also called the Android SDK (Software
Development Kit) [13]. The kit includes the Eclipse IDE (Integrated Development
Environment) the ADT (Android Developer Tools) plugin and other required items. A
full list of system and software requirements is available on the webpage as well. Java is
the foundation or base of the Android programming language with specific libraries
added for the increased or specific functionality of Android powered devices. The
14
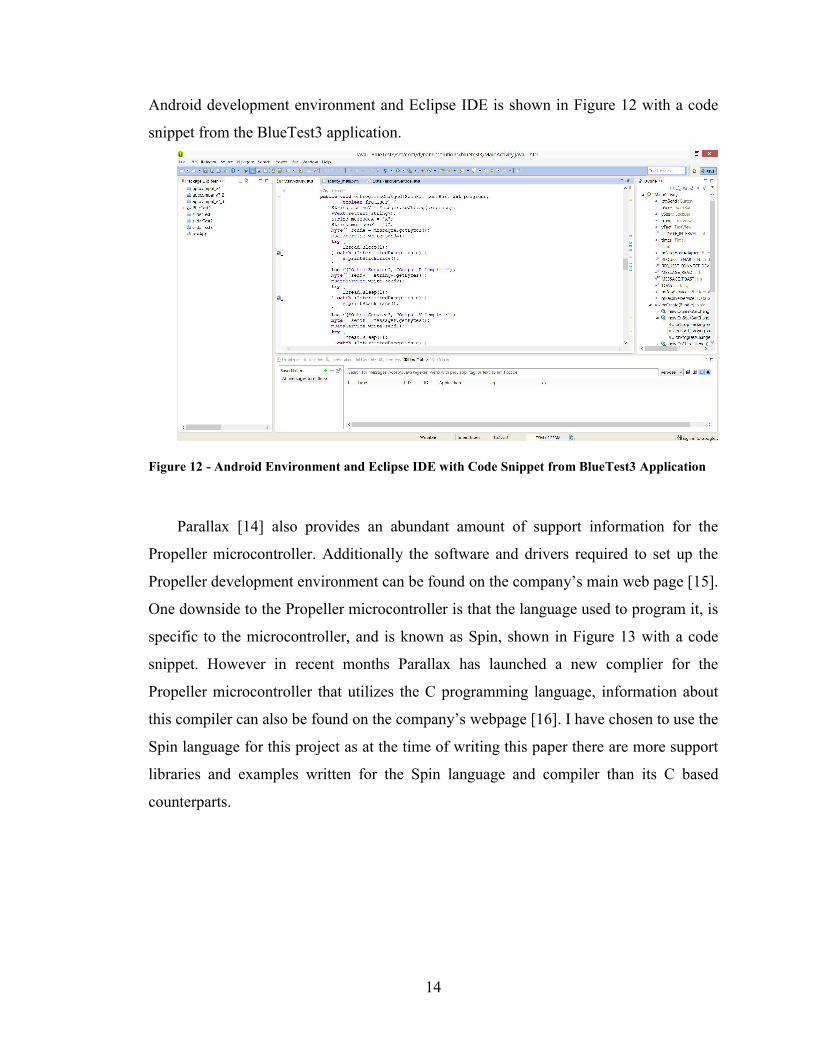
Android development environment and Eclipse IDE is shown in Figure 12 with a code
snippet from the BlueTest3 application.
Figure 12 - Android Environment and Eclipse IDE with Code Snippet from BlueTest3 Application
Parallax [14] also provides an abundant amount of support information for the
Propeller microcontroller. Additionally the software and drivers required to set up the
Propeller development environment can be found on the company’s main web page [15].
One downside to the Propeller microcontroller is that the language used to program it, is
specific to the microcontroller, and is known as Spin, shown in Figure 13 with a code
snippet. However in recent months Parallax has launched a new complier for the
Propeller microcontroller that utilizes the C programming language, information about
this compiler can also be found on the company’s webpage [16]. I have chosen to use the
Spin language for this project as at the time of writing this paper there are more support
libraries and examples written for the Spin language and compiler than its C based
counterparts.

15
Figure 13 - Spin IDE with Code Snippet from the PBAA_v0.7.spin Program
2.2 Communication Protocol and Control Logic Design
In the next section I will elaborate on the communication protocol designed and created
for implementation between the mobile operating system and the robotic platform.
Additionally I will describe at a high level, the control logic implemented on both the
Android device and the Propeller controlled robotic platform.
2.2.1 Development of a Communication Protocol
In its most basic form the communication protocols purpose is to serve as a common
language that can be interpreted by any device design to accept the language and rules of
the communication protocol. A device receiving a message per the communication
protocol would not care how the message was generated or by what type of device the
message was generated from. Additionally, the device generating the message would not
care what type of device the message is going to. This is because compatibility between
the two devices is guaranteed based on following the rules of the protocol.
To suit the needs of this project while remaining general enough that its
implementation could be widely accepted I set out to create as basic a communication
protocol as possible. This was in an attempt to make the requirements imposed on

16
devices as basic as possible in order to capture as many devices as possible. The rules of
the protocol are as follows:
1. The device should parse all messages and transmit them a single byte of data at
a time.
2. The data must be transmitted as 8-bit ASCII (American Standard Code for
Information Interchange) characters.
3. The first character must be an Alpha and is the Index that represents the
parameter the following data will be relative to.
4. The characters following the index, i.e. the second and so forth bytes must be
numeric as the expectation is they will be converted to and stored as a single
number. This number can contain up to 10 characters and its numeric value must
not exceed 2,147,483,647. This value may be positive or negative.
5. The last character of the message must be an “!” (Exclamation Point). This acts
as a stop byte and lets the program know that the message is complete.
An example of a message written to the rules of the communication can be seen in
Figure 14. Note that the example message shown “X123!” is displayed in its symbol
format per the ASCII code. A conversion chart between the Symbol, Decimal, and
Binary formats for the first 128 ASCII characters is included in Appendix 6.1.
Figure 14 - Example Message per the Communication Protocol

17
As an example “X123!” broken down and converted to binary format would be
displayed as “1011000110001110000110011100001”. This communication protocol
establishes the ability to send up to 52 unique parameters (includes upper and lower case
alphas) with assigned values up to 10 characters long. The reason for the 10 character
2,147,483,647 numeric value limitation is due to the 32 bit architecture of the Propeller
microcontroller. The value 2,147,483,647 which can be represented in binary as
“1111111111111111111111111111111” is the largest value that can be stored in a
single variable or register of a 32 bit microcontroller.
2.2.2 Implementing and Demonstrating the Communication Protocol
To demonstrate the applicability of the protocol designed, I implemented its use on the
communication between a mobile operating system, Android, and a robotic platform, the
Parallax ActivityBot over Bluetooth. In the actual implementation of the communication
protocol an additional level of detail is required. As noted earlier the first character
transmitted in the message represents the Index or parameter of the data being
transferred. In practical terms it is a label for the data so that when the data is received
the receiving device knows how to handle it. To properly use the index I must establish
the index values required and assign them their respective functions. Due to the simple
nature of the robotic platform selected all that is needed to control its movement is a
value to control its speed and a value for its direction. This will also be true for almost
all wheeled robotic platforms. Indexes and their corresponding incarnations on the
Android device and ActivityBot are listed in Table 2.
Table 2 - Correlation between Index, its Meaning on the Android Device and the Robot
Furthermore, to properly implement the communication protocol, limits and
boundaries of the parameters being transmitted must be defined and correlated in terms
of numeric value, their physical appearance on the user interface and their expected
effect on the robotic platform. Table 3 contains the numeric value boundaries and their
correlation to the Android application and the Robotic platform. Note that the values are
Index Android Correlation Robotic Platform Correlation
A Vertical Slider Position Speed
B Horizontal Slider Position Direction

18
to a degree arbitrary, as the important item is consistency in their meaning between the
Android application and the robot. The values selected and their correlations were
chosen based in that they appeared convenient and logical. As shown below in Table 3
the numeric value 100 represent full speed forward on the robotic platform and on the
android application it represents the vertical slider in its topmost position. The
parameters are arbitrary in the sense that the numeric value 150 representing full speed
forward could be implemented with little to no effect on the results.
Table 3 - Correlation between Numerical Value, its Physical Implementation on the Android
Application and the Robotic Platform for Parameters A & B
Additionally, before we can dive into the implementation of the protocol on the
Android and robotic platforms, it is important to create a roadmap or high level system
block diagram describing the flow of input form the user to the eventual signals that will
be sent to the motors on the robotic platform. The block diagram governing the entire
system can be seen in Figure 15. This diagram shows which tasks will be the
responsibility of the Android device and which operations the robotic platform will be
responsible for. Additional block diagrams showing in greater detail the operations on
the individual devices as well as their interaction are included in later sections of this
report.
Android Correlation Robotic Platform Correlation Android Correlation Robotic Platform Correlation
100 Slider in topmost position Full speed forward Slider in rightmost position Full turn right
50 Slider in central position Neutral Slider in center position Neutral
0 Slider in bottommost position Full speed reverse Slider in leftmost position Full turn left
Parameter ANumeric Value
Parameter B

19
Figure 15 - Level 0 System Block Diagram
2.2.2.1 Implementation of the Communication Protocol on the Android Device
To implement the communication protocol on the Android powered mobile device one
must first create an Android application. In addition to the behind the scenes code that
runs the Android application, which is responsible for taking the users input and
converting it into what will eventually become messages sent via the communication
protocol, a large part of the Android application development is the user interface. To
create the user interface for controlling a wheeled robotic platform I decided to mimic as
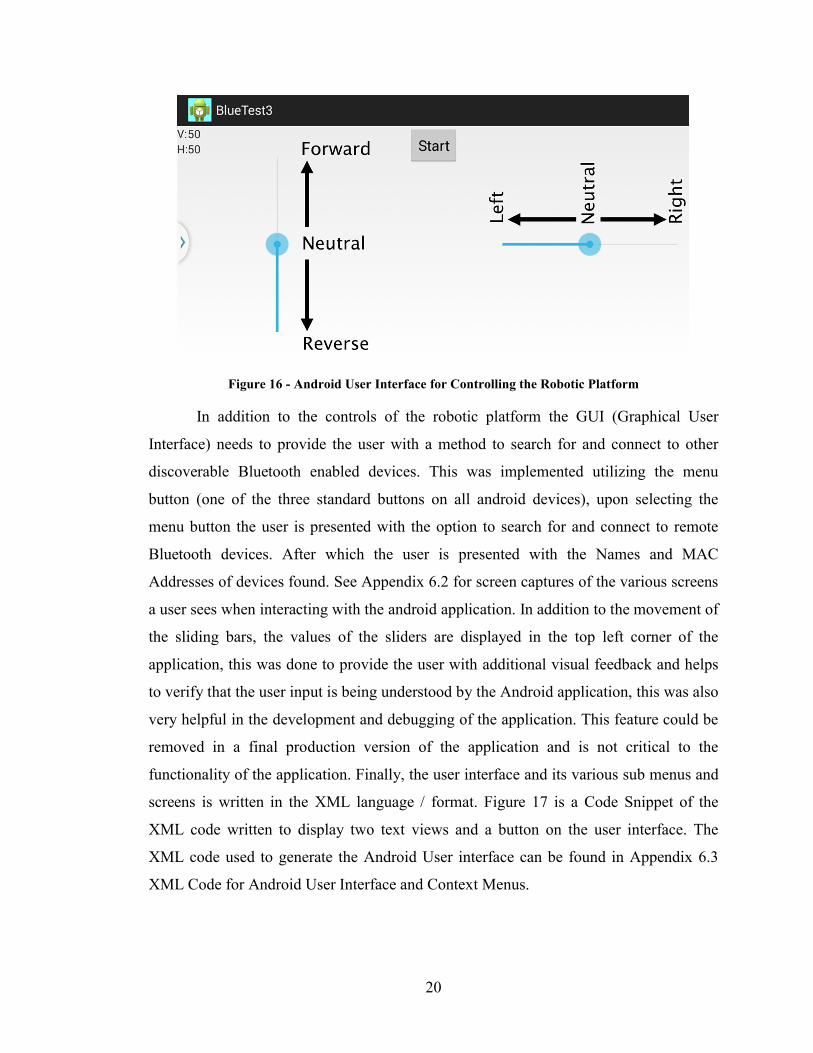
closely as possible a standard remote that would be used to control a RC car Figure 16.
A vertical scrolling bar will be used to control the speed of the robot, while a similar
horizontal scrolling bar will be used to control the direction of the robot.
20
Figure 16 - Android User Interface for Controlling the Robotic Platform
In addition to the controls of the robotic platform the GUI (Graphical User
Interface) needs to provide the user with a method to search for and connect to other
discoverable Bluetooth enabled devices. This was implemented utilizing the menu
button (one of the three standard buttons on all android devices), upon selecting the
menu button the user is presented with the option to search for and connect to remote
Bluetooth devices. After which the user is presented with the Names and MAC
Addresses of devices found. See Appendix 6.2 for screen captures of the various screens
a user sees when interacting with the android application. In addition to the movement of
the sliding bars, the values of the sliders are displayed in the top left corner of the
application, this was done to provide the user with additional visual feedback and helps
to verify that the user input is being understood by the Android application, this was also
very helpful in the development and debugging of the application. This feature could be
removed in a final production version of the application and is not critical to the
functionality of the application. Finally, the user interface and its various sub menus and
screens is written in the XML language / format. Figure 17 is a Code Snippet of the
XML code written to display two text views and a button on the user interface. The
XML code used to generate the Android User interface can be found in Appendix 6.3
XML Code for Android User Interface and Context Menus.

21
Figure 17 - Android User Interface Code Snippet
In addition to the user Interface the behind the scenes control logic written in
Java for the Android application has an even larger role to play. This is where all of the
activity takes place to support the user interface, interpret user input, manage the
Bluetooth connection / data transmissions, and last but certainly not least to implement
mistake proofing features like ensuring the Bluetooth device is enabled before starting
the application. Figure 18 is a block diagram that represents the process for connecting
to a remote discoverable Bluetooth enabled device from the Android device. Note that
the application ensures that Bluetooth is enabled on the mobile device, requesting user
input when required or else the application is terminated. Note also that it is possible to
write an application that will on its own enable Bluetooth communication without
notifying or requesting permission from the user. However this is generally frowned
upon by the Android development community as well as most application users as there
is an implicit trust among users that one would not have written an application that may
harm their device or act in any malicious manner. When applications start to modify the
state of the device without first requesting permission that trust can be lost very quickly
and is not likely to be regained. Java source code supporting the Android application can
be found in Appendix 6.4. Additionally, screen captures of the user interface showing

22
the automated prompts as well as the other screens the user will see during the Bluetooth
connection process can be seen in Appendix 6.2 Android Device User Interface Screen
Captures.
Figure 18 - Level 1 Block Diagram Android Process for Connecting to a Remote Bluetooth Device
In addition to detecting and connecting to a remote Bluetooth device the Android
application is also responsible for obtaining the user’s input through the user interface
and converting the gestures and motions of the user’s hand on the touch screen into input
for controlling the robotic platform. Ultimately, the application takes the user’s input,
constructs messages that fit the established communication protocol and then transmits
them over the Bluetooth connection. A block diagram of the process implemented can be
seen in Figure 19. Note that at this point a successful connection with a remote device
has already been established. Also note that this process is repeated as to continuously
monitor user input and transfer data to the remote device. It is also worth noting that data
transmission is triggered by user input, if user input is not received or remains
unchanged over a period of time, data is not transmitted. Keep in mind that this is just
one method for implementing the communication protocol, another approach could have
been to transmit updated values of the sliders at a fixed time interval independent of
whether the input had changed. The Java source code associated with the block diagram

23
from Figure 19 can be found in Appendix 6.3.6. Likewise relevant screen captures of the
user interface can be found in Appendix 6.2.
Figure 19 - Level 1 Block Diagram for Reading User Input and Transmitting to a Remote Device
2.2.2.2 Implementation of the Communication Protocol on the Robotic Platform
The task of implementing the communication protocol on the robotic platform
and Propeller microcontroller is similar to that of its implementation on the Android
device. However, there is one key difference that simplifies to some degree the task on
the robotic platform, no user interface is required. While instead of interfacing with a
user and obtaining input, the Propeller microcontroller is tasked with reading input per
the communication protocol and outputting signals to drive the platforms motors.
To establish communication between the Bluetooth module and the Propeller
microcontroller as well as setting the module in the correct mode for accepting
connection attempts, the module must first be configured. This is done via the
asynchronous serial interface with RTS/CTS flow control which can be established
between the Propeller and the Bluetooth module. Supporting documentation and the
products user manual go into sufficient detail on how to set up and configure the
Bluetooth module based on the desired application, both are available on the product’s

24
webpage [11]. Additionally the Propeller .Spin code used to configure and then verify
the state of the Bluetooth adapter can be found in Appendix sections 6.5.1 and 6.5.2.
The task of implementing the communication protocol on the ActivityBot robotic
platform utilizes the multiple cores of the Propeller microcontroller. Since the
communication protocol does not specify when or how frequent data will be transmitted
and received, the robotic platform must be ready and capable of receiving a message at
any time. For example on a single processor microcontroller, if a message was received
while the microcontroller was processing a piece of data that was received earlier or
outputting a pulse command to one of the servo motors the incoming message could be
missed. However, since the Propeller microcontroller is capable of preforming multiple
tasks simultaneously by utilizing its 8 processors or cogs, it can have one processor that
is solely devoted to listening for incoming data, helping to ensure a message is not
missed. This can be done while other cogs work to interpret the data received and
generate the pulse commands require to run the platforms motors.
Figure 20 - Level 1 Block Diagram of the Propeller Microcontroller and the Interaction between
Cogs
A block diagram of the processes executed on each cog as well as the interaction
between cogs and the shared global memory can be seen in Figure 20. Additionally the

25
.Spin source code implemented on the Propeller microcontroller can be found in
Appendix 6.5.3 with supporting libraries in appendix sections 6.5.4 and 6.5.5.

26
3. RESULTS AND DISCUSSION
To determine if the attempt to create and implement a communication protocol between
a mobile device and a robotic platform was successful I determined it was best to
implement the device on physical hardware. This would provide means of comparison
between existing radio controlled robotic platforms, even something as simple as an RC
car would serve as an acceptable analog for comparison.
Along the way I uncovered several unforeseen challenges that did create good
learning opportunities, some directly relevant to my work and others not as much. One
such example was the use of the Easy Bluetooth Module which was offered by Parallax
for some period of time. The most notable difference between the Easy Bluetooth
Module and the RN-42 Bluetooth Adapter was the lack of RTS/CTS flow control for the
asynchronous serial interface between the Bluetooth module and the microcontroller.
While initially I did not believe this would be an issue, I was unable to write an
application that was able to maintain a good connection. The adapter and the Propeller
were constantly getting out of sync causing slow transfer rates and data loss. This issue
was especially challenging to debug as it was difficult to determine if the issue was with
the data being transmitted over Bluetooth or if it was the sync between the module and
the Propeller. However, I am now confident that the lack of flow control was the source
of the problem as all sync issues were resolved with the implementation of the RN-42
module with no major changes to the structure of the Propeller code. It is also worth
noting that the Easy Bluetooth module is now discontinued, however Parallax does still
offer support for the product on their web page.
As an additional means for measuring success I set a bench mark for the minimum
number of data transfers or parameter updates that needed to be able to occur per second.
This was in an attempt to quantify the responsiveness of the platform and the
implementation of the communication protocol. Additionally, it would help flush out if
the protocol had any inherent attributes that were not conducive to rapid data transfer. I
initially had set out to show that the given parameters could be updated 4 times per
second, this should ensure that the robotic platform would be responsive and react to
user input without a significant visual delay. With some simple testing I observed that
the configuration was capable of preforming over 20 updates per second. The capability

27
for this high refresh rate meant that the robotic platform would be able to react to the
users input with virtually no visual delay, on par with existing R/C solutions and
products currently on the market.
A video of the application and robotic platform in action has been uploaded to You
Tube [16].

28
4. CONCLUSIONS
The intent of this project was to demonstrate the possibility to create a communication
protocol that could be implemented over Bluetooth between a mobile device and a
robotic platform. The intent being that if the robotic platform was designed to receive
messages per the protocol, it could be implemented without creating a unique application
on the mobile device for each robotic platform.
I have shown in my creation of an Android application that outputs messages per the
communication protocol and development of a robotic platform that accepts messages
per the communication protocol and response with the appropriate actions that it is
possible to implement such a communication protocol. However, there is still further
work to be done, as I have thus far only defined two parameters in the communication
protocol, speed and direction or A and B. While these two parameters are sufficient for a
simple two wheeled robot they would not be sufficient for control of say a helicopter
which would require at least 4 parameters for control over roll, pitch, yaw, and elevation.
I can envision a protocol that takes advantage of the full 52 upper and lower case
characters for all sorts of different parameters and for all sorts of different robotic
platforms. Additionally, the protocol can also be utilized to transmit data from the
robotic platform back to the Android application possible using upper versus lower case
letters to distinguish the difference of in the direction of flow of the data.

29
5. REFERENCES
[1] Definition of a communication protocol
http://www.webopedia.com/TERM/C/communications_protocol.html
[2] Rover Revolution™ App-Controlled Wireless Spy Vehicle
http://www.brookstone.com/rover-revolution-wireless-spy-vehicle
[3] Parallax RN-42 Bluetooth to PC demo
http://learn.parallax.com/project/rn-42-bluetooth-pc-demo
[4] MicroTronics Technologies Mobile Controlled Robot
http://www.projectsof8051.com/mobile-controlled-robot/
[5] Mobile Operating System World Wide Market Share – International Business Times
http://www.ibtimes.com/android-vs-ios-whats-most-popular-mobile-operating-system-
your-country-1464892
[6] Android platform names, API levels, and Code names
http://developer.android.com/guide/topics/manifest/uses-sdk-element.html
[7] Bluetooth Adapter Class
http://developer.android.com/reference/android/bluetooth/BluetoothAdapter.html
[8] Relative number of devices running a given Android version or API level
http://developer.android.com/about/dashboards/index.html
[9] ActivityBot Robot Kit manufactured by Parallax
http://www.parallax.com/product/32500
[10] Propeller Activity Board Manufactured by Parallax
http://www.parallax.com/product/32910
[11] RN-42 Bluetooth Adapter manufactured by parallax
http://www.parallax.com/product/30086
[12] Android Developers Website
http://developer.android.com/index.html
[13] Android SDK download link
http://developer.android.com/sdk/index.html
[14] Parallax Main Webpage
http://www.parallax.com/

30
[15] Propeller software and driver download
http://www.parallax.com/downloads/propeller-tool-software
[16] You Tube video of application and robotic platform in action
http://youtu.be/ytDogEmw2ZQ

31
6. APPENDICES
6.1 Table of the first 128 Characters of the ASCII Code
Table 4 - First 128 Characters of the ASCII code
Decimal BIN Symbol Description Decimal BIN Symbol Description
0 0 NUL Null char 64 1000000 @ At symbol
1 1 SOH Start of Heading 65 1000001 A Uppercase A
2 10 STX Start of Text 66 1000010 B Uppercase B
3 11 ETX End of Text 67 1000011 C Uppercase C
4 100 EOT End of Transmission 68 1000100 D Uppercase D
5 101 ENQ Enquiry 69 1000101 E Uppercase E
6 110 ACK Acknowledgment 70 1000110 F Uppercase F
7 111 BEL Bell 71 1000111 G Uppercase G
8 1000 BS Back Space 72 1001000 H Uppercase H
9 1001 HT Horizontal Tab 73 1001001 I Uppercase I
10 1010 LF Line Feed 74 1001010 J Uppercase J
11 1011 VT Vertical Tab 75 1001011 K Uppercase K
12 1100 FF Form Feed 76 1001100 L Uppercase L
13 1101 CR Carriage Return 77 1001101 M Uppercase M
14 1110 SO Shift Out / X-On 78 1001110 N Uppercase N
15 1111 SI Shift In / X-Off 79 1001111 O Uppercase O
16 10000 DLE Data Line Escape 80 1010000 P Uppercase P
17 10001 DC1 Device Control 1 (oft. XON) 81 1010001 Q Uppercase Q
18 10010 DC2 Device Control 2 82 1010010 R Uppercase R
19 10011 DC3 Device Control 3 (oft. XOFF) 83 1010011 S Uppercase S
20 10100 DC4 Device Control 4 84 1010100 T Uppercase T
21 10101 NAK Negative Acknowledgement 85 1010101 U Uppercase U
22 10110 SYN Synchronous Idle 86 1010110 V Uppercase V
23 10111 ETB End of Transmit Block 87 1010111 W Uppercase W
24 11000 CAN Cancel 88 1011000 X Uppercase X
25 11001 EM End of Medium 89 1011001 Y Uppercase Y
26 11010 SUB Substitute 90 1011010 Z Uppercase Z
27 11011 ESC Escape 91 1011011 [ Opening bracket
28 11100 FS File Separator 92 1011100 \ Backslash
29 11101 GS Group Separator 93 1011101 ] Closing bracket
30 11110 RS Record Separator 94 1011110 ^ Caret - circumflex
31 11111 US Unit Separator 95 1011111 _ Underscore
32 100000 Space 96 1100000 ` Grave accent
33 100001 ! Exclamation mark 97 1100001 a Lowercase a
34 100010 " Double quotes (or speech marks) 98 1100010 b Lowercase b
35 100011 # Number 99 1100011 c Lowercase c

32
36 100100 $ Dollar 100 1100100 d Lowercase d
37 100101 % Percent 101 1100101 e Lowercase e
38 100110 & Ampersand 102 1100110 f Lowercase f
39 100111 ' Single quote 103 1100111 g Lowercase g
40 101000 ( Open parenthesis (or open bracket) 104 1101000 h Lowercase h
41 101001 ) Close parenthesis (or close bracket) 105 1101001 i Lowercase i
42 101010 * Asterisk 106 1101010 j Lowercase j
43 101011 + Plus 107 1101011 k Lowercase k
44 101100 , Comma 108 1101100 l Lowercase l
45 101101 - Hyphen 109 1101101 m Lowercase m
46 101110 . Period, dot or full stop 110 1101110 n Lowercase n
47 101111 / Slash or divide 111 1101111 o Lowercase o
48 110000 0 Zero 112 1110000 p Lowercase p
49 110001 1 One 113 1110001 q Lowercase q
50 110010 2 Two 114 1110010 r Lowercase r
51 110011 3 Three 115 1110011 s Lowercase s
52 110100 4 Four 116 1110100 t Lowercase t
53 110101 5 Five 117 1110101 u Lowercase u
54 110110 6 Six 118 1110110 v Lowercase v
55 110111 7 Seven 119 1110111 w Lowercase w
56 111000 8 Eight 120 1111000 x Lowercase x
57 111001 9 Nine 121 1111001 y Lowercase y
58 111010 : Colon 122 1111010 z Lowercase z
59 111011 ; Semicolon 123 1111011 { Opening brace
60 111100 < Less than (or open angled bracket) 124 1111100 | Vertical bar
61 111101 = Equals 125 1111101 } Closing brace
62 111110 > Greater than (or close angled
bracket) 126 1111110 ~
Equivalency sign - tilde
63 111111 ? Question mark 127 1111111 Delete

33
6.2 Android Device User Interface Screen Captures
Figure 21 - BlueTest 3 Application Launched from the Application Menu
Figure 22 - User Menu within the Application

34
Figure 23 - List of Bluetooth Devices Found for Pairing
Figure 24 - Screen Prior to Selecting Start, Slider Bars Disabled

35
Figure 25 - Screen after Selecting Start, Slider Bars Enabled
Figure 26 - Screen Requesting the User to Enable Bluetooth on the Device

36
Figure 27 - Alerting the User of Successfully Enabling Bluetooth
Figure 28 - Alerting the User, Bluetooth Failed to Initialize

37
Figure 29 - Example of User Input
6.3 XML Code for Android User Interface and Context Menus
6.3.1 Main User Interface XML Code
<RelativeLayout xmlns:android="http://schemas.android.com/apk/res/android" xmlns:tools="http://schemas.android.com/tools" android:layout_width="fill_parent" android:layout_height="fill_parent" tools:context=".MainActivity" android:orientation="horizontal" > <TextView android:id="@+id/txtOut" android:layout_width="fill_parent" android:layout_height="wrap_content"/> <Button android:id="@+id/btn_Send" android:layout_width="wrap_content" android:layout_height="wrap_content" android:layout_alignParentTop="true" android:layout_centerHorizontal="true" android:text="Start" /> <TextView android:id="@+id/textView1" android:layout_width="wrap_content" android:layout_height="wrap_content" android:layout_alignParentLeft="true" android:layout_alignParentTop="true" android:text="V:" />

38
<TextView android:id="@+id/textView2" android:layout_width="wrap_content" android:layout_height="wrap_content" android:layout_alignParentLeft="true" android:layout_below="@+id/txtOut" android:text="H:" /> <TextView android:id="@+id/vTextView" android:layout_width="wrap_content" android:layout_height="wrap_content" android:layout_above="@+id/hTextView" android:layout_toRightOf="@+id/textView2" android:text="50" /> <TextView android:id="@+id/hTextView" android:layout_width="wrap_content" android:layout_height="wrap_content" android:layout_alignBaseline="@+id/textView2" android:layout_alignBottom="@+id/textView2" android:layout_alignLeft="@+id/vTextView" android:text="50" /> <SeekBar android:id="@+id/vSeekBar1" android:layout_width="250dip" android:layout_height="wrap_content" android:layout_alignParentLeft="true" android:layout_centerVertical="true" android:rotation="270" /> <SeekBar android:id="@+id/hSeekBar1" android:layout_width="250dip" android:layout_height="wrap_content" android:layout_alignParentRight="true" android:layout_alignTop="@+id/vSeekBar1" />
6.3.2 Discovered and Connected Bluetooth Device List
<?xml version="1.0" encoding="utf-8"?> <LinearLayout xmlns:android="http://schemas.android.com/apk/res/android" android:layout_width="match_parent" android:layout_height="match_parent" android:orientation="vertical" > <TextView android:id="@+id/title_paired_devices" android:layout_width="match_parent" android:layout_height="wrap_content" android:text="@string/title_paired_devices" android:visibility="gone" android:background="#666" android:textColor="#fff"

39
android:paddingLeft="5dip" /> <ListView android:id="@+id/paired_devices_list" android:layout_width="match_parent" android:layout_height="wrap_content" android:stackFromBottom="true" android:layout_weight="1"/> <TextView android:id="@+id/title_new_devices" android:layout_width="match_parent" android:layout_height="wrap_content" android:text="@string/title_new_devices" android:visibility="gone" android:background="#666" android:textColor="#fff" android:paddingLeft="5dip" /> <ListView android:id="@+id/new_device_list" android:layout_width="match_parent" android:layout_height="wrap_content" android:stackFromBottom="true" android:layout_weight="1" /> <Button android:id="@+id/btn_scan" android:layout_width="match_parent" android:layout_height="wrap_content" android:text="@string/btn_scan" /> </LinearLayout>
6.3.3 Display Format of Device Names
<?xml version="1.0" encoding="utf-8"?> <TextView xmlns:android="http://schemas.android.com/apk/res/android" android:layout_width="match_parent" android:layout_height="wrap_content" android:textSize="18sp" android:padding="5dip" />
6.3.4 XML Code for Options Menu
<?xml version="1.0" encoding="utf-8"?> <menu xmlns:android="http://schemas.android.com/apk/res/android" > <item android:id="@+id/scan_and_connect" android:icon="@android:drawable/ic_menu_search" android:title="@string/scan_and_connect" /> <item android:id="@+id/discoverable" android:icon="@android:drawable/ic_menu_mylocation" android:title="@string/discoverable"/> </menu> <?xml version="1.0" encoding="utf-8"?> <menu xmlns:android="http://schemas.android.com/apk/res/android" > <item android:id="@+id/scan_and_connect" android:icon="@android:drawable/ic_menu_search" android:title="@string/scan_and_connect" />

40
<item android:id="@+id/discoverable" android:icon="@android:drawable/ic_menu_mylocation" android:title="@string/discoverable"/> </menu>
6.3.5 String Constants Referenced in the User Interface
<?xml version="1.0" encoding="utf-8"?> <resources> <string name="app_name">BlueTest3</string> <string name="scan_and_connect">Scan and Connect</string> <string name="discoverable">Make device discoverable</string> <string name="title_paired_devices">Paired Devices</string> <string name="title_new_devices">New Devices</string> <string name="btn_scan">Scan for Devices</string> <string name="scanning">Scanning for devices</string> <string name="none_paired">No devices have been paired</string> <string name="select_device">Select a device to connect to</string> <string name="none_found">No devices found</string> </resources>
6.3.6 Android Manifest File
<?xml version="1.0" encoding="utf-8"?> <manifest xmlns:android="http://schemas.android.com/apk/res/android" package="com.dynamicsolutions.bluetest3" android:versionCode="1" android:versionName="1.0" > <uses-sdk android:minSdkVersion="9" android:targetSdkVersion="17" /> <uses-permission android:name="android.permission.BLUETOOTH"/> <uses-permission android:name="android.permission.BLUETOOTH_ADMIN"/> <application android:allowBackup="true" android:icon="@drawable/ic_launcher" android:label="@string/app_name" android:theme="@style/AppTheme" > <activity android:name="com.dynamicsolutions.bluetest3.MainActivity" android:label="@string/app_name" > <intent-filter> <action android:name="android.intent.action.MAIN" /> <category android:name="android.intent.category.LAUNCHER" /> </intent-filter> </activity> <activity android:name=".DeviceListActivity"

41
android:label="@string/select_device"/> </application> </manifest>
6.4 Java Source Code for Android Device
6.4.1 Main Activity Java Code
package com.dynamicsolutions.bluetest3; import android.os.Bundle; import android.os.Handler; import android.os.Message; import android.util.Log; import android.view.Menu; import android.view.MenuInflater; import android.view.MenuItem; import android.view.View; import android.view.View.OnClickListener; import android.widget.Button; import android.widget.SeekBar; import android.widget.TextView; import android.widget.Toast; import android.widget.SeekBar.OnSeekBarChangeListener; import android.app.Activity; import android.bluetooth.BluetoothAdapter; import android.bluetooth.BluetoothDevice; import android.content.Intent; import java.util.Timer; import java.util.TimerTask; public class MainActivity extends Activity { //Declare variables and constants //Declare buttons Button btnSend; // Declare Seek Bars SeekBar hSeek; SeekBar vSeek; TextView hText; TextView vText; //Timer declarations static final int UPDATE_INTERVAL = 250; private Timer timer = new Timer(); int i; // The local Bluetooth Adapter private BluetoothAdapter mBluetoothAdapter = null;
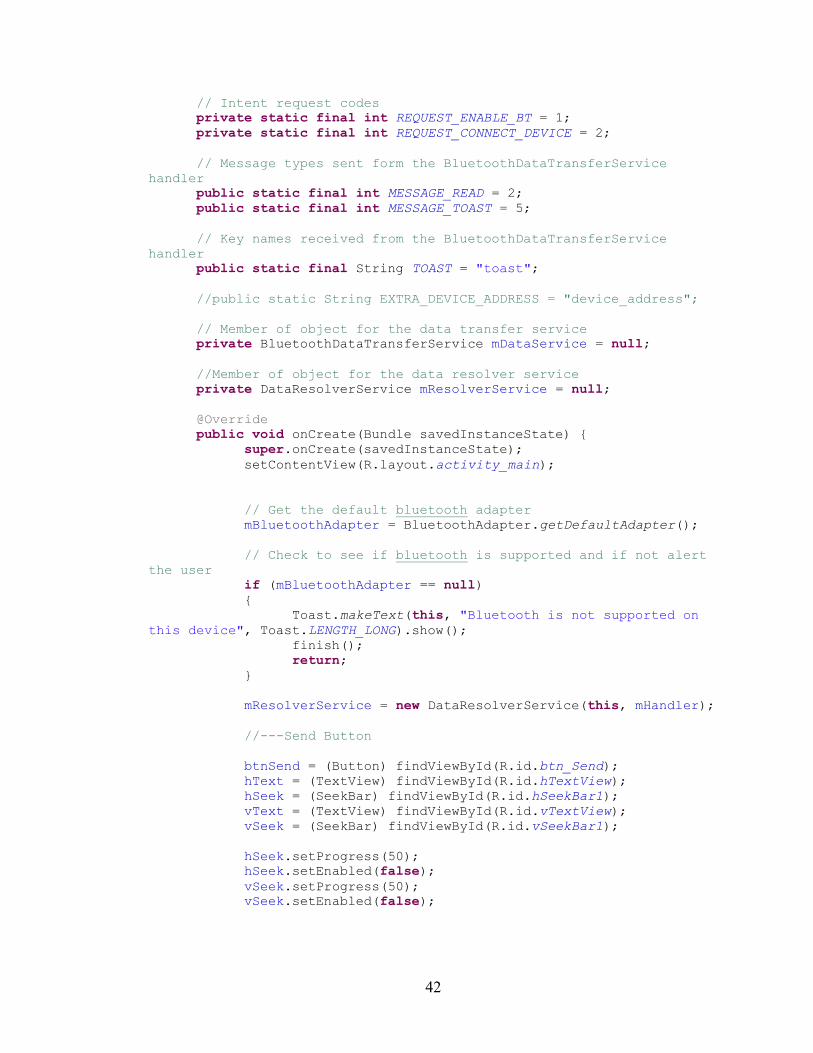
42
// Intent request codes private static final int REQUEST_ENABLE_BT = 1; private static final int REQUEST_CONNECT_DEVICE = 2; // Message types sent form the BluetoothDataTransferService handler public static final int MESSAGE_READ = 2; public static final int MESSAGE_TOAST = 5; // Key names received from the BluetoothDataTransferService handler public static final String TOAST = "toast"; //public static String EXTRA_DEVICE_ADDRESS = "device_address"; // Member of object for the data transfer service private BluetoothDataTransferService mDataService = null; //Member of object for the data resolver service private DataResolverService mResolverService = null; @Override public void onCreate(Bundle savedInstanceState) { super.onCreate(savedInstanceState); setContentView(R.layout.activity_main); // Get the default bluetooth adapter mBluetoothAdapter = BluetoothAdapter.getDefaultAdapter(); // Check to see if bluetooth is supported and if not alert the user if (mBluetoothAdapter == null) { Toast.makeText(this, "Bluetooth is not supported on this device", Toast.LENGTH_LONG).show(); finish(); return; } mResolverService = new DataResolverService(this, mHandler); //---Send Button btnSend = (Button) findViewById(R.id.btn_Send); hText = (TextView) findViewById(R.id.hTextView); hSeek = (SeekBar) findViewById(R.id.hSeekBar1); vText = (TextView) findViewById(R.id.vTextView); vSeek = (SeekBar) findViewById(R.id.vSeekBar1); hSeek.setProgress(50); hSeek.setEnabled(false); vSeek.setProgress(50); vSeek.setEnabled(false);

43
hSeek.setOnSeekBarChangeListener( new OnSeekBarChangeListener() { @Override public void onStopTrackingTouch(SeekBar seekBar) { hSeek.setProgress(50); } @Override public void onStartTrackingTouch(SeekBar seekBar) { // TODO Auto-generated method stub } @Override public void onProgressChanged(SeekBar seekBar, int progress, boolean fromUser) { String stringH = Integer.toString(progress); hText.setText(stringH); String messageB = "B"; String messageF = "!"; byte[] sendB = messageB.getBytes(); mDataService.write(sendB); try { Thread.sleep(1); } catch (InterruptedException e) { // TODO Auto-generated catch block e.printStackTrace(); } Log.d("OutputService", "Output B Complete"); byte[] sendH = stringH.getBytes(); mDataService.write(sendH); try { Thread.sleep(1); } catch (InterruptedException e) { // TODO Auto-generated catch block e.printStackTrace(); } Log.d("OutputService", "Output H Complete"); byte[] sendF = messageF.getBytes(); mDataService.write(sendF); try { Thread.sleep(1); } catch (InterruptedException e) { // TODO Auto-generated catch block e.printStackTrace(); } Log.d("OutputService", "Output F Complete"); } });

44
vSeek.setOnSeekBarChangeListener( new OnSeekBarChangeListener() { @Override public void onStopTrackingTouch(SeekBar seekBar) { vSeek.setProgress(50); } @Override public void onStartTrackingTouch(SeekBar seekBar) { // TODO Auto-generated method stub } @Override public void onProgressChanged(SeekBar seekBar, int progress, boolean fromUser) { String stringV = Integer.toString(progress); vText.setText(stringV); String messageA = "A"; String messageF = "!"; byte[] sendA = messageA.getBytes(); mDataService.write(sendA); try { Thread.sleep(1); } catch (InterruptedException e) { // TODO Auto-generated catch block e.printStackTrace(); } Log.d("OutputService", "Output A Complete"); byte[] sendV = stringV.getBytes(); mDataService.write(sendV); try { Thread.sleep(1); } catch (InterruptedException e) { // TODO Auto-generated catch block e.printStackTrace(); } Log.d("OutputService", "Output V Complete"); byte[] sendF = messageF.getBytes(); mDataService.write(sendF); try { Thread.sleep(1); } catch (InterruptedException e) { // TODO Auto-generated catch block e.printStackTrace(); } Log.d("OutputService", "Output F Complete"); } }); btnSend.setOnClickListener(new OnClickListener() {
45
public void onClick(View arg0) { vSeek.setEnabled(true); hSeek.setEnabled(true); } } ); } // End of onCreate @Override public void onStart() { super.onStart(); // If bluetooth is not enabled request that it is enabled if( !mBluetoothAdapter.isEnabled() ){ Intent enableBTIntent = new Intent(BluetoothAdapter.ACTION_REQUEST_ENABLE); startActivityForResult(enableBTIntent, REQUEST_ENABLE_BT); } } // End of onStart @Override public synchronized void onResume() { super.onResume(); } // End of on resume @Override public void onDestroy() { super.onDestroy(); if (timer != null){ timer.cancel(); }// End of if }// End of on destroy @Override public void onActivityResult(int requestCode, int resultCode, Intent data) { switch (requestCode){ case REQUEST_CONNECT_DEVICE: //When DeviceListActivity returns with a device to connect to if results ok, then launch connectDevice if(resultCode == Activity.RESULT_OK) { connectDevice(data); } break; case REQUEST_ENABLE_BT: if(resultCode == Activity.RESULT_OK){ // Bluetooth is now enabled, notify the user

46
Toast.makeText(this, "Bluetooth Enabled", Toast.LENGTH_SHORT).show(); } else { //The user chose not to enable bluetooth or there was an error Toast.makeText(this, "Bluetooth failed to initialize, exiting!", Toast.LENGTH_SHORT).show(); finish(); } } // end request code switch }// end on activity result // Creates an option menu for when the user presses the menu key @Override public boolean onCreateOptionsMenu(Menu menu){ MenuInflater inflater = getMenuInflater(); inflater.inflate(R.menu.option_menu, menu); return true; } // End of onCreateOptionsMenu @Override public boolean onOptionsItemSelected(MenuItem item){ Intent serverIntent = null; switch (item.getItemId()) { case R.id.scan_and_connect: //Launch the device list activity to see existing, find new, and select a device to connect to serverIntent = new Intent(this, DeviceListActivity.class); startActivityForResult(serverIntent, REQUEST_CONNECT_DEVICE); return true; case R.id.discoverable: //Enable bluetooth device discovery Toast.makeText(getBaseContext(), "Discover", Toast.LENGTH_SHORT).show(); return true; } // end switch return false; }// end of onOptionsItemSelected private void connectDevice(Intent data) { //Initialize the BluetoothDataTransferService to perform bluetooth connections mDataService = new BluetoothDataTransferService(this, mHandler); //Get the MAC Address String address = data.getExtras().getString(DeviceListActivity.EXTRA_DEVICE_ADDRESS); //Get the bluetooth Device object BluetoothDevice device = mBluetoothAdapter.getRemoteDevice(address);
47
// Attempt to connect to the device Toast.makeText(getBaseContext(), "Attempting to connect to " + address, Toast.LENGTH_SHORT).show(); mDataService.connect(device); } //The Handler that gets information back from the BluetoothDataTransferService private final Handler mHandler = new Handler(){ @Override public void handleMessage(Message msg) { switch (msg.what) { case MESSAGE_TOAST: Toast.makeText(getBaseContext(), msg.getData().getString(TOAST), Toast.LENGTH_SHORT).show(); break; case MESSAGE_READ: resolveData(msgFull); break; }// End of switch }// End of handleMessage };//End of mHandler private void resolveData( String inputString ){ String message = "ABCDE!"; String test = mResolverService.SortInputData(inputString); Toast.makeText(getBaseContext(), test, Toast.LENGTH_SHORT).show(); TextView txtOut = (TextView) findViewById(R.id.txtOut); txtOut.setText(test); byte[] send = message.getBytes(); mDataService.write(send); //}//End if } }// end main
6.4.2 Bluetooth Data Transfer Service
package com.dynamicsolutions.bluetest3; import java.io.IOException; import java.io.InputStream;

48
import java.io.OutputStream; import java.nio.charset.Charset; import java.util.UUID; import android.bluetooth.BluetoothAdapter; import android.bluetooth.BluetoothDevice; import android.bluetooth.BluetoothSocket; import android.content.Context; import android.os.Build; import android.os.Handler; import android.util.Log; import android.widget.Toast; public class BluetoothDataTransferService { // Member Fields private ConnectThread mConnectThread; private final BluetoothAdapter mAdapter; private final Handler mHandler; private ConnectedThread mConnectedThread; // UUID for this application - MY_UUID is the secure UUID from the google bluetooth chat example private static final UUID MY_UUID = UUID.fromString("00001101-0000-1000-8000-00805f9b34fb"); //UUID.fromString("fa87c0d0-afac-11de-8a39-0800200c9a66"); public BluetoothDataTransferService(Context context,Handler handler) { mAdapter = BluetoothAdapter.getDefaultAdapter(); mHandler = handler; } public synchronized void connect(BluetoothDevice device){ // Start the tread to connect with the given device mConnectThread = new ConnectThread(device); mConnectThread.start(); } private class ConnectThread extends Thread { private final BluetoothSocket mmSocket; private final BluetoothDevice mmDevice; private String mSocketType = "Secure"; public ConnectThread(BluetoothDevice device) { mmDevice = device; BluetoothSocket tmp = null;

49
// Get a bluetoothSocket for a connection with the given BluetoothDevice try { tmp = device.createRfcommSocketToServiceRecord(MY_UUID); }//End try catch (IOException e) { }//End Catch mmSocket = tmp; }//End of ConnectThread - public method public void run() { setName("ConnectThread" + mSocketType); //Always cancel discovery because it will slow down the connection mAdapter.cancelDiscovery(); //Make a connection to the bluetooth socket try{ //This is a blocking call and will only return on a successful connection or an exception mmSocket.connect(); }//End try catch (IOException e){ //Close the socket try{ mmSocket.close(); }//End try catch (IOException E2){ }//End catch connectionFailed(); return; }//End catch // Reset the ConnectThread because we're done synchronized (BluetoothDataTransferService.this) { mConnectThread = null; } // Start the connected thread connected(mmSocket, mmDevice, mSocketType); }//End run public void cancel() { try { mmSocket.close(); } catch (IOException e) { } }//End of cancel }//End of ConnectThread - private class

50
public void write(byte[] out) { // Create temporary object ConnectedThread r; //Synchronize a copy of the connected thread synchronized (this) { // should check for a connected thread here first // need to add code.... r = mConnectedThread; }// End of synchronized //Perform the write unsynchronized r.write(out); Log.d("Data Transfer", "Sent"); }// End of write private void connectionFailed(){ }//End of connection failed public synchronized void connected(BluetoothSocket socket, BluetoothDevice device, final String socketType) { //Start the thread to manage the connection and perfor transmission mConnectedThread = new ConnectedThread(socket, socketType); mConnectedThread.start(); }//End of connected private class ConnectedThread extends Thread { private final BluetoothSocket mmSocket; private final InputStream mmInStream; private final OutputStream mmOutStream; public ConnectedThread(BluetoothSocket socket, String socketType) { mmSocket = socket; InputStream tmpIn = null; OutputStream tmpOut = null; // Get the bluetooth socket input and output streams try { tmpIn = socket.getInputStream(); tmpOut = socket.getOutputStream(); }// End of try catch (IOException e) { //Log.e(TAG,"temp sockets not created", e); }// End of Catch mmInStream = tmpIn; mmOutStream = tmpOut; } public void run() { byte[] buffer = new byte[1024];

51
int bytes; String end = "!"; StringBuilder curMsg = new StringBuilder(); //Keep listening to the input stream while connected while(true) { try{ while (-1 != (bytes = mmInStream.read(buffer))) { curMsg.append(new String(buffer, 0, bytes, Charset.forName("UTF-8"))); String fullMessage = curMsg.toString(); mHandler.obtainMessage(MainActivity.MESSAGE_READ, fullMessage).sendToTarget(); curMsg.delete(0, bytes); } }//End of try catch (IOException e) { //connectionLost(); break; }//End of Catch }// End of while }//End of run public void cancel() { try { mmSocket.close(); }//end of try catch (IOException e) { // TODO: handle exception }//End of cancel }//End of cancel /** * Write to the connected OutStream. * @param buffer The bytes to write */ public void write(byte[] buffer) { String good = new String(buffer, Charset.forName("ISO-8859-1") ); buffer = good.getBytes(Charset.forName(("ISO-8859-1"))); try { mmOutStream.write(buffer); }// end of try catch (IOException e){ }// end of catch

52
}// End of write }//End of ConnectedThread }// End of BluetoothData
6.4.3 Device List Activity
package com.dynamicsolutions.bluetest3; import java.util.Set; import android.app.Activity; import android.bluetooth.BluetoothAdapter; import android.bluetooth.BluetoothDevice; import android.content.BroadcastReceiver; import android.content.Context; import android.content.Intent; import android.content.IntentFilter; import android.os.Bundle; import android.view.View; import android.view.View.OnClickListener; import android.view.Window; import android.widget.AdapterView; import android.widget.AdapterView.OnItemClickListener; import android.widget.ArrayAdapter; import android.widget.Button; import android.widget.ListView; import android.widget.TextView; import android.widget.Toast; public class DeviceListActivity extends Activity { private BluetoothAdapter mBtAdapter; private ArrayAdapter<String> mPairedDevicesArrayAdapter; private ArrayAdapter<String> mNewDevicesArrayAdapter; //Return Intent extras public static String EXTRA_DEVICE_ADDRESS = "device_address"; @Override protected void onCreate(Bundle savedInstanceState) { super.onCreate(savedInstanceState); //Set up the display window requestWindowFeature(Window.FEATURE_INDETERMINATE_PROGRESS); setContentView(R.layout.device_list); //Set results as canceled in case the user backs out setResult(Activity.RESULT_CANCELED); // Initialize the button to perform device discovery Button btnScan = (Button) findViewById(R.id.btn_scan); btnScan.setOnClickListener(new OnClickListener() { public void onClick(View v) {

53
discoverDevices(); v.setVisibility(View.GONE); } }); // End of setOnClickListener //Initialize the array adapters. One for the paired devices and one for the newly discovered devices mPairedDevicesArrayAdapter = new ArrayAdapter<String>(this, R.layout.device_name); mNewDevicesArrayAdapter = new ArrayAdapter<String>(this, R.layout.device_name); // Find and set up the list view for paired devices ListView lstPairedDevices = (ListView) findViewById(R.id.paired_devices_list); lstPairedDevices.setAdapter(mPairedDevicesArrayAdapter); lstPairedDevices.setOnItemClickListener(mDeviceSelectedListener); // Find and set up list view for new devices ListView lstNewDevices = (ListView) findViewById(R.id.new_device_list); lstNewDevices.setAdapter(mNewDevicesArrayAdapter); lstNewDevices.setOnItemClickListener(mDeviceSelectedListener); // Register for broadcasts when a device is found IntentFilter filter = new IntentFilter(BluetoothDevice.ACTION_FOUND); this.registerReceiver(mReceiver, filter); //Register for broadcasts when discovery has finished filter = new IntentFilter(BluetoothAdapter.ACTION_DISCOVERY_FINISHED); this.registerReceiver(mReceiver, filter); // Get the local bluetooth adapter mBtAdapter = BluetoothAdapter.getDefaultAdapter(); // Get a set of currently paired devices Set<BluetoothDevice> pairedDevices = mBtAdapter.getBondedDevices(); // If there are paired devices add them to the Array Adapter if (pairedDevices.size() >0) { findViewById(R.id.title_paired_devices).setVisibility(View.VISIBLE); for (BluetoothDevice device : pairedDevices){ mPairedDevicesArrayAdapter.add(device.getName() + "\n" + device.getAddress()); } //End for } //End of if else {

54
String noDevices = getResources().getText(R.string.none_paired).toString(); mPairedDevicesArrayAdapter.add(noDevices); } // End else } // End of OnCreate protected void onDestroy() { super.onDestroy(); //Make sure we are not still discovering devices mBtAdapter.cancelDiscovery(); //Unregister broadcast listeners this.unregisterReceiver(mReceiver); }//End of on destroy // Starts device discovery with the bluetooth adapter private void discoverDevices() { // indicate scanning in the title setProgressBarIndeterminateVisibility(true); setTitle(R.string.scanning); // Turn on the subtitle for new devices findViewById(R.id.title_new_devices).setVisibility(View.VISIBLE); //If we are already discovering stop it if (mBtAdapter.isDiscovering()) { mBtAdapter.cancelDiscovery(); } // end if // Request discovery from Bluetooth Adapter mBtAdapter.startDiscovery(); }// end of discoverDevices // The on click listener for all of the devices in the ListViews private OnItemClickListener mDeviceSelectedListener = new OnItemClickListener(){ public void onItemClick(AdapterView<?> av, View v, int arg2, long arg3) { // Cancel discovery if it is still active mBtAdapter.cancelDiscovery(); //Get the MAC address, which is the last 17 characters in the View String info = ((TextView) v).getText().toString(); String address = info.substring(info.length() - 17); //create the result Intent and include the MAC address Intent intent = new Intent(); intent.putExtra(EXTRA_DEVICE_ADDRESS, address);

55
Toast.makeText(getBaseContext(), address.toString(), Toast.LENGTH_SHORT).show(); //Set the results and finish the activity setResult(Activity.RESULT_OK, intent); finish(); }// End of on item click };// End mDeviceSelectedListener //The Broadcast Receiver for when devices are found and discovery is finished private final BroadcastReceiver mReceiver = new BroadcastReceiver() { @Override public void onReceive(Context context, Intent intent) { String action = intent.getAction(); //When discovery finds a device if (BluetoothDevice.ACTION_FOUND.equals(action)) { // Get the Bluetooth Device from the Intent BluetoothDevice device = intent.getParcelableExtra(BluetoothDevice.EXTRA_DEVICE); //If its already paired skip is since its already been listed if (device.getBondState() != BluetoothDevice.BOND_BONDED) { mNewDevicesArrayAdapter.add(device.getName() + "\n" + device.getAddress()); }//End if }// End if else if (BluetoothAdapter.ACTION_DISCOVERY_FINISHED.equals(action)) { setProgressBarIndeterminateVisibility(false); setTitle(R.string.select_device); if (mNewDevicesArrayAdapter.getCount() == 0) { String noDevices = getResources().getText(R.string.none_found).toString(); mNewDevicesArrayAdapter.add(noDevices); }//End if }// End else if }// End onRecieve };//End Broadcast Receiver } // End of DeviceListActivity Class

56
6.4.4 Data Resolver Service
package com.dynamicsolutions.bluetest3; import android.content.Context; import android.os.Handler; public class DataResolverService { //Member Fields private final Handler mHandler; private StringBuilder masterString = new StringBuilder(); private String end = "!"; public DataResolverService(Context context, Handler handler) { mHandler = handler; } public String SortInputData(String inputString) { String completeSegment; masterString.append(inputString); String temp = masterString.toString(); int endIdX = masterString.indexOf(end); if (-1 != endIdX) { completeSegment = masterString.substring(0, endIdX); masterString.delete(0, endIdX+1); return completeSegment; } else { return "Working"; } } } //End of DataResolver
6.5 ActivityBot Propeller .Spin Source Code
6.5.1 RN-42 Bluetooth Module Configuration .Spin Source Code
'' File: PBAA_v0.2.spin
'' PBAA = Propeller Bluetooth and Android
'' v0.2 = This application programs the RN-42 to communicate with a 9600 Baud rate

57
'' It also demonstrates how to enter command mode and also how to exit it.
'' The program also demonstrates how to record the responses received after issuing
commands.
'' New to Version 0.2
CON
_xinfreq = 5_000_000
_clkmode = xtal1 + pll16x
'Bluetooth Constants
DEBUG = 0 ' Debug port sends results to Parallax Serial
Terminal
A_PORT = 1 ' Bluetooth Module
A_RESET = 0 ' To RST pin on RN-42 Bluetooth Module
A_TX = 1 ' To RX pin on RN-42 Bluetooth Module
A_RX = 2 ' To TX pin on RN-42 Bluetooth Module
A_CTS = 3 ' To RTS pin on RN-42 Bluetooth Module
A_RTS = 4 ' To CTS pin on RN-42 Bluetooth Module
BAUD = 9600 ' Baud Rate 9600 bps
VAR
long tLow, tHigh, T, dt, stack[700], cntr, inByte, inString, ctr, testStr[15], milis, char
word cntMin
byte i, inByteArr[25], bufferSize

58
OBJ
fds : "FullDuplexSerial4port"
dio : "dataIO4port"
{
pst: "Parallax Serial Terminal V1.0" 'Create the Parallax Serial Terminal
Object for the LCD Screen & Bluetooth module
'Need to use pst file in this folder as it has been modified to use Pin 1 & 12 for serial
comm
}
PUB Main
milis := clkfreq / 1_000
dira[26..27] := %11 'Set Pin 26 & 27 to output
outa[26..27] := %00 'Set pin 26 & 27 to low
dira[A_TX] := 1
outa[A_TX] := 1
Pause(100)
outa[A_TX] := 0
fds.Init
fds.AddPort(A_PORT, A_RX, A_TX, A_CTS, A_RTS, 0, %000000, BAUD)
fds.AddPort(DEBUG, 31, 30, -1, -1, 0, %000000, BAUD) ' Debug to the terminal
screen
fds.Start
59
fds.str(DEBUG, String("Program Started")) 'Outputs "Program Started" to the
terminal screen
Pause(2000) 'UART startup delay
fds.str(A_PORT, String("$$$")) 'Sends "$$$" to the RN-42 to enter
command mode
ctr := 0 'This block of code reads in characters until "13" is
found
inByteArr[ctr] := fds.rx(A_PORT) '"13" represents the Carraige Return
which is sent at the end of
fds.tx(DEBUG, inByteArr[ctr]) 'every message from the RN-42 Unit
repeat until inByteArr[ctr] == 13 'If successfull "CMD" is returned
ctr++
inByteArr[ctr] := fds.rx(A_PORT)
fds.tx(DEBUG, inByteArr[ctr])
Pause(1200) 'Pause for 1.2 seconds, the "$$$" message will
be ignored if
'additional messages are sent within 1 second of the
"$$$"
fds.str(A_PORT, String("SU,96")) 'Set up message that sets the
programmed serial baud rate to 9600
fds.tx(A_PORT, 13) 'If successfull "AOK" is returned
fds.tx(A_PORT, 10)
ctr := 0

60
inByteArr[ctr] := fds.rx(A_PORT)
fds.tx(DEBUG, inByteArr[ctr])
repeat until inByteArr[ctr] == 13
ctr++
inByteArr[ctr] := fds.rx(A_PORT)
fds.tx(DEBUG, inByteArr[ctr])
fds.str(A_PORT, String("---")) 'Message sent "---" that tells the RN-42 to
Exit command mode
fds.tx(A_PORT, 13) 'If successfull "END" is returned
fds.tx(A_PORT, 10)
ctr := 0
inByteArr[ctr] := fds.rx(A_PORT)
fds.tx(DEBUG, inByteArr[ctr])
repeat until inByteArr[ctr] == 13
ctr++
inByteArr[ctr] := fds.rx(A_PORT)
fds.tx(DEBUG, inByteArr[ctr])
6.5.2 RN-42 Bluetooth Module Verification .Spin Source Code
'' File: PBAA_v0.3.spin
'' PBAA = Propeller Bluetooth and Android
'' v0.3 = Test the use of get commands on the RN-42 Bluetooth Module
'' Assumption is that the module is set to 9600 Baud rate
CON
_xinfreq = 5_000_000
_clkmode = xtal1 + pll16x

61
'Bluetooth Constants
DEBUG = 0 ' Debug port sends results to Parallax Serial
Terminal
A_PORT = 1 ' Bluetooth Module
A_RESET = 0 ' To RST pin on RN-42 Bluetooth Module
A_TX = 1 ' To RX pin on RN-42 Bluetooth Module
A_RX = 2 ' To TX pin on RN-42 Bluetooth Module
A_CTS = 3 ' To RTS pin on RN-42 Bluetooth Module
A_RTS = 4 ' To CTS pin on RN-42 Bluetooth Module
BAUD = 9600 ' Baud Rate 9600 bps
VAR
long tLow, tHigh, T, dt, stack[700], cntr, inByte, inString, ctr, testStr[15], milis, char
word cntMin
byte i, inByteArr[300], bufferSize
OBJ
fds : "FullDuplexSerial4port"
dio : "dataIO4port"
{
pst: "Parallax Serial Terminal V1.0" 'Create the Parallax Serial Terminal
Object for the LCD Screen & Bluetooth module
'Need to use pst file in this folder as it has been modified to use Pin 1 & 12 for serial
comm

62
}
PUB Main
milis := clkfreq / 1_000
dira[26..27] := %11 'Set Pin 26 & 27 to output
outa[26..27] := %00 'Set pin 26 & 27 to low
dira[A_TX] := 1
outa[A_TX] := 1
Pause(100)
outa[A_TX] := 0
fds.Init
fds.AddPort(A_PORT, A_RX, A_TX, A_CTS, A_RTS, 0, %000000, BAUD)
fds.AddPort(DEBUG, 31, 30, -1, -1, 0, %000000, BAUD) ' Debug to the terminal
screen
fds.Start
fds.str(DEBUG, String("Program Started")) 'Outputs "Program Started" to the
terminal screen
fds.tx(DEBUG, 13)
Pause(2000) 'UART startup delay
fds.str(A_PORT, String("$$$")) 'Sends "$$$" to the RN-42 to enter
command mode

63
ctr := 0 'This block of code reads in characters until "13" is
found
inByteArr[ctr] := fds.rx(A_PORT) '"13" represents the Carraige Return
which is sent at the end of
fds.tx(DEBUG, inByteArr[ctr]) 'every message from the RN-42 Unit
repeat until inByteArr[ctr] == 13 'If successfull "CMD" is returned
ctr++
inByteArr[ctr] := fds.rx(A_PORT)
fds.tx(DEBUG, inByteArr[ctr])
Pause(1200) 'Pause for 1.2 seconds, the "$$$" message will
be ignored if
'additional messages are sent within 1 second of the
"$$$"
fds.str(A_PORT, String("D"))
fds.tx(A_PORT, 13)
fds.tx(A_PORT, 10)
repeat 11
ctr := 0
inByteArr[ctr] := fds.rx(A_PORT)
fds.tx(DEBUG, inByteArr[ctr])
repeat until inByteArr[ctr] == 13
ctr++
inByteArr[ctr] := fds.rx(A_PORT)
fds.tx(DEBUG, inByteArr[ctr])
64
fds.str(A_PORT, String("---")) 'Message sent "---" that tells the RN-42 to
Exit command mode
fds.tx(A_PORT, 13) 'If successfull "END" is returned
fds.tx(A_PORT, 10)
ctr := 0
inByteArr[ctr] := fds.rx(A_PORT)
fds.tx(DEBUG, inByteArr[ctr])
repeat until inByteArr[ctr] == 13
ctr++
inByteArr[ctr] := fds.rx(A_PORT)
fds.tx(DEBUG, inByteArr[ctr])
6.5.3 ActivityBot .Spin Source Code Implemented on the Propeller Microcontroller
'' File: PBAA_v0.7.spin
'' PBAA = Propellar Bluetooth and Android
'' v0.7 = Working control of platfrom and successfull bluetooth comm
CON
_xinfreq = 5_000_000
_clkmode = xtal1 + pll16x
'Bluetooth Constants
DEBUG = 0 ' Debug port sends results to Parallax Serial
Terminal
A_PORT = 1 ' Bluetooth Module
A_RESET = 0 ' To RST pin on RN-42 Bluetooth Module
A_TX = 1 ' To RX pin on RN-42 Bluetooth Module

65
A_RX = 2 ' To TX pin on RN-42 Bluetooth Module
A_CTS = 3 ' To RTS pin on RN-42 Bluetooth Module
A_RTS = 4 ' To CTS pin on RN-42 Bluetooth Module
BAUD = 9600 ' Baud Rate 9600 bps
VAR
long tLow, tHigh, T, dt, stack[700], cntr, inByte, inString, ctr, testStr[15], milis,
char,us, dataV, dataH, scale, rawSpeed, rawDirection, speed, lServo, rServo, direction,
range
word cntMin
byte i, inByteArr[300], bufferSize, cntB, temp, Index
OBJ
fds : "FullDuplexSerial4port"
dio : "dataIO4port"
PUB Main
milis := clkfreq / 1_000
dira[26..27] := %11 'Set Pin 26 & 27 to output
outa[26..27] := %00 'Set pin 26 & 27 to low
dira[A_TX] := 1
outa[A_TX] := 1
rawSpeed := 50
rawDirection := 50

66
lServo := 750
rServo := 750
Pause(100)
outa[A_TX] := 0
fds.Init
fds.AddPort(A_PORT, A_RX, A_TX, A_CTS, A_RTS, 0, %000000, BAUD)
fds.AddPort(DEBUG, 31, 30, -1, -1, 0, %000000, BAUD) ' Debug to the terminal
screen
fds.Start
fds.str(DEBUG, String("Program Started")) 'Outputs "Program Started" to the
terminal screen
fds.tx(DEBUG, 13)
Pause(2000) 'UART startup delay
cognew(Values, @stack[0]) 'Start a new cog to manage the servo pulses
Pause(250)
cognew(ServoPulse, @stack[300])
repeat
repeat
ctr := 0
inByteArr[ctr] := fds.rx(A_PORT)
until inByteArr[ctr] == "A" or inByteArr[ctr] == "B"
if inByteArr[ctr] == "A"

67
repeat
ctr++
inByteArr[ctr] := fds.rx(A_PORT)
until inByteArr[ctr] == "!"
dataV := 0
scale := 0
repeat Index from 1 to (ctr - 1)
scale := ctr - 1 - Index
if scale == 2
dataV := dataV + (inByteArr[Index] - 48) * 100
elseif scale == 1
dataV := dataV + (inByteArr[Index] - 48) * 10
else
dataV := dataV + (inByteArr[Index] - 48)
rawSpeed := dataV
'dio.dec(DEBUG, dataV)
'fds.tx(DEBUG, 13)
if inByteArr[ctr] == "B"
repeat
ctr++
inByteArr[ctr] := fds.rx(A_PORT)
until inByteArr[ctr] == "!"
dataH := 0
scale := 0
repeat Index from 1 to (ctr - 1)
scale := ctr - 1 - Index
if scale == 2
dataH := dataH + (inByteArr[Index] - 48) * 100
elseif scale == 1
dataH := dataH + (inByteArr[Index] - 48) * 10
else
68
dataH := dataH + (inByteArr[Index] - 48)
rawDirection := dataH
'dio.dec(DEBUG, dataH)
'fds.tx(DEBUG, 13)
PUB Values
fds.str(DEBUG, String("Values Started")) 'Outputs "Program Started" to the
terminal screen
fds.tx(DEBUG, 13)
repeat
waitcnt(clkfreq/20 + cnt)
if rawSpeed > 50 and rawDirection < 50 'Forward and Left
range := 100
speed := (range * (((rawSpeed - 50) * 100) / 50)) / 100
direction:= (speed * (100 - (((50 - rawDirection) * 100) / 50))) / 100
lServo := 750 + direction
rServo := 750 - speed
elseif rawSpeed > 50 and rawDirection > 50 'Forward and Right
range := 100
speed := (range * (((rawSpeed - 50) * 100) / 50)) / 100
direction:= (speed * (100 - (((rawDirection - 50) * 100) / 50))) / 100
lServo := 750 + speed
rServo := 750 - direction
elseif rawSpeed < 50 and rawDirection < 50 'Reverse and Right
range := 100
speed := (range * (((50 - rawSpeed) * 100) / 50)) / 100
direction:= (speed * (100 - (((50 - rawDirection) * 100) / 50))) / 100
lServo := 750 - direction
rServo := 750 + speed
elseif rawSpeed < 50 and rawDirection > 50 'Reverse and Left
69
range := 100
speed := (range * (((50 - rawSpeed) * 100) / 50)) / 100
direction:= (speed * (100 - (((rawDirection - 50) * 100) / 50))) / 100
lServo := 750 - speed
rServo := 750 + direction
elseif rawDirection == 50 and rawSpeed > 50
speed := ((rawSpeed - 50) * 2)
lServo := 750 + speed
rServo := 750 - speed
elseif rawDirection == 50 and rawSpeed < 50
speed := ((50 - rawSpeed) * 2)
lServo := 750 - speed
rServo := 750 + speed
elseif rawSpeed == 50 and rawDirection > 50
speed := ((rawDirection - 50) *2)
lServo := 750 + speed
rServo := 750 + speed
elseif rawSpeed == 50 and rawDirection < 50
speed := ((50 - rawDirection) *2)
lServo := 750 - speed
rServo := 750 - speed
else
lServo := 750
rServo := 750
PUB ServoPulse
fds.str(DEBUG, String("Pulse out Started")) 'Outputs "Program Started" to the
terminal screen
70
fds.tx(DEBUG, 13)
us := clkfreq / 1_000_000 'define what a micro second is
tLow := clkfreq / 50 'Duration of time between pulses (standard 20
mS or 0.020 Seconds)
dira[14..15]~~ 'Set P14 and P15 to output
T := cnt 'T is set to the current number of clock ticks when
line is executed
repeat
T += tLow
waitcnt(T)
PULSOUT(15, lServo)
PULSOUT(14, rServo)
PUB PULSOUT(Pin,duration) | clkcycles
{{
Produces an opposite pulse on the pin for the duration in 2uS increments
Smallest value is 10 at clkfreq = 80Mhz
Largest value is around 50 seconds at 80Mhz.
BS2.Pulsout(500) ' 1 mS pulse
}}
ClkCycles := (Duration * us * 2 - 1250) #> cntMin ' duration * clk cycles for 2us
' - inst. time, min cntMin
dira[pin]~~ ' Set to output
!outa[pin] ' set to opposite state
waitcnt(clkcycles + cnt) ' wait until clk gets there
!outa[pin]

71
PRI Pause(ms)
waitcnt(clkfreq / 1000 * ms + cnt) ' Convert to mS
6.5.4 FullDuplexSerial4port.Spin Library
{{ FullDuplexSerial4portPlus version 1.01
- Tracy Allen (TTA) (c)22-Jan-2011 MIT license, see end of file for terms of use.
Extends existing terms of use.
- Can open up to 4 independent serial ports, using only one pasm cog for all 4.
- Supports flow control and open and inverted baud modes
- Individually configurable tx and rx buffers for all 4 ports, any size, set in CONstants
section at compile time
- Part of the buffer fits within the object's hub footprint, but even so the object is
restartable
- Buffers are DAT type variables, therefore a single instance of the object can be
accessed throughout a complex project.
- Modified from Tim Moore's pcFullDuplexSerial4fc, with further motivation and ideas
from Duane Degn's pcFullDuplexSerial4fc128
- Changes and bug fixes include:
- Flow control is now operational when called for, with correct polarity (bug
correction)
- Jitter is reduced, unused ports are properly skipped over (bug correction), operation
speed is increased.
- Stop bit on reception is now checked, and if there is a framing error, the byte is not
put in the buffer.
- Buffer sizes are arbitrary, each port separate rx & tx up to available memory
Changes in pasm and in Spin methods to accomodate larger buffers, major
reorganization of DAT section.
- Added strn method for counted string, and rxHowFull method for buffer size.

72
- Cut out most of the format methods such as DEC and HEX, expecting those to be
their own object calling rx, tx, str and strn methods.
See companion object DataIO4port.spin in order to maintain compatibility with
methods in the original pcFullDuplexSerial4fc.
- 1v01
- init method returns pointer @rxsize, for data buffers and data structure.
- 1v00
- documentation
- 0v91
- restored DEFAULTTHRESHOLD constant
- made default buffer sizes in the DAT section rather than init
- removed the numeric methods to their own companion object, dataIO4port.
- 0v3
- first public release with the jitter and flow control issues fixed, and large buffers.
Links:
Development of this version:
--- http://forums.parallax.com/showthread.php?137349-yet-another-variant-
fullDuplexSerial4portplus
Tim Moore's original pcFullDuplexSerial4fc and updates to allow flow control:
---
http://forums.parallaxinc.com/forums/default.aspx?f=25&p=1&m=273291#m276667
--- http://obex.parallax.com/objects/340/ 7/24/08 version
--- http://forums.parallaxinc.com/forums/default.aspx?f=25&p=1&m=349173
8/14/08 update, flow polarity correction, not in obex
Duane Degn's thread, larger 128 or 512 byte buffers and reusing buffer space,
discussion of issues
--- http://forums.parallax.com/showthread.php?129714-Tim-Moore-s-
pcFullDuplexSerial4FC-with-larger-%28512-byte%29-rx-buffer
Juergen Buchmueller, 2 port trimmed down version

73
--- http://forums.parallax.com/showthread.php?128184-Serial-Objects-for-SPIN-
Programming&p=967075&viewfull=1#post967075
Serial Mirror, single port but same idea regarding buffers in the DATa space
--- http://forums.parallax.com/showthread.php?94311-SerialMirror-A-
FullDuplexSerial-enhancement
--- http://obex.parallax.com/objects/189/
Re baud rates attainable, hiccups:
---
http://forums.parallaxinc.com/forums/default.aspx?f=25&p=1&m=282923#m282978
--- http://forums.parallaxinc.com/forums/default.aspx?f=25&p=1&m=334784
--- http://forums.parallax.com/showthread.php?120868-FullDuplexSerial-hiccups
Jitter, discussions of jitter in different Prop serial programs, PhiPi's development of
PBnJ full duplex:
--- http://forums.parallax.com/showthread.php?129776-Anybody-aware-of-high-
accuracy-(0.7-or-less)-serial-full-duplex-driver
--- http://forums.parallax.com/showthread.php?136431-Serial-objects-question
Humanoido's catalog of serial port objects
--- http://forums.parallax.com/showthread.php?128184-Serial-Objects-for-SPIN-
Programming
Tim Moore's release notes follow... Also note by Duane Degn.
Not all these comments apply to FullDuplexSerial4port.
}}
''******************************************************************
''* Based on *
''* Full-Duplex Serial Driver v1.1 *
''* Author: Chip Gracey *
''* Copyright (c) 2006 Parallax, Inc. *
''* See end of file for terms of use. *
''* *
''* Tim Moore 2008 *

74
''* Modified to support 4 serial ports *
''* It should run 1 port faster than FullDuplexSerial or run *
''* up to 4 ports *
''* Merged 64 byte rx buffer change *
''* Merged Debug_PC (Jon Williams) *
''* (TTA) cut the numeric methods, see dataIO4port.spin *
''* to maintain compatibility with pcFullDuplexSerial4fc *
''* or use other numeric methods such as "simpleNumbers" *
''* Uses DAT rather than VAR so can be used in multiple objects *
''* If you want multiple objects using this driver, you must *
''* copy the driver to a new file and make sure version long is *
''* unique in each version
''* Added txflush *
''* Optimization perf *
''* 1 port up to 750kbps *
''* 2 port up to 230kbps *
''* 3 port up to 140kbps *
''* 4 port up to 100kbps *
''* Tested 4 ports to 115Kbps with 6MHz crystal *
''* These are approx theoretical worse case you may get faster *
''* if port is active but idle *
''* Added RTS/CTS flow control *
''* *
''* There is no perf penalty supporting 4 serial ports when they *
''* are not enabled *
''* There is no perf penalty supporting CTS and RTS *
''* Enabling CTS on any port costs 4 clocks per port *
''* Enabling RTS on any port costs 32 clocks per port *
''* Main Rx+Tx loop is ~256 clocks per port (without CTS/RTS) *
''* compared with FullDuplexSerial at ~356 clocks *
''* *

75
''* There is a cost to read/write a byte in the transmit/ *
''* receive routines. The transmit cost is greater than the *
''* receive cost so between propellors you can run at max baud *
''* rate. If receiving from another device, the sending device *
''* needs a delay between each byte once you are above ~470kbps *
''* with 1 port enabled *
''* *
''* (TTA) I have not updated the following comments. *
''* Size: *
''* Cog Initialzation code 1 x 8 + 4 x 25 *
''* Cog Receive code 4 x 30 words *
''* Cog Transmit code 4 x 26 words *
''* Spin/Cog circular buffer indexes 4 x 4 words *
''* Used in both spin and Cog and read/written in both *
''* directions *
''* Spin/Cog per port info 4 x 8 words *
''* Passed from Spin to Cog on cog initialization *
''* Spin per port info 4 x 1 byte *
''* Used by Spin *
''* Spin/Cog rx/tx buffer hub address 4 x 4 words *
''* Passed from Spin to Cog on cog initialization *
''* Spin/Cog rx/tx index hub address 4 x 4 words *
''* Passed from Spin to Cog on cog initialization *
''* Spin per port rx buffer 4 x 64 byte *
''* *
''* DWD Changed to 4 x 128 bytes *
''* Read by Spin, written by cog *
''* *
''* Cog per port rx state 4 x 4 words (overlayed on rx buffer) *
''* Used by Cog *
''* Spin per port tx buffer 4 x 16 byte *

76
''* Written by Spin, read by Cog *
''* Cog per port tx state 4 x 4 words (overlayed on tx buffer) *
''* Used by Cog *
''* Cog constants 4 words *
''* A significant amount of space (4 x 16 words) is used for *
''* pre-calculated information: hub addresses, per port *
''* configuration. This speeds up the tx/rx routines at the cost *
''* of this space. *
''* *
''* Note: There are 8 longs remaining in the cog's memory, *
''* expect to do some work to add features :). *
''* *
''* DWD Note from Duane: Many of the longs in the cog image *
''* are only used in hub RAM. There is still lots of room *
''* in cog RAM. (TTA) agreed, thanks DWD! *
''* *
''* 7/1/08: Fixed bug of not receiving with only 1 port enabled *
''* Fixed bug of rts not working on ports 0, 2 and 3 *
''* 7/22/08: Missed a jmpret call in port 1 and 3 tx *
''* Fixed a bug in port 3 tx not increasing tx ptr *
''* 7/24/08: Added version variable to change if need multiple *
''* copies of the driver *
''* *
''******************************************************************
CON
NOMODE = %000000
INVERTRX = %000001
INVERTTX = %000010
OCTX = %000100
77
NOECHO = %001000
INVERTCTS = %010000
INVERTRTS = %100000
PINNOTUSED = -1 'tx/tx/cts/rts pin is not used
DEFAULTTHRESHOLD = 0 ' zero defaults to 3/4 of buffer
length
BAUD1200 = 1200
BAUD2400 = 2400
BAUD4800 = 4800
BAUD9600 = 9600
BAUD19200 = 19200
BAUD38400 = 38400
BAUD57600 = 57600
BAUD115200 = 115200
' The following constants declare the sizes of the rx and tx buffers.
' Enter in the needed size in bytes for each rx and tx buffer
' These values can be any size within available memory. They do not have to be a power
of two.
' Unused buffers can be reduced to 1 byte.
RX_SIZE0 = 200 ' receive buffer allocations
RX_SIZE1 = 200
RX_SIZE2 = 80
RX_SIZE3 = 80
TX_SIZE0 = 20 ' transmit buffer allocations
TX_SIZE1 = 20
TX_SIZE2 = 20
TX_SIZE3 = 20 '

78
RXTX_BUFSIZE = (TX_SIZE0 + TX_SIZE1 + TX_SIZE2 + TX_SIZE3 +
RX_SIZE0 + RX_SIZE1 + RX_SIZE2 + RX_SIZE3)
' total buffer footprint in bytes
' 77 longs, 308 bytes are available for buffers within the hub
footprint of the object
' the final instruction in this program allocates additional buffer
space beyond that if necessary
' to accomodate all of the buffers.
' if the sum totals to 308, then the buffers exactly fit within the
object footprint.
PUB Init
''Always call init before adding ports
Stop
bytefill(@startfill, 0, (@endfill-@startfill)) ' initialize head/tails,port info and hub
buffer pointers
return @rxsize ' TTA returns pointer to data structure, buffer
sizes.
PUB AddPort(port,rxpin,txpin,ctspin,rtspin,rtsthreshold,mode,baudrate)
'' Call AddPort to define each port
'' port 0-3 port index of which serial port
'' rx/tx/cts/rtspin pin number XXX#PINNOTUSED if not used
'' rtsthreshold - buffer threshold before rts is used XXX#DEFAULTTHRSHOLD
means use default
'' mode bit 0 = invert rx XXX#INVERTRX
'' mode bit 1 = invert tx XXX#INVERTTX
'' mode bit 2 = open-drain/source tx XXX#OCTX

79
'' mode bit 3 = ignore tx echo on rx XXX#NOECHO
'' mode bit 4 = invert cts XXX#INVERTCTS
'' mode bit 5 = invert rts XXX#INVERTRTS
'' baudrate
if cog OR (port > 3)
abort
if rxpin <> -1
long[@rxmask][port] := |< rxpin
if txpin <> -1
long[@txmask][port] := |< txpin
if ctspin <> -1
long[@ctsmask][port] := |< ctspin
if rtspin <> -1
long[@rtsmask][port] := |< rtspin
if (rtsthreshold > 0) AND (rtsthreshold < rxsize[port]) ' (TTA) modified for
variable buffer size
long[@rtssize][port] := rtsthreshold
else
long[@rtssize][port] := rxsize[port]*3/4 'default rts threshold 3/4 of
buffer TTS ref RX_BUFSIZE
long[@rxtx_mode][port] := mode
if mode & INVERTRX
byte[@rxchar][port] := $ff
long[@bit_ticks][port] := (clkfreq / baudrate)
long[@bit4_ticks][port] := long[@bit_ticks][port] >> 2
PUB Start : okay
'' Call start to start cog
'' Start serial driver - starts a cog
'' returns false if no cog available
''

80
'' tx buffers will start within the object footprint, overlaying certain locations that were
initialized in spin
'' for use within the cog but are not needed by spin thereafter and are not needed for
object restart.
txbuff_tail_ptr := txbuff_ptr := @buffers ' (TTA) all buffers are calculated as
offsets from this address.
txbuff_tail_ptr1 := txbuff_ptr1 := txbuff_ptr + txsize 'base addresses of the
corresponding port buffer.
txbuff_tail_ptr2 := txbuff_ptr2 := txbuff_ptr1 + txsize1
txbuff_tail_ptr3 := txbuff_ptr3 := txbuff_ptr2 + txsize2
rxbuff_head_ptr := rxbuff_ptr := txbuff_ptr3 + txsize3 ' rx buffers follow
immediately after the tx buffers, by size
rxbuff_head_ptr1 := rxbuff_ptr1 := rxbuff_ptr + rxsize
rxbuff_head_ptr2 := rxbuff_ptr2 := rxbuff_ptr1 + rxsize1
rxbuff_head_ptr3 := rxbuff_ptr3 := rxbuff_ptr2 + rxsize2
' note that txbuff_ptr ... rxbuff_ptr3 are the base
addresses fixed
' in memory for use by both spin and pasm
' while txbuff_tail_ptr ... rxbuff_head_ptr3 are
dynamic addresses used only by pasm
' and here initialized to point to the start of the
buffers.
' the rx buffer #3 comes last, up through address
@endfill
rx_head_ptr := @rx_head ' (TTA) note: addresses of the head and
tail counts are passed to the cog
rx_head_ptr1 := @rx_head1 ' if that is confusing, take heart. These
are pointers to pointers to pointers
rx_head_ptr2 := @rx_head2
rx_head_ptr3 := @rx_head3

81
rx_tail_ptr := @rx_tail
rx_tail_ptr1 := @rx_tail1
rx_tail_ptr2 := @rx_tail2
rx_tail_ptr3 := @rx_tail3
tx_head_ptr := @tx_head
tx_head_ptr1 := @tx_head1
tx_head_ptr2 := @tx_head2
tx_head_ptr3 := @tx_head3
tx_tail_ptr := @tx_tail
tx_tail_ptr1 := @tx_tail1
tx_tail_ptr2 := @tx_tail2
tx_tail_ptr3 := @tx_tail3
okay := cog := cognew(@entry, @rx_head) + 1
PUB Stop
'' Stop serial driver - frees a cog
if cog
cogstop(cog~ - 1)
PUB getCogID : result
return cog -1
PUB rxflush(port)
'' Flush receive buffer, here until empty.
repeat while rxcheck(port) => 0
PUB rxHowFull(port) ' (TTA) added method
'' returns number of chars in rx buffer
return ((rx_head[port] - rx_tail[port]) + rxsize[port]) // rxsize[port]
' rx_head and rx_tail are values in the range 0=< ... < RX_BUFSIZE

82
PUB rxcheck(port) : rxbyte
'' Check if byte received (never waits)
'' returns -1 if no byte received, $00..$FF if byte
'' (TTA) simplified references
if port > 3
abort
rxbyte--
if rx_tail[port] <> rx_head[port]
rxbyte := rxchar[port] ^ byte[rxbuff_ptr[port]+rx_tail[port]]
rx_tail[port] := (rx_tail[port] + 1) // rxsize[port]
PUB rxtime(port,ms) : rxbyte | t
'' Wait ms milliseconds for a byte to be received
'' returns -1 if no byte received, $00..$FF if byte
t := cnt
repeat until (rxbyte := rxcheck(port)) => 0 or (cnt - t) / (clkfreq / 1000) > ms
PUB rx(port) : rxbyte
'' Receive byte (may wait for byte)
'' returns $00..$FF
repeat while (rxbyte := rxcheck(port)) < 0
PUB tx(port,txbyte)
'' Send byte (may wait for room in buffer)
if port > 3
abort
repeat until (tx_tail[port] <> (tx_head[port] + 1) // txsize[port])
byte[txbuff_ptr[port]+tx_head[port]] := txbyte
tx_head[port] := (tx_head[port] + 1) // txsize[port]

83
if rxtx_mode[port] & NOECHO
rx(port)
PUB txflush(port)
repeat until (long[@tx_tail][port] == long[@tx_head][port])
PUB str(port,stringptr)
'' Send zstring
strn(port,stringptr,strsize(stringptr))
PUB strn(port,stringptr,nchar)
'' Send counted string
repeat nchar
tx(port,byte[stringptr++])
DAT
'***********************************
'* Assembly language serial driver *
'***********************************
'
org 0
'
' Entry
'
'To maximize the speed of rx and tx processing, all the mode checks are no longer inline
'The initialization code checks the modes and modifies the rx/tx code for that mode
'e.g. the if condition for rx checking for a start bit will be inverted if mode INVERTRX
'is it, similar for other mode flags
'The code is also patched depending on whether a cts or rts pin are supplied. The normal
' routines support cts/rts processing. If the cts/rts mask is 0, then the code is patched

84
'to remove the addtional code. This means I/O modes and CTS/RTS handling adds no
extra code
'in the rx/tx routines which not required.
'Similar with the co-routine variables. If a rx or tx pin is not configured the co-routine
'variable for the routine that handles that pin is modified so the routine is never called
'We start with port 3 and work down to ports because we will be updating the co-routine
pointers
'and the order matters. e.g. we can update txcode3 and then update rxcode3 based on
txcode3.
'(TTA): coroutine patch was not working in the way originally described. (TTA)
patched
'unused coroutines jmprets become simple jmps.
' Tim's comments about the order from 3 to 0 no longer apply.
' The following 8 locations are skipped at entry due to if_never.
' The mov instruction and the destination address are here only for syntax.
' the important thing are the source field
' primed to contain the start address of each port routine.
' When jmpret instructions are executed, the source adresses here are used for jumps
' And new source addresses will be written in the process.
entry
rxcode if_never mov rxcode,#receive ' set source fields to initial entry points
txcode if_never mov txcode,#transmit
rxcode1 if_never mov rxcode1,#receive1
txcode1 if_never mov txcode1,#transmit1
rxcode2 if_never mov rxcode2,#receive2
txcode2 if_never mov txcode2,#transmit2
rxcode3 if_never mov rxcode3,#receive3
txcode3 if_never mov txcode3,#transmit3

85
' INITIALIZATIONS
===============================================================
===============
' port 3 initialization -------------------------------------------------------------
test rxtx_mode3,#OCTX wz 'init tx pin according to mode
test rxtx_mode3,#INVERTTX wc
if_z_ne_c or outa,txmask3
if_z or dira,txmask3
'patch tx routine depending on invert and oc
'if invert change muxc to muxnc
'if oc change outa to dira
if_z_eq_c or txout3,domuxnc 'patch muxc to muxnc
if_nz movd txout3,#dira 'change destination from outa to dira
'patch rx wait for start bit depending on invert
test rxtx_mode3,#INVERTRX wz 'wait for start bit on rx pin
if_nz xor start3,doifc2ifnc 'if_c jmp to if_nc
'patch tx routine depending on whether cts is used
'and if it is inverted
or ctsmask3,#0 wz 'cts pin? z not set if in use
if_nz test rxtx_mode3,#INVERTCTS wc 'c set if inverted
if_nz_and_c or ctsi3,doif_z_or_nc 'if_nc jmp (TTA) reversed order to
correctly invert CTS
if_nz_and_nc or ctsi3,doif_z_or_c 'if_c jmp
'if not cts remove the test by moving
'the transmit entry point down 1 instruction
'and moving the jmpret over the cts test
'and changing co-routine entry point
if_z mov txcts3,transmit3 'copy the jmpret over the cts test
if_z movs ctsi3,#txcts3 'patch the jmps to transmit to txcts0
if_z add txcode3,#1 'change co-routine entry to skip first jmpret
'patch rx routine depending on whether rts is used
86
'and if it is inverted
or rtsmask3,#0 wz
if_nz or dira,rtsmask3 ' (TTA) rts needs to be an output
if_nz test rxtx_mode3,#INVERTRTS wc
if_nz_and_nc or rts3,domuxnc 'patch muxc to muxnc
if_z mov norts3,rec3i 'patch rts code to a jmp #receive3
if_z movs start3,#receive3 'skip all rts processing
or txmask3,#0 wz 'if tx pin not used
if_z movi transmit3, #%010111_000 ' patch it out entirely by making the
jmpret into a jmp (TTA)
or rxmask3,#0 wz 'ditto for rx routine
if_z movi receive3, #%010111_000 ' (TTA)
' in pcFullDuplexSerial4fc, the bypass was ostensibly
done
' by patching the co-routine variables,
' but it was commented out, and didn't work when
restored
' so I did it by changing the affected jmpret to jmp.
' Now the jitter is MUCH reduced.
' port 2 initialization -------------------------------------------------------------
test rxtx_mode2,#OCTX wz 'init tx pin according to mode
test rxtx_mode2,#INVERTTX wc
if_z_ne_c or outa,txmask2
if_z or dira,txmask2
if_z_eq_c or txout2,domuxnc 'patch muxc to muxnc
if_nz movd txout2,#dira 'change destination from outa to dira
test rxtx_mode2,#INVERTRX wz 'wait for start bit on rx pin
if_nz xor start2,doifc2ifnc 'if_c jmp to if_nc
or ctsmask2,#0 wz
if_nz test rxtx_mode2,#INVERTCTS wc

87
if_nz_and_c or ctsi2,doif_z_or_nc 'if_nc jmp (TTA) reversed order to
correctly invert CTS
if_nz_and_nc or ctsi2,doif_z_or_c 'if_c jmp
if_z mov txcts2,transmit2 'copy the jmpret over the cts test
if_z movs ctsi2,#txcts2 'patch the jmps to transmit to txcts0
if_z add txcode2,#1 'change co-routine entry to skip first jmpret
or rtsmask2,#0 wz
if_nz or dira,rtsmask2 ' (TTA) rts needs to be an output
if_nz test rxtx_mode2,#INVERTRTS wc
if_nz_and_nc or rts2,domuxnc 'patch muxc to muxnc
if_z mov norts2,rec2i 'patch to a jmp #receive2
if_z movs start2,#receive2 'skip all rts processing
or txmask2,#0 wz 'if tx pin not used
if_z movi transmit2, #%010111_000 ' patch it out entirely by making the
jmpret into a jmp (TTA)
or rxmask2,#0 wz 'ditto for rx routine
if_z movi receive2, #%010111_000 ' (TTA)
' port 1 initialization -------------------------------------------------------------
test rxtx_mode1,#OCTX wz 'init tx pin according to mode
test rxtx_mode1,#INVERTTX wc
if_z_ne_c or outa,txmask1
if_z or dira,txmask1
if_z_eq_c or txout1,domuxnc 'patch muxc to muxnc
if_nz movd txout1,#dira 'change destination from outa to dira
test rxtx_mode1,#INVERTRX wz 'wait for start bit on rx pin
if_nz xor start1,doifc2ifnc 'if_c jmp to if_nc
or ctsmask1,#0 wz
if_nz test rxtx_mode1,#INVERTCTS wc

88
if_nz_and_c or ctsi1,doif_z_or_nc 'if_nc jmp (TTA) reversed order to
correctly invert CTS
if_nz_and_nc or ctsi1,doif_z_or_c 'if_c jmp
if_z mov txcts1,transmit1 'copy the jmpret over the cts test
if_z movs ctsi1,#txcts1 'patch the jmps to transmit to txcts0
if_z add txcode1,#1 'change co-routine entry to skip first jmpret
'patch rx routine depending on whether rts is used
'and if it is inverted
or rtsmask1,#0 wz
if_nz or dira,rtsmask1 ' (TTA) rts needs to be an output
if_nz test rxtx_mode1,#INVERTRTS wc
if_nz_and_nc or rts1,domuxnc 'patch muxc to muxnc
if_z mov norts1,rec1i 'patch to a jmp #receive1
if_z movs start1,#receive1 'skip all rts processing
or txmask1,#0 wz 'if tx pin not used
if_z movi transmit1, #%010111_000 ' patch it out entirely by making the
jmpret into a jmp (TTA)
or rxmask1,#0 wz 'ditto for rx routine
if_z movi receive1, #%010111_000 ' (TTA)
' port 0 initialization -------------------------------------------------------------
test rxtx_mode,#OCTX wz 'init tx pin according to mode
test rxtx_mode,#INVERTTX wc
if_z_ne_c or outa,txmask
if_z or dira,txmask
'patch tx routine depending on invert and oc
'if invert change muxc to muxnc
'if oc change out1 to dira
if_z_eq_c or txout0,domuxnc 'patch muxc to muxnc
if_nz movd txout0,#dira 'change destination from outa to dira

89
'patch rx wait for start bit depending on invert
test rxtx_mode,#INVERTRX wz 'wait for start bit on rx pin
if_nz xor start0,doifc2ifnc 'if_c jmp to if_nc
'patch tx routine depending on whether cts is used
'and if it is inverted
or ctsmask,#0 wz 'cts pin? z not set if in use
if_nz or dira,rtsmask ' (TTA) rts needs to be an output
if_nz test rxtx_mode,#INVERTCTS wc 'c set if inverted
if_nz_and_c or ctsi0,doif_z_or_nc 'if_nc jmp (TTA) reversed order to
correctly invert CTS
if_nz_and_nc or ctsi0,doif_z_or_c 'if_c jmp
if_z mov txcts0,transmit 'copy the jmpret over the cts test
if_z movs ctsi0,#txcts0 'patch the jmps to transmit to txcts0
if_z add txcode,#1 'change co-routine entry to skip first jmpret
'patch rx routine depending on whether rts is used
'and if it is inverted
or rtsmask,#0 wz 'rts pin, z not set if in use
if_nz test rxtx_mode,#INVERTRTS wc
if_nz_and_nc or rts0,domuxnc 'patch muxc to muxnc
if_z mov norts0,rec0i 'patch to a jmp #receive
if_z movs start0,#receive 'skip all rts processing if not used
or txmask,#0 wz 'if tx pin not used
if_z movi transmit, #%010111_000 ' patch it out entirely by making the
jmpret into a jmp (TTA)
or rxmask,#0 wz 'ditto for rx routine
if_z movi receive, #%010111_000 ' (TTA)
'
' MAIN LOOP
===============================================================
========================

90
' Receive0 -------------------------------------------------------------------------------------
receive jmpret rxcode,txcode 'run a chunk of transmit code, then return
'patched to a jmp if pin not used
test rxmask,ina wc
start0 if_c jmp #norts0 'go check rts if no start bit
' have to check rts because other process may remove
chars
'will be patched to jmp #receive if no rts
mov rxbits,#9 'ready to receive byte
mov rxcnt,bit4_ticks '1/4 bits
add rxcnt,cnt
:bit add rxcnt,bit_ticks '1 bit period
:wait jmpret rxcode,txcode 'run a chuck of transmit code, then return
mov t1,rxcnt 'check if bit receive period done
sub t1,cnt
cmps t1,#0 wc
if_nc jmp #:wait
test rxmask,ina wc 'receive bit on rx pin
rcr rxdata,#1
djnz rxbits,#:bit 'get remaining bits
test rxtx_mode,#INVERTRX wz 'find out if rx is inverted
if_z_ne_c jmp #receive 'abort if no stop bit (TTA) (from
serialMirror)
jmpret rxcode,txcode 'run a chunk of transmit code, then return
shr rxdata,#32-9 'justify and trim received byte

91
wrbyte rxdata,rxbuff_head_ptr'{7-22} '1wr
add rx_head,#1
cmpsub rx_head,rxsize ' (TTA) allows non-binary buffer size
wrlong rx_head,rx_head_ptr '{8} '2wr
mov rxbuff_head_ptr,rxbuff_ptr 'calculate next byte head_ptr
add rxbuff_head_ptr,rx_head
norts0 rdlong rx_tail,rx_tail_ptr '{7-22 or 8} will be patched to jmp #r3 if no
rts
'1rd
mov t1,rx_head
sub t1,rx_tail wc 'calculate number bytes in buffer, (TTA) add
wc
' and t1,#$7F 'fix wrap
if_c add t1,rxsize ' fix wrap, (TTA) change
cmps t1,rtssize wc 'is it more than the threshold
rts0 muxc outa,rtsmask 'set rts correctly
rec0i jmp #receive 'byte done, receive next byte
'
' Receive1 -------------------------------------------------------------------------------------
'
receive1 jmpret rxcode1,txcode1 'run a chunk of transmit code, then return
test rxmask1,ina wc
start1 if_c jmp #norts1 'go check rts if no start bit
mov rxbits1,#9 'ready to receive byte
mov rxcnt1,bit4_ticks1 '1/4 bits
add rxcnt1,cnt
92
:bit1 add rxcnt1,bit_ticks1 '1 bit period
:wait1 jmpret rxcode1,txcode1 'run a chuck of transmit code, then return
mov t1,rxcnt1 'check if bit receive period done
sub t1,cnt
cmps t1,#0 wc
if_nc jmp #:wait1
test rxmask1,ina wc 'receive bit on rx pin
rcr rxdata1,#1
djnz rxbits1,#:bit1
test rxtx_mode1,#INVERTRX wz 'find out if rx is inverted
if_z_ne_c jmp #receive1 'abort if no stop bit (TTA) (from
serialMirror)
jmpret rxcode1,txcode1 'run a chunk of transmit code, then return
shr rxdata1,#32-9 'justify and trim received byte
wrbyte rxdata1,rxbuff_head_ptr1 '7-22
add rx_head1,#1
cmpsub rx_head1,rxsize1 ' (TTA) allows non-binary buffer size
wrlong rx_head1,rx_head_ptr1
mov rxbuff_head_ptr1,rxbuff_ptr1 'calculate next byte head_ptr
add rxbuff_head_ptr1,rx_head1
norts1 rdlong rx_tail1,rx_tail_ptr1 '7-22 or 8 will be patched to jmp #r3 if
no rts
mov t1,rx_head1
sub t1,rx_tail1 wc
if_c add t1,rxsize1 ' fix wrap, (TTA) change
93
cmps t1,rtssize1 wc
rts1 muxc outa,rtsmask1
rec1i jmp #receive1 'byte done, receive next byte
'
' Receive2 -------------------------------------------------------------------------------------
'
receive2 jmpret rxcode2,txcode2 'run a chunk of transmit code, then return
test rxmask2,ina wc
start2 if_c jmp #norts2 'go check rts if no start bit
mov rxbits2,#9 'ready to receive byte
mov rxcnt2,bit4_ticks2 '1/4 bits
add rxcnt2,cnt
:bit2 add rxcnt2,bit_ticks2 '1 bit period
:wait2 jmpret rxcode2,txcode2 'run a chuck of transmit code, then return
mov t1,rxcnt2 'check if bit receive period done
sub t1,cnt
cmps t1,#0 wc
if_nc jmp #:wait2
test rxmask2,ina wc 'receive bit on rx pin
rcr rxdata2,#1
djnz rxbits2,#:bit2
test rxtx_mode2,#INVERTRX wz 'find out if rx is inverted
if_z_ne_c jmp #receive2 'abort if no stop bit (TTA) (from
serialMirror)
94
jmpret rxcode2,txcode2 'run a chunk of transmit code, then return
shr rxdata2,#32-9 'justify and trim received byte
wrbyte rxdata2,rxbuff_head_ptr2 '7-22
add rx_head2,#1
cmpsub rx_head2,rxsize2 ' ' (TTA) allows non-binary buffer size
wrlong rx_head2,rx_head_ptr2
mov rxbuff_head_ptr2,rxbuff_ptr2 'calculate next byte head_ptr
add rxbuff_head_ptr2,rx_head2
norts2 rdlong rx_tail2,rx_tail_ptr2 '7-22 or 8 will be patched to jmp #r3 if
no rts
mov t1,rx_head2
sub t1,rx_tail2 wc
if_c add t1,rxsize2 ' fix wrap, (TTA) change
cmps t1,rtssize2 wc
rts2 muxc outa,rtsmask2
rec2i jmp #receive2 'byte done, receive next byte
'
' Receive3 -------------------------------------------------------------------------------------
'
receive3 jmpret rxcode3,txcode3 'run a chunk of transmit code, then return
test rxmask3,ina wc
start3 if_c jmp #norts3 'go check rts if no start bit
mov rxbits3,#9 'ready to receive byte
mov rxcnt3,bit4_ticks3 '1/4 bits
add rxcnt3,cnt

95
:bit3 add rxcnt3,bit_ticks3 '1 bit period
:wait3 jmpret rxcode3,txcode3 'run a chuck of transmit code, then return
mov t1,rxcnt3 'check if bit receive period done
sub t1,cnt
cmps t1,#0 wc
if_nc jmp #:wait3
test rxmask3,ina wc 'receive bit on rx pin
rcr rxdata3,#1
djnz rxbits3,#:bit3
test rxtx_mode3,#INVERTRX wz 'find out if rx is inverted
if_z_ne_c jmp #receive3 'abort if no stop bit (TTA) (from
serialMirror)
jmpret rxcode3,txcode3 'run a chunk of transmit code, then return
shr rxdata3,#32-9 'justify and trim received byte
wrbyte rxdata3,rxbuff_head_ptr3 '7-22
add rx_head3,#1
cmpsub rx_head3,rxsize3 ' (TTA) allows non-binary buffer size
wrlong rx_head3,rx_head_ptr3 '8
mov rxbuff_head_ptr3,rxbuff_ptr3 'calculate next byte head_ptr
add rxbuff_head_ptr3,rx_head3
norts3 rdlong rx_tail3,rx_tail_ptr3 '7-22 or 8, may be patched to jmp #r3 if
no rts
mov t1,rx_head3
sub t1,rx_tail3 wc
if_c add t1,rxsize3 ' fix wrap, (TTA) change
cmps t1,rtssize3 wc 'is buffer more that 3/4 full?

96
rts3 muxc outa,rtsmask3
rec3i jmp #receive3 'byte done, receive next byte
'
' TRANSMIT
===============================================================
========================
'
transmit jmpret txcode,rxcode1 'run a chunk of receive code, then return
'patched to a jmp if pin not used
txcts0 test ctsmask,ina wc 'if flow-controlled dont send
rdlong t1,tx_head_ptr '{7-22} - head[0]
cmp t1,tx_tail wz 'tail[0]
ctsi0 if_z jmp #transmit 'may be patched to if_z_or_c or if_z_or_nc
rdbyte txdata,txbuff_tail_ptr '{8}
add tx_tail,#1
cmpsub tx_tail,txsize wz ' (TTA) for individually sized buffers, will
zero at rollover
wrlong tx_tail,tx_tail_ptr '{8}
if_z mov txbuff_tail_ptr,txbuff_ptr 'reset tail_ptr if we wrapped
if_nz add txbuff_tail_ptr,#1 'otherwise add 1
jmpret txcode,rxcode1
shl txdata,#2
or txdata,txbitor 'ready byte to transmit
mov txbits,#11
mov txcnt,cnt

97
txbit shr txdata,#1 wc
txout0 muxc outa,txmask 'maybe patched to muxnc dira,txmask
add txcnt,bit_ticks 'ready next cnt
:wait jmpret txcode,rxcode1 'run a chunk of receive code, then return
mov t1,txcnt 'check if bit transmit period done
sub t1,cnt
cmps t1,#0 wc
if_nc jmp #:wait
djnz txbits,#txbit 'another bit to transmit?
txjmp0 jmp ctsi0 'byte done, transmit next byte
'
' Transmit1 -------------------------------------------------------------------------------------
'
transmit1 jmpret txcode1,rxcode2 'run a chunk of receive code, then return
txcts1 test ctsmask1,ina wc 'if flow-controlled dont send
rdlong t1,tx_head_ptr1
cmp t1,tx_tail1 wz
ctsi1 if_z jmp #transmit1 'may be patched to if_z_or_c or if_z_or_nc
rdbyte txdata1,txbuff_tail_ptr1
add tx_tail1,#1
cmpsub tx_tail1,txsize1 wz ' (TTA) for individually sized buffers,
will zero at rollover
wrlong tx_tail1,tx_tail_ptr1
if_z mov txbuff_tail_ptr1,txbuff_ptr1 'reset tail_ptr if we wrapped
if_nz add txbuff_tail_ptr1,#1 'otherwise add 1

98
jmpret txcode1,rxcode2 'run a chunk of receive code, then return
shl txdata1,#2
or txdata1,txbitor 'ready byte to transmit
mov txbits1,#11
mov txcnt1,cnt
txbit1 shr txdata1,#1 wc
txout1 muxc outa,txmask1 'maybe patched to muxnc dira,txmask
add txcnt1,bit_ticks1 'ready next cnt
:wait1 jmpret txcode1,rxcode2 'run a chunk of receive code, then return
mov t1,txcnt1 'check if bit transmit period done
sub t1,cnt
cmps t1,#0 wc
if_nc jmp #:wait1
djnz txbits1,#txbit1 'another bit to transmit?
txjmp1 jmp ctsi1 'byte done, transmit next byte
'
' Transmit2 -------------------------------------------------------------------------------------
'
transmit2 jmpret txcode2,rxcode3 'run a chunk of receive code, then return
txcts2 test ctsmask2,ina wc 'if flow-controlled dont send
rdlong t1,tx_head_ptr2
cmp t1,tx_tail2 wz
ctsi2 if_z jmp #transmit2 'may be patched to if_z_or_c or if_z_or_nc
rdbyte txdata2,txbuff_tail_ptr2

99
add tx_tail2,#1
cmpsub tx_tail2,txsize2 wz ' (TTA) for individually sized buffers,
will zero at rollover
wrlong tx_tail2,tx_tail_ptr2
if_z mov txbuff_tail_ptr2,txbuff_ptr2 'reset tail_ptr if we wrapped
if_nz add txbuff_tail_ptr2,#1 'otherwise add 1
jmpret txcode2,rxcode3
shl txdata2,#2
or txdata2,txbitor 'ready byte to transmit
mov txbits2,#11
mov txcnt2,cnt
txbit2 shr txdata2,#1 wc
txout2 muxc outa,txmask2 'maybe patched to muxnc dira,txmask
add txcnt2,bit_ticks2 'ready next cnt
:wait2 jmpret txcode2,rxcode3 'run a chunk of receive code, then return
mov t1,txcnt2 'check if bit transmit period done
sub t1,cnt
cmps t1,#0 wc
if_nc jmp #:wait2
djnz txbits2,#txbit2 'another bit to transmit?
txjmp2 jmp ctsi2 'byte done, transmit next byte
'
' Transmit3 -------------------------------------------------------------------------------------
'
transmit3 jmpret txcode3,rxcode 'run a chunk of receive code, then return

100
txcts3 test ctsmask3,ina wc 'if flow-controlled dont send
rdlong t1,tx_head_ptr3
cmp t1,tx_tail3 wz
ctsi3 if_z jmp #transmit3 'may be patched to if_z_or_c or if_z_or_nc
rdbyte txdata3,txbuff_tail_ptr3
add tx_tail3,#1
cmpsub tx_tail3,txsize3 wz ' (TTA) for individually sized buffers,
will zero at rollover
wrlong tx_tail3,tx_tail_ptr3
if_z mov txbuff_tail_ptr3,txbuff_ptr3 'reset tail_ptr if we wrapped
if_nz add txbuff_tail_ptr3,#1 'otherwise add 1
jmpret txcode3,rxcode
shl txdata3,#2
or txdata3,txbitor 'ready byte to transmit
mov txbits3,#11
mov txcnt3,cnt
txbit3 shr txdata3,#1 wc
txout3 muxc outa,txmask3 'maybe patched to muxnc dira,txmask
add txcnt3,bit_ticks3 'ready next cnt
:wait3 jmpret txcode3,rxcode 'run a chunk of receive code, then return
mov t1,txcnt3 'check if bit transmit period done
sub t1,cnt
cmps t1,#0 wc
if_nc jmp #:wait3

101
djnz txbits3,#txbit3 'another bit to transmit?
txjmp3 jmp ctsi3 'byte done, transmit next byte
'
'The following are constants used by pasm for patching the code, depending on options
required
doifc2ifnc long $003c0000 'patch condition if_c to if_nc using xor
doif_z_or_c long $00380000 'patch condition if_z to if_z_or_c using or
doif_z_or_nc long $002c0000 'patch condition if_z to if_z_or_nc using
or
domuxnc long $04000000 'patch muxc to muxnc using or
txbitor long $0401 'bits to or for transmitting, adding start and stop
bits
' Buffer sizes initialized from CONstants and used by both spin and pasm
rxsize long RX_SIZE0 ' (TTA) size of the rx and tx buffers is
available to pasm and spin
rxsize1 long RX_SIZE1 ' these values are transfered from the
declared CONstants
rxsize2 long RX_SIZE2 ' at startup, individually configurable
rxsize3 long RX_SIZE3
txsize long TX_SIZE0
txsize1 long TX_SIZE1
txsize2 long TX_SIZE2
txsize3 long TX_SIZE3
' Object memory from here to the end is zeroed in the init/stop method ---------------'
' Some locations within the next set of values, after being initialized to zero, are then
filled with alternative options
102
' That are accessed from both spin and pasm
' Dont Change the order of these initialized variables within port groups of 4 without
modifying
' the code to match - both spin and assembler
startfill
rxchar byte 0 ' used by spin rxcheck, for inversion of received data
rxchar1 byte 0
rxchar2 byte 0
rxchar3 byte 0
cog long 0 'cog flag/id
rxtx_mode long 0 ' mode setting from values passed in by addport
rxtx_mode1 long 0 '
rxtx_mode2 long 0
rxtx_mode3 long 0
rx_head long 0 ' rx head pointer, from 0 to size of rx buffer, used in
spin and pasm
rx_head1 long 0 ' data is enqueued to this offset above base,
rxbuff_ptr
rx_head2 long 0
rx_head3 long 0
rx_tail long 0 ' rx tail pointer, ditto, zero to size of rx buffer
rx_tail1 long 0 ' data is dequeued from this offset above base,
rxbuff_ptr
rx_tail2 long 0
rx_tail3 long 0
tx_head long 0 ' tx head pointer, , from 0 to size of tx buffer, used in
spin and pasm
tx_head1 long 0 ' data is enqueued to this offset above base,
txbuff_ptr
tx_head2 long 0
103
tx_head3 long 0
tx_tail long 0 ' tx tail pointer, ditto, zero to size of rx buffer
tx_tail1 long 0 ' data is transmitted from this offset above base,
txbuff_ptr
tx_tail2 long 0
tx_tail3 long 0
rxbuff_ptr long 0 ' These are the base hub addresses of the receive
buffers
rxbuff_ptr1 long 0 ' initialized in spin, referenced in pasm and spin
rxbuff_ptr2 long 0 ' these buffers and sizes are individually configurable
rxbuff_ptr3 long 0
txbuff_ptr long 0 ' These are the base hub addresses of the transmit
buffers
txbuff_ptr1 long 0
txbuff_ptr2 long 0
txbuff_ptr3 long 0
' Start of HUB overlay ------------------------------------------------------------------------
' Some locations within the next set of values, after being init'd to zero, are then filled
from spin with options
' That are transferred to and accessed by the pasm cog once started, but no longer needed
in spin.
' Therefore, tx and rx buffers start here and overlays the hub footprint of these variables.
' tx_buffers come first, 0,1,2,3, then rx buffers 0,1,2,3 by offset from "buffers"
overlay
buffers
txdata long 0
txbits long 0
txcnt long 0
txdata1 long 0
txbits1 long 0

104
txcnt1 long 0
txdata2 long 0
txbits2 long 0
txcnt2 long 0
txdata3 long 0
txbits3 long 0
txcnt3 long 0
rxdata long 0
rxbits long 0
rxcnt long 0
rxdata1 long 0
rxbits1 long 0
rxcnt1 long 0
rxdata2 long 0
rxbits2 long 0
rxcnt2 long 0
rxdata3 long 0
rxbits3 long 0
rxcnt3 long 0
t1 long 0 ' this is a temporary variable used by pasm
rxmask long 0 ' a single bit set, a mask for the pin used for receive,
zero if port not used for receive
rxmask1 long 0
rxmask2 long 0
rxmask3 long 0
txmask long 0 ' a single bit set, a mask for the pin used for transmit,
zero if port not used for transmit
txmask1 long 0
txmask2 long 0
txmask3 long 0

105
ctsmask long 0 ' a single bit set, a mask for the pin used for cts input,
zero if port not using cts
ctsmask1 long 0
ctsmask2 long 0
ctsmask3 long 0
rtsmask long 0 ' a single bit set, a mask for the pin used for rts output,
zero if port not using rts
rtsmask1 long 0
rtsmask2 long 0
rtsmask3 long 0
bit4_ticks long 0 ' bit ticks for start bit, 1/4 of standard bit
bit4_ticks1 long 0
bit4_ticks2 long 0
bit4_ticks3 long 0
bit_ticks long 0 ' clock ticks per bit
bit_ticks1 long 0
bit_ticks2 long 0
bit_ticks3 long 0
rtssize long 0 ' threshold in count of bytes above which will assert rts
to stop flow
rtssize1 long 0
rtssize2 long 0
rtssize3 long 0
rxbuff_head_ptr long 0 ' Hub address of data received, base plus offset
rxbuff_head_ptr1 long 0 ' pasm writes WRBYTE to hub at this address,
initialized in spin to base address
rxbuff_head_ptr2 long 0
rxbuff_head_ptr3 long 0
txbuff_tail_ptr long 0 ' Hub address of data tranmitted, base plus offset
txbuff_tail_ptr1 long 0 ' pasm reads RDBYTE from hub at this address,
initialized in spin to base address

106
txbuff_tail_ptr2 long 0
txbuff_tail_ptr3 long 0
rx_head_ptr long 0 ' pointer to the hub address of where the head and
tail offset pointers are stored
rx_head_ptr1 long 0 ' these pointers are initialized in spin but then used
only by pasm
rx_head_ptr2 long 0 ' the pasm cog has to know where in the hub to
find those offsets.
rx_head_ptr3 long 0
rx_tail_ptr long 0
rx_tail_ptr1 long 0
rx_tail_ptr2 long 0
rx_tail_ptr3 long 0
tx_head_ptr long 0
tx_head_ptr1 long 0
tx_head_ptr2 long 0
tx_head_ptr3 long 0
tx_tail_ptr long 0
tx_tail_ptr1 long 0
tx_tail_ptr2 long 0
tx_tail_ptr3 long 0
'' ----------- End of the object memory zeroed from startfill to endfill in the init/stop
method ------
endfill
FIT
'' The above is all of the necessary code that must fit in the cog
'' The following are extra bytes if necessary to provide the required rx and tx buffers.
'' the number required is computed from the aggregate buffer size declared, minus the
above initialized but recycled variables.
107
extra byte 0 [RXTX_BUFSIZE - (RXTX_BUFSIZE <# (@extra -
@overlay))]
{{
┌─────────────────────────────────────────────────
──────────────────────────────────────────────────
───────────────────────────┐
│ TERMS OF USE: MIT License
│
├─────────────────────────────────────────────────
──────────────────────────────────────────────────
───────────────────────────┤
│Permission is hereby granted, free of charge, to any person obtaining a copy of this
software and associated documentation │
│files (the "Software"), to deal in the Software without restriction, including without
limitation the rights to use, copy, │
│modify, merge, publish, distribute, sublicense, and/or sell copies of the Software, and
to permit persons to whom the Software│
│is furnished to do so, subject to the following conditions:
│
│ │
│The above copyright notice and this permission notice shall be included in all copies or
substantial portions of the Software.│
│ │
│THE SOFTWARE IS PROVIDED "AS IS", WITHOUT WARRANTY OF ANY
KIND, EXPRESS OR IMPLIED, INCLUDING BUT NOT LIMITED TO THE │
│WARRANTIES OF MERCHANTABILITY, FITNESS FOR A PARTICULAR
PURPOSE AND NONINFRINGEMENT. IN NO EVENT SHALL THE AUTHORS
OR │

108
│COPYRIGHT HOLDERS BE LIABLE FOR ANY CLAIM, DAMAGES OR OTHER
LIABILITY, WHETHER IN AN ACTION OF CONTRACT, TORT OR OTHERWISE,
│
│ARISING FROM, OUT OF OR IN CONNECTION WITH THE SOFTWARE OR
THE USE OR OTHER DEALINGS IN THE SOFTWARE. │
└─────────────────────────────────────────────────
──────────────────────────────────────────────────
───────────────────────────┘
6.5.5 DataIO4port.Spin Library
''******************************************************************
''* DataIO4port version 1.0 1/22/2012 *
''* Author: Tracy Allen *
''* Copyright (c), EME Systems and others under MIT licence *
''* See end of file for terms of use. *
''* adapted from pcFullDuplexSerial4fc by Tim Moore 2008 *
''* Merged Debug_PC (Jon Williams) *
''* Merged Parallax Serial Terminal numeric input (Jeff Martin, *
''* Andy Lindsay, Chip Gracey) *
''* *
''* Release Notes: *
''* These are methods for string and numeric output and input *
''* using fullDuplexSerial4port, my adaptation of Tim Moore's *
''* pcFullDuplexSerial4fc. In the original these were included *
''* in the main program, but here I have broken them off as pass- *
''* through routines, and added string and numeric input methods. *
''* These methods are called with reference to a port as defined *
''* when FullDuplexSerial4port is initialized. *
''* *
''* If you do want to merge these methods back into the main *
''* object, simply remove all the "uarts." object references *

109
''* *
''* I made these separate, because for my own work I often use a *
''* completely different set of string & numeric i/o methods. *
''* *
''******************************************************************
CON
FF = 12 ' form feed
CR = 13 ' carriage return
NL = 13
MAXSTR_LENGTH = 32 ' this limits the size of a binary string
that can be entered
VAR
byte str_buffer[MAXSTR_LENGTH+1] 'String buffer for numerical
string input only
' This is in VAR space. If multiple cogs will be
_inputing_ numerical data
' simultaneously, it is necessary to delare another
instance so that
' the buffers do not clash! That applies to numerical
parsing only.
OBJ
uarts : "FullDuplexSerial4port"
PUB str(port,stringptr)

110
'' Send string
repeat strsize(stringptr)
uarts.tx(port,byte[stringptr++])
PUB strln(port,strAddr)
'' Print a zero-terminated string
str(port,strAddr)
uarts.tx(port,CR)
PUB dec(port,value) | i
'' Print a decimal number
decl(port,value,10,0)
PUB decf(port,value, width) | i
'' Prints signed decimal value in space-padded, fixed-width field
decl(port,value,width,1)
PUB decx(port,value, digits) | i
'' Prints zero-padded, signed-decimal string
'' -- if value is negative, field width is digits+1
decl(port,value,digits,2)
PUB decl(port,value,digits,flag) | i, x
digits := 1 #> digits <# 10
x := value == NEGX 'Check for max negative
if value < 0
value := ||(value+x) 'If negative, make positive;
adjust for max negative
uarts.tx(port,"-")
i := 1_000_000_000

111
if flag & 3
if digits < 10 ' less than 10 digits?
repeat (10 - digits) ' yes, adjust divisor
i /= 10
repeat digits
if value => i
uarts.tx(port,value / i + "0")
value //= i
result~~
elseif (i == 1) OR result OR (flag & 2)
uarts.tx(port,"0")
elseif flag & 1
uarts.tx(port," ")
i /= 10
PUB decDp(port,value,places) | divisor ' prints out a fixed point number with a decimal
point, places
divisor := 1
repeat places
divisor := divisor * 10
dec(port,value/divisor)
uarts.tx(port,".")
decx(port,||value//divisor,places)
PUB hex(port,value, digits)
'' Print a hexadecimal number
value <<= (8 - digits) << 2
repeat digits
uarts.tx(port,lookupz((value <-= 4) & $F : "0".."9", "A".."F"))

112
PUB ihex(port,value, digits)
'' Print an indicated hexadecimal number
uarts.tx(port,"$")
hex(port,value,digits)
PUB bin(port,value, digits)
'' Print a binary number
value <<= 32 - digits
repeat digits
uarts.tx(port,(value <-= 1) & 1 + "0")
PUB padchar(port,count, txbyte)
repeat count
uarts.tx(port,txbyte)
PUB ibin(port,value, digits)
'' Print an indicated binary number
uarts.tx(port,"%")
bin(port,value,digits)
PUB putc(port,txbyte)
'' Send a byte to the terminal
uarts.tx(port,txbyte)
PUB newline(port)
putc(port,CR)
PUB cls(port)
putc(port,FF)
PUB getc(port)

113
'' Get a character
'' -- will not block if nothing in uart buffer
return uarts.rxcheck(port)
' return rx
con
{the following added from PST primarily for data input}
PUB StrIn(port,stringptr)
{{TTA from PST.
Receive a string (carriage return terminated) and stores it (zero terminated) starting at
stringptr.
Waits until full string received.
Parameter:
stringptr - pointer to memory in which to store received string characters.
Memory reserved must be large enough for all string characters plus a zero
terminator.}}
StrInMax(port, stringptr, -1)
PUB StrInMax(port, stringptr, maxcount) | char, ticks
{{from PST, modified
Receive a string of characters (either carriage return terminated or maxcount in length)
and stores it (zero terminated)
starting at stringptr. Waits until either full string received or maxcount characters
received.
Parameters:
stringptr - pointer to memory in which to store received string characters.
Memory reserved must be large enough for all string characters plus a zero
terminator (maxcount + 1).
maxcount - maximum length of string to receive, or -1 for unlimited.}}

114
maxcount <#= MAXSTR_LENGTH
repeat maxcount 'While maxcount not reached
if (byte[stringptr++] := uarts.rx(0)) == NL 'Get chars until NL
quit
byte[stringptr+(byte[stringptr-1] == NL)]~ 'Zero terminate string;
overwrite NL or append 0 char
PUB StrInB(port, stringptr, seconds) | char, ticks
ticks := clkfreq*seconds+cnt
repeat MAXSTR_LENGTH
repeat
char := uarts.rxcheck(port)
until char > -1
case char
32..126 : byte[stringptr++] := char ' encompasses all numeric chars in dec and hex
8, 127 :stringptr--
13 : quit
if ticks -= cnt < 0
quit
byte[stringptr]~
PUB DecIn(port) : value
{{PST.
Receive carriage return terminated string of characters representing a decimal value.
Returns: the corresponding decimal value.}}
StrInMax(port, @str_buffer, MAXSTR_LENGTH)
value := StrToBase(@str_buffer, 10)

115
PUB HexIn(port) : value
{{from PST.
Receive carriage return terminated string of characters representing a hexadecimal value.
Returns: the corresponding hexadecimal value.}}
StrInMax(port, @str_buffer, MAXSTR_LENGTH)
value := StrToBase(@str_buffer, 16)
PUB BinIn(port) : value
{{from PST.
Receive carriage return terminated string of characters representing a binary value.
Returns: the corresponding binary value. Note that the constant MAXSTR_LENGTH
limits the # of digits}}
StrInMax(port, @str_buffer, MAXSTR_LENGTH)
value := StrToBase(@str_buffer, 2)
PRI StrToBase(stringptr, base) : value | chr, index
{from PST.
Converts a zero terminated string representation of a number to a value in the designated
base.
Ignores all non-digit characters (except negative (-) when base is decimal (10)).}
value := index := 0
repeat until ((chr := byte[stringptr][index++]) == 0)
chr := -15 + --chr & %11011111 + 39*(chr > 56) 'Make "0"-
"9","A"-"F","a"-"f" be 0 - 15, others out of range
if (chr > -1) and (chr < base) 'Accumulate valid values
into result; ignore others
value := value * base + chr

116
if (base == 10) and (byte[stringptr] == "-") 'If decimal, address
negative sign; ignore otherwise
value := - value
DAT
'***********************************
'* Assembly language serial driver *
'***********************************
{{
┌─────────────────────────────────────────────────
──────────────────────────────────────────────────
───────────────────────────┐
│ TERMS OF USE: MIT License
│
├─────────────────────────────────────────────────
──────────────────────────────────────────────────
───────────────────────────┤
│Permission is hereby granted, free of charge, to any person obtaining a copy of this
software and associated documentation │
│files (the "Software"), to deal in the Software without restriction, including without
limitation the rights to use, copy, │
│modify, merge, publish, distribute, sublicense, and/or sell copies of the Software, and
to permit persons to whom the Software│
│is furnished to do so, subject to the following conditions:
│
│ │
│The above copyright notice and this permission notice shall be included in all copies or
substantial portions of the Software.│
│ │

117
│THE SOFTWARE IS PROVIDED "AS IS", WITHOUT WARRANTY OF ANY
KIND, EXPRESS OR IMPLIED, INCLUDING BUT NOT LIMITED TO THE │
│WARRANTIES OF MERCHANTABILITY, FITNESS FOR A PARTICULAR
PURPOSE AND NONINFRINGEMENT. IN NO EVENT SHALL THE AUTHORS
OR │
│COPYRIGHT HOLDERS BE LIABLE FOR ANY CLAIM, DAMAGES OR OTHER
LIABILITY, WHETHER IN AN ACTION OF CONTRACT, TORT OR OTHERWISE,
│
│ARISING FROM, OUT OF OR IN CONNECTION WITH THE SOFTWARE OR
THE USE OR OTHER DEALINGS IN THE SOFTWARE. │
└─────────────────────────────────────────────────
──────────────────────────────────────────────────
───────────────────────────┘
}}