Get flexible, feature-rich datacenter management at a ... · datacenter management at a lower cost...
29
Get flexible, feature-rich datacenter management at a lower cost June 2018 Get flexible, feature-rich datacenter management at a lower cost The Dell EMC PowerEdge FX2 with OpenManage can save time for IT admins compared to HPE Synergy with OneView When you’re considering a modular solution for your datacenter, the IT staff dedicated to datacenter management will likely have a number of questions. How much time and effort will they need to spend managing it? Can they still use their existing toolsets and processes? Will the solution fit neatly into the current management infrastructure? And perhaps most important for your decision-makers: how much will it cost? Organizations of every size must answer these questions before any new datacenter purchase. After comparing the hands-on management experience of the Dell EMC ™ PowerEdge ™ FX2 server using 14th generation Dell EMC FC640 compute sleds with Dell EMC OpenManage ™ Systems Management solutions to that of HPE Synergy with embedded HPE OneView, we found that the Dell EMC solution saved time in multiple use cases, offered feature-rich integrations with Microsoft ® System Center and VMware vCenter ® , and had a lower price tag than the HPE solution. If your datacenter needs powerful new hardware and great manageability, read on to learn why your IT admins and your CFO might thank you for choosing the Dell EMC solution. Dell EMC PowerEdge FX2 chassis with FC640 modular servers up to 97% faster when deploying multiple Windows ® servers up to 89% faster when using OpenManage Integration for Microsoft System Center to deploy firmware updates up to 36% less cost on an initial six-node purchase compared to HPE Synergy A Principled Technologies report: Hands-on testing. Real-world results.
Transcript of Get flexible, feature-rich datacenter management at a ... · datacenter management at a lower cost...
Get flexible, feature-rich datacenter management at a lower cost June 2018
Get flexible, feature-rich datacenter management at a lower costThe Dell EMC PowerEdge FX2 with OpenManage can save time for IT admins compared to HPE Synergy with OneView When you’re considering a modular solution for your datacenter, the IT staff dedicated to datacenter management will likely have a number of questions. How much time and effort will they need to spend managing it? Can they still use their existing toolsets and processes? Will the solution fit neatly into the current management infrastructure? And perhaps most important for your decision-makers: how much will it cost? Organizations of every size must answer these questions before any new datacenter purchase.
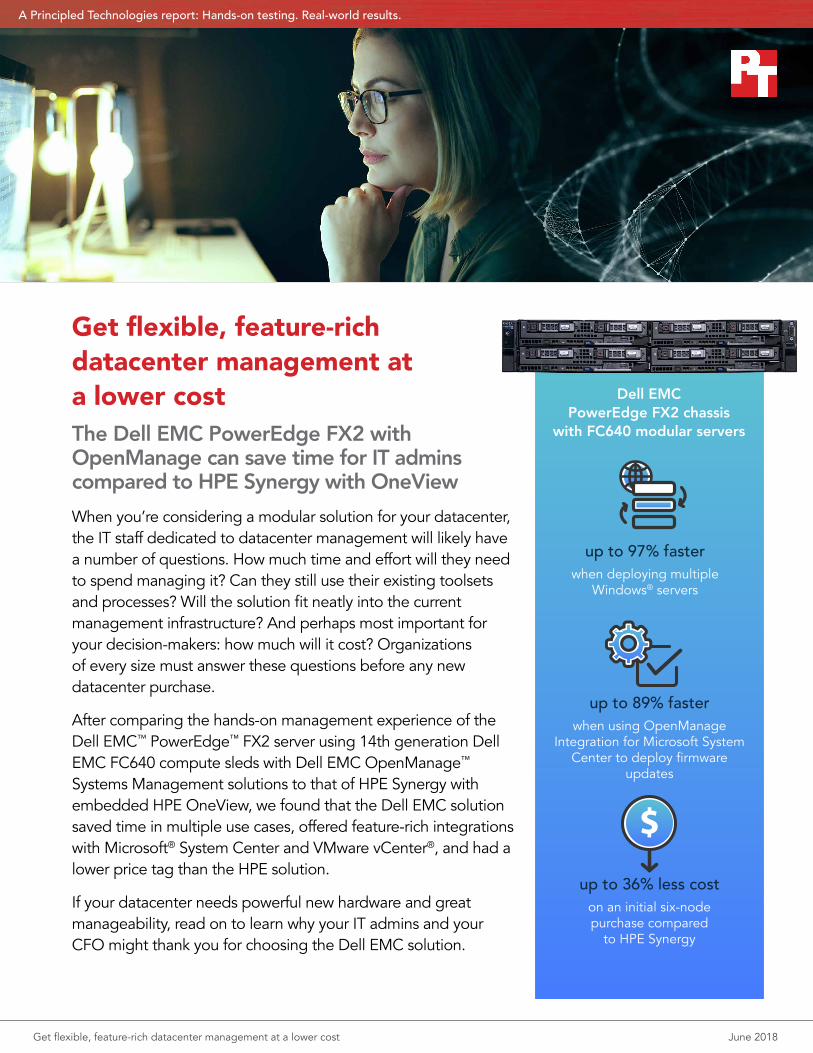
After comparing the hands-on management experience of the Dell EMC™ PowerEdge™ FX2 server using 14th generation Dell EMC FC640 compute sleds with Dell EMC OpenManage™ Systems Management solutions to that of HPE Synergy with embedded HPE OneView, we found that the Dell EMC solution saved time in multiple use cases, offered feature-rich integrations with Microsoft® System Center and VMware vCenter®, and had a lower price tag than the HPE solution.
If your datacenter needs powerful new hardware and great manageability, read on to learn why your IT admins and your CFO might thank you for choosing the Dell EMC solution.
Dell EMC PowerEdge FX2 chassis
with FC640 modular servers
up to 97% fasterwhen deploying multiple
Windows® servers
up to 89% fasterwhen using OpenManage
Integration for Microsoft System Center to deploy firmware
updates
up to 36% less coston an initial six-node purchase compared
to HPE Synergy
A Principled Technologies report: Hands-on testing. Real-world results.

Get flexible, feature-rich datacenter management at a lower cost June 2018 | 2
Dell EMC PowerEdge FX2 + OpenManage: Simpler, faster management options for new and existing datacentersFor a wide range of businesses—from growing startups to modernizing enterprises with large IT installations worldwide—the Dell EMC PowerEdge FX2 with OpenManage systems management offers advantages in datacenter management, including savings in time and effort, increased automation, and minimized complexity. For example, if an organization with VMware virtual infrastructure chose to add an FX2 solution to their existing datacenter, OpenManage Integration for VMware vCenter would allow IT admins to manage servers directly from within VMware vCenter. Managing new hardware and existing virtual layers simultaneously could save time and effort for IT admins compared to using HPE OneView for VMware vCenter with an HPE Synergy solution. In addition, the PowerEdge FX2 solution costs up to 36 percent less than the HPE option, which bolsters the decision for any organization, as paying less for modern IT architecture can help anyone’s bottom line. In this paper, we’ll walk you through our findings and highlight where a Dell EMC PowerEdge FX2 solution with OpenManage systems management solutions can benefit your organization.
How we testedWe compared the management capabilities of a Dell EMC PowerEdge FX2 solution to the HPE Synergy platform’s comparable offerings. For the FX2 solution, we leveraged iDRAC, Lifecycle Controller, and OpenManage Essentials; for the HPE solution, we used OneView for Synergy, Integrated Lights-Out (iLO), and Intelligent Provisioning. We ran each environment through common administration scenarios such as deploying ESXi™ or Hyper-V® and updating firmware.
We also compared how well VMware and Microsoft tools integrated with Dell EMC OpenManage and HPE OneView. These third-party integrations seek to offer agent-free, comprehensive management and monitoring for datacenters operating under established workflows and processes based on third-party tools.
In our testing, we used OpenManage Essentials; however, OpenManage Enterprise, the latest Dell EMC systems management solution, is also now available to customers. To learn more about it, please visit http://www.dell.com/en-us/work/learn/enterprise-systems-management.
Automate PowerEdge server management with iDRAC9According to Dell, “[t]he integrated Dell Remote Access Controller 9 (iDRAC9) with Lifecycle Controller delivers advanced, agent-free, local, and remote server administration. Embedded in every PowerEdge server, iDRAC9 provides a secure means to automate a multitude of common server management tasks” including configuration, firmware updates, monitoring, and troubleshooting.1
Key features include:2, 3
• Agent-free embedded management for automating common lifecycle management tasks
• Remote virtual console with HTML5 interface
• iDRAC RESTful automation API
• Automated “Zero Touch” provisioning of configuration and firmware for bare metal servers via DHCP
• Wireless server management for iOS and Android™ mobile devices via Quick Sync 2 and OpenManage Mobile app
• Security features for protecting server operation including Silicon Root of Trust and System Lockdown
• Integration with Dell EMC and leading third-party management consoles

Get flexible, feature-rich datacenter management at a lower cost June 2018 | 3
Manage with flexible and familiar tools from Dell EMCWhen it comes to datacenter management, every IT administrator has preferences or know-how for certain tools and features. Learning a new management platform can be frustrating and time-consuming, so if IT admins can continue using tools they already know and use, it could save them time—thereby saving money for your organization.
An FX2 solution offers familiar Dell EMC tools with updates for the modern datacenter. Your IT admins can choose from the following approaches to manage an FX2 in your datacenter:
• Direct hardware management at the chassis level using the Dell EMC Chassis Management Controller (CMC)
• Wider-ranging, centralized management with Dell EMC OpenManage Essentials, which IT admins can use to control entire datacenters
• The OpenManage Integrations for VMware vCenter and Microsoft System Center (OMIVV and OMIMSSC), which provide direct, integrated hardware management within the context of the familiar VMware and Microsoft solutions
This flexibility can be extremely helpful for datacenters with and without existing Dell EMC hardware and is different than managing an HPE Synergy solution.
About the Dell EMC PowerEdge FX2 solutionThe Dell EMC PowerEdge FX2 is a modular platform that combines servers, storage, and networking in a single 2U chassis.
In our testing, we used two-socket, half-height Dell EMC PowerEdge FC640 compute sleds. Each FX2 chassis can support up to four FC640 compute sleds in 2U. These new 14th generation servers feature the new Intel® Xeon® Processor Scalable family, up to 2 TB of memory, and a range of storage media, including SSDs using SATA, SAS, and NVMe drive technology.
To learn more about the Dell EMC PowerEdge FX architecture, visit http://www.dell.com/en-us/work/learn/fx-server-solutions.
Racking and cabling under your controlOur IT administrators were able to start deploying the Dell EMC PowerEdge FX2 as soon as it arrived in our datacenter. In contrast, a lack of official deployment documentation from HPE means your IT admins will need to use Installation and Startup Services for HPE Synergy, which means delaying the installation until professional services can perform the initial configuration.4
By deploying the Dell EMC solution ourselves rather than waiting for professional services, we had our Dell EMC environment production ready sooner than the Synergy solution. It took HPE services two days to deploy the Synergy solution onsite, with additional time from IT admins prior to installation.
If you prefer professional services, Dell EMC offers ProDeploy, which we discuss in a February 2018 report.5

Get flexible, feature-rich datacenter management at a lower cost June 2018 | 4
IT admins have only one choice for managing a Synergy platform with OneView version 3.0, the release that we tested: embedded HPE OneView. The embedded OneView can manage only the HPE systems within the Synergy platform. IT admins must use a second, separate, global OneView environment to manage the other HPE offerings including rack and stand-alone systems. They can monitor Synergy from the second OneView window, but to perform any management tasks, they must switch back to the first OneView environment embedded in Synergy in another pane. Managing multiple HPE tools and windows can be a time-consuming headache for IT admins and can increase the chance for errors.
OpenManage Essentials in general allows IT admins to monitor third-party servers and manage different Dell EMC rack, tower, and blade systems and modular enclosures, such as the FX2.
In the datacenterThe following sections use results from our hands-on testing to discuss the advantages a Dell EMC PowerEdge FX2 and OpenManage systems management solution could give your organization.
Save time deploying Windows Server using OpenManage Essentials Multiple Windows servers
After the initial setup and Windows Server® profile creation in our datacenter, we found it took 97 percent less time (over an hour and 10 minutes faster) to deploy three Windows servers using Dell EMC OpenManage Essentials compared to HPE OneView. The key to the disparity: IT admins using only HPE Synergy native tools still have to log into each node and install Windows Server, one instance at a time.
Deploying Windows Server at scale is simpler with OpenManage Essentials. Whether an IT admin wants to deploy three or 100, it would take the same amount of time and steps after initial configuration. It’s more time-consuming and complex to do the same task in OneView: As IT admins can’t deploy multiple Windows Server systems at once, each deployment would require additional time to repeat the steps. This kind of time savings would allow IT admins to focus on other crucial datacenter initiatives.
Spend up to 97% less time and take 20 fewer steps when deploying three Windows serversDell EMC PowerEdge FX2
0:02:03
(hr:min:sec)
1:12:21HPE Synergy
13 steps
33 steps
“ [IT Admins] can monitor Synergy from the second OneView window, but to perform any management tasks, they must switch back to the first OneView environment embedded in Synergy in another pane.”

Get flexible, feature-rich datacenter management at a lower cost June 2018 | 5
Single Windows server
We found a significant time savings when we used OpenManage Essentials to deploy a single Windows server as well. Compared to using OneView, OpenManage Essentials saved over 22 minutes (91 percent less time). If your datacenter frequently scales Windows servers to meet customer demand or improve operational efficiency, an FX2 with OpenManage Essentials delivers those production-ready Windows servers sooner to improve production and productivity.
Updating firmware
After some initial configuration, OpenManage Essentials is the faster choice when you need to update firmware for multiple Windows servers. Updating firmware for either one or many servers requires less than a minute of IT administrator time and six steps with OpenManage Essentials. It’s a fully automated process after that.
Without additional supporting infrastructure for OneView 3.0, a firmware update for each base OS requires four steps and 23 seconds of IT administrator time. As OpenManage Essentials can update firmware concurrently and OneView 3.0 cannot, we found an IT admin using OpenManage Essentials needed 27 percent less time (nearly 20 seconds) to update firmware for three servers. The savings scales: If your IT admin needed to update firmware to hundreds or thousands of Windows servers, they would save significant time from their busy schedule.
Simplify management with powerful third-party integrationsDepending on your datacenter’s needs, your IT admins may routinely run enterprise management solutions from VMware or Microsoft in addition to the tool specific to your solution’s requirements. By effectively integrating these third-party tools with your hardware management platform, you can reduce the complexity of managing your datacenter.
Here are some key takeaways we found when testing the integrations for both solutions:
• Both Dell EMC and HPE systems management solutions offer integrations for these third-party tools, but using the tools for managing an HPE Synergy platform can disrupt existing workflows.
• The OpenManage Integrations for VMware vCenter and Microsoft System Center offer several speed and efficiency advantages compared to the integrations for OneView.
• When using VMware vCenter and Microsoft System Center integrations for OneView, IT admins still have to switch back over to the embedded OneView for Synergy to perform several management tasks.
Get flexible, feature-rich datacenter management at a lower cost June 2018 | 6
The sections below highlight more ways your organization can benefit from third-party integrations for OpenManage.
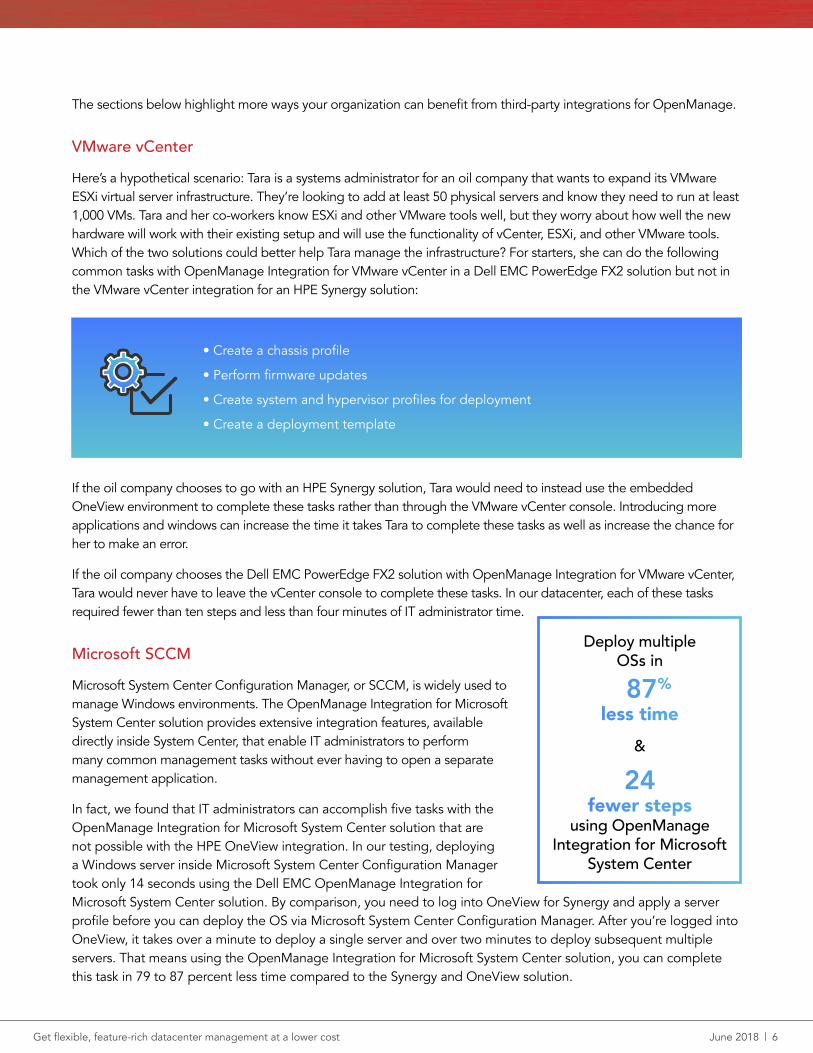
VMware vCenterHere’s a hypothetical scenario: Tara is a systems administrator for an oil company that wants to expand its VMware ESXi virtual server infrastructure. They’re looking to add at least 50 physical servers and know they need to run at least 1,000 VMs. Tara and her co-workers know ESXi and other VMware tools well, but they worry about how well the new hardware will work with their existing setup and will use the functionality of vCenter, ESXi, and other VMware tools. Which of the two solutions could better help Tara manage the infrastructure? For starters, she can do the following common tasks with OpenManage Integration for VMware vCenter in a Dell EMC PowerEdge FX2 solution but not in the VMware vCenter integration for an HPE Synergy solution:
If the oil company chooses to go with an HPE Synergy solution, Tara would need to instead use the embedded OneView environment to complete these tasks rather than through the VMware vCenter console. Introducing more applications and windows can increase the time it takes Tara to complete these tasks as well as increase the chance for her to make an error.
If the oil company chooses the Dell EMC PowerEdge FX2 solution with OpenManage Integration for VMware vCenter, Tara would never have to leave the vCenter console to complete these tasks. In our datacenter, each of these tasks required fewer than ten steps and less than four minutes of IT administrator time.
Microsoft SCCMMicrosoft System Center Configuration Manager, or SCCM, is widely used to manage Windows environments. The OpenManage Integration for Microsoft System Center solution provides extensive integration features, available directly inside System Center, that enable IT administrators to perform many common management tasks without ever having to open a separate management application.
In fact, we found that IT administrators can accomplish five tasks with the OpenManage Integration for Microsoft System Center solution that are not possible with the HPE OneView integration. In our testing, deploying a Windows server inside Microsoft System Center Configuration Manager took only 14 seconds using the Dell EMC OpenManage Integration for Microsoft System Center solution. By comparison, you need to log into OneView for Synergy and apply a server profile before you can deploy the OS via Microsoft System Center Configuration Manager. After you’re logged into OneView, it takes over a minute to deploy a single server and over two minutes to deploy subsequent multiple servers. That means using the OpenManage Integration for Microsoft System Center solution, you can complete this task in 79 to 87 percent less time compared to the Synergy and OneView solution.
Deploy multiple OSs in87%
less time &
24fewer steps
using OpenManage Integration for Microsoft
System Center
• Create a chassis profile
• Perform firmware updates
• Create system and hypervisor profiles for deployment
• Create a deployment template
Get flexible, feature-rich datacenter management at a lower cost June 2018 | 7
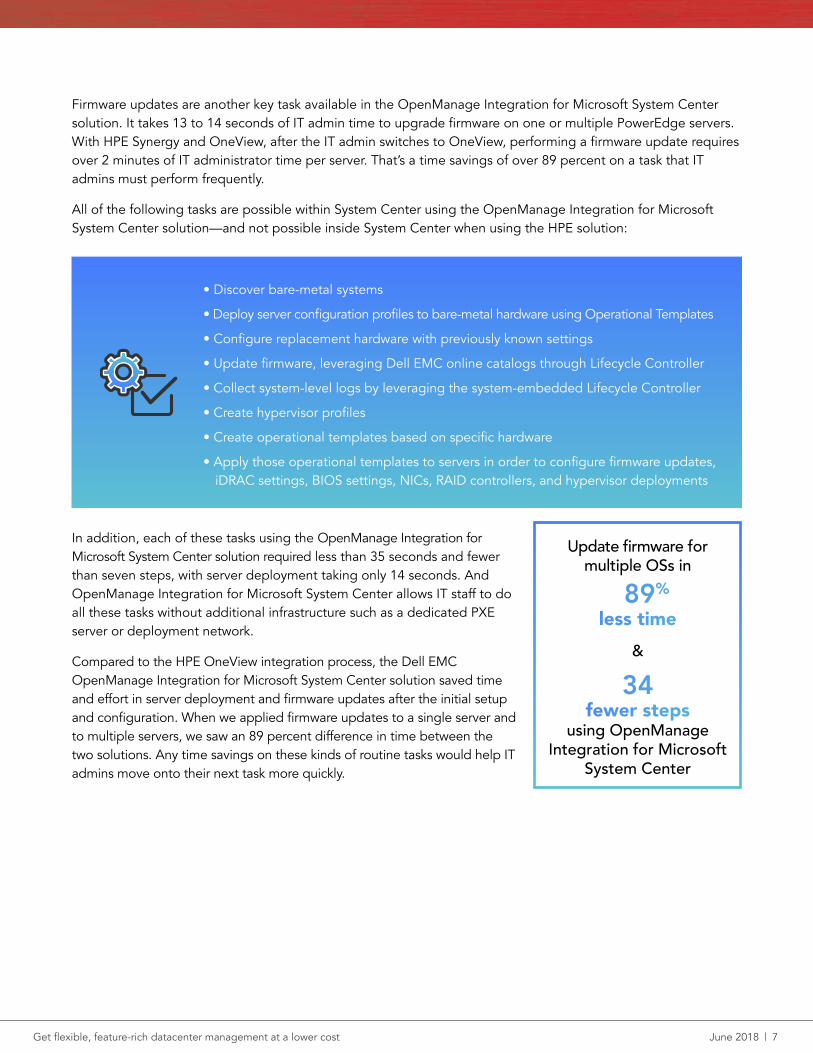
Firmware updates are another key task available in the OpenManage Integration for Microsoft System Center solution. It takes 13 to 14 seconds of IT admin time to upgrade firmware on one or multiple PowerEdge servers. With HPE Synergy and OneView, after the IT admin switches to OneView, performing a firmware update requires over 2 minutes of IT administrator time per server. That’s a time savings of over 89 percent on a task that IT admins must perform frequently.
All of the following tasks are possible within System Center using the OpenManage Integration for Microsoft System Center solution—and not possible inside System Center when using the HPE solution:
In addition, each of these tasks using the OpenManage Integration for Microsoft System Center solution required less than 35 seconds and fewer than seven steps, with server deployment taking only 14 seconds. And OpenManage Integration for Microsoft System Center allows IT staff to do all these tasks without additional infrastructure such as a dedicated PXE server or deployment network.
Compared to the HPE OneView integration process, the Dell EMC OpenManage Integration for Microsoft System Center solution saved time and effort in server deployment and firmware updates after the initial setup and configuration. When we applied firmware updates to a single server and to multiple servers, we saw an 89 percent difference in time between the two solutions. Any time savings on these kinds of routine tasks would help IT admins move onto their next task more quickly.
Update firmware for multiple OSs in
89%
less time &
34fewer steps
using OpenManage Integration for Microsoft
System Center
• Discover bare-metal systems
• Deploy server configuration profiles to bare-metal hardware using Operational Templates
• Configure replacement hardware with previously known settings
• Update firmware, leveraging Dell EMC online catalogs through Lifecycle Controller
• Collect system-level logs by leveraging the system-embedded Lifecycle Controller
• Create hypervisor profiles
• Create operational templates based on specific hardware
• Apply those operational templates to servers in order to configure firmware updates, iDRAC settings, BIOS settings, NICs, RAID controllers, and hypervisor deployments
Get flexible, feature-rich datacenter management at a lower cost June 2018 | 8
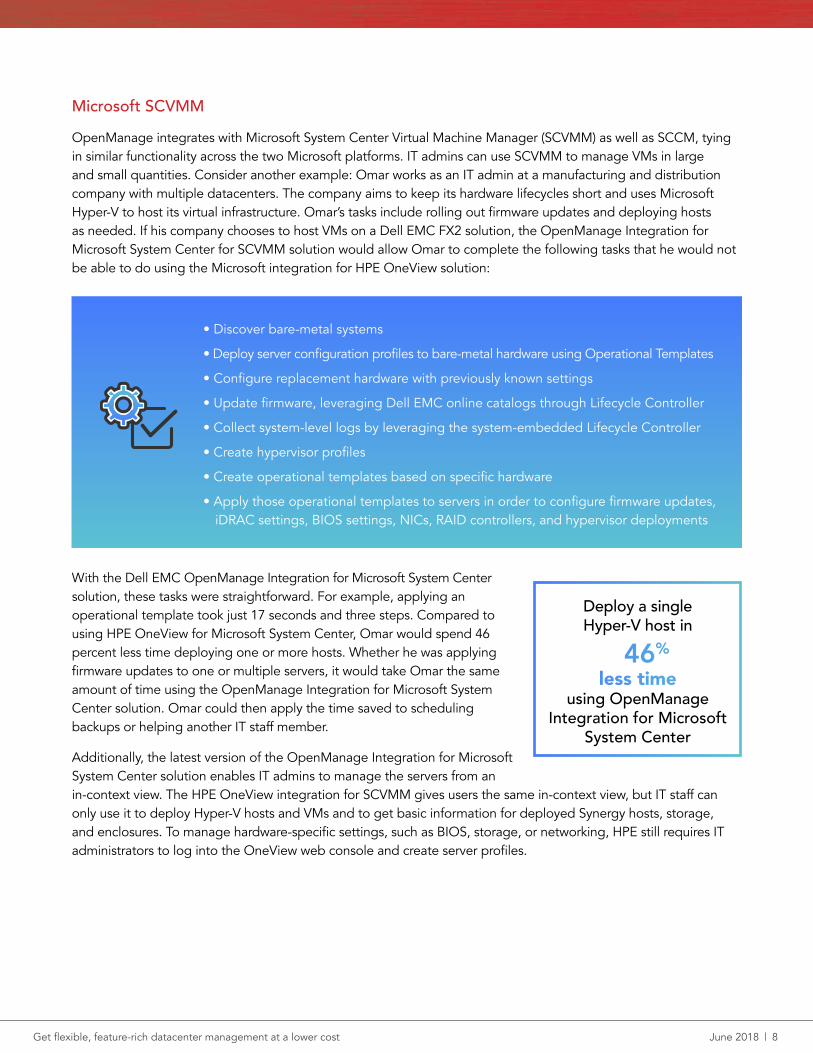
Microsoft SCVMMOpenManage integrates with Microsoft System Center Virtual Machine Manager (SCVMM) as well as SCCM, tying in similar functionality across the two Microsoft platforms. IT admins can use SCVMM to manage VMs in large and small quantities. Consider another example: Omar works as an IT admin at a manufacturing and distribution company with multiple datacenters. The company aims to keep its hardware lifecycles short and uses Microsoft Hyper-V to host its virtual infrastructure. Omar’s tasks include rolling out firmware updates and deploying hosts as needed. If his company chooses to host VMs on a Dell EMC FX2 solution, the OpenManage Integration for Microsoft System Center for SCVMM solution would allow Omar to complete the following tasks that he would not be able to do using the Microsoft integration for HPE OneView solution:
With the Dell EMC OpenManage Integration for Microsoft System Center solution, these tasks were straightforward. For example, applying an operational template took just 17 seconds and three steps. Compared to using HPE OneView for Microsoft System Center, Omar would spend 46 percent less time deploying one or more hosts. Whether he was applying firmware updates to one or multiple servers, it would take Omar the same amount of time using the OpenManage Integration for Microsoft System Center solution. Omar could then apply the time saved to scheduling backups or helping another IT staff member.
Additionally, the latest version of the OpenManage Integration for Microsoft System Center solution enables IT admins to manage the servers from an in-context view. The HPE OneView integration for SCVMM gives users the same in-context view, but IT staff can only use it to deploy Hyper-V hosts and VMs and to get basic information for deployed Synergy hosts, storage, and enclosures. To manage hardware-specific settings, such as BIOS, storage, or networking, HPE still requires IT administrators to log into the OneView web console and create server profiles.
• Discover bare-metal systems
• Deploy server configuration profiles to bare-metal hardware using Operational Templates
• Configure replacement hardware with previously known settings
• Update firmware, leveraging Dell EMC online catalogs through Lifecycle Controller
• Collect system-level logs by leveraging the system-embedded Lifecycle Controller
• Create hypervisor profiles
• Create operational templates based on specific hardware
• Apply those operational templates to servers in order to configure firmware updates, iDRAC settings, BIOS settings, NICs, RAID controllers, and hypervisor deployments
Deploy a single Hyper-V host in
46%
less time using OpenManage
Integration for Microsoft System Center
Get flexible, feature-rich datacenter management at a lower cost June 2018 | 9
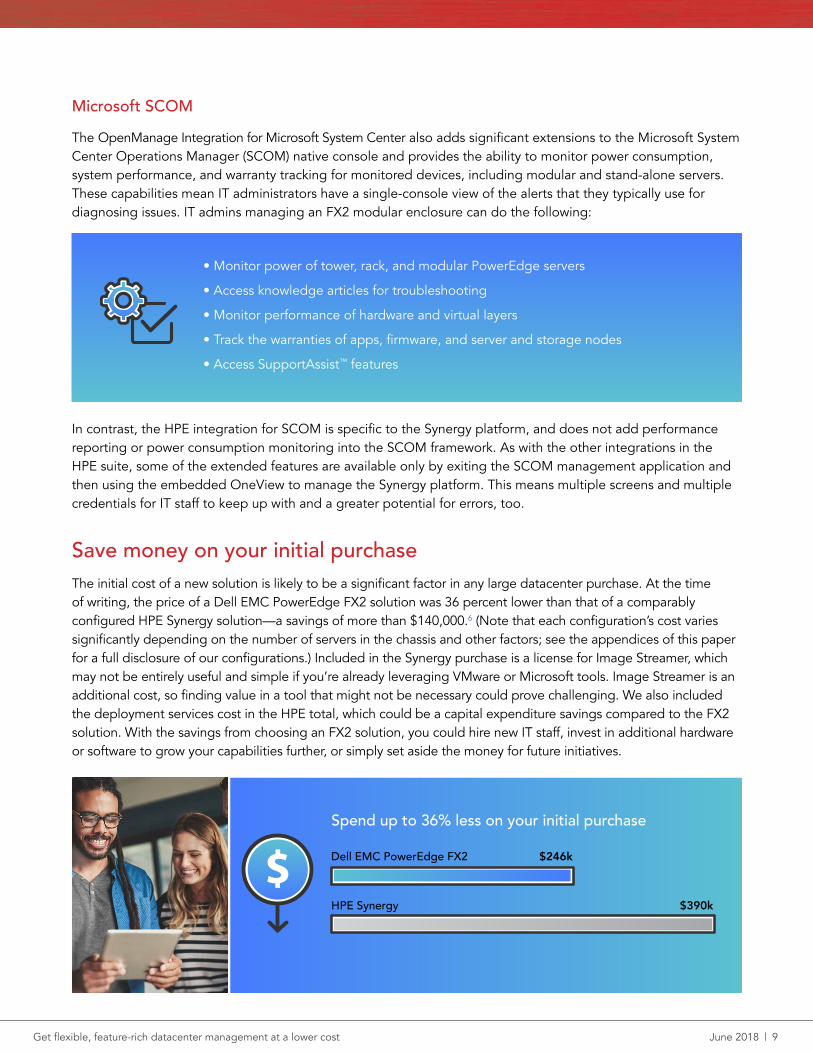
Microsoft SCOMThe OpenManage Integration for Microsoft System Center also adds significant extensions to the Microsoft System Center Operations Manager (SCOM) native console and provides the ability to monitor power consumption, system performance, and warranty tracking for monitored devices, including modular and stand-alone servers. These capabilities mean IT administrators have a single-console view of the alerts that they typically use for diagnosing issues. IT admins managing an FX2 modular enclosure can do the following:
In contrast, the HPE integration for SCOM is specific to the Synergy platform, and does not add performance reporting or power consumption monitoring into the SCOM framework. As with the other integrations in the HPE suite, some of the extended features are available only by exiting the SCOM management application and then using the embedded OneView to manage the Synergy platform. This means multiple screens and multiple credentials for IT staff to keep up with and a greater potential for errors, too.
Save money on your initial purchaseThe initial cost of a new solution is likely to be a significant factor in any large datacenter purchase. At the time of writing, the price of a Dell EMC PowerEdge FX2 solution was 36 percent lower than that of a comparably configured HPE Synergy solution—a savings of more than $140,000.6 (Note that each configuration’s cost varies significantly depending on the number of servers in the chassis and other factors; see the appendices of this paper for a full disclosure of our configurations.) Included in the Synergy purchase is a license for Image Streamer, which may not be entirely useful and simple if you’re already leveraging VMware or Microsoft tools. Image Streamer is an additional cost, so finding value in a tool that might not be necessary could prove challenging. We also included the deployment services cost in the HPE total, which could be a capital expenditure savings compared to the FX2 solution. With the savings from choosing an FX2 solution, you could hire new IT staff, invest in additional hardware or software to grow your capabilities further, or simply set aside the money for future initiatives.
• Monitor power of tower, rack, and modular PowerEdge servers
• Access knowledge articles for troubleshooting
• Monitor performance of hardware and virtual layers
• Track the warranties of apps, firmware, and server and storage nodes
• Access SupportAssist™ features
Spend up to 36% less on your initial purchase
Dell EMC PowerEdge FX2 $246k
$390kHPE Synergy

Get flexible, feature-rich datacenter management at a lower cost June 2018 | 10
ConclusionYour business operations depend on your datacenter running smoothly, which is why effective datacenter management is so important. Instead of an unfamiliar solution with a learning curve, consider an option that will allow your IT staff to jump right into their work. By choosing the Dell EMC PowerEdge FX2 and OpenManage systems management tools, your IT administrators can manage their new modular enclosure with familiar systems management solutions that also integrate into common management solutions—at a 36 percent lower cost and require up to 97 percent less time to deploy three subsequent Windows servers at once.
To find out more about Dell EMC servers, visit DellEMC.com/Servers.
1 “Complete Agent-Free Management of PowerEdge Servers,” accessed May 8, 2018, http://i.dell.com/sites/doccontent/shared-content/data-sheets/en/Documents/idrac-spec-sheet.pdf
2 “Complete Agent-Free Management of PowerEdge Servers,” accessed May 8, 2018, http://i.dell.com/sites/doccontent/shared-content/data-sheets/en/Documents/idrac-spec-sheet.pdf
3 “iDRAC9 with Lifecycle Controller—Best in class management for Dell EMC 14th generation PowerEdge Servers,” accessed May 16, 2018, http://en.community.dell.com/techcenter/extras/m/white_papers/20444263
4 “HPE Installation and Startup Services for HPE Synergy,” accessed February 20, 2018, https://cc.cnetcontent.com/vcs/hp-ent/inline-content/S6/C/E/CEF90ECE7D384A9B6F4B753FDBA08ADC5E74057E_source.PDF
5 “Save server time and management for IT staff,” accessed February 20, 2018, http://i.dell.com/sites/doccontent/shared-content/data-sheets/en/Documents/prodeploy-enterprise-principled-technologies-report.pdf
6 For our pricing comparison, we priced a three-frame HPE Synergy solution with six HPE Synergy 480 Gen10 blades and 2.4 TB of SSDs and 1.2 TB of HDDs in each frame’s HPE Synergy D3940 Storage module. We then priced the Dell EMC PowerEdge FX2 solution specs that were as close to comparable as possible: three PowerEdge FX2 chassis, six PowerEdge FC640 blades, and three PowerEdge FD332 storage blocks. Prices presented here reflect the list price at the time of writing. Customers will experience varying discounts when buying these solutions.
7 ”HPE Gen10 Servers,” accessed April 17, 2018, https://www.hpe.com/us/en/servers/gen10-servers.html
8 “Dell EMC Announce 14th Generation PowerEdge Servers,” accessed April 17, 2018, http://www.storagereview.com/dell_emc_announce_14th_generation_poweredge_servers
9 “Press Release: Dell EMC Launches Next Generation of the World’s Best-Selling Server Portfolio,” accessed April 17, 2018, https://www.emc.com/about/news/press/2017/20170711-01.htm
Protect your dataSecurity threats develop and evolve dynamically, so having numerous, granular settings to adjust helps an organization protect its data and applications at many levels. In addition to management advantages, we found the Dell EMC solution with OpenManage allows IT admins to enable System Lockdown Mode via the iDRAC9 dashboard. System Lockdown Mode prevents unauthorized changes to either configuration settings or firmware. The HPE solution we tested did not have a similar feature.
Both solutions offer “System Erase” features to wipe everything. HPE also offers additional data erasure options we didn’t use, including Crypto Erase, which requires an extra license for every disk. Based on publicly available documentation, the System Erase feature from Dell EMC, which IT admins execute from within the Lifecycle Controller GUI, is similar to Crypto Erase. In addition to data removal options, we also found both the Dell EMC solution with OpenManage and the HPE solution with OneView offered the following security features:
• Silicon-based root of trust
• Secure default passwords
• Trusted Platform Module (TPM) utilization
• Cryptographically signed firmware
• Secure boot
• Rapid system erase based on NIST-compliant erase techniques
The presence of these security features in both solutions runs counter to the HPE website,7 where HPE claims that their Gen10 servers are “the world’s most secure industry standard servers,” citing a May 2017 paper from independent security consulting firm InfusionPoints. Because testing for that paper occurred in or before May 2017, however, InfusionPoints could not have assessed the security capabilities of Dell EMC 14th generation servers, which Dell EMC announced in May 2017 and released in July 2017.8, 9 Given that it’s based on testing that excluded the latest Dell EMC servers—and given the many security features we found in our assessment of the PowerEdge FX2—we believe the HPE claim is no longer verifiable.
Get flexible, feature-rich datacenter management at a lower cost June 2018 | 11
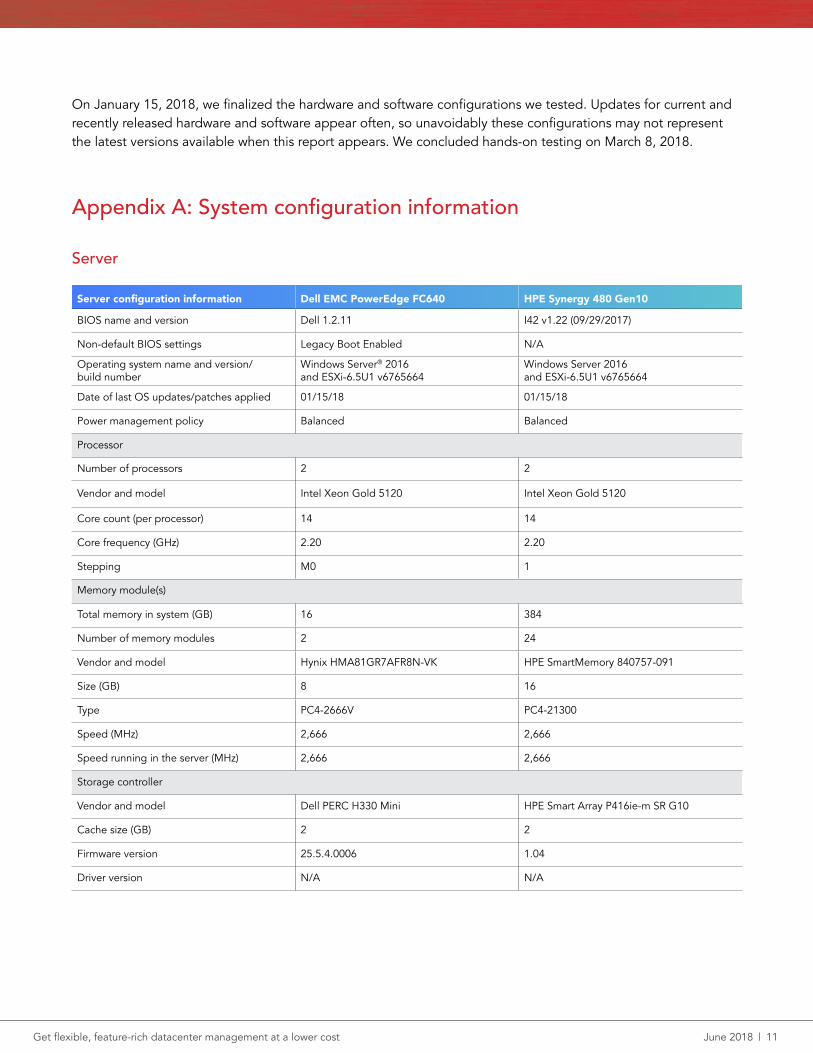
On January 15, 2018, we finalized the hardware and software configurations we tested. Updates for current and recently released hardware and software appear often, so unavoidably these configurations may not represent the latest versions available when this report appears. We concluded hands-on testing on March 8, 2018.
Appendix A: System configuration information
Server
Server configuration information Dell EMC PowerEdge FC640 HPE Synergy 480 Gen10
BIOS name and version Dell 1.2.11 I42 v1.22 (09/29/2017)
Non-default BIOS settings Legacy Boot Enabled N/A
Operating system name and version/build number
Windows Server® 2016 and ESXi-6.5U1 v6765664
Windows Server 2016 and ESXi-6.5U1 v6765664
Date of last OS updates/patches applied 01/15/18 01/15/18
Power management policy Balanced Balanced
Processor
Number of processors 2 2
Vendor and model Intel Xeon Gold 5120 Intel Xeon Gold 5120
Core count (per processor) 14 14
Core frequency (GHz) 2.20 2.20
Stepping M0 1
Memory module(s)
Total memory in system (GB) 16 384
Number of memory modules 2 24
Vendor and model Hynix HMA81GR7AFR8N-VK HPE SmartMemory 840757-091
Size (GB) 8 16
Type PC4-2666V PC4-21300
Speed (MHz) 2,666 2,666
Speed running in the server (MHz) 2,666 2,666
Storage controller
Vendor and model Dell PERC H330 Mini HPE Smart Array P416ie-m SR G10
Cache size (GB) 2 2
Firmware version 25.5.4.0006 1.04
Driver version N/A N/A

Get flexible, feature-rich datacenter management at a lower cost June 2018 | 12
Server configuration information Dell EMC PowerEdge FC640 HPE Synergy 480 Gen10
Local storage (type A)
Number of drives 8 1
Drive vendor and model Dell SSDSC2BB120G7R HPE VK000480GWCFE
Drive size (GB) 120 480
Drive information (speed, interface, type) 6Gbps, SATA, SSD 6Gbps, SATA, SSD
Network adapter
Vendor and model Broadcom® GbE 4P 5720 bNDC Synergy 3820C 10/20Gb Converged Network Adapter
Number and type of ports 4 x 1 GbE 2 x 20 GbE
Driver version 25.6.52 N/A
Server enclosure
Server enclosure configuration information Dell EMC PowerEdge FX2 HPE Synergy 12000 Frame
Number of management modules 1 2
Management module firmware revision 2.0 2.01.01
KVM module firmware N/A 1.15
Midplane version 1.0 N/A
First type of I/O module
Vendor and model number Dell E14M001 1Gb Pass-Through Module Synergy 12Gb SAS Connection Module
I/O module firmware revision 1.0 1.2.4.0
Number of modules 1 2
Occupied bay(s) 1, 2 1, 4
Second type of I/O module
Vendor and model number N/A Synergy 20Gb Interconnect Link Module
I/O module firmware revision N/A 1.08
Number of modules N/A 2
Occupied bay(s) N/A 3, 6
Power supplies
Vendor and model number Dell D1600E-S0 HPE 798095-B21
Number of power supplies 2 6
Wattage of each (W) 1,600 2,650
Cooling fans
Vendor and model number Dell 06ww82 Dell 0X4GJ2 Synergy Fan Module 809097-001
Number of fans 8 10

Get flexible, feature-rich datacenter management at a lower cost June 2018 | 13
Appendix B: How we testedConfiguring the Dell EMC hardware and toolsConfiguring the hardwareConfiguring the chassis for the first time1. Connect the serial cable to the FX2 serial port of the CMC.2. Connect the USB connection to your laptop.3. On the laptop, open Device Manager.4. In Device Manager, locate the Ports (COM & LPT) and note which COM port is available (ex. COM4).5. On the laptop, open PuTTY.6. Select the serial radio button.7. Put the COM port number identified in Device Manager in the serial line box, and change the speed to 1152008. Click Open.9. Type the username: root10. Type the password: calvin11. Run the following command to enable DHCP: racadm setniccfg –d12. Run the following command to see the new IP address: getniccfg –m chassis13. On a laptop connected to the same network, open the browser.14. Type the IP address of the CMC into the address bar, and click Advance.15. Type in the credentials username: root password: calvin16. Log into the CMC.17. Go to Chassis OverviewPowerControl, and choose Power On System. Click Apply.
Configuring iDRAC on the first Dell EMC PowerEdge FC6401. Log into the CMC for the FX2 chassis.2. Select the server in the first slot on the left-hand side.3. Select the Setup tab, and click iDRAC.4. Configure the iDRAC network settings, and click Apply iDRAC Network Settings.5. At the warning popup, click OK.
Configuring the PowerEdge FC640 and deploying VMware ESXi 6.5 with iDRAC server profiles and Lifecycle ControllerConfiguring the RAID controller for the first Dell EMC PowerEdge FC6401. Select the server on the left-hand side.2. Click Launch iDRAC GUI.3. Once the iDRAC GUI loads, click Configuration.4. Click Storage Configuration.5. Expand Virtual Disk Configuration, and click Create Virtual Disk.6. Enter a name, select a RAID level, and select the physical disks for the new virtual disk.7. Click Add to Pending Operations, and click Apply Now.
Configuring the BIOS for the first Dell EMC PowerEdge FC6401. From the Configuration screen, click BIOS Settings.2. Expand System Profile Settings, and select Performance for the System Profile.3. For the Workload Profile, select Virtualization Optimized Performance Profile.4. Click Apply. At the success prompt, click OK.5. Click Apply and Reboot. At the prompt, click OK.
Creating a server profile from the first Dell EMC PowerEdge FC6401. From the Configuration screen, click Server Configuration Profile.2. Expand Export, and enter a name for the file.3. Check All, and select Clone for the Export type.4. Click Export, and click Save Locally at the prompt.

Get flexible, feature-rich datacenter management at a lower cost June 2018 | 14
Applying the server profile to another Dell EMC PowerEdge FC6401. Launch the iDRAC GUI for the second FC640.2. Click ConfigurationServer Configuration Profile.3. Under Import, choose the XML file exported from the first FC640.4. Check All, click Import, and at the prompt, click OK.
Deploying ESXi 6.5 from Lifecycle Controller1. From the CMC, select the first FC640 on the left-hand side.2. Click Launch Remote Console.3. Once you have loaded the console, attach the Dell ESXi 6.5 installation image.4. Boot to Lifecycle Controller.5. Once Lifecycle Controller has booted up, click OS DeploymentDeploy OS.6. Select Go Directly to OS Deployment, and click Next.7. Select Any Other Operating System from the drop down list, and click Next.8. On the Select Installation Mode screen, click Next.9. On the Insert OS Media screen, click Next.10. Click Finish.11. Once the ESXi installer loads, complete the installation.
Configuring the PowerEdge FC640 servers and deploying Windows Server 2016 using Dell EMC OpenManage EssentialsDiscovering the PowerEdge FC640 servers1. Open your Dell EMC OpenManage Essentials console.2. Click the Manage tab.3. Click Discovery and Inventory.4. Right-click your discovery range, and select Perform Discovery and Inventory Now.
Creating a template1. Click the Manage tab.2. Right-click your configured FC640 server, and select Create Template.3. In the Create Template Wizard, name your template, enter your username and password, and click Finish.4. Click the Deployment tab.5. Select your new template.6. Click the Attributes tab.7. Open the BIOS segment, change Boot Mode to BIOS, and set Internal USB Port to Off.8. Click Save.9. To overwrite the template, Click Yes.
Deploying a template1. Open your Dell EMC OpenManage Essentials console.2. Click the Manage tab.3. Highlight the servers on which you wish to deploy the BIOS changes, right-click, and choose Device ConfigurationAdd Devices to
Repurpose and Bare Metal Device Group.4. Right-click your highlighted servers again and select Device ConfigurationDeploy Template.5. In the Deploy Template Wizard, under Name and Deploy Options, check Boot to Network ISO, and click Next.6. In Select Template, select your template, and click Next.7. In Select ISO Location, enter the following, and click Next:
• ISO Filename: WS2016.iso• Share IP: 10.128.1.13• Share Name: ServerConfig• Share Username: domain\administrator• Share Password: ********
8. In Select Virtual IO pool, click Next.9. In Select Devices, verify that you’ve selected the servers, and click Next.10. In Edit Attributes, click Next.11. In Set Schedule, check Run now, enter your username and password, and click Next.12. In Preview, click Next.

Get flexible, feature-rich datacenter management at a lower cost June 2018 | 15
13. In Summary, click Finish.
Applying firmware updates1. Open your Dell EMC OpenManage Essentials console.2. Click the Manage tab.3. Click System Update.4. In System Update, select Non-Compliant systems.5. Select the servers you wish to update. In the bottom right, select Apply Selected Updates.6. In the System Update Task window, select Run Now, type in your username and password, and click Finish.
Configuring the HPE hardware and toolsSetting up the HPE SynergyHPE engineers did the initial Synergy deployment. It took them a day and a half to configure our three-frame Synergy platform. There were a few hiccups in the process that contributed to additional time to deploy where there might not otherwise be. We were missing some cables that should have come with the platform; we changed the IP schema from what was in the HPE checklist; and HPE engineers input the wrong default gateway for our environment. The install service got the Synergy platform to a baseline configuration where we could deploy servers and storage through OneView and Image Streamer. Below, we have included the steps for each post-configuration task needed to deploy a server profile and an OS using OneView and Image Streamer.
Configuring and deploying ESXi 6.5 with HPE OneView for SynergyConfiguring ImageStreamer for ESXi deploymentAfter the initial deployment of the Synergy platform, HPE engineers installed HPE Foundation and Support artifact bundles for test deployments. For our OS deployment test, we downloaded the latest ESXi 6 ImageStreamer artifact bundle from HPE’s GitHub library. The artifact bundle contains tested Build Plans and Plan Scripts that allow for easy deployment of ESXi via ImageStreamer. You can find the latest artifact bundle at https://github.com/HewlettPackard/image-streamer-esxi/tree/v3.1/artifact-bundles.
1. Log into the ImageStreamer web client.2. From the Image Streamer menu, select Artifact Bundles.3. Click Add artifact bundle.4. Click Browse, and select the artifact bundle downloaded from GitHub.5. Click Add.6. Once you have added the artifact bundle, select it on the left.7. Click ActionsExtract.8. Click Yes, Extract.
Creating a Golden Image for the OS1. From the OneView menu, click Server Profile Templates.2. Click Create server profile template.3. Name the template Blank OS, select the server hardware type, and select the Enclosure group.4. Under OS Deployment, select the OS deployment plan HPE – Foundation 1.0 – create empty OS Volume-2017-03-245. Click Create.6. From the OneView menu, click Server Profiles.7. Click Create profile.8. Enter a name for the Server Profile, and select Blank OS for the server profile template.9. Select the Server hardware for deployment.10. Under OS Deployment, enter a volume size.11. Click Create.12. Once you have deployed the profile, click ActionsPower On.13. Click ActionsLaunch console.14. Attach the ESXi 6.5 installation media, and boot to it.15. Install ESXi 6.5 to the blank OS disk that you created during the server profile deployment (Note: the OS disk will be labeled
“LEFTHAND iSCSIDisk”).16. Once ESXi 6.5 completes the installation, power down the server.17. From the Image Stream web client, navigate to Golden Images.18. Click Create Golden Image.19. Name the Golden Image, and give it a description.20. Select the OS volume with the fresh install of ESXi 6.5.

Get flexible, feature-rich datacenter management at a lower cost June 2018 | 16
21. For the Capture OS build plan, select HPE – ESXi – generalize full state – 2017-08-0222. Click Create.23. Once you have created the Golden Image, navigate to Deployment Plans.24. Click Create deployment plan.25. Enter a name and description for the deployment plan.26. For the OS build plan, select HPE - ESXi - deploy in single frame non-HA config - 2017-08-2227. For the Golden Image, select the newly created ESXi 6.5 Golden Image.28. Click Create.
Creating a server profile template for ESXi 6.51. From the OneView web client, navigate to Server Profile Templates.2. Click Create Server Profile Template.3. Enter a name and a description for the server profile template.4. Under Server Profile, enter a description for the server profile.5. Select the hardware type, enclosure group, and affinity for the server profile.6. Under OS Deployment, select the new OS deployment plan created in the previous step.7. Enter information for the DomainName and Hostname.8. Enter a password for the server, and confirm.9. Under Connections, click Add connection.10. Enter a name, and select the Synergy network for the new connection. 11. Click Add.12. Under OS Deployment, select the new connection for the ManagementNIC.13. Under BIOS Settings, check the box for Manage BIOS.14. Click Edit BIOS settings.15. Select Virtualization – Max Performance for the Workload Profile, and click OK.16. Click Create.
Creating a server profile1. From the OneView menu, click Server Profiles.2. Click Create profile.3. Enter a name for the server profile.4. Select the server profile template that you created in the previous section.5. Enter a description for the server profile.6. Select the server hardware to which you want to deploy the profile.7. Review the remaining settings, and click Create.
Deploying Windows Server 2016 using HPE Intelligent ProvisioningDeploying OS from Intelligent Provisioning1. Power on the server, and press F10 to enter Intelligent Provisioning.2. After Intelligent Provisioning loads, click Express OS Install.3. Select the RAID configuration, Controller, Disk, Install Source, Attempt Firmware Update, and Install Method options. Click Next.4. Once you have verified the install source, click Next.5. Choose the OS Family, and select the OS Language, OS Keyboard, and Time Zone. Enter the Computer Name, Organization Name,
Owner Name, and Password. Click Next.6. Confirm the settings, and click Next.7. Click Launch Now.
Installing Windows Server 20161. When prompted, enter your license key for Windows Server 2016. Click Next.
Completing post-installation tasksLog into Windows. Intelligent Provisioning runs a series of post-install tasks and then reboots the server. We stopped our timing of this task when the Windows login screen had loaded after that reboot.
Get flexible, feature-rich datacenter management at a lower cost June 2018 | 17
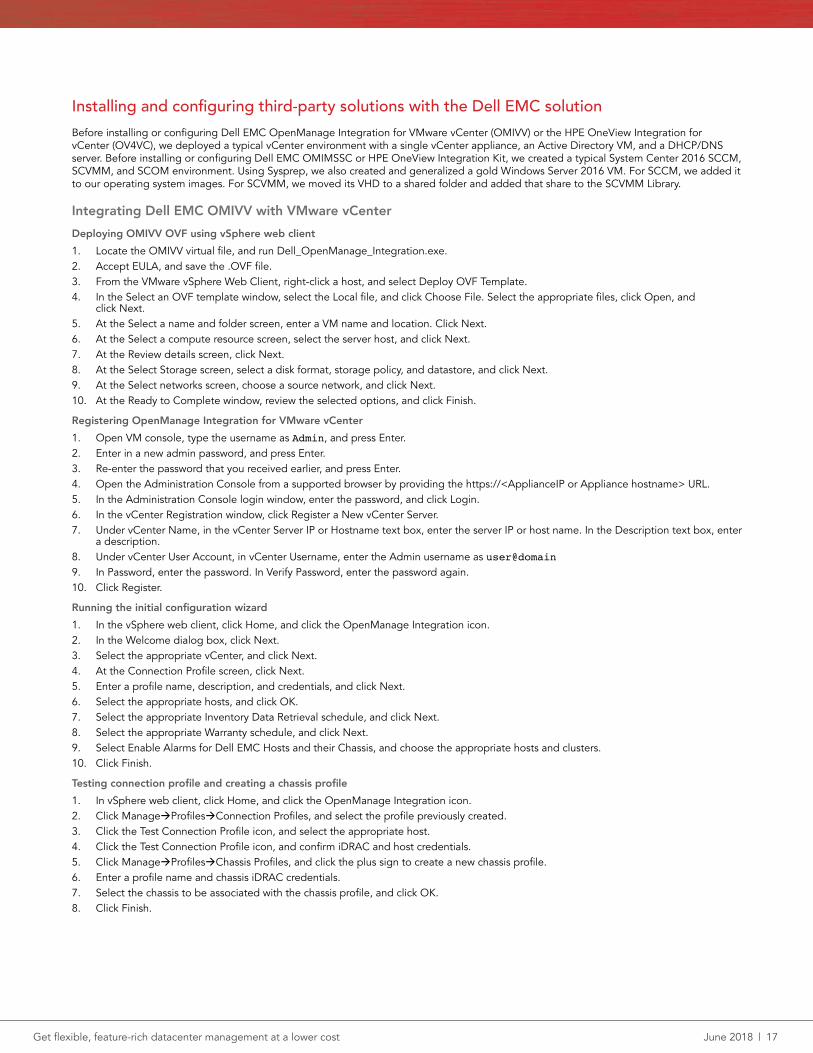
Installing and configuring third-party solutions with the Dell EMC solutionBefore installing or configuring Dell EMC OpenManage Integration for VMware vCenter (OMIVV) or the HPE OneView Integration for vCenter (OV4VC), we deployed a typical vCenter environment with a single vCenter appliance, an Active Directory VM, and a DHCP/DNS server. Before installing or configuring Dell EMC OMIMSSC or HPE OneView Integration Kit, we created a typical System Center 2016 SCCM, SCVMM, and SCOM environment. Using Sysprep, we also created and generalized a gold Windows Server 2016 VM. For SCCM, we added it to our operating system images. For SCVMM, we moved its VHD to a shared folder and added that share to the SCVMM Library.
Integrating Dell EMC OMIVV with VMware vCenterDeploying OMIVV OVF using vSphere web client1. Locate the OMIVV virtual file, and run Dell_OpenManage_Integration.exe.2. Accept EULA, and save the .OVF file.3. From the VMware vSphere Web Client, right-click a host, and select Deploy OVF Template.4. In the Select an OVF template window, select the Local file, and click Choose File. Select the appropriate files, click Open, and
click Next.5. At the Select a name and folder screen, enter a VM name and location. Click Next.6. At the Select a compute resource screen, select the server host, and click Next. 7. At the Review details screen, click Next. 8. At the Select Storage screen, select a disk format, storage policy, and datastore, and click Next. 9. At the Select networks screen, choose a source network, and click Next. 10. At the Ready to Complete window, review the selected options, and click Finish.
Registering OpenManage Integration for VMware vCenter 1. Open VM console, type the username as Admin, and press Enter.2. Enter in a new admin password, and press Enter.3. Re-enter the password that you received earlier, and press Enter.4. Open the Administration Console from a supported browser by providing the https://<ApplianceIP or Appliance hostname> URL.5. In the Administration Console login window, enter the password, and click Login.6. In the vCenter Registration window, click Register a New vCenter Server.7. Under vCenter Name, in the vCenter Server IP or Hostname text box, enter the server IP or host name. In the Description text box, enter
a description.8. Under vCenter User Account, in vCenter Username, enter the Admin username as user@domain 9. In Password, enter the password. In Verify Password, enter the password again.10. Click Register.
Running the initial configuration wizard1. In the vSphere web client, click Home, and click the OpenManage Integration icon.2. In the Welcome dialog box, click Next.3. Select the appropriate vCenter, and click Next.4. At the Connection Profile screen, click Next. 5. Enter a profile name, description, and credentials, and click Next. 6. Select the appropriate hosts, and click OK. 7. Select the appropriate Inventory Data Retrieval schedule, and click Next.8. Select the appropriate Warranty schedule, and click Next. 9. Select Enable Alarms for Dell EMC Hosts and their Chassis, and choose the appropriate hosts and clusters. 10. Click Finish.
Testing connection profile and creating a chassis profile 1. In vSphere web client, click Home, and click the OpenManage Integration icon.2. Click ManageProfilesConnection Profiles, and select the profile previously created. 3. Click the Test Connection Profile icon, and select the appropriate host. 4. Click the Test Connection Profile icon, and confirm iDRAC and host credentials. 5. Click ManageProfilesChassis Profiles, and click the plus sign to create a new chassis profile. 6. Enter a profile name and chassis iDRAC credentials. 7. Select the chassis to be associated with the chassis profile, and click OK. 8. Click Finish.

Get flexible, feature-rich datacenter management at a lower cost June 2018 | 18
Viewing hardware details 1. Click Hosts and Clusters.2. Select the specific host, cluster, or datacenter for which you want to view hardware.3. In the Monitor tab, select the Dell EMC Host Information tab.
Performing firmware updates 1. Right-click Select the specific host or cluster or datacenter for which you want to update firmware, and select All OpenManage
Integration ActionsFirmware Update.2. At the Firmware Wizard Welcome screen, click Next.3. Select the appropriate hosts, and click Next.4. Select Current repository location: Dell Online (http://ftp.dell.com/catalog/Catalog.xml.gz), and click Next. 5. The system will display Select Components screen, which lists the firmware details for the components and other details for the selected
host. Use the checkboxes to select all the necessary components from the list, and click Next. 6. Select a time frame for the update, and click Next. 7. At the summary screen, click Finish.
Creating system and hypervisor profiles for deployment1. In OpenManage Integration for VMware vCenter, under ManageDeploymentSystem Profiles, click the plus icon.2. At the System Profile Wizard Welcome screen, click Next. 3. Enter a profile name and description, and click Next. 4. Select a compliant managed host as a reference server, and click Next.5. Review the profile settings, and enter the User Admin Password under iDRAC. 6. Click Customize Reference Server Settings, and choose the RAID, BIOS, Boot order, and iDRAC settings that the system says you can
customize. 7. Click Next, and click Finish. 8. In OpenManage Integration for VMware vCenter, under ManageDeploymentHypervisor Profiles, click the plus icon.9. Enter a profile name, description, and the reference ISO path and version, and click Apply.
Creating a deployment template1. In OpenManage Integration for VMware vCenter, under ManageDeploymentDeployment Template, click the plus icon.2. Select System Profile, and select the appropriate profile. 3. Select the appropriate Hypervisor profile, and click Save.
Running the deployment wizard1. In OpenManage Integration for VMware vCenter, under Manage, click the Deployment tab.2. In the Bare Metal Servers window, click the Run Deployment Wizard link.3. On the Welcome page, view the information, and click Next.4. To assign compliant bare-metal servers to a deployment job in the Select the Servers for Deployment page, click the checkboxes next to
the list of servers, and click Next.5. From Select Deployment Template on the Select Template/Profile page, select the existing deployment template.6. Under Hypervisor installation, select Internal Dual SD Module. 7. Select the vCenter Instance. 8. Under Credential Profile, select Use this Credential Profile for all Servers, and select the appropriate profile.9. Click Next. 10. Under Networking, select Obtain Using DHCP, and click Next. 11. Enter a deployment job name, and select the vCenter Destination Container. 12. Under Deployment Schedule, select Schedule Deployment Job Now. 13. Click Finish.
Integrating Dell EMC OMIMSSC with System Center Configuration ManagerInstalling the OMIMSSC VM1. Move the OMIMSSC-v7.0.0.972.vhd file from the OMIMSSC-v7.0.0.972_A00.zip file to a location accessible to the Windows host to
which you uploaded the appliance.2. On the hypervisor, open Hyper-V manager.3. Click ActionNewVirtual Machine…4. Click Next.5. For Specify Name and Location, enter OMIMSSC, and click Next.6. On the Assign Memory screen, enter 8 GB of memory, and click Next.

Get flexible, feature-rich datacenter management at a lower cost June 2018 | 19
7. On the Configure Networking screen, connect the VM to the test network, and click Next.8. On the Connect Virtual Hard Disk screen, select Use an existing virtual hard disk, select the OMIMSSC-v7.0.0.972.vhd file, and
click Finish.9. Once you have created the VM, edit the VM settings.10. Set the virtual processors count to 2, and click OK.11. Start the newly created OMIMSSC VM.12. After booting, log in as admin.13. Enter and confirm a new password. We used Password1!14. When asked to select an action, select Configure Network configuration, and press Enter.15. Select DNS configuration, and press Enter.16. Change the hostname to OMIMSSC17. Leave the default primary DNS, and click Save.
Installing the Integration Gateway1. From the configuration manager server, open PowerShell as an administrator.2. Run the following command: Set-ExecutionPolicy Unrestricted3. Run the following command: Enable-PSRemoting – Force4. Navigate to the OMIMSSC admin portal, and log in using your credentials.5. On the Downloads page, click Download Installer under the Integration Gateway.6. Run the .exe file for the Integration Gateway v7.0 installer.7. On the EULA screen, accept the terms of the agreement, and click Next.8. On the MIT License agreement screen, click Next.9. On the Prerequisite Status screen, click Install Prerequisite.10. Once complete, click Scan for Prerequisite, and click Next.11. Enter the credentials for the username and password. We used test\administrator : Password112. On the Destination Folder screen, click Next.13. Click Next.14. Once the installer finishes, click Finished.
Installing the Console Extension for SCCM1. Navigate to the OMIMSSC admin portal, and log in using your credentials.2. Under downloads, under OMIMSSC console extension for SCCM installer, click Download.3. If asked to close the console to continue, click Yes.4. Click Next.5. On the License Agreement screen, accept the terms, and click Next.6. On the Ready to Install the Program screen, click Install.7. Once complete, click Finish.
Enrolling the console1. Navigate to the OMIMSSC admin portal, and log in using your credentials.2. Under settings, click Enroll a Console.3. Enter the following information:
• Name: Test• Server FQDN: cm.test.local• Credentials: Create New Windows credentials for the administrator
4. Once you have finished, click Test Connection.
Creating a custom WinPE Image1. On the Configuration Manager server, download the Dell DTK from http://en.community.dell.com/techcenter/systems-management/w/
wiki/1772.dell-openmanage-deployment-toolkit.2. Unzip the DTK.zip file to C:\Dell.3. In Explorer, navigate to C:\Dell, and double-click the extract.bat file.4. On the OMIMSSC SCCM Console Extension page in SCCM, log in using the test\administrator credentials.5. Click WinPE Update.6. Enter the custom WinPE Image Path, Dell Deployment Toolkit Drivers Path, and the Output File ISO File Name, and click Update.

Get flexible, feature-rich datacenter management at a lower cost June 2018 | 20
We entered:
• WinPE Image Path: \\CM\ISO\boot.wim • Dell Deployment Toolkit Drivers Path: \\CM\Dell\x64\ • Output File ISO File Name: DellWinPEx64.iso
7. Add the boot image in SCCM.8. In the SCCM console, in the software library, right-click Operating System Images, and select Add an Operating System Image Wizard.9. In the Add Operating System Image Wizard, click Browse.10. Navigate to and select the DellWinPEx64.iso, and click OK.11. Click Summary.12. Click Next.
Creating the task sequence1. In the Configuration Manager console, in the Software Library pane, under Overview, Operating Systems, right-click task sequences.
Under OMIMSSC Server Deployment, select Create OMIMSSC Server Deployment Template.2. In the OMIMSSC Task Sequence Wizard, enter the following information:
• Task Sequence Name: Dell WS2016 Deployment• Boot Image Section: dellwinpex64• Network (Admin) Account: Enter the credentials for the Network admin account• Installation Type: Use OS WIM Image• Operating System Package: Windows Server 2016 Server Standard• Package with Sysprep.inf info: <do not select now>
3. Click Create.4. Right-click the file, and click Edit.5. In the Dell WS2016 Deployment Task Sequence Editor, click Apply Operating System Image.6. Uncheck the box for Unattended or Sysprep answer file for a custom installation. Click Apply Windows Settings.7. Enter the Product Key for Windows that you will use. Click Apply Network Settings.8. Select Join a Domain. Enter test.local. For account, click Set.9. Enter the credentials for the test\administrator account, and click OK.10. Click Apply Drivers from Dell Lifecycle Controller.11. For Operating System, select Windows Server 2016, and enter test\administrator credentials. Click setup windows and ConfigMgr.12. For Client package, click Browse…13. Select the Configuration Manager Client Package, and click OK.14. Click OK.
Distributing the content1. Right-click your target task sequence, and click Distribute Content.2. On the Distribute Content Wizard, click Next.3. Click Next.4. Click Add. 5. Select cm.test.local, and click OK.6. Click Next.7. Click OK.
Deploying the task sequence1. Right-click the task sequence, and select Deploy.2. In the Deploy Software Wizard, for Collection, click Browse.3. Select the Dell Imported Servers Collection, and click OK.4. Click Next.5. Select Required, and select Make available to the following: Configuration Manager clients, media and PXE. Click Next.6. Check the box to schedule when this deployment will become available. Enter a time. For Assignment schedule, click New…7. Select Assign immediately after this event: As soon as possible, and click OK.8. Accept the remaining defaults, and close the wizard after it has completed the task sequence.
Creating the task sequence media1. Select the target task sequence, and select Create Task Sequence Media on the home tool bar.2. In the Create Task Sequence Media Wizard, select Bootable media, check the box for Allow unattended operating system deployment,
and click Next.

Get flexible, feature-rich datacenter management at a lower cost June 2018 | 21
3. Select Site-based media, and click Next.4. Select CD/DVD set, and for media file, enter \\CM\share\lcmedia.iso. Click Next.5. Uncheck Protect media with password. Click Next.6. For Boot image, click Browse.7. Select the dellwinpex64 image, and click OK.8. For Distribution point, click Browse.9. Select cm.test.local, and click OK.10. For Management point, click Add.11. Select cm.test.local, and click OK.12. Click Summary.13. Click Next.14. When complete, click Close. 15. On the OMIMSSC SCCM Console Extension page in SCCM, log in using the test\administrator credentials.16. Select Boot Media Creation.17. Enter the task sequence media path and the boot media, and click Update.
• Task sequence media path: \\CM\share\lcmedia.iso• Output file boot media: \\CM\ISO\lcmedia.iso
Discovering the target server1. Click Configuration and Deployment.2. Click Discover.3. In the Discover Window, next to Apply this Credential Profile to all servers, click Create New.4. In the Credential Profile Window, enter the following, and click Finish.
• Credential Profile Type: Device Credential Profile• Credential Profile Name: FX2• Username: root• Password: Password1• Default Profile for: iDRAC
5. Type the Dell iDRAC IP Address of the target server and job name.6. Click Finish.
Creating the operational template1. Under Profile and Templates, select Operational Templates.2. On the Operational Template page, click Next.3. Under Template Details, enter details for the FX2 server added in the previous section, and click Next.4. Select only the following: Firmware Update, BIOS.Setup.1-1, RAID.Integrated.1-1, Operating System. Click Firmware Update.5. Under Update Source, for Firmware Update, select the following, and click BIOS.Setup.1-1.
• Update Source: Dell Online Catalog
6. For BIOS.Setup.1-1, select the following and click Operating System.
• System Profile Settings—System Profile: Performance optimized• Boot settings—Boot Mode: BIOS• Integrated Devices—Integrated RAID Controller: Enabled• Integrated Devices—Internal SD card: Disabled
7. On the Operating System Settings page, select the following, and click Finish:
• OS name: Windows• Task Sequence: Use the task sequence that you created for Windows Server 2016 deployment• Deployment: Boot to Network ISO• Task Sequence Media: lcmedia.iso• Check the box for Enable Dell Lifecycle Controller Drivers Injection• Operating System: Microsoft Windows Server 2016
Applying the operational template to the target1. In OMIMSSC, click Configuration and Deployment.2. Check the box next to the FC640. Click Assign.3. Select the FC640 Operational Template. Name the job, and click Assign.

Get flexible, feature-rich datacenter management at a lower cost June 2018 | 22
Deploying the operational template to the target1. On the OMIMSSC SCCM Console Extension page in SCCM, log in using the test\administrator credentials.2. Select Configuration and Deployment.3. Check the box for the target server.4. Click Deploy.5. Name the job, and click Deploy.
Integrating Dell EMC OMIMSSC with SCVMMIn the following tests, we assume that you have already installed SCVMM and added a PXE server with an updated image. Additionally, we assume that you have added a second run-as account.
Installing the OMIMSSC VM
1. Move the OMIMSSC-v7.0.0.972.vhd file from the OMIMSSC-v7.0.0.972_A00.zip file to a location accessible to the Windows host to which you uploaded the appliance.
2. On the hypervisor, open Hyper-V Manager.3. Click ActionNewVirtual Machine…4. Click Next.5. For Specify Name and Location, enter OMIMSSC, and click Next.6. On the Assign Memory screen, enter 8 GB of memory, and click Next.7. On the Configure Networking screen, connect the VM to the test network, and click Next.8. On the Connect Virtual Hard Disk screen, select Use an existing virtual hard disk, select the OMIMSSC-v7.0.0.972.vhd file, and
click Finish.9. Once the VM has been created, edit the VM settings.10. Set the virtual processors count value to 2, and click OK.11. Start the newly created OMIMSSC VM.12. After booting, log in as admin.13. Enter and confirm a new password. We used Password1!14. When asked to select an action, select Configure Network Configuration, and press Enter.15. Select DNS configuration, and press Enter.16. Change the hostname to OMIMSSC.17. Leave the default primary DNS, and click Save.
Installing the Integration Gateway1. From the virtual machine server, open PowerShell as an administrator.2. Run the following command: Set-ExecutionPolicy Unrestricted3. Run the following command: Enable-PSRemoting – Force4. Navigate to the OMIMSSC admin portal, and log in using your credentials.5. On the Downloads page, under the Integration Gateway, click Download Installer.6. Run the .exe file for the Integration Gateway v7.0 installer.7. On the EULA screen, accept the terms of the agreement, and click Next.8. On the MIT License Agreement screen, click Next.9. On the Prerequisite Status screen, click Install Prerequisite.10. Once complete, click Scan for Prerequisite, and click Next.11. Enter the credentials for the username and password. We used test\administrator : Password112. On the Destination Folder screen, click Next.13. Click Next.14. Click Finish.
Installing the Console Extension for SCVMM1. Navigate to the OMIMSSC admin portal, and log in using your credentials.2. Under downloads, under OMIMSSC console extension for SCVMM installer, click Download.3. If asked to close the console to continue, click Yes.4. Click Next.5. On the License Agreement screen, accept the terms, and click Next.

Get flexible, feature-rich datacenter management at a lower cost June 2018 | 23
6. On the Ready to Install the Program screen, click Install.7. Once complete, click Finish.8. In the SCVMM console, under Settings, right-click Console Add-ins, and select Import Console.9. In the Import Console Add-in Wizard, click Browse…10. Select C:\Program Files\OMIMSSC\VMM Console Extension\OMIMSSC_VMM_Console_Extension.zip, and click Open.11. Click Next.12. Click Finish.
Enrolling the console1. Navigate to the OMIMSSC admin portal, and log in using your credentials.2. Under settings, click Enroll a Console.3. Enter the following information:
• Name: Test• Server FQDN: scvmm.test.local• Credentials: Create New Windows credentials for the administrator
4. Once finished, click Test Connection.
Creating the WinPE image1. On the SCVMM server, launch the DTK 6.1 installation file.2. Once the installer loads, on the introduction screen, click OK.3. Select the location of the DTK share, and run the self-extractor.4. On the OMIMSSC SCCM Console Extension page in SCCM, log in using the test\administrator credentials.5. Click WinPE Update.6. Enter the custom WinPE Image Path, Dell Deployment Toolkit Drivers Path, and the Output File ISO File Name, and click Update.
We entered:
• WinPE Image Path: \\CM\WIM\• Dell Deployment Toolkit Drivers Path: \\CM\DTK\x64\ • Output File ISO File Name: boot.iso
Discovering the target server1. Click Configuration and Deployment.2. Click Discover.3. In the Discover Window, next to Apply this Credential Profile to all servers, click Create New.4. In the Credential Profile Window, enter the following, and click Finish.
• Credential Profile Type: Device Credential Profile• Credential Profile Name: FX2• Username: root• Password: Password1• Default Profile for: iDRAC
5. Type the Dell iDRAC IP Address of the target server and job name.6. Click Finish.
Creating the hypervisor template 1. Under Profile and Templates, select Hypervisor Profile.2. On the Operational Template page, click Create.3. On the Welcome screen, click Next.4. For the Profile Name, enter FX25. For the SCVMM Host Group, use the drop-down menu to select a group. For the SCVMM Host Profile, use the drop-down menu to
select a profile. Click Next.6. For WinPE Boot Image Source enter boot.iso, and click Next.7. Check Enable Dell Lifecycle Controller drivers injection. Select Windows Server 2016 from the drop-down menu, and click Next.8. On the Summary Page, click Next.

Get flexible, feature-rich datacenter management at a lower cost June 2018 | 24
Creating the operational template1. Under Profile and Templates, select Operational Templates.2. On the Operational Template page, click Create.3. On the Welcome screen, click Next.4. Under Template Details, enter details for the FX2 server you added in the previous section, and click Next.5. Select only the following: Firmware Update, BIOS.Setup.1-1, RAID.Integrated.1-1, Operating System. Click Firmware Update.6. For Firmware Update under Update Source, select Update Source: Dell Online Catalog, and click BIOS.Setup.1-1.7. For BIOS.Setup.1-1, select the following, and click Operating System.
• System Profile Settings – System Profile: Performance optimized• Boot Settings – Boot Mode: BIOS• Integrated Devices – Integrated RAID Controller: Enabled• Integrated Devices – Internal SD card: Disabled
8. On the Operating System Settings page, select the following, and click Finish:
• OS name: Windows• Hypervisor Profile: FX2• Credential Profile: FX2• Server IP from: DHCP
Applying the operational template to the target1. In OMIMSSC, click Configuration and Deployment.2. Check the box next to the FC640. Click Assign.3. Select the FC640 Operational Template. Name the job, and click Assign.
Deploying the operational template to the target 1. On the OMIMSSC SCVMM Console Extension page in SCVMM, log in using the test\administrator credentials.2. Select Configuration and Deployment.3. Check the box for the target server.4. Click Deploy.5. Name the job, and click Deploy.
Integrating Dell EMC OMIMSSC with SCOMImporting Management Packs into OpsMgr1. Launch the OpsMgr console.2. From the navigation pane, click Administration.3. Expand Administration, right-click Management Packs, and select Import Management Packs.4. On the Select Management Packs screen, click AddAdd from Disk. 5. Type the location details or navigate to the location where you have installed the Dell EMC Server Management Pack Suite. If you chose
to install in the default directory, then you will find the Management Packs under C:\Program Files\Server Mgmt Suite\Dell Management Packs\7.0.
6. Select the management pack you want to import, and click Open. The Import Management Packs screen will appear with the Management Packs displayed in the Import List.
7. Click Install.
Adding Dell EMC 14th generation servers to Management Pack1. Make sure the Microsoft System Center SMASH Library pack is installed.2. In the SCOM OpsMgr, in the left pane, click Authoring.3. In the left pane, click Add Monitoring Wizard.4. On the Adding Wizard page, select WS-Management and SMASH Device Discovery, and click Next.5. On the Template Name and Description, enter a name for the template (Dell Physical 14G Server SMASH Template).6. Copy the name, and under Management pack, click New.7. On the Management Pack General Properties Page, paste the template name in the Name box, and click Next. 8. On the Knowledge Article page, click Create.9. On the Specify the target page, click Next.

Get flexible, feature-rich datacenter management at a lower cost June 2018 | 25
10. On the Specify the account to be used to run discovery page, click New.11. On General Properties, under Run As account type, select Simple Authentication.12. Under Display Name, enter Dell 14G Server Discovery Run As Account, and click Next.13. On the Credential page, enter the account name and password (root / calvin), and click Next.14. On the Distribution Security screen, select less secure, and click Create. Close the wizard complete screen.15. On the Credential screen, click Next.16. On the Devices screen, click Add.17. On the Add devices, select IP Range, and enter the device IP in the from and to sections.18. Click Advanced Options, check Skip CA Check and Skip CN Check, and click OK.19. Click Scan for Devices. The system should appear in available devices.20. Select the device, and click Add.21. Click OK.22. On the Device screen, click Next.23. On the Summary screen, click Create.24. Right-click the template, and click Refresh.25. Click the Monitoring tab in the left pane.26. Click WS-Management Device State.27. In the right pane, click Refresh, and see if the device goes from a non-monitoring state to a healthy state.
Installing and configuring third-party solutions with the HPE solutionHPE OV4VCDeploying OV4VC OVF using vSphere web client1. From the VMware vSphere Web Client, right-click a host, and select Deploy OVF Template.2. In the Select an OVF template window, select the local file, and click Choose File. Select the appropriate files, click Open, and
click Next.3. At the Select a name and folder screen, enter a VM name and location. Click Next.4. At the Select a compute resource screen, select the server host, and click Next. 5. At the Review details screen, click Next. 6. At the License agreements screen, click I Accept All License Agreements, and click Next.7. At the Select Storage screen, select a disk format, storage policy, and datastore, and click Next. 8. At the Select networks screen, choose a source network, and click Next.9. At the Customize template screen, enter a fully qualified domain name and static IP settings. Click Next.10. At the Ready to Complete window, review the selected options, and click Finish.
Registering OV4VC with VMware vCenter1. Launch the Administrator Console using the appliance hostname or IP from https:// <ApplianceHostname>, and click Setup.2. Enter the new password, and confirm password. Click OK. 3. To open the HPE OneView for VMware vCenter menu, click the down arrow. Under MANAGERS, click vCenters.4. In the left pane, click the Add vCenter button. 5. Enter Name, Username, and Password, and click Add.6. Click Accept, and click Refresh data.
Viewing hardware details 1. Click Hosts and Clusters.2. Select the specific host, cluster, or datacenter for which you want to view hardware.3. In the Monitor tab, select the HPE Host Information tab.
Deploying OS to bare-metal servers1. Click the cluster.2. Select HP server management actions – grow cluster. 3. Select the target server for deployment, and click Next. 4. Review network configuration, and click Next.5. Click Finish.
Get flexible, feature-rich datacenter management at a lower cost June 2018 | 26
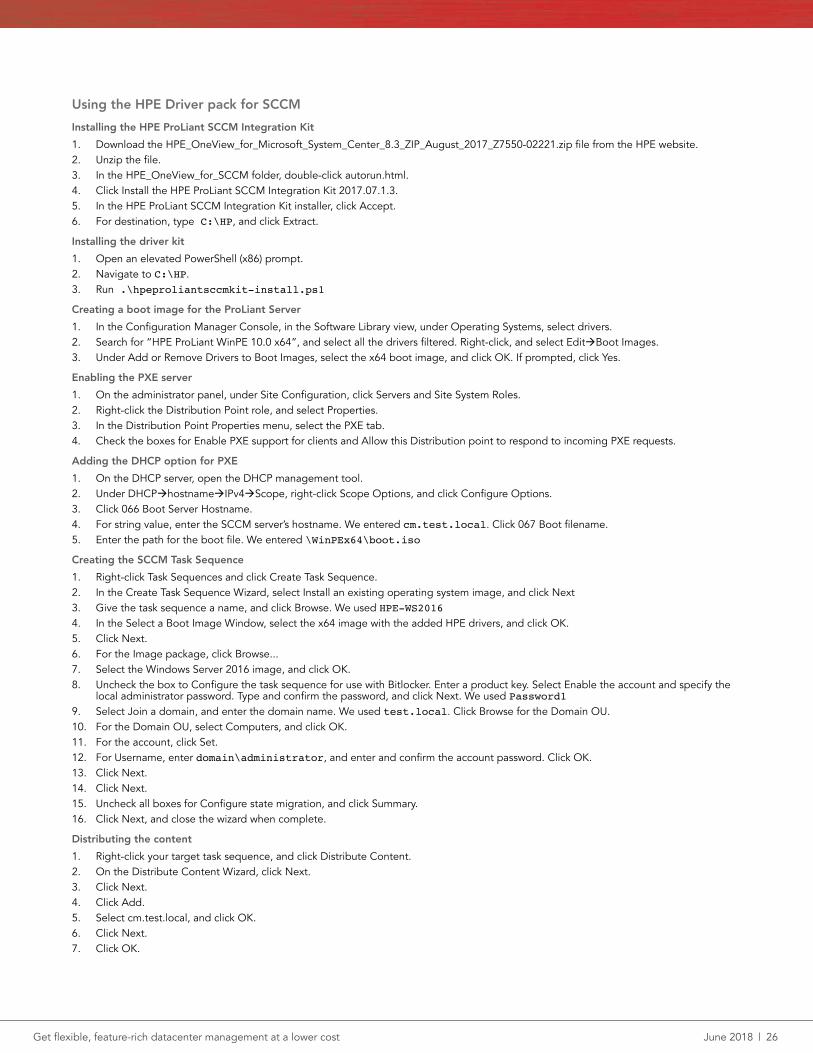
Using the HPE Driver pack for SCCMInstalling the HPE ProLiant SCCM Integration Kit1. Download the HPE_OneView_for_Microsoft_System_Center_8.3_ZIP_August_2017_Z7550-02221.zip file from the HPE website.2. Unzip the file.3. In the HPE_OneView_for_SCCM folder, double-click autorun.html.4. Click Install the HPE ProLiant SCCM Integration Kit 2017.07.1.3.5. In the HPE ProLiant SCCM Integration Kit installer, click Accept.6. For destination, type C:\HP, and click Extract.
Installing the driver kit1. Open an elevated PowerShell (x86) prompt.2. Navigate to C:\HP.3. Run .\hpeproliantsccmkit-install.ps1
Creating a boot image for the ProLiant Server1. In the Configuration Manager Console, in the Software Library view, under Operating Systems, select drivers.2. Search for “HPE ProLiant WinPE 10.0 x64”, and select all the drivers filtered. Right-click, and select EditBoot Images.3. Under Add or Remove Drivers to Boot Images, select the x64 boot image, and click OK. If prompted, click Yes.
Enabling the PXE server1. On the administrator panel, under Site Configuration, click Servers and Site System Roles.2. Right-click the Distribution Point role, and select Properties.3. In the Distribution Point Properties menu, select the PXE tab.4. Check the boxes for Enable PXE support for clients and Allow this Distribution point to respond to incoming PXE requests.
Adding the DHCP option for PXE1. On the DHCP server, open the DHCP management tool.2. Under DHCPhostnameIPv4Scope, right-click Scope Options, and click Configure Options.3. Click 066 Boot Server Hostname.4. For string value, enter the SCCM server’s hostname. We entered cm.test.local. Click 067 Boot filename.5. Enter the path for the boot file. We entered \WinPEx64\boot.iso
Creating the SCCM Task Sequence 1. Right-click Task Sequences and click Create Task Sequence.2. In the Create Task Sequence Wizard, select Install an existing operating system image, and click Next3. Give the task sequence a name, and click Browse. We used HPE-WS20164. In the Select a Boot Image Window, select the x64 image with the added HPE drivers, and click OK. 5. Click Next.6. For the Image package, click Browse...7. Select the Windows Server 2016 image, and click OK.8. Uncheck the box to Configure the task sequence for use with Bitlocker. Enter a product key. Select Enable the account and specify the
local administrator password. Type and confirm the password, and click Next. We used Password19. Select Join a domain, and enter the domain name. We used test.local. Click Browse for the Domain OU.10. For the Domain OU, select Computers, and click OK.11. For the account, click Set.12. For Username, enter domain\administrator, and enter and confirm the account password. Click OK.13. Click Next.14. Click Next.15. Uncheck all boxes for Configure state migration, and click Summary.16. Click Next, and close the wizard when complete.
Distributing the content 1. Right-click your target task sequence, and click Distribute Content.2. On the Distribute Content Wizard, click Next.3. Click Next.4. Click Add. 5. Select cm.test.local, and click OK.6. Click Next.7. Click OK.

Get flexible, feature-rich datacenter management at a lower cost June 2018 | 27
Deploying the task sequence1. Right-click the task sequence, and select Deploy.2. In the Deploy Software Wizard, for Collection, click Browse.3. Select the HPE target Servers Collection, and click OK.4. Click Next.5. Select Required, and select Make available to the following: Configuration Manager clients, media and PXE. Click Next.6. Check the box to schedule when this deployment will become available. Enter a time. For Assignment schedule, click New…7. Select Assign immediately after this event: As soon as possible, and click OK.8. Accept the remaining defaults, and close the wizard after the task sequence has completed.
Adding the target server to the appropriate collection1. In the Assets and Compliance panel, right-click devices, and select Import Computer Information.2. Select import single computer, and click Next.3. Enter the computer’s name and MAC address. Click Next.4. Click Next.5. Click Add computers to the collection targeted by the deployed task sequence, and click Browse.6. Select the target collection, and click OK.7. On the Summary screen, click Next.
Integrating the HPE OneView SCVMM Integration Kit with SCVMMWe used our Windows Server 2016 image to create our physical computer profile. Below, we have included the prerequisites for installing and configuring the HPE OneView SCVMM Integration Kit.
Creating a Physical Computer Profile1. In the SCVMM Management Console, navigate to Library.2. Under Profiles, right-click Physical Computer Profiles, and click Create Physical Computer Profile.3. On the Profile Description screen, enter a name for the Physical Computer Profile, select VM Host, and click Next.4. On the OS Image screen, click Browse.5. Select the Windows Server 2016 shared VHD, and click OK.6. Click Next.7. On the Hardware Configuration screen, configure the Management NIC, Disk, and Driver Options for your environment. Click Next.8. On the OS Configuration screen under Domain, enter the domain name, and select Run As account.9. Under Admin Password, enter the desired password for the new server’s local administrator account, and confirm.10. Under Computer Access Credentials, select a different Run As account than the SCVMM service account.11. Under Identity Information, enter a full name and organization name for your environment.12. Under Product Key, enter the product key for the version of Windows Server you are deploying.13. Under Time Zone, enter the time zone for the new server. Click Next.14. On the Host Settings screen, enter a location for new virtual machines, click Add, and click Next.15. On the Summary Screen, click Finish.
Installing the HPE OneView SCVMM Integration Kit1. Launch the installer for HPE OneView SCVMM Integration Kit 9.0.2. Once the installer loads, click Next on the Introduction screen.3. On the License Agreement screen, accept the agreement, and click Next.4. On the Module to Install screen, select Server and Console, and click Next.5. On the Server and Console Install Path screen, click Next.6. On the Port Numbers screen, click Next.7. On the Pre-Installation Summary screen, click Install.8. Once the installation has completed, click Done.
Configuring the HPE OneView SCVMM Integration Kit1. Launch the SCVMM console, and log into the SCVMM server.2. Navigate to FabricAll Hosts.3. Click HPE Fabric Management.4. Click Add OneView.5. Enter the IP and credentials for the Synergy OneView.6. Under Virtualization Servers, click Authorize for the SCVMM server.7. Enter the domain password, and click OK.

Get flexible, feature-rich datacenter management at a lower cost June 2018 | 28
Deploying a Hyper-V host through HPE Fabric Management1. We assume that the Server Profile Template in Synergy has already been created and that a Physical Computer Profile already exists in
the SCVMM Library.2. With the HPE Fabric Management view open in SCVMM, locate the newly added OneView, and click Deploy Servers.3. Select the desired Host group, SCVMM physical computer profile, OneView server profile template, and Synergy blade to deploy to,
and click Next.4. Assign the management NIC to the proper OneView network, and click Next.5. Enter a computer name for the new host, and click Next.6. Review the deployment settings, and click Deploy.
Integrating the HPE OneView Management Pack with SCOMInstalling the HPE OneView Management Pack1. From the Welcome screen, click Next.2. From the License Agreement screen, select I accept the terms in the license agreement, and click Next.3. From the Select features to install screen, select HPE OneView SCOM Management Pack and HPE OneView Event Manager, and click
Next.4. On the Ready to Install screen, click Install, and wait for the installation to complete.5. To close the installer, click Finish.
Adding a OneView Appliance1. In SCOM under HPE OneView Systems, click Configuration dashboard.2. In the right pane, input the IP address and credentials, and click Add.

Get flexible, feature-rich datacenter management at a lower cost June 2018 | 29
Principled Technologies is a registered trademark of Principled Technologies, Inc.All other product names are the trademarks of their respective owners.
DISCLAIMER OF WARRANTIES; LIMITATION OF LIABILITY:Principled Technologies, Inc. has made reasonable efforts to ensure the accuracy and validity of its testing, however, Principled Technologies, Inc. specifically disclaims any warranty, expressed or implied, relating to the test results and analysis, their accuracy, completeness or quality, including any implied warranty of fitness for any particular purpose. All persons or entities relying on the results of any testing do so at their own risk, and agree that Principled Technologies, Inc., its employees and its subcontractors shall have no liability whatsoever from any claim of loss or damage on account of any alleged error or defect in any testing procedure or result.
In no event shall Principled Technologies, Inc. be liable for indirect, special, incidental, or consequential damages in connection with its testing, even if advised of the possibility of such damages. In no event shall Principled Technologies, Inc.’s liability, including for direct damages, exceed the amounts paid in connection with Principled Technologies, Inc.’s testing. Customer’s sole and exclusive remedies are as set forth herein.
This project was commissioned by Dell EMC.
PrincipledTechnologies®
Facts matter.®PrincipledTechnologies®
Facts matter.®
Appendix C: ResultsDell EMC HPE Wins
Use case Time (Hour:min:sec)
Steps Time (Hour:min:sec)
Steps Percent less time
Steps difference
OME - Deploying a single Windows Server VM 0:02:03 13 0:24:07 11 91
OME - Deploying three Windows Server VMs 0:02:03 13 1:12:21 33 97 20
OME - Updating firmware for three Windows Server VMs 0:00:50 6 0:01:09 12 27 6
vCenter - Updating firmware 0:01:42 7 n/a n/a
vCenter - Creating system and hypervisor profiles for deployment 0:03:57 9 n/a n/a
vCenter - Creating a deployment template 0:00:08 3 n/a n/a
SCCM - Deploying a single server 0:00:14 5 0:01:08 15 79 10
SCCM - Deploying multiple servers 0:00:15 5 0:02:04 29 87 24
SCCM - Updating firmware for a single server 0:00:13 3 0:02:09 37 89 34
SCCM - Updating firmware for multiple servers 0:00:14 3 0:02:09 37 89 34
SCVMM - Deploying a single host 0:00:14 5 0:00:26 5 46 0
SCVMM - Deploying three hosts 0:00:15 5 0:00:28 5 46 0
SCVMM - Updating firmware for either one or multiple servers 0:00:13 3 n/a n/a
SCOM - Monitoring power Yes No
SCOM - Monitoring performance Yes No
SCOM - Tracking a warranty Yes No