
For users and administrators of Guvnor · Guvnor Manual For users and administrators of Guvnor...
116
Guvnor Manual For users and administrators of Guvnor 5.2.0.M2 by The JBoss Drools team [http://www.jboss.org/drools/team.html]
Transcript of For users and administrators of Guvnor · Guvnor Manual For users and administrators of Guvnor...

Guvnor Manual
For users and
administrators of Guvnor5.2.0.M2
by The JBoss Drools team [http://www.jboss.org/drools/team.html]


iii
1. Introduction ................................................................................................................. 1
1.1. What is a Business Rules Manager? ................................................................... 1
1.1.1. When to use Guvnor ................................................................................ 1
1.1.2. Who uses Guvnor .................................................................................... 2
1.2. Features outline .................................................................................................. 2
I. User Guide .................................................................................................................... 3
2. Quick start guide ................................................................................................. 5
2.1. Supported browser platforms ....................................................................... 7
2.2. Initial configuration ...................................................................................... 7
2.3. Writing some rules ...................................................................................... 8
2.4. Finding stuff ............................................................................................... 8
2.5. Deployment ................................................................................................ 8
3. Guvnor concepts ............................................................................................... 11
3.1. Rules are assets ....................................................................................... 11
3.2. Categorization ........................................................................................... 12
3.3. The asset editor ........................................................................................ 15
3.4. Rule authoring .......................................................................................... 16
3.4.1. Business rules with the guided editor ............................................... 16
3.4.2. DSL rules ...................................................................................... 24
3.4.3. Spreadsheet decision tables ........................................................... 25
3.4.4. Guided decision tables (web based) ................................................ 25
3.4.5. Rule flows ...................................................................................... 27
3.4.6. Technical rules (DRL) ..................................................................... 27
3.4.7. Functions ....................................................................................... 28
3.4.8. Data enumerations (drop down list configurations) ............................ 28
3.4.9. Advanced enumeration concepts ..................................................... 29
3.5. Templates of assets/rules .......................................................................... 31
3.6. Status management .................................................................................. 31
3.7. Package management ............................................................................... 32
3.7.1. Importing DRL packages ................................................................ 36
3.8. Version management ................................................................................ 36
3.9. Deployment management .......................................................................... 37
3.10. Navigating and finding rules ..................................................................... 38
4. Creating a business user view .......................................................................... 41
5. The fact model (object model) ........................................................................... 43
6. Working Sets ..................................................................................................... 47
6.1. Activating and Using Working Sets ............................................................ 49
6.1.1. Using Field Constraint .................................................................... 50
7. The business user perspective .......................................................................... 53
8. Advanced config options in a rule package ...................................................... 55
9. Deployment: Integrating rules with your applications ........................................ 57
9.1. The Knowledge Agent ............................................................................... 57
10. WebDAV and HTTP .......................................................................................... 61
10.1. WebDAV ................................................................................................ 61

Guvnor Manual
iv
10.2. URLs ...................................................................................................... 61
11. Inbox and comments ....................................................................................... 63
11.1. Comments .............................................................................................. 63
11.2. Inbox ...................................................................................................... 63
12. Eclipse Guvnor integration .............................................................................. 65
12.1. Source Code and Plug-in Details ............................................................. 65
12.2. Functionality Overview ............................................................................. 65
12.3. Guvnor Connection Wizard ...................................................................... 67
12.4. Guvnor Repository Explorer ..................................................................... 71
12.5. Local Copies of Guvnor Files ................................................................... 74
12.6. Actions for Local Guvnor Resources ........................................................ 75
12.7. Importing Guvnor Repository Resources ................................................... 80
12.8. Guvnor plugin Preferences ...................................................................... 84
II. Administration Guide .................................................................................................... 87
13. Installation ....................................................................................................... 89
13.1. Installation step by step ........................................................................... 89
13.2. Supported and recommended platforms ................................................... 89
14. Database configuration .................................................................................... 91
14.1. Changing the location of the data store .................................................... 91
14.2. Configuring Guvnor to use an external RDBMS ......................................... 92
14.3. Searching and indexing, Version storage .................................................. 92
15. Switch from JackRabbit to ModeShape ........................................................... 93
16. Security - Authentication and basic access ..................................................... 97
16.1. Using your containers security and LDAP ................................................. 97
17. Fine grained permissions and security .......................................................... 101
17.1. Enabling fine grained authorization ......................................................... 105
18. Data management .......................................................................................... 107
18.1. Backups ................................................................................................ 107
18.2. Selectors for package building ............................................................... 107
18.3. Adding your own logos or styles to Guvnor web GUI ................................ 107
18.4. Import and Export ................................................................................. 108
19. Architecture .................................................................................................... 109
19.1. Building from source .............................................................................. 110
19.1.1. Modules ..................................................................................... 110
19.1.2. Working with Maven 2 ................................................................ 110
19.1.3. Working with GWT ..................................................................... 110
19.1.4. Debugging, Editing and running with Eclipse ................................ 110
19.2. Re-usable components .......................................................................... 111
19.3. Versioning and Storage ......................................................................... 111
19.4. Contributing .......................................................................................... 112

Chapter 1.
1
Chapter 1. IntroductionThis section introduces the Guvnor. See the other relevant sections for installation, usage and
administration.
Figure 1.1. The Guvnor main screen
1.1. What is a Business Rules Manager?
A business rules manager allows people to manage rules in a multi user environment, it is a single
point of truth for your business rules, allowing change in a controlled fashion, with user friendly
interfaces.
Guvnor is the name of the web and network related components for managing rules with drools.
This combined with the core drools engine and other tools forms the business rules manager.
1.1.1. When to use Guvnor
You should consider Guvnor if any of the following apply to you: You need to manage versions/
deployment of rules, you need to let multiple users of different skill levels access and edit rules,
you don't have any existing infrastructure to manage rules, you have lots of "business" rules (as
opposed to technical rules as part of an application).

Chapter 1. Introduction
2
Guvnor can be used on its own, or with the IDE tooling (often both together).
Guvnor can be "branded" and made part of your application, or it can be a central rule repository.
1.1.1.1. When to not use Guvnor
In some situations applications may exist which have the rules in a database (for instance as part
of an existing application), and no new application is needed to manage the rules.
In this case, the drools-template library is worth a look - you can define templates for rules to be
generated from any tabular data source.
Otherwise, perhaps an existing rule management system and user interface already exists (and
is tailored to your environment already) - in this case migrating to Guvnor may not be necessary.
If you are using rules to solve complex algorithmic problems, and the rules are essentially an
integral part of the application (and don't need to be managed separately to the code).
1.1.2. Who uses Guvnor
The main roles of people who would use Guvnor are: Business Analyst, Rule expert, Developer,
Administrators (rule administrators etc).
Guvnor is designed in such a way as these different roles can be accommodated, it can be
controlled how much is exposed to different users in a safe fashion.
1.2. Features outline
• Multiple types of rule editors (GUI, text)
• Version control (historical assets)
• Categorization
• Build and deploy
• Store multiple rule "assets" together as a package

Part I. User GuideThis part covers Guvnor for end-users.


Chapter 2.
5
Chapter 2. Quick start guideIf you are reading this, you must be the impatient type who wants to kick the tires (and light the
fires) and have a look around as soon as possible. This section will provide a quick end to end
tour of the steps involved (but does not go through the concepts in detail). This assumes you have
installed the repository correctly, and are able to access the main login screen.
You can also consult the wiki: http://wiki.jboss.org/wiki/Wiki.jsp?page=RulesRepository for some
tutorials and user tips (it IS a wiki, so you can even contribute your own tips and examples and
even upload files if you desire !).

Chapter 2. Quick start guide
6
Figure 2.1. Main feature areas of Guvnor

Supported browser platforms
7
The above picture shows the main feature areas of Guvnor.
• Info: This is the initial screen, with links to resources.
• Rules: This is the category and business user perspective.
• Package: This is where packages are configured and managed.
• Deployment: this is where deployment snapshots are managed.
• Admin: Administrative functions (categories, statuses, import and export)
2.1. Supported browser platforms
The supported server side platforms are mentioned in the installation guide. For browsers - the
major ones are supported, this includes Firefox (1.5 and up), IE7 and up, Opera, Safari, Google
Chrome etc. The preferred browser for most platforms is firefox, it is widely available and free, if
you have any choice at all, Firefox is the preferred platform, followed by safari on mac. IE6 users
can experience some poor performance, and as this is a dangerously insecure browser IE7 or a
superior browser (such as Google Chrome, Firefox, Safari) is recommended.
2.2. Initial configuration
Some initial setup is required the first time. The first time the server starts up, it will create an
empty repository, then take the following steps:
• Once deployed, go to http://localhost:8080/guvnor-webapp/ This will show the initial info screen
or login screen depending on the configuration.
• If it is a brand new repository, you will want to go to "Admin", and choose "Manage Categories"
(Add a few categories of your choosing, categories are only for classification, not for execution
or anything else.)
• Rules need a fact model (object model) to work off, so next you will want to go to the Package
management feature. From here you can click on the icon to create a new package (give it a
meaningful name, with no spaces).
• To upload a model, use a JAR which has the fact model (API) that you will be using in your
rules and your code (go and make one now if you need to !). When you are in the model editor
screen, you can upload a JAR file, choose the package name from the list that you created in
the previous step.
• Now edit your package configuration (you just created) to import the fact types you just uploaded
(add import statements), and save the changes.
• At this point, the package is configured and ready to go (you generally won't have to go through
that step very often).

Chapter 2. Quick start guide
8
(Note that you can also import an existing DRL package - it will store the rules in the repository
as individual assets).
2.3. Writing some rules
• Once you have at least one category and one package setup, you can author rules.
• There are multiple rule "formats", but from the Guvnor point of view, they are all "assets".
• You create a rule by clicking the icon with the rules logo (the head), and from that you enter
a name.
• You will also have to choose one category. Categories provide a way of viewing rules that is
separate to packages (and you can make rules appear in multiple packages) - think of it like
tagging.
• Chose the "Business rule (guided editor)" formats.
• This will open a rule modeler, which is a guided editor. You can add and edit conditions and
actions based on the model that is in use in the current package. Also, any DSL sentence
templates setup for the package will be available.
• When you are done with rule editing, you can check in the changes (save), or you can validate
or "view source" (for the effective source).
• You can also add/remove categories from the rule editor, and other attributes such as
documentation (if you aren't sure what to do, write a document in natural language describing
the rule, and check it in, that can also serve as a template later)
2.4. Finding stuff
In terms of navigating, you can either use the Rules feature, which shows things grouped by
categories, or you can use the Package feature, and view by package (and rule type). If you know
the name or part of the name of an asset, you can also use the "Quick find", start typing a rule
name and it will return a list of matches as you type (so if you have a sensible naming scheme,
it will make it very quick to find stuff).
2.5. Deployment
• After you have edited some rules in a package, you can click on the package feature, open the
package that you wish, and build the whole package.
• If that succeeds, then you will be able to download a binary package file which can be deployed
into a runtime system.
• You can also take a "snapshot" of a package for deployment. This freezes the package at that
point in time, so any concurrent changes to not effect the package. It also makes the package

Deployment
9
available on a URL of the form: "http://<your server>/guvnor-webapp/org.drools.guvnor.Guvnor/
packages/<packageName>/<snapshotName>" (where you can use that URL and downloads
will be covered in the section on deployment).

10

Chapter 3.
11
Chapter 3. Guvnor concepts
3.1. Rules are assets
As the Guvnor can manage many different types of rules (and more), they are all classed as
"assets". An asset is anything that can be stored as a version in the repository. This includes
decision tables, models, DSLs and more. Sometimes the word "rule" will be used to really mean
"asset" (i.e. the things you can do also apply to the other asset types). You can think of asset
as a lot like a file in a folder. Assets are grouped together for viewing, or to make a package for
deployment etc.

Chapter 3. Guvnor concepts
12
3.2. Categorization
Figure 3.1. Categories
Categories allow rules (assets) to be labeled (or tagged) with any number of categories that you
define. This means that you can then view a list of rules that match a specific category. Rules can
belong to any number of categories. In the above diagram, you can see this can in effect create

Categorization
13
a folder/explorer like view of assets. The names can be anything you want, and are defined by
the Guvnor administrator (you can also remove/add new categories - you can only remove them
if they are not currently in use).
Generally categories are created with meaningful name that match the area of the business
the rule applies to (if the rule applies to multiple areas, multiple categories can be attached).
Categories can also be used to "tag" rules as part of their life-cycle, for example to mark as "Draft"
or "For Review".
Figure 3.2. Assets can have multiple categories
The view above shows the category editor/viewer that is seen when you open an asset. In this
example you can see the asset belongs to 2 categories, with a "+" button to add additional items
(use the trash can item to remove them). This means that when either category is used to show
a list of assets, you will see that asset.
In the above example, the first Category "Finance" is a "top level" category. The second one: "HR/
Awards/QAS" is a still a single category, but its a nested category: Categories are hierarchical.
This means there is a category called "HR", which contains a category "Awards" (it will in fact have
more sub-categories of course), and "Awards" has a sub-category of QAS. The screen shows this
as "HR/Awards/QAS" - its very much like a folder structure you would have on your hard disk (the
notable exception is of course that rules can appear in multiple places).
When you open an asset to view or edit, it will show a list of categories that it currently belongs to
If you make a change (remove or add a category) you will need to save the asset - this will create
a new item in the version history. Changing the categories of a rule has no effect on its execution.

Chapter 3. Guvnor concepts
14
Figure 3.3. Creating categories
The above view shows the administration screen for setting up categories (there) are no categories
in the system by default. As the categories can be hierarchical you chose the "parent" category
that you want to create a sub-category for. From here categories can also be removed (but only
if they are not in use by any current versions of assets).
As a general rule, an asset should only belong to 1 or 2 categories at a time. Categories are critical
in cases where you have large numbers of rules. The hierarchies do not need to be too deep, but
should be able to see how this can help you break down rules/assets into manageable chunks.
Its ok if its not clear at first, you are free to change categories as you go.

The asset editor
15
3.3. The asset editor
Figure 3.4. The Asset editor view
The above diagram shows the "asset editor" with some annotated areas. The asset editor is where
all rule changes are made. Below is a list which describes the different parts of the editor.
• A
This is where the "editor widget" lives - exactly what form the editor takes depends on the asset
or rule type.
• B
This is the documentation area - a free text area where descriptions of the rule can live. It is
encouraged to write a plain description in the rule here before editing.
• C
These are the actions - for saving, archiving, changing status etc. Archiving is the equivalent
of deleting an asset.
• D

Chapter 3. Guvnor concepts
16
This has the asset name, as well as the list of categories that the asset belongs to.
• E
This section contains read-only meta data, including when changes were made, and by whom.
"Modified on:" - this is the last modified date.
"By:" - who made the last change.
"Note:" - this is the comment made when the asset was last updated (i.e. why a change was
made)
"Version:" - this is a number which is incremented by 1 each time a change is checked in (saved).
"Created on:" - the date and time the asset was created.
"Created by:" - this initial author of the asset.
"Format:" - the short format name of the type of asset.
• F
This shows what package the asset belong to (you can also change it from here).
• G
This is some more (optional) meta data (taken from the Dublin Core meta data standard)
• H
This will show the version history list when requested.
3.4. Rule authoring
The Guvnor supports a (growing) list of formats of assets (rules). Here the key ones are described.
Some of these are covered in other parts of the manual, and the detail will not be repeated here.
3.4.1. Business rules with the guided editor
Guided editor style "Business rules": (also known as "BRL format"). These rules use the guided
GUI which controls and prompts user input based on knowledge of the object model. This can
also be augmented with DSL sentences.
IMPORTANT: to use the BRL guided editor, someone will need to have you package configured
before hand.
Also note that there is a guided editor in the Eclipse plug in, most of the details in this section
can also apply to it.

Business rules with the guided editor
17
Figure 3.5. The guided BRL editor
The above diagram shows the editor in action. The following description apply to the letter boxes
in the diagram above:
A: The different parts of a rule. The "WHEN" part is the condition, "THEN" action, and "(options)"
are optional attributes that may effect the operation of the rule.
B: This shows a pattern which is declaring that the rule is looking for a "Driver" fact (the fields are
listed below, in this case just "age"). Clicking in the fact name (Driver) will popup a list of options
to add to the fact declaration: you can add more fields (e.g. their "location"), or you can assign a
variable name to the fact (which you can use later on if needs be). As well as adding more fields
to this pattern - you can add "multiple field" constraints - i.e. constraints that span across fields
(e.g. age > 42 or risk > 2). The popup dialog shows the options.
C: The small triangle indicates you can remove something. In this case it would remove the whole
Driver fact declaration. If its the one below, it would remove just the age constraint.
D: The "+" symbols allow you to add more patterns to the condition or the action part of the rule,
or more attributes. In all cases, a popup option box is provided. For the "WHEN" part of the rule,
you can choose from a list of Conditional Elements to add:
• A Constraint on a Fact: it will give you a list of facts.
• "The following does not exist": the fact+constraints must not exist.
• "The following exists": at least one match should exist (but there only needs to be one - it will
not trigger for each match).
• "Any of the following are true": any of the patterns can match (you then add patterns to these
higher level patterns).

Chapter 3. Guvnor concepts
18
• "From": this will insert a new From Conditional Element to the rule.
• "From Accumulate": this will insert a new Accumulate Conditional Element to the rule.
• "From Collect": this will insert a new Collect Conditional Element to the rule.
• "Free Form DRL": this will let you insert a free chunk of DRL.
If you just put a fact (like is shown above) then all the patterns are combined together so they
are all true ("and").
E: This shows the constraint for the "age" field. Looking from left to right you find:
• The field name: Clicking on it you can assign a variable name to it, or access nested properties
of it.
• A list of constraint operations: The content of this list changes depending on the field's data type.
• The value field: It could be on of
1. A literal value: depending on the field's data type different components will be displayed:
String or Number -> textbox, Date -> calendar, Enumeration -> combobox, Boolean ->
checkbox
2. A "formula": this is an expression which is calculated (this is for advanced users only)
3. An Expression - this will let you use an Expression Builder to build up a full mvel expression.
(At the moment only basic expressions are supported)
F: This shows an "action" of the rule, the Right Hand Side of a rule consists in a list of actions.
In this case, we are asserting/inserting a new fact, which is a Rejection (with the "reason" field
set to an explanation). There are quite a few other types of actions you can use: you can modify
an existing fact (which tells the engine the fact has changed) - or you can simply set a field on a
fact (in which case the engine doesn't know about the change - normally because you are setting
a result). You can also retract a fact. In most cases, just like in Fact Types, you can click in the
Fact name to get a list of its attributes or to bound it to a variable name. The values you enter are
"literal" - in the sense that what you type is what the value is. If it needs to be a calculation, then
add an "=" at the start of the value - this will be interpreted as a "formula" (for advanced users
only) ! and the calculation will be performed (not unlike a spreadsheet). You can also perform a
logical insert of Facts, add Facts to existing global lists, call a method on a variable or write some
free form chunk of code.
G: This is where the rule options live. In this case, only salience is used which is a numeric value
representing the rules "priority". This would probably be the most common option to use.
H: Pattern/Action toolbar. Next to each Pattern or Action you will find a toolbar containing 3 buttons.
The first button lets you insert a new Pattern/Action bellow the one you selected, the other two
buttons will move the current Pattern/Action up or down. The toolbars are translucent by default;
they get active when you move the mouse cursor inside one of them.

Business rules with the guided editor
19
3.4.1.1. User driven drop down lists
Figure 3.6. Data enumeration showing as a drop down list
Note that is it possible to limit field values to items in a pre configured list. This list is configured
as part of the package (using a data enumeration to provide values for the drop down list). These
values can be a fixed list, or (for example) loaded from a database. This is useful for codes, and
other fields where there are set values. It is also possible to have what is displayed on screen, in a
drop down, be different to the value (or code) used in a rule. See the section on data enumerations
for how these are configured.
3.4.1.2. Augmenting with DSL sentences
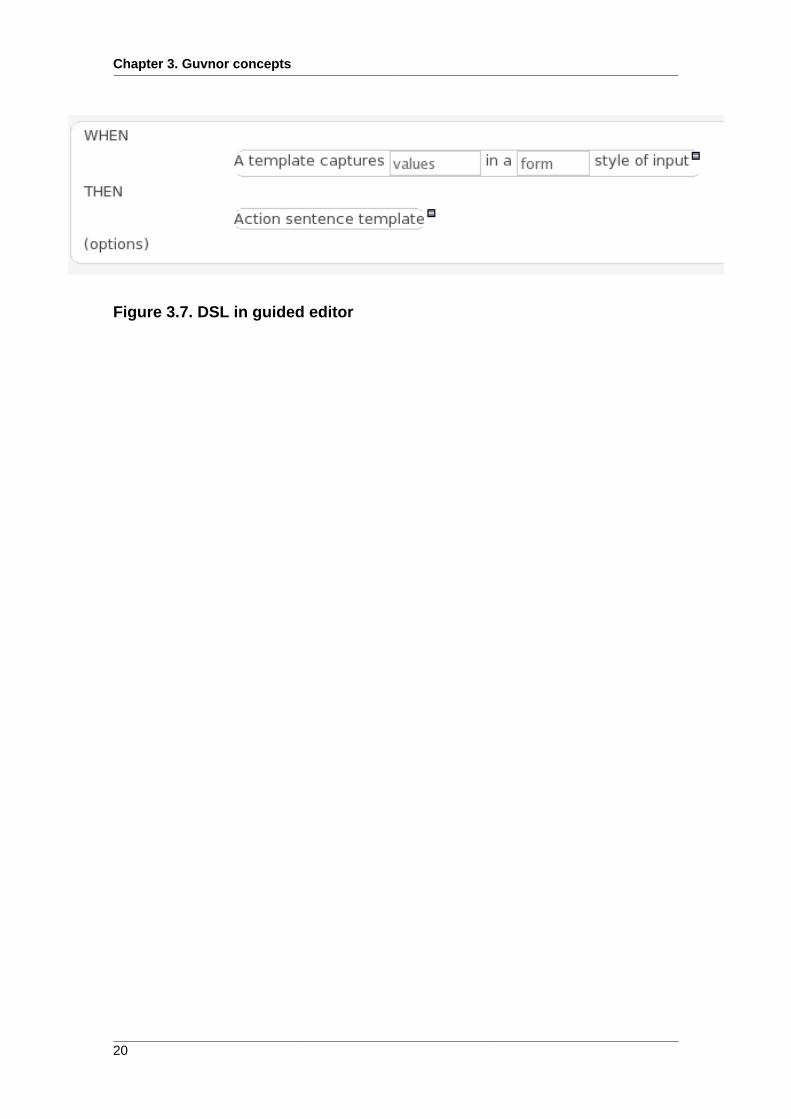
If the package the rule is part of has a DSL configuration, when when you add conditions or actions,
then it will provide a list of "DSL Sentences" which you can choose from - when you choose one,
it will add a row to the rule - where the DSL specifies values come from a user, then a edit box
(text) will be shown (so it ends up looking a bit like a form). This is optional, and there is another
DSL editor. Please note that the DSL capabilities in this editor are slightly less then the full set
of DSL features (basically you can do [when] and [then] sections of the DSL only - which is no
different to drools 3 in effect).
The following diagram shows the DSL sentences in action in the guided editor:
Chapter 3. Guvnor concepts
20
Figure 3.7. DSL in guided editor

Business rules with the guided editor
21
3.4.1.3. A more complex example:
Figure 3.8. A more complex BRL example
In the above example, you can see how to use a mixture of Conditional Elements, literal values,
and formulas. The rule has 4 "top level" Patterns and 1 Action. The "top level" Patterns are:
1. A Fact Pattern on Person. This Pattern contains two field constraints: one for birthdate field
and the other one is a formula. Note that the value of the birthdate restriction is selected from a
calendar. Another thing to note is that you can make calculations and use nested fields in the
formula restriction (i.e. car.brand). Finally, we are setting a variable name ($p) to the Person
Fact Type. You can then use this variable in other Patterns.

Chapter 3. Guvnor concepts
22
Note
The generated DRL from this Pattern will be:
$p : Person( birthDate < "19-Dec-1982" , eval( car.brand == "Ford" && salary
> (2500 * 4.1) ))
2. A From Pattern. This condition will create a match for every Address whose street name is "Elm
St." from the Person's list of addresses. The left side of the from is a regular Fact Pattern and
the right side is an Expression Builder that let us inspect variable's fields.
Note
The generated DRL from this Pattern will be: Address( street == "Elm St." )
from $p.addresses
3. A "Not Exist" Conditional Element. This condition will match when its content doesn't create a
match. In this case, its content is a regular Fact Pattern (on Person). In this Fact Pattern you
can see how variables ($p) could be used inside a formula value.
Note
The generated DRL from this Pattern will be: not Person( salary ==
( $p.salary * 2 ) )
4. A "From Accumulate" Conditional Element. This is maybe one of the most complex Patterns
you can use. It consist in a Left Pattern (It must be a Fact Pattern. In this case is a Number
Pattern. The Number is named $totalAddresses), a Source Pattern (Which could be a Fact
Pattern, From, Collect or Accumulate conditional elements. In this case is an Address Pattern
Restriction with a field restriction in its zip field) and a Formula Section where you can use any
built-in or custom Accumulate Function (in this example a count() function is used). Basically,
this Conditional Element will count the addresses having a zip code of 43240 from the Person's
list of addresses.
Note
The generated DRL from this Pattern will be: $totalAddresses : Number()
from accumulate ($a : Address( zipCode == " 43240") from
$p.addresses, count($a))

Business rules with the guided editor
23
Figure 3.9. Adding Patterns
Chapter 3. Guvnor concepts
24
When clicking on the + button of the WHEN section, a new popup will appear letting you to add
a new Pattern to the Rule. The popup will looks similar to the image above. In this popup you
could select the type of Pattern to add by selecting one of the list items. In the list you will have
an entry for each defined Fact Type, in addition to the already mentioned Conditional Elements
like "exists", "doesn't exist", "from", "collect", "accumulate" and "free form DRL". Once you have
selected one of this elements, you can add a new Pattern by clicking on the "Ok" button. The new
pattern will be added at the bottom of the rule's left hand side. If you wan't to choose a different
position, you can use the combobox placed at the top of the popup.
You can also open this popup by clicking in the + button from a Pattern's action toolbar. If that
is the case, the popup that appears wouldn't containt the position combobox, because the new
Pattern will be added just after the Pattern where you clicked.
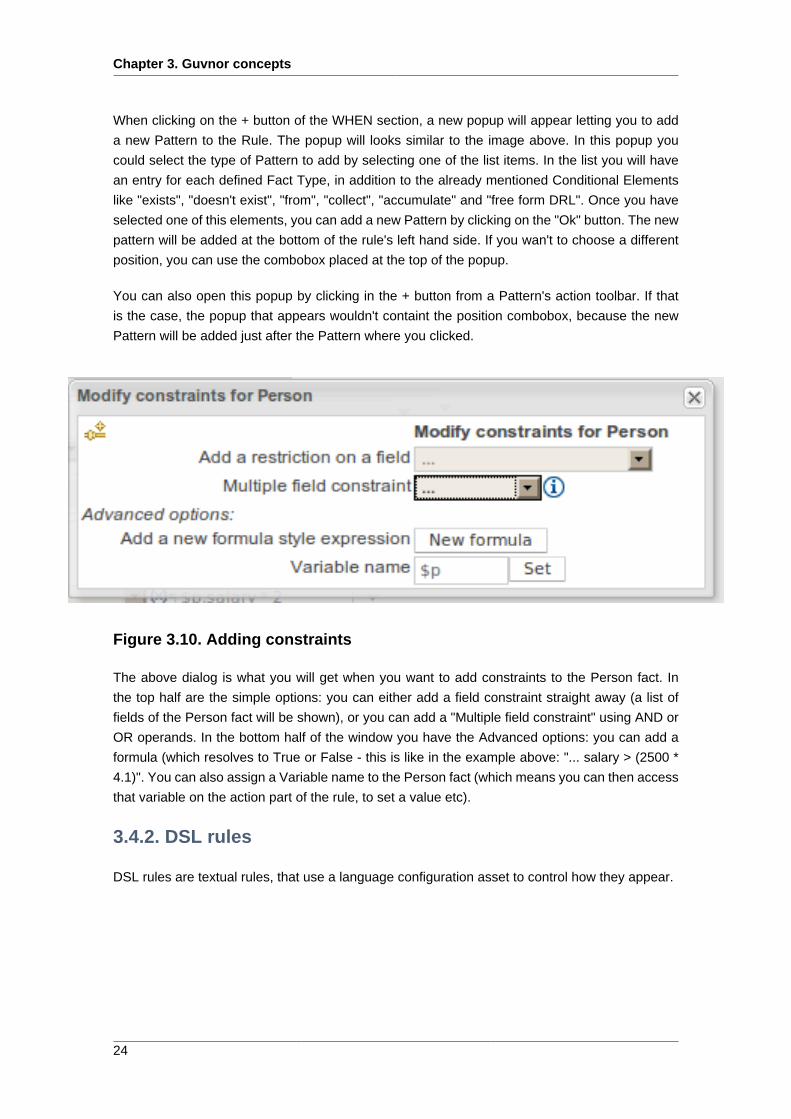
Figure 3.10. Adding constraints
The above dialog is what you will get when you want to add constraints to the Person fact. In
the top half are the simple options: you can either add a field constraint straight away (a list of
fields of the Person fact will be shown), or you can add a "Multiple field constraint" using AND or
OR operands. In the bottom half of the window you have the Advanced options: you can add a
formula (which resolves to True or False - this is like in the example above: "... salary > (2500 *
4.1)". You can also assign a Variable name to the Person fact (which means you can then access
that variable on the action part of the rule, to set a value etc).
3.4.2. DSL rules
DSL rules are textual rules, that use a language configuration asset to control how they appear.

Spreadsheet decision tables
25
Figure 3.11. DSL rule
A dsl rule is a single rule. Referring to the picture above, you can a text editor. You can use the
icons to the right to provide lists of conditions and actions to choose from (or else press Control
+ Space at the same time to pop up a list).
3.4.3. Spreadsheet decision tables
Multiple rules can be stored in a spreadsheet (each row is a rule). The details of the spreadsheet
are not covered in this chapter (as there is a separate chapter for them).
Figure 3.12. Spreadsheet decision table
To use a spreadsheet, you upload an XLS file (and can download the current version, as per the
picture above). To create a new decision table, when you launch the rule wizard, you will get an
option to create one (after that point, you can upload the XLS file).
3.4.4. Guided decision tables (web based)
The guided decision table feature allows decision tables to be edited in place on the web. This
works similar to the guided editor by introspecting what facts and fields are available to guide the
creation of a decision table.

Chapter 3. Guvnor concepts
26
Figure 3.13. Decision table
At the top right there is a button which shows the configuration area of the guided decision table:
Figure 3.14. Decision table config
It is in this section where condition and action columns are configured. "Attribute columns" are
for setting attributes on a per rule (row) basis, such as salience. Web based decision tables are
compiled into DRL like all other rule assets.

Rule flows
27
Column configurations: when you edit or create a new column, you will be given a choice of the
type of constraint: Literal (the value in the cell will be compared with the field using the operator),
Formula (in which case the expression in the cell will be evaluated and then compared with the
field) and Predicate (this means no field is needed, the expression will be evaluated to true or
false). You can set a default value, but normally if there is no value in the cell, that constraint
will not apply.
The "in" operator: when you chose the operator that says "is in the following list" then the cell value
can be a comma separated list of values, of which as long as one of them matches the specified
field, that constraint will be deemed true.
In general, there are little "info" icons (with the letter "i") which if you click on, a popup description
of the feature is provided in context.
3.4.5. Rule flows
Rule flows: Rule flows allow you to visually describe the steps taken - so not all rules are evaluated
at once, but there is a flow of logic. Rule flows are not covered in this chapter on the Guvnor, but
you can use the IDE to graphically draw ruleflows, and upload the .rfm file to the Guvnor.
Similar to spreadsheets, you upload/download ruleflow files (the eclipse IDE has a graphical editor
for them). The details of Rule Flows are not discussed here.
3.4.6. Technical rules (DRL)
Technical (DRL) rules are stored as text - they can be managed in the Guvnor. A DRL can either
be a whole chunk of rules, or an individual rule. if its an individual rule, no package statement or
imports are required (in fact, you can skip the "rule" statement altogether, just use "when" and
"then" to mark the condition and action sections respectively). Normally you would use the IDE to
edit raw DRL files, since it has all the advanced tooling and content assistance and debugging.
However, there are times when a rule may have to deal with something fairly technical in a package
in Guvnor. In any typical package of rules, you generally have a need for some "technical rules"
- you can mix and match all the rule types together of course.
Figure 3.15. DRL technical rule

Chapter 3. Guvnor concepts
28
3.4.7. Functions
Functions are another asset type. They are NOT rules, and should only be used when necessary.
The function editor is a textual editor. Functions
Figure 3.16. Function
3.4.8. Data enumerations (drop down list configurations)
Data enumerations are an optional asset type that technical folk can configure to provide drop
down lists for the guided editor. These are stored and edited just like any other asset, and apply
to the package that they belong to.
The contents of an enum config are a mapping of Fact.field to a list of values to be used in a
drop down. That list can either be literal, or use a utility class (which you put on the classpath) to
load a list of strings. The strings are either a value to be shown on a drop down, or a mapping
from the code value (what ends up used in the rule) and a display value (see the example below,
using the '=').

Advanced enumeration concepts
29
Figure 3.17. Data enumeration
In the above diagram - the "MM" indicates a value that will be used in the rule, yet "Mini Mal" will
be displayed in the GUI.
Getting data lists from external data sources: It is possible to have the Guvnor call a piece of code
which will load a list of Strings. To do this, you will need a bit of code that returns a java.util.List
(of String's) to be on the classpath of the Guvnor. Instead of specifying a list of values in the
Guvnor itself - the code can return the list of Strings (you can use the "=" inside the strings if you
want to use a different display value to the rule value, as normal). For example, in the 'Person.age'
line above, you could change it to:
'Person.age' : (new com.yourco.DataHelper()).getListOfAges()
This assumes you have a class called "DataHelper" which has a method "getListOfAges()" which
returns a List of strings (and is on the classpath). You can of course mix these "dynamic"
enumerations with fixed lists. You could for example load from a database using JDBC. The data
enumerations are loaded the first time you use the guided editor in a session. If you have any
guided editor sessions open - you will need to close and then open the rule to see the change. To
check the enumeration is loaded - if you go to the Package configuration screen, you can "save
and validate" the package - this will check it and provide any error feedback.
3.4.9. Advanced enumeration concepts
There are a few other advanced things you can do with data enumerations.
Drop down lists that depend on field values: Lets imagine a simple fact model, we have a class
called Vehicle, which has 2 fields: "engineType" and "fuelType". We want to have a choice for the
"engineType" of "Petrol" or "Diesel". Now, obviously the choice type for fuel must be dependent on

Chapter 3. Guvnor concepts
30
the engine type (so for Petrol we have ULP and PULP, and for Diesel we have BIO and NORMAL).
We can express this dependency in an enumeration as:
'Vehicle.engineType' : ['Petrol', 'Diesel']
'Vehicle.fuelType[engineType=Petrol]' : ['ULP', 'PULP' ]
'Vehicle.fuelType[engineType=Diesel]' : ['BIO', 'NORMAL' ]
This shows how it is possible to make the choices dependent on other field values. Note that once
you pick the engineType, the choice list for the fuelType will be determined.
Loading enums programmatically: In some cases, people may want to load their enumeration data
entirely from external data source (such as a relational database). To do this, you can implement
a class that returns a Map. The key of the map is a string (which is the Fact.field name as shown
above), and the value is a java.util.List of Strings.
public class SampleDataSource2 {
public Map<String>, List<String> loadData() {
Map data = new HashMap();
List d = new ArrayList();
d.add("value1");
d.add("value2");
data.put("Fact.field", d);
return data;
}
}
And in the enumeration in the BRMS, you put:
=(new SampleDataSource2()).loadData()
The "=" tells it to load the data by executing your code.
Mode advanced enumerations: In the above cases, the values in the lists are calculated up front.
This is fine for relatively static data, or small amounts of data. Imagine a scenario where you have
lists of countries, each country has a list of states, each state has a list of localities, each locality
has a list of streets and so on... You can see how this is a lot of data, and it can not be loaded up.
The lists should be loaded dependent on what country was selected etc...

Templates of assets/rules
31
Well the above can be addressed in the following fashion:
'Fact.field[dependentField1, dependentField2]' : '(new
com.yourco.DataHelper()).getListOfAges("@{dependentField1}", "@{dependentField2}")'
Similar to above, but note that we have just specified what fields are needed, and also on the
right of the ":" there are quotes around the expression. This expression will then be evaluated,
only when needed, substituting the values from the fields specified. This means you can use the
field values from the GUI to drive a database query, and drill down into data etc. When the drop
down is loaded, or the rule loaded, it will refresh the list based on the fields. 'depenentField1' and
'dependentField2' are names of fields on the 'Fact' type - these are used to calculate the list of
values which will be shown in a drop down if values for the "field".
3.5. Templates of assets/rules
Tip: As you may have many similar rules, you can create rule templates, which are simply rules
which are kept in an inactive package - you can then categories templates accordingly, and copy
them as needed (choosing a live package as the target package).
3.6. Status management
Each asset (and also package) in Guvnor has a status flag set. The values of the status flag are
set in the Administration section of the Guvnor. (you can add your own status names). Similar to
Categories, Statuses do NOT effect the execution in any way, and are purely informational. Unlike
categories, assets only have one status AT A TIME.
Using statuses is completely optional. You can use it to manage the lifecycle of assets (which you
can alternatively do with categories if you like).
Figure 3.18. Asset status
You can change the status of an individual asset (like in the diagram above). Its change takes
effect immediately, no separate save is needed.

Chapter 3. Guvnor concepts
32
Figure 3.19. Asset status
You can change the status of a whole package - this sets the status flag on the package itself,
but it ALSO changes the statuses on ALL the assets that belong to this package in one hit (to be
the same as what you set the package to).
3.7. Package management
Configuring packages is generally something that is done once, and by someone with some
experience with rules/models. Generally speaking, very few people will need to configure
packages, and once they are setup, they can be copied over and over if needed. Package
configuration is most definitely a technical task that requires the appropriate expertise.
All assets live in "packages" in the Guvnor - a package is like a folder (it also serves as a
"namespace"). A home folder for rule assets to live in. Rules in particular need to know what the
fact model is, what the namespace is etc.
Figure 3.20. The package explorer
The above picture shows the package explorer. Clicking on an asset type will show a list of
matches (for packages with thousands of rules, showing the list may take several seconds - hence
the importance of using categories to help you find your way around).

Package management
33
So while rules (and assets in general) can appear in any number of categories, they only live in
one package. If you think of the Guvnor as a file system, then each package is a folder, and the
assets live in that folder - as one big happy list of files. When you create a deployment snapshot of
a package, you are effectively copying all the assets in that "folder" into another special "folder".
The package management feature allows you to see a list of packages, and then "expand" them, to
show lists of each "type" of asset (there are many assets, so some of them are grouped together):
The asset types:
• Business assets: this shows a list of all "business rule" types, which include decision tables,
business rules etc. etc.
• Technical assets: this is a list of items that would be considered technical (e.g. DRL rules, data
enumerations and rule flows).
• Functions: In the Guvnor you can also have functions defined (optionally of course).
• DSL: Domain Specific Languages can also be stored as an asset. If they exist (generally there
is only one), then they will be used in the appropriate editor GUIs.
• Model: A package requires at least one model - for the rules.
• WorkingSets: Working Sets let you create subsets of package's Fact Types and apply
constraints to their fields.

Chapter 3. Guvnor concepts
34
Figure 3.21. Creating new assets

Package management
35
From the package explorer you can create new rules, or new assets. Some assets you can only
create from the package explorer. The above picture shows the icons which launch wizards for
this purpose. If you hover the mouse over them, a tooltip will tell you what they do.
Figure 3.22. Package configuration
One of the most critical things you need to do is configure packages. This is mostly importing
the classes used by the rules, and globals variables. Once you make a change, you need
to save it, and that package is then configured and ready to be built. For example, you may
add a model which has a class called com.something.Hello, you would then add import
com.something.Hello in your package configuration and save the change.

Chapter 3. Guvnor concepts
36
Figure 3.23. Package building
Finally you would "build" a package. Any errors caught are then shown at this point. If the build
was successful, then you will have the option to create a snapshot for deployment. You can also
view the DRL that this package results in.
Warning
In cases of large numbers of rules, all these operations can take some time.
It is optional at this stage to enter the name of a "selector" - see the admin section for details
on how to configure custom selectors for your system (if you need them - selectors allow you to
filter down what you build into a package - if you don't know what they are for, you probably don't
need to use them).
3.7.1. Importing DRL packages
It is also possible to create a package by importing an existing DRL file. When you choose to
create a new package, you can choose an option to upload a .drl file. The Guvnor will then
attempt to understand that DRL, break create a package for you. The rules in it will be stored as
individual assets (but still as DRL text content). Note that to actually build the package, you will
need to upload an appropriate model (as a JAR) to validate against, as a separate step.
3.8. Version management
Both assets and whole packages of assets are "versioned" in the Guvnor, but the mechanism is
slightly different. Individual assets are saved a bit like a version of a file in a source control system.
However, packages of assets are versioned "on demand" by taking a snapshot (typically which is
used for deployment). The next section talks about deployment management and snapshots.

Deployment management
37
Figure 3.24. Asset versions
Each time you make a change to an asset, it creates a new item in the version history. This is a
bit like having an unlimited undo. You can look back through the history of an individual asset like
the list above, and view it (and restore it) from that point in time.
3.9. Deployment management
Snapshots, URLS and binary packages:
URLs are central to how built packages are provided. The Guvnor provides packages via URLs
(for download and use by the Knowledge Agent). These URLs take the form of:
http://<server>/guvnor-webapp/org.drools.guvnor.Guvnor/package/
<packageName>/<packageVersion>
<packageName> is the name you gave the package. <packageVersion> is either the name of a
snapshot, or "LATEST" (if its LATEST, then it will be the latest built version from the main package,
not a snapshot). You can use these in the agent, or you can paste them into your browser and
it will download them as a file.
Refer to the section on the Knowledge Agent for details on how you can use these URLs (and
binary downloads) in your application, and how rules can be updated on the fly.

Chapter 3. Guvnor concepts
38
Figure 3.25. Deployment snapshots
The above shows deployment snapshots view. On the left there is a list of packages. Clicking on
a specific package will show you a list of snapshots for that package (if any). From there you can
copy, remove or view an asset snapshot. Each snapshot is available for download or access via
a URL for deployment.
3.10. Navigating and finding rules
The two main ways of viewing the repository are by using user-driven Categorization (tagging) as
outlined above, and the package explorer view.
The category view provides a way to navigate your rules in a way that makes sense to your
organization.

Navigating and finding rules
39
Figure 3.26. Category view

Chapter 3. Guvnor concepts
40
The above diagram shows categories in action. Generally under each category you should have
no more then a few dozen rules, if possible.
The alternative and more technical view is to use the package explorer. This shows the rules
(assets) closer to how they are actually stored in the database, and also separates rules into
packages (name spaces) and their type (format, as rules can be in many different formats).
Figure 3.27. Package view
The above shows the alternate way of exploring - using packages.

Chapter 4.
41
Chapter 4. Creating a business user
viewIn most cases not all users will want to see all the functionality described here. You could have a
subset of users who you only want to let view or edit certain sets of rules, without getting confused
by all the other stuff. In this case you can use fine grained authorization (see the Admin Guide
on how to initialize this). By setting permissions on a per category basis, users that only have
category permissions will see a limited subset of functionality, and only items that are tagged with
those categories.

42

Chapter 5.
43
Chapter 5. The fact model (object
model)For any rule base application, a fact model is needed to drive the rules. The fact model typically
overlaps with the applications domain model, but in general it will be decoupled from it (as it makes
the rules easier to manage over time).
There are 2 ways to to do this: you can upload jar files containing classes which your application
and the rules both use, or you can use models that are declared along with the rules.

Chapter 5. The fact model (ob...
44
Figure 5.1. Choosing a model type
When a JAR is uploaded, it will add import statements to the package configuration (you can then
review and change them).

45
Using declared models, you will see an editor like the following:
Figure 5.2. Choosing a model type
In here you can define types, and add fields (each field has a type). The type of a field is suggested
by a list (but this list is not exhaustive):
Figure 5.3. Choosing a model type

Chapter 5. The fact model (ob...
46
These fact models can be used like normal fact objects, however the way you create them
is different (as they are not on your applications classpath). To create these objects, they are
available from the RuleBase instance.
// Retrieve the generated fact type
FactType cheeseFact = ruleBase.getFactType( "org.drools.generatedbeans.Cheese" );
// Create a new Fact instance
Object cheese = cheeseFact.newInstance();
cheeseFact.set( cheese, "type", "stilton" );
The "cheese" object above can then be inserted into working memory just like a normal POJO
based fact.
Note that the namespace of the declared type is the package namespace where it was declared
(in the above case org.drools.generatedbeans).
Why would you chose declared types over JAR files: generally this reinforces the fact that the
model "belongs" to the rulebase, rather then the application, and allows the model to have a
lifecycle separate from the application. It also removed the hassle of keeping jar files in sync
between rules and the applications that use the rules.

Chapter 6.
47
Chapter 6. Working SetsWorking Sets are a mean for grouping Facts and then defining constraints on them. You can create
groups of Facts and only those Facts will be visible when authoring rules using the Guided Editor.
Right now, Working Sets must be activated manually from the Guided Editor window (using the
"Select Working Set" button placed in the toolbar). In the future, different Working Sets could be
assigned to different users to reduce the scope and complexity when authoring rules.
Figure 6.1. Creating a new Working Set
The figure above shows the window used to create or modify Working Sets. In this window you
will find 2 lists. The list on the left side contains the possible Fact Types that can be added to the
Working Set. These facts are those defined/imported in the package's model. The list on the right
side contains the allowed Fact Types of this Working Set. When this Working Sets is active, only
those Fact Types could be used while authoring rules using the Guided BRL Editor

Chapter 6. Working Sets
48
Figure 6.2. Defining Field Constraints inside a Working Set
Once you have selected the valid Fact Types for a Working Set, you can add Constraints to the
fields of those Facts Types. The image above shows how the Field Constraint tab looks like. In
this configuration screen you will find:
A.- Fact Types dropdown: Here you will find a list containing the Working Set's Fact Types
B.- Field dropdown: Once you have selected a Fact Type, this dropdown will contain its fields.
C.- Constraints List: This lists shows all the Constraints applied to the selected Field
D.- Action Buttons: Using these buttons you will be able to add or remove Constraints to the
selected Field. Right now, Guvnor provides a built-in collection of Constraints. The idea for next
releases is to let users to plug their custom Constraints too.
E.- Constraint's Attributes: In this section you will find all the attributes of the current Constraint
that could be parametrized by the user.
In the example above, a Matches Constraint is created for Car.brand field. This means that when
rule authors use this field in a Rule condition, they should use a value valid according to this
constraint, otherwise they will receive an error or warning.

Activating and Using Working Sets
49
6.1. Activating and Using Working Sets
Working Sets are no active by default in Guvnor. Because this is an experimental feature, you
must enable them manually in the Guided Editor panel if you want to use them. In the future,
Working Sets will be associated to each user's profile.
A new button was added in Guided Editor's Toolbar: "Select Working Sets". This button will open
a popup with the list of the package's Working Sets. Using this popup you can activate one or
more Working Sets.
When Working Sets are activated, only the Fact Types allowed by them could be used when
inserting new Patterns or Actions. The Patterns and Actions already present in the rule that contain
prohibited Fact Types are marked as read only. Take a look at the next screen shots comparing
the Guided Editor panel with and without Working Sets
Figure 6.3. Comparison of "Add new Pattern" window using Working Set
and without using them
In the image you can see how Working Sets could help rule's authors by reducing the amount
of available Fact Types

Chapter 6. Working Sets
50
Figure 6.4. Comparison of "Add new Pattern" window using Working Set
and without using them
Here you can see how Patterns containing prohibited Fact Types are switched to read only mode
after Working Sets are activated.
6.1.1. Using Field Constraint
Up to now we have only cover how Facts are filtered using Working Sets. Another important
feature of Working Sets is Field Constraints. We have already saw how to configure them, now
we are going to explain how to use them.
Because Field Constraints are defined inside a Working Set, we need to activate one or more
Working Set to start working with them. Once a Working Set defining Field's Constraints is active
we have two ways to use them: on demand validation and real-time validation.
On demand validation is performed when you press the "Verify" button present in Guided Editor's
toolbar. This button will fire a rule verification and will end up showing a report with the results.
Any violated constraint will be shown as an error or warning according to its relevance
Figure 6.5. On demand Field Constraints validation

Using Field Constraint
51
The image above shows the report that appears when a Working Set defines a Range Constraint
on Driver.age. The age should be between 18 and 80.
Real-Time validation is an experimental feature (yes, inside another experimental feature like
Working Sets) that checks for Field's Constraints violations in real time and mark the lines where
the violations are using error or warning icons. This feature is disabled by default because
sometimes it could be expensive. If you want to try it out, you should enable it in Administration
-> Rules Verification. This configuration is not yet persisted, so you need to enable it every time
you start Guvnor.
Figure 6.6. Real-Time Field Constraints validation
This Image shows the result of real-time validation. There you can see the same result as on
demand validation, but you don't need to click any button, and the errors/warnings are shown in
a more fashionable way!
Warning
The problem with real-time validation is that right now only support "top level"
Patterns.

52

Chapter 7.
53
Chapter 7. The business user
perspectiveYou can see from this manual, that some expertise and practice is required to use Guvnor. In fact
any software system in some sense requires that people be "technical" even if it has a nice looking
GUI. Having said that, in the right hands Guvnor can be setup to provide a suitable environment
for non technical users.
The most appropriate rule formats for this use are using the Guided editor, Decision tables and
DSL rules. You can use some DSL expressions also in the guided editor (so it provides "forms"
for people to enter values).
You can use categories to isolate rules and assets from non technical users. Only assets which
have a category assigned will appear in the "categories" view.
The initial setup of Guvnor will need to be done by a developer/technical person who will set the
foundations for all the rules. They may also create "templates" which are rules which may be
copied (they would typically live in a "dummy" package, and have a category of "template" - this
can also help ease the way).
Deployment should also not be done by non technical users (as mentioned previously this happens
from the "Package" feature).

54

Chapter 8.
55
Chapter 8. Advanced config
options in a rule packageAs drools supports various configuration options for a package (such as adding functions for
"accumulate" etc), this can be done by adding a X.package or X.conf file to the package - files
which contain name/value pairs in the "properties" style. These will then be automatically added
to the package configuration. See the main drools documentation for all the things you can do.

56

Chapter 9.
57
Chapter 9. Deployment: Integrating
rules with your applicationsIts all very interesting to manage rules, but how to you use or "consume" them in your application?
This section covers the usage of the KnowledgeAgent deployment component that automates
most of this for you.
9.1. The Knowledge Agent
The knowledge agent is a component which is embedded in knowledge-api. To use this, you don't
need any extra components. In fact, if you are using Guvnor, your application should only need to
include the knowledge-api and drools-core dependencies in its classpath (drools and mvel JARs
only), and no other rules specific dependencies.
Note that there is also a drools-ant ant task, so you can build rules as part of an Ant script (for
example in cases where the rules are edited in the IDE) without using Guvnor at all - the drools-
ant task will generate .pkg files the same as Guvnor.
Once you have "built" your rules in a package in Guvnor (or from the ant task), you are ready to
use the agent in your target application.
The Following example constructs an agent that will build a new KnowledgeBase from the files
specified in the path String. It will poll those files every 60 seconds, which is the default, to see if
they are updated. If new files are found it will construct a new KnowledgeBase. If the change set
specifies a resource that is a directory it's contents will be scanned for changes too.
KnowledgeAgent kagent = KnowledgeAgentFactory.newKnowledgeAgent( "MyAgent" );
kagent.applyChangeSet( ResourceFactory.newUrlResource( url ) );
KnowledgeBase kbase = kagent.getKnowledgeBase();
The KnowledgeAgent can accept a configuration that allows for some of the defaults to be
changed. An example property is drools.agent.scanDirectories, by default any specified
directories are scanned for new additions, it is possible to disable this.
KnowledgeBase kbase = KnowledgeBaseFactory.newKnowledgeBase();
KnowledgeAgentConfiguration kaconf = KnowledgeAgentFactory.newKnowledgeAgentConfiguration();
// we do not want to scan directories, just files
kaconf.setProperty( "drools.agent.scanDirectories", "false" );
// the name of the agent

Chapter 9. Deployment: Integr...
58
KnowledgeAgent kagent = KnowledgeAgentFactory.newKnowledgeAgent( "test agent", kaconf );
// resource to the change-set xml for the resources to add
kagent.applyChangeSet( ResourceFactory.newUrlResource( url ) );
An example of the change-set.xml file.
<change-set xmlns='http://drools.org/drools-5.0/change-set'";
xmlns:xs='http://www.w3.org/2001/XMLSchema-instance'
xs:schemaLocation='http://drools.org/drools-5.0/change-set drools-change-set-5.0.xsd' >
<add>
<resource source='http://localhost:9000/TEST.pkg' type='PKG' />
</add>
</change-set>
Resource scanning is not on by default, it's a service and must be started, the same is for
notification. This can be done via the ResourceFactory.
ResourceFactory.getResourceChangeNotifierService().start();
ResourceFactory.getResourceChangeScannerService().start();
Following shows the deployment screen of Guvnor, which provides URLs and downloads of
packages.
Figure 9.1. Snapshot deployment
You can see the "Package URI" - this is the URL that you would copy and paste into the change-
set.xml file to specify that you want this package. It specifies an exact version (in this case to a

The Knowledge Agent
59
snapshot) - each snapshot has its own URL. If you want the "latest" - then replace "NewSnapshot"
with "LATEST".
You can also download a .pkg file from here, which you can drop in a directory and use the "file"
or "dir" feature of the KnowledgeAgent if needed (in some cases people will not want to have
the runtime automatically contact Guvnor for updates - but that is generally the easiest way for
many people).

60

Chapter 10.
61
Chapter 10. WebDAV and HTTPThe repository back end can also be accessed via webdav. WebDAV is a http based file system
API - which has clients on all platforms (some operating systems such as windows can connect
directly to WebDAV repositories almost like a file system.
10.1. WebDAV
Figure 10.1. Windows webdav
In windows the "web folders" feature can be used. On OSX - the free Cyberduck client can work
well. To access the repository as webdav, you the url is the same as the web interface, only with /
webdav at the end, instead of Guvnor.html. Authentication will be required to get access this
way. This will show a packages and snapshots directory - the snapshots directory is read only (a
view of created snapshots of packages). The packages directory will contain a list of packages in
the repository, drilling in to them will show the individual assets as files.
10.2. URLs
There are a few other URLs which are handy to know exist. The package deployment URL
mentioned in the section about knowledge agent deployment also has a few other features:
By appending .drl to the end of a URL, you will show the generated DRL for that package.
e.g.: /package/testPDSGetPackage/LATEST.drl - will show the DRL (not the binary package)
for the latest package. Further to this, you can append /assetName.drl - and it will show the
generated DRL for that item. (even if it isn't a DRL file). E.g. /package/testPDSGetPackage/
LATEST/SomeFile.drl.

62

Chapter 11.
63
Chapter 11. Inbox and commentsBuilt into the Guvnor are two useful features to helping manage changes: an Inbox, and a
comments section. These features do not affect any execution or access to rules, but are purely
for documentation and notification purposes, and are of course always optional to use.
11.1. Comments
Below the documentation box of each artifact, is a "comments" section - simply, you can add a
new comment. Administrators can clear all comments on a given artifact, but other users can only
append comments. Each comment records what user made the comment, and when. Users who
can't edit artifacts can still comment on them.
11.2. Inbox
In the "browse" section of the application, there is an "Inbox" tree item, below this are 3 inboxes.
"Incoming changes" contains changes to any artifacts that the current logged in user has edited in
the past, or commented on. Simply editing or commenting on an artifact registers interest in it to
be notified of changes the next time you log in."Recently opened" contains items that have been
recently opened (simply opening an artifact will make it appear here, the last 100 recently opened
items will appear here). "Recently edited" contains the last 100 recently edited items (artifacts that
the current user has made changes to).

64

Chapter 12.
65
Chapter 12. Eclipse Guvnor
integrationThe Eclipse Guvnor tools (EGT) provide the ability to push/pull artifacts from the Guvnor repository
server and the developers workspace in eclipse. It is therefore possible for artifacts to be
both managed via Guvnor as well as in traditional developer friendly SCM systems (such as
subversion). The Guvnor repository is not intended as a Source Code Management (SCM)
solution, and the EGT are not intended to be Eclipse “team provider” extensions or replacements.
Rather, the Guvnor repository is a location where certain artifacts (such as rules and SOA policy
definitions) are controlled (“governed”) by policies defined by the deployment environment. The
purpose of the EGT is then to enable access to resources held by the Guvnor repository, so they
can be used in development. Thus, limited capabilities for reading, writing, adding, and removing
Guvnor repository resources are provided in the EGT.
12.1. Source Code and Plug-in Details
The source code for the EGT is available at: http://anonsvn.jboss.org/repos/labs/labs/jbossrules/
trunk/drools-eclipse/. EGT consist of two plug-ins: org.guvnor.tools org.eclipse.webdav and
requires Eclipse 3.3.x. The current Eclipse Drools plug-ins are also useful for viewing Guvnor
repository resources such as rule definitions, but not required for operation of the EGT.
12.2. Functionality Overview
Views and Perspective: The EGT contains two views – Repository Explorer and Version History
– that will be the center of most interaction with Guvnor. Eclipse standard views such as
Properties and the Resource Navigator are also useful. While each of these views can be opened
and positioned independently within an Eclipse workbench, the Guvnor perspective provides
a convenient method of getting a suggested layout. In the Eclipse workbench menu, choose
Window, Open Perspective, Other to get the perspective list and then choose "Guvnor Repository
Exploring."

Chapter 12. Eclipse Guvnor in...
66
Figure 12.1. Views and perspectives
This opens the Guvnor perspective.

Guvnor Connection Wizard
67
Figure 12.2. Views and perspectives
On the left side is the Guvnor Repository Explorer and the Eclipse Properties views, the Guvnor
Resource History view is on the bottom, and the Eclipse Resource Navigator is on the right side.
The purpose of the Guvnor Repository Explorer is to enable access to Guvnor repository resources
in a standard tree format, and the Guvnor Resource History view shows revisions of specific
resources available in the repository.
12.3. Guvnor Connection Wizard
After opening the Guvnor perspective, the first task is to make a connection to a Guvnor repository.
This is handled by the Guvnor Connection wizard. This wizard appears in a number of places
within the EGT (as detailed below), but in this section we will cover only the two most basic entry
points. The Guvnor Connection wizard can be started using the Eclipse menu: File , New , Other ,
Guvnor , Guvnor repository location, or in the Guvnor Explorer using the drop-down menu:

Chapter 12. Eclipse Guvnor in...
68
Figure 12.3. Connection wizard
or the menu button:

Guvnor Connection Wizard
69
Figure 12.4. Connection wizard
Choosing either of these will start the Guvnor connection wizard:
Figure 12.5. Connection wizard
Default values appear in the Location, Port, and Repository fields. (See Section 12.8, “Guvnor
plugin Preferences” for details about how to change these default values.) Of course, any of these

Chapter 12. Eclipse Guvnor in...
70
fields can be edited by typing in the corresponding text box. Drag-and-drop or paste into the
Location field of a typical Guvnor repository URL such as: http://localhost:8080/guvnor-webapp/
org.drools.guvnor.Guvnor/webdav results in the URL being parsed into the respective fields as
well. The authentication information (user name and password) can optionally be stored in the
Eclipse workbench's key-ring file based on the selection of "Save user name and password." If the
authentication information is not stored in the key-ring, then the EGT uses session authentication,
which means that the credentials supplied are used only for the lifetime of the Eclipse workbench
instance.
If authentication information is not stored in the key-ring or the authentication information (key-ring
or session) is not valid, the EGT will prompt for authentication information when it has to access
the Guvnor repository:
Figure 12.6. Login
If authentication fails, the EGT will retry once and then issue an authentication failure error. (If
an authentication failure error occurs, you can retry the same operation and supply different
authentication information.) Note that the EGT calls the Guvnor repository at various times, such
as when determining if resource updates are available, so, if you use session authentication,
the authentication dialog will appear at different times during the Eclipse workbench session,
depending on what actions you take. For ease of use, we recommend saving the authentication
information in the Eclipse key-ring. (The Eclipse key-ring file is distinct from key-ring files found
in some platforms such as Mac OS X and many forms of Linux. Thus, sometimes if you access
a Guvnor repository outside the EGT, the key-ring files might become unsynchronized and you
will be unexpectedly prompted for authentication in Eclipse. This is nuisance, but your usual
credentials should apply in this case.)
Once the Guvnor connection wizard is complete, the new Guvnor repository connection will appear
in the Guvnor Repository Explorer. You can then expand the tree to view Guvnor repository
contents.

Guvnor Repository Explorer
71
12.4. Guvnor Repository Explorer
Figure 12.7. Explorer
The Guvnor Repository Explorer view contains tree structures for Guvnor repository contents. As
described above, there are menu and tool-bar actions for creating Guvnor repository connections.
The red “X” in the tool-bar and “Delete” in the menu removes a Guvnor repository connection, and
the “Refresh” menu item reloads tree content for the selected node. Finally, there are a number of
tool-bar/menu items in support of “drill-into” functionality: one the tool-bar these are represented
by the house (“return to top level/home”) and the arrows (go into/back). Drill-down is useful when
working with deeply nested tree structures and when you wish to concentrate on only branch of the
tree. For example, drilling into the “defaultPackage” node shown above changes the tree view to:

Chapter 12. Eclipse Guvnor in...
72
Figure 12.8. Explorer

Guvnor Repository Explorer
73
That is, we see only the contents of “defaultPackage” in the tree. Clicking on the house button, or
selecting “Go Home” returns the tree to the top-level structure shown in the previous picture above.
There are a number of operations that can be performed on Guvnor repository files. Selecting a file
in the Guvnor repository causes the Eclipse Properties view to update with details about that file:
Figure 12.9. Properties
Double-clicking on a folder (directory) in the tree will cause that folder to expand if collapsed and
collapse if expanded. Double-clicking on a file in the tree will cause a read-only editor in Eclipse
to open, showing the contents of that file:
Figure 12.10. Comments
Dragging a file from the Guvnor repository tree to a folder in an Eclipse local project (for example in
the Eclipse Resource Navigator view) will cause a copy of that file to be made in the local Eclipse
workspace. (Note: You can also “Save As...” when a file is open in a read-only editor to save a
local writable copy of the contents. Doing so, however, will not associate the file created with its

Chapter 12. Eclipse Guvnor in...
74
Guvnor source.) Finally, you can view the revision history of a file selected in the tree using the
“Show History” context menu item. (The details of resource history will be discussed below.)
12.5. Local Copies of Guvnor Files
As mentioned in the Introduction, the main purpose of the EGT is to allow development using
resources held in a Guvnor repository. There are two method of getting local copies of Guvnor
repository resources:
1. Drag-and-drop from the Guvnor Repository Explorer, as described above.
2. Using the “import from Guvnor” wizard, as described below.
When local copies of Guvnor repository files are created, the EGT sets an association between the
local copy and the master file in the repository. (This information is kept in the (normally) hidden
.guvnorinfo folder in the local project and, like all metadata, should not be changed by end
users.) This association allows for operations such as update and commit in synchronization with
the master copy held in the Guvnor repository. The EGT decorates local resources associated
with Guvnor repository master copies. This decoration appears in Eclipse views conforming to
the Eclipse Common Navigator framework, such as the Eclipse Resource Navigator and the Java
Package Explorer. The image below shows decoration in the Eclipse Resource Navigator:
Figure 12.11. Navigator

Actions for Local Guvnor Resources
75
Note the Guvnor icon decorator on the top right of the file images, and the Guvnor revision details
appended to the file names. (The presence/location of these can be changed. See Section 12.8,
“Guvnor plugin Preferences” for details.) Here we see that, for example, simpleRule.drl is
associated with a Guvnor repository resource and the local copy is based on revision 3, with a
7-15-2008, 15:37:34 date/time stamp. The file deleteTest.txt, however, is not associated with
a Guvnor repository file. Further details about the association can be found in the standard Eclipse
properties page, via the context menu “Properties” selection:
Figure 12.12. Properties
The EGT contributes a property page to the standard Eclipse properties dialog, the contents of
which are shown above. The specific Guvnor repository, the location within the repository, the
version (date/time stamp) and revision number are displayed.
12.6. Actions for Local Guvnor Resources
The EGT provides a number of actions (available through the “Guvnor” context menu on files)
for working with files, both those associated with Guvnor repository master copies and those
not associated. The actions are: 1.Update 2.Add 3.Commit 4.Show History 5.Compare
with Version 6.Switch to Version 7.Delete 8.Disconnect Each of these actions will
be described below.
Update Action:

Chapter 12. Eclipse Guvnor in...
76
The Update action is available for one or more Guvnor resources that are not in synchronization
with the Guvnor repository master copies. These resources would not be in synchronization
because either/both (1) there are local changes to these resources or (2) the master copies have
changed in the Guvnor repository. Performing the Update action replaces the local file contents
with the current contents from the Guvnor repository master copies (equivalent to “Switch to
version” for latest version).
Add Action
The Add action is available for one or more local files that are not associated with a Guvnor
repository master copy. Choosing the Add action launches the “Add to Guvnor” wizard:
Figure 12.13. Add action
The first page of the wizard asks for the selection of the target Guvnor repository and gives the
choice to create a new Guvnor repository connection (in which case the second page is the same
as the Guvnor Connection wizard described above). Once the target Guvnor repository is chosen,
the wizard then asks for the folder location to add the selection files:

Actions for Local Guvnor Resources
77
Figure 12.14. Add action
Here I have selected the folder “anotherPackage” as the destination location1. Clicking on “Finish”
adds the selected files to the Guvnor repository and creates an association between the local
and Guvnor repository files. (Not that the wizard will not allow for overwrite of existing Guvnor
repository files – another target location must be chosen.)
Compare with Version Action:
The Compare with Version action is enabled for one Guvnor repository associated file. This action
first opens a wizard asking for the version for comparison (with the local file contents):

Chapter 12. Eclipse Guvnor in...
78
Figure 12.15. Compare
Once the revision is selected, the action opens the Eclipse compare editor (read-only):
Figure 12.16. Compare
This editor uses Eclipse-standard comparison techniques to show the differences in the two
versions. In cases where there are no differences, the editor will not open: rather, a dialog saying
that there are no differences will appear.
Switch to Version Action:
The Switch to Version action is enabled for one Guvnor repository associated file. First the Switch
to Version action prompts for selection of version:

Actions for Local Guvnor Resources
79
Figure 12.17. Versions
Once the version is selected, the Switch to Version action replaces the local file contents with
those from the revision selected.
Delete Action:
The Delete action is enabled for one or more Guvnor repository associated files. After confirmation
via a dialog, the Delete action removes the files in the Guvnor repository and deletes local
metadata for the Guvnor repository association.
Disconnect Action:
The Disconnect action is enabled for one or more Guvnor repository associated files, and removes
local metadata for the Guvnor repository association.
Guvnor Resource History View:
The Guvnor Resource History view should details about revision history for selected files, both
local and those in Guvnor repositories. The initial state of this view is:
Figure 12.18. History

Chapter 12. Eclipse Guvnor in...
80
The Guvnor Resource History view is populated by “Show History” actions in either the local
“Guvnor” context menu or in the context menu for a Guvnor repository file in the Guvnor Repository
Explorer. Once this action is performed, the Guvnor Resource History view updates to show the
revision history:
Figure 12.19. History
Here we see that the file “simpleRule.drl” has three revisions. Double clicking on a revision row (or
context menu “Open (Read only)”) opens an Eclipse read-only editor with the revision contents.
(Note: You can also “Save As...” when a file is open in a read-only editor to save a local writable
copy of the contents. Doing so, however, will not associate the file created with its Guvnor source.)
12.7. Importing Guvnor Repository Resources
In addition to the single file drag-and-drop from the Guvnor Repository Explorer view, the EGT also
includes a wizard for copying one or more files from a Guvnor repository to the local workspace
(and setting the association with the Guvnor repository). This wizard is available from the Eclipse
Import , Guvnor, Resource from Guvnor and the Eclipse File, New, Other, Guvnor, Resource from
Guvnor menu items. (Note: the wizard is identical but appears in both locations to accommodate
users who tend to view this functionality as being in either category.) The first page of the wizard
asks for the selection of the source Guvnor repository and gives the choice to create a new Guvnor
repository connection (in which case the second page is the same as the Guvnor Connection
wizard described above).

Importing Guvnor Repository Resources
81
Figure 12.20. Import
Once the source Guvnor repository is chosen, the wizard prompts for resource selection:

Chapter 12. Eclipse Guvnor in...
82
Figure 12.21. Import
Finally, the target location in the local workspace is chosen:

Importing Guvnor Repository Resources
83
Figure 12.22. Import
On completion the wizard copies the selected files from the Guvnor repository to the local
workspace. If a file with the same name already exists in the destination, the wizard uses the
Eclipse standard “prompt for rename” dialog:

Chapter 12. Eclipse Guvnor in...
84
Figure 12.23. Copy
12.8. Guvnor plugin Preferences
The EGT provides a preference page in the “Guvnor” category:
Figure 12.24. Preferences
The preferences cover two categories: Guvnor repository connections and local Guvnor repository
resource decorations.

Guvnor plugin Preferences
85
Guvnor Repository Connection Preferences
There are two preferences that can be set for Guvnor repository connections, and these are used
when creating new connections. The first is a default Guvnor repository URL template, which can
make it easier to create multiple similar connections by simply changing part of the field, such as
the host name. The second is whether saving of authentication information in the Eclipse platform
key-ring should be enabled by default. As with the Guvnor repository URL template, actually
whether to save a specific instance of authentication information in the Eclipse platform key-ring
can be determined when actually creating the connection. That is, both of these preferences are
simply convenience values set to reasonable defaults.
Local Guvnor Repository Resource Decoration Preferences
The second category of preferences provided by the EGT deals with how decoration of local
resources associated with Guvnor repository resources is presented. Since the Guvnor repository
is not a substitute for a SCM, and since SCM tools in Eclipse tend to decorate local resources, it is
useful to be able to control just how the EGT decorate its local resources to avoid messy conflicts
with SCM packages. In the “File Decoration” section of the preference page, you can choose the
location (top right, bottom right, top left, bottom left) of the decoration icon, or you can choose
not to display it. In the “Text” section, you can format the Guvnor metadata that is appended to
the file names: Whether to show an indicator (>) when the local file has changes not committed
back to the Guvnor repository. Whether to show the revision number. Whether to show the date/
time stamp. Any changes to these preferences take effect immediately upon clicking the “Apply”
or “Ok” buttons.

86

Part II. Administration GuideThis part covers installation and administration issues of Drools Guvnor.
Drools Guvnor is a web application that can run in multiple environments, and be configured to
suit most situations. There is also some initial setup of data, and export/import functions covered.


Chapter 13.
89
Chapter 13. InstallationThe Guvnor application is packaged as a .war file, which can be deployed to any application
server (such as JBoss AS, ...) or servlet container (such as Tomcat, ...) out-of-the-box.
13.1. Installation step by step
Installation is simple: download, deploy, start and surf.
1. If you don't have an application server or servlet container, download and install one. For
example, download JBoss AS [http://www.jboss.org/jbossas/].
2. Download the Guvnor distribution from the download site. In the download zip, there's 1 war
file per app server version, for example guvnor-5.2.0-jboss-as-5.1.war for JBoss AS 5.1.
Use the war file best suited for your app server. Essentially there's little difference between
those war files: mostly it's a matter of excluded jars which are already available on the app
server.
If no war specifically for your app server exists yet, take the latest Tomcat war. It might require
minor configuration tweaks. Consult our wiki for specific tips. The community has been able
to make it run on various platforms. Patches (pull requests) to expand our war assemblies for
another app server or version are welcome.
3. Optionally rename that war file to guvnor.war to have a nicer URL. For the rest of the manual
we'll presume you've done this.
4. Optionally customize the configuration. First explode (unzip) the war file, and change any
configuration and then unexplode (zip) it again.
5. Deploy the war file by copying it into the deployment directory of the app server. For JBoss AS
5 and 6, that directory is server/default/deploy. Alternatively you can first explode (unzip)
the war file and copy that exploded directory. Note: in JBoss AS, the exploded directory name
must end with the suffix .war.
6. Start the app server. For JBoss AS 5 and 6, run $JBOSS_AS_HOME/bin/run.sh (or run.bat).
7. Surf to the Guvnor webapp. This will probably be at localhost on port 8080, for example
at http//localhost:8080/guvnor/ or (if you haven't rename the war file) at something like http//
localhost:8080/guvnor-5.2.0-jboss-as-5.1/.
13.2. Supported and recommended platforms
Guvnor runs in any application server or servlet container that supports Java SE 5 (JEE 5 is not
required), this includes JBoss AS, Tomcat, Jetty and many more.

Chapter 13. Installation
90
JBoss AS is the recommended application server, because it is actively tested/developed on it.
If you're looking for mission critical, enterprise support, take a look BRMS subscription [http://
www.jboss.com/products/platforms/brms/].

Chapter 14.
91
Chapter 14. Database configurationGuvnor uses the JCR standard for storing assets such as rules. The default implementation is
Apache Jackrabbit, http://jackrabbit.apache.org. This includes an out of the box storage engine/
database, which you can use as is, or configure to use an existing RDBMS if needed.
14.1. Changing the location of the data store
Assuming you are using on of the JBoss platforms, running Guvnor for the first time will create a
database in the bin/ directory of the application server. There will be a repository.xml file, and
a repository directory that are automatically created.
The location of the data store should be a secure location, that is backed up. The default location
may not be suitable for this, so the easiest way is to set a more suitable location. If you want
to change this, please make sure you have stopped Guvnor (i.e. stopped the app server or un-
deployed the application).
To change the location, unzip the WAR file, and locate the components.xml file in the WEB-INF
directory. This is a JBoss Seam configuration file (Seam is the framework used) which allows
various parts of the system to be customized. When you have located the components.xml file,
you should see something like the following:
<component name="repositoryConfiguration">
<!--
*** This is for configuring the "home" directory for the repository storage. the directory must
exist. ***
<property name="homeDirectory">/home/michael/RulesRepository_001</property>
-->
...
</component>
Find the component with a name of repositoryConfiguration and the property with the name
of homeDirectory.
If you un-comment this (as in the example above it is commented out), you can set whatever path
you need for the repository data to be stored in. You can also use this to move the repository
around. In that case, when you have set the location in the components.xml you can simply
move the repository.xml AND the repository directory to the new location that you set in the
components.xml.
If there is no repository at the location specified (or in the default location) then Guvnor will create
a new empty one.
There are many more options which can be configured in the repository.xml, but for the most
part, it is not recommended to change the defaults.

Chapter 14. Database configur...
92
14.2. Configuring Guvnor to use an external RDBMS
In some cases it may be a requirement that you use an external RDBMS, such as Oracle, MySQL,
or Microsoft SQL Server as the data store - this is permitted. In this case, the easiest thing to do
is to start up Guvnor with defaults (or with a suitable home directory as specified above) to let it
generate the default repository.xml.
Locate the repository.xml file that was generated, and open it - it will be annotated
with comments describing many of the different options. From here on, you will need
to know a little about Jackrabbit Persistence managers, http://wiki.apache.org/jackrabbit/
PersistenceManagerFAQ.
There are a few persistence managers, some are database specific (eg Oracle). There is a
SimpleDBPersistenceManager which works with any database that supports JDBC - you also
specify the database type, so it uses the specific DDL to create the table structure (all major
databases are supported).
Guvnor will create the tables the first time it is started up if it is running against a fresh (empty)
RDBMS - so its important to note that the user credentials supplied have permissions to create
tables (at least initially, on first run, after that they could be locked down).
14.3. Searching and indexing, Version storage
Jackrabbit has a separate storage area for version storage (as over time, the number of old
versions will increase, yet it should not slow down the performance of the main data store). The
version storage also has its own persistence manage configuration in the repository.xml, but for
most purposes you can use the same database as the main storage (just with a different schema
object prefix - ie in your database, all the version data will be prefixed with version_ but otherwise
in the same tablespace). See the repository.xml for more details of this.
Lucene is used to provide indexing across the semi structured data, and across versions. This
indexing is generally best stored on a filesystem, local to Guvnor (as per the default in the
repository.xml) - in most cases the default is fine.

Chapter 15.
93
Chapter 15. Switch from JackRabbit
to ModeShapeGuvnor supports running on either JackRabbit and ModeShape as the underlaying JCR-2.0
implementation. By default Guvnor ships using JackRabbit. However if you want to switch to
using ModeShape then you need to install ModeShape as a service in JBossAS-5.x. Check the
ModeShape project and download and install the latest ModeShape 'kit'. After installing the kit, you
should have a modeshape-service.jar directory in your deploy directory. Now we can remove
some jars from the guvnor WAR that are no longer needed, and in fact will cause classloading
issues if you don't remove them:
[localhost ]$ rm -f WEB-INF/lib/jackrabbit-*
[localhost]$ rm -f WEB-INF/lib/hibernate-* WEB-INF/persistence-api-1.0.jar
WEB-INF/lucene-*.jar
[localhost]$ rm -f WEB-INF/lib/jcr-2.0.jar
Next you need to edit the WEB-INF/components.xml file to switch over to ModeShape. Comment
out the JackRabbit section and uncomment the ModeShape section:
<component name="repositoryConfiguration">
<!-- JackRabbit
<property name="properties">
<key>org.drools.repository.configurator</key>
<value>org.drools.repository.jackrabbit.JackrabbitRepositoryConfigurator</value>
-->
<!-- the root directory for the repo storage the directory must exist. -->
<!-- <key>repository.root.directory</key><value>/opt/yourpath</value> -->
<!--
</property>
-->
<!-- ModeShape
passwords for the background users (admin and mailman), these need to match the setting
you provided for JAAS (used by ModeShape only).
-->
<property name="properties">
<key>org.drools.repository.configurator</key>
<value>org.drools.repository.modeshape.ModeShapeRepositoryConfigurator</value>
<key>org.modeshape.jcr.URL</key>
<value>jndi:jcr/local?repositoryName=repository</value>
<key>org.drools.repository.secure.passwords</key>

Chapter 15. Switch from JackR...
94
<value>false</value>
<key>org.drools.repository.admin.password</key>
<value>admin</value>
<key>org.drools.repository.mailman.password</key>
<value>mailman</value>
</property>
</component>
Note that you can use encrypted passwords by setting the
org.drools.repository.secure.passwords setting to true. To encrypt a password use:
[localhost]$ java -cp client/jboss-logging-spi.jar:common/lib/jbosssx.jar
org.jboss.resource.security.SecureIdentityLoginModule <password>
ModeShape does not support 'trusted' access like JackRabbit does, and by default uses JAAS
for authentication and authorization. For more detail on Guvnor and Security see the next section
about Security. To use JAAS and the modeshape policy comment out the defaultAuthenticator
section and uncomment the jaas-configuration section, and change the policy name from 'other'
to 'modeshape':
<!-- SECURITY IDENTITY CONFIGURATION -->
<!--
default (will take any username, useful if you want to keep track of
users but not authenticate
<security:identity authenticate-method="#{defaultAuthenticator.authenticate}" />
-->
<!--
NO authentication. This will bypass the login screen when you hit the
app. Everyone is "guest"
<security:identity
authenticate-method="#{nilAuthenticator.authenticate}"/>
-->
<!--
FOR EXAMPLE: the following one will use the jaas configuration called
"other" - which in jboss AS means you can use properties files for
users:
-->
<security:identity authenticate-method="#{authenticator.authenticate}"
jaas-config-name="modeshape"/>
<!--
as JAAS is used you can use container specific ones to link up to your

95
login services, eg LDAP/AD etc
-->
You may have noticed the settings of two passwords in the modeshape property settings for the
'admin' and 'mailman' users. These users are used by guvnor to perform background tasks. Now
that we are no longer allowing for anyone to run as 'guest', we need to ass these two users to the
modeshape users and roles files. Open the conf/props/modeshape-users.properties file and
add the mailman user, so the file looks like:
admin=admin
guest=guest
mailman=mailman
Finally open the conf/props/modeshape-roles.properties file and add the mailman role, so
the file looks like:
admin=connect,readonly,readwrite
guest=connect,readonly
mailman=connect,readonly,readwrite
By default JackRabbit uses InMemory storage, which is configured in the modeshape-
service.jar/modeshape-config.xml. To change this we recommend reading the modeshape
documentation. To use a referenced JNDI data source, replace the <mode:source></
mode:source> segment with the following:
<mode:source jcr:name="store" mode:classname="org.modeshape.connector.store.jpa.JpaSource"
mode:dataSourceJndiName="your JNDI name"
mode:model="Simple"
mode:dialect="org.hibernate.dialect.HSQLDialect"
mode:referentialIntegrityEnforced="true"
mode:largeValueSizeInBytes="10000"
mode:retryLimit="3"
mode:compressData="false"
mode:predefinedWorkspaceNames="default,system"
mode:showSql="false"
mode:autoGenerateSchema="update"
mode:creatingWorkspacesAllowed="true"
mode:defaultWorkspaceName="default" />

Chapter 15. Switch from JackR...
96
Alternatively you can connect directly to a JDBC data source, use the same <mode:source>
fragment as for JNDI except replace the mode:dataSourceJndiName attribute with these
attributes:
mode:driverClassName=org.hsqldb.jdbcDriver
mode:username=sa
mode:password=
mode:url=jdbc:hsqldb:mem:target
mode:maximumConnectionsInPool=5
For purposes of illustration, the HSQL DB is being used, but simply replace the attribute values
with the appropriate driver class name, username, password, and database URL.

Chapter 16.
97
Chapter 16. Security -
Authentication and basic accessPlease note that giving someone access to Guvnor indicates a level of trust. Being able to editing
and build rules is providing a great deal of power to a user. Thus you should not open up Guvnor
to your entire organization - but instead to a select few. Use https (http with TLS/SSL) where ever
possible, even internally in a company network this is a good idea. Use this power wisely - this
not a "run of the mill" application that provides read/write access to a database, but something
much more power. Just imagine you are spider man - with great power comes great responsibility
(of course even more so for super man).
Security is configured by using the components.xml file in the war file. To customize this, you will
need to unzip the WAR file, and locate the components.xml file which is in the WEB-INF directory.
The JAAS standard is used as the underlying authentication and authorization mechanism, the
upshot of which means its very flexible and able to integrate into most existing environments.
Out of the box, Guvnor shows a login screen, but no security credentials are enforced - the
user name is used, but no password check is performed. To enforce authentication, you need to
configure it to use an appropriate user directory, you may have Active Directory or similar already.
In the components.xml file, you should located a security configuration section like the following:
<!-- SECURITY CONFIGURATION -->
<!-- default (will take any username, useful if you want to keep track of users but not authenticate --
>
<security:identity authenticate-method="#{defaultAuthenticator.authenticate}"/>
<!-- NO authentication. This will bypass the login screen when you hit the app. Everyone is
"guest" -->
<!-- <security:identity authenticate-method="#{nilAuthenticator.authenticate}"/> -->
As you can see from above, the 2 "out of the box" options are pass through - which means any
user is allowed in, or bypassed, in which case there is no login screen (e.g. you may be securing
access to the app via a web server anyway).
16.1. Using your containers security and LDAP
Every application server supports advanced configurations which can work with your existing
security infrastructure. The case of JBoss AS will be shown here as an example.

Chapter 16. Security - Authen...
98
<security:identity authenticate-method="#{authenticator.authenticate}"
jaas-config-name="other"/>
This will use the other JAAS config in JBoss AS. If you look in jboss-as/server/default/conf
you will see a login-config.xml file. This file contains various configurations. If you use other
like the one above, then it will look for users.properties and roles.properties in the conf/
directory for usernames and passwords to authenticate against. This is maintainable only for a
fixed small number of users.
LDAP is perhaps the most popular choice for larger enterprises. Here is an example that works
with Active Directory. You can get much more information on how to configure JBoss AS for all
scenarios with LDAP from http://wiki.jboss.org/wiki/Wiki.jsp?page=LdapLoginModule and http://
wiki.jboss.org/wiki/Wiki.jsp?page=LdapExtLoginModule.
<application-policy name="brms">
<authentication>
<login-module code="org.jboss.security.auth.spi.LdapExtLoginModule" flag="required" >
<!--
Some AD configurations may require searching against
the Global Catalog on port 3268 instead of the usual
port 389. This is most likely when the AD forest
includes multiple domains.
-->
<module-option name="java.naming.provider.url">ldap://ldap.jboss.org:389</module-
option>
<module-option name="bindDN">JBOSS\someadmin</module-option>
<module-option name="bindCredential">password</module-option>
<module-option name="baseCtxDN">cn=Users,dc=jboss,dc=org</module-option>
<module-option name="baseFilter">(sAMAccountName={0})</module-option>
<module-option name="rolesCtxDN">cn=Users,dc=jboss,dc=org</module-option>
<module-option name="roleFilter">(sAMAccountName={0})</module-option>
<module-option name="roleAttributeID">memberOf</module-option>
<module-option name="roleAttributeIsDN">true</module-option>
<module-option name="roleNameAttributeID">cn</module-option>
<module-option name="roleRecursion">-1</module-option>
<module-option name="searchScope">ONELEVEL_SCOPE</module-option>
</login-module>
</authentication>
</application-policy>

Using your containers security and LDAP
99
To use the above, you would put jaas-config-name="brms" in the security:identity tag in
the components.xml for Guvnor.
Similar configuration examples can be found for other directory services.
LDAP isn't the final word, you can use JDBC against a database of user name, or you can write
your own login module to use any sort of weird and wonderful authentication and authorization
systems that you may have to deal with (that would be an extreme case, but its possible). Refer
to JBoss AS documentation (or documentation for your existing application server).

100

Chapter 17.
101
Chapter 17. Fine grained
permissions and securityThe above section talks about establishing identity and access for users. This section talks about
granting specific permissions to these users (to control data visibility and access). This can be
used to partition data, or to control access for "non power users" which can limit the damage they
can do.
Figure 17.1. Administer user permissions
A common need and desire of the web interface of Guvnor is to be able to have users of different
technical abilities interact with it. Another need is to be able to allocate people different sets of
data to "own".
Typically users identities are managed in a centralized directory - application servers can integrate
with these directories (e.g. active directory, LDAP) so users to Guvnor can be authenticated

Chapter 17. Fine grained perm...
102
without having to create another duplicate identity. It is also possible (thanks to JAAS) to define
what users have the "admin" role for Guvnor (note that an Admin user of Guvnor doesn't have to
really be a system administrator). Further to this, Guvnor augments this identity with data specific
permissions, which are managed in Guvnor itself.
Figure 17.2. User listing
Note that the above users identities are not stored in Guvnor, only their permission mappings are
which are specific to Guvnor.
There are really two system wide roles: Users who are Administrators and users who are not.
Administrators can see and do anything. Out of the box, the permission system is turned off,
and every user is an administrator (this is pretty much how things used to work). There is also a
system setting in components.xml that can turn the permissions system on and off (so people can
manually override if needs be). A administrator can also give other users admin rights, regardless
of their roles in the external directory service.

103
Figure 17.3. Editing
There are several types of permissions: Per package: Package Administrator ("owns" a package
- can deploy etc, but has no administrative rights to the system). Package developer - this
permissions allows users to create new items, edit etc - but only at the package level (not deploy).
They can also run and create tests. Package readonly - well this one is pretty obvious. Per
Category: This is the "interesting" one - as assets (rules) can be tagged with multiple categories,
you can use these to assign permissions to an "analyst" type of user. A user can be assigned
multiple categories. A user can then edit and view any asset that is tagged in that category
(regardless of package). A user that only has category permissions will not be shown any
package views or details, and will only see the simple categories view. This allows administrators
and managers to control exactly what these users can and can't see. Note that per category
permissions can also be set as "read only" so a user can view all the assets in a category, but
not make changes to them.

Chapter 17. Fine grained perm...
104
Figure 17.4. The analyst view

Enabling fine grained authorization
105
The per category "analyst" permissions are quite useful - you can also augment their permissions
with a specific package (so on top of their category rights, they can see and play with a particular
package - which may be used as a "practice" area, or test area for instance). This provides a few
ways to manage permissions in a coarse or fine grained way, as suits the different types of users.
17.1. Enabling fine grained authorization
By default authorization is not enabled. To enable it, edit the components.xml file in the WEB-
INF directory:
<component name="org.jboss.seam.security.roleBasedPermissionResolver">;
<property name="enableRoleBasedAuthorization">false</property>
</component>

106

Chapter 18.
107
Chapter 18. Data management
18.1. Backups
How backups are performed is dependent on what persistence manager scheme you are using.
Using the default one - then its a matter of backing up the repository directory (wherever you have
it configured to be). Restoring it is simply a matter of copying across the repository directory.
Ideally you will either stop Guvnor application while a file backup is being done, or ensure that
no one is using it.
In the case of using an external database (e.g. Oracle, MySQL), then the normal scheme can
apply that you would use to backup those database (you do back them up, right?). In this case,
when restoring, it is also a good idea to clear the indexes (delete the directory where the indexes
are) so they are created fresh from the data (and thus guaranteed to be in sync).
18.2. Selectors for package building
When building packages using the "Packages" feature you have the option to use a "selector".
This selector will filter the list of rules that are built into the package.
Guvnor provides several built-in selectors which allow you to choose what assets form part of a
package build according to asset's status and category.
You can use a custom selector if the built-in selector does not satisfy your requirement. To
configure a custom selector, you will need to "explode" the WAR file for Guvnor, and locate the
selectors.properties file (note you can also put your own selectors.properties file in the
system classpath if you like). In this file, you will find details on how you can configure a custom
selector. The options are to use a DRL file, or the name of a class that you have written (and which
is available on the classpath). Classes must implement the AssetSelector interface. DRL files
can also be used and there is an example one in the selectors.properties file). Each selector
you configure has a unique name in this properties file - and this is the name that you can use
when building packages.
18.3. Adding your own logos or styles to Guvnor web
GUI
To achieve, this, you can "explode" the deployment WAR file, and locate the Guvnor.html file,
which will look something like the following:
<!DOCTYPE HTML PUBLIC "-//W3C//DTD HTML 4.01 Transitional//EN" "http://www.w3.org/TR/
html4/loose.dtd">
<html>
<head>

Chapter 18. Data management
108
<!-- Note you can append #asset=UUID to the end of the URL to preload a given asset.
Also, if you appent #asset=UUID&nochrome it will only show the asset without all the
GUI "chrome"
To select a locale, specify &locale=en_US at the end of the URL to pick the appropriate
bundle.
-->
<meta http-equiv="Content-Type" content="text/html; charset=UTF-8">
<meta http-equiv="X-UA-Compatible" content="IE=EmulateIE7" />
<title>JBoss Guvnor</title>
..........
</body>
</html>
Note that the above Guvnor.html file is fairly small (as most of the work is done by the GWT - the
GUI is built dynamically in the browser). The parts you can customize are the style sheet - you
can either edit the Guvnor.css (or better yet, take a copy, and change the style to be what you
need), the "shortcut icon" (its what shows in the address bar in the browser etc - also change the
"icon" link to be the same so it works in IE), and the header logo. The rest should be left as is, to
allow the GWT components to be loaded and attached to the page. This html page is loaded only
once by the browser when the user accesses Guvnor web GUI.
The best way to customize is to take a copy of the Guvnor.html file and then edit. You can also
change the URL by editing the web.xml via the normal means.
18.4. Import and Export
A JCR standard export/import feature is available from the Admin part of the web interface.
This will export the entire repository to an XML format as defined by the JCR standard.
In the case of import, it will clear any existing content in the database.
This is not a substitute for backup but can be useful when migrating. It is important to note that
version history is not exported this way, only the current state. Hence it is still recommended that
a formal backup regime be used at all times on the repository database itself.
Note that when importing repositories with many thousands of items, extra memory will be required
when performing the import.

Chapter 19.
109
Chapter 19. ArchitectureThis section covers the technical aspects of Guvnor, it is not necessary to use this if you are
integrating or an end user of the application. However, Drools is open source, so build instructions
form part of the manual.
You may want to build from source if you want to re-use components, or embed the application
within another.
Figure 19.1. Architectural diagram
The above diagram shows the major components of the system and how they integrate and
are deployed. The User Guide has more details on the parts that are highly configurable (e.g.
database).

Chapter 19. Architecture
110
Guvnor is deployed as a WAR, which provides user interfaces over the web, and provides binary
packages using URLs (or files). It uses the JSR-170 standard for data storage (JCR). JBoss Seam
is used as the component framework, and GWT is used as the widget toolkit for constructing the
AJAX-based web user interface.
19.1. Building from source
This section will go over the steps necessary to build various components. Mostly this is
automated, but the manual process is described for thoroughness.
19.1.1. Modules
There are 2 modules: guvnor-repository (back end) and guvnor-webapp (front end and rules
integration). The guvnor-webapp module depends on the guvnor-repository module, as well
as other components. Guvnor is part of the main build for all of Drools - when building Drools,
Guvnor is built alongside it.
19.1.2. Working with Maven 2
Maven 2 is used as the build system. To get started, the whole of the source tree for JBoss Rules
needs to be checked out. This includes the other modules, and the top level lib and repository
directories (which are needed by the build); as the Guvnor build is part of the main Drools build.
Initially, go into the root of the jboss-rules checked out source tree, and run mvn install to install
all the components for the inter-project dependencies. If the build is broken (all care is taken for
this eventuality not to occur), the flag -DskipTests can be used to prevent failing unit tests from
preventing the build.
When wishing to build Guvnor, go into the guvnor-webapp directory, and run mvn package. This
will run the tests, and then build a deployable WAR. Once the WAR file is in the target directory,
the Guvnor is ready to go.
19.1.3. Working with GWT
The GUI widgets for the web front end are developed with GWT (Google Web Toolkit).
19.1.4. Debugging, Editing and running with Eclipse
Each module has a ready to go and up to date eclipse project configuration, so they can merely
be imported into the eclipse workspace. These projects are generated by Maven. Use the mvn
eclipse:eclipse command to refresh them in case they are wrong or outdated. They have been
manually modified to have project dependencies which means that the code can be stepped
through when debugging.
Some environment variables are required in eclipse (for Window: >Preferences->Java->Build
path-> Classpath variables): the M2_REPO, as normal, to point to where Maven downloads shared
dependencies. GWT_HOME should point to where you installed GWT. GWT_DEV must point to the
platform specific "dev" JAR that ships with the version of GWT you have.

Re-usable components
111
How to launch from Eclipse: unit tests can be launched, as normal (in which case only M2_REPO
setup is needed, GWT does not need to be downloaded separately), or it can be launched it in
hosted mode using the GWT browser, which is great for debugging (from GUI to back end, the
code can be stepped through, and changes made on the fly and simply hit refresh). There is a
Guvnor.launch file in in the guvnor-webapp directory. To launch Guvnor in debug mode, open
the Run dialog (Run->Run), and then choose Guvnor from the list. Launching this will open a
new window, with Guvnor in debug mode, ready to go.
Downloading and debugging Guvnor with GWT is optional, so if there are no GUI issues being
worked on then this step can be safely skipped.
19.2. Re-usable components
Guvnor uses a service interface to separate the GUI from the back end functionality. In this case
the back end both includes the asset repository (guvnor-repository and JCR) as well as the
compiler specifics to deal with rules.
The main interface is RepositoryService, which is implemented in ServiceImplementation.
The GWT ajax front end talks to this interface using the asynchronous callback mechanism that
GWT uses. The Seam configuration file is components.xml. Refer to the Seam documentation,
and the components.xml file for details.
This service interface may be re-used by alternative components or front ends.
The GWT user interface may be re-used, as it is GWT is only one html page: Guvnor.html.
Normally Guvnor is intended to be deployed as its own WAR, however it can be combined with
another application (with some care), but it is easier to keep it as a separate WAR. We recommend
deploying Guvnor by itself because this will make it easier to upgrade to newer releases as they
come out.
The Guvnor.html file can be customized. For example to change logos or embed Guvnor in
another page. Take a look at the Guvnor.html file for details.
19.3. Versioning and Storage
Refer to Chapter 14, Database configuration for for configuration options for database and
filesystems.
Versions of assets are stored in the database along with the data.
When snapshots are created, copies are made of the entire package into a separate location in
the JCR database.
For those familiar with JCR and Apache Jackrabbit, the *.cnd files are in the source for the node
type definitions as some wish to view these. In a nutshell, a package is a folder and each asset
is a file: an asset can either be textual or have a binary attachment.

Chapter 19. Architecture
112
19.4. Contributing
As an open source project, contributions from the wider community are encouraged. In order to
contribute consult the wiki and project home pages. A useful way to contribute is via logging issues
or feature requests in JIRA. The JIRA link to use is https://jira.jboss.org/jira/browse/GUVNOR.


