DP5000 Users Guide
142
Telecommunication Systems Division October 2010 DP5000-Series Telephone User Guide ®
Transcript of DP5000 Users Guide

8/6/2019 DP5000 Users Guide
http://slidepdf.com/reader/full/dp5000-users-guide 1/142
Telecommunication Systems Division
October 2010
DP5000-Series
Telephone User Guide
®

8/6/2019 DP5000 Users Guide
http://slidepdf.com/reader/full/dp5000-users-guide 2/142
Publication Information
Toshiba America Information Systems, Inc.,Telecommunication Systems Division, reserves the right,without prior notice, to revise this information publication forany reason, including, but not limited to, utilization of newadvances in the state of technical arts or to simply change thedesign of this document.
Further, Toshiba America Information Systems, Inc.,
Telecommunication Systems Division, also reserves the right,without prior notice, to make such changes in equipmentdesign or components as engineering or manufacturingmethods may warrant.
DP5000-UG-VC Version C.2, October 2010
© Copyright 2007~2009Toshiba America Information Systems, Inc.Telecommunication Systems Division
All rights reserved. No part of this manual, covered by thecopyrights hereon, may be reproduced in any form or by anymeans—graphic, electronic, or mechanical, includingrecording, taping, photocopying, or information retrievalsystems—without express written permission of the publisherof this material.
Strata is a registered trademark of Toshiba Corporation.Stratagy is a registered trademark of Toshiba AmericaInformation Systems, Inc.
Trademarks, registered trademarks, and service marks are theproperty of their respective owners.
CAUTION! Do not use cleansers that contain benzene, paint thinner, alcohol or other solvents on the telephone'srubber feet. The color of the rubber may transfer to the desk or mounting surface.
Important! Toshiba Telecommunication Systems Division sells its products through
Authorized Dealers. Our Dealers are certified in Sales and TechnicalTraining for Toshiba products, and focus on providing the best possiblecustomer experience. Dealer services include: network assessments,
product recommendations, installations, and ongoing technical and sales support. Before making any changes or updates to their ToshibaTelecom product (hardware or software), Toshiba advises Businesses tocontact their System's installing Dealer or an Authorized Toshiba
Dealer in their area.
To locate a Toshiba Telecom dealer, visit: www.telecom.toshiba.com

8/6/2019 DP5000 Users Guide
http://slidepdf.com/reader/full/dp5000-users-guide 3/142
TOSHIBA AMERICA INFORMATION SYSTEMS, INC. (“TAIS”)Telecommunication Systems Division License Agreement
IMPORTANT: THIS LICENSE AGREEMENT (“AGREEMENT”) IS A LEGAL AGREEMENT BETWEEN YOU (“YOU”) AND TAIS. CAREFULLY READ THIS LICENSE AGREEMENT. USE OF ANY
SOFTWARE OR ANY RELATED INFORMATION (COLLECTIVELY, “SOFTWARE”) INSTALLED ON OR SHIPPED WITH A TAIS TELECOMMUNICATION SYSTEMS PRODUCT OR OTHERWISE MADE AVAILABLE TO YOU BY TAIS IN WHATEVER FORM OR MEDIA, WILL CONSTITUTE YOUR ACCEPTANCE OF THESE TERMS, UNLESS SEPARATE TERMS ARE PROVIDED BY THE SOFTWARE
SUPPLIER. IF YOU DO NOT AGREE WITH THE TERMS OF THIS LICENSE AGREEMENT, DO NOT INSTALL, COPY OR USE THE SOFTWARE AND PROMPTLY RETURN IT TO THE LOCATION
FROM WHICH YOU OBTAINED IT IN ACCORDANCE WITH APPLICABLE RETURN POLICIES. EXCEPT AS OTHERWISE AUTHORIZED IN WRITING BY TAIS, THIS SOFTWARE IS LICENSED FOR
DISTRIBUTION THROUGH TAIS AUTHORIZED CHANNELS ONLY TO END-USERS PURSUANT TO THIS LICENSE AGREEMENT.
1. License Grant. The Software is not sold; it is licensed upon payment of applicable charges. TAIS grants to you a personal, non-transferable and non-exclusive right to use the copy of the Software
provided under this License Agreement. You agree you will not copy the Software except as necessary to use it on one TAIS system at a time at one location. Modifying, translating, renting, copying,
distributing, printing, sublicensing, transferring or assigning all or part of the Software, or any rights granted hereunder, to any other persons and removing any proprietary notices, labels or marks from the
Software is strictly prohibited except as permitted by applicable law; you agree violation of such restrictions will cause irreparable harm to TAIS and provide grounds for injunctive relief, without notice,
against you or any other person in possession of the Software. You and any other person whose possession of the software violates this License Agreement shall promptly surrender possession of the
Software to TAIS, upon demand. Furthermore, you hereby agree not to create derivative works based on the Software. TAIS reserves the right to terminate this license and to immediately repossess the
software in the event that you or any other person violates this License Agreement. Execution of the Software for any additional capabilities require a valid run-time license.
2. Intellectual Property. You acknowledge that no title to the intellectual property in the Software is transferred to you. You further acknowledge that title and full ownership rights to the Software will remainthe exclusive property of TAIS and/or its suppliers, and you will not acquire any rights to the Software, except the license expressly set forth above. You will not remove or change any proprietary notices
contained in or on the Software. The Software is protected under US patent, copyright, trade secret, and/or other proprietary laws, as well as international treaties. Any transfer, use, or copying of the
software in violation of the License Agreement constitutes copyright infringement. You are hereby on notice that any transfer, use, or copying of the Software in violation of this License Agreement constitutes
a willful infringement of copyright.
3. No Reverse Engineering. You agree that you will not attempt, and if you employ employees or engage contractors, you will use your best efforts to prevent your employees and contractors from
attempting to reverse compile, reverse engineer, modify, translate or disassemble the Software in whole or in part. Any failure to comply with the above or any other terms and conditions contained herein
will result in the automatic termination of this license and the reversion of the rights granted hereunder back to TAIS.
4. Limited Warranty. THE SOFTWARE IS PROVIDED “AS IS” WITHOUT WARRANTY OF ANY KIND. TO THE MAXIMUM EXTENT PERMITTED BY APPLICABLE LAW, TAIS AND ITS SUPPLIERS
DISCLAIM ALL WARRANTIES WITH REGARD TO THE SOFTWARE, EITHER EXPRESS OR IMPLIED, INCLUDING, BUT NOT LIMITED TO, THE WARRANTY OF NON-INFRINGEMENT OF THIRD
PARTY RIGHTS, THE WARRANTY OF YEAR 2000 COMPLIANCE, AND THE IMPLIED WARRANTIES OF MERCHANTABILITY AND FITNESS FOR A PARTICULAR PURPOSE. THE ENTIRE RISK AS
TO THE QUALITY AND PERFORMANCE OF THE SOFTWARE IS WITH YOU. NEITHER TAIS NOR ITS SUPPLIERS WARRANT THAT THE FUNCTIONS CONTAINED IN THE SOFTWARE WILL MEET
YOUR REQUIREMENTS OR THAT THE OPERATION OF THE SOFTWARE WILL BE UNINTERRUPTED OR ERROR-FREE. HOWEVER, TAIS WARRANTS THAT ANY MEDIA ON WHICH THESOFTWARE IS FURNISHED IS FREE FROM DEFECTS IN MATERIAL AND WORKMANSHIP UNDER NORMAL USE FOR A PERIOD OF NINETY (90) DAYS FROM THE DATE OF DELIVERY TO
YOU.
5. Limitation Of Liability. TAIS’ ENTIRE LIABILITY AND YOUR SOLE AND EXCLUSIVE REMEDY UNDER THIS LICENSE AGREEMENT SHALL BE AT TAIS’ OPTION REPLACEMENT OF THE MEDIA OR
REFUND OF THE PRICE PAID. TO THE MAXIMUM EXTENT PERMITTED BY APPLICABLE LAW, IN NO EVENT SHALL TAIS OR ITS SUPPLIERS BE LIABLE TO YOU FOR ANY CONSEQUENTIAL,
SPECIAL, INCIDENTAL OR INDIRECT DAMAGES FOR P ERSONAL INJURY, LOSS OF BUSINESS PROFITS, BUSINESS INTERRUPTION, LOSS OF BUSINESS INFORMATION/DATA, OR ANY
OTHER PECUNIARY LOSS OF ANY KIND ARISING OUT OF THE USE OR INABILITY TO USE THE SOFTWARE, EVEN IF TAIS OR ITS SUPPLIER HAS BEEN ADVISED OF THE POSSIBILITY OF
SUCH DAMAGES. IN NO EVENT SHALL TAIS OR ITS SUPPLIERS BE LIABLE FOR ANY CLAIM BY A THIRD PARTY.
6. State/Jurisdiction Laws. SOME STATES/JURISDICTIONS DO NOT ALLOW THE EXCLUSION OF IMPLIED WARRANTIES OR LIMITATIONS ON HOW LONG AN IMPLIED WARRANTY MAY LAST, OR
THE EXCLUSION OR LIMITATION OF INCIDENTAL OR CONSEQUENTIAL DAMAGES, SO SUCH LIMITATIONS OR EXCLUSIONS MAY NOT APPLY TO YOU. THIS LIMITED WARRANTY GIVES Y OU
SPECIFIC RIGHTS AND YOU MAY ALSO HAVE OTHER RIGHTS WHICH VARY FROM STATE/JURISDICTION TO STATE/JURISDICTION.
7. Export Laws. This License Agreement involves products and/or technical data that may be controlled under the United States Export Administration Regulations and may be subject to the approval of theUnited States Department of Commerce prior to export. Any export, directly or indirectly, in contravention of the United States Export Administration Regulations, or any other applicable law, regulation or
order, is prohibited.
8. Governing Law. This License Agreement will be governed by the laws of the State of California, United States of America, excluding its conflict of law provisions.
9. United States Government Restricted Rights. The Software is provided with Restricted Rights. The Software and other materials provided hereunder constitute Commercial Computer Software and
Software Documentation and Technical Data related to Commercial Items. Consistent with F.A.R. 12.211 and 12.212 they are licensed to the U.S. Government under, and the U.S. Government’s rights
therein are restricted pursuant to, the vendor’s commercial license.
10. Severability. If any provision of this License Agreement shall be held to be invalid, illegal or unenforceable, the validity, legality and enforceability of the remaining provisions hereof shall not in any way
be affected or impaired.
11. No Waiver. No waiver of any breach of any provision of this License Agreement shall constitute a waiver of any prior, concurrent or subsequent breach of the same or any other provisions hereof, and no
waiver shall be effective unless made in writing and signed by an authorized representative of the waiving party.
12. Supplier Software. The Software may include certain software provided by TAIS suppliers. In such event, you agree that such supplier may be designated by TAIS as a third party beneficiary of TAIS with
rights to enforce the Agreement with respect to supplier’s software.
YOU ACKNOWLEDGE THAT YOU HAVE READ THIS LICENSE AGREEMENT AND THAT YOU UNDERSTAND ITS PROVISIONS. YOU AGREE TO BE BOUND BY ITS TERMS AND CONDITIONS. YOU
FURTHER AGREE THAT THIS LICENSE AGREEMENT CONTAINS THE COMPLETE AND EXCLUSIVE AGREEMENT BETWEEN YOU AND TAIS AND SUPERSEDES ANY PROPOSAL OR PRIOR
AGREEMENT, ORAL OR WRITTEN, OR ANY OTHER COMMUNICATION RELATING TO THE SUBJECT MATTER OF THIS LICENSE AGREEMENT.
Toshiba America Information Systems, Inc.
Telecommunication Systems Division
9740 Irvine Boulevard
Irvine, California 92618-1697
United States of America
DSD 020905
5932

8/6/2019 DP5000 Users Guide
http://slidepdf.com/reader/full/dp5000-users-guide 4/142
Toshiba America Information Systems, Inc.Telecommunication Systems Division
End-User Limited Warranty
Toshiba America Information Systems, Inc., (“TAIS”) warrants that this telephone equipment manufactured by
Toshiba (except for fuses, lamps, and other consumables) will, upon delivery by TAIS or an authorized TAIS
dealer to a retail customer in new condition, be free from defects in material and workmanship for twenty-four (24)
months after delivery, except as otherwise provided by TAIS in the TAIS warranty accompanying the products or
posted on TAIS’s website. Products which are not manufactured by Toshiba but are purchased from Toshiba, will be subject to the warranty provisions provided by the equipment manufacturer, unless TAIS notifies the end-user
of any additional warranty provisions in writing.
This warranty is void (a) if the equipment is used under other than normal use and maintenance conditions, (b) if
the equipment is modified or altered, unless the modification or alteration is expressly authorized by TAIS, (c) if
the equipment is subject to abuse, neglect, lightning, electrical fault, or accident, (d) if the equipment is repaired
by someone other than TAIS or an authorized TAIS dealer, (e) if the equipment’s serial number is defaced or
missing, or (f) if the equipment is installed or used in combination or in assembly with products not supplied by
TAIS and which are not compatible or are of inferior quality, design, or performance.
The sole obligation of TAIS or Toshiba Corporation under this warranty, or under any other legal obligation with
respect to the equipment, is the repair or replacement of such defective or missing parts as are causing the malfunc-
tion by TAIS or its authorized dealer with new or refurbished parts (at their option). If TAIS or one of its
authorized dealers does not replace or repair such parts, the retail customer’s sole remedy will be a refund of the
price charged by TAIS to its dealers for such parts as are proven to be defective, and which are returned to TAIS
through one of its authorized dealers within the warranty period and no later than thirty (30) days after such
malfunction, whichever first occurs.
Under no circumstances will the retail customer or any user or dealer or other person be entitled to any direct,special, indirect, consequential, or exemplary damages, for breach of contract, tort, or otherwise. Under no circum-
stances will any such person be entitled to any sum greater than the purchase price paid for the item of equipment
that is malfunctioning.
To obtain service under this warranty, the retail customer must bring the malfunction of the machine to the
attention of one of TAIS’ authorized dealers within the applicable warranty period and no later than thirty (30)
days after such malfunction, whichever first occurs. Failure to bring the malfunction to the attention of an
authorized TAIS dealer within the prescribed time results in the customer being not entitled to warranty service.
THERE ARE NO OTHER WARRANTIES FROM EITHER TOSHIBA AMERICA INFORMATION SYSTEMS,INC., OR TOSHIBA CORPORATION WHICH EXTEND BEYOND THE FACE OF THIS WARRANTY. ALL
OTHER WARRANTIES, EXPRESS OR IMPLIED, INCLUDING THE WARRANTIES OF MERCHANTABILITY,
FITNESS FOR A PARTICULAR PURPOSE, AND FITNESS FOR USE, ARE EXCLUDED.
No TAIS dealer and no person other than an officer of TAIS may extend or modify this warranty. No such modifi-
cation or extension is effective unless it is in writing and signed by the Vice President and General Manager,
Telecommunication Systems Division.

8/6/2019 DP5000 Users Guide
http://slidepdf.com/reader/full/dp5000-users-guide 5/142
WARRANTIES FOR NON-TOSHIBA BRANDED THIRD PARTY PRODUCTS
A valuable element of Toshiba’s product strategy is to offer our customers a complete productportfolio. To provide this value to our customers at the most optimal prices, we offer both
Toshiba-branded and third-party manufactured products that support our Toshiba Strata CIXproduct portfolio. Similar to other resellers of software, hardware and peripherals, these third-
party manufactured products carry warranties independent of our Toshiba limited warrantyprovided with our Toshiba-branded products. Customers should note that third-party
manufacturer warranties vary from product to product and are covered by the warrantiesprovided through the original manufacturer and passed on intact to the purchaser by Toshiba.Customers should consult their product documentation for third-party warranty informationspecific to third-party products. More information may also be available in some cases from the
manufacturer’s public website.
While Toshiba offers a wide selection of software, hardware and peripheral products, we donot specifically test or guarantee that the third-party products we offer work under every
configuration with any or all of the various models of the Toshiba Strata CIX. Toshiba does notendorse, warrant nor assume any liability in connection with such third party products orservices. If you have questions about compatibility, we recommend and encourage you tocontact the third-party software, hardware and peripheral product manufacturer directly.

8/6/2019 DP5000 Users Guide
http://slidepdf.com/reader/full/dp5000-users-guide 6/142
This page is intentionally left blank.

8/6/2019 DP5000 Users Guide
http://slidepdf.com/reader/full/dp5000-users-guide 7/142
Strata CIX DP5000-series Telephone UG 10/10 i
Contents
Introduction
Organization...................................................................................................................... vii
How to Use This Guide.................................................................................................... viii
Conventions .................................................................................................................. viii
Related Documents/Media...................................................................................................x
Chapter 1 – The Grand Tour
Overview..............................................................................................................................1
DP5000-series Telephone Overview ...................................................................................5
Fixed Buttons....................................................................................................................6
Programmable Feature Buttons ........................................................................................8
Key Strip...........................................................................................................................8
LCD......................................................................................................................................99-Line LCD Display .........................................................................................................9
4-Line LCD Display .......................................................................................................10
Soft Keys............................................................................................................................10
Chapter 2 – The Basics
Customizing Your Telephone ............................................................................................11
Volume Control ..............................................................................................................11Volume Control for the Single Line Telephone .............................................................12
LCD Contrast..................................................................................................................13
Brightness Control..........................................................................................................13
Backlight On/Off ............................................................................................................14
Keystrip Labels ..................................................................................................................15
Ring Tones.........................................................................................................................15

8/6/2019 DP5000 Users Guide
http://slidepdf.com/reader/full/dp5000-users-guide 8/142
Contents
Chapter 3 – Feature Operations
ii Strata CIX DP5000-series Telephone UG 10/10
Dial Pad and Button Beeps.............................................................................................16
Speakerphone/Microphone Sensitivity Adjustment .......................................................17Full Duplex Speakerphone Environment Setup
(DP5130-FDSL)....................................................................................................17
Telephone Terminology.....................................................................................................19
Making a Call.....................................................................................................................20
Handset ...........................................................................................................................20
Spkr Button.....................................................................................................................20
Hot Dialing .....................................................................................................................20Dial by Name Directory..................................................................................................21
Answering a Call................................................................................................................23
Handset ...........................................................................................................................23
Speaker ...........................................................................................................................23
Shift Button.....................................................................................................................23
Handsfree Answerback...................................................................................................23
On a Call ............................................................................................................................24
Switching Between Handset and Speakerphone.............................................................24
Microphone (Mic/Mute) Button .....................................................................................24
Hold ................................................................................................................................24
LED Indicator Details.....................................................................................................26
Chapter 3 – Feature Operations
Account Code Calls ...........................................................................................................27
Verified/Non-Verified Account Codes...........................................................................27
Forced Account Codes....................................................................................................28
Voluntary Account Codes (Verified/Non-Verified).......................................................29
Advisory Messages ............................................................................................................30
Alarm Notification Button .................................................................................................31
Automatic Busy Redial ......................................................................................................31Automatic Callback ...........................................................................................................32
Background Music.............................................................................................................33
Call Forward ......................................................................................................................34
System.............................................................................................................................34
Station.............................................................................................................................34
Station Call Forward Categories.....................................................................................35

8/6/2019 DP5000 Users Guide
http://slidepdf.com/reader/full/dp5000-users-guide 9/142
Contents
Chapter 3 – Feature Operations
Strata CIX DP5000-series Telephone UG 10/10 iii
Call Forward Settings .....................................................................................................35
Station Call Forward Procedures....................................................................................36Call Forward Examples ..................................................................................................37
Call History / Caller ID......................................................................................................37
Call Park Orbits..................................................................................................................38
Call Pickup.........................................................................................................................39
Group Pickup..................................................................................................................39
Ringing, Page or Held Call Pickup.................................................................................39
Call Transfer ......................................................................................................................41Call Waiting.......................................................................................................................42
Conference Calls................................................................................................................43
Adding Voice Mail to a Conference...............................................................................44
Supervising a Tandem Call.............................................................................................45
Conference Add/Split/Join/Drop ....................................................................................45
Direct Inward System Access (DISA) ...............................................................................47
Direct Station Selection Buttons (Hotline) ........................................................................47
Do Not Disturb...................................................................................................................48
Setting DND for Another Extension...............................................................................49
Door Lock(s)......................................................................................................................49
Door Phone(s) ....................................................................................................................50
Emergency Call..................................................................................................................51
Emergency Monitoring Station.......................................................................................51
Emergency Ringdown........................................................................................................52
Language Codes.................................................................................................................52
Message Waiting................................................................................................................53
Turning On/Off MW LED on Another Extension..........................................................54
Microphone Cut-Off ..........................................................................................................55
Off-hook Call Announce....................................................................................................56
Override Calls ....................................................................................................................57Busy Override.................................................................................................................57
Do Not Disturb Override ................................................................................................57
Executive Override.........................................................................................................58
Destination Restriction/Traveling Class Override..........................................................58
Class of Service Override...............................................................................................58
Privacy Override.............................................................................................................59

8/6/2019 DP5000 Users Guide
http://slidepdf.com/reader/full/dp5000-users-guide 10/142
Contents
Chapter 4 – ADM/DSS Console
iv Strata CIX DP5000-series Telephone UG 10/10
Paging ................................................................................................................................59
Answering a Page ...........................................................................................................59All Call Page...................................................................................................................60
Emergency Page .............................................................................................................60
Privacy ...............................................................................................................................61
Redial .................................................................................................................................61
Speed Dial..........................................................................................................................62
Making a Call Using Speed Dial ....................................................................................62
Storing a System/Station Speed Dial Number................................................................63Advanced Speed Dial Operation ....................................................................................64
Storing Personal Speed Dial Names...............................................................................65
Tone First / Voice First Signalling.....................................................................................67
Tone First Signalling ......................................................................................................67
Voice First Signalling.....................................................................................................67
Tone/Pulse Dialing.............................................................................................................68
Uniform Call Distribution..................................................................................................69Login/Logout ..................................................................................................................70
Chapter 4 – ADM/DSS Console
Add-on Modules ................................................................................................................71
ADM ..................................................................................................................................72
Buttons and LEDs...........................................................................................................72
Adding an ADM .............................................................................................................73
Brightness Control..........................................................................................................73
Keystrip Labels...............................................................................................................73
DSS Console ......................................................................................................................74
DSS Buttons....................................................................................................................74
Calling a Station .............................................................................................................74
Transferring to an Idle Station........................................................................................75Call Transfer with Camp-on ...........................................................................................76
Call Answering (Outside Line).......................................................................................76
Speed Dial.......................................................................................................................76
Paging .............................................................................................................................77
Call Forward Override (DSS Override)..........................................................................77
Night Transfer Button.....................................................................................................77

8/6/2019 DP5000 Users Guide
http://slidepdf.com/reader/full/dp5000-users-guide 11/142
Contents
Chapter 5 – Headset and Handset Operation
Strata CIX DP5000-series Telephone UG 10/10 v
Chapter 5 – Headset and Handset Operation
Recommended Headsets ....................................................................................................79Headset and Handset Interactions......................................................................................79
AUTO or CARBON Setting ..............................................................................................80
Headset Transmit Level Adjustments................................................................................82
Handset Level Adjustments ...............................................................................................83
Chapter 6 – User Programming
Programming Feature Buttons ...........................................................................................86
User Programming Mode ...............................................................................................86
Programmable Feature Button Codes ................................................................................86
Setting/Changing a Programmable Feature Button’s Function ......................................87
One Touch Buttons ............................................................................................................88
Changing a One Touch Button .......................................................................................88
To Use a One Touch Button ...........................................................................................89Setting/Changing a Personal Speed Dial Code...............................................................89
Feature Codes.....................................................................................................................90
Chapter 7 – Administrator Programming
Functions............................................................................................................................95
Administrator Mode...........................................................................................................96
Phone Name....................................................................................................................96Door Name......................................................................................................................97
System SD/Name............................................................................................................97
Phone Key Label and LM Key Label .............................................................................97
Station SD/ Name ...........................................................................................................98
CO Line Name................................................................................................................98
DNIS Name ....................................................................................................................98
System Features .................................................................................................................99
Direct Inward System Access (DISA) Security Code ....................................................99
Date and Time Setting .....................................................................................................101
Telephone Programming Mode .......................................................................................102
Initialize Telephone Settings ........................................................................................102
Call Waiting and Camp-on Ring Tone Over Handset/Headset Option........................103
8/6/2019 DP5000 Users Guide
http://slidepdf.com/reader/full/dp5000-users-guide 12/142
Contents
Appendix A – References
vi Strata CIX DP5000-series Telephone UG 10/10
Initialize or Adjust LCD Contrast.................................................................................103
DKT2000 Mode On/Off ..................................................................................................104Step 1: Turn DKT2000 Mode On/Off ......................................................................104
Step 2: Connect Cordless Telephone to DP5000-series Telephone ................................104
Single Line Telephone.....................................................................................................105
Buttons..........................................................................................................................105
Redial / Feature Button Activation / Deactivation .......................................................106
Msg / Feature Button Activation / Deactivation...........................................................106
Appendix A – References
Call Forward ....................................................................................................................107
Soft Keys..........................................................................................................................111
Button Labels ...................................................................................................................112
Appendix B – Hardware Connections
DP5000-Series Telephone Tilt Angles ............................................................................117
Wiring ..............................................................................................................................119
Appendix C – Centrex Application
Flexible Directory Numbering.........................................................................................121
Centrex Feature Buttons ..................................................................................................121
Ringing Repeat.................................................................................................................121Delayed Ringing ..............................................................................................................122
Index ....................................................................................................................................123

8/6/2019 DP5000 Users Guide
http://slidepdf.com/reader/full/dp5000-users-guide 13/142
Strata CIX DP5000-series Telephone UG 10/10 vii
Introduction
This user guide describes how to use the Toshiba DP5000-series telephones with theStrata CIX1200, CIX670, CIX200, CIX100, CIX100-S, and CIX40 telephonesystems. These include:
• Strata DP5000-series digital telephones shown in Table 2 on Page 4.
• Strata Digital Add-on Modules.
• Strata Direct Station Selection (DSS) console.
Note Telephones and ADM models that include “1” in the model number are modelsthat support the backlight feature.
Organization• Chapter 1 – The Grand Tour provides an overview DP5000 digital telephones.
• Chapter 2 – The Basics covers the basic telephone functions.
• Chapter 3 – Feature Operations includes an explanation of Soft Key operations,an alphabetical feature list and LCD information.
• Chapter 4 – ADM/DSS Console explains features and functions of the Add-onmodules.
• Chapter 5 – Headset and Handset Operation explains the interactions of these
accessories with the DP5000-series telephones.• Chapter 6 – User Programming explains how to program the Programmable
Feature Buttons, such as setting One Touch buttons, changing Personal Speed Dialnumbers, as well as other user programmable functions.
• Chapter 7 – Administrator Programming explains features and functions to beperformed by an Administrator.

8/6/2019 DP5000 Users Guide
http://slidepdf.com/reader/full/dp5000-users-guide 14/142
Introduction
How to Use This Guide
viii Strata CIX DP5000-series Telephone UG 10/10
• Appendix A – References includes tables that support procedures in the Basic and
Feature Operation chapters.• Appendix B – Hardware Connections includes tilt angles and telephone wiring
diagrams.
• Appendix C – Centrex Application describes the Centrex features which may beavailable with your Strata CIX system.
How to Use This GuideThis guide provides in-depth instructions for the DP5000-series telephones and theirfeatures. Most telephone users can use the “Strata CIX DP5000-series Quick
Reference Guide” instead of this guide.
ConventionsNote Elaborates specific items or references other information. Within some tables,
general notes apply to the entire table and numbered notes apply to specificitems.
Important! Calls attention to important instructions or information.
CAUTION! Advises you that hardware, software applications, or data could bedamaged if the instructions are not followed closely.
WARNING! Alerts you when the given task could cause personal injury or death.
Conventions Description
[DN]
Represents any Directory Number button, also known as anextension or intercom number.
Telephones can have multiple extensions. Incoming callsring extensions bottom to top.

8/6/2019 DP5000 Users Guide
http://slidepdf.com/reader/full/dp5000-users-guide 15/142
Introduction
How to Use This Guide
Strata CIX DP5000-series Telephone UG 10/10 ix
[PDN]Represents any Primary Directory Number button (theextension number for the telephone).
[SDN]Represents any Secondary appearance of a PDN. A PDNwhich appears on another telephone is considered an SDN.
[PhDN]Represents any Phantom Directory Number button (an
additional DN).
Ar ia l Bo ld Represent telephone buttons.
Courier Shows a computer keyboard entry or screen display.
Arial Represents LCD displays, tokens or custom IVR functions.
“Type” Indicates entry of a string of text.
“Press”Indicates entry of a single key. For example: Type prog then press Enter.
Plus (+)
Shows a multiple PC keyboard or phone button entry. Entrieswithout spaces between them show a simultaneous entry.Example: Esc+ Enter. Entries with spaces between them
show a sequential entry. Example: # 5.
Tilde (~) Means “through.” Example: 350~640 Hz frequency range.
Denotes a procedure.
Denotes the step in a one-step procedure.
Start > Settings >
Printers
Denotes a progression of buttons and/or menu options on the
screen you should select.
See Figure 10
Grey/Blue words within the printed text denote cross-references. In the electronic version of this document(Library CD-ROM or FYI Internet download), cross-references appear in blue hypertext.
Conventions Description

8/6/2019 DP5000 Users Guide
http://slidepdf.com/reader/full/dp5000-users-guide 16/142
Introduction
Related Documents/Media
x Strata CIX DP5000-series Telephone UG 10/10
Related Documents/MediaNote Some documents listed here may appear in different versions on the
electronically or in print. To find the most current version, check the version/ date in the Publication Information on the back of the document’s title page.
Refer to the following for more information:
• Strata CIX General Description
• Strata CIX DP5000-series Telephone Quick Reference Guide
• Strata CIX Installation and Maintenance Manual
• Strata CIX Programming Manual - Volume 1
• Strata CIX My Phone Manager User Guide

8/6/2019 DP5000 Users Guide
http://slidepdf.com/reader/full/dp5000-users-guide 17/142
Strata CIX DP5000-series Telephone UG 10/10 1
The Grand Tour 1
OverviewThe DP5000-series digital telephones connected to a Strata CIX telephone systeminclude a wide selection of digital telephone models and matching digital add-onmodules and a 60-button DSS Console. See Table 1 for more details.
Through dynamic soft key assignments, the LCD telephones provide easy access tofrequently-used features by prompting specific tasks, providing Outside LineIdentification, User Name/Number, Call Duration, Date/Time of Day displays, andName and number displays of incoming callers.
The speakerphone on these telephones enables you to place and receive calls withoutlifting the handset.
The LCD telephones with 10 and 20 buttons are available with LCD backlight. Tochange the backlight settings, refer to Chapter 3 – Feature Operations.

8/6/2019 DP5000 Users Guide
http://slidepdf.com/reader/full/dp5000-users-guide 18/142
The Grand Tour
Overview
2 Strata CIX DP5000-series Telephone UG 10/10
Table 1 DP5000 Series Digital Telephones
Description Image
Digital Single Line Telephone:
• On hook dialing
• Headset I/F• Ringing LED
• Non-display
10 Button Digital Telephone:• Half duplex Speakerphone
• Headset I/F
• Ringing LED
• Non-display
10 Button Digital Telephone:
• 4 line LCD with back light option
• Half duplex Speakerphone
• Headset I/F
• Ringing LED

8/6/2019 DP5000 Users Guide
http://slidepdf.com/reader/full/dp5000-users-guide 19/142
The Grand Tour
Overview
Strata CIX DP5000-series Telephone UG 10/10 3
20 Button Digital Telephone:
• 4 line LCD with back light option
• Half duplex Speakerphone
• Headset I/F• Ringing LED
20 Button with Electronic LCD Labels:
• 9 line LCD with back light
• Half duplex and Full duplexSpeakerphone options
• Dedicated call history button
• Headset I/F
• Ringing LED
Table 1 DP5000 Series Digital Telephones (continued)
Description Image
Th G d T

8/6/2019 DP5000 Users Guide
http://slidepdf.com/reader/full/dp5000-users-guide 20/142
The Grand Tour
Overview
4 Strata CIX DP5000-series Telephone UG 10/10
The DP5000-series telephone upgrade options include:
Table 2 DP5000 Series Add-on Modules
Description Image
10 Button ADM for DP5000-series
• LCD programmable key strip withback light
20 Button ADM for DP5000-series
• Paper Key Strip
60 Button DSS for DP5000-series
• Paper Key Strip
The Grand Tour

8/6/2019 DP5000 Users Guide
http://slidepdf.com/reader/full/dp5000-users-guide 21/142
The Grand Tour
DP5000-series Telephone Overview
Strata CIX DP5000-series Telephone UG 10/10 5
DP5000-series Telephone OverviewThe illustration of the DP5000-series telephone shown below gives a general idea of the basic attributes found on most of these telephones. The positioning of the buttonsvaries per telephone model.
LegendA. Status LED (message and ringing)B. LCD DisplayC. SoftkeysD. Programmable Feature ButtonsE. Message Waiting LED ButtonF. Microphone LED Button
G. Speaker LED ButtonH. VolumeI. Hold ButtonJ. MicrophoneK. Tilt stand
A
B
C
E
F
G
H
I
J
K
20 Programmable Feature Buttons 4-Line LCD Telephone
D

8/6/2019 DP5000 Users Guide
http://slidepdf.com/reader/full/dp5000-users-guide 22/142
The Grand Tour

8/6/2019 DP5000 Users Guide
http://slidepdf.com/reader/full/dp5000-users-guide 23/142
The Grand Tour
DP5000-series Telephone Overview
Strata CIX DP5000-series Telephone UG 10/10 7
The Fixed buttons are described below.
Table 3 Fixed Button Definitions
Button Definitions
Message (Msg): When Msg LED flashes, press Msg to call back thestation or voice mail device that activated the LED. This is thetelephone’s [PDN] message waiting button.
Important! Red LED must be on in order for button to function.
Microphone (Mic/Mute) button toggles between Mic and Mute. WhenMic key is lit, handsfree communication is supported, when Mic ispressed again and light is off, Mute is enabled on the microphone in thetelephone and the microphone in the handset.
Speaker: Press to toggle the speaker ON/OFF. When red Speaker LED
is lit handsfree communications is supported.To start a handsfree conversation; press the Speaker button, this turnsthe red Speaker LED on. To terminate this call press the Speaker buttonagain (Speaker LED off).
During a handset conversation, press the Speaker button to starthands-free communications (red Speaker LED on). Press the Speakerbutton again to transfer the conversation back to the handset (SpeakerLED off).
Press and release the volume control bar to adjust volume levels. See“Volume Control” on page 11.
Important! Continuously holding the volume button (up or down)does not change the volume. It is adjusted on a per
press basis.
SpdialPress Spdial and enter 3-digit Speed dial access code. Speed dialaccess codes must be setup before they can be accessed. See “SpeedDial” on page 62.
Redial
Press Redial to dial the last telephone number called (internal orexternal).
If you have Automatic Line Selection, lift the handset first.
The Grand Tour

8/6/2019 DP5000 Users Guide
http://slidepdf.com/reader/full/dp5000-users-guide 24/142
DP5000-series Telephone Overview
8 Strata CIX DP5000-series Telephone UG 10/10
Programmable Feature Buttons
Programmable Feature Buttons are programmed
by the System Administrator and can becustomized on a per user basis.
See Table 17 on page 112 for a list of Programmable Feature Buttons.
Note Programmable Feature Buttons arenumbered bottom to top, left to right(shown right).
Key Strip
The key strips on the DP5000-series telephonesand add-on modules are either electronic(programmable) or paper (refer to Table 1 andTable 2).
Cnf/Trn
(Conference/Transfer)
Press Cnf/Trn to add internal or external parties to a conference call (upto 8 parties).
Press Cnf/Trn and enter a number to transfer a call to another party (onthe CIX system).
Hold
Press Hold to place an internal or external call on hold.
Press Hold Hold to place an internal or external call on Exclusive hold.If your telephone is programmed for Automatic Hold, existing calls areautomatically placed on hold when you answer a call or make anothercall.
Table 3 Fixed Button Definitions (continued)
Button Definitions
Programmable Feature Button
Layout
01
02
03
04
05
06
07
08
09
10
11
12
14
15
16
17
18
19
20
13
The Grand Tour

8/6/2019 DP5000 Users Guide
http://slidepdf.com/reader/full/dp5000-users-guide 25/142
LCD
Strata CIX DP5000-series Telephone UG 10/10 9
LCDIf your telephone has an LCD, use this section to learn more about its functions.
9-Line LCD Display
The LCD on the 9-Line LCD telephone (shown below) in idle state shows:
Top to Bottom
Line 1 or the top line of the LCD will display your user name (if programmed) andyour extension number.
Line 2 will show the Date and time.
Line 3 will show information related to your telephone set: VM New/Saved messages,Call Forward, or if a certain feature is enabled on your telephone set. A plus sign + on the LCD indicates there is more data to display. Press SCRL to
advance through the information.
Lines 4~8 will indicate Programmable Feature Button labels.
Line 9 will display the Soft Keys (See “Soft Keys” on page 10).
Shift Button – togglesbetween ProgrammableFeature Buttons 1~10and 11~20.
Hist Button – Press Histbutton when phone isidle to access Caller IDhistory.
The Grand Tour

8/6/2019 DP5000 Users Guide
http://slidepdf.com/reader/full/dp5000-users-guide 26/142
Soft Keys
10 Strata CIX DP5000-series Telephone UG 10/10
4-Line LCD Display
The LCD in it's idle state (shown right)displays:
Line 1 or the top line of the LCD willdisplay your user name (if programmed) and your extensionnumber.
Line 2 will show the Date and time.Line 3 will show information related toyour telephone set: VM New/Savedmessages, Call Forward, or if a certainfeature is enabled on your telephoneset. A plus sign + on the LCD indicates there is more data to display. Press NEXT to
advance through the information.
Line 4 will display the soft keys available in idle state. Press DSPLY to switch fromthe Call Forward display to the User Name display.
Soft Keys
Softkeys (SK1 - SK4) refer to the fourbuttons directly below the LCD screen(shown right). Soft Keys dynamicallychange their functions and labeldepending on the state of the telephone.The dynamic feature associated with theSoft Key is displayed on the bottom line
of the LCD display directly above eachSoft Key button.
DP5000 4-line LCD display in Idle Mode
SK1 SK2 SK3 SK4

8/6/2019 DP5000 Users Guide
http://slidepdf.com/reader/full/dp5000-users-guide 27/142
Strata CIX DP5000-series Telephone UG 10/10 11
The Basics
2
This chapter reviews the basic operations of the DP5000-series telephones. Theinstructions apply to all telephone models, except when noted otherwise.
Customizing Your Telephone
Volume ControlNote The Volume Control instructions for the Single Line Telephone are on the next
page.
To adjust the handset volume
Press the Vo l to increase volume and Vo l to decrease volume during the call.When you hang up, the volume returns to the default setting.
To adjust the speaker volume for internal/external calls and background music
1. Press Spkr .
2. Press an extension button - you hear dial tone.
3. Press the Vo l to increase volume and Vo l to decrease volume. This volumesetting applies to all calls until changed.
To adjust Ring Tone, Hands free Answerback and Speaker Off-hook CallAnnounce
Make sure the telephone is idle and the handset is on-hook. Press the Vo l toincrease volume and Vo l to decrease volume. This adjusts volume for yourtelephone’s ring tone, Hands free Answerback and Speaker Off-hook CallAnnounce simultaneously.
The Basics
C

8/6/2019 DP5000 Users Guide
http://slidepdf.com/reader/full/dp5000-users-guide 28/142
Customizing Your Telephone
12 Strata CIX DP5000-series Telephone UG 10/10
To adjust handset Beep Tone
1. With the handset off-hook, dial the Beep Tone Adjustment Code #6101 (defaultcode). You hear busy tone.
2. Press Vo l or Vo l to reach the desired level.
Volume Control for the Single Line Telephone
Press the Vo l to increase volume and Vo l to decrease volume during it.
To adjust the handset volume
Press the Vo l to increase volume and Vo l to decrease volume during the call.When you hang up, the volume returns to the default setting.
To adjust the speaker volume for internal/external calls and background music
1. Press Spkr .
2. Press an extension button - you hear dial tone.
3. Press the Vo l to increase volume and Vo l to decrease volume. This volumesetting applies to all calls until changed.
To adjust Ring Tone
Make sure the telephone is idle and the handset is on-hook. Press the Vol s toincrease volume and Vol t to decrease volume.
The Basics
C i i Y T l h

8/6/2019 DP5000 Users Guide
http://slidepdf.com/reader/full/dp5000-users-guide 29/142
Customizing Your Telephone
Strata CIX DP5000-series Telephone UG 10/10 13
LCD Contrast
Available on backlit telephones and backlit add-on module.
To adjust the LCD contrast on the backlit telephones
1. Press and hold down the Mic button.
2. Press and release Vo l or Vo l repeatedly.
Note Holding the Vol button does not continue to change the setting. The button must
be pressed for each step of contrast change.
To adjust the LCD contrast on the Add-on Module
1. Press Hold+3+6+9 (simultaneously).
2. Press Cont ras t + button to increase contrast.
3. Press Cont ras t - button to decrease contrast.
4. Lift the handset off-hook / on-hook to save settings.Note Holding the softkey does not continue to change the setting. The softkey must
be pressed for each step of contrast change
Brightness Control
Available on backlit telephones and backlit add-on module.
To change the LCD back light brightness
1. Press Hold+3+6+9 (simultaneously).
2. Press Br ight softkey to increase brightness.
3. Press Di m softkey to decrease brightness.
4. Lift the handset off-hook / on-hook to save the settings.
Note Use the Br ight and Di m buttons in steps 2 and 3 on the 10 button LCD Add-onModule.
The Basics
Customizing Your Telephone

8/6/2019 DP5000 Users Guide
http://slidepdf.com/reader/full/dp5000-users-guide 30/142
Customizing Your Telephone
14 Strata CIX DP5000-series Telephone UG 10/10
Backlight On/Off
Available on backlit telephones and backlit add-on module.
To change Backlight Settings
1. Press Hold+3+6+9 (simultaneously).
2. Press the Mic button.
3. Use table below to choose preferred settings.
4. Press Hold to save settings
Note FB1 is the lower left key, FB2 in the next up, FB3 is above FB2, and FB4 isabove FB3.
Table 4 Backlight Settings
FB4 FB3 FB2 FB1 Meaning Delay (in Seconds)
On On On On Always On None
On On On Off Synchronized 300
On On Off On Synchronized 240
On On Off Off Synchronized 180
On Off On On Synchronized 160
On Off On Off Synchronized 140
On Off Off On Synchronized 120
On Off Off Off Synchronized 100
Off On On On Synchronized 80
Off On On Off Synchronized 60Off On Off On Synchronized 50
Off On Off Off Synchronized 40
Off Off On On Synchronized 30 (Default)
Off Off On Off Synchronized 20
Off Off Off On Synchronized 10
Off Off Off Off Always Off None
The Basics
Keystrip Labels
8/6/2019 DP5000 Users Guide
http://slidepdf.com/reader/full/dp5000-users-guide 31/142
Keystrip Labels
Strata CIX DP5000-series Telephone UG 10/10 15
Keystrip LabelsAvailable on 9 Line LCD telephone and 10 Button LCD Add-on Module
To program LCD Keystrip Labels
1. Dial #9876 (or press the flexible Program button)
2. Press the Speaker button.
3. Press the button you wish to label.
4. Use the dialpad to enter the label.
5. Press the button labeled in step 3 to save the setting.
6. To label another button, repeat steps 3-5.
7. To exit User Programming mode lift the handset off-hook / on-hook.
Ring Tones To set distinctive ringing
1. Press #9876 to enter User Programming Mode.
2. Press a Line or extension button. The LED is steady green.
3. You can press Hold to switch between internal and external pitch. (Internal =
station calls within your system; external = outside line calls.)4. Enter the two-digit pitch number (see Table 5 on page 16).
5. Press the same button that you pressed in Step 2 (Line or extension). Two beeps isa confirmation tone and “DATA PROGRAMMED” displays on your LCD.
6. Lift the handset off-hook/on-hook to save settings.
The Basics
Ring Tones

8/6/2019 DP5000 Users Guide
http://slidepdf.com/reader/full/dp5000-users-guide 32/142
Ring Tones
16 Strata CIX DP5000-series Telephone UG 10/10
Dial Pad and Button Beeps
Digital telephones can emit a “beep” whenever a dial pad or feature button is pressed.The “beeps” are On by default. Follow these steps to turn the “beeps” On or Off.
1. Press 3+6+9+Hold (simultaneously).
2. Press 0 .
3. Press Programmable Feature Button 1 (FB1) to toggle On/Off.
FB1, LED On: buttons beep.
FB1, LED Off: buttons do not beep.
4. Press Hold to set the option.
5. You must also go off-hook, then on-hook to exit the program mode.
For Single Line Telephone
1. Press 3+6+9+Hold (simultaneously).
2. Press 0 1 .
3. Press Msg to toggle On/Off.
Msg LED On: buttons beep.
Msg LED Off: buttons do not beep.
4. Press Hold to set the option.
5. You must also go off-hook, then on-hook to exit the program mode.
Table 5 Internal and External Call Ringing Tones
Tone No. Frequency and Cadence01 500 Hz 1 sec. On, 3 sec. Off, repeat
02 1300 Hz 1 sec. On, 1 sec. Off, repeat
11 500/640 Hz 1 sec. On, 3 sec. Off, repeat
12 500/640 Hz 1 sec. On, 1 sec. Off, repeat
13 860/1180 Hz 1 sec. On, 3 sec. Off, repeat
14 860/1180 Hz 1 sec. On, 1 sec. Off, repeat
15 1300/1780 Hz 1 sec. On, 3 sec. Off, repeat
16 1300/1780 Hz 1 sec. On, 1 sec. Off, repeat
17 860/1180 Hz 0.5 sec. On, 1300/1780 Hz 3 sec. Off, repeat
18 860/1180 Hz 0.5 sec. On, 1300/1780 Hz 1 sec. Off, repeat
The Basics
Ring Tones

8/6/2019 DP5000 Users Guide
http://slidepdf.com/reader/full/dp5000-users-guide 33/142
g
Strata CIX DP5000-series Telephone UG 10/10 17
Speakerphone/Microphone Sensitivity Adjustment
When you are using the speakerphone, high ambient noise levels may cause the partyyou are talking with to be to cut off frequently. If this happens, follow these steps tolower the sensitivity of the microphone on a DP5000-series telephone. The default isnormal sensitivity.
1. Press 3+6+9+Hold (simultaneously).
2. Press 0 .
3. Press Programmable Feature Button 3 (FB3) to toggle On/Off.FB3, LED On: Lower sensitivity
FB3, LED Off: Normal sensitivity
4. Press Hold to set the option.
5. Go off-hook, then on-hook to exit the program mode.
Full Duplex Speakerphone Environment Setup (DP5130-FDSL)
The DP5130-FSDL has a powerful integrated full duplex speakerphone that providesbi-directional voice transmission, allowing simultaneous talk. The microphone islocated on the front right side of the telephone, so all objects need to be kept well clearof that area to ensure there are no reflections that might generate an echo or other
feedback. In a full duplex speakerphone environment, a number of conditionsincluding room acoustics, network conditions, or the other party’s equipment caninduce echo, a short silence, or clipped speech, so it is important to use the followingrecommendations for optimal performance.
The Basics
Ring Tones

8/6/2019 DP5000 Users Guide
http://slidepdf.com/reader/full/dp5000-users-guide 34/142
18 Strata CIX DP5000-series Telephone UG 10/10
Recommended Environment for Optimal Performance
• Keep objects, for example; books, equipment or walls, away from the front andsides of the telephone.
• Keep telephone away from noise sources (e.g. PC fan).
• For small, enclosed office environments that have acoustical reflection, it may benecessary to select the lower speakerphone/microphone sensitivity setting (asshown above).
• The DP5130-FSDL is not recommended for very small rooms, which tend to havehigher acoustical reflection and can result in echo or feedback. For this roomenvironment, please consider the DP5130-SDL model (half duplex speakerphone).
• When using a SIP Trunk backbone Toshiba recommends the IP5131-SDL model,which is optimized for a full IP environment.
Key Considerations for Better Call Quality
• The powerful built-in echo canceller is constantly adjusting to its environment,providing optimal performance. For the first few seconds of a call, only one sideshould speak at a time as the echo canceller optimizes for its environment.
• For best performance, users should speak in front or slightly to the side of thetelephone.
• In a full duplex environment, it is important that both sides speak at similar voice
volume levels. If you hear clipped speech on your side, please speaker louder and/ or move closer to the microphone so that your speech is properly identified by theecho canceller.
If you hear clipped speech from the other side, please ask them to speak louderand/or move closer to the microphone. The DP5000 Series provides a wide rangeof volume steps, so you can also lower your volume setting 3 to 7 steps to bettermatch the voice levels.
• The echo canceller is constantly optimizing, so it is important not to move thetelephone while in use. Furthermore, do not move paper or other objects near themicrophone area during the call, which could generate a loud noise or cause anecho to be transmitted to the other side.
• Should an echo occur, simply pause a moment to allow the echo canceller to re-adjust. Continue to follow the steps above for better call quality.
The Basics
Telephone Terminology

8/6/2019 DP5000 Users Guide
http://slidepdf.com/reader/full/dp5000-users-guide 35/142
Strata CIX DP5000-series Telephone UG 10/10 19
Telephone TerminologyWhen making or receiving calls on your DP5000-series telephone you mayexperience one or more of the following call features depending on how yourtelephone is configured.
• Line – is synonymous with trunk which is the line that connects you to the PSTN(Public Switched Telephone Network). Line can be:
• a button on your telephone set designated for outgoing calls
• your DN button followed by dialing 9.
• Automatic Line Selection (ALS) – ALS is engaged on outgoing calls. Lift thehandset or press Spkr to hear dial tone, the steady green Line LED indicates ALSin enabled. The second line of the LCD will display the method of dialingavailable, followed by the digits dialed.
• Ringing Line Preference – Answer any incoming call by lifting the handset or
pressing Spkr . There is no need to press the ringing line button to answer the callwhen ringing line preference is enabled.
• Tone First Signaling – Internal incoming calls only: telephone rings in standardring tone, lift handset or press Spkr to answer call.
• Voice First Signaling – Internal incoming calls only: a long tone is heard,followed by the caller's voice, this will automatically engage the Spkr to allow for
hands free communications. Lift the handset if desired (for privacy). When VoiceFirst Signaling is enabled the telephone does not ring on internal incoming calls.
• Hot Dialing – Dial a telephone number from the dialpad, the telephoneautomatically selects a line, shown with a green LED, and turns on the Spkr andMic LED's. When Hot Dialing is not turned on the handset should be lifted or Sprk should be pressed in order to make a call.
The Basics
Making a Call

8/6/2019 DP5000 Users Guide
http://slidepdf.com/reader/full/dp5000-users-guide 36/142
20 Strata CIX DP5000-series Telephone UG 10/10
Making a CallThere are three ways to originate a call from the telephone:
Handset
1. To make a call, lift the handset, then dial the number.
A line may be automatically selected or choose a line manually. Dial tone is heard
through the handset. The Speaker and Microphone LEDs do not light.Digits display as they are dialed. Call progress tones (Ringback Tone, Busy Tone,etc.) are heard through the handset.
2. When connected, continue using the handset or switch to speakerphone by holdingdown Spkr and placing the handset in the cradle.
Spkr Button1. To make a call, press Spkr .
A line may be selected automatically or choose a line manually. The extension orLine button lights (depending on system programming). Dial tone is heardthrough the speaker. The Speaker and Microphone LEDs light.
2. Dial the number.
Digits display as they are dialed. Call progress tones (Ringback Tone, Busy Tone,etc.) are heard through the speaker.
3. When connected, continue using the speakerphone or lift the handset to continuethe conversation.
Hot Dialing
1. To make a call using Hot Dialing, start dialing the number.The extension button, Spkr and Mic LEDs light. Digits display as they are dialed.Call progress tones (Ringback Tone, Busy Tone, etc.) are heard through thespeaker.
2. When connected, continue using the speakerphone or lift the handset to continuethe conversation.
The Basics
Making a Call

8/6/2019 DP5000 Users Guide
http://slidepdf.com/reader/full/dp5000-users-guide 37/142
Strata CIX DP5000-series Telephone UG 10/10 21
Dial by Name Directory
This feature is supported on DP5000-series telephones with an LCD display runningon CIX R5.1 (or higher) software. Calls can be made by selecting a name from thealphabetical telephone directory.
To access the Directory
1. Press DI R soft key (shown right). Select Directory menu appears.
The soft keys on the SelectDirectory are: My = Personal Speed Dial Names EXTR = System Speed Dial Names INTR = Directory Number Names Dial = Cancel directory, get dialtone.
2. Choose the directory you wish to access and use the dial pad to enter the name.
Notes
• If a directory is not selected and a name is entered, all directories will besearched.
• To enter names from the dial pad, press the dial pad button associated with theletter to be entered. Press the button once for the first letter, twice for the second
letter, etc. Left and Right Soft Keys are available to move the cursor.3. Press Find to start the directory search.
4. Press Nex t to move forward through the directory.
5. Press Back to move backwards through the directory.
6. Press Call to connect to the directory entry selected.
On the 9-line LCD Display, press the button next to the displayed name. See figure
on following page.7. Press Cncl to quit the directory search.
TOM EDISON NO.2004
DIR
APR 05 WEDNESDAY 1:01PM
4 Line LCD Display
The Basics
Making a Call

8/6/2019 DP5000 Users Guide
http://slidepdf.com/reader/full/dp5000-users-guide 38/142
22 Strata CIX DP5000-series Telephone UG 10/10
Note Stick the Toshiba provided “Shift” label under the lower-left button and the“Hist” label under the lower-right button as shown in the figure above. Thestickers are provided in the telephone box.
BOB L (PRI)
BOB LAWVER BRAD FISHER
ONE TOUCH ONE TOUCH
PICKUP ONE TOUCH
CFAC
ONE TOUCH
NEXT
DND
Ext. 4227 ONE TOUCH
ONE TOUCH
BACK CNCL
BILL THOMAS
BRAD FERRIS
BRIAN SMITH
Press the key next to the displayedname to call that person.
HistShift
9 Line LCD Display - Dial by Name Screen
The Basics
Answering a Call

8/6/2019 DP5000 Users Guide
http://slidepdf.com/reader/full/dp5000-users-guide 39/142
Strata CIX DP5000-series Telephone UG 10/10 23
Answering a CallThere are several ways to answer a call:
Handset
When the telephone is programmed for Ringing Line Preference, pick up thehandset and the telephone automatically answers the ringing line.
... or press the button associated with the ringing line (flashing green LED).
Speaker When the telephone is programmed for Ringing Line Preference, press Spkr and
the ringing line is answered.
... or press the button associated with the ringing line (flashing green LED). Onceconnected, continue using the speakerphone or lift the handset.
Shift ButtonAvailable on a 9-line display telephone only.
If the LCD screen is set to view Buttons 11~20 and a call comes in on Button 1 thephone will ring and Caller ID information will display on the top of the screen,press the “Shift” Button to view Buttons 1~10 and answer the call.
Handsfree Answerback
With speakerphone enabled, the telephone may be programmed for HandsfreeAnswerback. The called party hears a single long tone, followed by the caller’s voice.Begin hands free conversation. If Handsfree Answerback were not programmed, thecalled party could hear the calling party speak but would not be able to answer themwithout answering the call manually.
Notes
• The extension LED flashes green, the Microphone LED lights steady red and theSpeaker LED flashes Red.
• In order to perform any additional functions with this call (like a transfer or hold)the call must be properly answered to gain full call control. Perform the same stepsyou normally would to answer a call: press the Spkr button, the flashing DN buttonor lift the handset.
• Handsfree MIC setting needs to be enabled by your System Administrator.
The Basics
On a Call

8/6/2019 DP5000 Users Guide
http://slidepdf.com/reader/full/dp5000-users-guide 40/142
24 Strata CIX DP5000-series Telephone UG 10/10
On a CallWhile on a call you can perform the following:
Switching Between Handset and Speakerphone
Press Spkr and place the handset on-hook to switch from handset to speakerphonemode.
Take the handset off-hook to switch from speakerphone to handset mode.
Microphone (Mic/Mute) Button
This button toggles between Mic and Mute. When Mic button is lit, handsfreecommunication is supported, when Mic is pressed again and light is off, Mute isenabled and mutes both the microphone and the handset.
Hold To place a call on hold, press Hold . Your LCD shows the line on hold. The held
Line’s LED flashes green while appearances of the line at other stations flash red.
• To return to the held call, press the flashing held Line button.
• If you do not return to the held call within a specified time, it rings back to yourtelephone. The call remains camped-on to your station.
• If the held party hangs up, the call is released.
• See the Call Pickup section to pick up a call on hold from another extension.
Exclusive Hold
This feature enables you to place a call on hold so that only you can retrieve it.
While on a call, press Hold twice. That line’s LED flashes green whileappearances of the line at other stations are steady red (in use).
The Basics
On a Call

8/6/2019 DP5000 Users Guide
http://slidepdf.com/reader/full/dp5000-users-guide 41/142
Strata CIX DP5000-series Telephone UG 10/10 25
Automatic Hold
This features enables you to move from one Line button to another Line buttonwithout pressing Hold.
Check with your System Administrator to make sure this setting is turned on. If Automatic Hold is not enabled, calls will drop when moving from one line to anotherwithout pressing Hold.
While on a call, press another extension button to receive/originate a new call. Theaccessed line’s LED flashes (in-use). The first call is put on hold and yourextension’s LED flashes.
Consultation Hold
1. While on a call, press Cnf/Trn . The call goes on hold.
2. Dial another line.
3. Transfer the call or return to the held call by pressing its Line button.
The Basics
On a Call

8/6/2019 DP5000 Users Guide
http://slidepdf.com/reader/full/dp5000-users-guide 42/142
26 Strata CIX DP5000-series Telephone UG 10/10
LED Indicator Details
Each line and Programmable Feature Button has a LED next to it which indicates thestatus of the line or feature associated with the button. Line LEDs light red or greenand flash at varying rates to indicate call status (see Table 6).
Note LEDs on the telephone flash at different speeds depending on the functionperformed. Flash rates can be found under “LED Indicator Details” on page 26.
Table 6 LED Indicators
LEDYour Station (Green) Other Station (Red)
Interval Rates
Extension In-Use (access outside line)
2 seconds On, 1/8 second Off — 1/8 second On/Off
steady
Incoming Call (while ringing)
1 second on at 10 pulses/second
—1 second Off one second On/Off
Hold (outside line) If using Pooled Line
Gr p , the hold indication is only at the
station that places the call on hold.
4 pulses/second for 1/8 second
On/Off 1/2 second On/Off
Hold – Consultation (during consultation/transfer to another
station)
10 pulses/second steady
Hold – Exclusive (outside line) 10 pulses/second steady
Hold – Recall (when held call recalls your idle station)
1 second at 2 pulses/second,
1 second at 10 pulses/secondflashes
Hold – Exclusive Recall1 second at 2 pulses/second,
1 second at 10 pulses/second
steady
Internal Call (while station ringing)
Your extension button flashes 10
pulses/second—1 second Off
[SDN] red flashing or
green ringing
Busy Station Transfer (outside call transferred to your busy station
from a designated station or AA)
4 pulses/second, 1/8 second On/
Off
3/4 second on, 1/8
second Off
After disconnecting first call... 10 pulses/second 2 pulses/second
Conference 10 pulses/second steady
F O i 3

8/6/2019 DP5000 Users Guide
http://slidepdf.com/reader/full/dp5000-users-guide 43/142
Strata CIX DP5000-series Telephone UG 10/10 27
Feature Operations 3
This chapter gives you more details about your DP5000-series telephone’s advancedfunctions. An alphabetical list of supported features has been compiled in this chapterfor fast and easy reference.
Account Code Calls
Account Codes (Forced or Voluntary) can be used for a variety of reasons includingbilling, tracking, and line restriction applications. Account Codes are assigned in thesystem as a fixed length (default is six digits) and are recorded by the system, alongwith the details of the calls, which can be printed on a Station Message DetailRecording (SMDR) report.
Verified/Non-Verified Account Codes
Verified Account Codes ensure that the system checks the account code you enteredagainst a list created by the System Administrator. If the code is not in the list, the callwill not go through.
Non-Verified Account Codes must be a uniform length but any digits are accepted.
Account Codes and Lengths are setup and managed by the System Administrator.
Feature Operations
Account Code Calls
8/6/2019 DP5000 Users Guide
http://slidepdf.com/reader/full/dp5000-users-guide 44/142
28 Strata CIX DP5000-series Telephone UG 10/10
Forced Account Codes
Some applications require you to enter an Account Code. These Forced AccountCodes may be verified or non-verified, depending upon the application, but in eithercase, the caller must enter a code before proceeding.
To dial using Forced Account Codes
1. Place a call in the normal method.
If the call requires an Account Code, a burst of tone (Success Tone) is heard after
dialing the telephone number alerting you to enter the Account Code.
2. Enter the account number.
When the number of digits designated for account codes has been entered, thenumber will be checked against the verified list, if chosen, and the call willcontinue as normal. If the number of digits entered for the account code is notreached or the verified code does not match, then re-order tone is heard and the call
is rejected.You can bypass Forced Account Code requirements with three emergency numbers,including 911. See your System Administrator for these numbers:
1) 911 2) _______ 3) _______
Feature Operations
Account Code Calls

8/6/2019 DP5000 Users Guide
http://slidepdf.com/reader/full/dp5000-users-guide 45/142
Strata CIX DP5000-series Telephone UG 10/10 29
Voluntary Account Codes (Verified/Non-Verified)
Voluntary Account Codes are optional. They can be entered during a call and are usedfor tracking selected calls using Station Message Detail Report (SMDR) call detailrecording option.
If the system is set for Verified Account Codes, station users must enter a specificcode when entering the Voluntary Account Code(s) or the code is not validated for theSMDR call report. This does not affect the call.
There are two ways to dial using a Voluntary Account Code:
To dial using the Account Code button
Note This will require a Programmable Feature Button to be programmed on yourtelephone set with the Account Code feature (#46).
1. After accessing a Central Office (CO) line, press the Accoun t Code button.LCD telephones prompt you to “ENTER ACCOUNT CODE NOW.”
2. Enter the account code digits. The LCD prompt disappears upon entry of the firstaccount code digit. After the account code is entered, the time indicator is restoredto the LCD.
3. If your station is set for Verified Account Codes, you hear a confirmation tonewhen the code is valid. If the code is invalid, you hear two short tones.
4. Enter the Account Code. Your conversation is not interrupted.
To enter an Account Code using access codes
Note It’s a good idea to warn the other party that you will be disconnectedmomentarily when you enter the access code. Once the code is entered, you willbe connected again.
1. After accessing a CO line, press Cnf/Trn . Once you press Cnf/Trn , your call isinterrupted; you and the other party cannot hear each other. You will hear feature
dial tone.2. Dial #46 . LCD telephones prompt you to “ENTER ACCOUNT CODE NOW.”
3. Enter the account code digits. The prompt disappears upon entry of the firstaccount code digit. After the account code is entered, the connection is restoredand the LCD shows the time.
Feature Operations
Advisory Messages

8/6/2019 DP5000 Users Guide
http://slidepdf.com/reader/full/dp5000-users-guide 46/142
30 Strata CIX DP5000-series Telephone UG 10/10
Advisory MessagesAdvisory messaging enables you to store an informative message for LCD telephonesthat call your telephone. The messages can be up to 16 characters long. The Stratasystem provides a number of predefined messages, shown in the table below. Messagenumbers 5~9 can be defined by your System Administrator.
To set an advisory message
1. Go off-hook or press your extension button to hear dial tone.
2. Press #411
3. Enter Message number (see table above)
4. Enter additional digits if required.
5. Go on-hook or press Spkr to release the line.
To clear the registered message1. Go off-hook or press your extension button to hear dial tone.
2. Press #412 .
3. Go on-hook or press Spkr to release the line.
Msg No. Characters Displayed Additional Digits
0 OUT TO LUNCH
1 IN A MEETING
2 CALL _____________ Directory Number (e.g.,220)
3 BACK AT __________ Time (e.g., 1030)
4 RETURN ON________ Date (e.g., 10 20)
5
67
8
9
Feature Operations
Alarm Notification Button
Alarm Notification Button

8/6/2019 DP5000 Users Guide
http://slidepdf.com/reader/full/dp5000-users-guide 47/142
Strata CIX DP5000-series Telephone UG 10/10 31
Alarm Notification Button
The Alarm Notification Button must be setup by your System Administrator on yourstation.
When the Alarm Notification button displays
Call your System Administrator.
This button stops displaying when the alarm clears or when you press the flashingbutton. If the alarm has not been cleared the Alarm Notification Button starts flashing
every 10 minutes.
Automatic Busy RedialAfter reaching a busy outside number, you can activate Automatic Busy Redial so thatthe system automatically redials the number at regular intervals. The system repeats
the redial until the destination is no longer busy. Check with your SystemAdministrator to see if this feature is setup for your telephone.
Automatic Busy Redial is not attempted while your station is busy, but continues totime-out. The system inserts a pause (P) on your LCD before redialing the number.
To activate Automatic Busy Redial
1. When you reach a busy number, press Aut o Busy Redial or Cnf/Trn + #441 .
The LED flashes red. You hear confirmation tone.2. Hang up or press Spkr . The system redials, up to five to 20 times, every 30 to 180
seconds (depending on system programming). Your telephone receives ring tonewhen Automatic Busy Redial dials the number and it is available. The extensionand Spkr LEDs flash green.
3. Lift the handset or press Spkr and wait for the party to answer. If you do not pick up the handset or press Spkr within recall timeout (five to 60 seconds) after aconnection is made, you hear a muted ring for another 30 seconds, then the calldisconnects.
To cancel Automatic Busy Redial
Press Auto Busy Redia l or extension + #442 .
Feature Operations
Automatic Callback
Automatic Callback

8/6/2019 DP5000 Users Guide
http://slidepdf.com/reader/full/dp5000-users-guide 48/142
32 Strata CIX DP5000-series Telephone UG 10/10
Automatic Callback
When you reach a busy station, you can set Automatic Callback to have the systemmonitor the busy extension and notify you when it becomes idle.
Automatic Callback can place you in queue for an available outside line, if you reacha line group in which all lines are busy. When a station or line becomes available, thesystem rings your telephone; when you answer the system automatically rings theintended destination. The amount of time the system will wait for an idle destination isset in system programming. Automatic Callback is also known as “CO Line
Queuing.”
To set Automatic Callback
1. If you hear busy tone after dialing an outside line access code or a station number,press Auto Cal lback or 4 . Busy tone stops, followed by success tone, then busytone resumes.
2. Hang up. You can make other calls while waiting.
3. When the called station or outside line becomes idle, your telephone rings and youwill see a fast flashing LED.
• If you called a busy station, the extension LED flashes green (incoming call)and the called number displays.
• If you called a busy outside line, the extension LED flashes green (incomingcall rate). The seized line’s number displays.
4. Answer within about three rings (can be programmed to ring up to three minutes)to prevent the callback from being cancelled. After you answer, you hear successtone, and the LED flashes green (in-use).
If you hear a busy tone after answering a callback, the called party is already onanother call or the line has already been seized or has received an incoming call.Your request is not cancelled. You will be called again the next time a line becomesidle.
If you were attempting to make an outside call, the telephone number isautomatically dialed, including the account code or override codes that were used.
To cancel ACB
Press Auto Cal lback or extension button + #431 .
Feature Operations
Background Music
Background Music

8/6/2019 DP5000 Users Guide
http://slidepdf.com/reader/full/dp5000-users-guide 49/142
Strata CIX DP5000-series Telephone UG 10/10 33
Background Music
You can set background music over your telephone speaker or over external speakers.At least one music source must be connected to your system. Up to 16 different musicsources can be applied to the Strata CIX/CTX system: the first source is Quiet Tone,all others can be music or recorded information.
To enable background music on your telephone speaker
Press BGM . LED turns on.
Or press an extension button + #490 + n + # , where n is the music source 1~15.
To cancel background music on your telephone speaker
Press BGM . LED turns off.
Or press an extension button + #491 .
To change the BGM source (1~15) assigned to the BGM button
Press an extension button + #9876 + BGM + n + BGM , where n is the musicsource 1~15.
To enable background music over your external paging speakers
Press an extension button + #492 + n + # , where n is the music source 1~15.
To cancel background music over your external paging speakers
Press an extension button + #493 + Spkr .
Feature Operations
Call Forward
Call Forward

8/6/2019 DP5000 Users Guide
http://slidepdf.com/reader/full/dp5000-users-guide 50/142
34 Strata CIX DP5000-series Telephone UG 10/10
Call Forward
There are two types of Call Forwarding that you can set. One is System Call Forward(set in System Programming) which automatically directs calls to a predefinedlocation, such as Voice Mail. See your System Administrator to determine or changeyour System Call Forward destination.
The other type is Station Call Forwarding. You can use Station Call Forwarding toreplace your System Call Forward destination with a custom Call Forward settingmade from your station.
System
System Call Forward directs calls to a destination preset by an Administrator for eachtelephone, commonly set to voice mail.
To turn on System Call Forward for your telephone, press #620 . Confirmationtone (three short tones) and display shows “DATA PROGRAMMED.” This
indicates the data is set.
To turn off System Call Forward for your telephone, press #621 . Confirmationtone (three short tones) and display shows “DATA PROGRAMMED.” Thisindicates the data is set.
Station
Station Call Forward enables you to assign Call Forward destinations for eachextension on your telephone that will override the telephone’s System Call Forwardsettings. Each extension can be independently setup to Station Call Forward to aunique destination. You can set a Programmable Feature Button to perform any CallForward function - see “Programming Feature Buttons” on page 86 for more details.Call Forward must be set prior to receiving the call.
The following calls to your station can be forwarded:
• Internal calls
• Auto Attendant calls
• Outside lines that ring only your station
• Transferred internal or incoming line calls
Feature Operations
Call Forward
Station Call Forward Categories

8/6/2019 DP5000 Users Guide
http://slidepdf.com/reader/full/dp5000-users-guide 51/142
Strata CIX DP5000-series Telephone UG 10/10 35
Station Call Forward Categories
You can set Call Forward for the following categories of calls. Within thesecategories, you can use five different types of Call Forward Settings (as detailed in thenext section).
• Call Forward Any Call – Forwards any call, whether an internal call or incomingline call.
• Call Forward - Incoming Line – Forward incoming line calls only.
• Call Forward Any Call - Set for Another Station – Enables you set forwarding
of all calls for another telephone within your telephone system.• Call Forward - Incoming Line Set for Another Station– Enables you to set
forwarding of incoming line calls for another telephone within your telephonesystem.
Notes
• Call Forward Any Call and Call Forward-Incoming line can be set simultaneouslyon a telephone. This allows incoming lines calls to be forwarded to a differentdestination than all of the other types of calls.
• Call Forward destinations can be set to internal destinations or an outsidetelephone number.
• You can change your forwarding destination from outside the system using theDISA feature. See your System Administrator for DISA telephone numbers andsecurity code access.
Call Forward Settings• Call Forward All Calls – Forwards all calls immediately.
• Call Forward Busy/Do Not Disturb – Forwards calls immediately when yourextension is busy or in Do Not Disturb (DND) mode.
In Tone-first systems with multiple lines, Call Forward Busy forwards calls onlywhen all line appearances are in use. In Voice-first systems, Call Forward Busy
forwards all calls any time your telephone is in use.• Call Forward - No Answer – Forwards unanswered calls after a preset number of
rings. The preset number of rings can be set on a per user basis.
• Call Forward Busy/Do Not Disturb/No Answer – Forwards all calls when you arebusy, in DND mode or when you don't answer a call within a preset number of rings.
• Call Forward Cancel – Cancels the set Call Forward feature. Notice that eachcategory of Call Forward has a different code for canceling.
Feature Operations
Call Forward
Station Call Forward Procedures

8/6/2019 DP5000 Users Guide
http://slidepdf.com/reader/full/dp5000-users-guide 52/142
36 Strata CIX DP5000-series Telephone UG 10/10
Station Call Forward Procedures
Table 15 on Page 107 contains Call Forward Button sequences. You can do a CallForward function by entering the button sequence as described or by programming aProgrammable Feature Button to perform the sequence. See “Programming FeatureButtons” on page 86 to program a Programmable Feature Button.
To use the Call Forward button sequence
Follow the instructions in Table 17 on Page 112, shown under the “Button
Sequence” heading. Some features require additional input, such as:• Dest. Ext. or Telephone No. – Call Forward destination numbers can be
internal extension numbers or outside telephone numbers. If the destination isan outside number, enter the access code used for dialing out (such as 9 ) + thetelephone number + #. The CIX accepts destination numbers of up to 32 digits.
• Timer – Enter the number of seconds (08~60) your telephone should ringbefore forwarding the call. (This is the Call Forward-No Answer timer.)
• Call Forward Pass Code – A four-digit Call Forward pass code can be setupby your System Administrator and will allow one station to activate the callforward setting for another station. Users must enter the Call Forward pass codefor the station to be forwarded.
Note In Table 15 on Page 107, (tone) refers to three short tones used as aconfirmation tone and will play at that point in the sequence to confirm your
input was accepted.
To program call forward button destination
1. On the phone that has the Call Forward button, press the PDN button.
2. Dial #9876 to enter programming mode.
3. Press the Call Forward button.
4. Enter in the destination and end with a #.5. Press the Call Forward button and you will hear two quick beeps. If you hear single
beep go back to step 3.
6. Go off hook and back on hook.
Feature Operations
Call History / Caller ID
Call Forward Examples

8/6/2019 DP5000 Users Guide
http://slidepdf.com/reader/full/dp5000-users-guide 53/142
Strata CIX DP5000-series Telephone UG 10/10 37
Call Forward Examples
To set your telephone to Call Forward Busy-No Answer to an internal extensionnumber
Press your extension button + #6041 + 3000# + 10
#6041 = Call Forward Access Code sequence 3000# = Internal Extension Number 10 = Ring time in seconds before Call Forwards
To set another telephone to Call Forward Busy-No Answer to an outsidedestination number after a set time
Press your extension button + #6042 + 1234 + 1111 + # + 9 +1 949
5873000 + # + 08
#6042 = Call Forward Busy No Answer Access Code sequence 1234 = Other telephone’s extension number 1111 = Call Forward Passcode for other telephone + # 9 = Outside Line Access Code 1 949 5553000 = 1 + Area Code + Telephone Number # = Must press after entering an outside destination number 08 = Ring time in seconds before Call Forwards
Call History / Caller IDIncoming calls to your extension with Caller ID can be recorded into a rolling list thatis saved on your telephone. The call information is placed in the list along with thenumber, name (if provided), time and date of the call, and status of the call (answered,abandoned, or redirected). You can access this list from an LCD telephone with aflexible Cal ler ID or His t button.
To view saved Caller ID information
1. When your station is idle, press the Cal ler ID or His t button.
The Caller ID LED lights green and the latest record displays.
2. Use the soft keys (Next, Prev, Call or Exit) to view and place calls.
Note Caller ID is displayed when a call is first answered and will be displayed for thefirst 15 seconds of the telephone call.
Feature Operations
Call Park Orbits
Call Park Orbits

8/6/2019 DP5000 Users Guide
http://slidepdf.com/reader/full/dp5000-users-guide 54/142
38 Strata CIX DP5000-series Telephone UG 10/10
Call Park OrbitsThe Call Park feature enables you to hold a call temporarily in a location other thanyour telephone. These areas are called orbits. You or another telephone user canretrieve a parked call from its orbit by specifying the orbit number. You can specifyone of 20 General Park Orbits (7000~7019) or a valid extension number within thesystem.
Once you have parked a call in an orbit, you can:
• Hang up and retrieve the parked call at a later time• Originate another call
• Access a voice paging device to announce the parked call for pickup from anotherstation
If you park a call and it is not retrieved, it will recall to the parking station and one of the following occurs:
• If your station is idle when the system Call Park recall timer expires, the parkedcall automatically recalls to your station.
• If your station is busy, the parked call camps on.
If you have an LCD telephone, you can let the system automatically select anavailable orbit number which displays on your LCD.
To park a call
1. While on a call, press Park in Orbi t or press Cnf/Trn + #33 . The LED flashesgreen (consultation-hold). If you were on an extension during the call, and youhave line button on your telephone, the line LED will flash until the call is pickedup (depending on programming).
2. Specify the Park Orbit using one of the following:
• Press * and the system automatically selects a General Park Orbit between7000~7019 . The chosen orbit appears on the LCD.
• Enter a valid extension.
• Press # and the system automatically selects your extension as the orbit.
3. Hang up. The caller’s extension or line number and the orbit number are shown. If the parked call is not retrieved within a specified time, the call rings back to yourtelephone. When a parked call recalls your telephone, the LCD shows the line orextension that is recalling and the orbit number.
Feature Operations
Call Pickup
To retrieve a parked call

8/6/2019 DP5000 Users Guide
http://slidepdf.com/reader/full/dp5000-users-guide 55/142
Strata CIX DP5000-series Telephone UG 10/10 39
1. Press Park in Orbi t or press your extension button + #32 .
2. Enter the Orbit Number where the call is parked or # for the extension from whichyou are calling. You cannot use * to retrieve a parked call. The extension LEDflashes at the in-use rate when the call is retrieved.
Call Pickup
You can pick up a call that is ringing another station’s extension, a call placed on holdat another station and other types of calls. When you pick up an internal call, thecalling station and the called station displays on your LCD.
Group Pickup
Two or more stations can be assigned to a pickup group, there are a total of 32 pickupgroups available. You can easily pick up ringing calls on other extensions. Ringing
calls include: new, transferred, internal, or external calls. You will have the ability topick up calls for other extensions in your group and other groups as well. See yourSystem Administrator for group assignments.
Ringing, Page or Held Call Pickup
This feature picks up ringing or held calls, including Group Page and All Call Page
calls. If these types of calls occur at the same time, the pickup priority is station-to-station and then Page calls in the order of occurrence. In some systems, this featurecan be applied to pick up All Call Page exclusively.
Feature Operations
Call Pickup
To perform Call Pickup

8/6/2019 DP5000 Users Guide
http://slidepdf.com/reader/full/dp5000-users-guide 56/142
40 Strata CIX DP5000-series Telephone UG 10/10
Press the buttons shown in the table below for the desired Pickup feature.
Notes
• The Primary extension number is the directory number by which the telephone set
is defined. Other, non-primary extension numbers may also appear on thetelephone. By convention, the Primary extension number is assigned to the firstbutton (on the bottom left-hand side) of a multi-button telephone.
• If more than one call is on hold, the call on the telephone’s lowest button number ispicked up.
• Ringing calls are picked up over held calls as a priority.
Table 7 Call Pickup Feature Codes
Ringing or
Page CallsTo Pick Up:
Press Ext. Button, then dial the
access sequence below:
Directed DNA call ringing or held at the Extension Number. #5#6 + Ext. No.
A call Ringing, held or parked at the Ext. No. #5#29 + Ext. No.
Group A call ringing a member of your pickup group. #5#34Directed Ext. A call ringing on any line of this Primary Ext. No. #5#5 + Primary Ext. No.
Directed Group A call ringing an extension in this Pickup Group. #5#32 + Group No.
Ext. No.A call ringing this Ext. No. only. Other lines ringing
on the same phone are unaffected.#5#22 + Ext. No.
Outside Calls Any incoming outside line call. #5#9
All Call, Group,
and/or External
Page
An All Call Page, Group Page and/or External Pageby Page Zone or by a specific Ext. No.
#5#36 + Page Zone No. (01~08)
#5#5 + Ext. No. of another phone
being paged.
Held Calls To Pick Up:Press Ext. Button, then dial the
access sequence below:
Local Retrieve A call held on this telephone. #5#71
Remote Retrieve A call held on another Primary Ext. No. #5#72 + Primary Ext. No.
Outside Line
Retrieve
A call held on this outside line only, regardless of thephone that placed the call on hold. Must enter a three
digit outside line no. (e.g., 007).
#5#73 + Outside Line No.
(001~128)
Directed Ext.
Retrieve
A call held on for this Ext. No., regardless of where
this Ext. No. appears.#5#74 + Ext. No.
Feature Operations
Call Transfer
Call Transfer
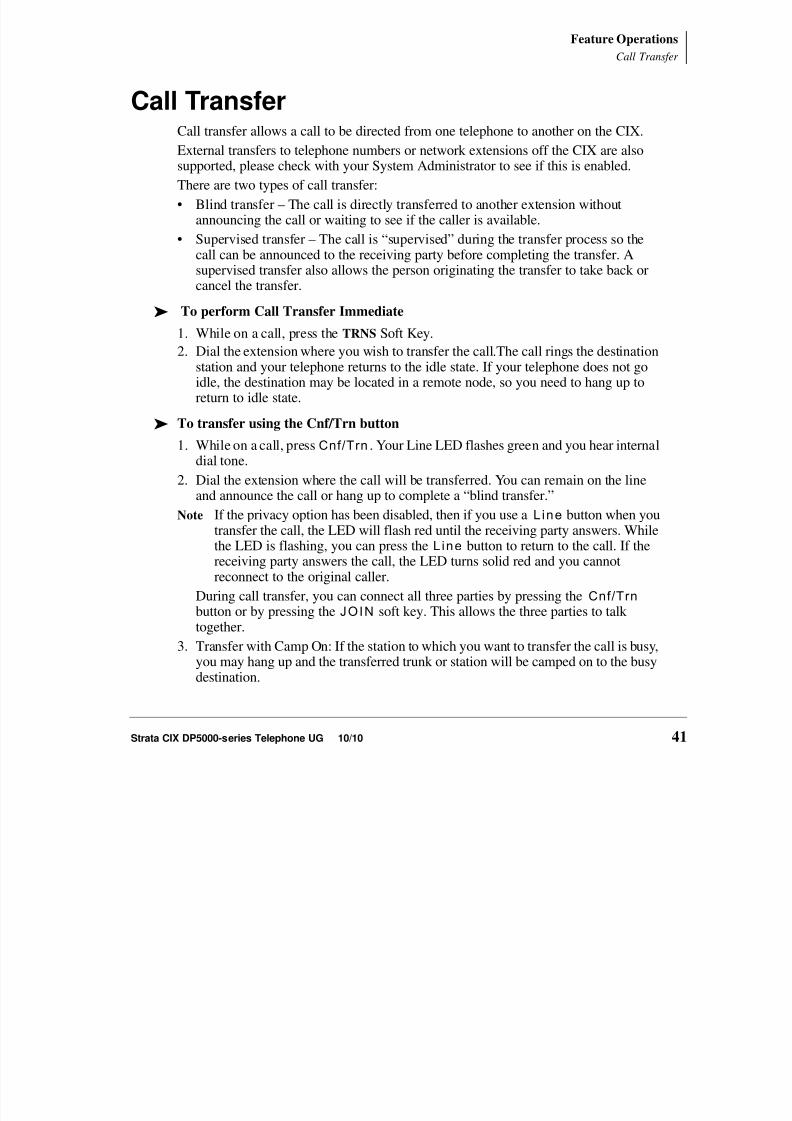
8/6/2019 DP5000 Users Guide
http://slidepdf.com/reader/full/dp5000-users-guide 57/142
Strata CIX DP5000-series Telephone UG 10/10 41
Call TransferCall transfer allows a call to be directed from one telephone to another on the CIX.External transfers to telephone numbers or network extensions off the CIX are alsosupported, please check with your System Administrator to see if this is enabled.
There are two types of call transfer:
• Blind transfer – The call is directly transferred to another extension withoutannouncing the call or waiting to see if the caller is available.
• Supervised transfer – The call is “supervised” during the transfer process so thecall can be announced to the receiving party before completing the transfer. Asupervised transfer also allows the person originating the transfer to take back orcancel the transfer.
To perform Call Transfer Immediate
1. While on a call, press the TRNS Soft Key.
2. Dial the extension where you wish to transfer the call.The call rings the destinationstation and your telephone returns to the idle state. If your telephone does not goidle, the destination may be located in a remote node, so you need to hang up toreturn to idle state.
To transfer using the Cnf/Trn button
1. While on a call, press Cnf/Trn . Your Line LED flashes green and you hear internaldial tone.
2. Dial the extension where the call will be transferred. You can remain on the lineand announce the call or hang up to complete a “blind transfer.”
Note If the privacy option has been disabled, then if you use a Line button when youtransfer the call, the LED will flash red until the receiving party answers. Whilethe LED is flashing, you can press the Line button to return to the call. If thereceiving party answers the call, the LED turns solid red and you cannotreconnect to the original caller.
During call transfer, you can connect all three parties by pressing the Cnf/Trn button or by pressing the JOIN soft key. This allows the three parties to talk together.
3. Transfer with Camp On: If the station to which you want to transfer the call is busy,you may hang up and the transferred trunk or station will be camped on to the busydestination.
Feature Operations
Call Waiting
To transfer a call directly to Voice Mail (VM)

8/6/2019 DP5000 Users Guide
http://slidepdf.com/reader/full/dp5000-users-guide 58/142
42 Strata CIX DP5000-series Telephone UG 10/10
1. While on a call, press Cnf/Trn .
2. Enter #407 .
3. Enter the VM mailbox number (usually the same as the extension number) + # .
4. Hang up and the caller is connected to the VM mailbox. This feature does a blindtransfer to VM.
To transfer a call directly to VM with a DSS button
1. While on a call, press Cnf/Trn .2. Press the DSS button programmed to the voice mail number.
3. Hang up and the caller is connected to the VM mailbox.
Call WaitingYou can answer a call that is transferred to your station, even when your station is
busy. When another call is camped onto your station, you hear two Camp-on tonebeeps and the extension or Line LED flashes red (on-hold).
If a call is sent to your station when busy, and your station does not have an extensionbutton available to receive the call, two camp-on tone beeps are sent to yourtelephone. You must disconnect or transfer the existing call to answer the waiting call.
To answer a waiting call by placing the current call on hold
Press Hold . The existing call is placed on hold. The camped-on line rings yourstation (the Line LED flashes green - incoming call)....or if your telephone has theAuto Hold feature, just press the flashing extension button.
You are connected to the transferred call. The extension or Line LED flashes green(in-use).
Note See your System Administrator to find out if you have Auto Hold.
To answer a waiting call by disconnecting or transferring the current call Hang up or transfer the existing call; the camped-on call rings your station. The
camped-on line rings your telephone and the Line LED flashes green (incoming call).
...or press the flashing extension or Line . The existing call is placed on hold. Thecamped-on line rings your station (the Line LED flashes green - incoming call).This disconnects the current call and connects you to the transferred call. Theextension or Line LED flashes green (in-use).
Feature Operations
Conference Calls
Conference Calls

8/6/2019 DP5000 Users Guide
http://slidepdf.com/reader/full/dp5000-users-guide 59/142
Strata CIX DP5000-series Telephone UG 10/10 43
You can conference together up to eight parties (including yourself) - with up to sixparties being external network lines. The actual number of conference parties withacceptable volume levels depends on the local and far end telephone line conditions.
The person who initiates the conference call is the Master. If, after the conference isestablished, the Master exits the conference, the first station to have been added to theconference becomes the Master.
To conference calls1. While on a call, press Cnf/Trn . You hear dial tone and your Line LED flashes green.
2. Call another station or outside line.
3. When the called party answers, press Cnf/Trn . If you receive a busy tone or noanswer, press Cnf/Trn again to return to the original connection.
All parties are conferenced. If the second call was placed on a Line that appears onyour telephone, the LED also flashes green.
4. Repeat steps 1~3 until all parties are added or the maximum number of parties isreached.
Note When the Master of the conference hangs up, the control is automaticallytransferred to the first internal station added to the conference call. If no otherinternal stations are included in the conference call, the call will bedisconnected.
To transfer conference control1. Complete Steps 1 and 2 above to add the line to which you wish to transfer
conference control. See previous Note.
2. Announce the call and hang up to transfer it. This station now becomes theconference Master with the ability to add or delete parties.
To hold a conference call
If you are the Conference Master, press the Hold button once (or twice forExecutive Hold) to place the conference call on hold. The other parties cancontinue with the conference. Music-on-hold is suppressed and your extensionLED flashes green. You can rejoin the conference at any time by pressing yourextension button. When you return, you retain Master status.
Feature Operations
Conference Calls
Adding Voice Mail to a Conference

8/6/2019 DP5000 Users Guide
http://slidepdf.com/reader/full/dp5000-users-guide 60/142
44 Strata CIX DP5000-series Telephone UG 10/10
The Conference Master can add voice mail to a conference. This feature enablesparticipants in a conference to listen to or leave a voice mail message during aconference call.
To add Voice Mail to a conference call (performed by Conference Master)
1. Press Cnf/Trn to place the current call on Consultation Hold.
2. Dial the voice mail (VM) extension number, then enter the VM mailbox and
security code. This adds the voice mailbox to the conference.3. Press Cnf/Trn to reconnect to the original party. (You can continue to add
conference members by pressing Cnf/Trn and dialing another extension.)
Now, all parties in the conference can listen to or record a message to this voicemailbox. Only the Master can control the VM with touchtones or Soft Keys.
Feature Operations
Conference Calls
Supervising a Tandem Call
8/6/2019 DP5000 Users Guide
http://slidepdf.com/reader/full/dp5000-users-guide 61/142
Strata CIX DP5000-series Telephone UG 10/10 45
1. While talking on an outside call, press Cnf/Trn . You hear dial tone. The extensionLED flashes (conference rate).
2. Dial an outside telephone number.
3. After the party answers, press Cnf/Trn . The extension LED flashes (in-use rate)and all parties are conferenced.
If you receive a busy tone or if the station does not answer, press the flashingextension button to return to the original connection.
4. Press Cnf/Trn and hang up. The extension LED flashes (exclusive-hold rate) andthe two lines are connected. The LED turns Off when the parties hang-up.
5. To supervise a tandem call, press the extension button. If the parties have finished,hang up...or if the parties are still talking, press Cnf/Trn and hang-up. Both LineLEDs turn Off and the connection is released.
If your telephone company provides automatic disconnect supervision, the
connection will release automatically when the parties hang up. If not, the linesmust be supervised to be disconnected.
Conference Add/Split/Join/Drop
If you initiate a conference with two or more parties, you can continue to add outsidecallers to conference; or you and another member of the conference can leave (Split)
the conference for a private conversation. During this time, other conference membersremain connected.
You can then Join both of you back into the conference, or you can Drop (disconnect)the member you are connected to. This feature is performed with Soft Keys if youhave a LCD phone or with a Split button programmed on one of your ProgrammableFeature Buttons.
This feature also works for remote stations which are connected through Strata NetQSIG.
Important! You must be a conference master to perform the Add, Split and Drop features. The conference master is the person that initiates theconference call. If that person drops from the conference, the first
person added to the conference becomes the conference master.
Feature Operations
Conference Calls
To add an Incoming call to the Conference
1 Place the first caller/Conference on hold

8/6/2019 DP5000 Users Guide
http://slidepdf.com/reader/full/dp5000-users-guide 62/142
46 Strata CIX DP5000-series Telephone UG 10/10
1. Place the first caller/Conference on hold.
2. Answer the incoming ringing call.
3. While speaking to the incoming caller, press Cnf/Trn button.
4. Press the blinking DN where the first caller/Conference was placed on hold.
5. Press Cnf/Trn twice to join all parties together.
To Split from a conference
1. While in a conference call on a DP5000-series phone, press the SPLT (Split) softkey or Split button.
2. Press the NEXT soft key until you see the extension number for the party that youwant to Split out of the conference.
3. You can return both yourself and the other Split party back into the conference bypressing JOIN.
RTRN terminates a feature operation and returns to the previously displayed state.
To Drop the Split party from a conference
Press the DROP Soft Key. The party that you are talking to privately (the partywhich you have Split from the conference) will be disconnected (Dropped) andyou will rejoin the conference.
If you are in a three-way conference and Split with one of the parties, the
remaining party will essentially be “on hold” until you return to the conference.
Feature Operations
Direct Inward System Access (DISA)
Direct Inward System Access (DISA)

8/6/2019 DP5000 Users Guide
http://slidepdf.com/reader/full/dp5000-users-guide 63/142
Strata CIX DP5000-series Telephone UG 10/10 47
Outside callers with touch tone telephones can call in to lines programmed for DirectInward System Access (DISA) and dial an extension or outgoing line without goingthrough an attendant or operator. Check with your System Administrator to see if thisfeatures is available for your telephone.
1. From outside the system, dial the public telephone number assigned to DISA. Thecall will be answered and you will hear system dial tone.
If you do not dial within 10 seconds, the line disconnects.
2. When you hear dial tone, dial an extension or an outside line.
3. If you dial an outside destination, you may need to enter a security code providedto you by the System Administrator. When you hear the tone, enter the securitycode. If accepted, the call will proceed.
4. If you receive busy tone and you want to dial another number while the station isstill ringing, press * and repeat Step 2.
Direct Station Selection Buttons (Hotline)This optional feature enables you to use a DSS button to connect directly to anotherstation’s line extension. The DSS LED shows the status (idle/busy) of the station and/ or the station’s primary extension. For example, a station’s DSS button LED showsbusy (light steady red) when the station is:
• busy on a call on any button
• idle but all appearances of the station’s extension are in use by other stations.
When the station is in DND, the LED flashes red.
To connect directly to another station’s extension
1. When connected to a line or another station, pressDSS
.The original party is put on-hold. You can call a station even if the DSS LEDshows busy (steady red).
2. Announce the call...or transfer the call by hanging up or pressing Release.
Note You can transfer the call to an idle or busy station.
Feature Operations
Do Not Disturb
Do Not Disturb

8/6/2019 DP5000 Users Guide
http://slidepdf.com/reader/full/dp5000-users-guide 64/142
48 Strata CIX DP5000-series Telephone UG 10/10
If your station is in Do Not Disturb (DND) mode, internal, external and transferredcalls do not ring your station and Off-hook Call Announce calls are denied. You cancontinue to make calls while in the DND mode. When originating a call in DNDmode, you will hear a short burst of interrupted dial tone followed by continuous dialtone. You can start dialing at any time during either tone.
If you put your Primary extension into DND mode, all calls to that telephone arerejected. If your extension is set for Call Forward-Busy or Call Forward-Busy/No
Answer, the call is redirected to the forwarding destination immediately.If you put an extension other than the Primary extension into DND, only calls to thatextension on your telephone will be blocked. Appearances of that extension on othertelephones continue to ring.
To activate DND on your Primary extension
Press Do Not D is turb or #6091 (hear Success Tone). The LED lights steady red
and DND mode is activated for the entire station.
To activate DND on a non-Primary extension
Press the desired extension appearance and Do Not D is turb or #6091 (hearSuccess Tone). The LED lights steady red and DND mode is activated for thatextension on your telephone.
To deactivate DND Press Do Not D is turb or #6092 (hear Success Tone). The LED lights goes out
and DND mode is de-activated.
Feature Operations
Door Lock(s)
Setting DND for Another Extension
To activate DND for another extension

8/6/2019 DP5000 Users Guide
http://slidepdf.com/reader/full/dp5000-users-guide 65/142
Strata CIX DP5000-series Telephone UG 10/10 49
To activate DND for another extension
Enter #6191 (hear Entry Tone) + the Primary extension of the remote extension +the pass code + # (hear Success Tone). This sets DND as if activated by thePrimary extension on the target telephone.
To deactivate DND for another extension
Enter #6192 (hear Entry Tone) + the Primary extension of the remote extension +the pass code + # (hear Success Tone). This removes DND from the target
telephone.
To change your DND Pass Code
Enter #670 (hear Entry Tone) + ext. no. (hear Entry Tone) + old pass code + #
(hear Entry Tone) + new pass code + # (hear Success Tone).
If you activate DND while a call is ringing, the ringing stops. The LED continuesto flash on your telephone and ring on other appearances.
Door Lock(s)If you have locked doors in your facility that can be controlled through the Strata CIXsystem, you may be able to unlock these doors by using your telephone’s Unlock Doorbutton(s). The Unlock Door button(s) is programmed to unlock a specific door.Check with your System Administrator to find out the locations of your system’s doorphones and record them below.
To unlock a door
Press the specific Unlock Door button or #12 + the Door Lock Number (seeabove table). The door unlocks for three~30 seconds (set in system programming).The Unlock Door LED is lit while the door is unlocked.
Door Lock No. Location Door Lock No. Location
0 6
1 7
2 8
3 9
4 10
5
Feature Operations
Door Phone(s)
Door Phone(s)Door phones can be used to call phones selected in system programming. When a door

8/6/2019 DP5000 Users Guide
http://slidepdf.com/reader/full/dp5000-users-guide 66/142
50 Strata CIX DP5000-series Telephone UG 10/10
Door phones can be used to call phones selected in system programming. When a doorphone calls, you hear a distinctive ringing tone, one or five times (set in systemprogramming). You can also call a door phone and monitor the surrounding area.
LCD telephones display the door phone name ID when calls are made to or from doorphones.
The number of possible door phones varies by Strata CIX system, 01~24 maximumfor larger systems. Check with your System Administrator to find out the names and
locations of your system’s door phones and record them below.
To answer a door phone call
When you hear a door phone call ringing, lift the handset or press the ringingbutton. A door phone call sounds like chimes (high/low). The extension LED
flashes green (in-use) and you are connected to the door phone....or to pick up door phone calls ringing someone else’s telephone, press yourextension + #5#5 + directory number of the ringing phone.
Door Phone Name/Location Door Phone Name/Location
Feature Operations
Emergency Call
To call/monitor a door phone
1. With the handset off-hook, press an extension button. You hear dial tone and the
8/6/2019 DP5000 Users Guide
http://slidepdf.com/reader/full/dp5000-users-guide 67/142
Strata CIX DP5000-series Telephone UG 10/10 51
LED flashes green (in-use).
2. Press #15 (hear three tone bursts), then enter the door phone number (01~24,depending on system size). A two-way talk-path exists between your telephoneand the door phone. The door phone will not ring. You can audibly monitor thearea around the door phone.
To call from a door phone
1. Press the door phone button and then release it. You hear a distinctive ringingtone–one or five times (set in system programming).
2. When answered, speak at a normal voice level in the direction of the door phone.
Emergency Call To make an emergency call, dial 911 or Acc ess Code + 911 . This depends on
off-hook preference set up for your telephone.
Note Check with your System Administrator for the Access Code because this codemay be different from the one used to get an outside line.
Emergency Monitoring Station
Your system may have one digital telephone assigned as an emergency monitoringstation. If your telephone has this assignment, your line LED will flash green whensomeone makes a 911 call. When you answer the call, you can listen in andparticipate in the conversation. See your System Administrator for more information
on this feature.
Feature Operations
Emergency Ringdown
Emergency Ringdown

8/6/2019 DP5000 Users Guide
http://slidepdf.com/reader/full/dp5000-users-guide 68/142
52 Strata CIX DP5000-series Telephone UG 10/10
If a station remains off-hook for a programmable period, it can be automaticallytreated as an Emergency Call and directed to an emergency destination. The stationmay have partially dialed a number or have dialed no digits at all. Each station isprogrammed with its specific emergency ringdown destination.
A station number or a group pilot number can be specified as an emergency ringdowndestination. In a private network, the station or pilot number must be in the samenetwork node. Remote emergency destination and door phones are not permitted.
Language CodesThis feature enables you to change the language sent from the Attendant Console orfrom a PC. See your System Administrator to find out if your telephone isprogrammed with the ability to change languages.
To change the Language Display Enter the Change Language access code #495 + the Language Code (see below).
1 : English date format – MM/DD (/YY)
2 : British English – DD/MM (/YY)
3 : French – DD/MM (/YY)
4 : Spanish – DD/MM (/YY)
Feature Operations
Message Waiting
Message Waiting
M W i i i h h M b hi h ill fl h d h h

8/6/2019 DP5000 Users Guide
http://slidepdf.com/reader/full/dp5000-users-guide 69/142
Strata CIX DP5000-series Telephone UG 10/10 53
Message Waiting is shown on the Msg button which will flash red when there aremessages waiting. The waiting message indicators can come from the voicemailsystem or they can be internal messages sent from other extensions.
The messages from other extensions are notifications that someone has called yourextension and wants you to call them back.
An extension can receive up to three Message Waiting indications, one additionalindicator will always be reserved for the voicemail system.
Note If there are Phantom DN's (PhDN's) programmed on an extension, each PhDNcan receive up to three message waiting indicators.
Responding to a Lit Msg LED
1. Press Red flashing Msg button. The telephone will dial the message source (thevoicemail or another extension). See Note below.
2. When call is finished, hang up and the message waiting indicator will be cleared.
3. If the Msg LED continues to flash, there are additional messages to check, repeatsteps 1-2.Voicemail devices have a short delay in turning off the message waiting indicators.
To manually turn off the Msg LED, press your extension button, then enter #409.Repeat this sequence until all the messages are cleared.
Notes
• If there is a + on the LCD, press the Nex t Soft Key to scroll through the messagessent to that extension.
• To see who has sent you messages, or to retrieve the messages, press the flashingMsg button.
Feature Operations
Message Waiting
Turning On/Off MW LED on Another Extension
When an extension is called, the calling party can choose to send a message to the
ll d t Thi i tifi ti t th t ll h b i d d th lli

8/6/2019 DP5000 Users Guide
http://slidepdf.com/reader/full/dp5000-users-guide 70/142
54 Strata CIX DP5000-series Telephone UG 10/10
called party. This is a notification to say that a call has been missed and the callingparty would like to be called back.
By sending a message to another extension you turn on their Msg LED.
1. Dial an internal extension. You may hear ringing or busy tone.
2. Press Msg or 7 . The Msg LED flashes red on the called telephone. At yourtelephone, the Msg LED lights steady red and the LCD shows the station number
where the Message Waiting light was sent to.
If you decide to cancel the Message Waiting light at this point, press Msg or 7
again while ring-over tone is playing and the light will be cancelled, or if you wantto cancel the message later, call the telephone you set the message on and press 7 twice.
3. Press Spkr . Your Msg LED turns Off. The Msg LED on the called telephone
flashes until the called party presses the flashing Msg button which calls you back.4. Turn off the Message LED.
The two ways to turn Off a Message LED are
Method 1
1. Press #64 plus the extension number that has the message light set.
2. Press Spkr or hang up to end the call.
Method 2
1. Dial the extension that has the Message LED on.
2. Press 77
3. Press Spkr or hang up to release your telephone.
Feature Operations
Microphone Cut-Off
Microphone Cut-Off
This feature prevents callers from monitoring the sounds near your telephone when

8/6/2019 DP5000 Users Guide
http://slidepdf.com/reader/full/dp5000-users-guide 71/142
Strata CIX DP5000-series Telephone UG 10/10 55
This feature prevents callers from monitoring the sounds near your telephone whenyour telephone receives a Handsfree Call or cuts-off the telephone microphone whileon a speakerphone call. When the feature is ON, the Micr ophn Cut -o f f LED lightssteady red and the Mic and Spkr LEDs do not light when your telephone is called.When the feature is OFF, the Microphn Cut -o f f LED is not lit and your microphoneworks. The Microphn Cut-of f functions on Handsfree Answerback and speakerOCA calls for privacy.
To turn the microphone ON/OFF
Press Microphn Cut-of f to toggle between ON/OFF.
Feature Operations
Off-hook Call Announce
Off-hook Call Announce
Off hook Call Announce (OCA) enables you to complete a call to a busy digitalt l h Y t l h t b d t ith t ti ll t

8/6/2019 DP5000 Users Guide
http://slidepdf.com/reader/full/dp5000-users-guide 72/142
56 Strata CIX DP5000-series Telephone UG 10/10
Off-hook Call Announce (OCA) enables you to complete a call to a busy digitaltelephone. Your telephone must be programmed to either announce automatically or toannounce after you press a button on your dial pad. The destination telephone must beprogrammed to accept an OCA. The announcement may be delivered over the handsetor the speaker.
Handset OCA can operate on any digital telephone. Speaker OCA requires theaddition of a special circuit board inside the speakerphone.
To make an OCA call Manual – Dial an extension. When you hear busy tone, press 5 and, after one long
tone, you can talk through the speaker of the destination telephone. The person youare calling has answering options described below.
Automatic – If your telephone and the extension you are calling have beenprogrammed for Automatic OCA, you can talk through the speaker of thedestination telephone without hearing the busy tone and without dialing 5 .
To answer a Handset OCA call
While you have a call in progress, you hear one tone in your handset to indicate that asecond station is calling.
Press Msg button to toggle between the new or original caller. Press and releasethe Msg button to talk to the new caller, then press and release the Msg buttonagain to return to the original caller.
The PDN flashing rapidly means talking to OCA caller; PDN flashing at a normal,steady pace means talking to original caller. In both cases, neither caller can hearthe other. Your LCD indicates which station or CO line you are connected to.
To answer a Speaker OCA call
1. While you have a handset call in progress and you hear one tone, this indicates thata second station is calling. The second caller connects to the speaker in yourtelephone. The Spkr LED flashes and the Mic LED lights. You will be speaking to
the first caller through your handset and the second caller through the microphone.2. To turn off your microphone speaker to the second party, you can press Mic or
Micr ophn Cut -o f f ; the Mic LED turns Off. You will no longer be talking to thesecond caller, although he/she can still speak through your speaker.
3. Press Mic or Micr ophn Cut -o f f again to reconnect to the second caller. You cantoggle as often as you choose. If you do not want the first caller to hear yourconversation with the second caller, cover the mouthpiece of your handset.
Feature Operations
Override Calls
Override Calls
The available override features are:

8/6/2019 DP5000 Users Guide
http://slidepdf.com/reader/full/dp5000-users-guide 73/142
Strata CIX DP5000-series Telephone UG 10/10 57
The available override features are:• Busy Override
• Do Not Disturb Override
• Executive Override
• Destination Restriction/Traveling Class Override
• Class of Service Override
• Privacy Override
Busy Override
Ring Over Busy Override enables you to send a muted ring tone to a busy station toindicate a call is waiting. The Busy Override (BOV) muted ring can be programmedfor each station to be two muted rings only or continued muted rings until the call isanswered. This option applies to the station receiving the muted ring. The muted ring
can be sent to the telephone speaker or to the telephone handset/headset and speaker.
To use Busy Override
After reaching a busy station, press 2 . A muted tone is heard at the busy station,indicating that a call is waiting. The station number displays.
Do Not Disturb Override
Do Not Disturb (DND) Override lets you send a call waiting tone or ringing to astation in DND mode to indicate that a call is coming in. Your telephone may beprogrammed to block DND Override from other telephones. Your station’s LCDshows the station you have called is in the DND mode.
OCA is possible to DND stations from stations that are programmed for DNDOverride.
To use DND Override
After reaching a station in DND mode, press 2 . A tone signal is heard at the DNDstation, indicating a call is coming in. On your station, the LCD shows the stationnumber you have overridden.
Your LCD displays DND OVR DENY, if the station you called denies DNDOverride.
Feature Operations
Override Calls
Executive Override
Executive Override enables you to enter an established conversation. Your telephone
can also be programmed to block Executive Override from other telephones.

8/6/2019 DP5000 Users Guide
http://slidepdf.com/reader/full/dp5000-users-guide 74/142
58 Strata CIX DP5000-series Telephone UG 10/10
can also be programmed to block Executive Override from other telephones.
To perform Executive Override
After reaching a busy station, press 3
...or, if you have an LCD telephone, use the OVRD Soft Key.
You enter a conference with the busy station and the party to whom he was talking.The called parties may hear an optional tone signal prior to your entering the
conversation.
Your LCD displays EXEC OVR DENY, if the station you called denies ExecutiveOverride. If you do not have Override privileges, you will camp on.
Destination Restriction/Traveling Class Override
Enables a station user to override the Destination Restriction or Traveling Class of a
particular telephone by entering a pre-determined account code. To use Destination Restriction or Traveling Class Override
1. Press 471 . Confirmation tone plays and the LCD shows “Enter OVR Code.”
2. Enter the trunk access code or LCR access code.
3. Dial the external telephone number.
Class of Service Override
By dialing a Class of Service (COS) Override code, a user can change a station’s set of privileges to one associated with the override code. When the call is terminated andanother is attempted from the same station, the original COS is applied. This allowsselected users to override restrictions that are placed on any telephone in the system.
To perform Class of Service Override
1. Access a Primary or Phantom DN. You hear dial tone and the LED flashes at thein-use rate.
2. Press #471 . Dial tone stops. Your LCD prompts you to enter a code.
3. Enter the COS Override Code (four digits). You hear dial tone.
4. Dial a telephone number.
Note For security reasons, the override codes are only available on a selected basis.See your System Administrator.
Feature Operations
Paging
Privacy Override
This feature enables you to enter an established call on a line you share with anothertelephone. Up to two station users can enter an existing Central Office (CO) line-to-

8/6/2019 DP5000 Users Guide
http://slidepdf.com/reader/full/dp5000-users-guide 75/142
Strata CIX DP5000-series Telephone UG 10/10 59
p p g ( )station call (i.e., up to three stations can be connected to a CO line). You can also usethis feature if the station that is already connected to the CO line is in the PrivacyRelease mode.
Station users with Privacy Release can allow stations with the shared buttonappearance to enter their conversations, even if the station entering the conversation isnot programmed for Privacy Override. (see “Privacy” on page 61.)
PagingStation users can make page announcements to telephones and external speakers.Check with your System Administrator to find out the zone numbers for variouspaging groups.
To make a Page Announcement to telephones or external speakers
1. Lift the handset, press your extension button and enter a paging access code.
2. Make your announcement, then hang up.
To make a Group Page
Press Group Page and enter the Group number (01~16)
...or press extension + #31 and enter the zone number.
Answering a Page
To answer a Group Page, lift the handset off-hook, dial #5#36 and enter the PageZone number (01~08, depending on your telephone system).
To answer an External Page Zone, lift the handset off-hook, dial #5#36 and enterthe Page Zone number (01~08, depending on your telephone system).
Feature Operations
Paging
All Call Page
You can make an All Call Page to telephones assigned to the “All Call Page Group.”Stations are assigned to the “All Call Page Group” in system programming.

8/6/2019 DP5000 Users Guide
http://slidepdf.com/reader/full/dp5000-users-guide 76/142
60 Strata CIX DP5000-series Telephone UG 10/10
g g p y p g g
To make an All Call Page
1. With the handset off-hook, press Al l Cal l Page
...or dial #30 . This pages all telephones in the All Call Page Group but, dependingon system programming, you may or may not page external speakers.
2. Make your announcement then hang up.
To answer an All Call Page
1. Lift the handset off-hook, dial #5#36 .
2. Enter the Page Zone Number (01~08, depending on your telephone system).
Emergency PageAn Emergency Page overrides Group Pages or All Call Pages to telephone andexternal paging devices.
To make an Emergency Page, lift the handset off-hook, dial #37 .
To make an Emergency Page to a group, lift the handset off-hook, dial #38 andenter the Group number.
Feature Operations
Privacy
Privacy
Privacy controls the ability of more than one person to use the same extension or COline at the same time Privacy applies to multiple appearances of extensions Phantom

8/6/2019 DP5000 Users Guide
http://slidepdf.com/reader/full/dp5000-users-guide 77/142
Strata CIX DP5000-series Telephone UG 10/10 61
line at the same time. Privacy applies to multiple appearances of extensions, Phantomextensions, outside Lines and outside Line Group buttons. The application of Privacyto individual telephones is controlled in system programming.
By default, the system is private. If you are in a conversation, another telephone withan appearance of the line on which you are talking cannot intrude unless thattelephone has been programmed for Privacy Override. In that event, the other
telephone may enter and leave the conversation at will. If all users are provided withPrivacy Release in Class of Service, the system will function as non-private.
Your telephone may be equipped with a Privacy Release and/or a Privacy on
Line button. On a normally private telephone, Privacy Release allows otherappearances of you line to join the conversation. On a normally non-private telephone,Privacy on Line allows you to exclude others. The Privacy condition may betoggled at any time during a conversation. At the end of the conversation, the line’s
privacy condition returns to its original state.
To use Privacy Release
While on a CO line call, press Privacy Release . The LED lights red. Theoutside line flashes at all appearances. When another station user enters the outsideline call by pressing a common outside Line , the Privacy Release LED turns Off.To add a third station, press Privacy Release again; the process repeats.
To set/cancel Privacy
Press Pr ivacy on L ine to set privacy. The LED lights steady red. Others areblocked from entering your outside line calls when they press a common Line
...or press Pr ivacy on L ine again to cancel the feature. The LED turns Off.
RedialUse this button to redial the last number dialed from your telephone.
To redial the last number, press Redial or * 0 .
Feature Operations
Speed Dial
Speed DialSpeed Dial (SD) enables you to dial a sequence of up to 32 digits with a shorter code.
Dial sequences can include telephone numbers, authorization codes, passwordsf t ti ti d d S d Di l b d t i i t ll

8/6/2019 DP5000 Users Guide
http://slidepdf.com/reader/full/dp5000-users-guide 78/142
62 Strata CIX DP5000-series Telephone UG 10/10
feature activation codes and pauses. Speed Dial may be used to originate a call orinvoked after a call is established. There are two types of Speed Dial:
• System SD – All telephones in your system can share a list of up to 800 SystemSpeed Dial numbers under the exclusive control of the System Administrator. Insome cases, System Speed Dial enables you to reach numbers that you would notbe allowed to dial directly from your telephone.
• Station SD – Your System Administrator allocates a block of up to 100 personalSD numbers (10 per telephone). You have exclusive use of them and you cancreate and change them from your own telephone.If you have a 9-Line LCDtelephone, you can assign names to your station SD numbers to appear on thePersonal SD Directory display (see your System Administrator or use theprocedure for “Storing Personal Speed Dial Names” on page 65.)
To use personal Speed Dial
1. See your System Administrator to check how many personal Speed Dial numbersare allocated to your telephone and if you have Speed Dial capabilities enabled onyour telephone.
2. Setup / Store your personal Speed Dial numbers.
3. Assign names to personal Speed Dial numbers (on supported models).
Making a Call Using Speed Dial
There are two ways to begin a Speed Dial Call.
1. Press Spdial on a DP5000-series digital telephone
...or press the * button on any telephone.
2. Dial the Station or System Speed Dial Number. Station Speed Dial numbersoccupy numbers 100~199. System Speed Dial numbers occupy numbers 200~999.
Feature Operations
Speed Dial
Table 8 Speed Dial Access Codes
Feature Feature Access Code Sequences
Speed Dial (Dialing an SD number)
S di l2
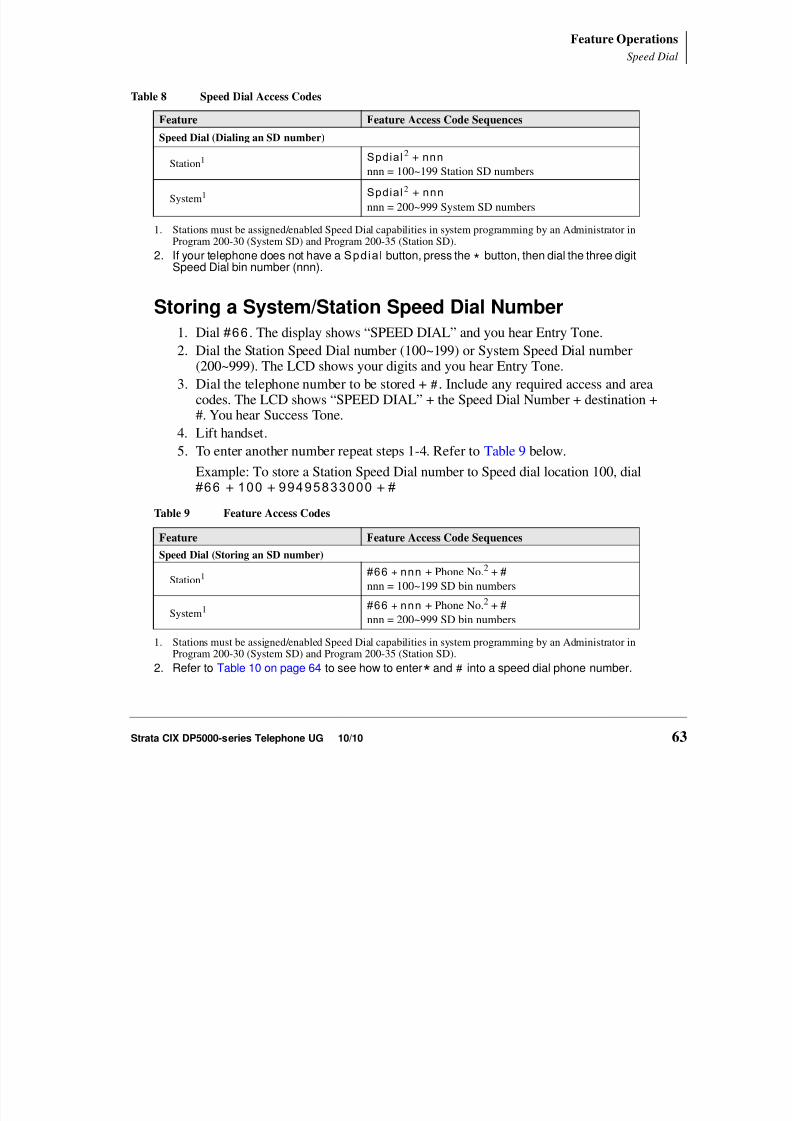
8/6/2019 DP5000 Users Guide
http://slidepdf.com/reader/full/dp5000-users-guide 79/142
Strata CIX DP5000-series Telephone UG 10/10 63
Storing a System/Station Speed Dial Number
1. Dial #66 . The display shows “SPEED DIAL” and you hear Entry Tone.
2. Dial the Station Speed Dial number (100~199) or System Speed Dial number
(200~999). The LCD shows your digits and you hear Entry Tone.3. Dial the telephone number to be stored + #. Include any required access and area
codes. The LCD shows “SPEED DIAL” + the Speed Dial Number + destination +#. You hear Success Tone.
4. Lift handset.
5. To enter another number repeat steps 1-4. Refer to Table 9 below.
Example: To store a Station Speed Dial number to Speed dial location 100, dial#66 + 100 + 99495833000 + #
Station1 Spdial2 + nnn nnn = 100~199 Station SD numbers
System1 Spdial2 + nnn nnn = 200~999 System SD numbers
1. Stations must be assigned/enabled Speed Dial capabilities in system programming by an Administrator inProgram 200-30 (System SD) and Program 200-35 (Station SD).
2. If your telephone does not have a Spdial button, press the * button, then dial the three digitSpeed Dial bin number (nnn).
Table 9 Feature Access Codes
Feature Feature Access Code Sequences
Speed Dial (Storing an SD number)
Station1
1. Stations must be assigned/enabled Speed Dial capabilities in system programming by an Administrator inProgram 200-30 (System SD) and Program 200-35 (Station SD).
#66 + nnn + Phone No.2 + # nnn = 100~199 SD bin numbers
2. Refer to Table 10 on page 64 to see how to enter* and # into a speed dial phone number.
System1 #66 + nnn + Phone No.2 + # nnn = 200~999 SD bin numbers
Feature Operations
Speed Dial
Advanced Speed Dial Operation
Special Characters
SD numbers may include 0~9 , # , * and Pause. For an example on how to use special

8/6/2019 DP5000 Users Guide
http://slidepdf.com/reader/full/dp5000-users-guide 80/142
64 Strata CIX DP5000-series Telephone UG 10/10
SD numbers may include 0 9 , # , and Pause. For an example on how to use specialcharacters, see page 89.
Long SD Numbers
Up to 32 digits can be stored in one SD location. If you exceed 32 digits, the excessdigits are automatically stored in the next sequential SD location. If SD 100 contains40 digits, then 8 of those digits would be stored in SD 101. If you save other digits toSD101 they will over-write the eight digits automatically stored there.
Table 10 Phone Number Dial String Characters
Entry Meaning
0~9 0~9
# End of Speed Dial Number when entering via access code (#66)
*
Escape. “* ” functions as an escape key indicating that the number immediately following
represents something exceptional. When * is used as an escape character, it consumes one
Speed Dial digit. Entering * 7 to insert a seven-second pause would use two of 32
characters.
*
(1 ~ 9)
A pause from 1~9 seconds. To pause longer than 9 seconds, enter more pause escape
sequences. Example: To insert a 17-second pause, press
*9
*8 . A “P” displays denoting a
pause in the SD number. In this example, you would see “PP.”
* * * is entered into the speed dial string.
* # # is entered into the speed dial string.
Feature Operations
Speed Dial
Storing Personal Speed Dial Names
You can store names with Personal Speed Dial numbers. These names will display as
Soft Keys, that can be used for dialing from the telephone LCD directories.

8/6/2019 DP5000 Users Guide
http://slidepdf.com/reader/full/dp5000-users-guide 81/142
Strata CIX DP5000-series Telephone UG 10/10 65
Notes
• Speed Dial locations must be assigned to your telephone by your SystemAdministrator before you can store names. Your System Administrator can alsoassociate names with Station Speed Dial numbers.
• Only the Administrator telephone can store System Speed Dial numbers.
To assign Station Speed Dial names
1. Enter User Programming Mode by dialing #9876 or, press Program .
2. Press Spdial . “SPEED DIAL MODE” displays on the LCD.
3. Enter a Speed Dial location number (100~199 for personal speed dial or 200~999
for System speed dial, depending on system programming).4. Enter the telephone
number to be stored. If you normally a dial lineaccess code (such as 9 )and/or and area code, enterthe codes before the
telephone number.5. Press Spkr , then input the
name that will appear inthe Personal SD directory(nine characters max).
You can enteralphanumeric charactersfrom the dial pad (shownright and in Table 11).
Example:
Press the for “A.”
Press the again for “B,” etc.
Refer to the table for other characters.
5859
Notes
• To store #, press * #
• To store *, press * *
Feature Operations
Speed Dial
• To move one characterto the right, pressSCROLL or RIGHT Soft Key. To add aspace press the RIGHT
Table 11 Dial Pad Alphanumeric Characters
Dial PadButtons
Number of times to press
the dial pad button
1 2 3 4 5
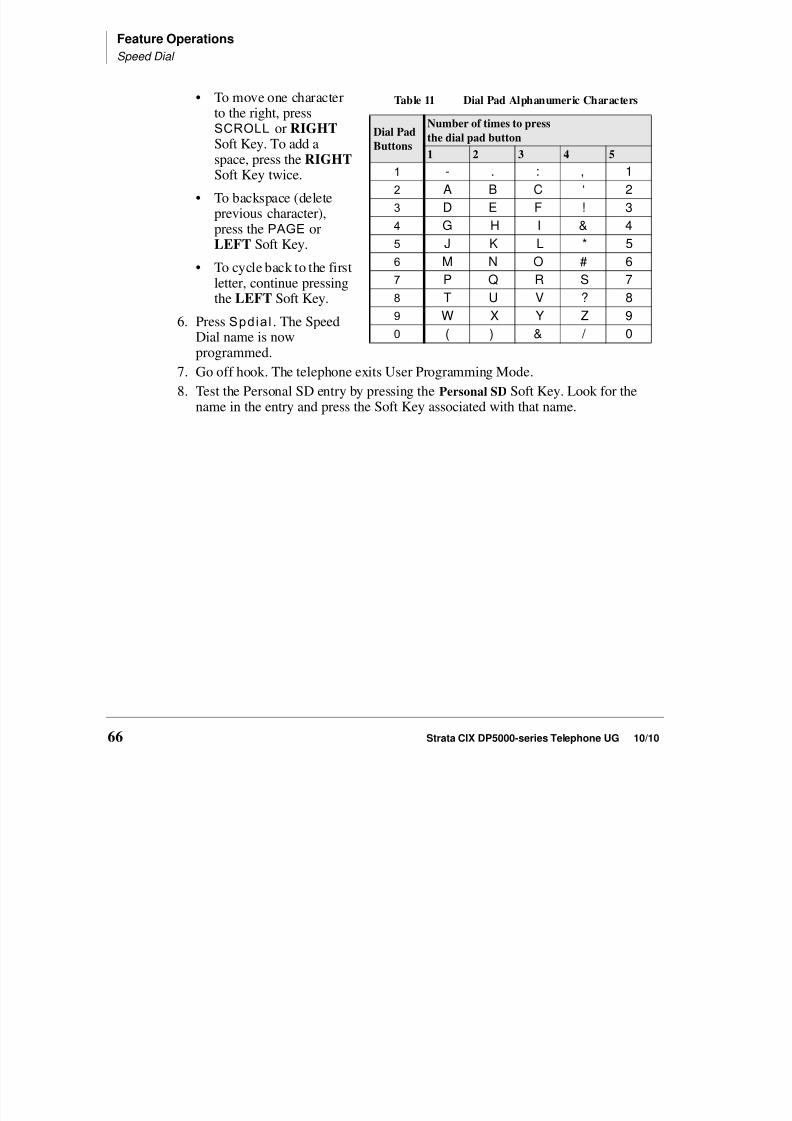
8/6/2019 DP5000 Users Guide
http://slidepdf.com/reader/full/dp5000-users-guide 82/142
66 Strata CIX DP5000-series Telephone UG 10/10
space, press the RIGHT Soft Key twice.
• To backspace (deleteprevious character),press the PAGE or
LEFT Soft Key.• To cycle back to the first
letter, continue pressingthe LEFT Soft Key.
6. Press Spdial . The SpeedDial name is nowprogrammed.
7. Go off hook. The telephone exits User Programming Mode.
8. Test the Personal SD entry by pressing the Personal SD Soft Key. Look for thename in the entry and press the Soft Key associated with that name.
1 - . : , 1
2 A B C ‘ 2
3 D E F ! 3
4 G H I & 4
5 J K L * 5
6 M N O # 6
7 P Q R S 7
8 T U V ? 8
9 W X Y Z 9
0 ( ) & / 0
Feature Operations
Tone First / Voice First Signalling
Tone First / Voice First Signalling
To determine the signalling on the telephone circuit.
T Fi t Si lli

8/6/2019 DP5000 Users Guide
http://slidepdf.com/reader/full/dp5000-users-guide 83/142
Strata CIX DP5000-series Telephone UG 10/10 67
Tone First Signalling
When the telephone rings and the called party must press Spkr or lift the handset inorder to receive the call.
Voice First SignallingThe telephone does not ring when it is being called, rather a long tone is heard,followed by the caller's voice coming through the speaker. This method automaticallystarts in a hands free mode and allows both parties to speak with each other.
Note The calling party has control over whether Tone First or Voice First Signaling isbeing used. The ability to switch between the two is setup by the SystemAdministrator.
To change the signalling method while placing the call
1. Enter the extension number
2. Press 1 to turn on Tone First Signaling.
3. Press 2 to turn on Voice First Signaling.
Feature Operations
Tone/Pulse Dialing
Tone/Pulse Dialing
With some older Central Offices, you may have to make calls on outside linesprogrammed for rotary dial pulses. This feature enables you, while on these lines, toswitch to tone dial to access remote equipment (such as an answering machine)

8/6/2019 DP5000 Users Guide
http://slidepdf.com/reader/full/dp5000-users-guide 84/142
68 Strata CIX DP5000-series Telephone UG 10/10
switch to tone dial to access remote equipment (such as an answering machine)requiring touchtones.
Note With ISDN calls, when Tone Dial Selec t is pressed, all of the digits enteredafter that point will be sent with touchtones.
To change Tone Dialing
1. Access an outside line.
2. Dial a telephone number.
3. While on the call, press Tone Dial Selec t . Although the outside line isprogrammed for rotary dial pulses, access the outside line and dial the telephonenumber like any other call described in this user guide.
The Tone LED lights steady red and you are able to send touchtones with your dialpad. The feature is cancelled when the call is completed.
Feature Operations
Uniform Call Distribution
Uniform Call DistributionUniform Call Distribution (UCD) provides ACD-like service based on the simplified
Distributed Hunt feature. Incoming calls are answered by Voice Mail as the AutoAttendant function or they can be directly routed to the UCD (Distributed Hunt) Pilot
b h ll ill di l h C il i i h ll

8/6/2019 DP5000 Users Guide
http://slidepdf.com/reader/full/dp5000-users-guide 85/142
Strata CIX DP5000-series Telephone UG 10/10 69
number. The caller will dial the UCD Pilot station in response to a prompt. The callwill go to the next agent or, if all agents are busy, the call will camp-on to theDistributed Hunt pilot and ring-back tone or Music-on-Hold (MOH) will be sent.
This feature distributes incoming calls to available agents. Agents must be logged intothe group to receive UCD calls. The following illustration shows the typical call flow
for this service.
1. Agent logs into the UCD group.
2. CIX receives a call from PSTN or extension.
3. The call is routed to voice mail which provides the initial greeting using the autoattendant service.
4. The voice mail can be configured to prompt callers to enter the destination numberor to route the call to the pre-determined destination.
5. The voice mail transfers the call to the UCD pilot group.
6. According to the hunting rule (distribute), the call is delivered to an idle agent whologs in to this hunting group.
If no agent is available in the hunting group, the call is queued to the UCD pilot group.The caller may hear the Music on Hold (MOH) or Ring Back Tone (RBT) depending
on the configuration. If the call cannot be answered within the preconfigured time, thecall is routed to an overflow destination.
Feature Operations
Uniform Call Distribution
Login/Logout
Login and Logout is controlled by the Login key assigned to the agent phone (see
Strata CIX Programming Manual, Volume 1 for details). The Log status is displayedon the Login key as shown below

8/6/2019 DP5000 Users Guide
http://slidepdf.com/reader/full/dp5000-users-guide 86/142
70 Strata CIX DP5000-series Telephone UG 10/10
• Login - Key is On Steady
• Logout - Key is Off
The Login/Logout feature is applied to the call which terminates to UCD pilot only.Therefore, the call can terminate to agent Prime or Phantom PDN directly even if the
agent is in Logout state. Also, Login/Logout can be activated by an access code. Thedefault numbering plan is shown below.
Access Code Feature
#6061 Login - from Agent Station
#6062 Logout - from Agent Station
#6161 + DN + # Login - Agent Station (DN) from another station
#6162 + DN + # Logout – Agent Station (DN) from another station
where DN = the Directory number of the agent station.
ADM/DSS Console 4

8/6/2019 DP5000 Users Guide
http://slidepdf.com/reader/full/dp5000-users-guide 87/142
Strata CIX DP5000-series Telephone UG 10/10 71
This chapter provides an overview of the optional units that can be connected to theDP5000-series telephones (except the Single line telephone).
Add-on ModulesThe following Add-on modules provide additional buttons:
• 10 Button LCD Module, up to two supported per telephone.
• 20 Button Add on Module with paper keystrip, up to two supported per telephone.
• Digital Direct Station Selection (DSS) Module with 60 buttons and Paper Keystrip,up to three supported per telephone.
ADM/DSS Console
ADM
ADM
Buttons and LEDsThe 10 button LED add on module

8/6/2019 DP5000 Users Guide
http://slidepdf.com/reader/full/dp5000-users-guide 88/142
72 Strata CIX DP5000-series Telephone UG 10/10
and the 20 button keystrip add onmodule have programmable featurebuttons that can be assigned as COLine, Directory Number, DSS, OneTouch Speed Dial or any other
programmable feature.
When a Programmable FeatureButton is programmed as a DSSbutton or a Line button, it will have anLED that provides a status of theoutside line or station assigned to it.The DSS button acts like a speed dialbutton to a specific extension.
• A station or line shows steady red when in use by others; green when in use byyour extension.
• A DSS LED will flash red while making a call and turn intermittently green onceconnected.
• An outside Line LED is green when the outside line is in use by your extension. Itis red if it is in use by another telephone user.
ADM/DSS Console
ADM
Adding an ADM
For installation instructions, please refer to the Strata CIX Installation & Maintenance.
Please read the caution, if you are connecting the ADM with the telephone or movingthe telephone with the ADM.

8/6/2019 DP5000 Users Guide
http://slidepdf.com/reader/full/dp5000-users-guide 89/142
Strata CIX DP5000-series Telephone UG 10/10 73
CAUTION! Unplug the line cord from the DP5000-series telephone beforeattaching the ADM. Plugging the ADM cable in while theDP5000-series telephone is powered will damage or impair thefunctionality of the telephone, ADM or both.
Brightness Control
To change the Brightness Control for a 10 button LCD add on module, refer to“Brightness Control” on page 13.
Keystrip Labels To label the keystrip buttons on the 10 button LCD add on module, refer to
“Keystrip Labels” on page 15.
ADM/DSS Console
DSS Console
DSS ConsoleThe 60 button Direction Station
Selection (DSS) Console operatesoperates alongside a digitaltelephone to provide 60 (up to

8/6/2019 DP5000 Users Guide
http://slidepdf.com/reader/full/dp5000-users-guide 90/142
74 Strata CIX DP5000-series Telephone UG 10/10
p p ( p180) additional buttons (shownright).
The 60 programmable featurebuttons can be assigned as CO
line, extension, DSS, One TouchSpeed Dial or any other flexiblefeature.
The DDM5060 console uses dual red and green LEDs to show call and feature status.
DSS ButtonsDSS buttons can appear on both the ADM and DSS Console. Each DSS button isassociated with a particular station in your telephone system. DSS buttons can transferan outside call to the associated station or make a direct call to the associated station.
The DSS LED lights steady red when the station associated with the DSS button isringing, busy on a call, or is idle, but all appearances of the station’s extensions arebusy or in-use by other stations. When the associated DSS button is in the Do Not
Disturb mode, the LED blinks red at a slow rate.
DSS buttons cannot directly call station Phantom extension numbers, DistributedHunt Group Directory Numbers, or ACD Groups. DSS buttons may be configured asOne Touch Buttons that may be programmed to call these destinations.
Calling a Station
To call a station’s extension from either a DSS console or a ADM, press the DSSassociated with the station.
A station call with a DSS button can be made on-hook or off-hook, and with VoiceFirst or Tone signaling. After pressing the button, treat the call like any otherstation call made from a digital telephone.
ADM/DSS Console
DSS Console
Transferring to an Idle Station
You can transfer internal or outside calls to an idle station from either a DSS console
or a ADM.
To transfer a call to an idle station

8/6/2019 DP5000 Users Guide
http://slidepdf.com/reader/full/dp5000-users-guide 91/142
Strata CIX DP5000-series Telephone UG 10/10 75
1. Press the DSS button corresponding to the station to be called.
The call is placed automatically on hold. The Line or extension LED flashes greenat double the on-hold rate, and the DSS LED flashes green. You hear a single ringtone. (If using the Tone signaling mode, you hear successive ring tones.)
2. Announce the call.
With Tone signaling, you would have to wait for the called station to answer beforeannouncing the call.
3. Hang up.
The call rings the called station when you hang up. While the called station is
ringing, the DSS LED is steady red, and the Line LED flashes green at the on-holdrate or if on a extension button, it goes idle.
When the called station answers the call, the DSS LED stays steady red, and theLine LED becomes steady red.
4. If the station does not answer before a period set in system programming, the callrecalls your station.
ADM/DSS Console
DSS Console
Call Transfer with Camp-on
You can transfer a call to a busy station from either a DSS console or an ADM. Use
the DSS to transfer the call, even though the DSS LED associated with the station youare “transferring to” is red.
To transfer call to a busy station

8/6/2019 DP5000 Users Guide
http://slidepdf.com/reader/full/dp5000-users-guide 92/142
76 Strata CIX DP5000-series Telephone UG 10/10
To transfer call to a busy station
1. Press DSS corresponding to the busy station to be called.
You may hear a busy tone. The original caller is placed automatically on hold. TheLine or extension LED flashes green at double the on-hold rate, and the DSS LED
remains steady red.
2. Hang up.
The call rings the called station once with the camp-on tone. While the calledstation is receiving this tone, the Line LED flashes green (on-hold rate) or if youare on a extension button, it goes idle. The [DSS] LED remains steady red.
When the called station answers the transferred call, the Line LED becomes steady
red. The [DSS] LED remains steady red.
Note If the busy station is in the Do Not Disturb mode, the call will not transfer, butwill recall your telephone immediately.
If the call is not answered after a specified Recall time set in system programming,camp-on is cancelled and the transferred call rings back.
Call Answering (Outside Line)If your ADM or DSS console is equipped with a Line button, you can answer outsideline calls from the ADM or DSS console as you would from a digital telephone.
To answer an incoming outside line call to a ADM or DSS Console, press theflashing Line .
Speed DialYour ADM or DSS console may be equipped with SD (Speed Dial) buttons that canbe programmed to dial telephone numbers or to access features. SD buttons on eitherthe ADM or DSS console function like SD buttons on digital telephones.
ADM/DSS Console
DSS Console
Paging
You can make an announcement page to a group of telephone speakers selected in
system programming with Al l Cal l Page on the DSS console. SD (if programmed)on either the DSS console or the ADM can be used for page announcements. See “AllCall Page” on page 60.

8/6/2019 DP5000 Users Guide
http://slidepdf.com/reader/full/dp5000-users-guide 93/142
Strata CIX DP5000-series Telephone UG 10/10 77
Call Forward Override (DSS Override)
Either the DSS buttons on your DSS console or the associated telephone can be set insystem programming to ring stations that are in the Call Forward mode, instead of being forwarded. Usually the console’s telephone is the unit activated to perform thisfunction. Among other applications, this feature can be used to notify a person whoforgets to deactivate the Call Forward feature after returning to the office.
To override call forward with the console’s associated telephone
1. Press Cnf/Trn or extension button.
2. Dial the station number set for call forward.Make the call as you would from any other station. This procedure assumes yourstation has a typical program setting.
To override call forward with your DSS Console
Press the station DSS button set for Call Forward.
Night Transfer ButtonThis button enables a pre-programmed station to place the system into Day, Day2 orNight Mode. See your System Administrator for information on the settings for Day,Day2 or Night Mode. These modes will transfer calls to a designated location or voicemailbox, depending on programming.
1. Press Night Transfer .
2. Press the desired Mode number:
• Press 1 for Day Mode (LED remains off).
• Press 2 for Day2 Mode (LED flashes red).
• Press 3 for Night Mode (LED is solid red).

8/6/2019 DP5000 Users Guide
http://slidepdf.com/reader/full/dp5000-users-guide 94/142
This page is intentionally left blank.
Headset and Handset Operation 5

8/6/2019 DP5000 Users Guide
http://slidepdf.com/reader/full/dp5000-users-guide 95/142
Strata CIX DP5000-series Telephone UG 10/10 79
The DP5000-series telephone come standard with a built-in headset interface.
Recommended HeadsetsFor an extensive list of recommended and supported headsets please visit Toshiba'swebsite at www.telecom.toshiba.com
Important! If you experience any electrical interference when using a wirelessheadset, please follow headset manufacturer's recommendations or ensure the headset base unit is at least six inches from your telephone.
Headset and Handset InteractionsWhen headset is connected and handset is off hook, you can use handset only.
When headset is connected and handset is on hook, you can use headset.
The handset and headset cannot be used simultaneously.
Headset and Handset Operation
AUTO or CARBON Setting
AUTO or CARBON SettingThere exist two types of headsets: ECM and Carbon. The default setting on thetelephones is AUTO. When the headset is connected to the Headset ModularConnector of the telephone, the AUTO setting enables the headset I/F current detectorto determine which headset type is connected (EMC or Carbon). If the current is

8/6/2019 DP5000 Users Guide
http://slidepdf.com/reader/full/dp5000-users-guide 96/142
80 Strata CIX DP5000-series Telephone UG 10/10
marginal using a carbon headset (only) and performance is not good, change thesetting to CARBON.
To change the setting from Auto to Carbon
Telephones: All except the Single Line Telephone
1. Press 3+6+9+Hold (simultaneously).
2. Press Spdial .
3. Press FB 3 to toggle On/Off.
FB3, LED On: CARBON
FB3, LED Off: AUTO (default)4. Press Hold to set the option.
5. Go off-hook, then on-hook to exit the program mode.
Telephones: Single Line Telephone
1. Press 3+6+9+Hold (simultaneously).
2. Press Spdial and press 3 .
3. Press Msg to toggle On/Off.
Msg LED On: CARBON
Msg LED Off: AUTO (default)
4. Press Hold to set the option.
5. Go off-hook, then on-hook to exit the program mode.
Headset and Handset Operation
AUTO or CARBON Setting
To change the headset transmit level to Low or Normal
Telephones: All except Single Line Telephone
1. Press 3+6+9+Hold (simultaneously).2. Press Spdial .
3. Press FB 2 to toggle On/Off.

8/6/2019 DP5000 Users Guide
http://slidepdf.com/reader/full/dp5000-users-guide 97/142
Strata CIX DP5000-series Telephone UG 10/10 81
FB2, LED On: Low
FB2, LED Off: Normal (default)
4. Press Hold to set the option.
5. Go off-hook, then on-hook to exit program mode.
Telephones: Single Line Telephone
1. Press 3+6+9+Hold (simultaneously).
2. Press Spdial and press 2 .
3. Press Msg to toggle On/Off.
Msg LED On: Low
Msg LED Off: Normal (default)
4. Press Hold to set the option.
5. Go off-hook, then on-hook to exit the program mode.
Headset and Handset Operation
Headset Transmit Level Adjustments
Headset Transmit Level Adjustments To set the level of the Headset Transmitter for DP5000-series telephones
1. Press 3+6+9+Hold (simultaneously).
2. Press # .
3. Set the headset transmit level using FB1, FB2 and FB3. For Single Line Telephone

8/6/2019 DP5000 Users Guide
http://slidepdf.com/reader/full/dp5000-users-guide 98/142
82 Strata CIX DP5000-series Telephone UG 10/10
g , g p(SLT), use 1,2,3 and Msg. See table below.
4. Press Hold .
5. Go Off-hook, then on-hook to exit the program mode.
Headset Transmit Level
Transmit
Level
FB1 FB2 FB3 Level
SLT Press 1 and Msg Press 2 and Msg Press 3 and Msg
Max. (louder) OFF OFF OFF +12 dB
ON OFF OFF +8 dB
OFF ON OFF +4 dB
Default ON ON OFF 0 dB
OFF OFF ON -4 dB
ON OFF ON -8 dB
OFF ON ON -12 dB
Min. (softer) ON ON ON -16 dB
Note ON means LED ON; OFF means LED OFF
Headset and Handset Operation
Handset Level Adjustments
Handset Level AdjustmentsChange the Carbon setting if a Carbon type handset or headset is connected to thehandset jack. This feature is not available on the Single Line Telephone (SLT).
To change the Carbon Setting
1 P 3 6 9 H ld ( i lt l )

8/6/2019 DP5000 Users Guide
http://slidepdf.com/reader/full/dp5000-users-guide 99/142
Strata CIX DP5000-series Telephone UG 10/10 83
1. Press 3+6+9+Hold (simultaneously).
2. Press Spdial .
3. Press FB 1 to toggle On/Off.
FB1, LED On: Carbon type handset
FB1, LED Off: DP5000 ECM handset (default)
4. Press Hold to set the option.
5. Go off-hook, then on-hook to exit the program mode.
To adjust the Handset Transmit Level for DP5000-series telephones
1. Press 3+6+9+Hold (simultaneously).2. Press Redial .
3. Set the level using FB1, FB2 and FB3. For Single Line Telephone, use 1,2,3 and Msg. See table below.
4. Press Hold to set the option.
5. Go Off-hook, then on-hook to exit the program mode.
Handset Transmit Level
Transmit
Level
FB1 FB2 FB3
SLT Press 1 and Msg Press 2 and Msg Press 3 and Msg
Max. (louder) ON ON ON
OFF ON ON
ON OFF ON
Default OFF OFF ON
ON ON OFF
OFF ON OFF
ON OFF OFFMin. (softer) OFF OFF OFF
Headset and Handset Operation
Handset Level Adjustments
To adjust the Handset or Headset Receiver Level for DP5000-series telephones
1. Press 3+6+9+Hold (simultaneously).
2. Press Redial .
3. Set the level using the buttons shown in the table below.
Handset / Headset Receiver Level
FB4 FB5 FB6

8/6/2019 DP5000 Users Guide
http://slidepdf.com/reader/full/dp5000-users-guide 100/142
84 Strata CIX DP5000-series Telephone UG 10/10
4. Press Hold to set the option.
5. Go Off-hook, then on-hook to exit the program mode.
To adjust the Handset Side Tone Level for DP5000-series telephones
Note This feature is not supported on the Single Line Telephone.
1. Press 3+6+9+Hold (simultaneously).
2. Press Redial .
3. Set the level using the buttons shown in the table below.
4. Press Hold to set the option.
5. Go Off-hook, then on-hook to exit the program mode.
Transmit
Level
FB4 FB5 FB6
9-Line LCD FB4 FB11 FB12
SLT Press 1 and Msg Press 2 and Msg Press 3 and Msg
Max. (louder) ON ON ON
OFF ON ON
ON OFF ON
Default OFF OFF ON
ON ON OFF
OFF ON OFF
ON OFF OFF
Min. (softer) OFF OFF OFF
Handset / Headset Side Tone Level
Side Tone LevelDP5000-series FB7 FB8
9-Line LCD FB13 FB14
Max. (louder)
ON ON
OFF ON
Default ON OFF
Min. (softer) OFF OFF
User Programming 6

8/6/2019 DP5000 Users Guide
http://slidepdf.com/reader/full/dp5000-users-guide 101/142
Strata CIX DP5000-series Telephone UG 10/10 85
User programming allows you to customize your LCD telephone. You will be able to:
• Enter numbers in your personal Speed Dial list
• Program One Touch and Programmable Feature Buttons
• Register Call Forward assignments
• Assign Message Waiting Keys
• Assign the background music (BGM) source to be played over the telephone’sspeaker
User Programming
Programming Feature Buttons
Programming Feature ButtonsYou can use the User Programming Mode (described below) for customizing your
DP5000-series display telephone without the aid of an Administrator or ServiceTechnician. The User Programming mode is accessed with a Program buttonassigned to a Programmable Feature Button or through an access code. UserProgramming enables users to customize these features:

8/6/2019 DP5000 Users Guide
http://slidepdf.com/reader/full/dp5000-users-guide 102/142
86 Strata CIX DP5000-series Telephone UG 10/10
g g
• Programmable Feature Buttons – The DP5000-series telephones have 10 or 20Programmable Feature Buttons to which the user can assign any one of approximately 50 different features. Once a Programmable Feature Button isprogrammed, press the button anytime you need to use the feature.
Notes
• ACD and FeatureFlex Application keys are not supported on programmablefeature buttons 11~20 of the large 9-line display telephone.
• Directory number and external line buttons cannot be added or deleted, but their
ring tones can be individually changed. See “Ring Tones” on page 15.
User Programming Mode
To enter User Programming Mode, press the Program button
...or dial #9876 . “USER PROG MODE” appears on your LCD. The ProgramLED is steady green.
To exit User Program Mode Lift the handset off-hook / on-hook.
Programmable Feature Button CodesProgrammable Feature Buttons are the unassigned buttons on your keystrip that canbe used to store features. The number of available Programmable Feature Buttons
depends on your telephone model and how the buttons are preassigned by the SystemAdministrator.
The following steps enable you to program features onto Programmable FeatureButtons.
User Programming
Programmable Feature Button Codes
Setting/Changing a Programmable Feature Button’sFunction
1. Press #9876 to enter User Programming Mode.2. Press Hold .
3. Press the Programmable Feature Button to set or change.
4 Enter the Programmable Feature Button Code (see Table 12) plus any optional

8/6/2019 DP5000 Users Guide
http://slidepdf.com/reader/full/dp5000-users-guide 103/142
Strata CIX DP5000-series Telephone UG 10/10 87
4. Enter the Programmable Feature Button Code (see Table 12), plus any optionalparameters.
5. Press the same Programmable Feature Button (flashing) to save the setting. “DATA
PROGRAMMED” appears on your LCD.Table 12 Programmable Feature Button Codes
Feature Code Feature Code
Account Code 660 Caller ID 580
Automatic Busy Redial - On 150 Cancel 290
Automatic Callback 160 Do Not Disturb (On/Off) 180
Background Music 530 Door Lock Cancel 540
Call Forward - Any Calls DSS Button610
All Call 340 Flash - Short 200
Busy 350 Flash - Long 210
No Answer 360 Microphone Cut-off 840
Busy No Answer 370 One Touch Button 570
Call Forward - External (Outside) Calls Paging
All Call 380 Page All Groups 220
Busy 390 Page Individual Groups 230
No Answer 400 Emerg. Page - Individ. Group 250
Busy No Answer 420 Emerg. Page - All Groups 240
Call Park Orbit 170 Answer Page - All Groups 590
Call Pickup Phantom Extension Message Waiting 560
Incoming - Group Pickup 430 Privacy 320
Incoming - Directed Extension Pickup 440 Privacy Release 330
Incoming - Directed Group Pickup 450 Night Transfer 600
Incoming - Directed Extension Pickup 460 Record to VM 630
On hold - Local Retrieve 490 Pause/Resume recording 640
On hold - Remote Retrieve 500 Release Button 270
On hold - Outside Line Retrieve 480 Release/Answer 280
On hold - Directed Extension Retrieve 510 Split 860
On hold and Incoming 520 Speed Dial 260
Incoming - Any External Call 470 User Programming Mode 650
User Programming
One Touch Buttons
One Touch ButtonsOne Touch buttons can be used for storing frequently used features or dialed numbers,
such as Speed Dial numbers (use Speed Dial Codes to store additional numbers). One-touch buttons can be preassigned to your telephone – your System Administrator canhelp you identify them.
If you do not have a One Touch button, but you have an available Programmable

8/6/2019 DP5000 Users Guide
http://slidepdf.com/reader/full/dp5000-users-guide 104/142
88 Strata CIX DP5000-series Telephone UG 10/10
Feature Button, you can convert the Programmable Feature Button to a One Touchbutton. Perform the procedure called “Setting/Changing a Programmable FeatureButton’s Function” on page 87 (in Step 4, enter the access code for One Touch button).
Once you have created a One Touch button, you can change the function by using thefollowing procedure.
Changing a One Touch Button
1. Press #9876 to enter User Programming Mode.
2. Press the One Touch button to be set.
3. Enter the digits or special buttons for the function to be dialed. You can include thefollowing in the dial string:
• Dial pad digits 0~9 .To program special characters, see Table 13.
• A maximum of 32 characters.
• Station and System Speed Dial index numbers can be entered. The Speed Dialindex number will automatically dial out on the extension or Line programmedon the One Touch button with the associated Speed Dial index number.
• Function buttons, except One Touch or a Program button.
• Handset hooking (on-hook/off-hook) cannot be recorded.
4. Press the One Touch button to save the entry.
We suggest labelling the One Touch button on your button strip.
User Programming
One Touch Buttons
Table 13 Special Characters
Entry Meaning
* + Hold
Indicates “stop.” The One Touch button blinks rapidly and stops the delivery of the
remaining digits in the string until it is pressed again. Multiple “stops” can be
programmed into one string.
Pause (1~9) seconds If you need to pause longer than nine seconds enter additional

8/6/2019 DP5000 Users Guide
http://slidepdf.com/reader/full/dp5000-users-guide 105/142
Strata CIX DP5000-series Telephone UG 10/10 89
Example of Special Character Usage
To create a One Touch for Park and Page under one button, program the followingsequence under the One Touch button.
CNF #33* ** HOLD FB1 #30
CN F – puts the caller on hold and gets new dial tone.
#33 – code to park call
* * – this special character outputs a single * which will select an available orbitand display the selected orbit on the phone.
*HOLD – This special character is a Stop. The dial string pauses and enables the
user to view the selected orbit on the display. The dial string will restart from thispoint when the One Touch button is pressed again.
FB 1 – gets new dial tone on the PDN
#30 – code for All Call Page which allows the user to page the location of theorbited call.
To Use a One Touch Button Press the One Touch button.
Setting/Changing a Personal Speed Dial CodeSee “Storing a System/Station Speed Dial Number” on page 63.
*
(1~9)
Pause (1~9) seconds. If you need to pause longer than nine seconds, enter additional
pause escape sequences. For example, to insert a 17-second pause, enter *9 *8 . The
display of a pause in the Speed Dial Number shows a “P” without specifying the
duration. In this example, you would see “PP.”
* * *
* # #
User Programming
Feature Codes
Feature CodesFeature Access Codes are entered as a sequence on your telephone to use a particular feature.
For an example of Call Forward, see “Call Forward Examples” on page 37.I
Table 14 Feature Access Codes
Feature Feature Access Code Sequences1
Account Code (while on a call) Cnf/Trn + #46 , dial account code digits

8/6/2019 DP5000 Users Guide
http://slidepdf.com/reader/full/dp5000-users-guide 106/142
90 Strata CIX DP5000-series Telephone UG 10/10
( ) Cnf/Trn #46 , d a accou t code d g ts
Attendant Console Ext. button + 0
Automatic Busy Redial - On Cnf/Trn + #441 , hang up
Automatic Busy Redial - Off Ext. button + #442
Automatic Callback (while on a call) 4 when you hear busy tone
Automatic Callback Cancel Ext. button + #431
Background Music
Telephone Speaker On Ext. button + #490 + music source no. (1~15) + #
Telephone Speaker Off Ext. button + #491 + Spkr
External Speaker On Ext. button + #492 + music source no. (1~15) + #
External Speaker Off Ext. button + #493 + Spkr
Call Forward - See Table 15 on page 107.
Call Park
Activate (while on a call)Cnf/Trn + #33 + Orbit Number (7000~7019) or an Ext.
No.
Retrieve (while on a call)
Ext. button + #32 + Orbit Number (7000~7019) or an Ext.
No.
Call Pickup
Directed DN pickup of ringing or held
calls.Ext. button + #5#6 + Ext. No
Directed DN pickup of ringing, held or
parked calls.Ext. button + #5#29 + Ext. No. to be picked up
Incoming - Group Pickup Ext. button + #5#34 + Group Number to be picked up
Incoming - Directed Extension Pickup Ext. button + #5#5 + Primary Ext. No to be picked up
Incoming - Directed Group Pickup Ext. button + #5#32 + Group Number to be picked up
Incoming - Directed Extension Pickup Ext. button + #5#22 + Ext. Number
All Call Page, Group Page and/or
External Page Pickup of page
Ext. button + #5#36 + Page Zone No. (01~08)
#5#5 + Ext. No. of another phone being paged.
User Programming
Feature Codes
Call Pickup for calls on HoldLocal Pickup (call held on this phone) Ext. button + #5#71
Remote Pickup (pickup another
extension)Ext. button + #5#72 + Primary Ext. No.
Pickup an Outside Line on Hold Ext button + #5#73 + Outside Line on hold (001~128)
Table 14 Feature Access Codes (continued)
Feature Feature Access Code Sequences1

8/6/2019 DP5000 Users Guide
http://slidepdf.com/reader/full/dp5000-users-guide 107/142
Strata CIX DP5000-series Telephone UG 10/10 91
Pickup an Outside Line on Hold Ext. button + #5#73 + Outside Line on hold (001~128)
Pickup a an on Hold Ext. button + #5#74 + Ext. No. on hold
Conferencing - Three Way #494
Dialing Special Characters from a Rotary Phone
Simulate Dialing * Dial 441
Simulate Dialing # Dial 440
DISA Security Code - ChangeExt. button + #658 + old Security Code (1~15 digits) + # +
new Security Code (1~15 digits) + #
Distinctive Ringing - See “Ring Tones” on page 15.
Do Not Disturb
Local - On Ext. button + #6091
Local - Off Ext. button + #6092
Remote - OnExt. button + #6191 + ext. no. of the phone where DND will
be set + Pass Code Number + #
Remote - Off Ext. button + #6192 + ext. no. of the phone where DND will
be set + Pass Code Number + #
Door Lock Control Ext. button + #12 + Door Lock Number
Door Phone CallingExt. button + #15 + Door Phone No. (01~24, depending on
system size)
Emergency Call Ext. button + #911
Flash - Short Ext. button + #450
Flash - Long Ext. button + #451
LCD Language (Change) Ext. button + #495 + Language No.
LCR (Outgoing Call) Ext. button + 9
Message Waiting (MW)
Manually turn off MW LED Ext. button + #409
Retrieve a received MW Ext. button + #408
User Programming
Feature Codes
Activate MW at another Stationwithout Ringing
#63 + Ext. no. (where you want to light the MW LED)
Cancel MW at another Station without
Ringing#64 + Ext. no. (where you want to turn off the MW LED)
Messaging - Advisory
Table 14 Feature Access Codes (continued)
Feature Feature Access Code Sequences1

8/6/2019 DP5000 Users Guide
http://slidepdf.com/reader/full/dp5000-users-guide 108/142
92 Strata CIX DP5000-series Telephone UG 10/10
Messaging Advisory
Advisory Message - ActivationExt. or Phantom Ext. button + #411 + Message No. (see table
in “Advisory Messages” on page 30). Hang up.
Advisory Message - Cancellation Ext. or Phantom Ext. button + #412 . Hang up.
Network Access Code (Private Network) 8 + Private Network No.
Night Ring Answer Ext. button + #5#39
Off-hook Call Announce or Busy
Override
Voice First: 2 ; Tone First: 1 , 21 , 12 , or 5 , depending on
programming for your phone.
Override
Busy, Do Not Disturb After reaching a busy or DND station, press 2 .
Executive After reaching a busy station, press 3
Paging
Page All Groups Ext. button + #30
Page Individual Groups Ext. button + #31 + Page Zone No. (01~08)
Emergency Page - Individual Group Ext. button + #38 + Group Number
Emergency Page - All Groups Ext. button + #37
Answer for External Group Page Ext. button + #5#36 + Page Zone No. (01~08)
Repeat Last Number Dialed Ext. button +* 0
User Programming
Feature Codes
Speed Dial (Storing an SD number)
Station2 #66 + nnn + Phone No.3 + # nnn = 100~199 SD bin numbers
System2 #66 + nnn + Phone No.3 + # nnn = 200~999 SD bin numbers
Table 14 Feature Access Codes (continued)
Feature Feature Access Code Sequences1

8/6/2019 DP5000 Users Guide
http://slidepdf.com/reader/full/dp5000-users-guide 109/142
Strata CIX DP5000-series Telephone UG 10/10 93
Speed Dial (Dialing a stored SD number)
Station2 Spdial4 + nnn nnn = 100~199 Station SD bin numbers
System2 Spdial4 + nnn nnn = 200~999 System SD bin numbers
Start Application #18
Travelling Class Override
Enter Code #471 , then dial number (enter LCR code if required)
Change Code #69 + Index Number + old Code + # + new Code + #
Uniform Call Distribution
Login from Agent Station #6061
Logout from Agent Station #6062
Login to Agent Station—another Station #6161
Logout to Agent Station–another Station #6162
User Programming Mode #9876
Voice Mail (VM)
Direct Transfer to Voice MailWhile on a call, press Cnf/Trn + #407 . Dial VM mailbox
number (usually Ext. Number) + # .
Volume Control - Beep With handset on-hook, press #6101 . Press Vo l or.
Volume Control - Ringing With handset on-hook, press #6102 . Press Vo l or.
1. If you have “hot dialing,” you do not need to press Ext. button as part of the sequence.
2. Stations must be assigned/enabled SD capabilities in system programming by an Administratorin Program 200-30 (System SD) and Program 200-35 (Station SD).
3. Refer to Table 10 on page 64 to see how to enter * and # into a speed dial number.
4. If your telephone does not have a Spdial button, press the * button, then dial the three digit Speeddial number (nnn).

8/6/2019 DP5000 Users Guide
http://slidepdf.com/reader/full/dp5000-users-guide 110/142
This page is intentionally left blank.
Administrator Programming 7
8/6/2019 DP5000 Users Guide
http://slidepdf.com/reader/full/dp5000-users-guide 111/142
Strata CIX DP5000-series Telephone UG 10/10 95
This appendix contains some of the functions that can be performed usingAdministrator Mode.
Important!
• These functions require Strata CIX 5.1 or higher system software.
• To access the Admin mode, the telephone must be enabled for these functions insystem programming using eManager. Refer to “Strata CIX Programming Manual,Volume 1” for eManager programming.
FunctionsUse the Soft Keys on the telephone to program the following functions inAdministrator mode:
• Phone Name – enter the Extension (PDN) name for any telephone in the StrataCIX
• Door Name – enter door phone name
• System SD/Name1 – system speed dial names
• Station SD/Name1 – station speed dial names for any telephone in the system
• CO Line Name – CO line names
• DNIS Name – DNIS names
• Phone Key Label – button names on the electronic telephone key strips
• LM Key Label – button names on the Add-on module key strip
1 The Admin telephone mode allows speed dial names to be programmed, but the actual speed dial numbersare programmed using the speed dial programming procedures described in the User Guide.
Administrator Programming
Administrator Mode
Administrator ModeTo access Administrator Mode, your station must be enabled for administrative
access.
If Mode soft key is not available when telephone is idle, the telephone set does nothave Administrative access.
To enter Administrator Mode

8/6/2019 DP5000 Users Guide
http://slidepdf.com/reader/full/dp5000-users-guide 112/142
96 Strata CIX DP5000-series Telephone UG 10/10
1. Press Mode soft key.
2. Press ADMN soft key. The “Password” prompt appears.Enter the password (0000 – default).
3. Press Hold .
Follow the steps below to perform the following Administrator functions inAdministrator Mode.
Phone Name1. Enter Administrator Mode
2. Press Hold .
3. Enter the DN ID number. This is the extension number (PDN) of the telephone.
4. Enter the Phone Name that corresponds with that DN ID.
5. Press Hold to register the name and move on to the next Phone name entry.
6. Press RTRN softkey.
7. Repeat steps 1~4 to program additional names.
Administrator Programming
Administrator Mode
Door Name
Door Phone should be setup and programmed within the Strata CIX before a Door
Name can be assigned.1. Enter Administrator Mode.
2. Press Nex t , display shows Door Name
3. Press Hold , display shows Door Phone Number.
4 E t th D Ph b (01 24)

8/6/2019 DP5000 Users Guide
http://slidepdf.com/reader/full/dp5000-users-guide 113/142
Strata CIX DP5000-series Telephone UG 10/10 97
4. Enter the Door Phone number (01~24).
5. Enter the Door Phone name
6. Press Hold to save the name.
7. Repeat steps 4~6 to enter another Door Phone name.
System SD/Name
1. Enter Administrator Mode.
2. Press Nex t twice until display show System SD/Name.3. Press Hold , display shows IDX
4. Enter three digit Speed Dial Index (000~799).
5. Enter the Speed Dial name/label.
6. Press Hold to save your changes
7. Repeat steps 4~6 to label additional Speed Dials.
Phone Key Label and LM Key Label
See Chapter 4 – ADM/DSS Console.
Administrator Programming
Administrator Mode
Station SD/ Name
1. Enter Administrator Mode.
2. Press Nex t three times, display will show Station SD/Name3. Press Hold , display shows DN ID
4. Enter the DN number of the station whose speed dial you wish to label, displaywill show DN XXXX IDX
5. Enter the two digit Speed Dial number you wish to program, display shows DN

8/6/2019 DP5000 Users Guide
http://slidepdf.com/reader/full/dp5000-users-guide 114/142
98 Strata CIX DP5000-series Telephone UG 10/10
g p y p g , p yXXXX IDX 01
6. Enter the name/label of this Station Speed Dial.
7. Press Hold to save your changes.
8. To label additional Speed Dials for this extension, repeat steps 5~7.
9. To label Speed Dials for another extension, press Rtrn , display will show DN IDand repeat steps 4~7.
CO Line Name1. Enter Administrator Mode
2. Press Nex t four times, display will show CO Line Name.
3. Press Hold , display will show CO Line.
4. Enter the CO line number whose name you wish to change (001~264), if you enter001 display will show CO Line 001
5. Enter the name/label for the CO Line
6. Press Hold to save your changes.7. Repeat steps 4~6 to change addition CO Line names.
DNIS Name1. Enter Administrator Mode.
2. Press Nex t five times, display will show DNIS Name.
3. Press Hold , display will show ILG (Incoming Line Group)4. Enter the ILG number whose name you wish to change (001~128), if you enter 001
display will show ILG 001
5. Enter the name/label for the ILG.
6. Press Hold to save your changes.
7. Repeat steps 4~6 to change addition ILG names.
Administrator Programming
System Features
System FeaturesThe following are system features that require Administrator setup using the DP5000-
series telephone. For eManager programming refer to the Strata CIX Programming Manual, Volume 1.
Direct Inward System Access (DISA) Security Code
The Direct Inward System Access feature is used when calling into your system from

8/6/2019 DP5000 Users Guide
http://slidepdf.com/reader/full/dp5000-users-guide 115/142
Strata CIX DP5000-series Telephone UG 10/10 99
The Direct Inward System Access feature is used when calling into your system fromthe outside. This feature is available on certain CO lines and from the built-in Auto
Attendant. Assignments are made by the system programmer. CO lines can be DISAlines in the Day, Day 2, or Night mode, or any combination of these modes.
If a caller enters the system via a DISA line or built-in Auto Attendant, the caller canthen access another line to place an outgoing call through the system, in which casethe outgoing line call is charged as a call made from the CIX system. To preventunauthorized outgoing calls through the system using the DISA feature, enter a DISAsecurity code as shown in the following steps.
CAUTION! Whenever the built-in Auto Attendant is installed, the DISAsecurity code should be used (and changed periodically) to preventunauthorized access of outgoing CO lines via the Auto AttendantDISA access feature.
To change the DISA security code
1. Press DN + DISA Security Access Code (see note). A confirmation tone is heard.
2. Dial the existing DISA security code (1-15 digits).
3. Press # , confirmation tone is heard.
4. Enter the new DISA security code + # , confirmation tone is heard and displayshows Data Programmed.
5. Lift handset off-hook and on-hook to end session.
Administrator Programming
System Features
To cancel the DISA security code
CAUTION! Canceling the DISA security is very dangerous and allows your telephonesystem to be open to hackers and could result in unauthorized longdistance telephone calls. Perform the following steps with caution.
1. Press DN + DISA Security Access Code (see note). A confirmation tone is heard
2 Di l h i i DISA i d (1 15 di i )

8/6/2019 DP5000 Users Guide
http://slidepdf.com/reader/full/dp5000-users-guide 116/142
100 Strata CIX DP5000-series Telephone UG 10/10
2. Dial the existing DISA security code (1-15 digits)
3. Press # , confirmation tone is heard.
4. Press # again, this will allow the DISA feature to be used without a security code.
5. A confirmation tone is heard and display shows Data Programmed.
6. Lift handset off-hook and on-hook to end session.
Note The DISA Security Access Code needs to be defined in the Strata CIX by theSystem Administrator through eManager as it is not set in the default database.
Administrator Programming
Date and Time Setting
Date and Time SettingThis operation is possible from the Administrator station or attendant consoles and
enables you to set the date, time, and day.
To set the date
1. With the handset on-hook, press a DN + the access code assigned in eManager.
A confirmation tone is heard.

8/6/2019 DP5000 Users Guide
http://slidepdf.com/reader/full/dp5000-users-guide 117/142
Strata CIX DP5000-series Telephone UG 10/10 101
2. Enter the date (YYMMDD).
3. Press # button.
A confirmation tone is heard.
4. Press Spkr .
The telephone returns to the idle mode.
To set the time
1. Press DN + the access code assigned in eManager, with the handset on-hook.
A confirmation tone is heard.
2. Enter the time (HHMMSS) in the 24-hour clock format.
Note H=hour, M=minute and S=seconds. Use leading zeros: 060530 = 6:05AM and30 seconds; 143045 = 2:30PM and 45 seconds.
3. Press # button.
You hear a confirmation tone.
4. Press Spkr .
The telephone returns to the idle mode.
Administrator Programming
Telephone Programming Mode
Telephone Programming Mode To place your telephone in Programming Mode A
Press 3+6+9+Hold simultaneously. The LCD displays “DP PROGRAM MODE”and “SELECT=”. Your phone will not ring if it receives a call while inProgramming Mode.
To exit from Programming Mode A

8/6/2019 DP5000 Users Guide
http://slidepdf.com/reader/full/dp5000-users-guide 118/142
102 Strata CIX DP5000-series Telephone UG 10/10
Go Off-hook and On-hook or wait for 30 seconds for Programming Mode to
automatically time out.
Initialize Telephone Settings
This function resets all Programming Mode option settings to their default setting.
1. Press 3+6+9+Hold (simultaneously).
2. Press Mode soft key.
3. Press Msg button.
4. Press Hold .
5. Press Vo l s button.
6. Press Msg
7. Press Hold
8. Go off-hook, then on-hook to exit the program mode.
Administrator Programming
Telephone Programming Mode
Call Waiting and Camp-on Ring Tone Over Handset/Headset Option
Call Waiting and Camp-on tones are sent to a busy telephone’s speaker to indicate thata call is waiting. Call Waiting and Camp-on Tones can be sent, as an option, to thetelephone handset or headset, in addition to the speaker. Follow these steps to turnhandset/headset Call Waiting and Camp-on tone On/Off for a DP5000-seriestelephone. The default is Off.
1. Press 3+6+9+Hold (simultaneously).

8/6/2019 DP5000 Users Guide
http://slidepdf.com/reader/full/dp5000-users-guide 119/142
Strata CIX DP5000-series Telephone UG 10/10 103
1. Press 3+6+9+Hold (simultaneously).
2. Press 0 .
3. Press Feature Button 4 (FB4) to toggle On/Off.
FB4, LED On: Call Waiting tone
FB4, LED Off: No Call Waiting tone
4. Press Hold to set the option.
5. Go off-hook, then on-hook to exit the program mode.
Initialize or Adjust LCD Contrast
To initialize LCD Contrast for the LCD Telephones
1. Press 3+6+9+Hold (simultaneously).
2. Press Mode soft key.
3. Press Msg button so that the Msg LED is On.4. Press Hold . This sets the LCD lightness/darkness contrast to the default setting.
5. Go off-hook, then on-hook to exit the program mode.
To adjust LCD Contrast for the LCD Telephones
Press and hold down the Mic button while you press and release Vo l s or Vo l t repeatedly.
Each time you press Vo l s or Vo l t, the contrast increases or decreases. There area total of 13 different contrast levels available.
Administrator Programming
DKT2000 Mode On/Off
DKT2000 Mode On/OffBefore a cordless telephone (DKT2204-CT or DKT2304-CT) can share a digital
station port with a DP5000-series telephone set, the port must be programmed into2000 mode. If the mode is not changed to 2000-mode, the DP5000 phone will notwork and the display will be blank. Also see CIX Installation and Maintenance
Manual for additional information.
In 2000-mode:
O l 16 h b li di l h LCD

8/6/2019 DP5000 Users Guide
http://slidepdf.com/reader/full/dp5000-users-guide 120/142
104 Strata CIX DP5000-series Telephone UG 10/10
• Only 16 characters by two lines display on the LCD.
• LCD Programmable Feature Button does not work
• Spdial button does not work
Step 1: Turn DKT2000 Mode On/Off
Important! Change the mode on DP5000-series telephone before connecting aDKT2204-CT or DKT2304-CT.
1. On the DKT3x00 telephone, press 3+6+9+Hold (simultaneously).
2. Press # .
3. Press FB 7 . LED On = 2000 telephone. LED Off = 5000-series telephone.
4. Press Hold .
5. Lift the handset to exit programming mode. Wait a few seconds for the telephone
to reset itself.
Step 2: Connect Cordless Telephone to DP5000-seriesTelephone
The cordless telephone (base station) will connect to the digital station port and thenin turn the DP5000 phone will connect to the cordless base station.
Administrator Programming
Single Line Telephone
Single Line TelephoneThe Single Line Telephone is the smallest telephone set in the DP5000-series family.
This telephone has some variations on button functionality compared to the otherDP5000-series telephones. These differences are detailed here.
Buttons
Some of the fixed buttons are a littledifferent from the other DP5000 series

8/6/2019 DP5000 Users Guide
http://slidepdf.com/reader/full/dp5000-users-guide 121/142
Strata CIX DP5000-series Telephone UG 10/10 105
different from the other DP5000-series
telephones.Message (Msg) – This button is used tocall back the station or voice mail devicethat activated the LED.
Flexible (Flex) – Works as a Redial buttonby default. This button can also beprogrammed as a Programmable Feature
Button.
Off-hook – This button works as a PDNthat can be used to answer and make calls. Message
Flexible
Off-hook
Speaker
Administrator Programming
Single Line Telephone
Redial / Feature Button Activation / Deactivation
The Flex button has been set to act as a Redial button by default. However, you canreprogram the Flex button to work as Programmable Feature Button, as it set insystem programming. These steps enable you to change how the button functions.
1. Press 3+6+9+Hold (simultaneously).
2. Press 0 7 .
3. Press Msg to toggle On/Off
M LED O Fl b k P bl F B (FB3)

8/6/2019 DP5000 Users Guide
http://slidepdf.com/reader/full/dp5000-users-guide 122/142
106 Strata CIX DP5000-series Telephone UG 10/10
Msg LED On: Flex button works as Programmable Feature Button (FB3)
Msg LED Off: Flex button works as a Redial button.
4. Press Hold to set the option.
5. Go off-hook, then on-hook to exit the program mode.
Note If you program the Flex button to work as Programmable Feature Button 3, youcan press * 0 to redial.
Msg / Feature Button Activation / DeactivationYour Msg button has been set by default to work as a Msg button; however, you canreprogram it to work as Programmable Feature Button.
1. Press 3+6+9+Hold (simultaneously).
2. Press 0 8 .
3. Press Msg to toggle On/Off.
Msg LED On: Msg operates as Programmable Feature Button (FB2)
Msg LED Off: Works as a Msg button.
4. Press Hold to set the option.
5. Go off-hook, then on-hook to exit the program mode.
Note Please see your System Administrator to have Features assigned to the Flex orMsg buttons, this will be done through eManager.
References A

8/6/2019 DP5000 Users Guide
http://slidepdf.com/reader/full/dp5000-users-guide 123/142
Strata CIX DP5000-series Telephone UG 10/10 107
This Appendix contains table that support some of the feature operations.
Call Forward
Table 15 Call Forward Procedure
Feature Button Sequence
Call Forward Any Call - Internal and Incoming Line Calls:
Forwards any call, whether an internal call or incoming line call.
All Calls to an ext. Press ext. button + #6011 (tone) + dial the dest. ext. no. (tone)
All Calls to outside
telephone no.
Press ext. button + #6011 (tone) + outside line access code + dest. telephone no.
+ # (tone)
Busy to an ext. Press ext. button + #6021 (tone) + dial the dest. ext. no. (tone)Busy to outside
telephone no.
Press ext. button + #6021 (tone) + outside line access code + dest. telephone no.
+ # (tone)
No Answer to an ext. Press ext. button + #6031 (tone) + dial the dest. ext. no. + timer (08~60) (tone)
No Answer to outside
telephone no.
Press ext. button + #6031 (tone) + outside line access code + dest. telephone no.
+ # (tone) + timer (08~60) (tone)
Busy No Answer to an
ext.Press ext. button + #6041 + dial the dest. ext. no. # (tone) + timer (08~60) (tone)
Busy No Answer to
outside telephone no.
Press ext. button + #6041 + outside line access code + dest. telephone no. + # +
timer (08~60) (tone)
Cancel Press ext. button + #6051 (tone)
References
Call Forward
Call Forward - Incoming Line Calls:
Forward incoming line calls only.
All Calls to an ext. Press ext. button + #6013 (tone) + dial the dest. ext. no. (tone)
All Calls to outside
telephone no.
Press ext. button + #6013 (tone) + outside line access code + dest. telephone no.
+ # (tone)
Busy to an ext. Press ext. button + #6023 (tone) + dial the dest. ext. no. (tone)
Table 15 Call Forward Procedure (continued)
Feature Button Sequence

8/6/2019 DP5000 Users Guide
http://slidepdf.com/reader/full/dp5000-users-guide 124/142
108 Strata CIX DP5000-series Telephone UG 10/10
Busy to outside
telephone no.
Press ext. button + #6023 (tone) + outside line access code + dest. telephone no.
+ # (tone)
No Answer to an ext. Press ext. button + #6033 + dial the dest. ext. no. (tone) + timer (08~60)
No Answer to outside
telephone no.
Press ext. button + #6033 + outside line access code + dest. telephone no. + #
(tone) + timer (08~60)
Busy No Answer to an
ext.Press ext. button + #6043 + dial the dest. ext. no. (tone) + timer (08~60) (tone)
Busy No Answer to
outside telephone no.
Press ext. button + #6043 + outside line access code + dest. telephone no. + #
(tone) + timer (08~60) (tone)
Cancel Press ext. button + #6053 (tone)
Call Forward Any Call - Set for Another Station:
Enables you to set call forwarding for another telephone within your telephone system. You will need the
other telephone’s Call Forward pass code in order to do this. Call Forward Pass Codes are created in system
programming.
All Calls to an ext. Press ext. button +#6012
(tone) + dial the other telephone’s ext. no. + enter othertelephone’s Call Forward pass code + # + dest. telephone no. (tone)
All Calls to outside
telephone no.
Press ext. button + #6012 (tone) + dial the other telephone’s ext. no. + enter other
telephone’s Call Forward pass code + # + outside line access code + dest.
telephone no. + # (tone)
Busy to an ext.Press ext. button + #6022 (tone) + dial the other telephone’s ext. no. + enter other
telephone’s Call Forward pass code + # + dest. telephone no. (tone)
Busy to outsidetelephone no.
Press ext. button + #6022 (tone) + dial the other telephone’s ext. no. + enter other
telephone’s Call Forward pass code + # + outside line access code + dest.
telephone no. + # (tone)
No Answer to an ext.
Press ext. button + #6032 (tone) + dial the other telephone’s ext. no. + enter other
telephone’s Call Forward pass code (tone) + # + dest. telephone no. (tone) + timer
(08~60) (tone)
References
Call Forward
No Answer to outsidetelephone no.
Press ext. button + #6032 (tone) + dial the other telephone’s ext. no. + enter other
telephone’s Call Forward pass code (tone) + # + outside line access code + dest.telephone no. + # (tone) + timer (08~60) (tone)
Busy No Answer to an
ext.
Press ext. button + #6042 + dial the other telephone’s ext. no. + enter other
telephone’s Call Forward pass code + # (tone) + dest. telephone no. (tone) + timer
(08~60) (tone)
Busy No Answer toPress ext. button + #6042 + dial the other telephone’s ext. no. + enter other
telephone’s Call Forward pass code + # (tone) + outside line access code + dest
Table 15 Call Forward Procedure (continued)
Feature Button Sequence

8/6/2019 DP5000 Users Guide
http://slidepdf.com/reader/full/dp5000-users-guide 125/142
Strata CIX DP5000-series Telephone UG 10/10 109
outside telephone no.telephone s Call Forward pass code + # (tone) + outside line access code + dest.
telephone no. + # ( tone) + timer (08~60) (tone)
CancelPress ext. button + #6052 (tone) + dial the other telephone’s ext. no. + enter other
telephone’s Call Forward pass code + # (tone)
Call Forward - Incoming Line Call - Set for Another Station:
Enables you to set forwarding of incoming line calls for another telephone within your telephone system
All Calls to an ext.Press ext. button + #6014 (tone) + dial the other telephone’s ext. no. + enter other
telephone’s Call Forward pass code + # (tone) + dest. telephone no. (tone)
All Calls to outside
telephone no.
Press ext. button + #6014 (tone) + dial the other telephone’s ext. no. + enter other
telephone’s Call Forward pass code + # (tone) + outside line access code + dest.
telephone no. + # (tone)
Busy to an ext.Press ext. button + #6024 (tone) + dial the other telephone’s ext. no. + enter other
telephone’s Call Forward pass code + # (tone) + dest. telephone no. (tone)
Busy to outside
telephone no.
Press ext. button + #6024 (tone) + dial the other telephone’s ext. no. + enter other
telephone’s Call Forward pass code + # (tone) + outside line access code + dest.
telephone no. + # (tone)
No Answer to an ext.
Press ext. button + #6034 (tone) + dial the other telephone’s ext. no. + enter other
telephone’s Call Forward pass code + # (tone) + dest. telephone no. (tone) + timer
(08~60)
No Answer to outside
telephone no.
Press ext. button + #6034 (tone) + dial the other telephone’s ext. no. + enter other
telephone’s Call Forward pass code + # (tone) + outside line access code + dest.
telephone no. + # (tone) + timer (08~60) (tone)
Busy No Answer to an
ext.
Press ext. button + #6044 (tone) + dial the other telephone’s ext. no. + enter othertelephone’s Call Forward pass code + # (tone) + dest. telephone no. (tone) + timer
(08~60) (tone)
Busy No Answer to
outside telephone no.
Press ext. button + #6044 (tone) + dial the other telephone’s ext. no. + enter other
telephone’s Call Forward pass code + # (tone) + outside line access code + dest.
telephone no. + # (tone) + timer (08~60) (tone)
ReferencesCall Forward
Cancel
Press ext. button + #6054 (tone) + dial the other telephone’s ext. no. + enter other
telephone’s Call Forward pass code + # (tone)
Change Call Forward Pass Code:
Your telephone must be enabled in programming to have the ability to change pass codes.
Change Pass CodePress ext. button + #670 (tone) + dial the dest. ext. no. (tone) + old pass code + #
(tone) + new pass code (tone) + #
Table 15 Call Forward Procedure (continued)
Feature Button Sequence

8/6/2019 DP5000 Users Guide
http://slidepdf.com/reader/full/dp5000-users-guide 126/142
110 Strata CIX DP5000-series Telephone UG 10/10
References
Soft Keys
Soft KeysThe table below is a list of soft key labels that appear on the LCD telephones. Press
the soft key button associated with the label to activate the feature (SK 1 , SK 2 , SK 3 and SK4).
Table 16 Soft Key Prompts
Soft Key Definition
ABR Activates Automatic Busy Redial after dialing a busy outside telephone number.
ACB Activates Automatic Callback after reaching a busy station CO line or CO Line group

8/6/2019 DP5000 Users Guide
http://slidepdf.com/reader/full/dp5000-users-guide 127/142
Strata CIX DP5000-series Telephone UG 10/10 111
ACB Activates Automatic Callback after reaching a busy station, CO line, or CO Line group.
BUSY (Busy Override) Sends a call-waiting tone to a busy station.
CONF Initiates or completes a conference.
EXEC (Executive Override) Breaks into the conversation of a busy called station.
EXIT Exits you from a conference; remaining parties are connected.
JOIN Joins all parties to a conference while on a conference call.
LINEAdds a CO line to an existing call while in the Conference mode. The LCD prompts you to
access a CO line after you press this key.MESG Sets a message waiting indication at a busy or unanswered station.
OVRD Overrides options, busy mode, or overrides Do Not Disturb mode.
PGEEnables you to enter a Page Group number (01~16) and send a page to the phones in that page
group.
RING Makes a called station ring when making a voice announce call to the station.
RLS Disconnects a call and returns telephone to the idle state.
RTRN Terminates a feature operation and returns to a previously displayed state.
SPLT
Enables you to break off from a conference call with another conference call member for a
private conversation (split). You can use the Join key to reconnect both of you back into the
conference. You must be a conference master to use this. See instructions for Conference
Split/Join/Drop for further instruction.
STA.Adds a station to an existing call while in the Conference mode. The LCD prompts you to dial
a station number after you press this key.
TALK Makes a voice announcement to a called station that is ringing.
TRNS Initiates or completes a Transfer while on an outside call.
ReferencesButton Labels
Button LabelsThe button labels in Table 17 are for the Programmable Buttons on the telephone.
Programmable buttons are the unmarked buttons on the telephone keystrip.
Table 17 Programmable Feature Button Definitions
Button Definitions
AccountCode
Account Code – Press to enter a Voluntary Account Code anytime during a Central
Office (outside) line call without interrupting the conversation.
All Cal l

8/6/2019 DP5000 Users Guide
http://slidepdf.com/reader/full/dp5000-users-guide 128/142
112 Strata CIX DP5000-series Telephone UG 10/10
All Cal l
PageAll Call Voice Page – Press to page all of the telephones in the All Call Page group.
Auto BusyRedial
Automatic Busy Redial – Press to set up Automatic Busy Redial after receiving a busy
tone on a dialed outside line call (not available when calling on Tie or Direct Inward
Dialing (DID) outside lines).
AutoCal lback
Automatic Callback – Press to recall a busy station or station in the Do Not Disturb (Do
Not Disturb) mode as soon as that station becomes idle or deactivates Do Not Disturb.
Also used for outside line queuing when all lines are busy.
Call Frw dAll Cal ls
Call Forward-All Calls – Press to forward all calls to another station or voice mail
device.
Call Frw dBusy
Call Forward-Busy – Press to forward calls immediately to another station or voice mail
device when your station is busy or in the Do Not Disturb mode.
Call Frw dBusy NAns
Call Forward-Busy/No Answer – Press to forward calls immediately to another station
or voice mail device when your station is busy or in Do Not Disturb mode. Also forwards
calls when your station is not answered after 8~60 seconds (set at your station).
Call Frw dNo Answ er
Call Forward-No Answer – Press to forward calls to another station or voice mail device
when your station is not answered after 8~60 seconds (set at your station).
Call Frw dExterna l
Call Forward-External – Press to forward Private or DID line calls to an external or
internal telephone number.
Caller ID Caller ID – Press to view the Call History list (may include name/number, date, status).
Di rec tedPickupCall Pickup – Press to initiate a ringing Directed Call Pickup of outside line, extension,
and page calls.
Do NotDisturb Do Not Disturb – Press to lock your station in or out of the Do not Disturb mode.
References
Button Labels
DSS
Direct Station Selection(s) – Press to ring a preselected station. The LED associated
with each DSS button provides the status (idle/busy) of the station assigned to the
button.
Flash
Flash – Press to perform the following functions: Disconnect and recall dial tone on a
outside line; access Centrex or PBX features; enter a pause or flash signal when
programming speed dial numbers.
GroupPickup
Group Pickup – Press to pick up a call that is ringing a station that belongs to a Pickup
G th t t ti i b f
Table 17 Programmable Feature Button Definitions (continued)
Button Definitions
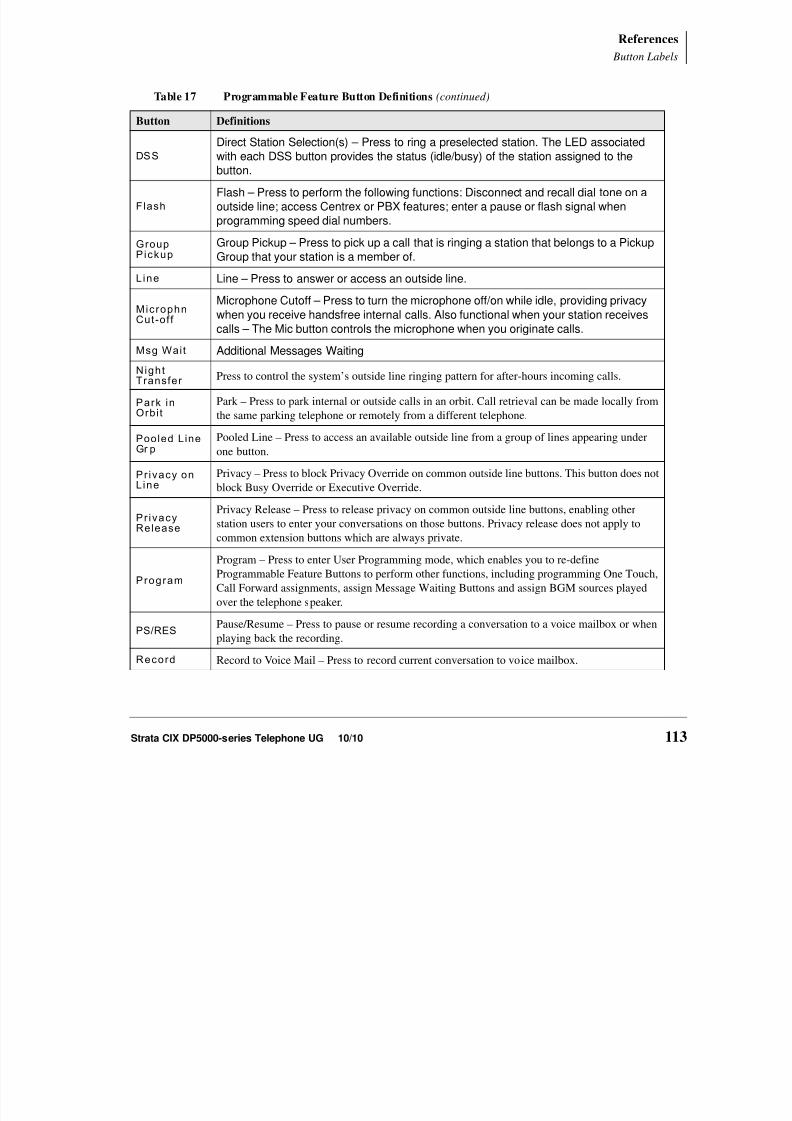
8/6/2019 DP5000 Users Guide
http://slidepdf.com/reader/full/dp5000-users-guide 129/142
Strata CIX DP5000-series Telephone UG 10/10 113
Pickup Group that your station is a member of.
Line Line – Press to answer or access an outside line.
MicrophnCut-off
Microphone Cutoff – Press to turn the microphone off/on while idle, providing privacy
when you receive handsfree internal calls. Also functional when your station receives
calls – The Mic button controls the microphone when you originate calls.
Msg Wait Additional Messages Waiting
NightTransfer Press to control the system’s outside line ringing pattern for after-hours incoming calls.
Park inOrbit
Park – Press to park internal or outside calls in an orbit. Call retrieval can be made locally from
the same parking telephone or remotely from a different telephone.
Pooled LineGr p
Pooled Line – Press to access an available outside line from a group of lines appearing under
one button.
Pr ivacy onLine
Privacy – Press to block Privacy Override on common outside line buttons. This button does not
block Busy Override or Executive Override.
Pr ivacyRelease
Privacy Release – Press to release privacy on common outside line buttons, enabling other
station users to enter your conversations on those buttons. Privacy release does not apply to
common extension buttons which are always private.
Program
Program – Press to enter User Programming mode, which enables you to re-define
Programmable Feature Buttons to perform other functions, including programming One Touch,
Call Forward assignments, assign Message Waiting Buttons and assign BGM sources played
over the telephone speaker.
PS/RESPause/Resume – Press to pause or resume recording a conversation to a voice mailbox or when
playing back the recording.
Record Record to Voice Mail – Press to record current conversation to voice mailbox.
ReferencesButton Labels
Release andAns
Release and Answer – Press to disconnect or complete the transfer the current outside or
extension call and automatically answer the new incoming outside or extension call.
Release Cal lRelease – Press to disconnect or complete the transfer of the current outside or extension call
and to place your station in the idle condition.
SD or CustomizedBut ton
Speed Dial – Press to Speed Dial a telephone number or feature access codes. SD buttons can be
used as either System Speed Dial numbers or Station Speed Dial numbers.
Spd Dial LngPause (Long) Press to insert a 10 second pause when programming Speed Dial numbers
Table 17 Programmable Feature Button Definitions (continued)
Button Definitions

8/6/2019 DP5000 Users Guide
http://slidepdf.com/reader/full/dp5000-users-guide 130/142
114 Strata CIX DP5000-series Telephone UG 10/10
p g
Pause
Pause (Long) – Press to insert a 10-second pause when programming Speed Dial numbers.
Spd DialPause
Pause – Press to set either a one-half or two-second pause when programming Speed Dial
numbers. (The pause time is set in system programming).
Star t Start – Press to make an outgoing call using an ISDN trunk.
Su b Sub address – Press to enter a sub address on an ISDN trunk outgoing call.
Tel SetMusic Background Music – Press to turn Background Music on or off over your station speaker.
Tone DialSelect
Tone – Press to change the outgoing dialing of the outside line in use from dial pulse to tone
signaling.
Unlock Door Door Unlock – Press to unlock a door lock mechanism.
Table 18 Programmable Feature Button Labels
Code FeatureName 1 2 3 4 5 6 7 8 9 10 11 12
LCD
DefaultLabel
User
CanRename
000Unused
Key
100Prime DN
KeyE x t . x x x x x
Ext.XXXXX
(CLID)
Yes
110Secondary/ PhantomDN Key
E x t . x x x x xExt.
XXXXX(Caller ID)
Yes
References Button Labels
120 CO L i n e x x x
Line
XXX(CallerID)
Yes
130CO Line
GroupL i n e G r p x x x
Line GrpXXX(Caller
ID)Yes
Table 18 Programmable Feature Button Labels (continued)
CodeFeature
Name1 2 3 4 5 6 7 8 9 10 11 12
LCDDefault
Label
UserCan
Rename

8/6/2019 DP5000 Users Guide
http://slidepdf.com/reader/full/dp5000-users-guide 131/142
Strata CIX DP5000-series Telephone UG 10/10 115
140Pooled
Line KeyP L L n G r p x x x
PL LnGrpXXX(C
aller ID)Yesl
540Door
UnlockD o o r L o c k x x x
Door LockXXX
Yes
560PhDN
Message
Waiting
M W f o r x x x x xMW forXXXXX
Yes
570 One Touch O n e T o u c h One Touch Yes
610 DSS Key D S x x x x x x xDSXXXXX
XXYes
900
ApplicationStart-
Application
#00-#89
A P P K e y 9 0 0 X XAPP Key900XX
Yes
900
ApplicationStart -
Application
#90
A C D L o g I n ACD LogIn Yes
900
Application
Start -
Application#91
U n A V a i l a b l eUnavailabl
e
Yes
900
Application
Start -Application
#92
A C D W o r k U n i t WorkUnit Yes
ReferencesButton Labels
900
Application
Start -Application
#93
A C D H e l p ACD Help Yes
900
ApplicationStart -
A C D P i c k U pACD
Yes
Table 18 Programmable Feature Button Labels (continued)
CodeFeature
Name1 2 3 4 5 6 7 8 9 10 11 12
LCDDefault
Label
UserCan
Rename

8/6/2019 DP5000 Users Guide
http://slidepdf.com/reader/full/dp5000-users-guide 132/142
116 Strata CIX DP5000-series Telephone UG 10/10
900Application
#94
A C D P i c k U pPickUp
Yes
900
ApplicationStart -
Application#95
E n d W r a p U pEnd
WrapUpYes
900
Application
Start -Application#96
A C D W r a p U p ACD Join Yes
900
ApplicationStart -
Application#97
A C D M o n i t o rACD
MonitorYes
900ApplicationStart -
Application#98
A C D S h i f t ACD Shift Yes
900
ApplicationStart -
Application#99
A C D S t a t u sACD
StatusYes
Hardware Connections B

8/6/2019 DP5000 Users Guide
http://slidepdf.com/reader/full/dp5000-users-guide 133/142
Strata CIX DP5000-series Telephone UG 10/10 117
DP5000-Series Telephone Tilt AnglesThe DP5000-series telephones, except the Single Line Telephone have three tiltpositions built into the base. There is also a tilt stand extension that adds an additional20 degrees of tilt. When the telephone is sitting on a desk or table there are a total of six different angles of tilt available. When wall mounted there are two anglesavailable. The Single Line Telephone base is fixed at 15 degrees. See figures on thenext page.
Table 19 DP5000-Series Tilt Angels
Model Tilt Without Stand Tilt with Stand
All DP5000-series, except theSingle Line Telephone 15°, 27.5°, 40° 35°, 47.5°, 60°
All Add-on and DSS modulesSingle Line Telephone 15 Degrees (fixed)
Hardware ConnectionsDP5000-Series Telephone Tilt Angles

8/6/2019 DP5000 Users Guide
http://slidepdf.com/reader/full/dp5000-users-guide 134/142
118 Strata CIX DP5000-series Telephone UG 10/10
DP5000-Series Desk-top Tilt Angle With Tilt-Stand Extension
DP5000-Series Wall Mount Angles
0° (no) Tilt -10° Tilt
Hardware ConnectionsWiring
WiringThe connectors on the DP5000-series telephones are identified with icons. The
connector icons and their meaning are shown below.
Connectors
ADM HandsetHeadsetExt. Speaker
Line Cord

8/6/2019 DP5000 Users Guide
http://slidepdf.com/reader/full/dp5000-users-guide 135/142
Strata CIX DP5000-series Telephone UG 10/10 119
DP5000-series Telephone Wiring
Cable Clips(To CIX System) Speaker (BESCB)
AMD Cord
The DP5000-series telephones include the special long-tail handsetcords required to fit the new tilt bases.
Headset Cord
Handset Cord
Hardware ConnectionsWiring
When the tilt stand extension is used,
simply remove the line cord from under the rear cable clip. This will allow the tilt stand extension to deploy without strain on the line cord.

8/6/2019 DP5000 Users Guide
http://slidepdf.com/reader/full/dp5000-users-guide 136/142
120 Strata CIX DP5000-series Telephone UG 10/10
Centrex Application C
Your system may be equipped with the Centrex Application, which enhances its
f t bilit h i t ll d b hi d C t PBX t Y t l h

8/6/2019 DP5000 Users Guide
http://slidepdf.com/reader/full/dp5000-users-guide 137/142
Strata CIX DP5000-series Telephone UG 10/10 121
feature capability when installed behind a Centrex or PBX system. Your telephonemay have access to one or more of the enhanced Centrex features listed below:
Flexible Directory NumberingA station’s extension can be three or four digits. It is, therefore, possible to match a
station’s extension and Centrex line extension number. Dial the entire station numberwhen indicated.
Note Some access code numbers may have been changed to avoid system numberingplan conflicts.
Centrex Feature ButtonsYou can access some Centrex features by pressing a pre-programmed Feature Buttonon your telephone, instead of dialing a Centrex access code. The Centrex access code,including the necessary flash and/or pause sequence, is activated when the button ispressed. See your Centrex or PBX operations manual for specific details.
Ringing RepeatThe distinctive ring patterns available in your Centrex system are automaticallyrepeated with your digital telephone, enabling you to answer appropriately for eitheroutside, inside or callback calls.
Centrex ApplicationDelayed Ringing
Delayed RingingOutside line or Centrex line(s) can be programmed for a 12-second and/or 24-secondring delay at stations to permit alternate answering conditions. Answer the line when
your telephone is ringing.

8/6/2019 DP5000 Users Guide
http://slidepdf.com/reader/full/dp5000-users-guide 138/142
122 Strata CIX DP5000-series Telephone UG 10/10
Index
Ab t thi b k
busy override, 57
button

8/6/2019 DP5000 Users Guide
http://slidepdf.com/reader/full/dp5000-users-guide 139/142
Strata CIX DP5000-series Telephone UG 10/10 123
about this book conventions, viiihow to use this guide, viiiorganization, viirelated documents, x
access codes, 63, 87, 90account codes, 28, 87, 90
calls, 27forced, 27verified/non-verified, 27
administratorfunctions, 95
advisory messaging, 92all call page, 60
alphanumeric entry, 65answer a call, 23answering calls, 20attendant console, 90automatic
busy redial, 87, 90callback, 32callback cancel, 87, 90hold, 25line selection, 19
automatic hold, 25
Bbackground music (BGM), 33, 87, 90
buttonfeature, 106flexible, 105labels, 112off-hook, 105programming, 87
buttons
Cnf/Trn, 8DSS on ADMs and DSS consoles, 74fixed, 6Hold, 8one touch, 88Redial, 7speed dial, 7
Ccaller ID, 37call forward
access codes, 87any call, 35override, 77station, 34system, 34
call history, 37call hold, 24calling, 20call park, 90
orbits, 38
IndexD ~ F
call pickup, 39, 87, 90held calls, 91
call waiting, 42, 58, 103
Camp-on ring tone, 103centrex
application, 121feature buttons, 121
class of serviceoverride, 58
Cnf/Trn, 8
CO linell f 41
override, 57door lock, 49
control, 91
door name, 97door phone, 50
calling, 91drop, 45DSS, 47
buttons on ADMs and DSS consoles, 74call answering, 76
call forward override 77lli 74

8/6/2019 DP5000 Users Guide
http://slidepdf.com/reader/full/dp5000-users-guide 140/142
124 Strata CIX DP5000-series
CO linecall transfer, 41CO line name, 98CO line queuing, 47conference
calls, 43, 91hold, 25split/join/drop, 45voice mail, 44
Ddate and time setting, 101day/day 2/night modes, 99deactivation, 106delayed ringing, 122
dial by name, 21dial directory, 21dial pad, 65direct inward system access (see DISA)directories, 65direct station selection
buttons, 47
DISA, 99security code, 91, 99
distinctive ringing, 15DKT2000 mode on/off, 104DNIS name, 98do not disturb, 48, 91
call forward override, 77calling, 74console, 74night transfer, 77paging, 77speed dial, 76transferring, 75
Eemergency
call, 91page, 60
emergency call, 51emergency ringdown, 52exclusive hold, 24
executive override, 58
Ffeature access codes, 90feature button activation, 106flash, 87, 91flexible button, 105
flexible buttonscodes, 87
flexible directory numbering, 121forced account codes (verified/non-verified), 27
IndexG ~ P
Ggroup pickup, 39
Hhandset calling, 20handsfree answerback, 23Hold, 8hold, 24
line hold, 38, 41hot dialing, 19, 20
on phantom ext/MW, 54messaging
advisory, 92
Mic button, 7, 24, 56microphone, 7, 20, 24, 55, 56microphone cut-off, 55, 56, 87, 113mute, 7, 24
Nnames
storing speed dial, 65( i ) 65

8/6/2019 DP5000 Users Guide
http://slidepdf.com/reader/full/dp5000-users-guide 141/142
Strata CIX DP5000-series Telephone UG 10/10 125
Iindicators
LED, 26ISDN
buttons, 68, 114
J join, 45
Llanguage changes, 91language code, 52LCD contrast, 103
LCRdialing out, 91
LED indicators, 26line
automatic selection, 19ringing preference, 19
line button, 41
Mmaking a call, 20message waiting, 53, 91message waiting light
on another telephone, 54
storing speed dial, 65names (entering), 65network access, 92night ring answer, 92night transfer button, 77
O
off-hook, 105off-hook call announce (OCA), 56, 92one touch button, 88, 89override
access codes, 92busy, 57call forward (DSS), 77class of service, 58do not disturb, 57executive, 58privacy, 59travelling class, 93
override calls, 57
P
paging, 39, 77access codes, 87, 92
park, 90park in orbit, 38
park in orbit, 38
IndexR ~ V
pickup, 39pick up group calls, 39privacy, 61
override, 59private network access, 92programming
buttons, 87programming mode, 102
R
redial, 7, 106t l t b di l d 92
storing speed dial names, 65system
features, 99
speed dial/name, 97
Ttelephone
buttons, 105single line telephone, 105
telephone settings, 102
Tilt Angles, 117t ⁄ l di li 68

8/6/2019 DP5000 Users Guide
http://slidepdf.com/reader/full/dp5000-users-guide 142/142
126 Strata CIX DP5000-series
, ,repeat last number dialed, 92ringing
distinctive settings, 15line preference, 19
ringing line preference, 23ringing repeat, 121
Ssignaling
tone, 19voice first, 19
soft keys, 30speakerphone, 24special characters for speed dialing, 64speed dial, 7, 62, 88
access codes, 63, 87, 93names, 65personal, 89station, 98system, 97
speed dial (DADM or DSS), 76
Spkr button, 20answering, 23
split, 45start application, 93station
speed dial/name, 98
g ,tone ⁄ pulse dialing, 68tone signaling, 19travelling class override, 93two (tandem) CO line connection, 45
U
uniform call distribution (UCD), 69user programming, 85, 87, 93
Vvoice first signaling, 19voice mail
access codes, 93conference, 44
volume control, 26, 93voluntary account codes (verified/non-verified), 29