Creating a New Site
12
Creating a New Wordpress.com Site
Transcript of Creating a New Site

Creating a New Wordpress.com Site
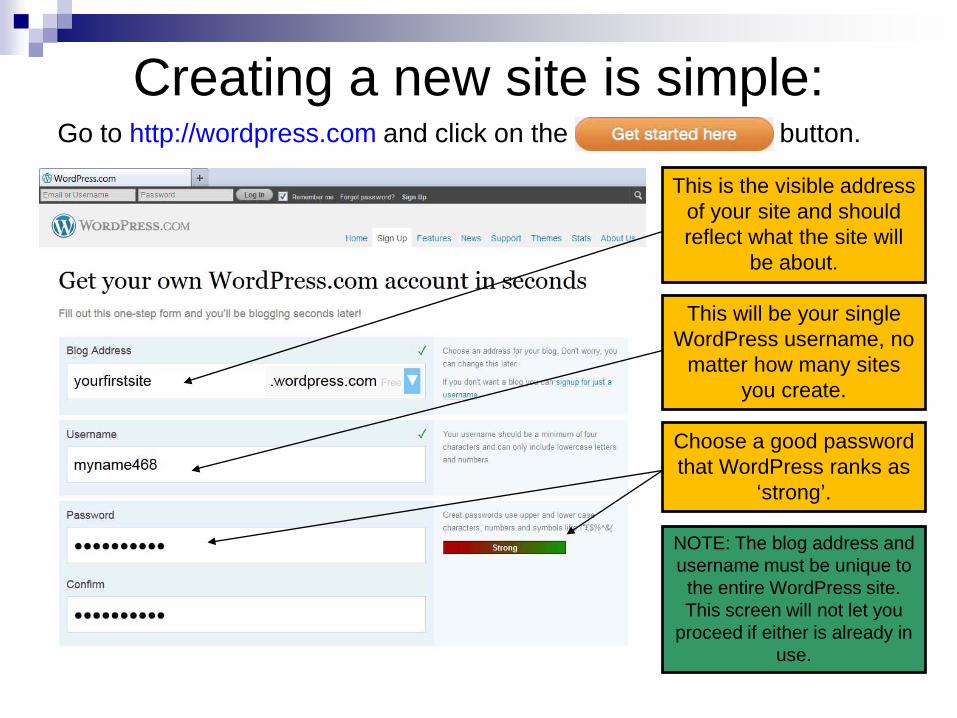
Creating a new site is simple: Go to http://wordpress.com and click on the button.
This is the visible address of your site and should reflect what the site will
be about.
This will be your single WordPress username, no
matter how many sites you create.
Choose a good password that WordPress ranks as
‘strong’.
NOTE: The blog address and username must be unique to
the entire WordPress site. This screen will not let you
proceed if either is already in use.
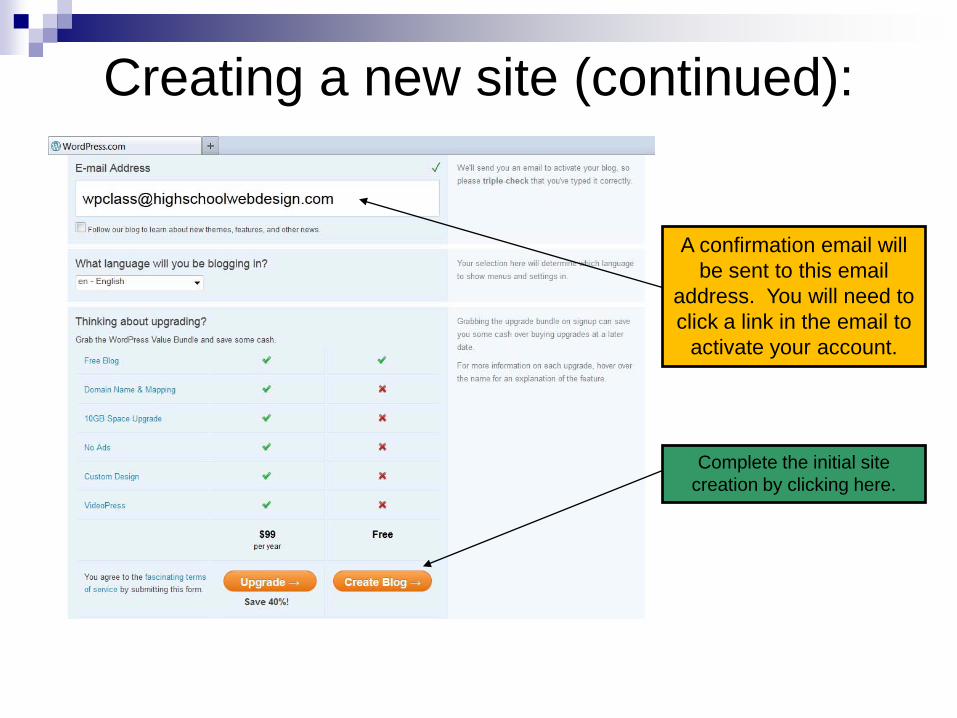
Creating a new site (continued):
A confirmation email will be sent to this email
address. You will need to click a link in the email to
activate your account.
Complete the initial site creation by clicking here.
Creating a new site (continued):
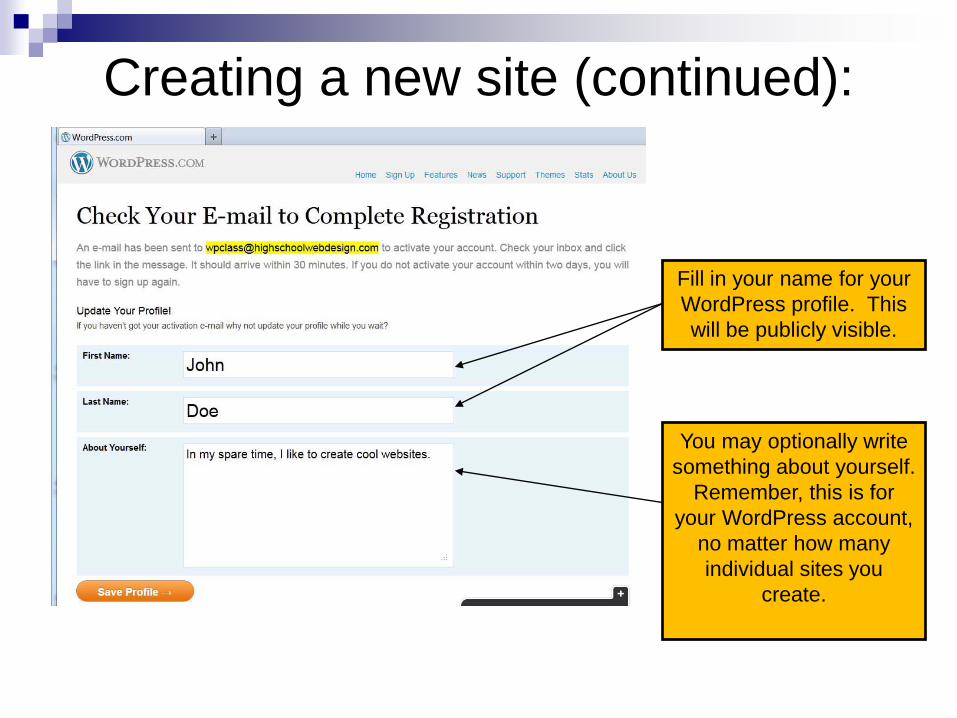
Fill in your name for your WordPress profile. This will be publicly visible.
You may optionally write something about yourself.
Remember, this is for your WordPress account,
no matter how many individual sites you
create.
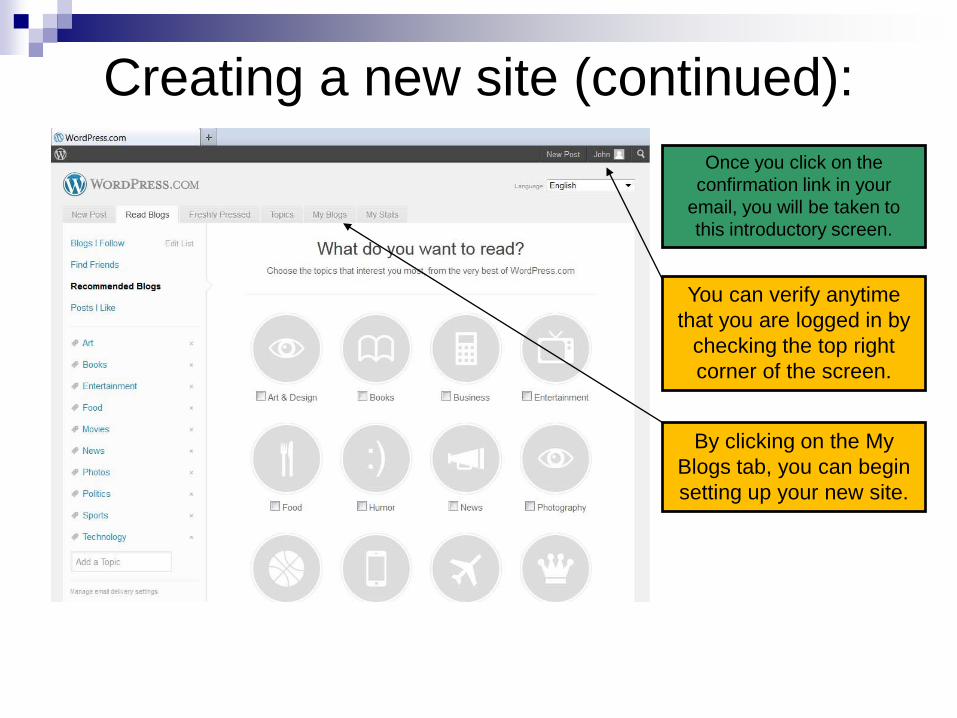
Creating a new site (continued): Once you click on the
confirmation link in your email, you will be taken to this introductory screen.
You can verify anytime that you are logged in by
checking the top right corner of the screen.
By clicking on the My Blogs tab, you can begin setting up your new site.

Creating a new site (continued):
This is the site we just created. If we were to create additional sites,
they would each be listed on this screen.
Notice that our new site already contains one
page and one comment. These are automatically
created for all new Wordpress sites.
To manage an individual site, we click on the
Dashboard link beneath its listing.
Creating a new site (continued):
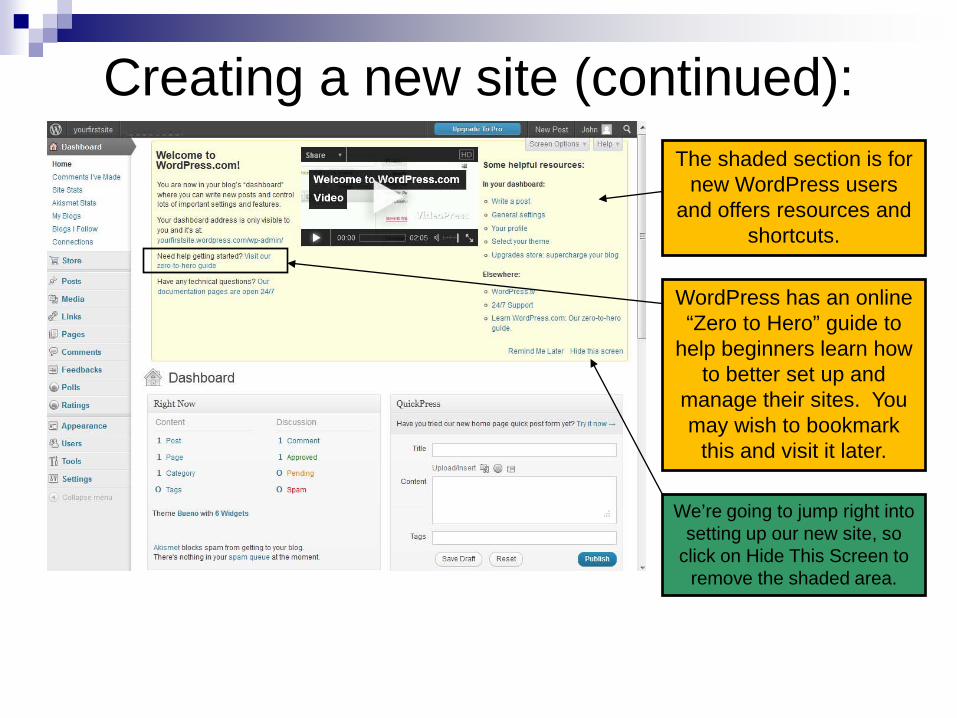
We’re going to jump right into setting up our new site, so
click on Hide This Screen to remove the shaded area.
The shaded section is for new WordPress users
and offers resources and shortcuts.
WordPress has an online “Zero to Hero” guide to
help beginners learn how to better set up and
manage their sites. You may wish to bookmark
this and visit it later.
Introducing the Dashboard:
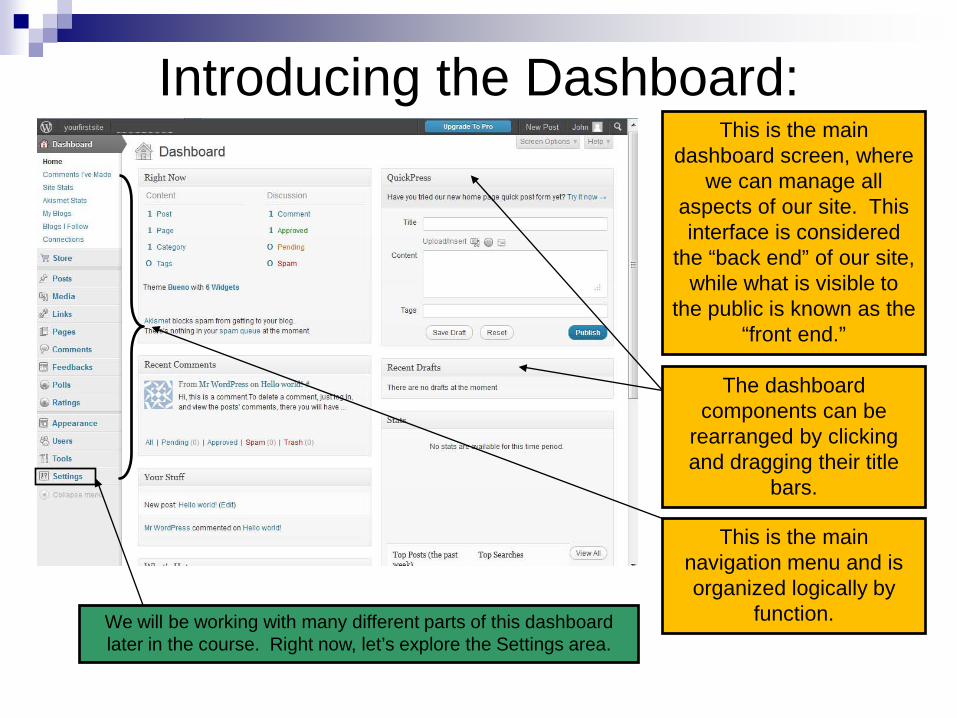
We will be working with many different parts of this dashboard later in the course. Right now, let’s explore the Settings area.
This is the main dashboard screen, where
we can manage all aspects of our site. This interface is considered
the “back end” of our site, while what is visible to
the public is known as the “front end.”
This is the main navigation menu and is organized logically by
function.
The dashboard components can be
rearranged by clicking and dragging their title
bars.
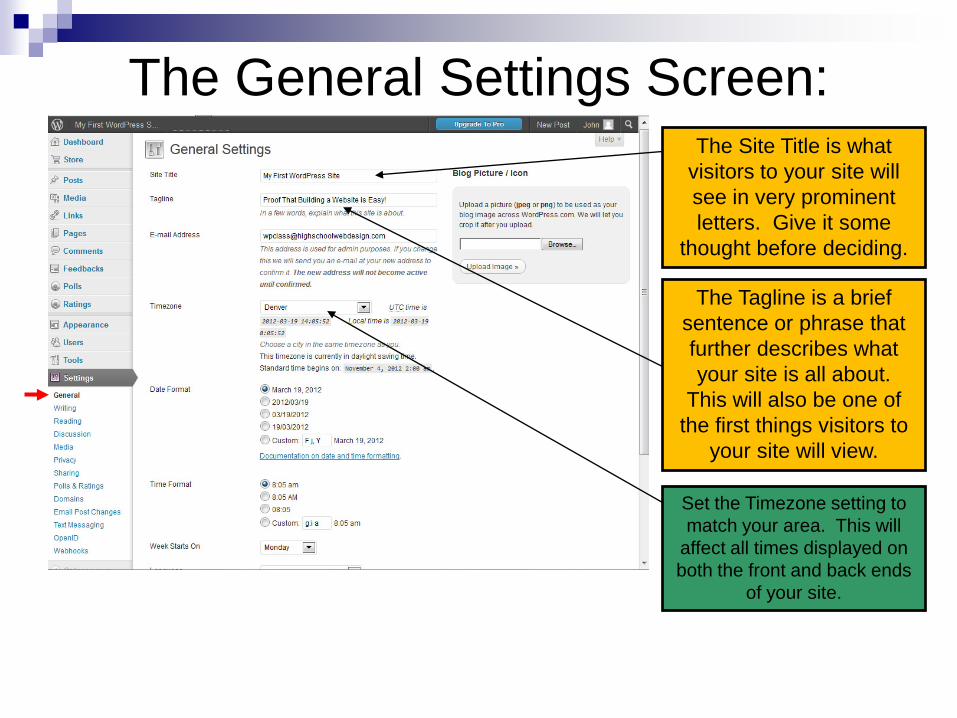
The General Settings Screen:
Set the Timezone setting to match your area. This will
affect all times displayed on both the front and back ends
of your site.
The Site Title is what visitors to your site will see in very prominent letters. Give it some
thought before deciding.
The Tagline is a brief sentence or phrase that further describes what your site is all about.
This will also be one of the first things visitors to
your site will view.
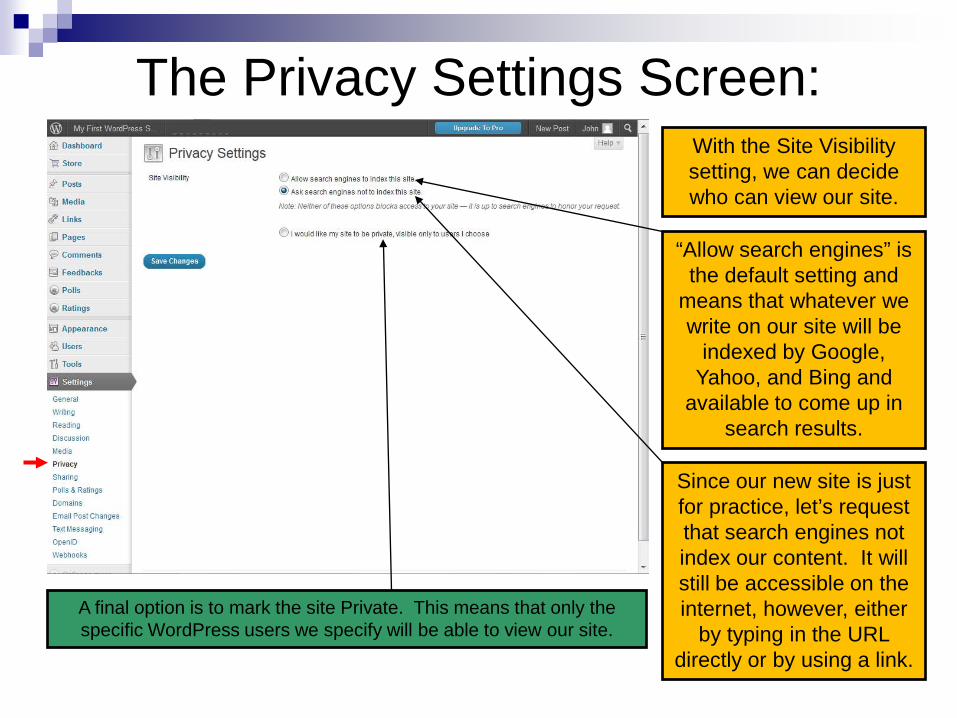
The Privacy Settings Screen:
A final option is to mark the site Private. This means that only the specific WordPress users we specify will be able to view our site.
With the Site Visibility setting, we can decide who can view our site.
“Allow search engines” is the default setting and
means that whatever we write on our site will be
indexed by Google, Yahoo, and Bing and
available to come up in search results.
Since our new site is just for practice, let’s request that search engines not index our content. It will still be accessible on the internet, however, either
by typing in the URL directly or by using a link.
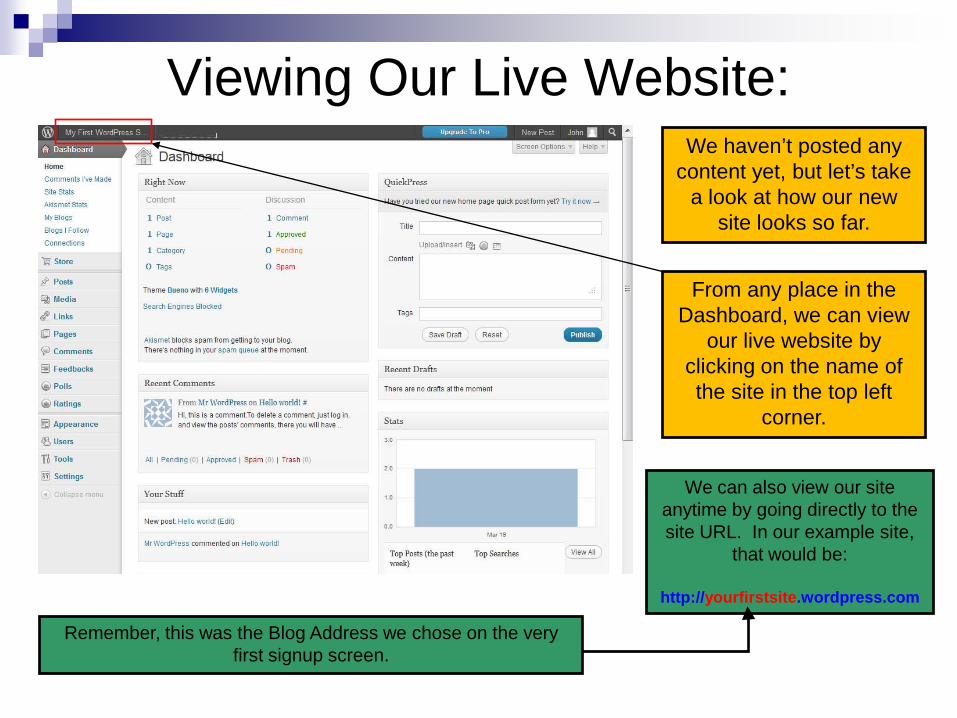
Viewing Our Live Website:
We can also view our site anytime by going directly to the site URL. In our example site,
that would be:
http://yourfirstsite.wordpress.com
We haven’t posted any content yet, but let’s take
a look at how our new site looks so far.
From any place in the Dashboard, we can view
our live website by clicking on the name of the site in the top left
corner.
Remember, this was the Blog Address we chose on the very first signup screen.
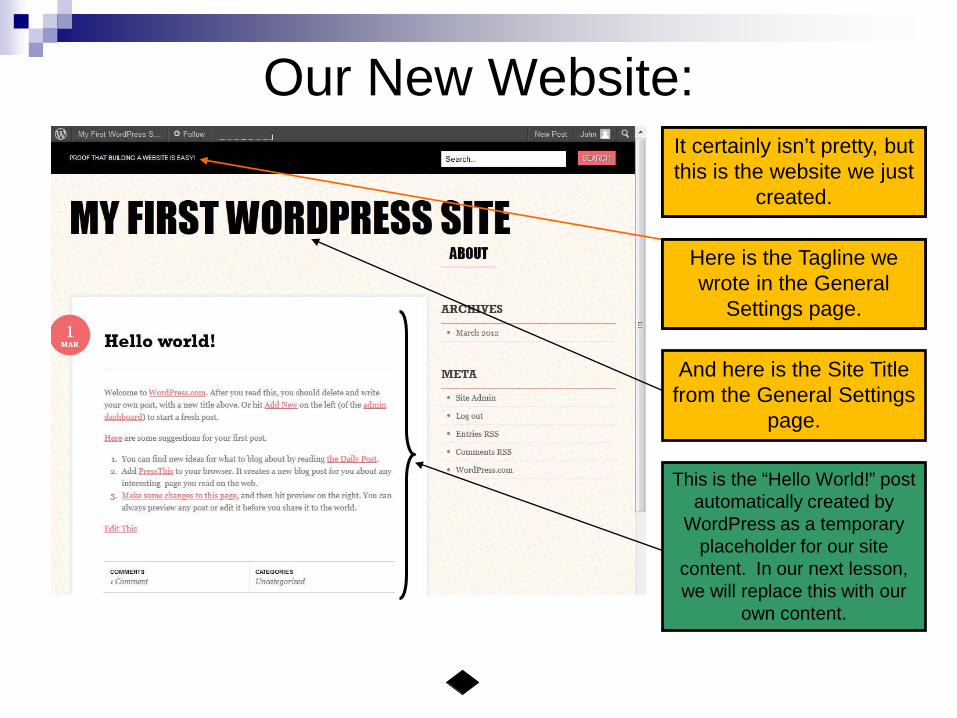
Our New Website:
This is the “Hello World!” post automatically created by
WordPress as a temporary placeholder for our site
content. In our next lesson, we will replace this with our
own content.
Here is the Tagline we wrote in the General
Settings page.
And here is the Site Title from the General Settings
page.
It certainly isn’t pretty, but this is the website we just
created!
Here is the Tagline we wrote in the General
Settings page.
It certainly isn’t pretty, but this is the website we just
created!
Here is the Tagline we wrote in the General
Settings page.
It certainly isn’t pretty, but this is the website we just
created.