Completing the PMP Application - Bill Lewis Training · Completing the PMP Application ... and more...
10
Completing the PMP Application Step 1: Go to www.PMI.org and click on ‘Login/Register’ at the top right-hand corner Step 2: Click on the “Create an Account” button below the New User section. Step 3: Fill in the PMI.org registration form with your personal information. In our example, we are going to use a fictional person named Frank Smith.
Transcript of Completing the PMP Application - Bill Lewis Training · Completing the PMP Application ... and more...

Completing the PMP Application Step 1: Go to www.PMI.org and click on ‘Login/Register’ at the top right-hand corner
Step 2: Click on the “Create an Account” button below the New User section.
Step 3: Fill in the PMI.org registration form with your personal information. In our example, we
are going to use a fictional person named Frank Smith.

Step 4: After you’ve successfully created a PMI account, you can now apply for your PMP
credential. Click on “Certification” from the top navigation and then click on “Ready to Apply?”

Step 5: Read the “Eligibility requirements and candidate policies/procedures” before proceeding.
In a nutshell, you need to make sure you have a bachelor’s degree, 3 years of work experience,
and more than 4500 hours or project management work experience.
Step 6: Click “Apply for PMP Credentials”

Step 7: As you can see from the left navigation, there are 8 sections to complete.
Step 8: The first step is to add your home and work addresses. If you do not have a work address,
leave this section blank. Click “save and continue”

Step 9: Add your contact information. You need at least one email and one phone number. After,
click “save and continue.”
Step 10: Fill in your education information. If you have multiple degrees, you only need to fill in
your HIGHEST degree obtained.
Step 11: Now, the fun part begins. Before you fill in the Requirements section, create your own
PMP Application Worksheet to organize your thoughts in one excel document.
It is easier to have everything in one place for future reference. Once you’ve create this
spreadsheet, all you need to do is copy and paste.

Step 12: For every one of your project experiences, write the title, your role, company, and start
and end dates.
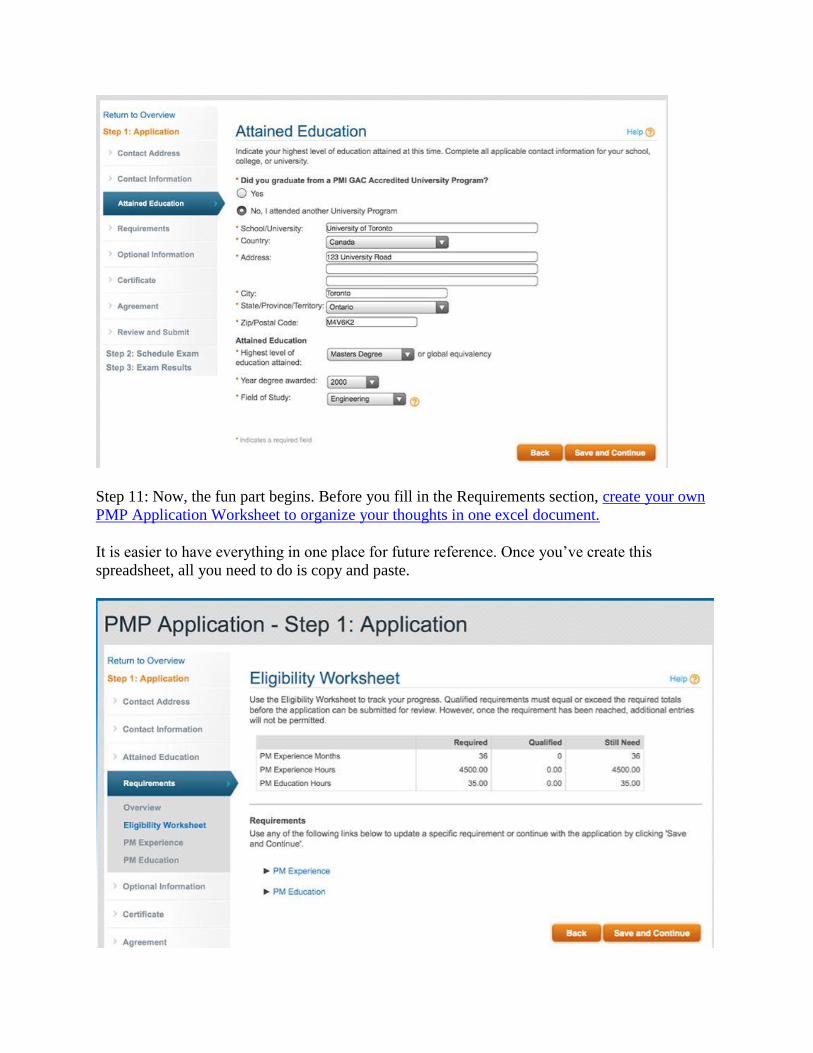
Step 13: Add in the organization details
Step 14: Add in the organization contact person’s details
Step 15: Add in the number of hours you worked in in each of the domain areas.
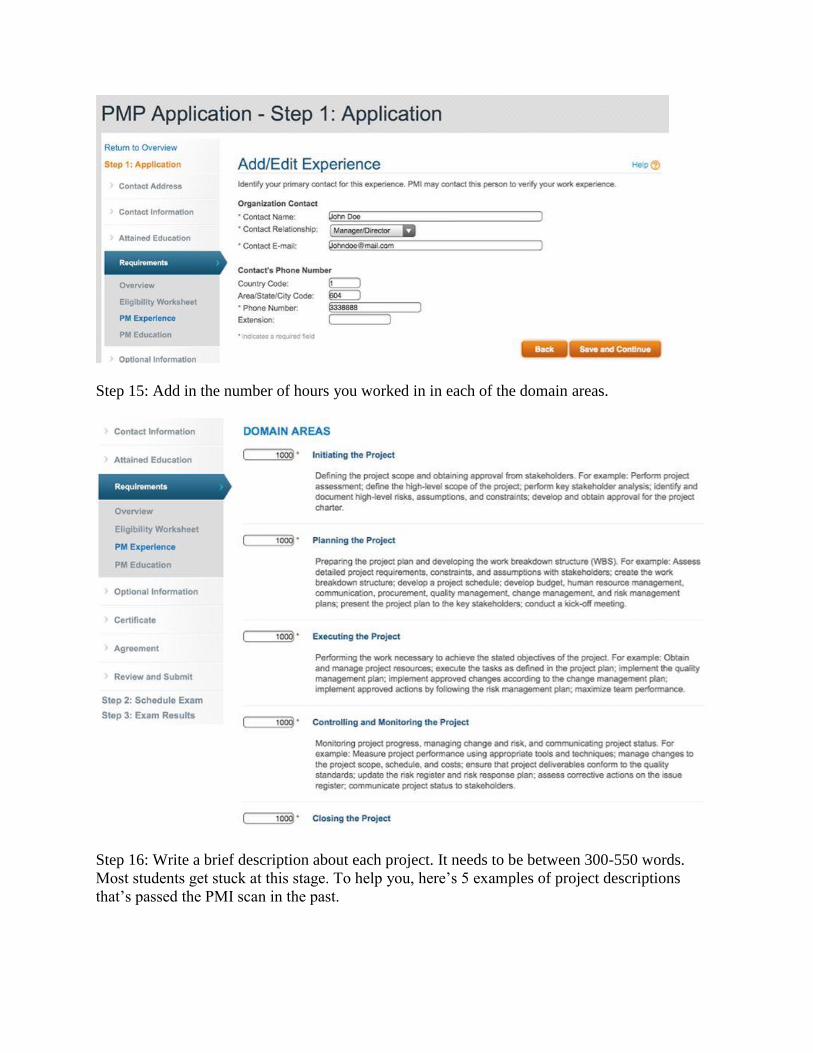
Step 16: Write a brief description about each project. It needs to be between 300-550 words.
Most students get stuck at this stage. To help you, here’s 5 examples of project descriptions
that’s passed the PMI scan in the past.
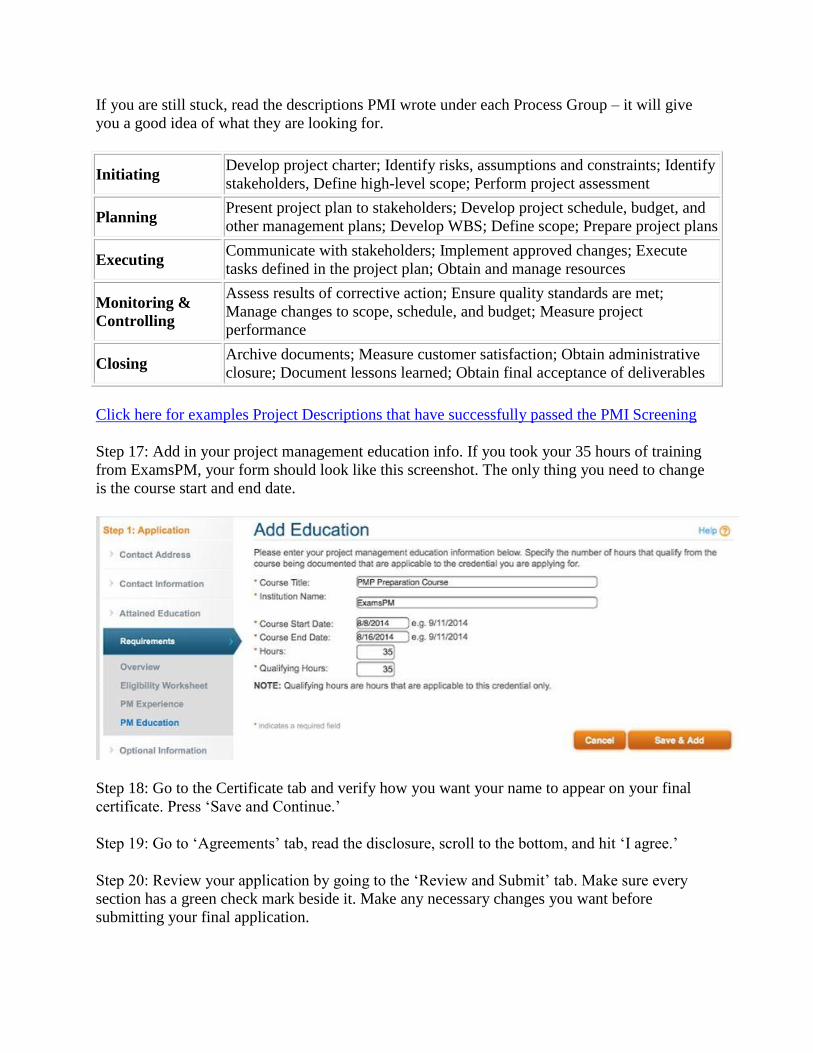
If you are still stuck, read the descriptions PMI wrote under each Process Group – it will give
you a good idea of what they are looking for.
Initiating Develop project charter; Identify risks, assumptions and constraints; Identify
stakeholders, Define high-level scope; Perform project assessment
Planning Present project plan to stakeholders; Develop project schedule, budget, and
other management plans; Develop WBS; Define scope; Prepare project plans
Executing Communicate with stakeholders; Implement approved changes; Execute
tasks defined in the project plan; Obtain and manage resources
Monitoring &
Controlling
Assess results of corrective action; Ensure quality standards are met;
Manage changes to scope, schedule, and budget; Measure project
performance
Closing Archive documents; Measure customer satisfaction; Obtain administrative
closure; Document lessons learned; Obtain final acceptance of deliverables
Click here for examples Project Descriptions that have successfully passed the PMI Screening
Step 17: Add in your project management education info. If you took your 35 hours of training
from ExamsPM, your form should look like this screenshot. The only thing you need to change
is the course start and end date.
Step 18: Go to the Certificate tab and verify how you want your name to appear on your final
certificate. Press ‘Save and Continue.’
Step 19: Go to ‘Agreements’ tab, read the disclosure, scroll to the bottom, and hit ‘I agree.’
Step 20: Review your application by going to the ‘Review and Submit’ tab. Make sure every
section has a green check mark beside it. Make any necessary changes you want before
submitting your final application.

Step 21: Download the PDF version of your application and save it onto your computer or
dropbox or google drive. Keep a copy for future reference.
Step 22: When you are satisfied with your application, click the checkbox next to ‘All
information that I have provided is accurate and complete.’
Step 23: Click ‘Submit Application’
And viola… you are done! Your PMP application is complete. Wait a few days for an email
confirmation to take your exams. It will look something like this: