Compact Concealed Toilet Cistern with Dual flush … Concealed Toilet Cistern with Dual flush Weight...
12
Compact Concealed Toilet Cistern with Dual flush CNC1001
Transcript of Compact Concealed Toilet Cistern with Dual flush … Concealed Toilet Cistern with Dual flush Weight...

Compact Concealed Toilet Cistern with Dual flush
CNC1001

Compact Concealed Toilet Cistern with Dual flush
Weight 5 kg
Width 335 mm
Height 320 mm
Depth 140mm
Flush 3Ltr / 6 Ltr
High quality push button concealed cistern
Side entry only
Dual push button in chrome finish
Extended flush pipe 300mm x 300mm
Compact concealed toilet cistern with dual flush can be
used with any of the back to wall toilets or wall hung
toilets that are available at Victoria Plumb.
With a water saving chrome dual flush button it will look
contemporary and minimal.
It fits all Victoria Plumb Furniture Back to Wall units.
Suitable for minimum water pressure from 0.1 bar

½” bsp water connection
Backnut – white sealing washer and black rubber conical sealing washer Float and cup
Adjusting screw
Inlet valve cap and diaphragm
The inlet valve allows water into the cistern.
Inlet Valve - Components

1. Remove backnut and white sealing washer from threaded tail of inlet valve.
2. Place threaded tail of inlet valve through left or right hand side hole making sure black rubber conical washer is on the inside of the cistern.
3. Place white sealing washer onto threaded tail and then backnut and hand tighten and then give ¼ turn with suitable spanner.
4. Connect to water supply, making sure that this connection is water tight after water is turned on.
Tip Make sure the cup and float are free of any obstruction
Inlet Valve - Installation

Chrome push button
Push button housing
Base sealing washer –slip ring and backnut
Internal overflow
Full flush adjustment slide
Part flush adjustment slide (up for less down for more) Flexible cable
Flush Valve - Components

1. Remove backnut and white slip ring from threaded tail of flushing valve.
2. Place threaded tail of flushing valve through cistern outlet hole making sure the base sealing washer is on the inside of the cistern
3. Place white slip ring and backnut onto threaded tail and hand tighten and give ¼” turn with suitable spanner
TIP Fill the cistern with 2” of water and check the cistern is water tight before the cistern is in final situ.
TIP Position the internal overflow to the opposite side of the cistern to the inlet valve
TIP Always make sure the cable is not kinked or twisted as this will make the flushing valve stick open
Flush Valve - Installation

Flush Pipe - Installation
1. Place the white shroud and black sealing washer on to the large end of the flushpipe.
2. Insert flushpipe into flushing valve and tighten the coupling nut up.
3. Place the flushpipe bung onto the thinner end of the flushpipe and insert into pan
TIP Do not over tighten the coupling nut as to do so may cause it to break.

• The cistern is not filling?
• Is the isolation valve – water supply been turned off
• The cistern has overflow and flooded the bathroom
Trouble shooting Guide
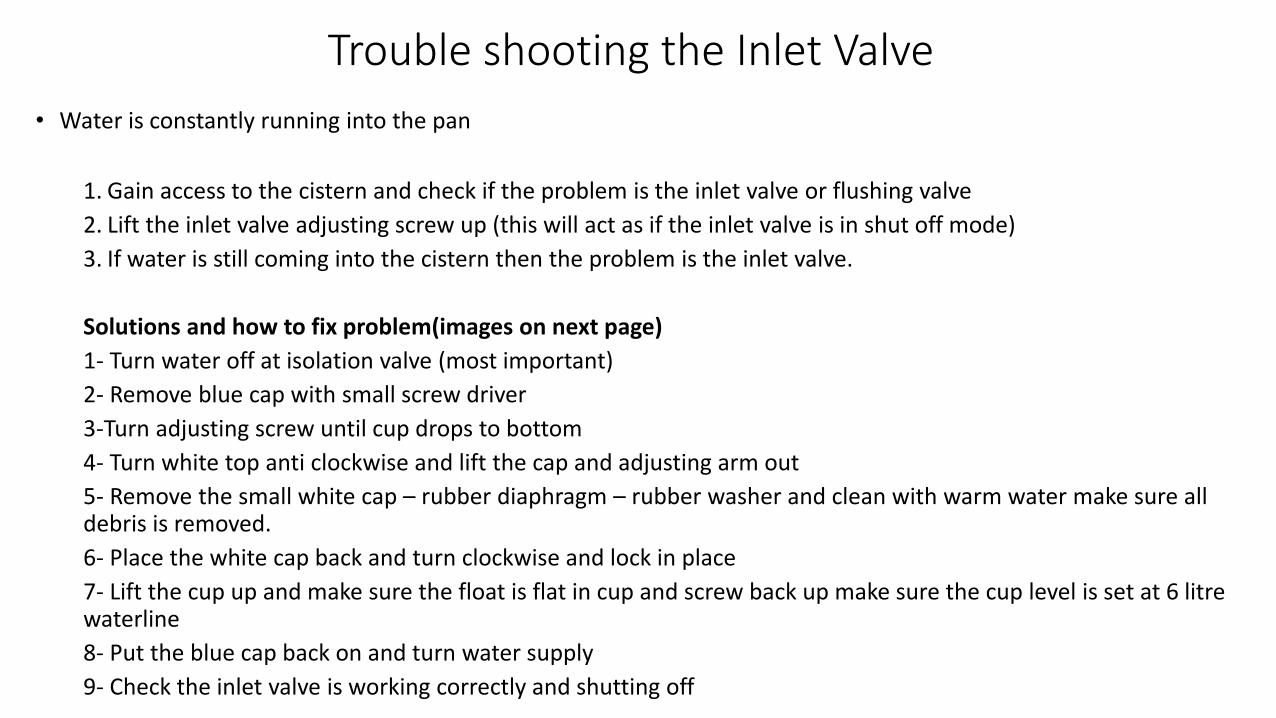
• Water is constantly running into the pan
1. Gain access to the cistern and check if the problem is the inlet valve or flushing valve
2. Lift the inlet valve adjusting screw up (this will act as if the inlet valve is in shut off mode)
3. If water is still coming into the cistern then the problem is the inlet valve.
Solutions and how to fix problem(images on next page)
1- Turn water off at isolation valve (most important)
2- Remove blue cap with small screw driver
3-Turn adjusting screw until cup drops to bottom
4- Turn white top anti clockwise and lift the cap and adjusting arm out
5- Remove the small white cap – rubber diaphragm – rubber washer and clean with warm water make sure all debris is removed.
6- Place the white cap back and turn clockwise and lock in place
7- Lift the cup up and make sure the float is flat in cup and screw back up make sure the cup level is set at 6 litre waterline
8- Put the blue cap back on and turn water supply
9- Check the inlet valve is working correctly and shutting off
Trouble shooting the Inlet Valve

23
4 56
1
4 5 6
Trouble shooting – Cleaning the Diaphragm

• Button does not flush / water continues to flow1. Gain access to the cistern and check if the problem is the inlet valve or flushing valve?
2. Check the inlet valve is set up to 6 litre waterline and not running down the internal overflow
3. Press the push button if no pressure when pushed in the flushing valve is sticking open.
4. Is the cable twisted or kinked?
5. Is the cable routed correctly as per image 4
• Solutions and how to fix problem
• 1- Turn water supply off
• 2- Disconnect the push button from flushing valve (simply press the clip in and remove the push button)
• 3- Remove flushing valve by turning it anti clockwise
• 4- Position the flushing valve so the cable is not kinked or twisted
• Tip while the flushing valve is out check the sealing washer is clean and has no debris on it
Trouble shooting the Flush Valve

Instruction leaflet