Ceram-Kote Coatings, Incorporated Installation and...
13
Ceram-Kote Coatings, Incorporated Installation and Handling Procedures Internally and Externally Coated Tubular CeRam-Kote Coating Systems
Transcript of Ceram-Kote Coatings, Incorporated Installation and...

Ceram-Kote Coatings, Incorporated
Installation and Handling Procedures
Internally and Externally Coated Tubular
CeRam-Kote Coating Systems
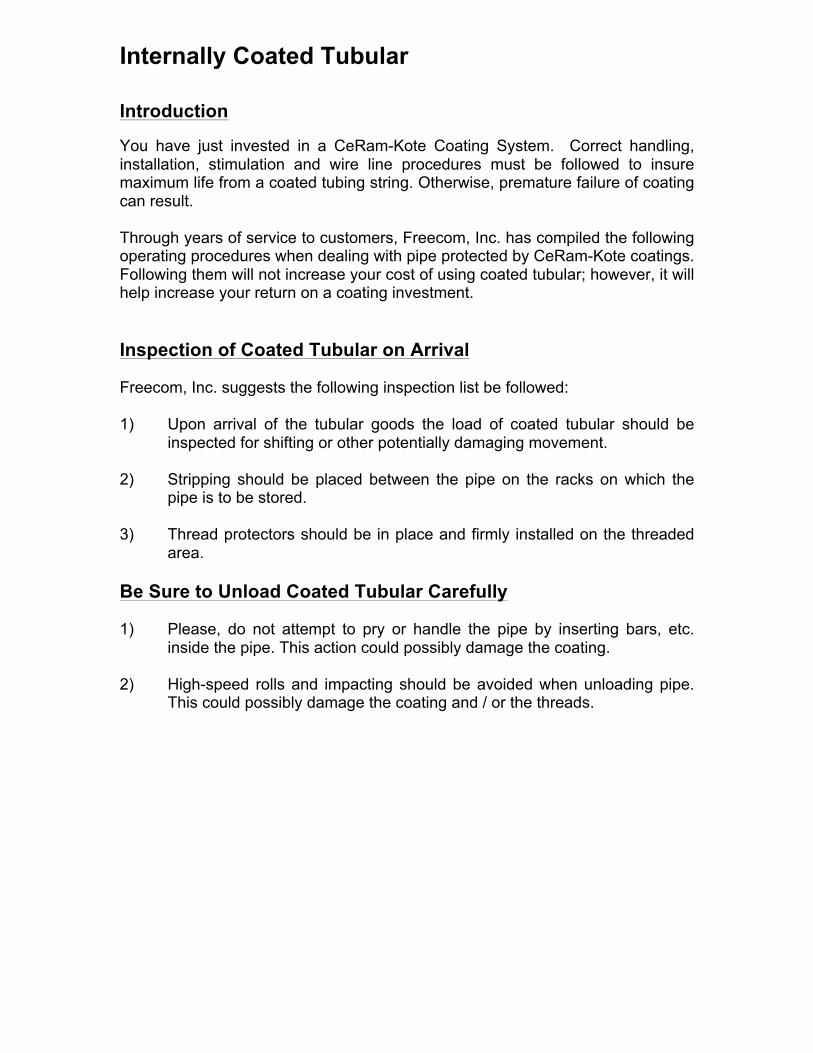
Internally Coated Tubular Introduction You have just invested in a CeRam-Kote Coating System. Correct handling, installation, stimulation and wire line procedures must be followed to insure maximum life from a coated tubing string. Otherwise, premature failure of coating can result. Through years of service to customers, Freecom, Inc. has compiled the following operating procedures when dealing with pipe protected by CeRam-Kote coatings. Following them will not increase your cost of using coated tubular; however, it will help increase your return on a coating investment. Inspection of Coated Tubular on Arrival Freecom, Inc. suggests the following inspection list be followed: 1) Upon arrival of the tubular goods the load of coated tubular should be
inspected for shifting or other potentially damaging movement. 2) Stripping should be placed between the pipe on the racks on which the
pipe is to be stored. 3) Thread protectors should be in place and firmly installed on the threaded
area. Be Sure to Unload Coated Tubular Carefully 1) Please, do not attempt to pry or handle the pipe by inserting bars, etc.
inside the pipe. This action could possibly damage the coating. 2) High-speed rolls and impacting should be avoided when unloading pipe.
This could possibly damage the coating and / or the threads.

3) All tubing is shipped with a lead-free API modified thread compound
applied to the threads. Should special thread compounds be required:
a) The protectors should be removed. b) The threads should be cleaned and dried c) The special thread compound can then be applied. d) The pin end thread protectors should then be reinstalled to protect
the threaded area from possible damage while the pipe is elevated through the “V” door into the derrick.
e) If the pipe is placed in the stands of the derrick to await the running of the string, pin end protectors should be left in place and removed as each length is installed.
f) For more detail consult API RP 5C1, Section 2.9. Use Stabbing Guides A Freecom, Inc. stabbing guide should always be used while running the tubular. This is to avoid damage to the coating on the pin end. The proper procedure for installation using the stabbing guide is shown below.
Open the guide and place over Place pin end inside Open the guide and
tubing collar guide and make up remove the guide. the joint.
Make-up Completely Freecom, Inc. recommends that API specifications be followed when making up. Please see table A*.

Use Protective Drift Bars Often oil operators run drift bars or "rabbits" through the tube while elevating the pipe through the "V door". Should this be necessary, the drift bar should be made of wood, Nylatron, Teflon or any other material that would not inflict damage on the coated tube. Freecom, Inc. drifts each joint before it leaves our yard. We drift each joint by API specifications on thin-mil coatings. For a table on Bare Drift sizes and Coated Drifts, please see Table 1-B*. Clearly Identify Wells Which Contain Coated Tubular All wells with coated tubing should be identified so that everyone is aware that the well is equipped with coated tubing. Experience has shown that the majority of damage done to coated tubing is done before anyone realizes they are working on a coated string. Use Protective Pressure Testing Tools Whenever pressure testing of the made-up joint is desired, pressure-testing tools should be selected which will not damage the internal protective coating. Most pressure testing firms have such equipment available. Stimulate Wells with Caution Well stimulation must be done with caution. Prolonged exposure to mud acid or super mud acid can result in severe damage to the coating. The greater the bottom hole temperature of the well, the more rapidly this damage will occur. The acids used in well stimulation and work over operations attack the mineral components in all coatings. This attack is slow but irreversible. Therefore, acid attack on a coating is cumulative. (i.e., if the coating life is 40 hours at 140°F (60°C) in mud acid and it is exposed for 20 hours, 50% of its life in this acid is used up. If it is exposed at a later date to mud acid at 140°F (60°C), we would not expect the full life of 40 hours, but rather 20 hours. The engineer should keep track of the exposure of his coatings to acid environments and express these exposures in terms of total coating life remaining with regard to acid resistance.) It is important to remember that during normal acidizing operations, the acid is charged into the formation so quickly it rarely arrives at bottom-hole temperature. Cool acid has relatively little effect on coatings. However, when trouble is encountered or for any other reason the acid is held in the string long enough to have reached zone temperature, then acid contact time should be noted. All CeRam-Kote 54® coatings have sufficient acid resistance to maintain corrosion protection after normal acidizing operations. Consultation with a Freecom, Inc. representative is recommended when acidizing is anticipated.
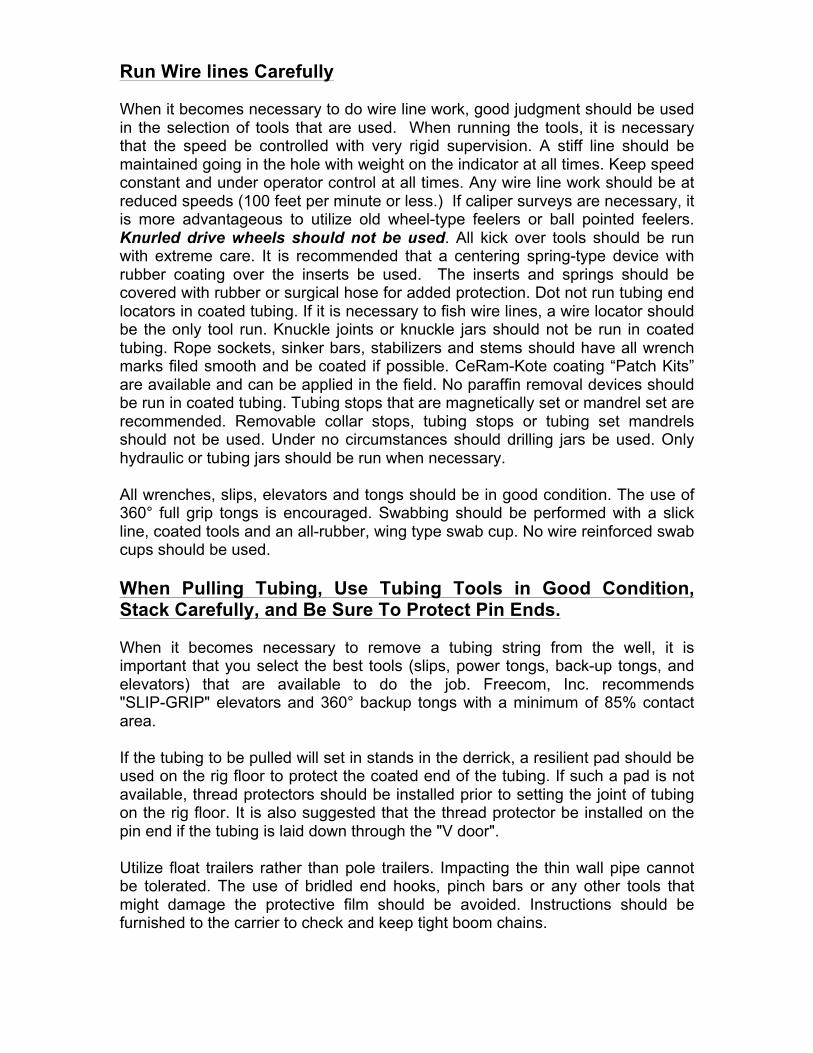
Run Wire lines Carefully When it becomes necessary to do wire line work, good judgment should be used in the selection of tools that are used. When running the tools, it is necessary that the speed be controlled with very rigid supervision. A stiff line should be maintained going in the hole with weight on the indicator at all times. Keep speed constant and under operator control at all times. Any wire line work should be at reduced speeds (100 feet per minute or less.) If caliper surveys are necessary, it is more advantageous to utilize old wheel-type feelers or ball pointed feelers. Knurled drive wheels should not be used. All kick over tools should be run with extreme care. It is recommended that a centering spring-type device with rubber coating over the inserts be used. The inserts and springs should be covered with rubber or surgical hose for added protection. Dot not run tubing end locators in coated tubing. If it is necessary to fish wire lines, a wire locator should be the only tool run. Knuckle joints or knuckle jars should not be run in coated tubing. Rope sockets, sinker bars, stabilizers and stems should have all wrench marks filed smooth and be coated if possible. CeRam-Kote coating “Patch Kits” are available and can be applied in the field. No paraffin removal devices should be run in coated tubing. Tubing stops that are magnetically set or mandrel set are recommended. Removable collar stops, tubing stops or tubing set mandrels should not be used. Under no circumstances should drilling jars be used. Only hydraulic or tubing jars should be run when necessary. All wrenches, slips, elevators and tongs should be in good condition. The use of 360° full grip tongs is encouraged. Swabbing should be performed with a slick line, coated tools and an all-rubber, wing type swab cup. No wire reinforced swab cups should be used. When Pulling Tubing, Use Tubing Tools in Good Condition, Stack Carefully, and Be Sure To Protect Pin Ends. When it becomes necessary to remove a tubing string from the well, it is important that you select the best tools (slips, power tongs, back-up tongs, and elevators) that are available to do the job. Freecom, Inc. recommends "SLIP-GRIP" elevators and 360° backup tongs with a minimum of 85% contact area. If the tubing to be pulled will set in stands in the derrick, a resilient pad should be used on the rig floor to protect the coated end of the tubing. If such a pad is not available, thread protectors should be installed prior to setting the joint of tubing on the rig floor. It is also suggested that the thread protector be installed on the pin end if the tubing is laid down through the "V door". Utilize float trailers rather than pole trailers. Impacting the thin wall pipe cannot be tolerated. The use of bridled end hooks, pinch bars or any other tools that might damage the protective film should be avoided. Instructions should be furnished to the carrier to check and keep tight boom chains.

Externally Coated Tubular Introduction You have just invested in a CeRam-Kote Coating System. Correct handling, installation, stimulation and wire line procedures must be followed to insure maximum life from a coated tubing string. Otherwise, premature failure of coating can result. Through years of service to customers, Freecom, Inc. has compiled the following operating procedures when dealing with pipe protected by CeRam-Kote coatings. Following them will not increase your cost of using coated tubular; however, it will help increase your return on a coating investment. Inspection of Coated Tubular on Arrival Freecom, Inc. suggests the following inspection list be followed: 1) Upon arrival of the tubular goods the load of coated tubular should be
inspected for shifting or other potentially damaging movement. 2) Stripping should be placed between the pipe on the racks on which the
pipe is to be stored. 3) Thread protectors should be in place and firmly installed on the threaded
area. Be Sure to Unload Coated Tubular Carefully 1) Please, do not attempt to pry or handle the pipe by inserting bars, etc.
inside the pipe. This action could possibly damage the coating. 2) High-speed rolls and impacting should be avoided when unloading pipe.
This could possibly damage the coating and / or the threads. 3) Fork-lift forks should have padded forks to minimize damage to coating. 4) All tubing is shipped with a lead-free API modified thread compound
applied to the threads. Should special thread compounds be required:
a) The protectors should be removed. b) The threads should be cleaned and dried c) The special thread compound can then be applied. d) The pin end thread protectors should then be reinstalled to protect
the threaded area from possible damage while the pipe is elevated through the “V” door into the derrick.
e) If the pipe is placed in the stands of the derrick to await the running of the string, pin end protectors should be left in place and removed as each length is installed.

f) For more detail consult API RP 5C1, Section 2.9. Use Stabbing Guides A Freecom, Inc. stabbing guide should always be used while running the tubular. This is to avoid damage to the coating on the pin end. The proper procedure for installation using the stabbing guide is shown below.
Close the guide and engage the strap Make up the joint Disengage the strap
and remove the guide. Make-up Completely Freecom, Inc. recommends that API specifications be followed when making up. Please see table 1-A*. After make-up: 1) Please refer to a “Mixing and Application Guide” before the installation of
externally coated tubing. This guide will instruct the inspector on the proper method of mixing and applying a patch kit of CeRam-Kote Coatings.
2) When installing a coated tubing string, it is important that the best tools are
selected for the job (especially slips, power tongs, back-up tongs and elevators). Tongs with a 360° full-grip with a minimum of 85% contact area should be used.
3) When running coated tubing on initial install, always leave pin protectors on
and tail tubing into rig. Remove pin protectors, stab and make-up. 4) Always use stabbing guides to protect the integrity of the coated pin end. 5) After make-up, rig operator must pick-up the tubing to the point that the slip
area, elevator, back up, and lead tong marks can be cleaned and inspected. 6) Should CeRam-Kote be damaged:
a) Clean these areas with a high grade solvent
b) Apply CeRam-Kote coating with a paint brush on an area approximately 25% larger than the spot to be patched.

c) Repair the damaged area with a “Patch kit” of CeRam-Kote*. Refer to the “Mixing and Application Guide” – Appendix 1 when preparing the damaged areas and applying the coating.
7) As soon as repairs are made in accordance with instruction on the patch kits,
tubing can be run into the well immediately without waiting time. 8) Each joint must be inspected after torqued to API specifications to insure
there are no chips or cracks in CeRam-Kote coating. Each chip or crack must be patched to insure a “holiday free” installation.
9) Please consult with Freecom, Inc. Technical Representatives with ANY
questions. (800) 346-4299 at 24 hours a day, 7 days a week. Use Protective Drift Bars Often oil operators run drift bars or "rabbits" through the tube while elevating the pipe through the "V door". Should this be necessary, the drift bar should be made of wood, Nylatron, Teflon or any other material that would not inflict damage on the coated tube. Freecom, Inc. drifts each joint before it leaves our yard. We drift each joint by API specifications on thin-mil coatings. For a table on Bare Drift sizes and Coated Drifts, please see Table 1-B*. Clearly Identify Wells Which Contain Coated Tubular All wells with coated tubing should be well so that everyone is aware that the well is equipped with coated tubing. Experience has shown that the majority of dam-age done to coated tubing is done before anyone realizes they are working on a coated string. Use Protective Pressure Testing Tools Whenever pressure testing of the made-up joint is desired, pressure-testing tools should be selected which will not damage the internal protective coating. Most pressure testing firms have such equipment available. Stimulate Wells with Caution Well stimulation must be done with caution. Prolonged exposure to mud acid or super mud acid can result in severe damage to the coating. The greater the bottom hole temperature of the well, the more rapidly this damage will occur. The acids used in well stimulation and work over operations attack the mineral components in all coatings. This attack is slow but irreversible. Therefore, acid attack on a coating is cumulative. (i.e., if the coating life is 40 hours at 140°F (60°C) in mud acid and it is exposed for 20 hours, 50% of its life in this acid is used up. If it is exposed at a later date to mud acid at 140°F (60°C), we would not expect the full life of 40 hours, but rather 20 hours. The engineer should keep track of the exposure of his coatings to acid environments and express these exposures in terms of total coating life remaining with regard to acid resistance.)
It is important to remember that during normal acidizing operations, the acid is charged into the formation so quickly it rarely arrives at bottom-hole temperature. Cool acid has relatively little effect on coatings. However, when trouble is encountered or for any other reason the acid is held in the string long enough to have reached zone temperature, then acid contact time should be noted. All CeRam-Kote coatings have sufficient acid resistance to maintain corrosion protection after normal acidizing operations. Consultation with a Freecom, Inc. representative is recommended when acidizing is anticipated. Run Wire lines Carefully When it becomes necessary to do wire line work, good judgment should be used in the selection of tools that are used. When running the tools, it is necessary that the speed be controlled with very rigid supervision. A stiff line should be maintained going in the hole with weight on the indicator at all times. Keep speed constant and under operator control at all times. Any wire line work should be at reduced speeds (100 feet per minute or less.) If caliper surveys are necessary, it is more advantageous to utilize old wheel-type feelers or ball pointed feelers. Knurled drive wheels should not be used. All kick over tools should be run with extreme care. It is recommended that a centering spring-type device with rubber coating over the inserts be used. The inserts and springs should be covered with rubber or surgical hose for added protection. Dot not run tubing end locators in coated tubing. Do not run wire line grabs in coated tubing. If it is necessary to fish wire lines, a wire locator should be the only tool run. Knuckle joints or knuckle jars should not be run in coated tubing. Rope sockets, sinker bars, stabilizers and stems should have all wrench marks filed smooth and be coated if possible. CeRam-Kote “Patch Kits” are available and can be applied in the field. No paraffin removal devices should be run in coated tubing. Tubing stops that are magnetically set or mandrel set are recommended. Removable collar stops, tubing stops or tubing set mandrels should not be used. Under no circumstances should drilling jars be used. Only hydraulic or tubing jars should be run when necessary. All wrenches, slips, elevators and tongs should be in good condition. The use of 360° full grip tongs is encouraged. Swabbing should be performed with a slick line, coated tools and an all-rubber, wing type swab cup. No wire reinforced swab cups should be used.
When Pulling Tubing, Use Tubing Tools in Good Condition, Stack Carefully, and Be Sure To Protect Pin Ends. When it becomes necessary to remove a tubing string from the well, it is important that you select the best tools (slips, power tongs, back-up tongs, and elevators) that are available to do the job. Freecom, Inc. recommends "SLIP-GRIP" elevators and 360° backup tongs with a minimum of 85% contact area. If the tubing to be pulled will set in stands in the derrick, a resilient pad should be used on the rig floor to protect the coated end of the tubing. If such a pad is not available, thread protectors should be installed prior to setting the joint of tubing on the rig floor. It is also suggested that the thread protector be installed on the pin end if the tubing is laid down through the "V door". Utilize float trailers rather than pole trailers. Impacting the thin wall pipe cannot be tolerated. The use of bridled end hooks, pinch bars or any other tools that might damage the protective film should be avoided. Instructions should be furnished to the carrier to check and keep tight stripping and strapping. Boom chains will not be allowed to secure externally coated tubing.

Table A Recommended Tubing Makeup Torque (API RP 5C1)
Torque, ft-lb Size (O.D.) Weight per
Foot Grade Minimum Optimum Maximum
2-1/16” 3.25 H-40 430 570 710
2-1/16” 3.25 J-55 560 740 920 2-1/16” 3.25 C-75 730 970 1210 2-1/16” 3.25 L-80 760 1010 1260 2-1/16” 3.25 N-80 770 1030 1290 2-1/16” 3.25 C-90 820 1100 1370 2-3/8” 4.70 H-40 740 990 1240
2-3/8” 4.70 J-55 970 1290 1610 2-3/8” 4.70 C-75 1590 2120 2650 2-3/8” 4.70 L-80 1320 1760 2200 2-3/8” 4.70 N-80 1350 1800 2250 2-3/8” 4.70 C-90 1440 1920 2410 2-3/8” 4.70 P-105 2120 2830 3540 2-3/8” 5.95 C-75 1590 2120 2650 2-3/8” 5.95 L-80 1640 2190 2740 2-3/8” 5.95 N-80 1680 2240 2800 2-3/8” 5.95 C-90 1800 2390 2990 2-3/8” 5.95 P-105 2120 2830 3540 2-7/8” 6.50 H-40 940 1250 1560
2-7/8” 6.50 J-55 1240 1650 2060 2-7/8” 6.50 C-75 1630 2170 2710 2-7/8” 6.50 L-80 1690 2250 2810 2-7/8” 6.50 N-80 1730 2300 2880 2-7/8” 6.50 C-90 1850 2460 3080 2-7/8” 6.50 P-105 2180 2910 3640 2-7/8” 7.90 C-75 1960 2610 3270 2-7/8” 7.90 L-80 2030 2710 3390 2-7/8” 7.90 N-80 2080 2770 3470 2-7/8” 7.90 C-90 2230 2970 3710 2-7/8” 7.90 P-105 2630 3500 4380 2-7/8” 8.70 C-75 2140 2850 3560 2-7/8” 8.70 L-80 2210 2950 3690 2-7/8” 8.70 N-80 2270 3020 3780 2-7/8” 8.70 C-90 2420 3230 4040 2-7/8” 8.70 P-105 2860 3810 4760 3½” 9.3 H-40 1300 1730 2160
3½” 9.3 J-55 1710 2280 2850 3½” 9.3 C-75 2260 3010 3760 3½” 9.3 L-80 2350 3130 3910 3½” 9.3 N-80 2400 3200 4000 3½” 9.3 C-90 2570 3430 4290 3½” 9.3 P-105 3040 4050 5060 3½” 12.95 C-75 3030 4040 5050 3½” 12.95 L-80 3150 4200 5250 3½” 12.95 N-80 3220 4290 5360 3½” 12.95 C-90 3450 4610 5760 3½” 12.95 P-105 4070 5430 6790

Appendix 1 – Mixing and Application Guide for CeRam-Kote products Surface Preparation: Bonding strength depends on proper preparation of the
surface to be protected for long-term performance of the product. The substrate should be free of oil, grease and salt/chloride contamination. Specifications call for a white metal (NACE 1, SSPC-SP5, Swedish Standards SA-3) finish with a 2.0-2.5 mil (50 - 62.5 microns) anchor profile. Surface preparation should be no less than a near white metal (NACE 2, SSPC-SP10, Swedish Standards SA 2 ½) finish. Cleanliness is the most important step to produce a coated surface that will perform and last. Make certain a strong solvent is used when removing pipe dope. After solvent is used to remove pipe dope, sand the effected area with 40-grit sandpaper. This will supply the needed surface preparation.
Mixing Ratio: Three and one-half (3-½ ) parts of Part A to one (1) part of
Part B by volume. Six and one-half (6-½) parts of Part A to one (1) part of
Part B ratio by weight. Mixing: CeRam-Kote PCF contains a high loading of ceramic
particles which must be placed into full suspension with the epoxy resin prior to application. CeRam-Kote PCF patch kits are packaged in two cans, Part A (base) and Part B (curing agent). Shake Part A (base) with a Cyclone air-powered shaker or mix Part A with an Edsan’s Jiffler Mixer until all ceramic powders are suspended in the resin. Time required to place ceramics into suspension varies according to temperature and length of material storage time. At 72°F (22.2°C), generally a four (4) to six (6) minute shake will place the ceramic powders into suspension. Regardless of time needed, shake all ceramic material into suspension prior to proceeding. Failure to properly mix will keep CeRam-Kote PCF from performing or curing properly. Check the can to assure all solids are in suspension prior to proceeding to the mixing step.
Combine Part A (base) and Part B (curing agent) and shake
again until both parts are thoroughly mixed. Shaking time is temperature dependent, but a two (2) to four (4) minute shake at 72°F (22.2°C) should thoroughly mix the components. However, caution must be used to prevent heat buildup. No induction time is needed before application.

Pot Life & Shelf Life: Pot life for CeRam-Kote PCF at 72°F (22.2°C) is two (2)
hours. Colder temperatures will increase the pot life and warmer temperatures will decrease the pot life. Keep cans out of direct sunlight to prevent heat buildup. CeRam-Kote PCF has an indefinite shelf life. Preferred storage/usage is a dry enclosed area under 85°F (29°C) /used within two (2) years. However, if stored more than two years above 85°F (29°C), call Freecom Technical Support prior to use.
. Thinning: No need to adjust viscosity. The coating should be thick.
This will help when brushing the coating onto the damaged area.