
Ball Skills (Manipulation Skills) - achper.vic.edu.au · Ball Skills (Manipulation Skills) ... They...
31
1 Ball Skills (Manipulation Skills) At the completion of this module, participants will: • understand how the acquisition of and knowledge about manipulative skills fits into the health and physical education domain • understand the links between the HPE domain and other domains relative to the acquisition of manipulative skills • understand the importance of the need to master manipulative skills to enable participation in sports and games • understand the process of skill acquisition and the progressive and sequential development of motor skills • have knowledge of how to teach and assess manipulative skills • be aware of resources designed to assist teachers to implement the ball handling component of the primary school physical and sport education program.
Transcript of Ball Skills (Manipulation Skills) - achper.vic.edu.au · Ball Skills (Manipulation Skills) ... They...

1
Ball Skills (Manipulation Skills) At the completion of this module, participants will:
• understand how the acquisition of and knowledge about manipulative skills fits into the health and physical
education domain
• understand the links between the HPE domain and other domains relative to the acquisition of manipulative
skills
• understand the importance of the need to master manipulative skills to enable participation in sports and
games
• understand the process of skill acquisition and the progressive and sequential development of motor skills
• have knowledge of how to teach and assess manipulative skills
• be aware of resources designed to assist teachers to implement the ball handling component of the primary
school physical and sport education program.
2
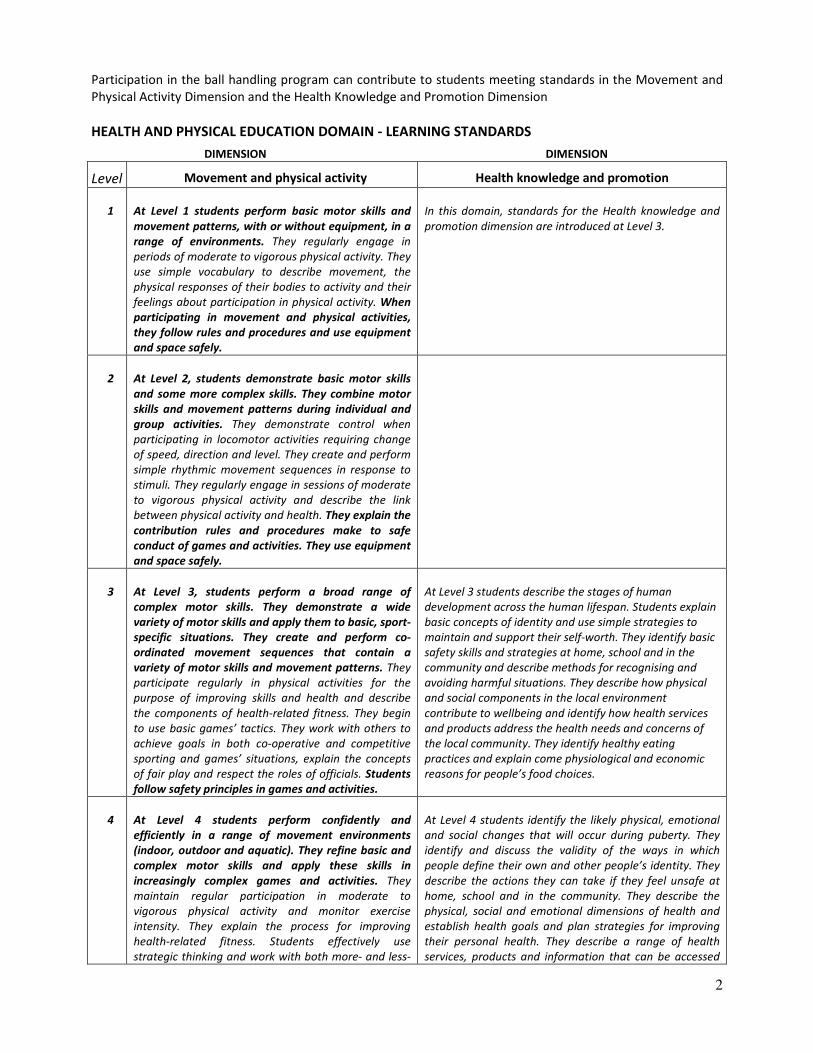
Participation in the ball handling program can contribute to students meeting standards in the Movement and
Physical Activity Dimension and the Health Knowledge and Promotion Dimension
HEALTH AND PHYSICAL EDUCATION DOMAIN - LEARNING STANDARDS
DIMENSION DIMENSION
Level
Movement and physical activity
Health knowledge and promotion
1
At Level 1 students perform basic motor skills and
movement patterns, with or without equipment, in a
range of environments. They regularly engage in
periods of moderate to vigorous physical activity. They
use simple vocabulary to describe movement, the
physical responses of their bodies to activity and their
feelings about participation in physical activity. When
participating in movement and physical activities,
they follow rules and procedures and use equipment
and space safely.
In this domain, standards for the Health knowledge and
promotion dimension are introduced at Level 3.
2
At Level 2, students demonstrate basic motor skills
and some more complex skills. They combine motor
skills and movement patterns during individual and
group activities. They demonstrate control when
participating in locomotor activities requiring change
of speed, direction and level. They create and perform
simple rhythmic movement sequences in response to
stimuli. They regularly engage in sessions of moderate
to vigorous physical activity and describe the link
between physical activity and health. They explain the
contribution rules and procedures make to safe
conduct of games and activities. They use equipment
and space safely.
3
At Level 3, students perform a broad range of
complex motor skills. They demonstrate a wide
variety of motor skills and apply them to basic, sport-
specific situations. They create and perform co-
ordinated movement sequences that contain a
variety of motor skills and movement patterns. They
participate regularly in physical activities for the
purpose of improving skills and health and describe
the components of health-related fitness. They begin
to use basic games’ tactics. They work with others to
achieve goals in both co-operative and competitive
sporting and games’ situations, explain the concepts
of fair play and respect the roles of officials. Students
follow safety principles in games and activities.
At Level 3 students describe the stages of human
development across the human lifespan. Students explain
basic concepts of identity and use simple strategies to
maintain and support their self-worth. They identify basic
safety skills and strategies at home, school and in the
community and describe methods for recognising and
avoiding harmful situations. They describe how physical
and social components in the local environment
contribute to wellbeing and identify how health services
and products address the health needs and concerns of
the local community. They identify healthy eating
practices and explain come physiological and economic
reasons for people’s food choices.
4
At Level 4 students perform confidently and
efficiently in a range of movement environments
(indoor, outdoor and aquatic). They refine basic and
complex motor skills and apply these skills in
increasingly complex games and activities. They
maintain regular participation in moderate to
vigorous physical activity and monitor exercise
intensity. They explain the process for improving
health-related fitness. Students effectively use
strategic thinking and work with both more- and less-
At Level 4 students identify the likely physical, emotional
and social changes that will occur during puberty. They
identify and discuss the validity of the ways in which
people define their own and other people’s identity. They
describe the actions they can take if they feel unsafe at
home, school and in the community. They describe the
physical, social and emotional dimensions of health and
establish health goals and plan strategies for improving
their personal health. They describe a range of health
services, products and information that can be accessed

3
skilled peers to improve game performance. Students
work independently to improve performance. They
evaluate the performance of a partner and provide
constructive feedback base on performance criteria
to assist skill development. Students describe and
analyse the various roles required in competitive
sports. They work in a group to create a game and
establish rules and procedures for its safe conduct.
to help meet health needs and concerns. They analyse
and explain physiological, social, cultural and economic
reasons for food choices and analyse and describe food
selection models. They describe how to prepare and store
food hygienically.
The standards in bold are directly linked to the acquisition of manipulative skills.

4
What are manipulation skills? Manipulative skills are those that involve control of an object such as a ball, beanbag, hoop, rope, ribbon and
frisbee. Most of these skills involve the hand and feet but other parts of the body can be used. Manipulative
skills develop hand-eye and foot-eye coordination which are particularly important for tracking objects in space.
Manipulative skills include throwing, catching, kicking, trapping, striking, volleying, rolling, dribbling. They are
referred to as complex motor skills. Competence in manipulative skills generally occurs at a later stage than
locomotor skills because of the need for complex hand eye and foot eye patterns required to track and
intercept a moving object. Manipulative skills do not develop automatically. Lots of opportunities for instruction
and practice are essential if students are to become competent with manipulative skills. The development of
manipulative skills leads to students becoming more actively involved in games and play activity. Competence
in manipulative skills can improve a student’s self esteem, peer acceptance and ease transition into local
community and other outside school environments.
The acquisition of manipulative skills is a core component of a comprehensive school physical and sport
education program.
The foundation of manipulative skills can be begin in the early years of schooling through exploratory activities
with a wide range of equipment. Skills can be further developed and refined in the middle years. Activities and
games of increasing complexity can be structured so that students progressively use the skills learned and
reinforce them in play situations. Lead up activities and modified games are particularly useful for this purpose
and can be continued into the upper grades where advantage can be taken of community interests in the major
team sports.
Teaching and Learning Experiences
Students require quality instruction, opportunities for practice and lots of encouragement if they are to
experience early success in manipulative skills. Teachers need to plan learning experiences in a logical manner
and combine skills into more and more complex activities, drills and games as students improve. The use of
teacher/student demonstrations, peer teaching, verbal cues, meaningful feedback, a variety of teaching
approaches, attention to students learning styles, skills progression, different equipment and teachable
moments should all be implemented to enhance this important area of learning in the physical and sport
education program.
Games and activities should be commensurate with the skill level of participants therefore teachers will need to
be able to cater for individual differences in their lessons.
In games and activities where players are eliminated it is critical that re-entry or skill related tasks are available,
to ensure continued and motivated involvement.

5
Student Centred Teaching and Learning Approaches The Victorian Essential Learning Standards and the Principles of Learning and Teaching encourages teachers to
use student centered learning and teaching approaches. What does this mean in a physical education context?
Traditional physical education classes tend to treat a class of students as if it were a single child. The lesson
format of warm-up, skill demonstration, skill practice, feedback, followed by a class game takes little account of
students’ motor abilities, learning styles, and intellectual development. This type of teaching approach requires
a high level of teacher support.
Learning how to learn and learning through movement are important objectives of student centred teaching
approaches. They allow for individuals to respond at their own level of ability and provide more opportunities
for a degree of success.
Varying the way teachers present the curriculum content during class can provide the learner with greater
responsibility by becoming more involved in the learning process, having opportunities to explore and
experiment with movement in a variety of ways. This in turn increases student motivation.
The teaching approach chosen will depend on:
• Teacher philosophy
• Teacher knowledge of level of support needed
• Students’ age, maturity, experience and motor ability
• Topic covered
• Time available
A lower level of teacher support and increased student involvement occurs where the teacher works closely
with the students, guiding the learning as they begin to apply the skills, knowledge and understandings being
taught.
During independent work, the student is practising, consolidating and applying skills, knowledge and
understandings being taught, so there is a high level of student involvement with the teacher acting as the
facilitator.
Exploratory Teaching Exploratory teaching for movement skill learning requires the teacher to present broad based movement
challenges or questions without requiring a specific solution. The students are not required to perform the skill
with correct technique, at this stage, it offers them the opportunity to find their own solution to the challenge.
It is particularly useful at the beginning of a manipulative skill unit and during the early years of school.
Examples:
Can you kick the ball…
� as hard as you can
� so it travels very slowly
� so it stays on the ground
� through the hoop
� with your opposite foot
� with no backswing
� with no knee bend
6
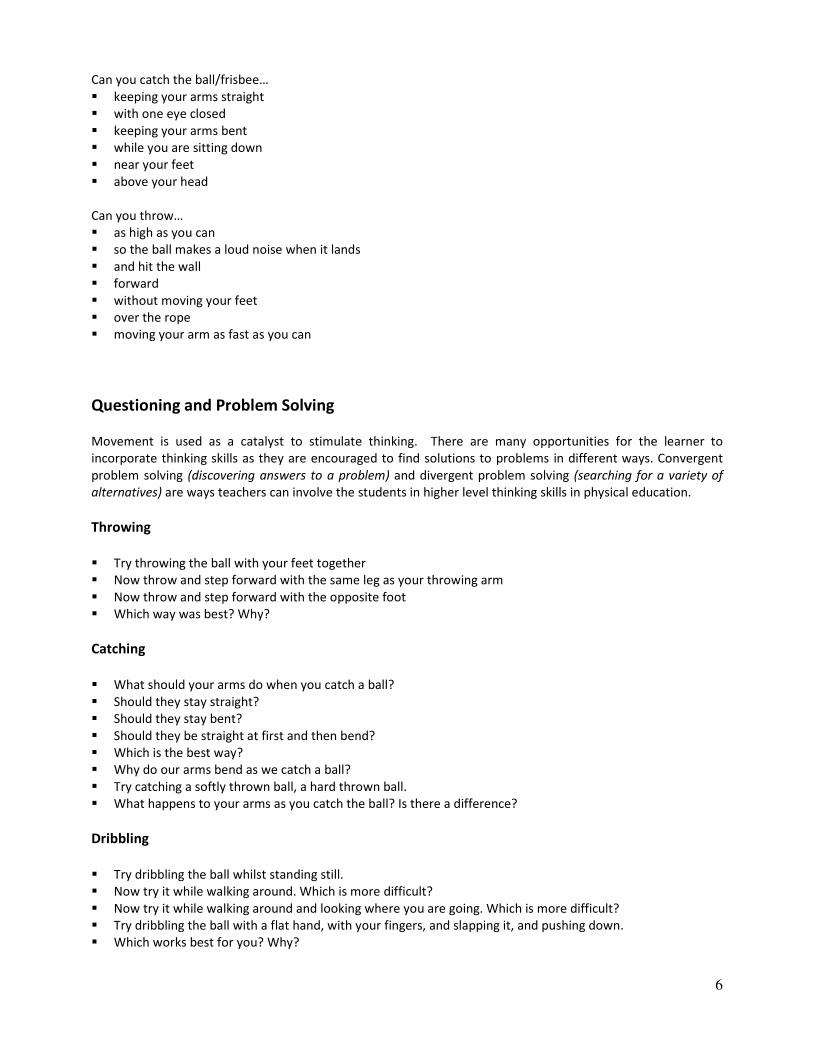
Can you catch the ball/frisbee…
� keeping your arms straight
� with one eye closed
� keeping your arms bent
� while you are sitting down
� near your feet
� above your head
Can you throw…
� as high as you can
� so the ball makes a loud noise when it lands
� and hit the wall
� forward
� without moving your feet
� over the rope
� moving your arm as fast as you can
Questioning and Problem Solving Movement is used as a catalyst to stimulate thinking. There are many opportunities for the learner to
incorporate thinking skills as they are encouraged to find solutions to problems in different ways. Convergent
problem solving (discovering answers to a problem) and divergent problem solving (searching for a variety of
alternatives) are ways teachers can involve the students in higher level thinking skills in physical education.
Throwing
� Try throwing the ball with your feet together
� Now throw and step forward with the same leg as your throwing arm
� Now throw and step forward with the opposite foot
� Which way was best? Why?
Catching
� What should your arms do when you catch a ball?
� Should they stay straight?
� Should they stay bent?
� Should they be straight at first and then bend?
� Which is the best way?
� Why do our arms bend as we catch a ball?
� Try catching a softly thrown ball, a hard thrown ball.
� What happens to your arms as you catch the ball? Is there a difference?
Dribbling
� Try dribbling the ball whilst standing still.
� Now try it while walking around. Which is more difficult?
� Now try it while walking around and looking where you are going. Which is more difficult?
� Try dribbling the ball with a flat hand, with your fingers, and slapping it, and pushing down.
� Which works best for you? Why?

7
Rolling
� How can you make the ball roll straight?
� How can you stop the ball bouncing before it rolls?
� How can you make the ball roll quickly?
The following are examples of teacher questioning in a physical education context using Bloom’s
Taxonomy of thinking skills.
Remembering
� Should the arms be straight or bent when catching a ball?
� Which foot should you step forward with when you throw overarm?
Understanding
� What should you do if you want to throw the ball as far as possible? Why?
� Try dribbling the ball in different ways. What do we do with fingers, wrist, arm? Do we push down or slap at
the ball? Why?
Applying
� How can you get away from your opponent so you can take the pass from your team mate?
� What sort of pass should you make so that your opponent can’t intercept?
� How can this game be modified so there is more opportunity for activity?
Analysing
� Watch the girl kick the ball each time. How was the second kick different from the first? Which kick went
further? Why?
� How can you help a person who is having trouble striking a ball off a tee?
Synthesizing
� In your group of three create a ball game where players must co-operate with each other.
� How can you modify this ball game so that team members can parctise kicking more?
Evaluating
� What changes would you suggest that Jane makes to her striking technique in order to get more power?
� Assess this group on their passing skills according to the following criteria.
It takes time and practice to incorporate these techniques into physical education teaching. The aim should
always be to provide children with an intellectually as well as a physically stimulating learning environment.
8
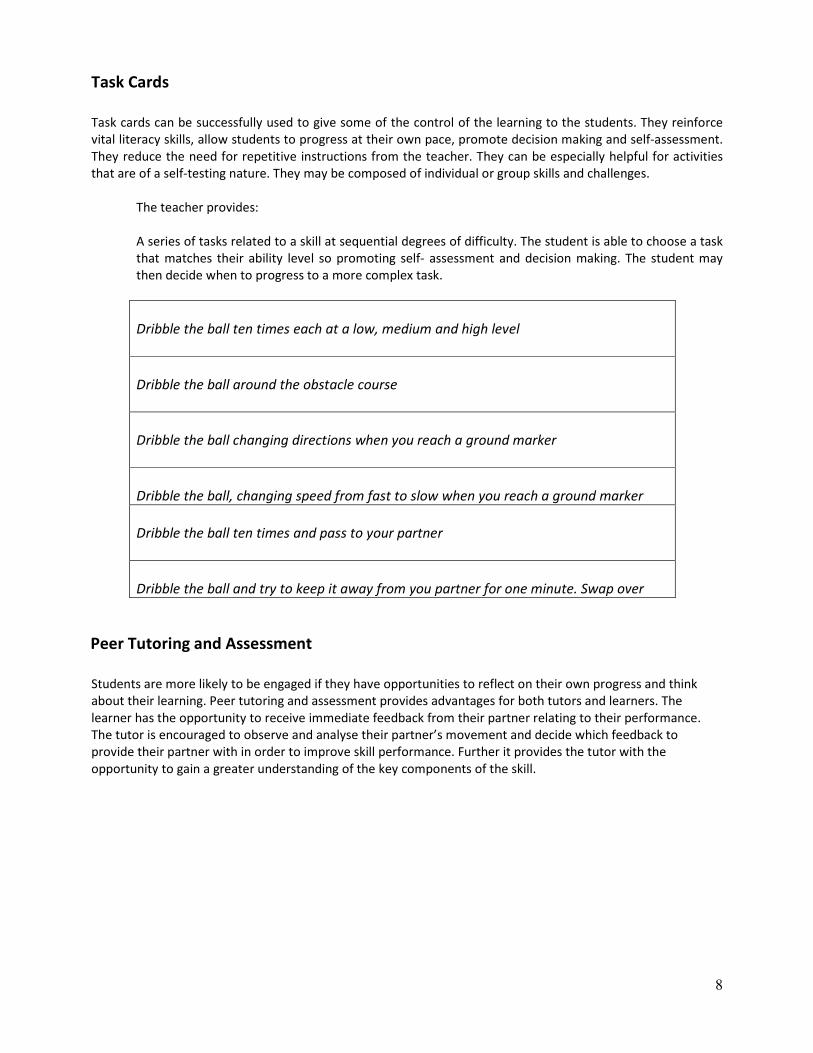
Task Cards
Task cards can be successfully used to give some of the control of the learning to the students. They reinforce
vital literacy skills, allow students to progress at their own pace, promote decision making and self-assessment.
They reduce the need for repetitive instructions from the teacher. They can be especially helpful for activities
that are of a self-testing nature. They may be composed of individual or group skills and challenges.
The teacher provides:
A series of tasks related to a skill at sequential degrees of difficulty. The student is able to choose a task
that matches their ability level so promoting self- assessment and decision making. The student may
then decide when to progress to a more complex task.
Dribble the ball ten times each at a low, medium and high level
Dribble the ball around the obstacle course
Dribble the ball changing directions when you reach a ground marker
Dribble the ball, changing speed from fast to slow when you reach a ground marker
Dribble the ball ten times and pass to your partner
Dribble the ball and try to keep it away from you partner for one minute. Swap over
Peer Tutoring and Assessment
Students are more likely to be engaged if they have opportunities to reflect on their own progress and think
about their learning. Peer tutoring and assessment provides advantages for both tutors and learners. The
learner has the opportunity to receive immediate feedback from their partner relating to their performance.
The tutor is encouraged to observe and analyse their partner’s movement and decide which feedback to
provide their partner with in order to improve skill performance. Further it provides the tutor with the
opportunity to gain a greater understanding of the key components of the skill.

9
Manipulative Skills
Throwing In throwing an object is propelled into space and is accelerated through the movement of the arm and the total
co-ordination of the body. The throw may be performed in many forms
• two handed underarm throw
• one handed underarm throw
• overarm throw
• shoulder pass
• sidearm throw
• chest pass.
The underarm throw and the overarm throw form the basis for many other throwing forms and emphasis
should be placed upon mastery during the primary school years.
Whilst many students will master the elementary pattern of the over arm throw as a function of maturation
they will not progress to the mature form without instruction and practice. Many adolescents and adults fail to
master the over arm throw which limits opportunities for participation in a wide range of games and sports.
Sequence of development:
1. Throw for distance 2. Throw for accuracy 3. Throw for distance and accuracy
Large/medium ball/object
Small ball/object
• two hand underarm throw
• two hand overhead throw
• side arm throw
• two hand side pass
• one hand shoulder pass
• one hand underarm throw
• one hand overhand throw
• one hand throw with spin

10
Catching Catching uses the hands to stop and control a moving object. In theory catching is more difficult than throwing
because the object must be tracked and the body moved into the flight path simultaneously. Another element
that makes catching more difficult is fear of being hit by the object, resulting in the avoidance reaction of closing
the eyes or turning the head. The size of the object should get smaller as young children improve catching skills.
The difficulties of the student learning to catch can be broken into three distinct areas:
Ocular Maturity
In simple terms, ocular maturity/inexperience means the catcher is not tracking the ball in its flight path.
The following activities practice tracking and have been proven to develop the elementary skills of catching.
1. A partner hides different coloured balls in their hands and drops one to the floor. The watcher has to
nominate the colour of the dropped ball before it hits the ground.
2. A partner hides different coloured bean bags behind their back and throws one to the catcher who must
nominate the colour prior to the catch and as early as possible.
3. Place different marks on a variety of balls. Hide the balls behind the back and throw one ball asking the
catcher to nominate which mark is on the ball prior to the catch and as soon as possible. To increase the
complexity, increase the number of balls from which to choose (ie throw a number of balls and ask the watcher
to catch a specific one). The throws specified here are short, soft, looping underarm throws.
4. Drop a ball from shoulder height and the 'watcher' claps as the ball bounces. This practices the
coincidence anticipation ability that transfers to hitting at the correct time in striking and closing the hands
at the correct time when catching. This can be combined with nominating marks on the ball as in activity 3.
The height of dropping the ball can also be varied to decrease the amount of information available to predict
the bounce (ie drop from waist height and then knee height or throw the ball up or against a wall).
5. To further complicate matters and combine both tracking and manipulation, use balls of different weights
and or size, so the catcher must attend to the specific ball and make a decision in regard to using an appropriate
catching grip.
Reprinted from Sport It! Manual, page 39 (Australian Sports Commission, 1993)

11
Manipulation Difficulties
This refers to the catcher having problems intercepting the flight path of the object so he/she will not close the
hands at the appropriate time or to the size of the ball.
The following manipulation activities assist the development of hand-eye coordination and ball awareness.
Many of the activities are self-regulating by nature so they will enrich the experience of the elite player while
providing the learner with appropriate challenges for their stage of development. They can be used either as a
complete lesson or as a warm up for any ball handling session.
1. The student tosses a ball from hand to hand; they start watching the ball carefully. Increase the speed
as confidence grows.
2. The student creates a figure 8 around their legs. They reverse the direction and increase the speed.
3. The student holds the ball with two hands behind their legs. They toss the ball up between the legs and
catch the ball in front of their legs and reverse.
4. The student holds the ball between their legs with one arm behind the legs and one in front. They drop
the ball, swap hands and catch.
5. The student circles the body with the ball around their
- ankles
- knees
- hips
- neck
They complete the circuit clockwise and anti-clockwise.
6. Students clench both fists and hit the ball from fist to fist.
7. Students place the ball on the ground between the feet (towards the front of the feet) and squeeze
the feet together and flip the ball up at the front to be caught.
8. Same as No. 7, except the ball is placed towards the heels. The student flips the ball up behind and catches
the ball.
9. Students close their eyes and place the ball on their head. They roll the ball off their head and try to
catch it as close to the ground as possible. This can be done one-handed as well.
10. Students place the ball on the back of their hand and roll the ball to be caught on the palm. The ball
must stay in contact with the hand at all times. Roll over the little finger, the middle finger or the
thumb. Once comfortable with this activity, students complete with their eyes closed.
11. Students throw the ball up in the air and clap as many times as possible. Only successfully completed
catches register. Students throw the ball higher and catch it lower to improve their score.
12. Students throw the ball up in the air and catch it in a 'nest' (formed by cupped hands held under the chin).
Students must not move the nest to catch the ball but move their feet to reposition the nest under
the ball. Note: This activity is designed to ensure children learn to move their feet (not just hands) to catch
a ball. It is not designed as a catching technique drill.
13. Students throw the ball up in the air and catch it with their hands on the ground.
12
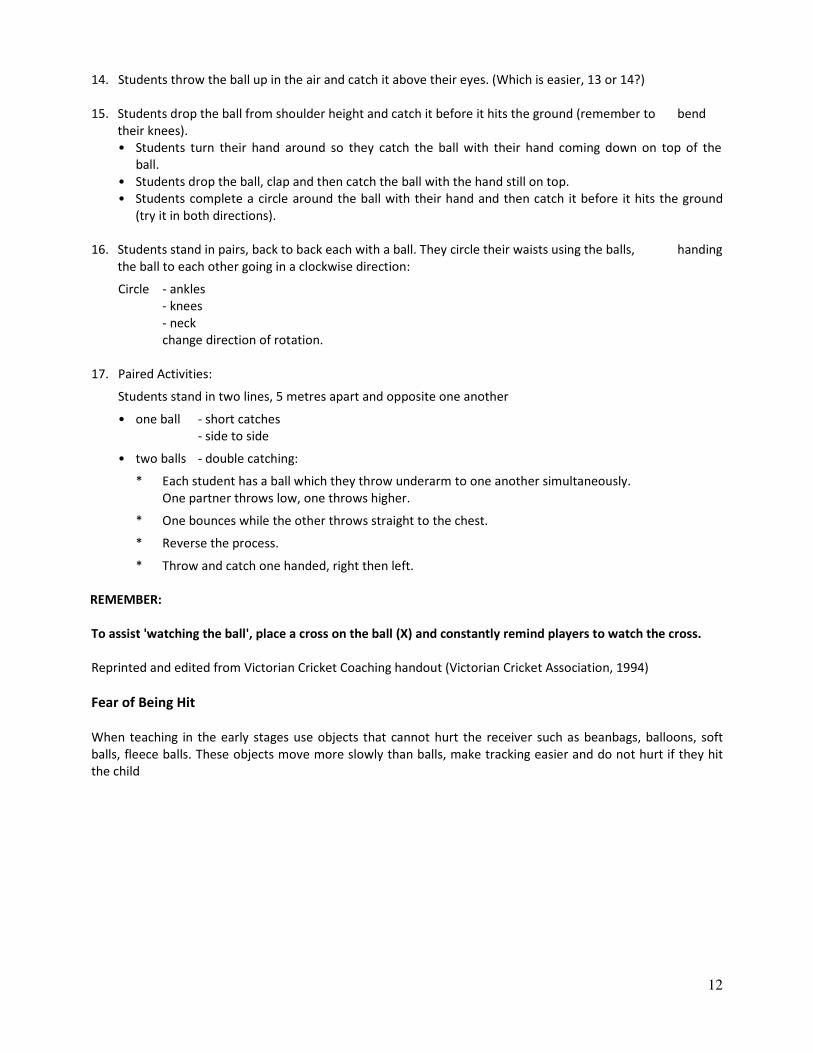
14. Students throw the ball up in the air and catch it above their eyes. (Which is easier, 13 or 14?)
15. Students drop the ball from shoulder height and catch it before it hits the ground (remember to bend
their knees).
• Students turn their hand around so they catch the ball with their hand coming down on top of the
ball.
• Students drop the ball, clap and then catch the ball with the hand still on top.
• Students complete a circle around the ball with their hand and then catch it before it hits the ground
(try it in both directions).
16. Students stand in pairs, back to back each with a ball. They circle their waists using the balls, handing
the ball to each other going in a clockwise direction:
Circle - ankles
- knees
- neck
change direction of rotation.
17. Paired Activities:
Students stand in two lines, 5 metres apart and opposite one another
• one ball - short catches
- side to side
• two balls - double catching:
* Each student has a ball which they throw underarm to one another simultaneously.
One partner throws low, one throws higher.
* One bounces while the other throws straight to the chest.
* Reverse the process.
* Throw and catch one handed, right then left.
REMEMBER:
To assist 'watching the ball', place a cross on the ball (X) and constantly remind players to watch the cross.
Reprinted and edited from Victorian Cricket Coaching handout (Victorian Cricket Association, 1994)
Fear of Being Hit
When teaching in the early stages use objects that cannot hurt the receiver such as beanbags, balloons, soft
balls, fleece balls. These objects move more slowly than balls, make tracking easier and do not hurt if they hit
the child

13
Catching Skill Progressions
LARGE AND MEDIUM BALL
SMALL BALL
1. Catching a ball with arms and chest
- bounce and catch
- throw in the air, bounce and catch
- throw in the air and catch
- throw onto wall on full bounce and
catch
- throw onto ground to rebound off
the wall, bounce and catch
- throw onto ground to rebound off
the wall and catch
- underarm throw onto wall and catch
(start a short distance and gradually
- work back)
2. Catching a ball with hands only
- see bouncing activities.
3. Catching in a distracting environment.
4. Catching a ball with hands only
(fingers up - high ball; fingers down - low ball)
- stationary
- using footwork.
5. Catching a ball with hands only (fingers up
and/or down) in a distracting environment.
1. • Increase the size of the catching receptacle
eg One hand - small witches hat
- fishing net
Two hands - dome markers
- ice cream containers
- small rubbish bins
- paper/aluminium foil plates
- hats/caps
• Throw small objects that ‘float’ to increase tracking
time (use looped trajectory)
- badminton shuttles
- blackboard dusters
- very soft toys
- foam balls
- foam cups
- ‘stocking’ balls
- tupperware containers and lids
- frisbees
- ‘Frog’ type bean bags.
• Use excitement -
eg imitation (or real) eggs
- balloon with a small amount of water.
- Partner throws gently over short distances initially.
2. Catch with both hands
- stationary
- using footwork
- over increasing distances
- fingers up - above waist level
- fingers down - below waist level.
3. Catch with one hand
- stationary
- using footwork
- diving - ‘classic catches’
- over increasing distances.
4. Catching in distracting environment.
5. Overhead catching.
Suggested Objects
Suggested Objects
Foam balls, balloons, Gator Skin large and medium balls,
soft and non-tightly inflated volleyballs, beach balls, soft
playballs, basketballs.
Eggs, soft gator skin balls, tennis ball size, waterbombs,
sofcrosse balls, baseballs, Incrediballs, Kanga cricket balls,
jugglers' balls, crumpled paper in stocking.

14
Stopping/Trapping Stopping or trapping is a skill that requires various part of the body to stop the forward momentum of a
moving object. With young students stopping a rolled ball should be taught before stopping a thrown object.
The lesson focus should be on gaining control of the ball and being able to make adjustments relative to the
speed of the ball and level of contact.
Trapping/Stopping skills
• Stopping a ball using different body parts.
• Stopping a ball using one hand (traveling in the same direction)
• Stopping a ball using two hands (meeting the ball front on).
• Stopping a ball using two hands (traveling in the same direction).
• Stopping a ball using one hand (meeting the ball front on).
• Stopping a ball using the sole of the foot.
• Stopping a ball with a bat or stick.
• Stopping a ball bounced by a partner using hands.
• Stopping a ball bounced by a partner using foot/chest.
BALL SIZE LEVEL BODY PART APPROACH SPEED
small high leg stationary slow ball
medium medium foot moving fast ball
large low chest towards
hand away
using equipment
eg bat
15
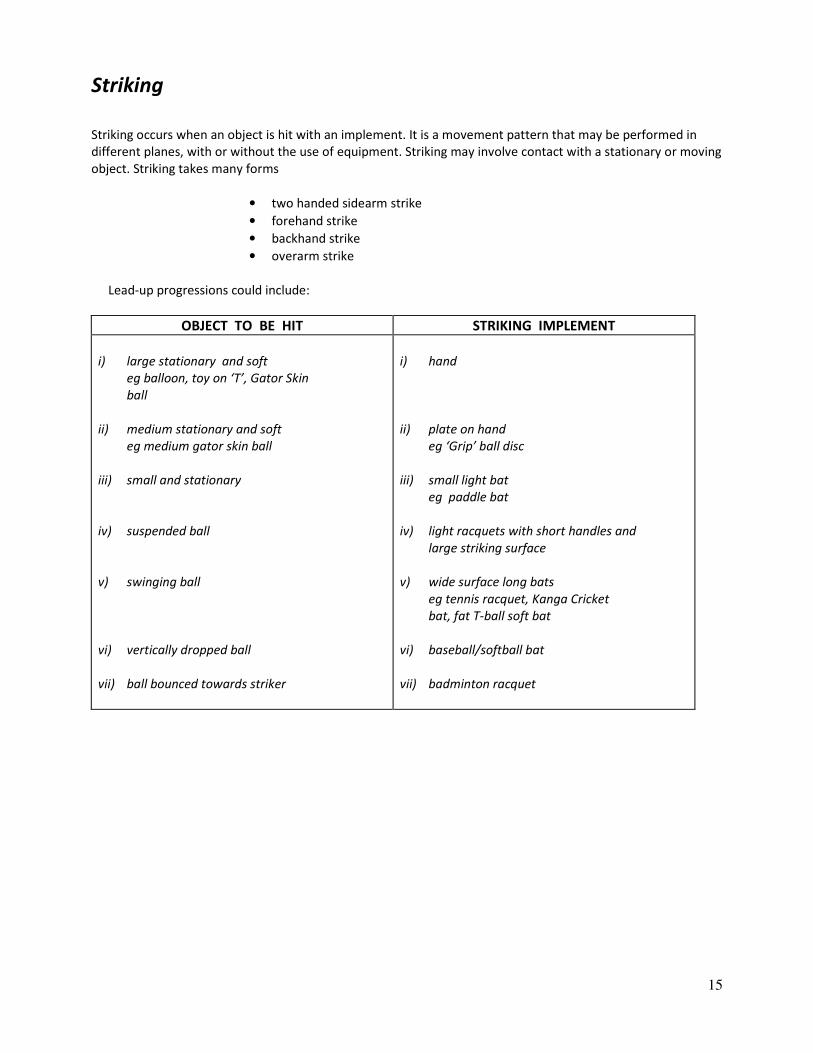
Striking
Striking occurs when an object is hit with an implement. It is a movement pattern that may be performed in
different planes, with or without the use of equipment. Striking may involve contact with a stationary or moving
object. Striking takes many forms
• two handed sidearm strike
• forehand strike
• backhand strike
• overarm strike
Lead-up progressions could include:
OBJECT TO BE HIT STRIKING IMPLEMENT
i) large stationary and soft
eg balloon, toy on ‘T’, Gator Skin
ball
ii) medium stationary and soft
eg medium gator skin ball
iii) small and stationary
iv) suspended ball
v) swinging ball
vi) vertically dropped ball
vii) ball bounced towards striker
i) hand
ii) plate on hand
eg ‘Grip’ ball disc
iii) small light bat
eg paddle bat
iv) light racquets with short handles and
large striking surface
v) wide surface long bats
eg tennis racquet, Kanga Cricket
bat, fat T-ball soft bat
vi) baseball/softball bat
vii) badminton racquet

16
Rolling
The movement pattern of ball rolling involves imparting force to an object in such a way that it travels along
the ground.
Rolling Skills
• Two-hand roll.
• One-hand roll.
• Rolling with different body parts.
• Rolling with either hand.
• Rolling a ball with spin.
DIRECTION SPEED VARIATIONS
forwards - one hand fast to knock over object between two lines
backwards - two hands slow to stop at a point over various distances
along a line slow to chase and retrieve against a wall
at a target/object to hit a moving target
in various directions accuracy
from different body positions
using various approaches

17
Dribbling
Dribbling is a movement pattern that involves receiving force from an object and immediately imparting force in
a downward, or horizontal direction without the use of an implement.
Dribbling Skills
• hand dribble,
• foot dribble
• implement dribble
Exploration with various types of balls, body parts and pieces of equipment.
Body Part Equipment Speed
hand
stick
slow
foot
bat
fast
foot and hand
medium
change of pace
Direction Height Ball
along a line
ground eg. hockey
small
around a circle
knee eg football
(ball along the ground)
medium
stop under control
hip eg basketball
large
weaving
dribble and shoot for
goal
rapid change to avoid
opponent

18
Kicking
Kicking involves imparting force to an action with foot or leg, it is a striking action executed with the
feet.
Kicking skills
• Place kick
• Punt kick
• Soccer kick
Sequence of Development:
1. Kick for distance 2. Kick for accuracy 3. Kick for distance and accuracy
Encourage kicking with the non-preferred foot after technique has been mastered with the preferred
foot.
Exploration with various types of balls
STILL BALL MOVING BALL DIRECTION TARGET
body stationary
ball in the air
inside of foot
distance
body moving
ball on the ground
outside of foot
stationary partner
ball bouncing along the
ground
top of foot forwards
moving partner
ball dropped from
hands
top of foot - over the
head
along a line
heel of foot -
backwards
rebound off wall
over an opponent to a
partner
between objects
into objects

19
Innovative Equipment One class management concern that arises when teaching ball handling is the very fact that balls are being used.
Problems such as space, retrieval time and balls rolling once they land, cause some class management
difficulties. Below are a few suggestions which may alleviate some of these concerns.
Use a confined space, eg enclosed tennis court, indoor area, rebound wall area.
Where possible use equipment which does not ‘travel’ when it hits the ground, yet can be thrown or kicked
with full force.
• kick empty cardboard boxes and milk cartons, very soft toys,
light bean bags
• strike suspended and swinging targets (eg a ball in a stocking)
• kick/throw elastic or string tethered balls
• throw crumpled up paper, soft toys, shuttlecocks scarves, juggling balls
SAFETY Teachers are responsible for ensuring the safety of their students.
The use of equipment such as that described above reduces the risk of injury to students.
Teachers should ensure that adequate space is provided, retrieval procedures are set in place and the
appropriate formations and target directions are utilised to maximise the provision of a safe working
environment.
When using striking implements caution must be exercised with regard to swinging space and the dropping or
throwing of the bat or racquet.
Pay careful attention to the suitability of any activity surface.
Encourage students to wear appropriate clothing and footwear
Provide proper supervision at all times
Ensure a correct warm up to prepare students for activity

20
Additional Minor Games and Activities to assist teaching Manipulative Skills
Throwing and Catching Chaos
Students: Whole class divided into two teams.
Equipment: soft balls
Area: Rectangular area approx one third of a netball court in size
Activity: Team A stands around the boundary of the rectangle. Team B each has a soft
ball and stands inside the rectangle. On the “Go” signal Team B must make as
many passes as possible to someone in Team A within a given time frame. Team
A members cannot pass to consecutive Team B members.
Star Passing
Students: Groups of five
Equipment: tennis balls/bean bags/ small soft balls
Area: Open space
Activity: With five players in a star formation, each player passes underarm to a second
person on the left. As skill increases add a second ball. Call the player’s name to
be passed to.
Birdies in the Cage
Students: groups of 8-15
Equipment: Basketball/soft ball
Area: Large Open Area
Activity: Players stand in a circle formation. Two/three students stand in the centre of
the circle. The object of the game is for the centre players to try to touch the
ball while circle players are passing it. After a brief time choose new players to
enter the circle. If scoring is desired centre players can count the number of
touches they made. The ball should move rapidly. Passing to a neighbouring
player is not allowed. Play can be limited to a certain type of throw (underarm,
bounce pass, overam)
'LET'S ELIMINATE ELIMINATION GAMES' - alternative ideas
Elimination games eg Poison Ball, usually eliminate students who most need to practice the skill involved in the
game/activity. It is therefore essential that teachers provide suitable skill practices for 'eliminated' students,
who return to the game immediately after completing the required task.
WHO'S GOT ME OUT? A 'brandy' game using a soft nerf type ball. Everyone is against everyone in a defined area (the size depends on
the number of participants). If branded the student is 'eliminated' and leaves the playing area, returning to the
game when the person who eliminated them is branded and therefore is temporarily eliminated.

21
DRIBBLE TAG Designed as an open skill practice for various game skills eg the basketball dribble. Each player dribbles a ball
(nominate which hand etc) within a defined area (the size depends on the number of participants). Everyone
tries to knock everyone else's ball away and at the same time keep control of their own.
A student is 'eliminated' if control of the ball is lost, but rejoins the game after having dribbled the ball twice
around the perimeter of the court. This gives students who are eliminated some valuable practice in a more
closed situation. This activity can be adapted for soccer, hockey etc.
RUN THE GAUNTLET A 'brandy' game using a soft nerf type ball. Two teams - the branders and the runners. The branding team lines
up along both sides of a running corridor and tries to eliminate (by branding) each runner as they individually
try to score a run by running the length of the corridor. Keep score until everyone is eliminated and then
change over. Second innings - 2 balls etc. (Think of other variations to this activity).
PASS TAG Players spread out in a defined area (the size depends on the number of participants). Nominate 'it' who then
has to escape being tagged by the other players. These players pass a ball around and can only make a tag if
they are in possession of the ball and can tag 'it' without stepping with the ball. Time how long 'it' can stay
untagged ('World Record'). Note: taggers need to learn to move into space to receive the pass and try to make
the tag.

37
BENCHMARK SKILLS
P 1 2 3 4 5 6
Rolling • exploring
different ways
of rolling
various types of
balls
• two hand roll -
rolling with
• rolling with one
hand
• rolling with
either hand
• rolling a ball
with spin
Stopping
• exploring
different ways
of stopping a
ball using
various body
parts
• using two hands
to stop a ball
• using one hand
• using sole of the
foot
• a bounced ball
using two hands
• using a bat or
stick
• stopping a
bounced ball
using foot and or
chest
Bouncing
• bounce and
catch-
two hands
• two hand
continuous
bounce
• one hand
continuous
bounce
• bounce using
alternate hands
• bounce using a
piece of
equipment
Kicking
• kick stationary
ball
• punt - dominant
foot
• kick with instep
and outside of
either foot
• kick a ball in
flight with either
foot

38
BENCHMARK SKILLS
P 1 2 3 4 5 6
Throwing
• two hand
underarm throw
• one hand
underarm throw
• two hand overhead
throw
• chest pass
• two hand
underarm throw
from the side
• overhand throw
(FMS)
• sidearm throw
• one hand shoulder
pass
• throwing a ball with
spin
Catching
• catching a ball
with arms and chest
• two hand tennis ball
catch (FMS)
• two hand catch -
chest height
• two hand catch at
student's own height
level
• one hand catch at
high and low level
(either hand)
Dribbling
• walking while
continuously
bouncing or kicking,
changing direction
and side of the body
• dribbling a ball using
either hand or foot or
with a stick
• dribbling using either
hand or foot or with a
stick in a distracting
environment
Striking
• two hand
underhand strike
• striking a stationary
ball
• underarm strike-
either hand
• underarm strike -
holding a bat
• heading a ball
• forehand strike (FMS)
• two hand side-arm
strike (FMS)
• striking a ball with
flat/top/backspin
39
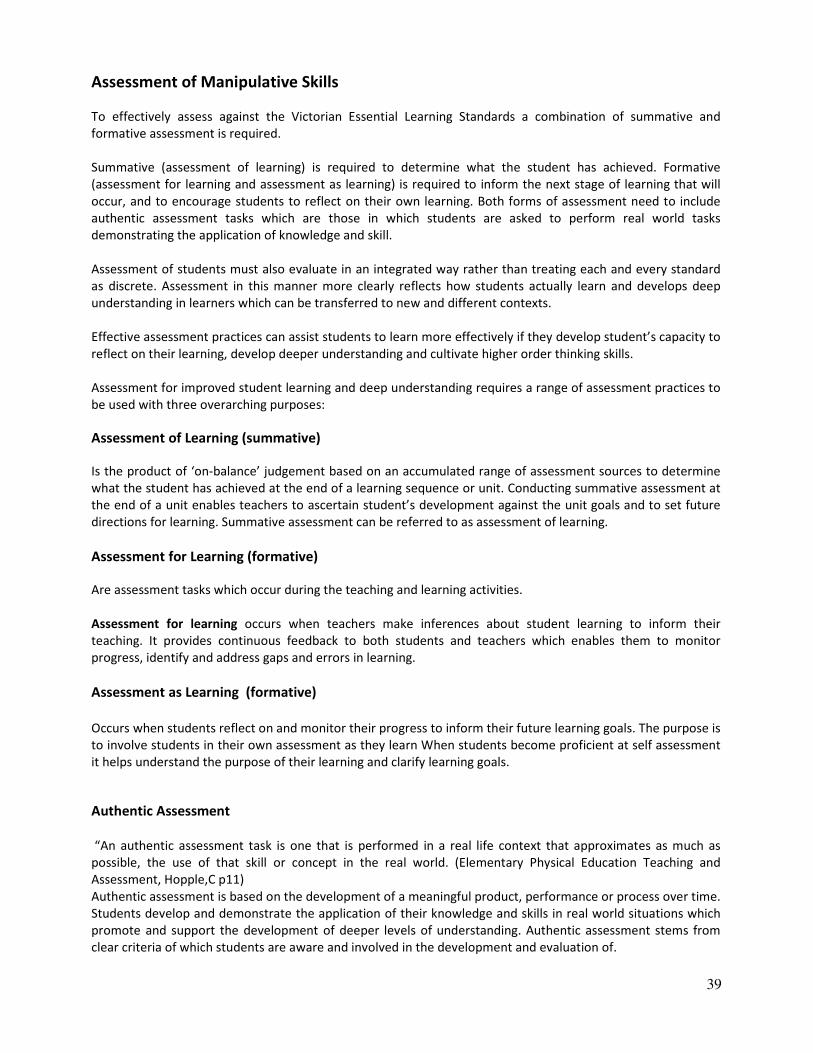
Assessment of Manipulative Skills
To effectively assess against the Victorian Essential Learning Standards a combination of summative and
formative assessment is required.
Summative (assessment of learning) is required to determine what the student has achieved. Formative
(assessment for learning and assessment as learning) is required to inform the next stage of learning that will
occur, and to encourage students to reflect on their own learning. Both forms of assessment need to include
authentic assessment tasks which are those in which students are asked to perform real world tasks
demonstrating the application of knowledge and skill.
Assessment of students must also evaluate in an integrated way rather than treating each and every standard
as discrete. Assessment in this manner more clearly reflects how students actually learn and develops deep
understanding in learners which can be transferred to new and different contexts.
Effective assessment practices can assist students to learn more effectively if they develop student’s capacity to
reflect on their learning, develop deeper understanding and cultivate higher order thinking skills.
Assessment for improved student learning and deep understanding requires a range of assessment practices to
be used with three overarching purposes:
Assessment of Learning (summative) Is the product of ‘on-balance’ judgement based on an accumulated range of assessment sources to determine
what the student has achieved at the end of a learning sequence or unit. Conducting summative assessment at
the end of a unit enables teachers to ascertain student’s development against the unit goals and to set future
directions for learning. Summative assessment can be referred to as assessment of learning.
Assessment for Learning (formative)
Are assessment tasks which occur during the teaching and learning activities.
Assessment for learning occurs when teachers make inferences about student learning to inform their
teaching. It provides continuous feedback to both students and teachers which enables them to monitor
progress, identify and address gaps and errors in learning.
Assessment as Learning (formative)
Occurs when students reflect on and monitor their progress to inform their future learning goals. The purpose is
to involve students in their own assessment as they learn When students become proficient at self assessment
it helps understand the purpose of their learning and clarify learning goals.
Authentic Assessment
“An authentic assessment task is one that is performed in a real life context that approximates as much as
possible, the use of that skill or concept in the real world. (Elementary Physical Education Teaching and
Assessment, Hopple,C p11)
Authentic assessment is based on the development of a meaningful product, performance or process over time.
Students develop and demonstrate the application of their knowledge and skills in real world situations which
promote and support the development of deeper levels of understanding. Authentic assessment stems from
clear criteria of which students are aware and involved in the development and evaluation of.
40
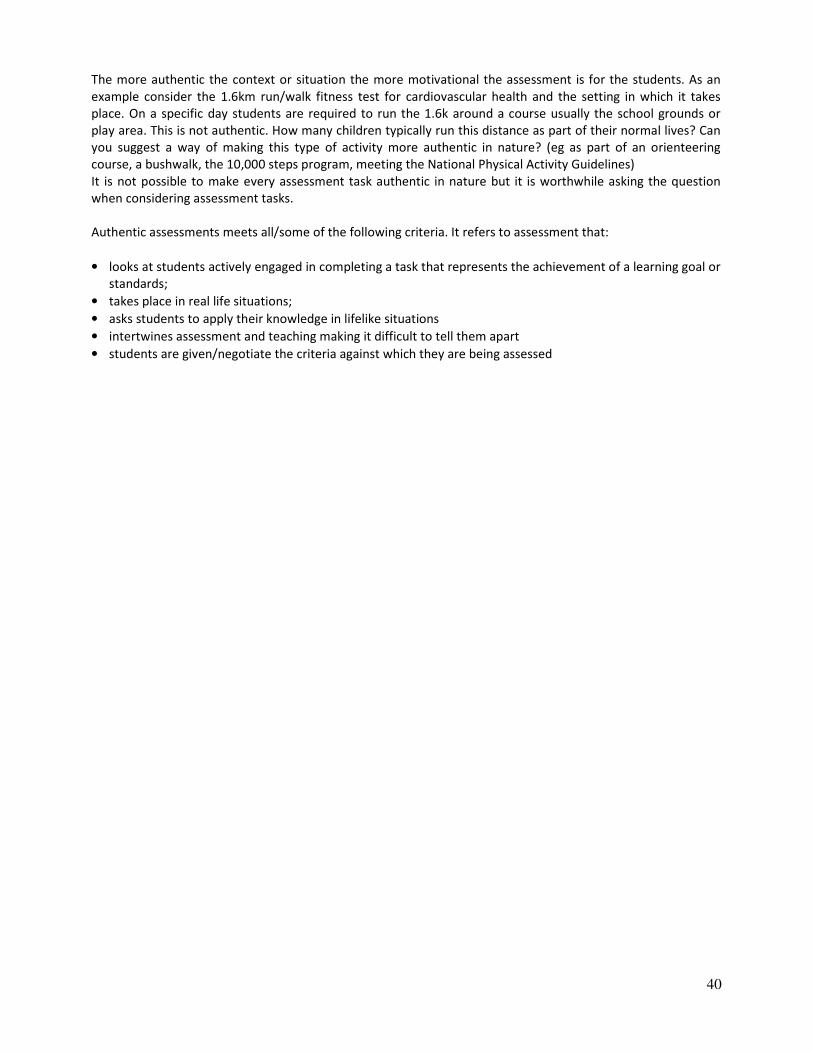
The more authentic the context or situation the more motivational the assessment is for the students. As an
example consider the 1.6km run/walk fitness test for cardiovascular health and the setting in which it takes
place. On a specific day students are required to run the 1.6k around a course usually the school grounds or
play area. This is not authentic. How many children typically run this distance as part of their normal lives? Can
you suggest a way of making this type of activity more authentic in nature? (eg as part of an orienteering
course, a bushwalk, the 10,000 steps program, meeting the National Physical Activity Guidelines)
It is not possible to make every assessment task authentic in nature but it is worthwhile asking the question
when considering assessment tasks.
Authentic assessments meets all/some of the following criteria. It refers to assessment that:
• looks at students actively engaged in completing a task that represents the achievement of a learning goal or
standards;
• takes place in real life situations;
• asks students to apply their knowledge in lifelike situations
• intertwines assessment and teaching making it difficult to tell them apart
• students are given/negotiate the criteria against which they are being assessed

41
Assessment rubric: Ball skills
Assessment Task (Level 3)
There are three parts to the assessment task:
Part 1: During minor games, students perform an overhand throw from a stationary position.
Part 2: During minor games, students perform a catch from a stationary position.
Part 3: During minor games, students move into position and perform an overhand throw or catch.
Suggested duration: 8 lessons.
Assessment can be integrated throughout the teaching and learning sessions.
Assessment criteria Towards the level At the level Beyond the level
Overarm throw in stationary
position
* Eyes focused on target
* Stand side on to target
* Step forward with opposite foot
during the throw
* Throwing arm follows through
down and across body
Attempts skill but lacks
correct technique or
control.
Demonstrates skill with the
correct technique and
control.
Performs skill with correct
technique and control in a
complex skill development
activity.
Catch in a stationary position.
* Eyes are focused on the ball
* Hands move to meet the ball
* Catch and control the ball with
hands only
* Elbows bend to absorb the force
of the ball
Attempts skill but lacks
correct technique or
control.
Demonstrates skill with the
correct technique and
control.
Performs skill with correct
technique and control in a
complex skill development
activity.
Ability to move into position to
proficiently perform the overhand
throw or catch.
* Tracks the ball speed and
direction
* Anticipates ball trajectory
* Moves towards the ball with
correct footwork
* Positions body behind the ball
* Hands are in correct position to
receive ball
Does not move into the
correct position or moves
into the wrong position,
and/or performs skills
without the correct
technique or control.
Demonstrates skills with the
correct technique and
control after moving into
correct position.
Moves into correct position
to perform skills with the
correct technique and
control in response to
demands in a complex skill
development activity.
Sample Record Sheet
Student Name: ______________________________
Date Session 1 Session 2 Session 3 Session 4 Session 5 Session 6 Session 7 Session 8 On balance
judgement
Criterion 1
Criterion 2
Criterion 3
Source: Adapted from VCAA Assessment Advice
42
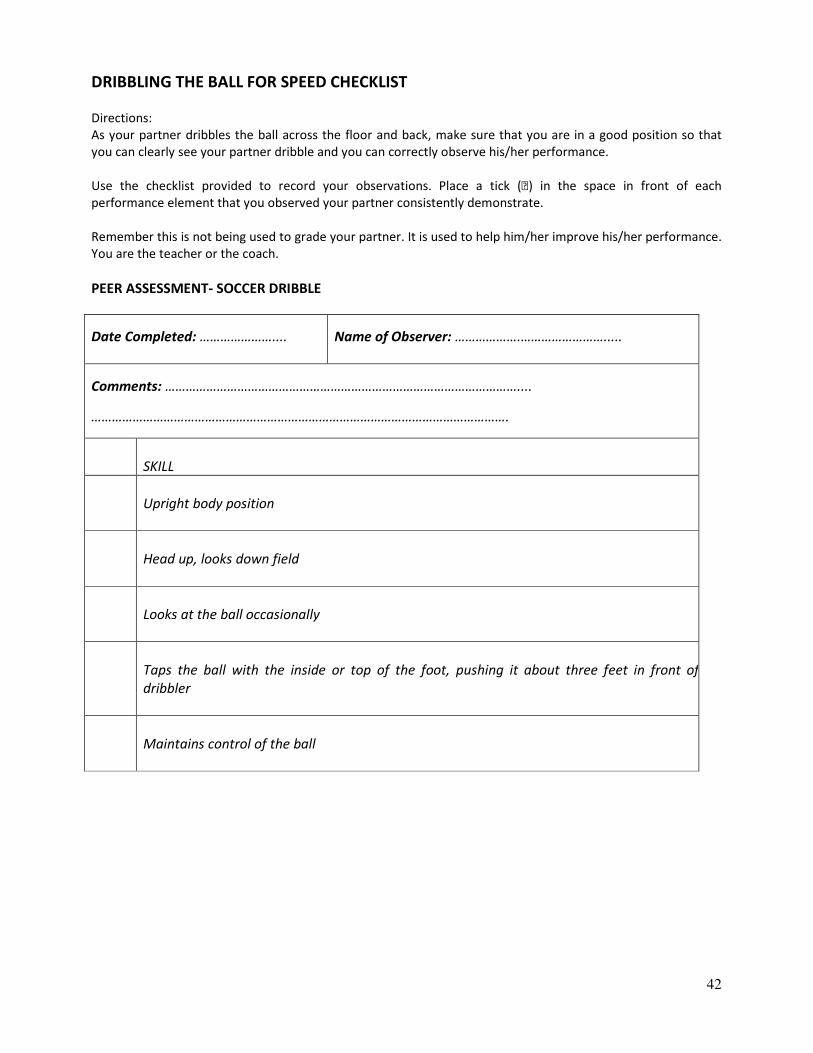
DRIBBLING THE BALL FOR SPEED CHECKLIST Directions:
As your partner dribbles the ball across the floor and back, make sure that you are in a good position so that
you can clearly see your partner dribble and you can correctly observe his/her performance.
Use the checklist provided to record your observations. Place a tick () in the space in front of each
performance element that you observed your partner consistently demonstrate.
Remember this is not being used to grade your partner. It is used to help him/her improve his/her performance.
You are the teacher or the coach.
PEER ASSESSMENT- SOCCER DRIBBLE
Date Completed: …………………....
Name of Observer: ……………….…………………….....
Comments: …………………………………………………………………………………………....
………………………………………………………………………………………………………….
SKILL
Upright body position
Head up, looks down field
Looks at the ball occasionally
Taps the ball with the inside or top of the foot, pushing it about three feet in front of
dribbler
Maintains control of the ball

43
Create a Game
Names --------------------------------------------------------------------------------------------------------------------
In a group of four, create and play a game that:
1 contains dribbling, passing, receiving, running and dodging
2 has no more than 8 rules
3 is safe to play
4 provides all team members lots of opportunity to participate
Use the rubric below as you work so you can be sure your game can meet the criteria
Score
Excellent work!
You went above
and beyond!
Good work!
Everything is here!
Good Attempt!
Just a few things
are missing.
Would you like
another try?
Let’s be sure that
you understand.
I recommend that
you try this one
again. See me
for more
explanation.

45
46
47
Resources
Fundamental Motor Skills Resources ACHPER Victorian Branch
Manual for Classroom Teachers GPO Box 412, Melbourne 3001
Activities Resource Tel: (03) 9851 6966
Instructional CD Fax: (03) 9851 6163
Posters
Dynamic Physical Education for Elementary Pearson Education 2004
School Children Robert Pangrazi
Motor Skills & Movement Stations Centre for Applied Research in Education 2000
Lesson Plans for Young Children
Landy and Burridge
Developmental Physical Education WCB McGraw Hill 2002
For all Children
Gallahue, D.
PE Teachers Pre-Sport Skills Centre For Applied Research in Education 2002
Lessons, Activities and Games for
Grades 4-6
Landy, J


![Meta-level Priors for Learning Manipulation Skills with ... · manipulation skill. Most of the work on skill learning has used manual feature selection by a human [3,4]. In some cases,](https://static.fdocuments.net/doc/165x107/60e4dd75de89801186575871/meta-level-priors-for-learning-manipulation-skills-with-manipulation-skill.jpg)


![MARIONETTE: FROM TRADITIONAL MANIPULATION …1].pdf · making and manipulation skills. Though there are quite a few literatures dedicated to the practice of puppetry, specific puppet](https://static.fdocuments.net/doc/165x107/5b5b73f77f8b9a302a8e02fd/marionette-from-traditional-manipulation-1pdf-making-and-manipulation-skills.jpg)