Arduino Micro Controllers - Home Metal Shop Clubhomemetalshopclub.org/news/15/arduino.pdf · Motor...
65
Arduino Microcontrollers By Norm Berls
Transcript of Arduino Micro Controllers - Home Metal Shop Clubhomemetalshopclub.org/news/15/arduino.pdf · Motor...

Arduino
Microcontrollers
By Norm Berls

Back in the day
Arduino invented in 2005
Art students at the Interaction Design Institute
Ivrea in Ivrea, Italy, needed controller for
kinetic art
Invention worked so well, they went into the
digital controller business
Open Source – design is public and anyone
can copy… and do they ever
Many enhancements since then
Arduino brought electrical engineering down
to the level of the hobbyist

A Microcontroller
More than an on/off
switch.
Less than a computer
Programmable: you must
write a program.
About the size of a credit
card.
Usually small project or
hobby applications.
Possibly limited CNC.
How It Works Hook up your choice of electronic devices to the
Arduino board.
You can buy devices ready made for Arduino
You can wire components together on a solderless breadboard and connect to Arduino
Connect the Arduino to a USB port on a PC
Write an Arduino program with a special program on the PC and download it into the Arduino.
Your program will immediately begin to execute and keep on executing, and executing…
Disconnect the Arduino from the PC
Connect a battery up to the Arduino
The Arduino will remember the last program you loaded and will immediately execute it when you turn the battery power on
Your program will only stop executing when the power is turned off to the Arduino

You gotta have
PC
Windows, IOS, Linux
Multimeter
Soldering Iron
You gotta know
something about
PCs and the Internet
Programming (C, C++)
Electronics
Arduinos

Arduino Devices and Features
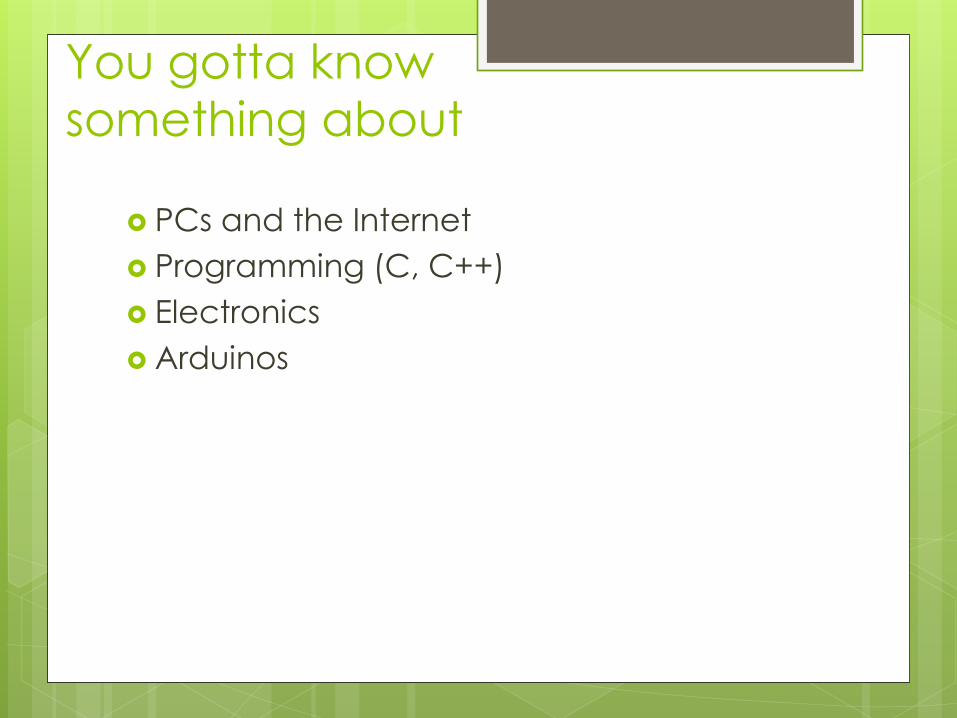
A Connected
Microcontroller
Connects to electronic components:
Switch
Resistor
Capacitor
Diode
Transistor
LED (Light Emitting Diode)
Solenoid
Relay
Potentiometer
IC chip

Fancy Sensor
Connections
Sensors: Heat (IR)
Humidity
CO2
Contact Proximity
Tilt (gyroscope)
Motion (inertia)
Light Sound
Key Pad
Real Time Clock
GPS
Sensor Input
Sensor input comes in the form of variable:
Voltage
Resistance
Capacitance
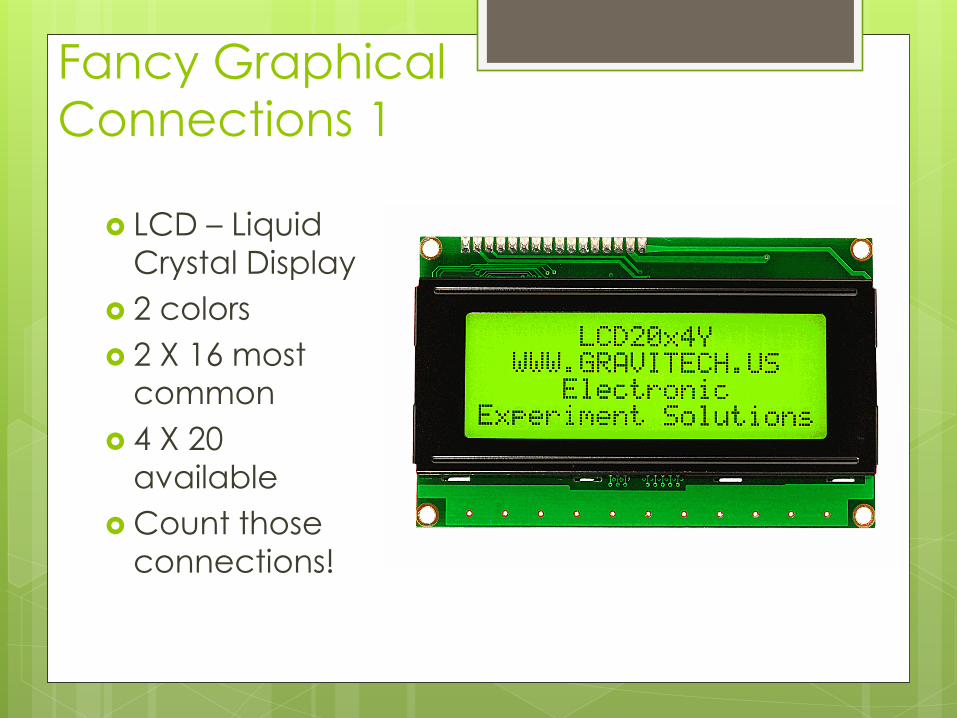
Fancy Graphical
Connections 1
LCD – Liquid
Crystal Display
2 colors
2 X 16 most
common
4 X 20
available
Count those
connections!

Fancy Graphical
Connections 2
TFT
Thin Film Transistor
Color Graphics
Choice of fonts.
Fast way to use
up Arduino IO
pins
SPI serial bus
requires just 2
pins

Fancy Graphical
Connections 3
TFT (Color)
Touch sensitive
Are we all
thinking DRO?
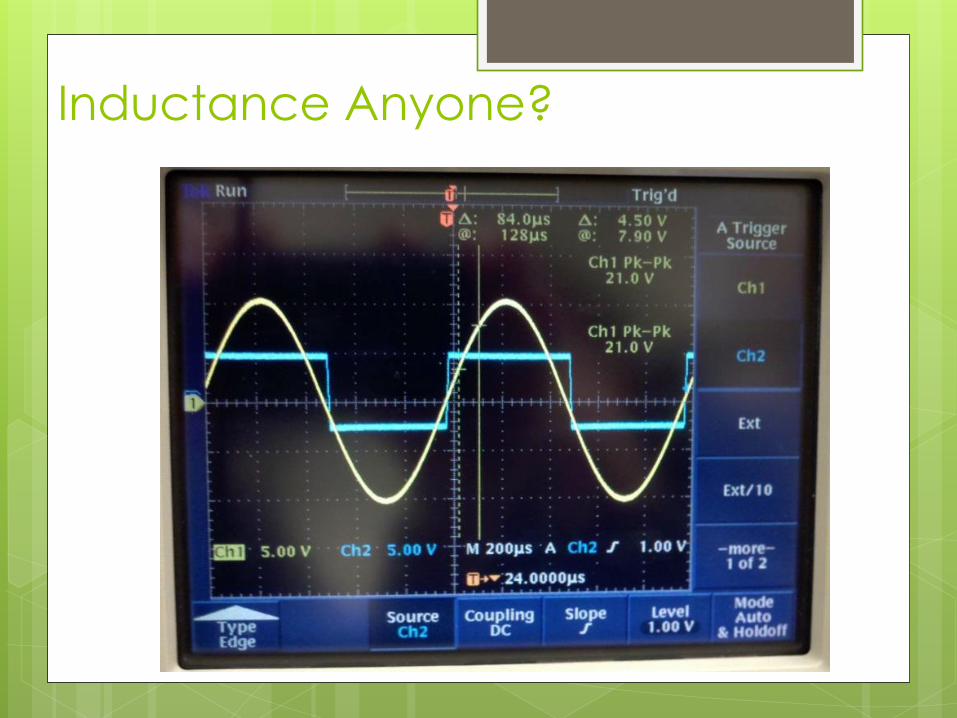
Inductance Anyone?

Mostly DC Motors,
if you please.
W and WO brushes
Arduino powered by computer
Motor powered by battery or other external power source
Arduino controls motor or additional motor controller.
Faster/Slower
Forward/Backward
Contact sensors for precise control.
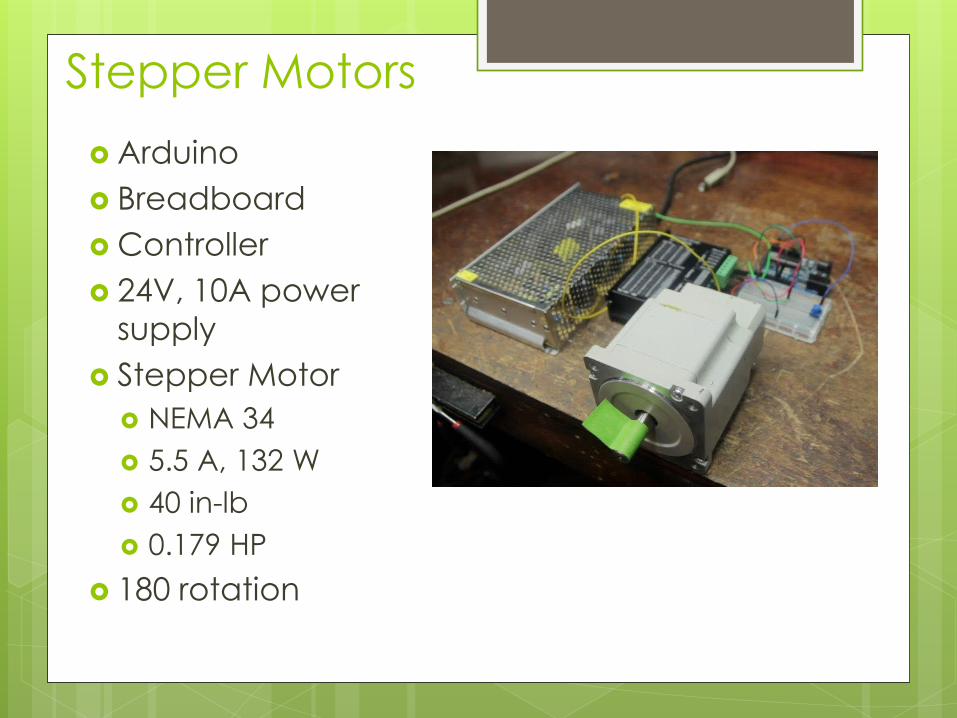
Stepper Motors
Arduino
Breadboard
Controller
24V, 10A power
supply
Stepper Motor
NEMA 34
5.5 A, 132 W
40 in-lb
0.179 HP
180 rotation
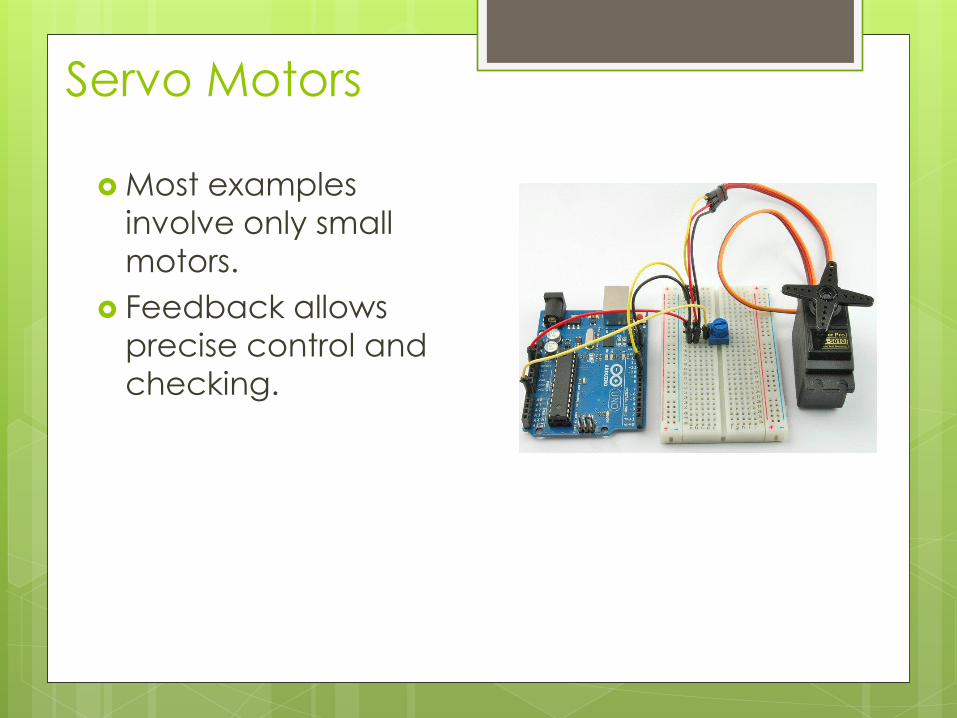
Servo Motors
Most examples
involve only small
motors.
Feedback allows
precise control and
checking.

No Way, Jose
At least a
transistor
Maybe a relay
Maybe a
controller
Any motor
pulling over 1 A
is going to
need a heat
sink or fan on
the Arduino
side
About CNC
gShield by Synthetos touted as the CNC solution
Works on Arduino Uno… the smallest Arduino
Apparent compatibility problems with Mega
GRBL-Arduino-Library needed – a G-code
interpreter (subset only)
2.5 Amps per winding
12-30 Input Voltage
TI DRV8818 Stepper Drivers

Micro SD Instead of cramming all
your data into memory at
once
Non-volatile memory card
Megabytes 16, 32
Read/Write
M codes
G codes
Limited CNC instruction set
Or data collection…
weather station, jogger
mileage

Communications
Various Serial Ports (Standard, SPI, I2C)
USB
Ethernet
WiFi
Blue Tooth
RFID

Insanity works better on
Arduino

Harass the Cat

3D Printer… $800

Millie?

Incoming!!!
Motion shield
Gyroscope shield
Altitude shield
GPS Shield
You still have to know
how to pilot a plane
and navigate
through cross winds

DIY DRO

The Devilish Details
or
What It Is

Geography
USB plug for program development
Program stays in Arduino even when power is off.
7-12 V power plug
40 uA per pin, 200 uA total
Reset Button
Timing crystal
Digital IO pins
Analog Input pins
Power & Ground pins
Serial Ports
Some digital pins double as analog output (PWM) Pulse Width Modulation.
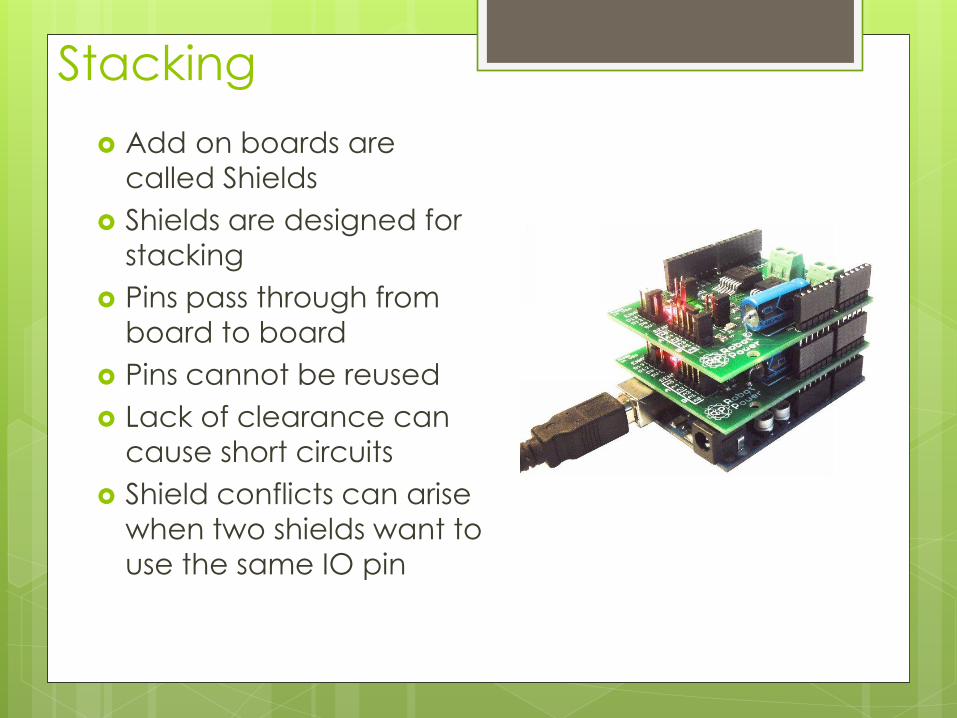
Stacking
Add on boards are
called Shields
Shields are designed for
stacking
Pins pass through from
board to board
Pins cannot be reused
Lack of clearance can
cause short circuits
Shield conflicts can arise
when two shields want to
use the same IO pin

Add More Pins
Uno 5.5 volts
4 KB flash memory
14 pins
8 bit addresses
Mega 2560 R3 5.5 volts
256 KB flash memory
66 pins
8 bit addresses
Due 3.3 volts
512 KB flash memory
66 pins
32 bit addresses

DIY Shield
Prototype on
breadboard
Move to prototype
shield
Solder in place
Add it to the stack

When an Arduino
gets Bored
It talks to itself
Arduinos can talk to each other through the I2C serial bus.
When you run out of IO pins, you split the work onto multiple Arduinos
One Arduino is the master
The others are slaves
Versioning
Dilemmas
Most shields that are compatible with Uno will
work on Mega.
Many versions of Arduino are now obsolete
and no longer made. Compatibility?
Pin assignment and functionality can change
between versions.
Voltage can be a compatibility issue for
shields.

Digital IO
WRT the Uno and the Mega
+5 volts is considered the input voltage
0 volts is the ground.
+5 volts is the “HIGH” setting or digital 1
0 volts is the “LOW” setting or digital 0
Any digital pin can be declared as input or
output, but not both.

Analog Input
Arduino has certain designated pins for analog
input named A0, A1, A2, A3…..
“analogRead” method returns integer values
between 0 and 1023
input = analogRead(A0);
“constrain” method clips analog values to fit in a
certain range
input = constrain(analogRead(A0),250,750);
“map” method scales analog values from one
range to another range
Input = map(analogRead(A0),0,1023,0,255);

Pulse Width
Modulation or
Analog Output PWM output is done via
specially designated
digital pins
It is really on/off digital
output but, the
duration is precisely
controlled in a “duty
cycle”
Used to control motors
by creating the illusion
of variable voltage
Serial IO
One bit at a time, one after the other
Standard Serial
SPI serial bus (2 wires) send, receive
I2C serial bus (2 wires) send-receive, timer
Specialized libraries needed to support
serial IO
You can have a several devices working
off the same I2C serial bus because each
one has to have a unique address.
Programming the Arduino

Bits and Bytes
Arduino calls a program a “sketch”
Arduino language is based on C
Some C++ mixed in
Libraries – special program functions written for use with Arduino… extensions to the Arduino language
Libraries and Shields go together
If you need a library, copy from Internet and install
Sketches are written with the Arduino IDE (Integrated Development Environment)
IDE is a Java-based program that runs on a PC
Download the IDE off the Internet… for free!

How much C?
Floating point numbers and arithmetic
Trig functions etc.
Logic If, Else
Case
Comparison operators < > == != And, Or && ||
Loops While
Indexed
Dynamic memory allocation
Arrays
Text strings
Beyond C
Arduino supports events
You can write your own libraries… if you
know C++
The Arduino IDE is written in Java
The IDE
What to do with it?
Integrated Development Environment – a program for the PC that lets you write Arduino sketches.
https://www.arduino.cc/en/Main/Software
Or just search for “Arduino IDE”
Download and install
Run an “A” cable from a USB port to the connector on the Arduino board.
Tell the IDE which COM port your are connecting with.
Tell the IDE which kind of Arduino board you are plugged into. Different boards have different chips and hence speak different versions of the Arduino language

The Arduino IDE

IDE Tools Menu
Pulled down the
tools menu
Board option
controls board type
Port option controls
which COM port the
Arduino board is
connected to
Remember, this is a
USB port

IDE Load
Open an existing sketch
Menu will show example sketches of how Arduino interacts with various devices.
First menu item brings up list of sketches you have saved.

IDE Edit
Sketch “traffic_light_1” has been loaded.
Slider allows scroll to bottom of sketch.
Cursor can be placed anywhere in sketch.
Typing enters new text or replaces old
Enter creates a new line
Copy to clipboard and paste will work
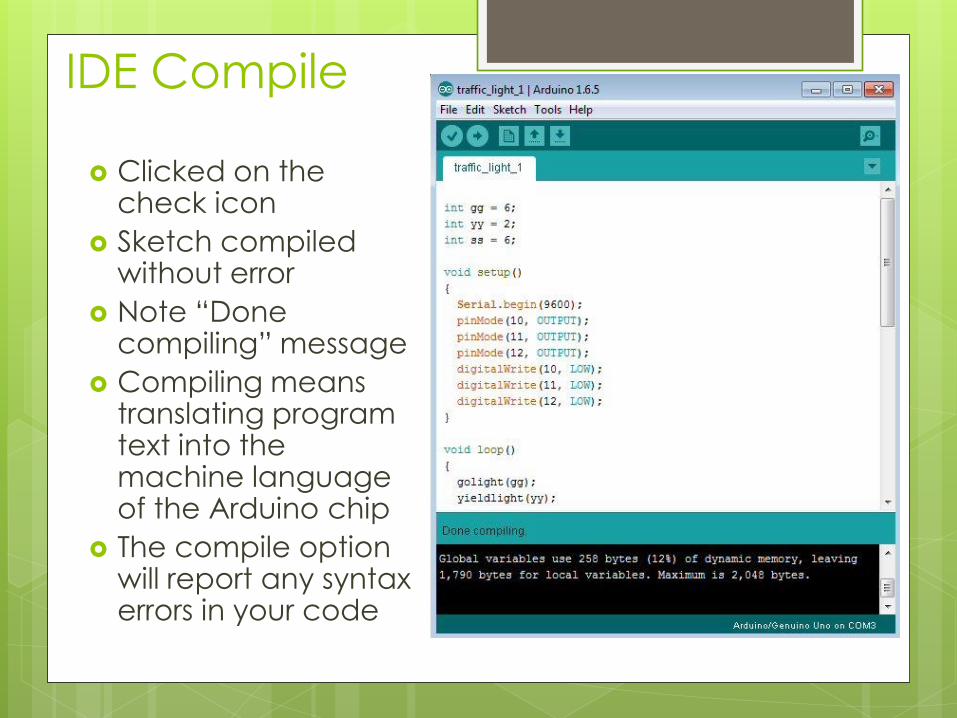
IDE Compile
Clicked on the check icon
Sketch compiled without error
Note “Done compiling” message
Compiling means translating program text into the machine language of the Arduino chip
The compile option will report any syntax errors in your code
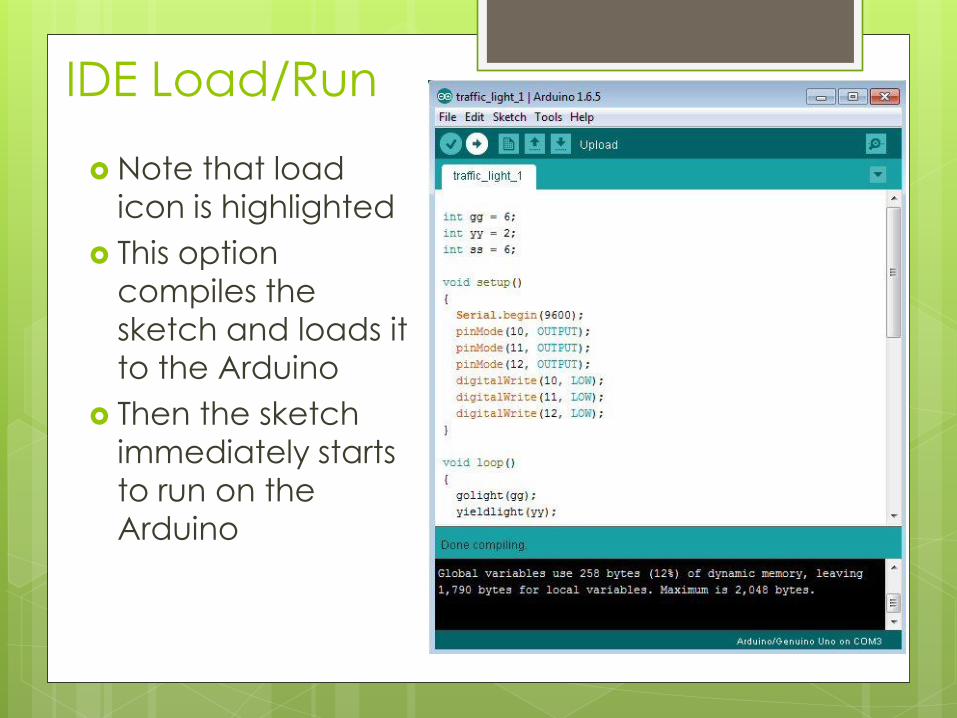
IDE Load/Run
Note that load
icon is highlighted
This option
compiles the
sketch and loads it
to the Arduino
Then the sketch
immediately starts
to run on the
Arduino

IDE Load/Run
Note “Done uploading” message
The sketch has been loaded to the Arduino and is running
Clicked on the serial output icon
This sketch contains instructions to write messages to the standard serial port.
Clicking the serial icon makes the serial port output visible in a window.
This only happens under the IDE.

IDE Serial Output

IDE Save
Clicked on the
save icon
Sketch was saved
to disk

traffic_light_1
Arduino Sketch int gg = 6;
int yy = 2;
int ss = 6;
void setup()
{
Serial.begin(9600);
pinMode(10, OUTPUT);
pinMode(11, OUTPUT);
pinMode(12, OUTPUT);
digitalWrite(10, LOW);
digitalWrite(11, LOW);
digitalWrite(12, LOW);
}
void loop()
{
golight(gg);
yieldlight(yy);
stoplight(ss);
}
void stoplight(int time)
{
digitalWrite(10, LOW);
digitalWrite(11, LOW);
digitalWrite(12, HIGH);
Serial.println("Light mode: Stop");
delay(time * 1000);
}
void yieldlight(int time)
{
digitalWrite(10, LOW);
digitalWrite(11, HIGH);
digitalWrite(12, LOW);
Serial.println("Light mode: Yield");
delay(time * 1000);
}
void golight(int time)
{
digitalWrite(10, HIGH);
digitalWrite(11, LOW);
digitalWrite(12, LOW);
Serial.println("Light mode: Go -");
delay(time * 1000);
}

Electronics

Watt Amp, Volt?
Keep track of which side of any device has the
most + voltage
A multimeter with automatic scaling is a good
tool for isolating circuit problems
Most every device will have some amount of
voltage across it
A device with no measurable voltage across it is
suspect

Getting Zapped
Some devices are sensitive to polarity
LEDs have a long wire and a short wire. The long wire must connect to the + input or the LED will not light.
Arduino outputs +5 V at 40 uA. This is enough to burn out a micro LED. 1000 Ohm resistor in series with the LED is necessary to keep LED from burning out.
Some capacitors will explode if connected to the wrong polarity.

iPhone App
Motors are confusing
Amps x Volts = Watts
How many HP?
iPhone app “Units Plus”
does units conversions
Including power
Watts HP

iPhone App
Color band codes on
resistors are
troublesome
iPhone app “Resistor”
converts colors to
Ohms
Does both 4 band
and 5 band resistors.

Arduino School

Books & Books
Title Author
Sams Teach Yourself
Arduino Programming in
24 Hours
Richard Blum
Arduino for Dummies John Nussey
Arduino Projects for Dummies Brock Craft
Make: Electronics Charles Platt
Make: Arduino Bots and Gadgets Kimmo Karvinen
Tero Karvinen
Programming Arduino
Next Steps
Simon Monk

Tutorial Websites
Name URL
Arduino www.arduino.cc
Learn Arduino learn.adafruit.com/category/learn-arduino
Arduino Tutorial http://www.ladyada.net/learn/arduino/
Sparkfun learn.sparkfun.com/tutorials/tags/arduino?page=all
YouTube www.youtube.com
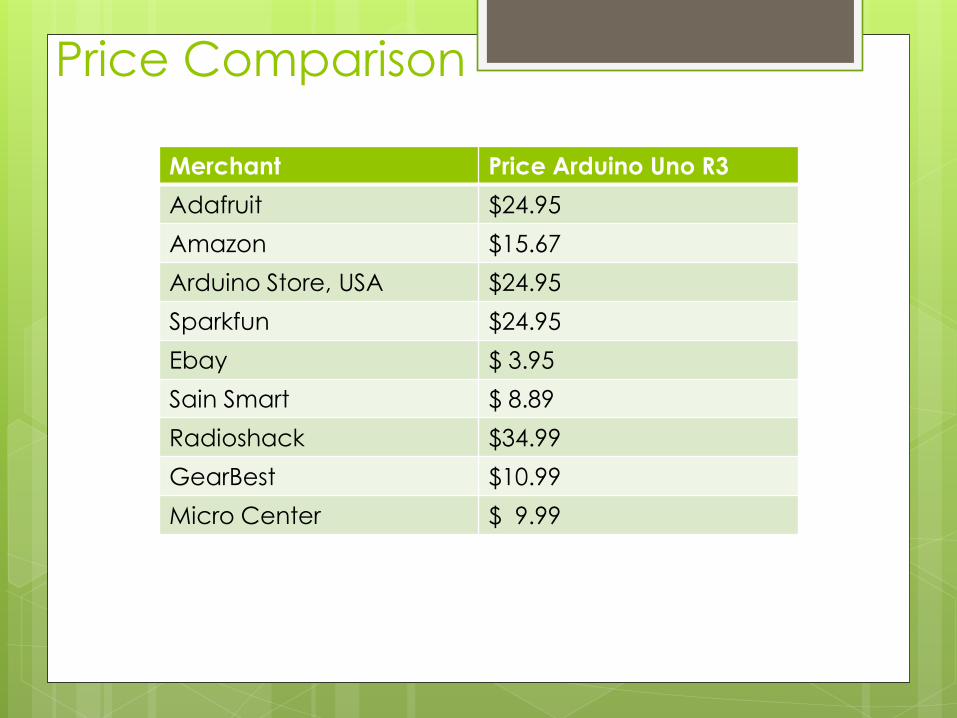
Price Comparison
Merchant Price Arduino Uno R3
Adafruit $24.95
Amazon $15.67
Arduino Store, USA $24.95
Sparkfun $24.95
Ebay $ 3.95
Sain Smart $ 8.89
Radioshack $34.99
GearBest $10.99
Micro Center $ 9.99
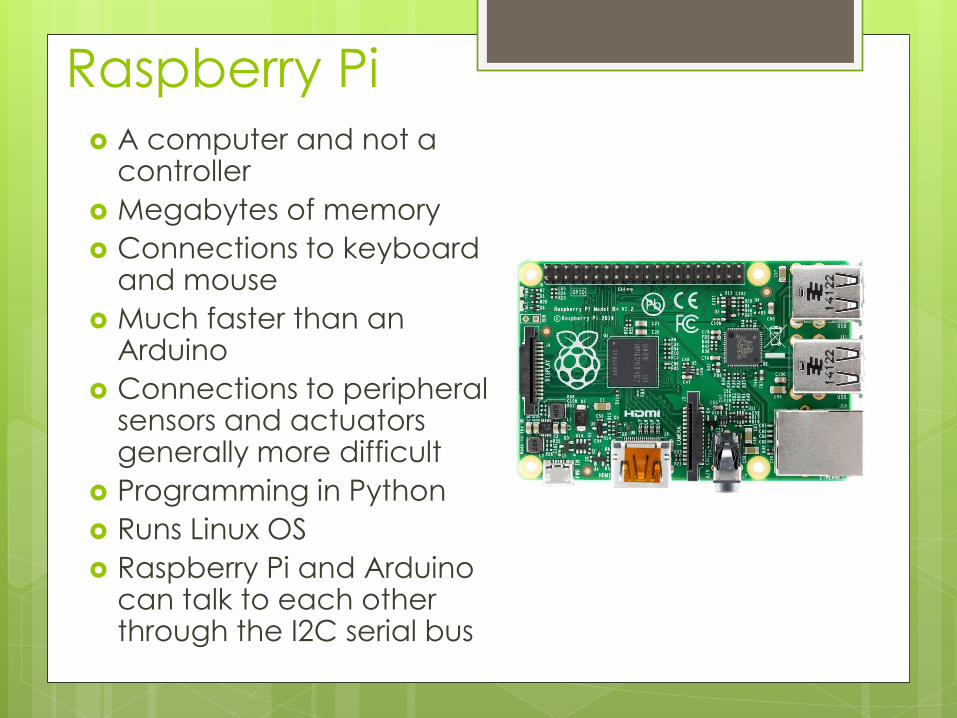
Raspberry Pi A computer and not a
controller
Megabytes of memory
Connections to keyboard and mouse
Much faster than an Arduino
Connections to peripheral sensors and actuators generally more difficult
Programming in Python
Runs Linux OS
Raspberry Pi and Arduino can talk to each other through the I2C serial bus

Future Project
Real time clock
Westminster chimes
Components
Tubular wind chimes
Real time shield
TFT shield for time/date
Key pad shield
Solenoids
LCD shield for reset
On/off switch for chimes
Arduinos

The End