All about the of your Split Type Room Air Conditioner
27
Refer to Page 2 for table of contents. www.frigidaire.com www.frigidaire.ca All about the Use & Care of your Split Type Room Air Conditioner USA 1-866-942-1567 Canada 1-866-942-1567
Transcript of All about the of your Split Type Room Air Conditioner

Refer to Page 2 for table of contents.
www.frigidaire.com www.frigidaire.ca
All about the
Use&Careof your
Split Type Room Air Conditioner
USA 1-866-942-1567 Canada 1-866-942-1567

Attention
Please read all of the instructions before using the air conditioner and keep this manual for future reference.We know you will enjoy your new air conditioner and thank you for choosing our product.We hope you will consider us for future purchase.
The air conditioner that you have bought may be slightly different from the one illustrated in this manual. Please refer to the information related to the model you have. This air conditioner is for domestic use only. It is not reccomended for commercial or industrial use.
recommend that you separate plastic, paper and cardboard and give them to recycling companies.
do NOT throw it away with the rest of your domestic
Environmental advices
Welcome to the world of simple handling and no worries
01 Welcome
Thank you for choosing Frigidaire. This manual contains all of the informationrequired to guarantee your safety and the appropriate use of your air conditioner.
If you need to dispose of this appliance in the future,
garbage.
The packaging material used is recyclable. We
Contents
02Contents
01. Welcome...........................................................................................0102. Environmental advices..........................................................................0103. Contents...............................................................................................02
05. Installation:5.1 Choosing the installation site.......................................................075.2 Parts list.....................................................................................09
5.4 Outdoor unit installation............................................................155.5 Refrigerant piping connection.....................................................175.6 Electrical 5.75.8
Gas leak check...........................................................................25
06. Operation:6.16.2
- Remote control operation- Remote control specifications- Remote control battery- When should the batteries be replaced- To replace batteries
- Remote control instructions6.4 Remote control description.........................................................32
- On/Off
- -
- TIMER OFF - Clock
- Turbo
- Mode
- Fan
- Sleep
- TEMP - Blow
- LIGHT6.5 INTRODUCTION FOR SPECIALFUNCTION.................................33
04. Safety precautions.......................................................................04
5.3 Indoor unit installation......................................................11
work......................................................................19
Electrical safety.....................................................................255.95.10 Test running..............................................................................26
Air Purge...................................................................................22
6.3 Remote control.........................................................................30Product description.............................................................28Preparing the device for operation............................................27
- TIMER ON-
+

36.6 4- Automatic operation- Cool/heat and fan only operation- Dry operation- Airflow direction adjustment- Sleep mode- Timer operation- Optimal operation
6.7 How to use the indoor unit......................................................38- Adjusting air flow direction- Adjusting the vertical air flow direction (up/down)- To set the horizontal air flow direction (left/right)- To automatically swing the air flow direction (up/down)
6.807. Maintenance....................................................................................41
How the air conditioner works........................................
Manual operation.....................................................................40
09. Solution for problems...........................................................................4508. Operation tips......................................................................................43
10.Major appliance 5 year parts only limited warranty................................46
03 Contents

Safety precautions
04Safety precautions
DANGER! Avoid Serious Injury
This appliance must be installed by a qualified licensed HVAC technician in accordance with all applicable codes. All electrical connections should be performed by a licensed electrician.
or Death
1. Do not attempt to install the split airconditioner by yourself.
2. This air conditioner contains no user-serviceable parts. Always callan authorized Electrolux servicer forrepairs.
3. When moving the air conditioner, always call an authorized Electroluxservicer for disconnection andre-installation.
4. Do not insert or place fingers orobjects into the air discharge area inthe front of the indoor unit.
5. Do not insert or place fingers orobjects into the air discharge areain the outdoor unit.
6. Do not start or stop the air conditionerby unplugging the power cord orturning off the power at the electricalbox.
7. Do not cut or damage the power cord.8. If the power cord is damaged it should
only be replaced by an authorizedElectrolux servicer.
9. In the event of a malfunction (sparks,burning smell, etc.) immediately stop the operation, disconnect the powercord, and call an authorized Electroluxservicer.
10.Do not operate the air conditionerswith wet hands
11.Do not pull on the power cord.12.Do not drink any water that is drained
from the air conditioners.
1. Provide occasional ventilationduring use. Do not direct airflow atfireplaces or other heat relatedsources as this could cause flare upsor make units run excessively.
2. Do not climb on or place objects onthe outdoor unit.
3. Do not hang objects off the indoor unit.
4. Do not place containers containingwater on the indoor and/or outdoor units.
5. Turn off the air conditioner at thepower source when it will not be used for an extended period of time.
6. Periodically check the condition ofthe outdoor unit’s installation basefor any damage.
7. Do not apply heavy pressure to theradiator fins of the indoor and/oroutdoor units.
8. Operate the indoor unit with airfilters in place.
9. Do not block or cover the intake grille, discharge area and outletports.
10.Ensure that any electrical/electronicequipment is one yard away fromthe indoor unit and outdoor unit.
11.Do not use or store flammable gases near the indoor and/oroutdoor units.
CAUTION! Avoid Injury ordamage to the unit or otherproperty

To prevent injury to the user or other people and property damage, the following instructions must be followed.
Incorrect operation due to ignoring of instructions may cause harm or damage. The seriousness is classified by the following indications.
1. Connect with the power properly.Otherwise, it may cause electric shock or fire due to excess heat generation.
shock.
sounds, smell, or smoke comes from it. It may cause fire and electric shock.
switching on or off the power. It may cause electric shock or fire due to heat generation.
damp environment. It may cause electric shock.
electric parts. It may cause failure of
05 Safety precautions
3. Disconnect the power if strange
machine, electric shock or fire.
2. Always ensure effective grounding.No grounding may cause electric
4. Do not operate or stop the unit by
5. Do not operate with wet hands or in
6. Do not allow water to run into
heating appliances. It may cause fire and electric shock.
unspecified power cord. It may cause electric shock or fire.
9.Do not damage or use an
8. Do not use the power cord close to
flammable gas or combustibles, such as gasoline, benzene, thinner,etc. It may cause an explosion or fire.
7. Do not use the power cord near
power cord and ensure that the
is danger of fire or electric shock.cord will not be compressed. There
10.Do not place heavy object on the
operation. It may cause electric
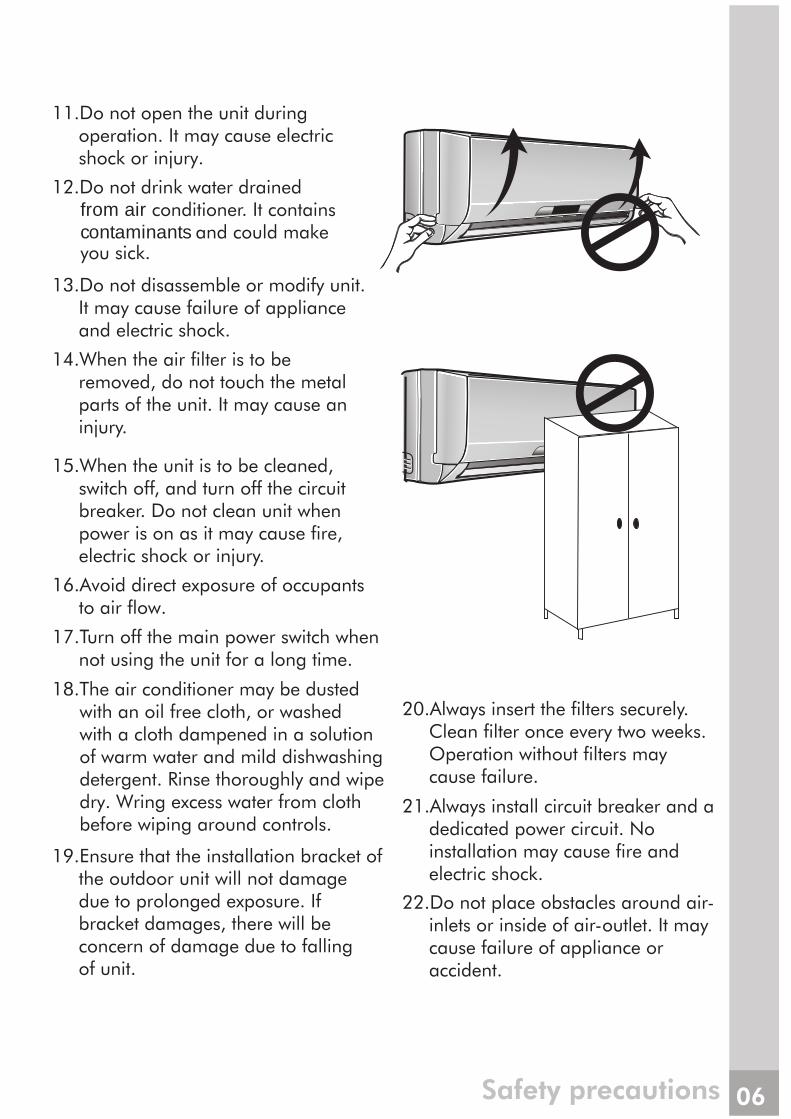
removed, do not touch the metal parts of the unit. It may cause an injury.
shock or injury.
and electric shock.It may cause failure of appliance
11.Do not open the unit during
13.Do not disassemble or modify unit.
14.When the air filter is to be
switch off, and turn off the circuit breaker. Do not clean unit when power is on as it may cause fire, electric shock or injury.
to air flow.
not using the unit for a long time.
15.When the unit is to be cleaned,
16.Avoid direct exposure of occupants
17.Turn off the main power switch when
18.The air conditioner may be dusted with an oil free cloth, or washed with a cloth dampened in a solution of warm water and mild dishwashing detergent. Rinse thoroughly and wipe dry. Wring excess water from cloth before wiping around controls.
Clean filter once every two weeks.
inlets or inside of air-outlet. It may cause failure of appliance or accident.
concern of damage due to fallingof unit.
due to prolonged exposure. Ifbracket damages, there will be
the outdoor unit will not damage19.Ensure that the installation bracket of
20.Always insert the filters securely.
22.Do not place obstacles around air-
cause failure.Operation without filters may
from air conditioner. It contains 12.Do not drink water drained
contaminants and could make you sick.
dedicated power circuit. No installation may cause fire and electric shock.
21.Always install circuit breaker and a
Safety precautions 06

Product description
Air outlet
Air inlet
129
Outdoor unit
All the pictures in this manual are for explanation purpose only. They maybe slightly different from the airconditioner you purchased.
Air inlet
3
2 1
4
5Air outlet
Indoor unit
76
Product description
Front panel
Air filter
Horizontal airflow grille
Vertical airflow grille
Temperature sensor
Panel
Remote control
Detection valve
Drain hose and refrigerant
connecting pipe
1
2
3
4
5
6
7
8
9
10
11
12
Attention
Infrared signal receiver
Connecting cable
(inside the indoor unit)
10
8
11
Refrigerant gas connector
(beneath front panel )
28

Product description29
on a typical model. The functions arethe same in your air conditioner, evenif there are some differences in theappearance.
Display panel(indoor unit)
HEAT indicator: This indicator
illuminates when the air conditioner
is in Heat operation
DIGITAL SCREEN: Show the present
adjustments to temperature when
air conditioner is operating.
1713 14 15 16
Attention
13
15
16
17
14
OPERATION indicator: Thisindicator illuminates red after power is on and illuminatesgreen when the unit is in operation.
The description of the control is based
COOL indicator: This indicator
illuminates when the air conditioneris in cool operation
DRY indicator: This indicator
illuminates when the air conditioneris in Dry operation

Remote control
Rated voltage
Transmission distance
Environment
3 V
two (R03/Ir03x2) alkaline AAA batteries.
block the signals between the remote control and the indoor unit.
2. Avoid spilling any liquid in the remote control. Do not expose to sunlight or any heat source.
3. If the infrared signal receiver in the indoor unit is exposed to sunlight, the air conditioner unit might not work properly. Use curtains or shades to avoid having sunlight directly to the receiver.
1. Operation mode: Cool, Heat (Only
FAN, and AUTO (Automatic).
3. Internal temperature range selection:
4. LCD
Remote control operation
Remote control
Attention
for models with heating function), DRY,
Lowest voltage of CPU emiting signal 2.4 V
1. The air conditioner will not operate when curtains, doors or other materials
Remote control battery: To use the remote control, it is necessary to install
2. 24 hrs Timer.
REMOTE CONTROL SPECIFICATIONS
61ºF - 86ºF
32.8'*
23ºF ~ 140ºF
4. If other electrical equipments react to the signals sent by the remote control, change their position or consult with you local dealer.
* With 3 V, reaches 40'
30

Remote control31
When should the batteries be
replaced
2. The indoor unit does not respond to the remote control commands to activate the programs.
To replace batteries
1. Slide out the battery
control).
the compartment (indicated in the drawing located inside the compartment).
3. Slide in the cover.4. If the remote control is not
operated for long period of times, batteries should be discarded.
Remote control instructions
1. The signal reach distance of the remote control to the receiver that
obstruction placed between the receiver and the remote control can cause interference, limiting the capacity of the programming.
conditioner emits a "beep" that indicates that a command has
the indoor unit.
1. When replacing batteries, do not use old batteries or a different type battery. This may cause the remote control to malfunction.
2. If you do not use the remote
remove the batteries. Otherwise battery leakage may damage the remote controller.
3. The average battery life under normal use is about 6 months.
4. Replace the batteries when there is no answering beep from the
3. When selecting the function of timer, the remote control sends (automatically) a signal to the indoor
that the signal is blocked, a 15 minute delay can be produced.
Attention
1. There is not a "beep" anymore
compartment cover ( located at the back of the remote
2. Install two AAA batteries in
is inside the indoor unit of the air conditioner is 32.8 ft. Any
2. Any time when a button is pressed on the remote control, the air
been received and transmitted to
remote control is left in a position unit at the specific period. If the
controller for several weeks,
indoor unit or if the transmission
from the indoor unit when using the control remote or the signallight indicator does not light.
indicator fails to light.

Remote control description
1
2
3
5
6
-
+:
:Press the button to decrease 4
AUTO COOL DRY HEAT*FAN
button, a mode is selected in a sequence that goes from AUTO, COOL, DRY, HEAT*NAF dna, , as the following figure indicates:
MODE: Each time you press the
* Note: Only for models with heating function
Cooling and heating model
1 2
8
9
10
34
11
12
7
6
13
14
5
ON/OFF: Press this button to start the unit operation. Push the button again to stop the unit operation.
Press the button to increase the indoor temperature setting.
8
FAN : This button is used for setting Fan Speed in the sequence that goes from AUTO,
, to , then back to Auto.
TIMER ON: Press this button to initiate the auto-on timer. To cancel theauto-timer program, simply press this button again.
7
TIMER OFF: Press this button to initiate the auto-off timer. To cancel the auto-timer program,sinply press the
9 Press this button, the clock can be set up, icon blinks. Within 5 seconds, the value can be adjusted by pressing "++" or "--" button, if continuously press this button for 2 seconds above,in every 1/2 seconds, one minute will be increased, if you are still pressing the button after ten minutes increased,tenminutes will be increased every 1/2 seconds. Druing blinking, repress the Clock button, icon will be constantly displayed and it denotes the setting succeeded
CLOCK:
Middle fanLow fan High fan
the indoor temperature setting.
Auto
OFF
:Press this button, to set up swing angle and swing range,whichcircularly changes as below:
which indicates the hozizontal louver will swing up and down automatically.
button again.
Remote control description 32

TURBO:Press this button to activate/deactivate the Turbo function whichenables the unit to reach the presettemperature in the shortest time.In cooling mode, the unit will blowstrong cooling air with super highfan speed. In heating mode, theunit will blow strong heatingair with super high fan speed.
Remote control description
12
33
SLEEP: Press this button to go into the operation mode. Press it again to cancel. This function only can be used in
and maintain the most comfortable temperature for you. To cancel SLEEP program,press this button again.
COOL, HEAT(Only for models with heating function) or DRY mode,
2.About switch between Fahrenheit and CentigradeUnder status of unit off, press "MODE"and " -- " buttons simultaneously to switch
INTRODUCTION FOR SPECIALFUNCTION
Press "++" and "--" buttons simultaneously to lock or unlock the keypad. If the remote controller is locked, the iconwill be displayed on it, in that case, press any button, the mark willflicker for three times. Repress the combination to unlock.
1.ABOUT LOCK
When in cool or dry mode,press "BLOW" button to activeor deactive blow function ,theicon will display and the indoorfan will continuely run for 10minutes in order to dry the indoorunit even though you have turned off the unit.
BLOW:10
Turn the unit LED light on or off only.LIGHT:
13
14
and .
TEMP:When pressing "TEMP" button, there may be 3 optional icon display: , , .But only is effective. The display panel will indicate ambient temperature for 5 seconds.
11
SLEEP

How the air conditioner works
Automatic operation
When the Air Conditioner is ready for use, switch on the power and the OPERATION indicator lamp on the display panel of the indoor unit starts illuminating.
1. Use the MODE button to select AUTO.
2. Use the "MODE" button to select Auto. The unit will automatically select Cool, Fan and Heat operation depending on the difference ambient temperature and system difference temperature .When in Cool Operation the panel will display 77 . In Fan Operation the panel will display 77In Heat Operation the panel will display 68 .
COOL / HEAT and FAN ONLY operation
1. If the AUTO mode is not comfortable, you may manually override the
2. Press the "+"/"-" button to set the desired room temperature. When in COOL
3. Press the FAN to select the FAN mode of AUTO, , or .4. Press the ON/OFF button, the operation lamp lights and the air conditioner
start to operate as your settings. Press the ON/OFF button again to stop this unit operation.
**Note: The FAN ONLY mode can not be used to control the temperature. While in this mode, only steps 1,3 and 4 may be performed.
1. When you set the air conditioner in AUTO mode, it will automatically select
depending on the room temperature.
2. If the AUTO mode is uncomfortable, you can select desired conditions manually.
How the air conditioner works
Attention
mode, the most comfortable settings are
* Note: Only for models with heating function
cooling, heating(only for models with heating function) or fan only operation
settings by using COOL, HEAT* or FAN ONLY** mode.
mode, the most comfortable settings are 70ºF or above. When in HEAT82ºF or below.
34
ºF ºFºF
3. Press the ON/OFF button again to stop the unit operation. .
Time
DRY FUNCTION
RoomTemperature
Set temperature
Coo
ling
Coo
ling
Coo
ling
Faon
lyn
Faon
lyn
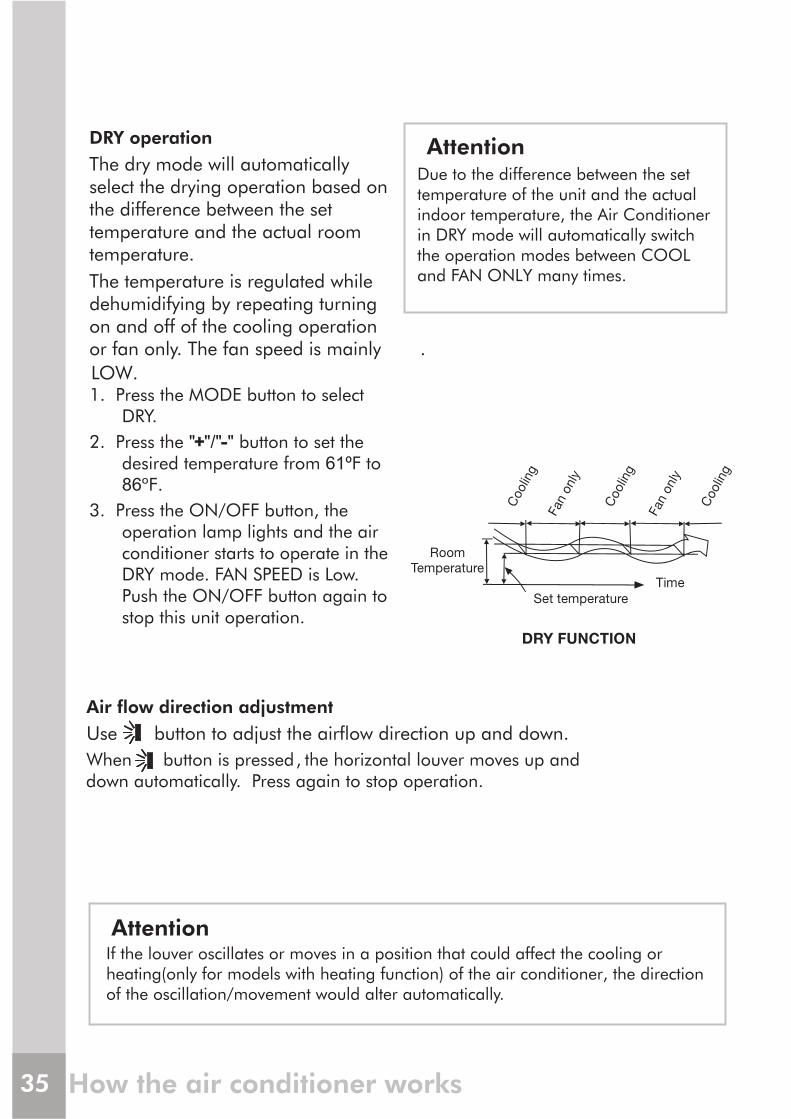
DRY operation
The dry mode will automatically select the drying operation based on the difference between the set temperature and the actual room temperature.
The temperature is regulated while dehumidifying by repeating turning on and off of the cooling operation
DRY.
operation lamp lights and the air conditioner starts to operate in the DRY mode. FAN SPEED is Low. Push the ON/OFF button again to stop this unit operation.
Due to the difference between the set temperature of the unit and the actual indoor temperature, the Air Conditioner
If the louver oscillates or moves in a position that could affect the cooling or heating(only for models with heating function) of the air conditioner, the direction of the oscillation/movement would alter automatically.
How the air conditioner works
Attention
Attention
1. Press the MODE button to select
2. Press the "++"/"--" button to set the
3. Press the ON/OFF button, the
in DRY mode will automatically switch the operation modes between COOLand FAN ONLY many times.
desired temperature from 61ºF to 86ºF.
.or fan only. The fan speed is mainly
LOW.
35
Air flow direction adjustment
Use button to adjust the airflow direction up and down.
When button is pressed , the horizontal louver moves up and down automatically. Press again to stop operation.
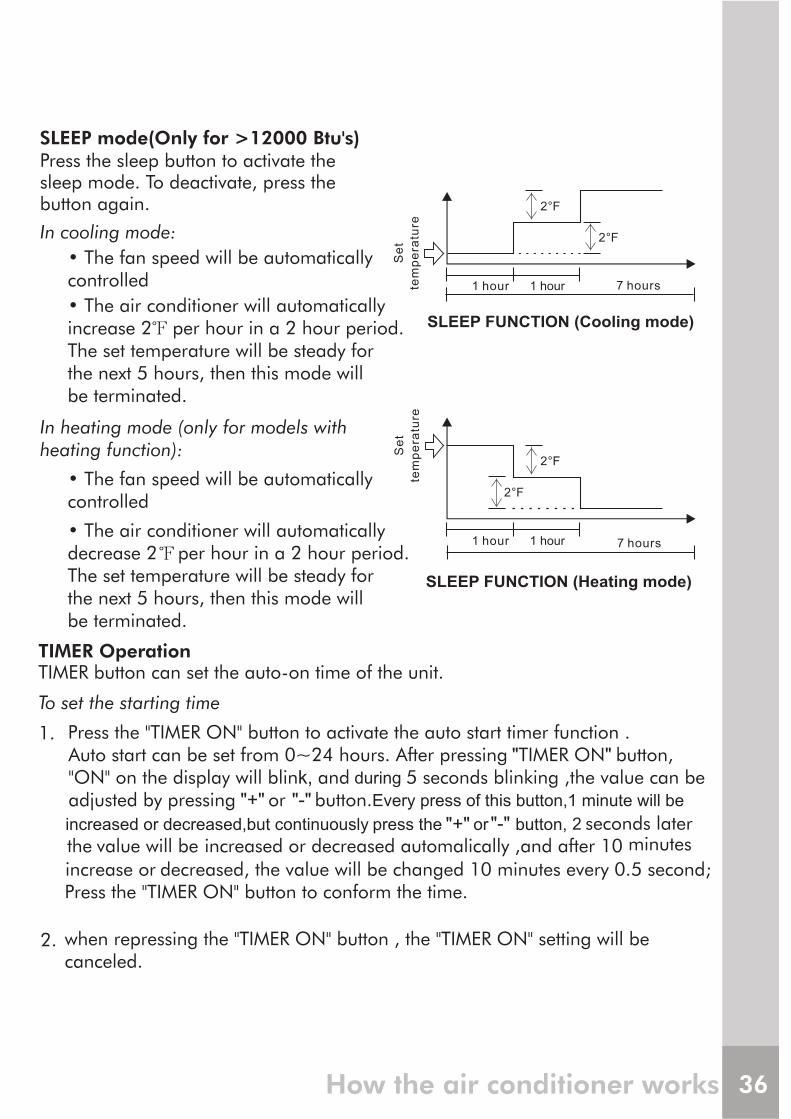
SLEEP mode(Only for >12000 Btu's)Press the sleep button to activate the
button again.
Set
tem
pera
ture
SLEEP FUNCTION (Cooling mode)
1 hour 1 hour
SLEEP FUNCTION (Heating mode)
7 hours
Set
tem
pera
ture
TIMER OperationTIMER button can set the auto-on time of the unit.
To set the starting time
1.
2.
Press the "TIMER ON" button to activate the auto start timer function .Auto start can be set from 0~24 hours. After pressing "TIMER ON" button,"ON" on the display will blink, and during 5 seconds blinking ,the value can be adjusted by pressing or "+" "-" button.Every press of this button,1 minute will be
2 seconds later the value will be increased or decreased automalically ,and after 10 minutesincrease or decreased, the value will be changed 10 minutes every 0.5 second; Press the "TIMER ON" button to conform the time.
when repressing the "TIMER ON" button , the "TIMER ON" setting will be canceled.
How the air conditioner works
sleep mode. To deactivate, press the
In heating mode (only for models with heating function):
In cooling mode:2 °F
2 °F
1 hour1 hour
2 °F
2 °F
7 hours
36
increased or decreased,but press the or button,continuously "+" "-"

To set the stopping time
1.
2.
Optimal operationTo achieve optimal performance, please note the following:1. Adjust the air flow direction correctly so that it is not directed on people.2. Adjust the temperature to achieve the highest comfort level. Do not adjust
the unit to excessive temperature levels.3. Close doors and windows on COOL or HEAT(only for models with heating
4. Use TIMER ON button on the remote controller to select a time you want to start your air conditioner.
5. Do not put any object near air inlet or air outlet, as the efficiency of the air conditioner may be reduced and the air conditioner may stop running.
6. Clean the air filter periodically, otherwise cooling or heating(only for modelswith heating function) performance may be reduced.
7. Do not operate unit with horizontal louvre in closed position.
How the air conditioner works
Exemples:
6h(Timer On)
OFF
ON
6h(Timer Off)
ON
OFF
12h(Timer Off)
ON
OFF
ON
14h(Timer On)
20h(Timer On)
OFF
23h(Timer Off)
OFF
ON
function)mode, or performance may be reduced.
37
Press the "TIMER OFF" button to activate the auto start timer function.The method of setting is the same as above of "TIMER ON".

How to use the indoor unit
Adjusting air flow direction
Adjust the air flow direction properly otherwise, it might cause discomfort or cause uneven room temperatures. Adjust the horizontal louver using the remote controller. Adjust the vertical louver manually.
To set the horizontal air flow direction (left/ right)
Adjust the vertical louver manually using the lever on the left or right side
depending on the specific model youchoose) end of the air outlet to thedesired position. Perform theseadjustments before you start the unitbecause once it has been started, there
To automatically swing the air flow direction (up/down)
Perform this function while the air conditioner is in operation.
Press the button on the remote controller.
To stop the function, press the button again.
Lever
How to use the indoor unit
of the vertical louver arm (Depending on the specific model you choose), or move the lever at the left(or right, or middle
is risk of your fingers getting caughton the fan.
38
which is only for 21500 Btu's,

Press to lock louver in desired position.
The button will be disabled when the air conditioner is not in operation (including when the TIMER ON is set).
Do not operate the air conditioner for long periods with the air flow direction set downward in cooling or dry mode. Otherwise, condensation may occur on the surface of the horizontal louver anddrop on to the floor or on furnishings.
Do not move the horizontal louver manually. Always use the button.
If you move this louver manually ,it may malfunction during operation.
If the louver malfunctions, stop the
Open angle of the horizontal louver should not be set too small, as COOLING or HEATING(only for modelswith heating function) performance may be impaired due to too restricted air flow area.
Do not operate unit with horizontal louver in closed position.
When the air conditioner is connected to power (initial operation), the horizontal louver may generate a sound for 10 seconds, this is a normal operation.
How to use the indoor unit
air conditioner and restart it.
39

Manual operation (without remote control)
Manual operation can be used temporarily in case you can not find the remote controller or its batteries are exhausted.
1. Open and lift the front panel up to an angle until it remains fixed with a clicking sound.
2. One press of the manual control button will lead to the forced AUTO operation.
3. Close the panel firmly to its original position.
Manual controlbutton
Once you press the manual button, the operation mode is shifted in an order as: AUTO and OFF.
The manual operation is mainly used for testingit is necessary. To return to the remote controller operation, use the remote
Auto/OFF
Manual operation
Attention
purpose. Do not choose it unless
controller
40

Maintenance
Cleaning the indoor unit and remote controller1. It is necessary to stop the air
conditioner and disconnect the power supply before cleaning.
2. Use a dry cloth to wipe the indoor unit and remote controller.
3. A cloth dampened with cold water may be used on the indoor unit if it is very dirty.
4. The front panel of the indoor unit can be removed and cleaned with water.Then wipe it with a dry cloth.
5. Do not use a chemically treated cloth or duster to clean the unit.
6. Do not use benzine, thinner,polishing powder, or similar solvents for cleaning. These may cause the plastic surface to crack or deform.
Cleaning the air filterA clogged air filter reduces the cooling efficiency of this unit. Please clean the filter once every 2 weeks.1. Lift the indoor unit panel up to an
angle until it stops with a clicking
pull it downwards.3. Remove the air filter (Fresh air filter if so
5. Clean the fresh air filter(if so equipped)at least once a month, and replaceevery 4 to 5 months. Use a vacuum cleaner, then dry.
6. Clean the support frame using a
air filter
air filter
Maintenance
vacuum cleaner or water. Then dry
sound.2. Take hold of the handle of the air
filter and lift it up slightly to take it out from the filter holder, then
equipped + support frame) from the unit.4. If so equipped, remove fresh air filter from the support frame.
41

7. Insert the fresh air filter(if so equipped) in its original place.
keeping in mind that the outside
filter in its initial position.
MaintenanceIf you plan to idle the unit for a long time, perform the following:1. Operate in fan mode for about half a day to dry the inside of the unit.2. Stop the air conditioner and disconnect power. Remove the batteries from
the remote controller.3. The outdoor unit requires periodic maintenance and cleaning. Do not
attempt to do this yourself. Contact your dealer or servicer.
2. Check that the air filter is installed.
Maintenance
Fig.2
Fig.3
Fig.4 Fig.5
Supportframe
Supportframe
for a couple of hours.
(Fresh air filter if so equipped +
border (right and left) are lined
1. Check that the wiring is not broken or disconnected.Check before operation
3. Check whether the air outlet or inlet is blocked after the air conditioner has not been used for a long time.
Supportframe
Fig.1
Bracket
8. Insert the upper part of the air filter
support frame) back into the unit
up correctly, then place the whole
42
Fresh air filter(if so equipped)
Fresh air filter(if so equipped)
Fresh air filter(if so equipped)

Operation tips
The following events may occur during normal operation.
Operation tips
Protection of the air conditioner.
Compressor protection
The compressor can't restart for 3 minutes after it stops.
Anti-cold air (Only for models with heating function)
heat exchanger is in one of the following three situations and the set temperature has not been reached.
1. When heating has just starting.
2. Defrosting.
3. Low temperature heating.
Defrosting (Only for models with heating function)
Frost may be generated on the outdoor unit during heat cycle when outdoor temperature is low and humidity is high resulting in lower heating efficiency of the air conditioner. During this condition, air conditioner will stop heating operation and start defrosting automatically.
The time of defrosting may vary from 0 to 8 minutes according to the outdoor temperature and the amount of frost buildup on the outdoor unit.
The indoor or outdoor fan stop running when defrosting (Only for models with heating function).
A white mist coming out from the indoor unit
A white mist may generate due to a large temperature difference between air inlet and air outlet in COOL mode in an indoor environment that has a high relative humidity.
A white mist may generate due to moisture generated from defrosting process when the air conditioner restarts in HEAT mode operation after defrosting.
Low noise of the air conditioner
You may hear a low hissing sound when the compressor is running or has just
to stop.
You can also hear a low "squeak" sound when the compressor is running or has just stopped running. This is caused by heat expansion and cold contraction of the plastic parts in the unit when the temperature is changing.
A noise may be heard due to louver returning to its original position when power is first turned on.
Dust is blown out from the indoor unit.This is a normal condition when the air conditioner has not been used for a
The unit is designed not to blow cold air in HEAT mode, when the indoor
stopped running. This sound is the sound of the refrigerant flowing or coming
43

Operation tips
long time or during first use of the unit.A peculiar smell comes out from the indoor unit.
material, furniture or smoke.
When indoor temperature reaches the temperature setting on air conditioner, the compressor will stop automatically, and the air conditioner turns to FAN only mode. The compressor will start again when the indoor temperature rises
to the set point.
Dripping water may generate on the surface of the indoor unit when cooling in a high relatively humidity (relative humidity higher than 80%). Adjust the horizontal louver to the maximum air outlet position and select HIGH fan speed.
The air conditioner draws in heat from the outdoor unit and releases it via the indoor unit during heating operation. When the outdoor temperature falls, heat drawn in by the air conditioner decreases accordingly. At the same time, heat loading of the air conditioner increases due to larger difference between indoor and outdoor temperature. If a comfortable temperature can't be achieved by the air conditioner, we suggest you use a supplementary heating device.Auto-restart functionPower failure during operation will stop the unit completely.For the unit without Auto-restart feature, when the power restores, the OPERATION indicator on the indoor unit starts illuminating. To restart the operation, press the ON/OFF button on the remote controller. For the unit with Auto-restart feature, when the power restores, the unit restarts automatically with all the previous settings preserved by the memory function.Lightning or a car wireless telephone operating nearby may cause the unit to malfunction.Disconnect the unit with power and then re-connect the unit with power again. Push the ON/OFF button on the remote controller to restart operation.
This is because the indoor unit gives off smells permeated from building
The air conditioner turns to FAN only mode from COOL or HEAT (Only for models with heating function) mode.
in COOL mode or falls in HEAT mode (Only for models with heating function)
Heating mode (Only for models with heating function)
Dripping water condenses on the surface of indoor unit
44

Solutions for problems
Poor Equipment performance
heat source.
3.
Heater or a cooking stove is being used in the same room.4. Room is full of people.5. The air filter is obstructed by dust or is dirty.6. Inappropriate temperature adjustment.
8. The capacity of the equipment is not adequate for the size of the room.9. Air conditioner was just turn on.10.Windows or doors are open.
The unit does not start
If your air conditioner malfunctions, check the following information to find solutions or probable causes of the failure. Do not try to repair the unit by
repair team.
Solution for problems
Attention
Stop the air conditioner immediately if one of the following malfunctions occur
1. The operation indicator or other indicator flash(5 times per second) and the
3. Water spills over the equipment.4. Remote control does not work.
yourself, if these solutions do not solve the failures, call your local service
2.The outdoor temperature is high due to direct sunlight or another
1. The air outlet or inlet of outdoor unit is obstructed.
7.
The air outlet or inlet of indoor unit is obstructed.
2. The voltage is different.3. Temperature is not adjusted properly.
5. The remote control batteries need to be replaced.
1. No power supply.
4. Fuse have blown.
6. The time you have set with timer is incorrect.
2. Fuse blows frequently or circuit breaker trips frequently.
5. Any other abnormal situations.
flashing is not stop by disconnecting the power and and then connecting it again.
45

Exclusions This limited warranty does not cover the following:1. Products with original serial numbers that have been removed,altered or cannot be readily determined.2. Product that has been transferred from its original owner to another party or removed outside the USA or Canada.3. Rust on the interior or exterior of the unit.4. Products purchased "as-is" are not covered by this warranty.5. Food loss due to any refrigerator or freezer failures.6. Products used in a commercial setting.
materials or workmanship, or for appliances not in ordinary household use or used other than in accordance with the provided instructions.
instruct you how to use your appliance.
9. Expenses for making the appliance accessible for servicing, such as removal of trim, cupboards, shelves, etc., which are not a part of the appliance when it is shipped from the factory.10. Service calls to repair or replace appliance light bulbs, air filters, water filters, other consumables, or knobs, handles, or other cosmetic parts.11. Surcharges including, but not limited to, any after hour,weekend, or holiday service calls, tolls, ferry trip charges, or mileage expense for service calls to remote areas, including the state of Alaska.12. Damages to the finish of appliance or home incurred during installation, including but not limited to floors, cabinets, walls, etc.
46
Your appliance is covered by a five year parts only limited warranty. For five years from your original date of purchase, Electrolux will pay for the cost of replacement parts used in the repair of the appliance if the original parts prove to be defective in materials or workmanship when such appliance is installed, used and maintained in accordance with the provided instructions.
13. Damages caused by: services performed by unauthorized service companies; use of parts other than genuine Electrolux parts or parts obtained from persons other than authorized service companies; or external causes such as abuse, misuse, inadequate power supply, accidents, fires, or acts of God.
Major Appliance 5 Year Parts Only Limited Warranty
14. The consumer will be responsible for diagnostic, labor, and parts costs as well as any removal, transportation and reinstallation expenses which are incurred during service.15. Labor costs for any and all repairs.
7. Service calls to correct the installation of your appliance or to
8. Service calls which do not involve malfunction or defects in

Major Appliance 5 Year Parts Only Limited Warranty
USA1.866.942.1567Electrolux Major AppliancesNorth AmericaP.O. Box 212378Augusta, GA 30907
Canada1.866.942.1567
Electrolux Canada Corp.5855 Terry Fox Way
Mississauga, Ontario, CanadaL5V 3E4
DISCLAIMER OF IMPLIED WARRANTIES; LIMITATION OF REMEDIES
If You Need Service
Keep your receipt, delivery slip, or some other appropriate paymentrecord to establish the warranty periodshould service be required. If service is performed, it is in your best interest to obtain and keep all receipts. Service under this warranty must be obtained by contacting Electrolux at the addresses or phone numbers below.
This limited warranty only applies in the USA and Canada. In the USA, your appliance is warranted by Electrolux Major Appliances NorthAmerica, a division of Electrolux Home Products, Inc. In Canada, your appliance is warranted by Electrolux Canada Corp. Electrolux authorizes no person to change or add to any obligations under this warranty. Obligations for service and parts under this warranty must be performedby Electrolux or an authorized service company. Product features or specifications as described or illustrated are subject to change without notice.
CUSTOMER'S SOLE AND EXCLUSIVE REMEDY UNDER THIS LIMITEDPARTS ONLY WARRANTY SHALL BE THE COST OF REPLACEMENT PARTSAS PROVIDED HEREIN. CLAIMS BASED ON IMPLIED WARRANTIES,INCLUDING WARRANTIES OF MERCHANTABILITY OR FITNESS FOR A PARTICULAR PURPOSE, ARE LIMITED TO ONE YEAR OR THE SHORTEST PERIOD ALLOWED BY LAW, BUT NOT LESS THAN ONE YEAR. ELECTROLUX SHALL NOT BE LIABLE FOR CONSEQUENTIAL OR INCIDENTAL DAMAGES SUCH AS PROPERTY DAMAGE AND INCIDENTAL EXPENSES RESULTING FROM ANY BREACH OF THIS WRITTEN LIMITED WARRANTY OR ANY IMPLIED WARRANTY. SOME STATES AND PROVINCES DO NOT ALLOW THE EXCLUSION OR LIMITATION OF INCIDENTAL OR CONSEQUENTIAL DAMAGES, OR LIMITATIONS ON THE DURATION OF IMPLIED WARRANTIES, SO THESE LIMITATIONS OR EXCLUSIONS MAY NOT APPLY TO YOU.THIS WRITTEN WARRANTY GIVES YOU SPECIFIC LEGAL RIGHTS.YOU MAY ALSO HAVE OTHER RIGHTS THAT VARY FROM STATE TO STATE.
47