200-1000 2 7 8 Micropipette Tutorial From the Science Dept at SHS.
39
200-1000 2 7 8 Micropipett e Tutorial From the Science Dept at SHS
-
Upload
clifford-green -
Category
Documents
-
view
215 -
download
1
Transcript of 200-1000 2 7 8 Micropipette Tutorial From the Science Dept at SHS.
200-
10002 7
8Micropipette
TutorialFrom the Science Dept
at SHS
200-
1000
μL
2 7
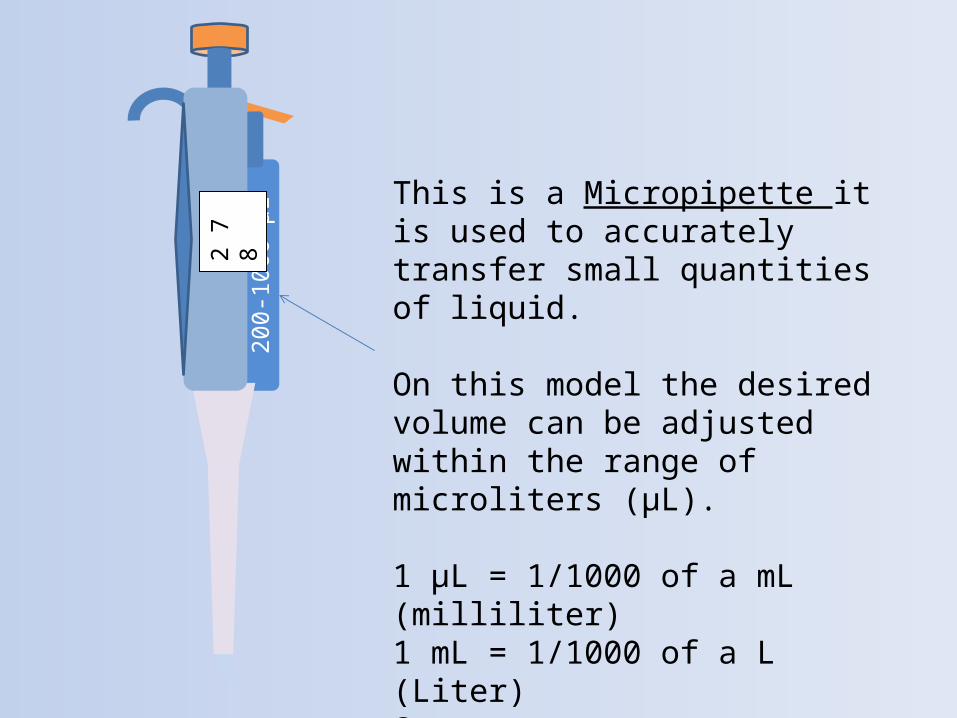
8This is a Micropipette it is used to accurately transfer small quantities of liquid.
On this model the desired volume can be adjusted within the range of microliters (μL).
1 μL = 1/1000 of a mL (milliliter)1 mL = 1/1000 of a L (Liter)So…1 μL = 1/1,000,000 of a Liter
200
μL
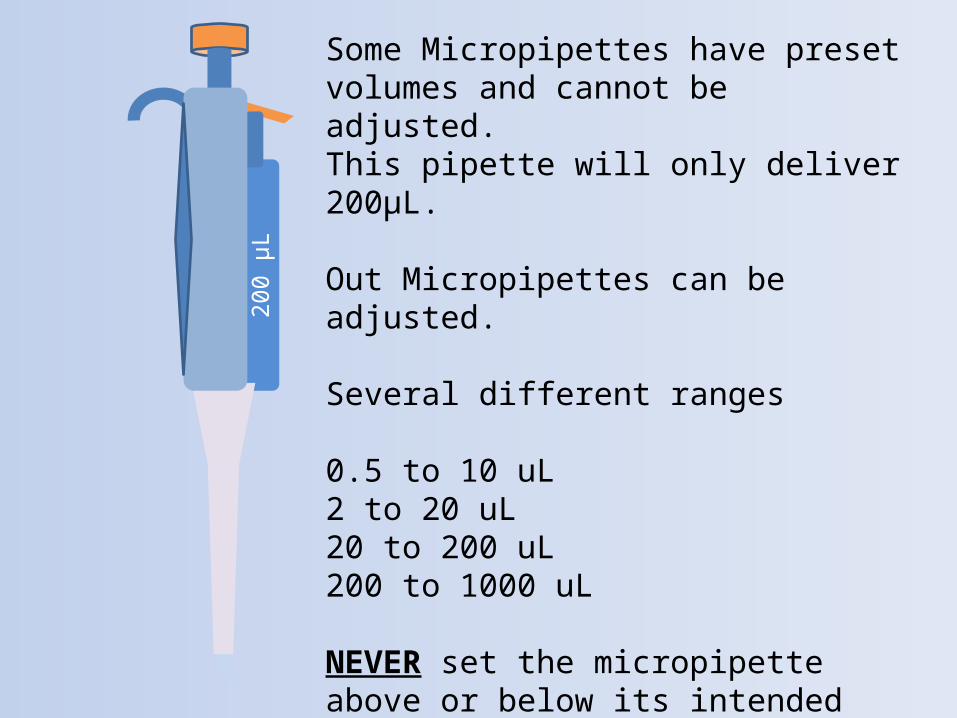
Some Micropipettes have preset volumes and cannot be adjusted.This pipette will only deliver 200μL.
Out Micropipettes can be adjusted.
Several different ranges
0.5 to 10 uL2 to 20 uL20 to 200 uL200 to 1000 uL
NEVER set the micropipette above or below its intended volume range

How does it work?It works much like a syringe that would deliver an injection.
Inside there is a spring loaded piston that moves up and down.
They are veryFRAGILE, EXPENSIVE,& COOL!
Be careful!!
2 7
8

The plunger has two stops: - at the First Stop the piston moves through the volume that is set on the pipette. (In this case 278μL)
2 7
82
7
8
278μL
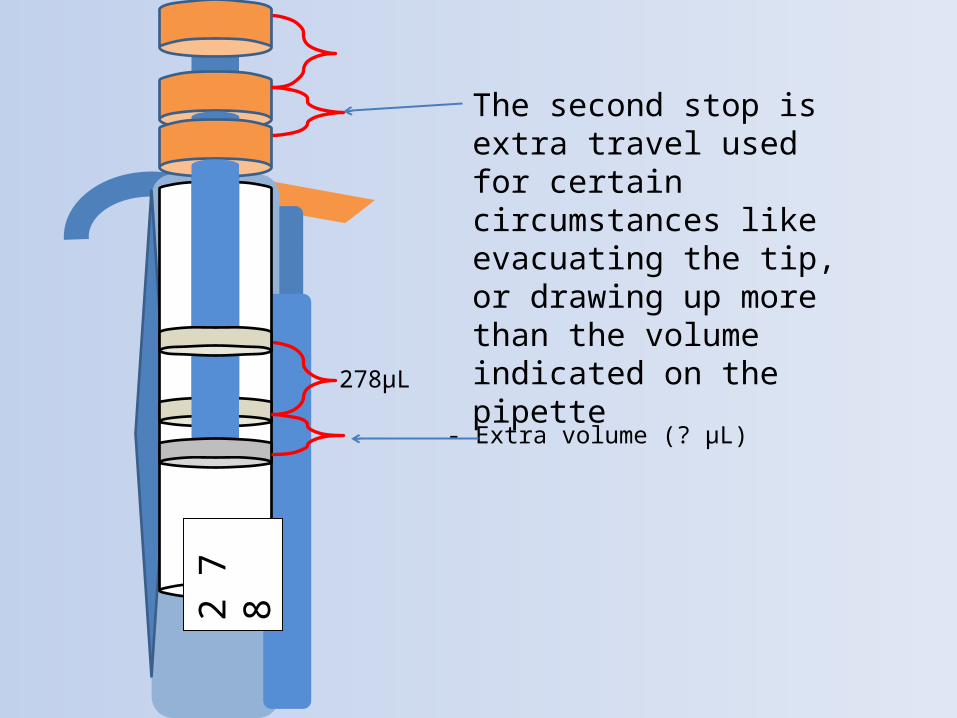
The second stop is extra travel used for certain circumstances like evacuating the tip, or drawing up more than the volume indicated on the pipette
2 7
82
7
8
278μL
- Extra volume (? μL)
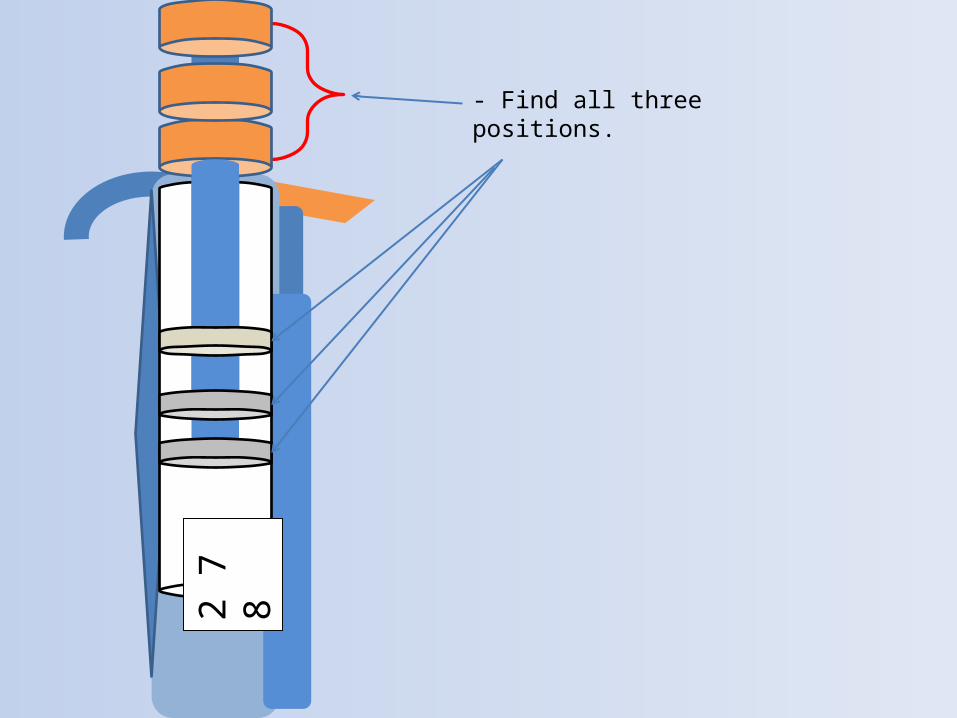
- Find all three positions.
2 7
82
7
8
200-
1000
2 7
8
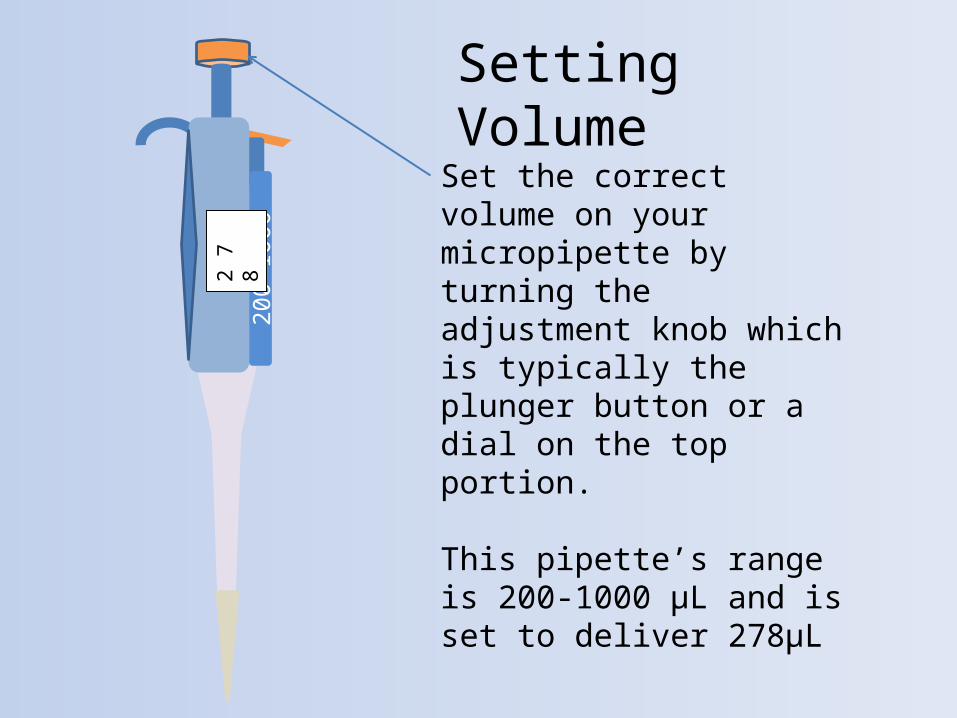
Set the correct volume on your micropipette by turning the adjustment knob which is typically the plunger button or a dial on the top portion.
This pipette’s range is 200-1000 μL and is set to deliver 278μL
Setting Volume
20-1
00
2 7
8
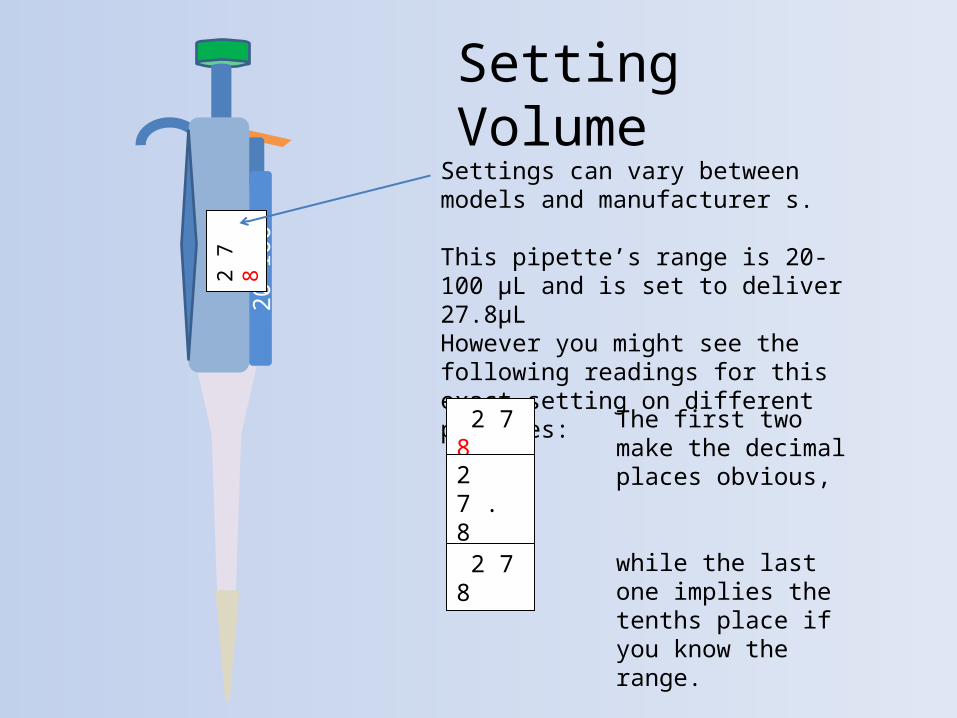
Settings can vary between models and manufacturer s.
This pipette’s range is 20-100 μL and is set to deliver 27.8μLHowever you might see the following readings for this exact setting on different pipettes:
Setting Volume
2 7 8
2 7 . 8
2 7 8
The first two make the decimal places obvious,
while the last one implies the tenths place if you know the range.

1.00
-10.
00
2 7
8
Settings can vary between models and manufacturer s.
This pipette’s range is 1-10 μL and is set to deliver 2.78μLHowever you might see the following readings for this exact setting on different pipettes:
Setting Volume
2 7 8
2 .7 8
2 7 8
Some companies will change the color of the plunger button.
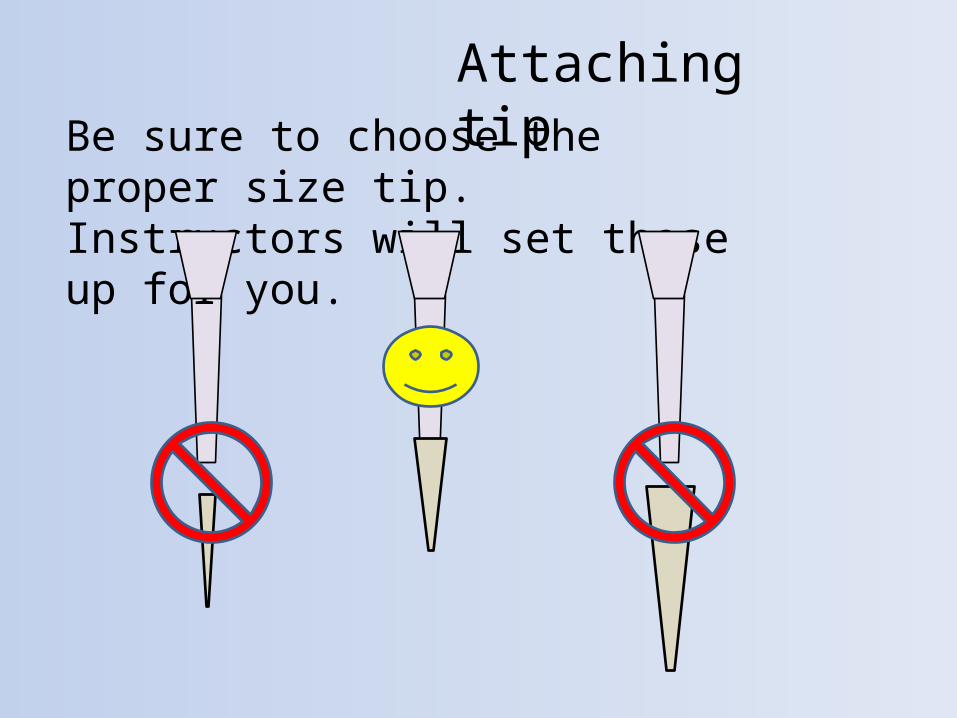
Attaching tipBe sure to choose the proper size tip. Instructors will set these up for you.
2 7
8
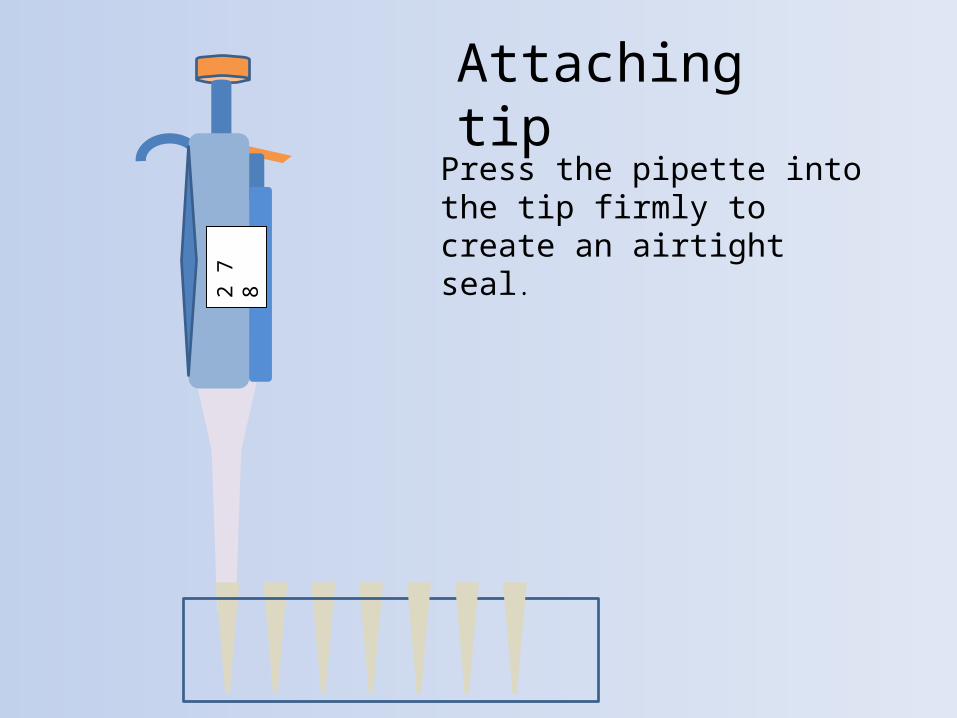
Attaching tip
Press the pipette into the tip firmly to create an airtight seal.
2 7
8
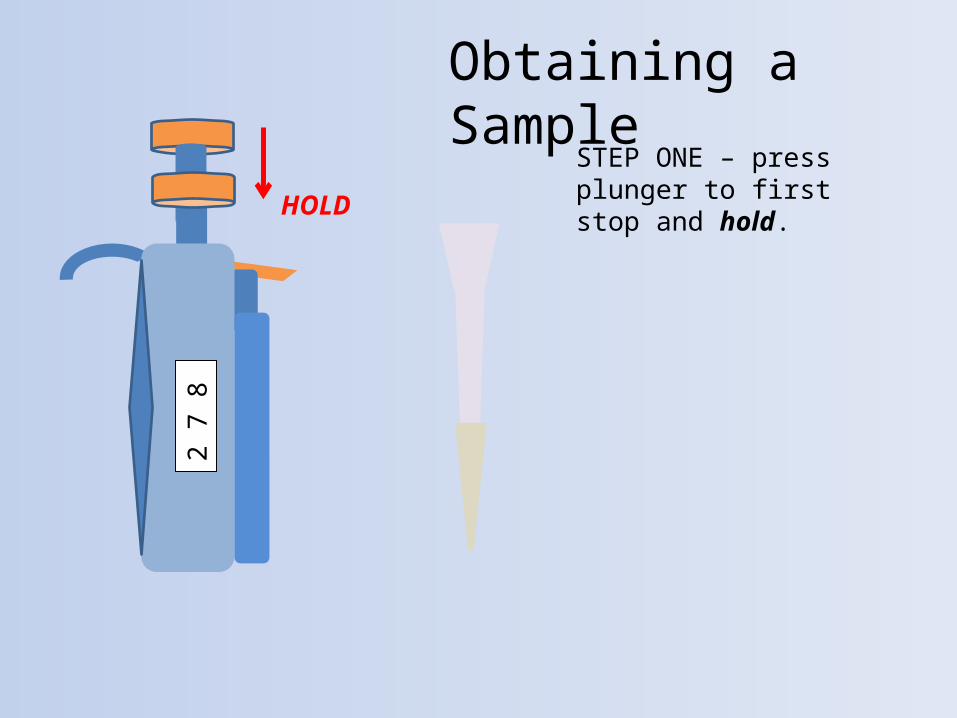
Obtaining a Sample
STEP ONE – press plunger to first stop and hold.HOLD
2 7
8
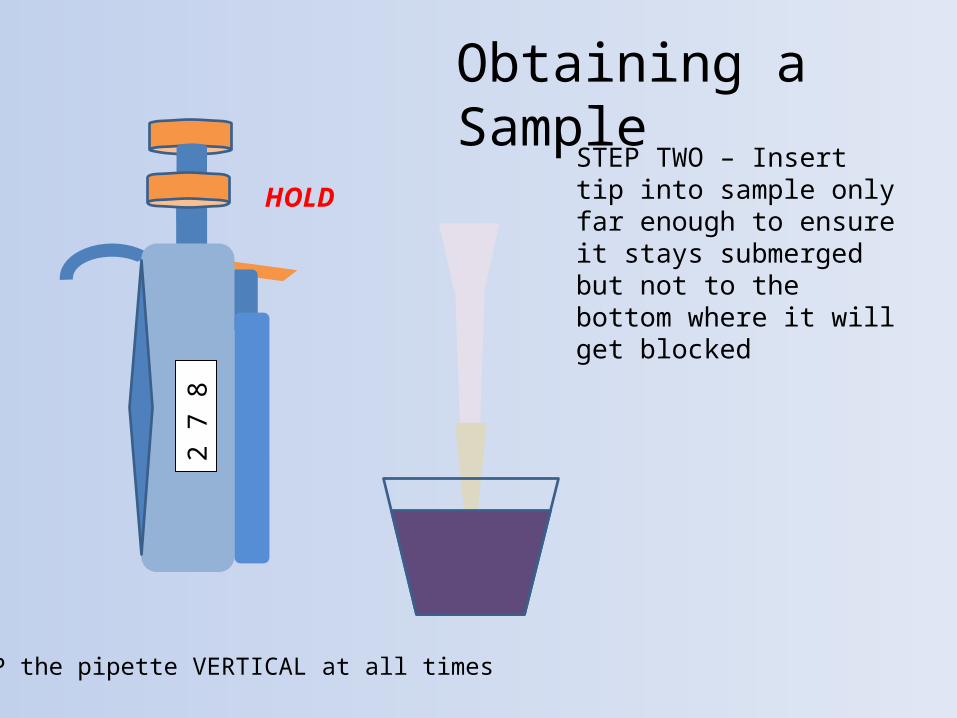
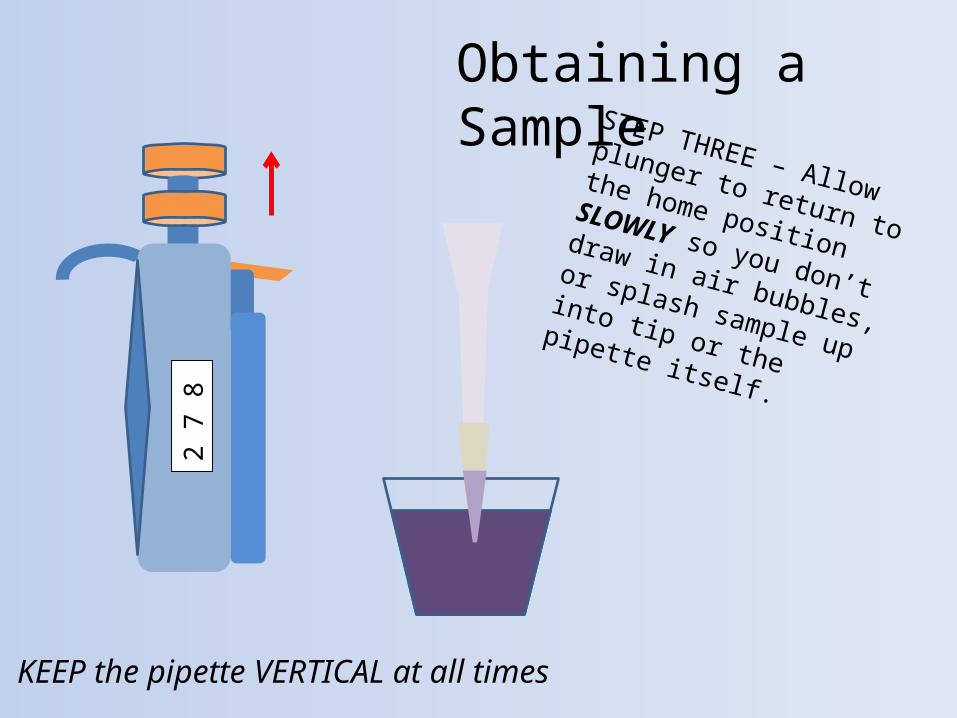
Obtaining a Sample
STEP TWO – Insert tip into sample only far enough to ensure it stays submerged but not to the bottom where it will get blocked
HOLD
KEEP the pipette VERTICAL at all times
2 7
8
Obtaining a SampleSTEP THREE – Allow plunger
to return to the home position SLOWLY so you don’t
draw in air bubbles, or splash
sample up into tip or the pipette itself.
KEEP the pipette VERTICAL at all times
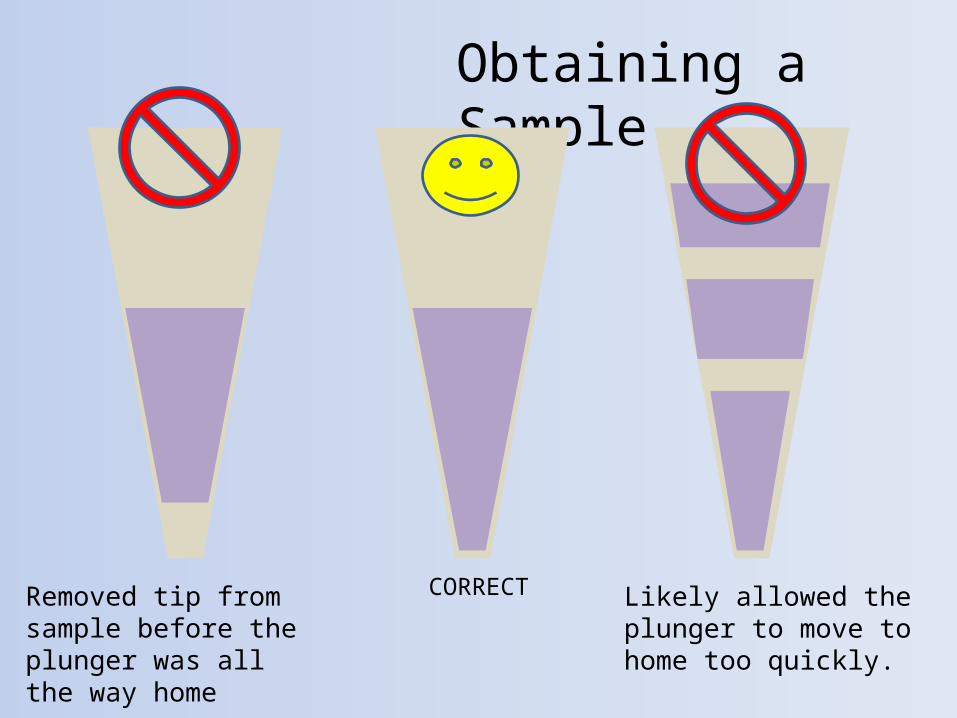
Obtaining a Sample
Removed tip from sample before the plunger was all the way home
Likely allowed the plunger to move to home too quickly.
CORRECT

2 7
8
Delivering the Sample
STEP FOUR – insert tip into the area you wish to deliver your sample. (in this case a gel for DNA fingerprinting)
KEEP the pipette VERTICAL at all times

2 7
8
Delivering the Sample
STEP FIVE – depress the plunger slowly to the first stop, then continue to the second stop, this will evacuate the entire contents of the tip. And HOLD
HOLD
KEEP the pipette VERTICAL at all times
2 7
8
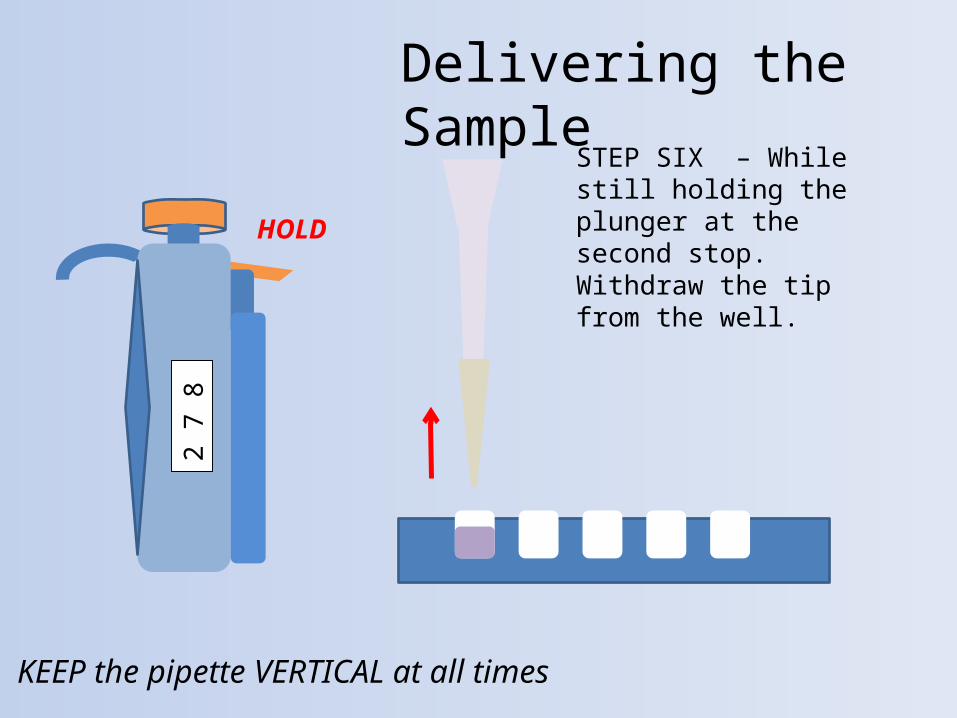
Delivering the Sample
STEP SIX – While still holding the plunger at the second stop. Withdraw the tip from the well.
HOLD
KEEP the pipette VERTICAL at all times
2 7
8
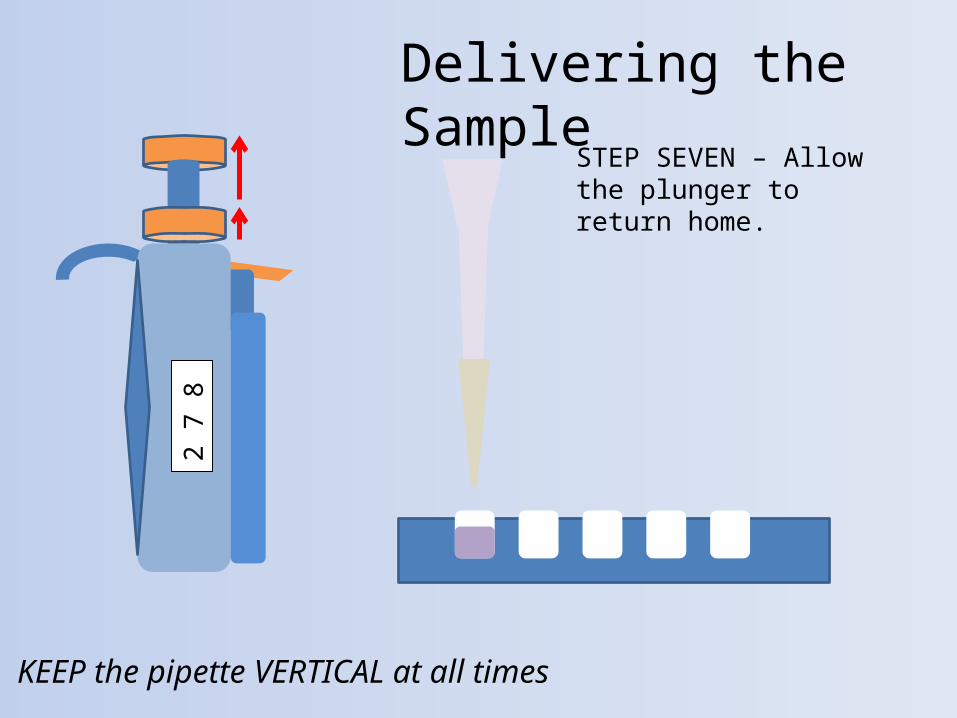
Delivering the Sample
STEP SEVEN – Allow the plunger to return home.
KEEP the pipette VERTICAL at all times
2 7
8
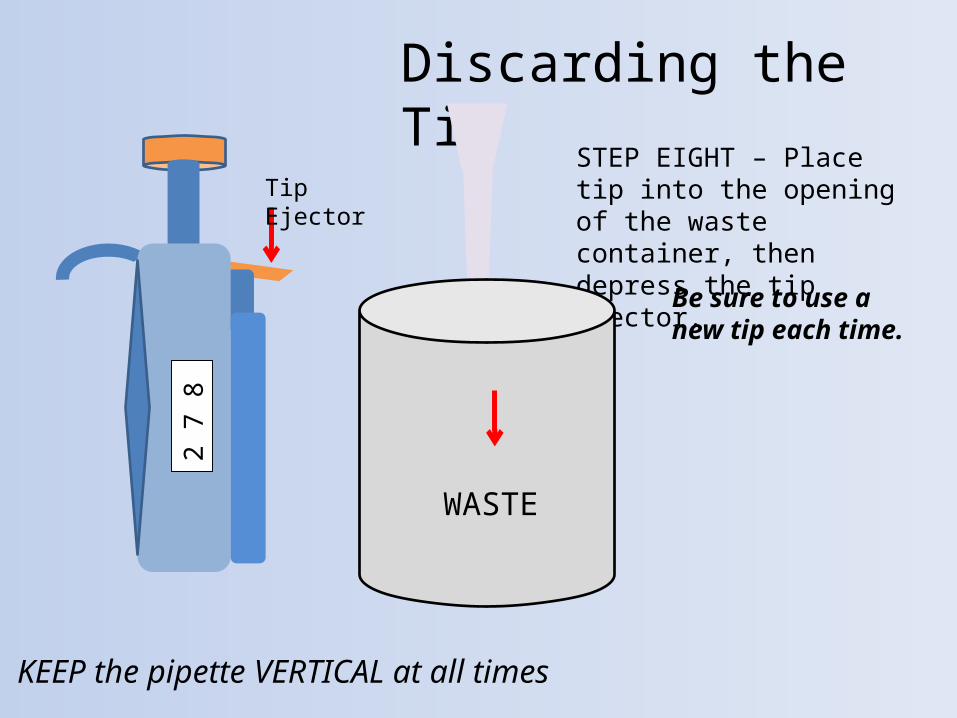
Discarding the Tip
STEP EIGHT – Place tip into the opening of the waste container, then depress the tip ejector.
WASTE
Tip Ejector
Be sure to use a new tip each time.
KEEP the pipette VERTICAL at all times
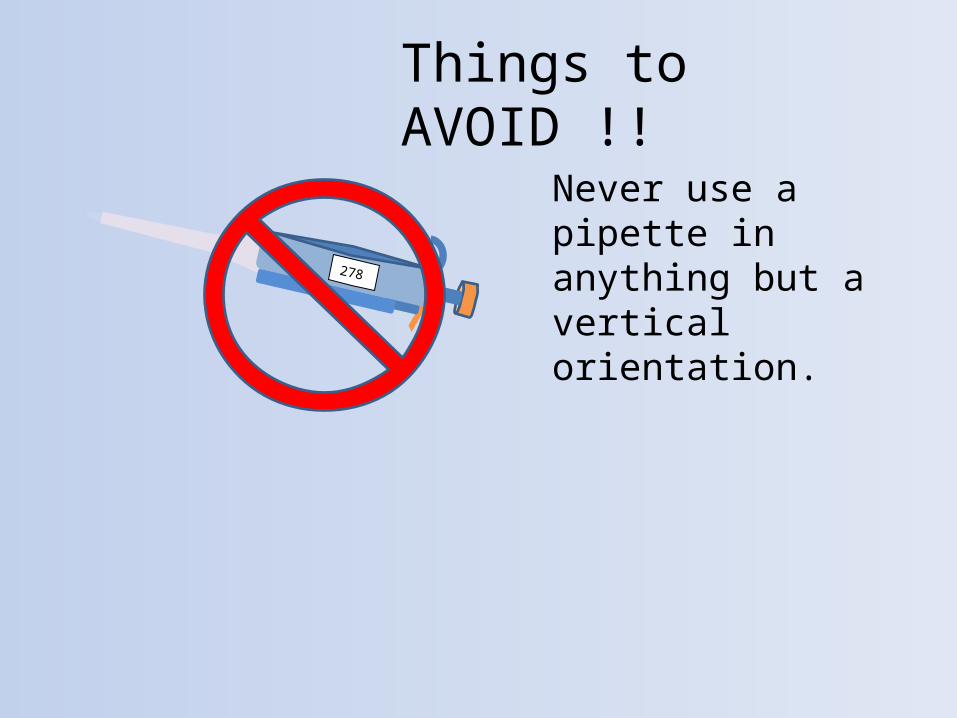
Things to AVOID !!
278
Never use a pipette in anything but a vertical orientation.
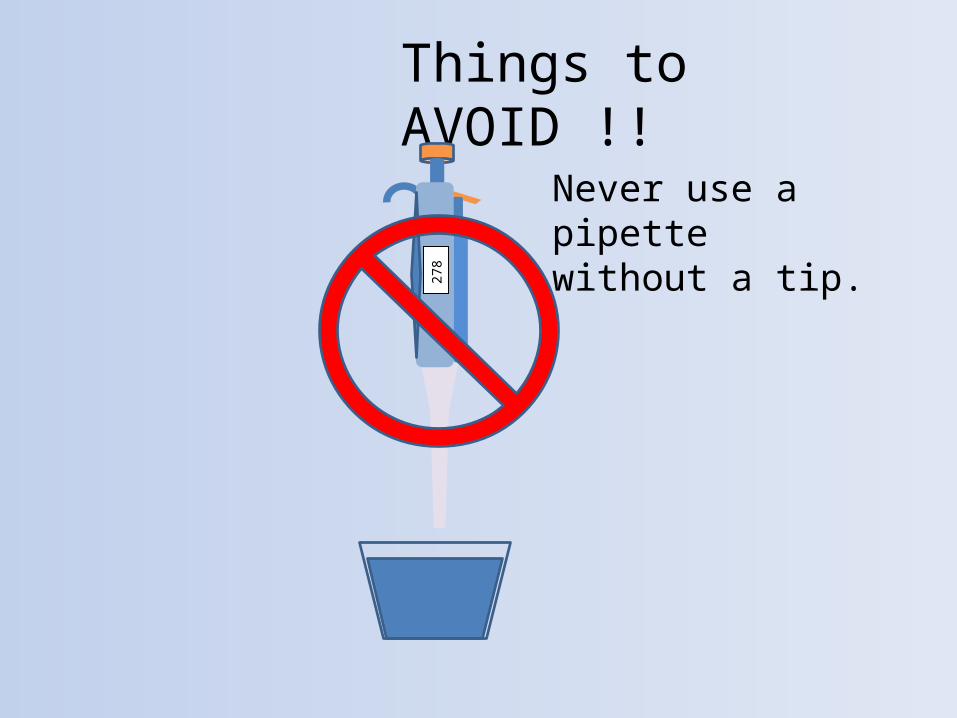
Things to AVOID !!
27
8
Never use a pipette without a tip.

HAPPY PIPETTING

2006-2007
BiotechnologyGel Electrophoresis

Comparing cut up DNA• How do we compare DNA from different
organisms?– cut up DNA into fragment• Restriction enzymes
– separate fragments by size• How do we separate DNA fragments?– run it through a gelatin – gel electrophoresis
• How does a gel work?
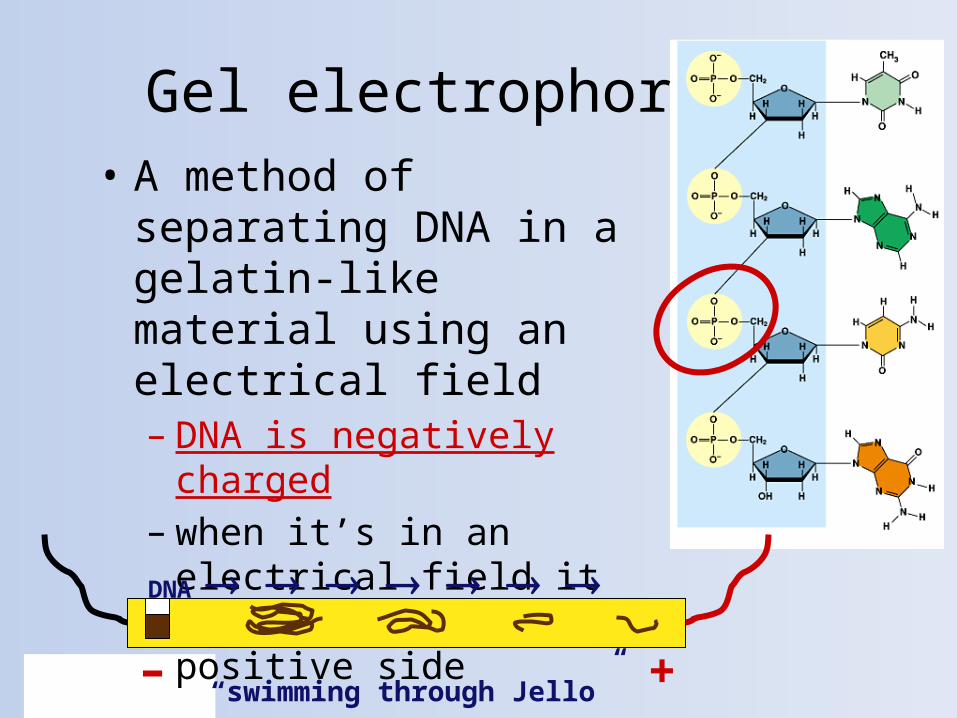
Gel electrophoresis• A method of separating DNA
in a gelatin-like material using an electrical field– DNA is negatively charged– when it’s in an electrical field it
moves toward the positive side
+–
DNA
“swimming through Jello”
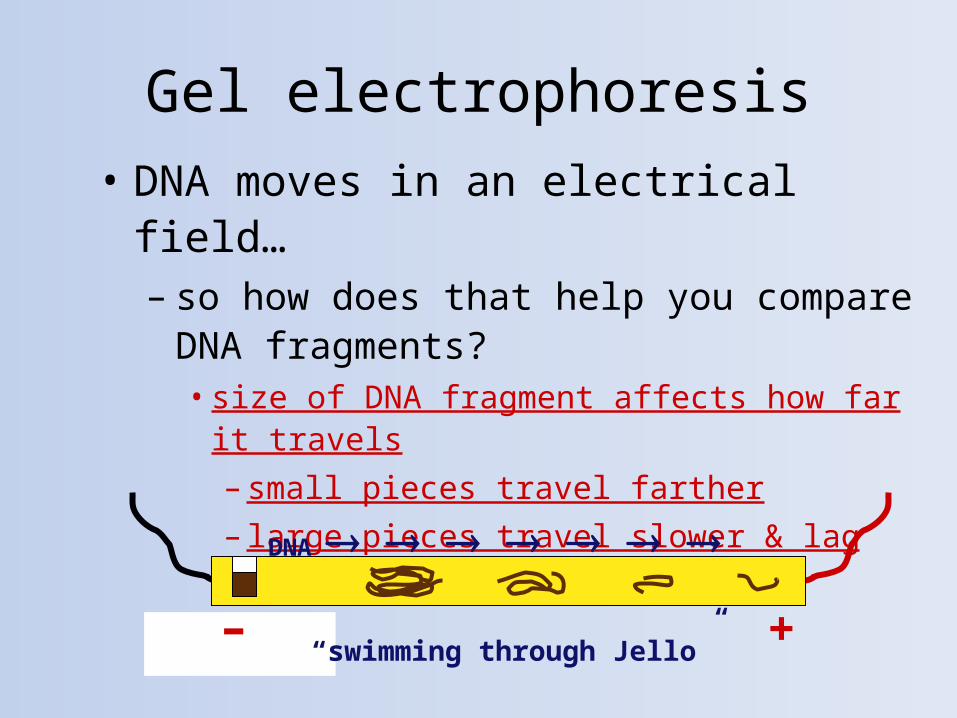
• DNA moves in an electrical field…– so how does that help you compare DNA
fragments?• size of DNA fragment affects how far it travels– small pieces travel farther– large pieces travel slower & lag behind
Gel electrophoresis
+–
DNA
“swimming through Jello”
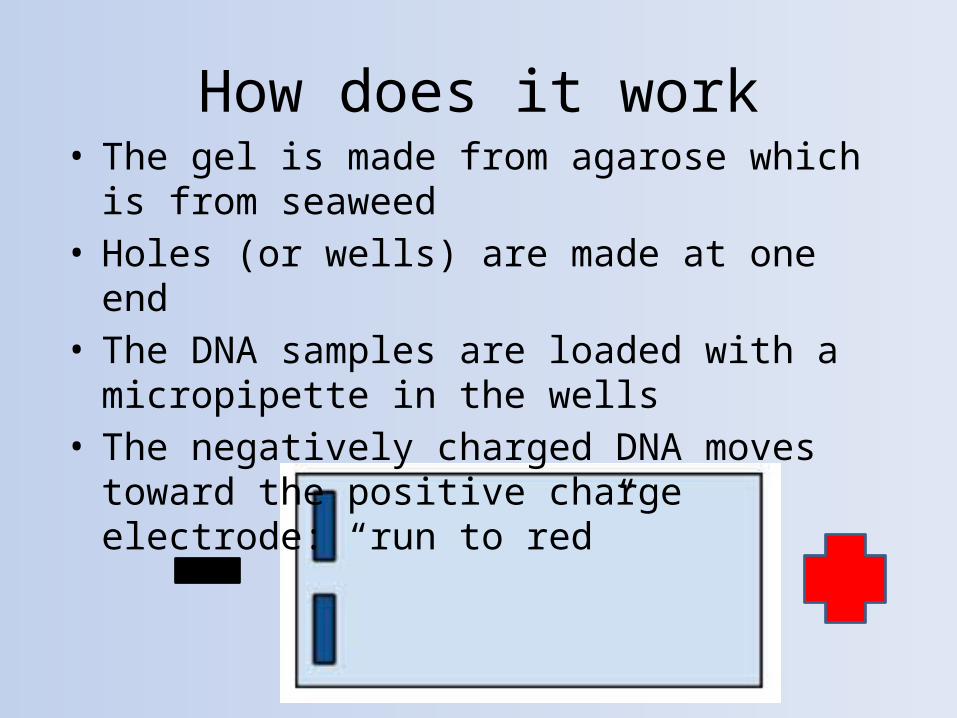
How does it work• The gel is made from agarose which is from seaweed• Holes (or wells) are made at one end• The DNA samples are loaded with a micropipette in
the wells• The negatively charged DNA moves toward the
positive charge electrode: “run to red”
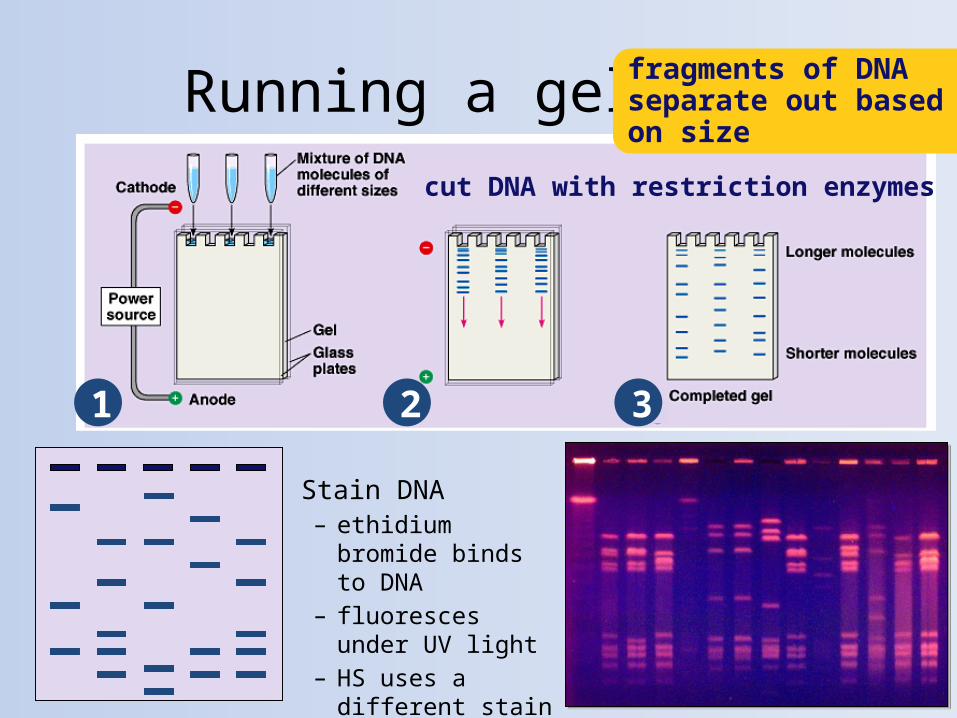
Running a gel
1 2
cut DNA with restriction enzymes
fragments of DNAseparate out based on size
3
Stain DNA– ethidium bromide
binds to DNA– fluoresces under UV
light– HS uses a different
stain
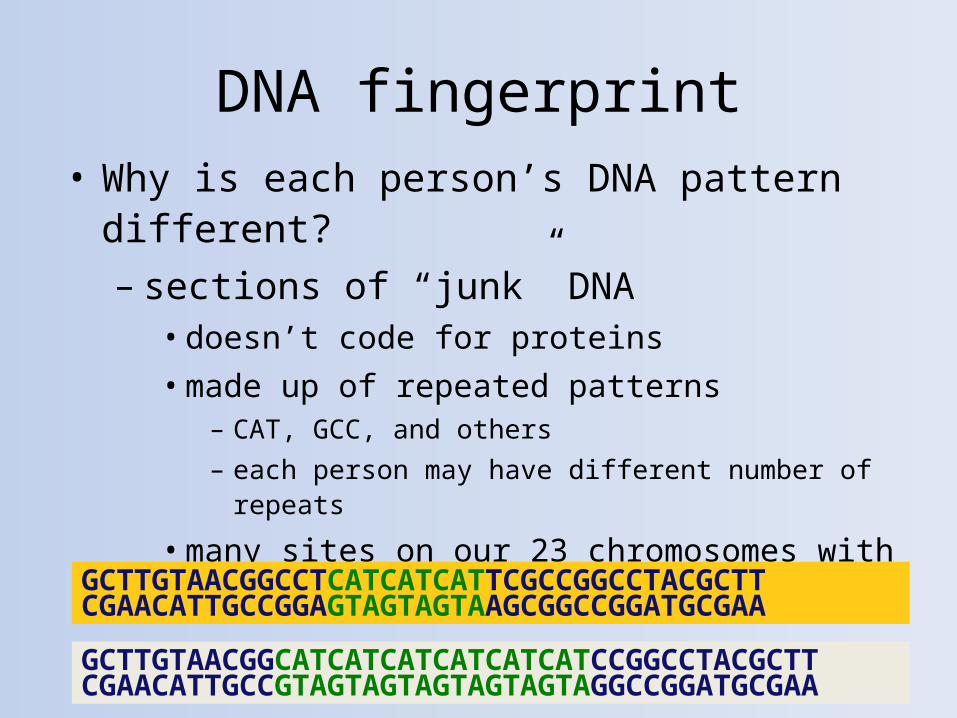
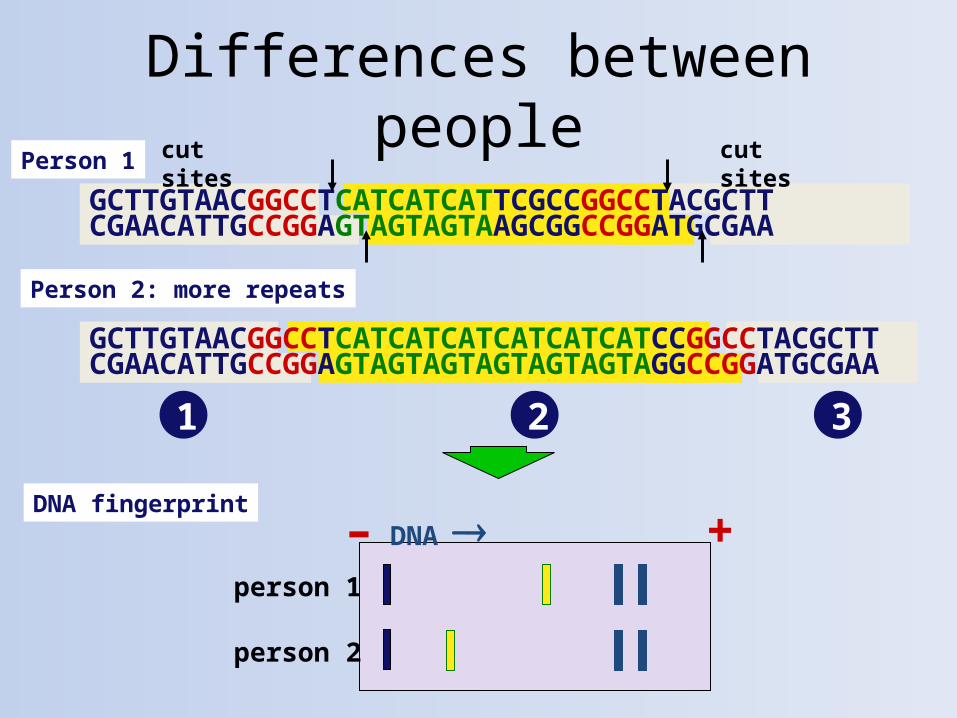
DNA fingerprint• Why is each person’s DNA pattern different?– sections of “junk” DNA• doesn’t code for proteins• made up of repeated patterns
– CAT, GCC, and others– each person may have different number of repeats
• many sites on our 23 chromosomes with different repeat patterns
GCTTGTAACGGCCTCATCATCATTCGCCGGCCTACGCTTCGAACATTGCCGGAGTAGTAGTAAGCGGCCGGATGCGAA
GCTTGTAACGGCATCATCATCATCATCATCCGGCCTACGCTTCGAACATTGCCGTAGTAGTAGTAGTAGTAGGCCGGATGCGAA

Allele 1
GCTTGTAACGGCCTCATCATCATTCGCCGGCCTACGCTTCGAACATTGCCGGAGTAGTAGTAAGCGGCCGGATGCGAA
repeats
DNA patterns for DNA fingerprintscut sitescut sites
GCTTGTAACG GCCTCATCATCATCGCCG GCCTACGCTTCGAACATTGCCG GAGTAGTAGTAGCGGCCG GATGCGAA
1 2 3
DNA – +allele 1
Cut the DNA
Person 1
GCTTGTAACGGCCTCATCATCATTCGCCGGCCTACGCTTCGAACATTGCCGGAGTAGTAGTAAGCGGCCGGATGCGAA
Differences between peoplecut sitescut sites
DNA – +person 1
Person 2: more repeats
GCTTGTAACGGCCTCATCATCATCATCATCATCCGGCCTACGCTTCGAACATTGCCGGAGTAGTAGTAGTAGTAGTAGGCCGGATGCGAA
DNA fingerprint
person 2
1 2 3
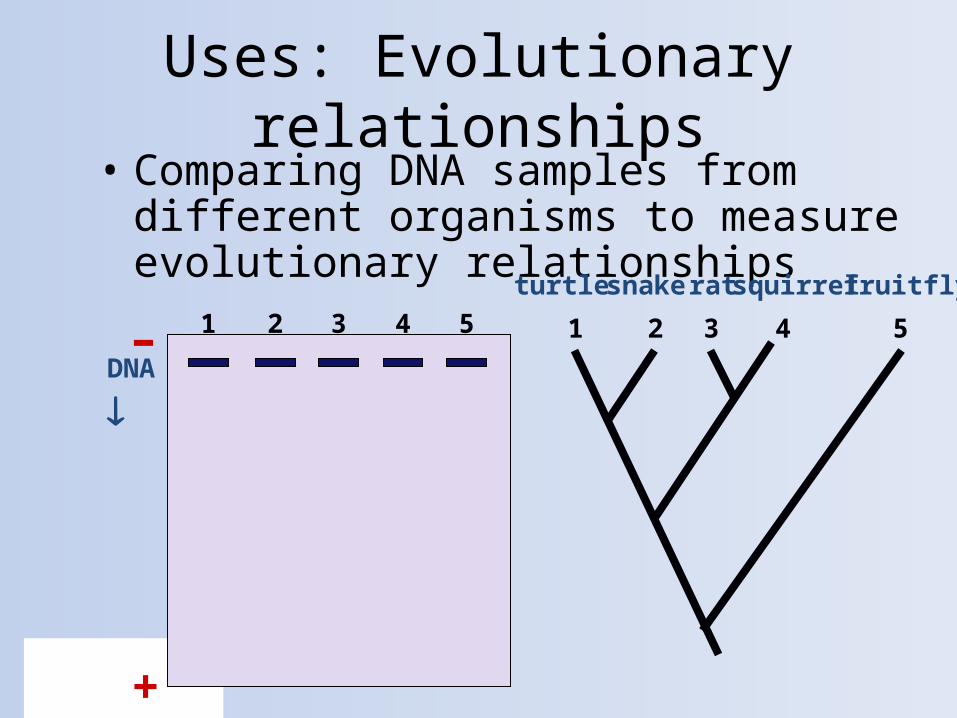
Uses: Evolutionary relationships• Comparing DNA samples from different
organisms to measure evolutionary relationships
–
+
DNA
1 32 4 5 1 2 3 4 5
turtle snake rat squirrel fruitfly

Uses: Medical diagnostic• Comparing normal allele to disease allele
chromosome with disease-causing allele 2
chromosomewith normal allele 1 –
+
allele 1allele 2
DNA
Example: test for Huntington’s disease
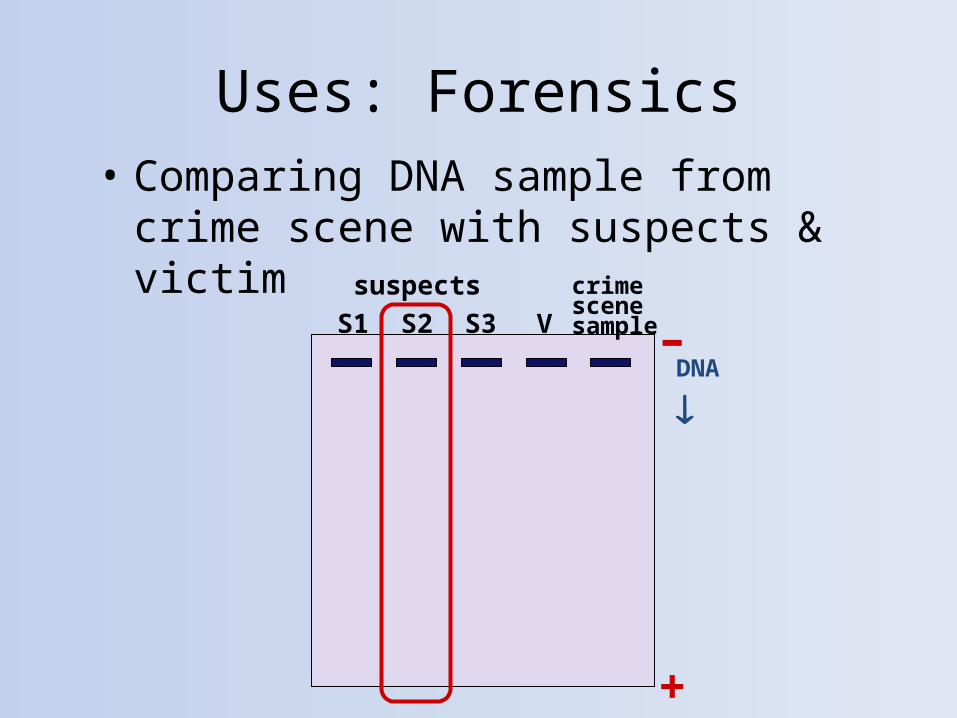
Uses: Forensics• Comparing DNA sample from crime scene
with suspects & victim
–
+
S1
DNA
S2 S3 V
suspects crime scene sample
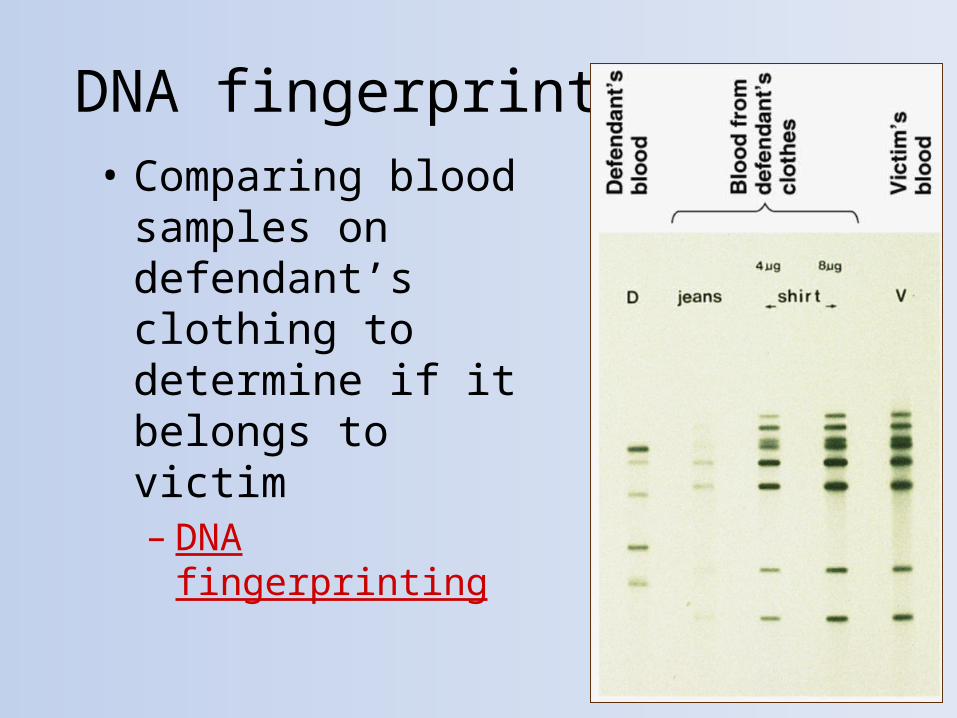
DNA fingerprints• Comparing blood
samples on defendant’s clothing to determine if it belongs to victim– DNA fingerprinting
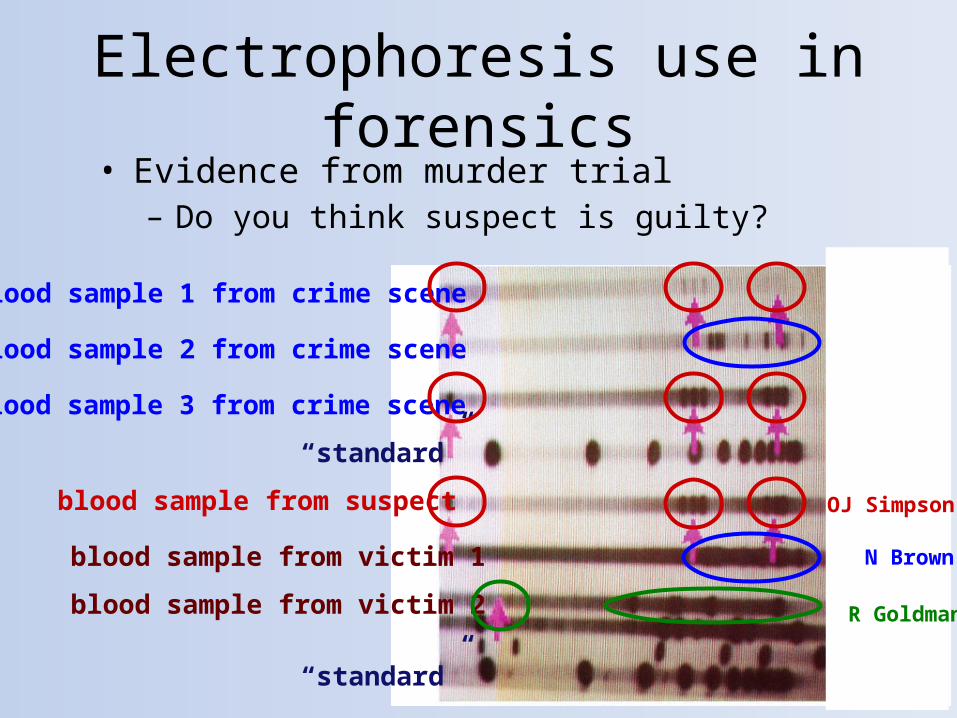
Electrophoresis use in forensics• Evidence from murder trial– Do you think suspect is guilty?
“standard”
blood sample 3 from crime scene
“standard”
blood sample 1 from crime scene
blood sample 2 from crime scene
blood sample from victim 2
blood sample from victim 1
blood sample from suspect OJ Simpson
N Brown
R Goldman

Uses: Paternity • Who’s the father?
+
DNA
childMom F1 F2–