images.pcmac.orgimages.pcmac.org/Uploads/OrangeburgCSD/OrangeburgCSD... · Web viewWeek of Aug....
110
Transcript of images.pcmac.orgimages.pcmac.org/Uploads/OrangeburgCSD/OrangeburgCSD... · Web viewWeek of Aug....


Week of Aug. 20th - Aug. 24th
Aug. 20th - Aug. 24th Indicator3-1.8 Use appropriate safety procedure when conducting investigations.
3-1.5 Use tools (including beakers, meter tapes and sticks, forceps/tweezers, tuning forks, graduated cylinders, andgraduated syringes) safely, accurately and appropriately when gathering specific data.
3-1.3 Generate questions such as “what if?” or “how?” about objects, organisms, and events in the environment and use those questions to conduct a simple scientific investigation
3-1.4 Predict the outcome of a simple investigation and compare the result with the prediction.
3-1.6 Infer meaning from data communicated in graphs, tables, and diagrams.3-1.7 Explain why similar investigations might produce different results.
Instructional Strategies
Essential Knowledge for Indicator for 3.1.8
1. Essential- It is essential for students to know that care should be taken when conducting a science investigation to make sure that everyone stays safe.
Students should have experiences during science investigations to demonstrate the use of safety procedures. A rubric is suggested to keep documentation.
Safety procedures to use when conducting simple science investigations may be Always wear appropriate safety equipment such as goggles or an apron when conducting an investigation. Be careful with sharp objects and glass. Only the teacher should clean up broken glass. Do not put anything in the mouth unless instructed by the teacher. Follow all directions for completing the science investigation. Follow proper handling of animals and plants in the classroom. Keep the workplace neat. Clean up when the investigation is completed. Practice all of the safety procedures associated with the activities or investigations conducted. Tell the teacher about accidents or spills right away. Use caution when working with heat sources and heated objects. Wash hands after each activity.
It is essential for students to use tools safely and accurately, including beakers, meter tapes and sticks, forceps/tweezers, tuning forks, graduated cylinders, and graduated syringes when conducting investigations.
NOTE TO TEACHER (safety while working with students): Teacher materials have lists of “Safety Procedures” appropriate for the suggested activities. Students should be able
to describe and practice all of the safety procedures associated with the activities they conduct. Most simple investigations will not have any risks, as long as proper safety procedures are followed. Proper
planning will help identify any potential risks and therefore eliminate any chance for student injury or harm. Teachers should review with students the safety procedures before doing an activity. Lab safety rules may be posted in the classroom and/or laboratory where students can view them. Students should
be expected to follow these rules. A lab safety contract is recommended to notify parents/guardians that classroom science investigations will be
hands-on and proper safety procedures will be expected. These contracts should be signed by the student and the parents or guardians and kept on file to protect the student, teacher, school, and school district.
In the event of a laboratory safety violation or accident, documentation in the form of a written report should be generated. The report should be dated, kept on file, include a signed witness statement (if possible) and be submitted to an administrator.
Materials Safety Data Sheets (MSDS) must be on file for hazardous chemicals. For further training in safety guidelines, you can obtain the SC Lab Safety CD or see the Lab Safety flip-chart (CD
with training or flip-chart available from the SC Department of Education).

Essential Knowledge for Indicator for 3.1.5
It is essential for students to know that every simple scientific investigation provides information. This information is called data. Data can be simple observations or measurements (in metric units or English units when appropriate).
Students should have many experiences using the different tools to collect data in simple investigations while demonstrating safety procedures.
It is essential for students to know that different tools are needed to collect different kinds of data.A beaker is a tool that measures liquid volume.
To read the volume of a liquid in a beaker, place the tool on a level surface. When using a beaker to measure the volume of a granular (powdered) solid, be sure the top surface of the solid
is level. Choose the appropriate size beaker for the measurement task—use small beakers for measuring small
amounts, and large beakers for large amounts. A beaker measures the volume in metric units such as milliliters (mL) or liters (L).A meter tape, or meter
stick, is a measurement tool that can be used to measure the length, width, or height of an object or the distance between two objects.
When using a meter tape, or stick, make sure to begin measuring from the zero (0) mark, not necessarily the edge of the tool.
A meter tape, or stick, measures in metric units such as centimeters (cm) or meters (m).Forceps/tweezers are tools that grasp or pick up small materials.A tuning fork is a tool that produces vibrations when struck appropriately.
Use the rubber mallet or rubber surface to strike the tuning fork.A graduated cylinder is a tool that measures volume of liquids.
To read the graduated cylinder, place the tool on a level surface.Choose the right size graduated cylinder for the measurement task—use small graduated cylinder for measuring small amounts, and large graduated cylinder for large amounts.The graduated marks are in metric units such as milliliters (mL).
A graduated syringe is a tool that measures volume of liquids.
Place the end of the syringe in the liquid and then pull the plunger out to draw in the appropriate amount of liquid.A graduated syringe measures in metric units such as milliliters (mL).
It is essential for students to use care when handling these tools when gathering data.Some beakers and graduated cylinders are glass. Care should be taken not to break them.Forceps can be sharp. Care should be taken not to pinch or pierce someone.To avoid breaking or chipping, tuning forks should not be struck on the side of the desk.Care should be taken when heating glass beakers.
It is also essential for students to use tools from previous grade levels that are appropriate to the content of this grade level such as eyedroppers, magnifiers, rulers (measuring to millimeters), pan balances (measuring in grams), measuring cups (measuring in parts of a cup), or thermometers (measuring in oF and oC) to gather data.
Essential Knowledge for Indicator for 3.1.3
It is essential for students to create their own questions through exploration, observations, or just curiosity about objects, organisms, and events in the environment. These questions can ask things such as “what,” “when,” “where,” “why” or “how.” Not all of these questions lead to scientific investigations, but they may be used to gain information that would then lead to a testable question.
A testable question is one in which an experiment is needed to find the answer.Testable questions will then be used to conduct a simple scientific investigation such as:
What if an object is pushed with different strengths?What if plants were watered with salt water?What affects the time it takes ice to melt?How does changing the length of an instrument string affect its pitch?How does camouflage help an animal survive in its habitat?
Essential Knowledge for Indicator for 3.1.7
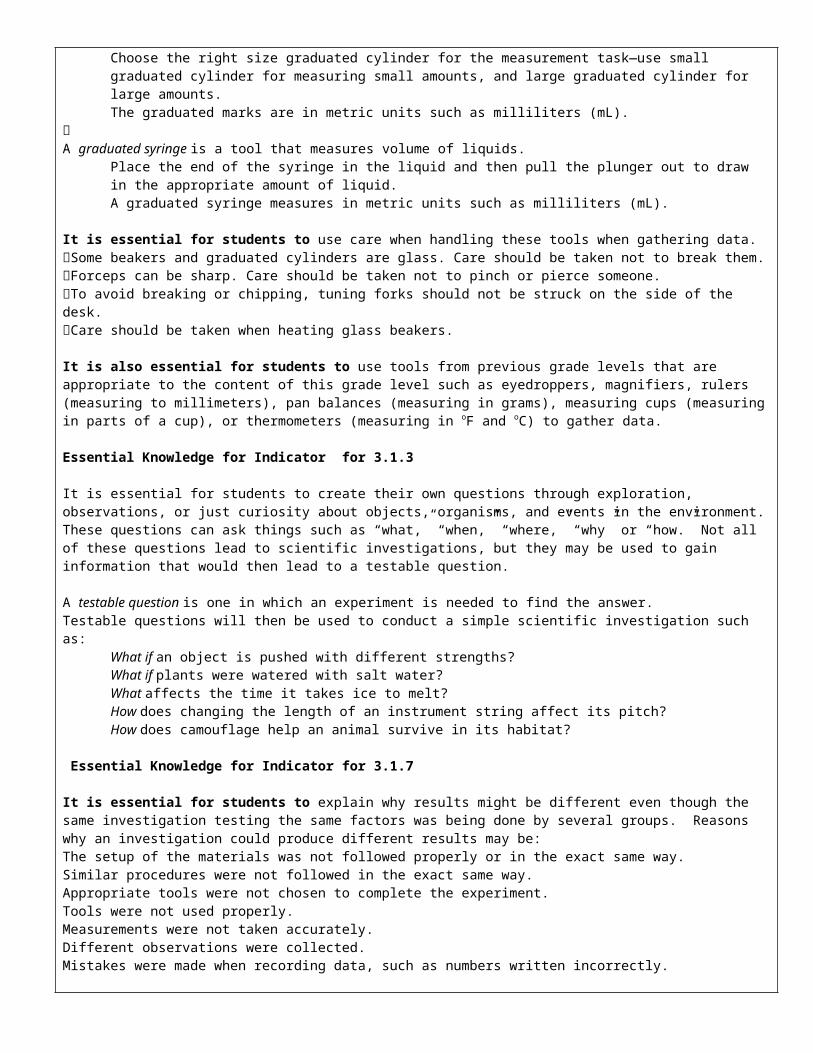
It is essential for students to explain why results might be different even though the same investigation testing the same factors was being done by several groups. Reasons why an investigation could produce different results may be: The setup of the materials was not followed properly or in the exact same way.Similar procedures were not followed in the exact same way.Appropriate tools were not chosen to complete the experiment. Tools were not used properly. Measurements were not taken accurately. Different observations were collected. Mistakes were made when recording data, such as numbers written incorrectly.
See 3rd Grade Science Modules on S3 Curriculum at http://scde.mrooms.org/index.php?page=14496
Resources
Web Sites: SC Science Standards Support Document at https://www.ed.sc.gov/agency/pr/Standards-and-Curriculum/old/cso/standards/science/sd.html www.studyisland.com
3rd Grade Science Modules on S3 Curriculum at http://scde.mrooms.org/index.php?page=14496
AssessmentUse rubrics to assess students’ knowledge of conducting simple investigations, use of tools, and safety procedures.
Benchmark #1 Testing Window: Aug. 22nd - Aug. 31st

Week of Aug. 27th - Aug. 31stAug. 27th - Aug. 31st Indicators3-1.3 Generate questions such as “what if?” or “how?” about objects, organisms, and events in the environment and use those questions to conduct a simple scientific investigation
3-1.4 Predict the outcome of a simple investigation and compare the result with the prediction.
3-1.6 Infer meaning from data communicated in graphs, tables, and diagrams.3-1.7 Explain why similar investigations might produce different results.
3-1.1 Classify objects by two of their properties (attributes).
3-1.2 Classify objects or events in sequential order.
Instructional Strategies
Essential Knowledge for Indicator 3.1.8
1. Essential- It is essential for students to know that care should be taken when conducting a science investigation to make sure that everyone stays safe.
Safety procedures to use when conducting simple science investigations may be Always wear appropriate safety equipment such as goggles or an apron when conducting an investigation. Be careful with sharp objects and glass. Only the teacher should clean up broken glass. Do not put anything in the mouth unless instructed by the teacher. Follow all directions for completing the science investigation. Follow proper handling of animals and plants in the classroom. Keep the workplace neat. Clean up when the investigation is completed. Practice all of the safety procedures associated with the activities or investigations conducted. Tell the teacher about accidents or spills right away. Use caution when working with heat sources and heated objects. Wash hands after each activity.
It is essential for students to use tools safely and accurately, including beakers, meter tapes and sticks, forceps/tweezers, tuning forks, graduated cylinders, and graduated syringes when conducting investigations.
NOTE TO TEACHER (safety while working with students): Teacher materials have lists of “Safety Procedures” appropriate for the suggested activities. Students should be
able to describe and practice all of the safety procedures associated with the activities they conduct. Most simple investigations will not have any risks, as long as proper safety procedures are followed. Proper
planning will help identify any potential risks and therefore eliminate any chance for student injury or harm. Teachers should review with students the safety procedures before doing an activity. Lab safety rules may be posted in the classroom and/or laboratory where students can view them. Students should
be expected to follow these rules. A lab safety contract is recommended to notify parents/guardians that classroom science investigations will be
hands-on and proper safety procedures will be expected. These contracts should be signed by the student and the parents or guardians and kept on file to protect the student, teacher, school, and school district.
In the event of a laboratory safety violation or accident, documentation in the form of a written report should be generated. The report should be dated, kept on file, include a signed witness statement (if possible) and be submitted to an administrator.
Materials Safety Data Sheets (MSDS) must be on file for hazardous chemicals. For further training in safety guidelines, you can obtain the SC Lab Safety CD or see the Lab Safety flip-chart (CD
with training or flip-chart available from the SC Department of Education).
Essential Knowledge for Indicator 3.1.5

It is essential for students to know that every simple scientific investigation provides information. This information is called data. Data can be simple observations or measurements (in metric units or English units when appropriate).
It is essential for students to know that different tools are needed to collect different kinds of data.A beaker is a tool that measures liquid volume.
To read the volume of a liquid in a beaker, place the tool on a level surface.When using a beaker to measure the volume of a granular (powdered) solid, be sure the top surface of the solid is level.Choose the appropriate size beaker for the measurement task—use small beakers for measuring small amounts, and large beakers for large amounts.A beaker measures the volume in metric units such as milliliters (mL) or liters (L).A meter tape, or meter stick, is a measurement tool that can be used to measure the length, width, or height of an object or the distance between two objects.When using a meter tape, or stick, make sure to begin measuring from the zero (0) mark, not necessarily the edge of the tool.A meter tape, or stick, measures in metric units such as centimeters (cm) or meters (m).
Forceps/tweezers are tools that grasp or pick up small materials.
A tuning fork is a tool that produces vibrations when struck appropriately.Use the rubber mallet or rubber surface to strike the tuning fork.
A graduated cylinder is a tool that measures volume of liquids.To read the graduated cylinder, place the tool on a level surface.Choose the right size graduated cylinder for the measurement task—use small graduated cylinder for measuring small amounts, and large graduated cylinder for large amounts.The graduated marks are in metric units such as milliliters (mL).
A graduated syringe is a tool that measures volume of liquids.Place the end of the syringe in the liquid and then pull the plunger out to draw in the appropriate amount of liquid.A graduated syringe measures in metric units such as milliliters (mL).
It is essential for students to use care when handling these tools when gathering data.Some beakers and graduated cylinders are glass. Care should be taken not to break them.Forceps can be sharp. Care should be taken not to pinch or pierce someone.To avoid breaking or chipping, tuning forks should not be struck on the side of the desk.Care should be taken when heating glass beakers.
It is also essential for students to use tools from previous grade levels that are appropriate to the content of this grade level such as eyedroppers, magnifiers, rulers (measuring to millimeters), pan balances (measuring in grams), measuring cups (measuring in parts of a cup), or thermometers (measuring in oF and oC) to gather data.
Essential Knowledge for Indicator 3.1.3
It is essential for students to create their own questions through exploration, observations, or just curiosity about objects, organisms, and events in the environment. These questions can ask things such as “what,” “when,” “where,” “why” or “how.” Not all of these questions lead to scientific investigations, but they may be used to gain information that would then lead to a testable question.
A testable question is one in which an experiment is needed to find the answer.Testable questions will then be used to conduct a simple scientific investigation such as:
What if an object is pushed with different strengths?What if plants were watered with salt water?What affects the time it takes ice to melt?How does changing the length of an instrument string affect its pitch?How does camouflage help an animal survive in its habitat?
Essential Knowledge for Indicator 3.1.7
It is essential for students to explain why results might be different even though the same investigation testing the

same factors was being done by several groups. Reasons why an investigation could produce different results may be: The setup of the materials was not followed properly or in the exact same way.Similar procedures were not followed in the exact same way.Appropriate tools were not chosen to complete the experiment. Tools were not used properly. Measurements were not taken accurately. Different observations were collected. Mistakes were made when recording data, such as numbers written incorrectly.
Essential Knowledge for Indicator 3.1.1
It is essential for students to classify objects by two properties, or attributes, so that similarities and differences can be observed between objects. To classify by two properties, First, observe the objects. Find out what properties they have that are the same and what they have that are different. Choose one property. Classify all objects into two groups based on one property—the objects either have the property (group 1) or they
do not (group 2). Next, take all the objects in group 1 and classify them into two smaller groups based on a second property. Then, take all the objects in group 2 and classify them into two smaller groups based on a second property. The second property used to further classify the groups does not have to be the same for each of the groups.
Instructional Strategies: Other alternatives : Rocks, Buttons, Hair barrettes
1. Write the focus question on the board and have students record and respond to the question in their science notebooks.
2. Show the students a collection of fruits to observe and have them work with a partner to record their observations on sentence strips.
3. Label a sheet of chart paper “Observations” and place it at the front of the room.4. Ask students randomly to share the observations they recorded on sentence strips with the class and tape them
on the chart paper for all to see. 5. Have the rest of the class check their observations to see if they made the same observation and if so, put a
checkmark on that strip because it’s been shared. 6. Continue until students or classmates have shared all their different observations. 7. Say, “As I look at the observations you made, I’m wondering how we mightuse those to separate/sort the pieces
of fruit?” 8. Draw the “Classifying ____” template on a sheet of chart paper and label it “Classifying Fruits” and place it at
the front of the room.
9. Have students look at the observations they’ve placed on the chart and decide on one to classify the fruit first (i.e., “round,”) and place it on the chart for students to see.
10. Ask, “Which pieces of fruit does the description ‘round’ fit?” and give students time to respond. 11. Have students identify all the pieces(i.e., apple, orange, and grapes)that the descriptor “round” describes and
physically move those together, leaving any other pieces that do not fit that descriptor separate. (May use pictures of fruit in the boxes to show how the fruit moves as attributes are identified.)
12. Point out that the attribute selected has been used to separate all the objects the descriptor describes into one group (i.e., all the fruit that is round is in a group together leaving the fruit that does not fit in another.
Essential Knowledge for Indicator 3.1.2
It is essential for students to group objects or events in sequential order.
Classifying Fruits

Objects or events can be placed in order according to a particular property, such as size, shape, color, or some other characteristic.
Another way to place objects or events in order is based on what occurred first, second and so forth.
1. Have students think about some event they do every day (such as brushing their teeth, taking a bath, getting dressed, going to school, coloring a picture, etc.) and each step they use to complete the task (getting the markers and coloring book, opening the markers, choosing a color, etc.).
2. Have students write the steps out on a sheet of paper in the order used to complete the task.3. Have students share their completed list with their partner to check for accuracy and make sure no steps were
left out.4. Monitor students as they work and provide feedback as needed to ensure the steps they write are clear and
correct.5. Have students write each step on a separate index card or strips of paper.6. Tell students to mix up the set and use a paper clip to hold the complete set together.7. Take up the sets and redistribute so that each student gets a new set of steps to put in order.8. Have each student work to put the new set in order and provide assistance as needed to any students who may
struggle with the task.9. Ask the students how they were able to complete the task, encouraging students to think about the skills and
thinking they used to complete the task.
Other ideas for suggested lessons use the following link:
See 3rd Grade Science Modules on S3 Curriculum at http://scde.mrooms.org/index.php?page=14496
Resources Web Sites:SC Science Standards Support Document athttps://www.ed.sc.gov/agency/pr/Standards-and-Curriculum/old/cso/standards/science/sd.html www.studyisland.com
3rd Grade Science Modules on S3 Curriculum at http://scde.mrooms.org/index.php?page=14496
AssessmentRubrics or performance assessment
Benchmark #1 Testing Window: Aug. 22nd - Aug. 31st
Week of Sept 3-7, 2012Sept. 3rd Labor Day Holiday

IndicatorLabor Day (Holiday) Labor Day (Holiday)
Instructional Strategies Labor Day (Holiday)
ResourcesLabor Day (Holiday)
AssessmentLabor Day (Holiday)
Indicators3-3.1 Classify rocks (including sedimentary, igneous, and metamorphic) and soils (including humus, clay, sand, and silt) on the basis of their properties.3-3.7 Exemplify Earth materials that are used as fuel, as a resource for building materials, and as a medium for growing plants.
Instructional Strategies
Essential Knowledge for Indicator: 3-3.1
1. Essential - Provide examples of rocks, minerals and, soil. Students complete a step book listing adjectives to describe each Quadrant C
EarthMaterials
SoilMineralsRocks
2. Essential - Students draw and color earth materials in their science journal and label the physical properties of each. Example: shiny, dull, purple, smooth, etc. Quadrant A
3. Essential - Provide examples of rocks and minerals. Class completes charts to list ways these materials show similarities and differences. Quadrant C
Ex:
4. Enrichment - Make a “touch box” using a sock with the toe cut out attached to a hole in the side of a shoebox. Place an example of an earth material inside the box. Students feel each time you place different materials in the box. Discuss what types of earth material the students think are in the box. Discuss what observation would have helped them better determine what earth material was in the box. Quadrant A
5. Essential - Divide examples of earth materials into groups of four. Divide the class into groups. Students classify the earth materials by their physical properties. Each group shares their findings with the class. Quadrant A
6. Essential - Make webs with the words “Types of Rock” in one and “Types of Soil” in the other center circle. As you study about rocks and soil, add the name of each to the web. Later classify each rock or soil with a physical characteristic in the center circle. Example: shine, color, etc. Quadrant C
7. Enrichment - Distribute trays of rocks and minerals for students to examine. Provide books on rock and mineral characteristics. Students look through the books and match the earth materials with its physical characteristics. Then have them draw the rock or mineral and write its characteristic in their science journals. Have them put each into a classification according to a physical characteristic. Quadrant D
8. Enrichment – Students complete “Properties of Rocks and Minerals” activity, GEMS Stories in Stone, p. 15. Quadrant B*Also see 3rd Grade Science Modules on S3 Curriculum at http://scde.mrooms.org/index.php?page=14496
Similarities
Differences

Essential Knowledge for Indicator 3-3.7
It is essential for students to know that Earth is rich in useful resources that can be used for various purposes:
Building structures Earth materials can be mined from Earth and used to make building blocks or other building materials. For example, granite, marble, and sandstone have been used to make blocks for homes and office buildings. The mineral calcite is used to make cement for building.
ResourcesText:MacMillan/McGraw-Hill South Carolina Science, pages 198-202
Science Kits:FOSS Earth MaterialsSTC Rocks and Minerals
Web Sites:SC Science Standards Support Document athttps://www.ed.sc.gov/agency/pr/Standards-and-Curriculum/old/cso/standards/science/sd.html www.studyisland.com
3rd Grade Science Modules on S3 Curriculum at http://scde.mrooms.org/index.php?page=14496
GT Extensions: Different kinds of rocks are found in various places throughout the world. The gifted and talented students initiate
a rock exchange by writing to classes in other locations offering to trade rock samples. An alternate extension would be to get a rock from every state and mount it on a map of the United States. The activity should be on-going through the school year. Quadrant C
Students take nature walks to collect rock samples common to the area. Through observation and research the students identify the characteristics of each rock and categorize the samples. Quadrant C
Students explore the benefits of South Carolina mined peat, including: source, soil conditioning, county where mined and benefits. Quadrant C
On a wall chart, students list and illustrate the varieties of materials contained in the soils of South Carolina. They specify the regions where each type of soil is prevalent and complete a PNI chart of the positive, negative and interesting characteristics of each type of soil or blend. Quadrant C
Using an auger, the gifted and talented students take core samples of soil from different locations on the school campus. After removing the samples from the auger, students compare and contrast, including measurements in centimeters, of the four layers (if available) of the soil sample. Quadrant B
AssessmentDaily and weekly assessments using rubrics and quizzes Notebook entries and performance assessment
Week of Sept 10-14Sept 10th -11th

Indicators3-3.1 Classify rocks (including sedimentary, igneous, and metamorphic) and soils (including humus, clay, sand, and silt) on the basis of their properties.3-3.7 Exemplify Earth materials that are used as fuel, as a resource for building materials, and as a medium for growing plants.
Instructional Strategies for 3.3.11. Essential - Provide examples of rocks, minerals and, soil. Students complete a step book listing adjectives to describe each Quadrant C
EarthMaterials
SoilMineralsRocks
2. Essential - Students draw and color earth materials in their science journal and label the physical properties of each. Example: shiny, dull, purple, smooth, etc. Quadrant A
3. Essential - Provide examples of rocks and minerals. Class completes charts to list ways these materials show similarities and differences. Quadrant C
Ex:
4. Enrichment - Make a “touch box” using a sock with the toe cut out attached to a hole in the side of a shoebox. Place an example of an earth material inside the box. Students feel each time you place different materials in the box. Discuss what types of earth material the students think are in the box. Discuss what observation would have helped them better determine what earth material was in the box. Quadrant A
5. Essential - Divide examples of earth materials into groups of four. Divide the class into groups. Students classify the earth materials by their physical properties. Each group shares their findings with the class. Quadrant A
6. Essential - Make webs with the words “Types of Rock” in one and “Types of Soil” in the other center circle. As you study about rocks and soil, add the name of each to the web. Later classify each rock or soil with a physical characteristic in the center circle. Example: shine, color, etc. Quadrant C
7. Enrichment - Distribute trays of rocks and minerals for students to examine. Provide books on rock and mineral characteristics. Students look through the books and match the earth materials with its physical characteristics. Then have them draw the rock or mineral and write its characteristic in their science journals. Have them put each into a classification according to a physical characteristic. Quadrant D
8. Enrichment – Students complete “Properties of Rocks and Minerals” activity, GEMS Stories in Stone, p. 15. Quadrant B
*Also see 3rd Grade Science Modules on S3 Curriculum at http://scde.mrooms.org/index.php?page=14496
ResourcesText:MacMillan/McGraw-Hill South Carolina Science, Chapter 4 (pages 198-202)
Science Kits:FOSS Earth MaterialsSTC Rocks and Minerals
Web Sites: SC Science Standards Support Document at https://www.ed.sc.gov/agency/pr/Standards-and-Curriculum/old/cso/standards/science/sd.html www.studyisland.com
Differences
Similarities

3rd Grade Science Modules on S3 Curriculum at http://scde.mrooms.org/index.php?page=14496
GT Extensions: Different kinds of rocks are found in various places throughout the world. The gifted and talented students initiate
a rock exchange by writing to classes in other locations offering to trade rock samples. An alternate extension would be to get a rock from every state and mount it on a map of the United States. The activity should be on-going through the school year. Quadrant C
Students take nature walks to collect rock samples common to the area. Through observation and research the students identify the characteristics of each rock and categorize the samples. Quadrant C
Students explore the benefits of South Carolina mined peat, including: source, soil conditioning, county where mined and benefits. Quadrant C
On a wall chart, students list and illustrate the varieties of materials contained in the soils of South Carolina. They specify the regions where each type of soil is prevalent and complete a PNI chart of the positive, negative and interesting characteristics of each type of soil or blend. Quadrant C
Using an auger, the gifted and talented students take core samples of soil from different locations on the school campus. After removing the samples from the auger, students compare and contrast, including measurements in centimeters, of the four layers (if available) of the soil sample. Quadrant B
AssessmentDaily and Weekly assessments using rubrics and quizzesNotebook entries and performance assessment
Week of Sept. 10th - Sept. 14th
Sept. 12th - Sept. 14th Indicators

3-3.1 Classify rocks (including sedimentary, igneous, and metamorphic) and soils (including humus, clay, sand, and silt) on the basis of their properties.3-3.7 Exemplify Earth materials that are used as fuel, as a resource for building materials, and as a medium for growing plants.
Instructional Strategies
Indicator 3.3.1
1. Essential - Make webs with the words “Types of Rock” in one and “Types of Soil” in the other center circle. As you study about rocks and soil, add the name of each to the web. Later classify each rock or soil with a physical characteristic in the center circle. Example: shine, color, etc. Quadrant C
2. Enrichment - Provide students with cups of soil taken from different places. Then tell students, “Using your senses, observe the differences between the different soil samples. Record your observations on a chart. Now inspect the samples with a magnifier. Do you have any new observations?” Students may want to examine soils with a screen or sieve, if available. Sample Classroom Activity Quadrant A
3. Enrichment - Differentiating Textbooks, p. 47. Word Toss Activity. Use the vocabulary words (soil, humus, silt, sand and clay). Quadrant B
4. Essential - As a class, brainstorm different non-renewable resources used in the world today. Students then work independently to write how their life would be different without one (soil) of these resources. Quadrant D
5. Enrichment - Bring in uprooted plants. Give each student a cup and a plant. Have them try to make the plant “stand up” in the cup. Ask them what is missing that allows the plant to “stand up.” Then have them put the plant in soil for support. Quadrant A
6. Essential -“What makes up soil?” inquiry activity using text page 207.
7. Enrichment—“Can water separate soil parts?” inquiry using the Activity Lab Book page 87.
Essential Knowledge for Indicator 3-3.7
It is essential for students to know that Earth is rich in useful resources that can be used for various purposes:
Growing plants Earth materials can be used as a medium for growing plants. For example, soil is made up of weathered pieces of rocks, minerals, and humus that supply water, nutrients and support for growing plants. Different types of soil are needed depending upon the type of plants that need to grow in the soil.
Resources Text:MacMillan/McGraw-Hill South Carolina Science (pages 206-212)
Science Kits:FOSS Earth MaterialsSTC Rocks and Minerals
Web Sites:SC Science Standards Support Document athttps://www.ed.sc.gov/agency/pr/Standards-and-Curriculum/old/cso/standards/science/sd.html www.studyisland.com
3rd Grade Science Modules on S3 Curriculum at http://scde.mrooms.org/index.php?page=14496
GT Extensions: Students take nature walks to collect soil samples common to the area. Through observation and research the
students identify the characteristics of each soil and categorize the samples. Quadrant C Students explore the benefits of South Carolina mined peat, including: source, soil conditioning, county where
mined and benefits. Quadrant C

On a wall chart, students list and illustrate the varieties of materials contained in the soils of South Carolina. They specify the regions where each type of soil is prevalent and complete a PNI chart of the positive, negative and interesting characteristics of each type of soil or blend. Quadrant C
Using an auger, the gifted and talented students take core samples of soil from different locations on the school campus. After removing the samples from the auger, students compare and contrast, including measurements in centimeters, of the four layers (if available) of the soil sample. Quadrant B
AssessmentDaily and Weekly assessment using rubrics and quizzes Notebook entries and performance assessment
Sept. 13th - Sept. 14th Indicators3-3.2 Identify common minerals on the basis of their properties by using a minerals identification key.3-3.7 Exemplify Earth materials that are used as fuel, as a resource for building materials, and as a medium for growing plants.
Instructional Strategies Indicator 3-3.2
Essential Knowledge for Indicator for 3.3.2
It is essential for students to know that minerals are solid, formed in nature, have never been alive, and have properties by which they can be identified. Some examples of physical properties of minerals may be:
Hardness Hardness refers to whether the mineral can be scratched or can scratch something else. The harder a mineral, the fewer things can scratch it. The hardness is numbered 1-10 with 1 being the softest and 10 being the hardest. Diamond is the hardest
mineral.Color
Color can be used along with other properties to help identify a mineral. Since many minerals have the same color, it cannot be used as the only property for identification.
Luster Some minerals can be very shiny, pearly, or glassy and other minerals are dull.
Special Properties If an acid (vinegar) is placed on a mineral, it may bubble or fizz. Some minerals split into thin sheets. Some minerals have magnetic properties.
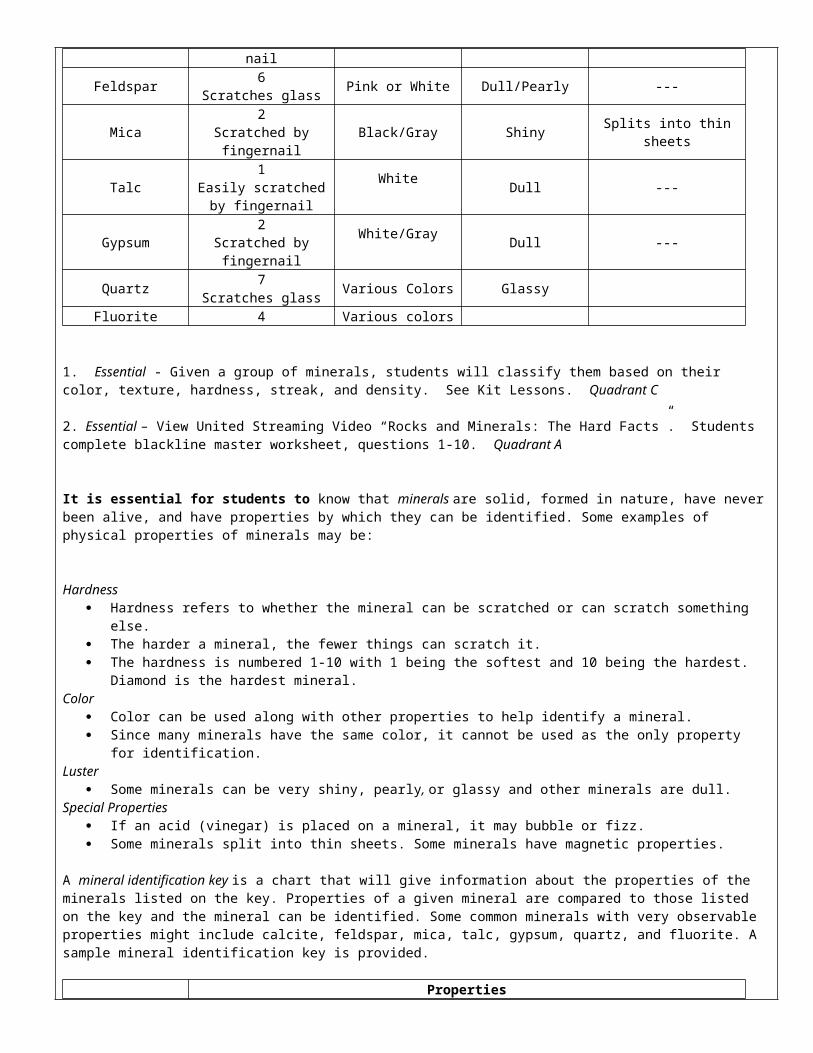
A mineral identification key is a chart that will give information about the properties of the minerals listed on the key. Properties of a given mineral are compared to those listed on the key and the mineral can be identified. Some common minerals with very observable properties might include calcite, feldspar, mica, talc, gypsum, quartz, and fluorite. A sample mineral identification key is provided.
MineralProperties
Hardness(Scratch Test) Color Luster Special Properties
Calcite 3Scratched by nail
White Dull/Glassy Bubbles with acid
Feldspar 6Scratches glass Pink or White Dull/Pearly ---
Mica2
Scratched by fingernail
Black/Gray Shiny Splits into thin sheets
Talc1
Easily scratched by fingernail
White Dull ---
Gypsum 2Scratched by
White/Gray Dull ---

fingernail
Quartz 7Scratches glass Various Colors Glassy
Fluorite 4 Various colors
1. Essential - Given a group of minerals, students will classify them based on their color, texture, hardness, streak, and density. See Kit Lessons. Quadrant C
2. Essential – View United Streaming Video “Rocks and Minerals: The Hard Facts”. Students complete blackline master worksheet, questions 1-10. Quadrant A
It is essential for students to know that minerals are solid, formed in nature, have never been alive, and have properties by which they can be identified. Some examples of physical properties of minerals may be:
Hardness Hardness refers to whether the mineral can be scratched or can scratch something else. The harder a mineral, the fewer things can scratch it. The hardness is numbered 1-10 with 1 being the softest and 10 being the hardest. Diamond is the hardest
mineral.Color
Color can be used along with other properties to help identify a mineral. Since many minerals have the same color, it cannot be used as the only property for identification.
Luster Some minerals can be very shiny, pearly, or glassy and other minerals are dull.
Special Properties If an acid (vinegar) is placed on a mineral, it may bubble or fizz. Some minerals split into thin sheets. Some minerals have magnetic properties.
A mineral identification key is a chart that will give information about the properties of the minerals listed on the key. Properties of a given mineral are compared to those listed on the key and the mineral can be identified. Some common minerals with very observable properties might include calcite, feldspar, mica, talc, gypsum, quartz, and fluorite. A sample mineral identification key is provided.
MineralProperties
Hardness(Scratch Test) Color Luster Special Properties
Calcite 3Scratched by nail
White Dull/Glassy Bubbles with acid
Feldspar 6Scratches glass Pink or White Dull/Pearly ---
Mica2
Scratched by fingernail
Black/Gray Shiny Splits into thin sheets
Talc1
Easily scratched by fingernail
White Dull ---
Gypsum2
Scratched by fingernail
White/Gray Dull ---
Quartz 7Scratches glass Various Colors Glassy
Fluorite 4 Various colors
Essential Knowledge for Indicator 3-3.7
It is essential for students to know that Earth is rich in useful resources that can be used for various purposes:

Building structures Earth materials can be mined from Earth and used to make building blocks or other building materials. For example, granite, marble, and sandstone have been used to make blocks for homes and office buildings. The mineral calcite is used to make cement for building.
*Also see 3rd Grade Science Modules on S3 Curriculum at http://scde.mrooms.org/index.php?page=14496
Resources
Text:MacMillan/McGraw-Hill South Carolina Science, 194-197/ How do we use minerals and rocks? (202)
Science Kits:FOSS Earth MaterialsSTC Rocks and Minerals
Other Resources:
Web Sites:United Streaming Video – http://streaming.discoveryeducation.com/index.cfm
“Rocks and Minerals: The Hard Facts”
3rd Grade Science Modules on S3 Curriculum at http://scde.mrooms.org/index.php?page=14496
SC Science Standards Support Document athttps://www.ed.sc.gov/agency/pr/Standards-and-Curriculum/old/cso/standards/science/sd.html
www.studyisland.com
GT Extensions:
AssessmentDaily and weekly assessments using rubrics and quizzes
Week of Sept. 17th - Sept. 21thSept. 17th - Sept. 19th Indicators

3-3.2 Identify common minerals on the basis of their properties by using a minerals identification key.3-3.7 Exemplify Earth materials that are used as fuel, as a resource for building materials, and as a medium for growing plants.
Instructional Strategies Indicator: 3-3.2
1. Essential - Given a group of minerals, students will classify them based on their color, texture, hardness, streak, and density. See Kit Lessons. Quadrant C
2. Essential – View United Streaming Video “Rocks and Minerals: The Hard Facts”. Students complete blackline master worksheet, questions 1-10. Quadrant A
It is essential for students to know that minerals are solid, formed in nature, have never been alive, and have properties by which they can be identified. Some examples of physical properties of minerals may be:
Hardness Hardness refers to whether the mineral can be scratched or can scratch something else. The harder a mineral, the fewer things can scratch it. The hardness is numbered 1-10 with 1 being the softest and 10 being the hardest. Diamond is the hardest
mineral.Color
Color can be used along with other properties to help identify a mineral. Since many minerals have the same color, it cannot be used as the only property for identification.
Luster Some minerals can be very shiny, pearly, or glassy and other minerals are dull.
Special Properties If an acid (vinegar) is placed on a mineral, it may bubble or fizz. Some minerals split into thin sheets. Some minerals have magnetic properties.
A mineral identification key is a chart that will give information about the properties of the minerals listed on the key. Properties of a given mineral are compared to those listed on the key and the mineral can be identified. Some common minerals with very observable properties might include calcite, feldspar, mica, talc, gypsum, quartz, and fluorite. A sample mineral identification key is provided.
MineralProperties
Hardness(Scratch Test) Color Luster Special Properties
Calcite 3Scratched by nail
White Dull/Glassy Bubbles with acid
Feldspar 6Scratches glass Pink or White Dull/Pearly ---
Mica2
Scratched by fingernail
Black/Gray Shiny Splits into thin sheets
Talc1
Easily scratched by fingernail
White Dull ---
Gypsum2
Scratched by fingernail
White/Gray Dull ---
Quartz 7Scratches glass Various Colors Glassy
Fluorite 4 Various colors
Indicator 3-3.7
It is essential for students to know that Earth is rich in useful resources that can be used for various purposes:

Building structures Earth materials can be mined from Earth and used to make building blocks or other building materials. For example, granite, marble, and sandstone have been used to make blocks for homes and office buildings. The mineral calcite is used to make cement for building.
*Also see 3rd Grade Science Modules on S3 Curriculum at http://scde.mrooms.org/index.php?page=14496
Resources
Text:MacMillan/McGraw-Hill South Carolina Science, pages 194-197
Science Kits:FOSS Earth MaterialsSTC Rocks and Minerals
Other Resources:
Web Sites:United Streaming Video – http://streaming.discoveryeducation.com/index.cfm
“Rocks and Minerals: The Hard Facts”
3rd Grade Science Modules on S3 Curriculum at http://scde.mrooms.org/index.php?page=14496
SC Science Standards Support Document at https://www.ed.sc.gov/agency/pr/Standards-and-Curriculum/old/cso/standards/science/sd.html
www.studyisland.com
AssessmentDaily and weekly assessments using rubrics and quizzes
Week of Sept. 17th - Sept. 21thSept. 20th - Sept. 21st Indicators3.3.3 Recognize types of fossils (including molds, casts, and preserved parts of plants and animals).3.3.4 Infer ideas about Earth’s early environments from fossils of plants and animals that lived long ago3-3.7 Exemplify Earth materials that are used as fuel, as a resource for building materials, and as a medium for growing plants.
Instructional Strategies
Essential Knowledge for Indicator: 3-3.3
It is essential for students to know that a fossil is the remains of a living thing that lived long ago that has turned to rock. There are several types of fossils:Mold
· A cavity or opening in a rock that has the shape of once living thing.· Fossil imprints of leaves and other thin objects, such as wings, feathers, and footprints are also molds.· The leaves or animal parts rotted away long ago.
Cast· A mold that has been filled in with sediments which harden and take the shape of the once living thing.
Preserved parts
· Actual parts of the living thing such as shells, bones, or teeth that have turned to stone.· For example, sometimes an insect long ago was trapped in tree sap.· That sap hardened into a rock called amber.
· The insect was preserved in the amber stone
1. Essential—Have students to describe how fossils are formed using a foldable or flipbook.
2. Essential—Make a Model Fossil:Material needed: seashell, petroleum jelly, modeling clay, small plastic bowl, white glue
Coat the outside of the seashell with a thin layer of petroleum jelly. Press the seashell into the clay to make a model of a fossil. Remove the seashell carefully from the clay. Place the clay with the seashell’s shape in the plastic bowl Drizzle white glue into the imprint. Fill it completely. This also makes a model of a fossil. Let the glue harden for about a day. When it is hard, separate the hardened glue from the clay. Have students to compare both fossils.
`3. Enrichment - Students write and perform a skit depicting how dinosaurs change from living flesh into petrified
bone. Quadrant B.
*Also see 3rd Grade Science Modules on S3 Curriculum at http://scde.mrooms.org/index.php?page=14496
Essential Knowledge for Indicator: 3-3.4
It is essential for students to know that fossils can give information about what the environment was like in the location where the fossil was found. For example,
Fossils of a water organism found in an area that is now mountains means that area was possibly once under water.
Fossils of trees or tree parts that are found in a desert mean that area was possibly once a forest. Fossils of plants that are found in very cold areas of Earth means that area at one time possibly had a warmer
climate.
1. Enrichment - Dress up as a paleontologist. Bring in examples of fossils. Tell the students where “you” found each. Students explain how the fossils got there. Are the plants and animals alive today? Discuss. Students write responses in their science journals. Quadrant D
2. Enrichment – Students illustrate and write 1 sentence for each stop of the fossil formation process. Refer to Fossils Tell Us of Long Ago by Aliki for examples. Quadrant B
3. Essential—Have students to read and discuss
*Also see 3rd Grade Science Modules on S3 Curriculum at http://scde.mrooms.org/index.php?page=14496
Essential knowledge for Indicator 3-3.7:
It is essential for students to know that Earth is rich in useful resources that can be used for various purposes:
Fuels Earth materials come from inside Earth and are used as fuels. For example, fuels such as oil and coal can be burned to produce heat or made into gasoline to help run cars and other vehicles.
Essential- Have students use the library, magazines, and the internet, if available, to research the location of the major deposits of coal in the world. What is the only continent that has little or no coal available? What does this research tell you about what North America and Asia were like millions of years ago?
Enrichment - Tell students, “Imagine that you are stranded on a deserted island. Using only natural materials that are available on the island, you must provide for all of your basic needs, such as shelter, food, and drinking water. Describe

how you would use the resources on the island to survive until you are rescued.” Sample Classroom Activity Quadrant C
ResourcesText: MacMillan/McGraw-Hill South Carolina Science, 218-219
Science Kits:FOSS Earth MaterialsSTC Rocks and Minerals
Other Resources:Differentiating Textbooks
Web Sites:03/19/09 – Mining Association of South Carolina - www.scmines.com03/19/09 – Zoom Dinosaurs www.zoomdinosaurs.com
www.studyisland.comSC Science Standards Support Document athttps://www.ed.sc.gov/agency/pr/Standards-and-Curriculum/old/cso/standards/science/sd.html
Text:MacMillan/McGraw-Hill South Carolina Science, 168-177.
Science Kits/Materials Boxes:
Other Resources:Contact Clemson University Geology DepartmentFossils Tell of Long Ago by Aliki
Web Sites:03/19/09 - Utah Educational Network - http://www.uen.org/. Follow the path of Curriculum Resources, Lesson Plans,
Second Grade, Science, “Fossil Formation Process www.studyisland.com
SC Science Standards Support Document athttps://www.ed.sc.gov/agency/pr/Standards-and-Curriculum/old/cso/standards/science/sd.html
AssessmentDaily and weekly assessments using rubrics and quizzes

How Fossils Are Made The Kinds of Fossils
Paleontologists are people who study ancient life. Because they study life forms that are now extinct, they rely on fossils to learn about life in the past. Fossils are the remains of living things that have transformed into stone over millions of years.
Most fossils are found in sedimentary rock. The fossils are made when living things die and get buried by sediments quickly before the hardest parts of the animal have a chance to decay. As sediments accumulate, pressure causes the sediments to harden into rock: Sand sediments become sandstone, clay sediments become shale, and shell sediments become limestone.
Groundwater carrying minerals seeps into the sedimentary rock and helps the fossils form in one of two ways. Sometimes the minerals fill in all of the empty places of the once living thing and form crystals. These crystals cause the remains of the living thing to harden along with the sedimentary rock that it is encased in. Petrified wood is an example of this process, which is called permineralization.
At other times, the minerals in the groundwater actually replace the minerals that make up the remains. So over time the hard parts are completely replaced by other minerals. This process is called replacement.
Other important fossils are impressions and molds. These are made when a hard part such as a shell, fills up with sediments that harden, and then the actual shell dissolves leaving nothing but the sediment mold. These molds can tell us much about the body structures of animals and plants.
As well, insects also get trapped in amber, which is fossilized tree sap. In the movie Jurassic Park, scientists used dinosaur DNA from the stomachs of mosquitoes trapped in amber to genetically engineer dinosaurs.
Some animals have even been trapped in ice, too, preserving them extremely well. Woolly mammoths and mastodons have been found with hair intact and bones in good condition. Likewise, some animals and plants have been mummified in hot arid conditions like those found in deserts.
Finally, paleontologists can learn about ancient life from trace fossils. Trace fossils are things like footprints or animal droppings, which can tell us about the animal’s behaviour.
Living things (usually aquatic) die and then get buried quickly under sand, dirt, clay, or ash sediments. Usually, the soft parts decay, or rot away, leaving the hard parts behind. These are ammonites, one of the most common fossils that are found.
As time goes on more and more sediment accumulates. Pressure, heat, and chemical reaction cause the sediments to harden into rock called sedimentary rock.
Movements in the earth’s crust, pushes the layers of sedimentary rock back up to higher ground.
Finally, through erosion caused by weather, wind, and water, the fossils become exposed at the surface again.

Week of Sept. 24th - Sept. 28thSept. 24th - Sept. 28th Indicators3.3.3 Recognize types of fossils (including molds, casts, and preserved parts of plants and animals).3.3.4 Infer ideas about Earth’s early environments from fossils of plants and animals that lived long ago
Instructional Strategies Indicator: 3-3.3-
1. Essential—Have students to describe how fossils are formed.
2. Enrichment - Students write and perform a skit depicting how dinosaurs change from living flesh into petrified bone. Quadrant D
3. Enrichment -Differentiating Textbooks, p. 94. Four Corners Voting. Quadrant C *Also see 3rd Grade Science Modules on S3 Curriculum at http://scde.mrooms.org/index.php?page=14496
Indicator: 3-3.4
1. Enrichment - Dress up as a paleontologist. Bring in examples of fossils. Tell the students where “you” found each. Students explain how the fossils got there. Are the plants and animals alive today? Discuss. Students write responses in their science journals. Quadrant D
2. Enrichment – Students illustrate and write 1 sentence for each stop of the fossil formation process. Refer to Fossils Tell Us of Long Ago by Aliki for examples. Quadrant B
*Also see 3rd Grade Science Modules on S3 Curriculum at http://scde.mrooms.org/index.php?page=14496
Indicator 3-3.7:
Essential- Have students use the library, magazines, and the internet, if available, to research the location of the major deposits of coal in the world. What is the only continent that has little or no coal available? What does this research tell you about what North America and Asia were like millions of years ago?
Enrichment - Tell students, “Imagine that you are stranded on a deserted island. Using only natural materials that are available on the island, you must provide for all of your basic needs, such as shelter, food, and drinking water. Describe how you would use the resources on the island to survive until you are rescued.” Sample Classroom Activity Quadrant C
ResourcesText: MacMillan/McGraw-Hill South Carolina Science, 218-219
Science Kits:FOSS Earth MaterialsSTC Rocks and Minerals
Other Resources:Differentiating Textbooks
Web Sites:03/19/09 – Mining Association of South Carolina - www.scmines.com03/19/09 – Zoom Dinosaurs www.zoomdinosaurs.com
www.studyisland.comSC Science Standards Support Document athttps://www.ed.sc.gov/agency/pr/Standards-and-Curriculum/old/cso/standards/science/sd.html

Text:MacMillan/McGraw-Hill South Carolina Science, 168-177.
Science Kits/Materials Boxes:
Other Resources:Contact Clemson University Geology DepartmentFossils Tell of Long Ago by Aliki
Web Sites:03/19/09 - Utah Educational Network - http://www.uen.org/. Follow the path of Curriculum Resources, Lesson Plans,
Second Grade, Science, “Fossil Formation Process www.studyisland.com
SC Science Standards Support Document at https://www.ed.sc.gov/agency/pr/Standards-and-Curriculum/old/cso/standards/science/sd.html
AssessmentDaily and Weekly assessments using rubrics and quizzes

Week of Oct. 1st - Oct. 5thOct. 1st - Oct. 5th Indicator3.3.5 Illustrate Earth’s saltwater and freshwater features (including oceans, seas, rivers, lakes, ponds, streams, and glaciers).
Instructional Strategies
Essential Knowledge for 3.3.5
It is essential for students to know that there are many places on Earth where water is found. Sometimes the water is saltwater and other times it is fresh water. Most of the water on Earth is saltwater. Water is mostly in liquid form in these features, but sometimes it can be solid (ice). Earth’s water features include: Oceans Oceans are large bodies of salt water that surrounds a continent. Seas Seas are large bodies of salt water that is often connected to an ocean. A sea may be partly or completely surrounded by land. Rivers Rivers are large, flowing bodies of fresh water that usually empty into a sea or ocean.Streams Streams are small, flowing bodies of fresh water that flow into rivers.Lakes& ponds Lakes and ponds are areas where water, usually freshwater, is surrounded by land. Lakes and ponds differ in size with ponds usually being smaller than lakes.Glaciers Glaciers are huge sheets of ice that cover land. They are found where temperatures are very cold, for example, high in the mountains or near the poles of Earth.
1. Essential - Divide students up into groups of four. Give each group a globe (topography) and describe each of the features. Students locate these on their globe. Quadrant A
2. Essential - Assign a feature to each group to describe to the class. Quadrant A
3. Essential - Students look through magazines to find examples of the surface features of Earth. Have them glue the examples on chart paper under the correct labels (saltwater, freshwater, glaciers, streams, ponds, lakes, rivers, seas and oceans). Quadrant B
4. Enrichment - Use Differentiating Textbooks, p. 36, “Pros, Cons, and What I Wonder” to summarize Earth’s features.**Any “What I Wonder” questions should be addressed before the close of this unit Quadrant C
5. Essential – Assign small groups a feature of the Earth’s surface. Research the topic and create a visual presentation (i.e., poster, PowerPoint, etc.). Quadrant D *Also see 3rd Grade Science Modules on S3 Curriculum at http://scde.mrooms.org/index.php?page=14496
ResourcesText: MacMillan/McGraw-Hill South Carolina Science, p. 234
Science Kits/Materials Boxes:
Other Resources:Differentiating Textbooks
Web Sites:03/19/09 - National Oceanic & Atmospheric Administration - www.NOAA.gov 03/19/09 - Public Broadcasting Service - Lifecycle of a Glacierhttp://www.pbs.org/wgbh/nova/vinson/glacier.html

United Streaming Video – http://streaming.discoveryeducation.com/index.cfm “Water: A First Look”“Water Smart: Water on Earth”“Geographical Feature: Bodies of Water”
www.studyisland.com
GT Extensions: Using teacher approved websites, students conduct research to determine the percentage of saltwater and
freshwater in the state of South Carolina. Quadrant C
Students explore the wildlife which inhabits the area around freshwater streams and the saltwater marshes. Quadrant C
AssessmentDaily and weekly assessments using rubrics and quizzes

Week of Oct. 8th - Oct. 12th
Oct. 8th - Oct. 12th Indicator3.3.6 Illustrate Earth’s land features (including volcanoes, mountains, valleys, canyons, caverns, and islands) by using models, pictures, diagrams, and maps.
Instructional Strategies
Essential Knowledge for 3.3.6
It is essential for students to know that Earth’s surface has many natural shapes or features called landforms. Earth’s land features that can be seen on models, pictures, diagrams, and maps include:
Volcanoes An opening in Earth’s surface from which lava flows. As the lava hardens and builds up, a volcanic mountain forms.
Mountains A place on Earth’s surface where the land is much higher than the land that surrounds it. Some mountains are tall and rocky and others are rounded and covered with trees. A mountain area that has a flat top is called a plateau.
Valleys A lowland area between higher areas such as mountains. Sometimes rivers can wear away land to form valleys.
Canyons A deep valley with very steep sides. They are often carved from the Earth by a river.
Caverns A large cave or underground chamber. Caverns or caves are formed underground when water wears away the rock.
Islands An area of land that is entirely surrounded by water. Sometimes islands are located in lakes, or they may be out from the seashore as barrier islands.
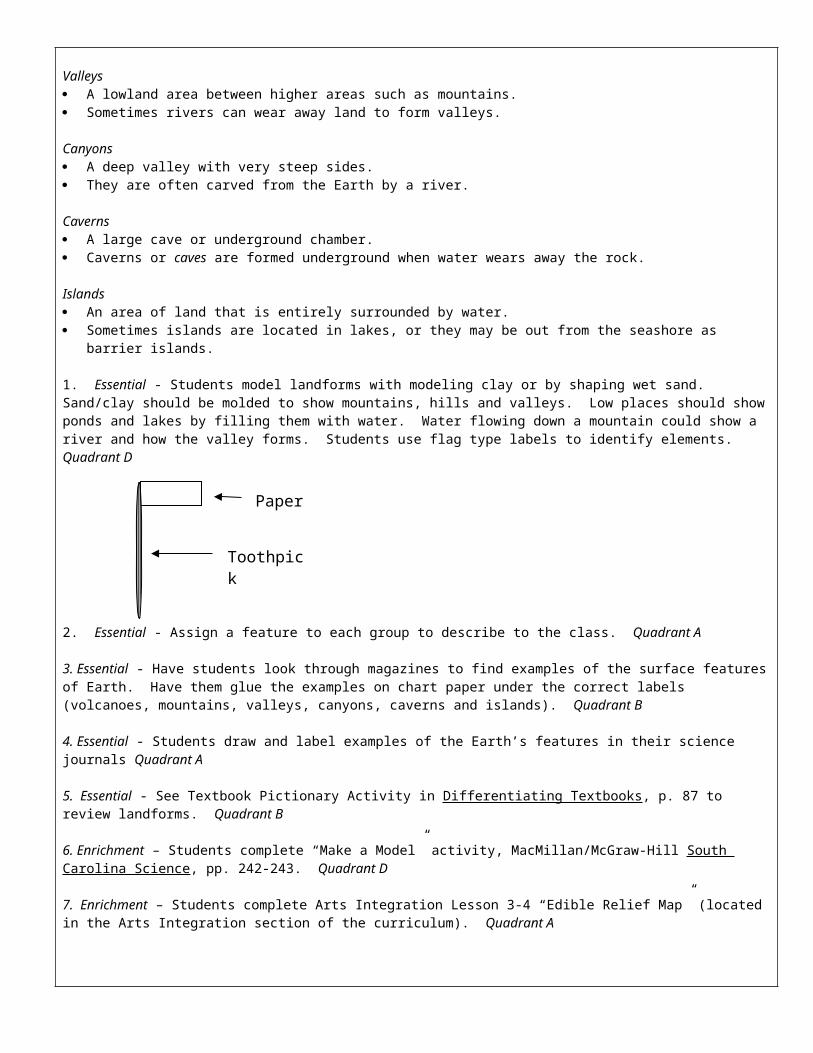
1. Essential - Students model landforms with modeling clay or by shaping wet sand. Sand/clay should be molded to show mountains, hills and valleys. Low places should show ponds and lakes by filling them with water. Water flowing down a mountain could show a river and how the valley forms. Students use flag type labels to identify elements. Quadrant D
2. Essential - Assign a feature to each group to describe to the class. Quadrant A
3. Essential - Have students look through magazines to find examples of the surface features of Earth. Have them glue the examples on chart paper under the correct labels (volcanoes, mountains, valleys, canyons, caverns and islands). Quadrant B
4. Essential - Students draw and label examples of the Earth’s features in their science journals Quadrant A
Toothpick
Paper

5. Essential - See Textbook Pictionary Activity in Differentiating Textbooks, p. 87 to review landforms. Quadrant B
6. Enrichment – Students complete “Make a Model” activity, MacMillan/McGraw-Hill South Carolina Science, pp. 242-243. Quadrant D
7. Enrichment – Students complete Arts Integration Lesson 3-4 “Edible Relief Map” (located in the Arts Integration section of the curriculum). Quadrant A
Resources
Text:MacMillan/McGraw-Hill South Carolina Science186-187, 236, 248-249
Science Kits/Materials Boxes:
Other Resources:Differentiating Textbooks
Web Sites:03/19/09 - Science, Lesson Plans “Landforms” - http://www.LessonPlansPage.com
SC Science Standards Support Document at
https://www.ed.sc.gov/agency/pr/Standards-and-Curriculum/old/cso/standards/science/sd.html
www.studyisland.com
GT Extensions: Students research, using teacher approved websites, active volcanoes around the world. Quadrant C Students conduct research on the eruption of Mt. St. Helens in Washington state. Quadrant C
AssessmentDaily and weekly assessments using rubrics and quizzes
Week of Oct. 15th - Oct. 19th

Oct. 15th - Oct. 19thIndicator3.3.8 Illustrate changes in Earth’s surface that are due to slow processes (including weathering, erosion, and deposition) and changes that are due to rapid processes (including landslides, volcanic eruptions, floods, and earthquakes).
Instructional Strategies
Essential Knowledge for 3.3.8
It is essential for students to know that the surface of Earth does change in natural ways. Sometimes the change can be caused by a very slow process and at other times it can be caused by a rapid process. There is often evidence on the surface that these processes have caused a change.
Changes Due to Slow ProcessesWeathering When weathering is occurring, Earth materials, for example rocks are being broken apart. Little
or big cracks in the rock are evidence that weathering is taking place.
Erosion When erosion is occurring, Earth materials, like rock, sand, and soil, are being carried away from their original location. Water and wind are often the causes for erosion.
Deposition When deposition is occurring, Earth materials that have been eroded are put in a new location. When the wind stops blowing, sand and soil may be put down in piles as large as dunes. Water may deposit its material at the end of a river and form a delta.
Changes Due to Rapid Processes and slide is occurring, Earth materials, like rock, sand, and soil, on the side of a slope or cliff
drop down to a lower location. Water soaking into the ground often makes this happen.
Volcanic Eruptions When a volcanic eruption is occurring, Earth material called lava comes out of the volcano flows down the side of the volcanic mountain (or is sent up into the air and lands nearby) where it hardens. The hardened volcanic rock forms new Earth material and often makes the volcanic mountain larger.
Floods When a flood is occurring, a lot of water causes rivers and streams to overflow their banks over the surrounding land around them. Heavy rainfall in the area is usually the cause of a flood.
Earthquakes When an earthquake is occurring, the surface of the ground shakes and rolls causing damage to the Earth’s surface, like cracks and other openings, and damage to roads and buildings.
1. Essential - Model examples of landslides and earthquakes. Compare these to changes made to a rock in a stream, or crevices in the Earth’s surface. Discuss time factors involved in these changes that occurred. 3-1.1 Classify objects by two of their properties (attributes). 3-1.3 Generate questions such as “what if?” or “how?” about objects, organisms, and events in the environment and use those questions to conduct a simple scientific investigation. Quadrant A
2. Enrichment - Complete Natural Disaster Research Project found at http://teachers.net/lessons/posts/355.html. Quadrant D
3. Enrichment – Students complete “Quaking Earth” or “Volcanoes” activity, AIMS Primarily Earth, p. 80 or p. 87. Quadrant B
4. Essential- Materials needed: moist sand, shallow cardboard box, leaves and twigs, wooden block, water, watering can, and small stones
With a partner, pack the sand into the box. Use your fingers to make hills, valleys, and a streambed. Push the leaves and twigs into the sand to represent plants.
Carefully lift one end of the box off the table. Place wooden block beneath that end. Slowly pour a little water from the watering can into the streambed you made. Observe what happens to
the sand, water, and plants. Pour the water more quickly into the streambed, and observe again. Have students to compare slow water observation and fast water observation.

*Also see 3rd Grade Science Modules on S3 Curriculum at http://scde.mrooms.org/index.php?page=14496
ResourcesText:MacMillan/McGraw-Hill South Carolina Science
Science Kits/Materials Boxes:
Other Resources:AIMS, Primarily Earth,
“Quaking Earth” 80, “Volcanoes” 87
Web Sites:03/19/09 - Utah Education Network, Curriculum Resources, Grade Two, Lesson Plans, “Changes Due to Erosion” -
http://www.uen.org/
03/19/09 - Natural Disaster Project – http://www.teachers.net/lessons/posts/355.html
SC Science Standards Support Document athttps://www.ed.sc.gov/agency/pr/Standards-and-Curriculum/old/cso/standards/science/sd.html
www.studyisland.com
GT Extensions: Conduct research on the formation of the Mississippi Delta. Quadrant C
Conduct research on the changes in the landscape of California due to frequent mudslides. Quadrant D Explore the changes due the 1906 San Francisco earthquake. Quadrant D
Flood waters did severe damage after hurricane Katrina due to levee ruptures. What significant changes must be made to the landscape of the city of New Orleans. Quadrant D
Students tour their school campus and use thermometers to record the temperature at 3 to 5 locations with different microclimates. Quadrant C
Assessment
Daily and weekly assessments using rubrics and quizzes
Week of Oct. 22nd - Oct. 26th
Oct. 22nd - Oct. 25th

Indicator3-2.1 Illustrate the life cycles of seed plants and various animals and summarize how they grow and are adapted to conditions within their habitats.
Instructional Strategies
Essential Knowledge for Indicator 3.2.1
It is essential for students to know the stages of growth in seed plants that are part of their life cycle.
Seed After pollination (the spreading of pollen from flower to flower) occurs, seeds are produced and may be stored in
fruits. Seeds contain tiny undeveloped plants and enough food for growth to start. Seeds need water and warmth to germinate (begin to grow).
Seedling Seedlings produce the parts of the plant that will be needed for the adult plant to survive in its habitat. Roots begin to grow and take in nutrients and water from the habitat. The stem starts to grow towards light and the first leaves form on the stem. Later, more leaves will form that help the plant make its food.
Mature Plant Mature plants have the same structures (for example roots, stems, and leaves) as seedlings, but in addition they
develop flowers or cones, which produce seeds.
Adaptations of Seed PlantsSome plants have special structural adaptations for meeting their needs in their particular habitat. Some examples of plant adaptations to conditions in their habitat may be:
Roots Roots take in water and nutrients from the habitat. They may also hold the plant in place and store food and water. Each variety of plant will survive where its roots size, length, and spread are adapted to the habitat. Some examples of root adaptations may be:
o Water lilies have long roots that can take in nutrients from the muddy bottoms of ponds or lakes. o Cacti have roots that spread out close to the surface for living in dry habitats. o Carrots and dandelions have a large, thick root that is longer than its other roots. This long root helps
the plant survive by reaching far underground to find water and to firmly anchor the plant.
Stems Stems move and store water and nutrients in the plant. Stems also provide support and protection for the plant.
Some examples of stem adaptations may be: o Vines have stems that can climb and stick to various surfaces to ensure that the leaves are exposed to
light. o Corn and sunflowers have stems that grow thick and strong but remain green and flexible so that they
can grow toward the sun. o Trees develop woody stems to support their size and provide protection during their long life cycles.o Cacti have thick stems that store water when the habitat does not provide it.o Some stems have thorns that provide protection.
Leaves Leaves produce food for plants in the presence of light. Each variety of plant will survive where its leaf size, texture, thickness, and shape are adapted to the habitat. Some examples of leaf adaptations may be:
o Water lilies develop wide leaves that allow them to float on the water to capture sunlight to make food. o Evergreen trees have leaves that are thin, waxy needles to protect them from freezing and from losing
water.
Flowers

Flowers often have special sizes, smells, shapes, or colors that attract organisms for pollination.
Fruit Fruits are formed around the seed to protect it. Some examples of fruit adaptations may be:
o Some fruits are moist and fleshy (tomatoes, grapes, or peaches). Fleshy fruits attract animals that eat them helping to disperse the seeds.
o Others fruits are dry and/or hard (coconuts, walnuts or pea pods).
Seeds Some seeds begin to grow as soon as conditions allow for germination. Seeds have adaptations that allow them to be dispersed and also to have enough food for the plant until it begins
making its own food.
1. Essential - Use line plot graphs to demonstrate the growth of plants over a period of days, weeks, or months. discuss what is happening to the plant and why it is happening during each measurement Quadrant C
2. Essential - Students compare and contrast the life cycle of a pumpkin plant and a frog on a Venn diagram. Quadrant C
3. Essential—Students are to watch the mini video from the website below and compare how the seed responds in each scenario.
http://www2.bgfl.org/bgfl2/custom/resources_ftp/client_ftp/ks2/science/plants_pt2/index.htm
*Also see 3rd Grade Science Modules on S3 Curriculum at http://scde.mrooms.org/index.php?page=14496
Resources
Text:MacMillan/McGraw-Hill South Carolina Science pages 34-40
Science Kits/Materials Boxes:FOSS Structures of Life (L)
STC Plant Growth & Development
Other Resources:Video, “Classification of Living Things! Understanding Science”, Teacher’s Video, Company
Video, “Plants: Experiments”, Thrilling Experiments
Web Sites:03/19/09 – Howard HughesMedical Institute – http://hhmi.org/coolscience/ - Where Do Butterflies Come From?
www.studyisland.com
SC Science Standards Support Document at https://www.ed.sc.gov/agency/pr/Standards-and-Curriculum/old/cso/standards/science/sd.html
GT Extensions: A weed is sometimes defined as a “plant out of place.” Explore and prepare an oral report on the characteristics
of the dandelion to include: flower, seeds, leaf pattern, taproot, survival. Quadrant D
Students design a mural for each of the regions of the state of South Carolina on which they illustrate the life cycle of the variety of seed plants and animals common to the region. Students design the layout of the mural in a

medium of their choice, using mathematics to specify the margins and the amount of space each student will have to illustrate their region. They prepare an oral presentation explaining what they have learned to a real audience. Quadrant D
Students compare and contrast, including measurements, the tap root and seed characteristics with different weeds. They make the following measurements in meters: length of tap root, length of plant above ground, approximate number of seeds and distance seed could travel if blown. Quadrant D
AssessmentDaily and Weekly assessments using rubrics and quizzes.
Oct. 26th Indicator
Professional Development/Workdays Professional Development/WorkdaysInstructional Strategies
Professional Development/WorkdaysResources
Professional Development/WorkdaysAssessment
Professional Development/Workdays
Week of Oct. 29th - Nov. 2ndOct. 29th – Oct 31st Indicator3-2.2 Explain how physical and behavioral adaptations allow organisms to survive (including hibernation, defense,

locomotion, movement, food obtainment, and camouflage for animals and seed dispersal, color, and response to light for plants).
Instructional Strategies
Essential Knowledge for Indicator 3.2.2
Physical and Behavioral Adaptations of Plants
Plants cannot move like animals can, but they can respond to a change in their environment. Some examples of plant adaptations for survival include:
Seed dispersal Most plants produce a large number of seeds because most seeds do not survive. In order to ensure that seeds will survive, they must be carried away (dispersed) from the parent plant. Some seeds have hooks on them that allow them to attach to animal fur or clothes. Some seeds are able to float in water. Some seeds are light and have wings or thin hairs that allow them to be carried away by wind. Some seeds are eaten by animals and deposited in areas away from the parent plants.
Color Flowers come in a variety of shapes, sizes, and colors. Petals are colored and scented to attract insects and other creatures for the purposes of pollination. The coloration of parts of some plants (fruits for example berries, or flower petals) makes them attractive to some
animals (for example birds or bees).
Response to light A plant needs sunlight or some other light source to survive. It uses the light for the energy it needs to make its food. A plant always turns its leaves and bends its stems toward the light.
Adaptations of Seed PlantsSome plants have special structural adaptations for meeting their needs in their particular habitat. Some examples of plant adaptations to conditions in their habitat may be:
Roots Roots take in water and nutrients from the habitat. They may also hold the plant in place and store food and water. Each variety of plant will survive where its roots size, length, and spread are adapted to the habitat. Some examples of root adaptations may be:
o Water lilies have long roots that can take in nutrients from the muddy bottoms of ponds or lakes. o Cacti have roots that spread out close to the surface for living in dry habitats. o Carrots and dandelions have a large, thick root that is longer than its other roots. This long root helps
the plant survive by reaching far underground to find water and to firmly anchor the plant.
Stems Stems move and store water and nutrients in the plant. Stems also provide support and protection for the plant.
Some examples of stem adaptations may be: o Vines have stems that can climb and stick to various surfaces to ensure that the leaves are exposed to
light. o Corn and sunflowers have stems that grow thick and strong but remain green and flexible so that they
can grow toward the sun. o Trees develop woody stems to support their size and provide protection during their long life cycles.o Cacti have thick stems that store water when the habitat does not provide it.o Some stems have thorns that provide protection.
Leaves Leaves produce food for plants in the presence of light.
Each variety of plant will survive where its leaf size, texture, thickness, and shape are adapted to the habitat. Some examples of leaf adaptations may be:
o Water lilies develop wide leaves that allow them to float on the water to capture sunlight to make food. o Evergreen trees have leaves that are thin, waxy needles to protect them from freezing and from losing
water.
Flowers Flowers often have special sizes, smells, shapes, or colors that attract organisms for pollination.
Fruit Fruits are formed around the seed to protect it. Some examples of fruit adaptations may be:
o Some fruits are moist and fleshy (tomatoes, grapes, or peaches). Fleshy fruits attract animals that eat them helping to disperse the seeds.
o Others fruits are dry and/or hard (coconuts, walnuts or pea pods).
Seeds Some seeds begin to grow as soon as conditions allow for germination. Seeds have adaptations that allow them to be dispersed and also to have enough food for the plant until it begins
making its own food.
1. Essential - Prepare questions on index cards regarding seed dispersal, scent, color of flowers. Students write the questions in their science journals and tell how each adaptation allows plants to obtain what they need to live. Quadrant C
2. Essential - Use a cactus (live is better) and students identify its plant mechanisms for survival (i.e. waxy leaves, shallow roots, etc.), MacMillan/McGraw-Hill South Carolina Science, pp. 88-89 Quadrant A
3. Essential—Have students to watch each mini video about seed dispersal and explain how the seed moved from one location to another.
Website:http://www2.bgfl.org/bgfl2/custom/resources_ftp/client_ftp/ks2/science/plants_pt2/dispersal.htm
ResourcesText:MacMillan/McGraw-Hill South Carolina Science page 37 in TE
Science Kits/Materials Boxes:
Other Resources:Project Learning Tree, “Birds and Worms”Bear Snores On by Karma WilsonEvery Autumn Comes A Bear by Jim ArnoskyUnited Streaming Video – AnimalMigration“Concepts in Nature: Instincts in Animals”“Through the Seasons with Birds: Fall”“The Magic School Bus Goes Upstream”“World of Nature: Monarch Butterfly: Milkweed to Mexico”
Web Sites:03/19/09 - Lesson Plans: Seed Dispersal (Elementary, Science) - http://www.teachers.net 03/19/09 - Lessons, Elementary, Science, “Bear Hibernation” - http://www.teachers.net/ 03/19/09 - Migration - Search Journey North Archives, “American Robin” - http://www.learner.org/jnorth 03/19/09 - “All About Nature: Biomes-Habitats” - http://www.EnchantedLearning.com/biomes 03/19/09 - Kodiak Hibernation – http://www.kodiak.org/explore-kodiak/wildlife/bears.html

03/19/09 - North American Bear Center – http://www.bear.org/website/ www.studyisland.com
SC Science Standards Support Document athttps://www.ed.sc.gov/agency/pr/Standards-and-Curriculum/old/cso/standards/science/sd.html
GT Extensions: Students create a play with seeds as the main characters who will tell how, when, where and why it is dispersed.
Quadrant C
Assessment
Daily and Weekly assessments using rubrics and quizzes
Week of Nov. 5th - Nov. 9th
Nov. 5th -9th Indicator

3-2.1 Illustrate the life cycles of seed plants and various animals and summarize how they grow and are adapted to conditions within their habitats.
Instructional Strategies
Essential Knowledge for Indicator 3.2.1
It is essential for students to know the stages of growth that are part of the life cycles in a variety of animal types. These stages are not the same for all animals. Some animals give birth to baby animals that look like small adults. As the babies grow, they change in size. Other
changes might be color, shape, or type of covering. For example, horses give birth to babies that look like small horses. Chickens lay eggs that hatch babies that look
like small chickens. Some animals begin as an egg and then undergo changes in their life cycle. These changes may be in appearance,
color, shape, or growth of new structures. These changes in form are called metamorphosis. For example, in a beetle the stages of metamorphosis are called egg, larva, pupa, and adult. In a grasshopper, the
stages of metamorphosis are egg, young (nymph), and adult.
Adaptations of Animals Some animals have special adaptations for living in their particular habitat. Some examples of animal adaptations to conditions in their habitat may be: In habitats where the temperature is cold, animals may have blubber or thick fur for warmth. In a water habitat, some animals have special structures that allow them to live as air-breathing animals in the water. In habitats where food is scarce, some animals may have long necks to obtain food (giraffe) or special storage
structures for food and water (camel). In habitats where the temperature is very hot, animals may seek food at night (nocturnal) or seek shelter in the
shade during the day.
1. Essential - Observe the life cycle of live butterflies. Make a step book of the four stages of a butterfly life cycle. Quadrant B
2. Enrichment – Have students to find pictures of animals at different stages of the life cycle. Students should explain each stage and how the animal may look before and after that picture.
3. Enrichment: Activity Lab Book page 21. (also see page 45 in TE)
4. Essential - Draw and illustrate life cycle of frogs. Explain how the frog’s body adapts to its location during various stages of growth. Refer to MacMillan/McGraw-Hill South Carolina Science, p. 46. Quadrant C
ResourcesText:MacMillan/McGraw-Hill South Carolina Science page 37 in TE
Science Kits/Materials Boxes:
Text:MacMillan/McGraw-Hill South Carolina Science
Science Kits/Materials Boxes:FOSS Structures of Life (L)
STC Plant Growth & Development
Other Resources:Video, “Classification of Living Things! Understanding Science”, Teacher’s Video, Company
Video, “Plants: Experiments”, Thrilling Experiments
Web Sites:
03/19/09 – Howard HughesMedical Institute – http://hhmi.org/coolscience/ - Where Do Butterflies Come From?
www.studyisland.com
SC Science Standards Support Document athttps://www.ed.sc.gov/agency/pr/Standards-and-Curriculum/old/cso/standards/science/sd.html
GT Extensions: A weed is sometimes defined as a “plant out of place.” Explore and prepare an oral report on the characteristics
of the dandelion to include: flower, seeds, leaf pattern, taproot, survival. Quadrant D
Students design a mural for each of the regions of the state of South Carolina on which they illustrate the life cycle of the variety of seed plants and animals common to the region. Students design the layout of the mural in a medium of their choice, using mathematics to specify the margins and the amount of space each student will have to illustrate their region. They prepare an oral presentation explaining what they have learned to a real audience. Quadrant D
Students compare and contrast, including measurements, the tap root and seed characteristics with different weeds. They make the following measurements in meters: length of tap root, length of plant above ground, approximate number of seeds and distance seed could travel if blown. Quadrant D
Other Resources:
AssessmentDaily and Weekly assessments using rubrics and quizzes
Benchmark #2 Testing Window: Nov. 5th - Nov. 16th
Nov. 6th Indicator
Election Day (Holiday) Election Day (Holiday)Instructional Strategies
Election Day (Holiday)Resources
Election Day (Holiday)Assessment
Election Day (Holiday)

Week of Nov. 5th - Nov. 9th
Nov. 7th - Nov. 9th Indicator3-2.2 Explain how physical and behavioral adaptations allow organisms to survive (including hibernation, defense, locomotion, movement, food obtainment, and camouflage for animals and seed dispersal, color, and response to light (for plants).
Instructional Strategies
Essential Knowledge for Indicator 3.2.2 Physical adaptations can be a body structure that an organism has that allows it to meet its needs in its habitat. Behavioral adaptations can be an activity or action that helps an organism survive in its habitat.
Physical and Behavioral Adaptations of AnimalsSome adaptations of animals can help them find food or water, protect them from danger, or help them survive when conditions in the environment change. These adaptations include:
Hibernation A resting state that helps animals survive in winter. During hibernation, the animal’s body processes, like breathing, slow down, and they survive on stored food or fat. Many animals, for example insects, birds, reptiles and some mammals, eat a lot of food in the autumn months to
store up fat. Then they burrow into the ground or curl up under leaves, or hide themselves in dens, safe from the winter cold and
enemies. When the temperature rises in the spring, the animal wakes up and leaves its hiding place.
Defense Some animals have special adaptations to protect themselves from being hurt, killed, or eaten. These special defense mechanisms include physical adaptations such as quills and claws, and behavioral
adaptations such as taking flight, tricking (mimicry, playing dead), spraying, or fighting.
Locomotion In order for animals to find the resources they need for food, shelter, or space, they must be able to move around. Animals have special structures for moving depending on where they live, for example above ground (swinging,
climbing and flying), on the ground (crawling, walking, hopping), or in the water (floating, swimming and diving).
Movement The movement of animals over the same route in the same season each year is called migration. This behavior allows animals to take advantage of resources (like food or water) in one location when they run low in
another location.
Food obtainment Animals have special structures used for getting food, for example the beaks of birds, mouths of insects, teeth, or
claws that are shaped in different ways depending on the type of food they eat.
Camouflage Camouflage is a color or pattern that allows an animal to blend into its environment and protects it from being seen
by its enemies or allows it to sneak up more easily on their food.
Indicator 3.2.2
1.. Essential - Create a flip book of animals that hibernate and their environment labeled on each page. Quadrant B
2.. Essential - Tell students to investigate an animal or plant that uses a physical or behavioral adaptation such as camouflage. Then tell them to predict how the adaptation helps the organism, make observations of the organism (live or with pictures), and compare your predictions to your observations Sample Classroom Activity Quadrant A
3.. Essential – Hibernation activity

A. Obtain and familiarize yourself with Bear Snores On by Karma Wilson and Every Autumn Comes a Bear by Jim Arnosky. The first is a fictional picture book that shows a bear sleeping in his cave while other animals join him for a midwinter party, eventually waking him up. The second is a non-fiction book about a bear that shows up at a farm every autumn. The story tells about a series of routines the bear does before finding a den among the hilltop boulders where he sleeps all winter. Read books aloud. Quadrant A
B. Use the following websites to find information to share about bears and hibernation. Pick the amount and type of information that is appropriate for your students. You can also use the Facts About Brown Bears handout with your students. Quadrant D
Kodiak: Hibernation - http://www.kodiak.org/explore-kodiak/wildlife/bears.html North American Bear Center - http://www.bear.org/website/
C. Have students develop five questions they want answers to about the hibernation habits of bears. The students will research to find the answers to the questions. On a poster, the students will design a display of their research results which will present each question and an answer along with a photograph/drawing to accompany the information. A creative title using the word “hibernation” or “hibernate” will top off the visual presentation. When students present their work, have them bring in a teddy bear (not too big). The presentation will be made from the bear’s perspective. Encourage character voices as the bear answers research questions and shows pictures and drawings. Quadrant C
4. Enrichment – Students complete Arts Integration Lesson 3-21 “Structural Adaptations” (located in Arts Integration section of curriculum. Quadrant A
*Also see 3rd Grade Science Modules on S3 Curriculum at http://scde.mrooms.org/index.php?page=1446
Resources
Text:MacMillan/McGraw-Hill South Carolina Science Animal Adaptations Camouflage pages 90-93, 124-125, Hibernation page 112Migration pages 124, 160-161, Mimicry page 110
Science Kits/Materials Boxes:
FOSS Structures of Life (L)STC Plant Growth & Development (L)
Other Resources:Project Learning Tree, “Birds and Worms”Bear Snores On by Karma WilsonEvery Autumn Comes A Bear by Jim ArnoskyUnited Streaming Video – AnimalMigration“Concepts in Nature: Instincts in Animals”“Through the Seasons with Birds: Fall”“The Magic School Bus Goes Upstream”“World of Nature: Monarch Butterfly: Milkweed to Mexico”
Web Sites:03/19/09 - Lessons, Elementary, Science, “Bear Hibernation” - http://www.teachers.net/ 03/19/09 - Migration - Search Journey North Archives, “American Robin” - http://www.learner.org/jnorth 03/19/09 - “All About Nature: Biomes-Habitats” - http://www.EnchantedLearning.com/biomes 03/19/09 - Kodiak Hibernation – http://www.kodiak.org/explore-kodiak/wildlife/bears.html03/19/09 - North American Bear Center – http://www.bear.org/website/ www.studyisland.com
SC Science Standards Support Document at https://www.ed.sc.gov/agency/pr/Standards-and-Curriculum/old/cso/standards/science/sd.htmlGT Extensions:
Assessment

Daily and Weekly assessments using rubrics and quizzes
Benchmark #2 Testing Window: Nov. 5th - Nov. 16th
Week of Nov. 12th - Nov. 16th
Nov. 12th - Nov. 16th Indicator

3-2.2 Explain how physical and behavioral adaptations allow organisms to survive (including hibernation, defense, locomotion, movement, food obtainment, and camouflage for animals and seed dispersal, color, and response to light for plants).
Instructional Strategies
Indicator 3.3.2
1.. Essential - Create a flip book of animals that hibernate and their environment labeled on each page. Quadrant B
2.. Essential - Tell students to investigate an animal or plant that uses a physical or behavioral adaptation such as camouflage. Then tell them to predict how the adaptation helps the organism, make observations of the organism (live or with pictures), and compare your predictions to your observations Sample Classroom Activity Quadrant A
3.. Essential – Hibernation activity
A. Obtain and familiarize yourself with Bear Snores On by Karma Wilson and Every Autumn Comes a Bear by Jim Arnosky. The first is a fictional picture book that shows a bear sleeping in his cave while other animals join him for a midwinter party, eventually waking him up. The second is a non-fiction book about a bear that shows up at a farm every autumn. The story tells about a series of routines the bear does before finding a den among the hilltop boulders where he sleeps all winter. Read books aloud. Quadrant A
B. Use the following websites to find information to share about bears and hibernation. Pick the amount and type of information that is appropriate for your students. You can also use the Facts About Brown Bears handout with your students. Quadrant D
Kodiak: Hibernation - http://www.kodiak.org/explore-kodiak/wildlife/bears.html North American Bear Center - http://www.bear.org/website/
C. Have students develop five questions they want answers to about the hibernation habits of bears. The students will research to find the answers to the questions. On a poster, the students will design a display of their research results which will present each question and an answer along with a photograph/drawing to accompany the information. A creative title using the word “hibernation” or “hibernate” will top off the visual presentation. When students present their work, have them bring in a teddy bear (not too big). The presentation will be made from the bear’s perspective. Encourage character voices as the bear answers research questions and shows pictures and drawings. Quadrant C
4. Enrichment – Students complete Arts Integration Lesson 3-21 “Structural Adaptations” (located in Arts Integration section of curriculum. Quadrant A
*Also see 3rd Grade Science Modules on S3 Curriculum at http://scde.mrooms.org/index.php?page=1446
Resources
Text:MacMillan/McGraw-Hill South Carolina Science Animal Adaptations Camouflage pages 90-93, 124-125, Hibernation pages 112Migration pages 124, 160-161, Mimicry page 110
Science Kits/Materials Boxes:
FOSS Structures of Life (L)STC Plant Growth & Development (L)
Other Resources:Project Learning Tree, “Birds and Worms”Bear Snores On by Karma WilsonEvery Autumn Comes A Bear by Jim ArnoskyUnited Streaming Video – AnimalMigration“Concepts in Nature: Instincts in Animals”“Through the Seasons with Birds: Fall”“The Magic School Bus Goes Upstream”

“World of Nature: Monarch Butterfly: Milkweed to Mexico”
Web Sites:03/19/09 - Lessons, Elementary, Science, “Bear Hibernation” - http://www.teachers.net/ 03/19/09 - Migration - Search Journey North Archives, “American Robin” - http://www.learner.org/jnorth 03/19/09 - “All About Nature: Biomes-Habitats” - http://www.EnchantedLearning.com/biomes 03/19/09 - Kodiak Hibernation – http://www.kodiak.org/explore-kodiak/wildlife/bears.html03/19/09 - North American Bear Center – http://www.bear.org/website/ www.studyisland. Daily and Weekly assessments using rubrics and quizzes com
SC Science Standards Support Document athttps://www.ed.sc.gov/agency/pr/Standards-and-Curriculum/old/cso/standards/science/sd.html
GT Extensions:
Assessment
Benchmark #2 Testing Window: Nov. 5th - Nov. 16th
Week of Nov. 19th - Nov. 23rd
Nov. 19th - Nov. 20th Indicator

Teachers will review indicators with students based on Benchmark #2 assessment data.
Instructional Strategies
Resources
Assessment
Nov. 21st - Nov. 23rd Indicator
Thanksgiving (Holiday) Thanksgiving (Holiday)Instructional Strategies
Thanksgiving (Holiday)Resources
Thanksgiving (Holiday)Assessment
Thanksgiving (Holiday)
Week of Nov. 26th - Nov. 30th
Nov. 26th - Nov. 30th Indicator3-2.3 Recall the characteristics of an organism’s habitat that allow the organism to survive there.

Instructional Strategies
Essential Knowledge for 3.2.3
It is essential for students to know that organisms have needs for survival that are found in their particular habitats. Organisms can only survive in an area where its basic needs (air, food, water, shelter or space, and light) can be met.
A habitat offers a range of conditions, for example water, air, food, shelter or space, or sunlight, which allow some organisms to live there. The specific characteristics of the habitat that allow the needs of energy, growth, and protection to be met are dependent upon the particular plant or animal. The habitat for some animals and plants may cover a large area. Some examples may be:
o grazing animals may need lots of area to get enough food, o birds fly from place to place to get food, or o large trees will grow in areas where enough water is available for their growth.
Other animals or plants have habitats that may be a small part of a larger environment. Some examples may be: o squirrels may make their nests in one tree in a forest, o some small insects may live under a fallen log in the forest; o orchid flowers live by hanging on trees found only in warm, wet areas, or o water lilies live in ponds in the shallow water.
1. Enrichment - Provide examples of habitat, both land and water, pictures or live. Allow students time to explore these. After investigating aquatic and terrestrial habitats, use a Venn diagram to describe how they are alike and different. . Quadrant C
2. Essential - Students create a diorama depicting an animal in its habitat. Include a written paragraph explaining how the habitat helps the animal survive. Discuss with the students what might happen to the animal if certain elements were missing from the habitat. Quadrant D
3. Enrichment - Refer to Differentiating Textbooks pp. 32-33. This activity involves using a concept map (KWL chart). Select and describe an appropriate habitat for a plant or animal. Divide students into groups to fill out the chart. Before reading, students will write what they think they know and want to know on the chart. After reading information from the text, students will write down what they learned. Each group will report this to the class. Quadrant C
4. Enrichment - Differentiating Textbooks, p. 88. Three Facts and a Fib. 3-1.3 Generate questions such as “what if?” or “how?” about objects, organisms, and events in the environment and use those questions to conduct a simple scientific investigation. Quadrant C
*Also see 3rd Grade Science Modules on S3 Curriculum at http://scde.mrooms.org/index.php?page=14496
ResourcesText: MacMillan/McGraw-Hill South Carolina Science, p.54-62
Science Kits/Materials Boxes:FOSS Structures of LifeSTC Plant Growth & Development
Other Resources:Differentiating Textbooks
Web Sites:03/19/09 - Utah Education Network, Curriculum Resources, ScienceLesson Plans, Third Grade - http://www.uen.org/ 03/19/09 – ScienceMuseum of Minnesota www.thinkingfountain.org/w/worms/worms/worms.html
www.studyisland.com

SC Science Standards Support Document at https://www.ed.sc.gov/agency/pr/Standards-and-Curriculum/old/cso/standards/science/sd.html
GT Extensions:
Design and conduct a laboratory investigation to observe and measure the effects on the balance in an aquatic ecosystem after adding a lawn fertilizer, such as 10-10-10, to the ecosystem. Quadrant D
Students investigate and predict changes in all aspects of the environment during each season: spring, summer, fall and winter. They keep on-going journals of their observations of change as it occurs. Quadrant D
Assessment
Daily and Weekly assessments using rubrics and quizzes
Week of Dec. 3rd - Dec. 7th
Dec. 3rd - Dec. 7th Indicator3-2.4 Explain how changes in the habitats of plants and animals affect their survival.

Instructional Strategies
Essential Knowledge for Indicator 3.2.4
It is essential for students to know that resources (basic needs) within a habitat can keep only a certain number of plants and animals alive. This depends on how well the habitat provides for the needs of the plant or animal. Changes in a habitat can affect the survival of a plant and animal. There are many changes that can occur within a habitat that would force the animals or plants to change or adapt to survive. Habitat change can occur naturally. Some changes occur rapidly, for example, disease, fire, hurricanes, landslides,
volcanoes, earthquakes, or changes in temperature or amount of rainfall (drought or flood) can change a habitat. Some changes occur slowly, for example, the changes in a plant life due to changes in sunlight (grasses to shrubs to trees), or if erosion occurs, causing the soil to wear away, fewer plants will be able to survive. When these events happen, the habitat usually cannot provide the needs for the animals or plants to survive there anymore.
Humans can also cause habitat changes. For example, clearing land to build homes, buildings, or farmland can cause the animals in that area to have to move to another location for food or shelter. Plants that normally grow there would not find the conditions for their growth available anymore.
Other animals or plants could also move into a habitat taking up needed space and food. If animals or plants cannot adapt to changes in the environment, extinction (loss of an entire group of organisms) of
that type of animal or plant can occur.
Indicator 3.2.4
1. Essential-Habitat change can occur naturally. Some changes occur rapidly, for example, disease, fire, hurricanes, landslides, volcanoes, earthquakes, or changes in temperature or amount of rainfall (drought or flood) can change a habitat. Some changes occur slowly, for example, the changes in a plant life due to changes in sunlight (grasses to shrubs to trees), or if erosion occurs, causing the soil to wear away, fewer plants will be able to survive. When these events happen, the habitat usually cannot provide the needs for the animals or plants to survive there anymore. Humans can also cause habitat changes. For example, clearing land to build homes, buildings, or farmland can cause the animals in that area to have to move to another location for food or shelter. Plants that normally grow there would not find the conditions for their growth available anymore. Other animals or plants could also move into a habitat taking up needed space and food. If animals or plants cannot adapt to changes in the environment, extinction (loss of an entire group of organisms) of that type of animal or plant can occur.
2. Essential - Students choose a particular habitat that includes many organisms. Ask them to construct a before and after diagram showing how the habitat changes due to a certain influence. (Ex. Strong winds, flood, temperature increase). Quadrant D
Essential - Using the diagrams from activity 1 above, divide students into groups of four to five students. Each group describes how the plant or animal changed over time due to the natural force. Example: An elephant during a drought would have to move to a new habitat that had many plants and animals. Quadrant A
4. Enrichment - Students watch United Streaming Video, “Jeff Corwin Experience: Orangutans”. Discuss how the tropical ecologist helps the animals by protecting the rainforest. Lead a class discussion on a local construction site and how the changes to the environment are affecting plants and animals that lived there. Quadrant B
5. Enrichment - Divide the class into groups of three to four. Provide situation cards and pass them out at random. Give the students five to ten minutes to come to a consensus. Each group shares their ideas. For example, one card might say, “You go to Antarctica and get a penguin. You put it in your backyard. How do you predict the penguin will adjust to its new environment? Where will it find food, water and shelter Quadrant D
5. Essential - Students are to make inferences about what would happen to the plants and animals living in a forest after a forest fire. Ask students, “Which plants and animals do you think might survive? Which ones might not? What do you think this forest will be like one year after the fire?” Sample Classroom Activity Quadrant A
6. Enrichment – Students complete “Forest in a Jar” activity, Project WILD K-12 Curriculum and Activity Guide, p. 108. Quadrant B
*Also see 3rd Grade Science Modules on S3 Curriculum at http://scde.mrooms.org/index.php?page=14496

Resources
Text: MacMillan/McGraw-Hill South Carolina Science, p.146-164.
Science Kits/Materials Boxes:FOSS Structures of LifeSTC Plant Growth & Development
Other Resources:Project WILD K-12 Curriculum ActivityGuide, “Forest in a Jar”, 108United Streaming Video – http://streaming.discoveryeducation.com/index.cfm “Jeff Corwin Experience: Orangutans”
Web Sites: www.studyisland.com
SC Science Standards Support Document at https://www.ed.sc.gov/agency/pr/Standards-and-Curriculum/old/cso/standards/science/sd.html
GT Extensions: Students predict and investigate the effect of the addition of various fertilizers and insecticides on the ecosystem.
They develop hypotheses, design and conduct experiments, analyze results and present their finding to a real audience. Quadrant D
Students, working in small groups, research an endangered species of plant or animal in the state of South Carolina. They conduct research to determine the environmental changes which caused the endangerment and the specific needs of the species. They propose environmental changes that would encourage reproduction and maintenance of the endangered plant or animal. They present their findings and solutions, in the medium of their choice, as an illustration, a narrative paper, a conservation essay, monologue, etc. Quadrant
AssessmentDaily and Weekly assessments using rubrics and quizzes
Week of Dec. 10th - Dec. 14th
Dec. 10th - Dec. 14th Indicator3-2.5 Summarize the organization of simple food chains (including the roles of producers, consumers, and decomposers).

Instructional Strategies: Essential Knowledge for Indicator 3.2.5
Food chains have three types of organisms. The role of an organism can be described by how it obtains its energy.
Producers Any green plant, which uses sunlight to make food for energy. Producers are the first organisms listed in a food chain, understanding that the Sun provides the initial energy for the
plants.
Consumers An organism (usually an animal) that obtains its energy by eating other organisms (plants and/or animals).
Decomposers An organism (for example worms, mold, or mushrooms) that obtains its energy by feeding on and breaking down
dead plants and animals. Decomposers are often not listed in a food chain even though they are always the final link.
Indicator 3.2.5.
1. Essential-Energy gives the organism its ability to move and do the things it needs to survive. In most habitats, the Sun provides the initial energy which is passed from plants to animals. When scientists describe the way that energy is passed from one organism to another they use a model called a food chain. A food chain uses arrows to show the direction in which energy is passed and usually contains no more than six organisms.
Modules on S3 Curriculum at http://scde.mrooms.org/index.php?page=14496
Resources:Text: MacMillan/McGraw-Hill South Carolina Science, pages .66-71, 74.
Science Kits/Materials Boxes:FOSS Structures of LifeSTC Plant Growth & Development
Other Resources:Project WILD K-12 Curriculum and Activity Guide “What’s for Dinner”, 48
Web Sites:www.studyisland.com
SC Science Standards Support Document athttps://www.ed.sc.gov/agency/pr/Standards-and-Curriculum/old/cso/standards/science/sd.html
GT Extensions: Trace the path of solar energy through a simple food chain that includes humans. They complete a flow chart of
illustrations to present their findings. Quadrant B
Assessment:Daily and Weekly assessment using rubrics and quizzesWeek of Dec. 17th - Jan. 4th
Dec. 17th - Jan. 2nd Indicator
Winter Break Winter BreakInstructional Strategies

Winter BreakResources
Winter BreakAssessment
Winter Break
Jan. 3rd - Jan. 4th IndicatorTeachers will review Science Fair Information with students.
Instructional Strategies

Winter BreakResources
Winter BreakAssessment
Winter BreakWeek of Jan. 7th - Jan. 11th
Jan. 7th - Jan. 11th Indicators3-5.1 Identify the position on of an object relative to a reference point by using position terms such as “above,” “below,” “inside of,” “underneath,” or “on top of” and a distance scale or measurement.
3-5.2 Compare the motion of common objects in terms of speed and direction.
Instructional Strategies Essential Knowledge for 3-5.1 Indicator
It is essential for students to know that the position of an object can be identified by using a reference point. Terms, such as, “above,” “below,” “inside of,” “underneath,” “on top of” can be used to describe its relative location to
another object. Distance is the length between two locations or positions. The distance of a specific object to another object can be measured using meter tapes, sticks, or rulers. This distance can be recorded in meters or centimeters.
1. Essential - Place objects in room. Students describe position of objects. Quadrant C
2. Essential - Students complete “How can you describe an object’s position?” inquiry activity, Macmillan/McGraw-Hill South Carolina Science, p. 335. Quadrant C
*Also see 3rd Grade Science Modules on S3 Curriculum at http://scde.mrooms.org/index.php?page=14496
Essential Knowledge for Indicator 3-5.2
Direction· Direction is the path/course along which something is moving.· Examples of terms that describe the direction of a moving object relative to another object are: “up,” “down,” “left,” “right,” “north,” “south,” “east,” “west.”
Speed· Speed is how fast an object moves.· Faster objects move a greater distance than slower objects in a certain period of time.· For example, if a toy car moves a greater distance than another toy car in one minute, then its speed is greater.
1. Essential - Place objects in room. Students describe position of objects. Quadrant C
2. Essential - Students complete “How can you describe an object’s position?” inquiry activity, Macmillan/McGraw-Hill South Carolina Science, p. 335. Quadrant C
3. Essential—Use websites (Science Clips – Push and Pull) to make predictions in their journal relating to the amount of force used to make the object move and how the amount of force determines the speed/direction of the object.
http://www.bbc.co.uk/schools/scienceclips/ages/5_6/pushes_pulls.shtml
Science Clips – Force and Motionhttp://www.bbc.co.uk/schools/scienceclips/ages/6_7/forces_movement.shtml
*Also see 3rd Grade Science Modules on S3 Curriculum at http://scde.mrooms.org/index.php?page=14496
Resources3-5.1 IndicatorText: MacMillan/McGraw-Hill South Carolina Science, p.334-340.
Science Kits/Materials Boxes:
Other Resources:
Web Sites:www.studyisland.com

SC Science Standards Support Document at https://www.ed.sc.gov/agency/pr/Standards-and-Curriculum/old/cso/standards/science/sd.html
GT Extensions:
Text: MacMillan/McGraw-Hill South Carolina Science, p.334-340.
Science Kits/Materials Boxes:
Other Resources:
Web Sites:www.studyisland.com
SC Science Standards Support Document at https://www.ed.sc.gov/agency/pr/Standards-and-Curriculum/old/cso/standards/science/sd.html
GT Extensions:
Assessment
Daily and weekly assessments using rubrics and quizzes
Week of Jan. 14th - Jan. 18thJan. 14th - Jan. 17th Indicator3-5.3 Explain how the motion of an object is affected by the strength of a push or a pull and the mass of the object. BreakInstructional Strategies
Essential Knowledge for Indicator 3.5.3

It is essential for students to know that the strength of a push or pull and the amount of mass of the object can affect the motion of an object at rest.
The stronger the push or pull, the faster the object would move. The weaker the push or pull, the slower the object would move. Mass is how much matter is in an object. If the strength of the push or pull is the same, an object of greater mass would move slower than an object of lesser mass.
1. Essential - Tie two washers to the end of a string to form a pendulum. Hold the string from the top and pull the washers back to a designated starting point. Release the string and count how many times the pendulum swings back and forth within 1 minute. Predict what would happen if more washers were added. Adjust the number of washers and repeat the experiment. Compare the numbers. Quadrant C
3 Essential- It is essential for students to know that the strength of a push or pull and the amount of mass of the object can affect the motion of an object at rest. The stronger the push or pull, the faster the object would move.
The weaker the push or pull, the slower the object would move. Mass is how much matter is in an object. If the strength of the push or pull is the same, an object of greater mass would move slower than an object of lesser mass.
4. Enrichment - Use a SMARTboard or LCD projector so the entire class can view the website on Forces and movement - http://www.bbc.co.uk/schools/scienceclips/ages/6_7/forces_movement.shtml . Students take the quiz at the end. Quadrant A
5. Essential - Ask students to predict how far a book will slide on the floor when given a “soft” push. Tell them to mark their prediction with a piece of tape and then close their eyes and push the book gently open their eyes. Ask them, “How close was your prediction?” Tell them to now predict how far the book will slide when given a “hard” push and record their prediction as they did earlier. Ask them whether they think the book will go farther when you push it harder? Tell them to close their eyes and push the book harder this time. Ask, “How close was your prediction?” Ask them if they think the book went farther when they used a soft push or a hard push? Why? Sample Classroom Activity Quadrant B
*Also see 3rd Grade Science Modules on S3 Curriculum at http://scde.mrooms.org/index.php?page=14496
Resources
Text: MacMillan/McGraw-Hill South Carolina Science, p. 344-347
Science Kits/Materials Boxes:
Other Resources:
Web Sites:03/19/09 - Forces and Motion – http://classroom.jc-schools.net/sci-units/force.htm#303/19/09 - Forces and Movement - http://www.bbc.co.uk/schools/scienceclips/ages/6_7/forces_movement.shtml
www.studyisland.com
SC Science Standards Support Document at https://www.ed.sc.gov/agency/pr/Standards-and-Curriculum/old/cso/standards/science/sd.html
GT Extensions: Our skeletal muscles allow us to move by contracting and pulling on bones. Students design and conduct a class
experiment to determine if there are differences in the number of clicks per minute of a spring-type clothespin between class member’s left and right hands. Quadrant D
Students create a model (in the medium of their choice) of the joints, bones and muscles in the arm or leg of the human body. Quadrant C
Winter BreakAssessment

Daily and weekly assessments using rubrics and quizzes
Winter Break
Jan. 18th
IndicatorProfessional Development/Workday Professional Development/Workday
Instructional Strategies Professional Development/Workday
ResourcesProfessional Development/Workday
AssessmentProfessional Development/Workday
Week of Jan. 21st - Jan. 25thJan. 21st - Jan. 22ndIndicator
Martin Luther King Jr. Day (Holiday)Professional Development/Workday
Martin Luther King Jr. Day (Holiday)Professional Development/Workday
Instructional Strategies
Martin Luther King Jr. Day (Holiday)Professional Development/Workday
ResourcesMartin Luther King Jr. Day (Holiday)Professional Development/Workday
AssessmentMartin Luther King Jr. Day (Holiday)Professional Development/Workday
Jan. 23rd - Jan. 25th Indicator3-5.4 Explain the relationship between the motion of an object and the pull of gravity.
Instructional Strategies
Essential Knowledge for Indicator 3.5.4
It is essential for students to know that the pull of gravity attracts objects to one another.· The pull of gravity is everywhere.· Earth’s gravity pulls objects toward the center of Earth.· The pull of gravity holds things down on Earth.· Things fall to Earth because they are pulled straight down by Earth’s gravity.· No matter whether an object is dropped or thrown, it will always fall toward Earth’s surface.
1. Essential - Drop a flat piece of paper. Crumple another piece of paper and drop it as well. Finally, drop both papers at the same time. Discuss what happened. Quadrant A
2. Essential - Students complete “Observe Gravity” quick lab, Macmillan/McGraw-Hill South Carolina Science, p. 349. Quadrant B
3. Essential—Speed RampMaterials needed:
Books Metric Ruler Cookie Sheet Penny Block Rubber Eraser
Procedure
1. Use the table below for this investigation.2. Stack the books about 5 cm high, Record how high the pile is.3. Work with a partner. Place the penny, the block, and the eraser at the top of the ramp. Hold the objects so

they don’t move.4. Lay one end of the cookie sheet on the books to make a ramp. Let the objects go at the same time.5. Record how fast each item traveled. Use words such as fastest, slowest, and did not move.6. Add books to make your stack about 10cm high. Repeat Steps 3-5.7. Add books to make the stack about 15 cm high. Repeat Steps 3-5.
Speed Table
Height of Books SpeedPennyBlockEraser
Reference: Lab Manual-Harcourt School Publishers-Science
*Also see 3rd Grade Science Modules on S3 Curriculum at http://scde.mrooms.org/index.php?page=14496
ResourcesMacMillan/McGraw-Hill South Carolina Science, p.294, 349.
Science Kits/Materials Boxes:
Other Resources:
Web Sites:03/19/09 - http://www.exploratorium.edu/ronh/weight/index.html www.studyisland.com
SC Science Standards Support Document at https://www.ed.sc.gov/agency/pr/Standards-and-Curriculum/old/cso/standards/science/sd.html
GT Extensions:
AssessmentDaily and Weekly assessments using rubrics, notebook entries, and quizzes.

Week of Jan. 28th - Feb. 1stJan. 28th - Feb. 1st Indicator3-5.5 Recall that vibrating objects produce sound and that vibrations can be transferred from one material to another BreakInstructional Strategies
Essential Knowledge for Indicator 3.5.5
· Vibrations can be transferred from one material to another causing that material to vibrate.· Vibrations of materials causing sound can travel through solids, liquids, and gases, but they cannot travel through empty space where there are no particles of matter to vibrate.· Sound moves better through some materials than others, for example, when a metal spoon is tied to a string and hit so that it vibrates, the sound can be heard through the string held to the ears better than through the air only.
1. Enrichment - Read The Listening Walk by Paul Showers. Then go on a listening walk. Record sounds in each place the class visits. Upon returning, students will try to recognize the location based on sounds that were recorded. Quadrant A
2. Enrichment - Before the lesson, prepare containers of gravel, sand, water, beads, etc. With a partner, students try to guess what’s in each container. One partner gets the container and shakes it in the ear of the other (blindfolded) partner. The blindfolded partner tries to guess the contents of the container. Quadrant A
3. Enrichment - Demonstrate compression sound waves with a Slinky. If you take the Slinky and stretch it out on a flat surface then bunch up about 6-8 inches at one end and then let go you should see the “bunch” move across the Slinky (it moves fast). The “bunch” may bounce off the other end, this would be an echo. Connect the movement of the Slinky to that of a sound wave. Quadrant A
*Also see 3rd Grade Science Modules on S3 Curriculum at http://scde.mrooms.org/index.php?page=14496
Winter BreakResources
Text: MacMillan/McGraw-Hill South Carolina Science pages 356-360.
Science Kits/Materials Boxes:FOSS Physics of Sound
Other Resources:The Listening Walk by Paul Showers
Web Sites:03/19/09 – Magic School Bus Gets an Earful - http://scholastic.com/magicschoolbus/games/sound/index.htm# 03/19/09 – Science Lab - http://www.iknowthat.com/com/L3?Area=science%20Lab
www.studyisland.com
SC Science Standards Support Document at https://www.ed.sc.gov/agency/pr/Standards-and-Curriculum/old/cso/standards/science/sd.html
GT Extensions:1. Different objects can make different sounds. For example, bean seeds dropped on metal will sound like rain, while a piece of tightly stretched leather can sound like a groan. Secretly create and record on a tape recorder (if available) a special sound effect of some objects. On a “Special Sound Effects Day,” students will attempt to identify the mystery sound. Replay sounds as needed. Quadrant D2. After researching and describing the development and use of communication tools, students will demonstrate home-made models and various sound experiments for an open house event. Students may arrange for products to be judged and the event publicized. Quadrant D3. Students research the location and function of the semicircular canals in the ear and demonstrate how the function of

the fluid in the semicircular canals can be compared to a bottle half filled with a colored liquid. Quadrant D4. Students explore the tracking of submarines in deep waters around the globe. What are the inputs and outputs of the submarine? Quadrant C5. Students conduct research and prepare a written or oral report on how bats flying at night can locate prey through echoes of their sound. Quadrant CWinter BreakAssessment
Daily and Weekly assessments using rubrics, notebook entries, and quizzes.
Winter Break

Week of Feb. 4th - Feb. 8thFeb. 4th - Feb. 8th Indicator 3-5.6 Compare the pitch and volume of different sounds.3-5.7 Recognize ways to change the volume of sounds
Instructional Strategies Essential knowledge for Indicator 3.5.6
It is essential for students to know that different sounds can have different pitches and volumes as follows:
Pitch· Pitch of a sound is how high or low it is.· For example, a man’s voice has a lower pitch than a woman’s voice, or a bird song has a higher pitch than the rumble of a heavy truck.· Changing the length of the vibrating object can change pitch.· A long string or wire will have a lower pitch than a short string or wire.
Volume· Volume is the loudness or softness of a sound.· For example, the sound from a person yelling is a louder volume than the sound from a person whispering even though the pitch is the same.· It takes more force to produce loud sounds than soft sounds.
1. Essential - Students sit quietly and listen for a few minutes to all sounds they hear. Quadrant A
2. Essential - Fill plastic eggs (or other opaque containers) with a variety of items that will produce sounds. Students predict what items will produce the loudest sounds. Students then shake the eggs to check predictions. Quadrant B
3. Enrichment - Play recordings of different types of music, i.e. classical, pop, rock, country. Compare sounds within a piece of music or compare the sounds in two different types of music. Quadrant B
4. Enrichment - Project: Other teachers are tired of hearing pencils tapped on desks. They have asked your company to create a desk, made from a material that will produce little or no sound when tapped. Use the scientific method to guide your research. Teacher divides the class into 3 groups. Each group will be assigned a surface material – cork, cardboard, white board. Teacher leads the students through the scientific process as the students test their surface material for volume produced by tapping a pencil on the surface material. Each group will rotate through all 3 surface materials. Quadrant D
5. It is essential for students to know that different sounds can have different pitches and volumes as follows: Pitch of a sound is how high or low it is. For example, a man’s voice has a lower pitch than a woman’s voice, or a bird song has a higher pitch than the rumble of a heavy truck. Changing the length of the vibrating object can change pitch. A long string or wire will have a lower pitch than a short string or wire. Volume is the loudness or softness of a sound. For example, the sound from a person yelling is a louder volume than the sound from a person whispering even though the pitch is the same. It takes more force to produce loud sounds than soft sounds.
*Also see 3rd Grade Science Modules on S3 Curriculum at http://scde.mrooms.org/index.php?page=14496
Essential Knowledge for Indicator 3.5.7
It is essential for students to know that the volume of sounds can be changed.

Strength of the vibrations
· If the vibrations are made stronger or weaker by striking or plucking objects harder or softer, the volume will get louder or softer.· If the force is decreased, the volume becomes softer.· If the force is increased, the volume becomes louder.· Tapping a desk lightly produces a soft sound while hitting a desk hard produces a loud sound.
Distance
· If the sources of the vibrations are farther away, the volume of the sound is softer.· The closer the source of the vibrations, the louder the volume of the sound will be. Radios, TVs, and disc players have loudness, or volume, controls. The volume can be turned up to make the sound louder or turned down to make the sound softer.
1. Essential--Bring in a variety of instruments such as small drums, bells, guitars, xylophones, toy piano. Give students the opportunity to play the instruments making soft and loud sounds.
2. Essential Have students to listen to instruments to determine the difference in volume. Science Clips – Sound and Hearing http://www.bbc.co.uk/schools/scienceclips/ages/5_6/sound_hearing.shtml
This interactive website offers a game for students to determine what causes sound and how it gets louder. Includes a quiz.
3. It is essential for students to know that the volume of sounds can be changed.
4. Enrichment Activity
Materials Needed:(Materials needed for each pair of students)1 plastic cup 1 piece of plastic wrap1 rubber band1 tablespoon of rice1 piece of construction paper
Pass out all of the materials to each pair of students. Have them cover the open part of the cup with the plastic wrap and secure it with the rubber band. Place the rice on the plastic wrap. Have the students make a megaphone with the construction paper by rolling it into the shape of a cone. Have students yell loud through the megaphone onto the plastic wrap. Have students repeat yelling softly onto the plastic wrap. Have students record what happens to the rice as when they yell loud and soft
Resources
Text: MacMillan/McGraw Hill South Carolina Science, p 358-359
Science Kits/Materials Boxes:FOSS Physics of Sound
Other Resources:
Web Sites:03/19/09 - Crackling Noise - http://simscience.org/crackling/index.html
www.studyisland.com
SC Science Standards Support Document at https://www.ed.sc.gov/agency/pr/Standards-and-Curriculum/old/cso/standards/science/sd.html

GT Extensions:Students prepare a list of interview questions for the instrumental music specialist in their building. They request that the specialist visit their classroom and bring a variety of stringed instruments. Students develop an hypothesis about the sounds produced by plucking and bowing the violin, the viola, the cello and the bass. They observe performances on each of the instruments to determine the validity of their hypothesis. Quadrant D Text: MacMillan/McGraw Hill South Carolina Science, p 358-359
Science Kits/Materials Boxes:FOSS Physics of Sound
Other Resources:
Web Sites:03/19/09 - Crackling Noise - http://simscience.org/crackling/index.html
www.studyisland.com
SC Science Standards Support Document at https://www.ed.sc.gov/agency/pr/Standards-and-Curriculum/old/cso/standards/science/sd.html
GT Extensions:
AssessmentDaily and Weekly assessments using rubrics, notebook entries, and quizzes.
Week of Feb. 11th - Feb. 15th

Feb. 11th - Feb. 15th Indicators3-5.6 Compare the pitch and volume of different sounds.3-5.8 Explain how the vibration of an object affects pitch
Winter BreaWinter Break
Instructional Strategies Essential Knowledge for Indicator
It is essential for students to know that the volume of sounds can be changed.
Strength of the vibrations· If the vibrations are made stronger or weaker by striking or plucking objects harder or softer, the volume will get louder or softer.· If the force is decreased, the volume becomes softer.· If the force is increased, the volume becomes louder.· Tapping a desk lightly produces a soft sound while hitting a desk hard produces a loud sound.
Distance· If the sources of the vibrations are farther away, the volume of the sound is softer.· The closer the source of the vibrations, the louder the volume of the sound will be. Radios, TVs, and disc players have loudness, or volume, controls. The volume can be turned up to make the sound louder or turned down to make the sound softer.
1. Essential-- Assemble six glass jars (same size) or glasses (same size). Fill each with a different amount of water and place in random order at front of room for students to observe. Ask the students what they observe. Tap each jar or glass with a spoon. Ask students what they hear. Students should complete a scientific drawing of the jars and describe the difference in pitch.
2. Essential-- Website: http://teachers.net/lessons/post/2049.html
Engage: Display the high and low pictures and ask the students if they can find any similarities between any of the pictures. Discuss that the pictures show some objects that are found high up in the air and some that are found down low to the ground. Explain that in music there are high and low sounds and they are called the pitch of music.
Explore 1. Ask the students to come up with ways that they could use their whole body to show the high and low sounds in music. Lead them to stand tall on tiptoe and reach for the sky for high and to squat down low to the ground for low.
2. Tell the students that they are going to listen to four different excerpts of music and that when they think the pitch is high they should stand on tiptoe and when they think it is low they should crouch down to the ground. The whole class could do the movements together or the students could do them in groups. Compliment the student's success with their contrasting movements for the high and low music. Have the students to record their new learning contrasting body moment with the pitch of the sound.
Enrichment--Tell the students that music is not the only thing that has high and low pitch--our voices do too. Tell the students to think about their parents and ask them who usually has the higher pitched voice? (Mom)
C. Concluding Activity
Introduce the students to the story of The Three Bears and ask if anyone is familiar with it. Tell the students that the three members of the Bear family have very different pitched voices. Discuss with the students the differences between Papa Bear, Mama Bear, and Little Bear's voices.Read the story to the class, emphasizing the different pitched voices of the characters. Invite
the students to repeat certain lines with you, giving them the opportunity to use high, medium, and low pitched voices. This book can also be made into a sound story. The students would choose instrument based on their knowledge of the high and low sounds of the character's voices and of the instruments. An example would be to use a triangle for Little Bear, a tambourine for Mama Bear, and a drum for Papa Bear. The students would play the instrument for one beat each time they spoke in the story.
3. Essential - Stretch four or five rubber bands of different thicknesses and lengths around a shoebox with the lid removed. Pluck the elastics with the index finger and observe the sounds. Try different lengths and thicknesses. 3-1.3 Generate questions such as “what if?” or “how?” about objects, organisms, and events in the environment and use those questions to conduct a simple scientific investigation. 3-1.3 Generate questions such as “what if?” or “how?” about objects, organisms, and events in the environment and use those questions to conduct a simple scientific investigation. 3-1.7 Explain why similar investigations might produce different results. 3-1.8 Use appropriate safety procedures when conducting investigations. Quadrant A
4. Enrichment - Discuss sounds humans cannot hear because they are too high-pitched, i.e., dog whistles. Quadrant A
Essential Knowledge for Indicator 3.5.8
It is essential for students to know how the vibrations of an object affect pitch of a sound. Pitch depends on how fast an object is vibrating. Pitch is affected by the materials vibrating in the following ways:
Length· Length of an object can change the vibration and cause the pitch to change.· Shorter materials vibrate faster than longer ones.· The faster a string, wire, or air in a tube vibrates, the higher the pitch of the sound. For example, when you shorten the length of a guitar string it makes a higher pitched sound.
Thickness· Thickness can change pitch.· Thinner strings or wires vibrate faster than thicker ones.· Thinner vibrating materials have a higher pitch than thicker ones when they are vibrated. For example, when a thick rubber band and a thin rubber band are plucked, the thinner one produces a higher pitched sound.
Tightness· Tightness of the stretch of the string or wire can change the pitch—the tighter the stretch of the string, the higher the pitch of the sound.· For example, guitars and pianos have screws that can tighten the wire.· Tightening the wire to tune the instrument can change the pitch.· Tighter wires vibrate faster, making the pitch higher.
1. Essential - Stretch four or five rubber bands of different thicknesses and lengths around a shoebox with the lid removed. Pluck the elastics with the index finger and observe the sounds. Try different lengths and thicknesses. 3-1.3 Generate questions such as “what if?” or “how?” about objects, organisms, and events in the environment and use those questions to conduct a simple scientific investigation. 3-1.3 Generate questions such as “what if?” or “how?” about objects, organisms, and events in the environment and use those questions to conduct a simple scientific investigation. 3-1.7 Explain why similar investigations might produce different results. 3-1.8 Use appropriate safety procedures when conducting investigations. Quadrant A
2. Essential - Hold hand around the front of the throat. Hum and talk. Make high and low sounds. Make soft and loud sounds. What happens? 3-1.3 Generate questions such as “what if?” or “how?” about objects, organisms, and events in the environment and use those questions to conduct a simple scientific investigation. 3-1.7 Explain why similar investigations might produce different results. Quadrant B
3. Essential - Bring in a string instrument. Demonstrate how sound changes as strings are loosened or tightened. This is a good introduction for the pegboard lesson in STC Sound kit. 3-1.3 Generate questions such as “what if?” or “how?” about objects, organisms, and events in the environment and use those questions to conduct a simple scientific investigation. 3-1.4 Predict the outcome of a simple investigation and compare the result with the

prediction. 3-1.7 Explain why similar investigations might produce different results. Quadrant B
4. Enrichment - Students create their own musical instrument. It must demonstrate different pitch and volume. Allow students to perform their instruments for the class. 3-1.3 Generate questions such as “what if?” or “how?” about objects, organisms, and events in the environment and use those questions to conduct a simple scientific investigation. 3-1.4 Predict the outcome of a simple investigation and compare the result with the prediction. 3-1.5 Use tools (including beakers, meter tapes and sticks, forceps/tweezers, tuning forks, graduated cylinders, and graduated syringes) safely, accurately, and appropriately when gathering specific data. 3-1.7 Explain why similar investigations might produce different results. 3-1.8 Use appropriate safety procedures when conducting investigations. Quadrant D
ResourcesText: MacMillan/McGraw Hill South Carolina Science, p 358-359
Text: MacMillan/McGraw Hill South Carolina Science Chapter 7, Lesson 3
Science Kits/Materials Boxes: Foss Physics of Sound
Other Resources:
PASS Coach 150-154
Web Sites:03/19/09 - Sounds from the Vaults – http://www.fieldmuseum.org/sounds/chooser.html
03/19/09 – Sound - http://www.internet4classrooms.com/science_elem_sound.htm
www.studyisland.com
S3 Science Standards Support Document at
http://scde.mrooms.org/index.php?page=14496
Winter BreakAssessment
Daily and Weekly assessments using rubrics, notebook entries, and quizzes.
Winter Break

Week of Feb. 18th - Feb. 22ndFeb. 18th
IndicatorPresident's Day (Holiday) President's Day (Holiday)
Instructional Strategies
President's Day (Holiday)Resources
President's Day (Holiday)Assessment
President's Day (Holiday)
Feb. 19th - Feb. 22nd
Indicator3-4.1 Classify different forms of matter (including solids, liquids, and gases) according to their observable and measurable properties.
Instructional Strategies
Essential Knowledge for Indicator 3.4.1.- It is essential for students to know that matter is anything that takes up space and has mass as follows:
Mass Mass is how much matter is in an object. Mass can be measured using a balance and known masses compared to the unknown mass being measured. An object with a large mass feels heavy.
Volume Volume is the amount of space an object takes up. Volume of a solid with rectangular sides can be measured with a ruler (length x width x height). Volume of a liquid can be measured with a beaker or graduated cylinder. Volume of a gas can be measured with a graduated syringe. An object that takes up more space has a greater volume.
Properties of matter are characteristics that can describe matter as follows:
Observable (using senses) properties Measurable (using tools) properties
(Using sense of sight): color, size, shape, shininess or luster (Using balance): mass
(Using sense of touch): texture or relative hotness or coldness (Using ruler, graduated cylinder or syringe, or
beaker): volume
(Using thermometer): temperature
Matter is classified into the following forms based on observable and measurable properties:
SolidsSolids have a definite size and shape, that is, the size and shape do not change.
LiquidsLiquids have a definite volume, but they take the shape of their containers.
GasesGases do not have a definite shape or volume. Gases take the shape and size of their container.
2. Essential - Go on an observation walk. Divide a piece of paper into 3 sections labeled “solid, liquid, gas”. List things in each category that you see on your walk. 3-1.1 Classify objects by two of their properties (attributes). Quadrant A
3. Enrichment- Split the class into 3 groups (solid, liquid, gas). Each group acts out their state of matter. 3-1.1

Classify objects by two of their properties (attributes). 3-1.2 Classify objects or events in sequential order. Quadrant C
4. Essential - Direct students to make a chart with three columns and then label the columns with the headings “water in solid form,” “water in liquid form,” and “water in gas form.” Under each column they should “list places you can find water in each of the three states of matter. For example, you can find liquid water in rivers and ponds.” Compare water with other substances that are easily changed from one state to another, such as candle wax, butter, or vinegar. Sample Classroom Activity Quadrant A
5. Essential – Teacher will review the word “matter”. Quadrant B
Solid – hold up an object and have students describe it (texture, shape, size). Have students predict what will happen if you drop the object on your desk. Drop it and discuss the results.
Liquid – hold up a cup of water and have students describe how it feels. Pour water on a desk or table. Have students touch it and describe.
Gas – explain that air is a form of gas that cannot be seen but we know it is there because we can sometimes feel or smell it. 3-1.1 Classify objects by two of their properties (attributes).
6. Enrichment - Gather various measurement tools (i.e. ruler, tape measure, measuring cup, measuring spoons, balance, graduated cylinder). Review matter and its 3 forms. Select some common classroom objects and have students identify which measuring tool would be used to measure it. A center can be created with the objects and flashcards with the names of the measuring tools. Students can match the object with corresponding flashcard. 3-1.5 Use tools (including beakers, meter tapes and sticks, forceps/tweezers, tuning forks, graduated cylinders, and graduated syringes) safely, accurately, and appropriately when gathering specific data. 3-1.6 Infer meaning from data communicated in graphs, tables, and diagrams. Quadrant B
Resources
Text: MacMillan/McGraw-Hill South Carolina Science pgs. 278-284
Science Kits/Materials Boxes: States of Matter
Other Resources:
PASS Coach pgs. 120-123
Web Sites:03/19/09 - “State of Matter Scavenger Hunt”, Elementary, Science - http://www.teachers.net www.studyisland.com
S3 Science Standards Support Document at
http://scde.mrooms.org/index.php?page=14496 Assessment
Daily and Weekly assessments using rubrics, notebook entries, and quizzes.

Week of Feb. 25th - Mar. 1st
Feb. 25th - Mar. 1st Indicator3-4.2 Explain how water and other substances change from one state to another (including melting, freezing, condensing, boiling, and evaporating).
WinterInstructional Strategies
Essential Knowledge for Indicator 3.4.2
It is essential for students to know that water and other substances can change from one state to another with either heating or cooling. The diagram below shows the relationship between heat and the changes of state:
GAS Cooled—Heat removed (condensing)
Added heat(Evaporating or boiling)
LIQUID LIQUID
Added heat Cooled---Heat removed (freezing) (Melting) SOLID SOLID
Students should explain how water and other substances change from one state or form to another as follows:
Melting Melting occurs when a solid is heated enough to change to a liquid. When solid ice melts, it changes to liquid water. Ice melts at 0oC or 32oF.
Freezing Freezing occurs when a liquid cools enough (heat is removed) to form a solid. When liquid water freezes, it changes to solid ice. Water freezes at 0oC or 32oF.
Evaporation Evaporation occurs when liquids change to gases rather slowly at the surface of the liquid as heat is added from their surroundings.
Boiling Boiling also is the change from a liquid to a solid but faster with bubbles of gas forming in the liquid at a given temperature because a lot heat is being added from a source. Water boils at 100oC or 212oF.
Condensing Condensation occurs when a gas is cooled enough (heat is removed) to form a liquid. Condensation occurs, for example, when a glass of ice water forms liquid water on the outside of the glass on a hot, humid day. The water vapor or gas in the air is cooled by the ice water and changes to a liquid on the cool surface of the glass. Another example of condensation is when the mirror in the bathroom “fogs” with droplets of water from the water vapor formed by the hot shower cooling and changing to liquid drops on the mirror. The water vapor in the air condenses on the cool glass.
1. Enrichment - Students observe solid materials in Ziploc bags focusing on their senses – How do the objects look and feel? How big are they? Discuss the properties of solids. Students then observe water in a container. What shape is the liquid in the container? Pour a little of the water on the desk and ask again – What shape is the liquid? Discuss the properties of a liquid. Blow up a balloon and tie it off. What made it blow up? Students blow on their hands to identify the answer – air. Discuss the properties of a gas. Put 1 tablespoon of baking soda in a limp balloon and 3 tablespoons of vinegar in a bottle. Attach the balloon to the bottle and watch what happens. What caused the balloon to inflate? 3-1.3 Generate questions such as “what if?” or “how?” about objects, organisms, and events in the environment and use those questions to conduct a simple scientific investigation. 3-1.4 Predict the outcome of a simple investigation and compare the result with the prediction. 3-1.6 Infer meaning from data communicated in graphs, tables, and diagrams. Quadrant B
2. Enrichment – Explain that matter can change its state without heat. Teacher provides flour, salt, water, and food coloring. Students mix the solids (flour and salt) and liquid (water) ingredients in a large bowl. Each group will color

their mixture with a different color of food coloring. After the dough is blended, students will observe its state and predict what will happen to it over the next few days. Allow students to create different shapes with their dough. 3-1.4 Predict the outcome of a simple investigation and compare the result with the prediction. 3-1.5 Use tools (including beakers, meter tapes and sticks, forceps/tweezers, tuning forks, graduated cylinders, and graduated syringes) safely, accurately, and appropriately when gathering specific data. 3-1.6 Infer meaning from data communicated in graphs, tables, and diagrams. Quadrant C
3. Enrichment – Burn a candle until it has accumulated a puddle of wax. Allow students to watch and discuss how the solid changed to a liquid. Next, place a small drop of cooking oil into a frying pan. Have students predict what will happen when a cracked egg is placed in the pan. Ask what the 2 demonstrations have in common. What had to happen in order for the matter to change from one form to another? Discuss that heat can cause matter to change from one form to another. Discuss physical changes and chemical changes. 3-1.7 Explain why similar investigations might produce different results. 3-1.8 Use appropriate safety procedures when conducting investigations. Quadrant B
Winter BreakResources
Text: MacMillan/McGraw-Hill South Carolina Science pages 320-321
Science Kits/Materials Boxes: States of Matter
Other Resources:
PASS Coach pgs. 124-127
Websites:www.studyisland.com
S3 Science Standards Support Document athttp://scde.mrooms.org/index.php?page=14496
GT Extensions: Students design an experiment to illustrate the fact that liquids have no shape. They design a demonstration to
be presented to the class, using models or illustrations. Quadrant C
Winter BreakAssessmentDaily and Weekly assessments using rubrics, notebook entries, and quizzes.
Winter Break
Week of Mar. 4th - Mar. 8th
Mar. 4th - Mar. 8th Indicator3-4.4 Identify sources of heat and exemplify ways that heat can be produced (including rubbing, burning, and using electricity).
Instructional Strategies
Essential Knowledge for Indicator 3.4.4
It is essential for students to know that sources of heat produce heat energy and make things warmer, for example, fires, stoves, toasters, ovens, the Sun, light bulbs, engines, animals, and other common objects in their environment. They should also identify the following ways that heat can be produced:
Rubbing When objects are rubbed together, heat is produced. For example, when hands are rubbed together, they get warmer on a cold day.
Burning When materials are burned in a fire, heat can be produced. For example, when wood or candles are burned, they produce heat.
Using electricity When electricity is used, heat can be produced. For example, when electricity is used in light bulbs heaters, stoves, toasters, or ovens, things get warmer.
1. Essential Tell the students that today they are going to look at what kinds of things produce heat. The earlier activity is the first step in learning some sources of heat.
2. Tell the students that they will first work on their own on the sheet entitled, “Which of these is a source of heat?”a. The criterion for being a source of heat is that the object must give off or produce heat on its own.(Try
not to give them any hints. If you feel it absolutely necessary, you can give them a hint at three of the items on the list will not give off their own heat. Objects that use an external source of energy like electricity to produce heat are considered to be sources of heat.)
b. They are to begin by writing the word “Source” by any of the objects that actually make heat by themselves. If they are sure it is not a source, they should write “Not a Source.” If they can’t make up their minds, have them put a question mark by the object.
c. Once you feel that most of the students are finished, let them compare notes with a partner and see if they agree.
3. When they are finished comparing their lists, discuss their results. The key is below:a. Light bulb Sourceb. Boot Not a sourcec. Electric heater Sourced. Fire Sourcee. Coat &Mittens Not a sourcef. Hair dryer Source g. Radiator Sourceh. Ice chest Not a source
1. Enrichment - Bring in a variety of objects from home (including heat producers). Pile them in the floor and instruct students to sort/classify them. Students tell you how they classified them. 3-1.1 Classify objects by two of their properties (attributes). 3-1.3 Generate questions such as “what if?” or “how?” about objects, organisms, and events in the environment and use those questions to conduct a simple scientific investigation. Quadrant D
2. Enrichment - Students demonstrate friction by sliding across room in shoes and then socks. Students explain why their feet got hot. 3-1.3 Generate questions such as “what if?” or “how?” about objects, organisms, and events in the environment and use those questions to conduct a simple scientific investigation. 3-1.4 Predict the outcome of a simple investigation and compare the result with the prediction. Quadrant A
3. Enrichment – Students complete “Heat From Friction” activity, AIMS Primarily Physics, p. 69. Quadrant B

Resources
Text: MacMillan/McGraw-Hill South Carolina Science 310-311
Science Kits/Materials Boxes: States of Matter
Other Resources:
PASS Coach pgs. 128-131
Web Sites:www.studyisland.com
S3 Science Standards Support Document at
http://scde.mrooms.org/index.php?page=14496
GT Extensions: Students design and conduct an experiment to measure, using Celsius thermometers, heat gained and heat lost
when 100 mL of water is heated and cooled at two minute intervals for a total of ten minutes for heating and ten minutes for cooling. They determine and compare total temperature rise and drop over the ten minute periods. Quadrant D
Students set up a demonstration to show that four materials (aluminum, brass, rubber and wood) will seem to be different temperatures to the touch, even though all four are resting on the same block of ice. Students can rank the materials from coolest to warmest. Quadrant C
Assessment
Daily and Weekly assessments using rubrics, notebook entries, and quizzes.
Benchmark #3 Testing Window: Mar. 4th - Mar. 15th

Week of Mar. 11th - Mar. 15th
Mar. 11th - Mar. 15th Indicator3-4.3 Explain how heat moves easily from one object to another through direct contact in some materials (called conductors) and not so easily through other materials (called insulators).
Winter BreakInstructional Strategies
Essential Knowledge for Indicator 3.4.3
1. Essential- It is essential for students to know that heat makes things warmer. Some materials allow heat to move through them easily and others do not as follows:
Conductors Some materials allow heat to move easily through them and from one object to another through direct
contact. These materials are called conductors. If a metal spoon, for example, is put in hot water, it will become warmer. Metal objects are good conductors of heat, and they get warmer.
Insulators Other materials do not allow heat to move easily through them and are called insulators. If wooden and plastic spoons are put in hot water, for example, they do not become warmer. These materials do not allow heat to move easily through them. Plastic and wood materials are insulators, and they do not get warmer.
2. Essential - See MacMillan/McGraw-Hill South Carolina Science, p. 314. Brainstorm a list of other insulators. Ask students to bring an insulator from home and tell why it’s an insulator. 3-1.3 Generate questions such as “what if?” or “how?” about objects, organisms, and events in the environment and use those questions to conduct a simple scientific investigation. Quadrant D
3. Enrichment - Students should describe a simple experiment they could do to determine what materials are heat conductors (allow heat to pass through them easily). Ask them, “What materials are heat insulators (do not allow heat to pass through them easily)?” 3-1.4 Predict the outcome of a simple investigation and compare the result with the prediction. 3-1.6 Infer meaning from data communicated in graphs, tables, and diagrams. Sample Classroom Activity Quadrant C
4. Essential—Getting WarmerMaterials needed: safely goggles, 3 spoons: wooden, plastic, and metal , hot water, 3 plastic foam cups, 3 mugs with handles: ceramic, plastic, and metal
Caution: Put on safely goggles Touch the three spoons. Record your observations. Caution: Be careful with hot water .Place one spoon in each cup. Wait 1 minute. Gently touch each spoon. Record your observations. Quickly touch the three mugs. Record your observations Fill each mug with the hot water. Carefully touch each handle every 30 seconds for 2 minutes. Record
what you observe.Wooden Spoon Plastic Spoon Metal Spoon
DryAfter 1 minute
inter BreakResources
Text: MacMillan/McGraw-Hill South Carolina Science page 314
Science Kits/Materials Boxes: States of Matter
Other Resources:
PASS Coach pgs. 128-131
Web Sites:

www.studyisland.com
S3 Science Standards Support Document at
http://scde.mrooms.org/index.php?page=14496
GT Extensions: Students design and conduct an experiment to measure, using Celsius thermometers, heat gained and heat lost
when 100 mL of water is heated and cooled at two minute intervals for a total of ten minutes for heating and ten minutes for cooling. They determine and compare total temperature rise and drop over the ten minute periods. Quadrant D
Students set up a demonstration to show that four materials (aluminum, brass, rubber and wood) will seem to be different temperatures to the touch, even though all four are resting on the same block of ice. Students can rank the materials from coolest to warmest. Quadrant C
BreakAssessment
Daily and Weekly assessments using rubrics and quizzes
Benchmark #3 Testing Window: Mar. 4th - Mar. 15th

Week of Mar. 18th - Mar. 22nd
Mar. 18th - Mar. 22nd IndicatorsReview Scientific Inquiry Standards 3-13-1.1 Classify objects by two of their properties (attributes). 3-1.2 Classify objects or events in sequential order.3-1.3 Generate questions such as “what if?” or “how?” about objects, organisms, and events in the environment and use those questions to conduct a simple3-1.4 Predict the outcome of a simple investigation and compare the result with the prediction.3-1.8 Use appropriate safety procedure when conducting investigations.3-1.5 Use tools (including beakers, meter tapes and sticks, forceps/tweezers, tuning forks, graduated cylinders, andgraduated syringes) safely, accurately and appropriately when gathering specific data.3-1.6 Infer meaning from data communicated in graphs, tables, and diagrams.3-1.7 Explain why similar investigations might produce different results.
Winter BreakInstructional Strategies
Teachers will review Science Inquiry Standards in preparation for the upcoming PASS Assessment.
Winter BreakResources
Winter BreakAssessment
Week of Mar. 25th - Mar. 29th

Mar. 25th - Mar. 28th IndicatorsReview Scientific Inquiry Standards 3-13-1.1 Classify objects by two of their properties (attributes). 3-1.2 Classify objects or events in sequential order.3-1.3 Generate questions such as “what if?” or “how?” about objects, organisms, and events in the environment and use those questions to conduct a simple3-1.4 Predict the outcome of a simple investigation and compare the result with the prediction.3-1.8 Use appropriate safety procedure when conducting investigations.3-1.5 Use tools (including beakers, meter tapes and sticks, forceps/tweezers, tuning forks, graduated cylinders, andgraduated syringes) safely, accurately and appropriately when gathering specific data.3-1.6 Infer meaning from data communicated in graphs, tables, and diagrams.3-1.7 Explain why similar investigations might produce different results.
Winter BreakInstructional Strategies Teachers will review Science Inquiry Standards in preparation for the upcoming PASS Assessment.
Resources
Winter BreakAssessment
Winter Break
Mar. 29th
IndicatorProfessional Development/Workday Professional Development/Workday
Instructional Strategies
Professional Development/WorkdayResources
Professional Development/WorkdayAssessment
Professional Development/Workday

Week of Apr. 1st - Apr. 5thApr. 1st - Apr. 5th Indicator
Spring Break (Holiday) Spring Break (Holiday)Instructional Strategies
Spring Break (Holiday)Resources
Spring Break (Holiday)Assessment
Spring Break (Holiday)

Apr. 8th - Apr. 12th IndicatorStandard Review based on benchmark data
Break
Winter BreakInstructional Strategies
Winter BreakResources
Winter BreakAssessment
Winter Break

Week of Apr. 15th - Apr. 19thApr. 15th - Apr. 19th IndicatorStandard Review based on benchmark data
Instructional Strategies
Resources
Assessment

Week of Apr. 22nd - Apr. 26thApr. 22nd - Apr. 26th IndicatorStandard Review based on benchmark data
Break
Winter BreakInstructional Strategies
Winter BreakResources
Winter BreakAssessment
Winter Break

Week of Apr. 29th - May 3rdApr. 29th - May 3rd IndicatorStandard Review based on benchmark data
r Break
Winter BreakInstructional Strategies
Winter BreakResources
Winter BreakAssessment
Winter Break

Week of May 6th - May 10thMay 6th - May 10th IndicatorPASS Testing
Winter Break
Winter BreakInstructional Strategies
Winter BreakResources
Winter BreakAssessment
Winter Break

Week of May 13th - May 17thMay 13th - May 17th Indicator
Winter Break
Winter BreakInstructional Strategies
Winter BreakResources
Winter BreakAssessment
Winter Break

Week of May 20th - May 24thMay 20th - May 24th Indicator
Winter Break
Winter BreakInstructional Strategies
Winter BreakResources
Winter BreakAssessment
Winter Break
Week of May 27th - May 31stMay 27th - May 31st Indicator
BreakInstructional Strategies
Winter BreakResources
Winter BreakAssessment
Winter Break

Week of Jun. 3rd - Jun. 7thJun. 3rd - Jun. 6th Indicator
Win BreakInstructional Strategies
Winter BreakResources
Winter BreakAssessment
Winter Break
Jun. 7th Indicator
Teacher Workday Teacher WorkdayInstructional Strategies
Teacher WorkdayResources
Teacher WorkdayAssessment
Teacher Workday