otherthings.comotherthings.com/uw/npr/NPR2.doc · Web viewA final word about the timing of ... A...
29
Non-Photorealistic Animation Cassidy Curtis Pacific Data Images Abstract A practical explanation of how to approach an animation production that calls for non-photorealistic imaging (NPI). To make things concrete, we will walk through the different key stages of NPI-based character animation, using some of the author's own projects as examples. The focus will be on the ways in which NPI requires alterations to the now-standard "traditional pipeline" for CG animation. Audience: animators, technical directors, art directors, producers, production managers, and software developers. Take-away knowledge: some guidelines for applying non-photorealistic techniques to an animation production, with lots of examples from real projects. Introduction Non-photorealistic animation may be quite new to the graphics community, but author Vladimir Nabokov seems to have anticipated the concept by decades. In his 1939 novel Laughter in the Dark, the main character, an art collector, is inspired by a "beautiful idea": It had to do with colored animated drawings -- which had just begun to appear at the time. How fascinating it would be, he thought, if one could use this method for having some well-known picture, preferably of the Dutch School, perfectly reproduced on the screen in vivid colors and then brought to life -- movement and gesture graphically developed in complete harmony with their static state in the picture . . . and the colors . . . they would be sure to be far more sophisticated than those of animated cartoons. What a tale might be told, the tale of an artist's vision, the happy journey of 1
Transcript of otherthings.comotherthings.com/uw/npr/NPR2.doc · Web viewA final word about the timing of ... A...

Non-Photorealistic Animation
Cassidy CurtisPacific Data Images
Abstract
A practical explanation of how to approach an animation production that calls for non-photorealistic imaging (NPI). To make things concrete, we will walk through the different key stages of NPI-based character animation, using some of the author's own projects as examples. The focus will be on the ways in which NPI requires alterations to the now-standard "traditional pipeline" for CG animation.
Audience: animators, technical directors, art directors, producers, production managers, and software developers.
Take-away knowledge: some guidelines for applying non-photorealistic techniques to an animation production, with lots of examples from real projects.
Introduction
Non-photorealistic animation may be quite new to the graphics community, but author Vladimir Nabokov seems to have anticipated the concept by decades. In his 1939 novel Laughter in the Dark, the main character, an art collector, is inspired by a "beautiful idea":
It had to do with colored animated drawings -- which had just begun to appear at the time. How fascinating it would be, he thought, if one could use this method for having some well-known picture, preferably of the Dutch School, perfectly reproduced on the screen in vivid colors and then brought to life -- movement and gesture graphically developed in complete harmony with their static state in the picture . . . and the colors . . . they would be sure to be far more sophisticated than those of animated cartoons. What a tale might be told, the tale of an artist's vision, the happy journey of eye and brush, and a world in that artist's manner suffused with the tints he himself had found! [NAB89]
It certainly is a beautiful idea, and one that still holds currency today. In the time since Nabokov's book, traditional animators have experimented with various techniques for bringing paintings to life. Alexander Petrov is known for the rich, hand-painted look of his oil-on-glass animations such as The Cow and The Mermaid. Another example is Joan Gratz, whose lighthearted film, Mona Lisa Descending the Staircase (1992) deftly morphs through dozens of works of modern art including Picasso's nudes and Van Gogh's self-portraits, always maintaining a painterly quality thanks to her innovative "claypainting" technique.
Computer animation is only beginning to catch up to the variety of styles found in traditional and experimental animation. Non-photorealistic rendering (NPR) is a step in the right direction, but like any tool, it can be used skillfully or clumsily. Nabokov's character articulates this perfectly:
...the designer would not only have to possess a thorough knowledge of the given painter and his period, but be blessed with talent enough to avoid any clash between the movements produced and those fixed by the old master: he would have to work them out from the picture -- oh, it could be done.
1

As recent work shows, it can indeed be done. But how? The existing literature on NPR techniques provides plenty of implementation details, but says little about how they might be used in production. The natural assumption is that an NPR algorithm can simply be tacked on to the end of the traditional CG pipeline as a post process, and that everything will work just fine. In my experience, this is almost never the case.
Animation requires a lot of design work and planning. Many of the most important decisions are made long before a finger touches a keyboard. If a project calls for a non-photorealistic look, it is essential to consider that look in every stage of pre-production and production, rather than trying to "fix it in post".
In this document, I hope to provide a few guidelines for using existing NPR techniques for animation, and for developing new techniques for specific projects. I will walk through some of the key stages of character animation production, and show examples of how an NPR technique can induce substantial changes in their planning and execution. The examples are drawn primarily from three short animations I have worked on: The New Chair, Fishing, and Brick-a-Brac.
Since each stage is typically the responsibility of a different person on a large production, each of the sections below is geared toward a different audience: art directors, technical directors, software developers, and producers. However, since there is often some overlap between these roles, it is worth reading beyond your own area to get a sense of the big picture.
Context
There are two terms used throughout this document: non-photorealistic imaging (NPI), which refers to the goal of creating images by any means that resemble some medium other than photography, and non-photorealistic rendering (NPR), an umbrella term comprising a set of digital techniques for achieving that goal. The distinction between the two is relevant in the context of animation production, since many animations these days employ a combination of digital and hand-drawn techniques.
A feature common to most current NPR methods is the use of some type of screen-space marks to construct an image. These marks may be small relative to the image being rendered, as in the case of pen-and-ink lines [SAL97] or oil paint brushstrokes [MEI96], or they may occupy nearly the entire image, as in the case of a watercolor wash [CUR97].
Screen-space marks, as their name implies, must obey rules relating to the two-dimensional space of the image. They may optionally also represent some aspect of a three-dimensional model, but they are fundamentally two-dimensional objects. An important distinction between screen-space marks and the two-dimensional polygons used in techniques like the Z-buffer is that the former are not necessarily projected from a three-dimensional original.
2

Section 1. Defining a visual goal
If computer animation is still a young medium, NPR is in its infancy. At this early stage, it's hard to know how any technique will look in motion because most have never been tried before. In this sense, every non-photorealistic animation project is a new experiment.
The greatest threat to the success of such an experiment is vagueness of purpose. I have seen many NPR animation projects revert to a traditional CG look, or fail entirely, simply because they were started without a clear visual goal in mind. Directors and animators can become locked in a pointless cycle of revisions, tweaking small parameters to little effect: "Can you make the lines thinner? Hmm, that's no good. Try making them thicker... No, that's still wrong. I guess this look just won't work after all." Such a situation is frustrating for everyone involved.
The key to avoiding such pitfalls is art direction. Art direction simply means determining how a project should look. Strong art direction depends mainly on two factors: vision and communication.
Vision
The art director has to have a vision. By this I don't mean some kind of supernatural revelation, but simply a clear mental image of what the finished product should look like, down to the tiniest detail.
For a non-photorealistic project, this means thinking of a certain class of details that aren't necessarily present in photorealistic CG. These are the specific qualities that make a painting look like a painting, a drawing like a drawing, and so on. They are also the details that give a particular image a "style". They include:
Texture of substrate:Is the image drawn on paper, or painted on canvas, or scratched on the wall of a cave? Every substrate has its own texture.
Type of medium:Oil paint? Pencil? Watercolor?Each medium has certain telltale signs that distinguish it from others. [CUR97]
Geometry of screen-space marks: Are the marks short or long? Fat or thin?Curved or straight?
Character of marks:Loose or tight?Rough or smooth?Calm or energetic?
Texture of marks: Transparent or opaque?Matte or glossy? Smooth or granular?
Perceptual function of marks:Do they represent outlines, highlights, or shadows?Do they convey surface orientation or texture?Do individual marks represent entire objects?
Semantic function of marks:
3

Do the marks express qualities not literally found in the subject, such as an emotional state?
In addition to these static qualities, the fact that the image will be animated brings on the need to consider its dynamic qualities. This is where things get most experimental: With current technology it's not yet possible to "sketch out" a flock of moving brushstrokes to see how they'll behave, so intuition and imagination are crucial. The dynamic qualities include:
Coherence of motion: If a mark persists from one frame to the next, it is said to be coherent over time. If its position is the same for consecutive frames, it will appear to stand still; if it changes, it will appear to move. The important question is not whether coherence is necessary, but what kind of coherence is desired.
Coherence with the canvas?Coherence with an object's surface?Coherence with outlines, highlights or shadows?Or none at all?
Character of motion: Smooth or rough?
Perceptual or semantic function of motion: Does the mark's motion represent the motion of an object in the scene? Does it represent the motion of artist's hand? Or does it express some non-literal quality?
Change of other qualities over time: Is the size, shape, color, and orientation of each mark static over time, or can some of those qualities change? If so, do they change smoothly or abruptly? Does the change have a perceptual or semantic function?
These properties will all be plainly visible to the viewer, whether you've chosen them or not. For this reason, it's essential to consider them all, even the ones that don't seem relevant at first glance. Imagine what it would look like one way or the other, and decide which is more appropriate. When in doubt about a particular feature, it's always good to check it against the story content, and to ask: Does this feature fit the content at this point? What might fit better?
You need to consider these properties separately for each character, prop and environment in every scene. What works for one subject may not work for them all. If there are important distinctions between characters and background, or between scenes that have different moods, try to identify which properties make those distinctions clear.
What you're doing is essentially aesthetic problem-solving. Ultimately, your job will entail a balancing act between the rules of composition [GLA98] for a static image, and the rules of animation [THO81] and cinematography [CAL96]. But given the directive to achieve a certain look in every frame while allowing motion in the scene, there may be multiple solutions, or there may be none at all! In the latter case, it's necessary to go back and analyze the initial directive, and try to ferret out what's really behind it.
For example: in Brick-a-Brac, the paper texture was originally meant to make the animation look as if it had really been drawn on paper. To mimic the entire animation process faithfully, this would have meant changing the texture from frame to frame, since each image would have had to be drawn separately. However, doing this caused a distracting amount of noise when the results were played back. The richer I made the texture, the 'louder' the noise became -- but without the texture, it no longer looked 'real' enough. This was an unacceptable aesthetic compromise.
Looking back at my own motivation, I realized that my real goal was not to fool people into believing that the animation was done by hand, but rather to acquaint them with the characters in the story. So I chose to keep the texture prominent but static from frame to frame. I felt like I had sacrificed the "handmade" illusion to protect the story. But much to my surprise, when I started showing the piece, many viewers still thought I had done it by hand.
This particular problem seems easy enough to resolve. But as the look of a piece becomes more complex, the coherence-related dilemmas tend to grow in number. The crucial step is to look at each such question as it comes up, and make an aesthetic choice that's consistent with and motivated by the story.
4

5

Communication
A clear vision in and of itself is not enough to get the job done. You have to communicate that vision to the rest of the team-- again, supplying all of the necessary details. Here are some suggestions:
Show pictures. Art books, magazines, and illustration annuals are terrific sources of reference material. Better still is to paint or draw the pictures yourself, if you have the skills to do so.
Show animations done using other techniques. Experimental animators have solved a huge number of aesthetic and technical problems, and there is a lot that you can learn by watching them frame by frame. The Animated Film Collector's Guide [KIL97] is a useful index for finding experimental short animations.
Point out the features that interest you in each piece of reference material . For example, you may want the line quality from a certain drawing, the color palette of a particular painter, and the motion style of a Joan Gratz animation.
Do tests using the software tools you already have, if time and budget allow. If new software gets developed for your project, use the early tests to illustrate what you do and don't want to see.
As a last resort, if no pictures are available, use words. This can help the artists on your team visualize what you mean, even if they can't see what you see.
Figures 1 and 2 are reference images from The New Chair. Figure 1 shows some drawings I used for line reference. My goal was to emulate the looseness and hastiness of these lines, if not their literal shape. Figure 2 (color) shows a collage I made to provide reference for texture and color palette.
1. Line reference for The New Chair. 2. Color and texture reference.
Figures 3-5 (color) show some reference images from David Gainey's film Fishing, for which I provided a watercolor look. Gainey is an accomplished watercolorist, and was able to paint me a set of pictures that showed exactly how he wanted the finished product to look, in every respect. He pointed out the functions of the different marks he had used, showing how some conveyed shading while others acted to fill negative space. He also described how the color palette should change over the course of the film, to convey the changing time of day. This is the best art direction one can hope for, and it is also the greatest challenge!
6

3. Hand-painted reference image by David Gainey for Fishing
4. Color reference for different scenes. 5. Line reference, with director's comments
on the functions of the different marks.
On that note, it's important to prioritize (unless you have an infinite budget.) Choose which properties define the style,and which ones don't matter as much. In the case of Fishing, the high priorities included random variation in line thickness, and the use of color to indicate time of day. In The New Chair, it was most important to provide a way to vary the line style according to the character's mood.
A final word about the timing of this process: Don't think that it's necessary to have your vision worked out to the tiniest detail before the project begins. Obviously, the more decisions you can make in advance, the clearer the task will be for the rest of the team. But every production has its little surprises. You may find that the work your team produces pulls you in a direction that you couldn't have imagined ahead of time. Your vision should continue to become clearer and more refined throughout production until, hopefully, it is matched by the finished piece.
7

Section 2. Defining the problem space
Once a visual goal is clearly defined, someone, usually a lead technical director, has to translate that goal into something that a team of animators can accomplish. This may require developing some new software, or it may mean simply making clever use of tools you already have.
At this point, you should ask yourself the following questions:
Is CG really the right tool for the job?
The benefits of CG: Free inbetweening, thanks to keyframe animation.Free perspective, thanks to 3D.Unlimited revisions.An economy of scale. (Imagine painting a watercolor every frame!)
The drawback:Setup is costly. A long time will pass before you see a single image.
What visual properties are most important for the look? Try to get a sense of the art director's priorities. You need to be sure that you understand all of the terms, so study up on your art-speak. If you have no art background, a good way to begin catching up is by reading the notes from the 1998 SIGGRAPH course, "Art for Computer Graphicists". [GLA98]
How much variation is there from shot to shot, or from subject to subject? Which properties vary the most? Try to anticipate the range of styles you'll need to simulate.
What are the skills of the artists on your team? For example, if they have a lot of painting experience, perhaps a tool with a painting interface would be more effective than one that requires text input.
Is it possible to accomplish all of the visual goals using your current tools? If not, what new tools need to be developed? Would some additional software make the job substantially easier? Easier for whom?
The end product of this stage should be (a) a specification for any software tools that need to be developed, and (b) a rough idea of the pipeline through which each shot will be pushed into production.
Example 1: Fishing
For Fishing, the director's specification for the look could be broken down to the following criteria:
Static properties:Substrate: rough watercolor paper.Medium: transparent watercolor paint.Geometry of marks: mostly long, thin lines, with a few wider brushstrokes.Texture of marks: both hard and soft edges, very rough and messy.Perceptual function: different marks may indicate body parts, shading and shadows, negative
space, fish, or ripples in water.Function of density of marks: indicates shading and/or depth.
8

Dynamic properties:Coherence of paper: paper should move with environment, but should not change between frames.Coherence of marks: marks should move with character, but outlines should change in an erratic
way, so explicit coherence is not crucial.Change in color: smooth transitions indicate changing time of day.
Was CG the right tool? Yes. The director's painting skills and draftsmanship were definitely up to the task of creating this animation by hand. However, he felt the end product would be much better if he could take advantage of the perspective and keyframe animation benefits of working in CG. Also, the project could then take place in an environment already streamlined for animation production, and make use of the skills of other CG animators.
Was additional software necessary to achieve the watercolor look? No. A heavy simulation approach to watercolor rendering [CUR97] would have been complete overkill in this case. The main benefit of such a simulation is the complex interaction between different flows of water and pigment within a reasonably-sized region. But in this case, the brushstrokes were all too narrow to show such effects. The edge-darkening effect could easily be faked using edge-detection and other filters available in a generic image processing toolkit, and the textures could be achieved with clever application of procedural noise.
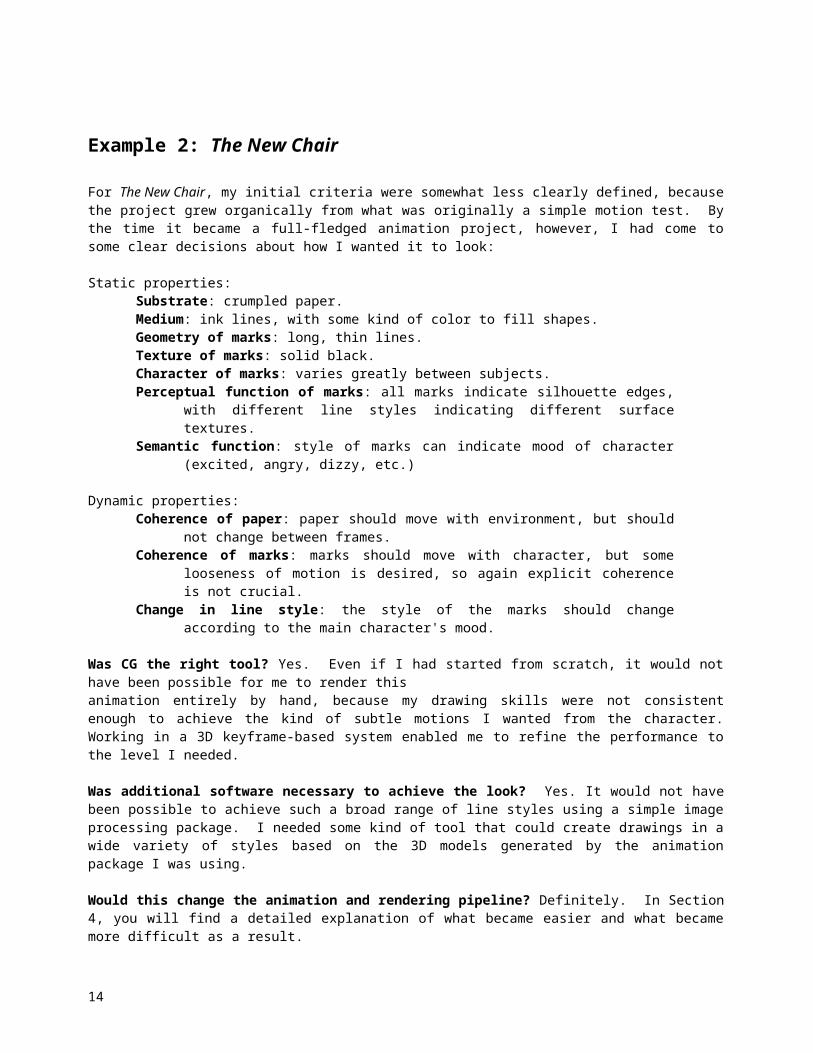
Example 2: The New Chair
For The New Chair, my initial criteria were somewhat less clearly defined, because the project grew organically from what was originally a simple motion test. By the time it became a full-fledged animation project, however, I had come to some clear decisions about how I wanted it to look:
Static properties:Substrate: crumpled paper.Medium: ink lines, with some kind of color to fill shapes.Geometry of marks: long, thin lines.Texture of marks: solid black.Character of marks: varies greatly between subjects.Perceptual function of marks: all marks indicate silhouette edges, with different line styles
indicating different surface textures.Semantic function: style of marks can indicate mood of character (excited, angry, dizzy, etc.)
Dynamic properties:Coherence of paper: paper should move with environment, but should not change between frames.Coherence of marks: marks should move with character, but some looseness of motion is desired,
so again explicit coherence is not crucial.Change in line style: the style of the marks should change according to the main character's mood.
Was CG the right tool? Yes. Even if I had started from scratch, it would not have been possible for me to render thisanimation entirely by hand, because my drawing skills were not consistent enough to achieve the kind of subtle motions I wanted from the character. Working in a 3D keyframe-based system enabled me to refine the performance to the level I needed.
Was additional software necessary to achieve the look? Yes. It would not have been possible to achieve such a broad range of line styles using a simple image processing package. I needed some kind of tool that could create drawings in a wide variety of styles based on the 3D models generated by the animation package I was using.
Would this change the animation and rendering pipeline? Definitely. In Section 4, you will find a detailed explanation of what became easier and what became more difficult as a result.
9

10
Section 3. Writing usable tools
If you are going to need new software, it's important to keep it simple. It may be impossible to write a tool that automatically replicates the style of a Van Gogh. But if you can provide a simpler tool that lets a skilled user do the job pretty quickly, then you're on the right track.
The goal should be to reduce the tedium the users experience. This is not the same thing as reducing the amount of work they have to do! This is a very important distinction. If you eliminate work at the cost of making the interface obscure or confusing, you will cripple your users. But if you make the work engaging, it will go quickly and the end product will be vastly better.
The computer should make only the decisions that would be too tedious for a person to do by hand. Placing thousands of brushstrokes for every frame of a film is a task that clearly falls in this category. But the computer does not have to make all of the decisions. Of the properties listed in the previous chapter, certain ones lend themselves to automation, while others do not. The most abstract properties, such as the emotional expressiveness of a mark, are naturally the most difficult to automate. Luckily, they can also be the most fun to set by hand.
In cases where there are many dimensions of variation to the style, it may be difficult or even impossible to write an algorithm that is guaranteed to work under all possible inputs. If that's the case, don't bang your head against the problem for too long. If it's possible to screen for bad combinations of parameters, do so. But if that proves too complex a task, it's probably better to risk the occasional bad frame than to impose too narrow a restriction on therange of possible styles. A good TD can always find a way around a glitch.
In the case of The New Chair, the right implementation turned out to be a simple image filter that turned a depth map into a line drawing. (See Appendix A for a brief description of the technique.) The interface was text-based, a compromise between ease of development and ease of use. (Since the user in question was a programmer and notmuch of a painter, this was an appropriate way to go.) Figures 6 and 7 show examples of the simple formats used.
## ## "shaky" drawing style: ## thin, rough, multiple strokes-- ## makes things look like they're shivering. ##
precision 20 erasure 0.25 drag 0.4 drunk 1.0 min 1.0 max 1.5 rough 0.1
6. A text file describing a drawing style for the "Loose and Sketchy" filter.
## ## Ergoman becomes angry at the chair. ##
path /home/cassidy/newchair/styles
306 normal 315 angry 321 angry
11
325 normal
7. An animation file for interpolating different styles.
12
Section 4. Optimizing the pipeline
Using NPR in production affects every stage of the process, including art direction, design, modeling, shading, lighting, and even motion. Depending on the technique used, some of these stages may be made more difficult, while others will become simpler or even disappear entirely. Consider this carefully before you start to budget your team’s time.
Task Difficulty No longer important: Still important:
Modeling EasierCrashing surfacesSmoothness of normalsTexture stretching
Appearance of silhouette
Surfacing Much easier Texture of all objects Texture of paper
Lighting Easier Separation of planesRounding of surfaces
Color paletteGround shadows
Animation A little easier Intersecting objectsThe third dimension
WeightActingPersonalityEtc…
Compositing Harder
New concerns:Animation of line stylesCombining different stylesHidden-line removalOrdering of planesCombining color with lines
8. The relative difficulty of various tasks, after the "Loose and Sketchy" process is introduced.
Figure 8 shows a synopsis of how the "Loose and Sketchy" process changed the production pipeline for The New Chair.
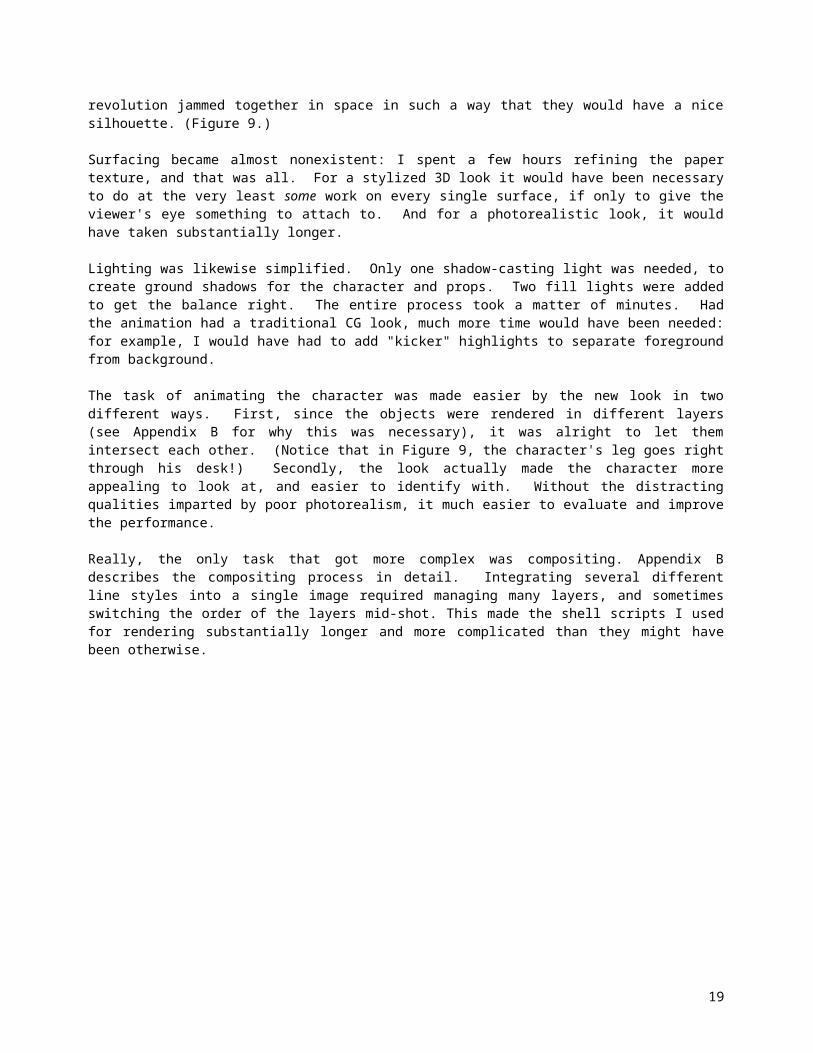
The task of modeling the main character and all of the props was reduced from potential weeks to a few days, because it was no longer necessary to worry about intersecting surfaces, parametric texture coordinates, or smoothness. For example, the main character consisted of a handful of surfaces of revolution jammed together in space in such a way that they would have a nice silhouette. (Figure 9.)
Surfacing became almost nonexistent: I spent a few hours refining the paper texture, and that was all. For a stylized 3D look it would have been necessary to do at the very least some work on every single surface, if only to give the viewer's eye something to attach to. And for a photorealistic look, it would have taken substantially longer.
Lighting was likewise simplified. Only one shadow-casting light was needed, to create ground shadows for the character and props. Two fill lights were added to get the balance right. The entire process took a matter of minutes. Had the animation had a traditional CG look, much more time would have been needed: for example, I would have had to add "kicker" highlights to separate foreground from background.
The task of animating the character was made easier by the new look in two different ways. First, since the objects were rendered in different layers (see Appendix B for why this was necessary), it was alright to let them intersect each other. (Notice that in Figure 9, the character's leg goes right through his desk!) Secondly, the look actually made the character more appealing to look at, and easier to identify with. Without the distracting qualities imparted by poor photorealism, it much easier to evaluate and improve the performance.
13
Really, the only task that got more complex was compositing. Appendix B describes the compositing process in detail. Integrating several different line styles into a single image required managing many layers, and sometimes switching the order of the layers mid-shot. This made the shell scripts I used for rendering substantially longer and more complicated than they might have been otherwise.
9. Models used in The New Chair.
ConclusionComputer animation is a truly limitless medium: any wild idea that you can imagine can be rendered digitally... but it's probably beyond your budget. For those of you in the production world, I hope these notes provide a bit of help in making your wilder ideas more feasible. For the researchers and developers among you, I hope you will consider collaborating with animators in your future projects. Your research will go much farther if it is driven by an animator’s aesthetic goals.
14

Appendix A: Loose and Sketchy method
The "loose and sketchy" filter automatically draws the visible silhouette edges of a 3-D model using image processing and a stochastic, physically-based particle system. For input, it requires only a depth map of the model (Figure A1) and a few simple parameters set by the user. First, the depth map is converted into two images:
The template image (Figure A2), in which each pixel represents the amount of ink needed in its immediate neighborhood. This image is obtained by calculating the magnitude of the gradient of the depth map, thresholding to give binary values, and then blurring the result.
The force field (Figure A3), a vector field that pushes particles along the silhouette edges. Such a field can be obtained by calculating unit vectors perpendicular to the depth map's gradient.
A1. A depth map. A2. The template image. A3. The force field.
Next, particles are generated, one at a time, for a fixed number of particles. Each particle's initial position is chosen at random from within the template image, with a bias toward areas that need more ink. (No particles are ever born in areas that need no ink.) Acceleration at each timestep is based on the force field, with additional coefficients for randomness and drag. The particle is rendered onto the canvas as an antialiased line segment. If a particle wanders into an area that needs no more ink, it dies and a new one is born in another random place. The particle also erases thedark pixels from the template image as it travels, so that those edges will not be drawn again. (This aspect of the technique is similar to previous approaches to pen-and-ink rendering [SAL97, TUR96].)
Examples
By tweaking drag and randomness, a continuous gamut of styles can be generated ranging from a tightly controlled technical drawing (Figure A4) to a loose and gestural sketch (Figure A6). The higher the drag, the tighter the style. These parameters also affect the character of motion, which can range from near-perfect smoothness to a lively staccato. The looser styles are particularly appropriate for animated characters, giving them a bit of life even when they stand perfectly still. It is also worth noting that for animation, it is not necessary to exactly render all of the silhouette edges all of the time. An error in a single frame will usually go unnoticed, because each frame lasts only a fraction of a second.
15

A4. High drag, zero randomness. A5. Moderate drag and randomness. A6. Low drag and high randomness.
Figures A7-A11 show just a few of the other styles available by varying these and other parameters. Each of these images took only 10-60 seconds to compute.
A7. A8. A9.
A10. A11.
16

Appendix B: Compositing with Loose and Sketchy layers
1. For each object or group of objects that needs a separate style, create a layer that can be rendered separately. Then, for each layer, do the following:
a. Render a depth map (Figure B1) and a matte (Figure B2) for each layer.
b. Apply the loose and sketchy filter to the depth map, using a style file specific to that layer, to generate lines (Figure B3).
c. Dilate the matte by a few pixels, to cover for some sloppiness in the lines (Figure B4).
d. Combine the lines with the dilated matte, and let that be the matte for this layer. (Figure B5).
2. Once all layers have been rendered as line drawings with alpha mattes, composite them together in the proper order. The mattes will cause the upper layers to hide the lines of the lower ones. (Note that this order may change as objects change in proximity to the camera. In the case of "The New Chair", these changes in proximity were only relevant in certain scenes, such as when the character spins in the chair. In these situations, a shell script was modified to switch from one ordering to another based on the frame number.) (Figure B6)
3. Render the entire scene in full color. (Figure B7)
4. Desaturate and blur the colored scene. (Figure B8)
5. Multiply the blurry-color image by the fully-composited line image (Figure B9). Note that the colors appear to fill the lines completely despite the fact that the lines do not coincide with the edges of the objects. This works because our brains process color and edge information separately. Blurring the color image removes the high-frequency information that would cause the impression of a double edge.
6. Generate a paper texture using Perlin [PER85] and Worley [WOR96] noise (Figure B10). The paper texture changes from one environment to the next, but not from frame to frame, as this would be visually distracting.
7. Multiply the color and lines by the paper texture to produce the final image (Figure B11).
B1. Depth map. B2. Matte. B3. Lines. B4. Dilated matte. B5. Final matte.
17

B6. Composition of all layers. B7. Rendered color image.
B8. Blurred color image. B9. Combination of color and lines.
B10. Procedural paper texture. B11. The final image.
18
References
[CAL96] Sharon Calahan. "Pixel Cinematography", SIGGRAPH 1996 Course #30.
[CUR97] Cassidy J. Curtis, Sean E. Anderson, Joshua E. Seims, Kurt W. Fleischer and David H. Salesin. Computer-Generated Watercolor, Proceedings of SIGGRAPH 1997, Computer Graphics Proceedings, Annual Conference Series, pp. 421-430 (August 1997). Addison Wesley. Edited by Turner Whitted. ISBN 0-89791-896-7.
[KIL97] David Kilmer. The Animated Film Collector's Guide, John Libbey & Company, Sydney, Australia, 1997.
[GLA98] Andrew Glassner, Barbara Kerwin, Jeff Callender, James Mahoney, and Mat Gleason. "Art for Computer Graphicists", SIGGRAPH 1998 Course #30.
[MEI96] Barbara J. Meier. Painterly Rendering for Animation, Proceedings of SIGGRAPH 1996, Computer Graphics Proceedings, Annual Conference Series, pp. 477-484 (August 1996). Addison Wesley. Edited by Holly Rushmeier. ISBN 0-201-94800-1.
[NAB89] Vladimir Nabokov. Laughter in the Dark, pp. 8-10, Vintage International Press, 1989
[PER85] Ken Perlin. An Image Synthesizer, Computer Graphics (SIGGRAPH '85 Proceedings), 19 (3), pp. 287-296 (July 1985). Edited by B. A. Barsky.
[SAL97] Michael P. Salisbury, Michael T. Wong , John F. Hughes and David H. Salesin. Orientable Textures for Image-Based Pen-and-Ink Illustration, Proceedings of SIGGRAPH 1997, Computer Graphics Proceedings, Annual Conference Series, pp. 401-406 (August 1997). Addison Wesley. Edited by Turner Whitted. ISBN 0-89791-896-7.
[THO81] Frank Thomas and Ollie Johnston. Disney Animation: The Illusion of Life, Abbeville Press, New York, 1981.
[TUR96] Greg Turk and David Banks. Image-Guided Streamline Placement, Proceedings of SIGGRAPH 1996, Computer Graphics Proceedings, Annual Conference Series, pp. 453-460 (August 1996). Addison Wesley. Edited by Holly Rushmeier. ISBN 0-201-94800-1.
[WOR96] Steven P. Worley. A Cellular Texture Basis Function, Proceedings of SIGGRAPH 1996, Computer Graphics Proceedings, Annual Conference Series, pp. 291-294 (August 1996). Addison Wesley. Edited by Holly Rushmeier. ISBN 0-201-94800-1.
19