


Languages
Pages
Legal


University of Ottawa
Faculty of Engineering
uOttawa Makerspace
Intel Galileo Project
Traffic Lights
Difficulty: Beginner
Yusuf Fadairo

Introduction The uOttawa Makerspace is home to the latest in microcontroller technology with Arduino Uno and
Intel Galileo microcontroller boards. This guide shows students of the Makerspace the appropriate
methods to use the Intel Galileo microcontroller boards by the creation of a simple electronics project
that teaches student the hardware and software capacity of the Intel Galileo board. This electronic
project uses the Intel Galileo board to power three LED as traffic lights.
Resources The items to be used for the project are:
Intel Galileo Board
Laptop or computer with USB compatibility
Three LEDs (green, amber/yellow, and red)
Three 330 Ω (ohm) resistor (orange, orange, brown)
USB Type A male to Type micro-B male cable
Small Breadboard
Additional material for the project is:
Traffic Light Circuit Image file
Traffic Light source code (sketch)
Procedure
Prepare the Circuit Connect the positive end of the green LED to pin 13 on the Galileo board using a breadboard.
The positive end of the LED is the one with the longer lead
Connect the positive end of the amber LED to pin 12 on the Galileo board
Connect the positive end of the green LED to pin 11 on the Galileo board.
Connect one of the ends of each of the resistors to the negative end of the LEDs
Connect the other end of the resistors together to the GND pin on the Galileo board
Ensure the circuit is connected as shown in Figure 1 or use the provided circuit schematic
Note: Make sure to ground the negative end of the circuit otherwise the circuit will not work.

Figure 1: Project Circuit Schematic
Upload Code Start the Arduino IDE for the software side of the project
Copy and paste the Traffic_Lights sketch source code (provided in Supporting Materials) in the
IDE window
Optional: Browse through the code to understand the functionality of the software
Click in the Verify button to make sure there are no compile time errors in the code
Ensure the Arduino is connected via the USB port to the computer
Click on the Upload button on the IDE to upload the code to the Intel Galileo
Optional: If there is an error message look over the connectivity of the board
The upload takes some time as it electronically rewrites the Intel Galileo microcontroller
Note: The source code must be verified before the code can be uploaded to the microcontroller board.
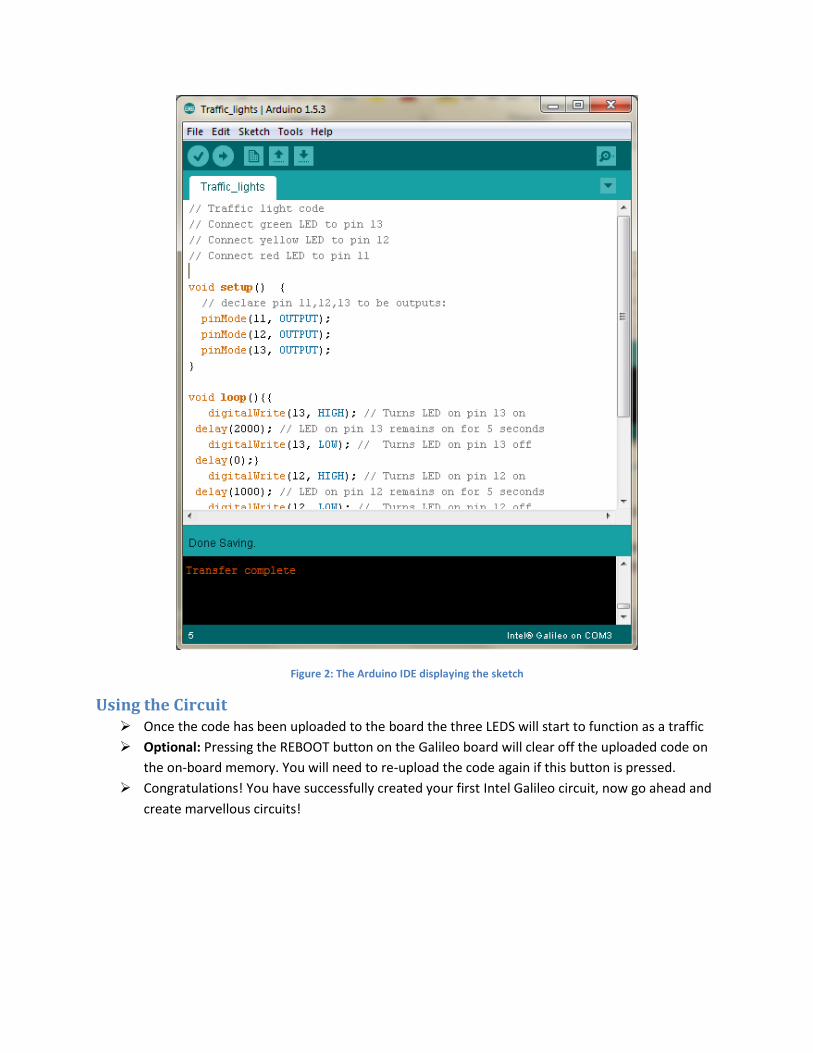
Figure 2: The Arduino IDE displaying the sketch
Using the Circuit Once the code has been uploaded to the board the three LEDS will start to function as a traffic
Optional: Pressing the REBOOT button on the Galileo board will clear off the uploaded code on
the on-board memory. You will need to re-upload the code again if this button is pressed.
Congratulations! You have successfully created your first Intel Galileo circuit, now go ahead and
create marvellous circuits!

Supporting Materials
Intel Galileo circuit schematic
Figure 3: Traffic Light Circuit Diagram

Arduino IDE sketch (source code) for Traffic_Lights
// Traffic light code
// Connect green LED to pin 13
// Connect yellow LED to pin 12
// Connect red LED to pin 11
void setup() {
// declare pin 11,12,13 to be outputs:
pinMode(11, OUTPUT);
pinMode(12, OUTPUT);
pinMode(13, OUTPUT);
}
void loop(){{
digitalWrite(13, HIGH); // Turns LED on pin 13 on
delay(2000); // LED on pin 13 remains on for 5 seconds
digitalWrite(13, LOW); // Turns LED on pin 13 off
delay(0);}
digitalWrite(12, HIGH); // Turns LED on pin 12 on
delay(1000); // LED on pin 12 remains on for 5 seconds
digitalWrite(12, LOW); // Turns LED on pin 12 off
delay(0);
digitalWrite(11, HIGH); // Turns LED on pin 11 on
delay(2000); // LED on pin 11 remains on for 5 seconds
digitalWrite(11, LOW); // Turns LED on pin 11 off
delay(0);
}
Top Related