


Languages
Pages
Legal


Table of Contents Welcome ....................................................................................................................................................... 1
Additional Resources ................................................................................................................................ 1
Hardware and Software Requirements ........................................................................................................ 2
Recommended Implementation Plan ........................................................................................................... 2
Phase One – Planning ................................................................................................................................... 3
Organize an Implementation Team .......................................................................................................... 3
Discuss the Company’s Vision ............................................................................................................... 3
Discuss the Implementation Method ................................................................................................... 4
Workflow Considerations ......................................................................................................................... 4
Assign Duties for the E2 Shop System ...................................................................................................... 5
Determine Go Live Date ........................................................................................................................... 6
Installing the Software .............................................................................................................................. 6
Data Conversions (If Applicable) ............................................................................................................... 6
Review Special Forms ............................................................................................................................... 7
Part Numbers ............................................................................................................................................ 7
Job Tracking .............................................................................................................................................. 8
Posting Material to Jobs ........................................................................................................................... 9
Inventory / Purchasing .............................................................................................................................. 9
Phase Two – Training .................................................................................................................................... 9
Getting Started - Classroom Training .................................................................................................... 9
Virtual Classes ....................................................................................................................................... 9
Online Tutorials ................................................................................................................................... 10
On-Site Training/Implementation ....................................................................................................... 10
Practice with Sample Company Data .................................................................................................. 10
One-on-One Internet Training ............................................................................................................ 10
Phase Three – Implementing ...................................................................................................................... 11
Gather Data ............................................................................................................................................ 11
Logging In ................................................................................................................................................ 11
User Security ........................................................................................................................................... 11
Create New Users ................................................................................................................................... 12

Company Maintenance – Edit Button .................................................................................................... 12
Company Maintenance – Defaults Button ............................................................................................. 12
Enter Table Items .................................................................................................................................... 13
Startup Checklist ..................................................................................................................................... 13
Enter Open Items .................................................................................................................................... 16
Shop Floor Entries ............................................................................................................................... 17
Accounting Entries .............................................................................................................................. 19
Verify Accuracy of Data Entry ............................................................................................................. 20
Phase IV - After Care ................................................................................................................................... 21
Assign a System Administrator ............................................................................................................... 21
Consulting Services ................................................................................................................................. 21
Technical Support – Maintenance Options ............................................................................................ 21

1 | P a g e
Welcome Shoptech Software would like to welcome you as a new user of the best shop control system on the
market today. As a result of enhancement suggestions from our customers, the E2 Shop System
continues to grow in features and function while maintaining a reputation for ease of use and reliability.
Add to that our commitment to provide the highest quality of customer support, and it is easy to
understand why so many others have made the same decision.
Making the transition to any new system can be a bit overwhelming, but with our proven road map to a
successful implementation, we will help make the process as smooth as possible. This guide will assist
you in the formulation of an Implementation Plan by providing the steps for a 4 phase approach utilizing
one of the following two methods:
• Full: Implement all areas of the software you intend to use at one time
• Staged: Implement areas of the software you intend to use over time, in logical segments
It is important to understand that disruptions will likely occur during this phase; however, you can
minimize them by having a defined plan, a strong team leader, and a well trained staff.
Additional Resources The following resources are available to assist in the implementation process:
Getting Started Class
Two-day class designed for new customers to provide an overview of E2 along with insights for
implementation.
Virtual Classes
Online, interactive classes designed to provide daily users of E2 an overview of the key areas of the
system.
Online Tutorials
Recorded content regarding the key features of E2 that can be accessed 24/7.
E2 Help
In-software help that provides a detailed overview of how each area of the system works.
Implementation Specialist
Shoptech personnel trained to assist you implement E2 by coordinating conversion timelines and
walking you through the stages outlined in this manual.
On-Site Consultations
Customized training that takes place in your shop designed to help you decide how to specifically
configure the System to fit your needs.
As you can see, you will not be alone during this process and our goal is the same as yours: to get the E2
Shop System up and running for your business as quickly and efficiently as possible.
Welcome aboard!

2 | P a g e
Hardware and Software Requirements It is imperative you have all your hardware and software requirements met prior to your “Go Live Date.”
If you do not have the equipment already it will be important to order it in enough time to assure it is
installed and operational.
An up to date list of hardware and software requirements can be found on Shoptech’s website:
www.shoptech.com . This information can also be obtained by contacting the Implementation Specialist
who has been assigned to your account.
Recommended Implementation Plan The following 4 stage Implementation Plan is proven to minimize the disruption in your business:
• Phase 1: Planning
• Phase 2: Training
• Phase 3: Implementing
• Phase 4: After Care
In the following sections of this document we will describe the decision points and considerations for
each Phase to achieve a successful implementation.

3 | P a g e
Phase One – Planning
Organize an Implementation Team Selecting the appropriate individuals for your Implementation Team is an important aspect of Phase
One, and pulling from a cross-section of the end users is generally the best way to proceed. If possible,
include:
• Department Heads
• End Users
• Management
When determining who should be included, be mindful of schedules and availability so you can strike a
balance between representation and the ability to meet and make decisions in a timely manner. With
that in mind, we recommend selecting two individuals to oversee the Team. Designate one individual to
be the Team Leader and the other as the backup. Both members should have the same commitment to
the Plan, share the company’s vision to make it successful, and have the authority to carry it out or seek
guidance when questions arise.
Regardless its composition, it is the Implementations Team’s responsibility to:
• Understand management’s goals, vision, and priorities
• Develop a method of implementing E2 in your business (Full or Staged)
• Develop an Implementation Plan with your Shoptech Consultant
Implementation Specialist (if no on site consulting services have been purchased)
Outside Consultant (if consulting services have been purchased)
• Successfully execute the Implementation Plan
• Ensure that all Shoptech resources (Training, Consulting and Support) are used in accordance to the
Implementation Plan
• Seek management’s help as needed, to meet the implementation schedule
Discuss the Company’s Vision If members of the Team were not involved in the process, share why the decision was made to purchase
the E2 Shop System. Make a list of the expectations and goals you have for the software and prioritize
them. We recommend the following categories, which lend themselves well to the Staged Approach:
• Needs: What is needed at this moment to operate your business?
Orders
Purchasing
Shipping/Receiving
Billing
• Wants: What would you like the software to provide for you?
Estimating
Inventory

4 | P a g e
Job Costing
• Wish: What do you hope to accomplish with the software?
Scheduling
Quality
Detailed reporting and Data analysis
While this list will look different from one company to another, the key is to identify YOUR priorities and
pass them along to the Team. As time passes and your use of the software grows, you can re-visit these
items and establish a new list as appropriate.
Discuss the Implementation Method As noted previously, there are two approaches to implementing systems:
• Staged (Recommended)
In a Staged Method, the software is implemented in small, logical segments that have well-defined start
and finish implementation dates. Once a segment is implemented, it is reviewed and assessed to make
sure it is working as expected before the next segment is begun. If changes are needed, the Team
determines if they impact the next segment and adjusts accordingly.
• Full
The Full Implementation Method employs a relatively straight-forward approach and assumes all the
modules your company plans to use are brought online at one time, using a “master” start and end date
for the entire process.
When determining which Method will work best for your Company, consider the following factors:
• Needs, Wants, and Wishes
This breakout lends itself well to the Staged Implementation Method.
• Available Resources
Who will perform the work and what other duties are required?
• Data Input
How much data needs to be entered from the previous system and how will it be done?
• Legacy Systems
How will E2 interface during the conversion period and will they run in parallel for a time?
• Risk Tolerance
How much risk is management willing to take to reach the Company’s goals?
Workflow Considerations If you have not already done so, document your current workflow, placing the processes in sequential
order. Note employee responsibilities: Who does what? When, where, and how do they do it? When
finished, compare it against this common E2 Shop System workflow:

5 | P a g e
• Estimating enters new Parts with Bills of Material and Routers
• Quotes are sent to Customers
• Orders are entered from accepted Customer Quotes
• Inventory is posted at Order Processing or on release to the floor (Inventory Transfer/Fill Job
Requirements)
• Appropriate paperwork is generated
• Purchasing orders needed material
• Material and hardware are received
• Jobs are distributed to the shop floor
• Manufacturing starts
• Labor is reported by clock or entered by office the next day
• Parts are set aside for Outside Services
• Purchase Orders are cut (from Outside Service Requirements)
• Parts are shipped to Vendors
• Parts are received back
• Parts are completed and are packaged for shipping/ stocking
• Customer Orders go to billing
• Stock Releases are placed into inventory Accounts Receivable Department
Generates Customer Invoices
Receives payments (Cash Receipts)
• Accounts Payable Department
Generates Vendor Invoices
Pays current A/P Invoices (Cash Disbursements)
• End of month transactions are performed (Journal Entries)
Financial Statements are generated
With this sample workflow you should be able to assign the correct employee.
Assign Duties for the E2 Shop System Below is a list to be used when assigning the employee to an area in E2. This will give a good basis to
develop security and training outline for the employees involved with the implementation.
Duty Name Position
Quoting _______________________ ______________________
Orders _______________________ ______________________
Shipping _______________________ ______________________
Purchasing _______________________ ______________________
Receiving _______________________ ______________________

6 | P a g e
Inventory Control _______________________ ______________________
Labor Reporting _______________________ ______________________
Scheduling _______________________ ______________________
Accounts Receivable _______________________ ______________________
Accounts Payable _______________________ ______________________
General Ledger _______________________ ______________________
Job Costing Analysis _______________________ ______________________
Determine Go Live Date Once you have mapped out the processes and considered how you will use the system, set your Go Live
Date, taking these issues into consideration:
• Time to convert any Legacy data (see the section on Data conversions)
• Time to order and install any needed new hardware
• Training of personnel
• Time to load any open items to start the system
Open orders
Purchase Orders
AR and AP
As you develop your Implementation Plan, consider using tools available on the market designed to help
with project management by allowing you to assign individuals to tasks and develop time frames to keep
you on track.
Installing the Software Installation of the E2 Shop System Software has multiple considerations:
• Installing:
The SQL Component
The E2 Shop System
• Logging into the system for the first time
Backups
Due to frequent changes in Hardware and SQL requirements, the Installation Instruction may be printed
from the Shoptech website www.shoptech.com .
Data Conversions (If Applicable) This area will only apply if your company has decided to convert any data from your current (Legacy)
system into E2. Typical records to convert include:
• Customers
• Vendors

7 | P a g e
• Parts
• Employees
• Work Centers
• Various Base Table data
It is important to understand that if you have “Bad Data” in your Legacy system it will simply be
converted into E2 as “Bad Data.” Therefore, to prevent problems from inaccurate or incomplete
information, it is very important to clean up as many of these “bad” records as possible prior to
converting. Based on your input, your Implementation Specialist will work with you to create timelines
for sending your data to Shoptech’s Data Conversion Specialists in order to meet the Go Live date you
have set.
Specific considerations for this process include:
• What data is going to be converted
• Who is going to gather the data
• Who is going to verify the accuracy of the converted data
How long will it take to review
Review Special Forms Before going live with E2, review the following forms:
• Accounts Payable Checks
• Bill of Lading
• Laser Labels
Parts
Shipping
Box
These forms should be printed and verified for alignment prior to going live as opposed to finding out
the day you will need them.
Part Numbers How to assign part numbers is a question that comes up often during implementation. To start, consider
the different kinds of parts (and their associated numbers) you deal with:
• Customer Parts
• Raw Material
• Hardware Supplies
Once you have identified the Parts you will work with, consider how you want to identify them.
• Customer Part Numbers
Generally the Part Number used to identify them in the system is the same number the customer has on
the Customer (Purchase) Order. Many customers will not pay an invoice unless it has the part number
they provided.

8 | P a g e
• Raw Material
With regards to these items, a common consideration is whether you want to identify them by their
geometry or their material composition. For example, do you make it (3.00_316_SS) or (SS_316_3.00)?
3.00 Being Size and Shape (3” Diameter Round)
316 Being the material type
SS Being the material class
Much of how to configure these items depends on what is easier for you to use and order from a
vendor.
• Hardware / Supplies
Use a system that will identify what the item is and your employees will understand. Bear in mind the
part number will often be different from vendor to vendor so you may want to consider the use of User
Defined fields to allow for these distinctions.
Regardless the parts you deal with and how you decide to identify them, consistency is the most
important aspect of any numbering system. The people that will be entering parts into the database
need to follow the same numbering scheme to avoid confusion and duplication.
As a general rule, we strongly encourage you to avoid leaving “blank spaces” in part numbers. Instead,
consider using dashes (-) or underscores (_) as separators so it is easy to determine the exact values
used.
Job Tracking There are three methods E2 provides with regards to Job Numbering:
• Order Plus Item Number (Recommended)
We strongly recommend this method as it automatically associates Jobs to the Order on which they
were processed. For example, assume a Customer Order has three items on it. If the Order Number is
1000, the Jobs will be numbered accordingly:
1000-01
1000-02
1000-03
• Sequential
E2 still automatically assigns the number, but they are no longer tied to the Order they are on. For
example, assume a starting number of 2000 is entered as the first Job Number to use. In the example
above, the Order Number would remain 1000, but the Jobs would be numbered as follows:
2000
2001
2002
• Free Form Text
9 | P a g e
While offering the most flexibility, this method is also least recommended as it requires the User to
enter a Job Number for every Job created on an Order. Not only can this slow Order Entry down
significantly, every Job MUST have a unique number assigned to it, meaning it is now up to you to create
and maintain this list outside of E2.
Posting Material to Jobs Consideration will need to be made about applying material to Jobs’; that is, should it be posted at order
entry or later? Do you automatically allow the material to be posted or do you want to have more
control over the process with regards to timing and quantities? This is a conversation you should have
with your Shoptech Consultant to determine the best possible process for you.
Inventory / Purchasing Along with the issue of when to post material, you will also need to consider how you are going to use
and stock it. Do you buy material directly to jobs, or do you purchase some to jobs and keep some high
use materials available in inventory? If kept in inventory, how much material do you use at a time? How
are you able to purchase it? These questions are very important as you consider how to define your
Purchased Parts and are central to the use of Purchasing Factors in your business.
Phase Two – Training No software package can be successfully implemented without proper training, and our multiple options
provide many tools to help get you "up and running" on the E2 Shop System in the shortest time
possible.
Getting Started - Classroom Training A two-day class designed for new customers to provide an overview of how E2 works along with insights
for a successful implementation. Given the scope and focus of the class, it is recommended that only
personnel involved with the overall implementation of E2 attend while remaining personnel take
advantage of our Virtual Classes to provide the information they will need regarding the use of the
system. Class schedules and registration are available by logging into the Shoptech Community
(https://shoptech.force.com/customers/login) and clicking the Classroom Registration tab.
Getting Started Classes are available to customers on full maintenance.
Virtual Classes These online, interactive classes are designed to provide daily users of E2 an overview of the key areas of
the system. Each class lasts approximately 2 to 2.5 hours and allows users to attend only those sessions
that relate to their job functions, reducing time away from the shop. Class schedules and registration are
available by logging into the Shoptech Community (https://shoptech.force.com/customers/login)
and clicking the Classroom Registration tab.
Virtual Classes are available to customers on full maintenance.

10 | P a g e
Online Tutorials Recorded content regarding the key features of E2 that can be accessed 24/7 by logging into the
Shoptech Community (https://shoptech.force.com/customers/login) and clicking the My Training
tab and then click Catalog tab.
Online Tutorials are available to customers on full maintenance.
On-Site Training/Implementation On-Site Training/Implementation can be tailored specifically to fit your needs and is conducted directly
at your facility to provide the most direct training possible. A Shoptech Consultant will work closely with
you to identify issues, develop a Meeting Agenda, and set a time that is most convenient for you for the
training to take place. By coming to your business and using your data, disruptions to daily work are
minimized while training impact is maximized.
Onsite Consultations are not included in maintenance, but can be purchased in time frames that best fit
your needs.
Practice with Sample Company Data Included with the system install is a Sample Company database that all Users will be able to access.
The Sample Company is a good place for Employees to “get their feet wet” while entering information to
get a sense of the System Flow. If you are having your data converted, consider turning your own data
into a Customized Sample Company for your Employees to use. Contact your Implementation Specialist
for assistance in creating this kind of Sample Company.
One-on-One Internet Training Implementation Specialists have the ability to connect with your System via the Internet, allowing them
to see your specific Data, a feature that can be especially useful when you need help understanding a
specific area of the software.
During your warranty period, two (2) hours of One-on-One Training are available at no charge. After the
warranty period, or beyond the initial two hours, this service is billable at an hourly rate. Ask your
Implementation Specialist for the details and to schedule a time that is convenient for you should you
require this service

11 | P a g e
Phase Three – Implementing There are basic items that must be entered regardless of which areas of the system you plan to use. We
have broken this section down to a natural flow for an Implementation of the E2 Shop System and
provided a Check List of “to do” items as a guide.
Gather Data Once you determine your conversion date, make sure you will have your converted data in time to go
live. In addition to the records being converted for you, make sure to gather the data from your Legacy
system that is NOT being converted but will still need to be entered into E2 once the conversion is
completed. Make sure this list is “as of” the conversion date so it will match the converted values where
appropriate. If you are converting the accounting module at this time, you must do so as of the last day
of a month. Below are the required listings:
• Active Customers
• Active Vendors
• Active Employees
• Chart of Accounts
• Outside/Inside sales staff/ with commission rate
• Departments (typically based on payroll departments)
• Work Centers (task or machine to make a part)
• Operations (description of a task within a work center)
• Open quotations
• Open customer orders
Enter old job cost for open jobs (optional)
• Take a physical inventory if tracking quantities on hand
• Open vendor purchase orders
• Open Requests for Quotation
• Open Accounts Receivable
• Open Accounts Payable
• Trial balance (beginning balances for general ledger)
• Parts list
Logging In Once you have entered the initial unlock code, you can log into the software by entering Supervisor for
the User ID and Pass for the Password. You will be logged into the Sample Company provided with the
software. If you are not having your data converted, you will need to create your New Company by
going to Company Maintenance and clicking the New button.
User Security Security in the Shop System can be as stringent or relaxed as you choose. The flexibility of the system
allows you to control access to each menu item or report on a per user basis. The system administrator

12 | P a g e
can set up a template for Security in Company maintenance; once set, any new Users will automatically
inherit these access levels. Each individual User can have access tailored to the needs of the job being
performed. Access set at the user level will override the template in Company Maintenance.
Create New Users User IDs must be created for every person that needs to log in to the system. Administrators must set
the initial password for new users but can allow the user to re-set the password upon the initial log in.
One person should be set up as “Supervisor” that will have access to all areas of the system and can
maintain Users and Security Settings.
Note: The system administrator should not log in as supervisor for daily functions, only when needing
to do high level security items.
Company Maintenance – Edit Button Establish the following information in Company Maintenance | Edit:
• Company Code
• Company Name
• Shipping Address
• Holidays
• Auto Numbering
These should not be set until you are ready to enter new data.
Use a number which is very different than your current numbers. Data Collection
Consider validation settings regarding Time Tickets entered via real time data collection
devices
• Order Entry
Automatically Post Parts
Inventory Posting Method
Job Number Creation Time and Attendance
Shift set up
Auto Rounding
Company Maintenance – Defaults Button While there are a number of Company Default settings to be addressed, the items listed below are of
particular significance given the impact they can have on the System.
• Customer Defaults
Customer Billing G/L Coding Driven By
Determines whether Customer Invoices will be populated by Work Codes or Product Codes
QuickBooks users must use Product Code.

13 | P a g e
• General Ledger
Default Currency Code
This will be used in setting up Customers and Vendors
Accounting Fiscal Year
Default General Ledger Accounts and Bank Codes Interfaces
Determine any use of 3rd party software
Reference the User Guide for further information regarding these settings.
Enter Table Items One of the most critical parts of getting the system up and running is the entry of Table items, typically
referred to as “Core Tables” (Customers, Vendors, Employees, Work Centers, G/L Accounts, etc.) and the
“Base Tables” (Operations, G/L Group Codes, Tax Codes, Terms Codes, etc.) used to create them. These
records serve as the building blocks of E2 and are called upon continuously throughout its use; therefor
it is absolutely crucial that the items in the Table Maintenance section be entered in a thorough manner.
If not, the data you enter “down the road” will be incomplete or even incorrect.
In the excitement of working with a new system many users are tempted to try shortcuts or skip steps
such as leaving addresses or telephone numbers blank in Customer Entry. At the time, this might seem
harmless; however, the result is that someone will have to go back through each customer, one at a
time and correct the information in the future. The old saying, “do it right the first time” certainly
applies to Table setup.
As a company, you may start using the Shop Floor Control area prior to the accounting system; we
simply assume there is another software package that contains the financial data. Even if this is so, the
Chart of Accounts (General Ledger Codes) still needs to be entered as they show up as required fields
throughout the system and are essential to capturing accurate Job Costs. When the user decides to
convert the accounting data, it must be done on the first day of the month since the General Ledger is
posted by one whole month at a time as opposed to a designated date range. See the instructions for
the accounting conversion procedures at the end of this section for additional details.
Startup Checklist While every company has its own way of doing business, years of experience of implementing systems
has led to this checklist regarding Shoptech’s recommendations for the entry of Table Data and Open
Items. It is important to make every effort stick to this order and refrain from “skipping ahead” because
later records might rely on bypassed information. Check off each area as it is completed to provide a
framework for progress. Additional details for each record are located in the User’s Guide. If you have
questions or run into issues, feel free to contact your Implementation Specialist or call our Technical
Support Team at 1-800-677-9640 or email them at [email protected] .
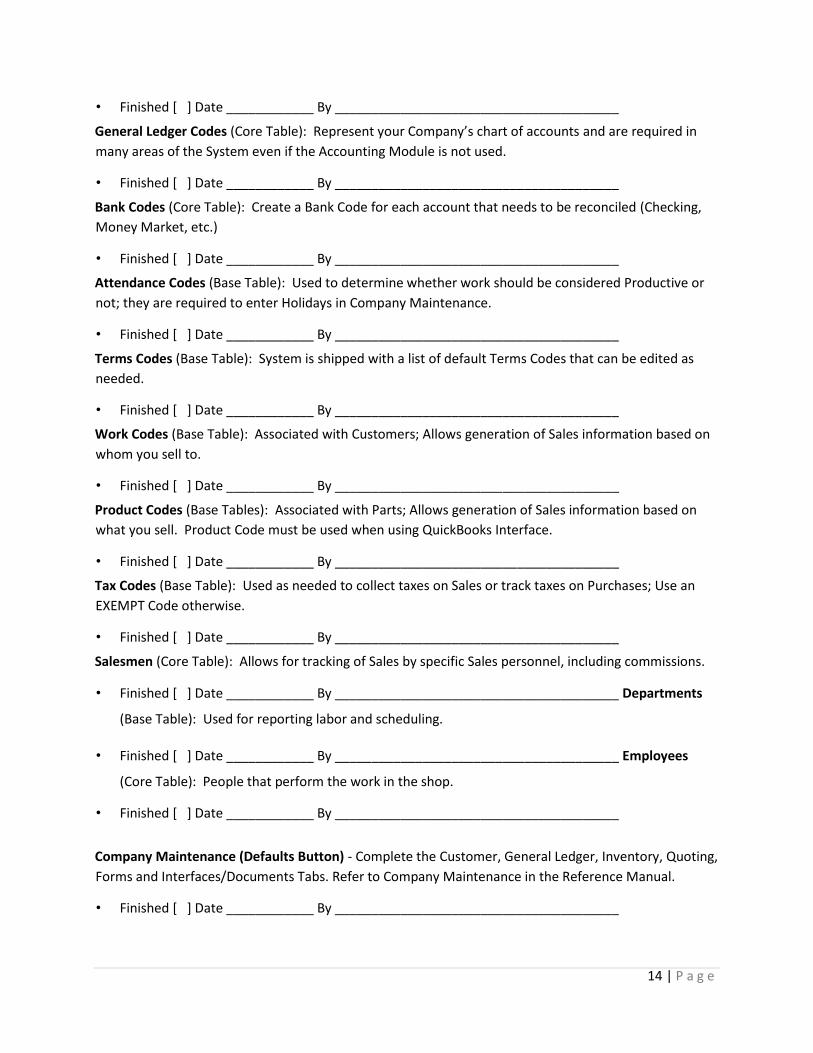
G/L Group Codes (Base Table): System is shipped with a list of default Group Codes that can be edited
as needed.
14 | P a g e
• Finished [ ] Date ____________ By _______________________________________
General Ledger Codes (Core Table): Represent your Company’s chart of accounts and are required in
many areas of the System even if the Accounting Module is not used.
• Finished [ ] Date ____________ By _______________________________________
Bank Codes (Core Table): Create a Bank Code for each account that needs to be reconciled (Checking,
Money Market, etc.)
• Finished [ ] Date ____________ By _______________________________________
Attendance Codes (Base Table): Used to determine whether work should be considered Productive or
not; they are required to enter Holidays in Company Maintenance.
• Finished [ ] Date ____________ By _______________________________________
Terms Codes (Base Table): System is shipped with a list of default Terms Codes that can be edited as
needed.
• Finished [ ] Date ____________ By _______________________________________
Work Codes (Base Table): Associated with Customers; Allows generation of Sales information based on
whom you sell to.
• Finished [ ] Date ____________ By _______________________________________
Product Codes (Base Tables): Associated with Parts; Allows generation of Sales information based on
what you sell. Product Code must be used when using QuickBooks Interface.
• Finished [ ] Date ____________ By _______________________________________
Tax Codes (Base Table): Used as needed to collect taxes on Sales or track taxes on Purchases; Use an
EXEMPT Code otherwise.
• Finished [ ] Date ____________ By _______________________________________
Salesmen (Core Table): Allows for tracking of Sales by specific Sales personnel, including commissions.
• Finished [ ] Date ____________ By _______________________________________ Departments
(Base Table): Used for reporting labor and scheduling.
• Finished [ ] Date ____________ By _______________________________________ Employees
(Core Table): People that perform the work in the shop.
• Finished [ ] Date ____________ By _______________________________________
Company Maintenance (Defaults Button) - Complete the Customer, General Ledger, Inventory, Quoting,
Forms and Interfaces/Documents Tabs. Refer to Company Maintenance in the Reference Manual.
• Finished [ ] Date ____________ By _______________________________________

15 | P a g e
Company Maintenance (Edit Button) – Enter the defaults for General, Data Collection, Time and
Attendance, Order Entry, Scheduling and Time Tickets. You may also enter Default Security and
Holidays. Refer to Company Maintenance in Reference Manual.
• Finished [ ] Date ____________ By _______________________________________
Customer Codes (Core Table): Represents companies to whom you sell products or provide services.
• Finished [ ] Date ____________ By _______________________________________
Shipping Codes (Base Table): Represents the ways in which material can be shipped to or from the
shop; values can be used on the Bill of Lading form
• Finished [ ] Date ____________ By _______________________________________
Vendor Types (Base Table): Allows grouping of Vendors into segments such as Steel, Heat Treat, Plating,
etc.
• Finished [ ] Date ____________ By _______________________________________ Vendors (Core
Table): Companies from which you purchase material or services.
• Finished [ ] Date ____________ By _______________________________________
Operations (Base Table): Represents processes that can be performed on Work Centers.
• Finished [ ] Date ____________ By _______________________________________ Work Centers
(Core Table): Represents where work is performed in the shop.
• Finished [ ] Date ____________ By _______________________________________
Collection Terminals (Base Table): Represents real-time data collection devices located in the shop.
• Finished [ ] Date ____________ By _______________________________________
Currency Codes (Base Table): System is shipped with a list of default Currency Codes that can be edited
as needed. Your “native” Currency Code should be set to an Exchange Rate of 1. Additional Currency
Codes should be configured accordingly.
• Finished [ ] Date ____________ By _______________________________________
Reason Codes (Base Table): Used in conjunction with Customer and Vendor Returns in addition to Time
Tickets (scrapped parts); for systems that have the Quality Module, they are also associated with
Corrective Actions and Non-Conformance records
• Finished [ ] Date ____________ By _______________________________________
The following Base Tables can be created as needed (Quality Module Base Tables)
Corrective Action Codes Finished [ ] Date ____________ By ____________________________
Maintenance Codes Finished [ ] Date ____________ By ____________________________

16 | P a g e
Document Review Codes Finished [ ] Date ____________ By ____________________________
Document Types Codes Finished [ ] Date ____________ By ____________________________
Feedback Codes Finished [ ] Date ____________ By __________________________
Non-Conformance Codes Finished [ ] Date ____________ By __________________________
Training Codes Finished [ ] Date ____________ By ___________________________
Additional Records (Non-Table Items)
Open Quotations: Optional; Can be used to create Orders at a later date.
• Finished [ ] Date ____________ By _______________________________________
Open Orders: Needed in order to get Job Numbers entered into the System for production purposes
and Job Costs; Part Numbers may be entered on the fly if they have not been defined as a Table Item.
• Finished [ ] Date ____________ By _______________________________________
Open Requests For Quotation: Optional; Can be used to create Purchase Orders and update Purchased
Part costs.
• Finished [ ] Date ____________ By _______________________________________
Open Purchase Orders: Needed for material or services that have been purchased but not yet received.
• Finished [ ] Date ____________ By _______________________________________
The following processes apply if the Accounting Module is being used.
Open Accounts Receivable: Needed for A/R Aging purposes and for Cash Receipts.
• Finished [ ] Date ____________ By _______________________________________ Open Accounts
Payable: Needed for A/P Aging and for Cash Disbursements.
• Finished [ ] Date ____________ By _______________________________________
Outstanding Checks: Needed for reconciliation purposes; Needs to be entered for each account
accordingly.
• Finished [ ] Date ____________ By _______________________________________ Beginning
Balances: Needed for accurate Financial Statements.
Finished [ ] Date ____________ By _______________________________________
Enter Open Items Even if data is being converted, there will still be open records that need to be entered. The following list
represents the minimum information needed to enter these records.
• Chart of Accounts
• Active Customers
• Active Vendors

17 | P a g e
• Active Employees
• Work Centers (task or machine to make a part) Parts List
Not truly required to enter open records (though recommended)
Is required to track inventory levels With this you can enter:
• Inventory Quantities On Hand (if tracking)
• Open Quotations
• Open Customer Orders
Enter old Job Cost for open Jobs (optional)
• Open Vendor Purchase Orders
The Accounting Module can be brought online at the same time as the Shop Floor portion of the
software or later.
• Open Accounts Receivable
• Open Accounts Payable
• Beginning Balances (for General Ledger)
Converting to a new system provides a good opportunity to “clean house” of old records that are no
longer useful. Keep this in mind as you consider exactly what records to enter into E2.
Shop Floor Entries
Enter Inventory Quantity on Hand
For accurate Job Costing and Asset Valuation you must have an accurate count of Available Inventory
items. The list from your current system should be in a format that will provide the following
information:
Inventory for Finished Goods, Raw Material, and Hardware (available for future Orders )
Bin Locations for the Inventory
This information will be entered using the Inventory Adjustments feature of E2.
Note: If your inventory has been part of a conversion with manufactured parts that include a Bill of
Materials, determine if the converted data has already removed allocated inventory from your count.
If so, entering open orders could cause a re-allocation of need material.
Enter Open Quotes
This is an Optional task. If your company wants to track and analyze how Estimating is doing, you can
enter all the current open quotes or you can simply start entering new ones as they are received.
Enter Open Orders
When entering open Orders, you don’t want to reinvent the wheel. Your Company’s needs regarding
costing information will determine the amount of data you will need to provide. Regardless the amount
of details needed, you should turn off the Auto Numbering option for Orders and disable the Auto Post
function (Company Maintenance | Edit | Order Entry) when entering open Orders; they can be turned
back on afterward as desired.

18 | P a g e
For any of the methods used below, enter Open Orders based on Ship Date starting with the earliest
date.
• Your Company is not capturing any cost. It is as simple as entering:
Customer
Order Date
Product Code or Work Code, as required
Remaining open quantity
Delivery Date(s)
Sell Price
Description
If there is an existing Job Number System in place, use that as the open Job Number and start using E2
numbering for new Order (and Jobs) as of the day you go live. Remember to make the new number
sequence very different from your previous one.
• Your Company is manually capturing cost (not using Data Collection). Enter the following:
Customer
Order Date
Product Code or Work Code as required
Remaining open quantity
Delivery Date(s)
Sell Price
Description
Add Miscellaneous Charges for Labor, Material, and Outside cost
These costs should be for the remaining open Quantity
• Your Company is capturing costs using Data Collection Clocks. Enter the following:
Customer
Order Date
Product Code or Work Code as required
Remaining open quantity
Delivery Date(s)
Sell Price
Description
Add Miscellaneous Charges for Labor, Material, and Outside cost
These costs should be for the remaining open Quantity
Provide to the shop floor a copy of a traveler
No routing necessary train to clock in and use Step zero
Assure any open Purchase Orders are entered for this job

19 | P a g e
The best method for entering open Orders will be covered with your Shoptech Consultant during your
pre-implementation conversations.
Enter Open Purchase Orders
These are Purchase Orders that cover Material, Outside Services, Inventory, and non-Inventory Items.
There is some information that will be needed to accomplish this task. You will want to turn off the Auto
Number function for Purchase Orders in Company Maintenance.
• Vendor
• P.O. Date
• Identify if Outside Service
• Description
• Part Number/Service
• Open Quantity
• Price
• Job Number/Stock (if for Inventory) Due Date
The Shop Floor is now running “Live” on the new E2 Shop System. All new entries will only be entered
into E2.
Accounting Entries If you are using the Accounting Module, here are additional “opening considerations.”
Set the Fiscal Year
Before any entries are entered, make sure the fiscal year is set to the oldest open invoice in A/R or A/P.
The system will not allow you to type a transaction in a period that is not open.
Fiscal Year Date is maintained under Company Maintenance | Defaults | General Ledger tab.
Enter Open Accounts Receivable
You will need a current open A/R Aging with the following information to enter this data:
• Invoice Number
• Customer
• Invoice Date
• Outstanding Amount open
The Part/Item number or quantity is not needed. The word “Conversion” can be used as the Part /Item
Number. This will identify that it was from the old system and the information can be found there. The
quantity would be 1 for the total remaining open due.
Note: Once completed, an Aging would need to be generated to prove the accuracy of the total open
A/R to the ending Balance in your old system and the General Ledgers beginning balance in the E2 Shop
System.
Enter Open Accounts Payable
You will need a current open A/P Aging with the following information to enter this data:

20 | P a g e
• Invoice Number
• Vendor
• Invoice Date
• GL Expense Account
• Outstanding Amount open
Note: Once completed, an Aging would need to be generated to prove the accuracy of the total open
A/P to the ending Balance in your old system and the General Ledgers beginning balance in the E2 Shop
System.
Enter Beginning General Ledger Balances
Finally, enter the beginning balances into the GL accounts from the previous accounting system.
Negative balances begin with a leading hyphen. Balances should be entered under Tables | GL Codes
under the This Year tab. There are a few things to consider depending on whether you are implementing
the Accounting Module at the start of your Fiscal Year or some time during the Fiscal Year.
Implementing at the Start of a New Fiscal Year
• Ending balances from the Balance Sheet are all that will be needed
Sales and Expense-related G/L Accounts start out with a zero balance
• If final balances are not available, enter the balances prior to the adjusting entries
Adjust the appropriate balances once an adjusted Balance Sheet is available
Implementing During a Fiscal Year
• Ending Balances from Balance Sheet and Income Statement will be needed
Sales and Expense-related G/L Accounts must account for the activity that has already taken
place
Current Earnings must also be entered to account for the profit or loss incurred during the same
period
Verify Accuracy of Data Entry The key to making sure that all your information was entered properly is to run reports in E2 Shop
System and compare the reports to your prior system.
• To verify order entry, print a job schedule or a backlog summary. Either report will show you a listing
of all open orders
• To verify open purchase orders, print a Purchase Order Summary filtered by open only
• To verify open quotations, print a Quotation Summary filtered by status pending
• To verify open Accounts Receivable, print an aging summary under the A/R menu. The “As-Of Date”
on the aging would be your conversion date
• To verify open Accounts Payable, print an aging summary under the A/P menu. The “As-Of Date” on
the aging would be your conversion date
• To verify beginning numbers are correct for general ledger, print a Trial Balance located under GL
menu. Select the first period and print the report. Look at the first column beginning balance

21 | P a g e
numbers. The grand total should be zeroes across the bottom of the page. This lets you know you
are in balance because all the debits equal the credits
• Print an Inventory Summary to see a parts list with quantities on hand
Use the Inventory Adjustment menu to fix any incorrect quantities
Congratulations! You are now LIVE in the E2 Shop System!
Phase IV - After Care
Assign a System Administrator During the Planning Phase, a “System Administrator” should have been chosen. This can be the Team
Leader or someone previously groomed for this position. Whether this is a full-time job will depend on
the size of your Company and the number of users. The following tasks are generally the responsibility
of the System Administrator.
• Hardware Maintenance
• Regularly scheduled backup of data (should be daily)
• Periodic file maintenance
• Answering user questions
• Training new users
• Installing new E2 releases and upgrades
• Working with E2 support to resolve issues
• Be the source for customer reports or report maintenance
Consulting Services In addition to assisting with the implementation of E2, your Implementation Specialist will assist you
with any problems you may encounter during the six-month period following your purchase of the
System and will help explain and coordinate training options, as well as act as your liaison with the
Development Team if there was a data conversion.
Beyond these standard services, the Shoptech Consulting Group can also work with you on-site to
develop best practices based on a customized training and implementation plan geared toward your
industry and system requirements.
Once your system is up and going, you may also find it worthwhile to have an Onsite Consultant perform
an audit of your system and processes to make sure you are fully utilizing the software to its potential.
Regardless the scenario, your Consultant’s job is to make your business run as efficiently as possible with
the tools available in the E2 Shop System. Contact the Consultant Group at 800-677-9640 for additional
information.
Technical Support – Maintenance Options In addition to access to your Implementation Specialist, you also receive free phone support during the
first six months after the purchase of the E2 Shop System. After this six-month warranty period, a yearly

22 | P a g e
(twelve-month) maintenance package is available at a percentage of the current list price of your
system. Maintenance covers:
• Unlimited phone support
• Free basic classroom training
• Access to current updates and future enhancements of the software
The Support staff is available Monday through Friday 8:00 AM until 8:00 PM Eastern time.
To log a support issue, you may contact us at 800-677-9640. An auto-attendant answers the phone and
directs you to make a selection: #1, #2, #3, or #4 … Below is a description of each call queue:
• Option #1: Shop Floor Control calls pertain to any menu options from Routing/Estimation through
and including the menu Cost Analysis.
• Option #2: Hardware calls pertain to loading and updating the software, troubleshooting and
installing data collection, error messages, and printing issues.
• Option #3: Accounting calls pertain to Accounts Receivable, Accounts Payable, General Ledger,
Bank Reconciliation, and Payroll interfaces.
• Option #4: Implementation Specialist calls pertain to training questions, data conversion issues,
and information about additional products you may need.
Based on your selection, your call is routed to a technical support person skilled to handle your question.
In those unusual instances they are unable to answer your question, your call will be routed to another
technician with the expertise to resolve your issue. If our Technical Support Agents are busy with other
customers at the time of you call, our goal is to respond to your issue within one hour. You can also
submit technical issues by emailing [email protected] or by faxing the details to 513794-7789.
Either method is treated with the same priority as a phone call.
We also offer a plan that allows you to purchase updates only, at a decreased percentage of the full
Maintenance Plan.
If a Maintenance Plan is not purchased, calls to Support are billed on a per-call, hourly basis. When using
this method, you will be asked to prepay the fee before service is rendered. You may complete a credit
card authorization to obtain service.
Top Related